
HornetBall's Build #2: Meet Red


I know the air keeps the valve from falling into the cylinder, but how do you push down the springs to take the keepers off? Those pliers? Is it a headache to push them
Down and place the half circle pieces in place?
Down and place the half circle pieces in place?
Reply
 0
0

0

Thread Starter
Elite Member
iTrader: (4)
Joined: Mar 2008
Posts: 6,301
Total Cats: 697
From: Granbury, TX
This youtube video pretty much shows how it works (reviews a similar tool):
The pliers are only used for the valve stem seals.
Seriously, it was easy. First one was intimidating, but by the time I got to #16 I was doing a complete seal replacement in about 3 minutes while drinking beer. While I'm disappointed my repair didn't fix the actual problem, I'm glad I've got this cool tool that really works for future jobs.
Reply
0
0

Junior Member
Joined: Jun 2014
Posts: 46
Total Cats: 0
I used compressed air to keep the valves in place. Tools used listed in prior post.
In your case, you should really eliminate the possibility that your CHRA is leaking first. As mentioned in the other thread, inspect the intake piping leading to the intercooler and also the downpipe for signs of oil.
In your case, you should really eliminate the possibility that your CHRA is leaking first. As mentioned in the other thread, inspect the intake piping leading to the intercooler and also the downpipe for signs of oil.
Reply
0
0

Reply
0
0


Reply
0
0

Senior Member
Joined: May 2011
Posts: 638
Total Cats: 76
went through both your build threads last night. Thanks for posting them up, I laughed, I cried, I learned some things... Enjoyable posts and great builds.
I'm building up a car that is similar to your red car and stealing emilio's formula as well. Looking forward to seeing your results with this thing.
Thanks.
I'm building up a car that is similar to your red car and stealing emilio's formula as well. Looking forward to seeing your results with this thing.
Thanks.
Reply
0
0
Thread Starter
Elite Member
iTrader: (4)
Joined: Mar 2008
Posts: 6,301
Total Cats: 697
From: Granbury, TX
Mounted the Xidas and went with no additional setup. I was at ~4"F and 4.25"R to the pinch welds.
Did a personal best 2:41 on MSR-Cs 3.1. It's in the video. I caught two laps, the 2:41 and the lap after. The second lap was faster by about a half second, but I threw it away at the end and did some Rallycross. Xidas make excellent off-road shocks BTW. LOL.
Pulling the engine today for rings. Tired of feeding it oil.
Reply
2
2

Newb
Joined: Jun 2011
Posts: 24
Total Cats: 0
From: Houston
Just finished lurking through this thread. Great build! Also just wondering if you have already sold the Koni/GC + FM combo? I'd like to buy a pair of the FM top hats from you if still available. Would you mind PMing me? (no post, no PM limitation on my end) Thanks.
Reply
0
0
Thread Starter
Elite Member
iTrader: (4)
Joined: Mar 2008
Posts: 6,301
Total Cats: 697
From: Granbury, TX
Giving Automotive Machine and Supply in Ft. Worth a try.
For the Red car, just fixing the oil consumption and doing whatever machining is needed for an MLS headgasket to seal. Might do 11:1 Supertechs.
On the Silver car, tearing it down to see what happened to #2. Also, want to do an MLS headgasket and ARP head studs on that one. I've been having headgasket issues with the OEM composite gasket on track. Might do 8.6:1 Supertechs there too.
Donnie's still shopless.
Reply
0
0
Thread Starter
Elite Member
iTrader: (4)
Joined: Mar 2008
Posts: 6,301
Total Cats: 697
From: Granbury, TX
Not a whole lot to report. Machine shop finally got the 1.8 torn down last Thursday. They didn't really see a lot wrong, but noted that the honing marks were steep (like 45�). They suspect that plus the headgasket blowing early in life and the low tension rings (Total Seal brand) kept the rings from seating.
I hope they'll finish the engine this coming week. They're a good two weeks behind what they told me schedule-wise.
I hope they'll finish the engine this coming week. They're a good two weeks behind what they told me schedule-wise.
Reply
0
0
Junior Member
Joined: Jun 2014
Posts: 46
Total Cats: 0
Just curious, did you ever perform a leakdown test? Bringing my car in tomorrow to see if the leakdown test points to anything.
My oil consumption has gotten TERRIBLE. Took a 6 hour (350 mile~) drive after an oil change and by the end, the dipstick wasn't even registering any oil. Much more of a burning oil smell on decel with high vacuum than before. Ugh. Really curious to see what they say, and what ultimately fixes it.
My oil consumption has gotten TERRIBLE. Took a 6 hour (350 mile~) drive after an oil change and by the end, the dipstick wasn't even registering any oil. Much more of a burning oil smell on decel with high vacuum than before. Ugh. Really curious to see what they say, and what ultimately fixes it.
Reply
0
0
Thread Starter
Elite Member
iTrader: (4)
Joined: Mar 2008
Posts: 6,301
Total Cats: 697
From: Granbury, TX
No leakdown. Did do a compression test. It was pretty even. Then I swapped out the valve guide seals (pretty inexpensive and easy with that trick tool). Since that didn't take care of it, I pulled the engine and took it in for rebuild. Will post up more if they uncover anything.
Reply
0
0
Thread Starter
Elite Member
iTrader: (4)
Joined: Mar 2008
Posts: 6,301
Total Cats: 697
From: Granbury, TX
Here's what the head looks like:
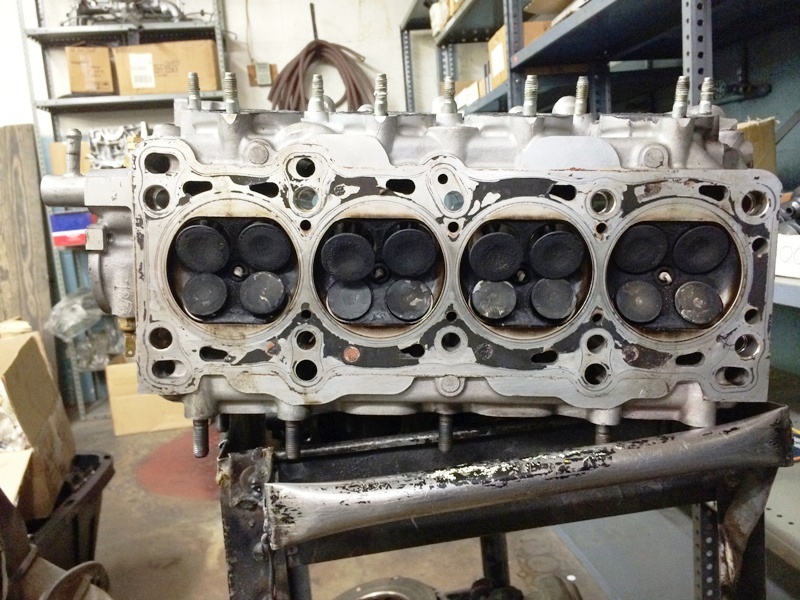
Black and oily, a lot of buildup. This is a 4,000 mile motor.
Pistons were in generally good shape, but the tops were black and crunchy.
No sign of det or overstress.
We're keeping the rebuild simple. Re-hone to get the correct crosshatch angle, new rings and bearings, ARP head studs and rod bolts, tri-coat the pistons and put it back together with OEM gaskets. The Mazdaspeed discount saved me $70 on the gasket set! Mazda OEM wasn't much more expensive than the Chinese junk that I refused to use.
Should be back in action soon!
Reply
0
0
Thread Starter
Elite Member
iTrader: (4)
Joined: Mar 2008
Posts: 6,301
Total Cats: 697
From: Granbury, TX
I should get the engine in time to install next weekend. Excite!
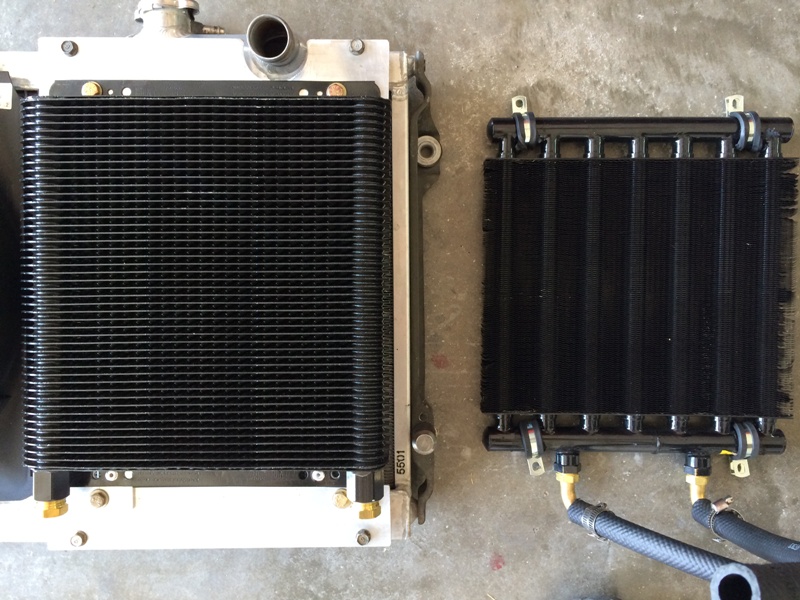
One thing I haven't been happy with was my oil cooling. The water cooling was perfect. It would go to 190 and just stay there. But the oil temps would get up to 250-270 during a track session. Because of where I located my temp sensor (in the sandwich plate), I suspect that I'm reading ~10-20 degrees warmer than a sensor in the oil pan. But still, I'd like to see those temps lower, maybe 220-230.
So, I'm going to try a different oil cooler. I bought a Canton Racing 23-520. This is a stacked-plate design rated at 29,200 BTU/hr. Jegs and Summit sell it for about $125 (see Canton Racing Products 23-520 Canton Racing Oil Coolers - Free Shipping on All Orders @ JEGS). It is replacing the Hayden 1233 headered tube-fin cooler that is rated at 7,300 BTU/hr (see http://www.haydenauto.com/upload/Hay...il_Coolers.pdf). So, nearly 4x the cooling.
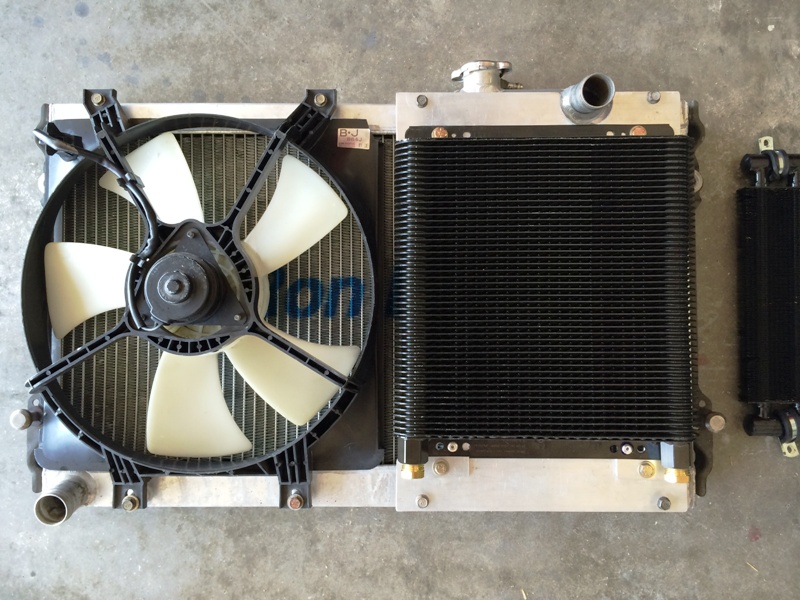
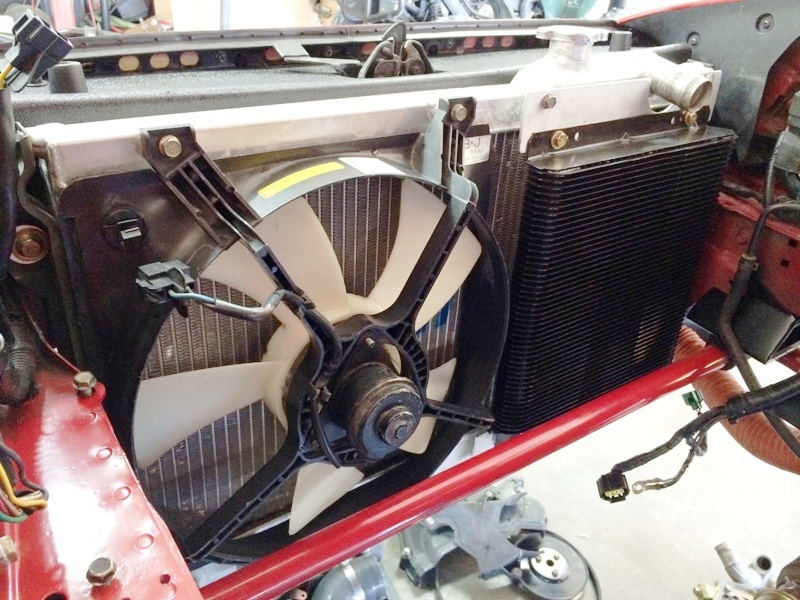
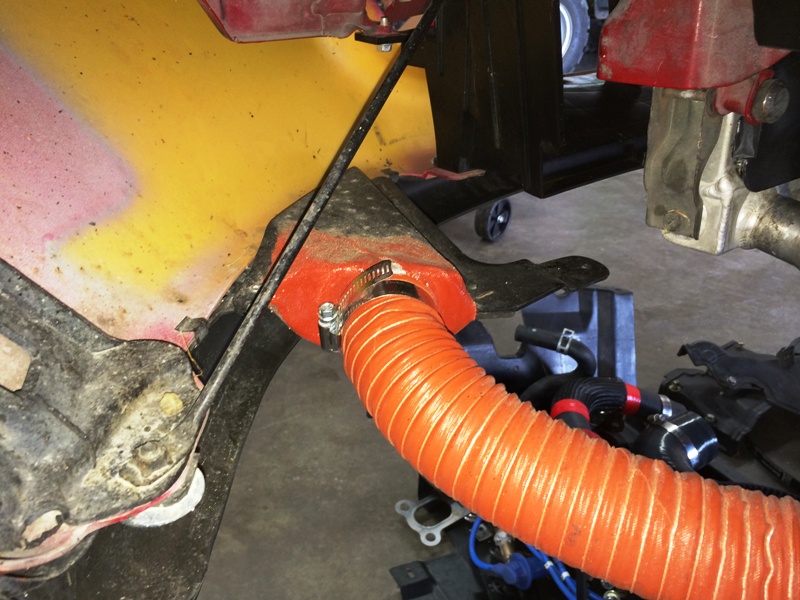
The dimensions of the replacement cooler are similar so I was able to re-use the radiator mounts I fabricated earlier. Some pics:
Will post up results of this swap once I'm back on track.
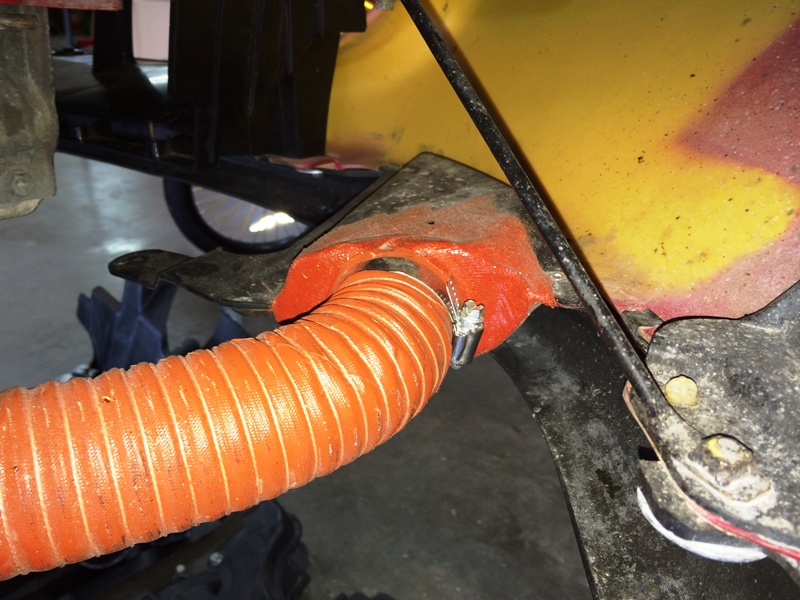
These pics are for Curly. This is how the RTV'd-fiberglass has held up after ~30 sessions (including some high-speed 4 wheeling -- see end of post #270). Other than being dusty, looks the same as the day it was laid.
Other than mounting the oil cooler, I spent the better part of today cleaning grass and grasshopers out of the radiator fins. LOL.
One thing I haven't been happy with was my oil cooling. The water cooling was perfect. It would go to 190 and just stay there. But the oil temps would get up to 250-270 during a track session. Because of where I located my temp sensor (in the sandwich plate), I suspect that I'm reading ~10-20 degrees warmer than a sensor in the oil pan. But still, I'd like to see those temps lower, maybe 220-230.
So, I'm going to try a different oil cooler. I bought a Canton Racing 23-520. This is a stacked-plate design rated at 29,200 BTU/hr. Jegs and Summit sell it for about $125 (see Canton Racing Products 23-520 Canton Racing Oil Coolers - Free Shipping on All Orders @ JEGS). It is replacing the Hayden 1233 headered tube-fin cooler that is rated at 7,300 BTU/hr (see http://www.haydenauto.com/upload/Hay...il_Coolers.pdf). So, nearly 4x the cooling.
The dimensions of the replacement cooler are similar so I was able to re-use the radiator mounts I fabricated earlier. Some pics:
Will post up results of this swap once I'm back on track.
These pics are for Curly. This is how the RTV'd-fiberglass has held up after ~30 sessions (including some high-speed 4 wheeling -- see end of post #270). Other than being dusty, looks the same as the day it was laid.
Other than mounting the oil cooler, I spent the better part of today cleaning grass and grasshopers out of the radiator fins. LOL.
Reply
0
0


