Rube Goldberg's Supercharger Setup
 06-27-2008, 01:19 AM
#61
Elite Member
Thread Starter
iTrader: (16)
Join Date: Aug 2007
Location: Houston, TX
Posts: 9,297
Total Cats: 477
Update: OMG I actually did something! My 3/8 steel plate came in yesterday so I made some flanges. I made a pair of flanges to bolt up to the discharge port on the SC's. I also cut the pipes to go onto the flanges. Doesn't sound like much but took a LOOOONNNNGGGG time to make those flanges. Had to make 2. First I drilled the bolt holes. Easy. Then I had to make a big hole in the center for air to come out....
Ended up buying a 1/4" die grinder and a carbide bit for it. Drilled a 3/4" hole in the center and then grinded one out to size. Yeah, grinded out a 2.25" hole in 3/8" plate using a die grinder. So after that I went to lowes and bought a 2.25" hole saw cutter and almost burned up my 100 dollar drill press cutting the second one. After that I matched the flanges to the port on the SC.
I also spoke with my machinist today about making an adapter to mount my trigger wheel. It will be mounted to an adapter that mounts to the front of my SC pulley. More on this later.
Ended up buying a 1/4" die grinder and a carbide bit for it. Drilled a 3/4" hole in the center and then grinded one out to size. Yeah, grinded out a 2.25" hole in 3/8" plate using a die grinder. So after that I went to lowes and bought a 2.25" hole saw cutter and almost burned up my 100 dollar drill press cutting the second one.
After that I matched the flanges to the port on the SC. I also spoke with my machinist today about making an adapter to mount my trigger wheel. It will be mounted to an adapter that mounts to the front of my SC pulley. More on this later.

Reply
 0
0

0
 07-05-2008, 12:13 AM
#64
Elite Member
Thread Starter
iTrader: (16)
Join Date: Aug 2007
Location: Houston, TX
Posts: 9,297
Total Cats: 477
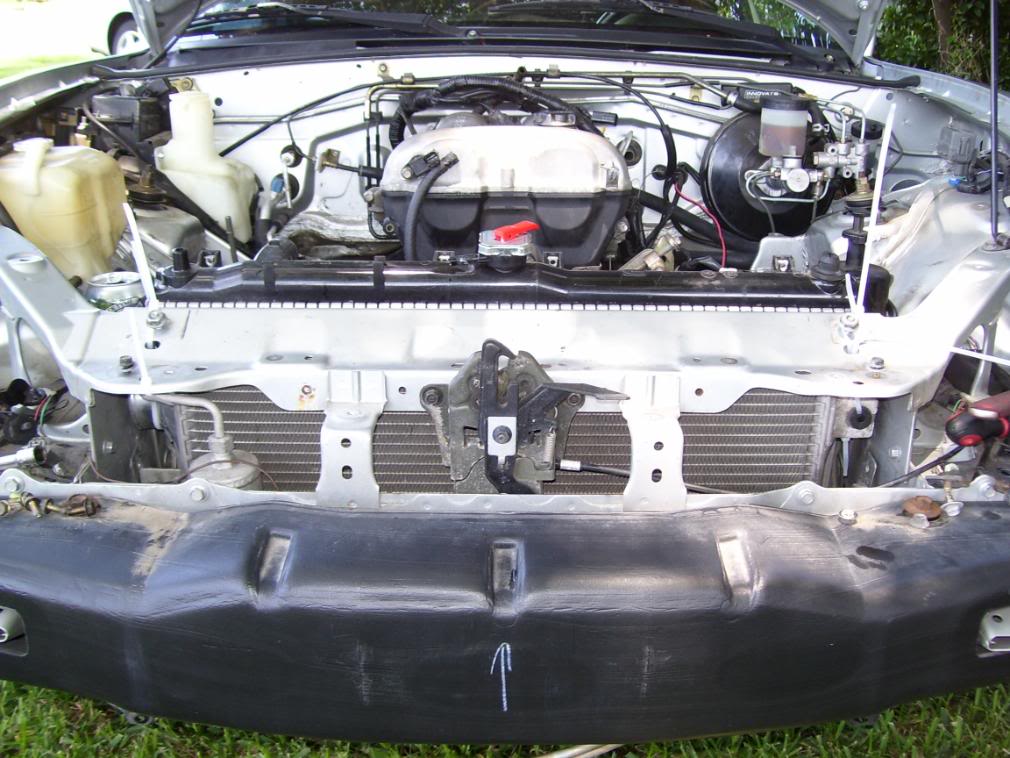
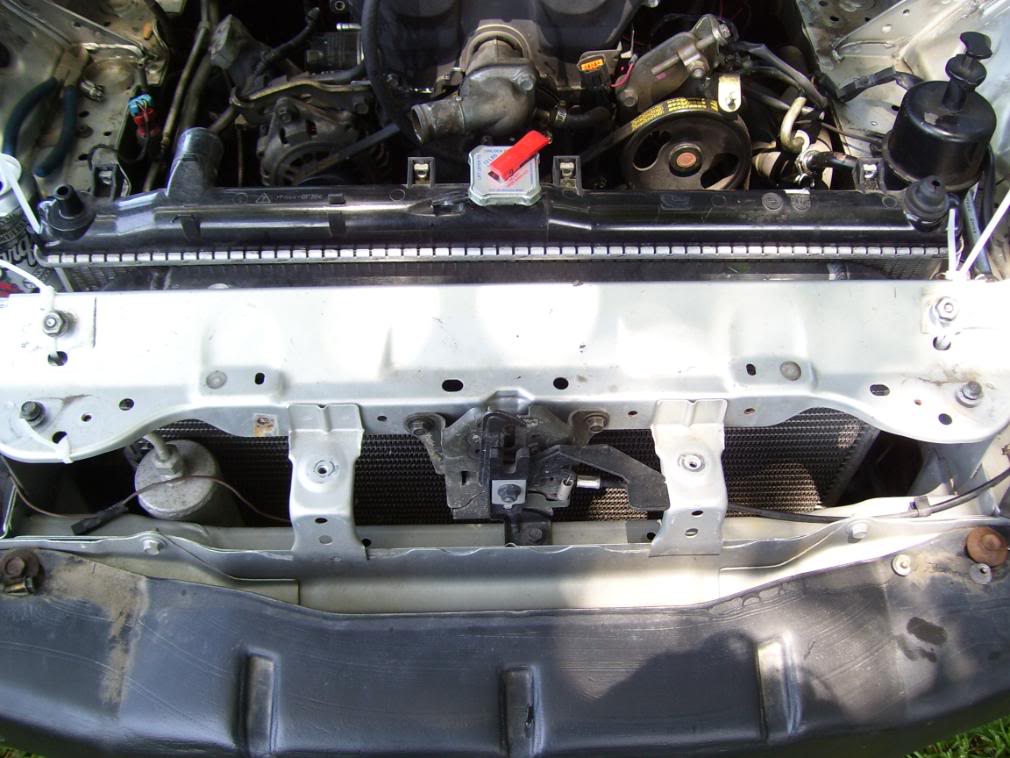
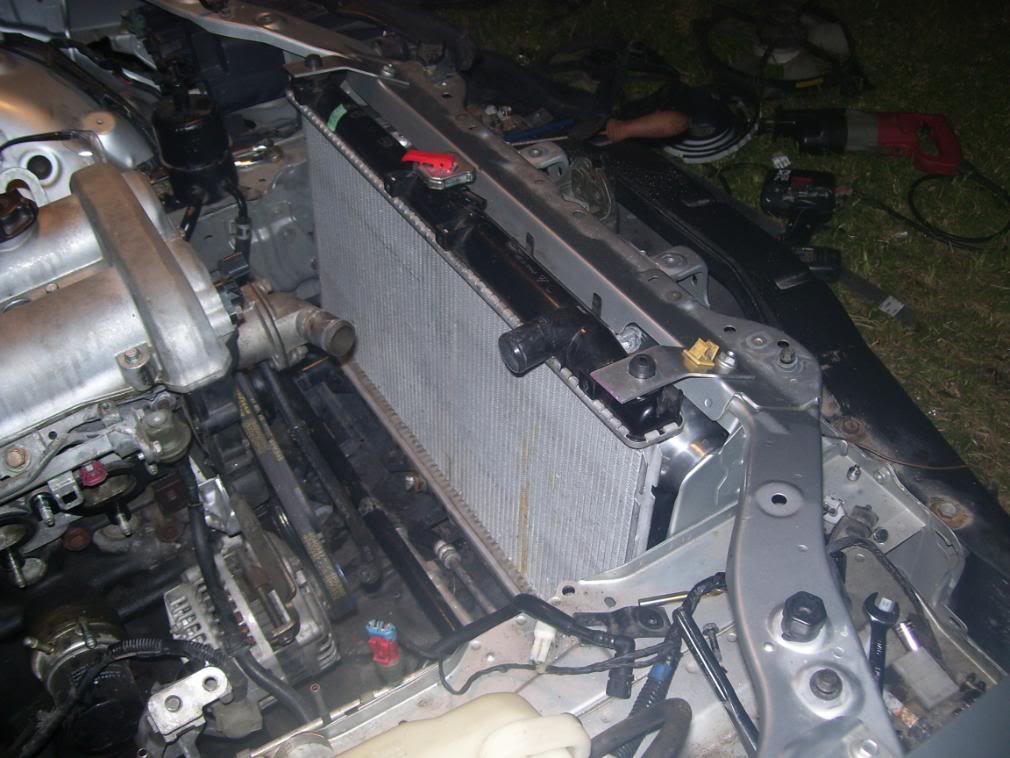
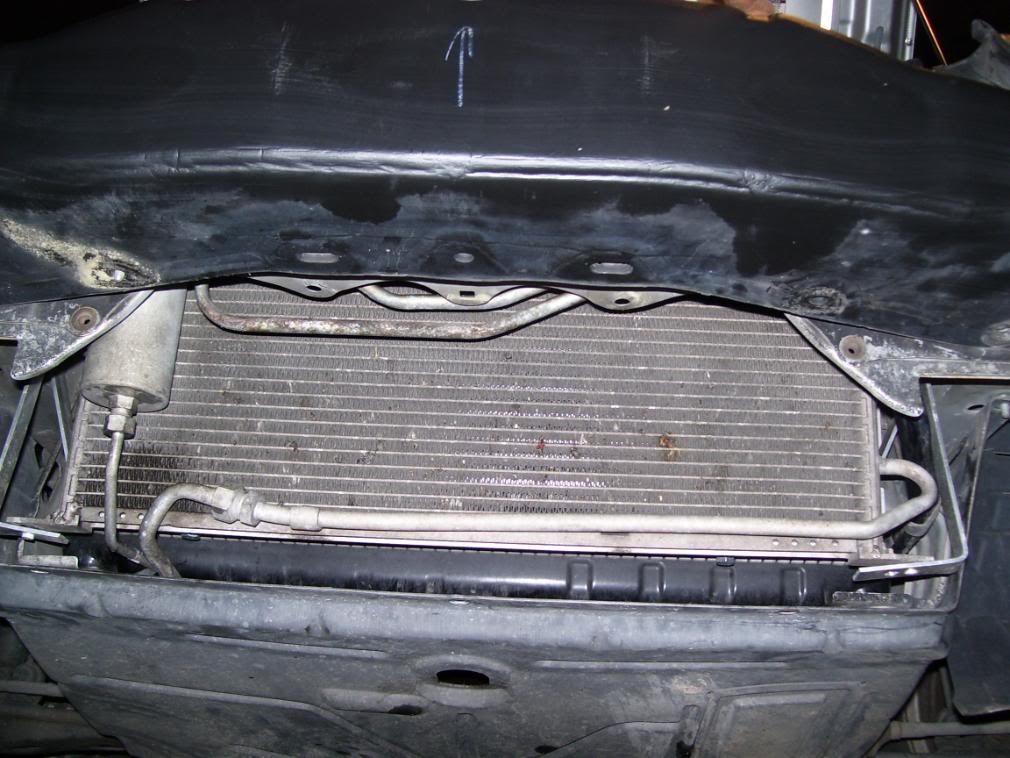
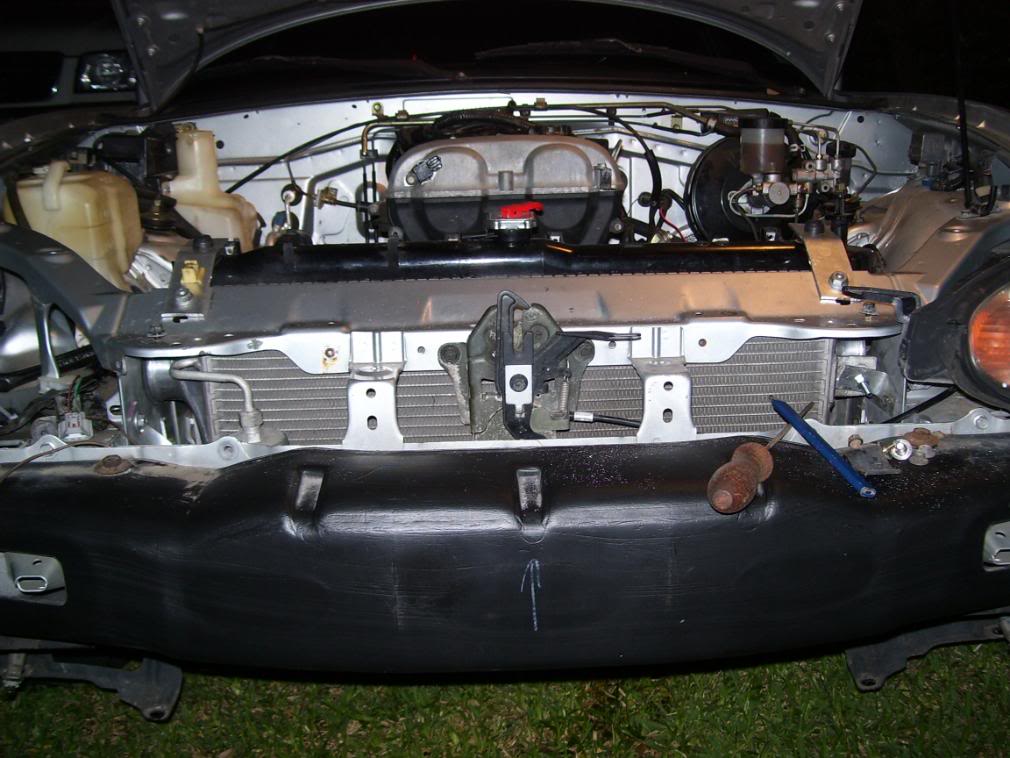
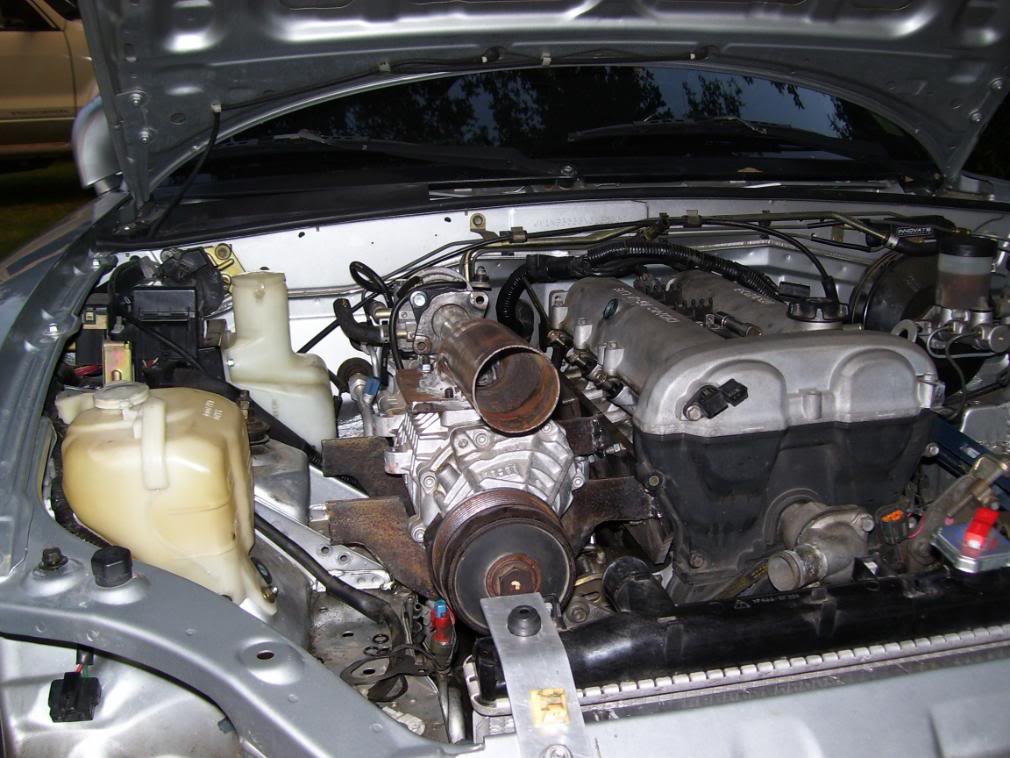
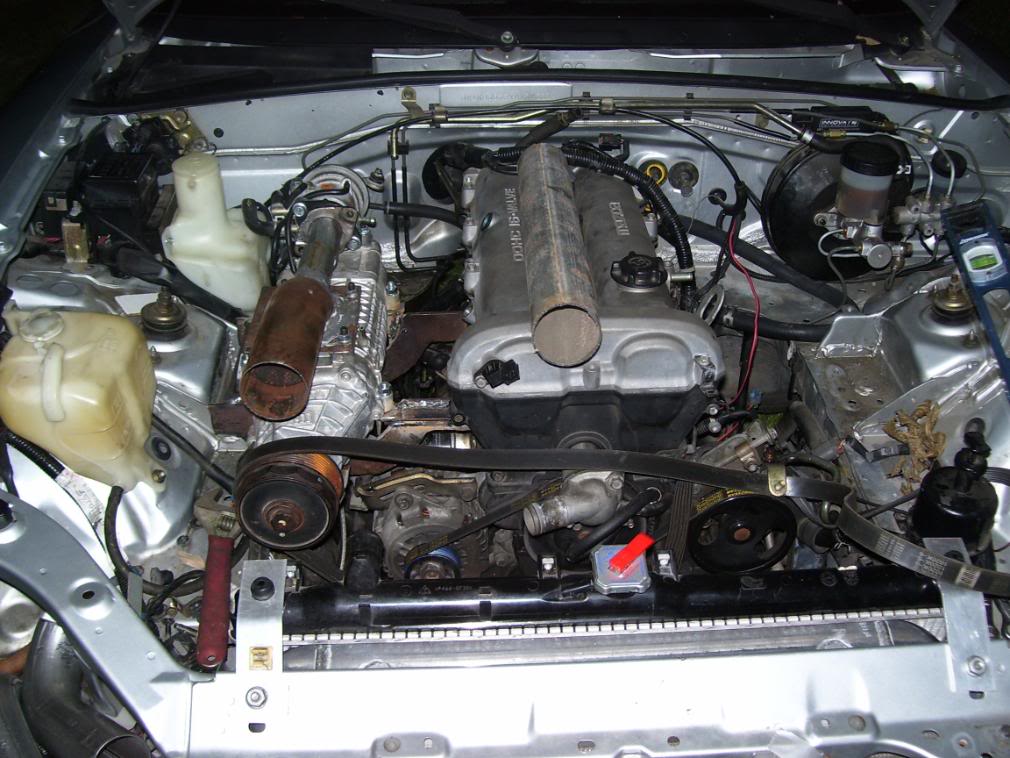
Finished mounting the condenser/intercooler/radiator today. I moved the condenser forward about 3" so I could slip my 20x12x3 core IC in between it and the radiator. I had to bend the lines to the condenser so it would move forward. Also had to notch out part of the car for the receiver to have clearance as it was keeping the condenser from moving forward the required distance. After successfully relocating and mounting the condenser, I bumped it with the IC and it sprung a leak and all my 134A leaked out. :(. Luckily, it leaks where the liquid line goes into the condenser at the fitting. Weird Mazda used all hard line from the condenser to the evaporator. Anyways shouldn't be too hard to fix.
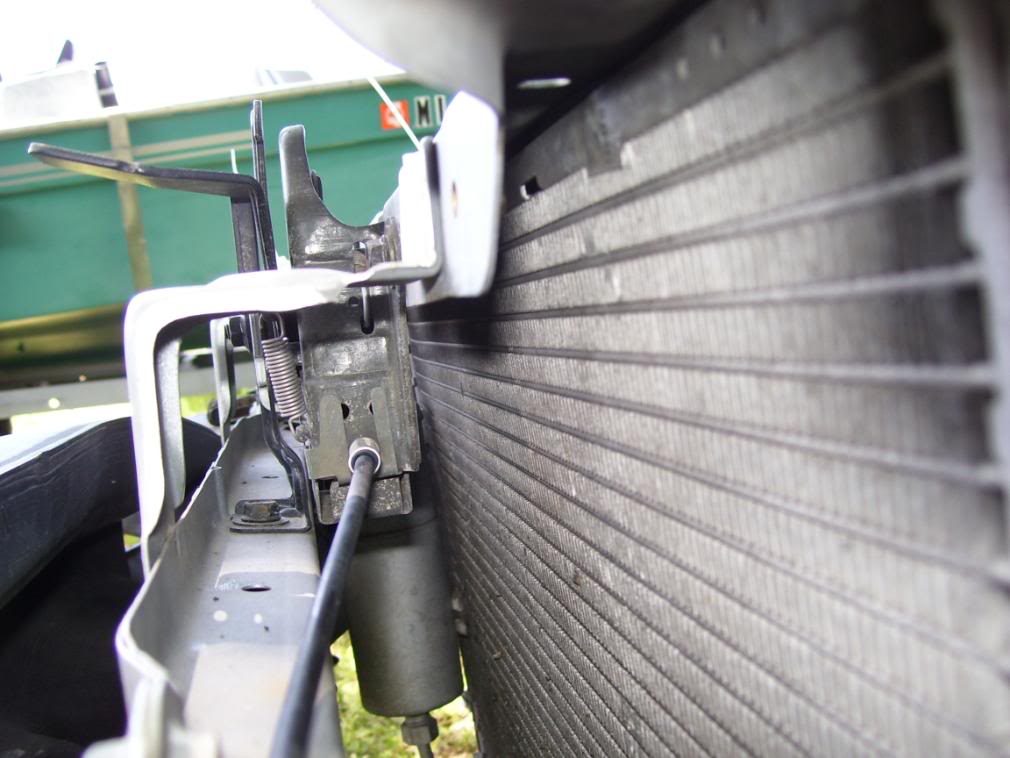
Aside from that A/C accident, it wasn't too bad. I fabed new brackets to hold the bottom of the condenser and bent the old upper brackets 90* and then made another bracket that bolted to it similar to how it is mounted stock. With the condenser mounted as high and forward as possible, I then mounted the IC behind it, using 5/16" weatherstripping for spacing the two apart from one another. This should be enough room for air to flow through the condenser and then mover over to line up to go through the IC. I used a light behind the IC and adjusted the distance between the IC and the condenser and found that 5/16 and up let the same amount of light through. Later I will completely seal the two together. The intercooler has 4 new brackets that mount somewhere on the car where there was a bolt. I never had to drill extra holes anywhere in the body to mount anything.
After that the stock radiator dropped into the stock untouched lower mounting bracket. I managed to get the upper radiator brackets to work, but it was pulling on the radiator and I didn't like that, so I fabed slightly longer ones.
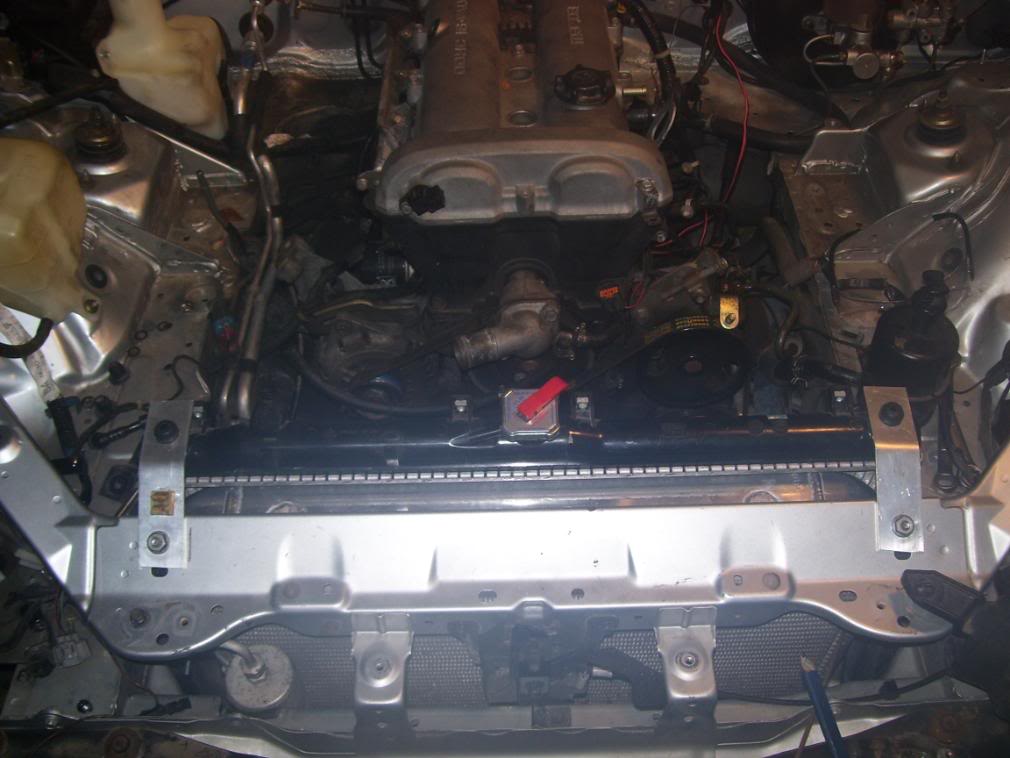
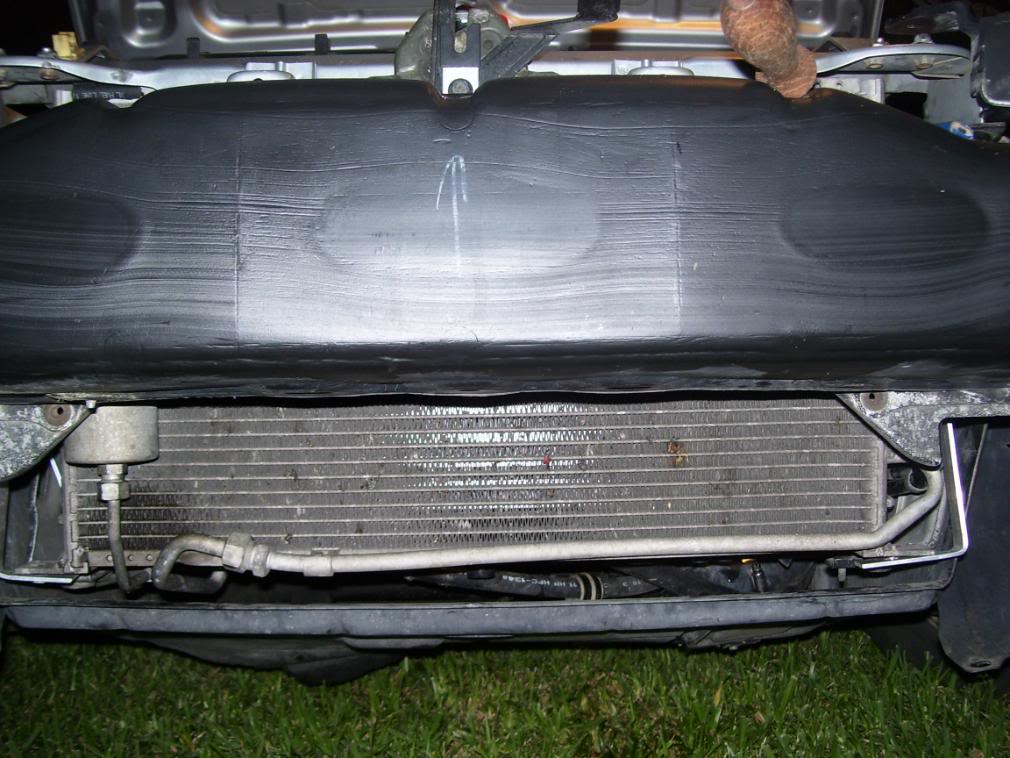
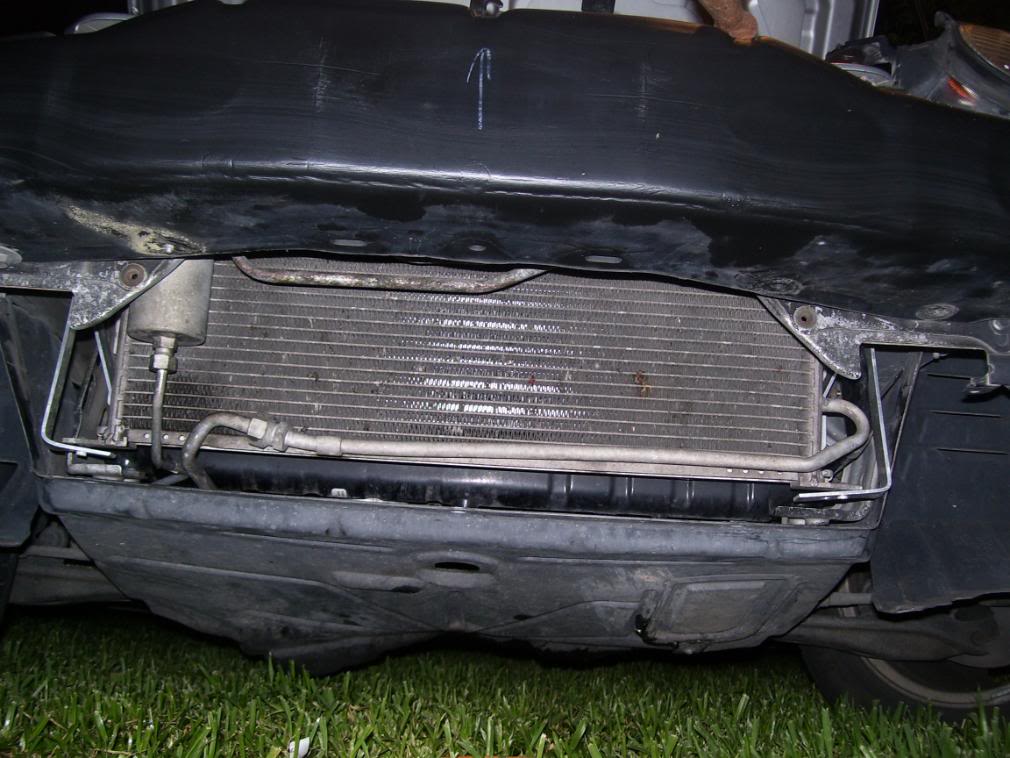
The good news is my intercooler is invisible behind the stock A/C condenser. The intercooler is mounted "upside down" such that the outlets are oriented upward. This will allow me to run my pipes up high and not under the radiator. Also ALL the factory plastic stuff under the bumper fits with no modifications. The car appears stock from the front as nothing has been modified and no IC or brackets are visible with the bumper installed. Note bumper is not installed in pics.
Go ahead, look for that IC.
Aside from that A/C accident, it wasn't too bad. I fabed new brackets to hold the bottom of the condenser and bent the old upper brackets 90* and then made another bracket that bolted to it similar to how it is mounted stock. With the condenser mounted as high and forward as possible, I then mounted the IC behind it, using 5/16" weatherstripping for spacing the two apart from one another. This should be enough room for air to flow through the condenser and then mover over to line up to go through the IC. I used a light behind the IC and adjusted the distance between the IC and the condenser and found that 5/16 and up let the same amount of light through. Later I will completely seal the two together. The intercooler has 4 new brackets that mount somewhere on the car where there was a bolt. I never had to drill extra holes anywhere in the body to mount anything.
After that the stock radiator dropped into the stock untouched lower mounting bracket. I managed to get the upper radiator brackets to work, but it was pulling on the radiator and I didn't like that, so I fabed slightly longer ones.
The good news is my intercooler is invisible behind the stock A/C condenser. The intercooler is mounted "upside down" such that the outlets are oriented upward. This will allow me to run my pipes up high and not under the radiator. Also ALL the factory plastic stuff under the bumper fits with no modifications. The car appears stock from the front as nothing has been modified and no IC or brackets are visible with the bumper installed. Note bumper is not installed in pics.
Go ahead, look for that IC.
Reply
0
0
07-05-2008, 09:39 PM
#65
Elite Member
Thread Starter
iTrader: (16)
Join Date: Aug 2007
Location: Houston, TX
Posts: 9,297
Total Cats: 477
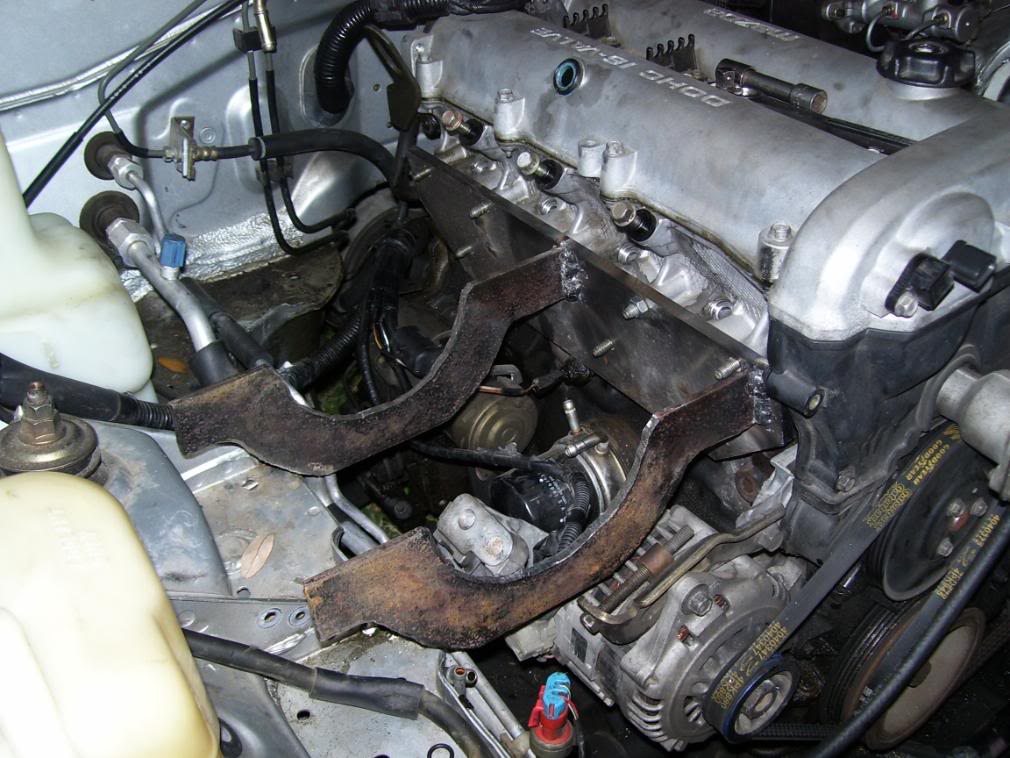
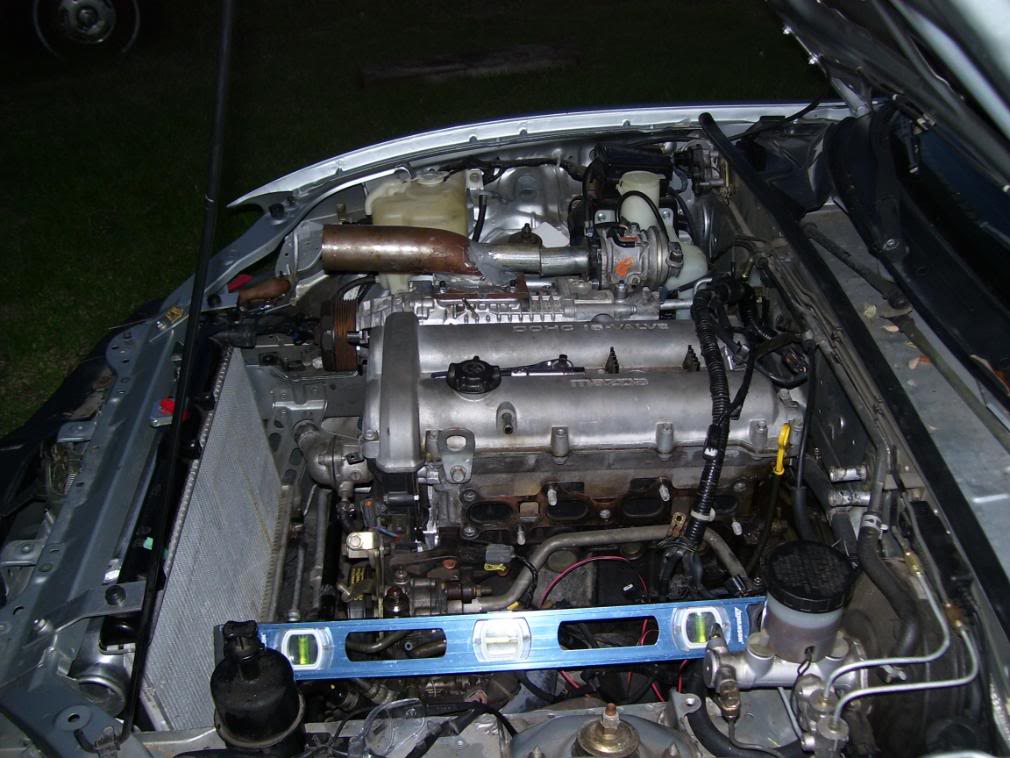
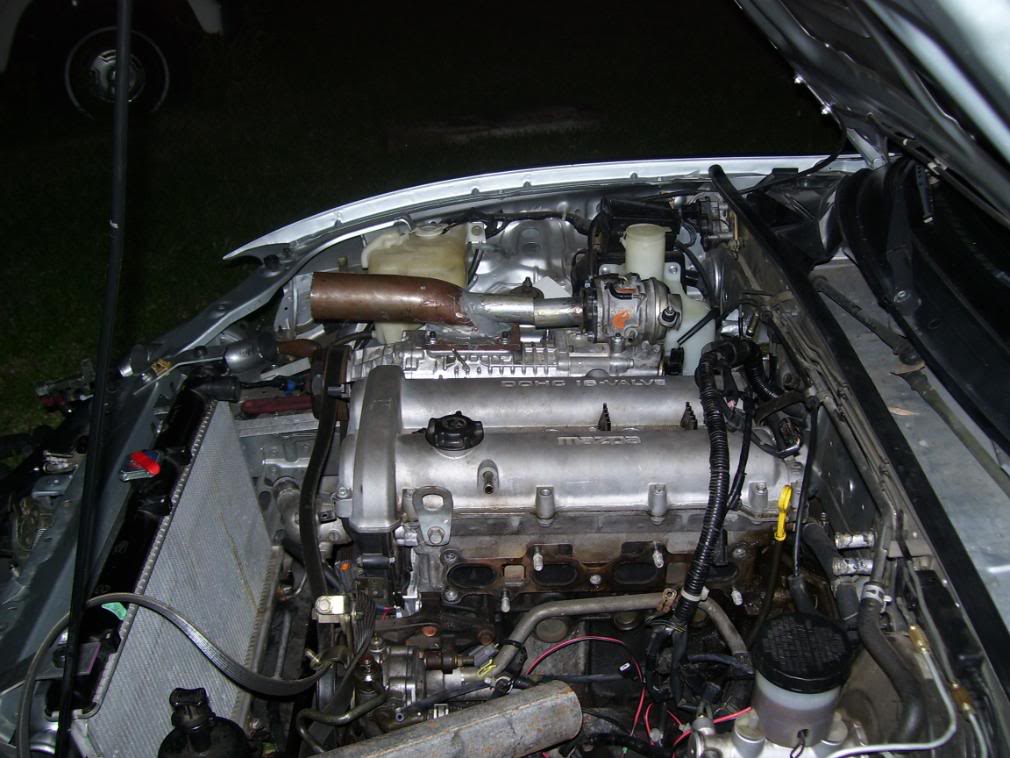
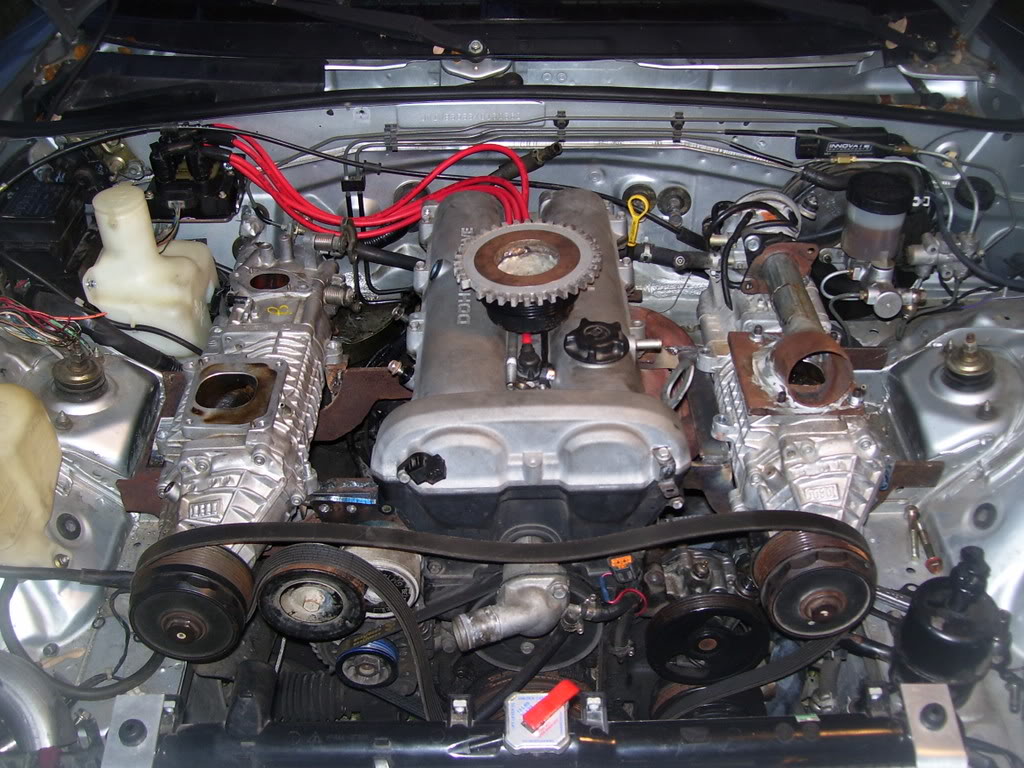
Made the intake manifold flange today. I haven't cut out the holes for the ports yet though. Got it built and welded a pair of U shaped brackets to it to support the SC. Bracket is not finished yet. I gotta take about a 1/2 inch off of the top of the bracket to lower the SC down some more. The bracket is over built already, so removing a 1/2 inch won't hurt its' strength. After that I'm planning to weld some angle iron to the brackets to tie them together and make a rail for the SC to sit on. The angle will be flat side up. The SC will have a piece of angle iron bolted on both sides and that will sit on the piece that's welded to the bracket. Anyway, here's where I'm at now.
Reply
0
0
07-06-2008, 11:18 PM
#66
Elite Member
Thread Starter
iTrader: (16)
Join Date: Aug 2007
Location: Houston, TX
Posts: 9,297
Total Cats: 477
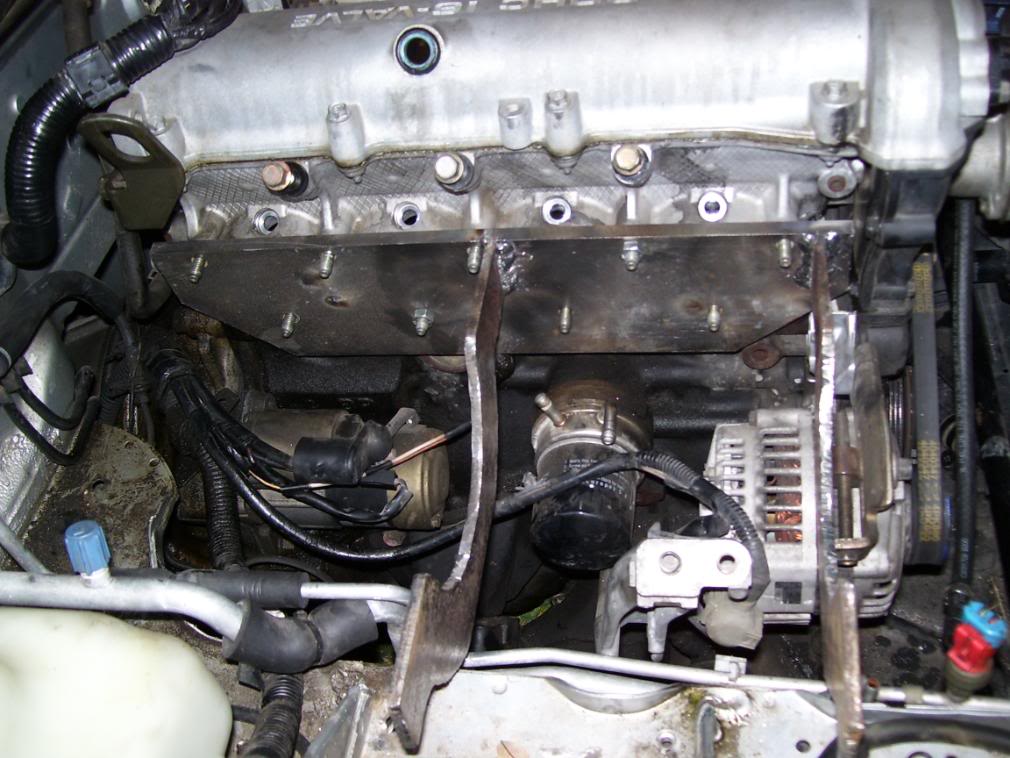
Finished the SC bracket on the cold side today. Started on building the intake manifold but didn't get far.
Welding Skilz...
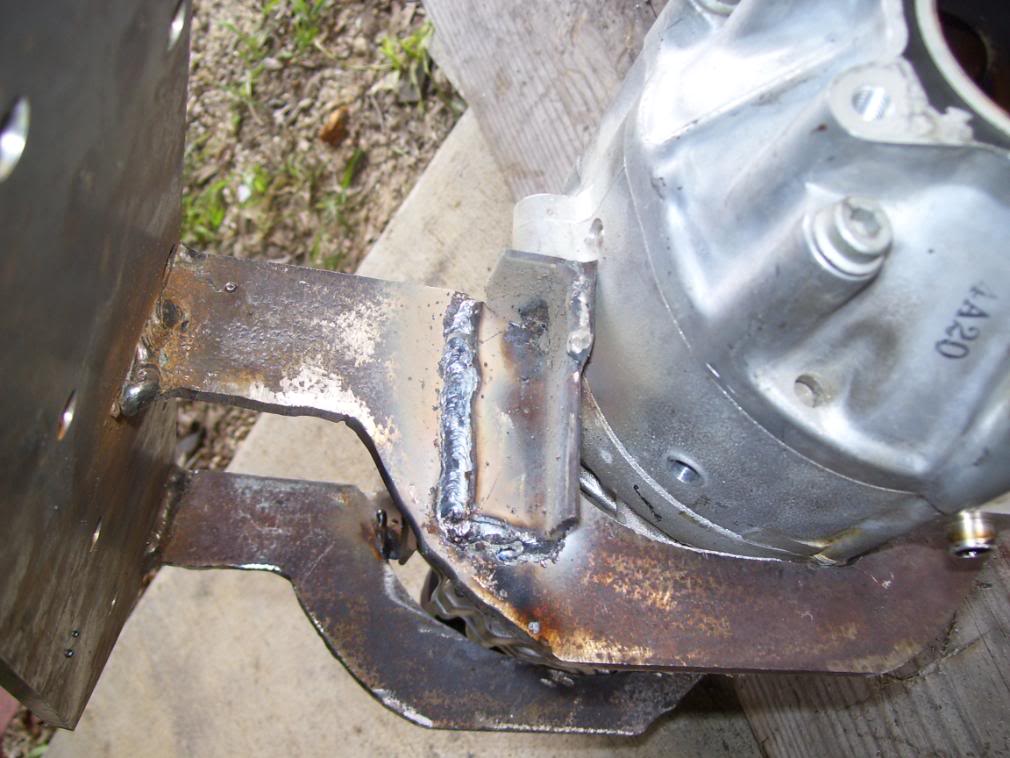
Nothing pretty but it will do. Using OLD *** 3/16 7018's that were flooded in salt water courtesy of hurricane Katrina.
Bracket finished
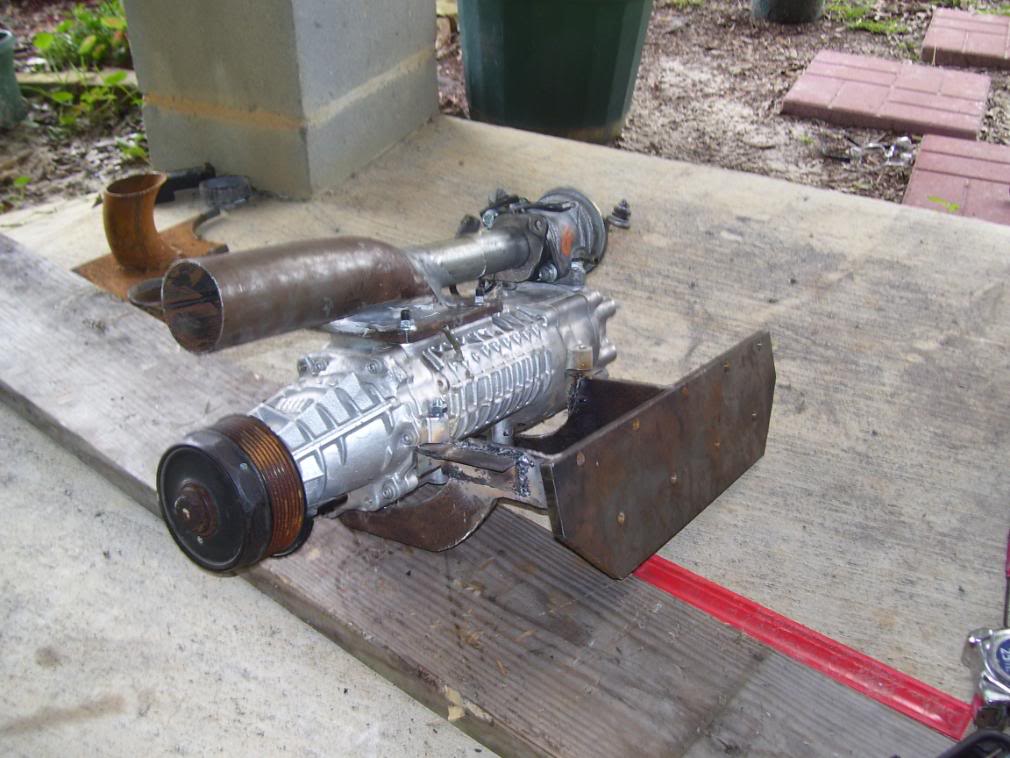
Installed.
.
Welding Skilz...
Nothing pretty but it will do. Using OLD *** 3/16 7018's that were flooded in salt water courtesy of hurricane Katrina.
Bracket finished
Installed.
.
Reply
0
0
07-07-2008, 12:03 AM
#67

umm... Im confused.
Im just gonna say a few things correct them if they are wrong, with a SC the exhaust goes out like normal right? Where is the second charger going to go? Are you going to put it above the exhaust? If so wont that make it really hot? Are you going to put them both to the IC and then in like you would if there was one, only with Y connections? Isnt it going to be akward to get to the intakes the way you made that bracket? From how Ive been able to picture it, which Im sure isnt the way you've pictured it or the way its going to be, there will be alot of tubing in there. Do you forsee any issues with the tubing comming from the screws of the passengerside(coldside? IDK) and the tubing going into the intake ports?
Im just gonna say a few things correct them if they are wrong, with a SC the exhaust goes out like normal right? Where is the second charger going to go? Are you going to put it above the exhaust? If so wont that make it really hot? Are you going to put them both to the IC and then in like you would if there was one, only with Y connections? Isnt it going to be akward to get to the intakes the way you made that bracket? From how Ive been able to picture it, which Im sure isnt the way you've pictured it or the way its going to be, there will be alot of tubing in there. Do you forsee any issues with the tubing comming from the screws of the passengerside(coldside? IDK) and the tubing going into the intake ports?
Reply
0
0
07-07-2008, 12:29 AM
#69
Elite Member
Thread Starter
iTrader: (16)
Join Date: Aug 2007
Location: Houston, TX
Posts: 9,297
Total Cats: 477
umm... Im confused.
Im just gonna say a few things correct them if they are wrong, with a SC the exhaust goes out like normal right? Where is the second charger going to go? Are you going to put it above the exhaust? If so wont that make it really hot? Are you going to put them both to the IC and then in like you would if there was one, only with Y connections? Isnt it going to be akward to get to the intakes the way you made that bracket? From how Ive been able to picture it, which Im sure isnt the way you've pictured it or the way its going to be, there will be alot of tubing in there. Do you forsee any issues with the tubing comming from the screws of the passengerside(coldside? IDK) and the tubing going into the intake ports?
Im just gonna say a few things correct them if they are wrong, with a SC the exhaust goes out like normal right? Where is the second charger going to go? Are you going to put it above the exhaust? If so wont that make it really hot? Are you going to put them both to the IC and then in like you would if there was one, only with Y connections? Isnt it going to be akward to get to the intakes the way you made that bracket? From how Ive been able to picture it, which Im sure isnt the way you've pictured it or the way its going to be, there will be alot of tubing in there. Do you forsee any issues with the tubing comming from the screws of the passengerside(coldside? IDK) and the tubing going into the intake ports?
Belive me, I'm a bit confused too. **** is a lot harder than I thought it would be.
Exhaust exits like a regular car. Second charger goes on the other side of the motor, beside/above the header I haven't built yet. The piping is gonna suck. I still haven't nailed down anything on that. The intake manifold will be built between the coldside SC and the head. There are a few constraints though that I haven't worked out. Can't really say much cause I seriously don't know what I'm gonna do on piping. There's gonna be a SC belt running horizontal from one SC to the other, so the piping has to fit around that.
The general idea is to have the outlets of both SC's combine somewhere into one 2.5" pipe, then in and out the IC, then into the intake manifold. For the charge air to enter the IC drivers side, the intake manifold pipe and coldside pipes will have to cross one another. Not sure how I could do that yet and deal with a SC belt too. Like I said this is a lot more work and thinking than I thought it would be.
Reply
0
0
 07-07-2008, 12:43 AM
#72
Elite Member
Thread Starter
iTrader: (16)
Join Date: Aug 2007
Location: Houston, TX
Posts: 9,297
Total Cats: 477
Meh, this motor's gonna hold 300whp just fine. I might pop the tires though...
Guess I'm not clear on belt stuff. There will be one belt that drives both SC's. It will have 180* wrap on the crank pulley and ascend upward to a pair of idler pulley's above whose centerline is horizontally inline with the bottoms of the Sc pulleys. The belt will make a "T" shape when it's done, and the two idlers will increase belt wrap allowing for 180* belt wrap on all 3 pulleys and also serve as a tensioner.
Guess I'm not clear on belt stuff. There will be one belt that drives both SC's. It will have 180* wrap on the crank pulley and ascend upward to a pair of idler pulley's above whose centerline is horizontally inline with the bottoms of the Sc pulleys. The belt will make a "T" shape when it's done, and the two idlers will increase belt wrap allowing for 180* belt wrap on all 3 pulleys and also serve as a tensioner.
Reply
0
0
07-23-2008, 11:44 PM
#73
Elite Member
Thread Starter
iTrader: (16)
Join Date: Aug 2007
Location: Houston, TX
Posts: 9,297
Total Cats: 477
Update: Been to busy working to mess with the car, so I called off the SC project.
J/K
Well I have been busy and today's the first day I worked on the car in two weeks. Definitely behind now so I gotta get caught up quick. Worked from 8 am till a half hour ago. Anyways I got some stuff done. To the pictures...
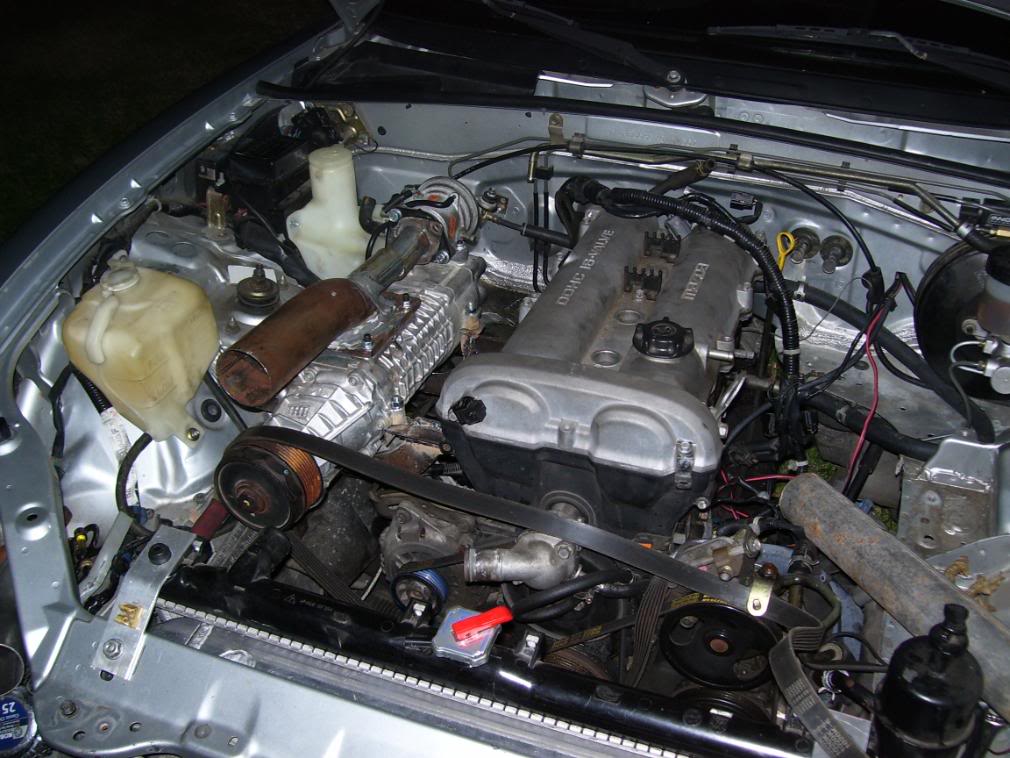
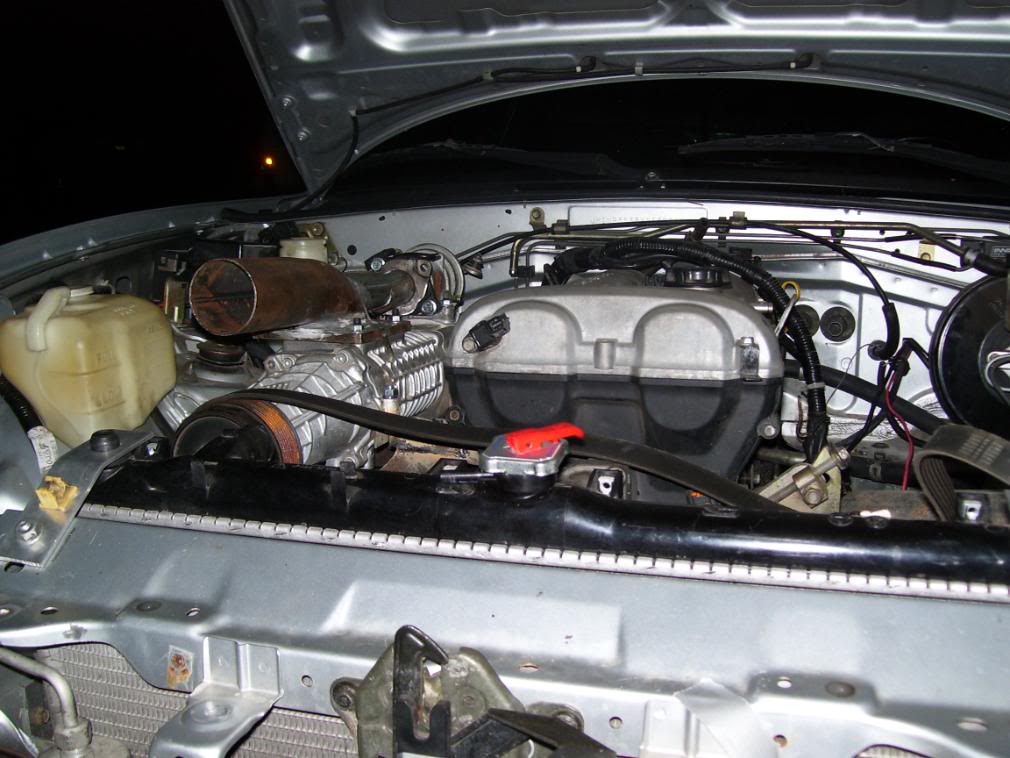
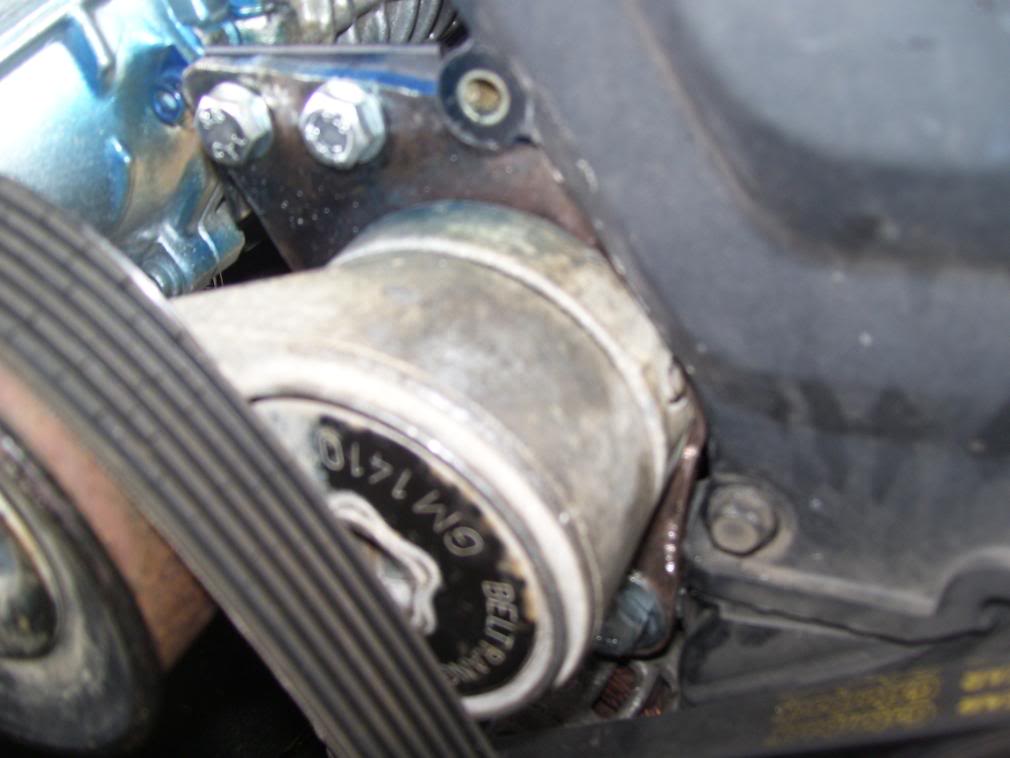
Found an auto tensioner from a 92 isuzu trooper at the local junk yard laying in the passengers seat so I got it and was able to use it. Now I won't have to manually adjust the belt tension. Tensioner was 2 dollars. It's mounted to a piece of 5/16" plate I made to bolt to the alternator and to the SC bracket I made.
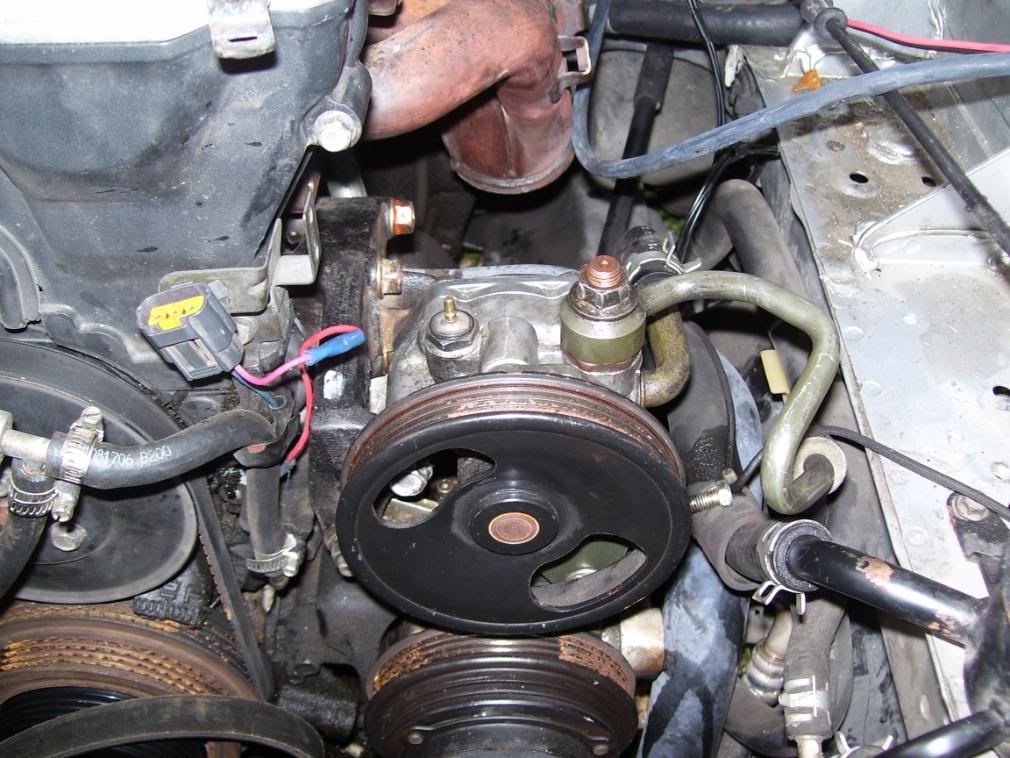
Then I decided to work on the P/S bracket. Problem is the factory tensioner is above the pump, and in the way of my SC snout. While I was at the yard I noticed that Protege's and Sephia's have a different tensioner that is lower, so I grabbed the cast bracket and tensioner assembly. Turns out it's not the same, but close, and with a BFH, a vise, and a 7/16 drill bit, I was able to coax it in there. Now I have room to put a SC above it.
I also pulled a header from a 96 KIA since it had a flange and looked like it would fit. It's not what I really want, but since I'm behind schedule I'm gonna use this for now. It does have a 3" collector that tapers to a 2" pipe, but I cut it off at the collector so I can build my 3" exhaust.
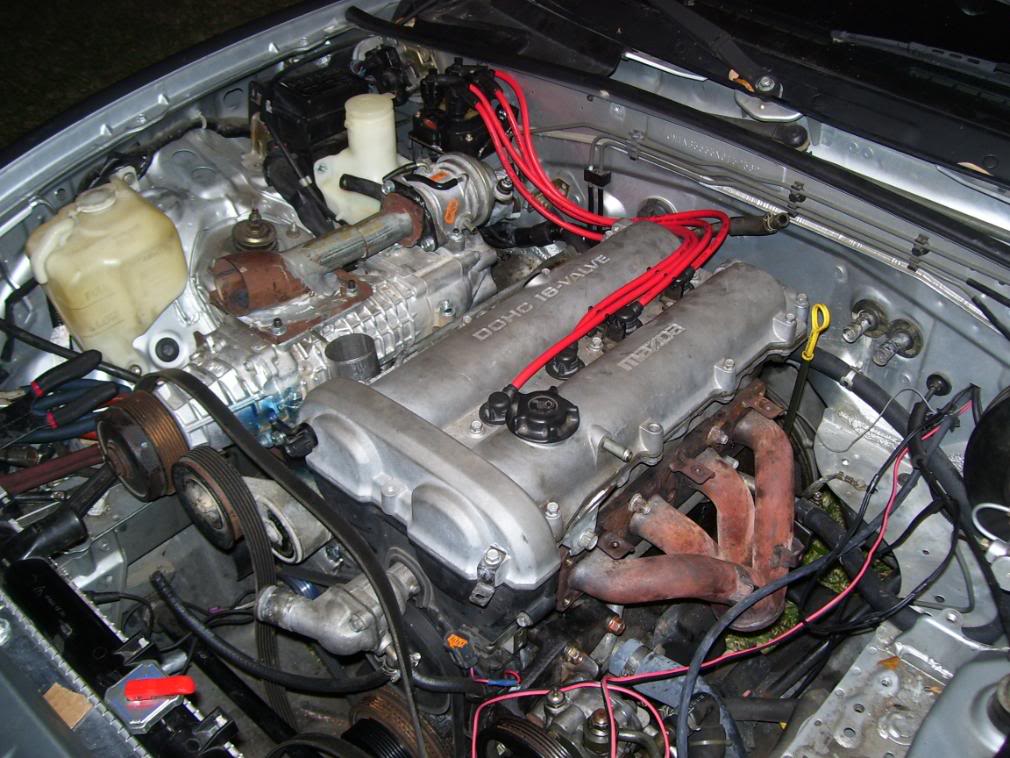
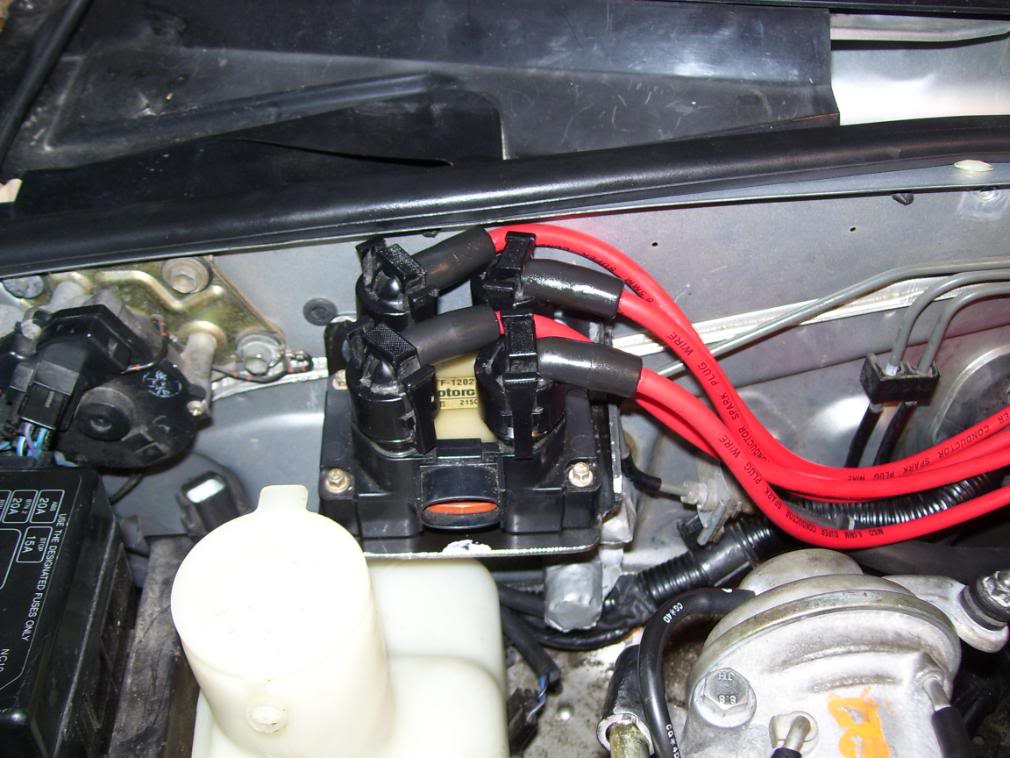
And finally the UPS guy delivered my MSD spark plug wire I ordered so I made my custom spark plug wires. One end is Ford that snaps onto the EDIS coil pack, the other is mazda that goes into the head. Took me about 2 hours to disassemble the old wires to get all the pieces I needed, and another 2 hours to make up the new wires. Sucks, but they're done and turned out good.
Oh yeah and I snagged me a 96 Kia BP 1.8 yesterday from the local yard. 81K miles on it and it looks good. Got it on an engine stand today. Looks like I need an 01+ oil pan and I'll have me a back up motor 'just incase'.
J/K
Well I have been busy and today's the first day I worked on the car in two weeks. Definitely behind now so I gotta get caught up quick. Worked from 8 am till a half hour ago. Anyways I got some stuff done. To the pictures...
Found an auto tensioner from a 92 isuzu trooper at the local junk yard laying in the passengers seat so I got it and was able to use it. Now I won't have to manually adjust the belt tension.
Tensioner was 2 dollars. It's mounted to a piece of 5/16" plate I made to bolt to the alternator and to the SC bracket I made. Then I decided to work on the P/S bracket. Problem is the factory tensioner is above the pump, and in the way of my SC snout. While I was at the yard I noticed that Protege's and Sephia's have a different tensioner that is lower, so I grabbed the cast bracket and tensioner assembly. Turns out it's not the same, but close, and with a BFH, a vise, and a 7/16 drill bit, I was able to coax it in there. Now I have room to put a SC above it.
I also pulled a header from a 96 KIA since it had a flange and looked like it would fit. It's not what I really want, but since I'm behind schedule I'm gonna use this for now. It does have a 3" collector that tapers to a 2" pipe, but I cut it off at the collector so I can build my 3" exhaust.
And finally the UPS guy delivered my MSD spark plug wire I ordered so I made my custom spark plug wires. One end is Ford that snaps onto the EDIS coil pack, the other is mazda that goes into the head. Took me about 2 hours to disassemble the old wires to get all the pieces I needed, and another 2 hours to make up the new wires. Sucks, but they're done and turned out good.
Oh yeah and I snagged me a 96 Kia BP 1.8 yesterday from the local yard. 81K miles on it and it looks good. Got it on an engine stand today. Looks like I need an 01+ oil pan and I'll have me a back up motor 'just incase'.
Reply
0
0
07-24-2008, 11:03 PM
#74
Elite Member
Thread Starter
iTrader: (16)
Join Date: Aug 2007
Location: Houston, TX
Posts: 9,297
Total Cats: 477
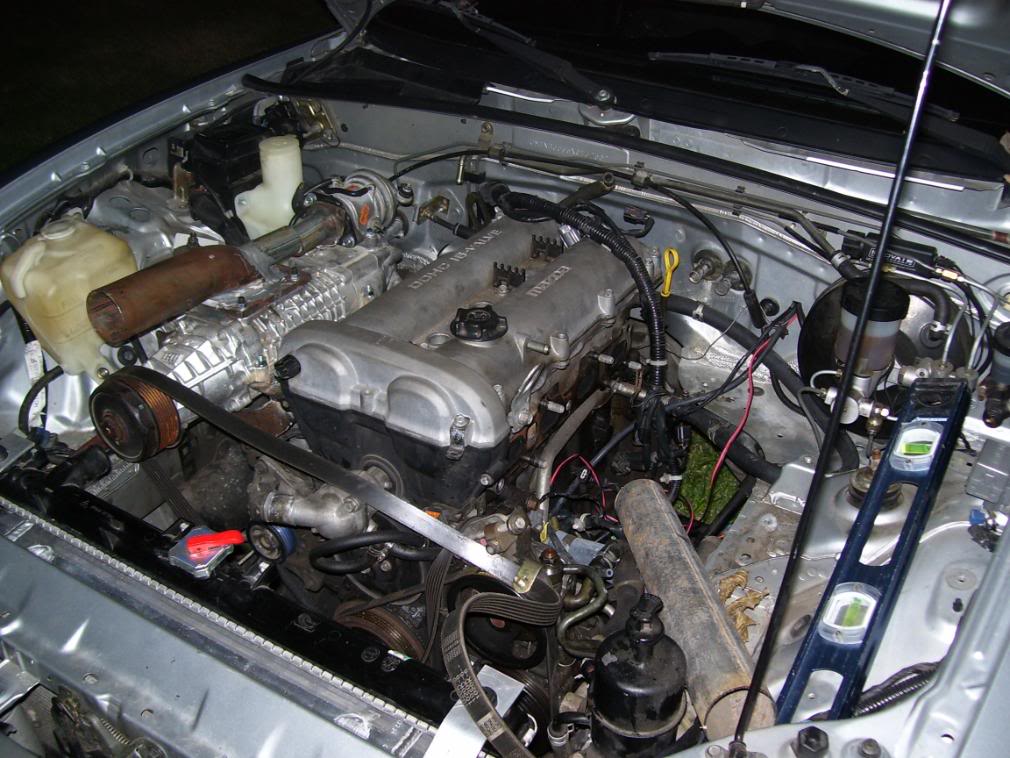
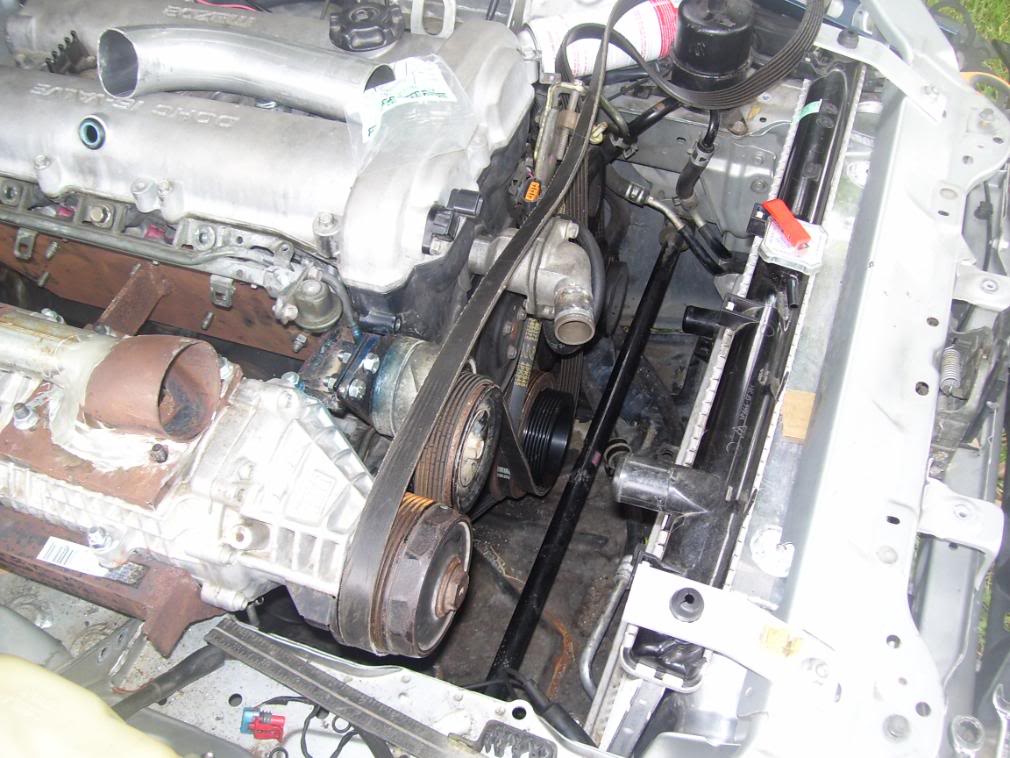
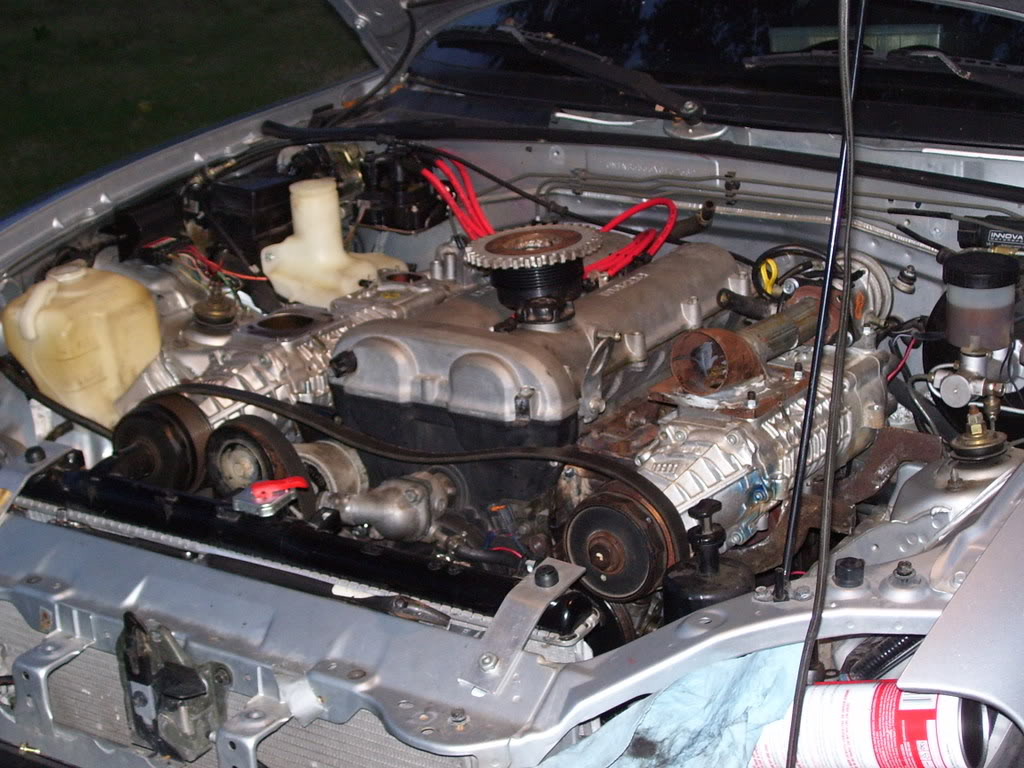
Well turns out the different P/S bracket I installed spaced the damn pump forward about 1/4". So off it came and I reinstalled the original bracket without the tensioner part. Will have to fab something to keep the pump from moving eventually.
I started working on the bracket for the hotside SC today. I didn't get much done though. Hopefully will finish it up tomorrow. Problem isn't gonna be mounting the SC's, it's gonna be plumbing all this stuff up. It's gonna be a NIGHTMARE!
I started working on the bracket for the hotside SC today. I didn't get much done though. Hopefully will finish it up tomorrow. Problem isn't gonna be mounting the SC's, it's gonna be plumbing all this stuff up. It's gonna be a NIGHTMARE!
Reply
0
0

 07-27-2008, 11:31 PM
#79
Elite Member
Thread Starter
iTrader: (16)
Join Date: Aug 2007
Location: Houston, TX
Posts: 9,297
Total Cats: 477
I haven't built the intake manifold yet. Read what I wrote earlier.
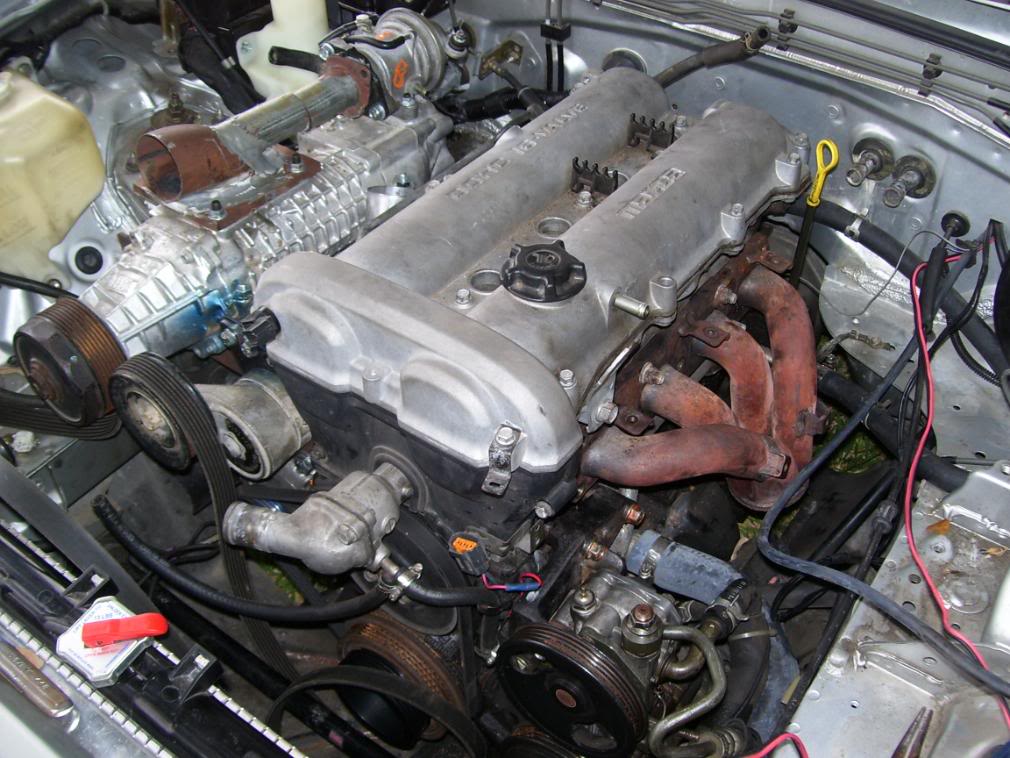
Tackled the ignition system today and got it done. Well, 99% done. It's all wired up and if I give the motor something to burn and turn the key, she fires right up at 10* BTDC. Still gotta run 2 wires to MS for timing control though.
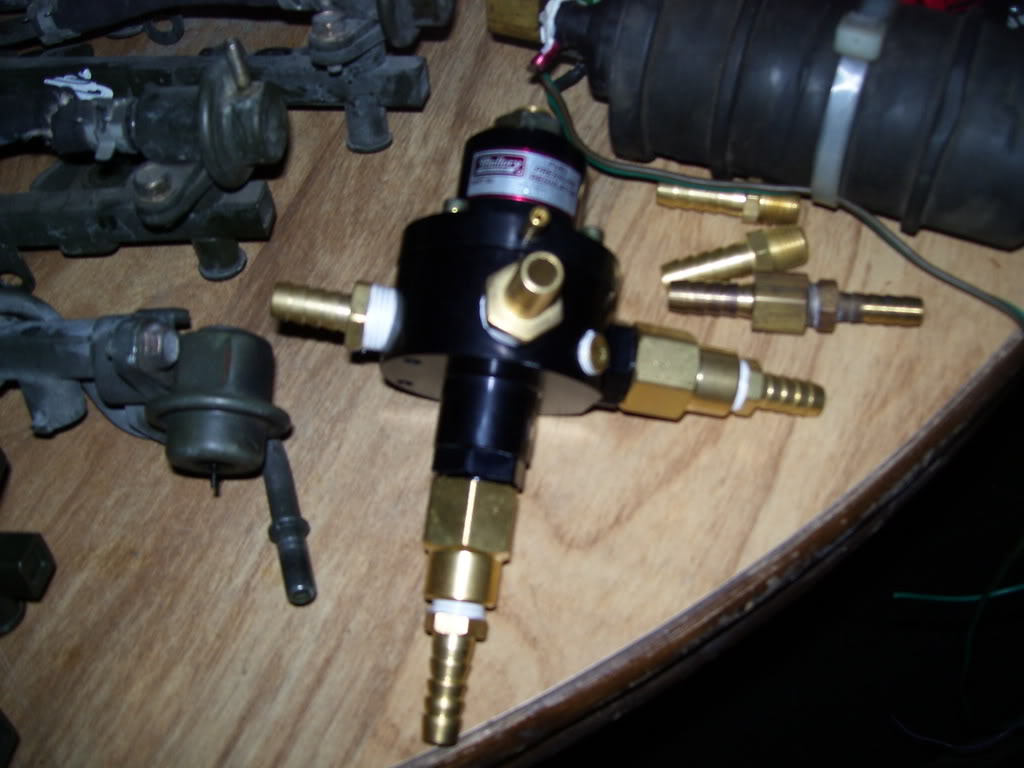
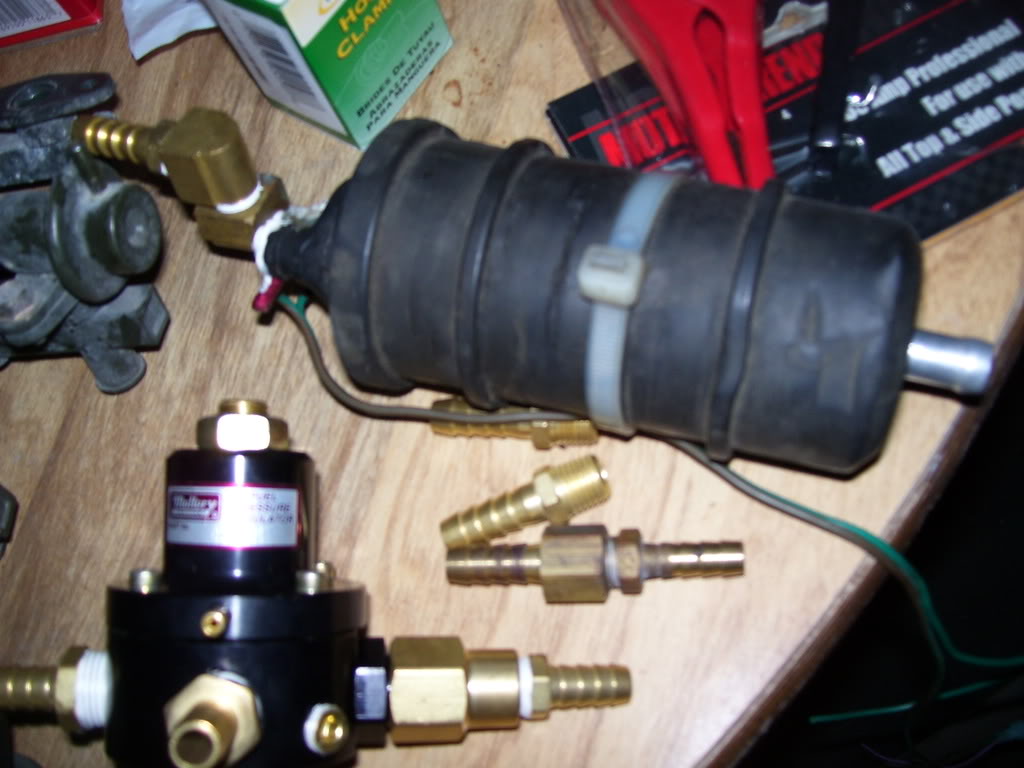
Yesterday I worked on the fuel system. Well actually I went and bought 3 kia fuel rails that morning, then came home and tapped one for dual feed. One end is 1/8 pipe, the other 1/4 pipe. Then went to Lowes and Advance too many times to buy fittings. But anyways I got everything with a 3/8" barb fitting on it now. Just gotta mount the regulator, install and wire up fuel pump, install the rail, and install hoses.
This pic shows 4 kia rails, as I fucked up the first one I bought, which is why I bought 3 more. Then there's a protege rail in there and the stocker of the 99. Reason for using the kia rail is it has more metal on the end to tap such that I get a good seal. The other rails are just sheet metal ends, but the kia has about 1/4" of steel.
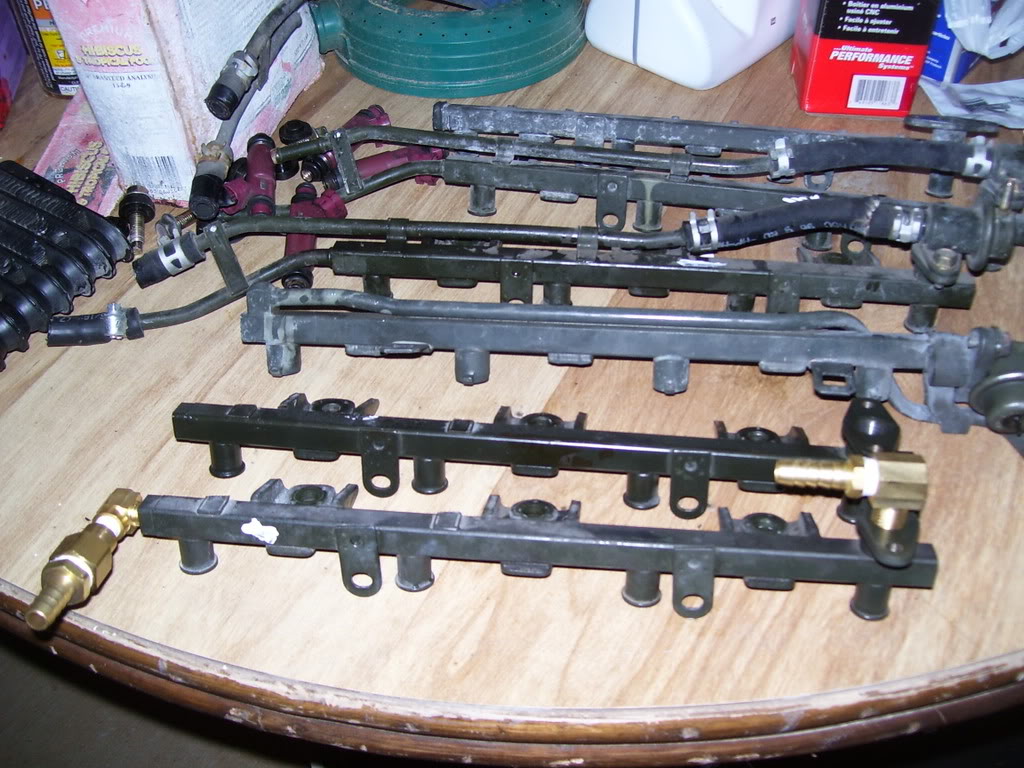
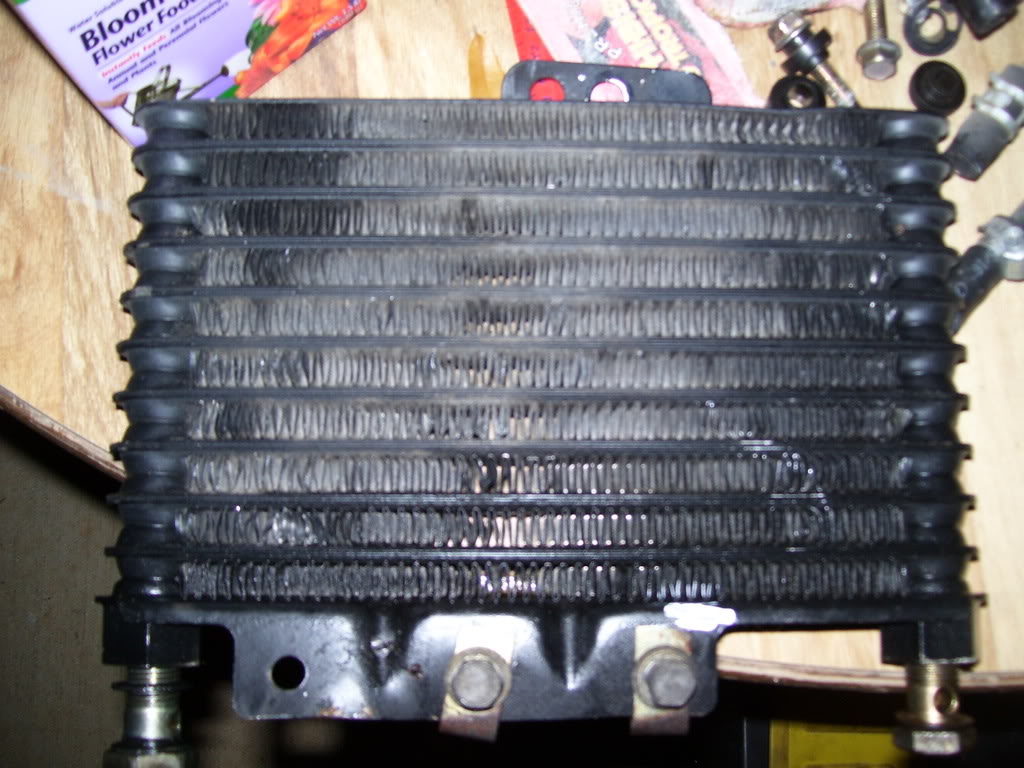
Oil cooler I snagged when I got the rails. I also got a spare EDIS4 module to keep in the trunk "just in case".
Tackled the ignition system today and got it done. Well, 99% done. It's all wired up and if I give the motor something to burn and turn the key, she fires right up at 10* BTDC. Still gotta run 2 wires to MS for timing control though.
Yesterday I worked on the fuel system. Well actually I went and bought 3 kia fuel rails that morning, then came home and tapped one for dual feed. One end is 1/8 pipe, the other 1/4 pipe. Then went to Lowes and Advance too many times to buy fittings. But anyways I got everything with a 3/8" barb fitting on it now. Just gotta mount the regulator, install and wire up fuel pump, install the rail, and install hoses.
This pic shows 4 kia rails, as I fucked up the first one I bought, which is why I bought 3 more. Then there's a protege rail in there and the stocker of the 99. Reason for using the kia rail is it has more metal on the end to tap such that I get a good seal. The other rails are just sheet metal ends, but the kia has about 1/4" of steel.
Oil cooler I snagged when I got the rails. I also got a spare EDIS4 module to keep in the trunk "just in case".
Reply
0
0
09-15-2008, 10:09 AM
#80
Junior Member

Join Date: Sep 2008
Location: Tulsa, Oklahoma
Posts: 345
Total Cats: -1
Here's an idea. Trying to pipe two superchargers to one pipe and then to an intercooler so the boost can finally make it to one pipe entering the manifold is kind of extensive. Just an idea here, but why not a dual inlet intercooler? I see them for sale, and if you can't find one, just make an end tank that has two inlets. That way you can save yourself some trouble and just pipe two different superchargers to one intercooler.
Also, have you checked the needle bearings on your superchargers? I have a Millenia S supercharger and before I did anything, I joined a Millenia forum and started looking for weak points. Found out that due to a poor oiling system and issues not unrelated to turbo systems, that the superchargers could experience oil coking in the bearings. Its quite common as I understand.
Sadly I messed my supercharger up while trying to reassemble it after tearing it down to check the bearings. Which is a PITA because mine happened to be in great shape. I'm assuming you already know about all this, but if not, then just look for signs of oil in the inlets and on the screws. If anything is stained, then It could be game over. Also, While looking at the oil inlets and outlets, I noticed that none of the fittings were ribbed. I'm just curious how you're managing with those. Are you going to flare them?
Here is my photobucket account with the supercharger teardown:
http://s36.photobucket.com/albums/e2...er%20Teardown/
Reply
0
0


