
Heat exchangers ducting pics+vid
 05-28-2012, 02:39 PM
#1
Elite Member
Thread Starter

Join Date: Mar 2008
Location: Enschede, NL
Posts: 2,053
Total Cats: 12
I needed to redo my radiator/IC/oil cooler ducting and thought I'd post some pics about it.
I have the big *** raditator from TSE
the BEGI #3 intercooler
and a smallish oil cooler (Setrab, wide but only 11 rows or something).
Ducting material is 2mm black plastic (not PVC) and lots of weatherproof ducttape of course.
I extended the 'mouth' of the bumper a little and the ducting from the intercooler side so the two meet and gives a fully sealed chamber.
95% of the air passes the intercooler, all of it the radiator.
This is a sample video with the bumper loosely attached. I run a single 12" fan from chinaland:
Last edited by Laur3ns; 06-14-2012 at 05:05 AM.

Reply
 0
0

0
05-28-2012, 05:39 PM
#2
Junior Member

Join Date: Jun 2011
Location: Houston
Posts: 409
Total Cats: 20
I hope your duct tape holds up better than mine did. I had a similar setup and 1 track day in 90 degree heat with 120+mph straights and it all fell apart. I'm in the process of re-designing it using weather stripping and some sort of removable fasteners. It sucks having to re-tape everything whenever you work on the front end of the car.
Ohh, and wheres your oil cooler?
Ohh, and wheres your oil cooler?
Reply
0
0
05-28-2012, 06:29 PM
#3
Elite Member
Thread Starter
Join Date: Mar 2008
Location: Enschede, NL
Posts: 2,053
Total Cats: 12
I'm in the process of re-designing it using weather stripping and some sort of removable fasteners. It sucks having to re-tape everything whenever you work on the front end of the car.
Ohh, and wheres your oil cooler?
Reply
0
0
05-29-2012, 10:53 AM
#4
Junior Member
Join Date: Jun 2011
Location: Houston
Posts: 409
Total Cats: 20
The hard part is the vertical pieces on the sides... They need to seal against the curving body on top, get around the IC and oil cooler pipes somehow, and seal against the horizontal bottom piece. I think I will split each into two pieces, one riveted to the horizontal bottom piece and the bumper and the other riveted to the body. Have them split around the IC and oil cooler lines so that the bottom of the ducting can come off with the bumper and allow removal of the heat exchangers and their lines, leaving the upper part of the ducting in place... I still need to figure out how I'm going to seal and attach the two halves to one another.
Reply
0
0
06-14-2012, 05:10 AM
#5
Elite Member
Thread Starter
Join Date: Mar 2008
Location: Enschede, NL
Posts: 2,053
Total Cats: 12
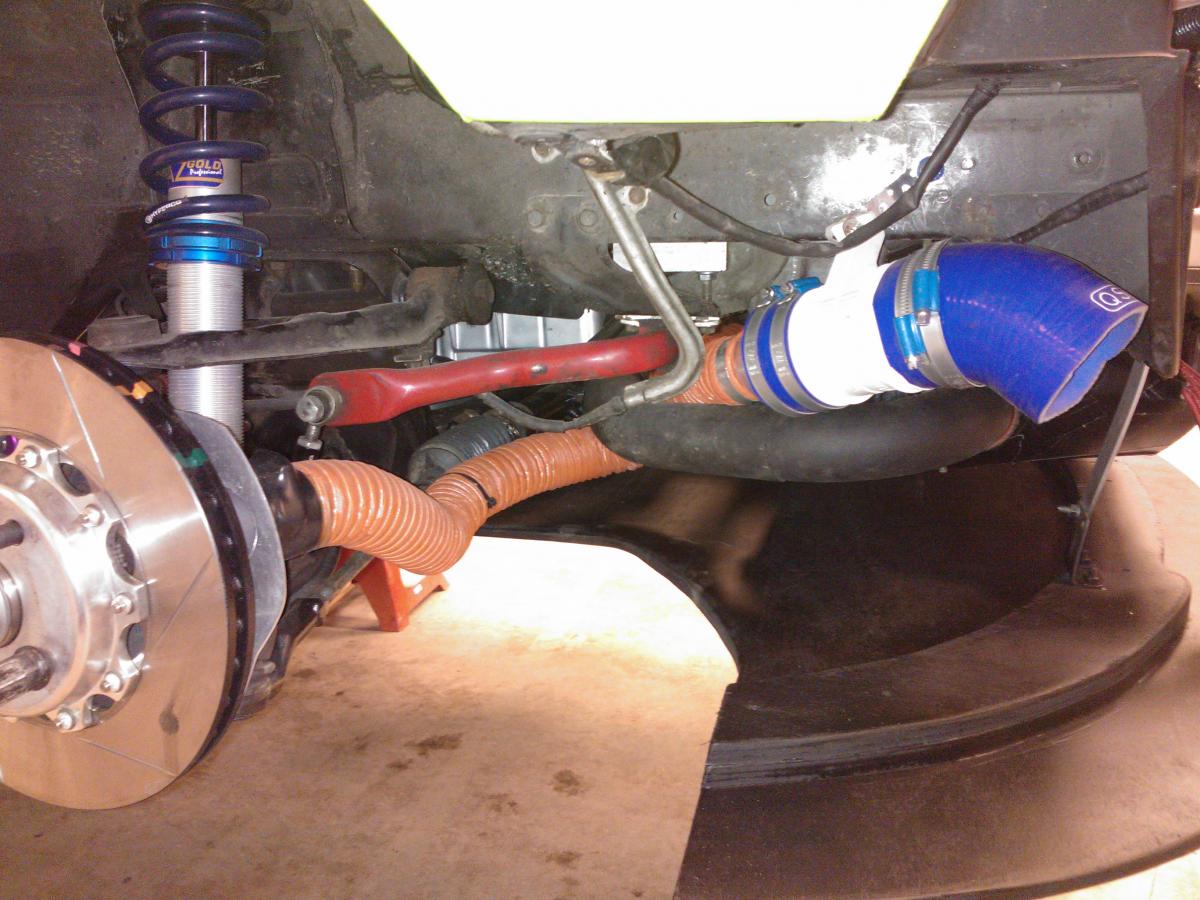
Brake cooling/ducting with forced air also completed:
- http://www.attwoodmarine.com/store/product/Turbo-3000
- TSE spindle plates
- http://www.attwoodmarine.com/store/product/Turbo-3000
- TSE spindle plates
Reply
0
0


 06-15-2012, 12:33 AM
#9
Elite Member

iTrader: (2)
Join Date: May 2008
Location: Portland, Oregon
Posts: 3,468
Total Cats: 365
Your brake duct hose routing is superior to mine. I have discovered that fastening it in place so that it is horizontally parallel with the sway bar is fail, and gets rubbed and crunched in interesting ways. I shall be replicating yours.
Reply
0
0
06-16-2012, 02:37 AM
#10
Elite Member
Thread Starter
Join Date: Mar 2008
Location: Enschede, NL
Posts: 2,053
Total Cats: 12
I can report that it works very well too! I now run Hawk DTC-60 on all corners and with the ducting and cooling in place I have solid pedal throughout the day. Pit in, the brakes no longer overheat which is a big plus!
Reply
0
0
06-19-2012, 07:28 AM
#12
Senior Member

Join Date: Dec 2010
Location: Auckland, NZ
Posts: 992
Total Cats: 57
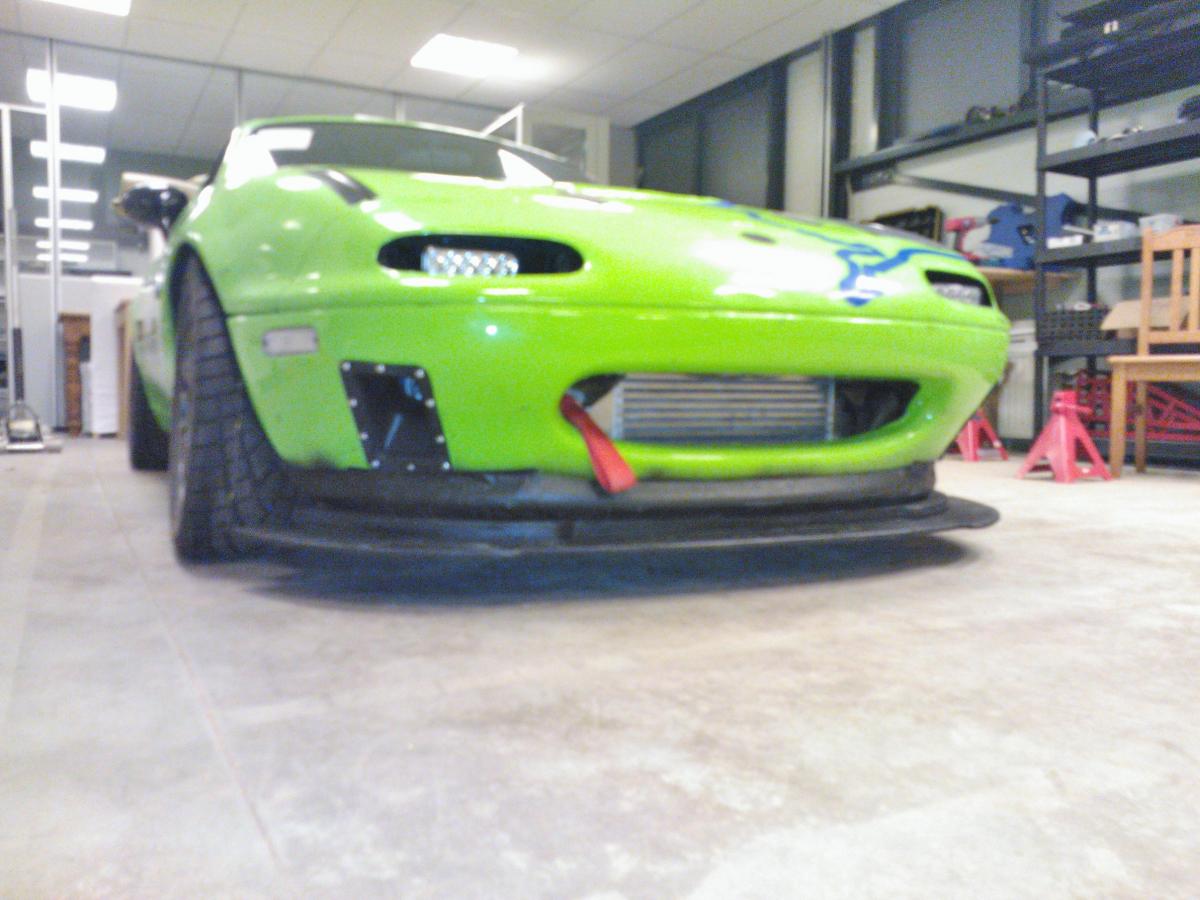
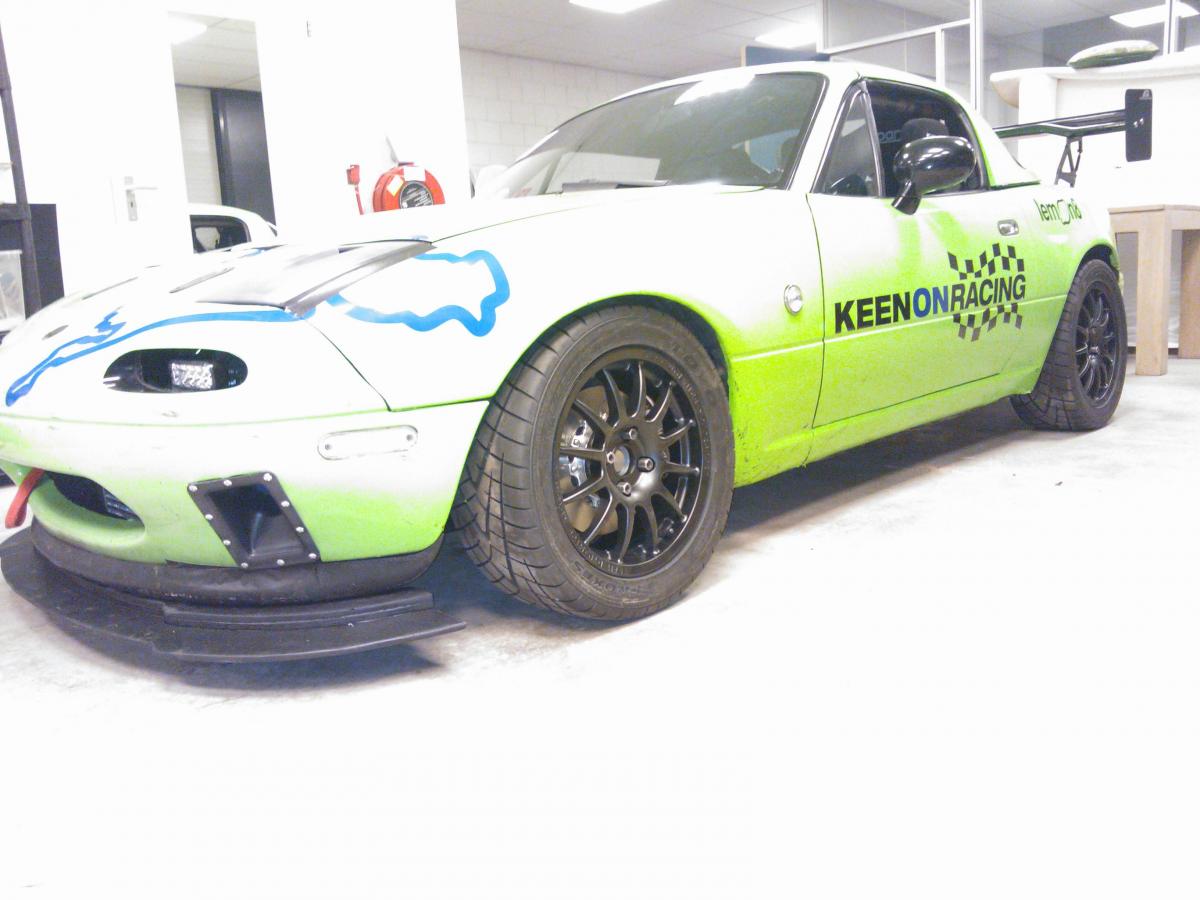
Spooky can we see a picture of the front of the car with the front end on, I am interested to see how your brake duct inlets sit with the front bumper/spoiler...
GREAT pictures of the ducting, I think i would have installed mine in a way that wouldn't have lasted and this just shows the right way to do it (or one right way perhaps).
My TSE brake ducts are coming from Flyin Miata in the next week or so hopefully.
GREAT pictures of the ducting, I think i would have installed mine in a way that wouldn't have lasted and this just shows the right way to do it (or one right way perhaps).
My TSE brake ducts are coming from Flyin Miata in the next week or so hopefully.
Reply
0
0
06-20-2012, 05:04 PM
#13
Elite Member
Thread Starter
Join Date: Mar 2008
Location: Enschede, NL
Posts: 2,053
Total Cats: 12
Actually, I had to redo part of the ducting. Just waterproof duct tape is not enough. So I used high adhesive tape that is good to 266F for attaching the ducting to the head exchangers and filled the space between the top of the splitter and the bottom of the radiator/ducting so it cannot droop. I used styrofoam-like material.
Reply
0
0
06-22-2012, 11:40 AM
#14
Junior Member

Join Date: Apr 2011
Location: Oregon
Posts: 301
Total Cats: 4
I've used some of your ideas as inspiration for my own radiator ducting project:

built a shroud to duct in the nose

sealed it around the intercooler piping at the sides, making it continuous with the OEM plastic tray

bedded in the radiator bottom with spray foam. spray it on and then set the radiator into it.

taped up the radiator top and used a tray from BEIG to finish off the top.

used a small splitter to help encourage air to flow up into the radiator and brake ducting
thx for the inspiration!
built a shroud to duct in the nose
sealed it around the intercooler piping at the sides, making it continuous with the OEM plastic tray
bedded in the radiator bottom with spray foam. spray it on and then set the radiator into it.
taped up the radiator top and used a tray from BEIG to finish off the top.
used a small splitter to help encourage air to flow up into the radiator and brake ducting
thx for the inspiration!
Last edited by gtred; 06-22-2012 at 12:04 PM.
Reply
0
0
06-22-2012, 08:29 PM
#16
Junior Member
Join Date: Apr 2011
Location: Oregon
Posts: 301
Total Cats: 4
Reply
0
0
06-26-2012, 01:48 AM
#17

.
I've used some of your ideas as inspiration for my own radiator ducting project:

built a shroud to duct in the nose

sealed it around the intercooler piping at the sides, making it continuous with the OEM plastic tray

bedded in the radiator bottom with spray foam. spray it on and then set the radiator into it.

taped up the radiator top and used a tray from BEIG to finish off the top.

used a small splitter to help encourage air to flow up into the radiator and brake ducting
thx for the inspiration!
built a shroud to duct in the nose
sealed it around the intercooler piping at the sides, making it continuous with the OEM plastic tray
bedded in the radiator bottom with spray foam. spray it on and then set the radiator into it.
taped up the radiator top and used a tray from BEIG to finish off the top.
used a small splitter to help encourage air to flow up into the radiator and brake ducting
thx for the inspiration!
Reply
0
0


Thread
Thread Starter
Forum
Replies
Last Post


