'95 Build Thread Attempt
 07-02-2012, 01:33 PM
#1
Elite Member
Thread Starter
iTrader: (15)

Join Date: Jan 2007
Location: Murfreesboro,TN
Posts: 2,045
Total Cats: 265
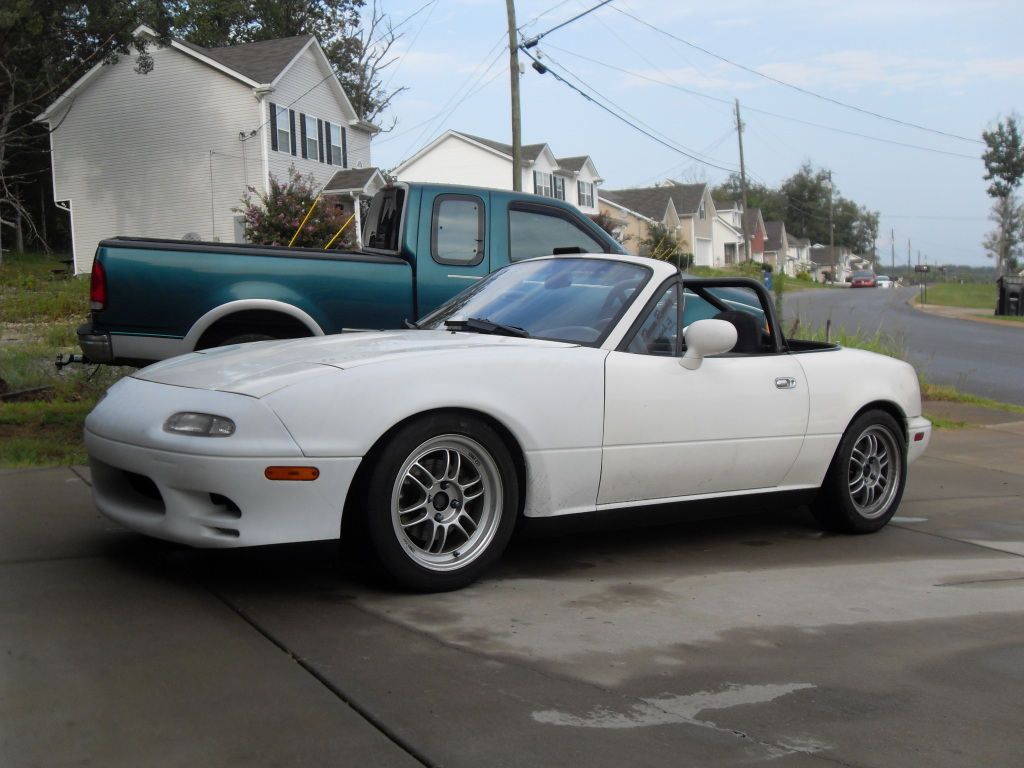
I purchased the car in 2007 with the intentions of building it into a STS(2) car. I refreshed the motor because a leaking exhaust valve. For the next year in a half I spent some time trying to dial in the suspension and learn to drive on street tires. Just before the 2008 Solo Nationals I dynoed the car and found it was still down on power. A leak down test showed a leaky exhaust valve. A later tear down found a bent exhaust valve. I suspect the first machine shop did not properly check the valves like I asked the first time (it was the one thing I specifically asked them to check).
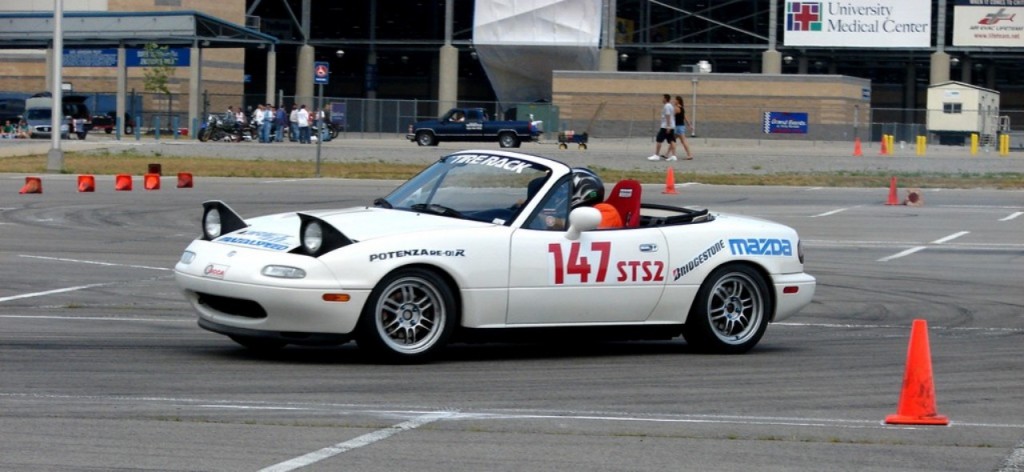

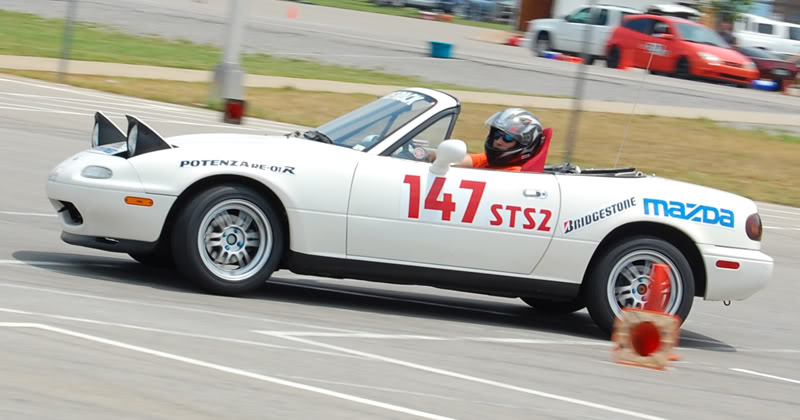
Luckily a friend of mine was looking for a co-driver for his ASP prepared Corvette that year, so I took him up on the offer. After driving that car, I knew there was no going back to STS(2). I started researching a SSM build. While searching a another friend of mine offered me his 96 M edition with a FMII kit for one hell of a deal, so I took him up on it.
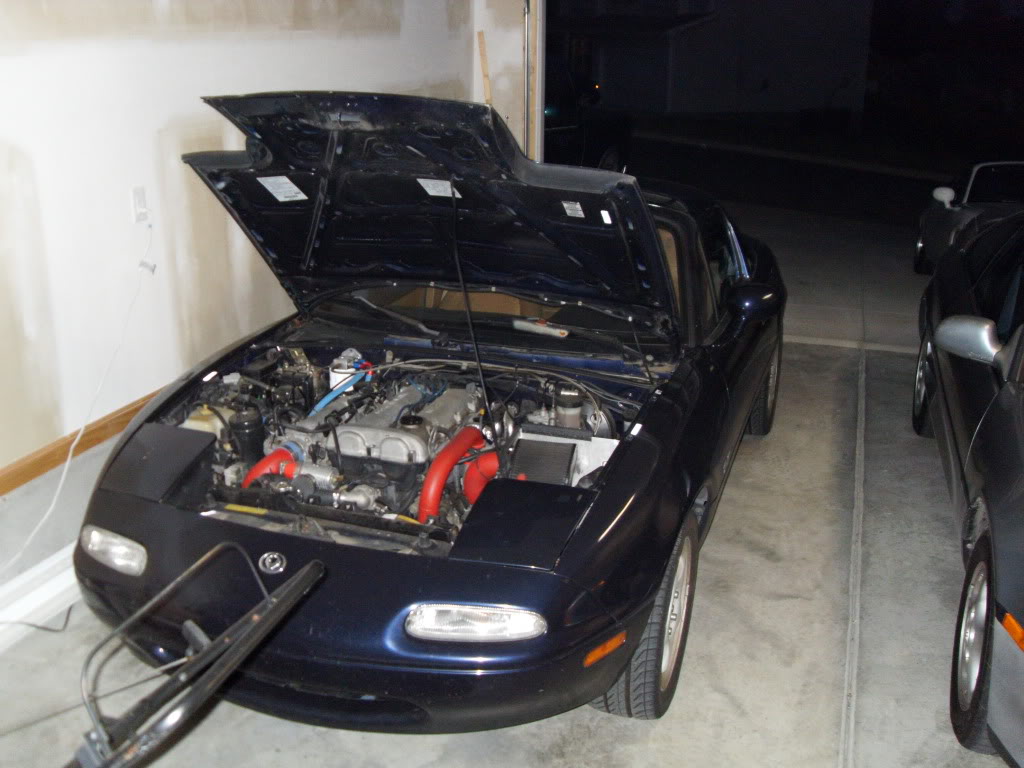
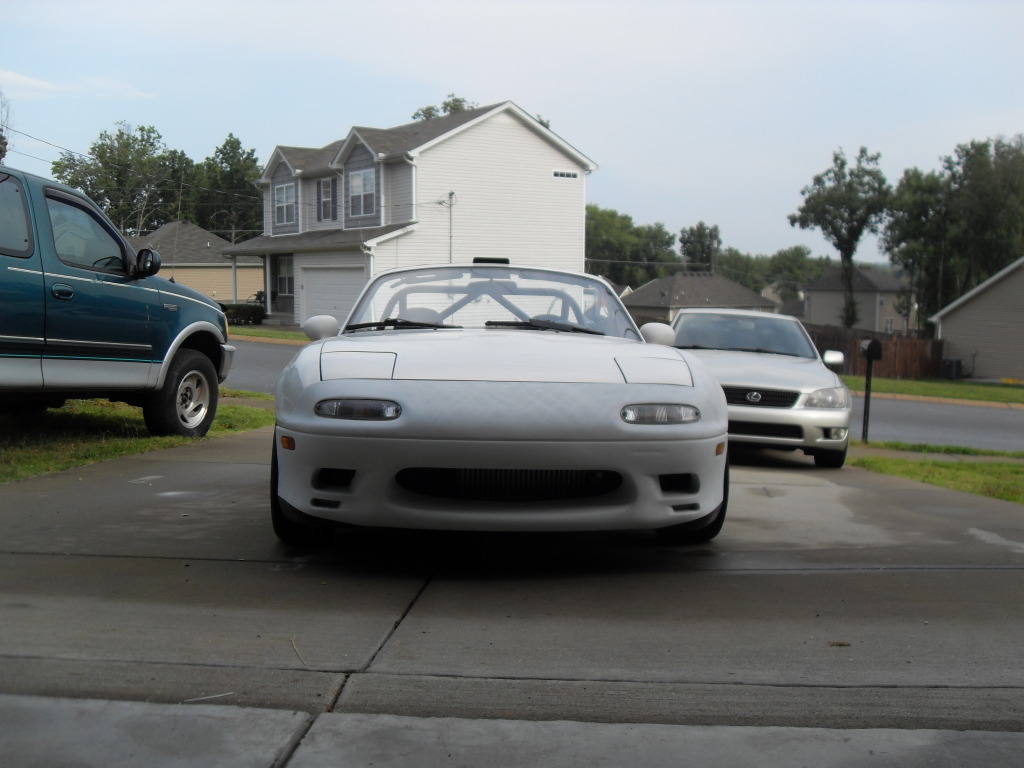
I swapped the motor from the '96 to my car (it was fresher and upgraded with Volvo valve springs). I put the '96 back to stock and sold it for almost as much as I bought it for. I ditched the Link from the '96 in favor of an AEM Series 1 EMS. Unfortunately the car set for over a year. Finally early last year I got the car back on the street. By this time I decided I was over auto-x (at least as nothing more than the casual participant) and figured I�d just have a fun street car I could do track days in (maybe NASA time trials).
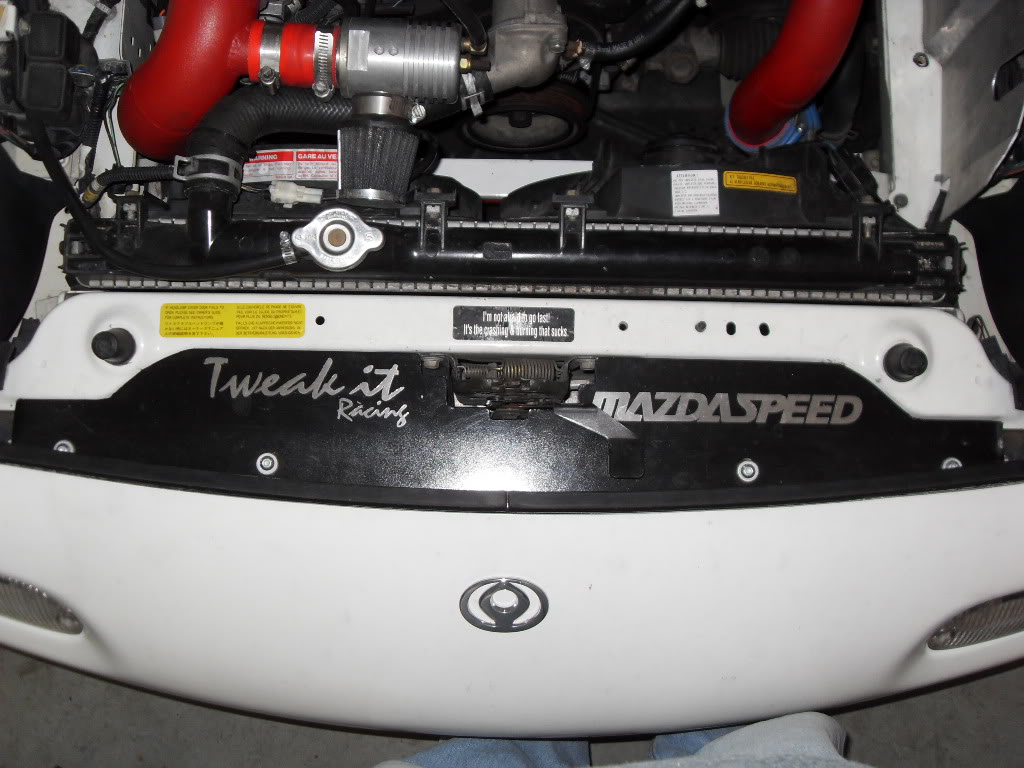
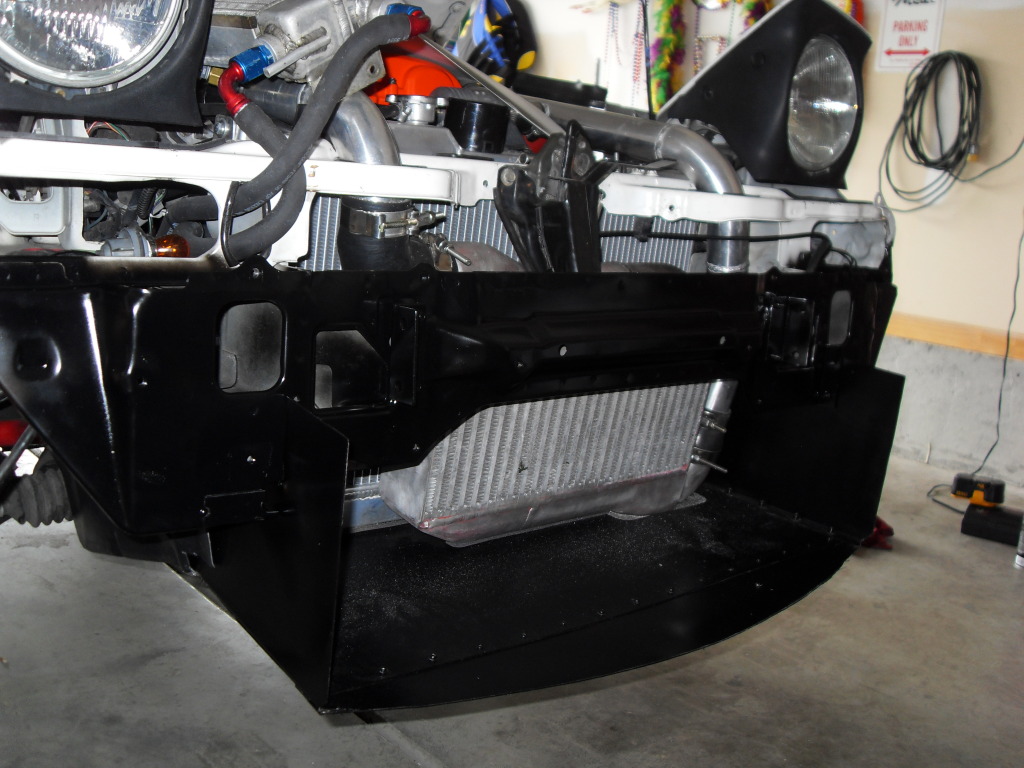
Custom radiator plate:
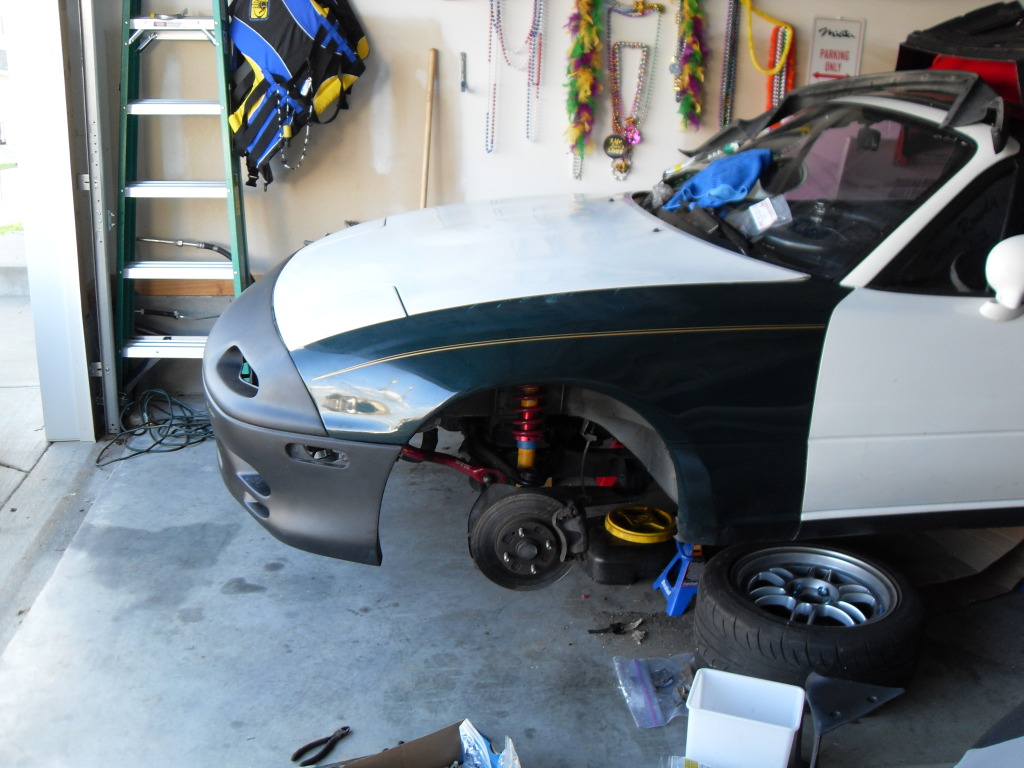
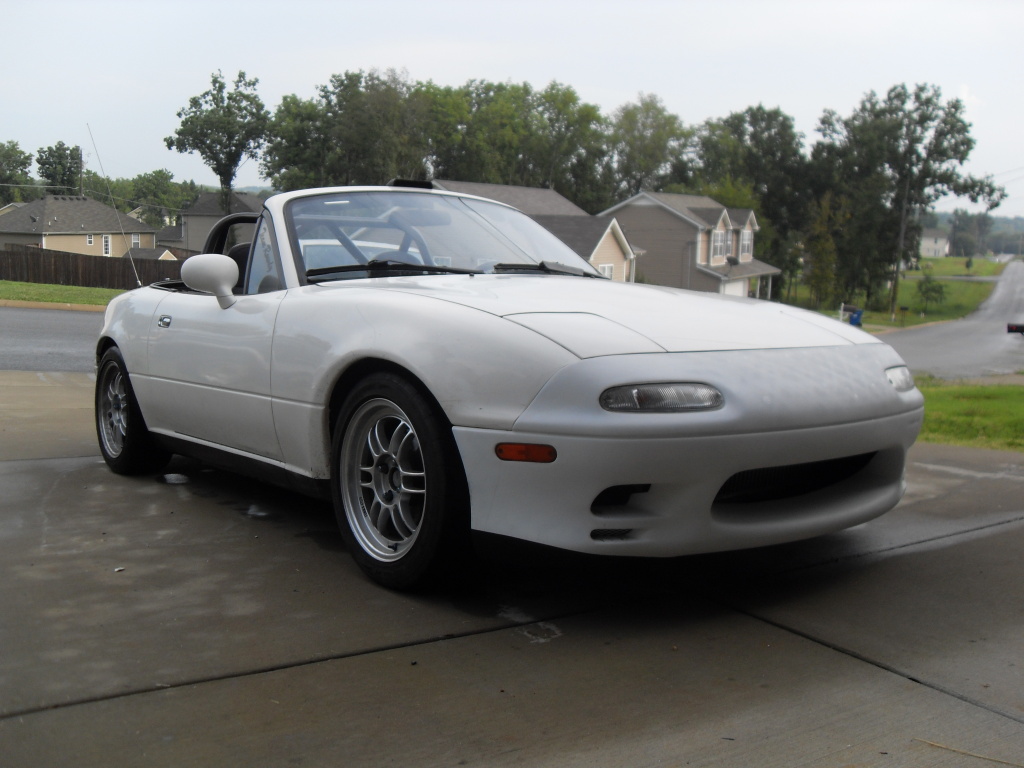
I purchased a roll bar and just enjoyed driving the car again. Then in haste to get home one day I pulled out and hit another car. Luckily it was low speed and only minor damage to the car. The corner was a little mangled, but I figured it was a good time for some upgrades!
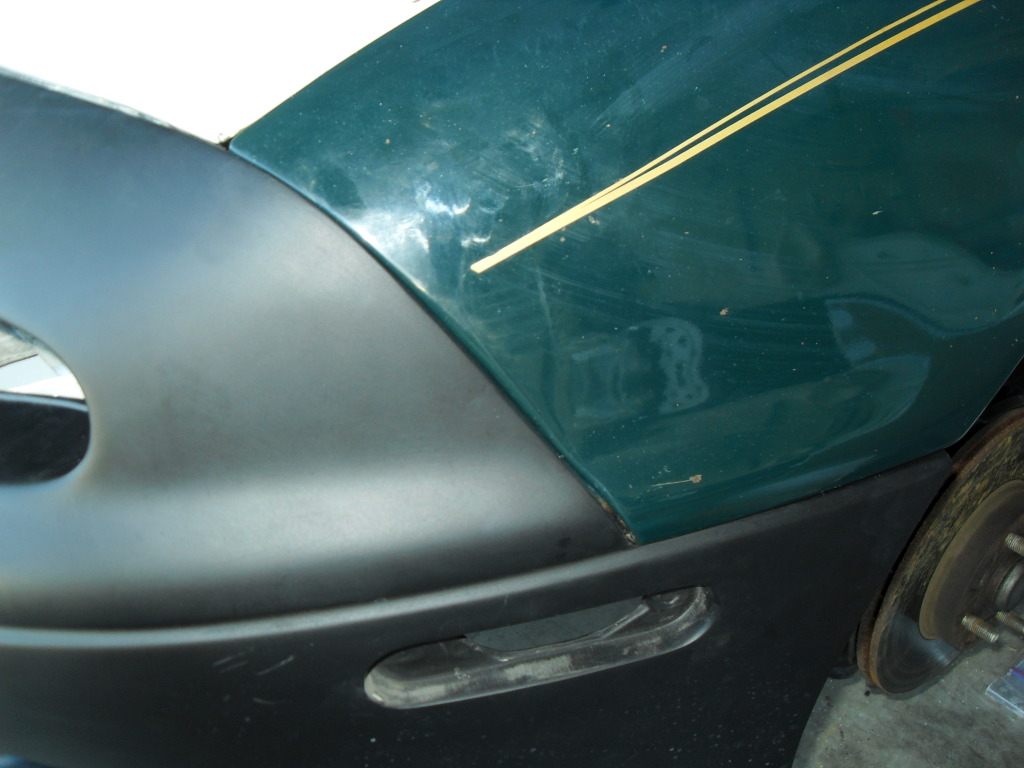
I got the corner straighten enough and took on Hustler as inspiration for my replacement fender.
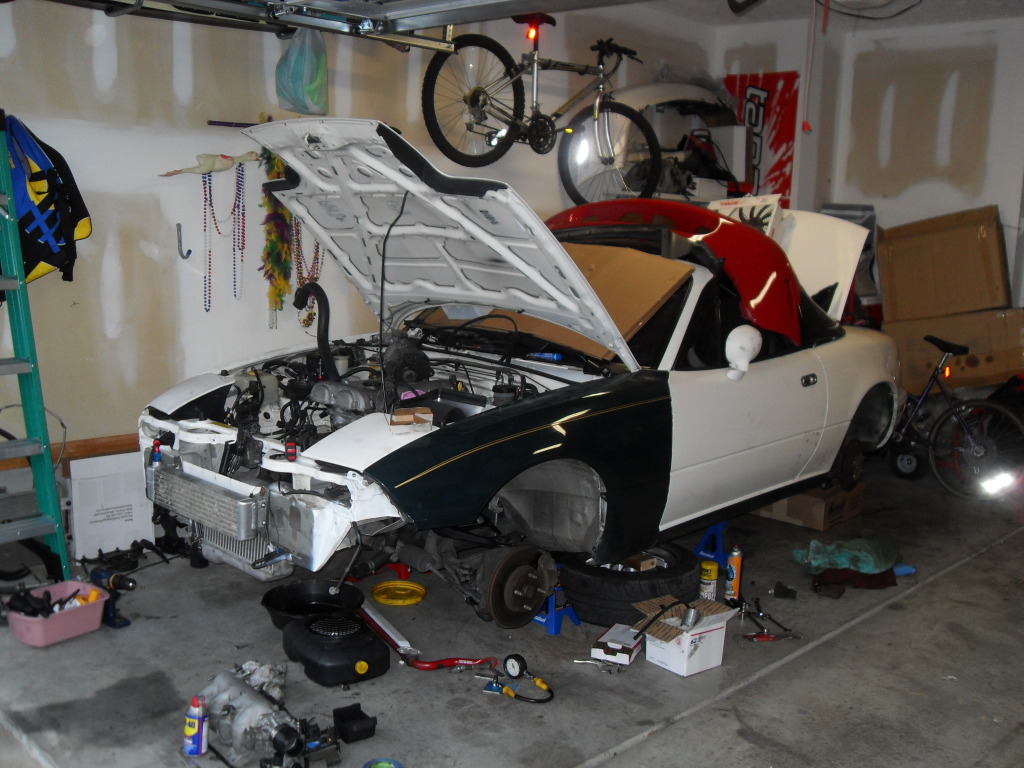
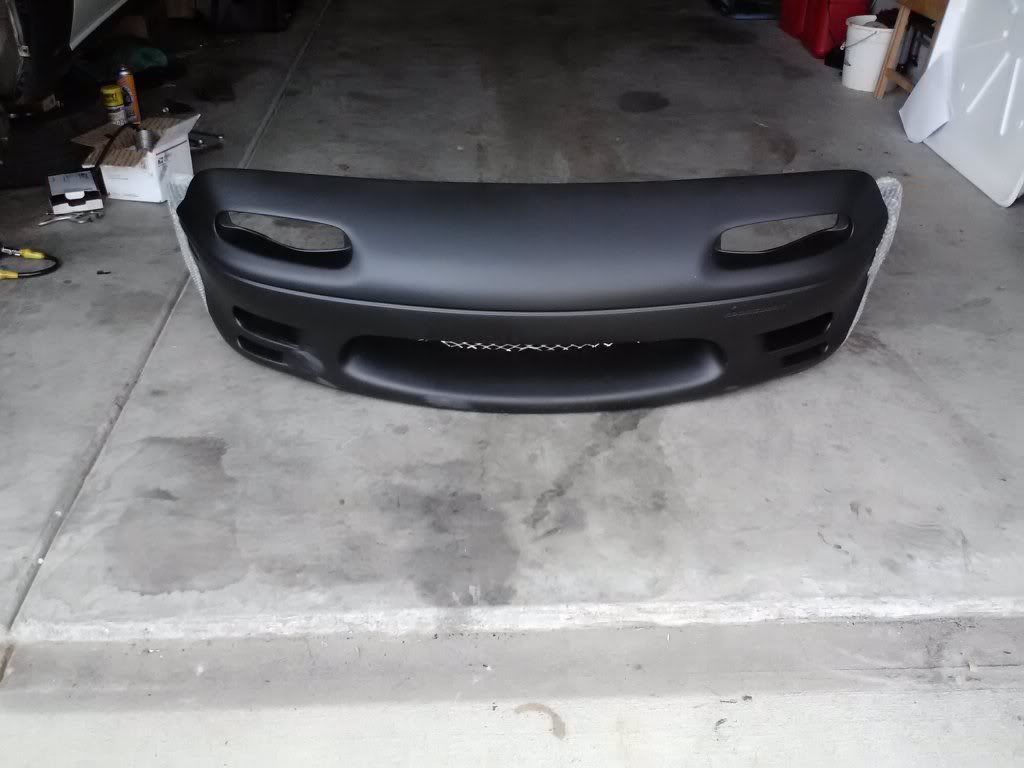
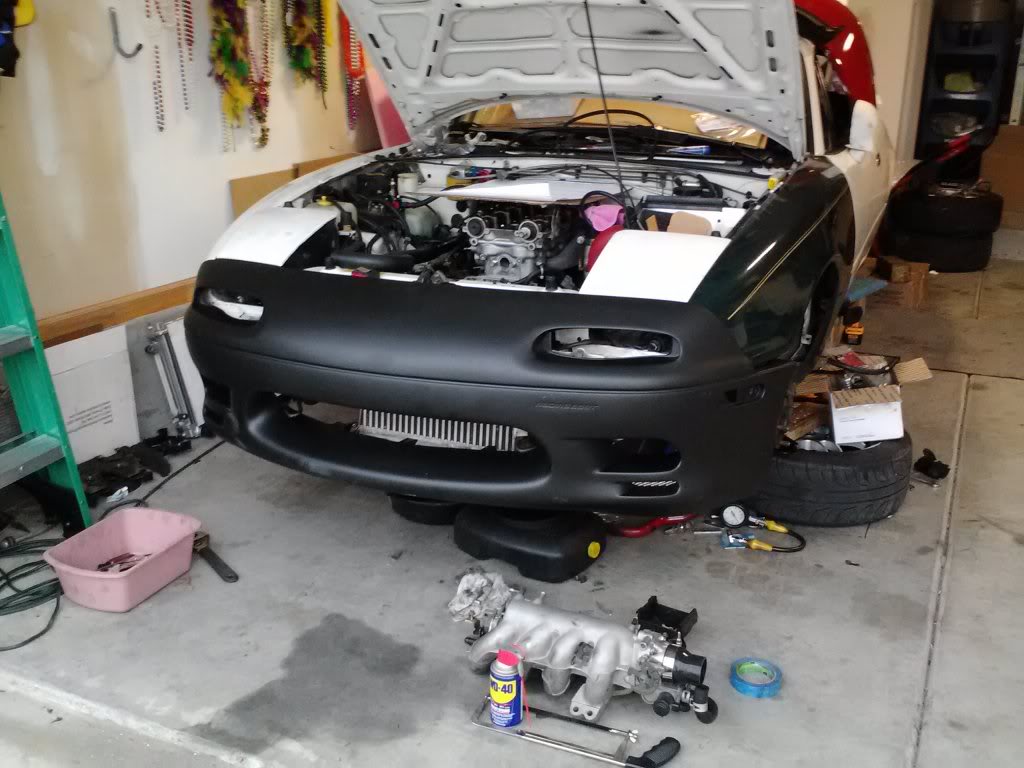
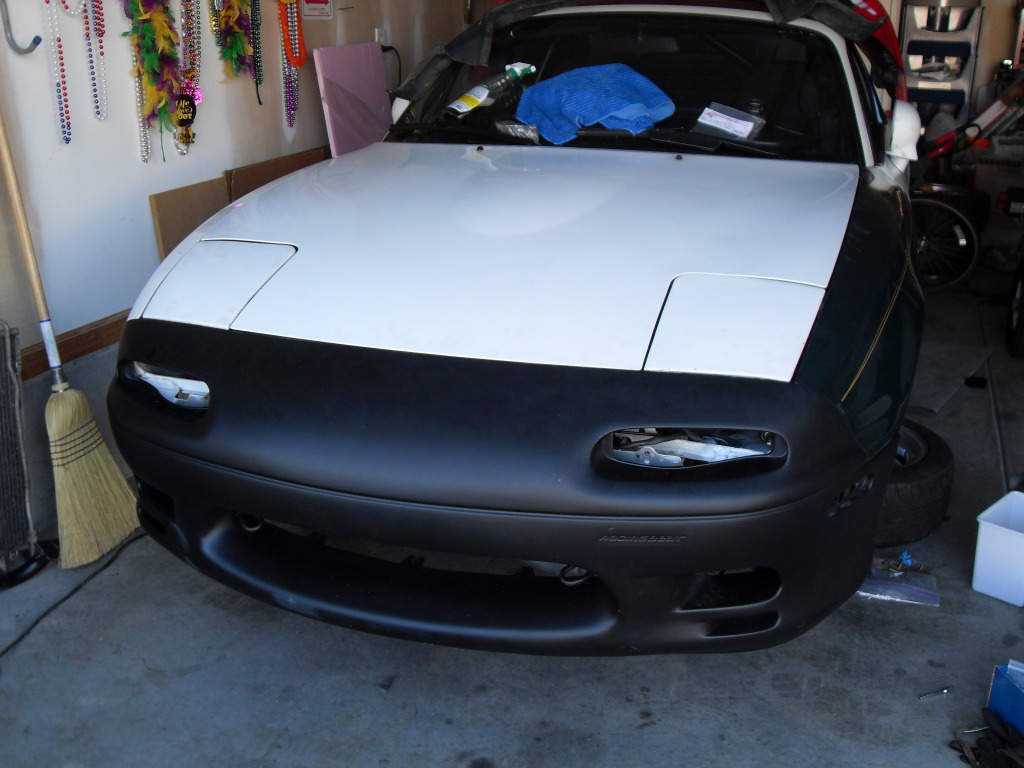
To replace the bumper I am going with a VIS Racing, Racing Beat Type2 replica.
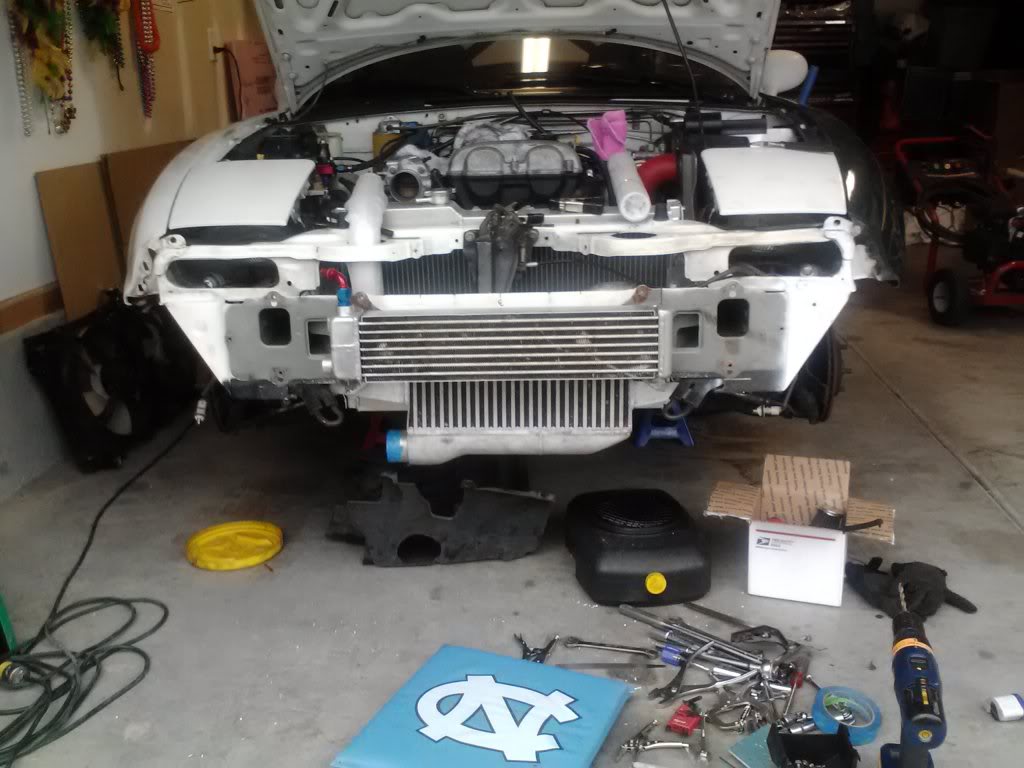
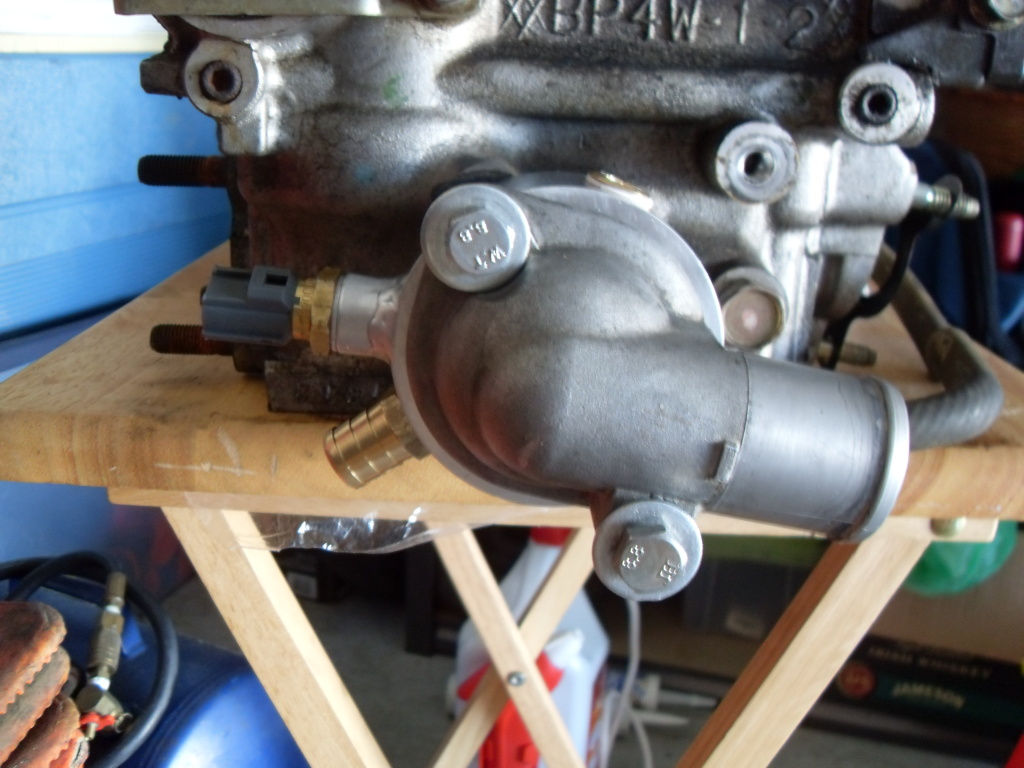
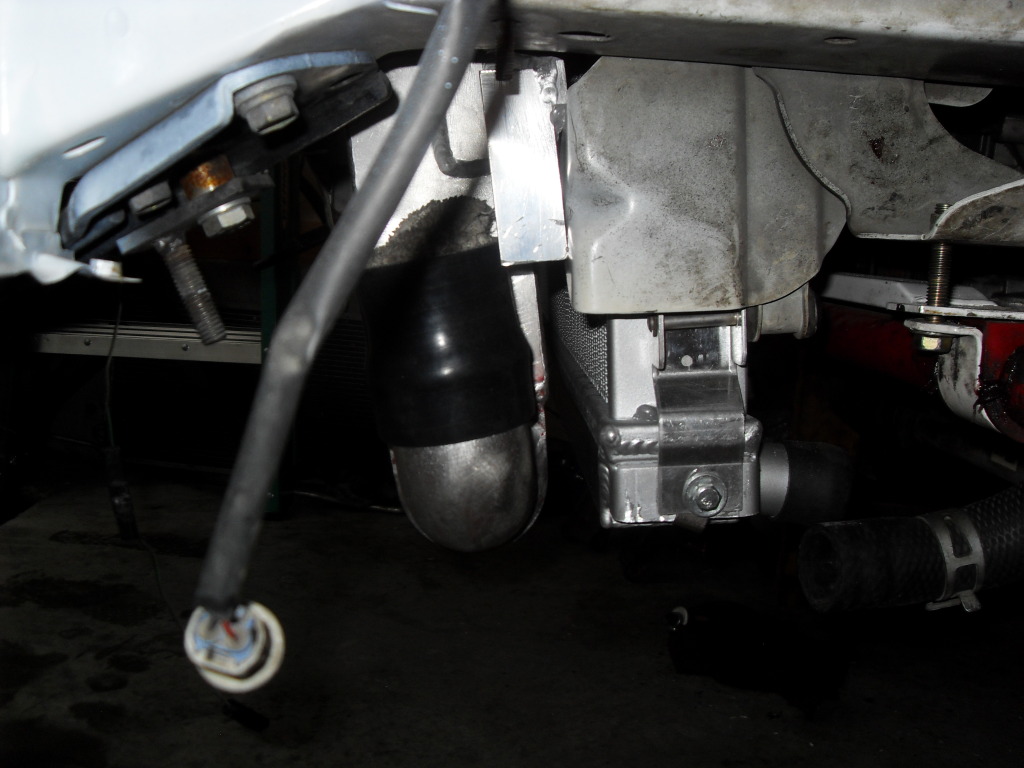
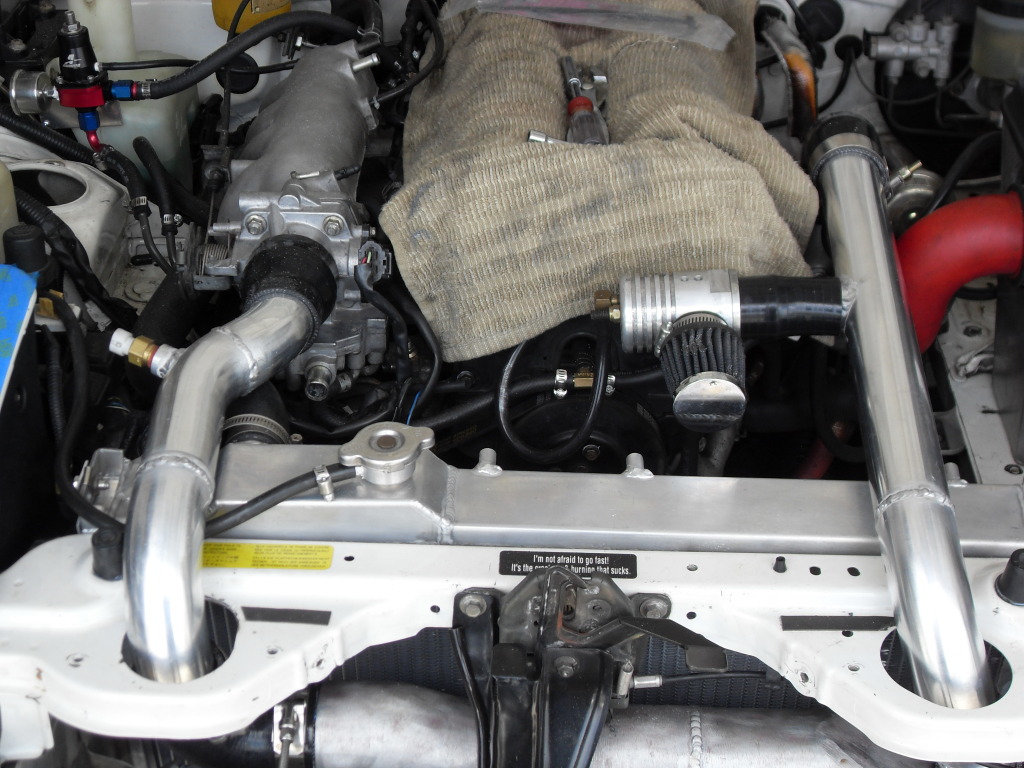
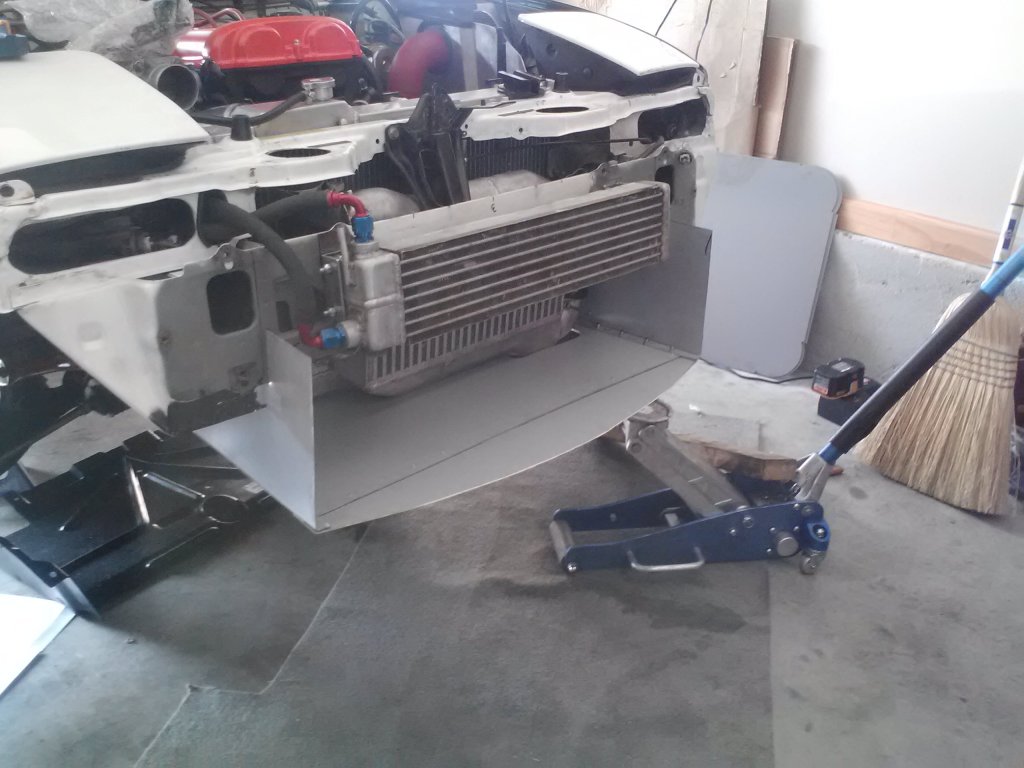
I am copying Savington�s RX7 oil cooler setup. The �96 motor came with a oil filter relocation, so that part was going to be easy. I decided the web in the radiator support was a perfect place to run the lines and keep them short.


Some McMaster-Carr (my favorite online store) clamps would keep everything neat and tidy.


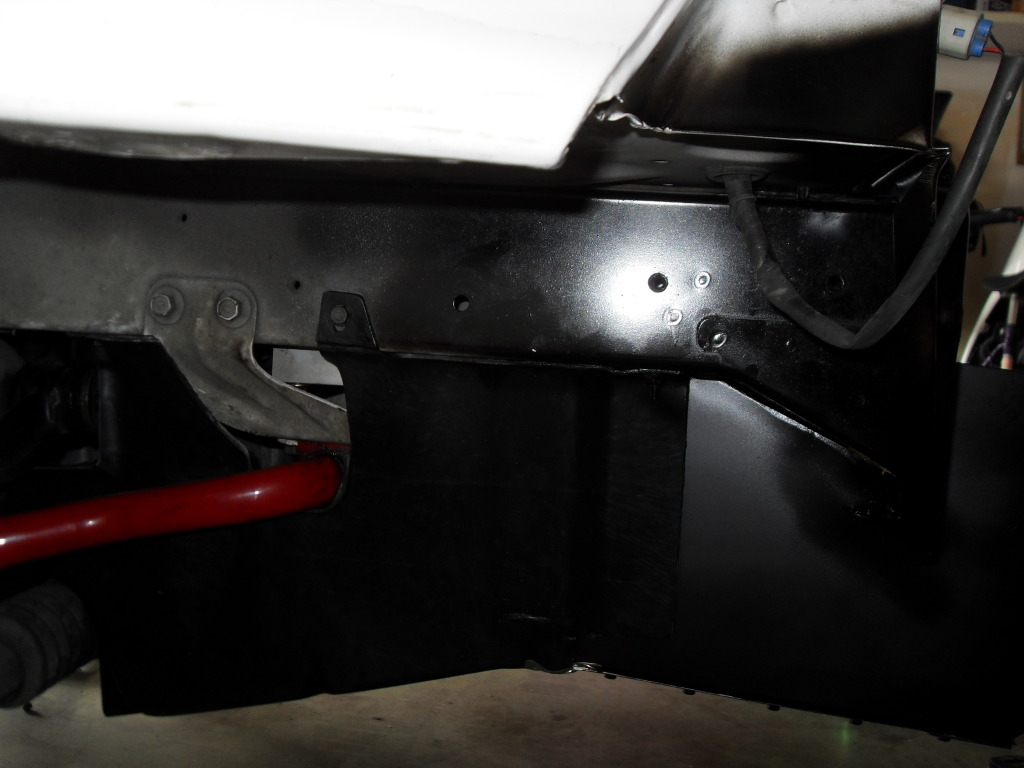
Upgraded the diff mounts:

Also going in is a CX Racing radiator and reroute.
I found using a mirror made cleaning the old gasket off much easier, though it took awhile to learn how to use my hand looking into them mirror. It also helped that I had the diff out because I just jacked the PPF all the way up for more clearance.
The BEGi spacer required some work to make it clear my bell house. I had to tap the barb fitting deeper and trim the end to make it fit.
Still in the works for this summer:
- Fan shroud
- Polyurethane suspension bushings and reinstall refreshed Konis (not enough of a budget for REAL coilovers yet).
- Revised intercooler plumbing (over radiator)
- Ducting
- Custom hood venting
Luckily a friend of mine was looking for a co-driver for his ASP prepared Corvette that year, so I took him up on the offer. After driving that car, I knew there was no going back to STS(2). I started researching a SSM build. While searching a another friend of mine offered me his 96 M edition with a FMII kit for one hell of a deal, so I took him up on it.
I swapped the motor from the '96 to my car (it was fresher and upgraded with Volvo valve springs). I put the '96 back to stock and sold it for almost as much as I bought it for. I ditched the Link from the '96 in favor of an AEM Series 1 EMS. Unfortunately the car set for over a year. Finally early last year I got the car back on the street. By this time I decided I was over auto-x (at least as nothing more than the casual participant) and figured I�d just have a fun street car I could do track days in (maybe NASA time trials).
Custom radiator plate:
I purchased a roll bar and just enjoyed driving the car again. Then in haste to get home one day I pulled out and hit another car. Luckily it was low speed and only minor damage to the car. The corner was a little mangled, but I figured it was a good time for some upgrades!
I got the corner straighten enough and took on Hustler as inspiration for my replacement fender.
To replace the bumper I am going with a VIS Racing, Racing Beat Type2 replica.
I am copying Savington�s RX7 oil cooler setup. The �96 motor came with a oil filter relocation, so that part was going to be easy. I decided the web in the radiator support was a perfect place to run the lines and keep them short.
Some McMaster-Carr (my favorite online store) clamps would keep everything neat and tidy.
Upgraded the diff mounts:
Also going in is a CX Racing radiator and reroute.
I found using a mirror made cleaning the old gasket off much easier, though it took awhile to learn how to use my hand looking into them mirror. It also helped that I had the diff out because I just jacked the PPF all the way up for more clearance.
The BEGi spacer required some work to make it clear my bell house. I had to tap the barb fitting deeper and trim the end to make it fit.
Still in the works for this summer:
- Fan shroud
- Polyurethane suspension bushings and reinstall refreshed Konis (not enough of a budget for REAL coilovers yet).
- Revised intercooler plumbing (over radiator)
- Ducting
- Custom hood venting
Last edited by Midtenn; 07-15-2012 at 09:37 PM. Reason: Better title

Reply
 0
0

0


 07-02-2012, 04:17 PM
#4
Elite Member
Thread Starter
iTrader: (15)
Join Date: Jan 2007
Location: Murfreesboro,TN
Posts: 2,045
Total Cats: 265
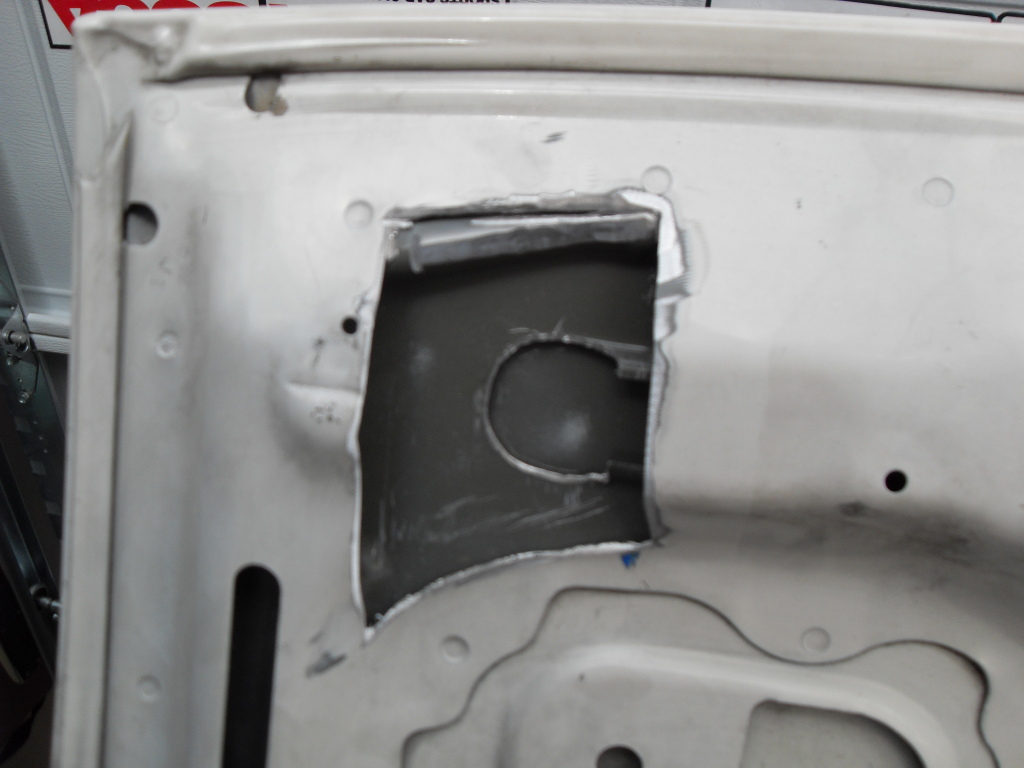
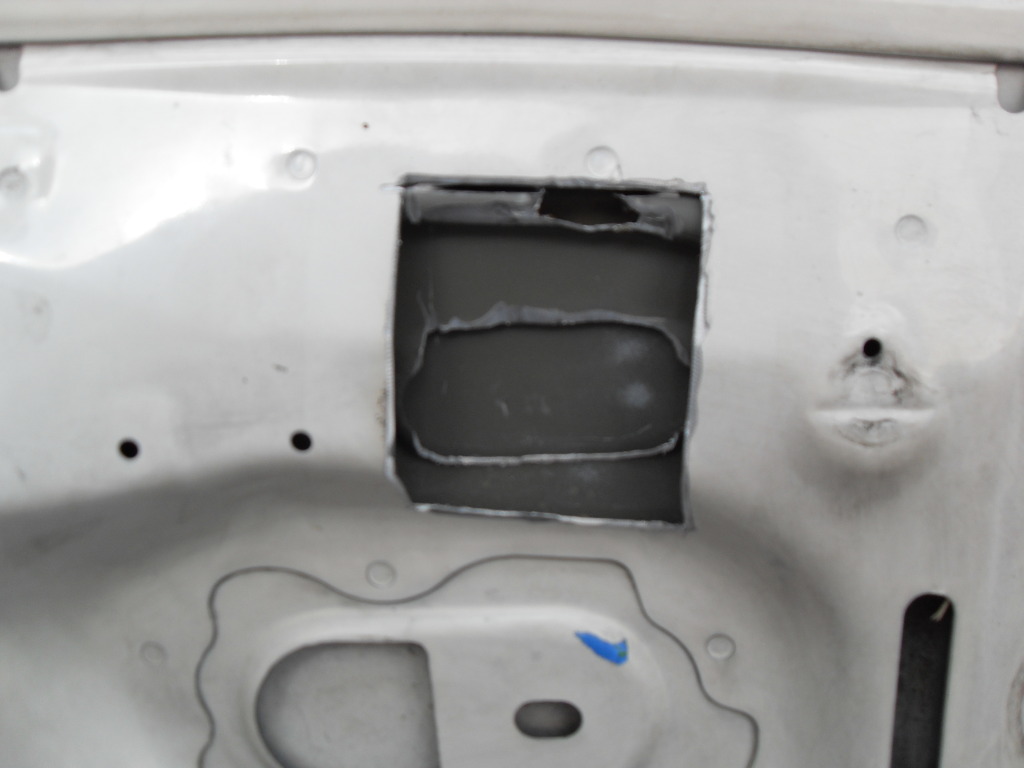
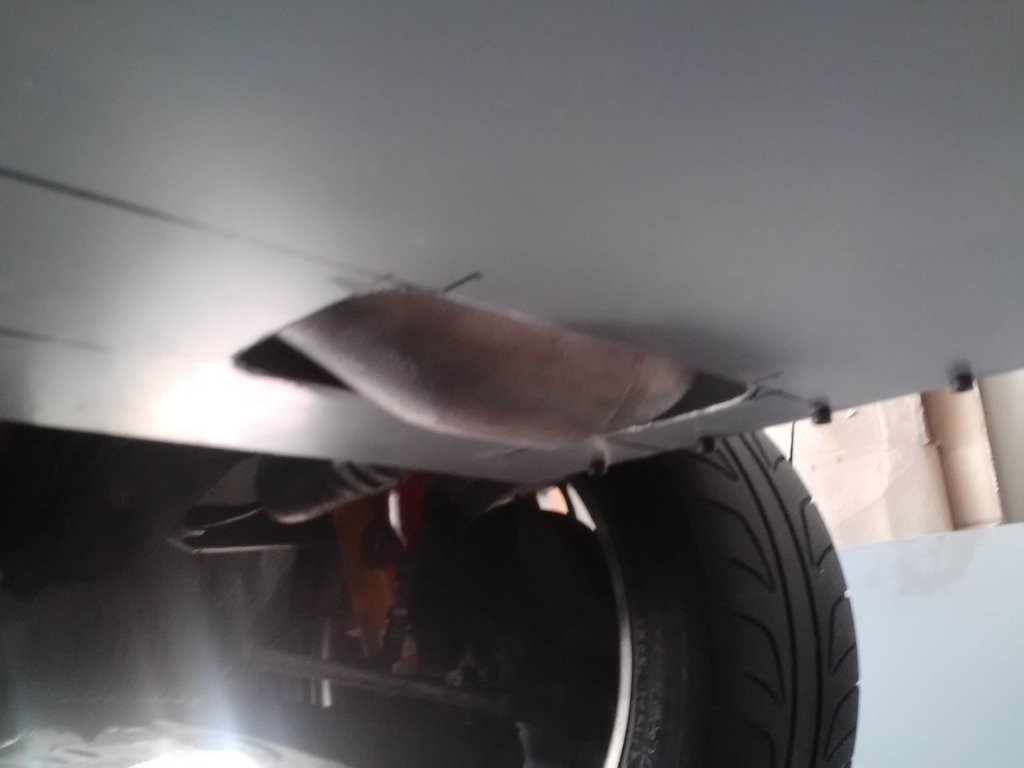
No problem. I really wanted some that looked factory. I just used a 1-1/4" hole saw to make two holes then cut in between them a Dremel cutoff disc. Unfortunately my Dremel died, so now I need to get a new one half way through the project, so the holes aren't as clean as I would like, but the silicon hose cut for edge trim hides it.
Reply
0
0

 07-09-2012, 10:53 PM
#8
Elite Member
iTrader: (11)

Join Date: Jun 2007
Location: Overland Park, Kansas
Posts: 5,360
Total Cats: 43
What did you do about a thermostat?
Edit- I see it has an internal thermostat. WIN!
Last edited by elesjuan; 07-10-2012 at 12:04 AM.
Reply
0
0
07-10-2012, 08:44 AM
#10
Elite Member
Thread Starter
iTrader: (15)
Join Date: Jan 2007
Location: Murfreesboro,TN
Posts: 2,045
Total Cats: 265
It's not too bad, but I went in to it knowing I was going to have some work ahead of me because of the accident. Some of the body panel mounts are a little off. That's my next big task to get everything lined up.
Reply
0
0
07-15-2012, 09:36 PM
#11
Elite Member
Thread Starter
iTrader: (15)
Join Date: Jan 2007
Location: Murfreesboro,TN
Posts: 2,045
Total Cats: 265
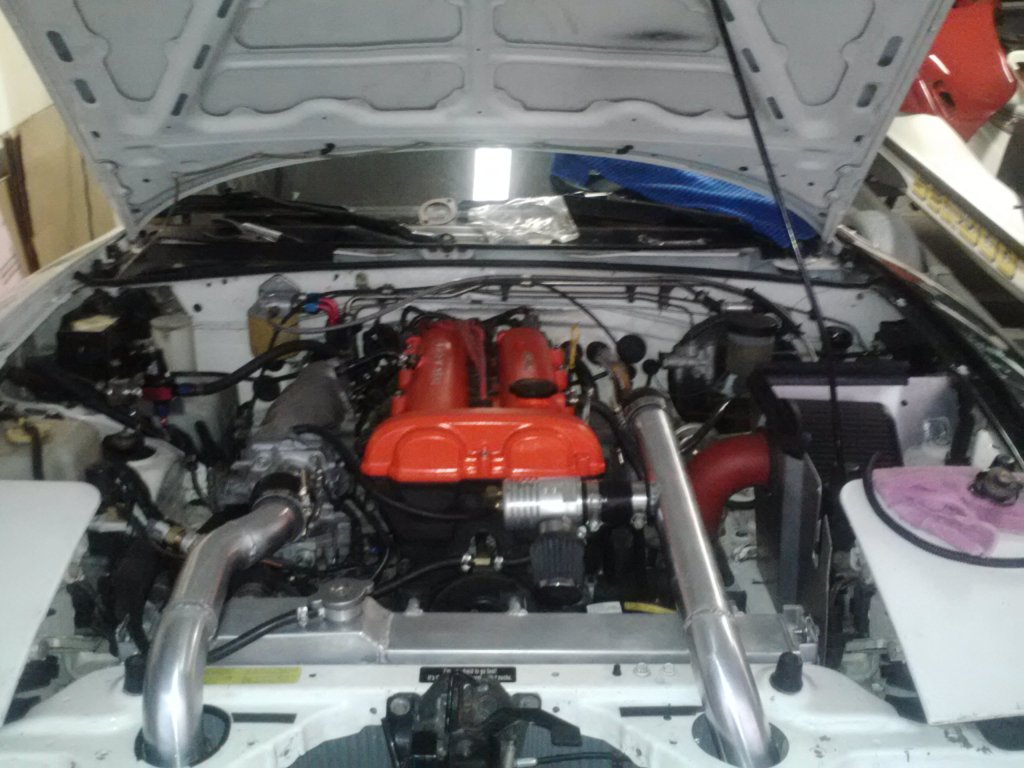
I got some more forward process this weekend. My friend finished up the hot side piping:
While he worked on that, I cut the the hood to clear the new pipes. The cold side is pretty close to the hood, but it was a necessary evil because of the expansion area of the radiator. I only had a 4" angle grinder to work with. Once I get a working a Dremel, I'll clean up the cutouts to make them look a little better.

All closed up:

Hopefully this week I'll get my shroud done and the Spal fans installed. I got my Koni's back from Pro Parts USA and I'm going to work on the rest of the urethane bushings.
While he worked on that, I cut the the hood to clear the new pipes. The cold side is pretty close to the hood, but it was a necessary evil because of the expansion area of the radiator. I only had a 4" angle grinder to work with. Once I get a working a Dremel, I'll clean up the cutouts to make them look a little better.
All closed up:
Hopefully this week I'll get my shroud done and the Spal fans installed. I got my Koni's back from Pro Parts USA and I'm going to work on the rest of the urethane bushings.
Reply
0
0
 08-20-2012, 01:24 PM
#13
Elite Member
Thread Starter
iTrader: (15)
Join Date: Jan 2007
Location: Murfreesboro,TN
Posts: 2,045
Total Cats: 265
I've been busy getting the car back together.
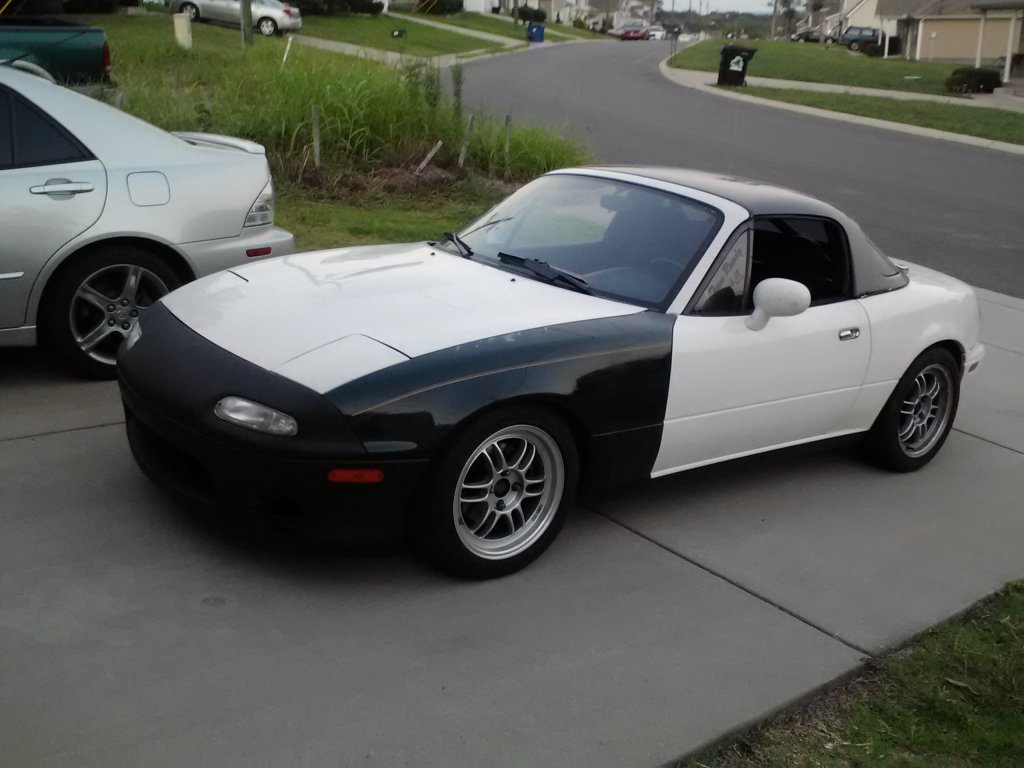
I spent a few hours fussing with the bumper, brackets, fenders and hood to get everything lined up. Its not perfect, but given the fiberglass bumper and the crash tweaked some of the bumper mounts, I am pretty happy
Rebuilt Koni Yellow's (revalved too), my McMaster-Carr NB sway bar bolts, and adjustment hole on the RB 1.125" bar.


I have also been working on my ducting. The FMII intercooler posed a little bit of a problem. It hangs slightly lower than the radiator and its it is pushed as high as we can get it. So as you can see, I had to make a little window for it to sit in. I will cover the finished ducting with aluminum duct tape to keep any air from making its way out the window.
Window layout:
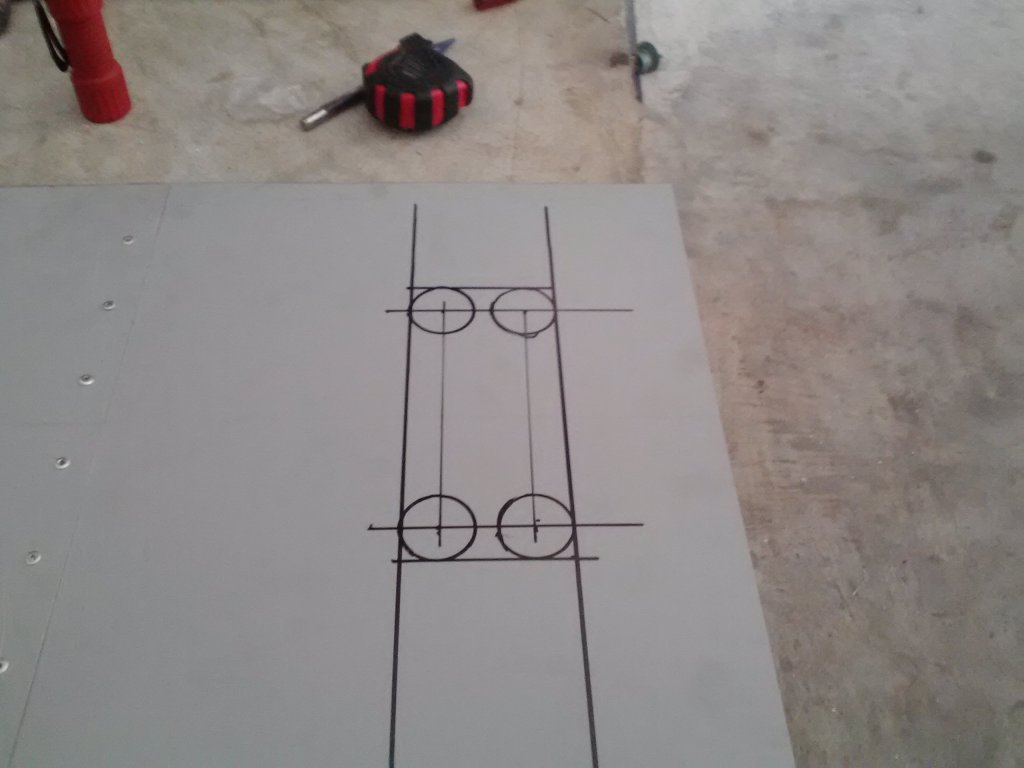
1.25" hole saw for a cleaner cutout (same one I used for the oil lines)
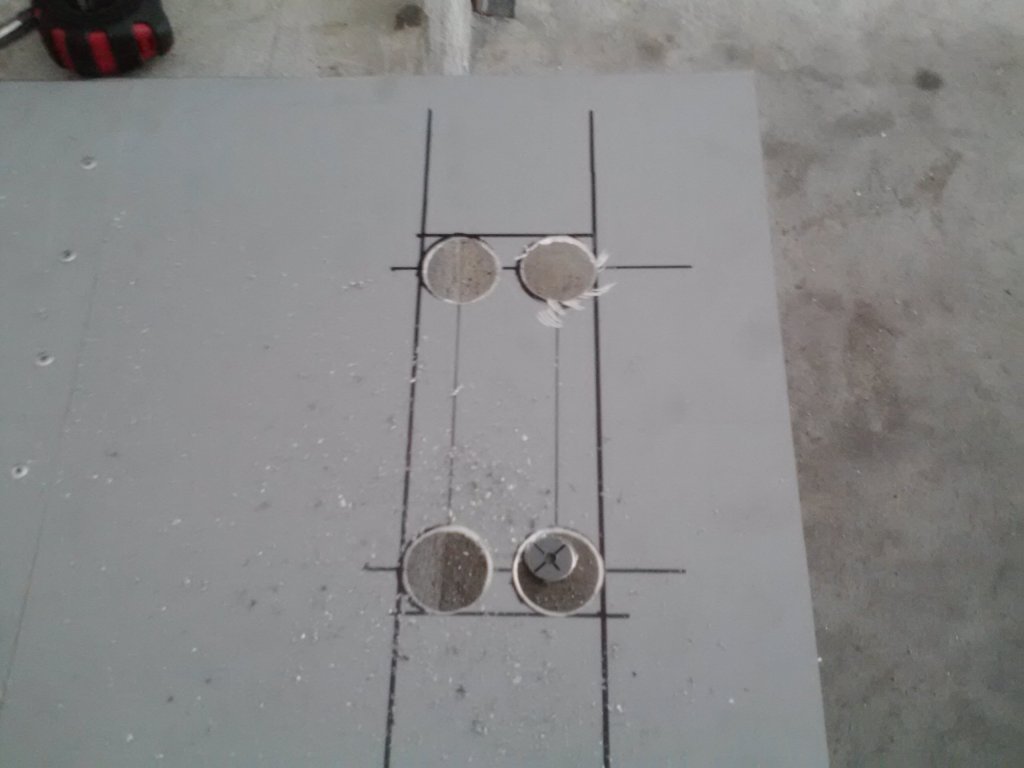
Finished:
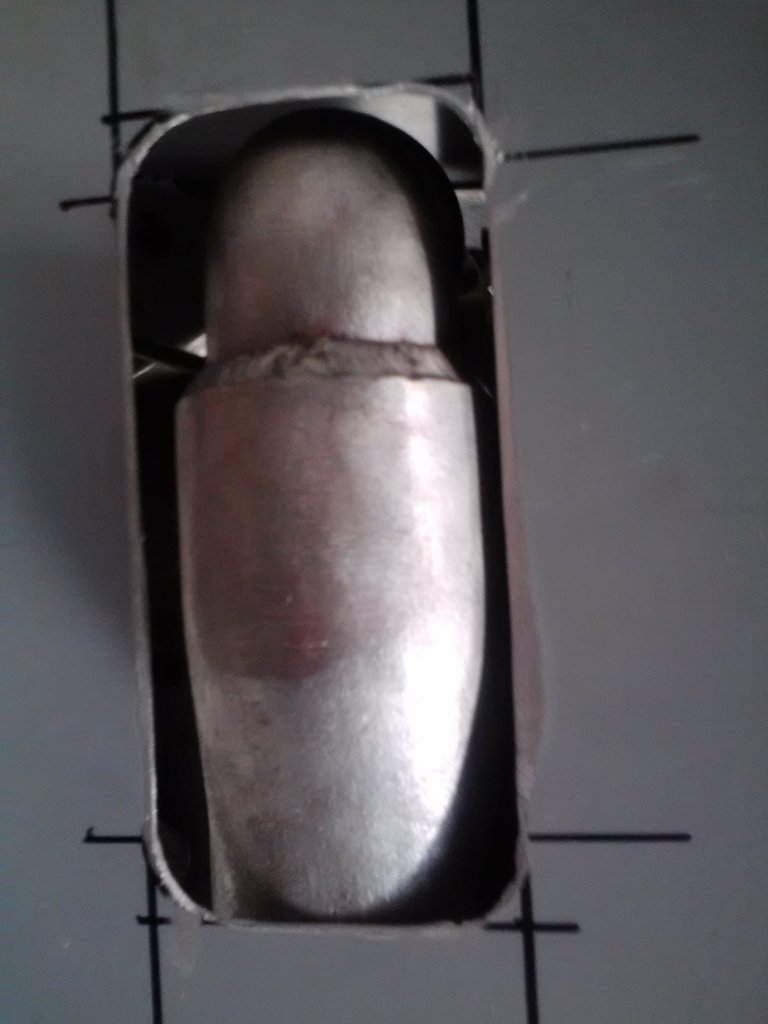

I did have one small problem pop up. The FC oil cooler I bought had a crack in the thermostat housing (I think it was my fault for installing the thermostat backwards). So I had to pick up another oil cooler. Luckily this one doesn't leak. I've only driven it a few miles (without a bumper) but so far no leaks from the oil lines or the coolant reroute.
I hope to get my radiator shroud done this week and then I'll finish up my ducting with some various bulb seals and sealing tape. In the mean time, I'll finish putting the bumper on tonight and enjoy the wonderful weather we are getting.
I spent a few hours fussing with the bumper, brackets, fenders and hood to get everything lined up. Its not perfect, but given the fiberglass bumper and the crash tweaked some of the bumper mounts, I am pretty happy
Rebuilt Koni Yellow's (revalved too), my McMaster-Carr NB sway bar bolts, and adjustment hole on the RB 1.125" bar.
I have also been working on my ducting. The FMII intercooler posed a little bit of a problem. It hangs slightly lower than the radiator and its it is pushed as high as we can get it. So as you can see, I had to make a little window for it to sit in. I will cover the finished ducting with aluminum duct tape to keep any air from making its way out the window.
Window layout:
1.25" hole saw for a cleaner cutout (same one I used for the oil lines)
Finished:
I did have one small problem pop up. The FC oil cooler I bought had a crack in the thermostat housing (I think it was my fault for installing the thermostat backwards). So I had to pick up another oil cooler. Luckily this one doesn't leak. I've only driven it a few miles (without a bumper) but so far no leaks from the oil lines or the coolant reroute.
I hope to get my radiator shroud done this week and then I'll finish up my ducting with some various bulb seals and sealing tape. In the mean time, I'll finish putting the bumper on tonight and enjoy the wonderful weather we are getting.
Reply
0
0
 08-25-2012, 06:56 PM
#17
Elite Member
Thread Starter
iTrader: (15)
Join Date: Jan 2007
Location: Murfreesboro,TN
Posts: 2,045
Total Cats: 265
Oh how I missed this car. The weather was great all week so I just left the hard top off an drove her work everyday this week.
Today I took some time to tighten up the oil cooler fitting that was seeping some. I also broke out some old rattle can painting skills from my drifting days (yes, I rocked a primer black AE86 hatch). Took some time today to paint the ducting and bumper support to clear up a few rust spots.
I modified the OEM splash guard to fit around my ducting. Complete with aluminum tape to seal it up (and keep it from flapping in the wind).
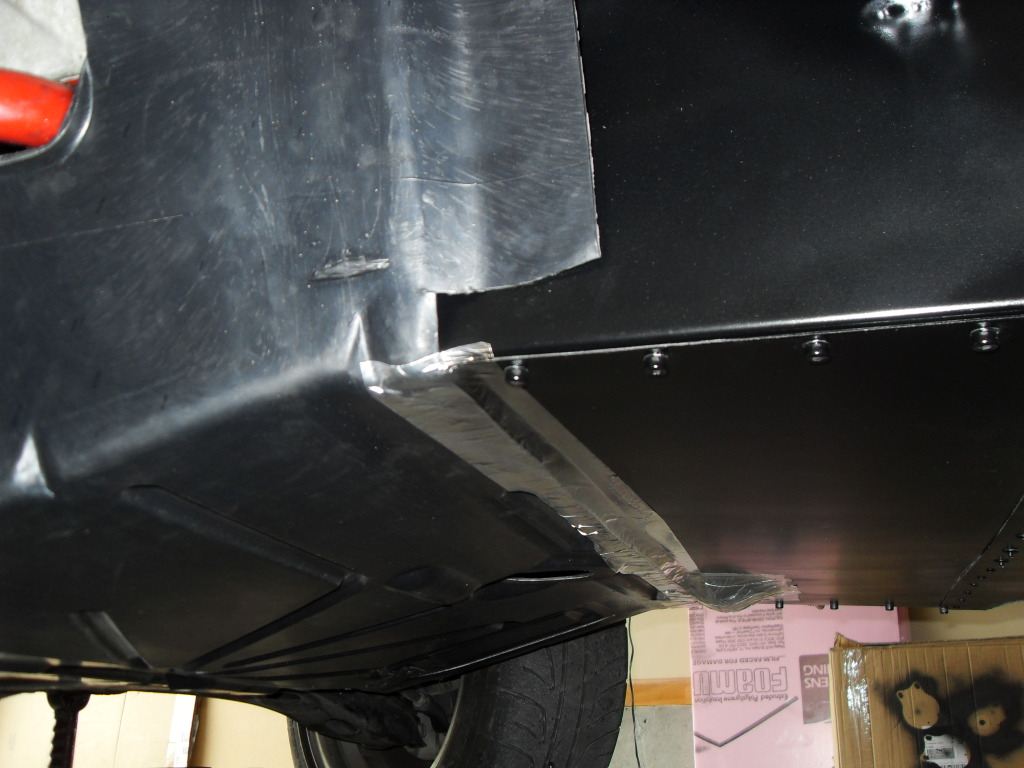
A little aluminum tape to seal up window I had to cut for the intercooler end tank.
Finished the day off with a little white primer on the bumper and fender. This will have to do until I have time this winter to give it a full paint job. I decided to carry the black rocker stripe onto the front bumper to make it look at little cleaner.
Today I took some time to tighten up the oil cooler fitting that was seeping some. I also broke out some old rattle can painting skills from my drifting days (yes, I rocked a primer black AE86 hatch). Took some time today to paint the ducting and bumper support to clear up a few rust spots.
I modified the OEM splash guard to fit around my ducting. Complete with aluminum tape to seal it up (and keep it from flapping in the wind).
A little aluminum tape to seal up window I had to cut for the intercooler end tank.
Finished the day off with a little white primer on the bumper and fender. This will have to do until I have time this winter to give it a full paint job. I decided to carry the black rocker stripe onto the front bumper to make it look at little cleaner.
Reply
0
0
08-25-2012, 07:34 PM
#19
Elite Member
Thread Starter
iTrader: (15)
Join Date: Jan 2007
Location: Murfreesboro,TN
Posts: 2,045
Total Cats: 265
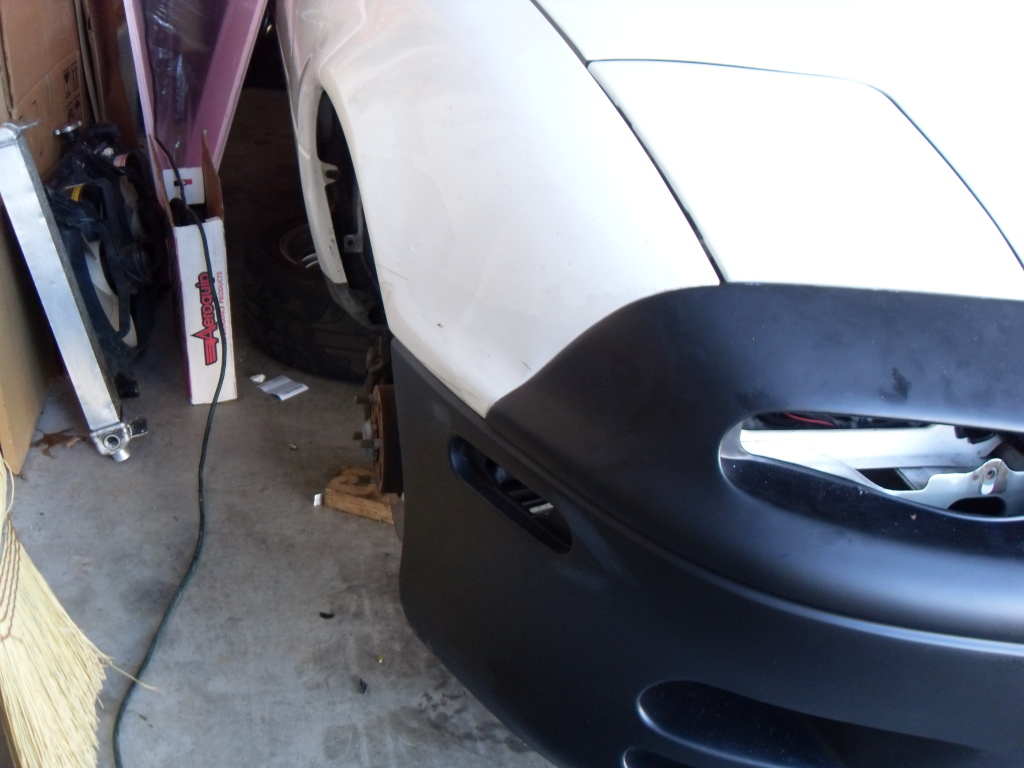
There were a few fitment issues, but I tweaked the fenders, headlight lids, and hood to get everything lined up. I know I'll have to pull it again at some point, so I didn't spend to long this time getting everything perfect.
My biggest complaint about it is the lack of holes. Some of them a easy to layout, but the ones from the bumper to the fender are a pain in the ***. They drilled the ones that hold the stud plate in place (but you can't use the plastic retainers because of the thickness of the fiberglass). So you have manually layout the holes and there is no real easy reference to take measurements from. I go them close enough and opened up the holes for adjustment.
My biggest complaint about it is the lack of holes. Some of them a easy to layout, but the ones from the bumper to the fender are a pain in the ***. They drilled the ones that hold the stud plate in place (but you can't use the plastic retainers because of the thickness of the fiberglass). So you have manually layout the holes and there is no real easy reference to take measurements from. I go them close enough and opened up the holes for adjustment.
Last edited by Midtenn; 08-25-2012 at 07:42 PM. Reason: More detail
Reply
0
0
11-04-2012, 08:09 PM
#20
Elite Member
Thread Starter
iTrader: (15)
Join Date: Jan 2007
Location: Murfreesboro,TN
Posts: 2,045
Total Cats: 265
I took it out to a local auto-x to test out the rigidity of the front bumper. It took a few good solid cone hits with nothing but some scuffs in the primer. Halfway through the day, I decided to put my LG Lucid in the GPS mount and take some video
Run #4
Run #5 -- Fastest so far, but a coned it away.
Run #6 -- Fastest time of the day
Run #4
Run #5 -- Fastest so far, but a coned it away.
Run #6 -- Fastest time of the day
Reply
0
0


