'95 Build Thread Attempt
 03-20-2013, 01:31 PM
#21
Elite Member
Thread Starter
iTrader: (15)

Join Date: Jan 2007
Location: Murfreesboro,TN
Posts: 2,045
Total Cats: 265
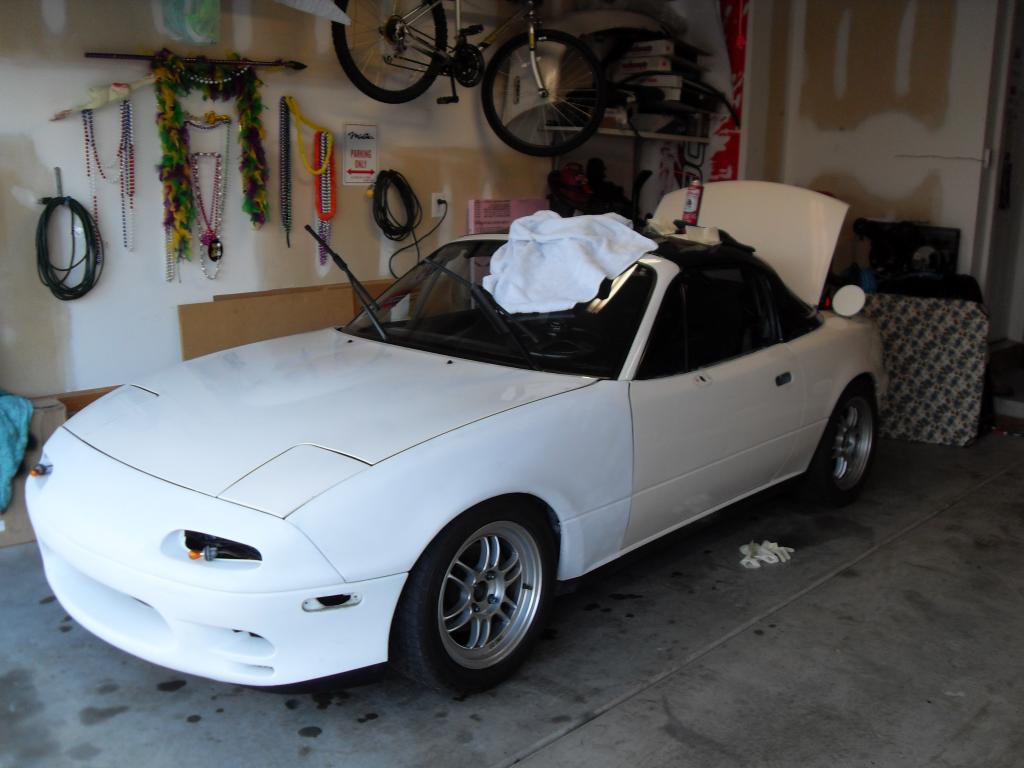
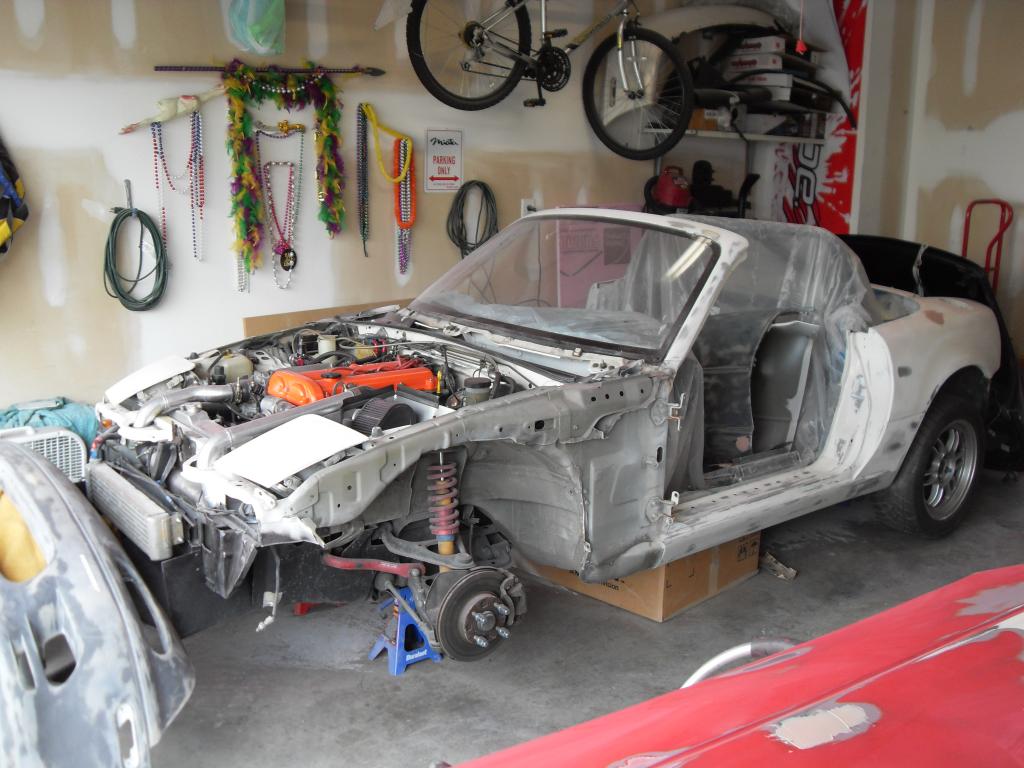
A little update for 2013. My wife started her masters degree program in January, so I needed a "little" project to keep me out of her hair while she studied. I decided I was tired of the multi-white look, so I started tearing everything down to repaint it.
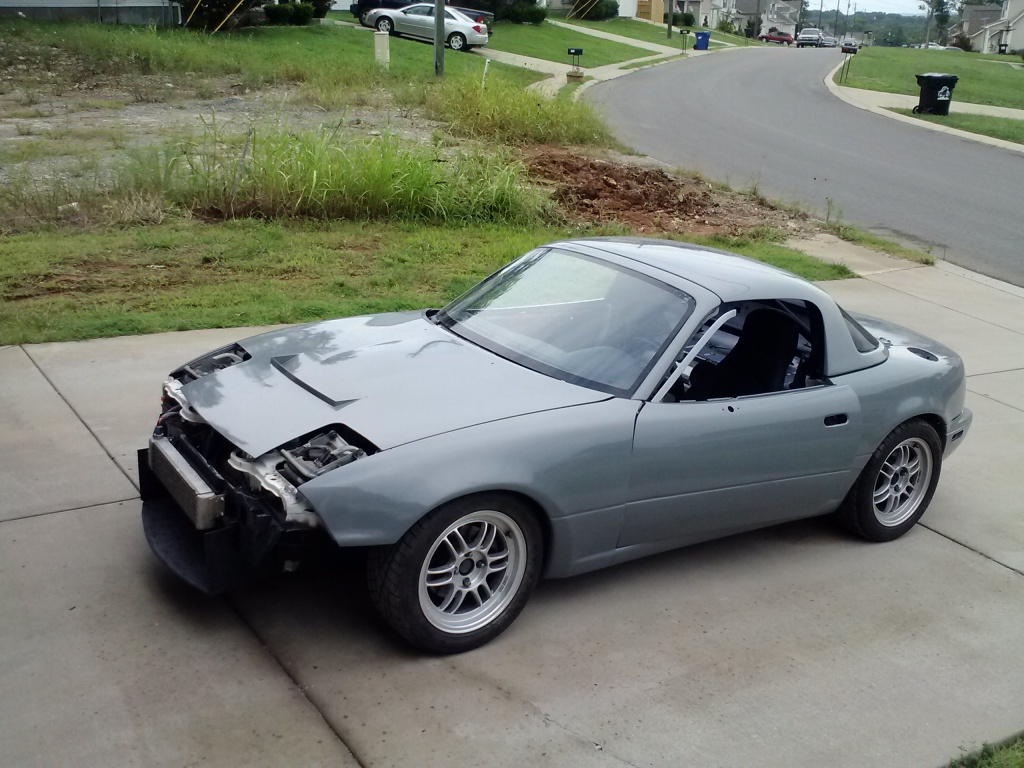
Disassembly Photo by midtenn86 | Photobucket
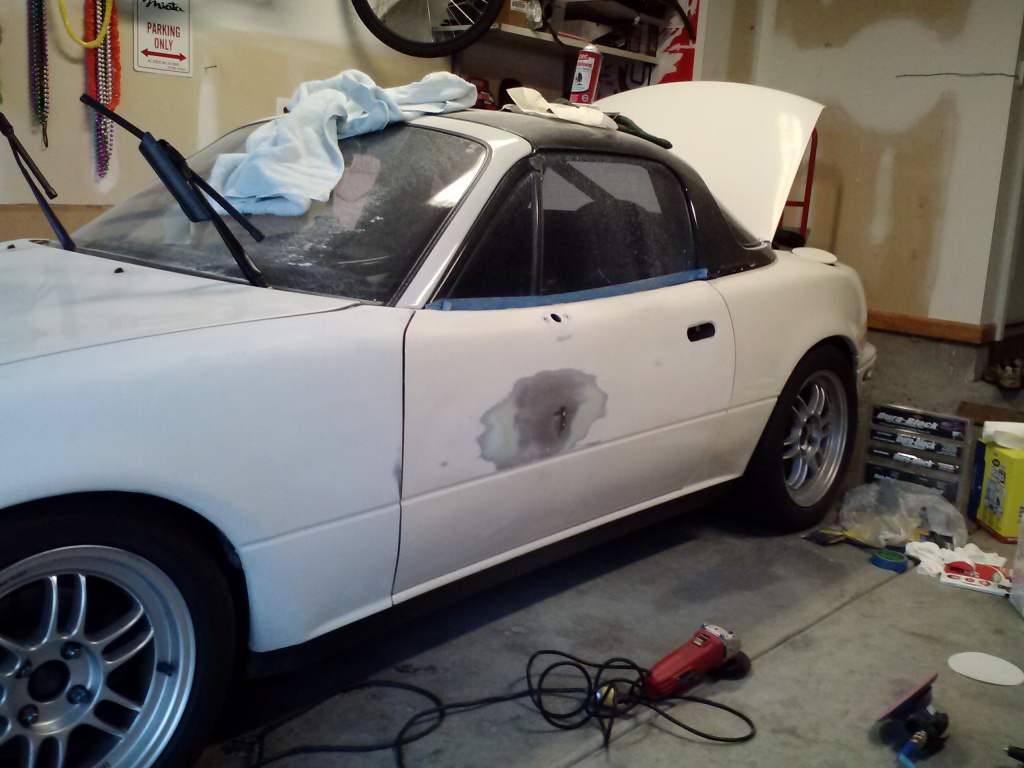
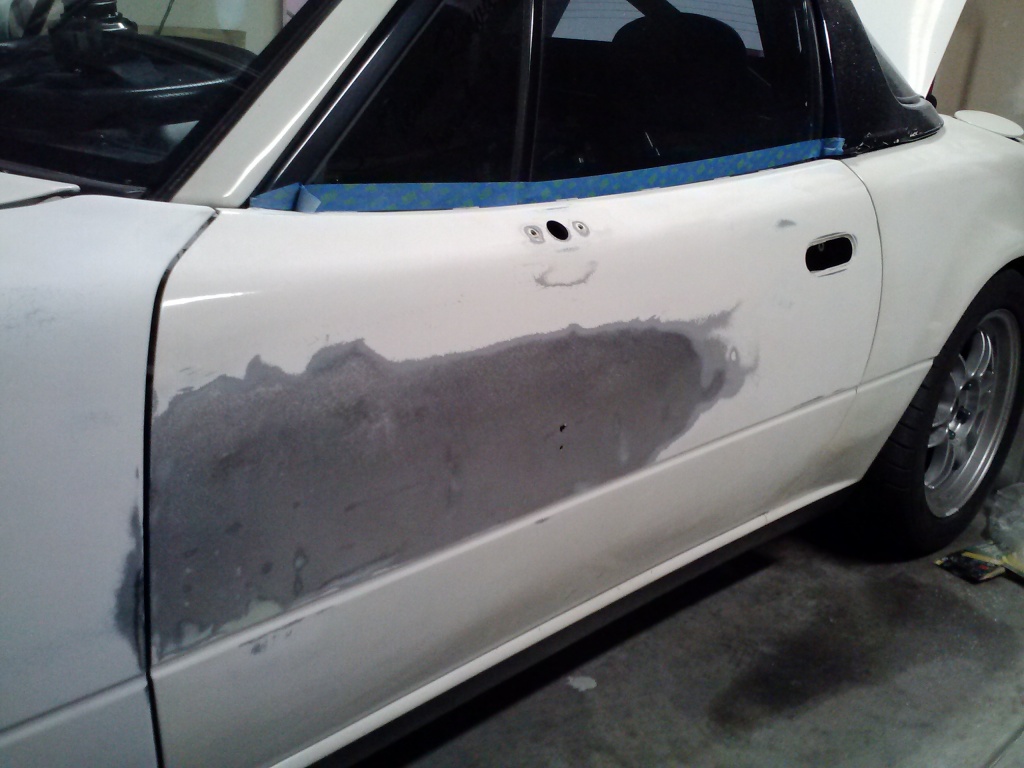
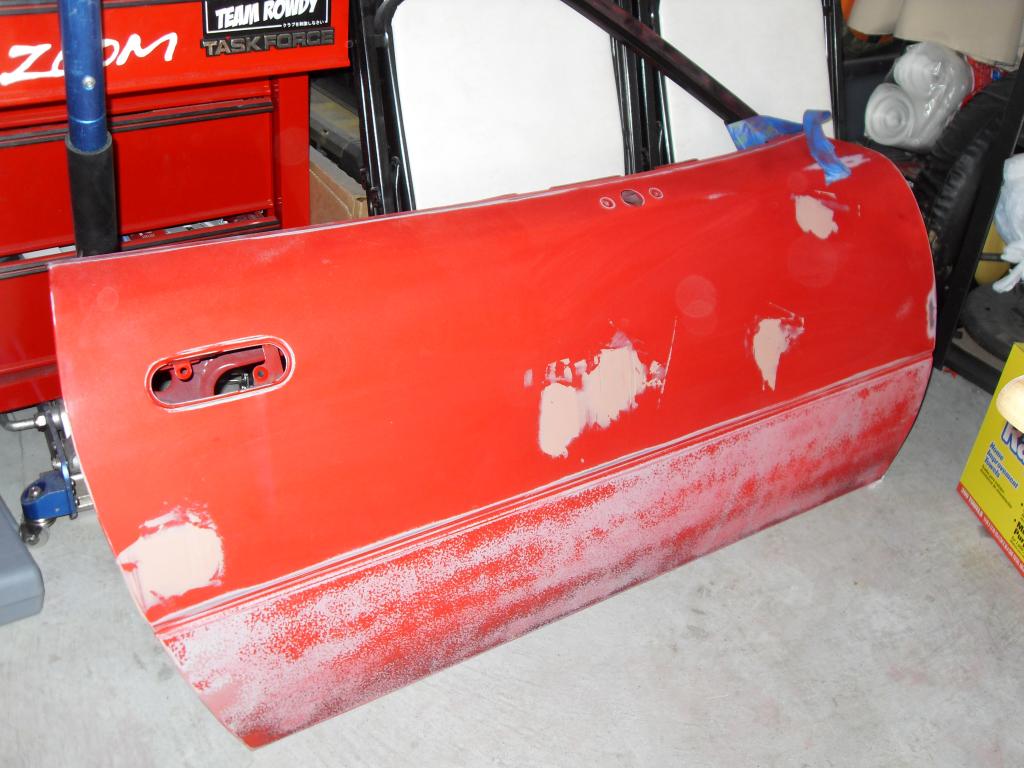
Surprise, surprise. I found a massive dent in the driver's side door with some nice big holes from the stud welder:

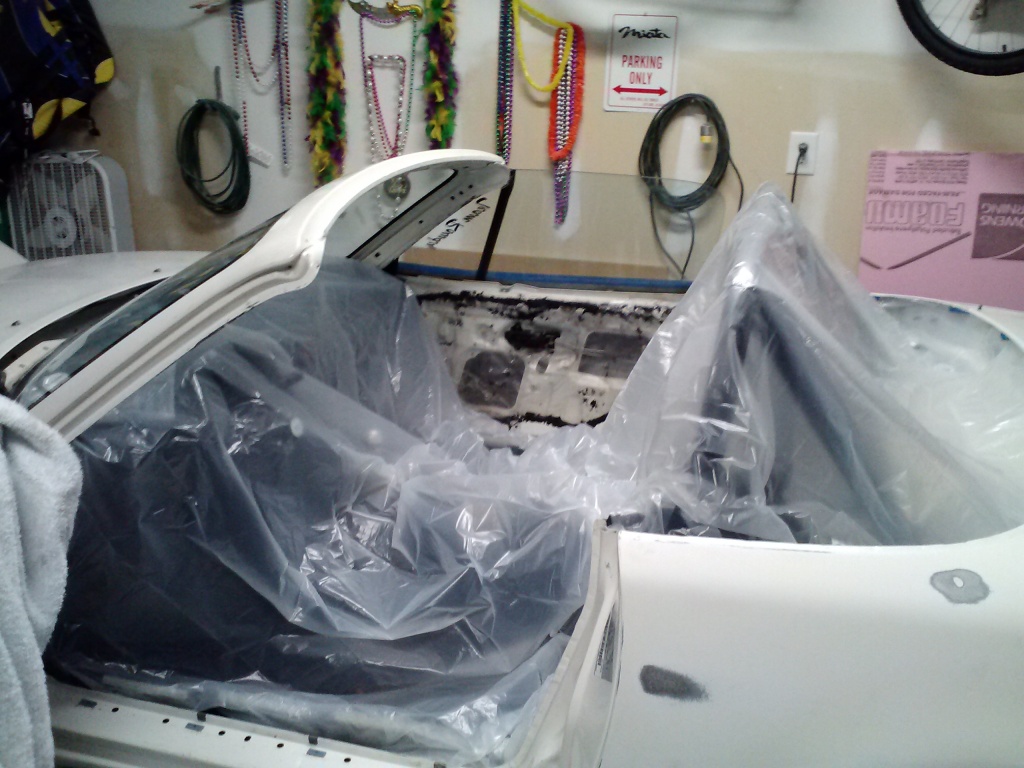
Sealed for your protection:

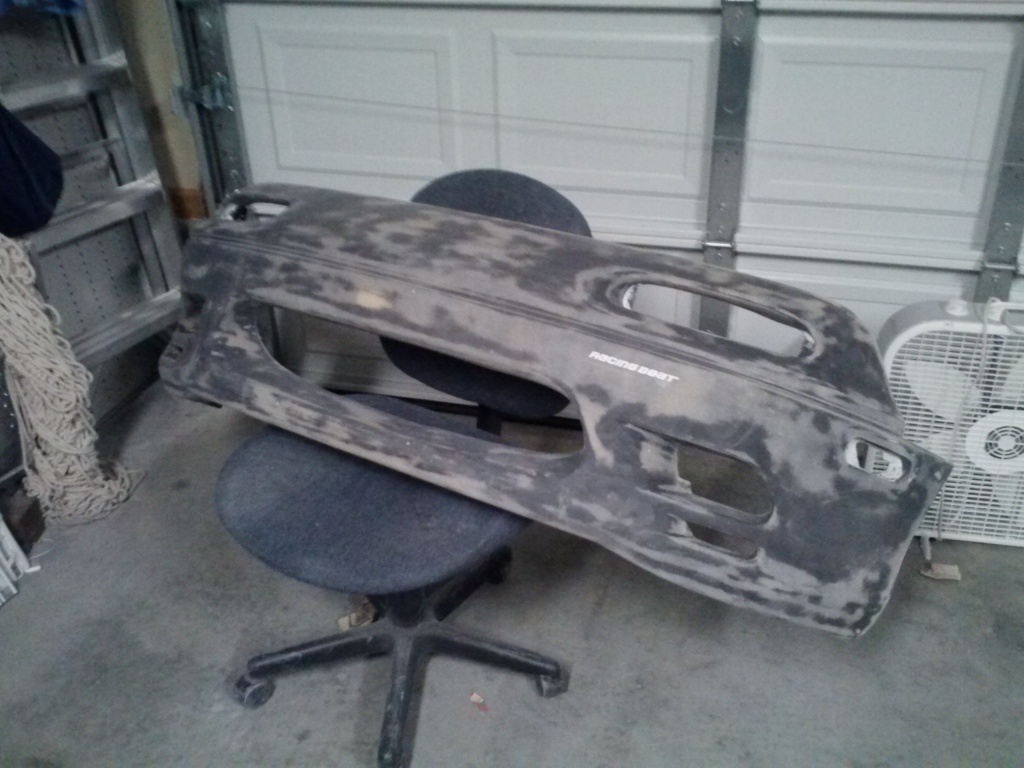
Still trying to figure out how to remove the old primer from the replica bumper:
I think that is everything I could remove:
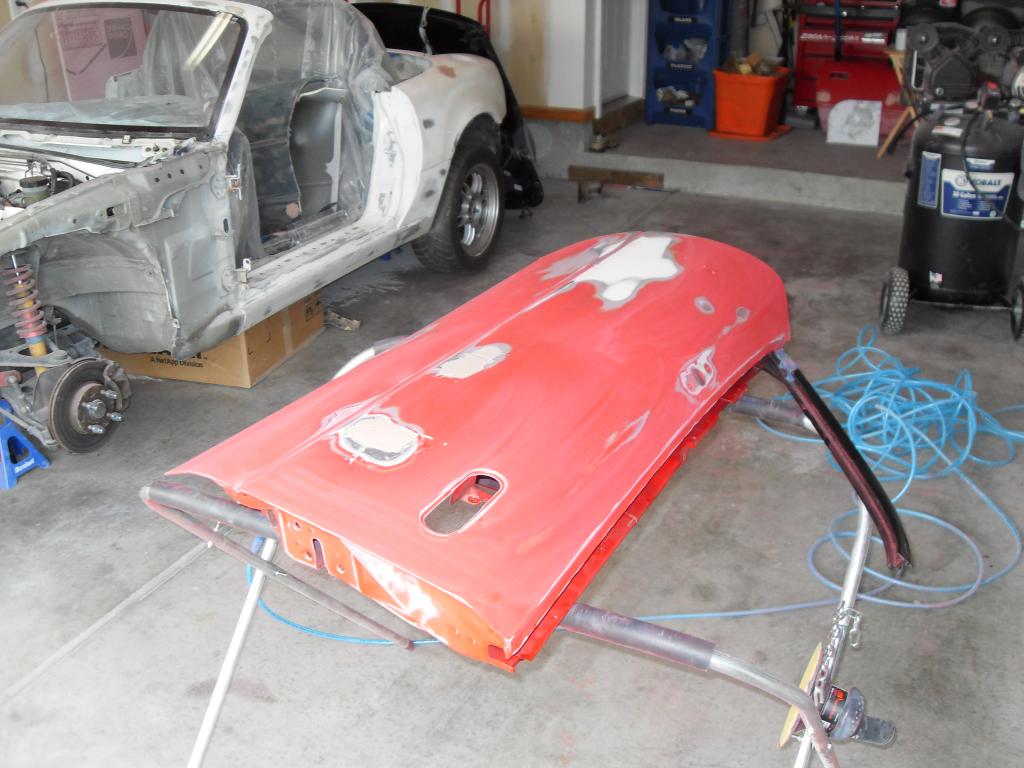
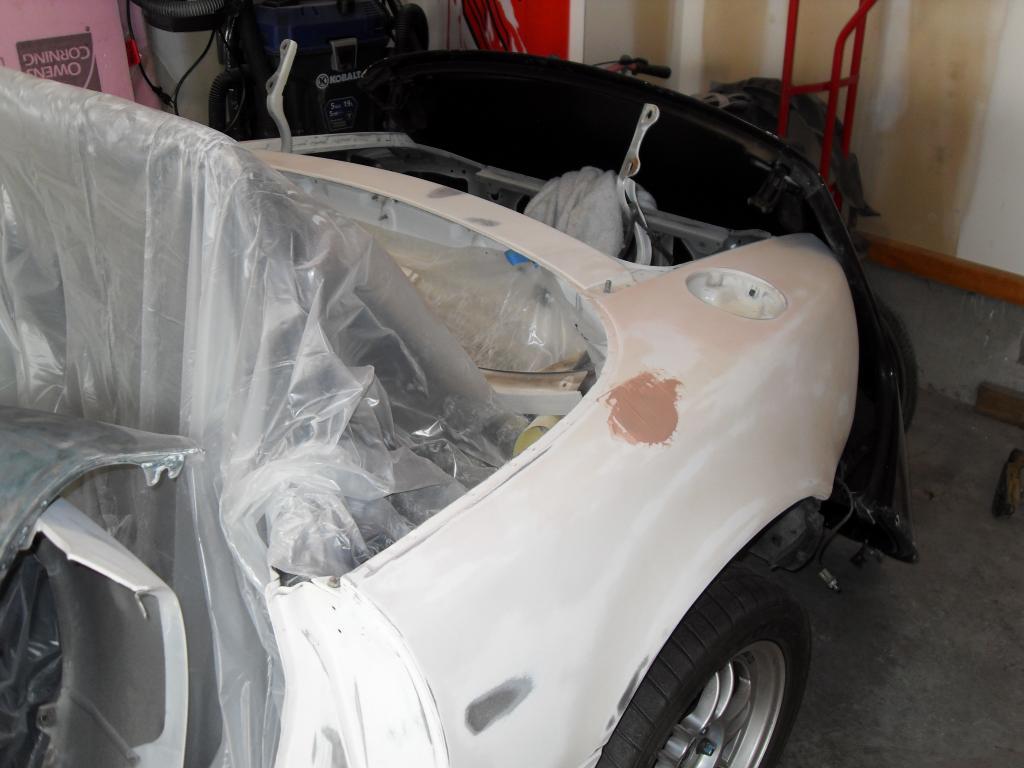
After a few weeks I have finally got to the point where I can put some body filler on. I sourced some replacement doors. Unfortunately the drivers door has a similar dent, its just not as bad, so I'm going to go with it:

I think my wife misses me:

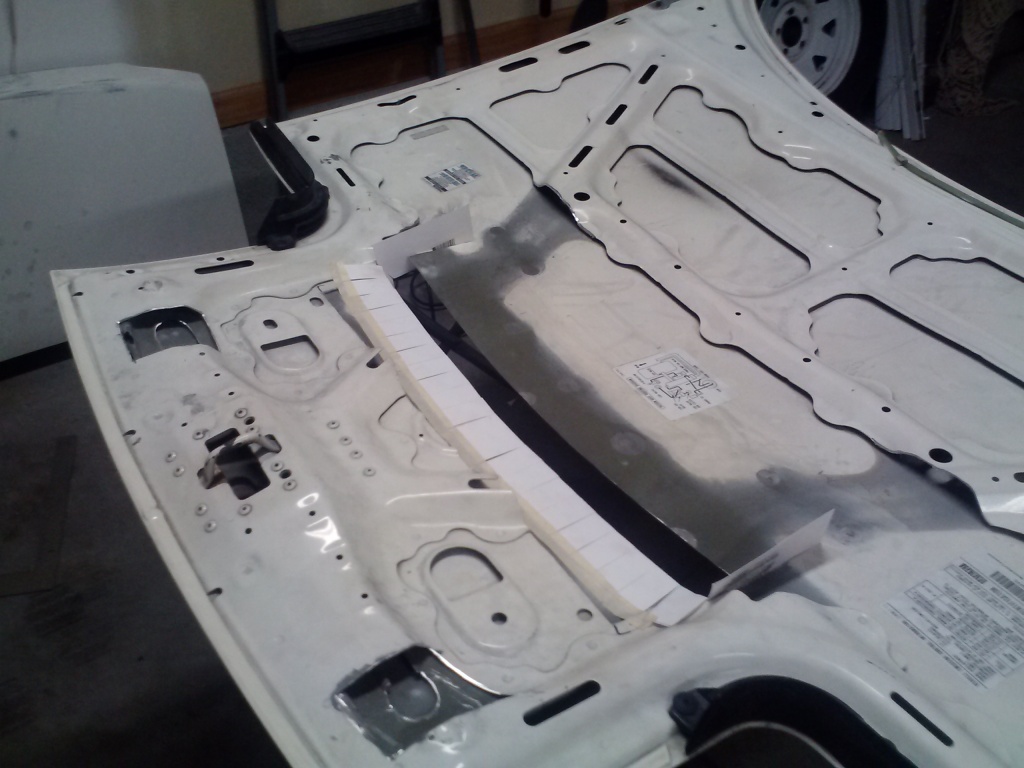
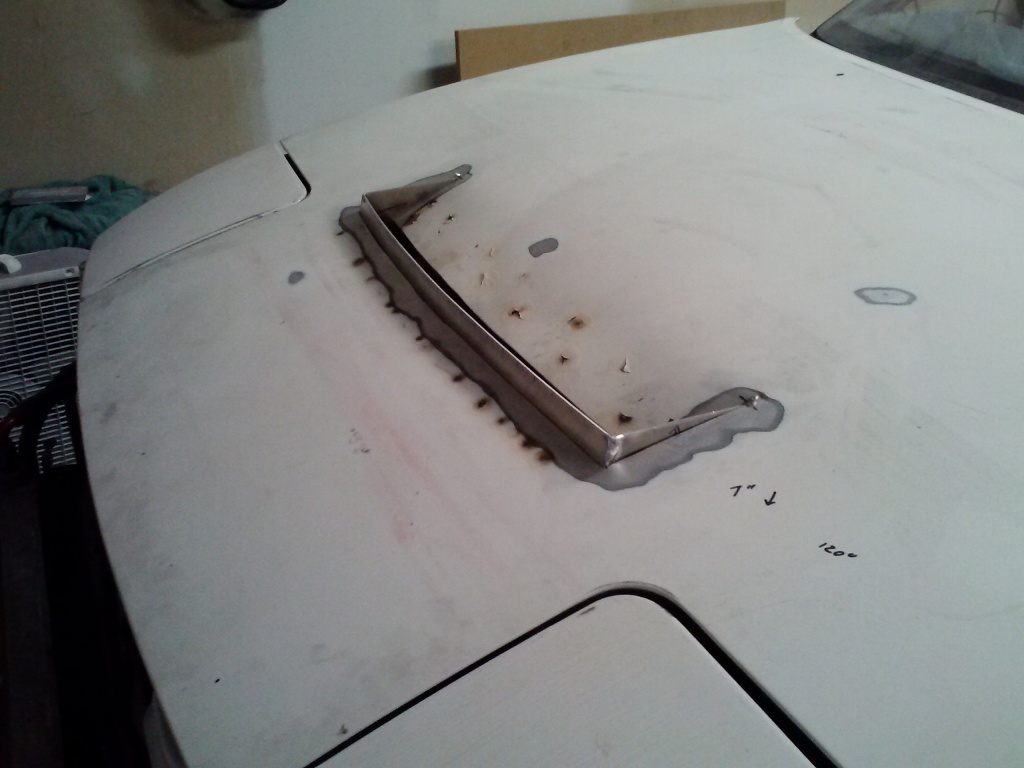
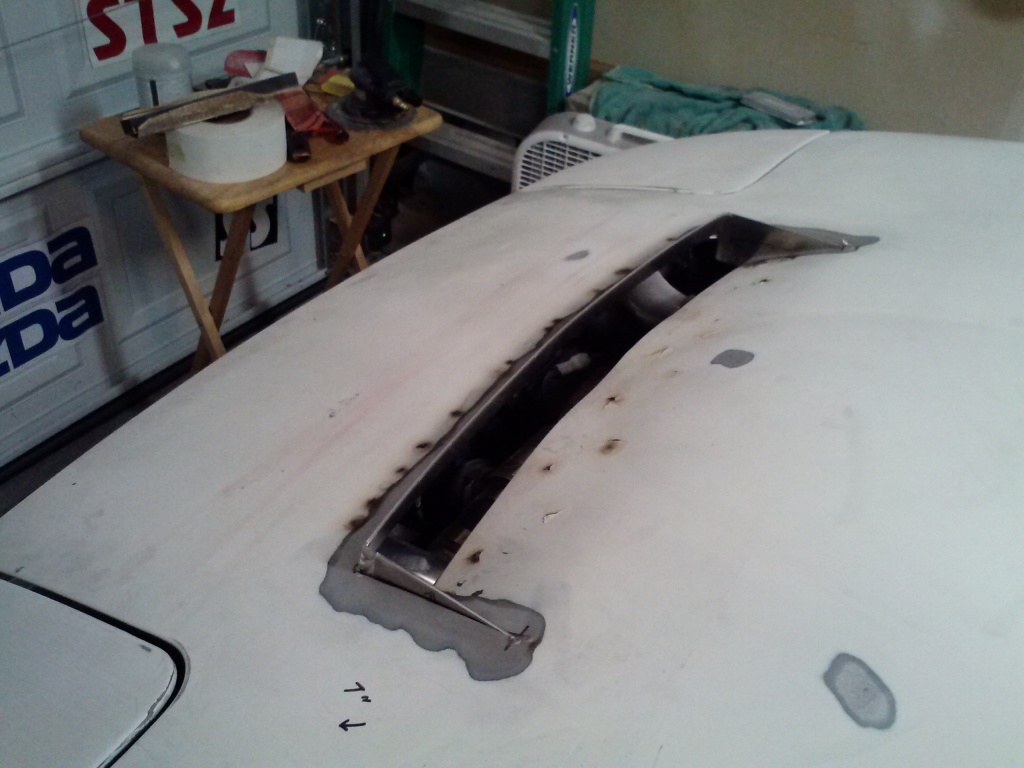
This is my favorite part of the project so far, a custom "drop" vent hood:

My inner ricer giggles a little that the BOV can be seen through the cutout:

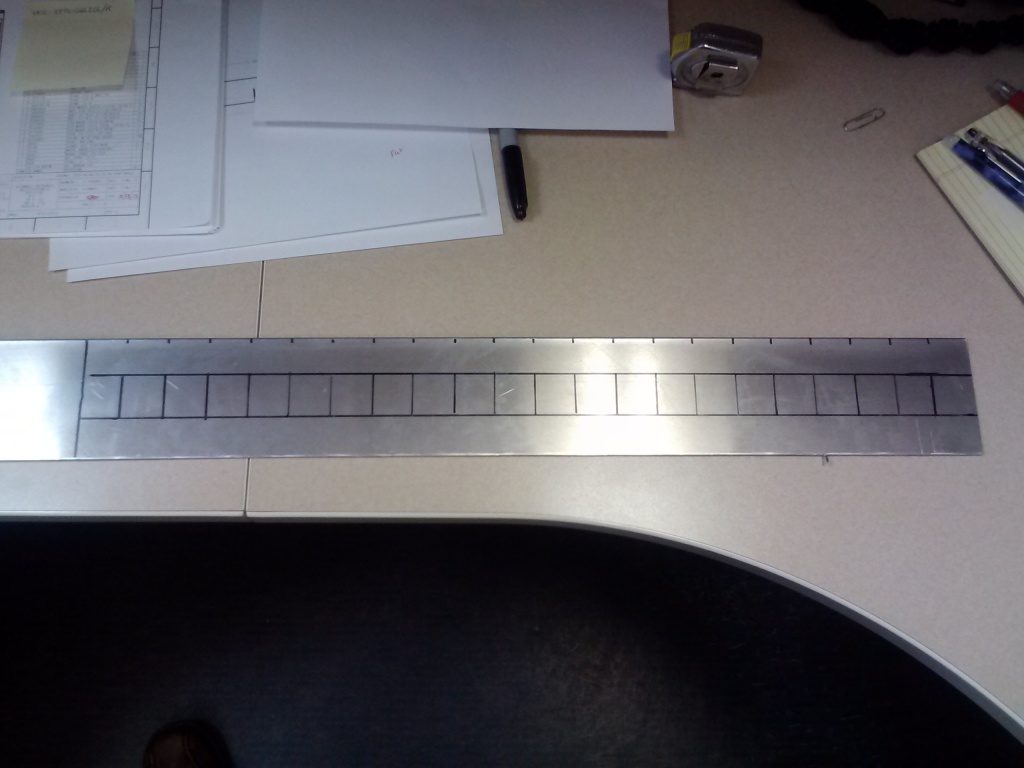
Working on the templates for the gurney flap and side dams:

Luckily I work for a sheet metal fabrication shop, so after layout work, some time on band saw, and a short trip over to the press brake, the gurney flap is done:

Hopefully I'll get started welding on the hood tomorrow night at a friends house and then start the body filler work. With my intercooler piping I can only drop the vent down 1", but I figure it is better than nothing.
Disassembly Photo by midtenn86 | Photobucket
Surprise, surprise. I found a massive dent in the driver's side door with some nice big holes from the stud welder:
Sealed for your protection:
Still trying to figure out how to remove the old primer from the replica bumper:
I think that is everything I could remove:
After a few weeks I have finally got to the point where I can put some body filler on. I sourced some replacement doors. Unfortunately the drivers door has a similar dent, its just not as bad, so I'm going to go with it:
I think my wife misses me:
This is my favorite part of the project so far, a custom "drop" vent hood:
My inner ricer giggles a little that the BOV can be seen through the cutout:
Working on the templates for the gurney flap and side dams:
Luckily I work for a sheet metal fabrication shop, so after layout work, some time on band saw, and a short trip over to the press brake, the gurney flap is done:
Hopefully I'll get started welding on the hood tomorrow night at a friends house and then start the body filler work. With my intercooler piping I can only drop the vent down 1", but I figure it is better than nothing.

Reply
 0
0

0


 03-21-2013, 08:13 AM
#24
Boost Czar


iTrader: (62)
Join Date: May 2005
Location: Chantilly, VA
Posts: 79,501
Total Cats: 4,080
Im sorry... its the.... its... the pleats... its actually an optical illusion...its the pattern on the pants, they fla flattering the crochral region, im actually taking them back right now,.... taking them back to he pants store.
Reply
0
0
03-24-2013, 06:58 PM
#25
Elite Member
Thread Starter
iTrader: (15)
Join Date: Jan 2007
Location: Murfreesboro,TN
Posts: 2,045
Total Cats: 265
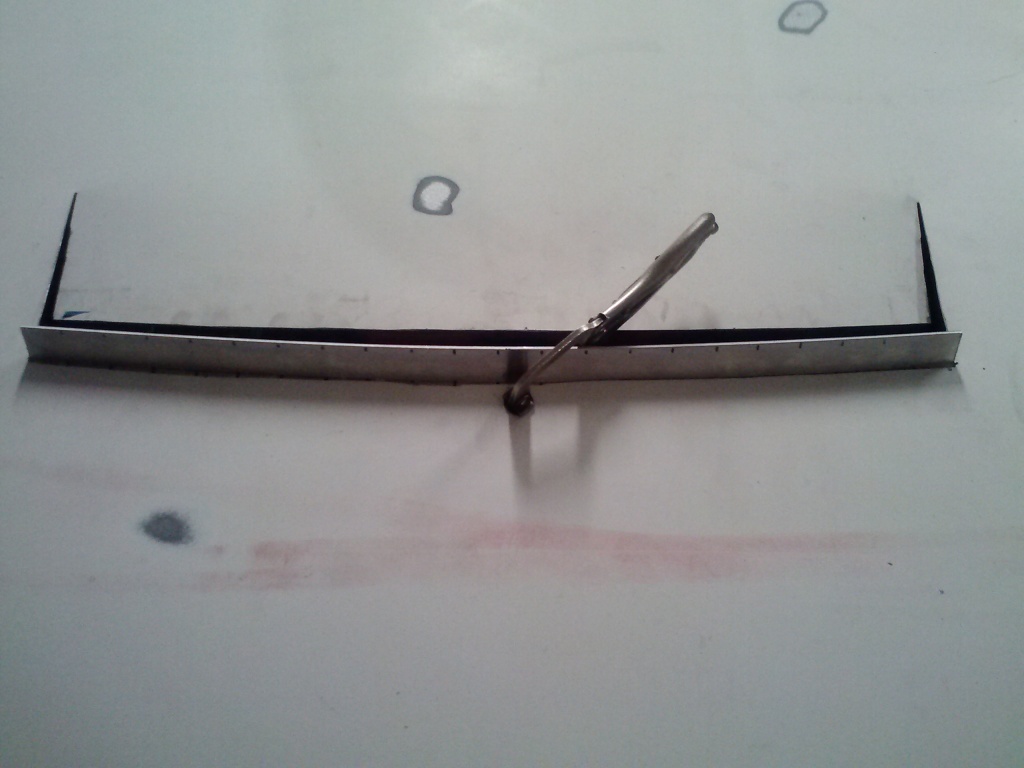
I little mock up of the gurney

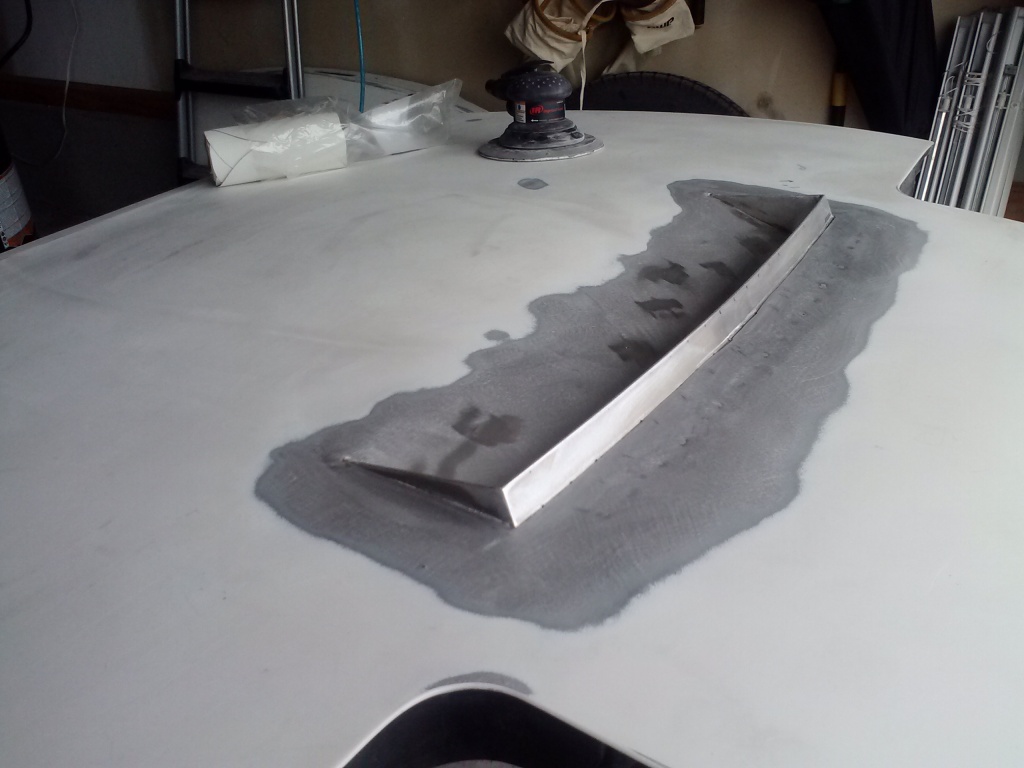
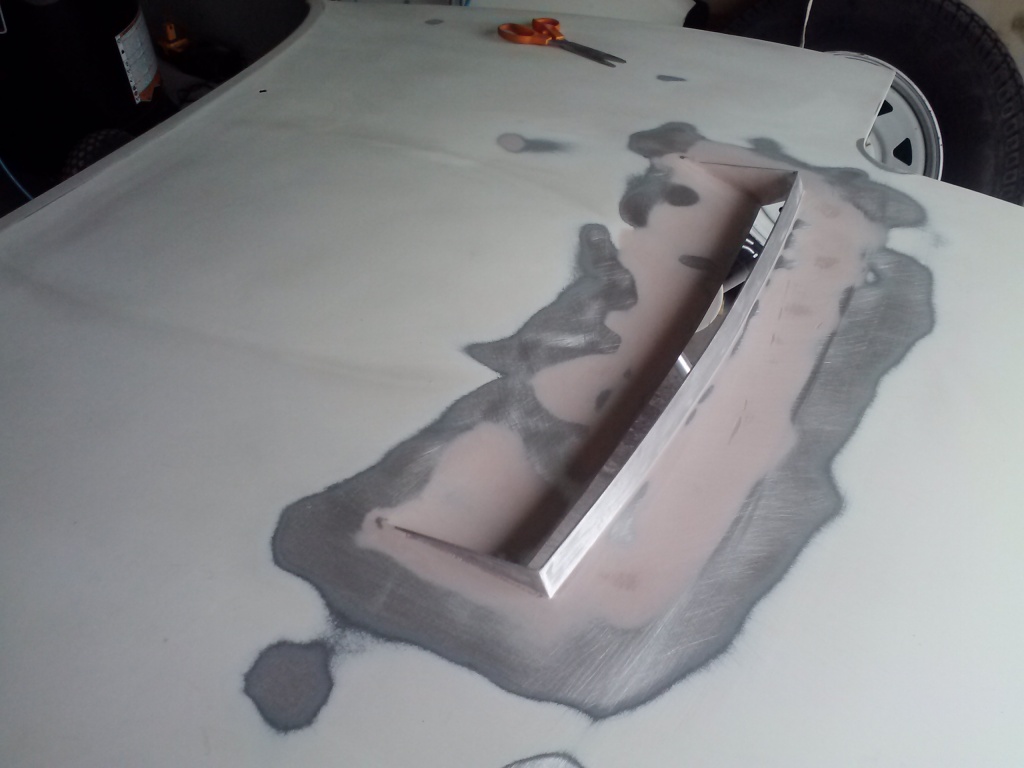
All welded up. Just have to trim a few places under the hood. It didn't warp as bad as we thought, but I still have a few ours of mud work ahead:
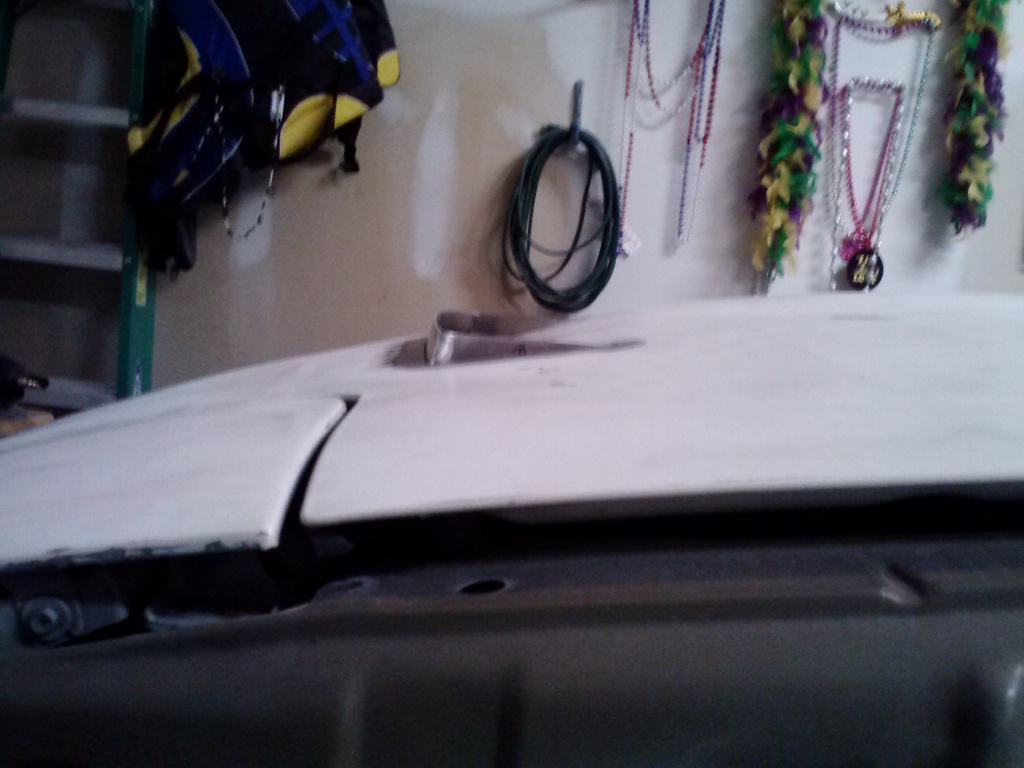
All welded up. Just have to trim a few places under the hood. It didn't warp as bad as we thought, but I still have a few ours of mud work ahead:
Reply
0
0

 07-22-2013, 01:31 PM
#27
Elite Member
Thread Starter
iTrader: (15)
Join Date: Jan 2007
Location: Murfreesboro,TN
Posts: 2,045
Total Cats: 265
Almost done! After months of sanding, filling, more sanding, and so forth and so on I finally got the paint sprayed this past weekend. Luckily enough my step-father works for a construction company which is owned by a car guy. He picked up a spray booth a few years ago and my step-dad lined up some time for me to work in a much better location than my garage.
Took a break one weekend to modify a 3" Enthuza exhaust and FM downpipe to fit my car. V-bands FTW!:

Fixed a broken filler panel with some two-part epoxy:

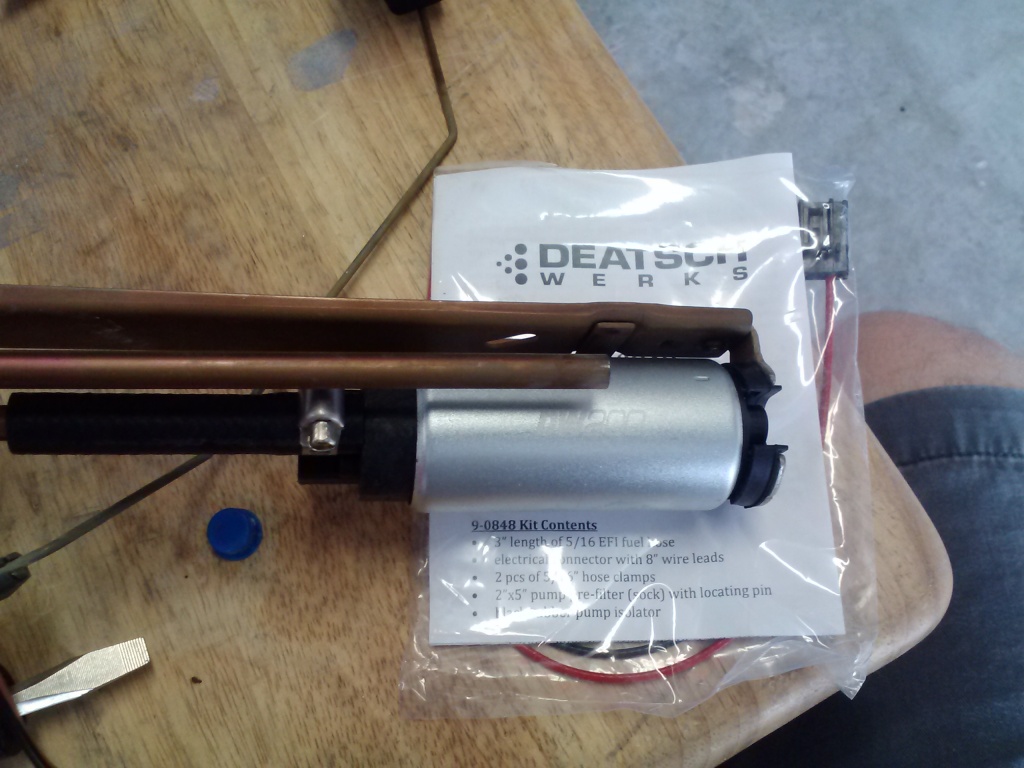
Installed a new fuel pump from Deutsch Works because my 6 month old Walbro 255HP (installed just before I started this project) locked up:
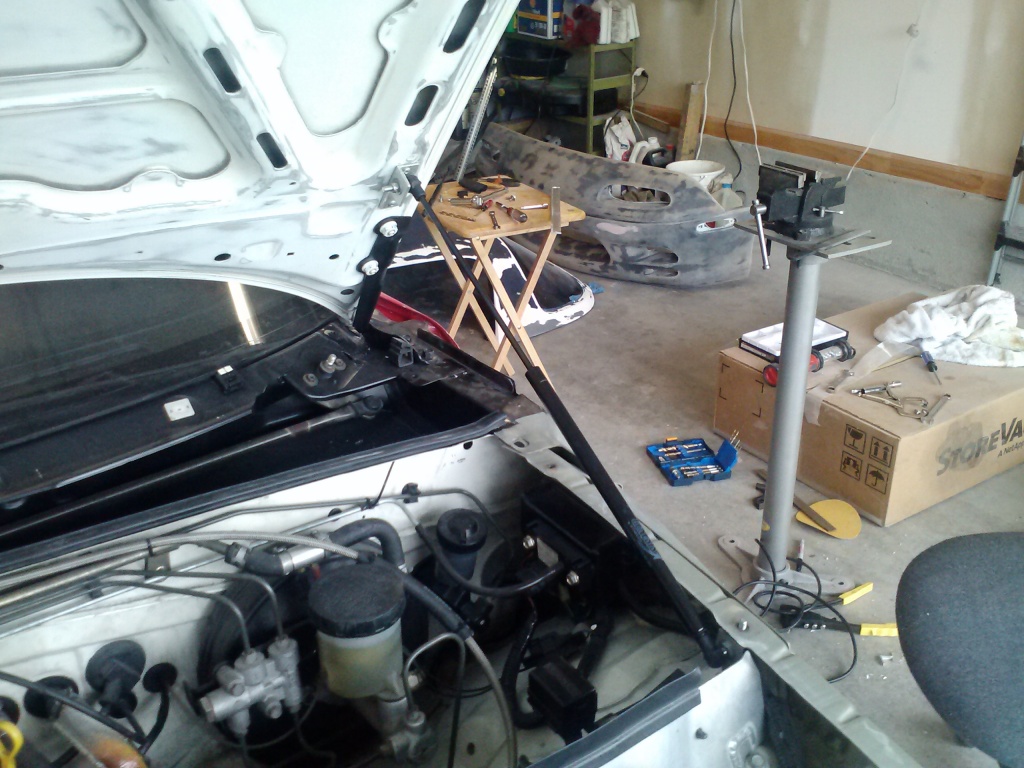
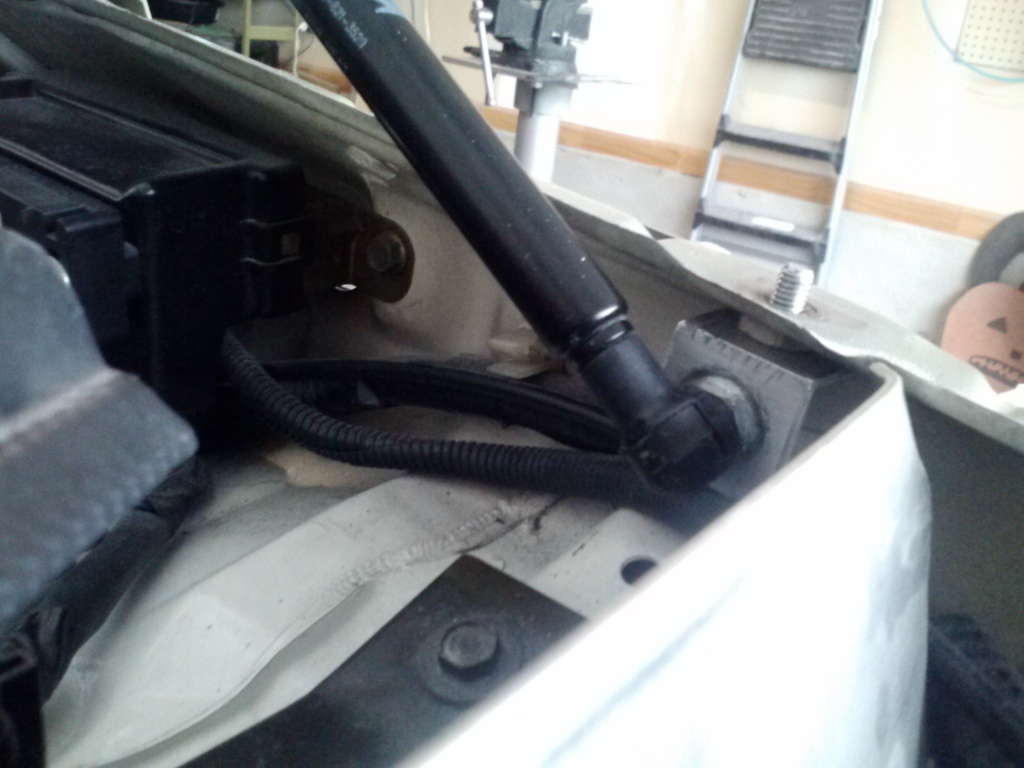
With my new hood vent, the carrying the stock prop rod along with no longer a good option. I had some sample gas springs laying around my office, so with about $20 in hardware, I made my own hood lift kit:

I didn't like the straight cut on the Enthuza exhaust, so I shortened it some and put a angle cut on it. I'll fab up a bumper protection plate from some scrap aluminum I have laying around this week.
Finally go everything over to the shop to start painting.

Got up a 5 am on a Saturday to beat the humidity (it didn't work), so I had to make myself an omelet to power through the day.

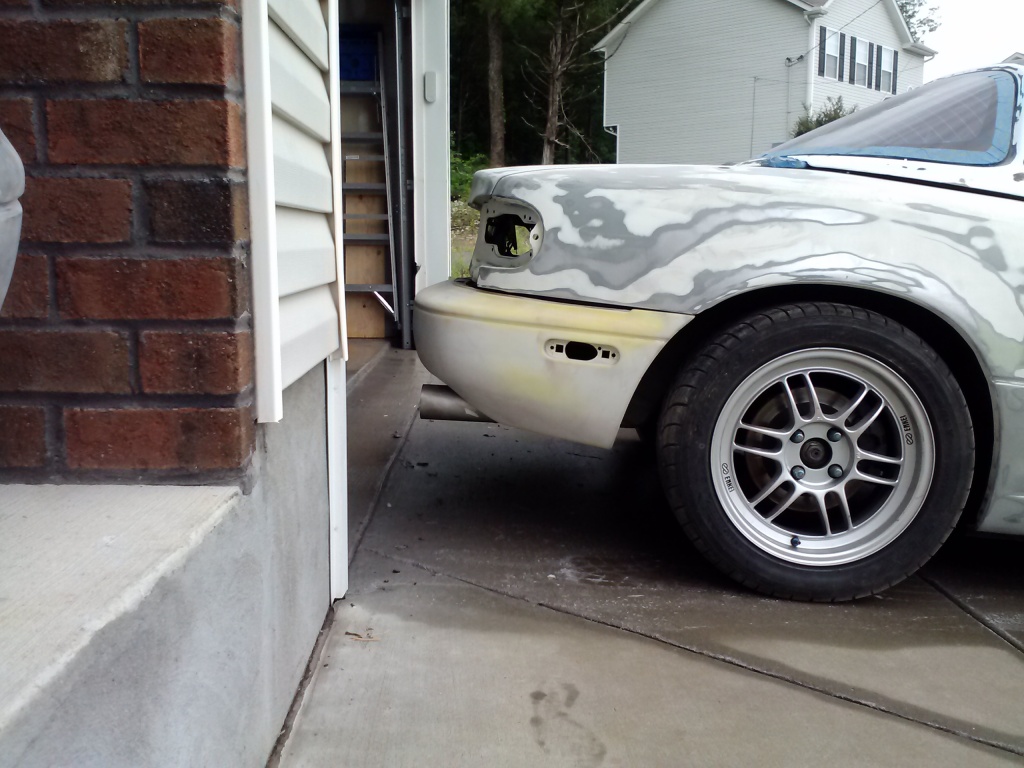
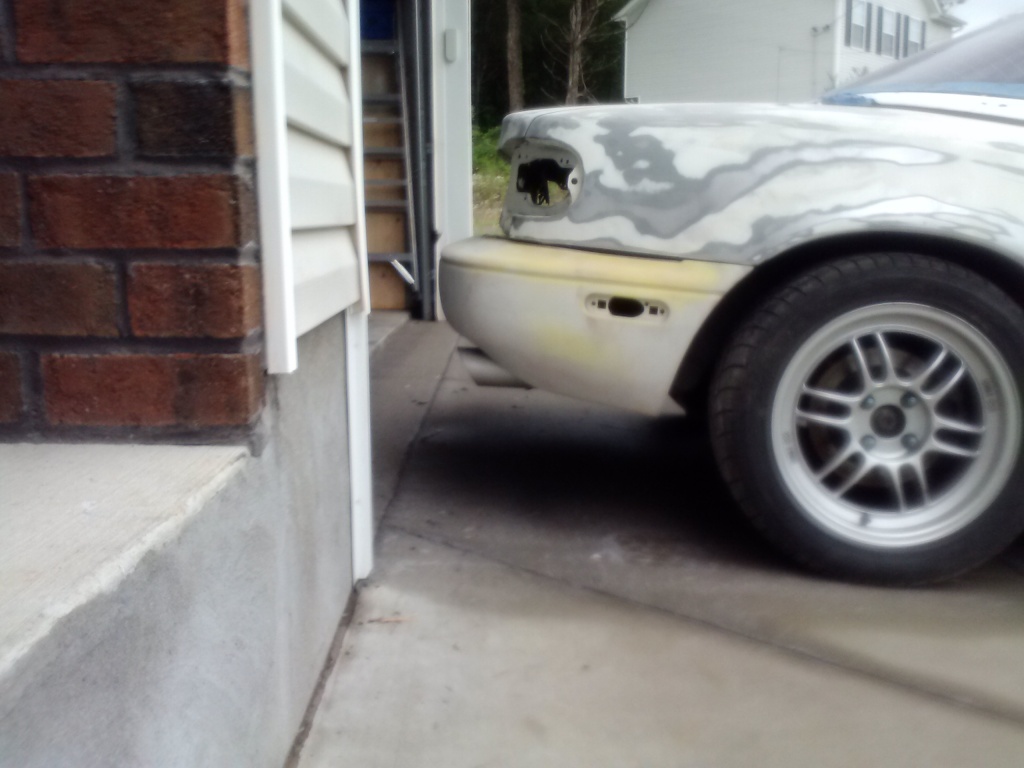
After long day, I finally laid color:
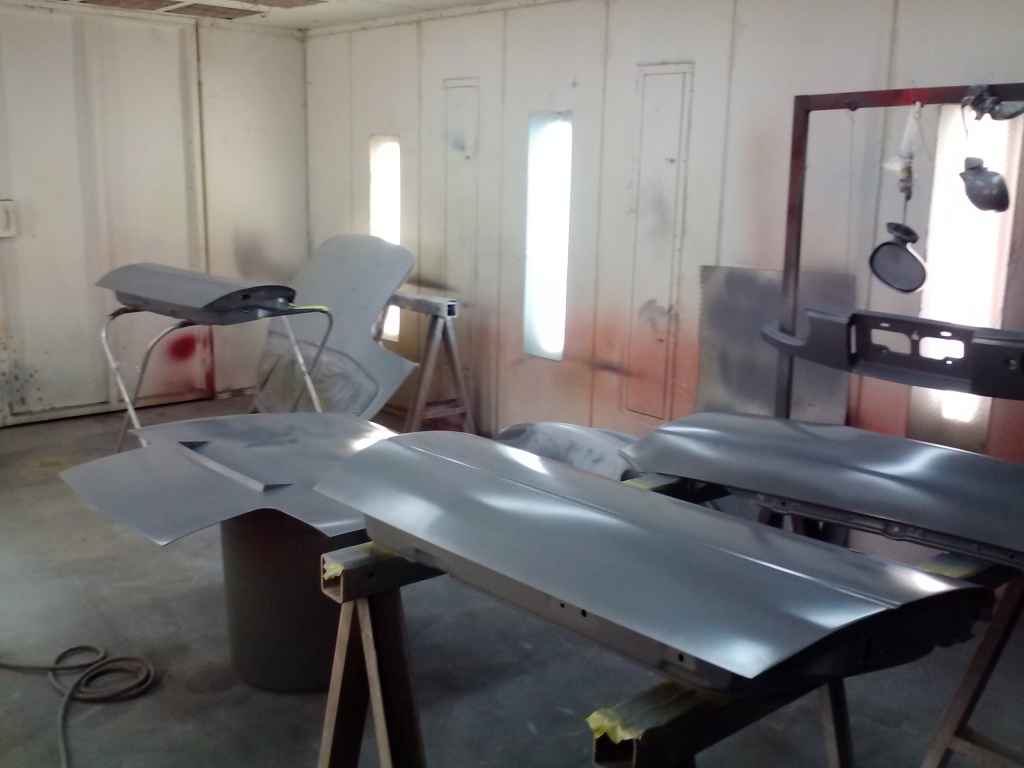
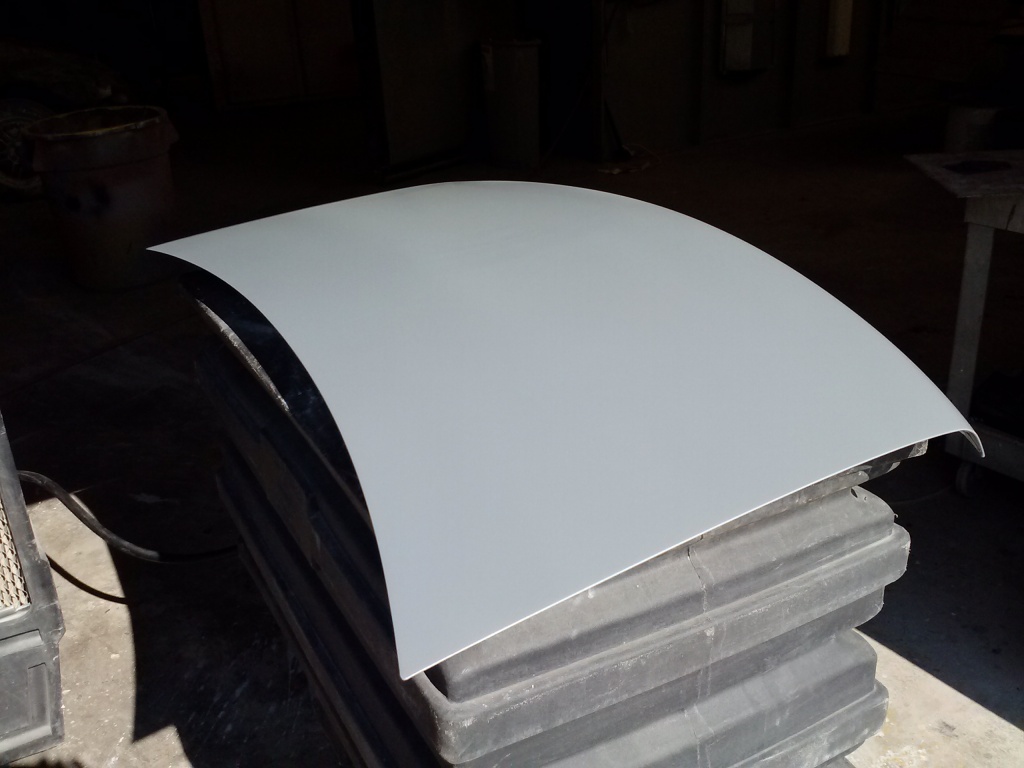

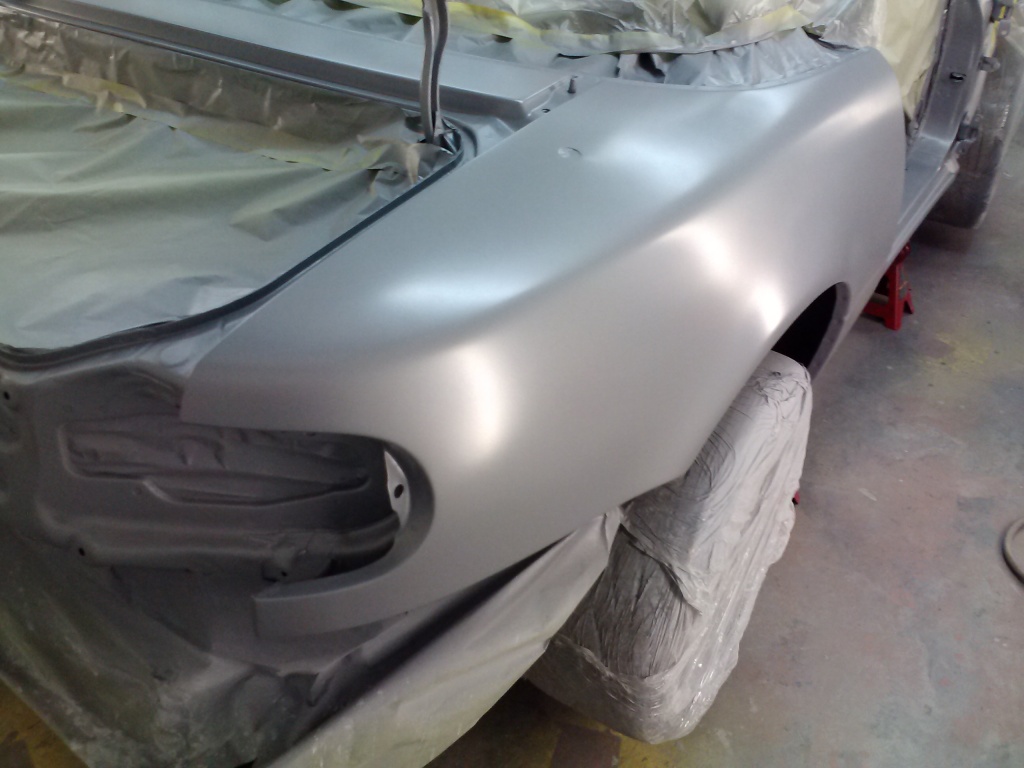
and 4 coats of clear:


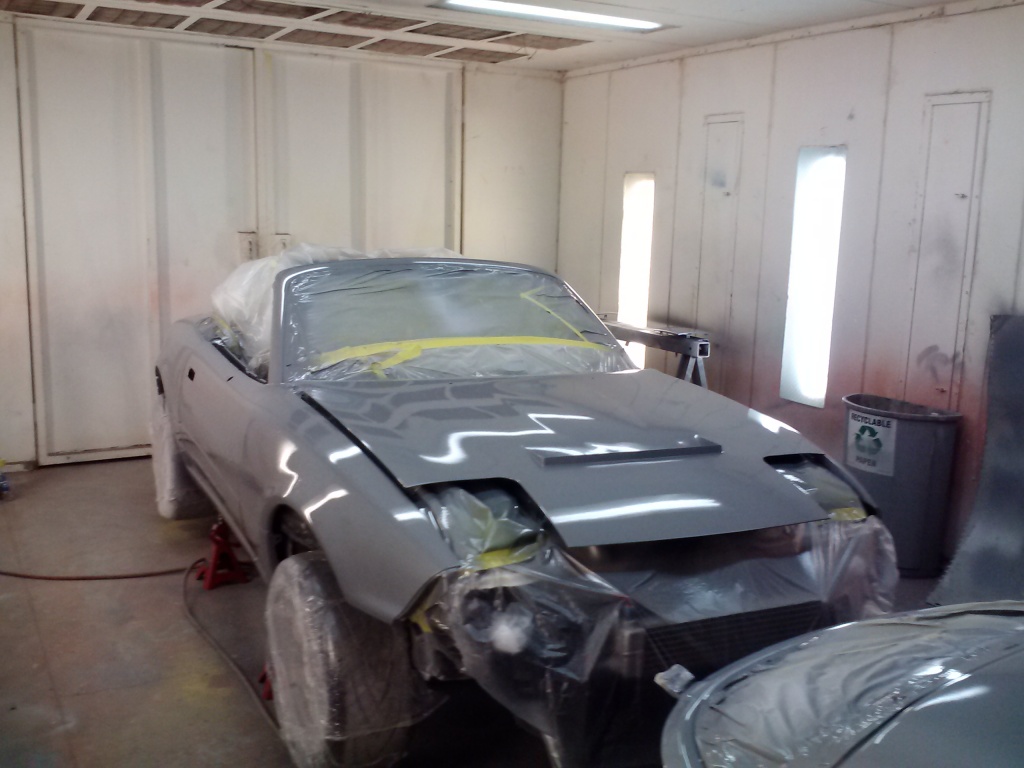
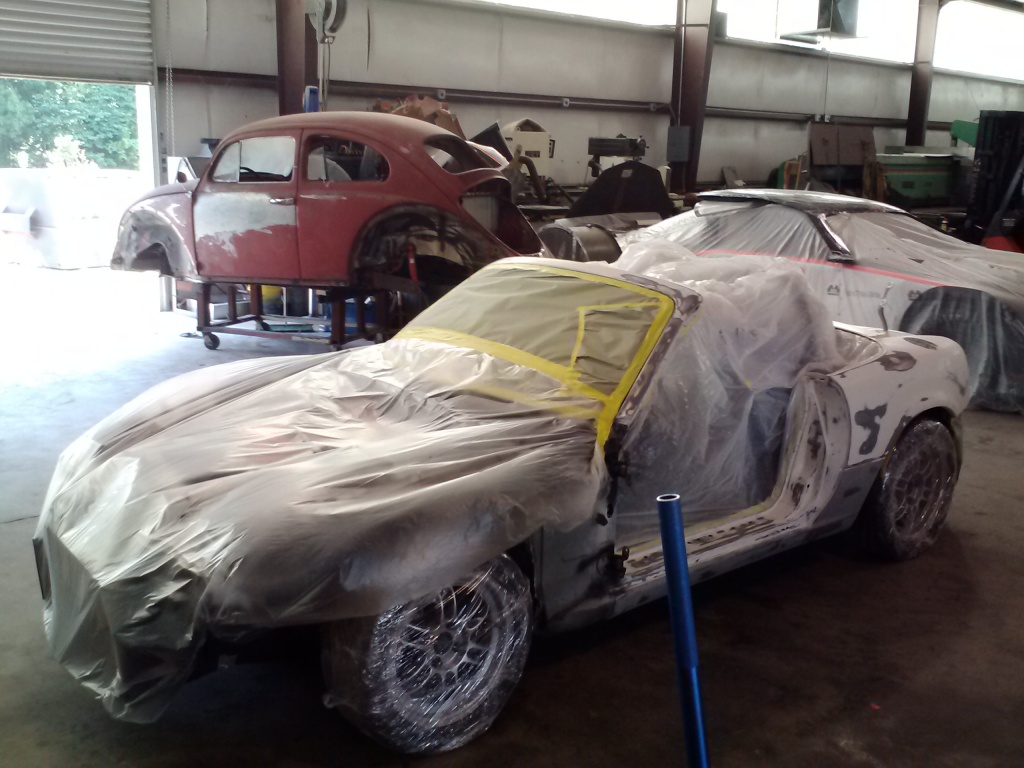
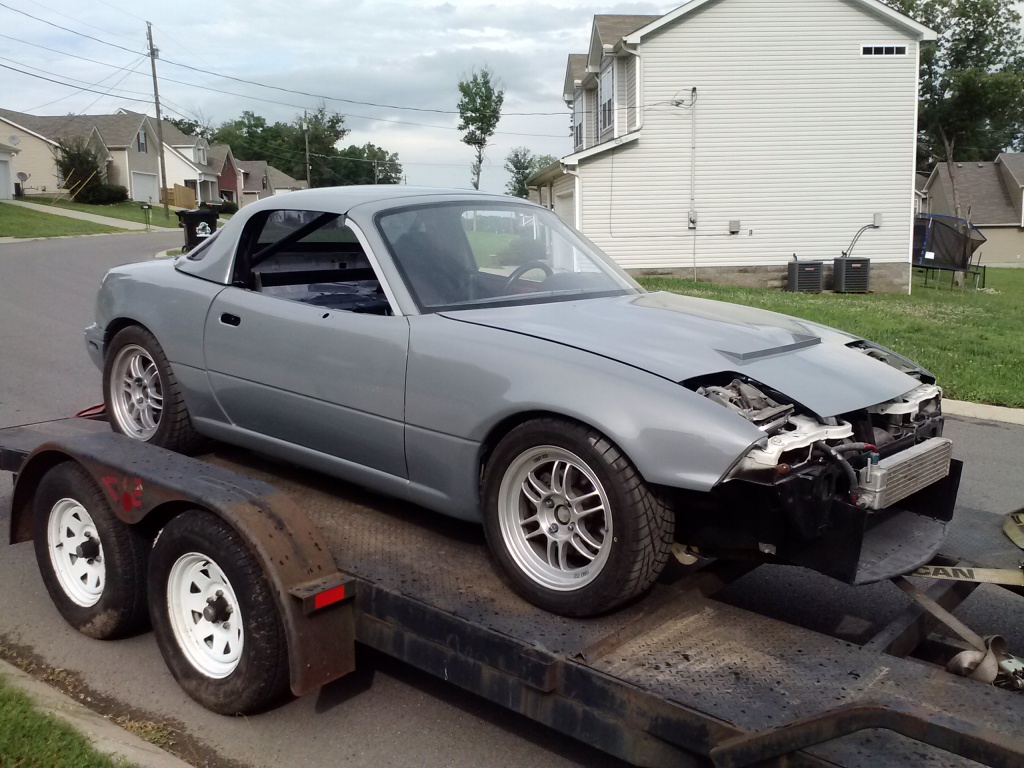
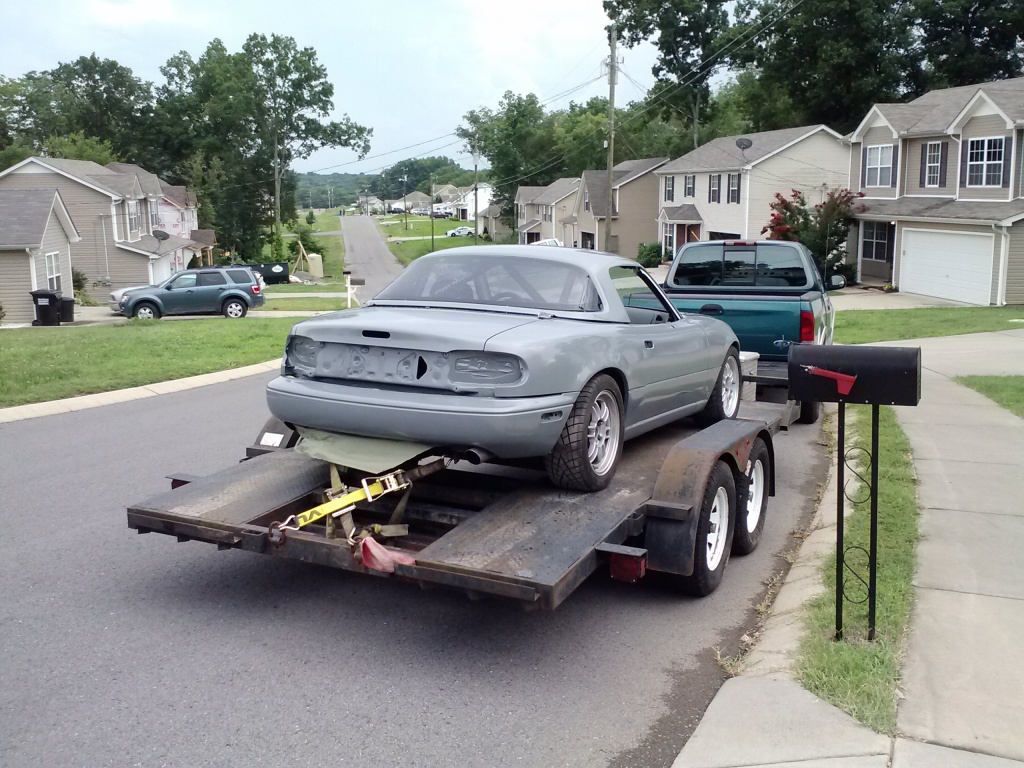
Finally I brought her home last night:
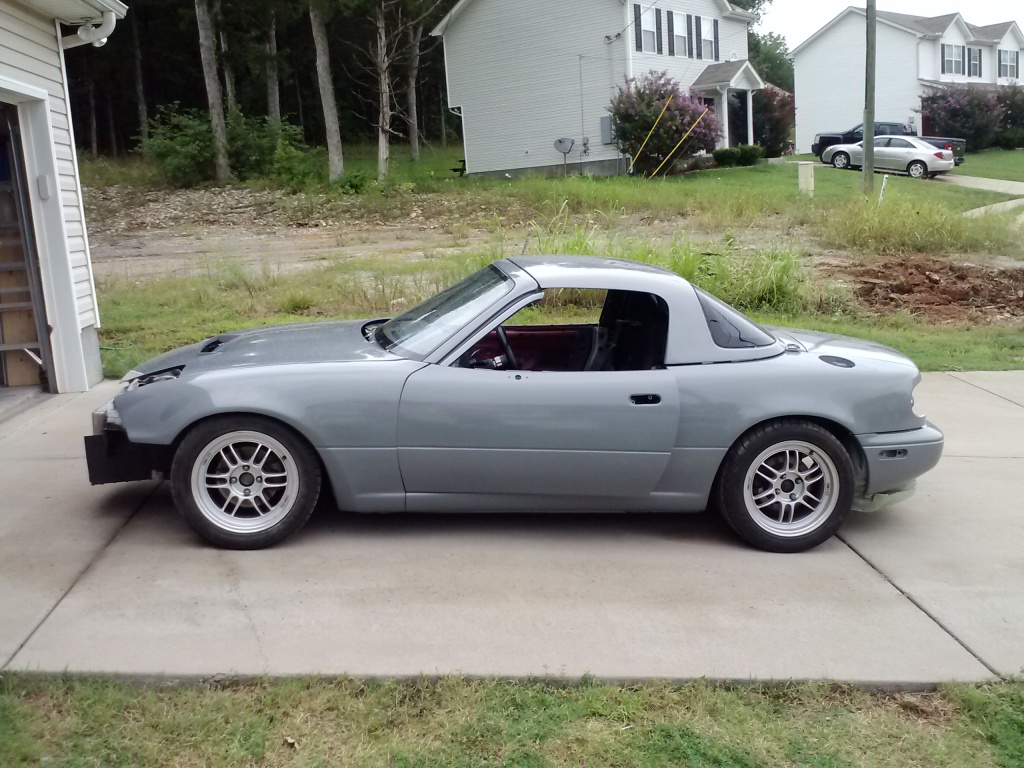
I still have a few weeks ahead of me, aligning panels, reassembly, and sanding out some (a lot) of runs in the clear coat. Given this was my first time painting, I'm pretty pleased with the results.
Took a break one weekend to modify a 3" Enthuza exhaust and FM downpipe to fit my car. V-bands FTW!:

Fixed a broken filler panel with some two-part epoxy:

Installed a new fuel pump from Deutsch Works because my 6 month old Walbro 255HP (installed just before I started this project) locked up:

With my new hood vent, the carrying the stock prop rod along with no longer a good option. I had some sample gas springs laying around my office, so with about $20 in hardware, I made my own hood lift kit:


I didn't like the straight cut on the Enthuza exhaust, so I shortened it some and put a angle cut on it. I'll fab up a bumper protection plate from some scrap aluminum I have laying around this week.


Finally go everything over to the shop to start painting.


Got up a 5 am on a Saturday to beat the humidity (it didn't work), so I had to make myself an omelet to power through the day.

After long day, I finally laid color:


and 4 coats of clear:


Finally I brought her home last night:


I still have a few weeks ahead of me, aligning panels, reassembly, and sanding out some (a lot) of runs in the clear coat. Given this was my first time painting, I'm pretty pleased with the results.
Reply
1
1


 07-22-2013, 03:33 PM
#35
Elite Member
Thread Starter
iTrader: (15)
Join Date: Jan 2007
Location: Murfreesboro,TN
Posts: 2,045
Total Cats: 265
It is Toyota/Scion "Cement" paint. The only two cars/trucks that come in it are the FJ and the tC that I know of. My wife was a little apprehensive about the color based on the pictures of the tC's I showed her, but she really likes it now that its on the Miata.
All told, minus parts I had to replace, I've got a little less than $1000 into the paint job. That includes the paint, consumables, and tools.
All told, minus parts I had to replace, I've got a little less than $1000 into the paint job. That includes the paint, consumables, and tools.
Reply
0
0
 Now you gots to put everything back together.


