99mx5 EFR build

 02-17-2015, 12:37 AM
#602
Elite Member
Thread Starter
iTrader: (16)

Join Date: Oct 2006
Location: Las Cruces, NM
Posts: 1,647
Total Cats: 524


Reply
 0
0

0

 You know I'm in for a set.


 03-09-2015, 07:05 PM
#609
Elite Member
Thread Starter
iTrader: (16)
Join Date: Oct 2006
Location: Las Cruces, NM
Posts: 1,647
Total Cats: 524
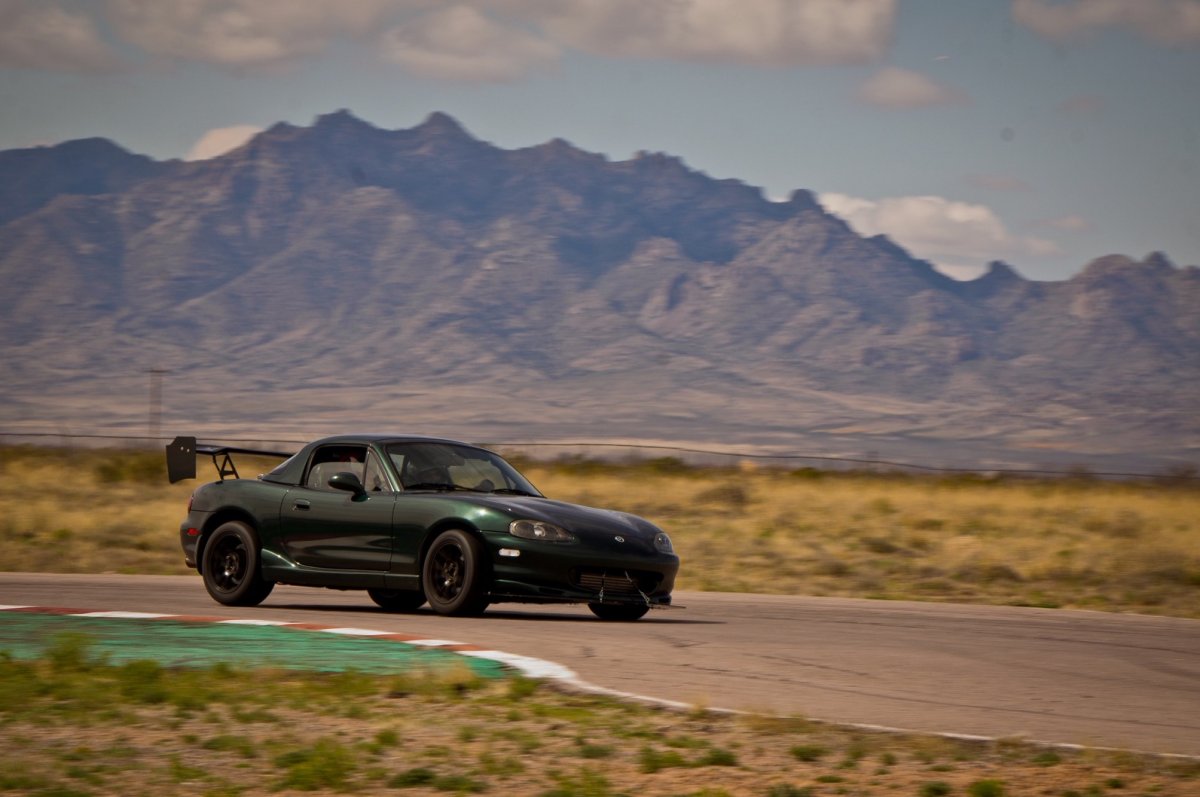
More progress. I'm prepping the car for the next track day / race season. My focus is wheels and tires, add a splitter to complement the wing, add brake cooling and upgrade brakes.
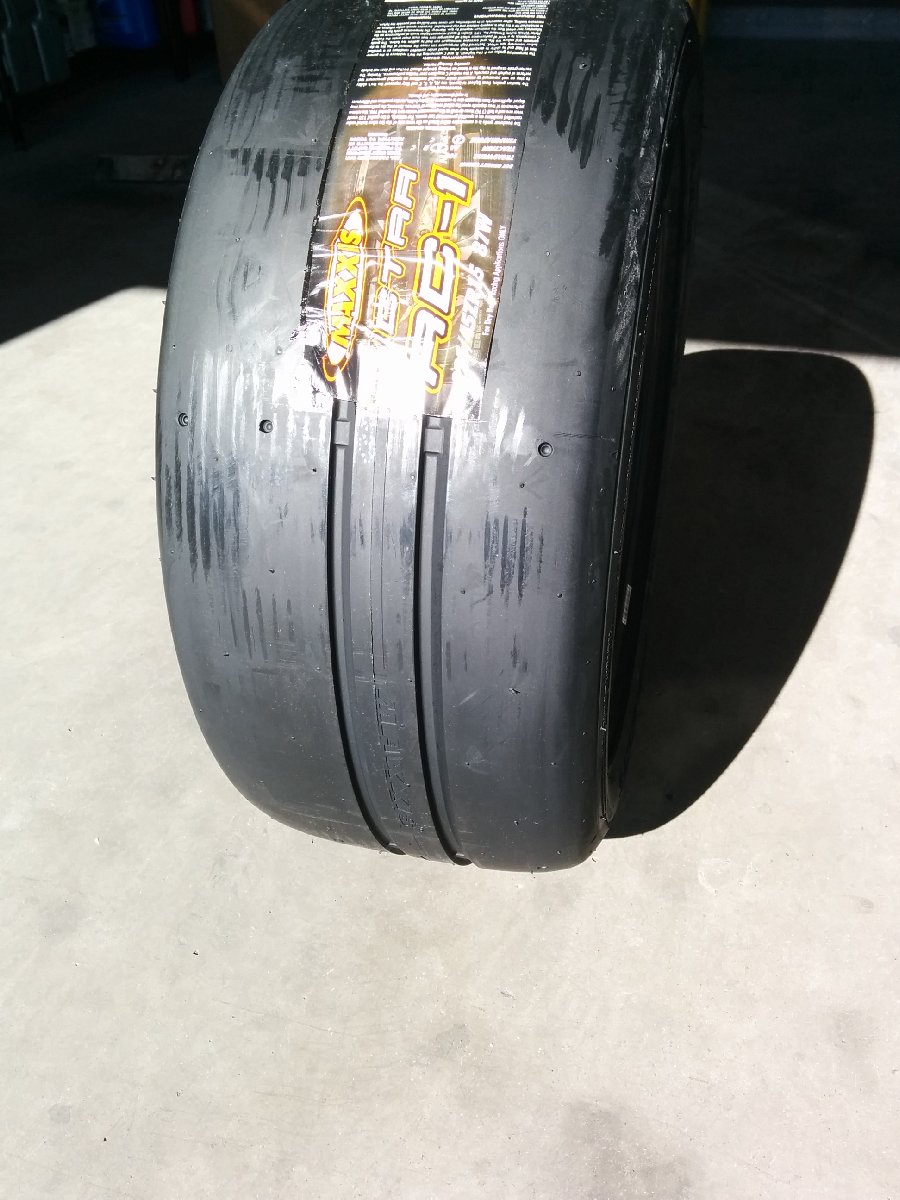
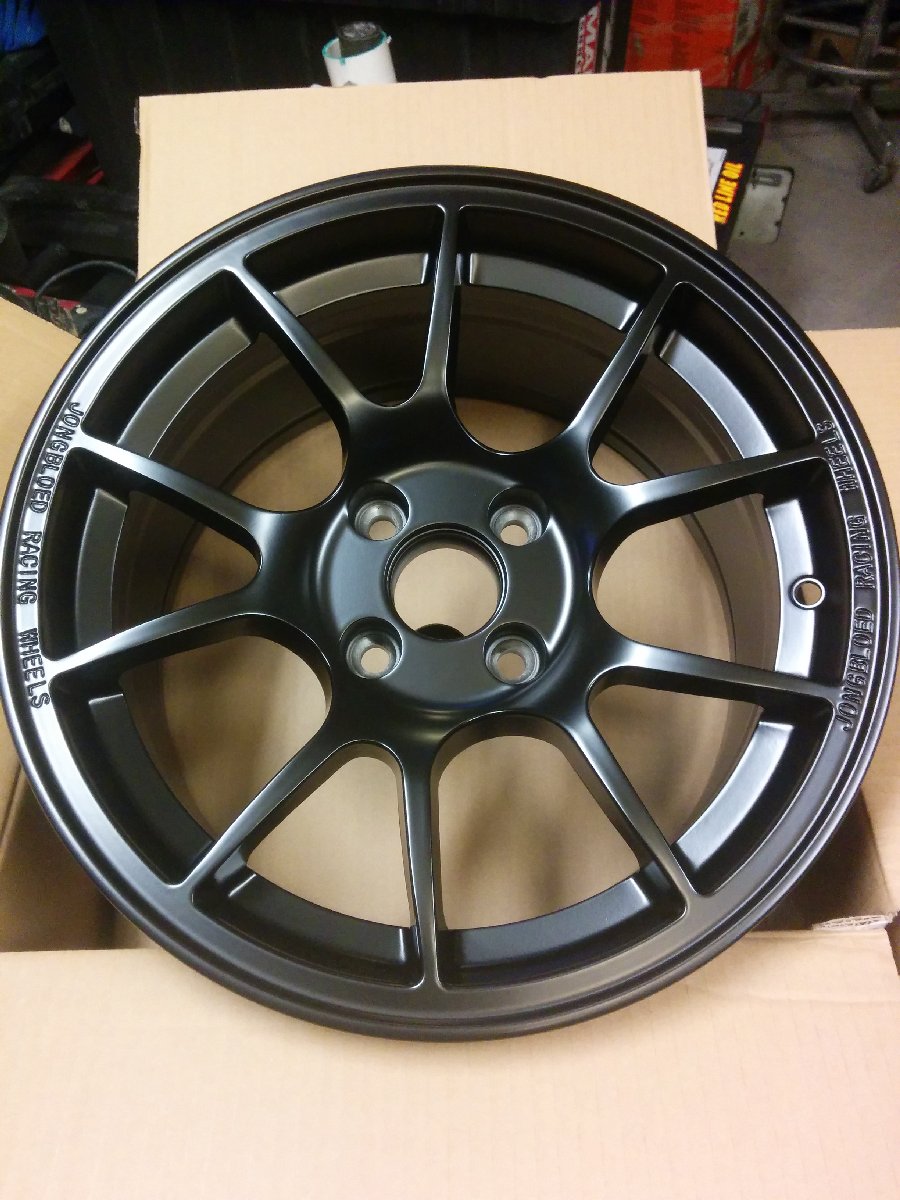
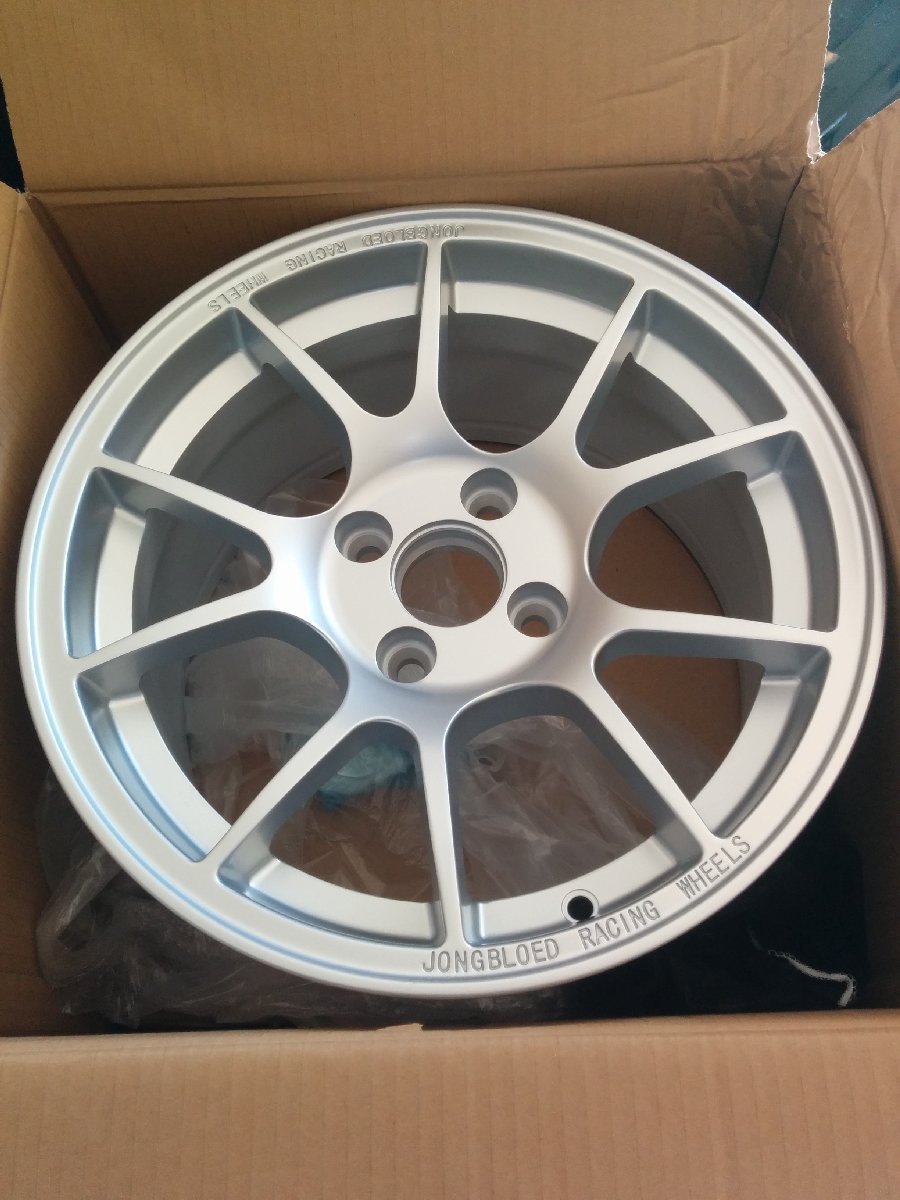
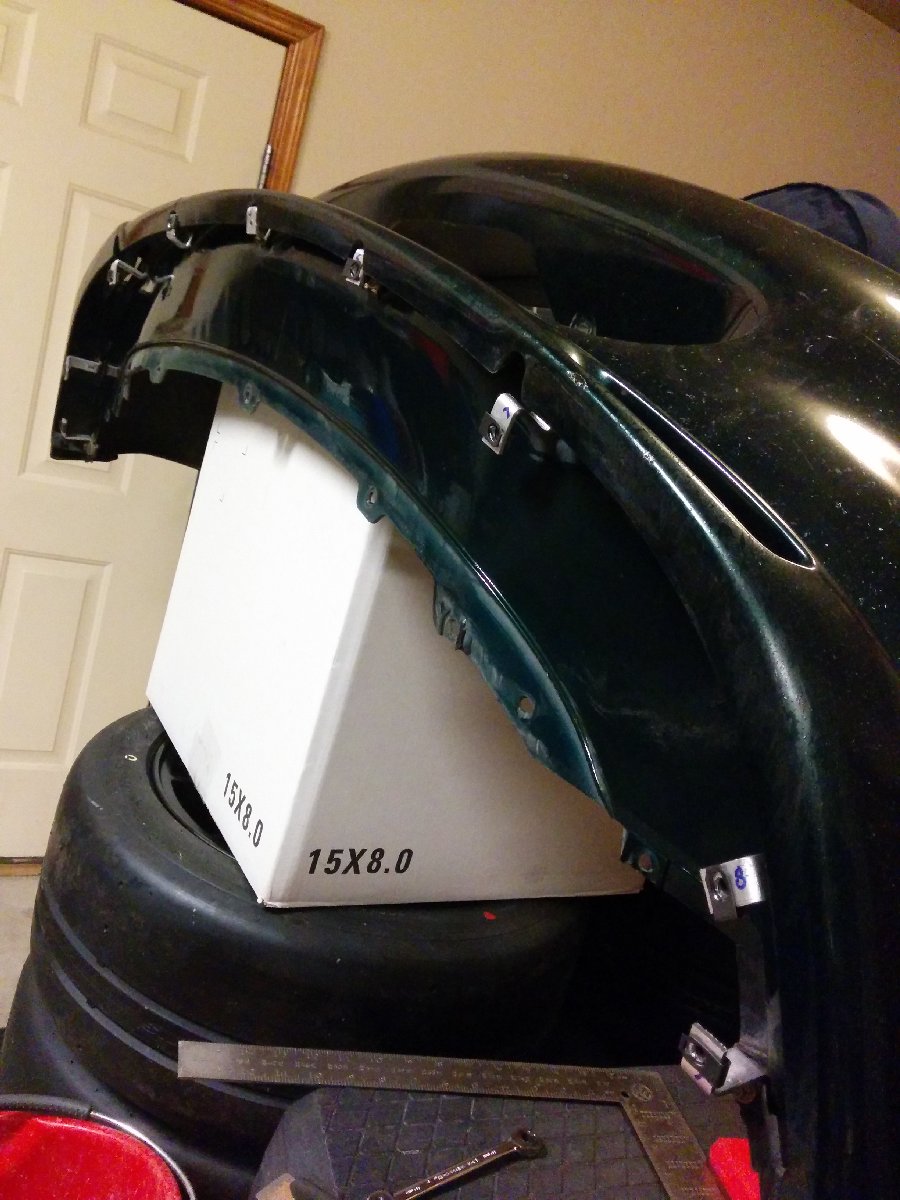
I ordered a set of Maxxis 225/45-15 Victra RC-1 tires and Jongbloed 15 x 8 wheels. Black wheels for the track and silver for the street.
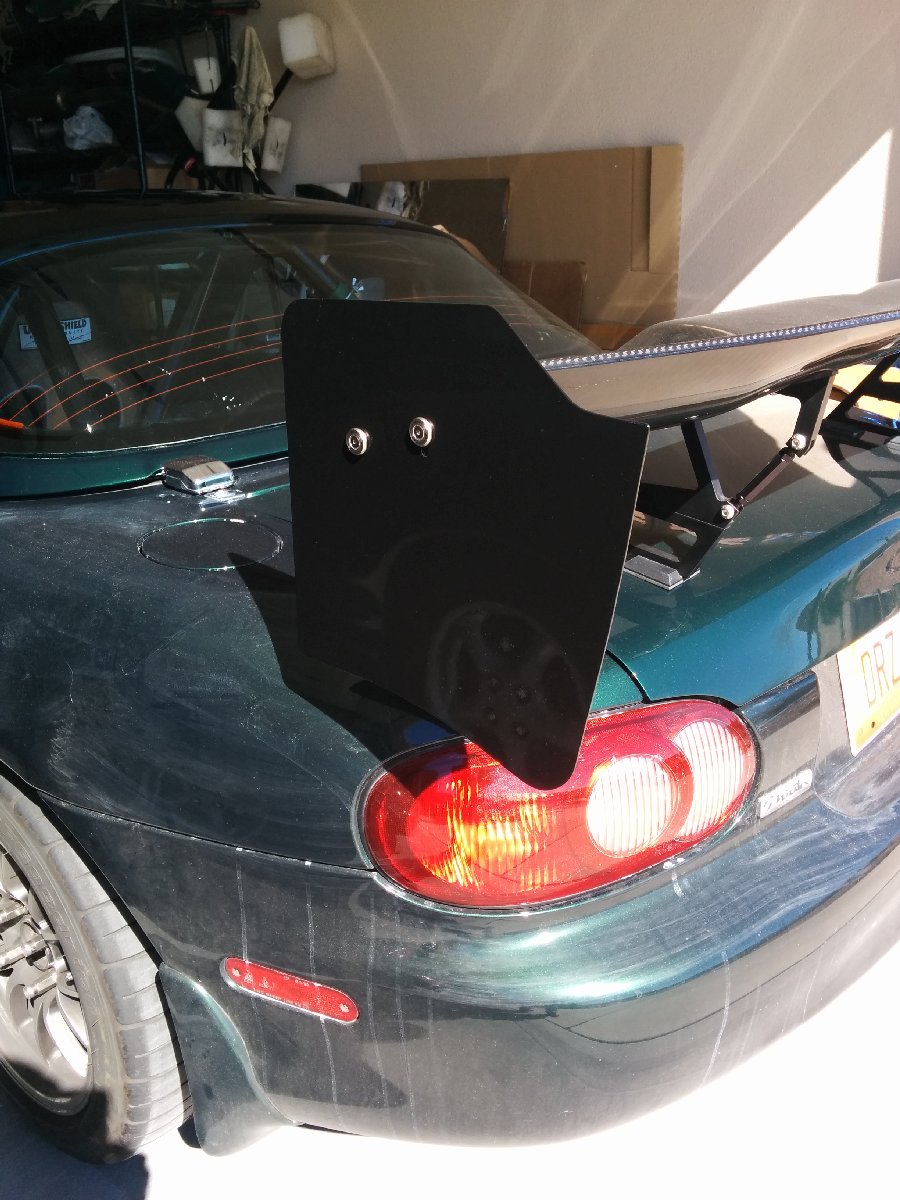
I also made a set of side plates for the wing.


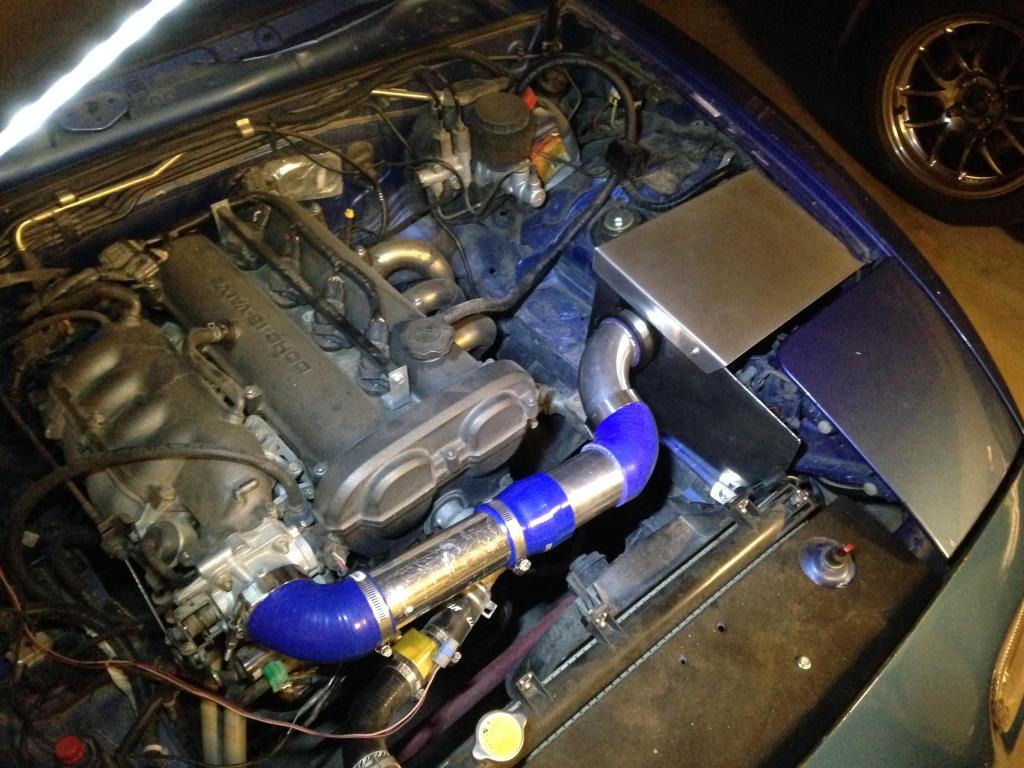
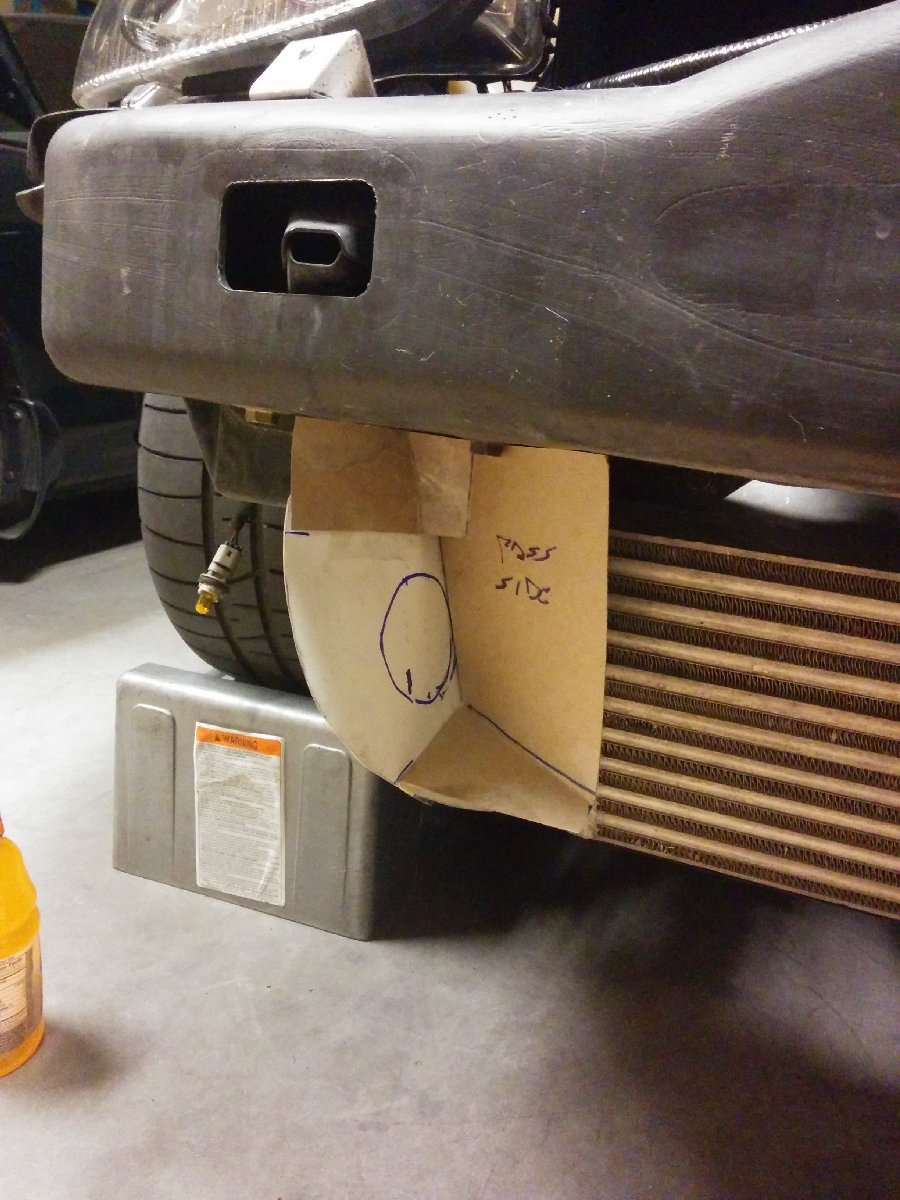
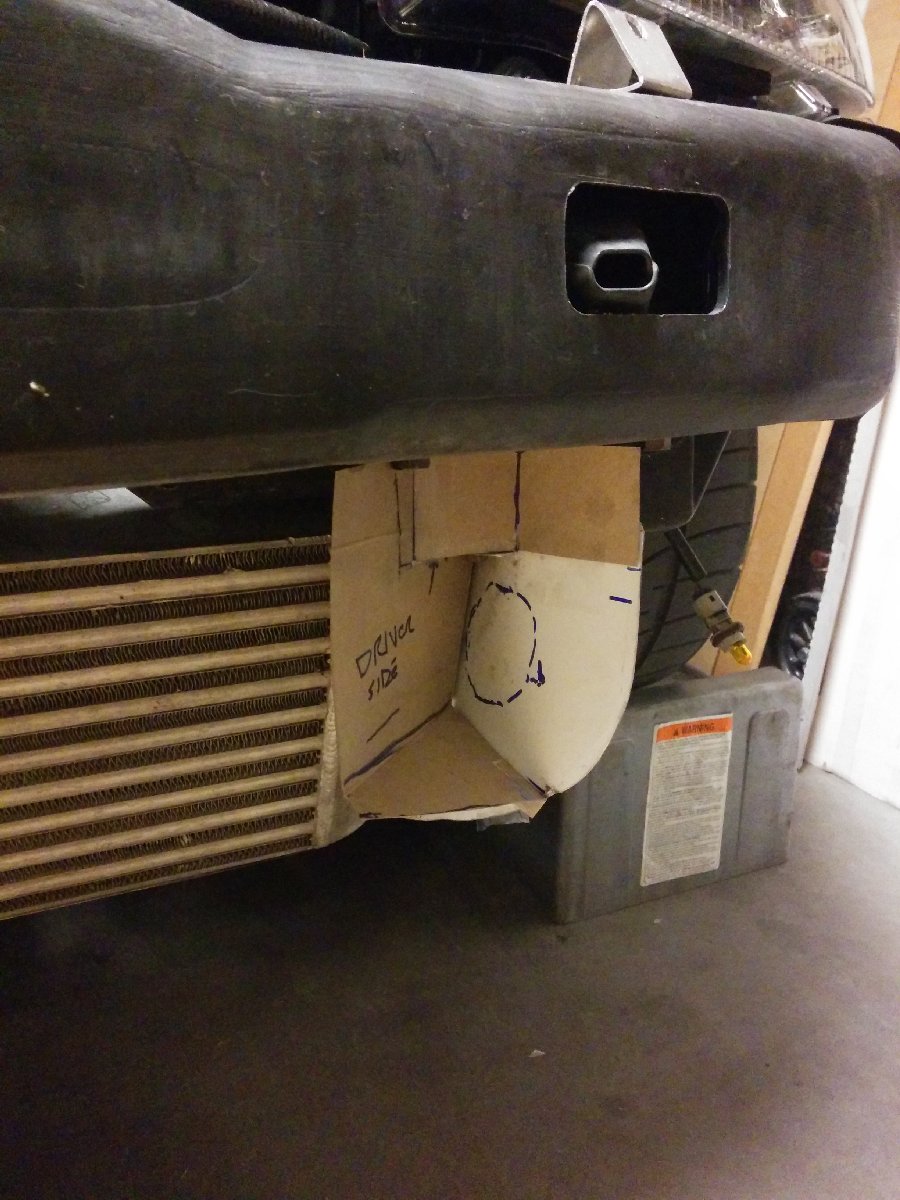
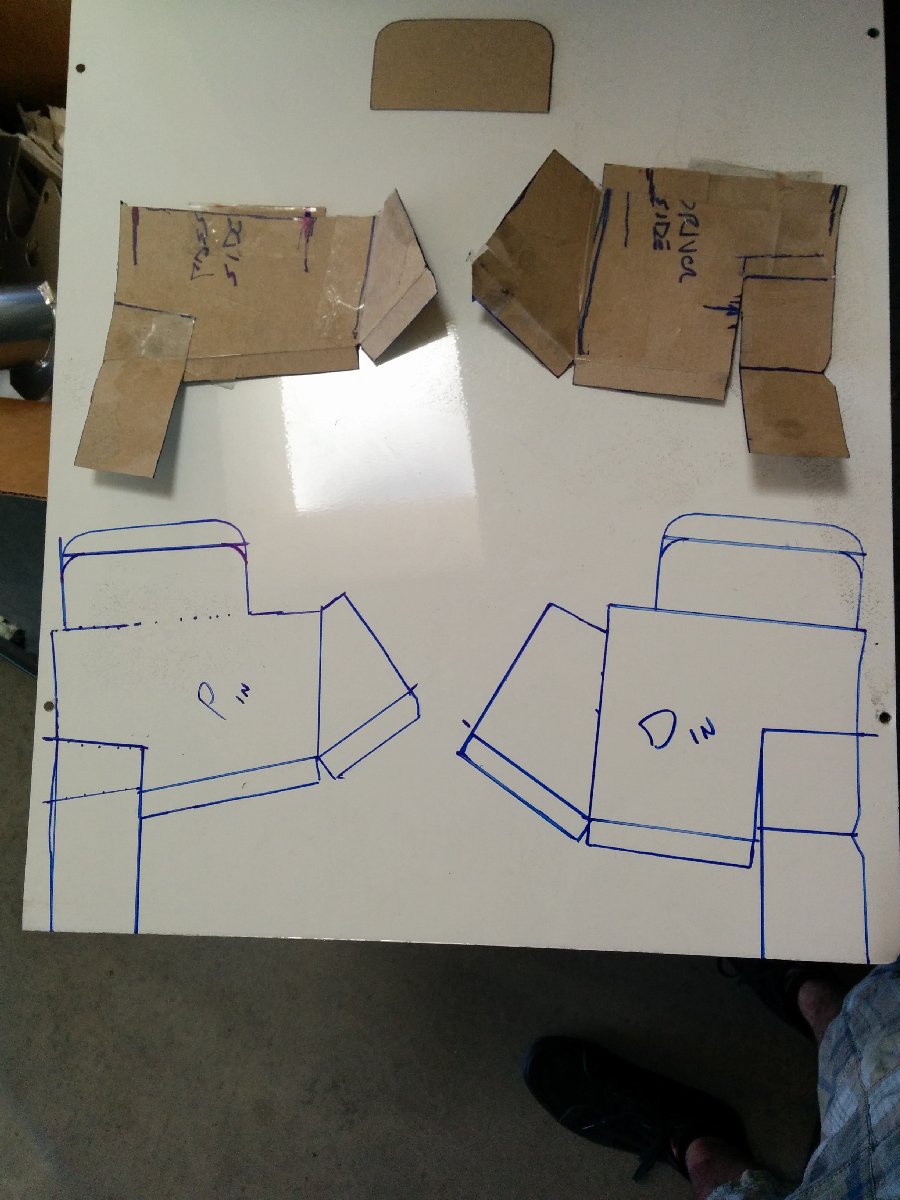
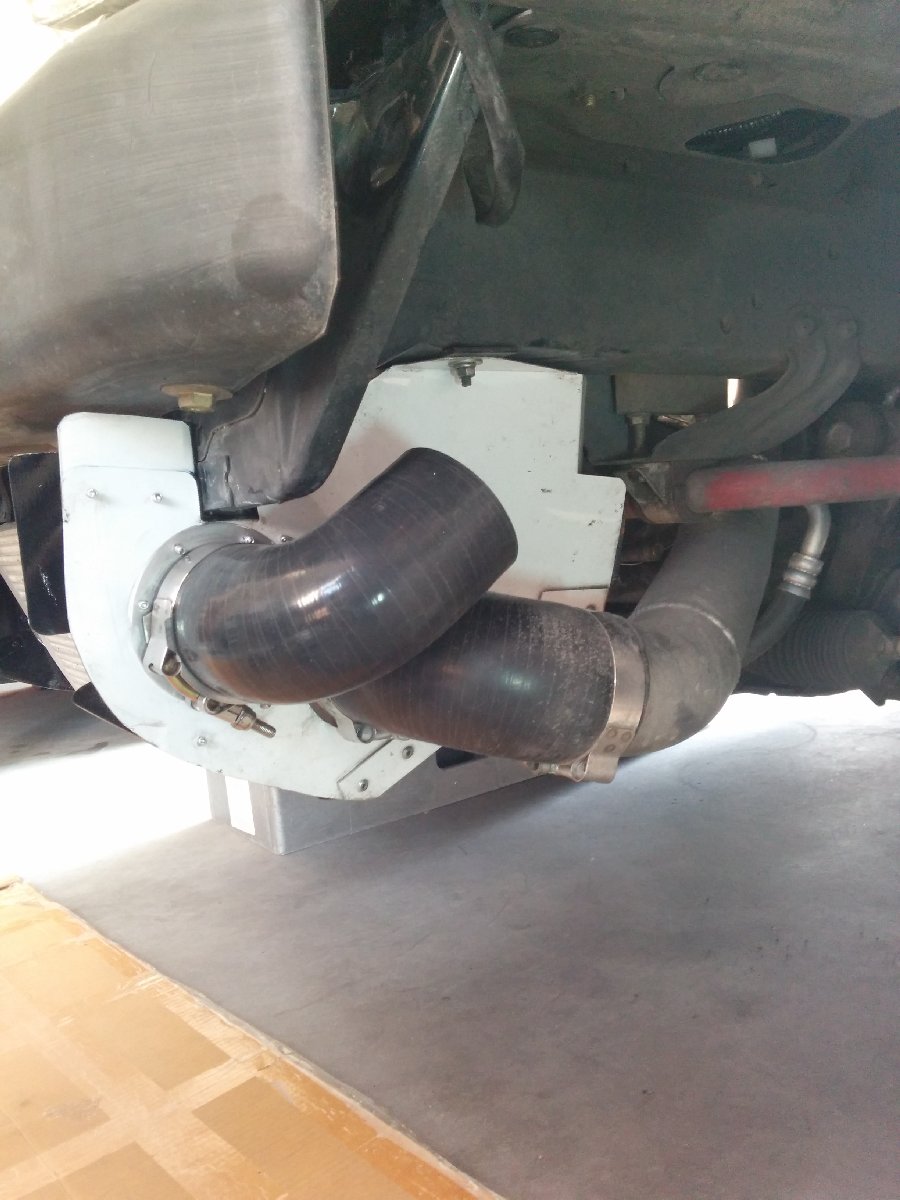
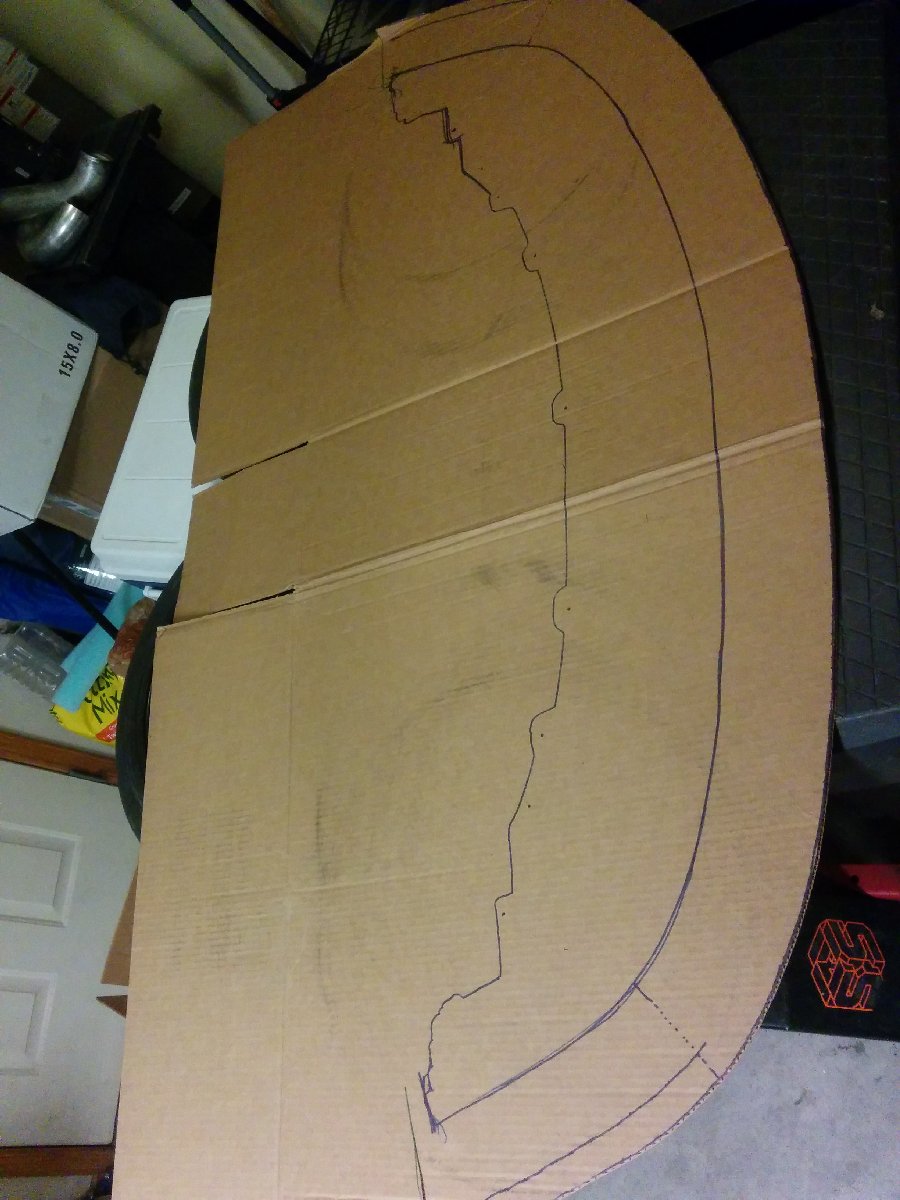
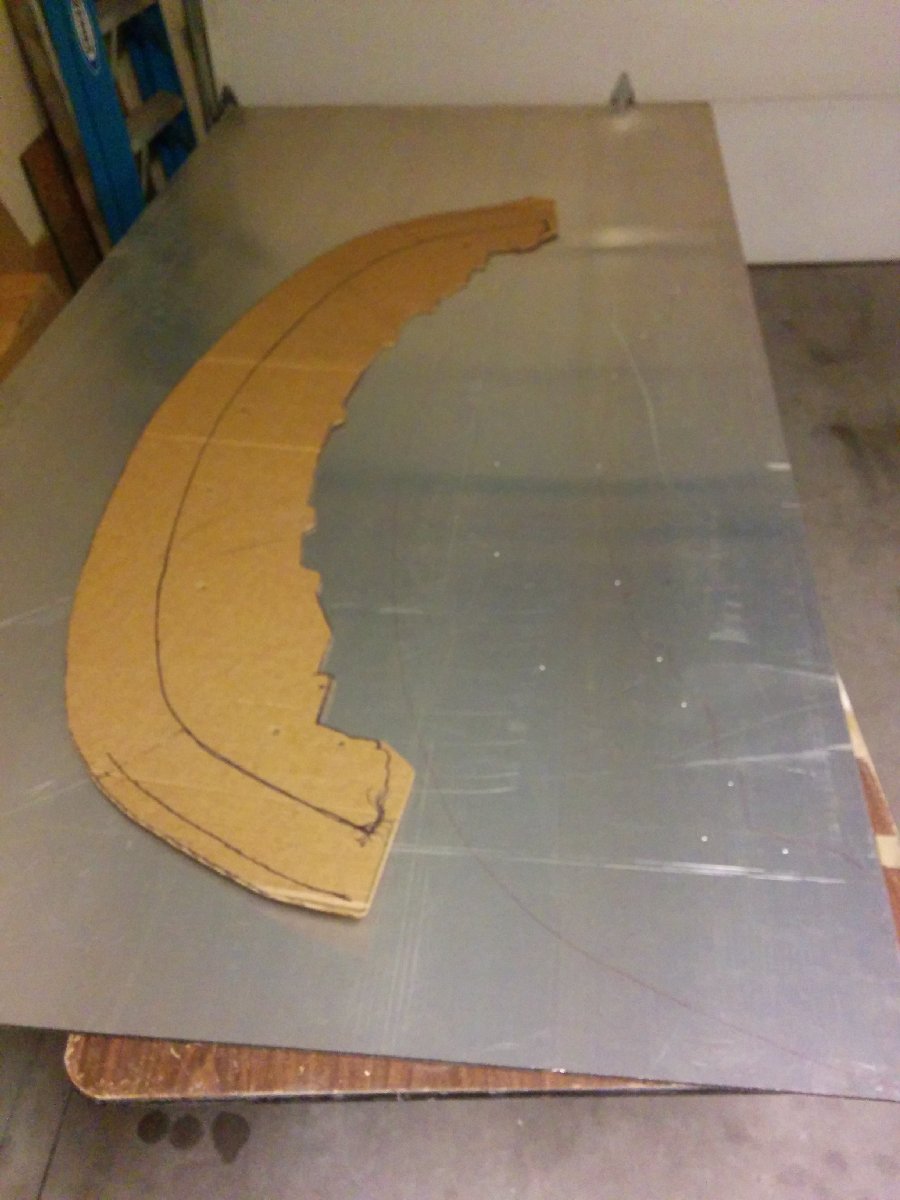
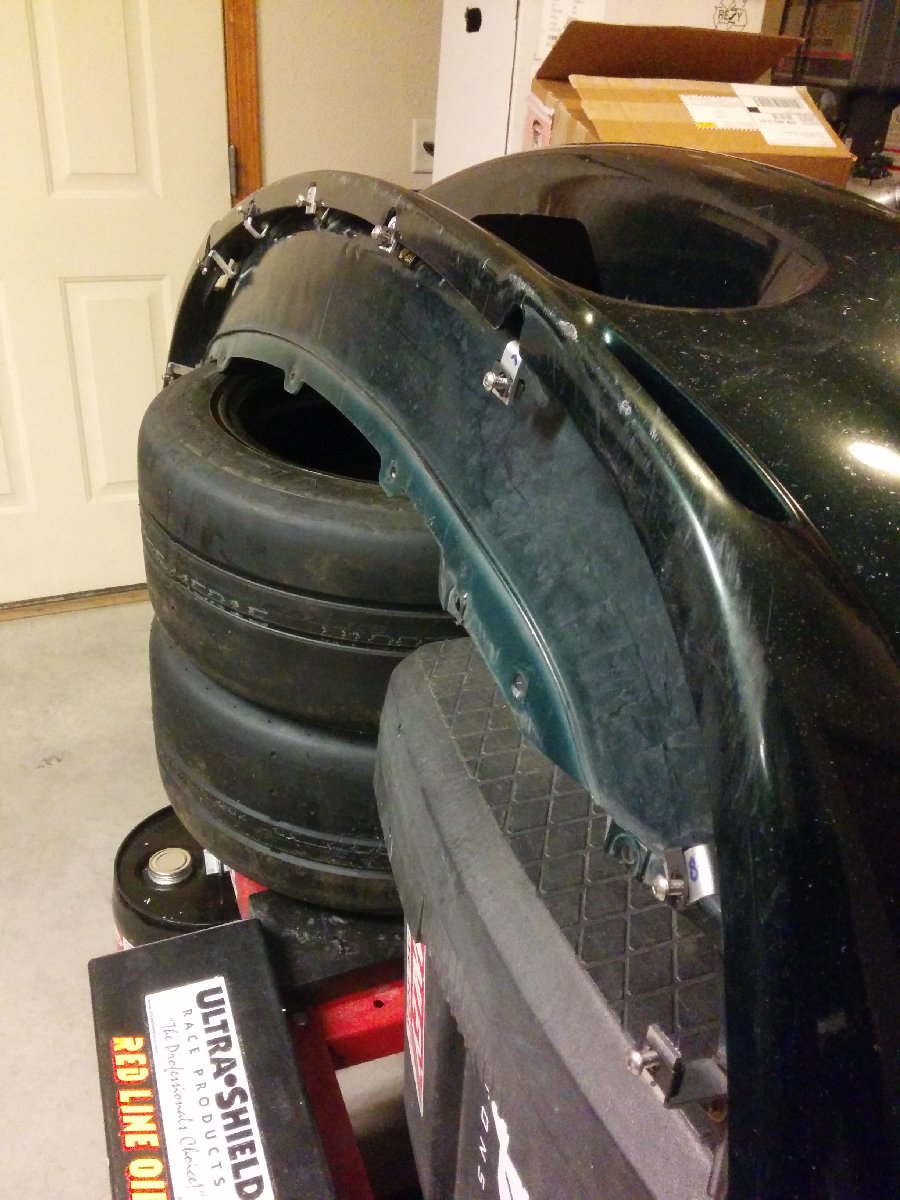
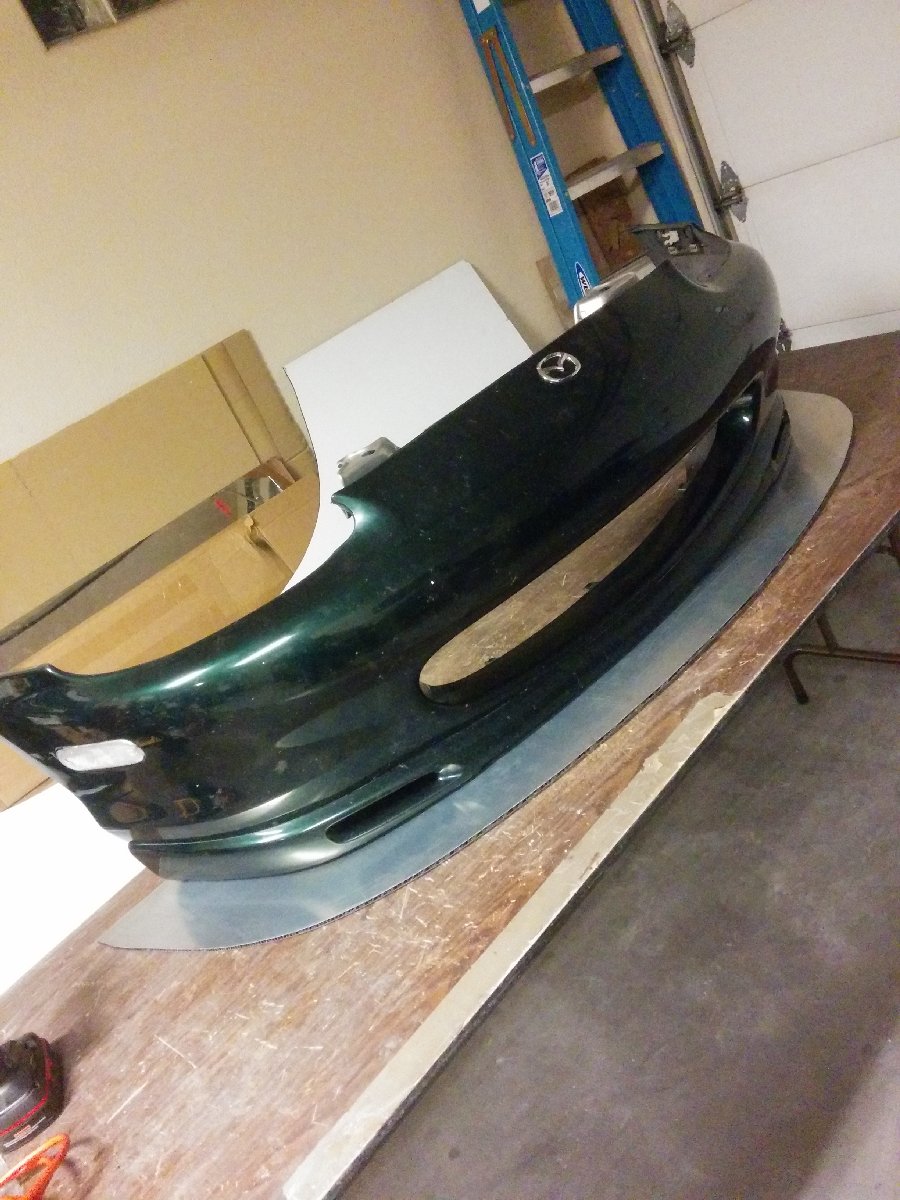
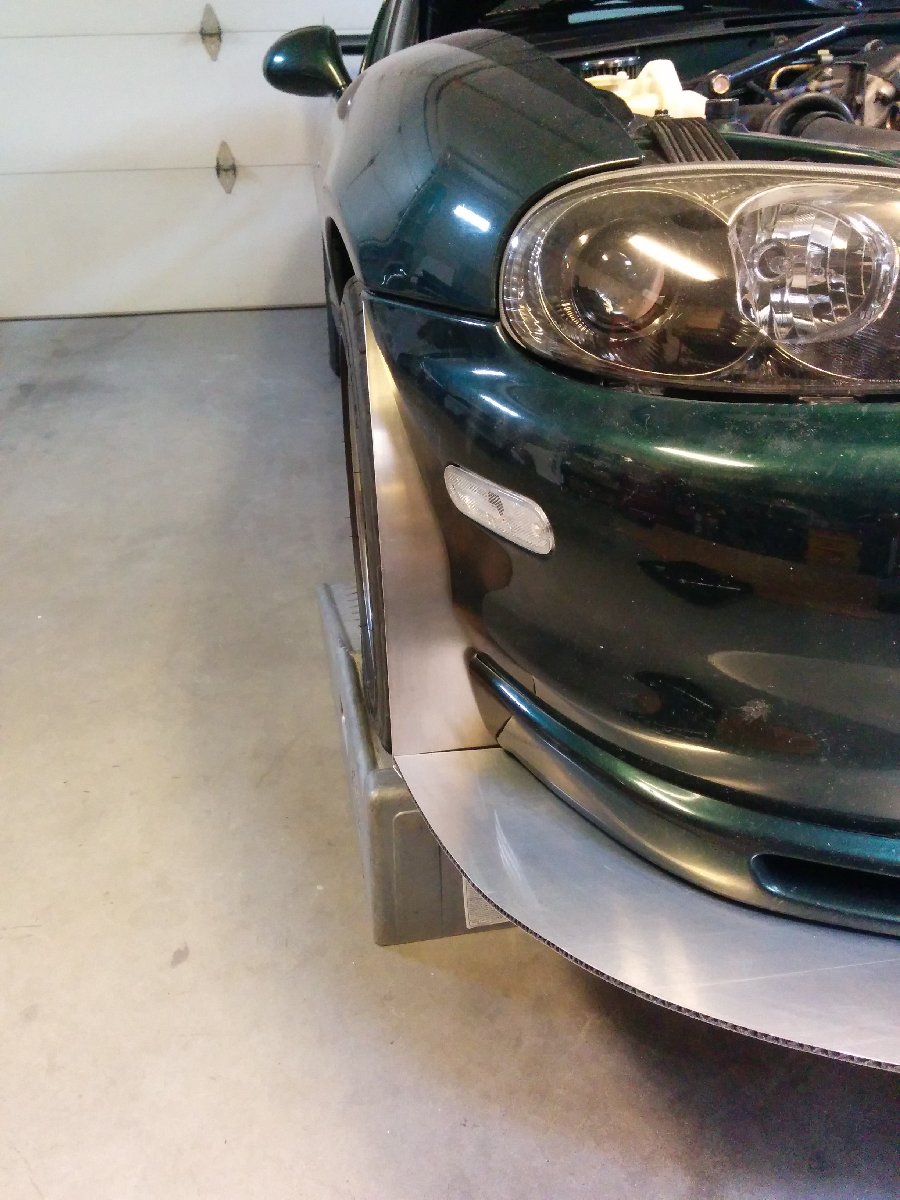
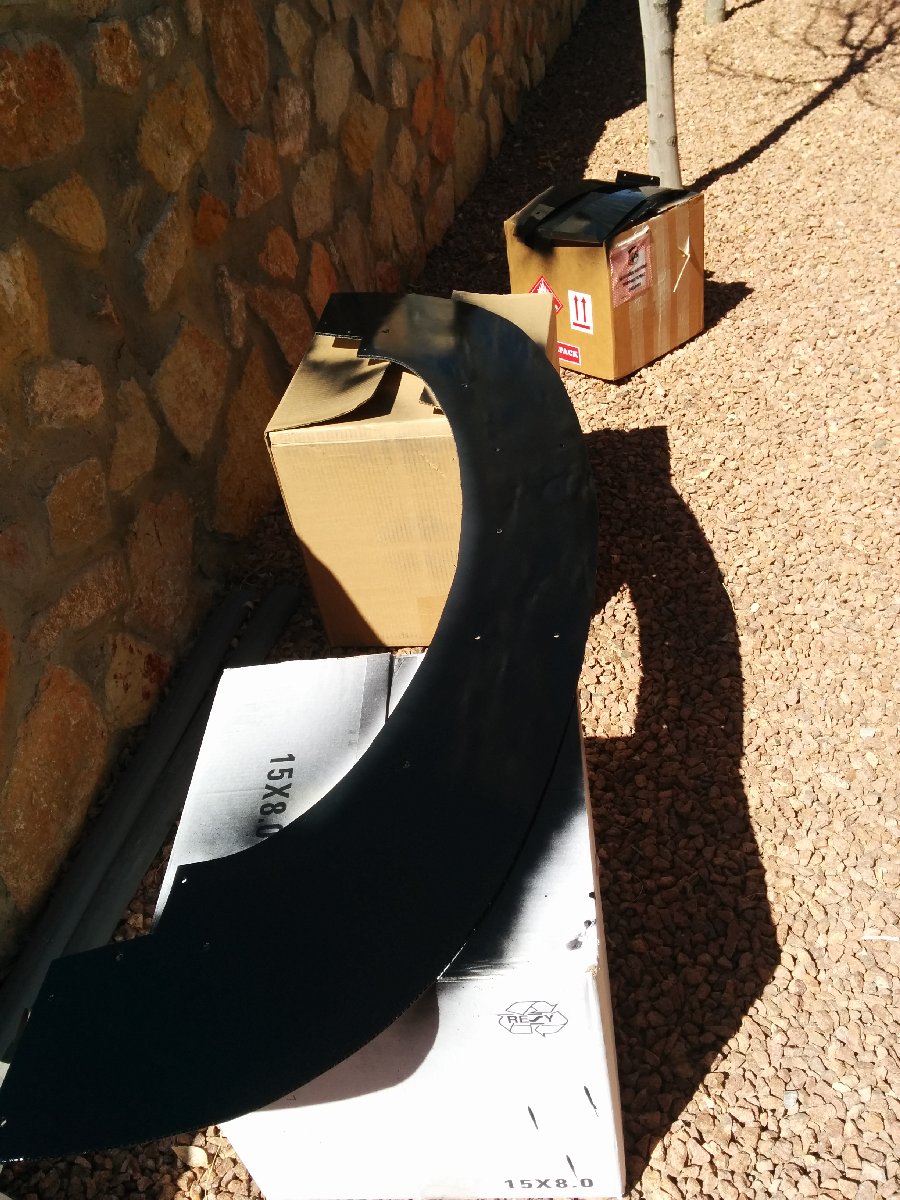
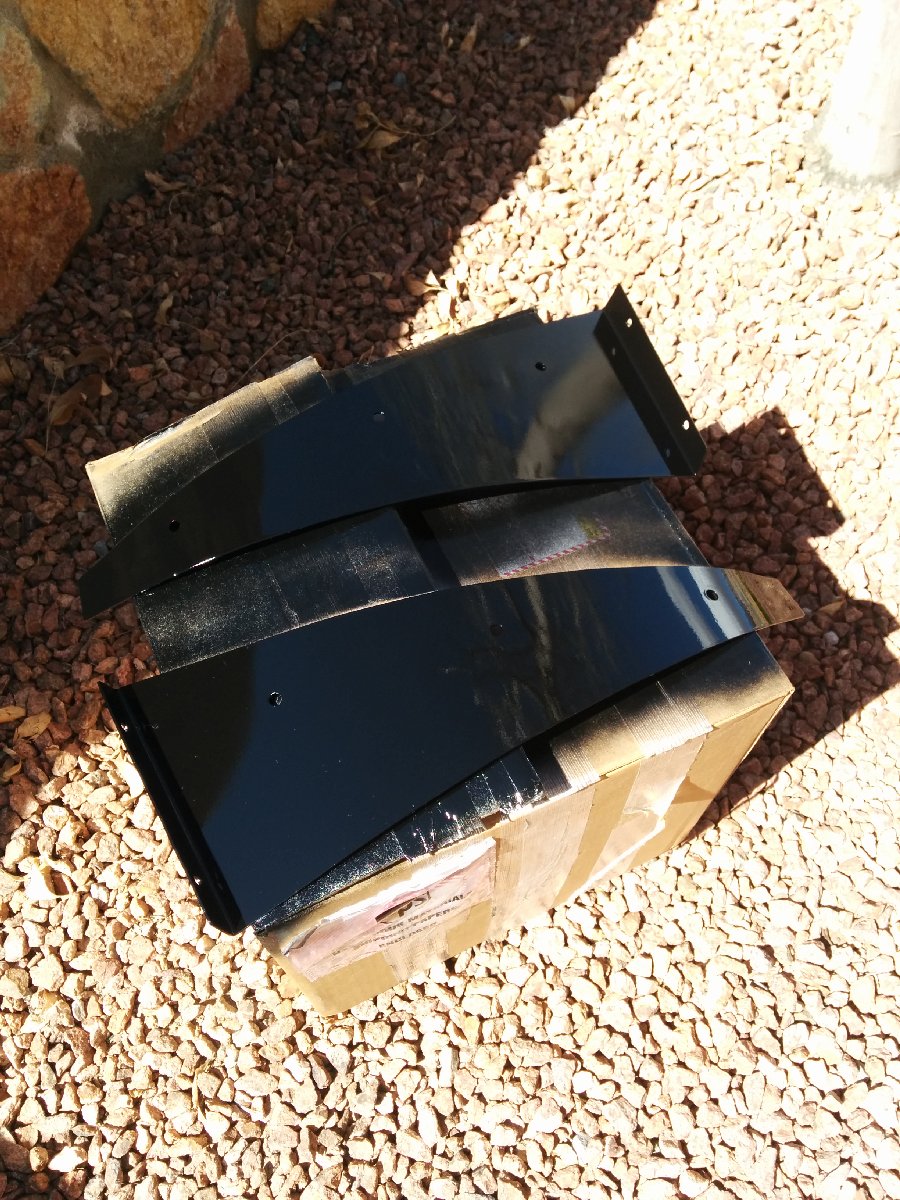
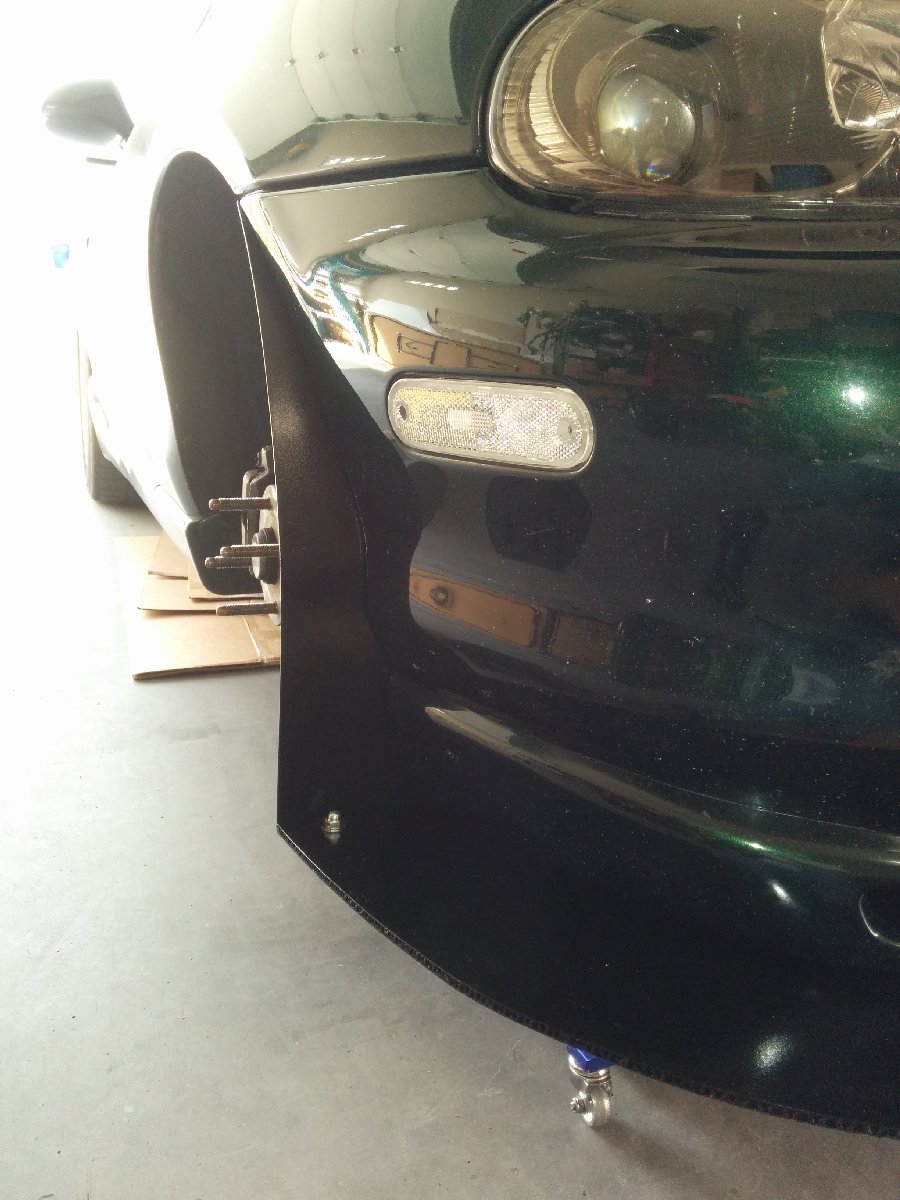
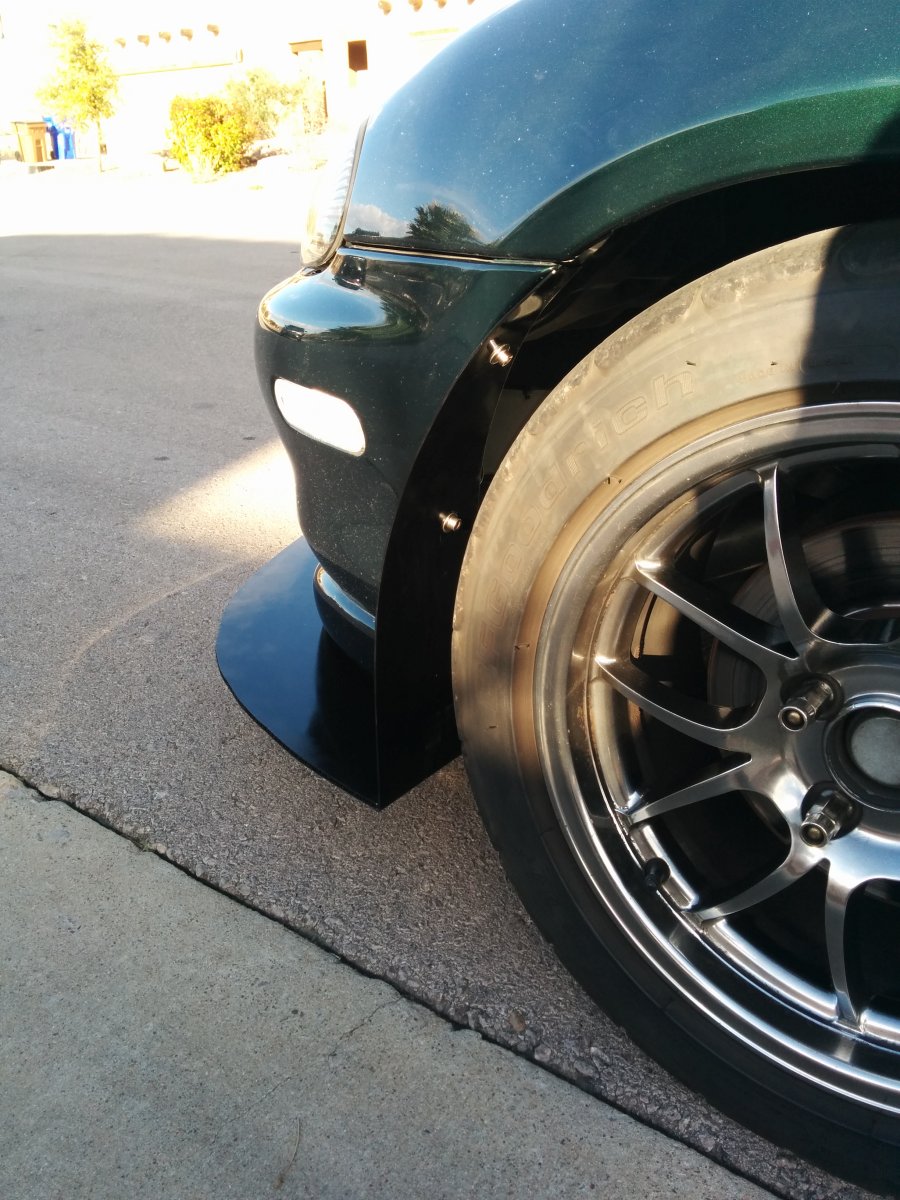
I bought flanges from AircraftSpruce and made air ducts in the mouth of the bumper. I integrated them into the intercooler ducting that I had previously made. I first made cardboard templates and then transferred them to aluminum sheet and then riveted them in and painted them black.
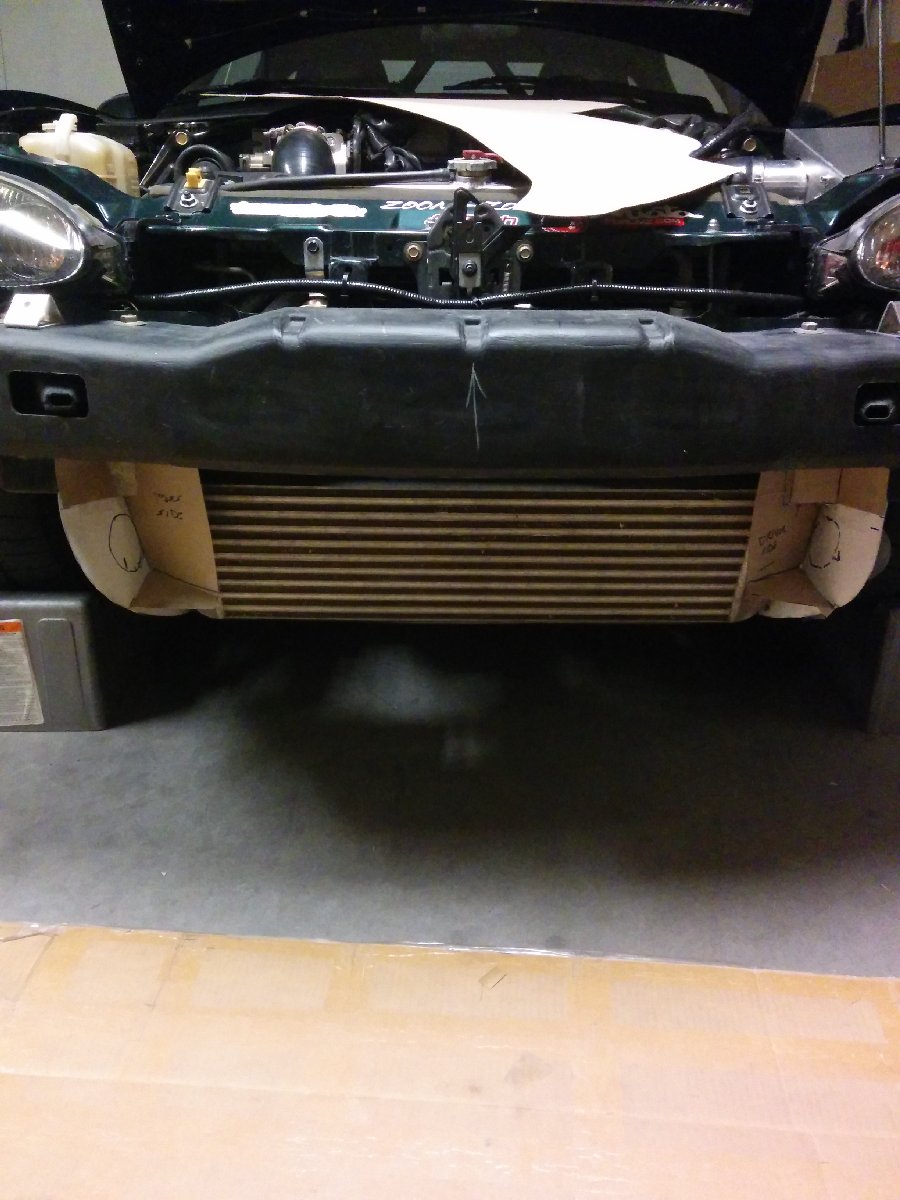
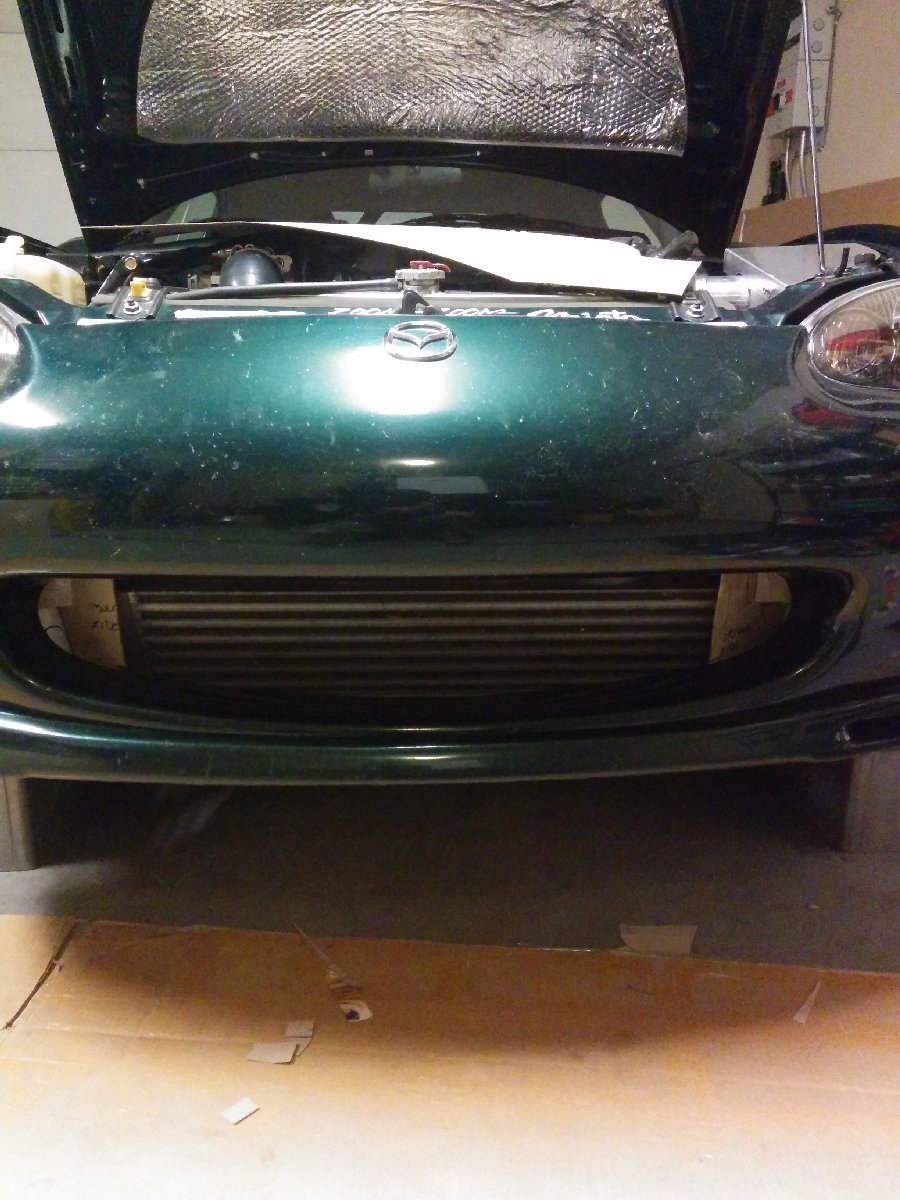
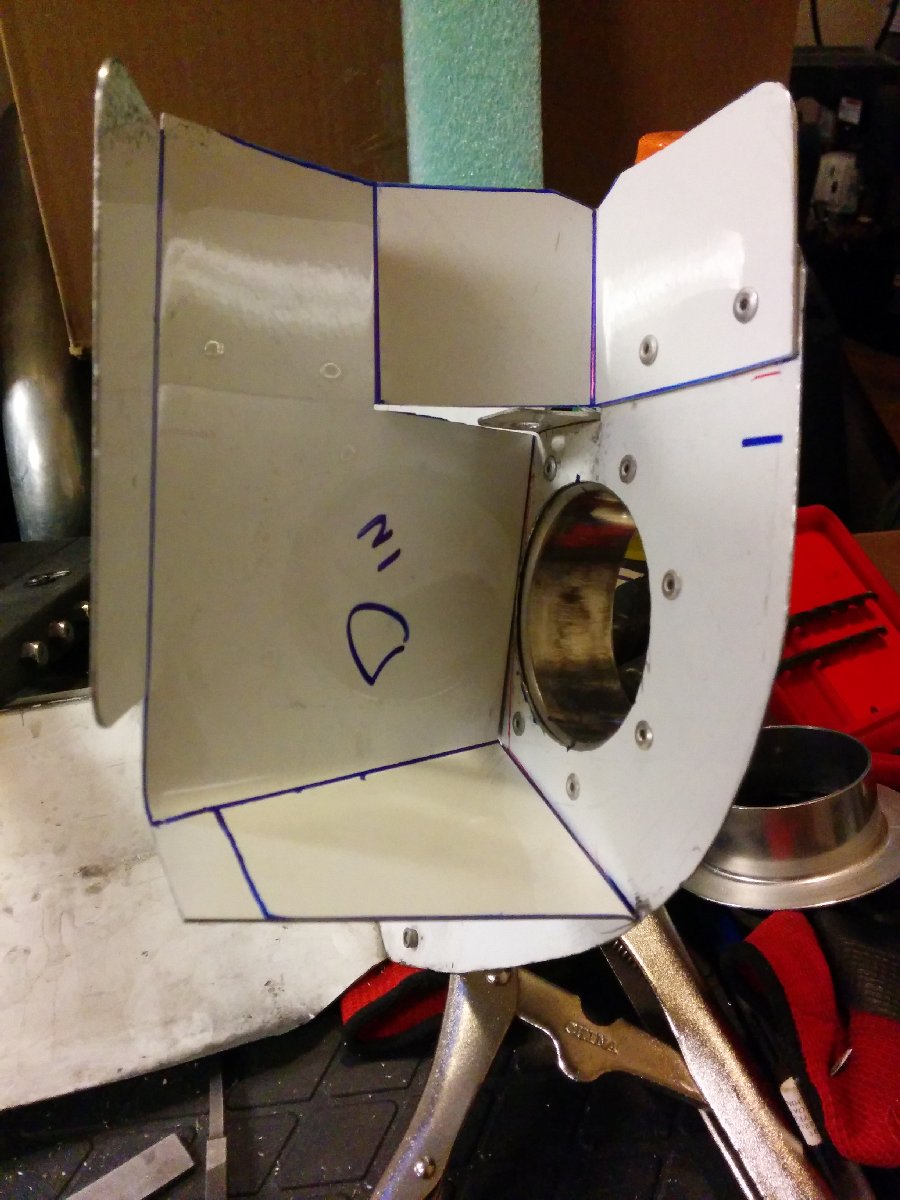
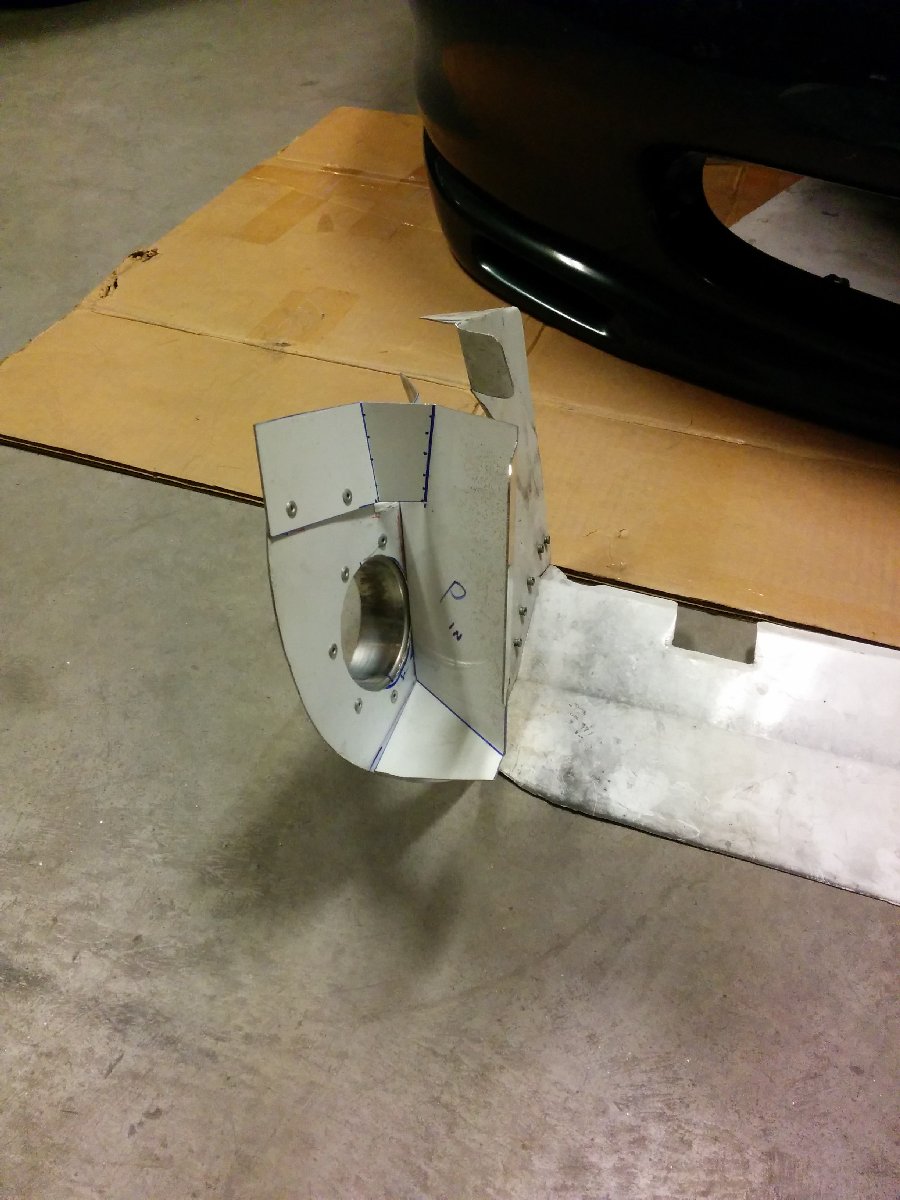
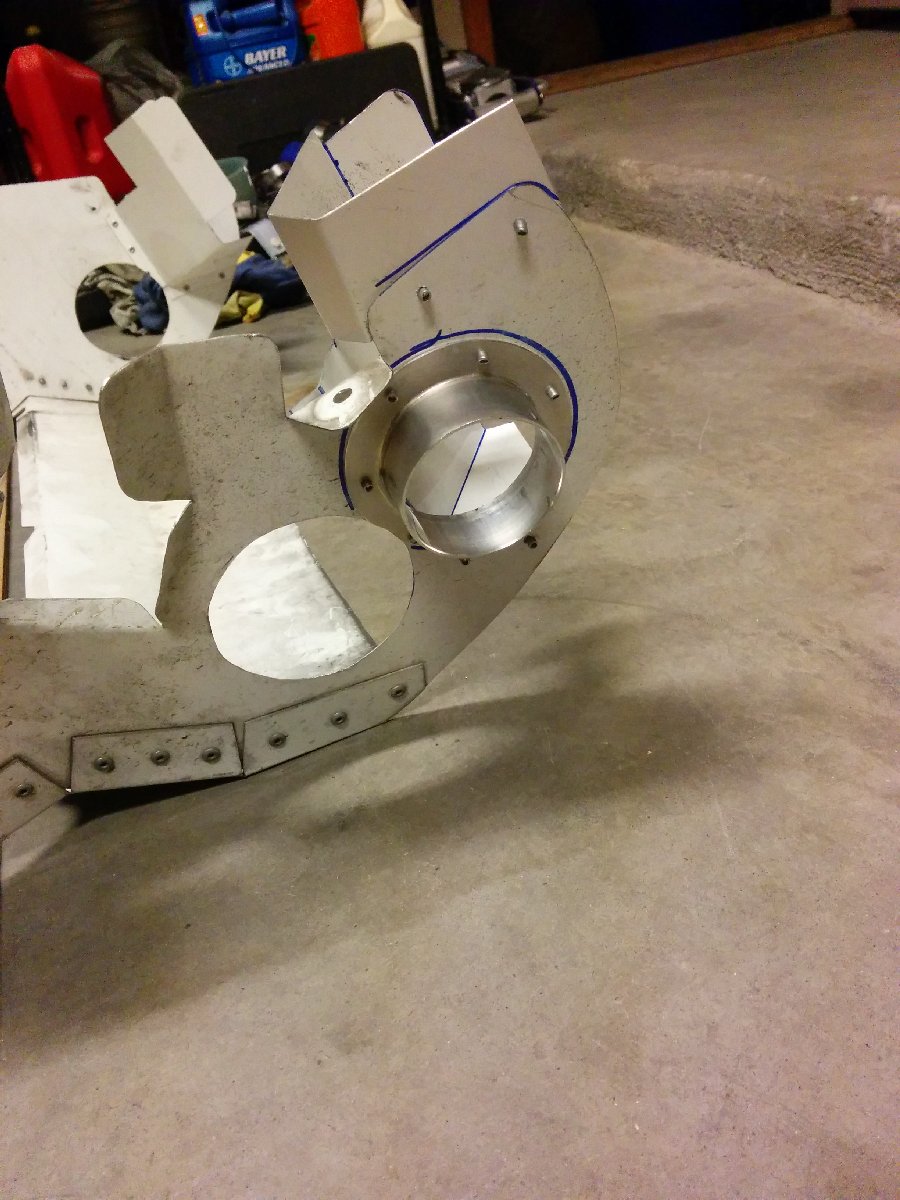
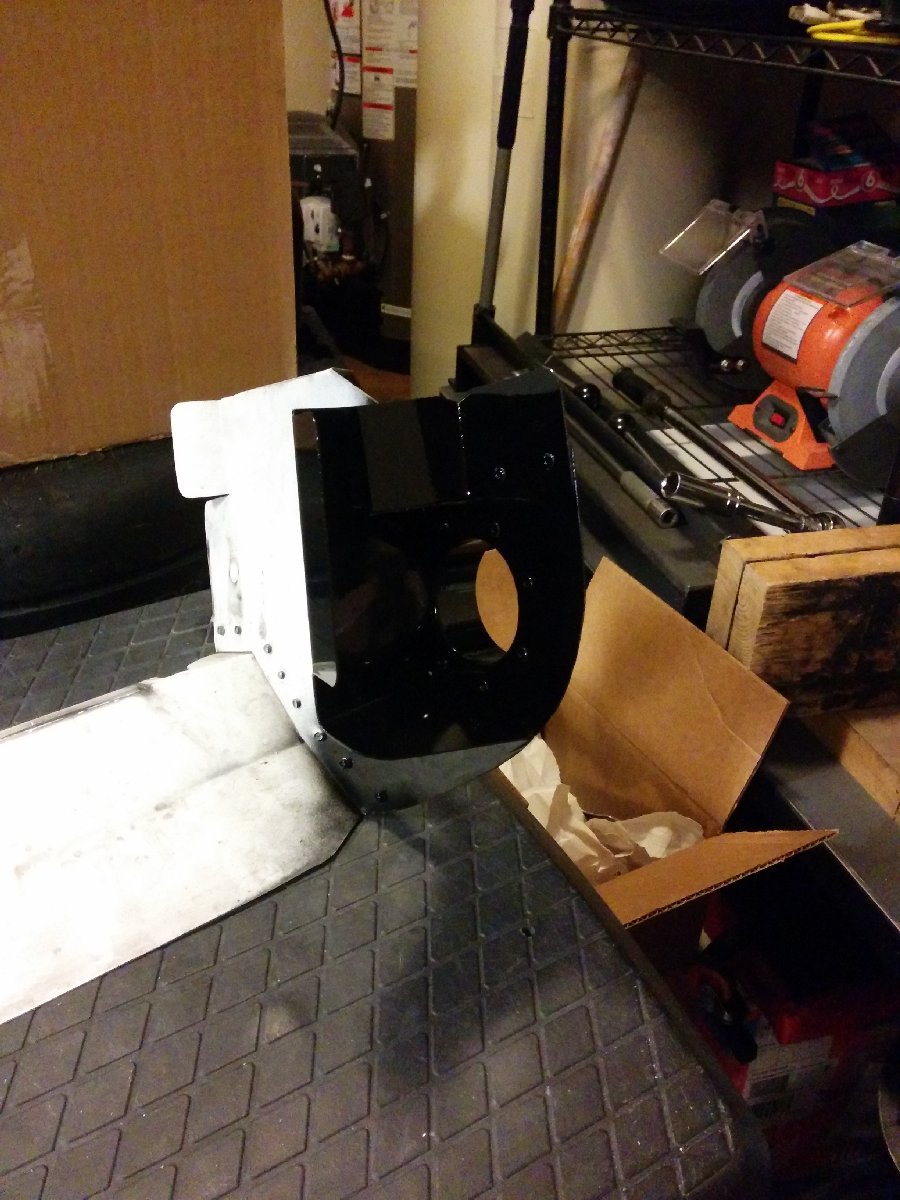
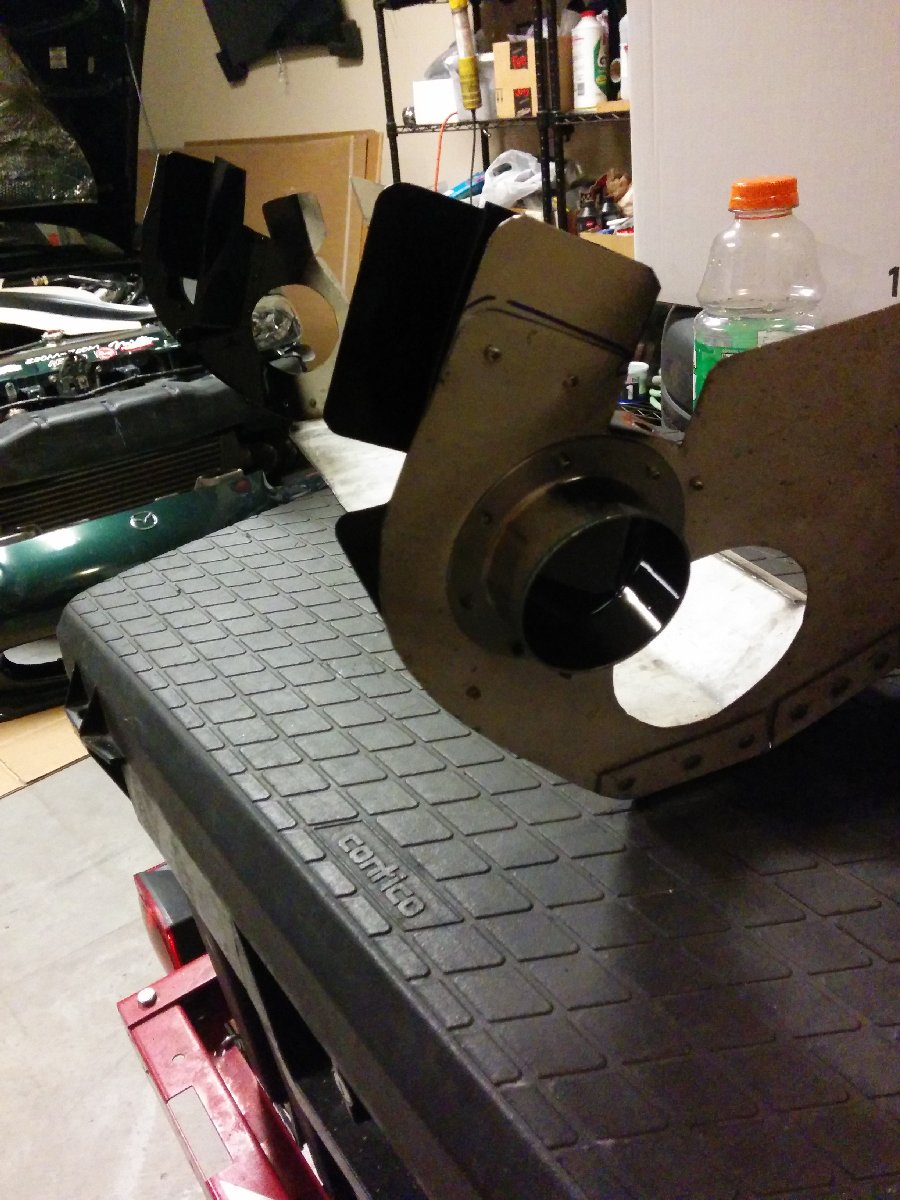
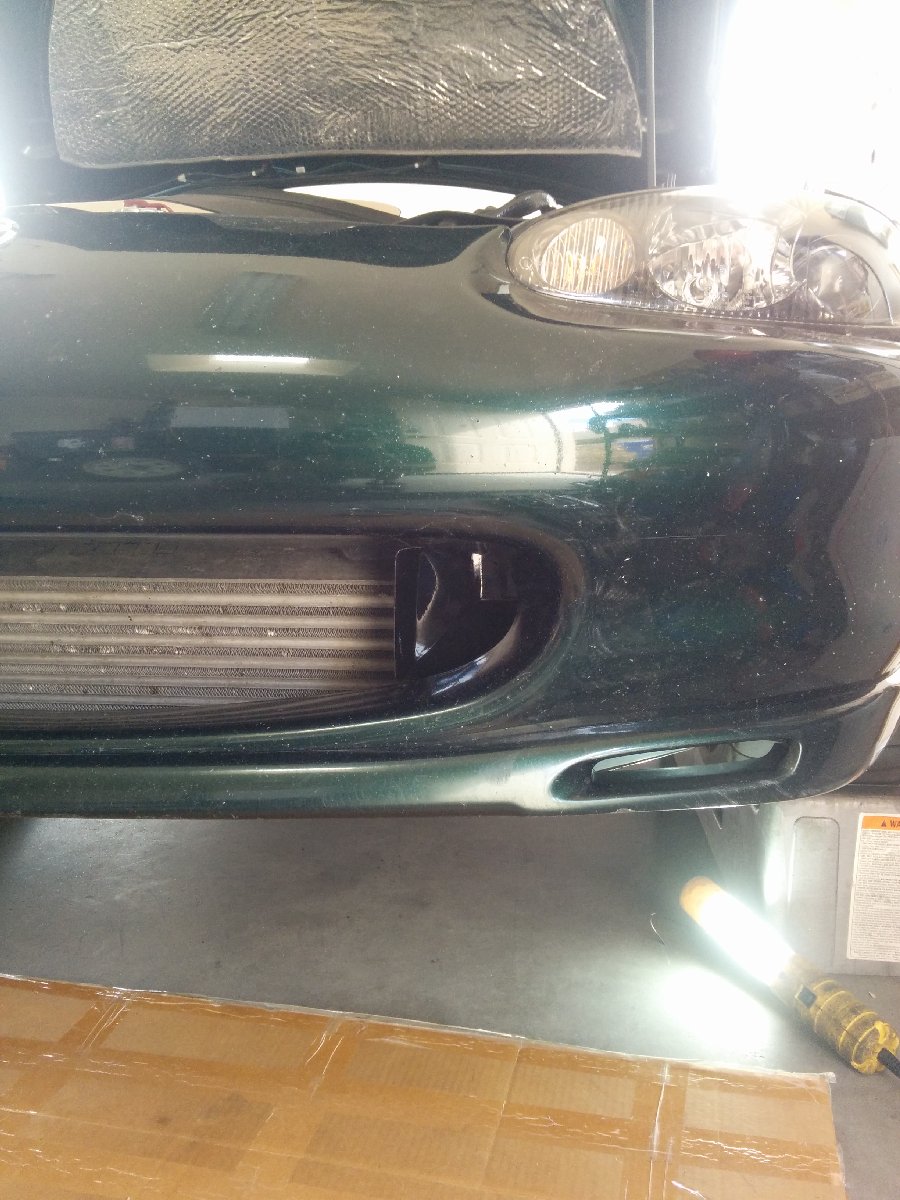
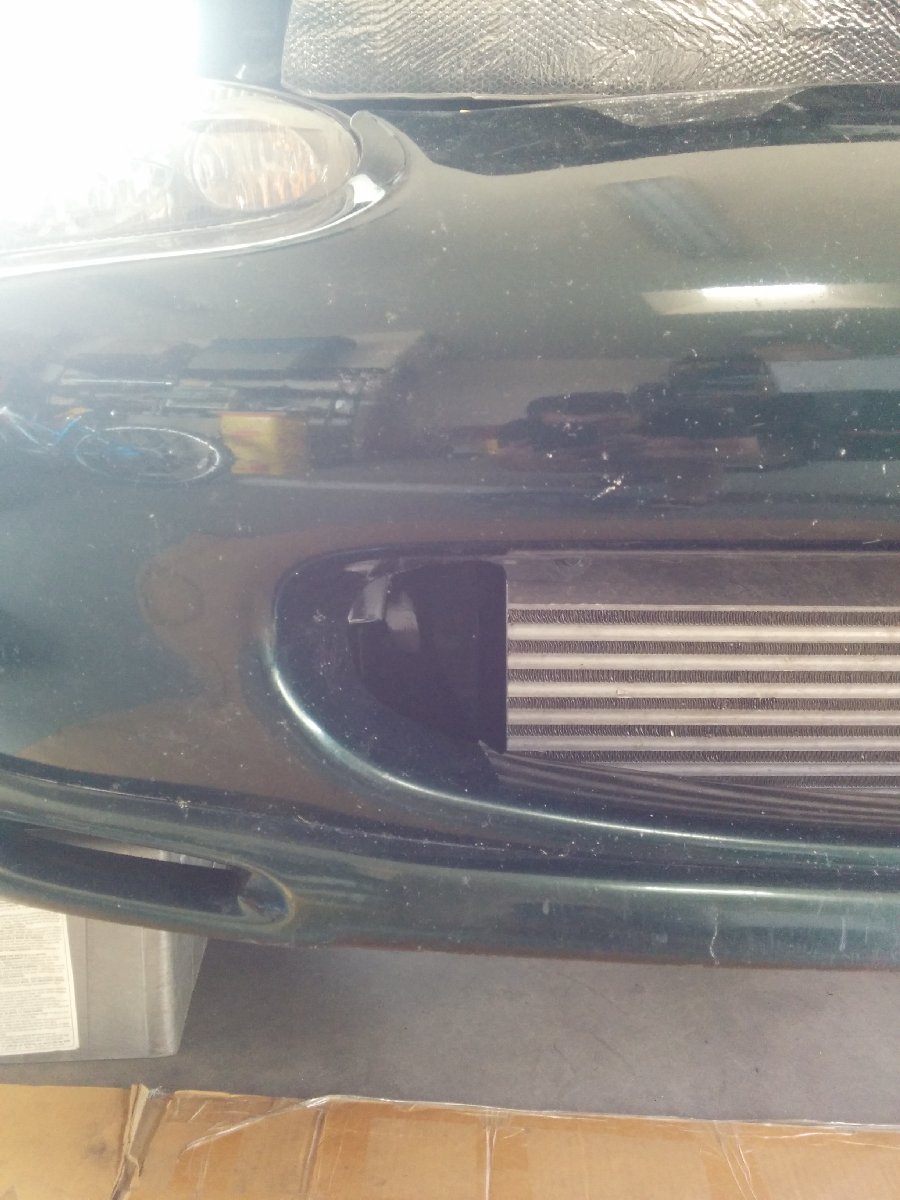
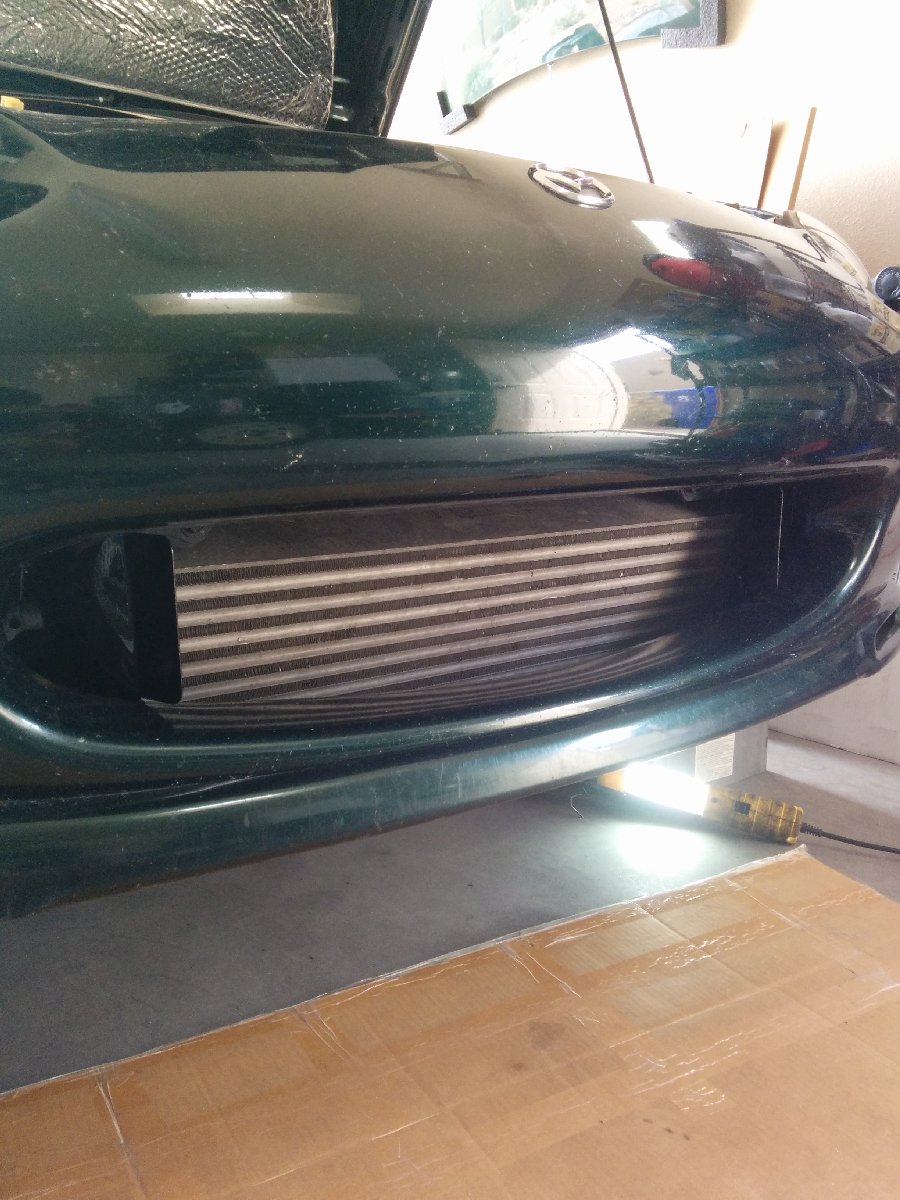
The flange connects to an elbow then will connect to the flex hose to the brake disc duct.
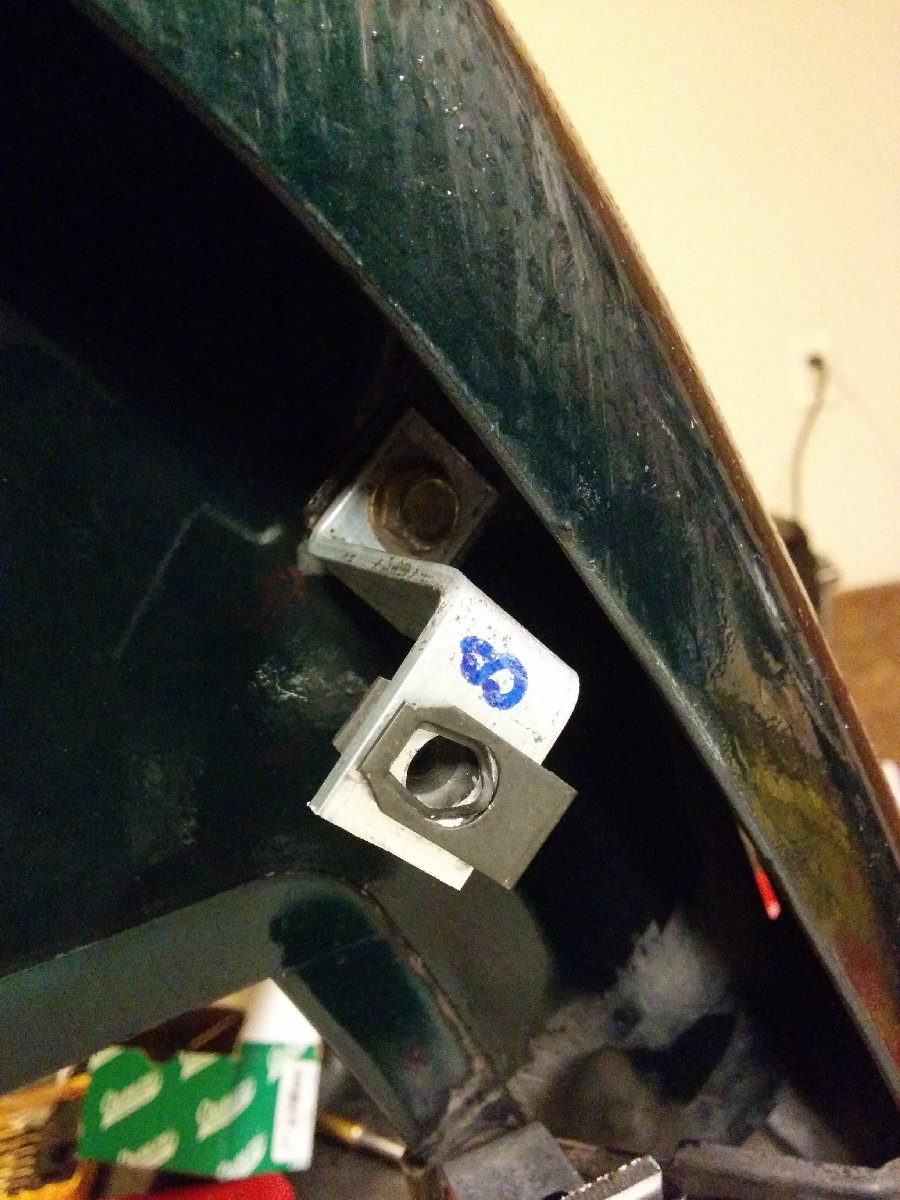
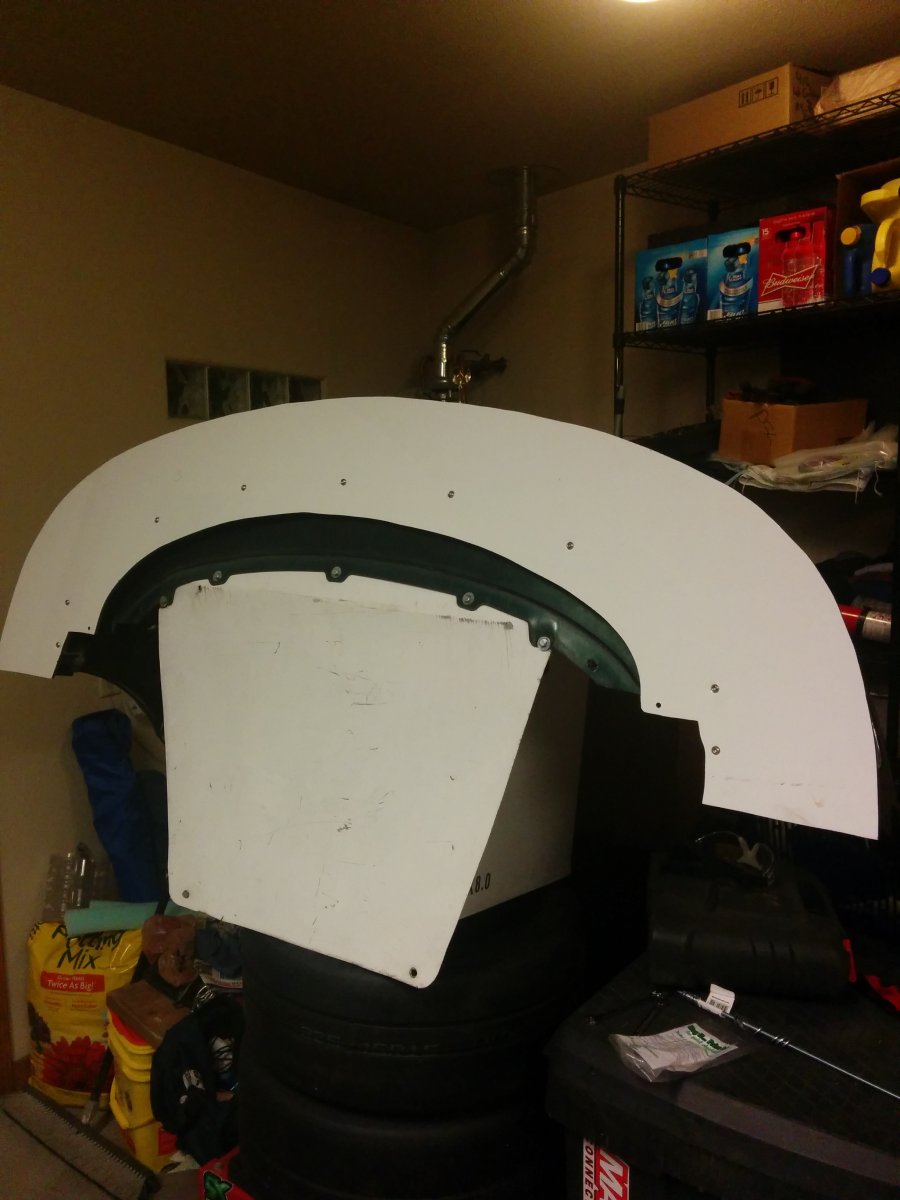
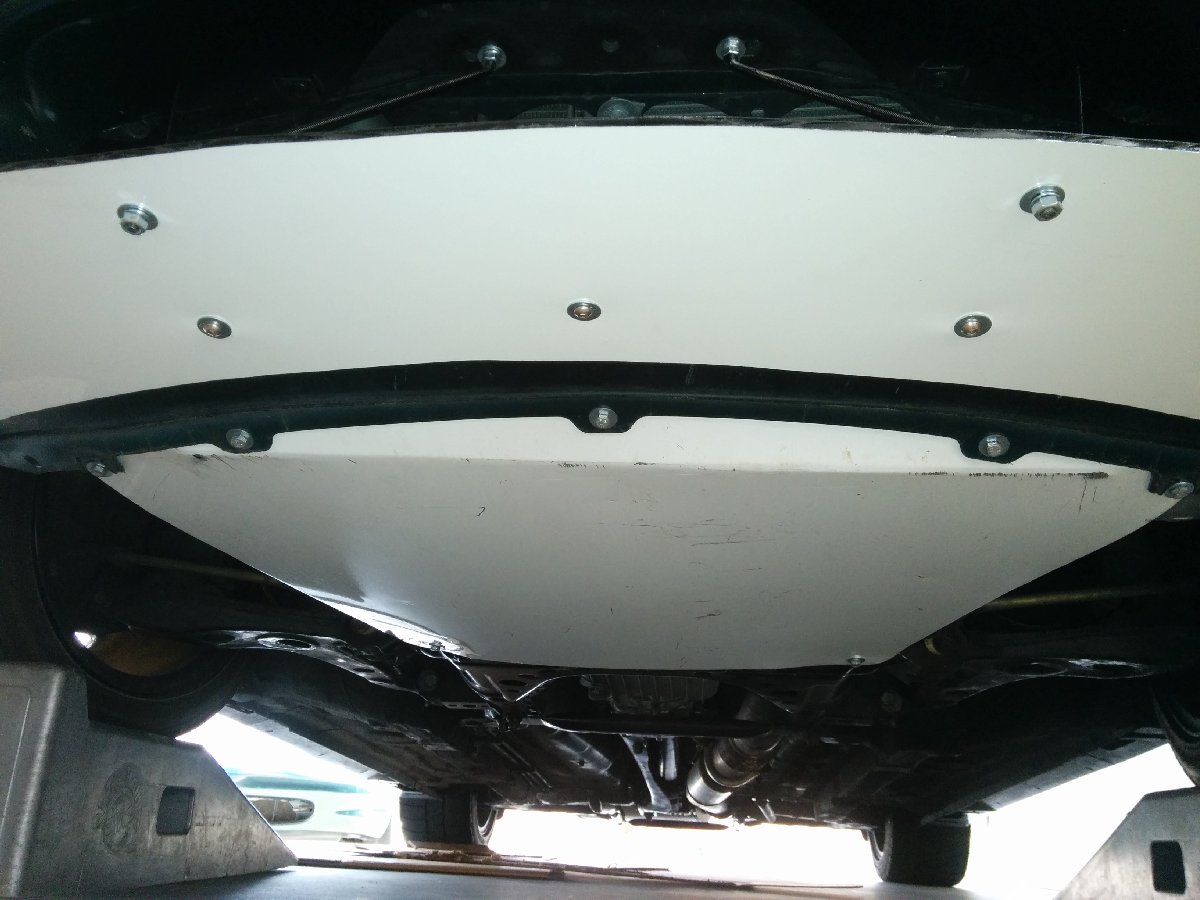
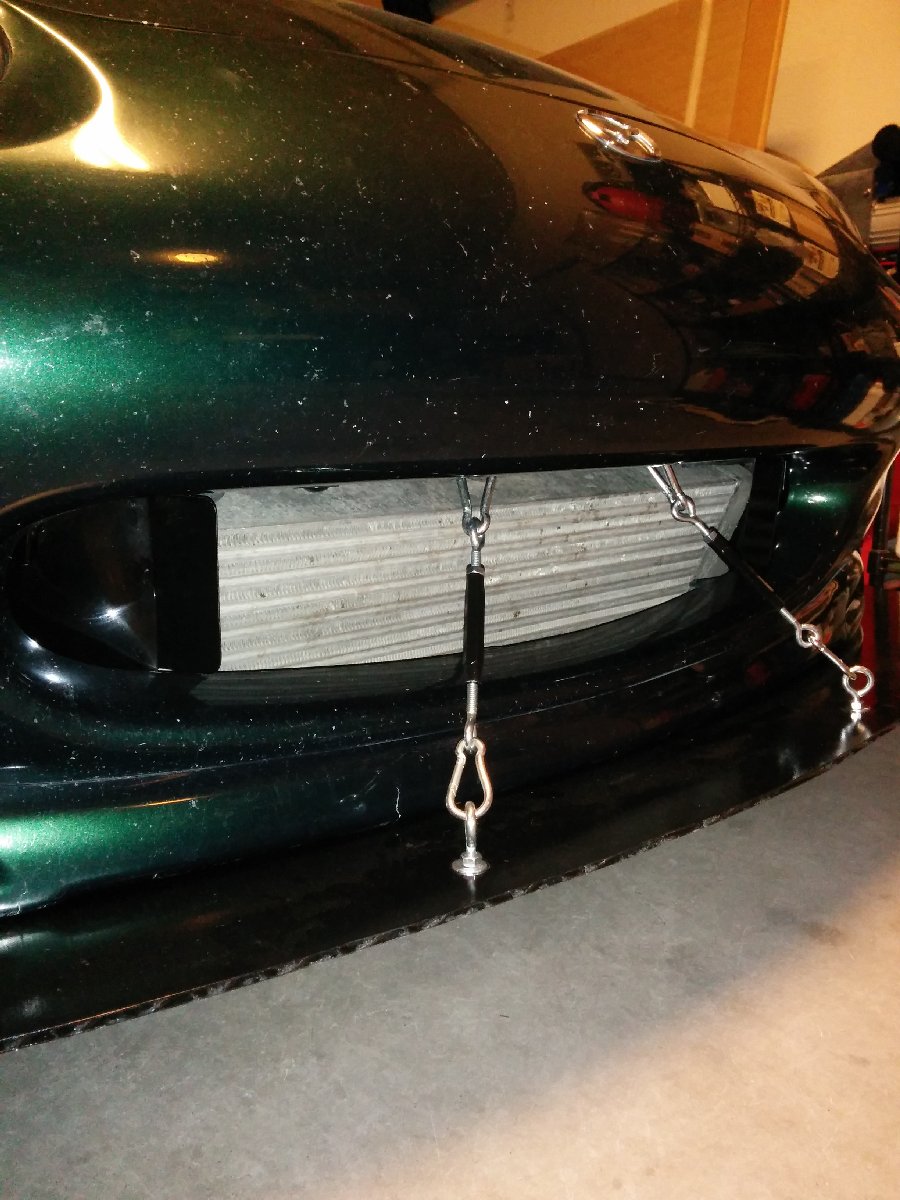
With the bumper air intakes made, I decided to continue with the front bumper splitter while I had the bumper cover off of the car. I bought a sheet of Alumalite to make the splitter. I made brackets to attach it to the bumper cover. I used u-nuts on the brackets for the bolts.
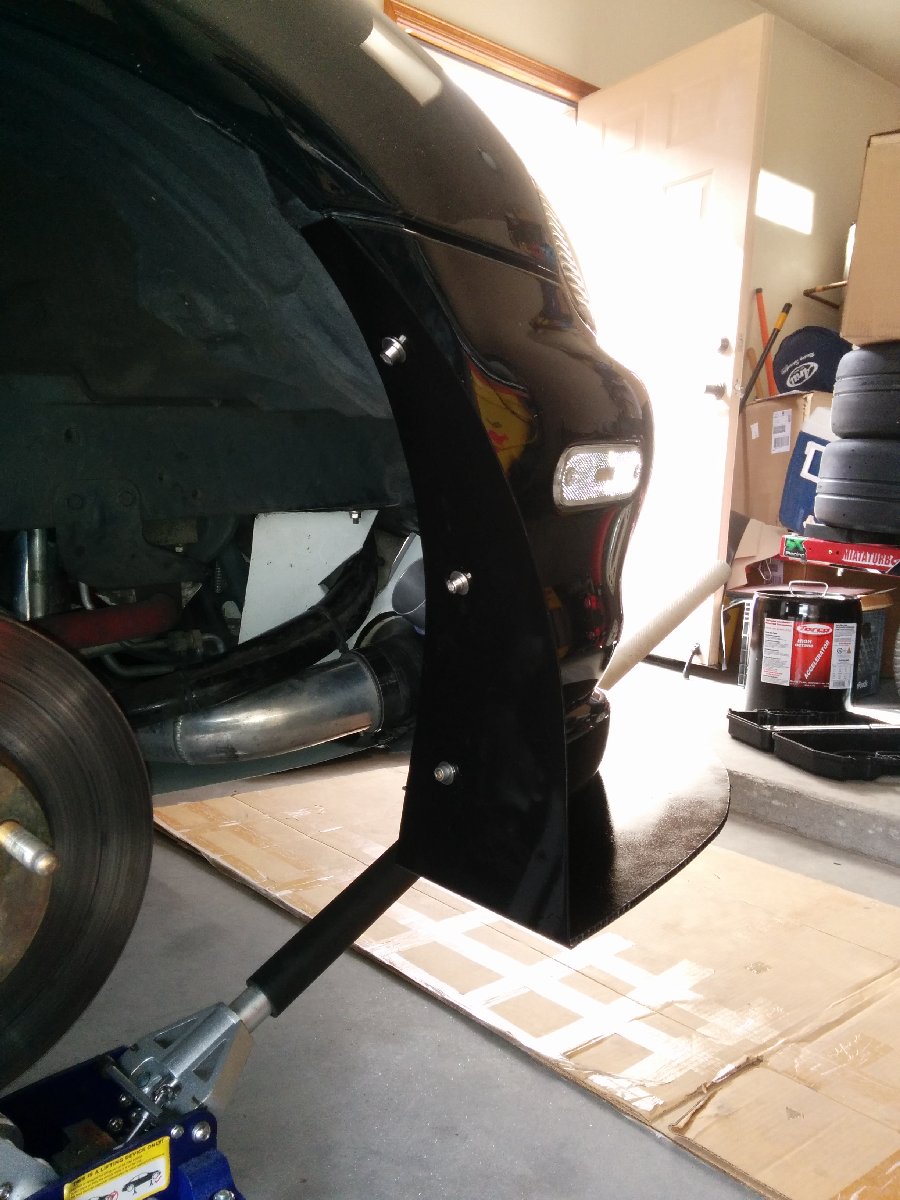
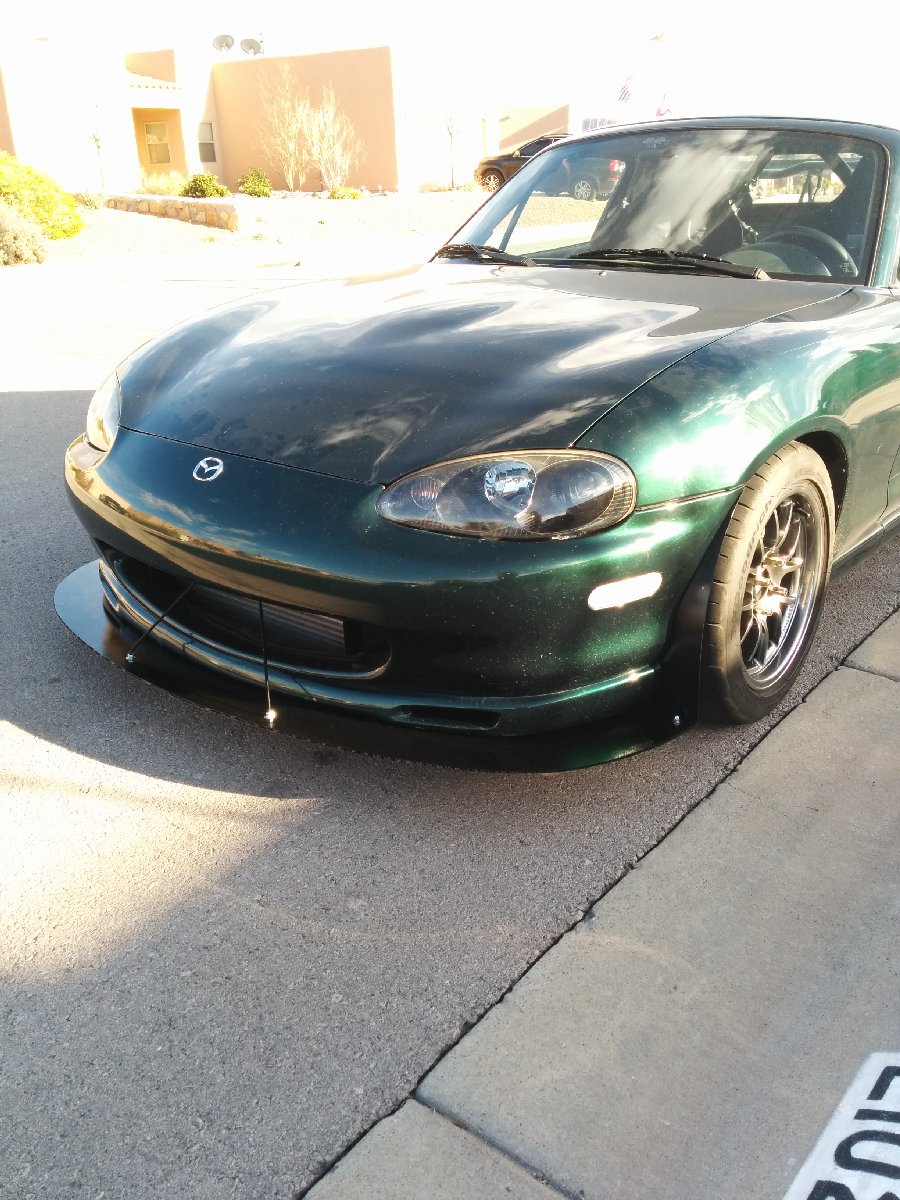
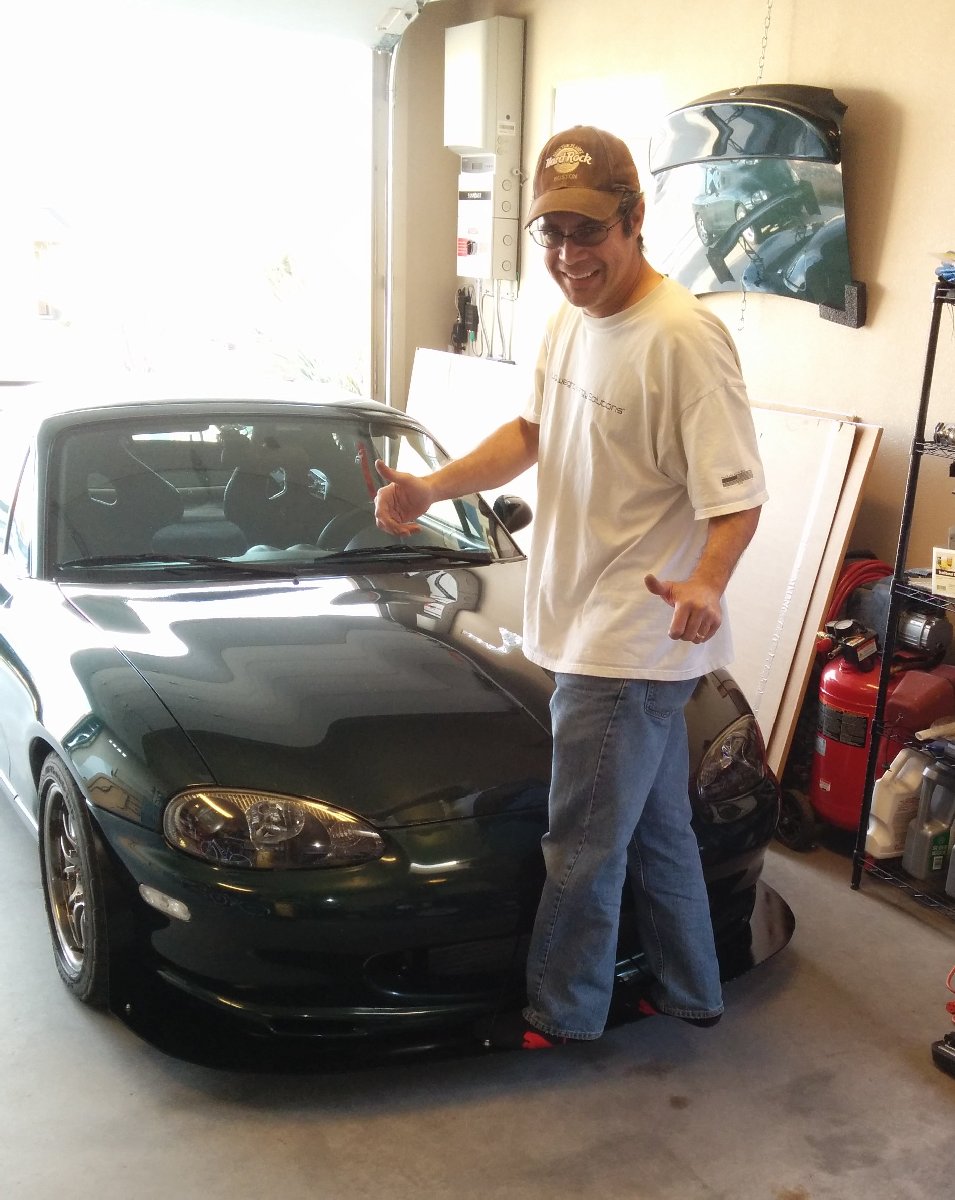
Me doing the splitter standing test
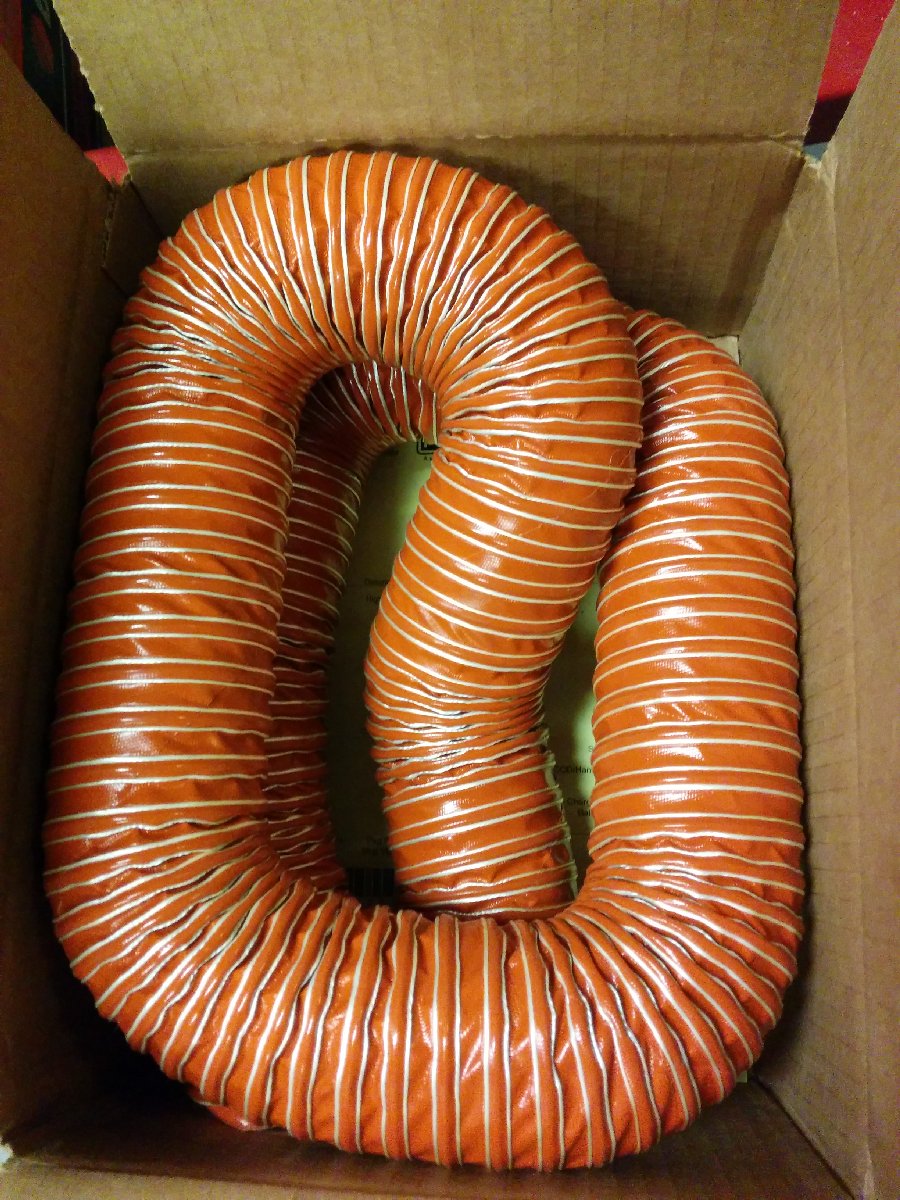
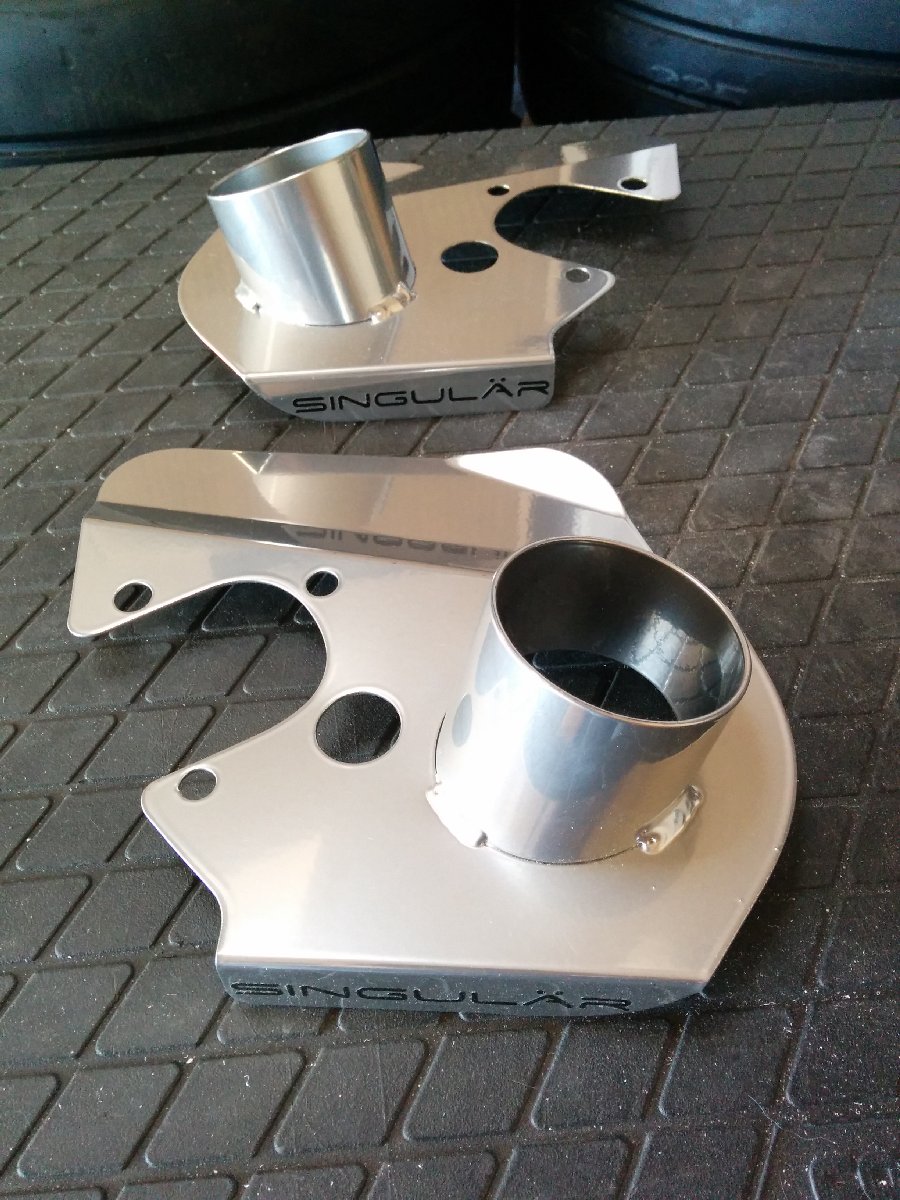
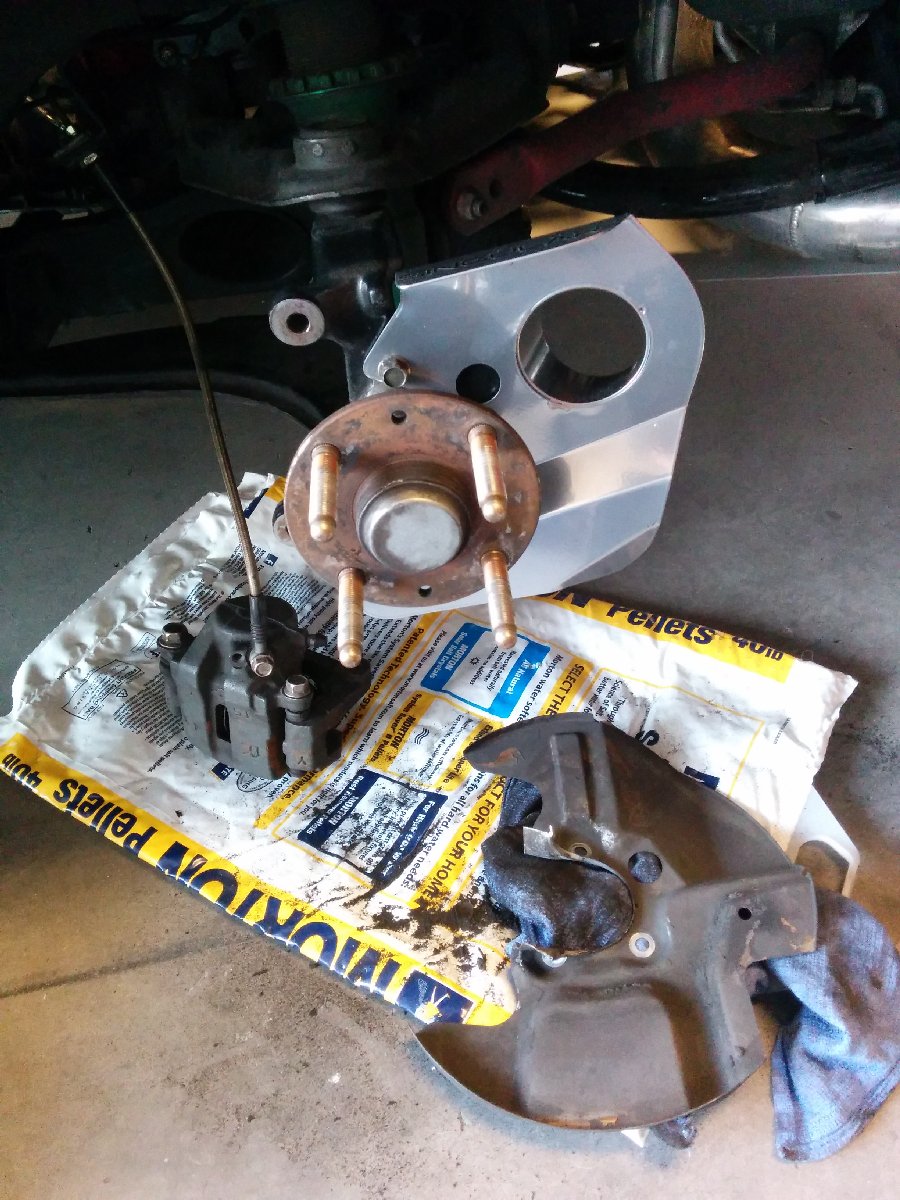
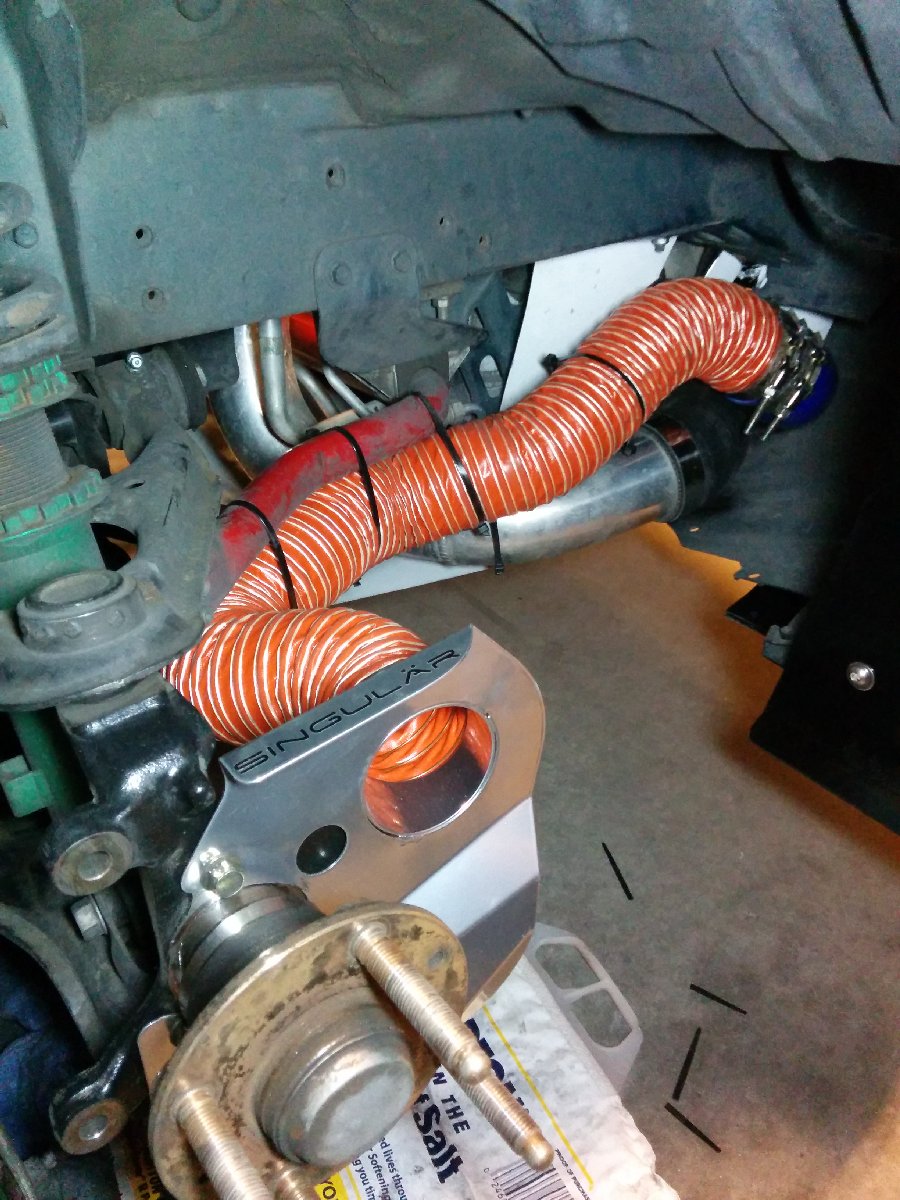
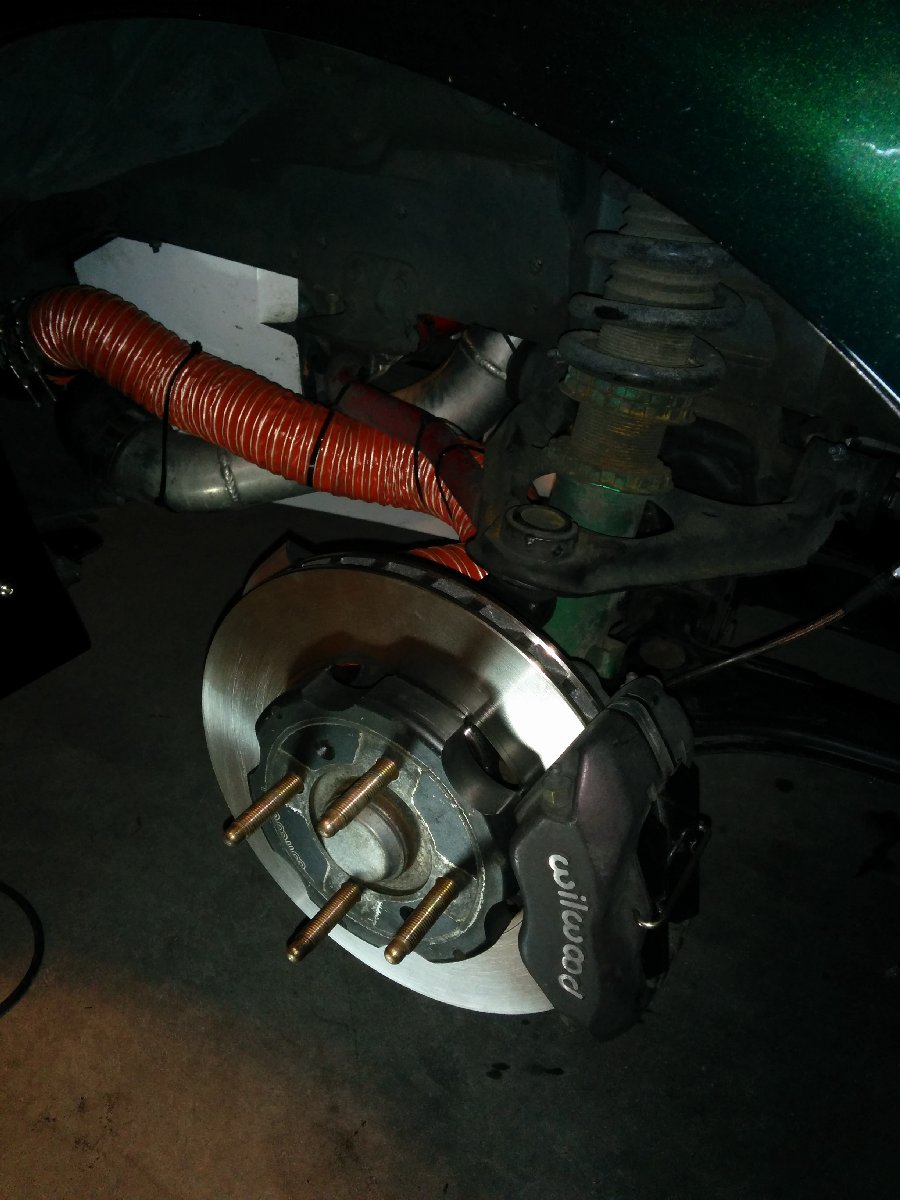
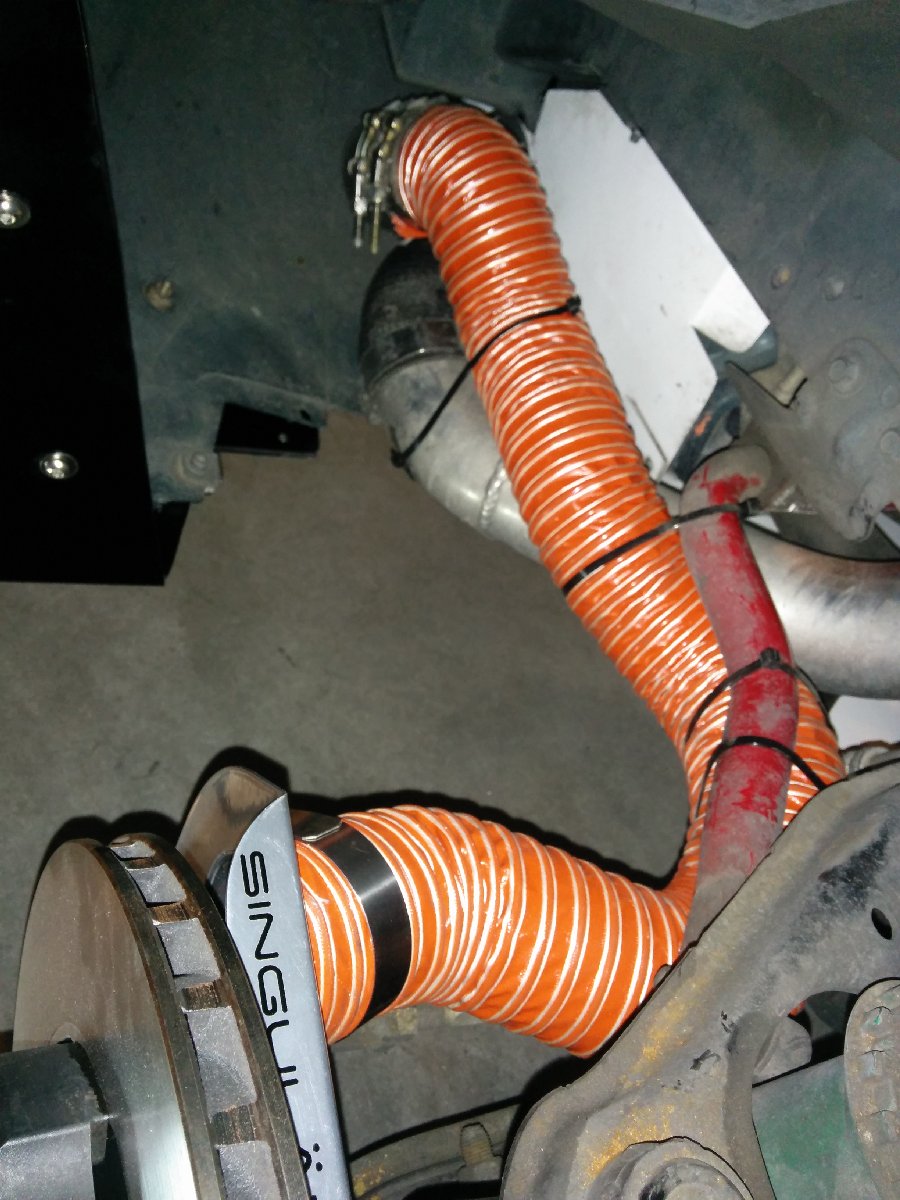
And finally the brake parts! I also ordered Singular 2.5" brake duct plates and Hawk DTC-60 pads from Trackspeed. I also ordered a set of directional rotors from 949Racing. I got the silicone duct hose from Pegasus Auto Racing.

I ordered a set of Maxxis 225/45-15 Victra RC-1 tires and Jongbloed 15 x 8 wheels. Black wheels for the track and silver for the street.
I also made a set of side plates for the wing.
I bought flanges from AircraftSpruce and made air ducts in the mouth of the bumper. I integrated them into the intercooler ducting that I had previously made. I first made cardboard templates and then transferred them to aluminum sheet and then riveted them in and painted them black.
The flange connects to an elbow then will connect to the flex hose to the brake disc duct.
With the bumper air intakes made, I decided to continue with the front bumper splitter while I had the bumper cover off of the car. I bought a sheet of Alumalite to make the splitter. I made brackets to attach it to the bumper cover. I used u-nuts on the brackets for the bolts.
Me doing the splitter standing test
And finally the brake parts! I also ordered Singular 2.5" brake duct plates and Hawk DTC-60 pads from Trackspeed. I also ordered a set of directional rotors from 949Racing. I got the silicone duct hose from Pegasus Auto Racing.
Reply
2
2
 03-10-2015, 11:24 AM
#612
Elite Member
Thread Starter
iTrader: (16)
Join Date: Oct 2006
Location: Las Cruces, NM
Posts: 1,647
Total Cats: 524
Last night I finally got to do the brakes. The Hawk pads are worse than the Carbotech pads. I had to re-drill and grind the holes to get them to line up and notch the top edge to make room for the pin.

Reply
1
1
03-19-2015, 04:15 PM
#614
Elite Member
Thread Starter
iTrader: (16)
Join Date: Oct 2006
Location: Las Cruces, NM
Posts: 1,647
Total Cats: 524
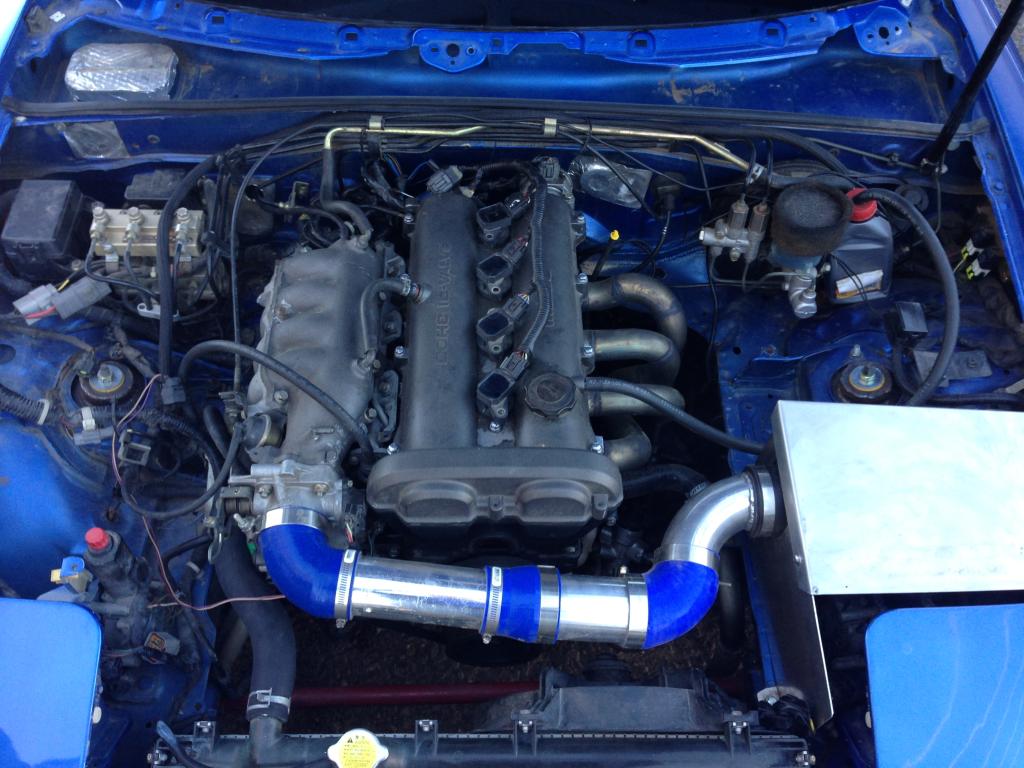
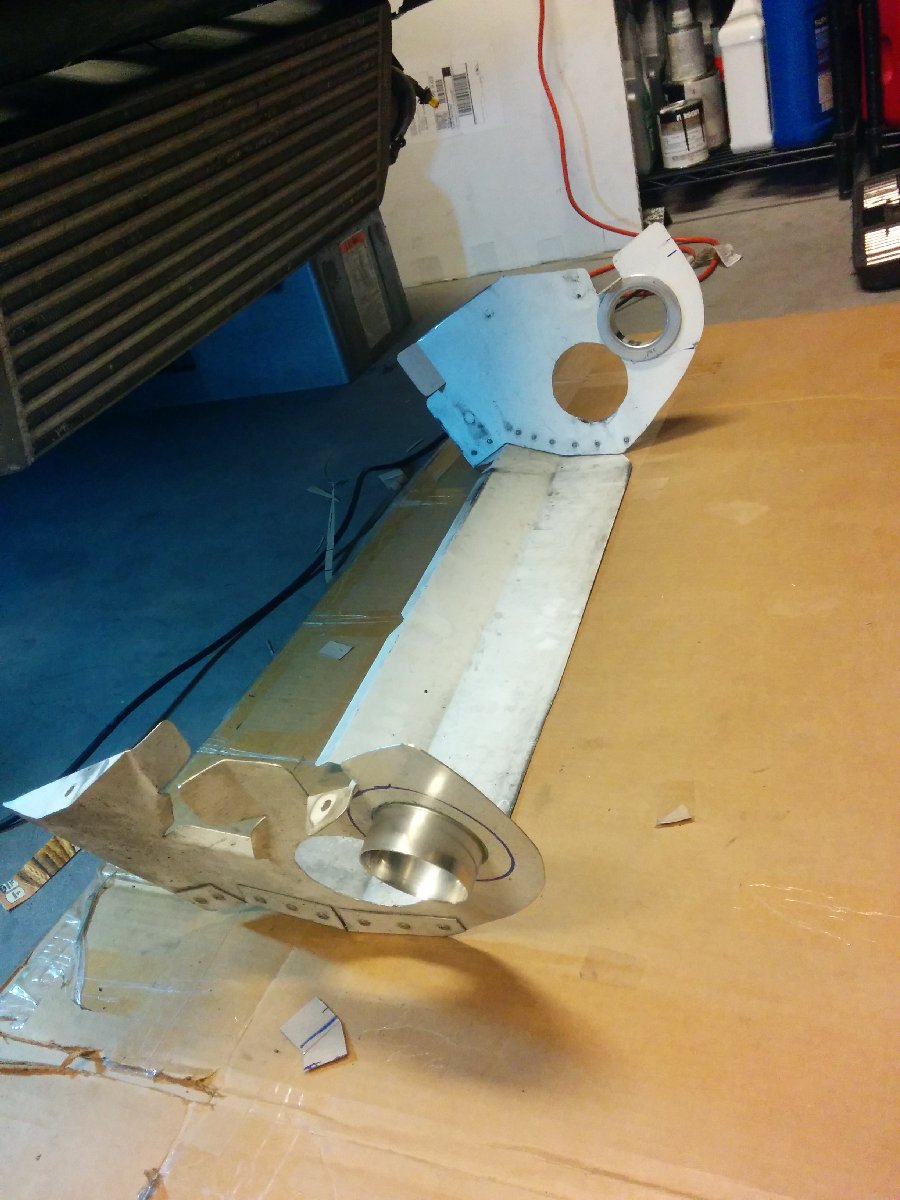
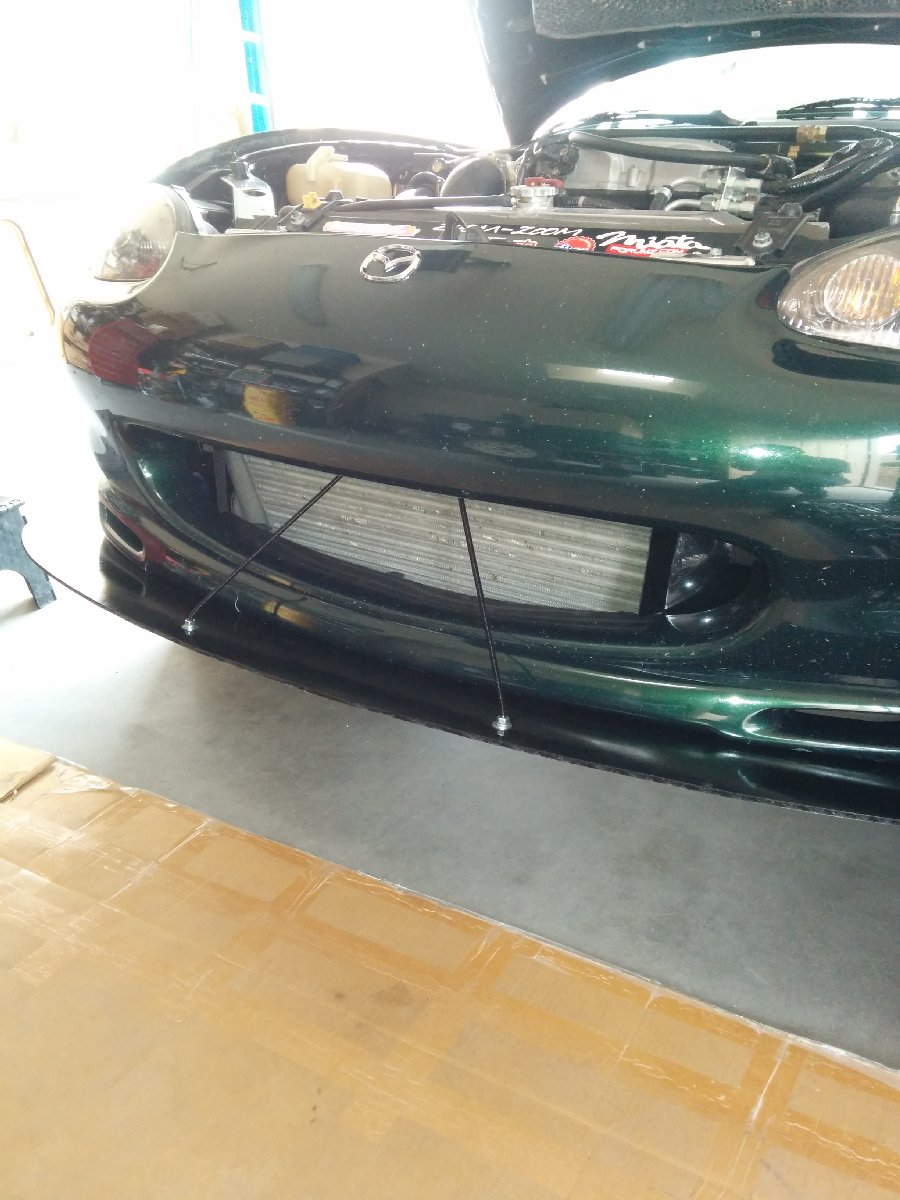
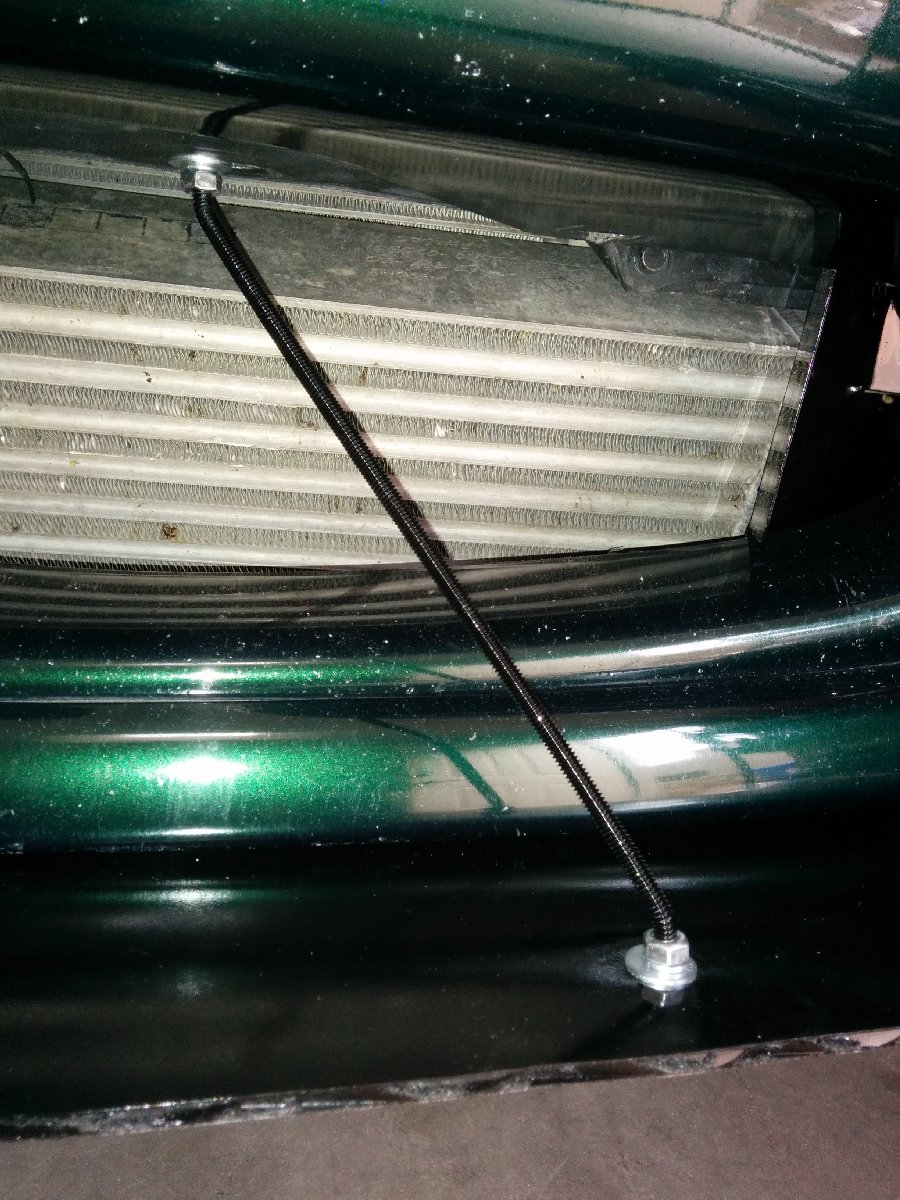
I realized that if the splitter is hit from below, it could potentially bend the rigid supports and hold the splitter in the bent position or break the supports and cause damage to the intercooler or radiator. I made new semi-rigid supports that will allow the splitter to return back to its original position if it receives an impact from below. I can also easily remove the supports.
The supports are made with cable tensioners and snap link hooks and eye bolts.
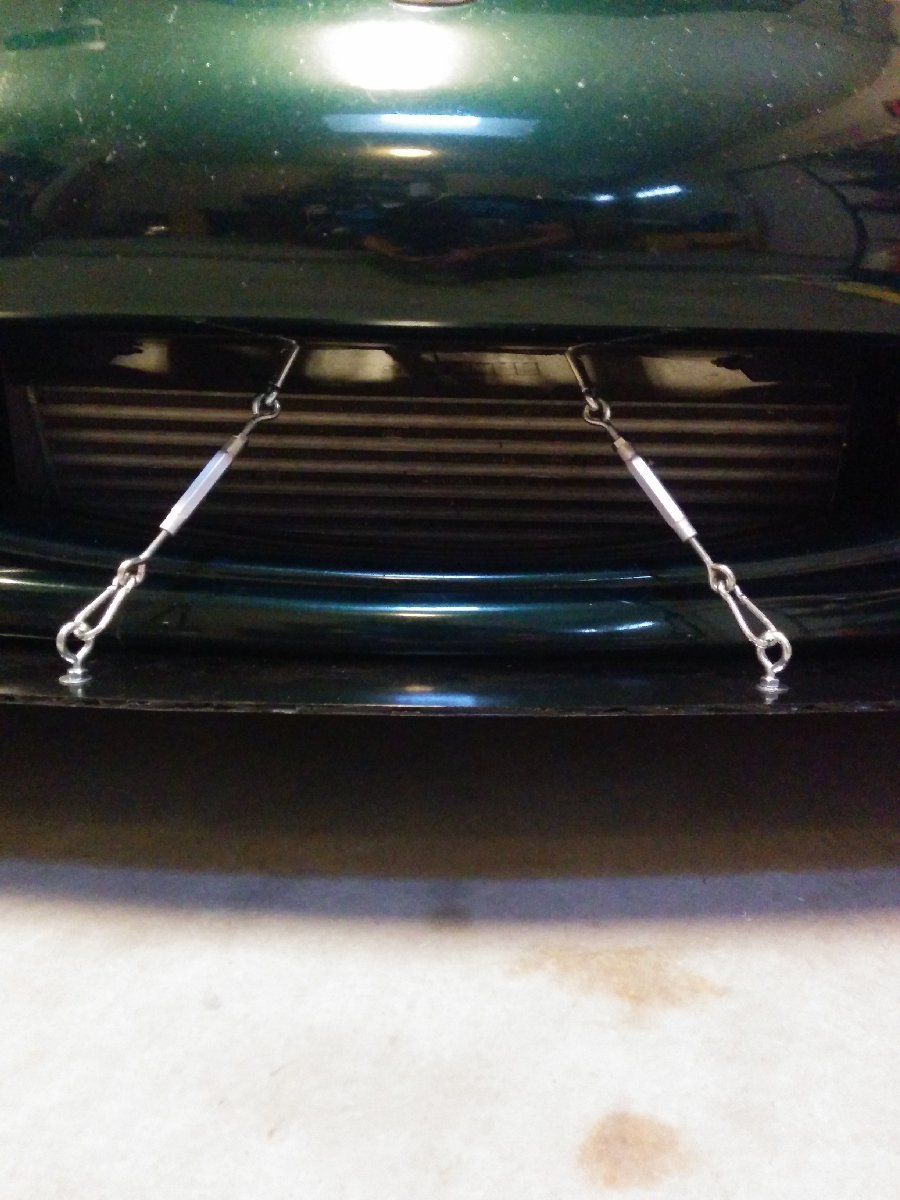
I painted the tensioner bodies black. You can also see the bumper mouth brake ducts.
The supports are made with cable tensioners and snap link hooks and eye bolts.
I painted the tensioner bodies black. You can also see the bumper mouth brake ducts.
Reply
0
0
 04-20-2015, 01:45 AM
#619
Elite Member
Thread Starter
iTrader: (16)
Join Date: Oct 2006
Location: Las Cruces, NM
Posts: 1,647
Total Cats: 524
Thanks for the comments! It feels like "the business" when I put my foot in it 
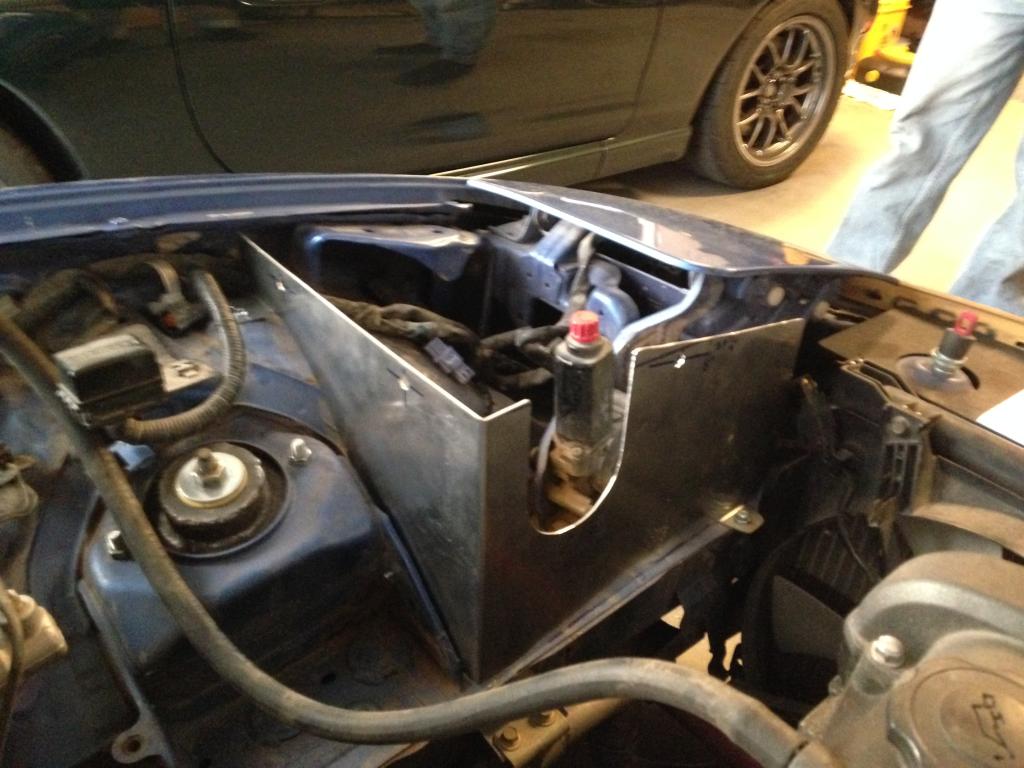
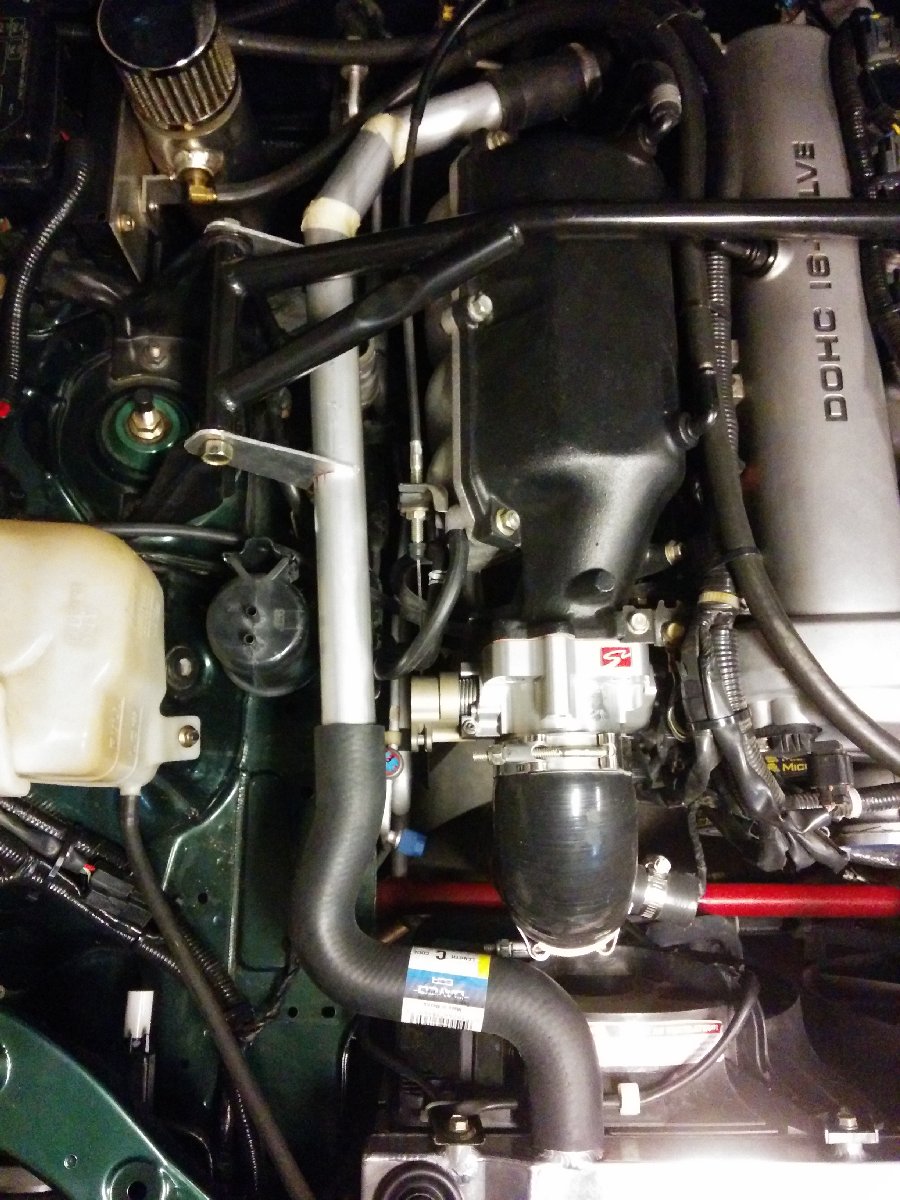
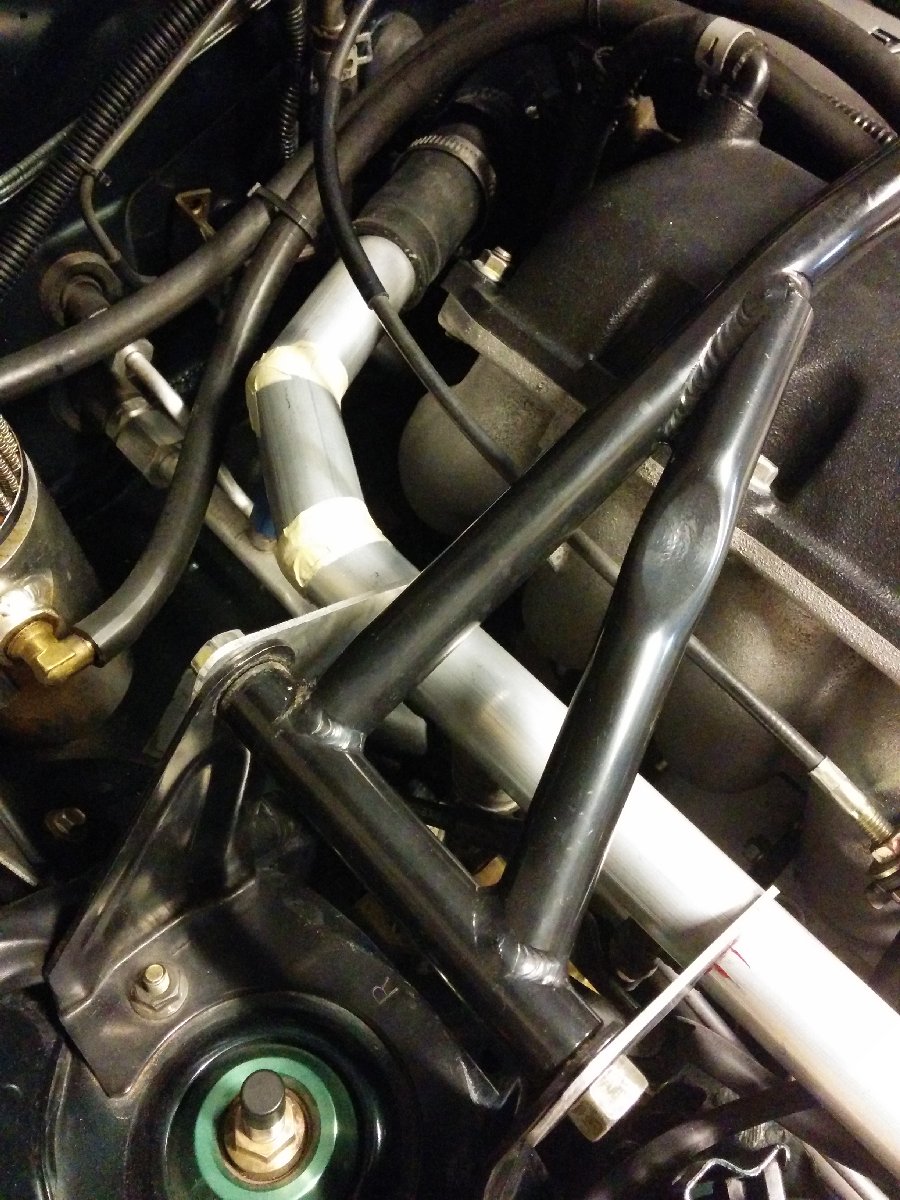
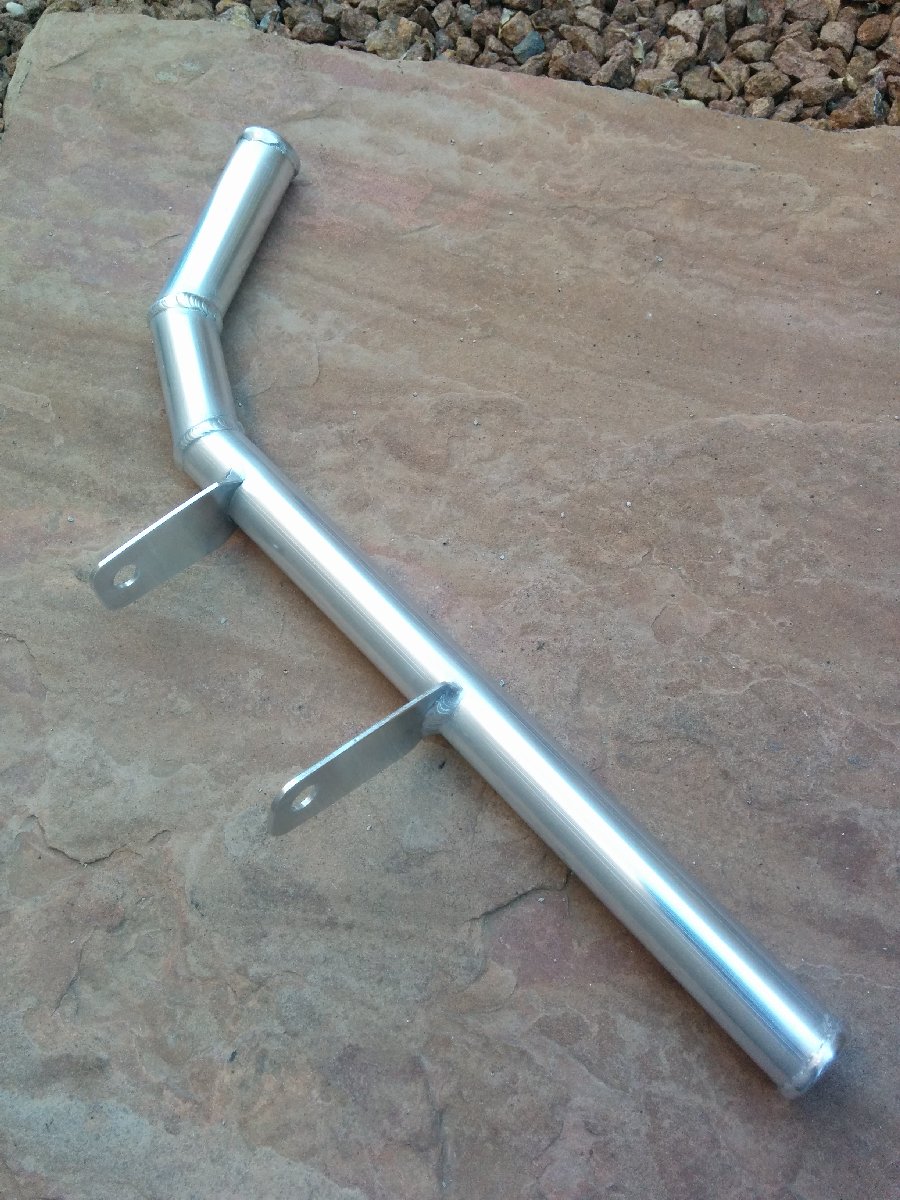
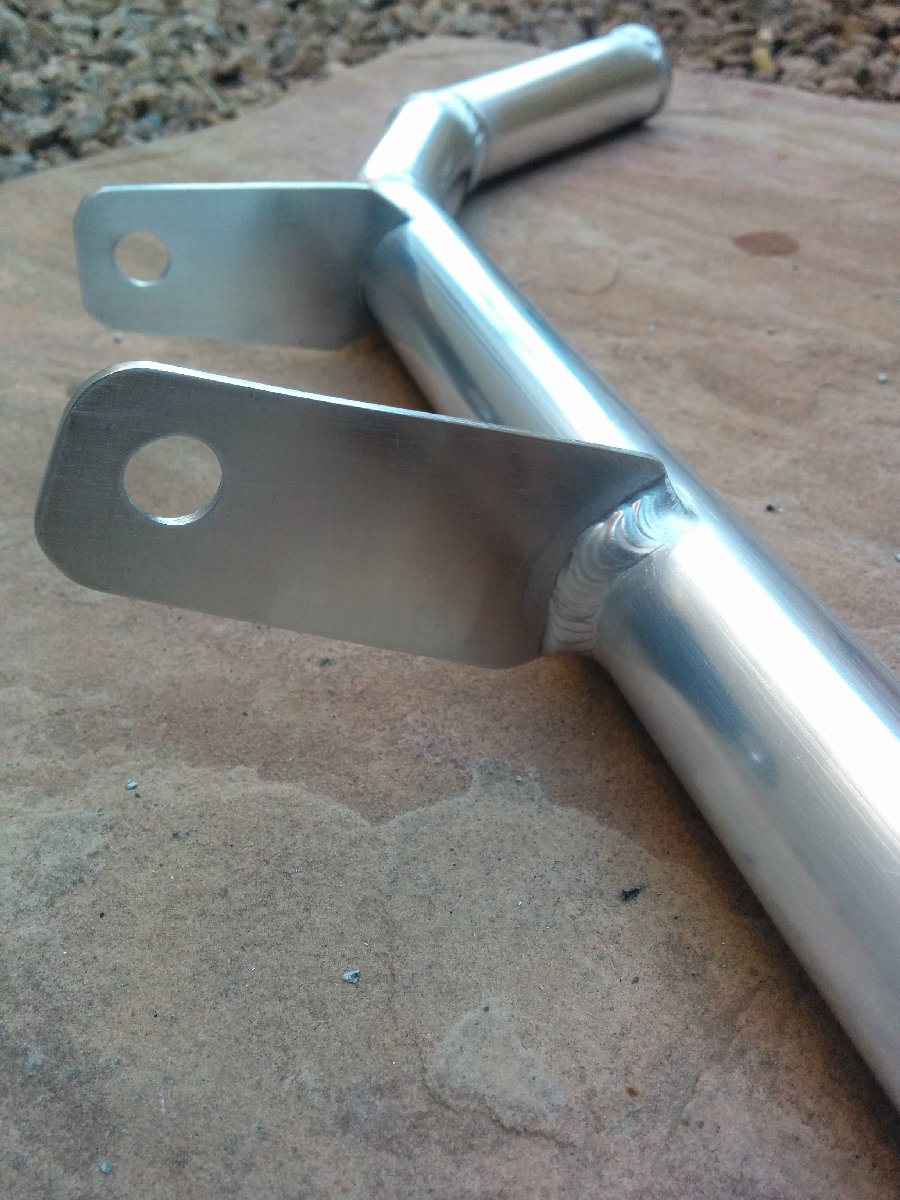
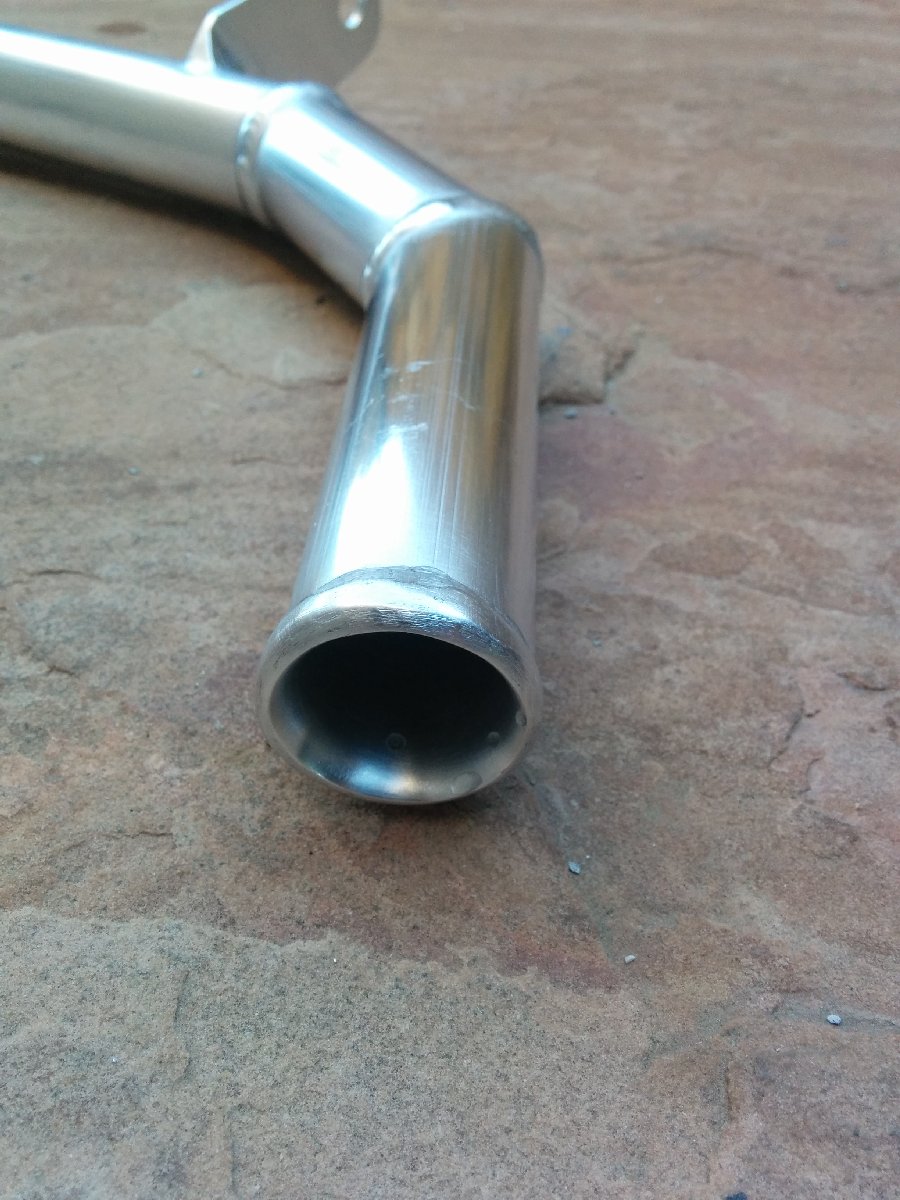
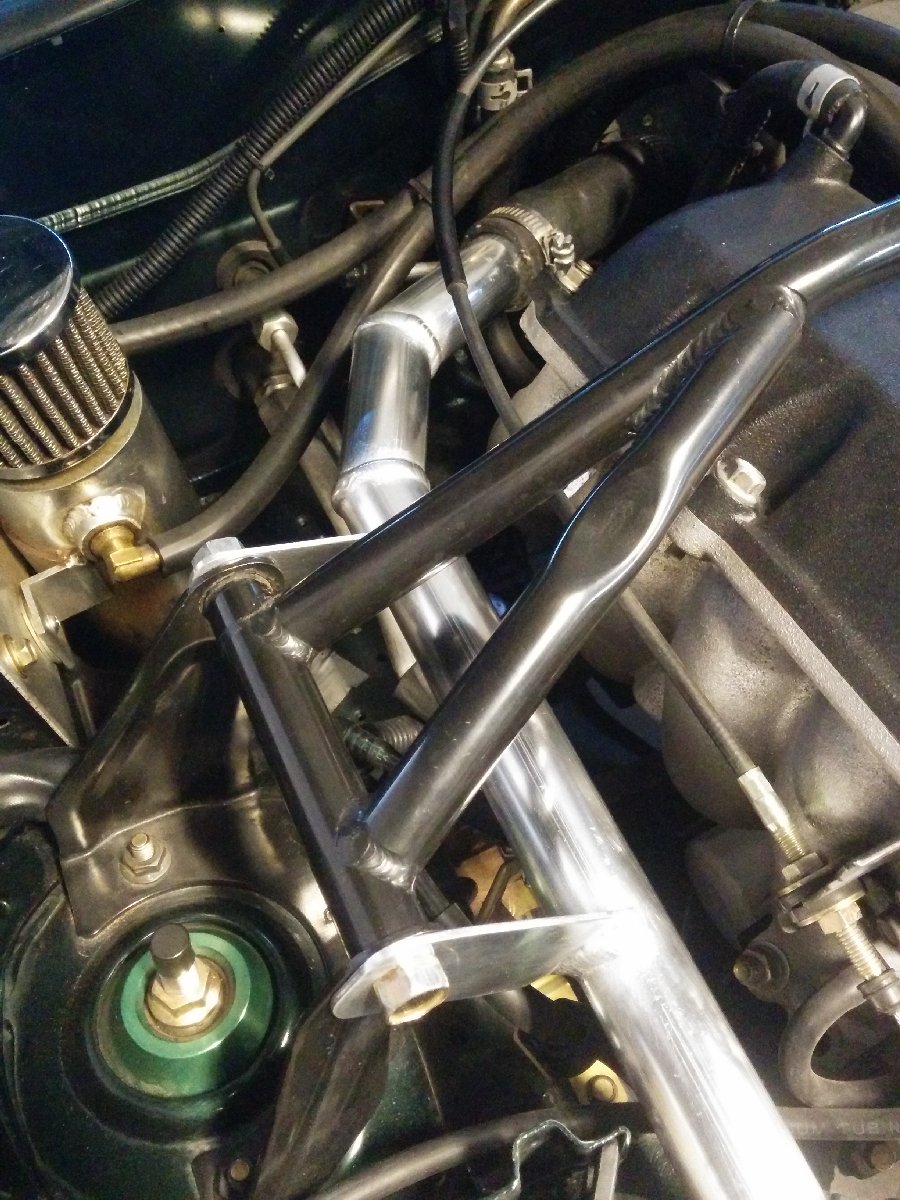
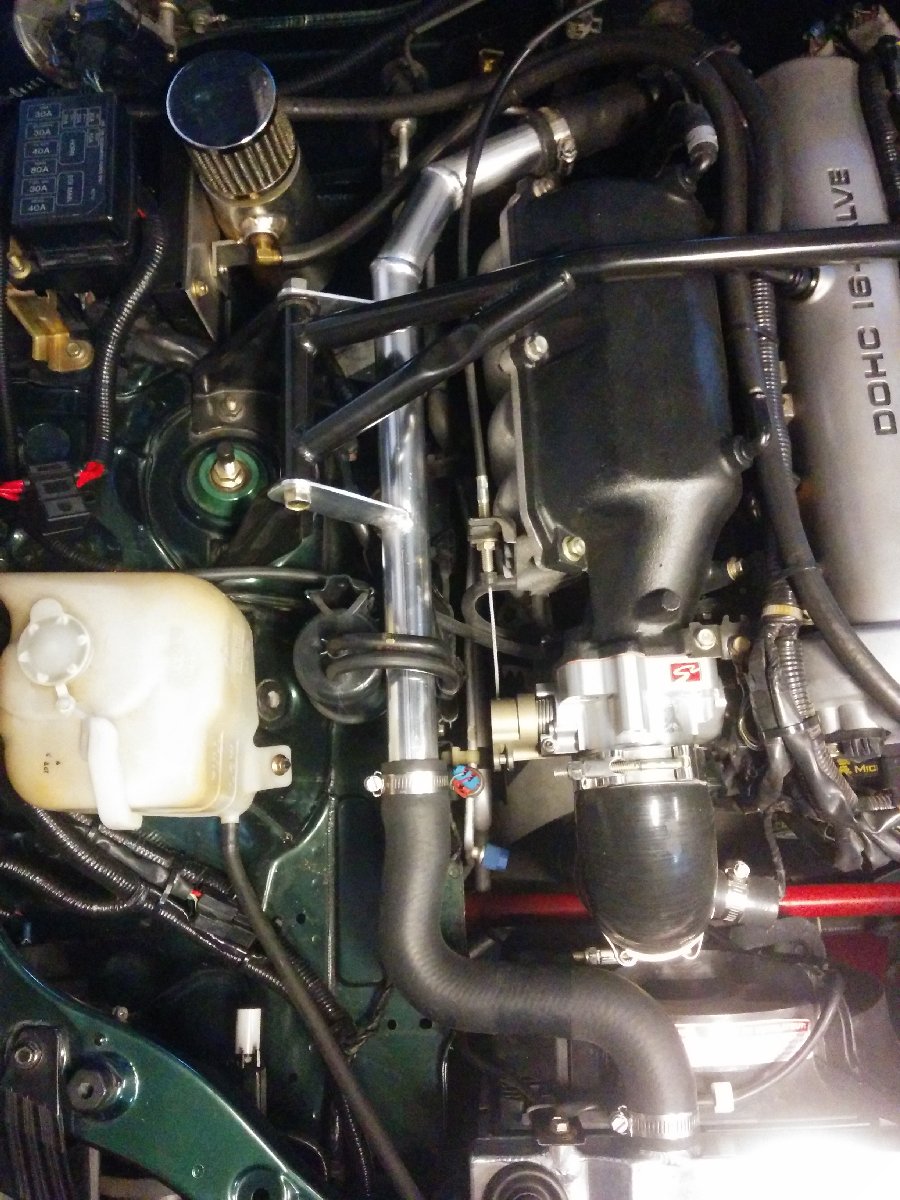
I always wanted to get rid of that long coolant hose, so I made a hard line to replace the GM truck hose. I bought schedule 40 aluminum tube and cut the pieces and taped them together to fit. I also made some cardboard pieces to make patterns for the mounts. I went to the local Autozone to get hose to to fit.
Here it is mocked up.
It feels like "the business" when I put my foot in it I always wanted to get rid of that long coolant hose, so I made a hard line to replace the GM truck hose. I bought schedule 40 aluminum tube and cut the pieces and taped them together to fit. I also made some cardboard pieces to make patterns for the mounts. I went to the local Autozone to get hose to to fit.
Here it is mocked up.
Reply
0
0


