When you click on links to various merchants on this site and make a purchase, this can result in this site earning a commission. Affiliate programs and affiliations include, but are not limited to, the eBay Partner Network.
My first welding project was my subframe reinforcements as well haha. I'm jealous of the TIG welder, I haven't spent the money to move on to learning TIG yet but I'm dying to! Awesome work.
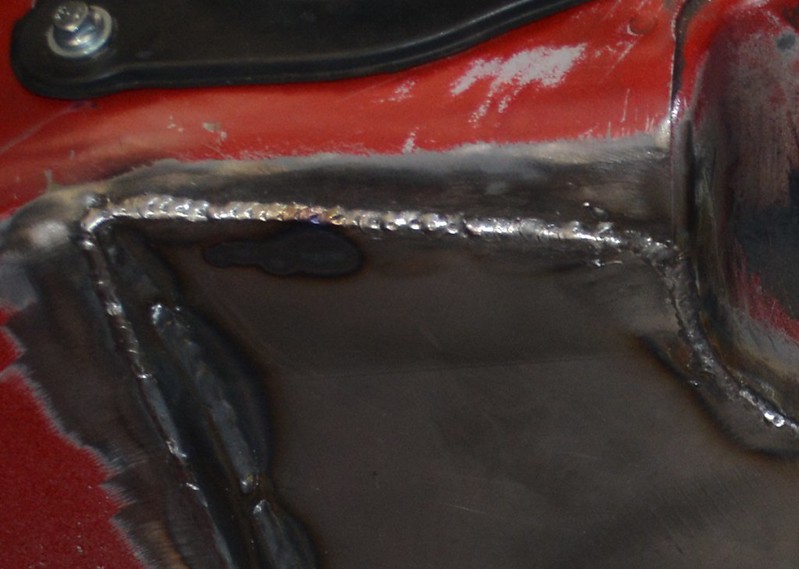
My dad started welding together some of the edges in the engine bay. No filler. We're doing this in addition to the stitch welding of the chassis. Also in the last picture you can see where we bent up the shelf for a little more downpipe clearance and it matches the way the front section closer to the camera is bent from the factory.
Just cruising on the chassis welding now. Little sandblaster from Harbor Freight actually works pretty good.
Using the mig to stitch and patch holes. Gonna grind down all the patches and use just a tiny bit of filler to try to make the engine bay look showcar quality.
Welding shut all the holes in the engine bay for extra show car points too. Starting to lose my patience with all this dirty thin sheet metal though. The old harbor freight grinder will probably sacrifice its life during the next part of this process...
If a mod sees this and wants to change the thread title that would be awesome, will reward with poscat. Not planning on ST5 anymore so...
Well, it looks like **** currently but it's gonna look really good.
Yeah definitely looks like hot garbage right meow. One of the worst parts of the process that's for sure. Trying to go for that super clean shaved/tucked look. Custom bare bones harness, all master cylinders, ABS module, and brake/clutch lines are moving inside the car mainly so I can run tubes from cage to shock towers, brake booster deleted, all holes patched, welded shut and grind them smooth, radiator leaned forward and mostly hidden, oil cooler and intake box will be hidden under the pop up light covers, whole bay painted high gloss white. Some anodized purple accents where possible and gonna hydrodip the valve cover with like a purple/blue galaxy pattern maybe?
Originally Posted by 99mx5
I must say that jack placement scares me. Put me in your will before going under that car.
Lol, it looks bad but I actually cut V shaped notches into it so the pinch weld is captured. If I try to set those the other direction the center is too deep to touch the pinch weld and it'll punch into the rockers/tub.
More engine bay work getting knocked out. Also with all the hydraulics out of the way there is lots of room for activities, just put some tubes through the heater hose and clutch master holes to see what it looks like and they actually land on the perfect spots on the existing cage. Still working on more stitch welding and reinforcements, I don't want to pass up any opportunities while the car is this far torn apart so it's taking longer than expected.
My dad used the Primeweld Tig225x to melt this seam together and put in a filler plate where a huge hole used to be in this fender structure. Also melted the firewall to cowl area seam and I started to stitch the rest together with the Lincoln ProMIG. Ground down a ton of the holes hole I filled previously, picked up a die grinder and mini handheld belt sander from harbor freight and they work decent for the tight spots but our 15+ year old craftsman air compressor is showing its age and can't keep up even though the ratings should support these tools. Today I'm going to hit the metal supply store to see about some material to do the shock tower plates and start figuring those out as well. At least it feels like progress is being made towards being able to paint the engine bay.
Also took a quick look at leaned forward radiator mounting for possible ducting to hood later on down the road. This will also tuck the radiator when looking into the engine bay and make it look even more empty... need to cut a little more of the tow hook mounts out and come a little further forward still. Then cut and weld shut the filler neck.
I'm jealous, because I wanted to do a lot of this work when I did my VVT swap, but project creep was already kicking my *** and I didn't want the car down for two years...
Have you thought about patching the large harness holes on each side? If you're planning on doing anything interesting with the wiring, those are almost certainly too big. I wish I had closed mine up so I could use a more reasonably sized grommet.
Have you thought about patching the large harness holes on each side? If you're planning on doing anything interesting with the wiring, those are almost certainly too big. I wish I had closed mine up so I could use a more reasonably sized grommet.
Yeah those are next on the list. A little more annoying than most of the other patches that I'm doing since I'll have to get in there and grind down the lips.
Got two more patches done today and they're ready for grinding. Sheet metal is definitely annoying. Tack after tack after tack. If you try to weld normally it just punches a hole after about half a second. The metal that I'm using to patch up the firewall is the same thickness as the firewall itself in case anyone is wondering.
When you are welding sheetmetal like that it IS possible to lay a consistent bead, you need to set the settings up well first so practice on a scrap piece. The trick is to let gravity carry the weld down so you aren't pumping heat in where you don't need to. Push the weld down and you are going to be moving quickly. For the horizontal parts its kinda the same, you are going to be favoring the upper half of the sheetmetal and letting the weld carry itself down to the bottom piece.
It is also worth mentioning that depending in the gauge you will have to move around a bit to let it cool so you don't blow through. So you might be doing a 2" bead, moving to the other side, 2" bead, bottom side, etc.
This is where TIG welders shine as you have way more heat control. You just have to get good at being consistent first.
Trust me man I tried. Believe me when I tell you it's pretty much imposslbe to lay beads on 18 gauge sheet metal that aren't total crap. I'm not a pro either but I feel decent with MIG now. If you set it up for "ideal" settings, and do a 2" weld, the beginning is too cold, the middle is okay and the end is punching holes through it. Even when you try to compensate with increasing travel speed as the weld continues, it usually turns out like **** and you have to be absolutely flying near the end in order to not punch holes in it, but then you encounter major warping issues from how much heat a continuous weld puts into the metal and you begin to out run the wire feed speed. It's just way too finicky. And don't even attempt to do 1" or 2" beads on the actual body while stitch welding, that will end in disaster with how much contamination there is, trust me I tried my hardest. There's a reason why all the stitch welded cars you see basically just have tack welds all over. I'm doing stacks of 4 to 5 tack welds with 1" spacing between groupings in most places.
I watched tons and tons of videos on sheet metal welding techniques and this is the best solution that I found by far. It's all getting hit with a grinder anyways so all I care about is decent and uniform penetration. You set the machine up relatively hot for the thickness of metal you are doing, so that tacks can get good penetration. You go around and do 3 tacks, then move to the opposite side, 3 tacks, go halfway in between that,3 tacks, opposite side, 3 tacks, then you go around in a star pattern adding 3 tacks to each area so that you spread the heat out until the patch is completely welded. With this method I have good penetration, I'm not blasting tons of holes in it that need to be filled, and it spreads heat out enough that I'm not encountering any warping issues.
I'm with Arca on this one. I've never been able to get a good bead on sheet metal without warping or blowing through. The 'dabbing' technique works, though. When you get a good rythm going, you can get a pretty nice 'bead' going.
Maybe a pro welder with a high dollar machine can make it work, but that's not me... LOL
I'm not a pro welder, but was employed as a welder when i was younger, and I've done a bunch of rust repair and cage installs. Welding late model car chassis can be difficult if they have been galvanized or treated to prevent rust. It doesn't matter how much you grind and clean them up you just can't get a pretty weld. There are contaminants embedded in the sheet metal. This is why even on nicely tig welded cages the pads for the cage are done by mig.
I've done a lot of thin sheet metal welding with the mig repairing rust and it takes patience and time. You really have to tack it far apart, let it cool, add more tacks, let it cool, and keep doing this until your tack welds are about a half an inch apart. It will feel like you aren't making any progress. But if you get impatient and don't let it cool or try to lay a continuous bead the sheet metal will warp or burn through. It helps if you're working on multiple panels at a time so you can move around the car and give the welds time to cool. They sell a paste that you can put next to your welding areas that absorbs the heat, it works okay but isn't a life-changer. It helps a lot to have compressed air to cool the welds in between tacking. Obviously you can't spray air on it while you're welding or it'll blow away all your shielding gas.
Patience is the most important thing. There are some techniques you can use. I find that having a slightly longer arc (more wire sticking out of the tip) helps. You may need to increase your gas flow to compensate. Pulsing the welder when you finally get to the point of joining the tacks helps. I use 0.030 wire and mixed AR/CO2 shielding gas.
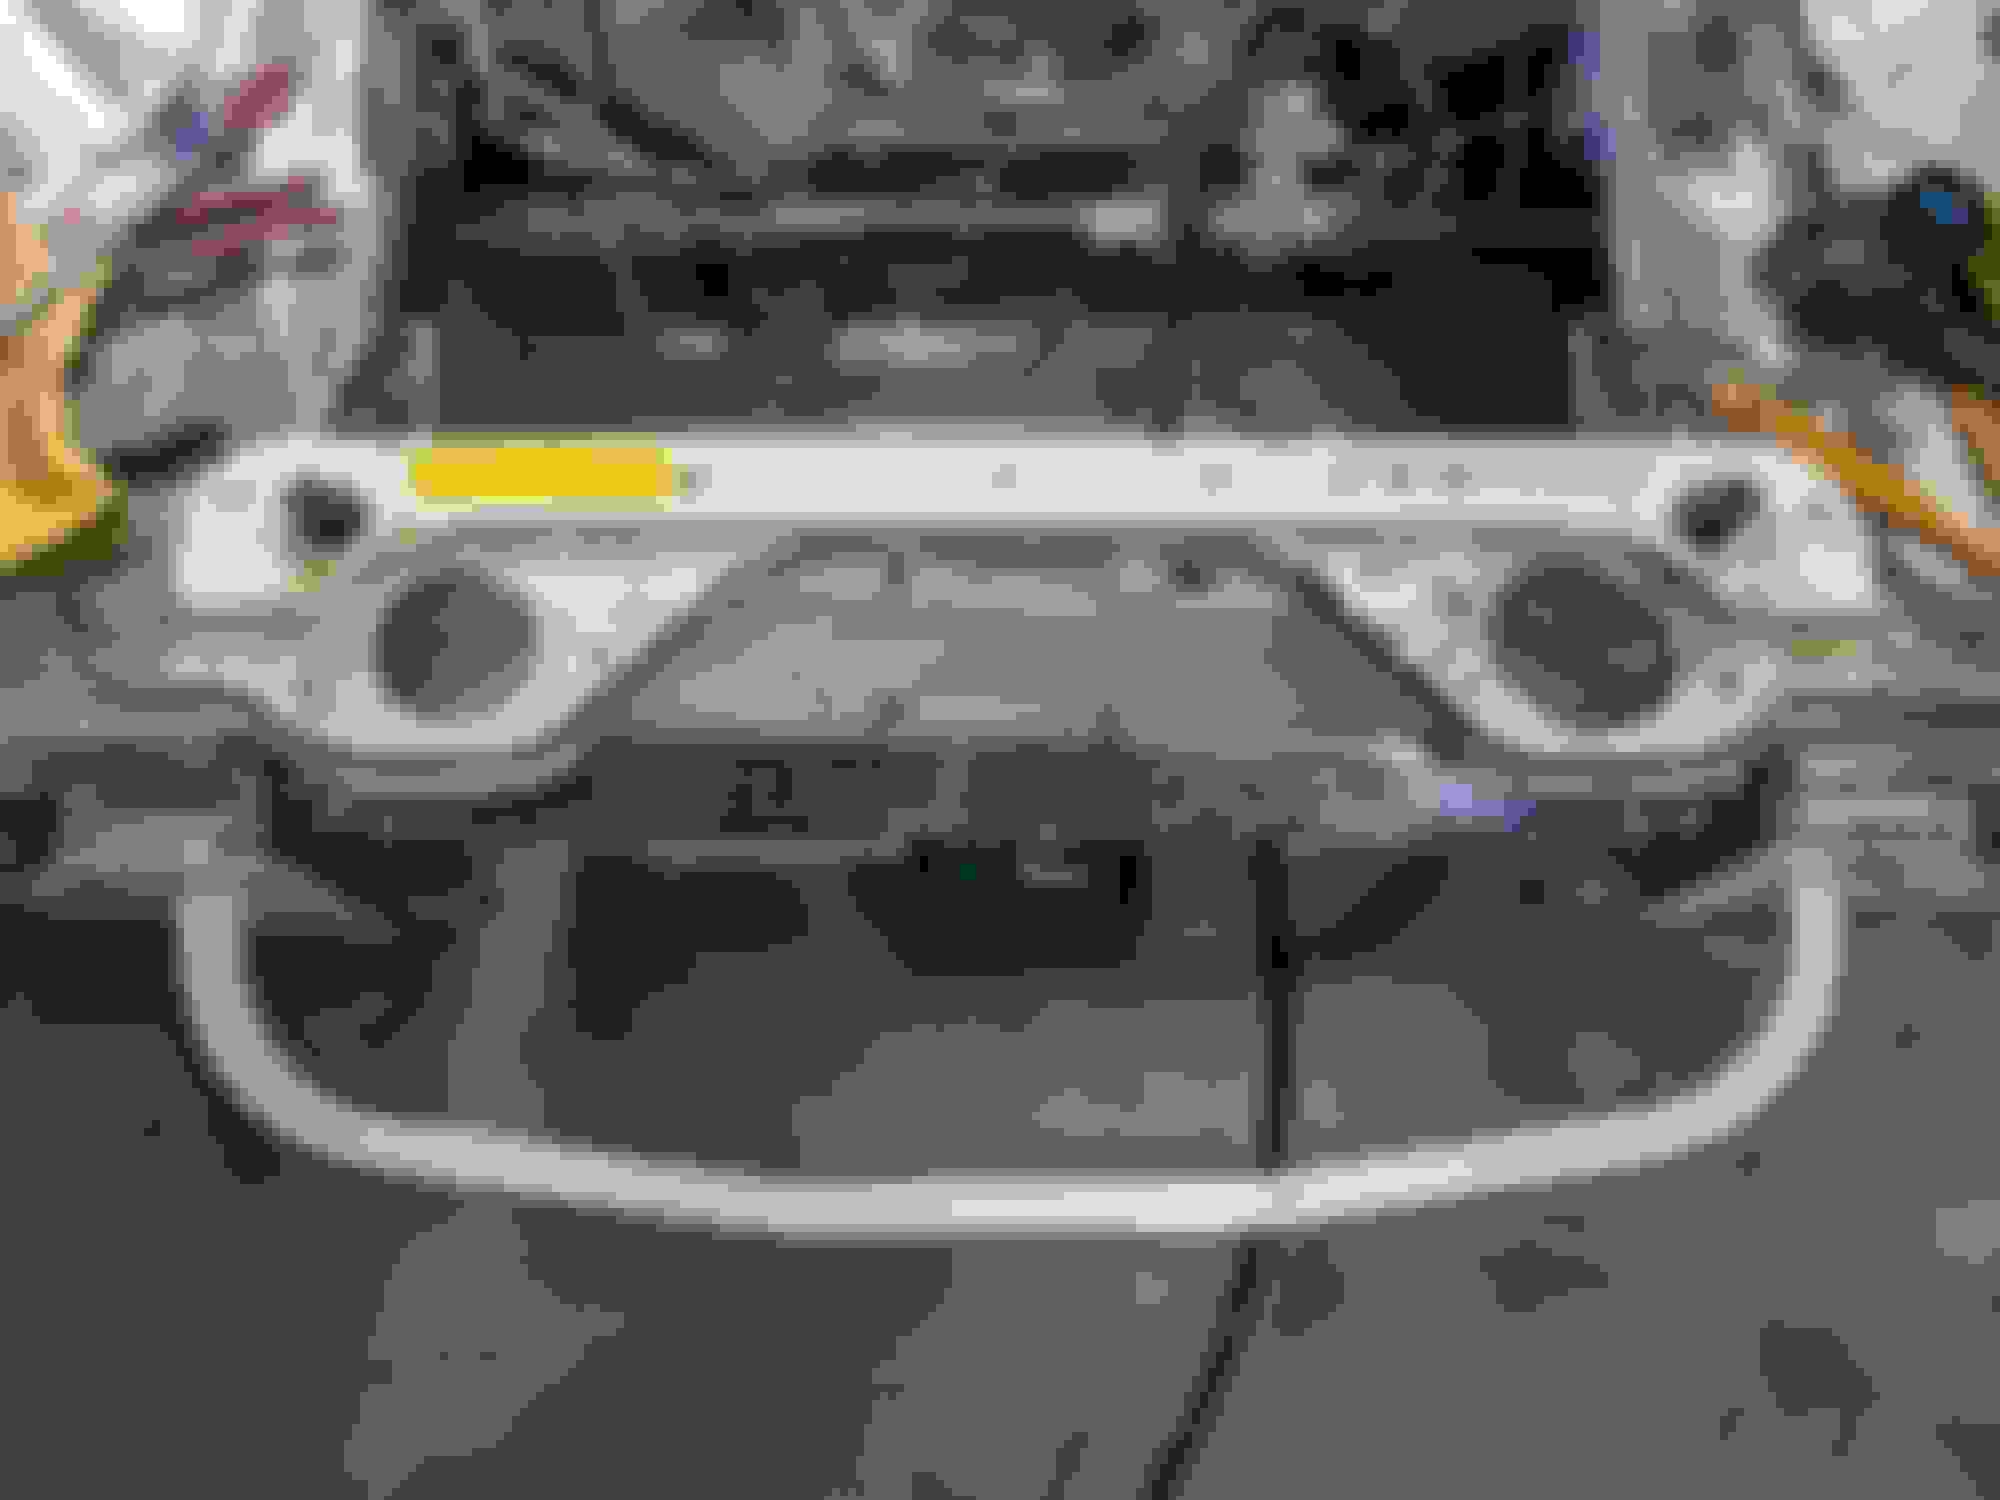
Some dimple dies and a harbor freight press have been acquired. This is the initial fit up of the 1/8" plates that connect the shock tower to the frame rail and subframe mounting area. The idea is that the bars coming out from the cage to the top of the shock tower will strengthen that structure substantially, and this reinforcement to the frame rail and subframe mount location will tie everything in nicely. This is only adding a couple more pounds but I can afford the weight. Ill be running a decent amount of ballast in almost all the classes I compete in anyways in case anyone is wondering since I've already gotten that question a couple times.
I'm interested to hear how that HF press holds up for that use.
I don't see it having any issues, not a lot to go wrong. I know lots of people with these cheap presses and they're pretty simple and seem to last. I think 1/8" is the max I can do with these dies and it was fine.


 06-10-2020, 03:05 AM


 2
2


 .
.