
Building the boosted smurf


If I was re-doing the whole wiring I would definitely make the engine and chassis harnesses split-able, so good call on that.
Doesn't Bryan sell those fancy connectors for the engine bay making engine wiring a 1-plug affair? I'd look into that.
Doesn't Bryan sell those fancy connectors for the engine bay making engine wiring a 1-plug affair? I'd look into that.
Reply
 0
0

0

Thread Starter
Junior Member
iTrader: (1)
Joined: Feb 2013
Posts: 403
Total Cats: 65
From: Windsor, Ontario
Thanks Mr. Chow! That's not even getting into pulling out unnecessary wires.
@Vlad, it's already in the works! Texted Bryan about those bulkhead connectors already, hopefully I'll be able to pick them up sometime this week.
@Vlad, it's already in the works! Texted Bryan about those bulkhead connectors already, hopefully I'll be able to pick them up sometime this week.
Reply
1
1
Thread Starter
Junior Member
iTrader: (1)
Joined: Feb 2013
Posts: 403
Total Cats: 65
From: Windsor, Ontario
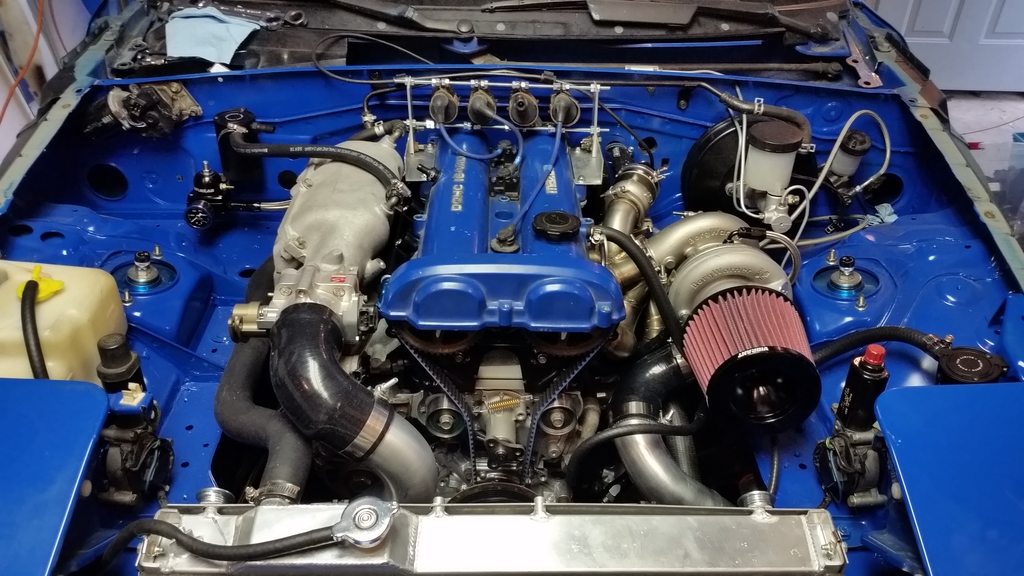
DEI fire sleeve showed up today so I did my heater core lines, turbo water lines, and a section of fuel line just because it would rub against the upper rad hose and I had some left over fire sleeve. I have some left over 1" sleeve that I might use on the oil drain just to be safe. But that's a lot of effort so we'll see lol
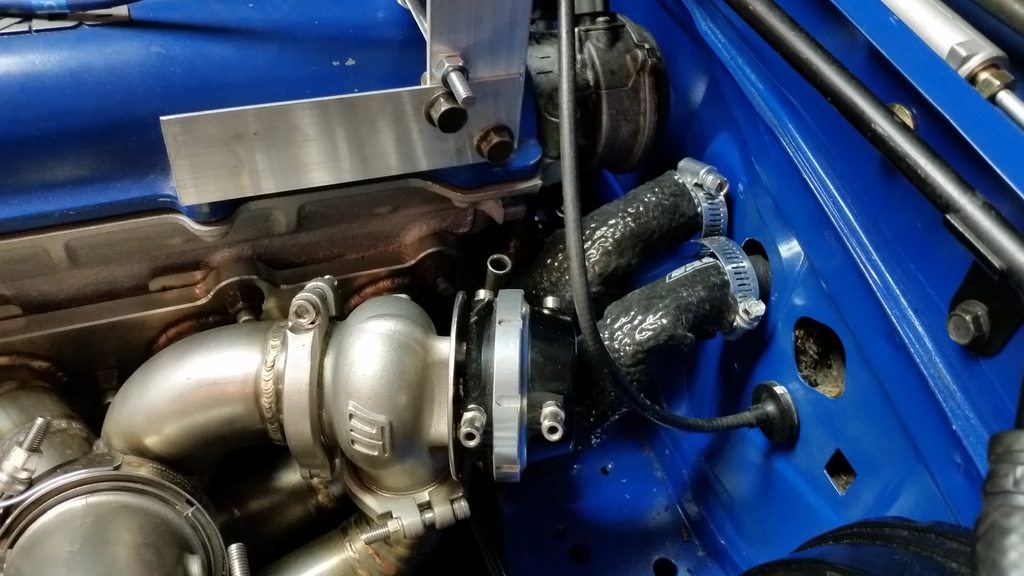
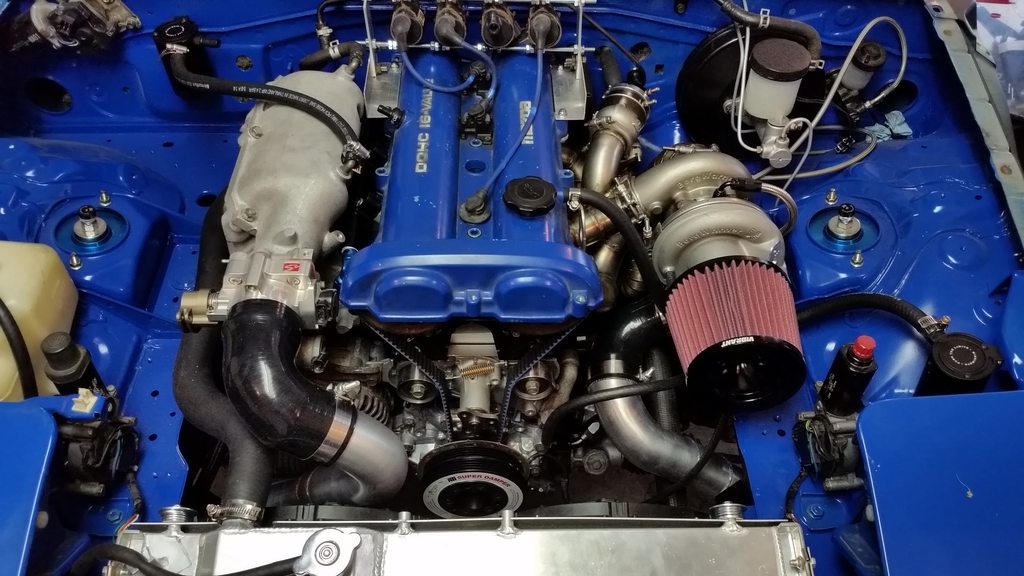
Also got an air filter from Vibrant so figured I'd toss that on, except I need a small straight section of pipe to get my catch can line in there. (I think that's where it's supposed to go from what I remember)
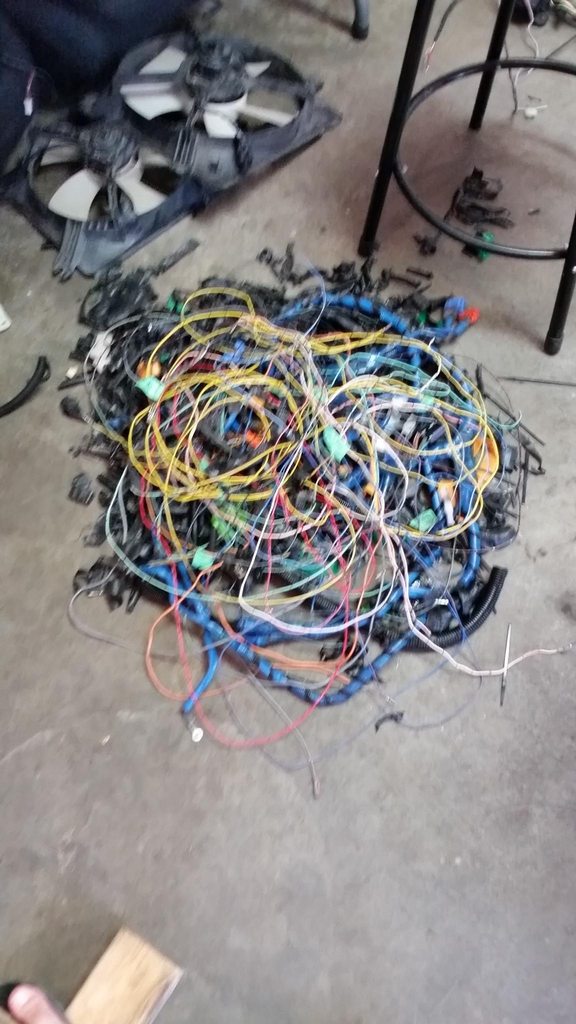
And more wiring things. Just been separating the engine harness from the chassis harness, eliminating all the wire that will be replaced by the new harness. Very time consuming and I really hope I didn't accidentally take out a wrong wire lol. A friend is bringing over a bunch of wire he has tomorrow after working so I might be able to start running some wires.
Bigger pile of garbage.
Also on the lookout for a '99 valve cover since I think I'll just run a 99 cam sensor rather than messing around with modifying the CAS.
Also got an air filter from Vibrant so figured I'd toss that on, except I need a small straight section of pipe to get my catch can line in there. (I think that's where it's supposed to go from what I remember)
And more wiring things. Just been separating the engine harness from the chassis harness, eliminating all the wire that will be replaced by the new harness. Very time consuming and I really hope I didn't accidentally take out a wrong wire lol. A friend is bringing over a bunch of wire he has tomorrow after working so I might be able to start running some wires.
Bigger pile of garbage.
Also on the lookout for a '99 valve cover since I think I'll just run a 99 cam sensor rather than messing around with modifying the CAS.
Reply
0
0
Thread Starter
Junior Member
iTrader: (1)
Joined: Feb 2013
Posts: 403
Total Cats: 65
From: Windsor, Ontario
So I just spent way more money than I wanted to on connectors and terminals. Ordered extra pins/seals from EasternBeaver just in case. Then I searched around and found out OnlineComponents was the place to get ECU connectors and the pins for them, except they have a $50 minimum order. So I ordered 6 of both the ECU connectors with enough pins to terminate them all. So if you want ecu connectors and terminals lmk.
Whenever all that stuff gets in I can hopefully terminate all the connectors and get that all sorted. Just waiting for the wires to show up to route all the wiring.
Also finished up most of my fuel things. Just need to figure out how to mount the Walbro 450 since its huge.
Bulkhead at the sender. All AN everythang
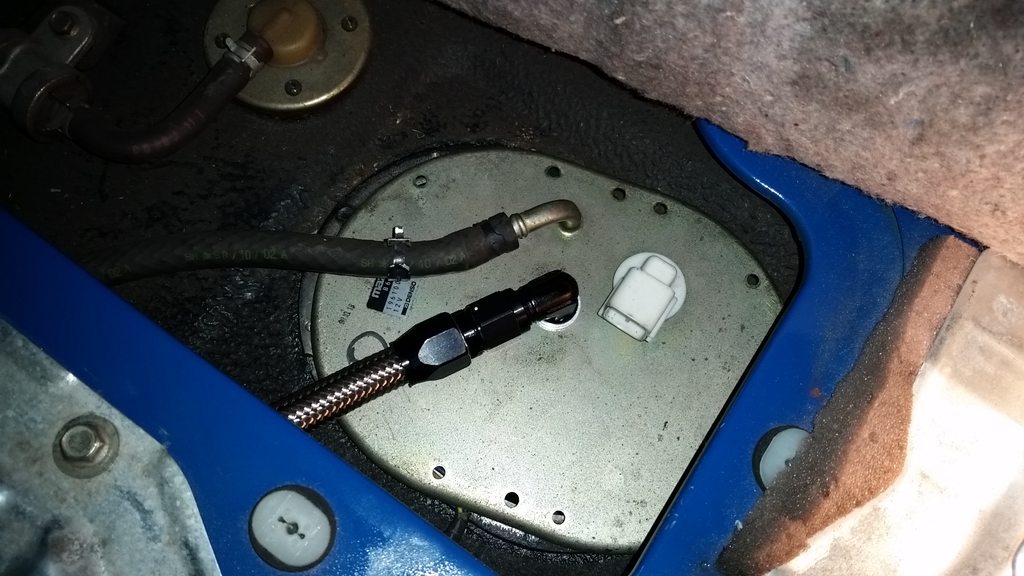
FPR mounted and the line from the rail to the regulator done. Just waiting for 1 fitting to get the return finalized.
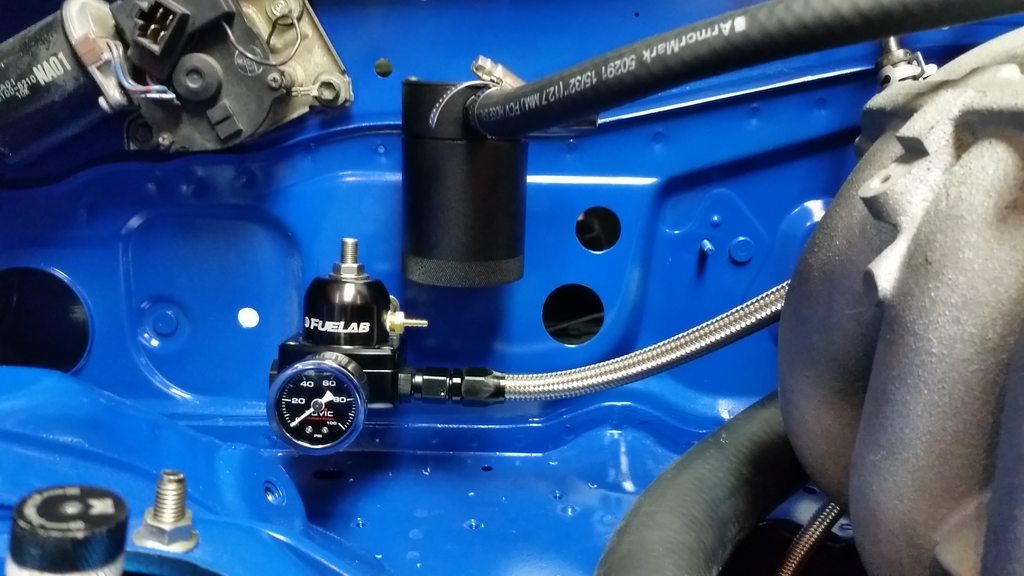
And because I like looking at this so much
Whenever all that stuff gets in I can hopefully terminate all the connectors and get that all sorted. Just waiting for the wires to show up to route all the wiring.
Also finished up most of my fuel things. Just need to figure out how to mount the Walbro 450 since its huge.
Bulkhead at the sender. All AN everythang
FPR mounted and the line from the rail to the regulator done. Just waiting for 1 fitting to get the return finalized.
And because I like looking at this so much
Reply
1
1


Thread Starter
Junior Member
iTrader: (1)
Joined: Feb 2013
Posts: 403
Total Cats: 65
From: Windsor, Ontario
When you know how much it'd be send me a pic and I'll see. I was originally going to mount the coils along the intake side of the valve cover but didn't have the tools to make a mounting bracket nicely so i settled for my current setup.
Reply
0
0
Thread Starter
Junior Member
iTrader: (1)
Joined: Feb 2013
Posts: 403
Total Cats: 65
From: Windsor, Ontario
Okay, I just want to make sure I have everything right here rather than thinking I'm right and then finding out when I go to turn the car on that I was wrong.
Crank sensor/trigger: I'm using the Fab9 12+1 trigger wheel with a 99 crank sensor. I will wire in the crank sensor into the correct pin on the ECU for crank signal.
Cam sensor: I will be using the OEM 99 cam sensor with a 99 intake cam gear. I need to grind off the double nubs on the cam gear, leaving only one nub for the cam sensor, correct? Again, the signal will be wired to the correct pin in the ECU for cam signal.
This setup should work with the Reverant built MS2 I'm running; correct? Do I just select 99 miata for ignition settings? Or is that only if I had the FM trigger wheel and no nubs ground off the intake cam gear?
Reply
0
0
Thread Starter
Junior Member
iTrader: (1)
Joined: Feb 2013
Posts: 403
Total Cats: 65
From: Windsor, Ontario
This was the case on the MS1, and ONLY on the MS1.
With the MS2 and MS3, the OEM NB sensors and plates can be used without modification. Simply tell the ECU that you have a '99-05 Miata engine and you wish to run fully sequential (four injector channels) and the ECU will do all the rest automatically.
Now, if you bring any other crankwheel into the mix (such as a 12T or 36T wheel), then you will need to physically modify the cam gear (99-00) or camshaft (01-05) to take it down to just one pulse per rev. But so long as you use the stock crankwheel, you can also use the stock cam/gear with no mods needed.
EDIT: I have been informed that a recent code change supports 36-2 in the FM configuration with the stock NB CAS pattern.
Frankly, I wouldn't bother with an aftermarket wheel here. The prediction on the MS3 is pretty damn accurate.
I can handle doing all the mechanical stuff but when it comes to tuning, megasquirt, or setting up anything on the ECU side of things my 10 year old nephew would probably be better off than me. Should probably throw that out there lol
Reply
0
0

Elite Member
Joined: Oct 2013
Posts: 2,764
Total Cats: 951
From: Cedar City, UT
Wish I could help. I went with the $20 FM 36-2 trigger wheel due to it being supported by the MS3X firmware and not needing to modify anything.
Their wheel is pretty damn cheap if you can stand waiting on another part
Their wheel is pretty damn cheap if you can stand waiting on another part
Reply
0
0
Thread Starter
Junior Member
iTrader: (1)
Joined: Feb 2013
Posts: 403
Total Cats: 65
From: Windsor, Ontario
<p>Part of me wishes I put that one on. It's not so much the waiting on a part that bothers me; its the entire pulling that crank pulley off again that bothers me. I mean if it will make things a lot easier it may be worth it but I need someone that knows about this setup to tell me if its worth doing or not. </p><p>I also need to figure out if I should be trying to get a new base map from Dimitris for this pretty much completely new car or if I should be getting a local-ish tuner to do things for me. Part of me wanted to learn how to do megasquirt things but when you're dealing with a $4-5000 motor, $3500+ hotside, and a whole bunch of other high value parts it is a little intimidating. I know if I break something expensive because of my own stupid mistake I'll be done with this car, at least for a very long time</p>
Reply
0
0


You will also need to grind the extra (odd) tooth from the 12+1 wheel, and an additional tooth as well, to make it a 12-1 wheel. This will allow for a faster startup.
Reply
0
0
Thread Starter
Junior Member
iTrader: (1)
Joined: Feb 2013
Posts: 403
Total Cats: 65
From: Windsor, Ontario
<p><br /><br />So grind off the double nubs on the intake cam, and I guess the double teeth off the trigger wheel? Would it be worth just putting an FM trigger wheel on there instead? Also, should I be contacting you about a new base map/msq file?</p>
Last edited by BoostedSmurf; Jun 2, 2015 at 12:08 AM.
Reply
0
0
Thread Starter
Junior Member
iTrader: (1)
Joined: Feb 2013
Posts: 403
Total Cats: 65
From: Windsor, Ontario
So I'm still alive, just haven't been making much progress. Waiting til Friday or Saturday when everything I've ordered over the past few weeks for building this harness arrives in Detroit so I can go pick everything up.
I've just mostly been trying to figure out all the things I no longer need in the harness and how I'll be routing everything. The ECU connectors are starting to look pretty empty.
Here's a picture of what I'm pretty sure will be the pinout of my ECU connectors. I'm mostly throwing it up here so you guys can let me know if I've deleted something I shouldn't have or if there's something in there that I don't actually need anymore.
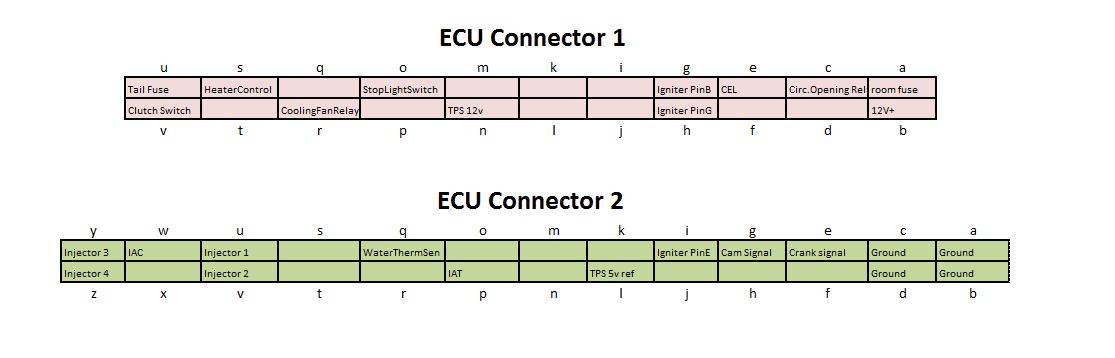
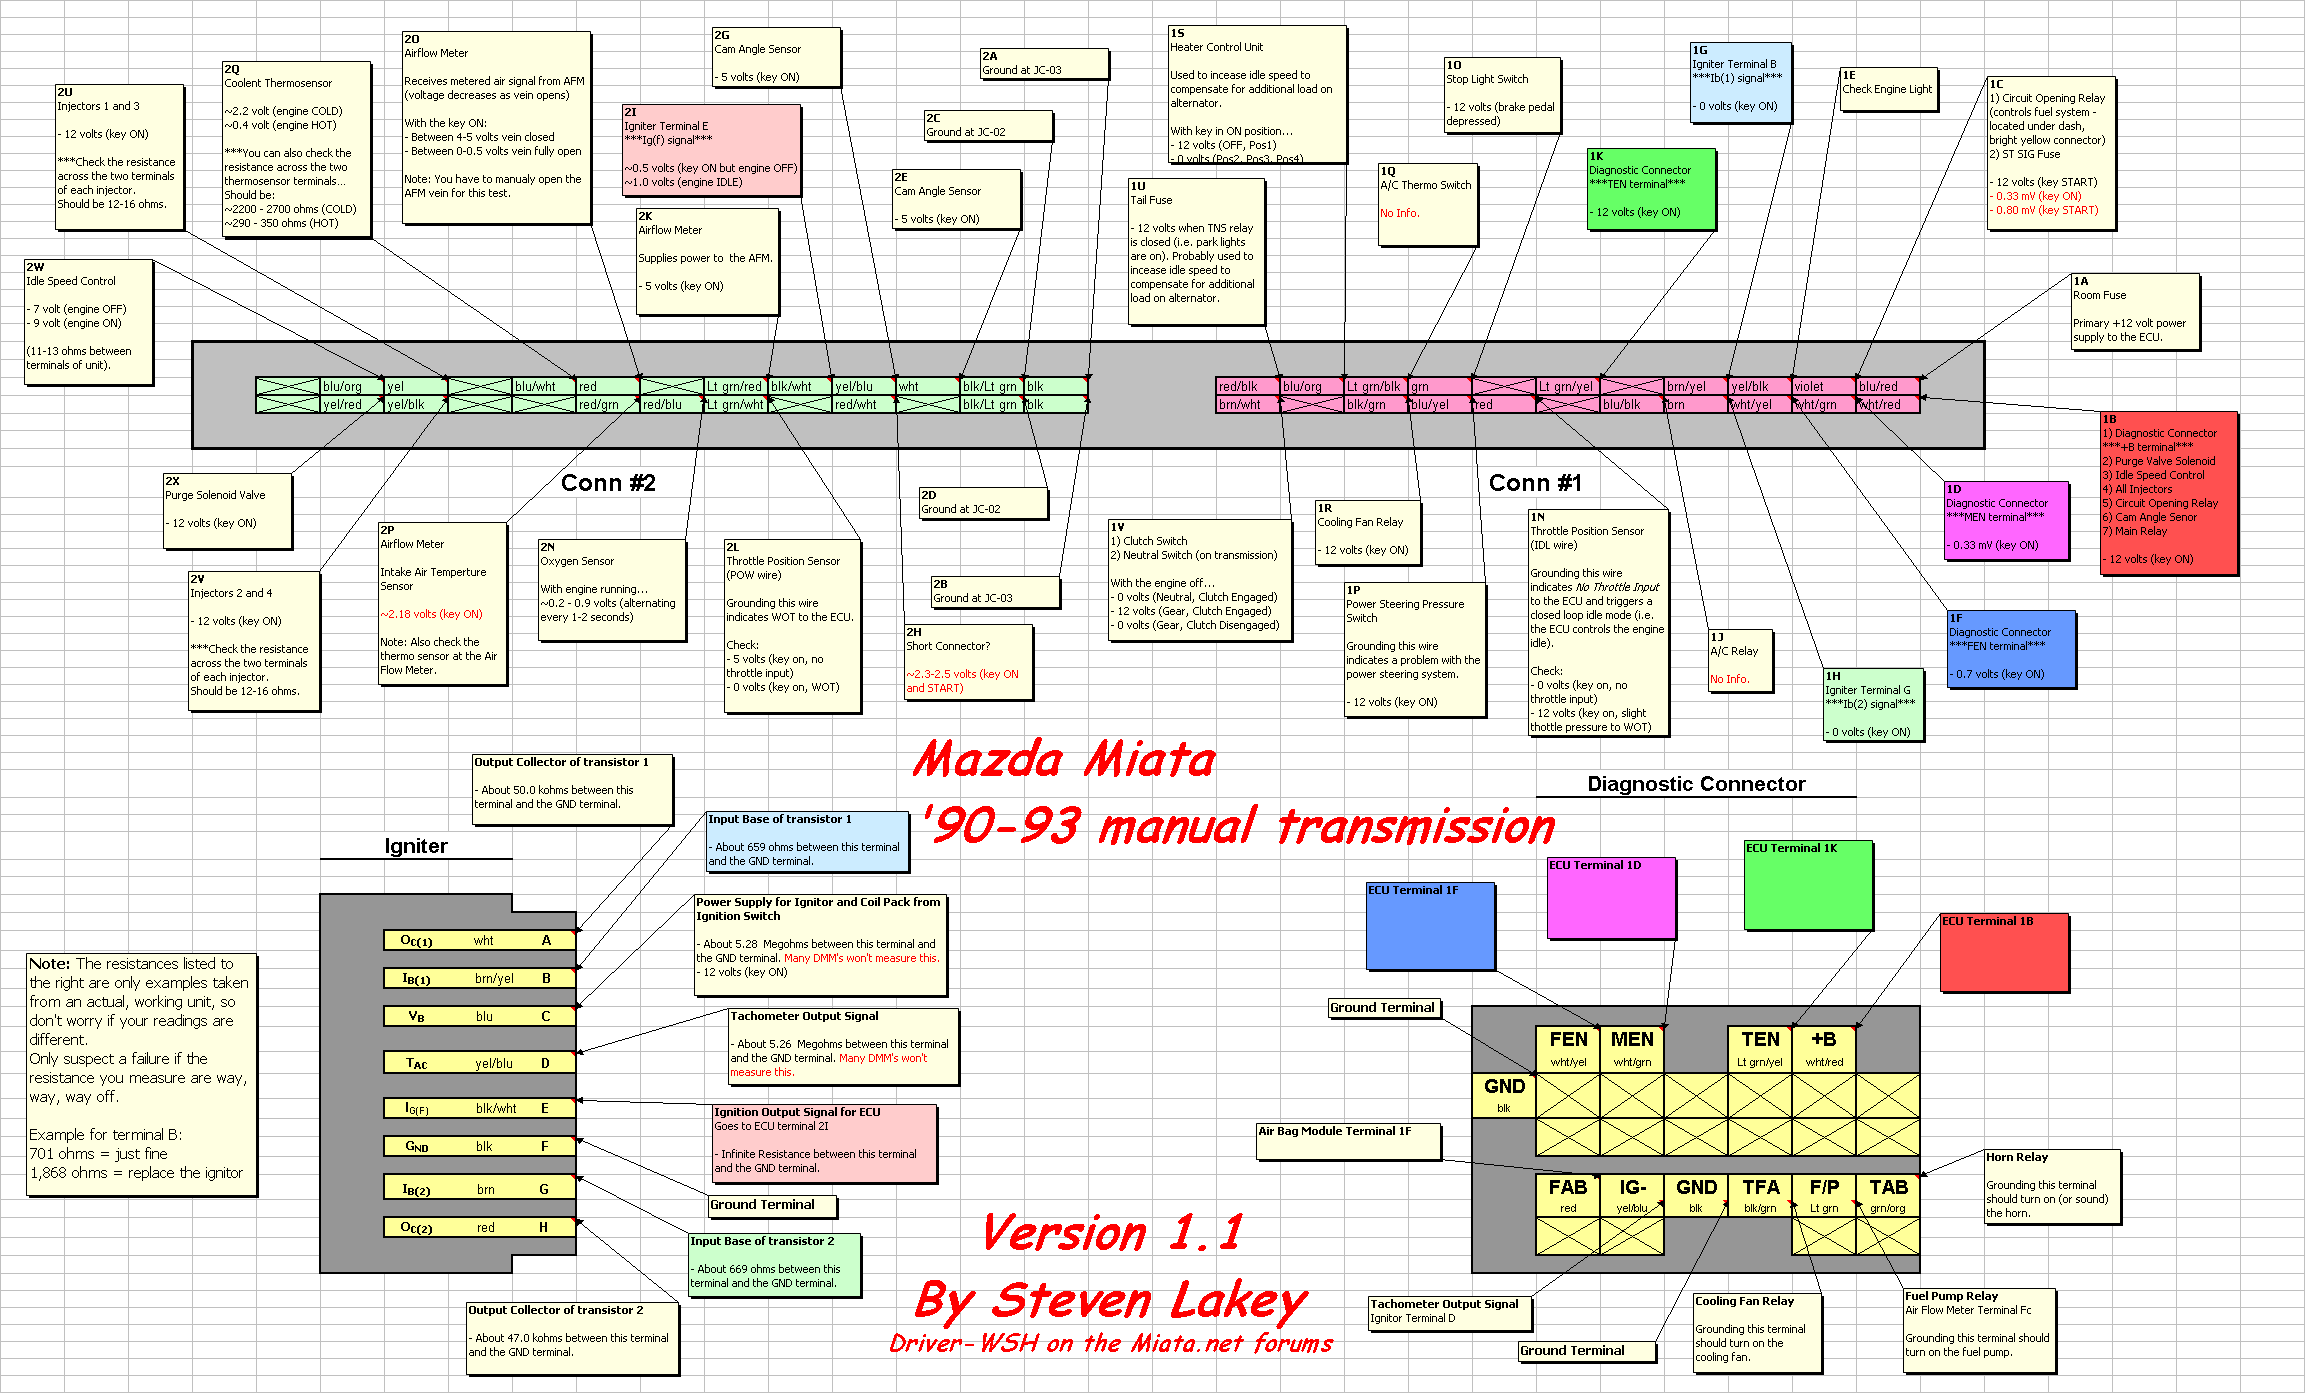
Here's the original for reference
I'm starting to understand the wiring side of things a lot more, the one thing I still am very unsure about is wiring my LS coils. I want them wired for sequential with my enhanced MS2 from Rev. Still doing some more reading about that but if someone wants to spoonfeed me, feel free
Hopefully this weekend I'll actually finally start building this harness!
Still have to mount my fuel pump, run brake & clutch lines, swap the intake cam gear/grind two nubs off the face, and grind off the double teeth on the trigger wheel.
I've just mostly been trying to figure out all the things I no longer need in the harness and how I'll be routing everything. The ECU connectors are starting to look pretty empty.
Here's a picture of what I'm pretty sure will be the pinout of my ECU connectors. I'm mostly throwing it up here so you guys can let me know if I've deleted something I shouldn't have or if there's something in there that I don't actually need anymore.
Here's the original for reference
I'm starting to understand the wiring side of things a lot more, the one thing I still am very unsure about is wiring my LS coils. I want them wired for sequential with my enhanced MS2 from Rev. Still doing some more reading about that but if someone wants to spoonfeed me, feel free
Hopefully this weekend I'll actually finally start building this harness!
Still have to mount my fuel pump, run brake & clutch lines, swap the intake cam gear/grind two nubs off the face, and grind off the double teeth on the trigger wheel.
Reply
0
0

Thread Starter
Junior Member
iTrader: (1)
Joined: Feb 2013
Posts: 403
Total Cats: 65
From: Windsor, Ontario
Haha thanks Jeff! If you don't fear wiring a Miata anymore you should fly here and take care of this one for me. With how fast you work it could be done in a weekend!
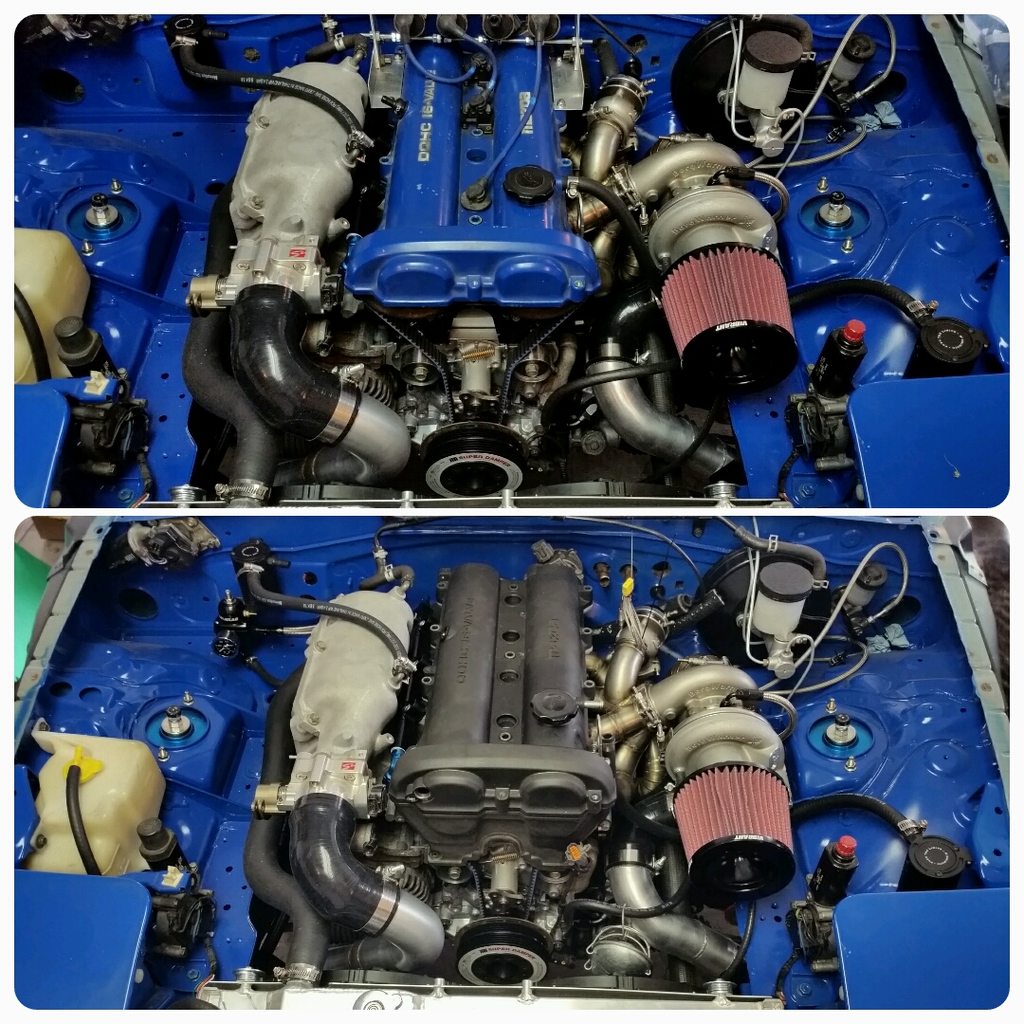
Went over to Detroit today to pick up a bunch of stuff. 99 Valve cover, shielded wire, all my connectors and pins, shift light, etc.
First up was the valve cover, it is currently flat black, tossed it on there to see how it looks compared to the blue before I sand it and paint it. Thoughts?
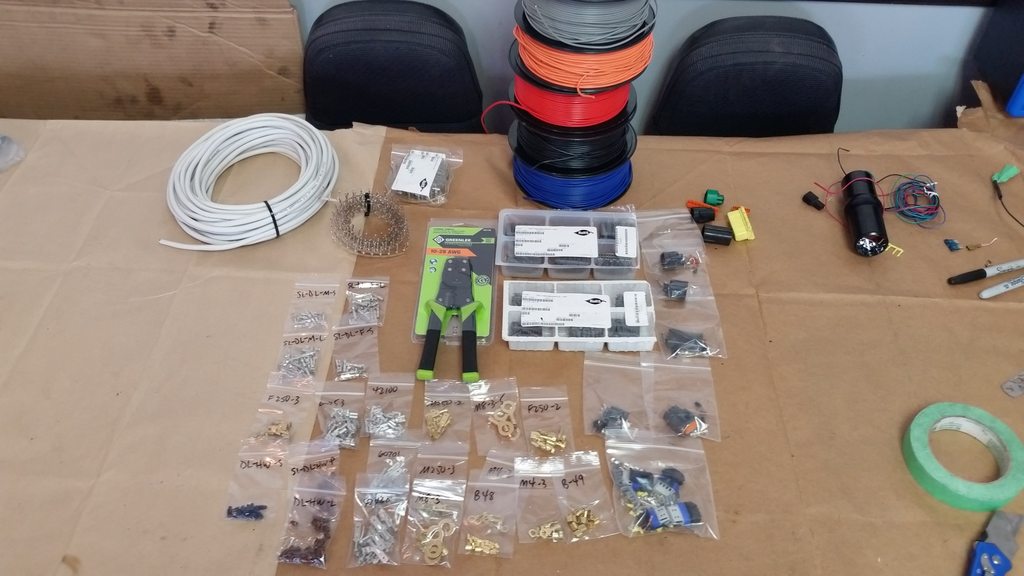
Next is all the wiring stuffs and things. Just need to pick up my milspec bulkhead connectors from Bryan and figure out how much of what size loom I need before ordering that. DEI fire tape is on the way too so I can avoid using any electrical tape on this harness. Hoping to keep it as clean as possible.
Went over to Detroit today to pick up a bunch of stuff. 99 Valve cover, shielded wire, all my connectors and pins, shift light, etc.
First up was the valve cover, it is currently flat black, tossed it on there to see how it looks compared to the blue before I sand it and paint it. Thoughts?
Next is all the wiring stuffs and things. Just need to pick up my milspec bulkhead connectors from Bryan and figure out how much of what size loom I need before ordering that. DEI fire tape is on the way too so I can avoid using any electrical tape on this harness. Hoping to keep it as clean as possible.
Reply
0
0


