
Crazyblackman's Brutus


Thread Starter
Junior Member
Joined: Feb 2015
Posts: 223
Total Cats: 31
From: Arizona
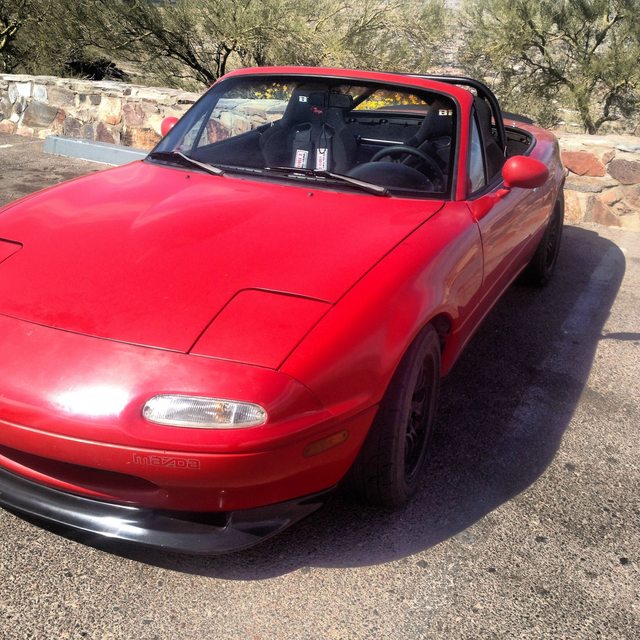
Soo I guess I should start a build thread here too. To give you all an idea of where I was at starting this, I have never really worked on a car before, just always been interested into it, so this has been my first car I actually am trying to learn.
You will see where this goes as I post more and how much I have learned going through this process.
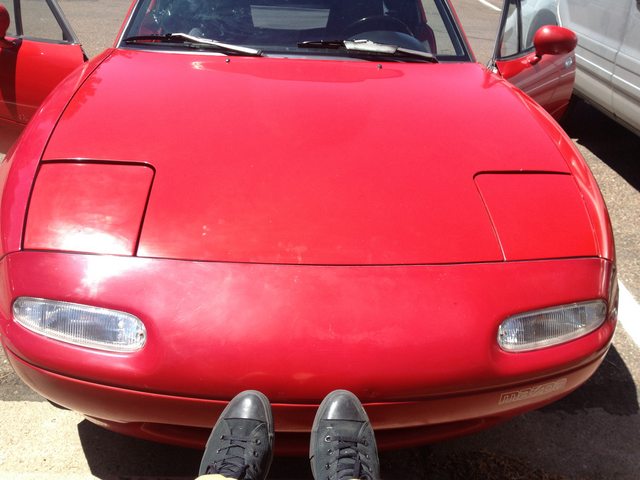
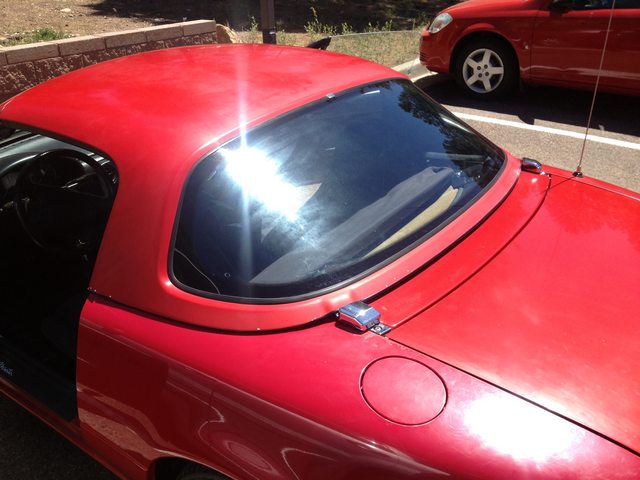
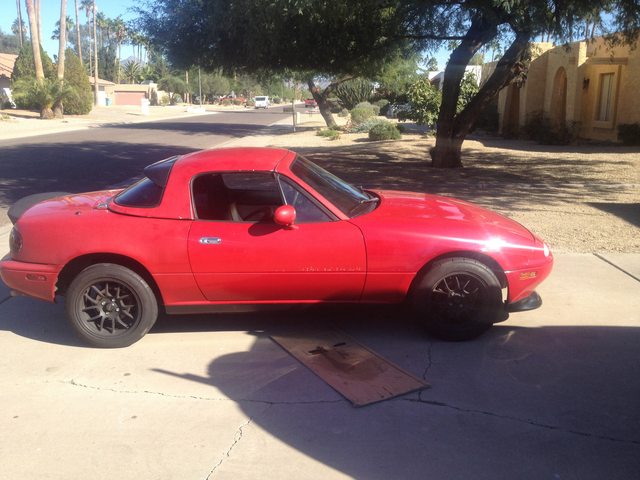
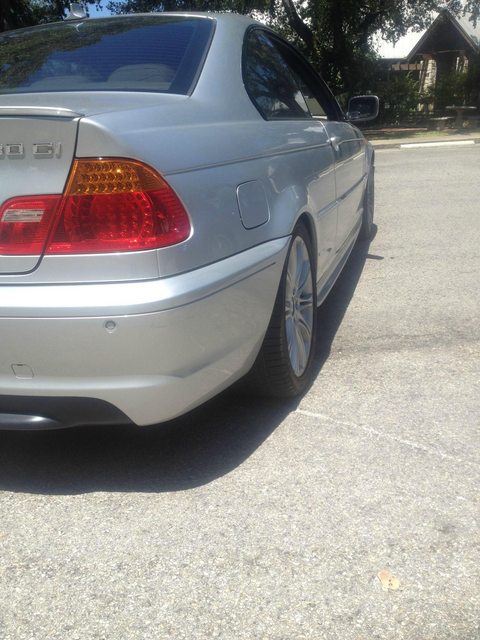
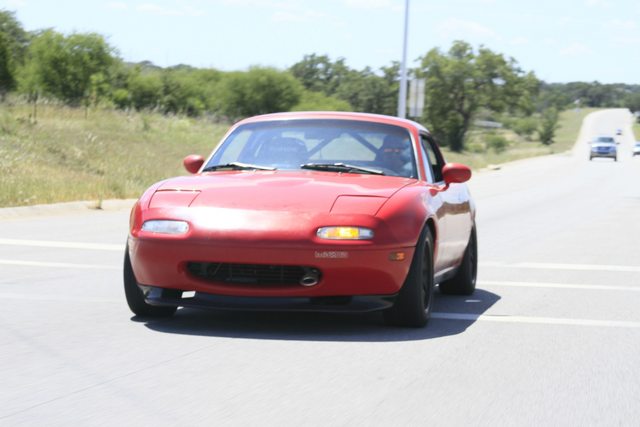
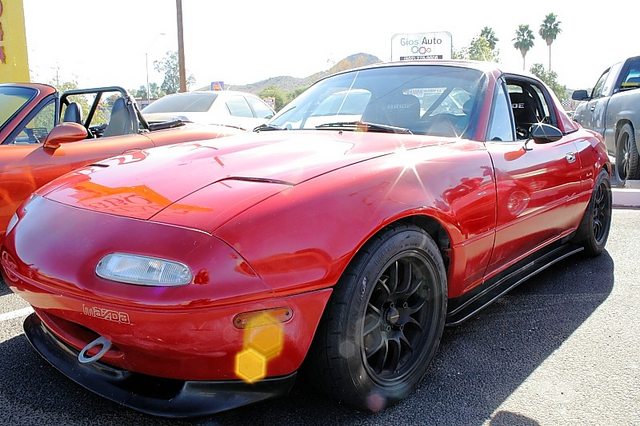
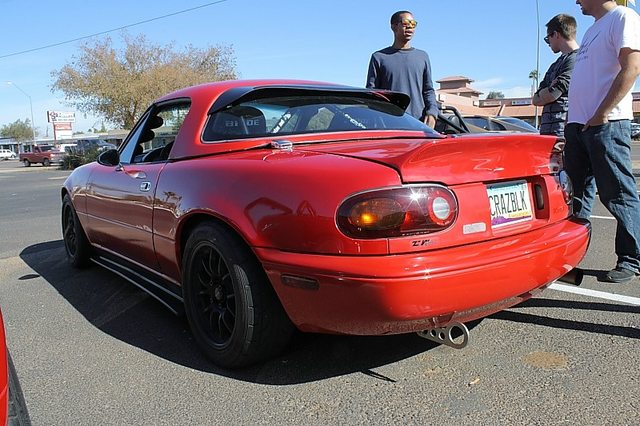
I got the car a year in a half ago with a hardtop and 85k on the clock.
First day brakes were going to the floor, so replaced the calipers and all is well again.
Runs awesome
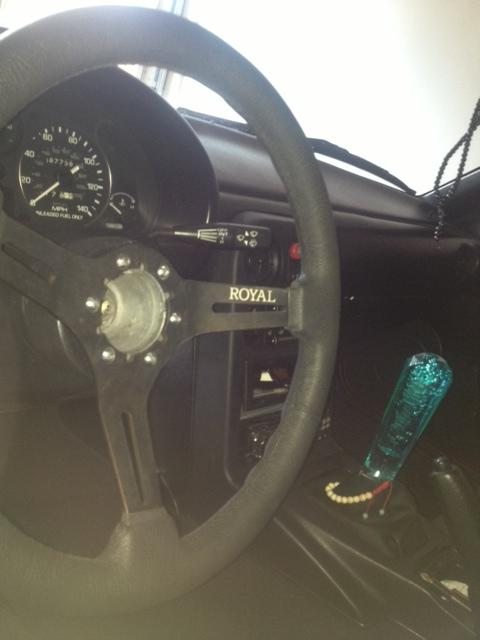
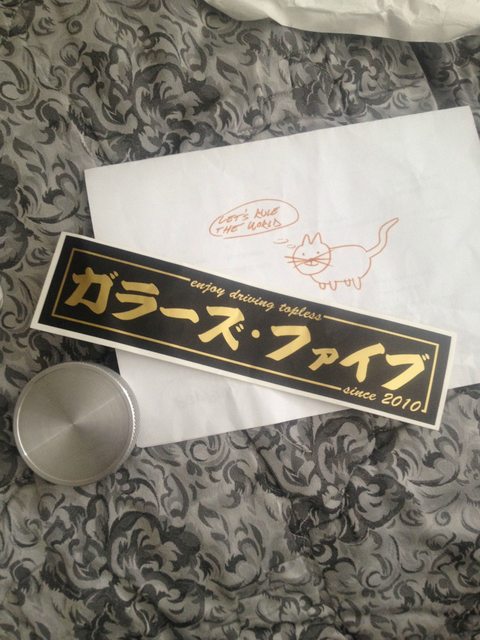
Got a steering wheel, and little *****
then I didn't like the *****, and got a Flossy Shift ****

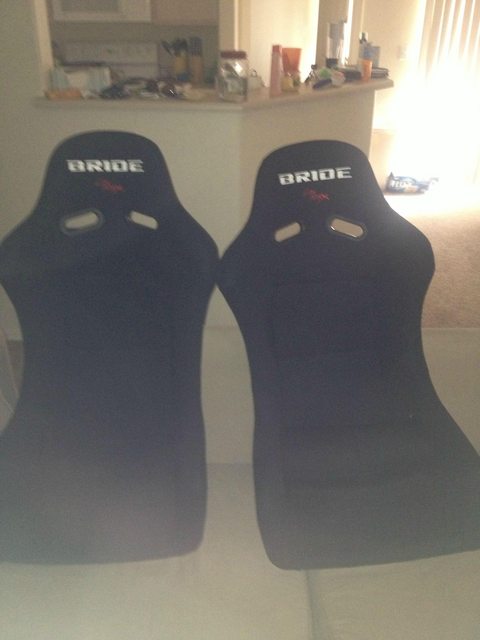
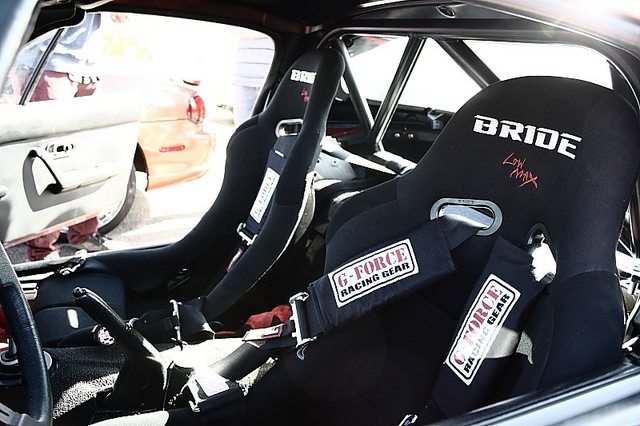
Then I got some bride reps, remember everything that was bought I did not know any better before
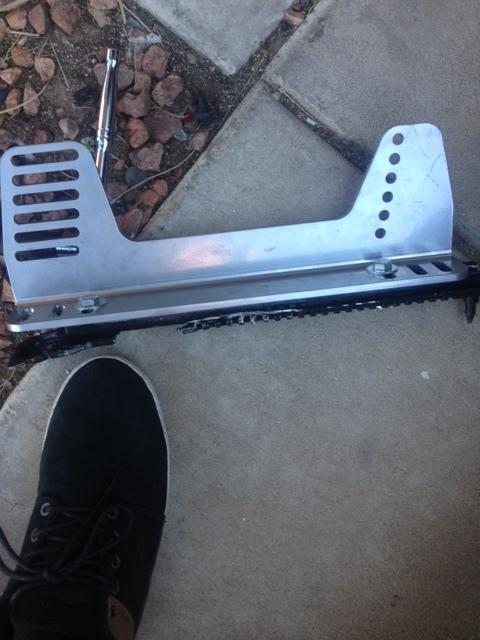
Made some seat rails from the stock ones.
Then they were installed and it was like I was sitting on the ground, but I am 6" even so it was helpful.
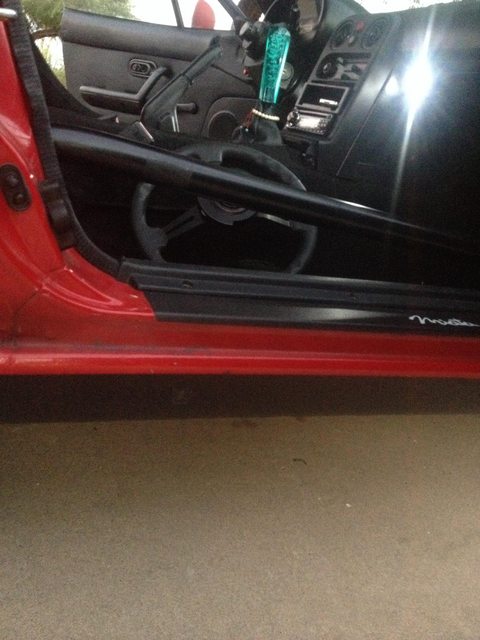
Then went into the small maintenance, my windows were a pain to roll up and down
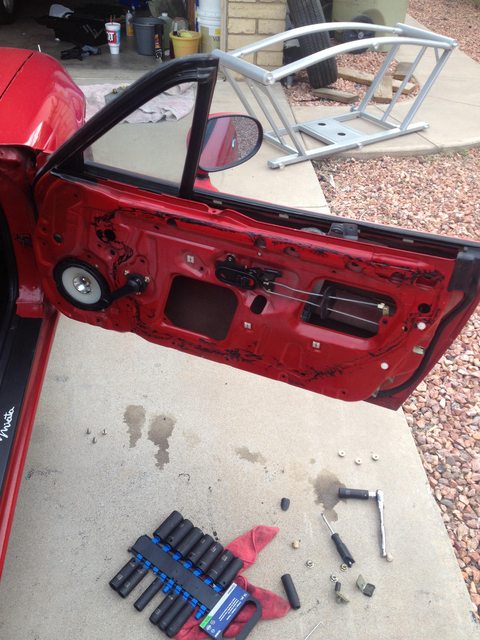
Soo much better, like a night and day difference.
Much more to go!
Edit-Now I know the size to use for these images.
You will see where this goes as I post more and how much I have learned going through this process.
I got the car a year in a half ago with a hardtop and 85k on the clock.
First day brakes were going to the floor, so replaced the calipers and all is well again.
Runs awesome
Got a steering wheel, and little *****
then I didn't like the *****, and got a Flossy Shift ****
Then I got some bride reps, remember everything that was bought I did not know any better before
Made some seat rails from the stock ones.
Then they were installed and it was like I was sitting on the ground, but I am 6" even so it was helpful.
Then went into the small maintenance, my windows were a pain to roll up and down
Soo much better, like a night and day difference.
Much more to go!
Edit-Now I know the size to use for these images.
Reply
 0
0

0
Thread Starter
Junior Member
Joined: Feb 2015
Posts: 223
Total Cats: 31
From: Arizona
Got a horn delete and a quick release.
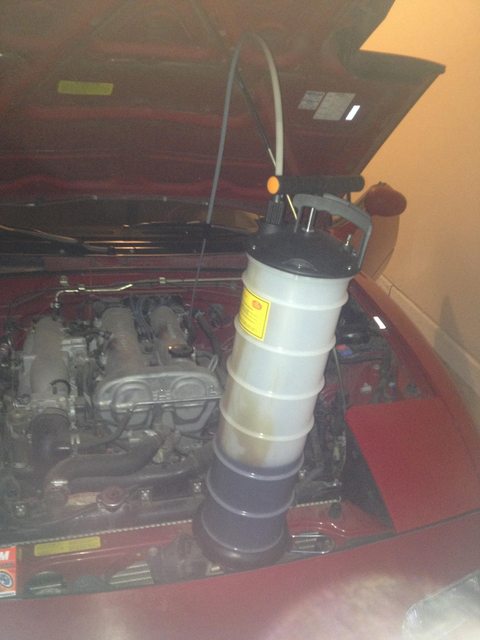
Did some fluid changes, PS I love this thing, makes life so much easier.
Then I got a torsen, that I have yet to use so far.
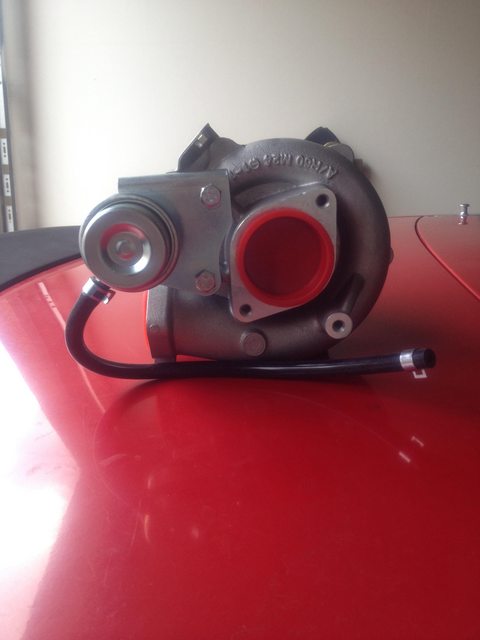
Also got my first turbo Godspeed GT82.
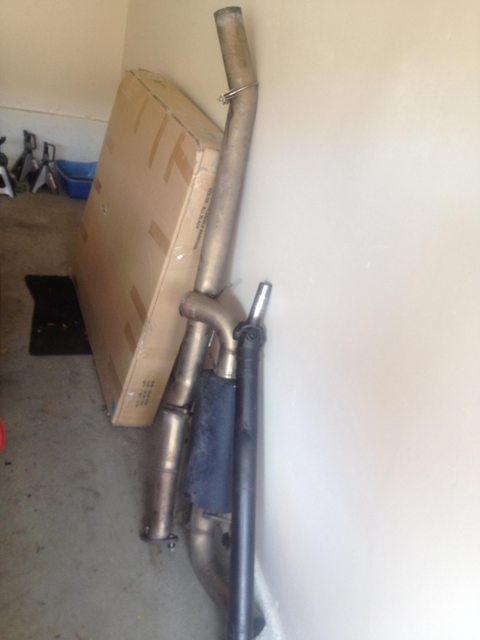
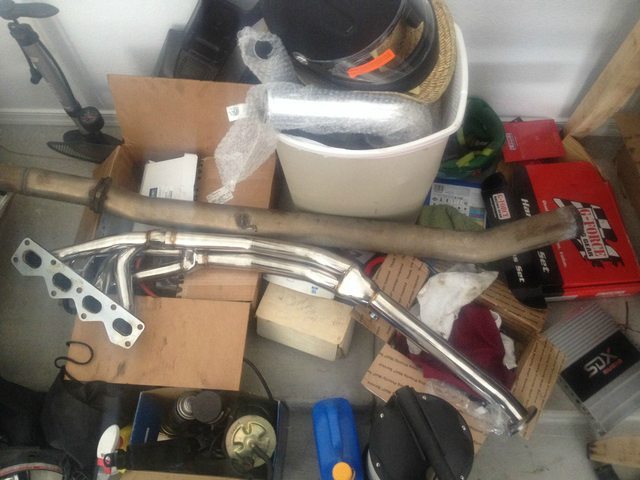
Bought an Enthuza exhaust and a 1.8 drive shaft
Got some Gauges from Adam, I will be getting some new ones again down the road.
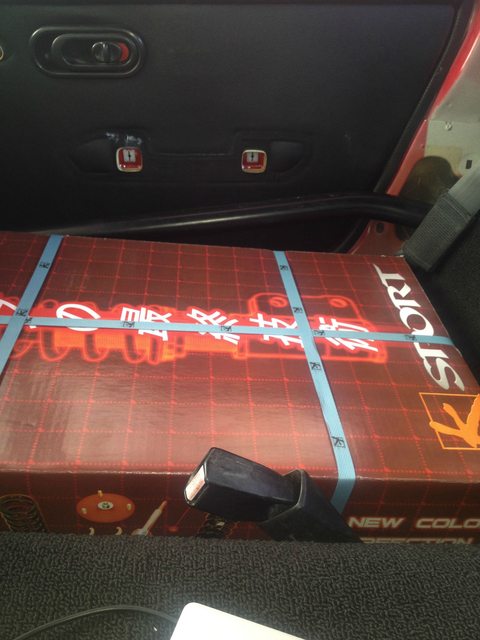
Got some K Sports
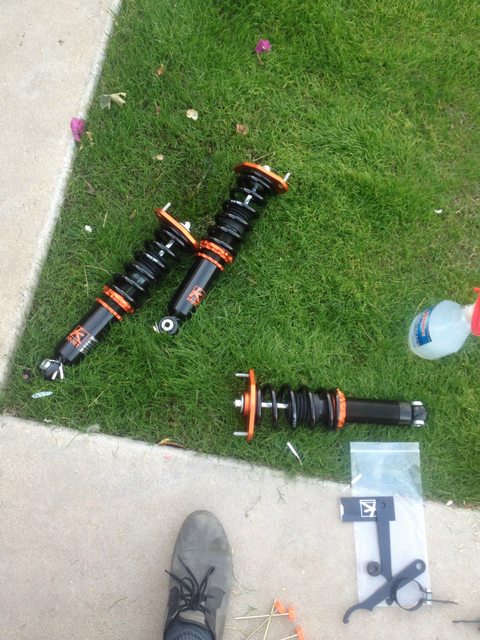
These will eventually be replaced with something more of what I want, once I learn more about spring rates and what I am looking for.
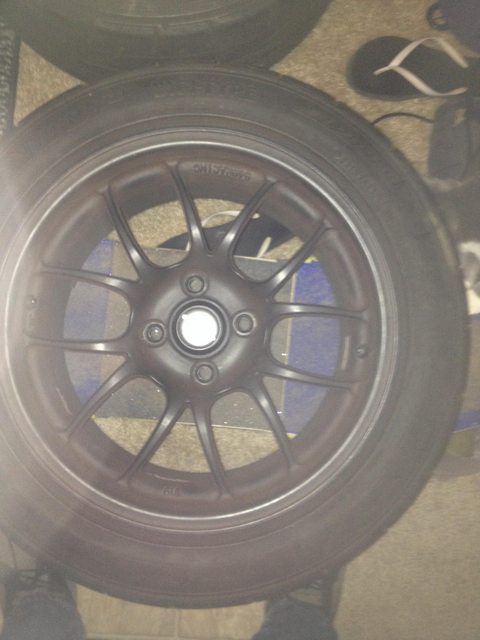
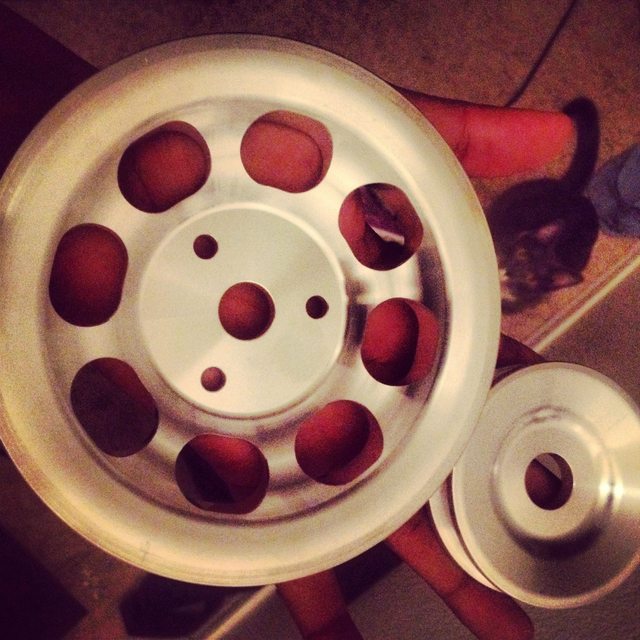
Also got some 6UL's 15x8
Now with them both together
Door bars were also installed that same day.
Did some fluid changes, PS I love this thing, makes life so much easier.
Then I got a torsen, that I have yet to use so far.
Also got my first turbo Godspeed GT82.
Bought an Enthuza exhaust and a 1.8 drive shaft
Got some Gauges from Adam, I will be getting some new ones again down the road.
Got some K Sports
These will eventually be replaced with something more of what I want, once I learn more about spring rates and what I am looking for.
Also got some 6UL's 15x8
Now with them both together
Door bars were also installed that same day.
Reply
1
1
Thread Starter
Junior Member
Joined: Feb 2015
Posts: 223
Total Cats: 31
From: Arizona
Got some stainless steel brake

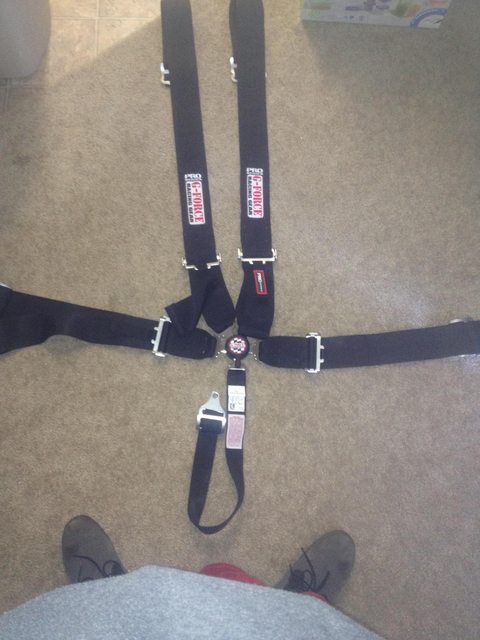
Got some harnesses
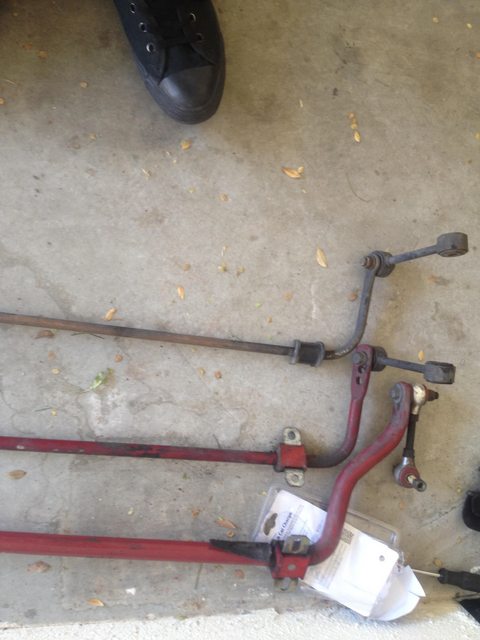
Got some Enkei Sway bars
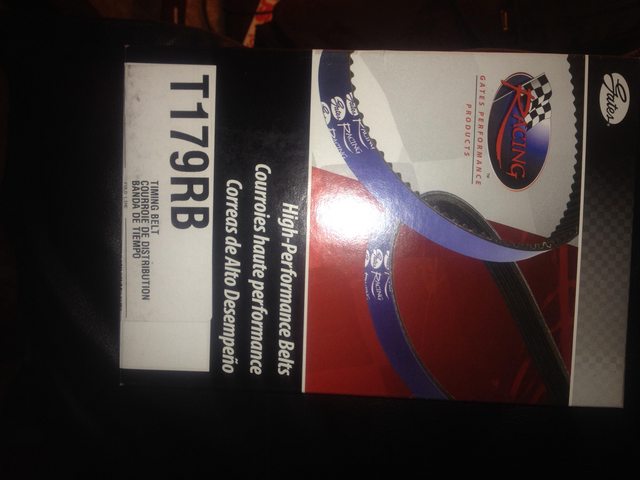
Got a timing belt to do before my texas trip...more on that later
Got a helmet I have yet to use yet too, hopefully this year.

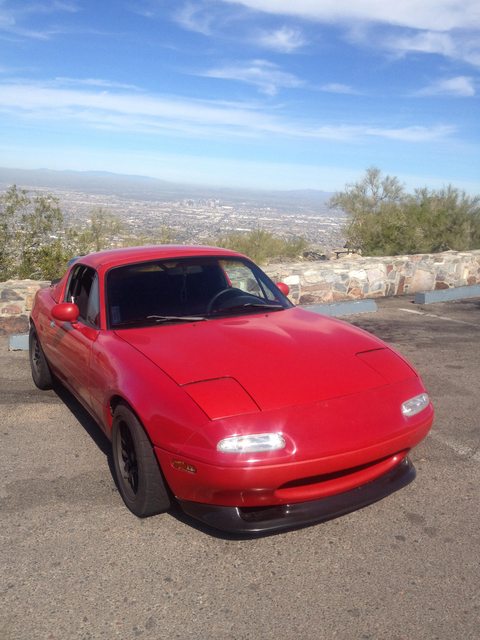
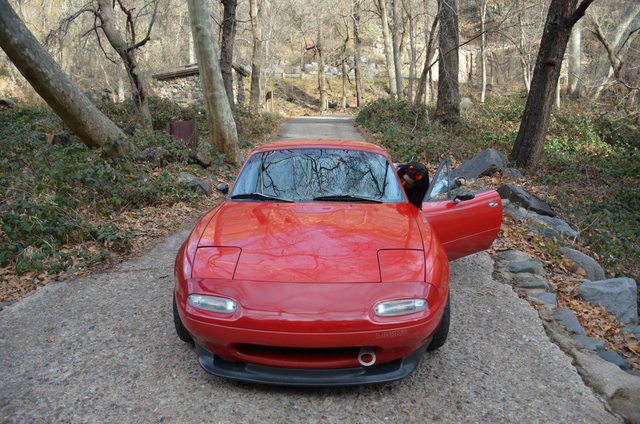
Took the car for a ride on a mountain as well.
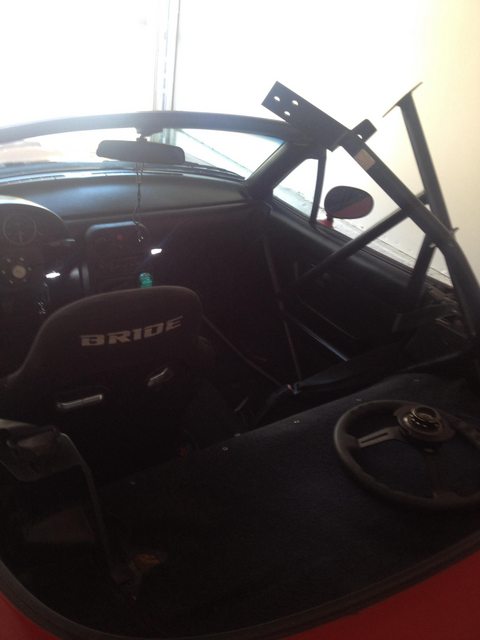
Got a roll bar as well
I am just trying to fly through the first year to get you guys up to date.
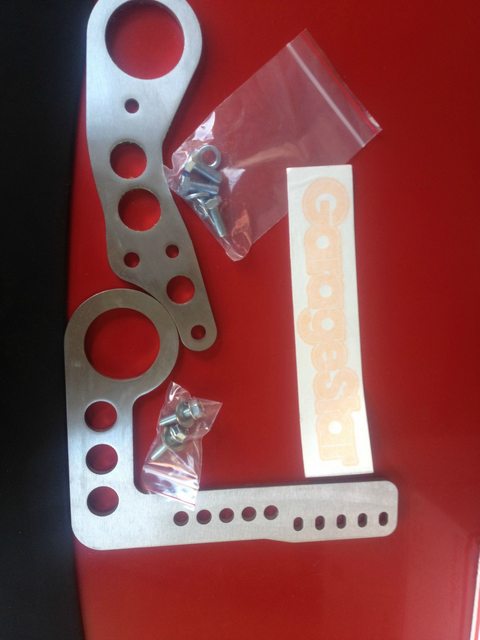
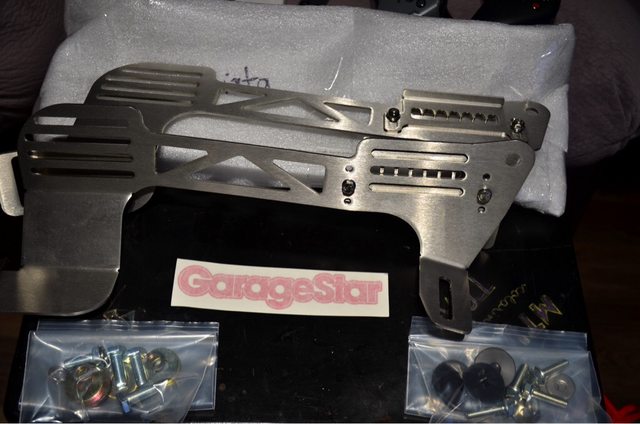
Got some GarageStar Goods
An awesome oil cap, I like things simple
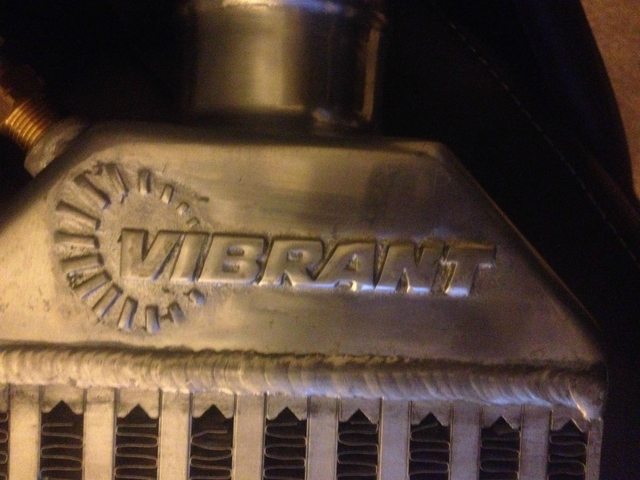
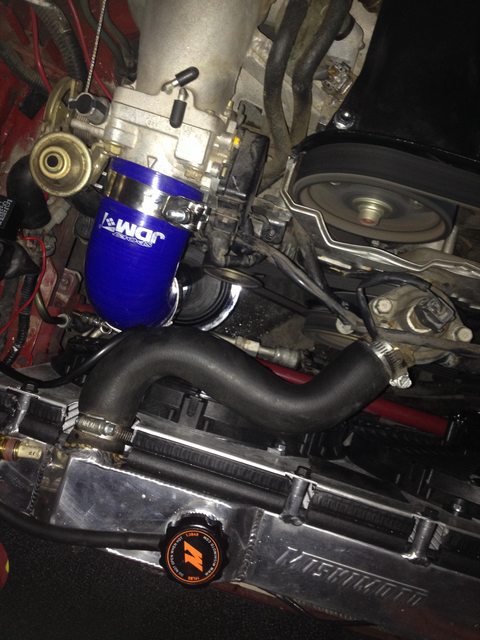
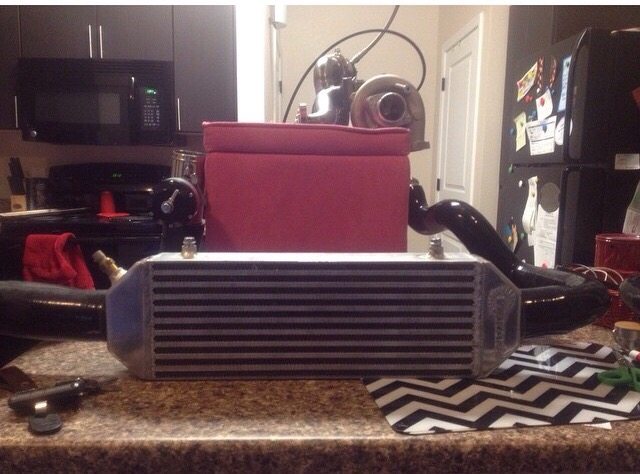
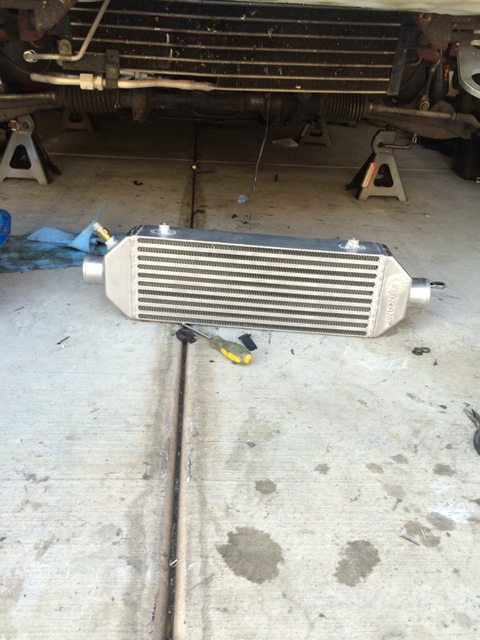
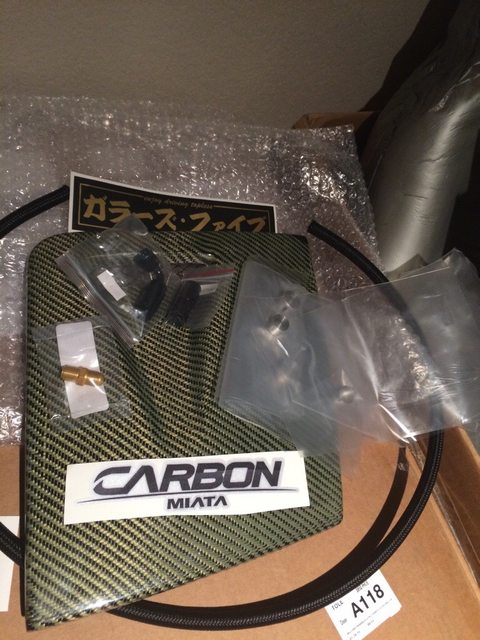
Then I got an intercooler

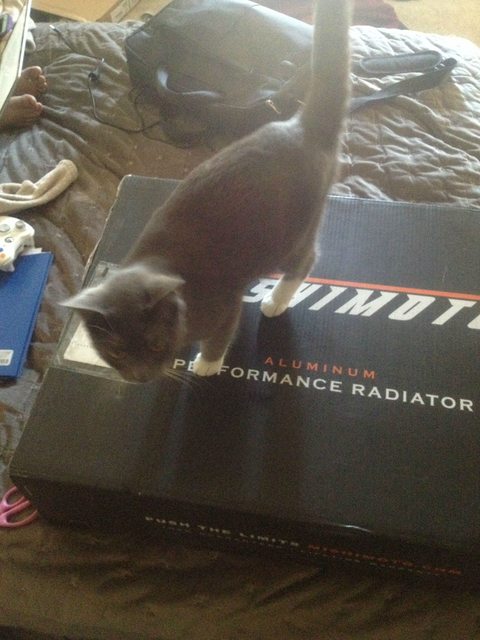
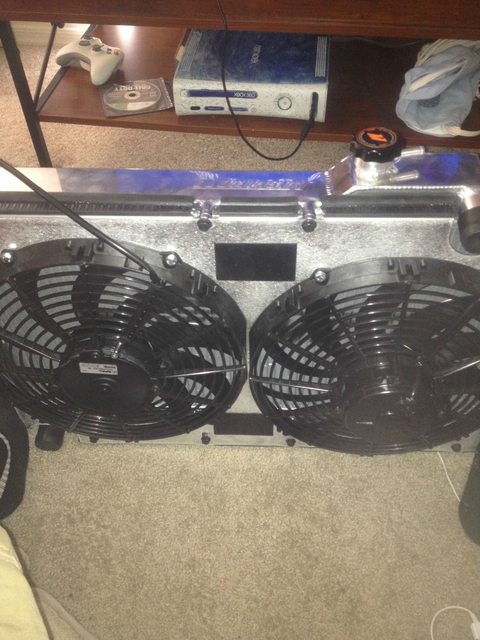
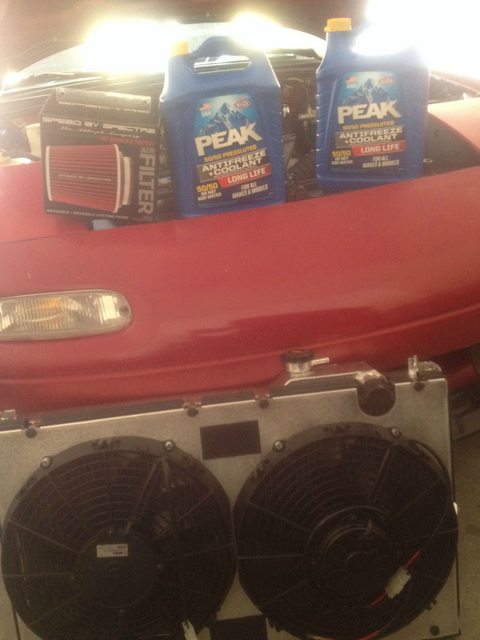
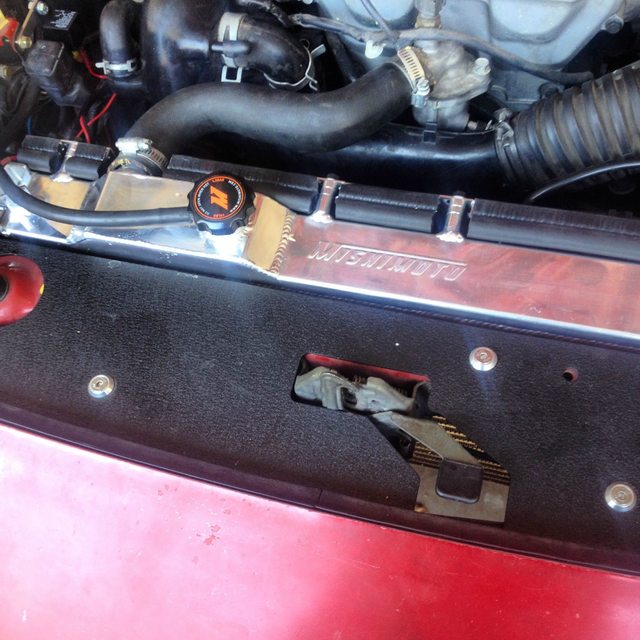
Got a mishimoto radiator, kitty approved
More maintenance needed to be done
Simple because of this
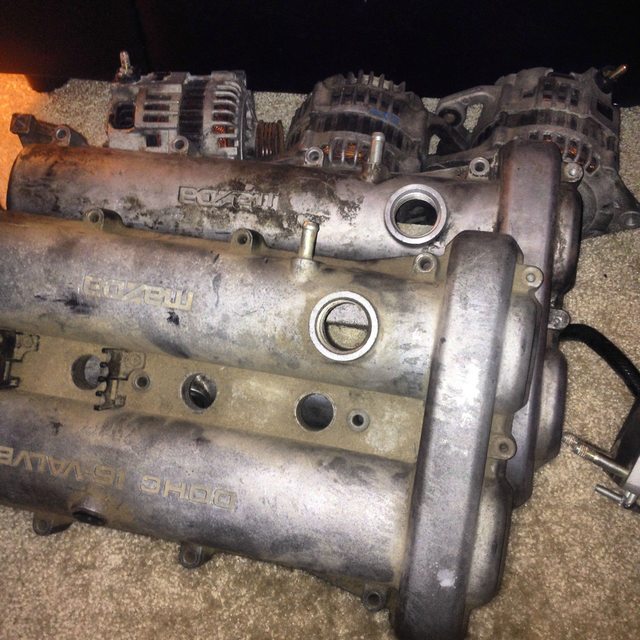
Got some extra valve covers
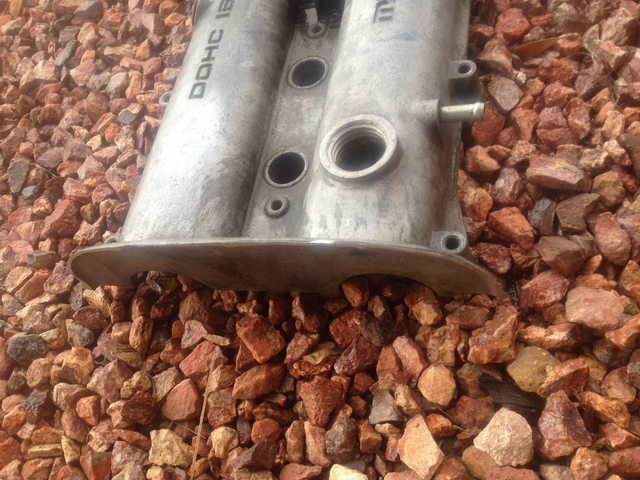
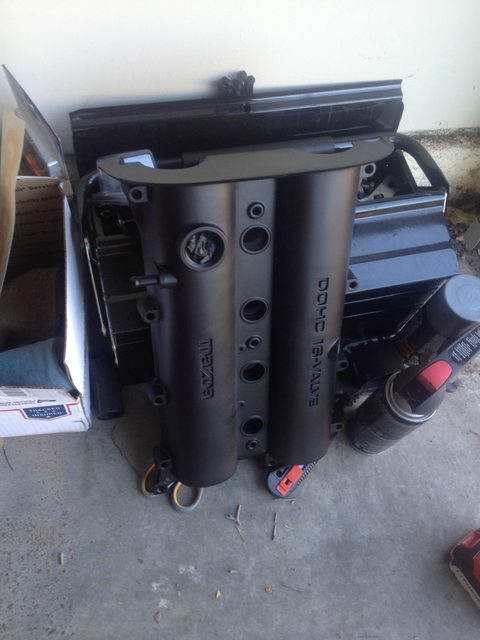
Cut 1, cleaned and painted
Went for another drive
Got some harnesses
Got some Enkei Sway bars
Got a timing belt to do before my texas trip...more on that later
Got a helmet I have yet to use yet too, hopefully this year.
Took the car for a ride on a mountain as well.
Got a roll bar as well
I am just trying to fly through the first year to get you guys up to date.
Got some GarageStar Goods
An awesome oil cap, I like things simple
Then I got an intercooler
Got a mishimoto radiator, kitty approved
More maintenance needed to be done
Simple because of this
Got some extra valve covers
Cut 1, cleaned and painted
Went for another drive
Reply
1
1

Thread Starter
Junior Member
Joined: Feb 2015
Posts: 223
Total Cats: 31
From: Arizona
Now we're getting to the goods
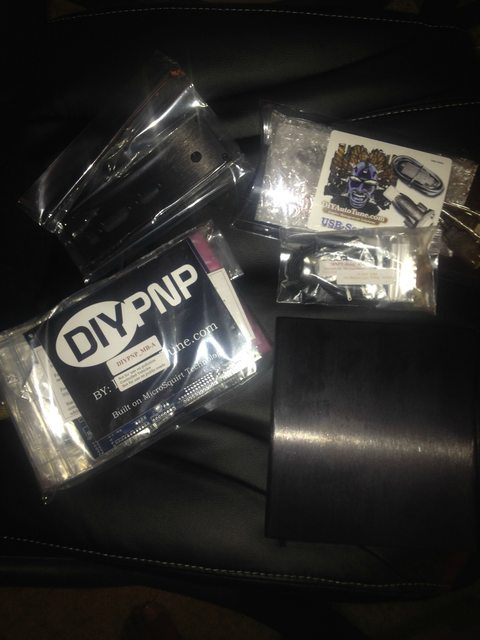
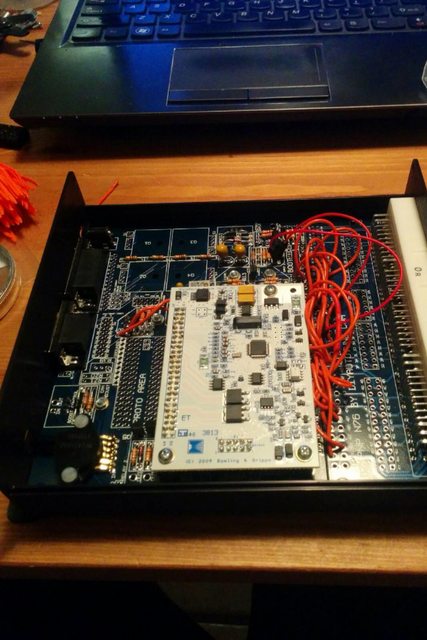

My buddy Paul put this together, cause I was clueless. Thanks again!!
Trying to get the car fired up with MS installed, way to funny.
A little more love for Paul and his Pigs of Whistles
This was a very temporary setup
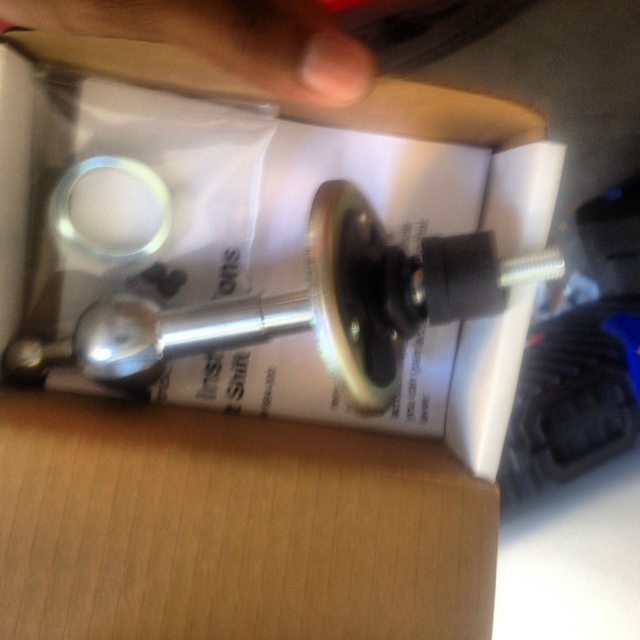
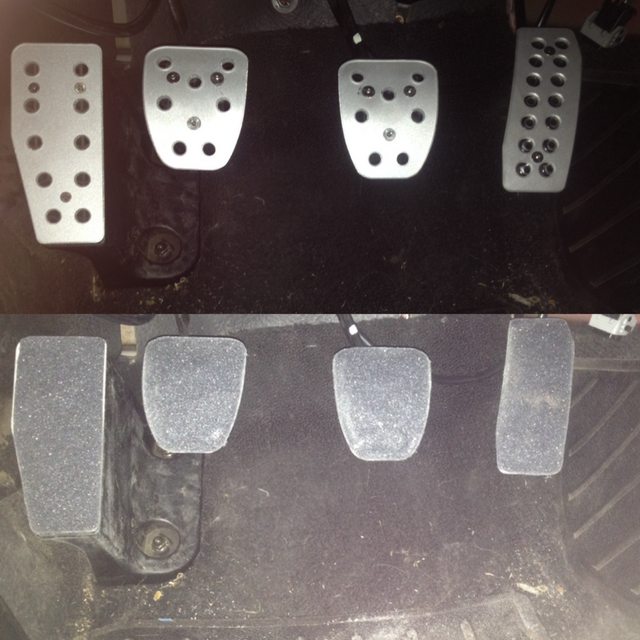
Got a Short Shifter and Pedals
Got some more GarageStar Goodies also Kitty Approved
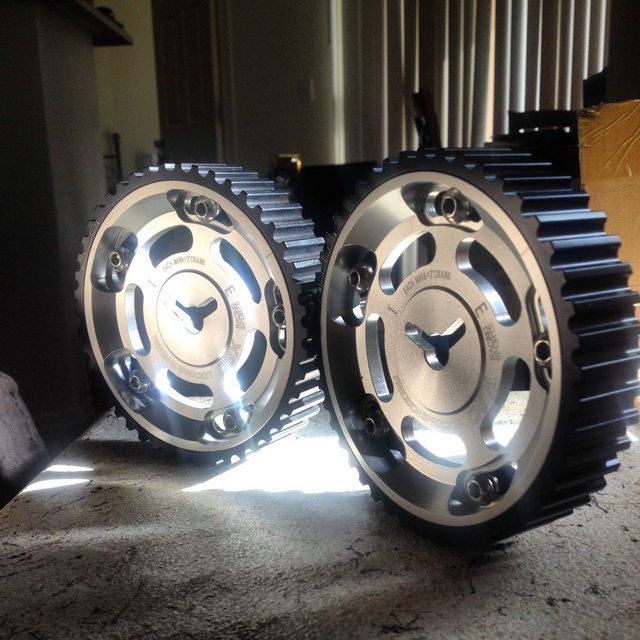
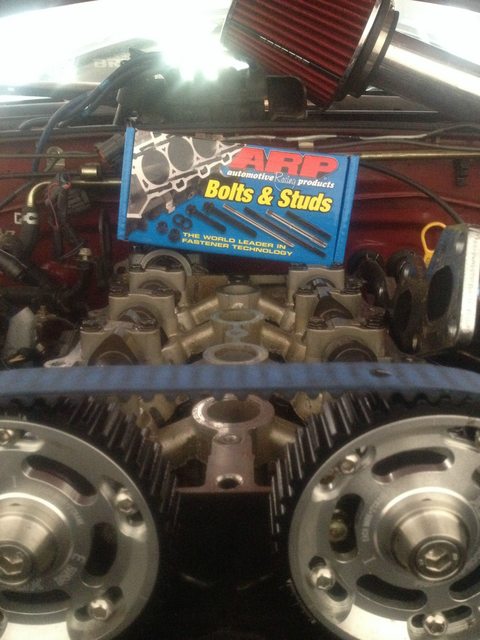
Some new Cam Gears
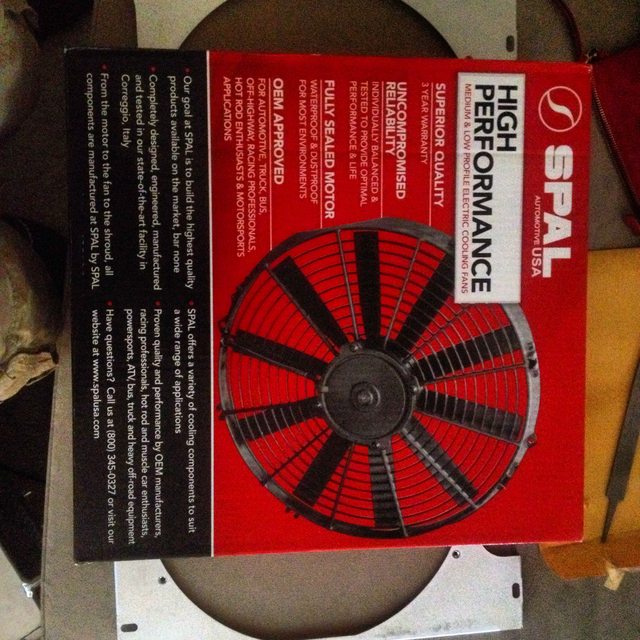
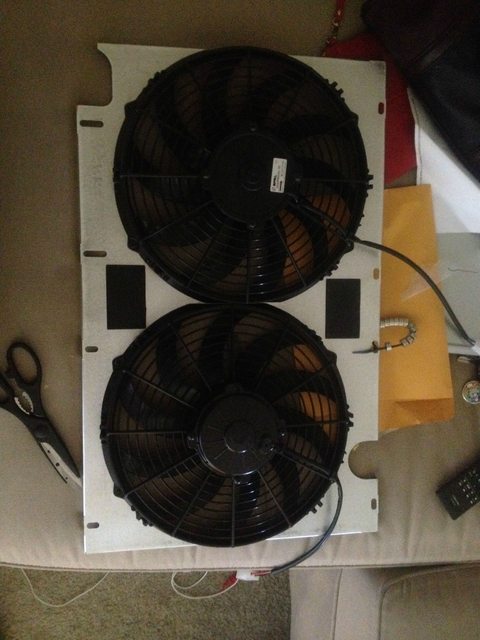
Also got my fan upgrades for the radiator upgrade
More Maintenance
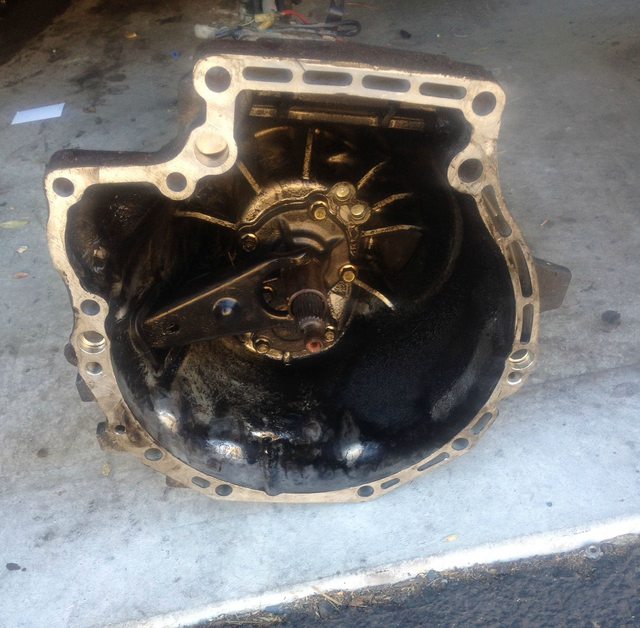
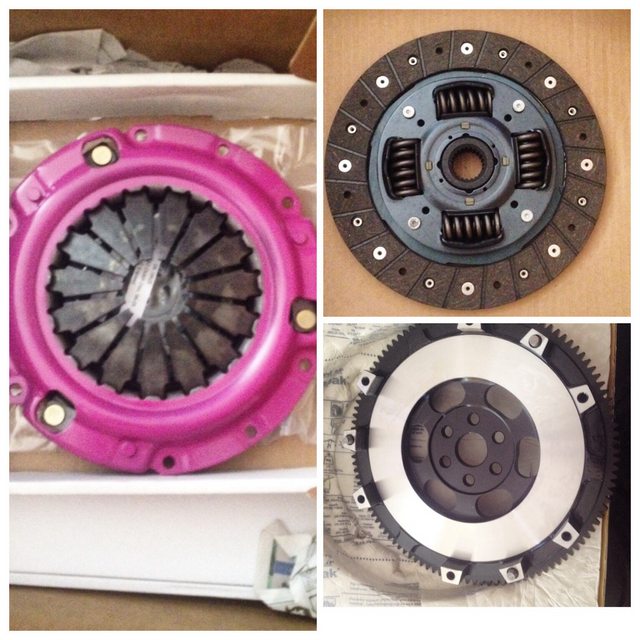
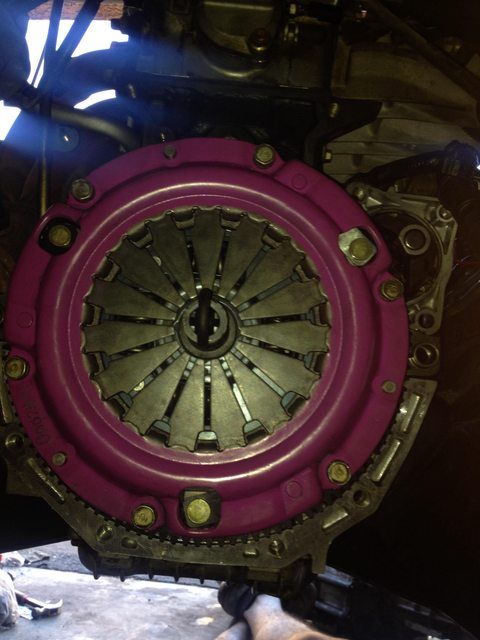
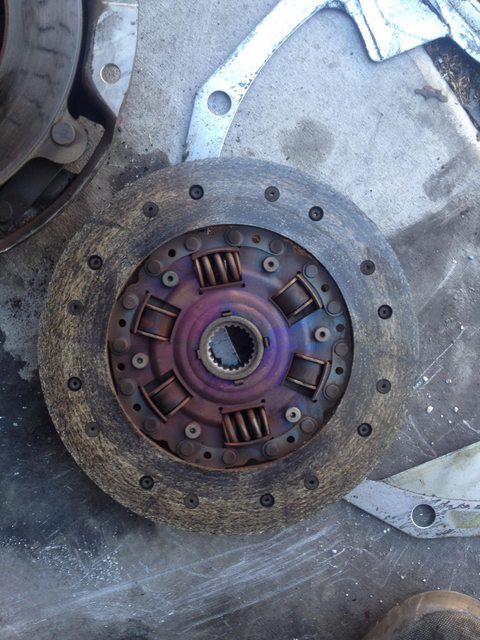
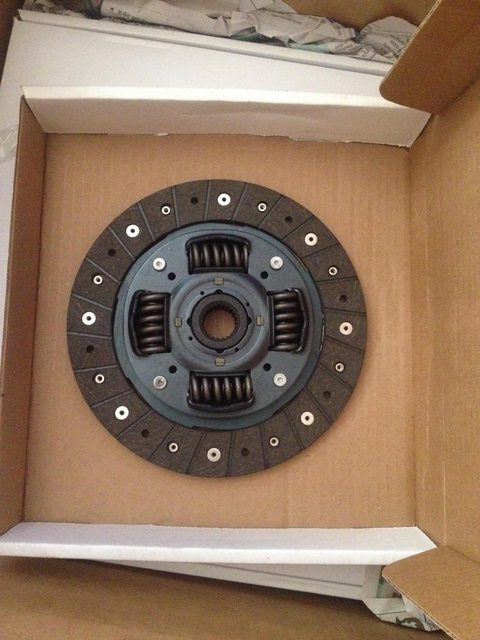
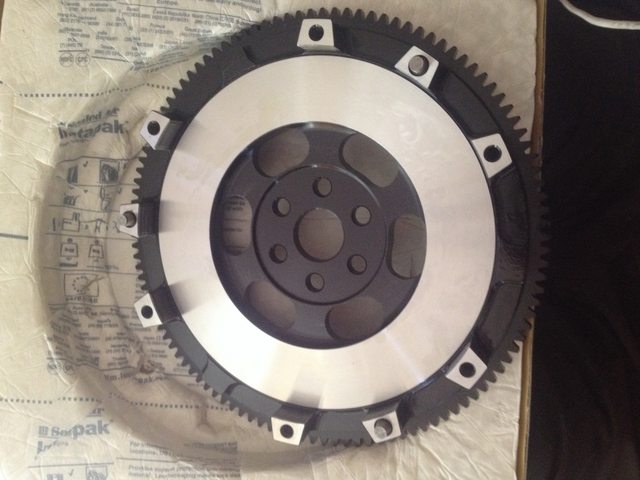
Prior to this, my transmission was making noise, so I was afraid of driving it. After doing some research, it seems that my pilot bearing was no longer spinning as it should of, so I just pulled the whole transmission, 1st time ever. I also upgraded the clutch and flywheel seeing as it needed to happen eventually anyways.
I got the flying miata happy meal 2
Cleaned the transmission up to looking really really good.
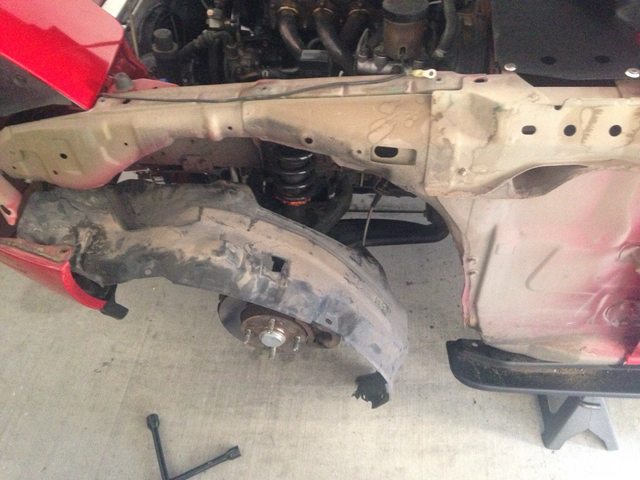
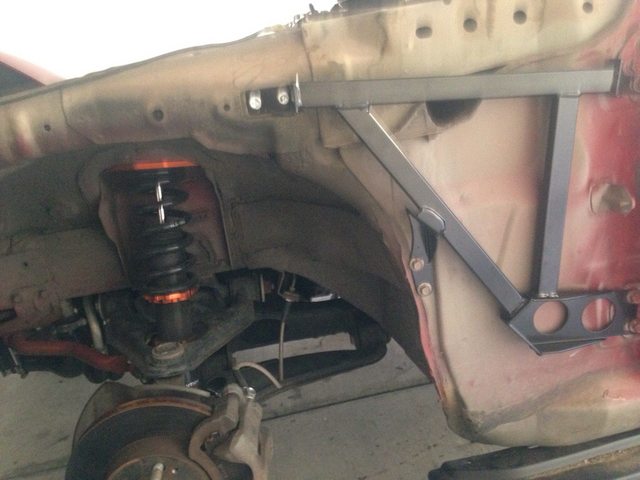
Also bought GarageStar Frame Rails as well, I can't find the picture but I have them some where.
Old Clutch VS New
Old Flywheel VS New

Put it all back in after a full day, but again first time, so much easier to pull the full engine with it, but well you see where this is going. However I did rip a heater hose, so I felt coolant burning my leg when I drove it that night. Got it fixed the next day.
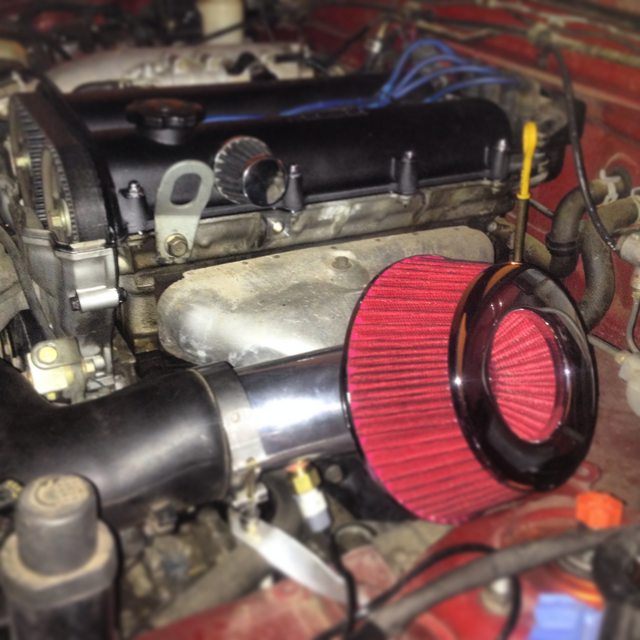
Then I made a similar intake to Paul, and just made a straight 90* down.
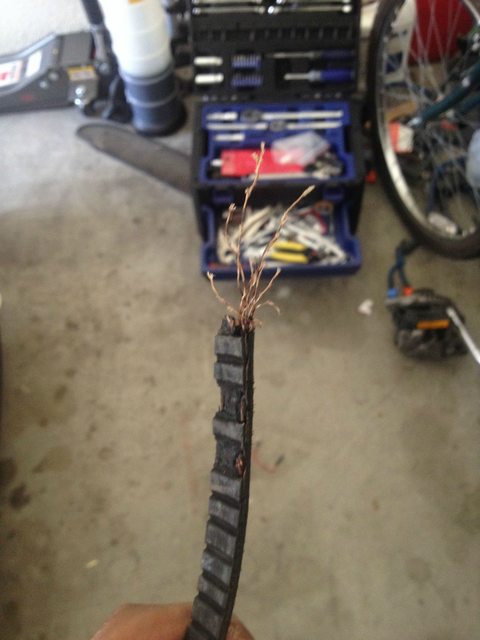
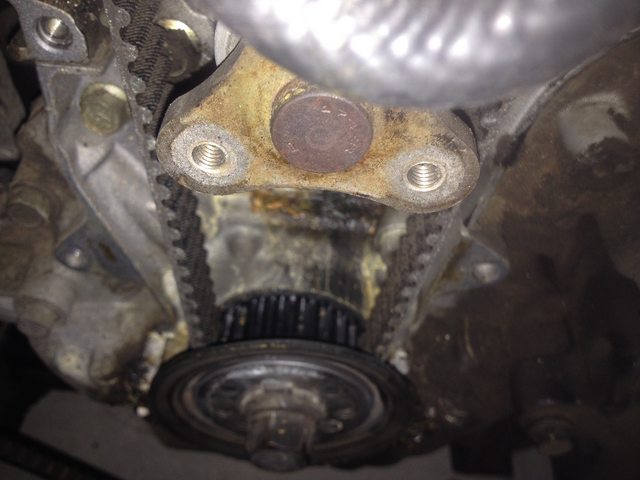
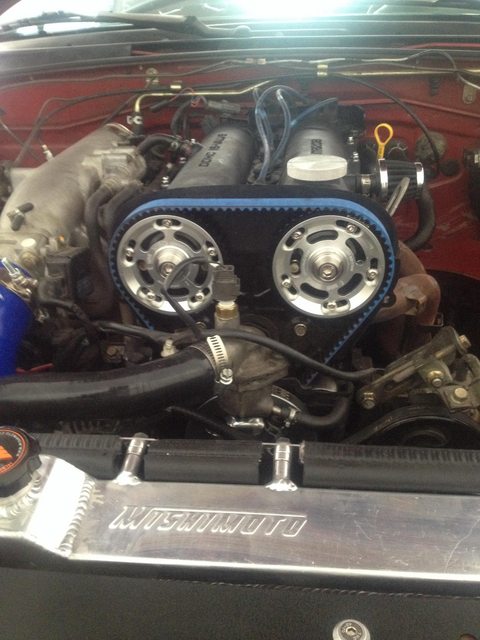
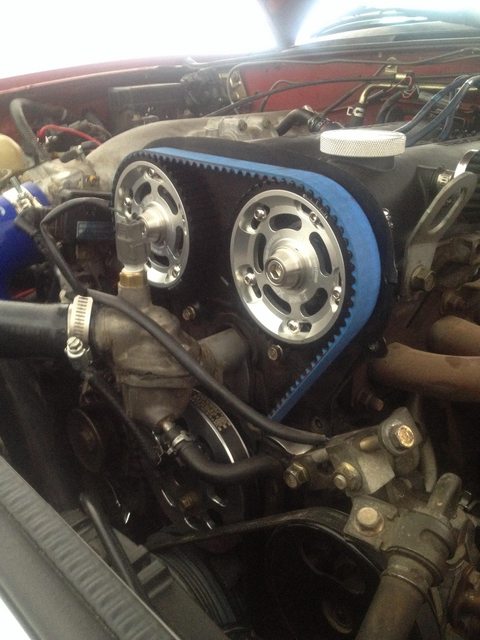
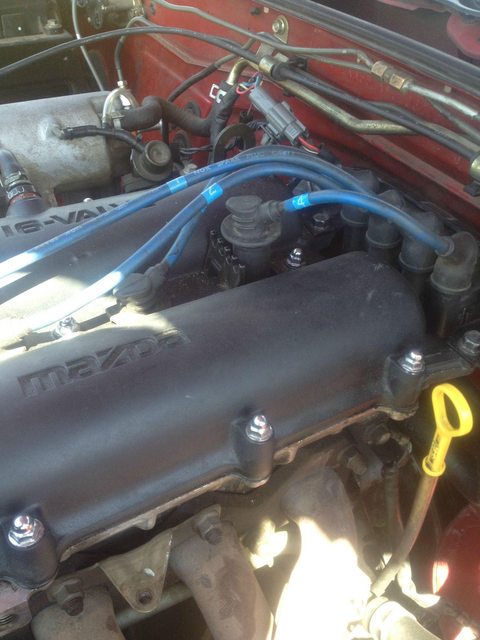
Then my timing belt started to chirp, so that was another 1st to do, went without a hitch.
Plus it gave me a reason to then install the cam gears, and new belt combo.
Old Setup
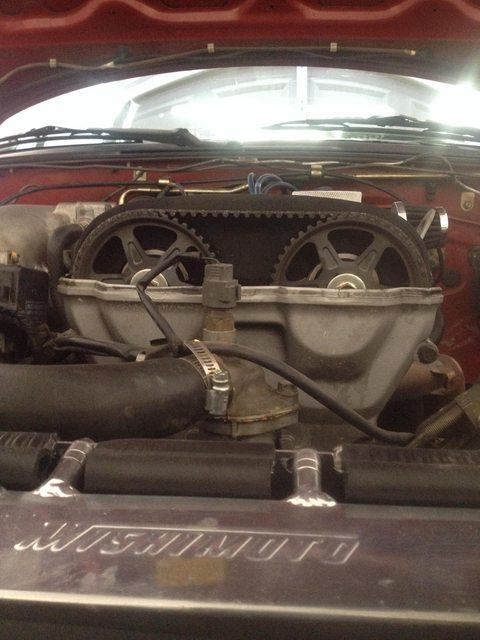
Just pulled the old miata.net trick

Should have done a water pump switch too, but I didn't.
Finished Product
My buddy Paul put this together, cause I was clueless. Thanks again!!
Trying to get the car fired up with MS installed, way to funny.
A little more love for Paul and his Pigs of Whistles
This was a very temporary setup
Got a Short Shifter and Pedals
Got some more GarageStar Goodies also Kitty Approved
Some new Cam Gears
Also got my fan upgrades for the radiator upgrade
More Maintenance
Prior to this, my transmission was making noise, so I was afraid of driving it. After doing some research, it seems that my pilot bearing was no longer spinning as it should of, so I just pulled the whole transmission, 1st time ever. I also upgraded the clutch and flywheel seeing as it needed to happen eventually anyways.
I got the flying miata happy meal 2
Cleaned the transmission up to looking really really good.
Also bought GarageStar Frame Rails as well, I can't find the picture but I have them some where.
Old Clutch VS New
Old Flywheel VS New
Put it all back in after a full day, but again first time, so much easier to pull the full engine with it, but well you see where this is going. However I did rip a heater hose, so I felt coolant burning my leg when I drove it that night. Got it fixed the next day.
Then I made a similar intake to Paul, and just made a straight 90* down.
Then my timing belt started to chirp, so that was another 1st to do, went without a hitch.
Plus it gave me a reason to then install the cam gears, and new belt combo.
Old Setup
Just pulled the old miata.net trick
Should have done a water pump switch too, but I didn't.
Finished Product
Reply
0
0
Thread Starter
Junior Member
Joined: Feb 2015
Posts: 223
Total Cats: 31
From: Arizona
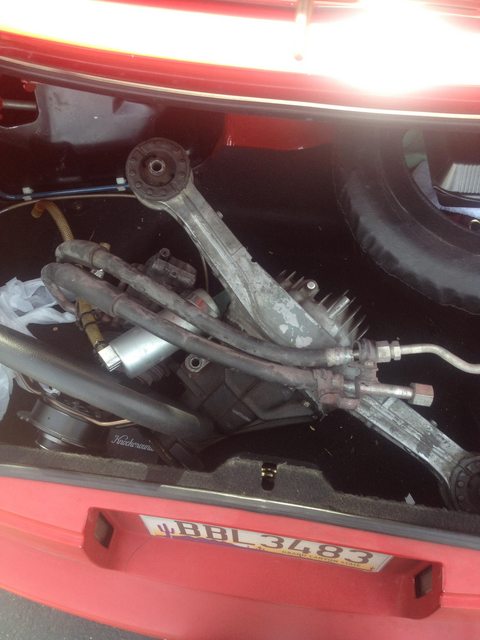
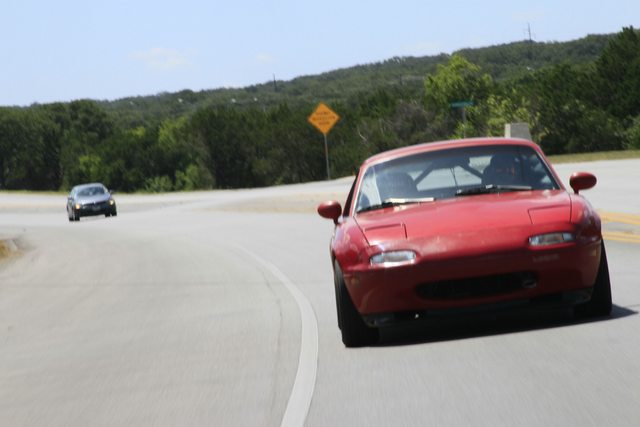
Pulled the carpet out to install the frame rails before I went to Texas to see Evan, Stoly and the gang.
Some of you may recognize him

Drove hard, so hard I pushed the plug off, I was pushing so hard, I was pretty sure my head gasket was donezo, Evan told me I was puffing some smoke while I shifted
I was running low on oil, so this was a blessing in disguise if you will, so I topped off, drove for a bit, and saw leaking where the head meets the block, not a lot, but enough to be annoying. So I just bandaged it up, and kept driving.
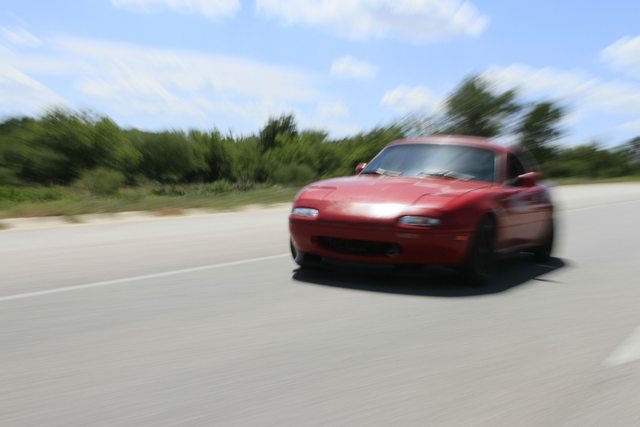
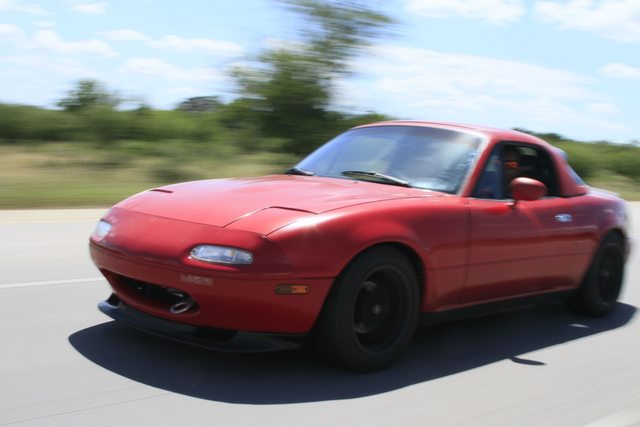
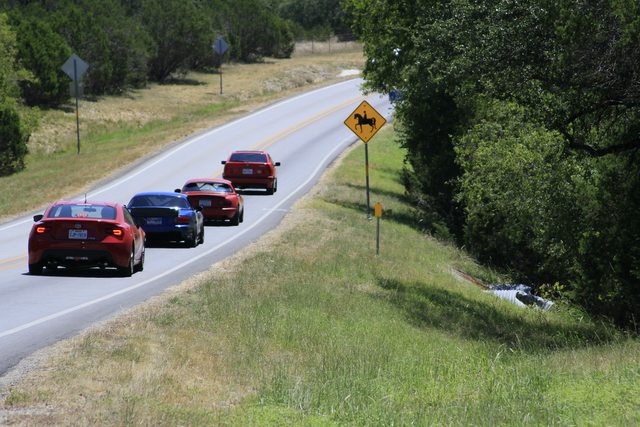
More Texas Shots
Some of you may recognize him
Drove hard, so hard I pushed the plug off, I was pushing so hard, I was pretty sure my head gasket was donezo, Evan told me I was puffing some smoke while I shifted
I was running low on oil, so this was a blessing in disguise if you will, so I topped off, drove for a bit, and saw leaking where the head meets the block, not a lot, but enough to be annoying. So I just bandaged it up, and kept driving.
More Texas Shots
Reply
0
0
Thread Starter
Junior Member
Joined: Feb 2015
Posts: 223
Total Cats: 31
From: Arizona
I have had to type this like 3 times cause it kicks me out
But I will do it again.
Once I got home, the head gasket was still leaking but I drove it more anyways not much but enough to get around
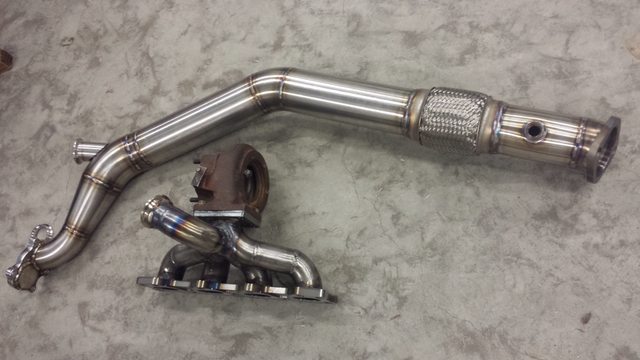
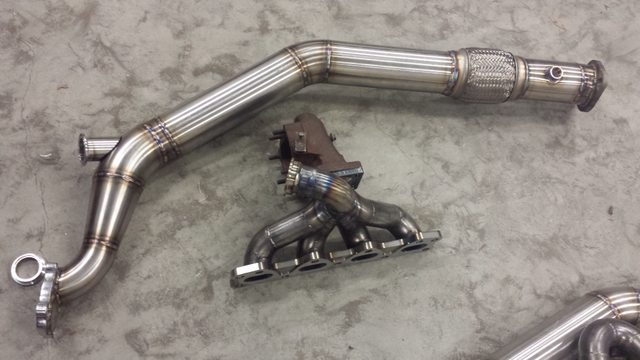
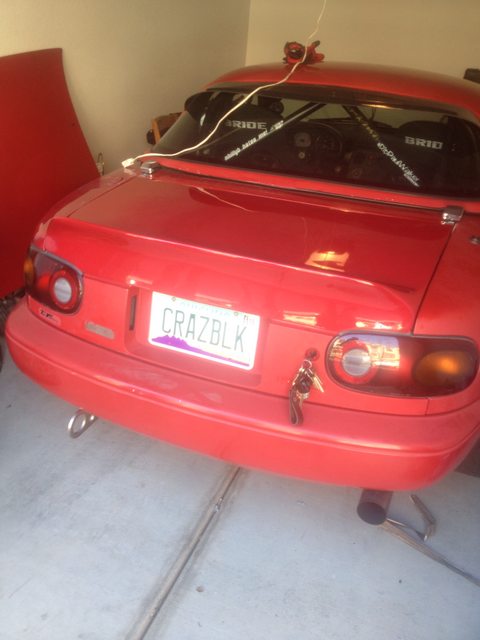
Put headers and 3" turbo back on to be obnoxious
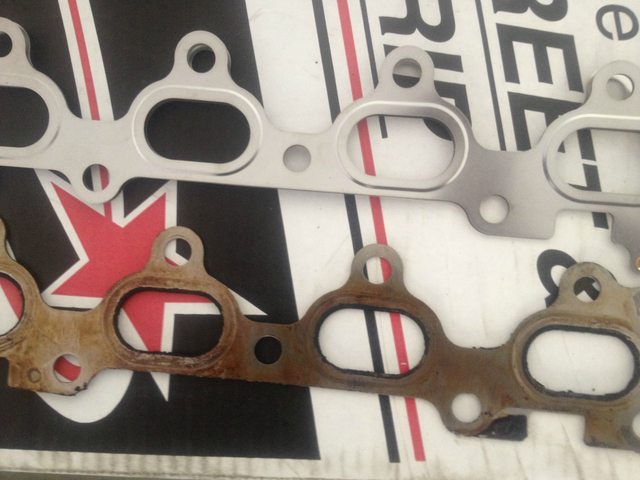
New gasket
Went for a drive, and it was in monsoon season so I had the top off and needed to put the car away, went back to the apartment, power was out so I had to wrap it up.

Next day decided to do my head gasket
Bought some stuff from Abe at ARTECH, great guy
Put it all back together again, and timing was WAY off, so after doing research I had no idea it was timing at the time, but finally figured out it was the timing.
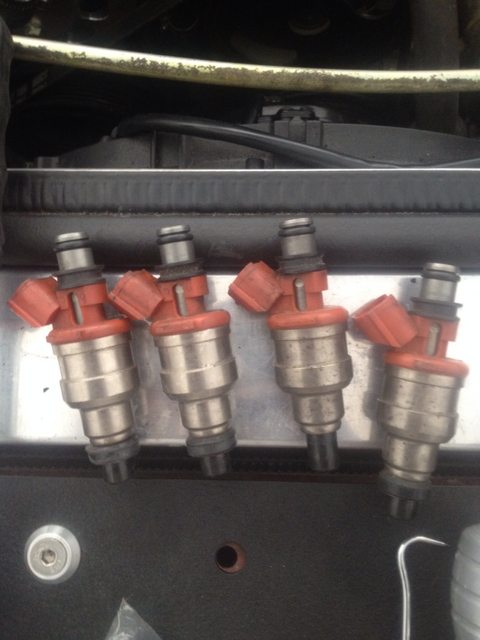
Got some goods from FRT_FUN. Rx7 460 Injectors
Mock up
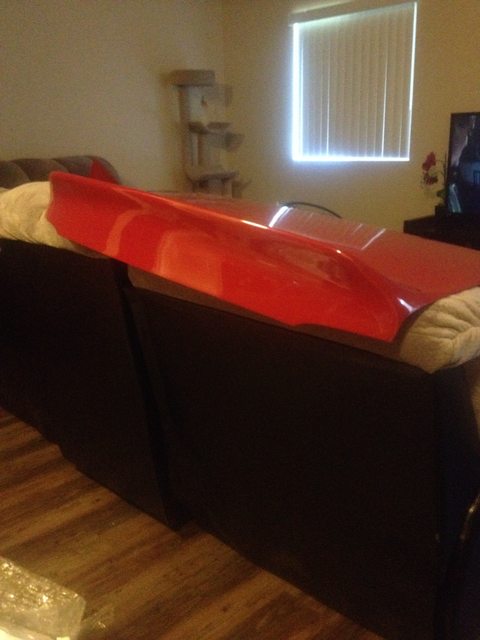
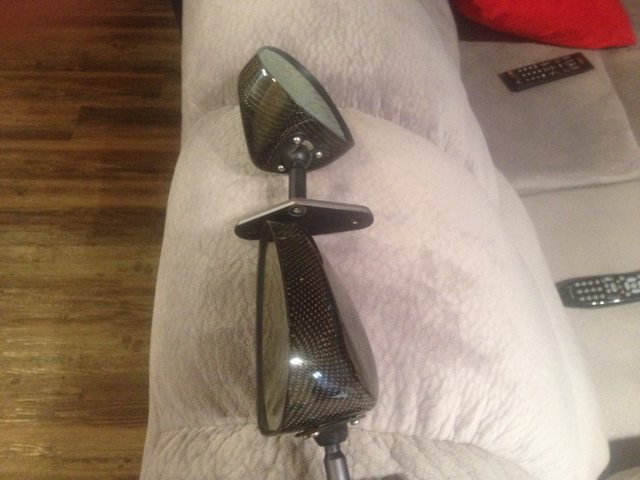
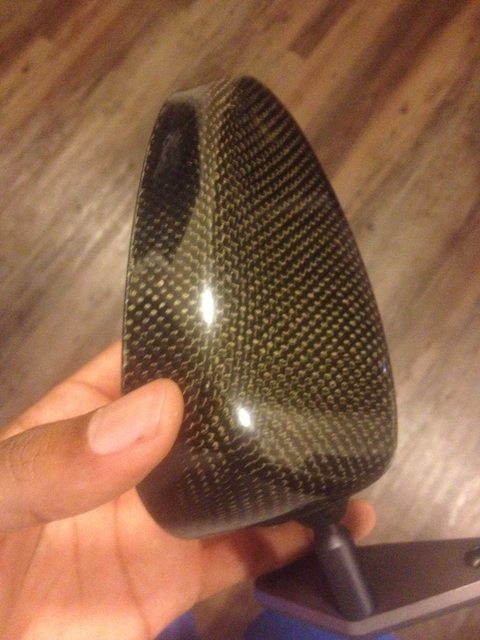
Then I started to splurge, v2 Autoken and Garage 502 Mirrors
Then I got into detailing slightly
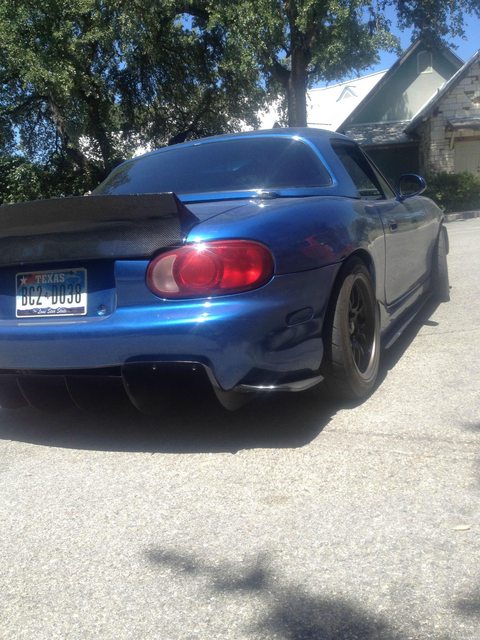
Got some skirts
Some Turbo Fittings
Thats it for now, I am tired of typing, and I am off work, until next time.
But I will do it again.
Once I got home, the head gasket was still leaking but I drove it more anyways not much but enough to get around
Put headers and 3" turbo back on to be obnoxious
New gasket
Went for a drive, and it was in monsoon season so I had the top off and needed to put the car away, went back to the apartment, power was out so I had to wrap it up.
Next day decided to do my head gasket
Bought some stuff from Abe at ARTECH, great guy
Put it all back together again, and timing was WAY off, so after doing research I had no idea it was timing at the time, but finally figured out it was the timing.
Got some goods from FRT_FUN. Rx7 460 Injectors
Mock up
Then I started to splurge, v2 Autoken and Garage 502 Mirrors
Then I got into detailing slightly
Got some skirts
Some Turbo Fittings
Thats it for now, I am tired of typing, and I am off work, until next time.
Reply
0
0
Thread Starter
Junior Member
Joined: Feb 2015
Posts: 223
Total Cats: 31
From: Arizona
I use to have a shoe fetish, I have slowed down dramatically since getting this car.
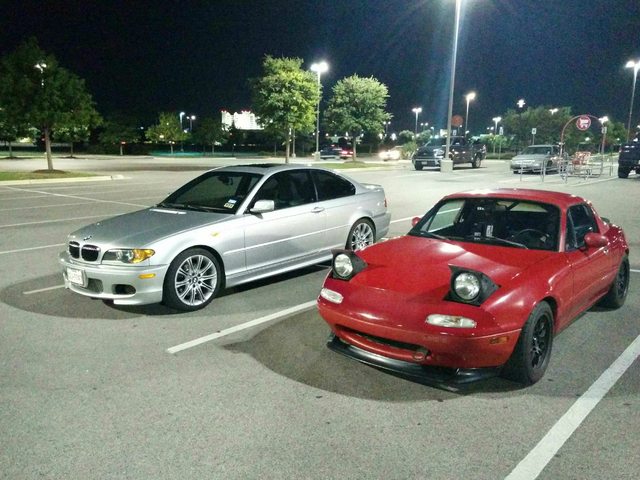
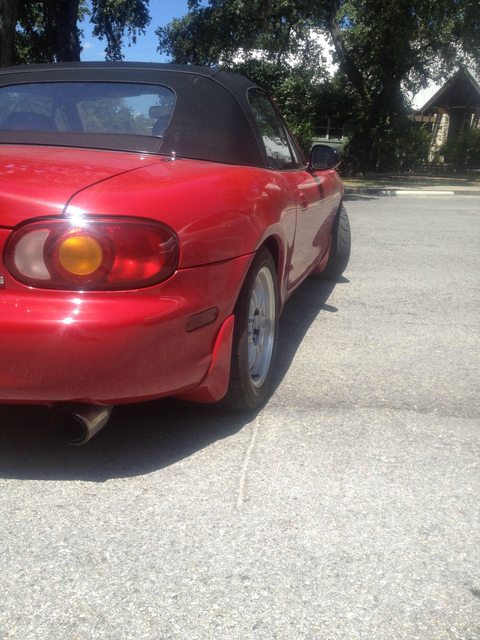
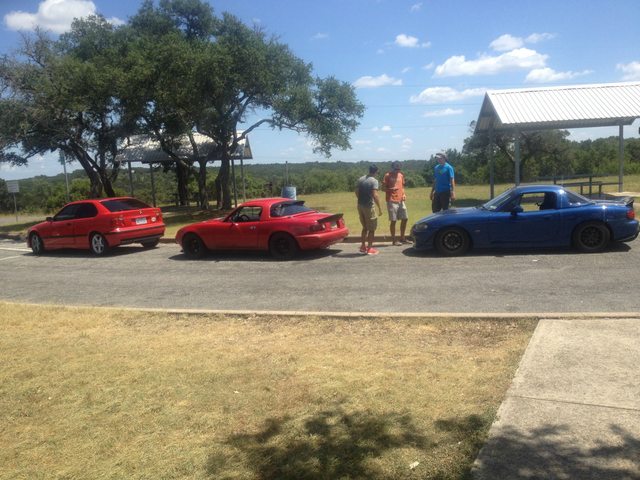
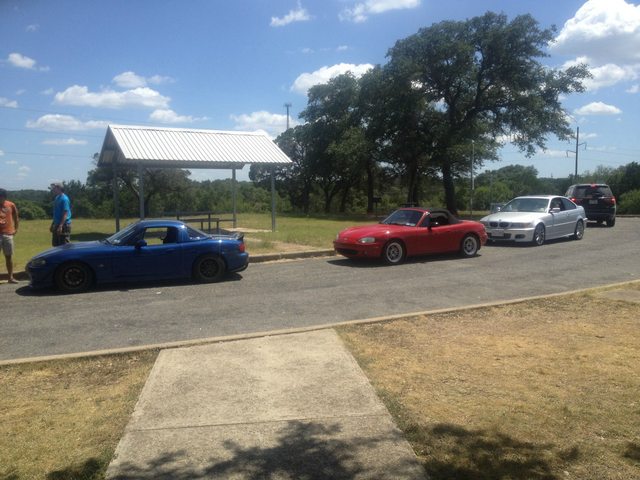
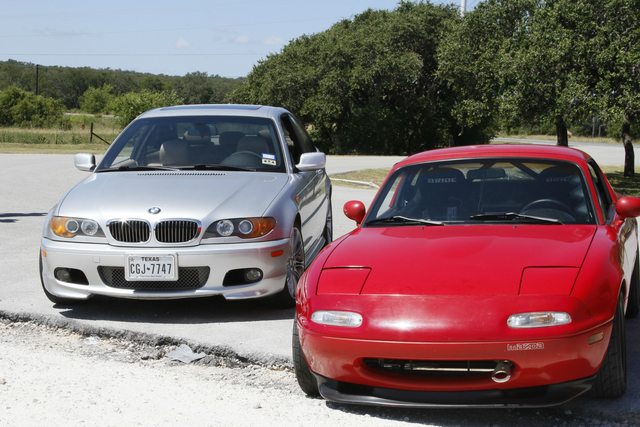
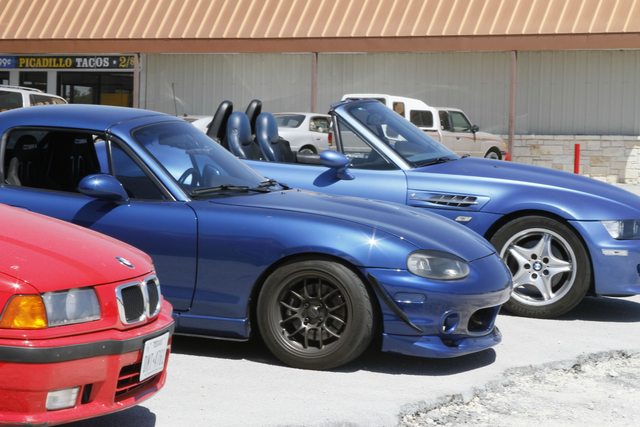
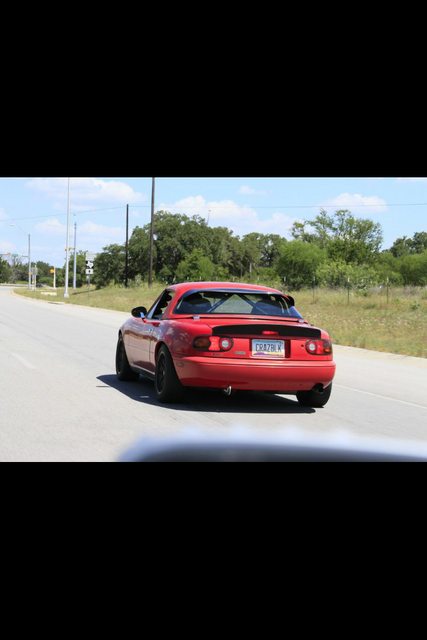
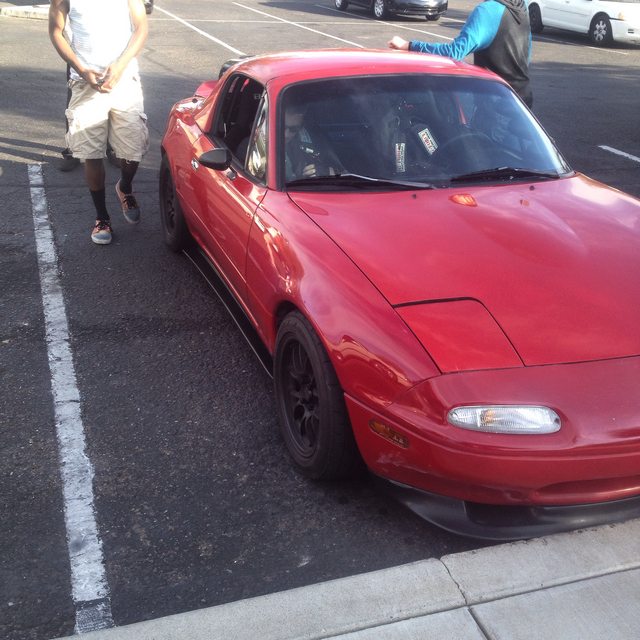
Texas trip was awesome, was in San Marcos, Texas for 3 days, hung out with some work buddies, and some forum buddies
Reply
0
0

Thread Starter
Junior Member
Joined: Feb 2015
Posts: 223
Total Cats: 31
From: Arizona
Appreciate it, ya lots of money has gone into it that's for sure, I did not want to just be another eBay manifold guy just doing it to do it, I guess if I was going to do it I wanted to do it right.
Reply
0
0
Thread Starter
Junior Member
Joined: Feb 2015
Posts: 223
Total Cats: 31
From: Arizona
Welp I lied about updating this the other day, but the app hates me basically, so we will continue posting when I work my 4x10's.
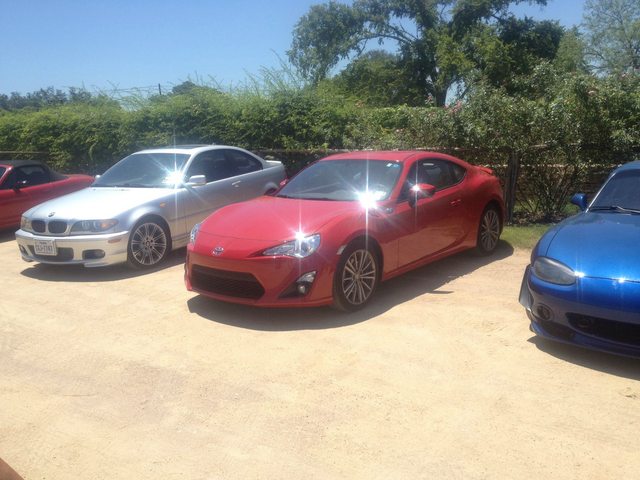
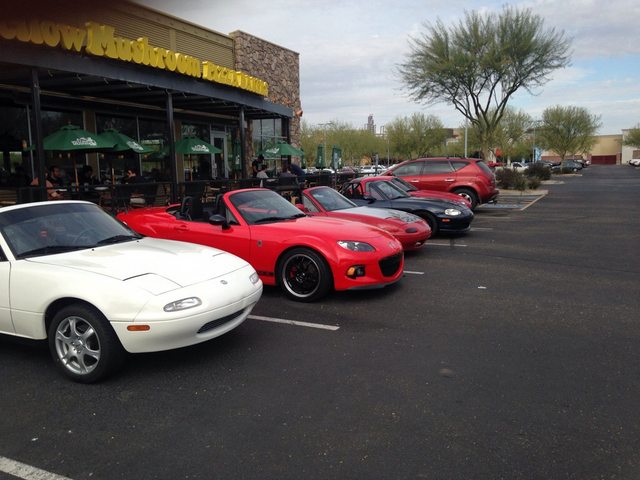
Anyways I went to a local meet around me and got some photos from a buddy.
I need to adjust my trunk still, so that is for another day.
Old setup
Now we are starting to get more recent, so more details are required now that you are caught up.
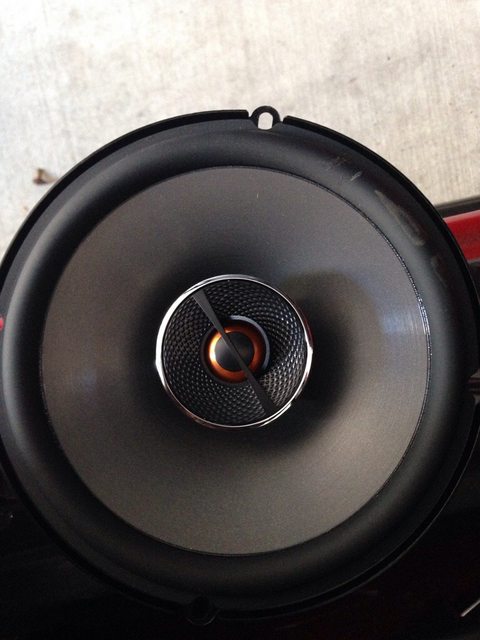
My music is always been a big thing for me, so I had to update my life, new radio, and door speakers as well.

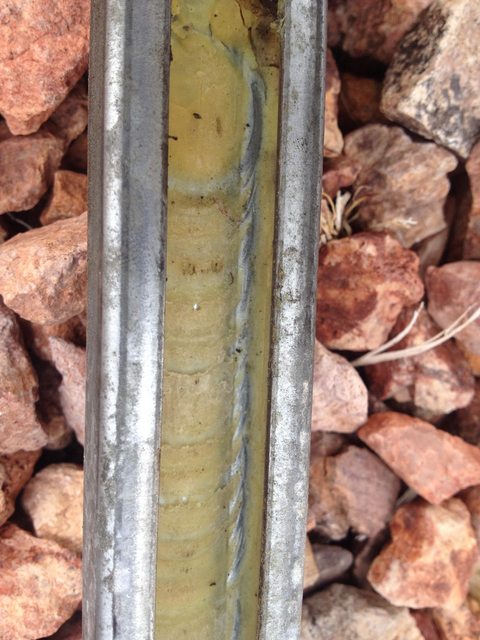
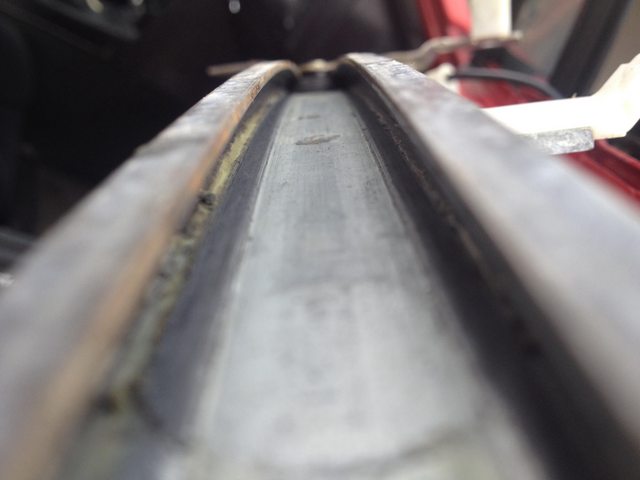
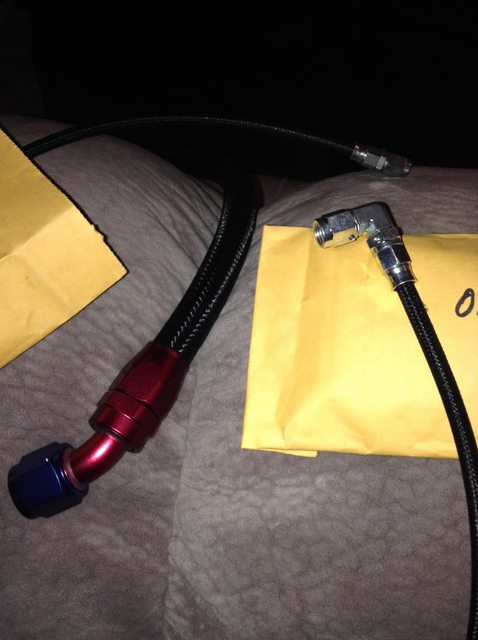
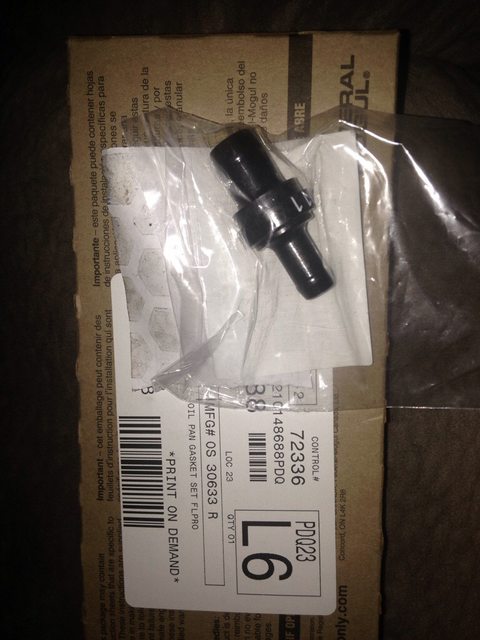
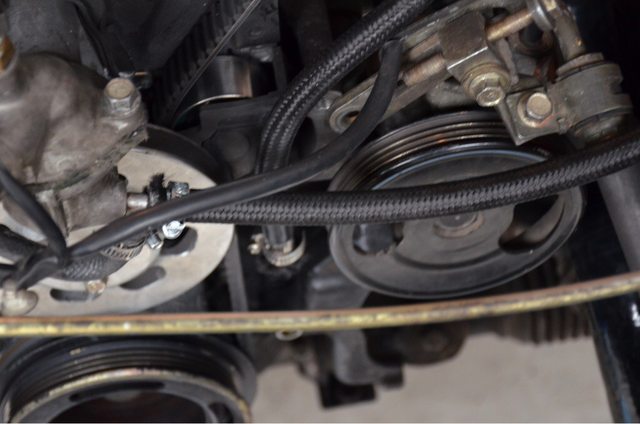
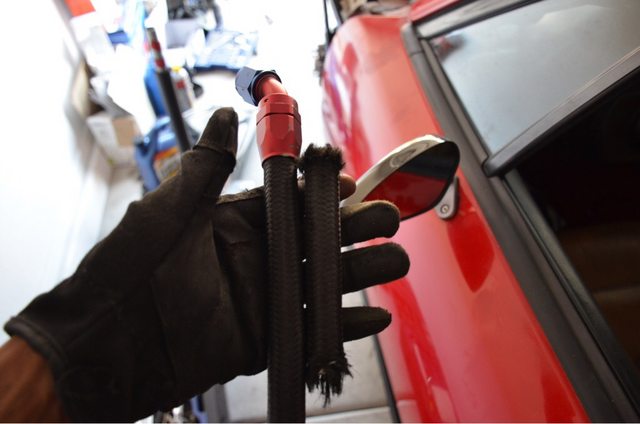
Got my coolant lines as well from BR Fittings. All -6 AN Fittings throughout everything to just make it easy. I had to get -4 AN to -6 AN adapters for the wastegate to make it all -6.

Some say it adds more leak points, but I put some putty on it, no problems here now.
I also got some more maintenance stuff as well.
When you get bored at home you make test mock ups
In this time, I was very happy with how the car was driving, no malfunctions driving NA. A while ago I was without the car for about a month, just driving was a great feeling when the car just works like it's suppose to.

Then I got some more Bracing
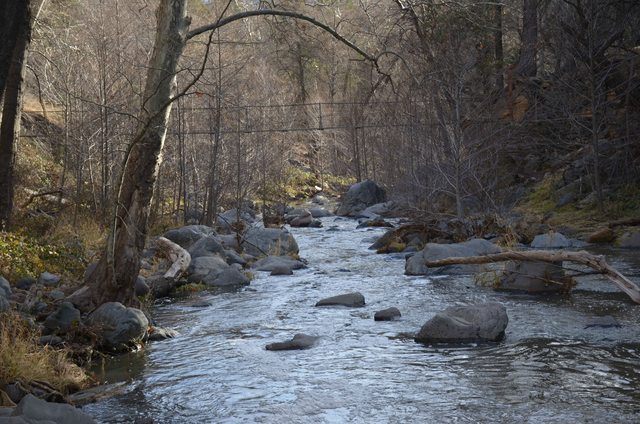
So simply because the car was running so well, the lady and I took a little trip to Sedona Arizona, plus I got a new Nikon so I have always been interested in photography and seeing may pictures that just blow me away. So this trip I took the new camera and put it to use, still learning the basics, but I am alway eager to learn.


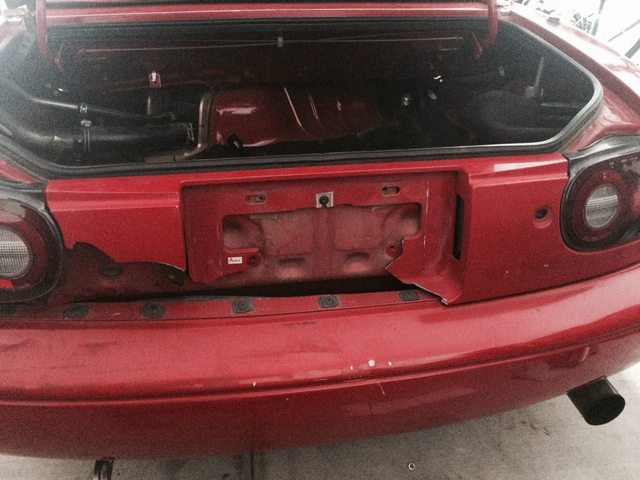
Then this happened on the same trip
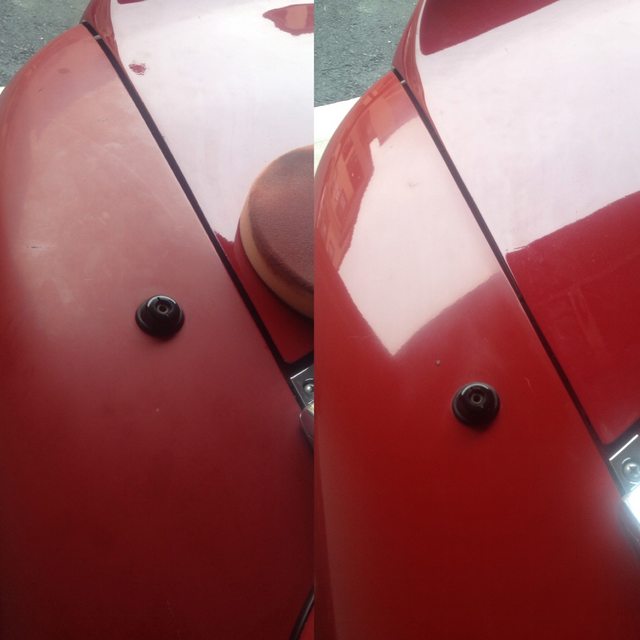
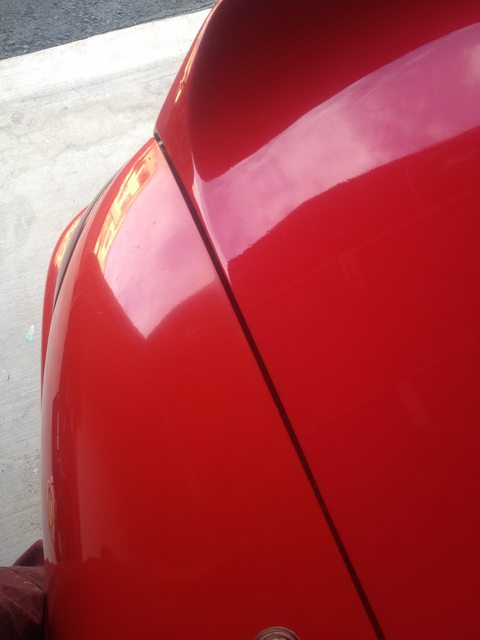
Rear ended by an Integra
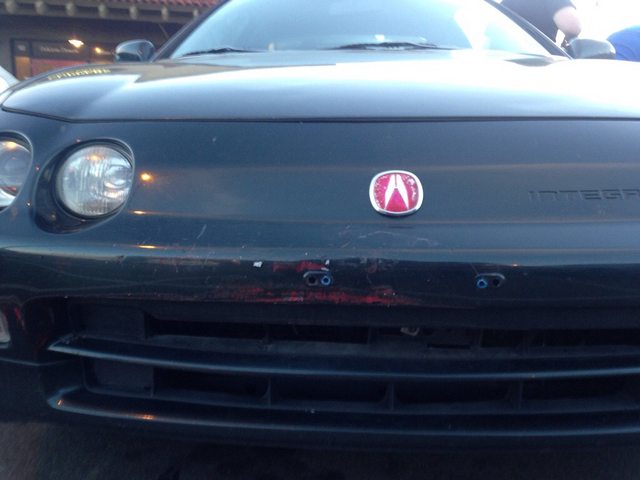
I think this is probably one of the best case scenarios when it comes to an accident, seeing as the trunk was untouched, it was only the bumper and the finish panel, mainly the finish panel.
So drove home a little broken hearted, but game to figure out the next step.
Anyways I went to a local meet around me and got some photos from a buddy.
I need to adjust my trunk still, so that is for another day.
Old setup
Now we are starting to get more recent, so more details are required now that you are caught up.
My music is always been a big thing for me, so I had to update my life, new radio, and door speakers as well.
Got my coolant lines as well from BR Fittings. All -6 AN Fittings throughout everything to just make it easy. I had to get -4 AN to -6 AN adapters for the wastegate to make it all -6.
Some say it adds more leak points, but I put some putty on it, no problems here now.
I also got some more maintenance stuff as well.
When you get bored at home you make test mock ups
In this time, I was very happy with how the car was driving, no malfunctions driving NA. A while ago I was without the car for about a month, just driving was a great feeling when the car just works like it's suppose to.
Then I got some more Bracing
So simply because the car was running so well, the lady and I took a little trip to Sedona Arizona, plus I got a new Nikon so I have always been interested in photography and seeing may pictures that just blow me away. So this trip I took the new camera and put it to use, still learning the basics, but I am alway eager to learn.
Then this happened on the same trip
Rear ended by an Integra
I think this is probably one of the best case scenarios when it comes to an accident, seeing as the trunk was untouched, it was only the bumper and the finish panel, mainly the finish panel.
So drove home a little broken hearted, but game to figure out the next step.
Reply
0
0
Thread Starter
Junior Member
Joined: Feb 2015
Posts: 223
Total Cats: 31
From: Arizona
So since that I had to wait a few days for the appraisal of the car, so I took it to get inspected it was pretty funny watching the guy get under the car, but I thought the outcome was great.
Since then I got some help from a buddy XHighschoolX, not sure if he is on here or not, but he helped me get a new finish panel and bumper support and sent it right out. I appreciate this community with no bounds!!!
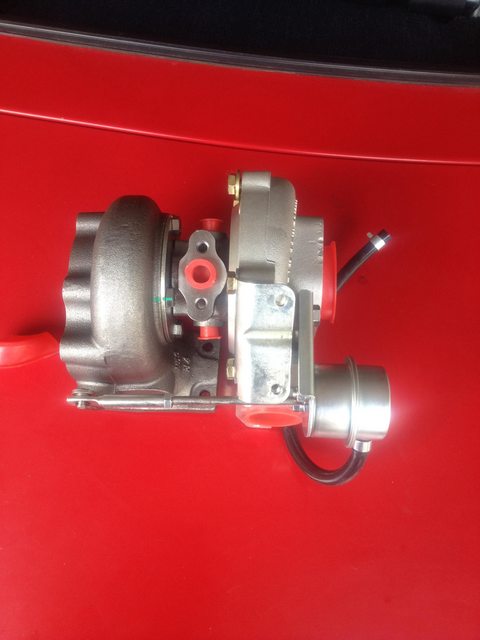
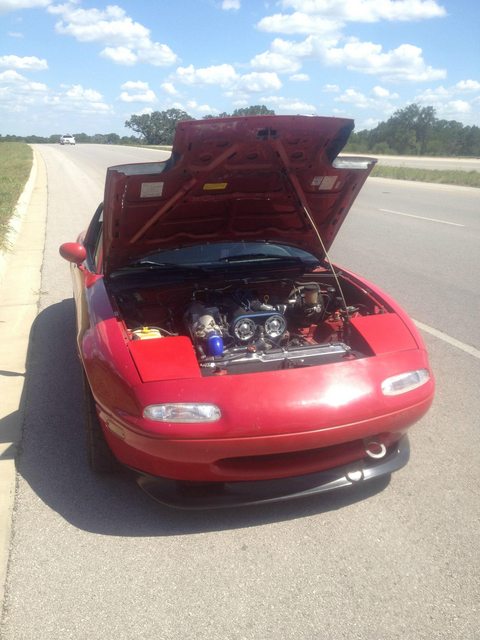
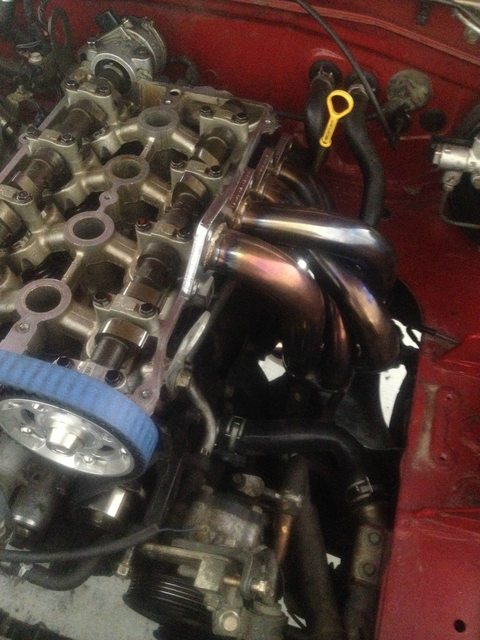
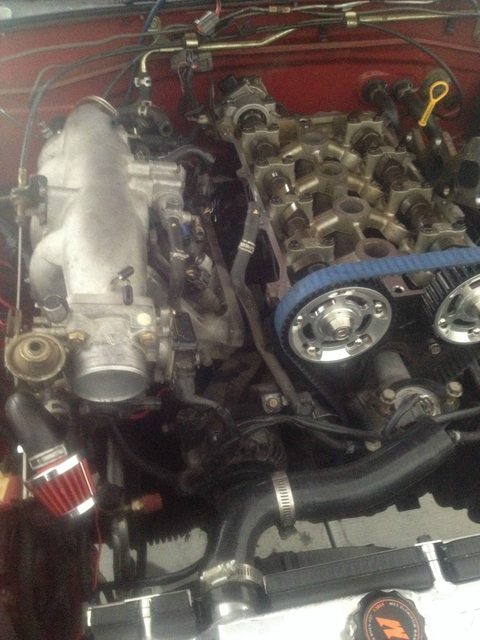
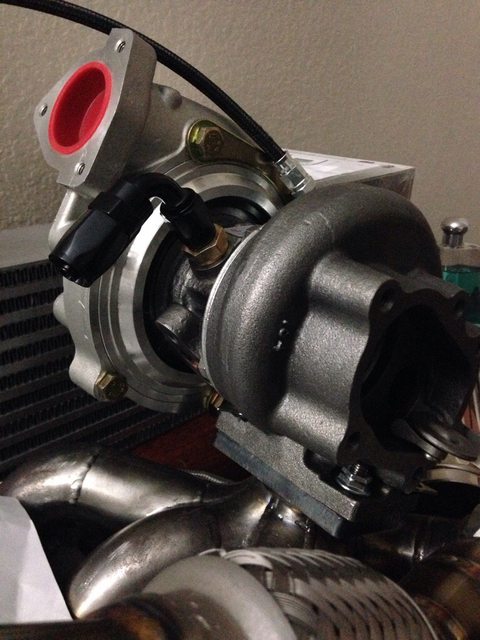
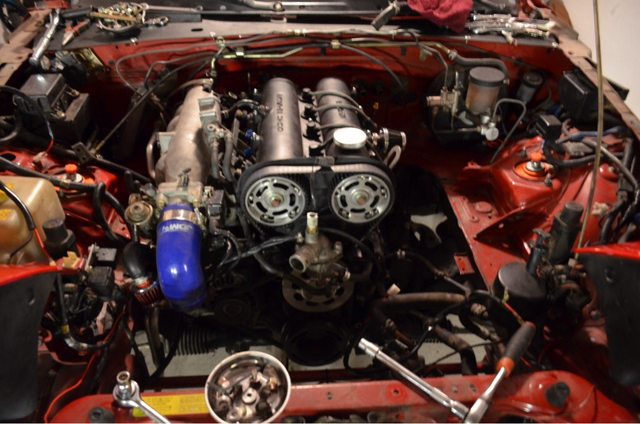
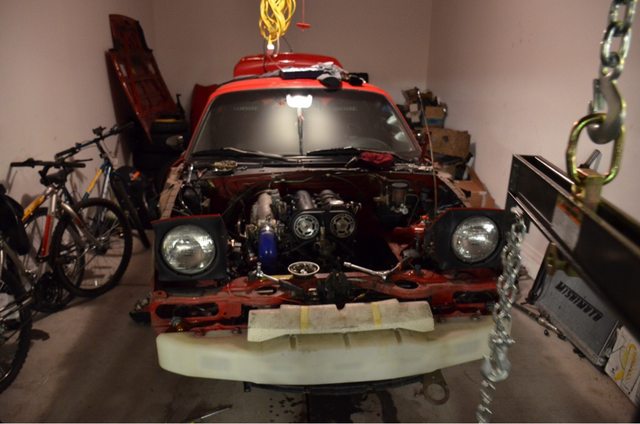
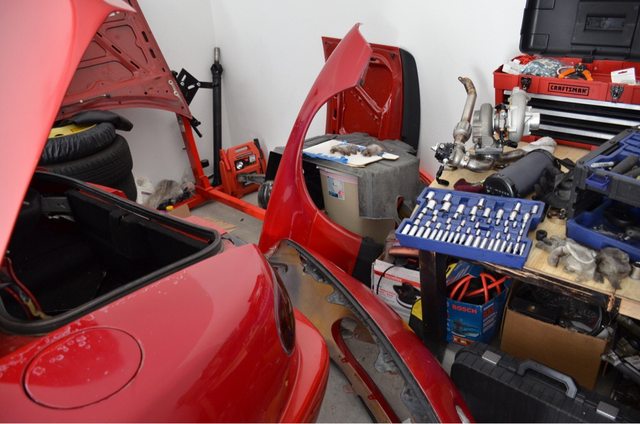
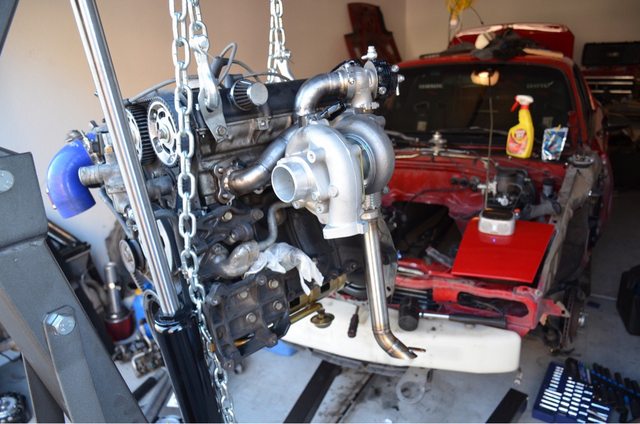
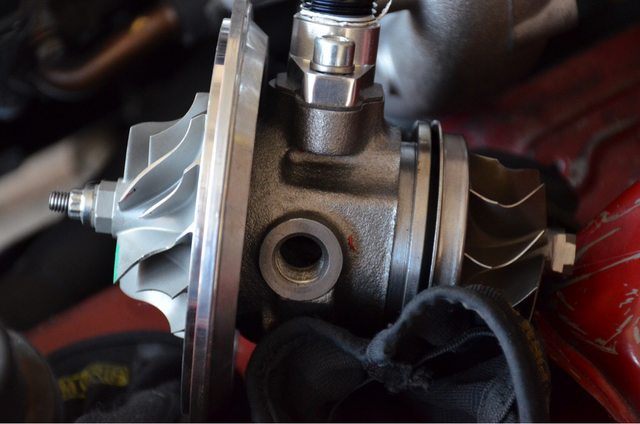
So that leads us to the turbo install time. I took about 5 days off work to get it done, HA, being first turbo install of my life, I underestimated that mainly because I had some wrong size fittings for the block and the turbo inlet.
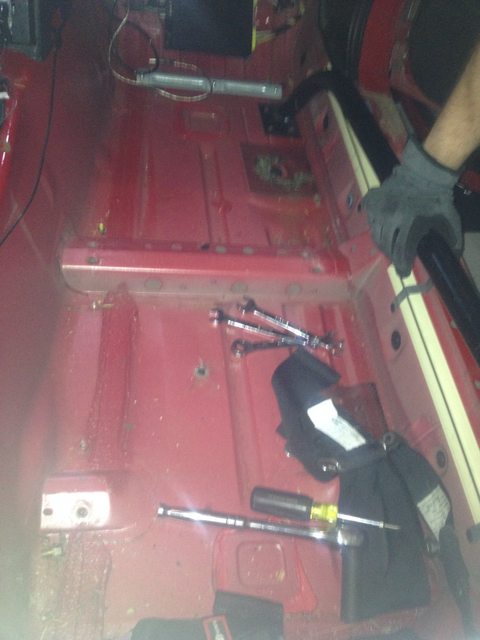
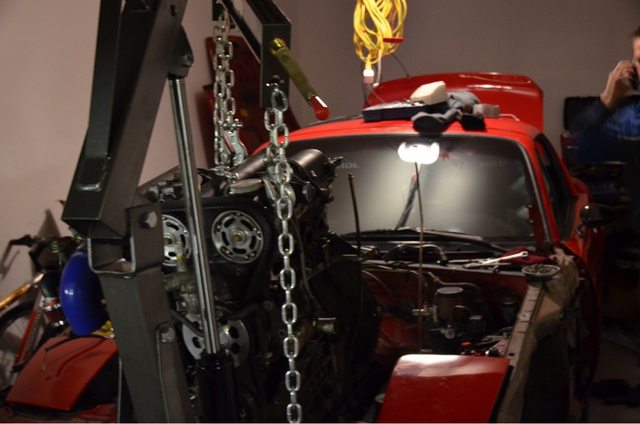
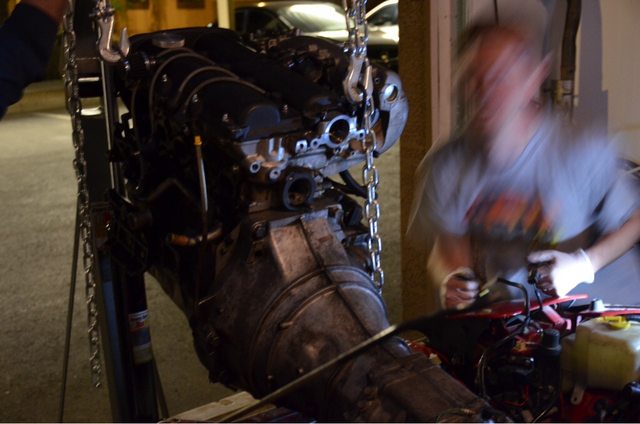
The process started with me wanting to do it right, So that hoist from earlier was of great use.
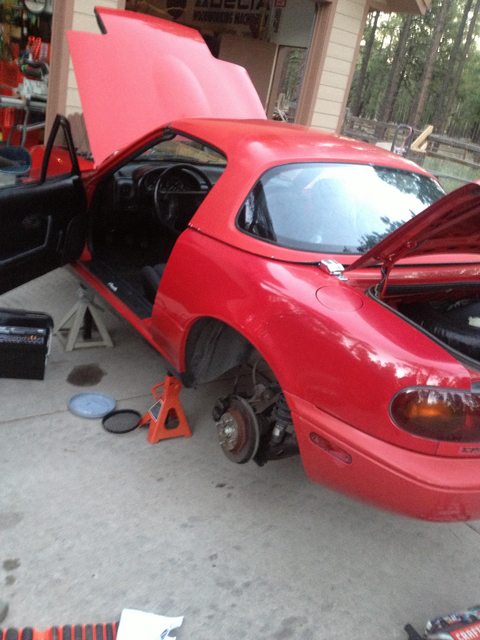
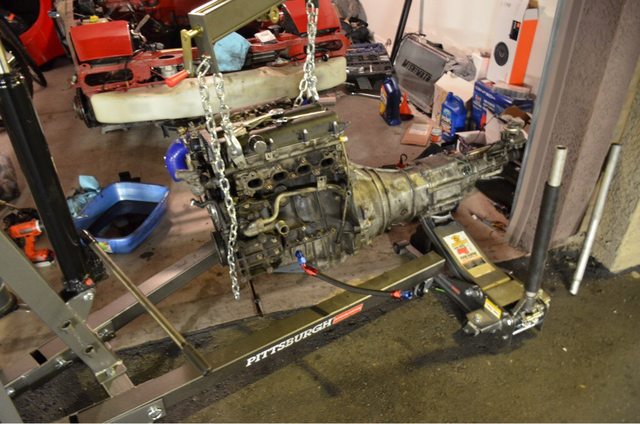
Had my buddy come over, we put the car on jack stands and got to work. He did the underside while I did the upper side. Remember this is the first time pulling an engine ever. So it basically took all day, but got it out. I was surprised how many connectors there were.
Boring content here for some
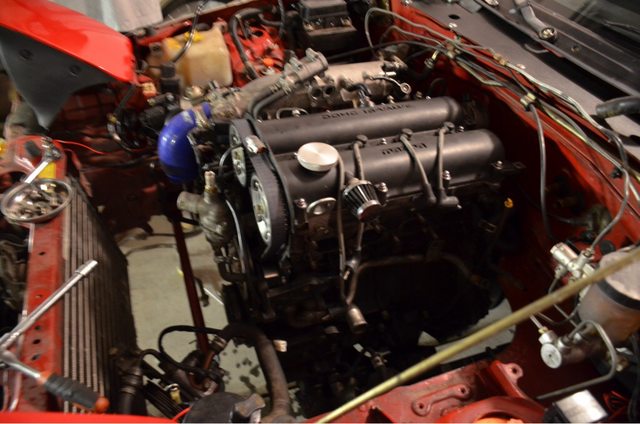
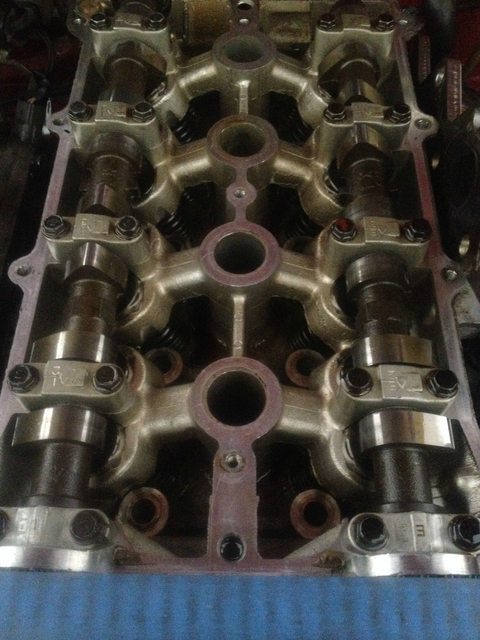
The next day I got to work separating the engine and transmission and doing all the maintenance. So little room in the garage.
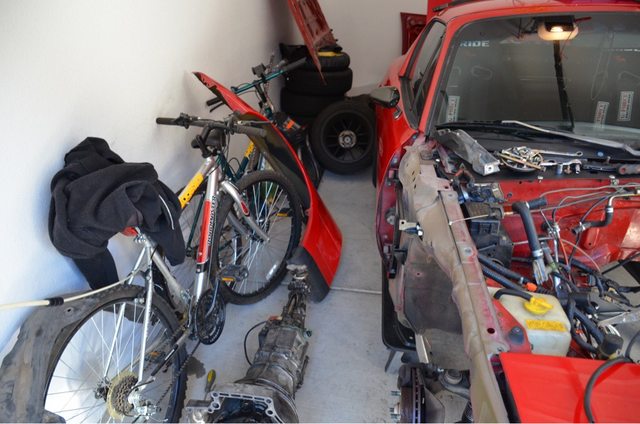
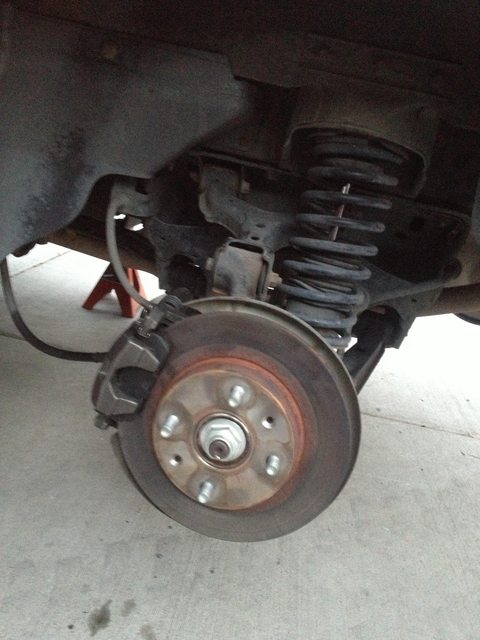
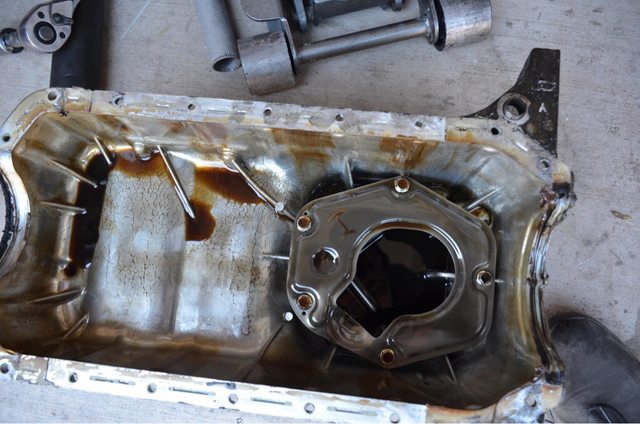
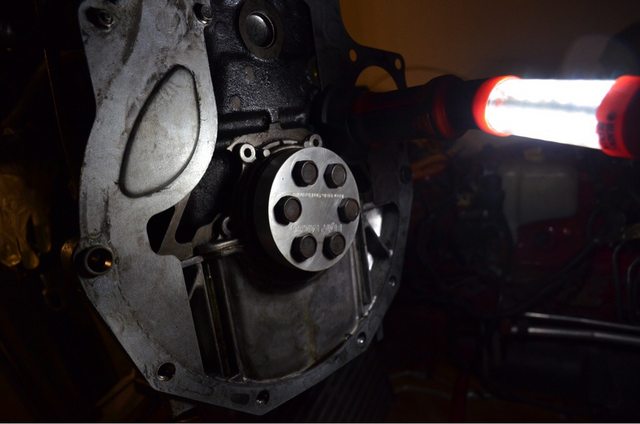
Took the oil pan off, was just like what am I looking at, always just curious about it all. Looked some stuff up on where to drill, drilled and tapped. Due to wanting to have AC I moved it back to not interfere.

Main reason I took the engine out was to 1 not have metal shavings everywhere while it was still on the engine, and 2 so I could do a little more maintenance like my rear main seal and etc.
Then I put the goods on there as a test fit, not to go in like this.
Put the transmission back on as well, kinda weird going back on alone, but whatever, the oil return was just on as a test fit there, nothing more nothing less, it is straight up and down basically.
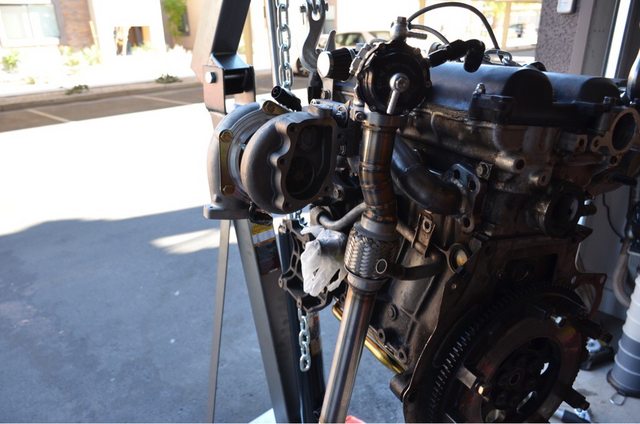
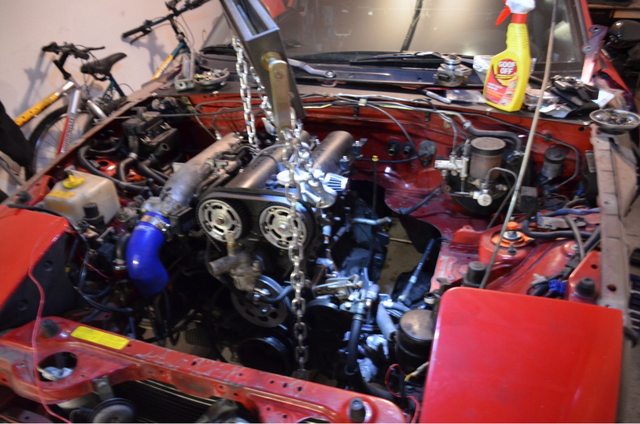
Then dropped the bad boy back in there. Seemed that you need help to just angle the engine at a downward angle and putting it in at the same time.
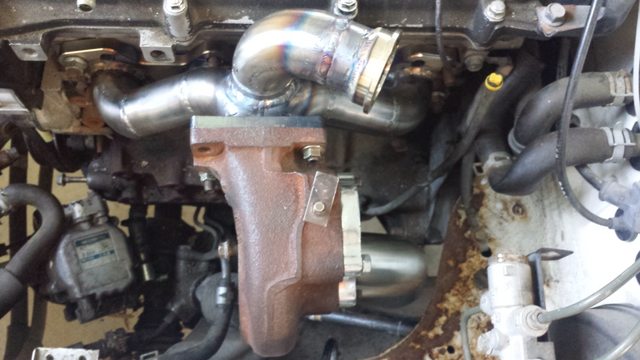
Then I got the turbo in too
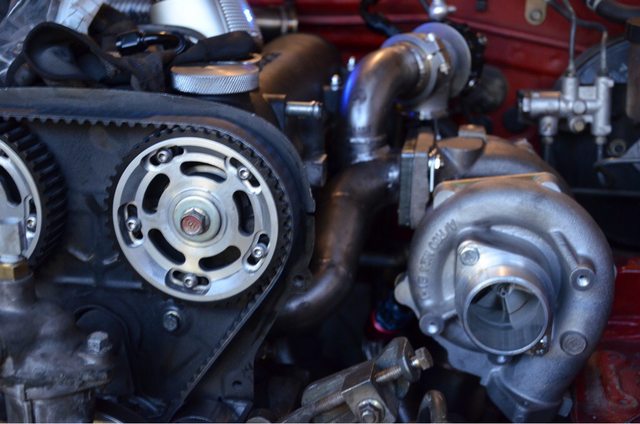
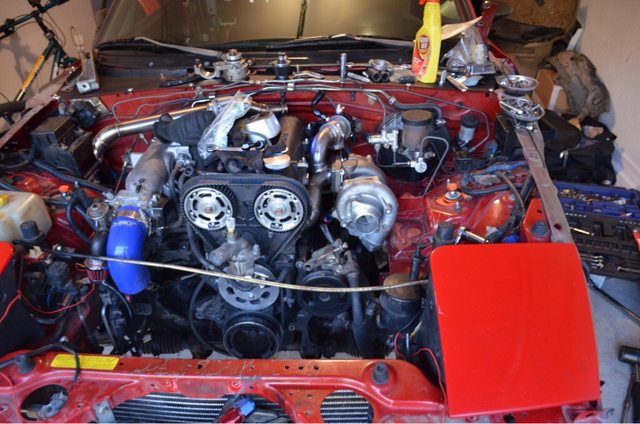
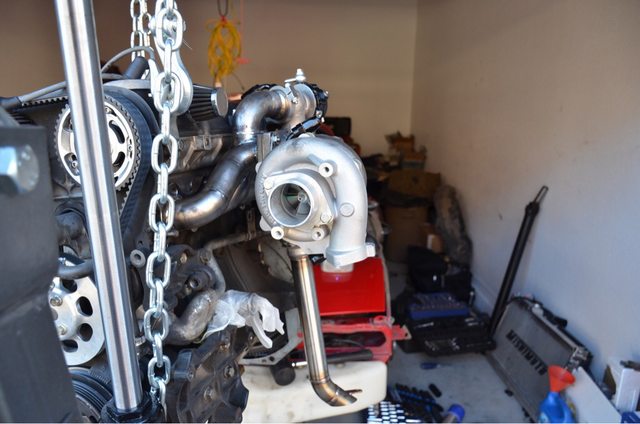
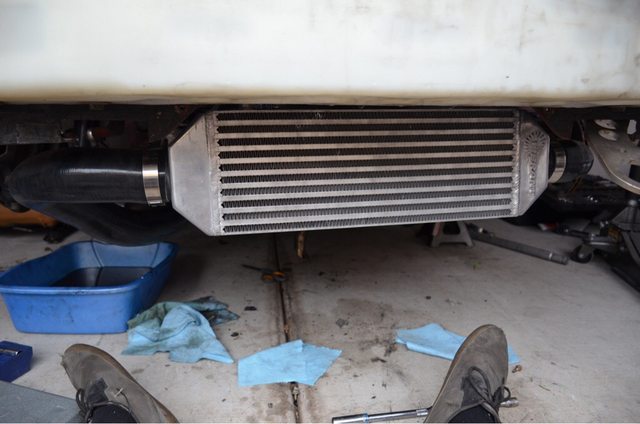
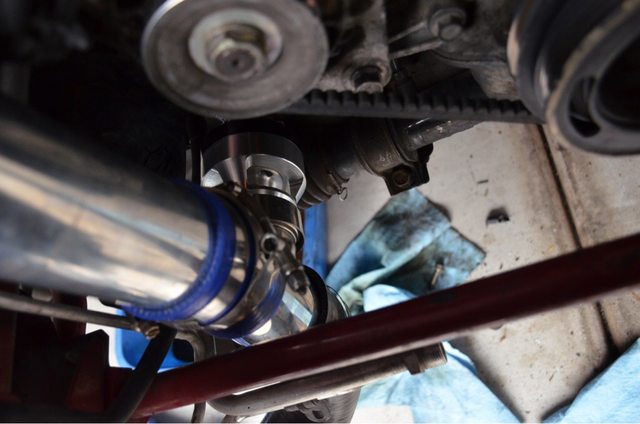
Stated to put the intercooler in as well. Not straight to start, but it is straight now.
Also started messing with the lines and which the original photos you will see the oil inlet is not up in down, but diagonal. That has been fixed, so please ignore that as of now.
This water line was also pretty damn tight, so I cut a new one with the extra line I had and made it longer so it wouldn't cause leaks.
The empty slot was my oil inlet, which was not straight up and down, so yeah that has been changed.
I love the sight of not having to lay on my back for a while again.
I wanted to do -6 for the return to this, but I guess the fitting I got was a little to big, so I just placed it and clamped it down for now.
When I originally put the BOV on, the pipe was WAYYY to long, so I cut that to size recently, this is before the fix.
In the time of getting these seats, while comfy and they took me from AZ to TX no problem, it was time to say goodbye, I wanted something a little more safe and wouldn't break if I got into a serious accident.
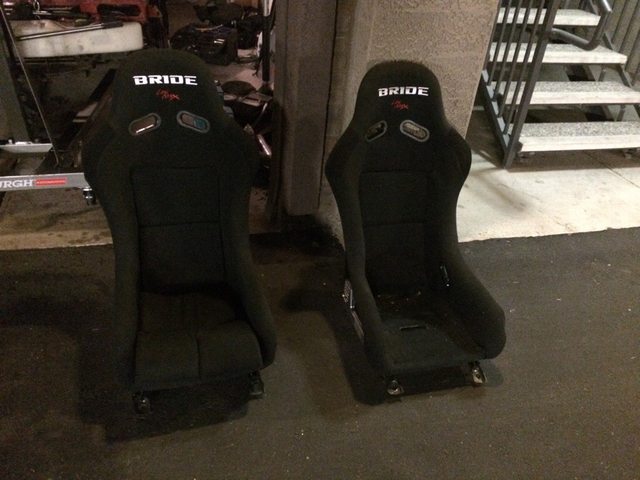
Which were replaced with these bad boys, Fitted with...
The Sparco F200 is bottom mount, so I will have a different mount for this seat. Right now the passenger seat is a normal miata seat.
Since then I got some help from a buddy XHighschoolX, not sure if he is on here or not, but he helped me get a new finish panel and bumper support and sent it right out. I appreciate this community with no bounds!!!
So that leads us to the turbo install time. I took about 5 days off work to get it done, HA, being first turbo install of my life, I underestimated that mainly because I had some wrong size fittings for the block and the turbo inlet.
The process started with me wanting to do it right, So that hoist from earlier was of great use.
Had my buddy come over, we put the car on jack stands and got to work. He did the underside while I did the upper side. Remember this is the first time pulling an engine ever. So it basically took all day, but got it out. I was surprised how many connectors there were.
Boring content here for some
The next day I got to work separating the engine and transmission and doing all the maintenance. So little room in the garage.
Took the oil pan off, was just like what am I looking at, always just curious about it all. Looked some stuff up on where to drill, drilled and tapped. Due to wanting to have AC I moved it back to not interfere.
Main reason I took the engine out was to 1 not have metal shavings everywhere while it was still on the engine, and 2 so I could do a little more maintenance like my rear main seal and etc.
Then I put the goods on there as a test fit, not to go in like this.
Put the transmission back on as well, kinda weird going back on alone, but whatever, the oil return was just on as a test fit there, nothing more nothing less, it is straight up and down basically.
Then dropped the bad boy back in there. Seemed that you need help to just angle the engine at a downward angle and putting it in at the same time.
Then I got the turbo in too
Stated to put the intercooler in as well. Not straight to start, but it is straight now.
Also started messing with the lines and which the original photos you will see the oil inlet is not up in down, but diagonal. That has been fixed, so please ignore that as of now.
This water line was also pretty damn tight, so I cut a new one with the extra line I had and made it longer so it wouldn't cause leaks.
The empty slot was my oil inlet, which was not straight up and down, so yeah that has been changed.
I love the sight of not having to lay on my back for a while again.
I wanted to do -6 for the return to this, but I guess the fitting I got was a little to big, so I just placed it and clamped it down for now.
When I originally put the BOV on, the pipe was WAYYY to long, so I cut that to size recently, this is before the fix.
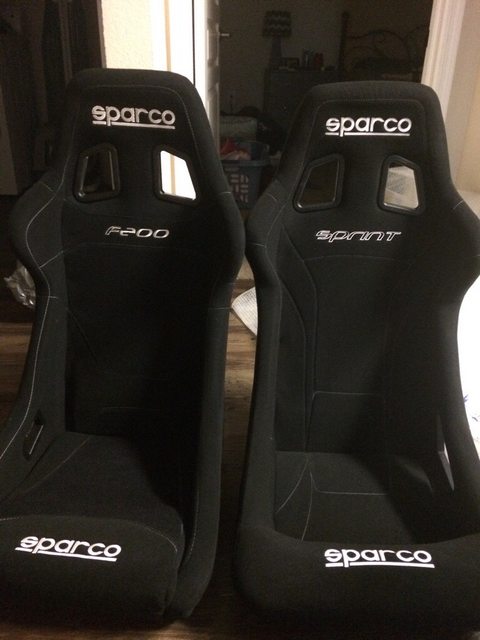
In the time of getting these seats, while comfy and they took me from AZ to TX no problem, it was time to say goodbye, I wanted something a little more safe and wouldn't break if I got into a serious accident.
Which were replaced with these bad boys, Fitted with...
The Sparco F200 is bottom mount, so I will have a different mount for this seat. Right now the passenger seat is a normal miata seat.
Reply
0
0
Thread Starter
Junior Member
Joined: Feb 2015
Posts: 223
Total Cats: 31
From: Arizona
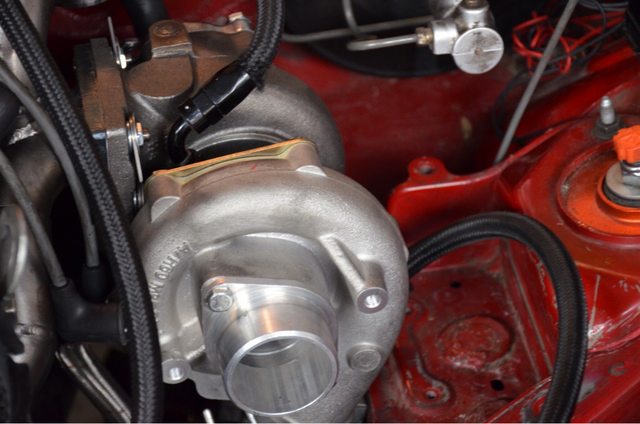
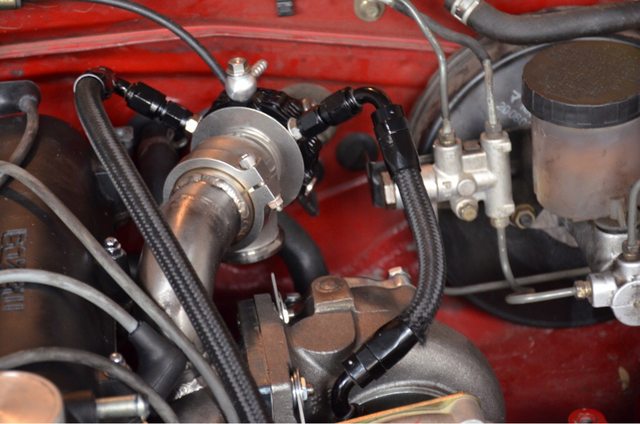
I had to clock the turbo a little more to get the desired oil straight up and down
Then I got my inner rice out and some more fittings for the block and the oil inlet on the turbo. The headlight cover will be painted to match the car, but the induction side will remain the look of kevlar.
Since clocking the turbo again, I had to cut my oil return line a heavy amount. So it won't bunch up
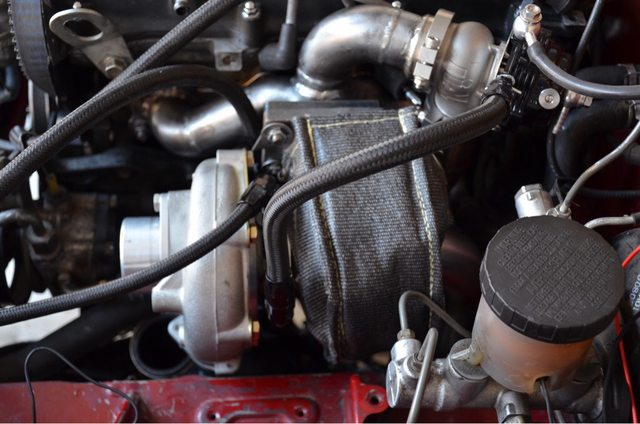
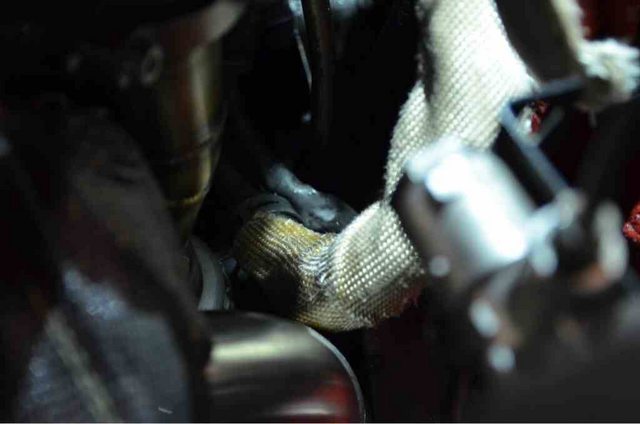
Got a turbo blanket so I don't set the place a blaze, and some heat tape as well for the smaller stuff like the heater houses and such
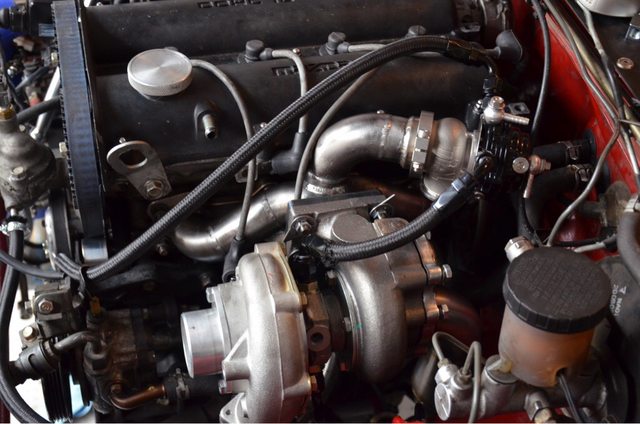
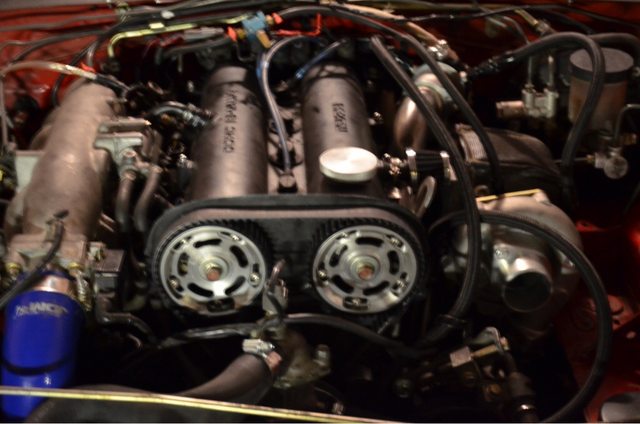
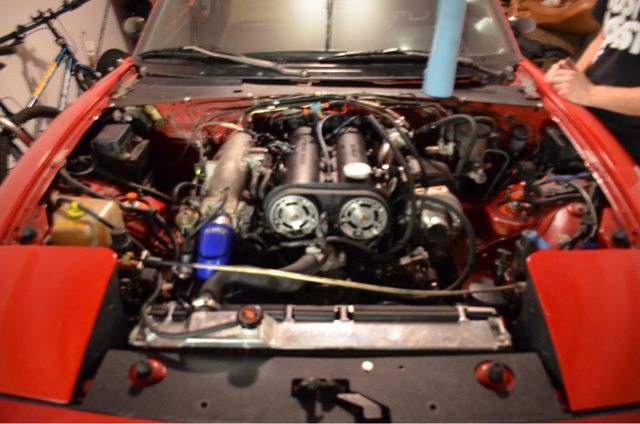
The finished product so far anyways with everything lined up as it should be
Then the breathe taking first start. Double checked everything, took 3 deep breathes and turned it over. First try turned over no problem which I was very thankful for there were no explosions. After the car fired up, I just let it ran to burn off the fingerprints, and let all the fluids cycle to see if I had any leaks.
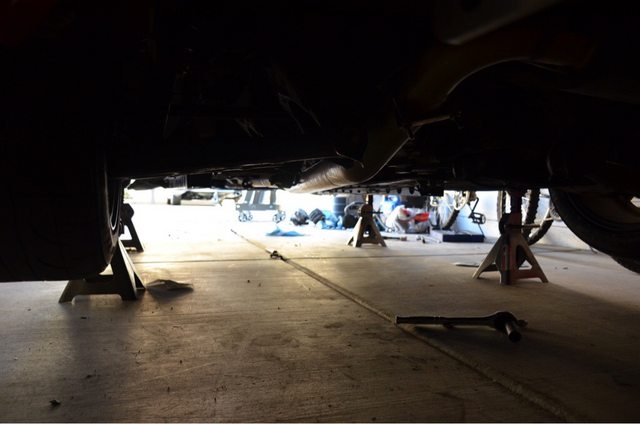
After about 3 mins I looked under the car, I see a puddle. Immediately turned the car off, checked oil first seeing as tapping the oil pan leak would be first, but no sign there thank the heavens. Checked coolant lines, small leak by wastegate inlet and outlet...but turbo is good, and checked last coolant source, my heater hoses, my 2nd heater hose is leaking a smidge. So I just let it drain out until it doesn't anymore, clean it up and call it a night very happy it started up and nothing blew up.
The next day, I couldn't wait to get back at it the next day. I went to my local ACE hardware store, and got some crush washers for the wastgate cause mine were a wee bit too crushed. I also put some sealant to not allow it to leak around the threads like it was before. Went to O'Reilly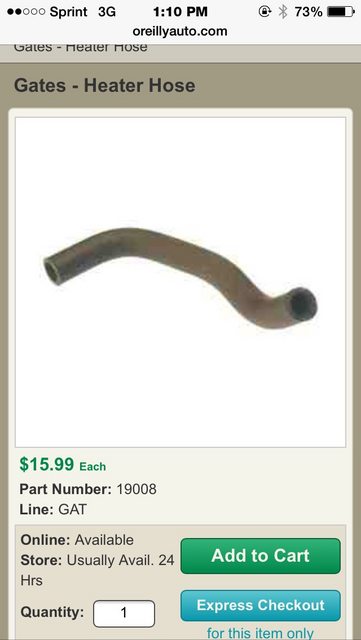
The weird part, is I when I went to O'Reilly and had to look up a 93 instead of a 91, so was weird but whatever I guess.
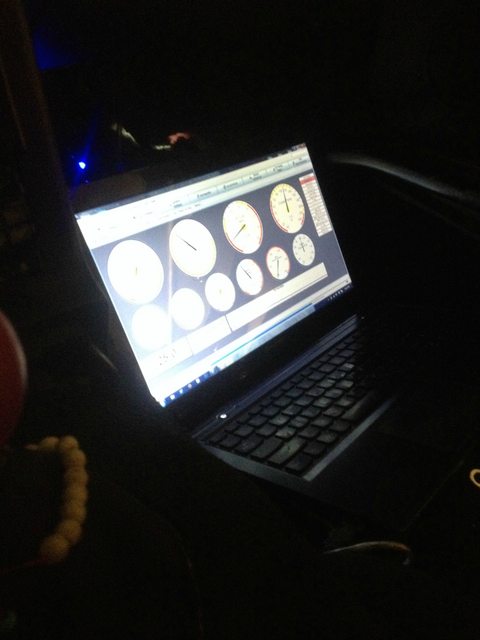
So that get's us to 2 days ago. Actually put the car on the ground, and took it out. Brought my computer, and setup for autotune and started slow. Idle was doing great during warmup enrichment however when driving and warmed up, it was fighting me at every time. So I will check out the idle thread here I have seen floating around, to get that re-setup.
Didn't both getting into boost because 1, too afraid to blow up, 2 AFR's while idling bounce, while driving AFR's are pretty good, or were, AFR's on the way home were kind of jumpy while driving as well, so I just went home to do some research.
Then I got my inner rice out and some more fittings for the block and the oil inlet on the turbo. The headlight cover will be painted to match the car, but the induction side will remain the look of kevlar.
Since clocking the turbo again, I had to cut my oil return line a heavy amount. So it won't bunch up
Got a turbo blanket so I don't set the place a blaze, and some heat tape as well for the smaller stuff like the heater houses and such
The finished product so far anyways with everything lined up as it should be
Then the breathe taking first start. Double checked everything, took 3 deep breathes and turned it over. First try turned over no problem which I was very thankful for there were no explosions. After the car fired up, I just let it ran to burn off the fingerprints, and let all the fluids cycle to see if I had any leaks.
After about 3 mins I looked under the car, I see a puddle. Immediately turned the car off, checked oil first seeing as tapping the oil pan leak would be first, but no sign there thank the heavens. Checked coolant lines, small leak by wastegate inlet and outlet...but turbo is good, and checked last coolant source, my heater hoses, my 2nd heater hose is leaking a smidge. So I just let it drain out until it doesn't anymore, clean it up and call it a night very happy it started up and nothing blew up.
The next day, I couldn't wait to get back at it the next day. I went to my local ACE hardware store, and got some crush washers for the wastgate cause mine were a wee bit too crushed. I also put some sealant to not allow it to leak around the threads like it was before. Went to O'Reilly
The weird part, is I when I went to O'Reilly and had to look up a 93 instead of a 91, so was weird but whatever I guess.
So that get's us to 2 days ago. Actually put the car on the ground, and took it out. Brought my computer, and setup for autotune and started slow. Idle was doing great during warmup enrichment however when driving and warmed up, it was fighting me at every time. So I will check out the idle thread here I have seen floating around, to get that re-setup.
Didn't both getting into boost because 1, too afraid to blow up, 2 AFR's while idling bounce, while driving AFR's are pretty good, or were, AFR's on the way home were kind of jumpy while driving as well, so I just went home to do some research.
Reply
1
1
Thread Starter
Junior Member
Joined: Feb 2015
Posts: 223
Total Cats: 31
From: Arizona
So this leads us to yesterday, I feel I have come a long way with this car, it seems that while this car has grown, so have I. This car has helped me grow as a person and the decisions I have made.
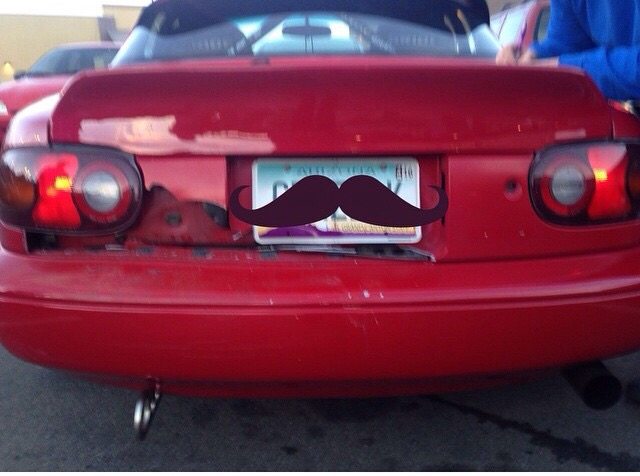
I went to tackle and fix my ***. Brutus's *** anyways.
The before incase you forget already
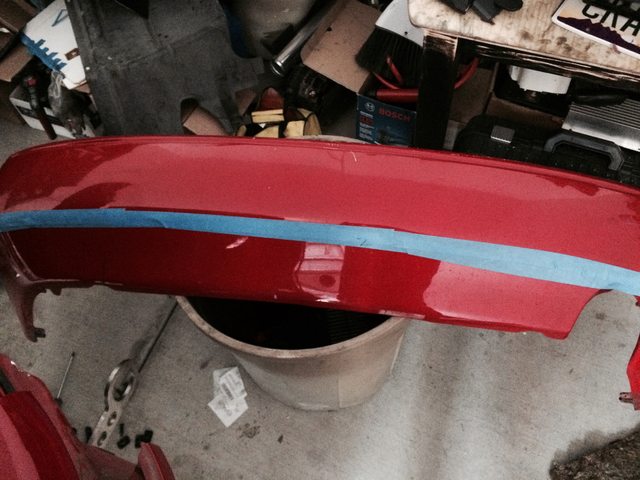
While taking the whole back panel off, I decided to cut my bumper too, it has been long overdue.
Now the new butt
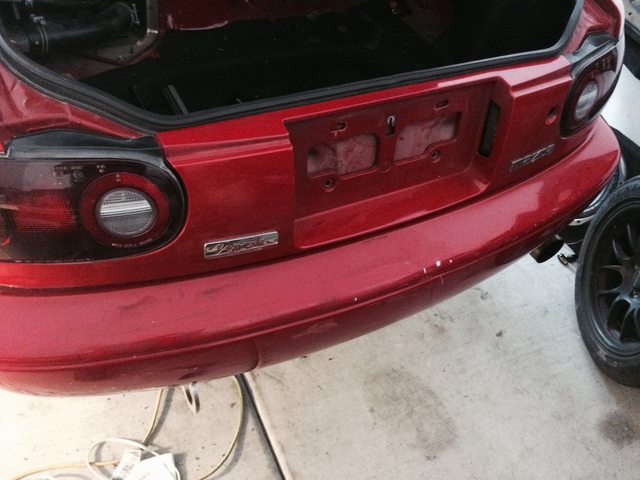
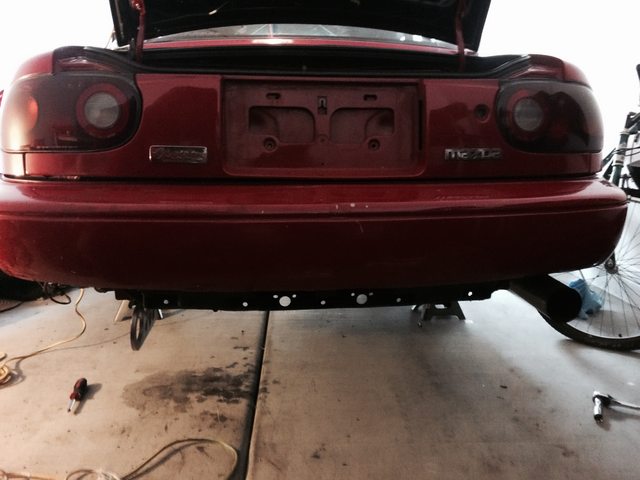
NOW you are up to date as far as I am.
I went for a drive last night, just set to autotune again, recently switched it to it being able to change the cells easier, and setup a custom filter to not mess with my idle when I get it working correctly again.
I think I may have gotten into boost ever so slightly yesterday, car snapped my neck. I know I do not have boost cut set to where it will shut down that hard. I think it was the AEM true boost, debating keeping that and just getting an EBC for the megasquirt directly, but I learned the AEM truboost settings too, and updated the duty cycle a little bit too, so we shall see I guess, still learning as I go.
I went to tackle and fix my ***. Brutus's *** anyways.
The before incase you forget already
While taking the whole back panel off, I decided to cut my bumper too, it has been long overdue.
Now the new butt
NOW you are up to date as far as I am.
I went for a drive last night, just set to autotune again, recently switched it to it being able to change the cells easier, and setup a custom filter to not mess with my idle when I get it working correctly again.
I think I may have gotten into boost ever so slightly yesterday, car snapped my neck. I know I do not have boost cut set to where it will shut down that hard. I think it was the AEM true boost, debating keeping that and just getting an EBC for the megasquirt directly, but I learned the AEM truboost settings too, and updated the duty cycle a little bit too, so we shall see I guess, still learning as I go.
Reply
0
0
Thread Starter
Junior Member
Joined: Feb 2015
Posts: 223
Total Cats: 31
From: Arizona
Well I have been messing around with the tuning a bit, change something test it, change something test it. When I started it seemed to be very strange, just left it test to auto tune and kept going. Mistake 1.
Car would buck due to the massive amounts of fuel going in, so I fixed the req fuel to 6.5
Started better, and ran better.
Looking around here found how to properly do that.
Also adjusted my spark table back to the base map to be conservative , afr table adjusted for boost, and let it auto tune again. A lot better now.
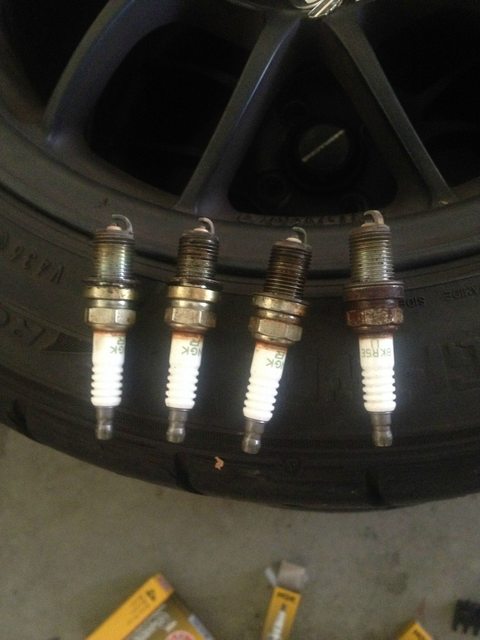
Next on the list is to swap spark plugs for something a little colder and gapped a lower than factory. Hoping this will help with the slight hesitation I have while driving 1, and help with boost starting quicker.
Feels like I barely get in boost at all if anything and I'm just an again, I hear the turbo spool but don't see much for boost. Will report back later.
Car would buck due to the massive amounts of fuel going in, so I fixed the req fuel to 6.5
Started better, and ran better.
Looking around here found how to properly do that.
Also adjusted my spark table back to the base map to be conservative , afr table adjusted for boost, and let it auto tune again. A lot better now.
Next on the list is to swap spark plugs for something a little colder and gapped a lower than factory. Hoping this will help with the slight hesitation I have while driving 1, and help with boost starting quicker.
Feels like I barely get in boost at all if anything and I'm just an again, I hear the turbo spool but don't see much for boost. Will report back later.
Reply
0
0


Joined: Apr 2014
Posts: 18,643
Total Cats: 1,870
From: Beaverton, USA
When I went turbo I added a bunch of fuel in boost, like 20+ and then let auto tune pull it out.
Also you missed out on a perfect time for a coolant reroute with the engine out.
Also you missed out on a perfect time for a coolant reroute with the engine out.
Reply
0
0

Thread Starter
Junior Member
Joined: Feb 2015
Posts: 223
Total Cats: 31
From: Arizona
Ya I know I didn't have the money at the time to get it done, and I debated just waiting but I had taking vacation time to take everything apart and put it back together in a weekend, but that will happen, hoping that the CNC machined reroute piece will be made again, but not sure if he will make another run cause I'm not paying $300 for a reroute when it is well documented on a diy reroute. Basically, all in due time it will happen I guess is what I'm saying, but definitely wish I had the money at the time.
Reply
0
0


