
Crazyblackman's Brutus


Thread Starter
Junior Member
Joined: Feb 2015
Posts: 223
Total Cats: 31
From: Arizona
Got some stuff that might hurt some but makes me smile....
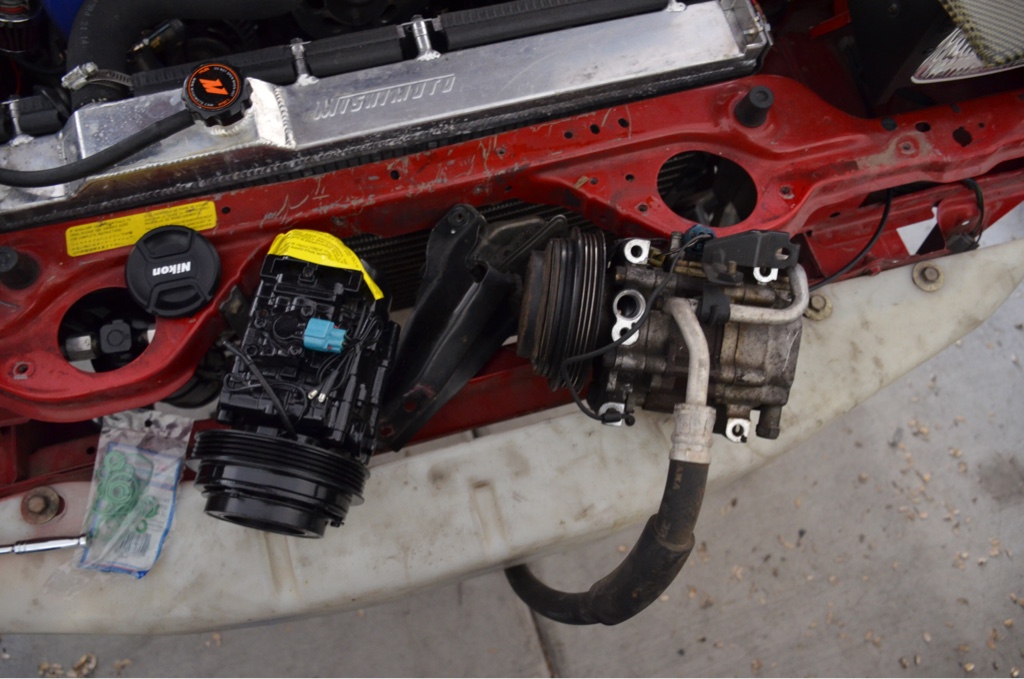
AC components! In Arizona it is hot as hell, and every car I have ever owned has not had AC working in them.
Well that stops with Brutus, I will have AC in this car because I prefer to be comfortable while driving and just going on a trip and bring the lady with and not hear complaining.
Now when I get a second car if the AC stays in here or not who knows but we're living in the now, so I'll get started on that next week.
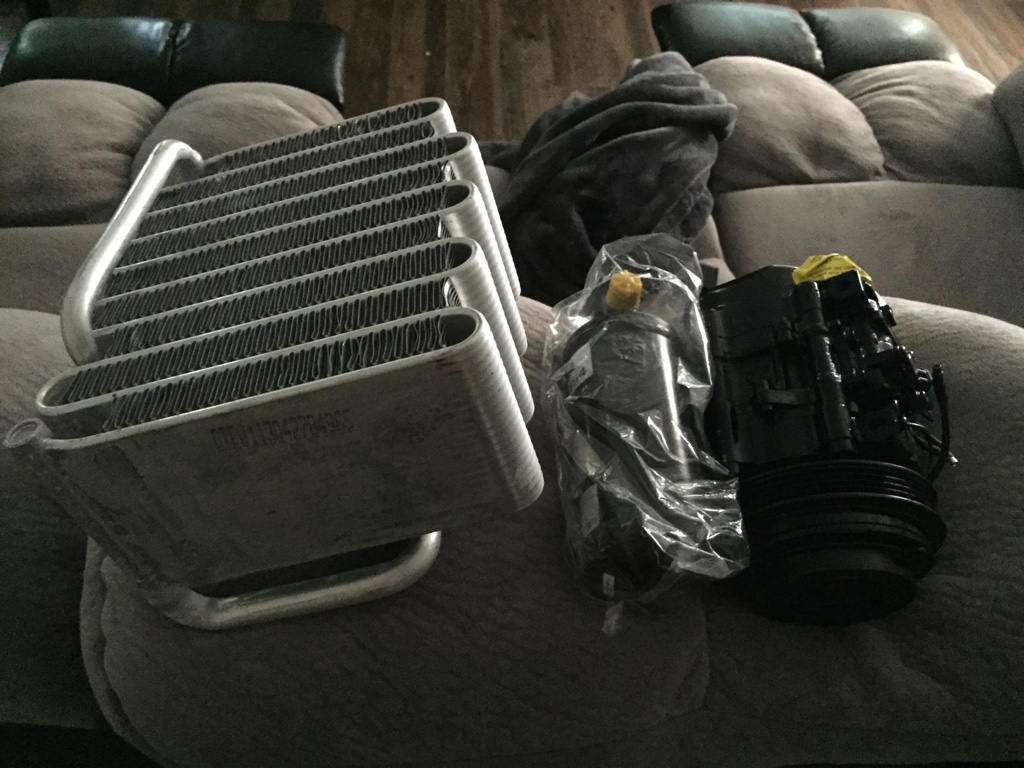
Evaporator, compressor, expansion valve (not pictured), and drier
I have had the o-rings for the whole system so it will be compatible with modern AC instead of R12
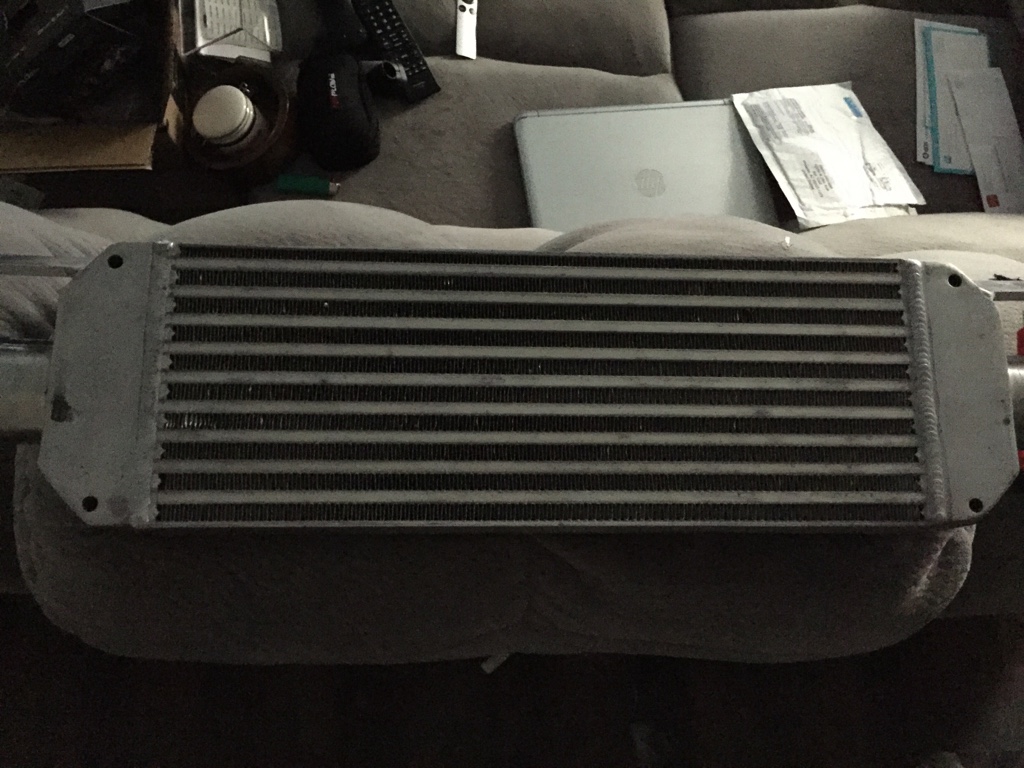
Also got my fab9 stage 1 intercooler. I prefer this mainly for the mounting points, they are pretty solid and it is small and thick at the same time
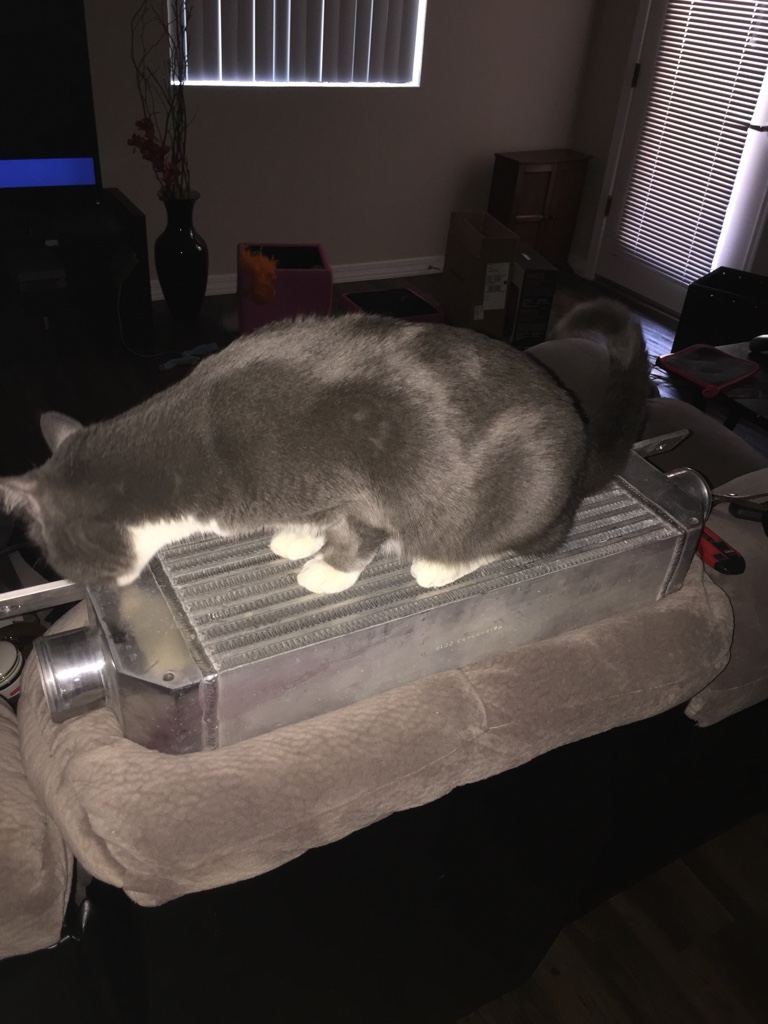
Kitty approved
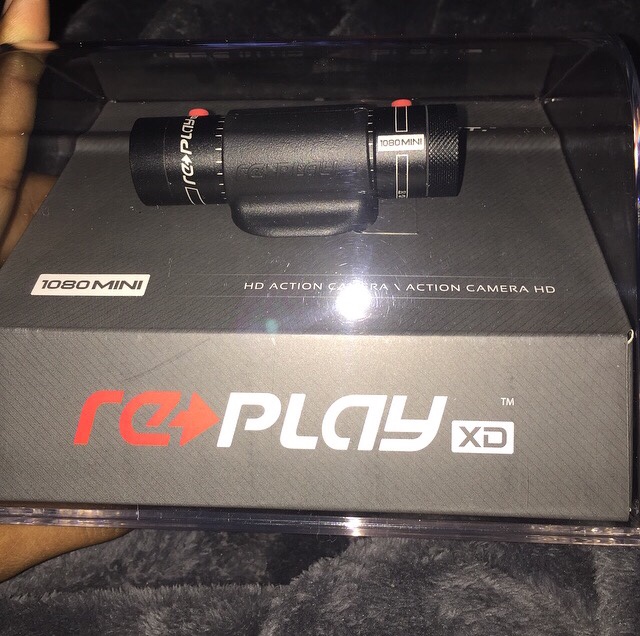
Also got my replayxd 1080mini camera for small stuff. Eventually will get some goPros but no rush plus this was $100 and was tiny so I can put it anywhere
Ps been driving with the bikini top a lot, and I love it absolutely love it, it's crazy favorite piece even more than the turbo. The turbo is a close 2nd though haha
AC components! In Arizona it is hot as hell, and every car I have ever owned has not had AC working in them.
Well that stops with Brutus, I will have AC in this car because I prefer to be comfortable while driving and just going on a trip and bring the lady with and not hear complaining.
Now when I get a second car if the AC stays in here or not who knows but we're living in the now, so I'll get started on that next week.
Evaporator, compressor, expansion valve (not pictured), and drier
I have had the o-rings for the whole system so it will be compatible with modern AC instead of R12
Also got my fab9 stage 1 intercooler. I prefer this mainly for the mounting points, they are pretty solid and it is small and thick at the same time
Kitty approved
Also got my replayxd 1080mini camera for small stuff. Eventually will get some goPros but no rush plus this was $100 and was tiny so I can put it anywhere
Ps been driving with the bikini top a lot, and I love it absolutely love it, it's crazy favorite piece even more than the turbo. The turbo is a close 2nd though haha
Reply
 0
0

0
Thread Starter
Junior Member
Joined: Feb 2015
Posts: 223
Total Cats: 31
From: Arizona
So it feels like it has been a while since I touched the car.. So got some motivation today to get out there to start this AC job. Being in AZ I have never had a car with working AC this car I decided to change that. So I know now 91's had R12 in the system. I didn't when I first got it, so I just put r134 in the system... Well it worked for a while then right back to how it was. So recently I just said screw it lets make sure I don't have to mess with AC for a while. Got the components and went out to the garage and went to work.
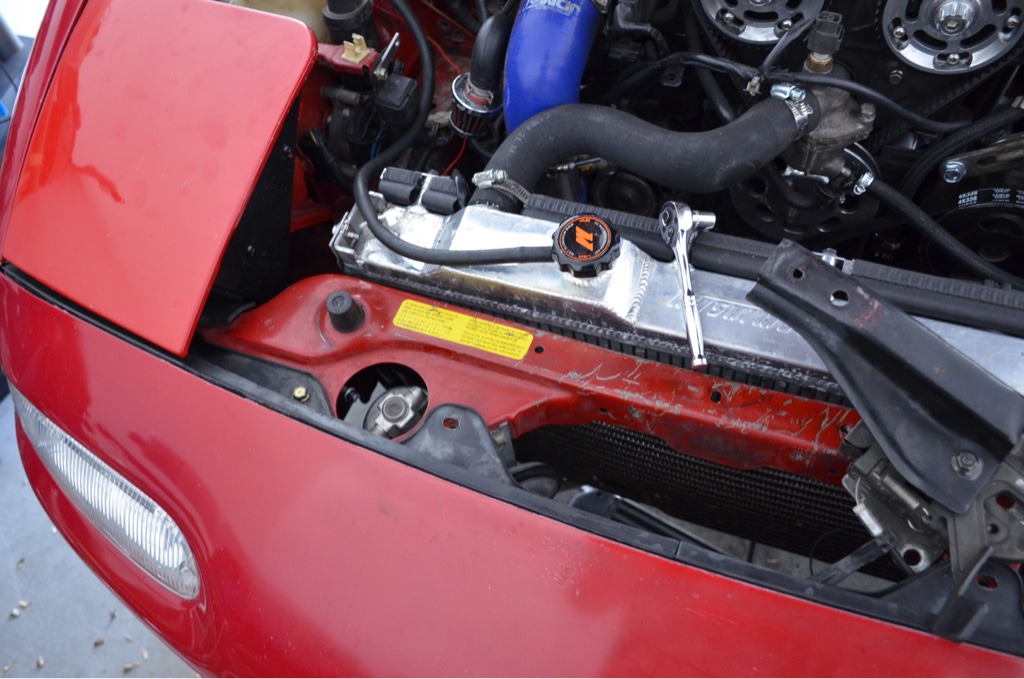
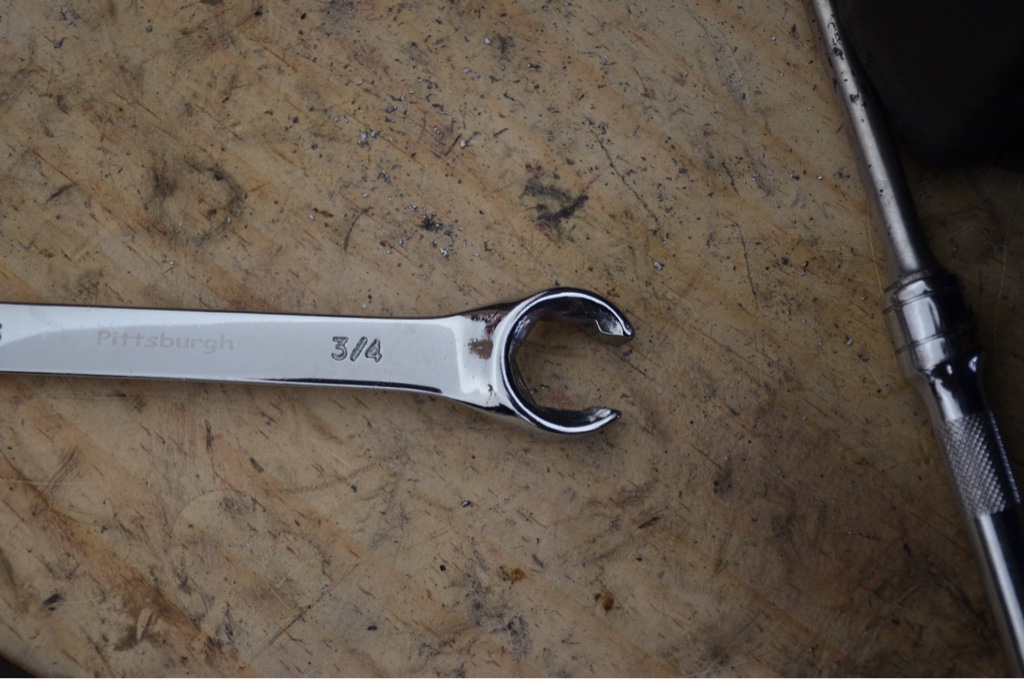
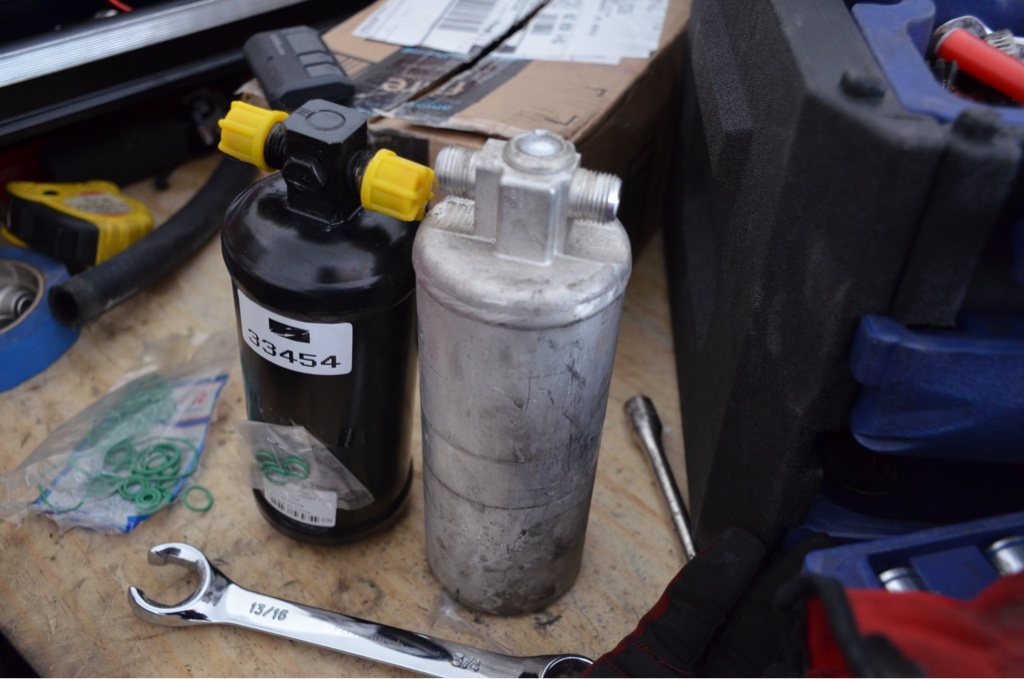
Started without taking the bumper off, but ended up taking it off for the intercooler since I was switching it anyways. Started with the drier. A little tough to get to with the bumper on but it can be done. Used a 3/4 wrench to get the drier off on both ends.
There is a little bolt that kept it tight in there and easiest to get from the bottom, there is a little piece keeping the drier from hitting the ground underneath as well
I just bent the piece to let the drier slide out easily and replaced that with a new one. The new one came pressurized I would assume to verify it does not leak.
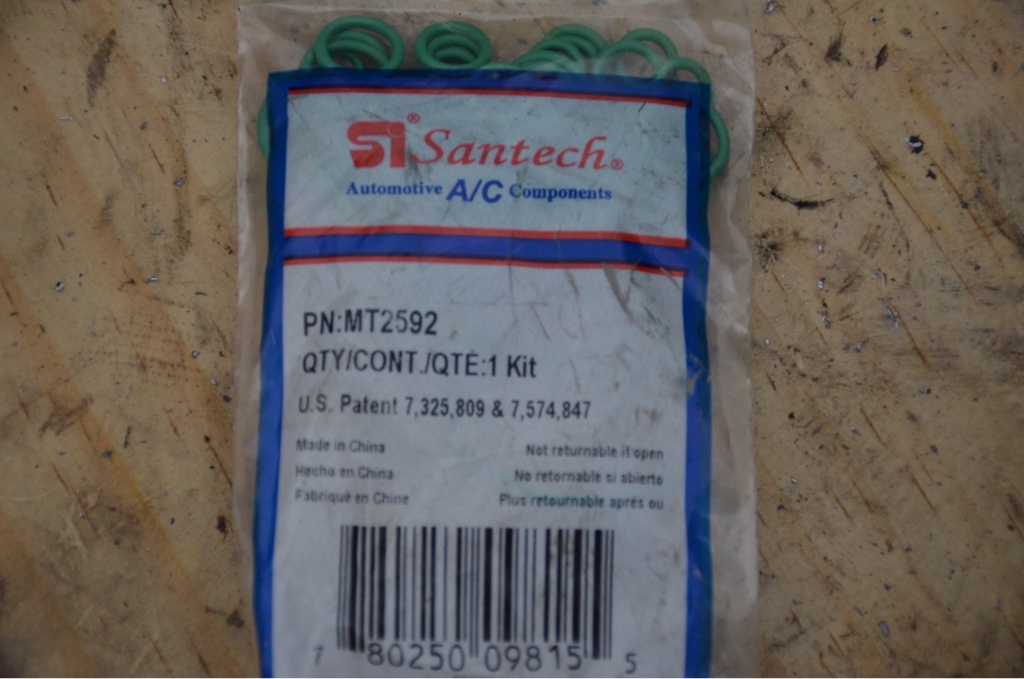
Replaced all the black orings with the r134 compatible orings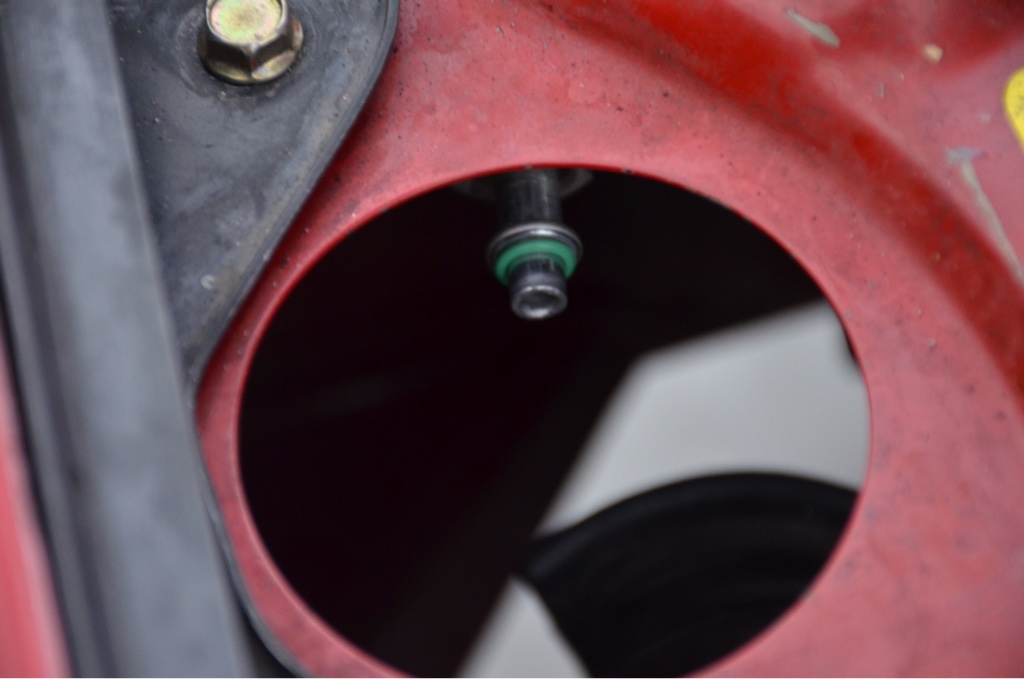
Just a piece from autozone pretty self explanatory.
The size of the new drier is a little bit smaller but not that big of a deal
Now my system was already evacuated so I just went ahead and started taking pieces out. Not a whole lot of connections that need the orings replaced to be fully compatible.
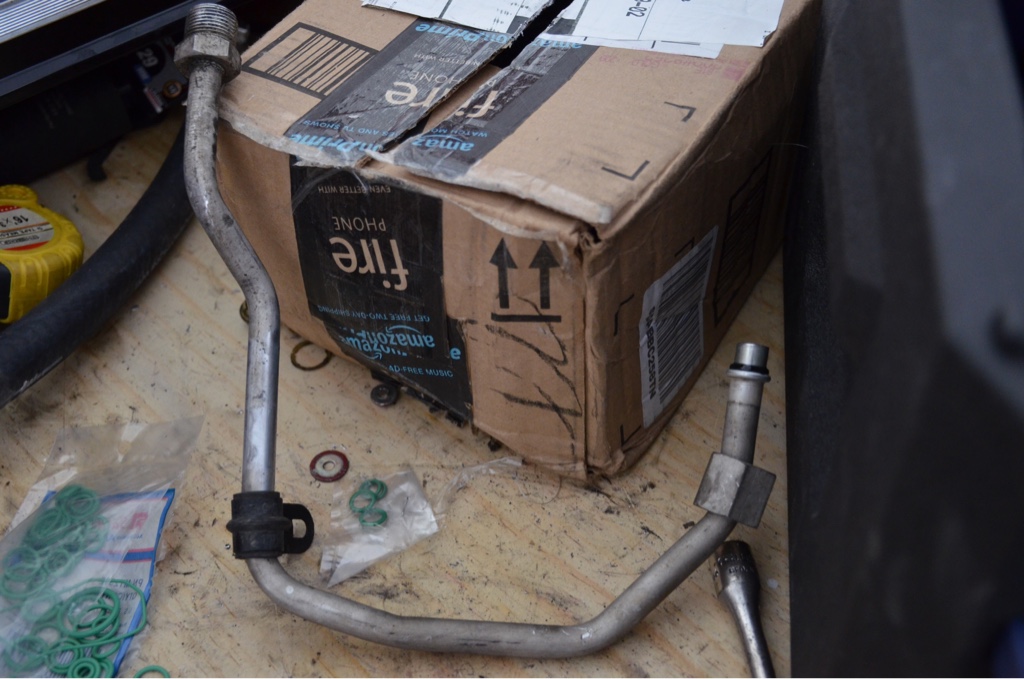
I did the same for any piece that could come off and out easily others I just left in the car.
Then I pulled my old compressor out of the box and needed to transfer some pieces over.
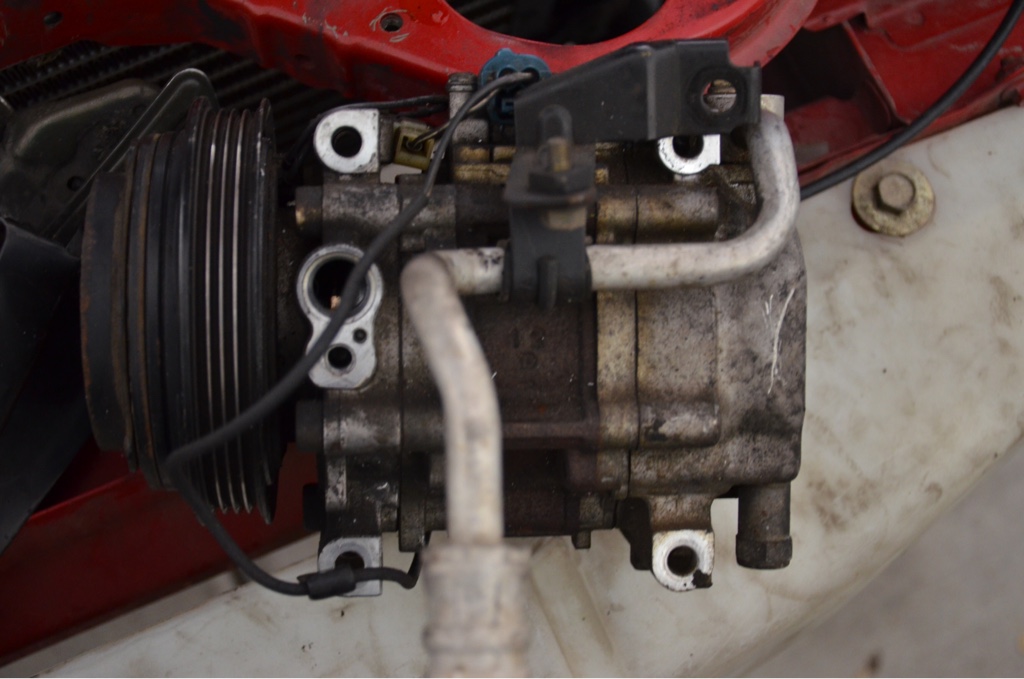
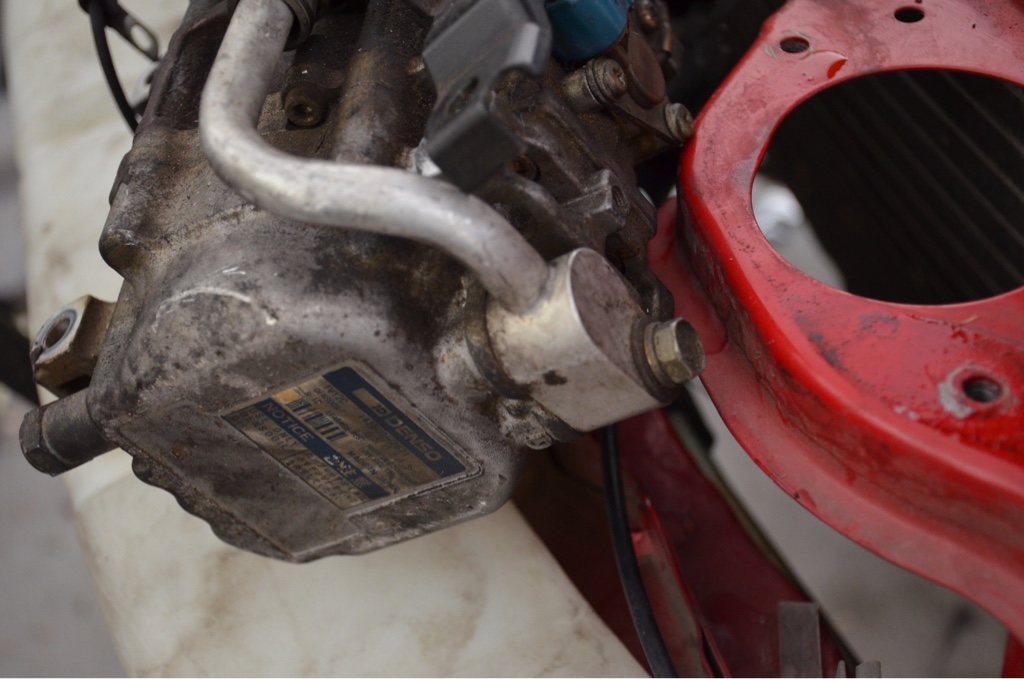
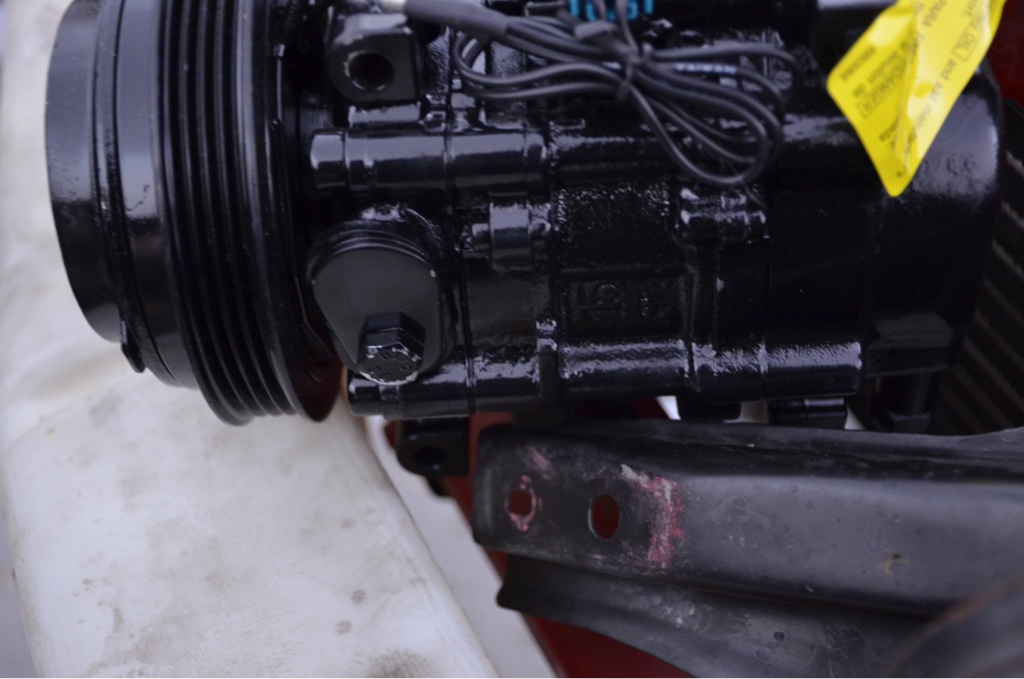
I just went through replaced the pieces and transferred to new one. The new one was painted gloss black for whatever reason. It did have a warning on the compressor before I could replace the pieces over.
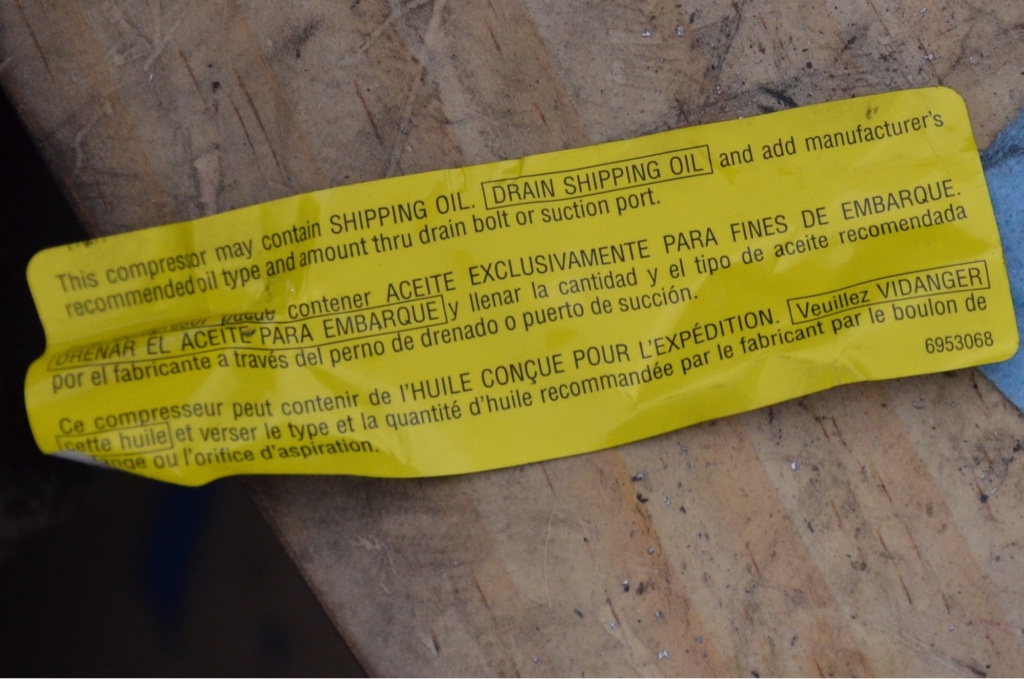
After reading and checking for "travel fluid" I found none so just continued on.
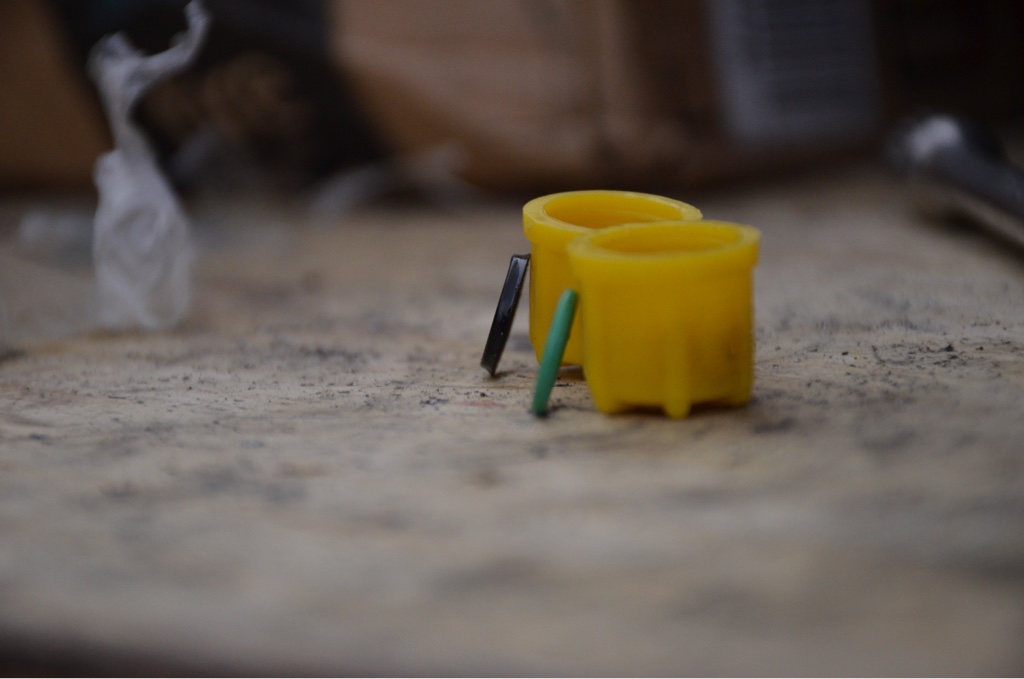
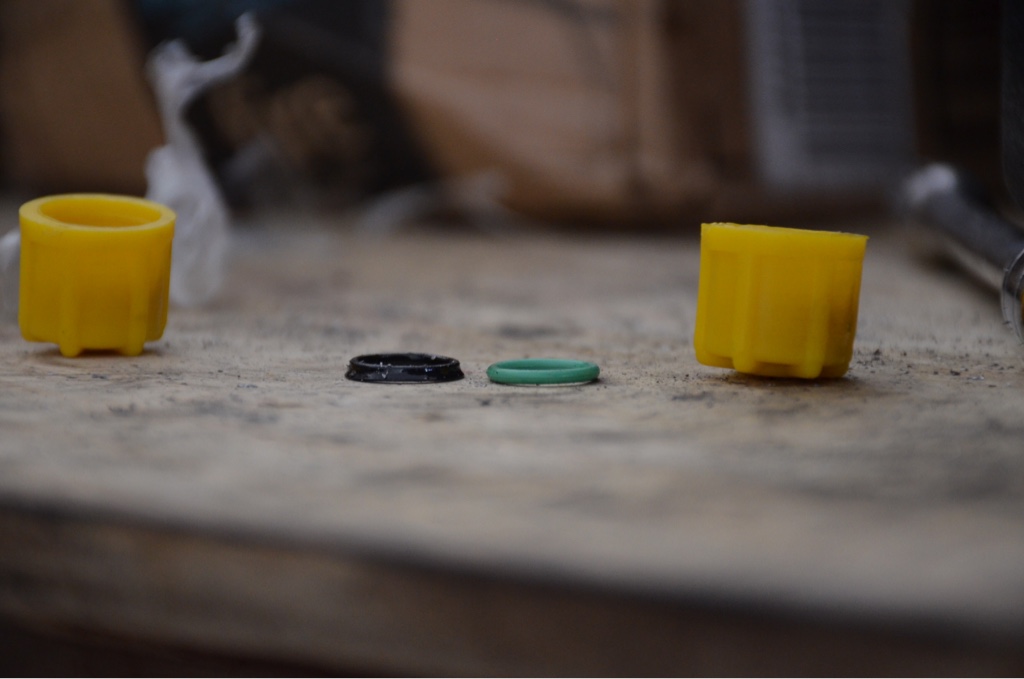
To show you a comparison of the orings that were in there vs the new r134 compatible ones. Mine were pretty beat! Just like any old oring mine were flat and a little frayed as well.
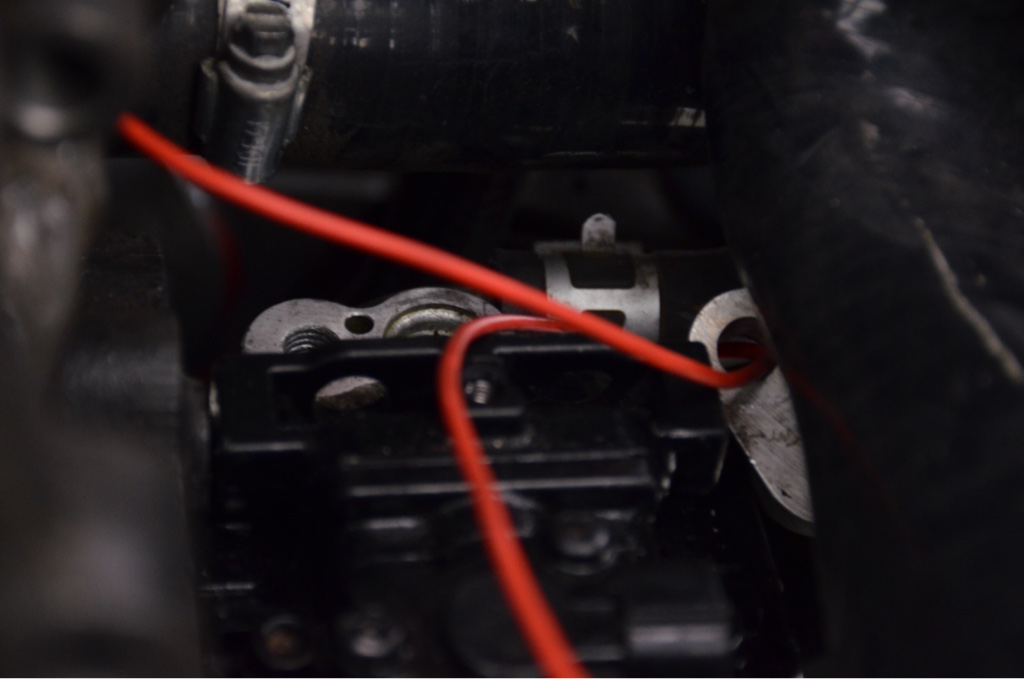
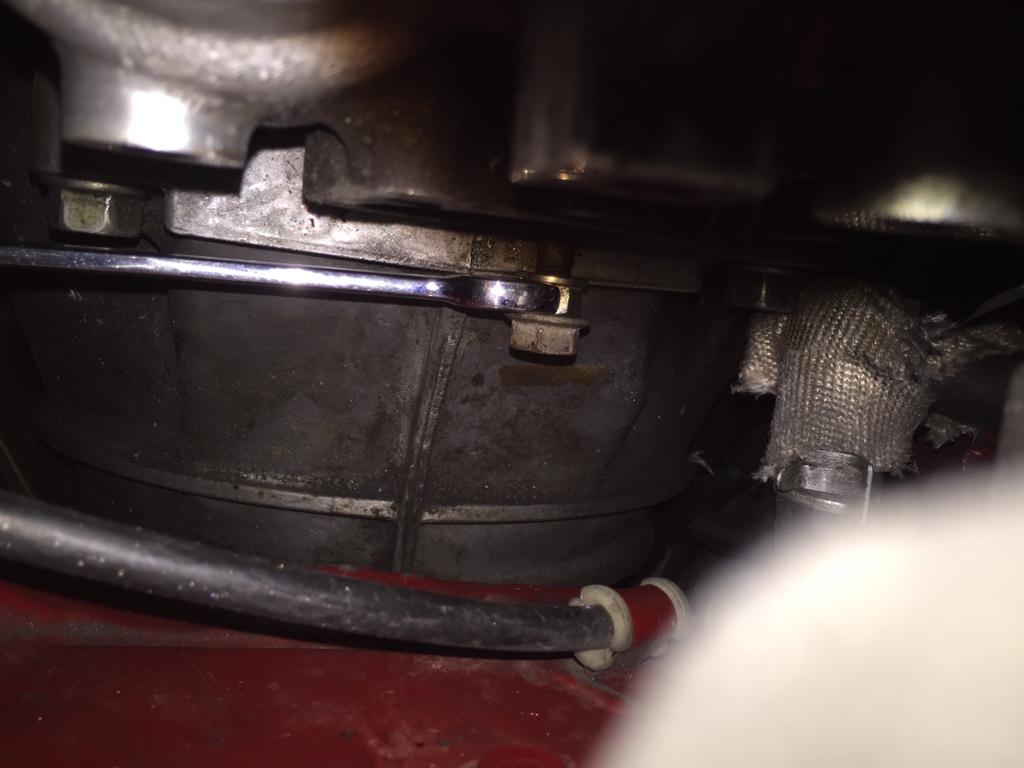
Once I replaced all the o rings, in the engine bay, I went ahead and started putting the compressor in. I knew it would be a pain since a turbo was in the way, so slowly but surely got it in, realizing from the bottom going up seems best. Then put the lines in connected to the compressor.
I should have had at least one line in before I put it in it would have made life easier but I like to do things the hard way, so one I got the piece in I pulled it up with some old beat up wire.
Also got it bolted in until I read up on compressor oil. I bought 100 pac but may switch depending on what I find online.
The issue I have so far is the intercooler piping and the belt are very close petty much touching so I will need to find a way to move that out of the way.
The goal tomorrow is to get the dash out and replace the other few components and while I have that out I'll get some sound deafening stuff for later as well. So far that's about it.
Started without taking the bumper off, but ended up taking it off for the intercooler since I was switching it anyways. Started with the drier. A little tough to get to with the bumper on but it can be done. Used a 3/4 wrench to get the drier off on both ends.
There is a little bolt that kept it tight in there and easiest to get from the bottom, there is a little piece keeping the drier from hitting the ground underneath as well
I just bent the piece to let the drier slide out easily and replaced that with a new one. The new one came pressurized I would assume to verify it does not leak.
Replaced all the black orings with the r134 compatible orings
Just a piece from autozone pretty self explanatory.
The size of the new drier is a little bit smaller but not that big of a deal
Now my system was already evacuated so I just went ahead and started taking pieces out. Not a whole lot of connections that need the orings replaced to be fully compatible.
I did the same for any piece that could come off and out easily others I just left in the car.
Then I pulled my old compressor out of the box and needed to transfer some pieces over.
I just went through replaced the pieces and transferred to new one. The new one was painted gloss black for whatever reason. It did have a warning on the compressor before I could replace the pieces over.
After reading and checking for "travel fluid" I found none so just continued on.
To show you a comparison of the orings that were in there vs the new r134 compatible ones. Mine were pretty beat! Just like any old oring mine were flat and a little frayed as well.
Once I replaced all the o rings, in the engine bay, I went ahead and started putting the compressor in. I knew it would be a pain since a turbo was in the way, so slowly but surely got it in, realizing from the bottom going up seems best. Then put the lines in connected to the compressor.
I should have had at least one line in before I put it in it would have made life easier but I like to do things the hard way, so one I got the piece in I pulled it up with some old beat up wire.
Also got it bolted in until I read up on compressor oil. I bought 100 pac but may switch depending on what I find online.
The issue I have so far is the intercooler piping and the belt are very close petty much touching so I will need to find a way to move that out of the way.
The goal tomorrow is to get the dash out and replace the other few components and while I have that out I'll get some sound deafening stuff for later as well. So far that's about it.
Reply
0
0

Thread Starter
Junior Member
Joined: Feb 2015
Posts: 223
Total Cats: 31
From: Arizona
Went out there again today just to start on my coolant reroute, I thought I had a block off plate for the front but sadly I didn't so the waiting begins again ha, what else is new, but for the AC stuff I got a lot done today.
Went a little further today, thought I had to take the dash out but I was very happy I didn't need to.
Went to the passenger side and starting taking the glove box out.

The bolts to bolt these in are pretty easy to find, 1 up top, 1 down low and 2 little connectors.
Curious to know what those are for, reason I'm so curious is the new condenser I have doesn't have a place to put them. Guess I'll either be returning the new one or it isn't super important but I'll find out one day.
Then took out the first box and opened it up, the little clips on it are easy, just place the flat head screw driver into the pieces and pry up they will stay on the flathead, vs just flying.

When I looked inside, I was very happy I decided to get a new condenser.
Just dirt dirt and more pine needles.
Once I took it apart I pulled the new condenser out and compared the 2
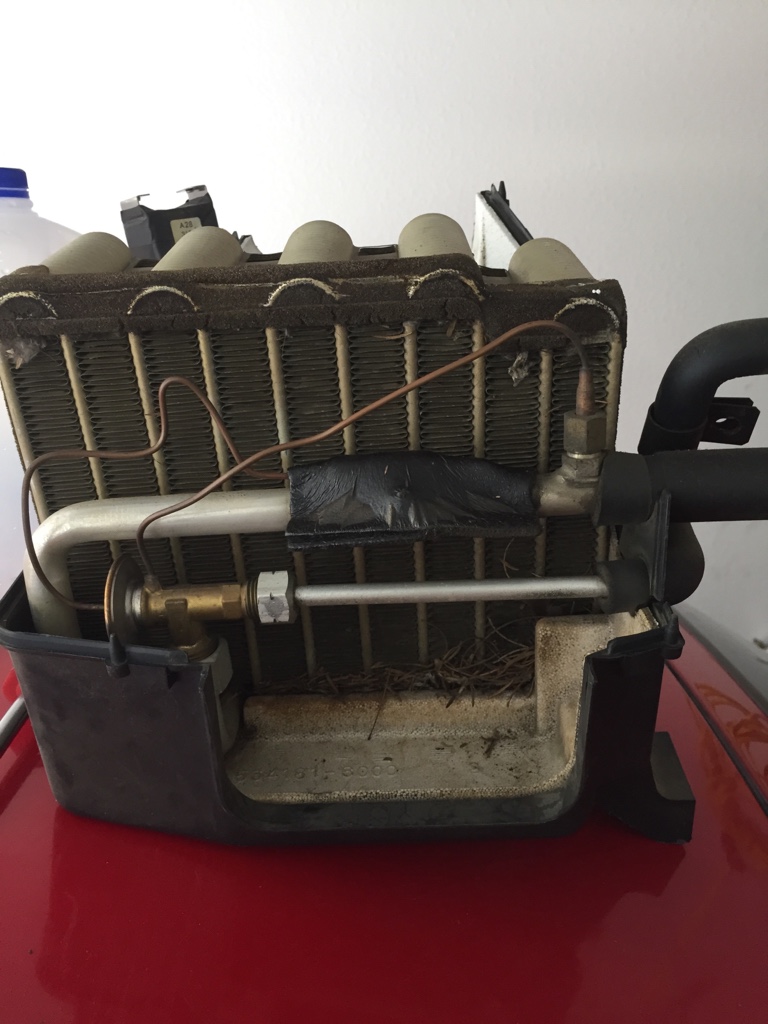
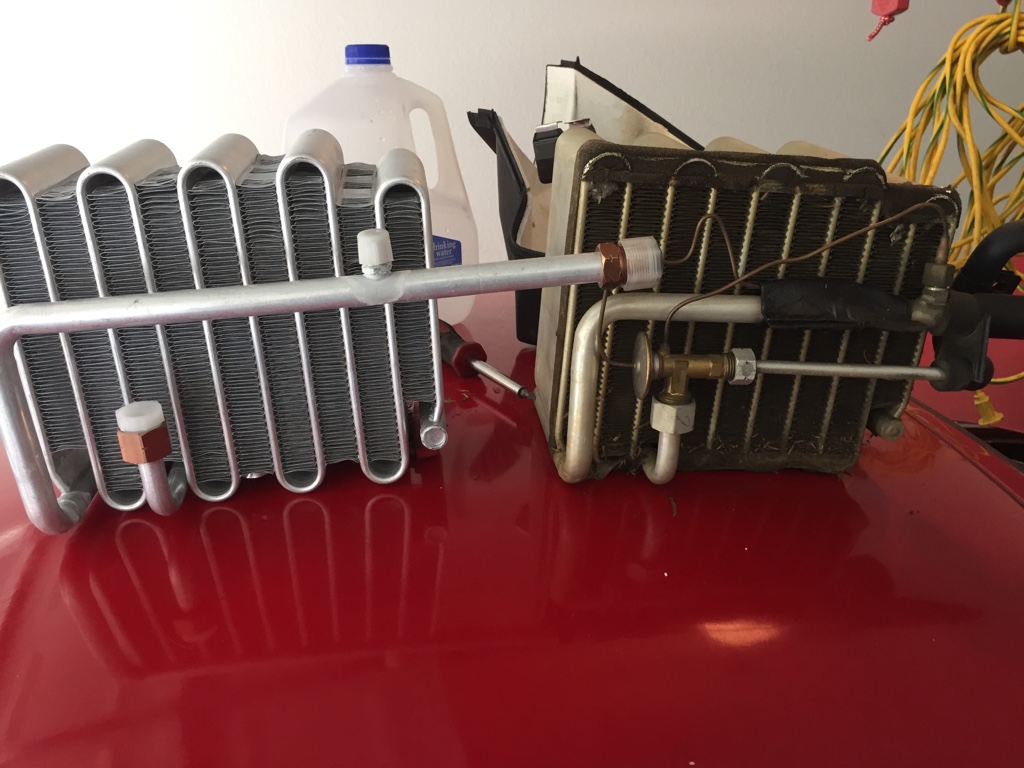
This piece was sticking out of the old condenser but nothing like that on the new, this is where the little green wires show but once again just not sure what they are really for.
Anywhoo replaced all the old stuff and replaced it with the new one, and just head wrapped the little temp piece since I didn't know what it was made out of but I figured it can't hurt.

Just looks so much better with the new one in there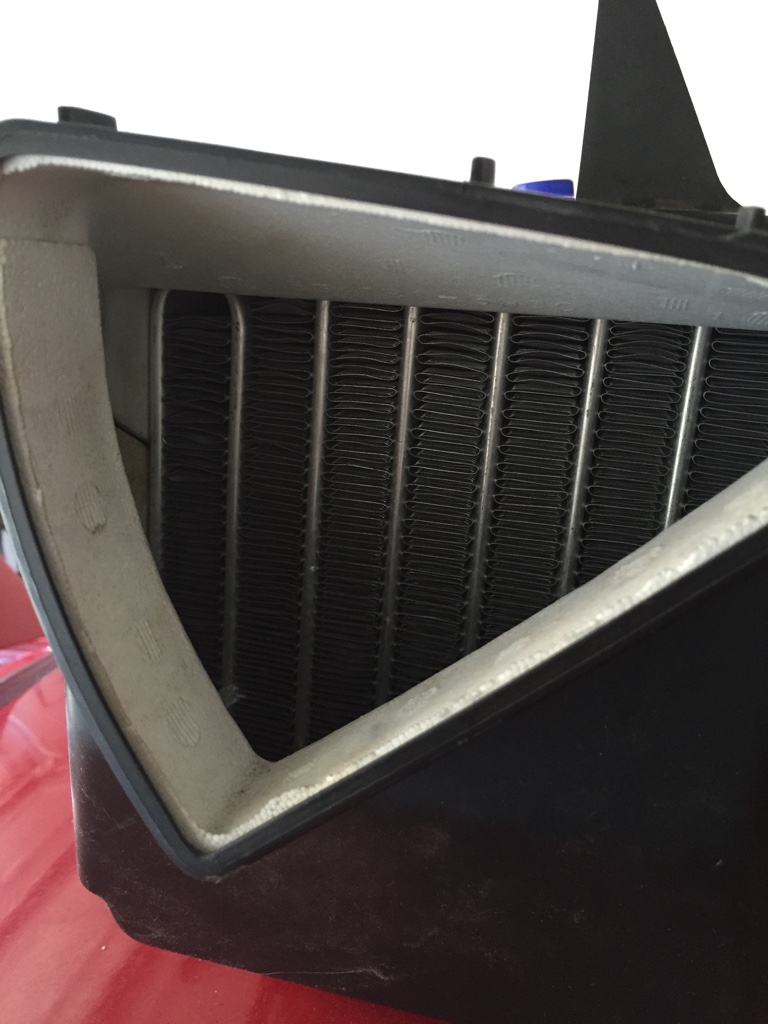
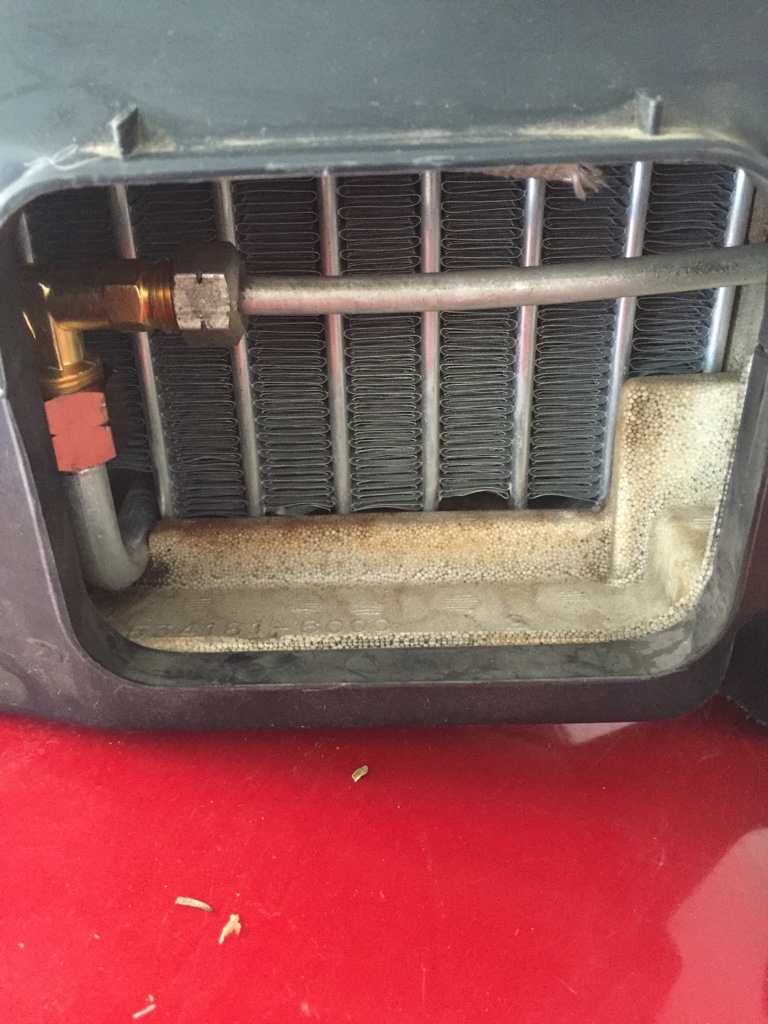
Then I started to put it back in and realized the other side probably could use the same cleaning. So out came the second side. It was similar to the other side to get out. Pulled it out and disassembled, and mainly screws were holding it together.
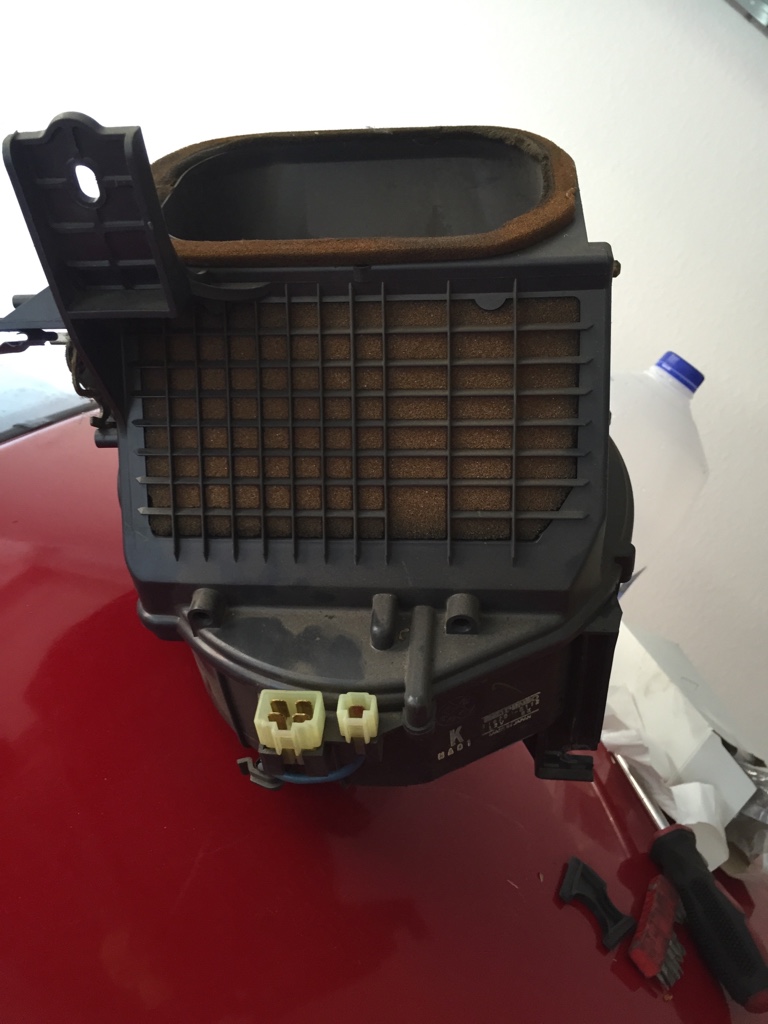
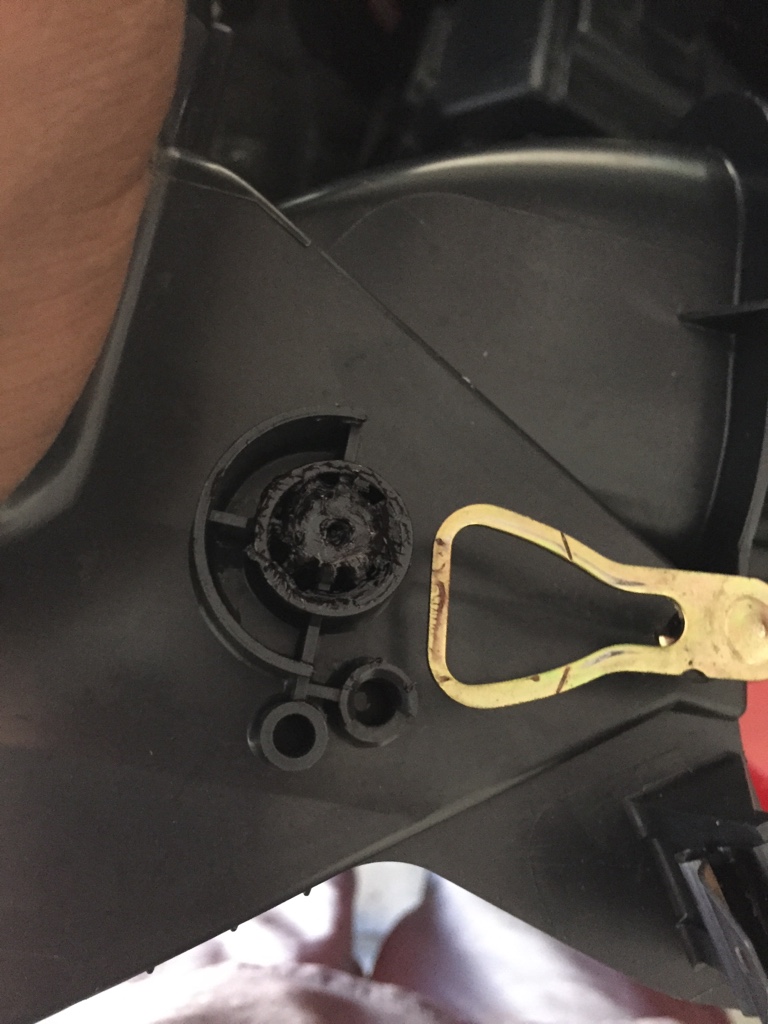
Just looks filthy... So I took it apart and took the piece off, it is a flapper door with 2 screws at the bottom holding it in. Then a shield holding the flapper in. It is a solid piece of medal with this brown filth all over it.

Then I took it apart further and realized that the arm that opens and closes that flapper door was kind of clunky, and so I took it apart, and saw old grease, so I went ahead cleaned that out and replaced it with new grease.
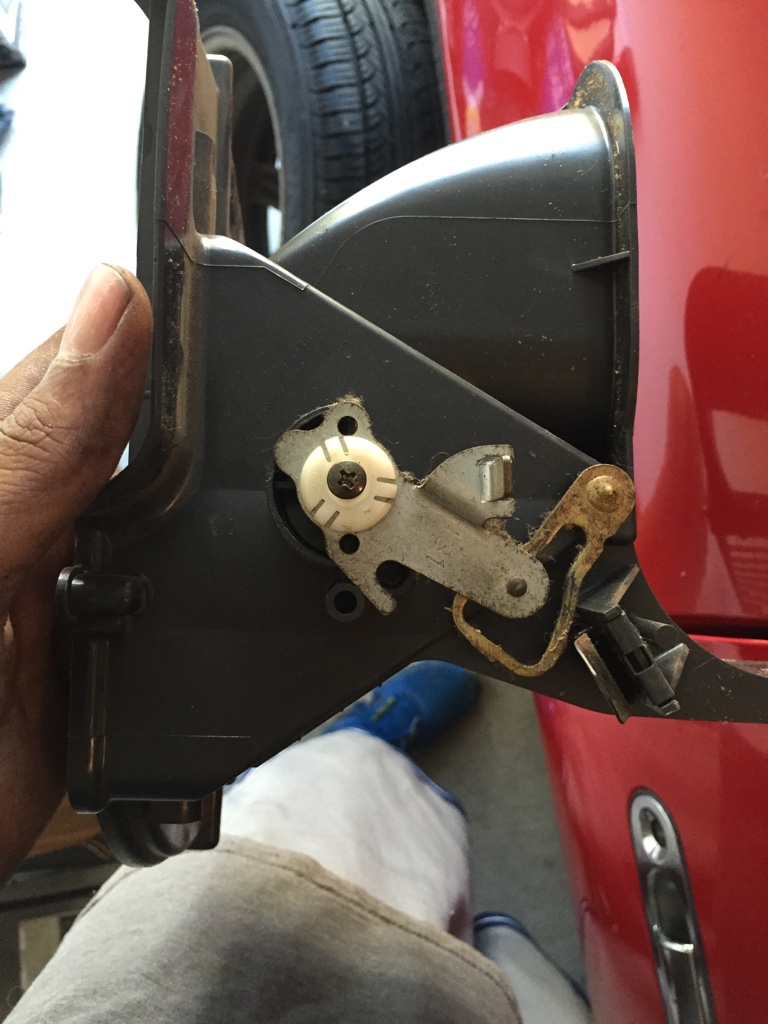
Then need to look up a couple ways on getting something new and clean on there. Once I get that I will put it together.
Eventually I will take the dash out once I move again and will just clean it all down inside.
Also filled the compressor with PAC 100 3.1 fl oz and slowly turned the compressor as it was being filled to lubricate all the internals as well.
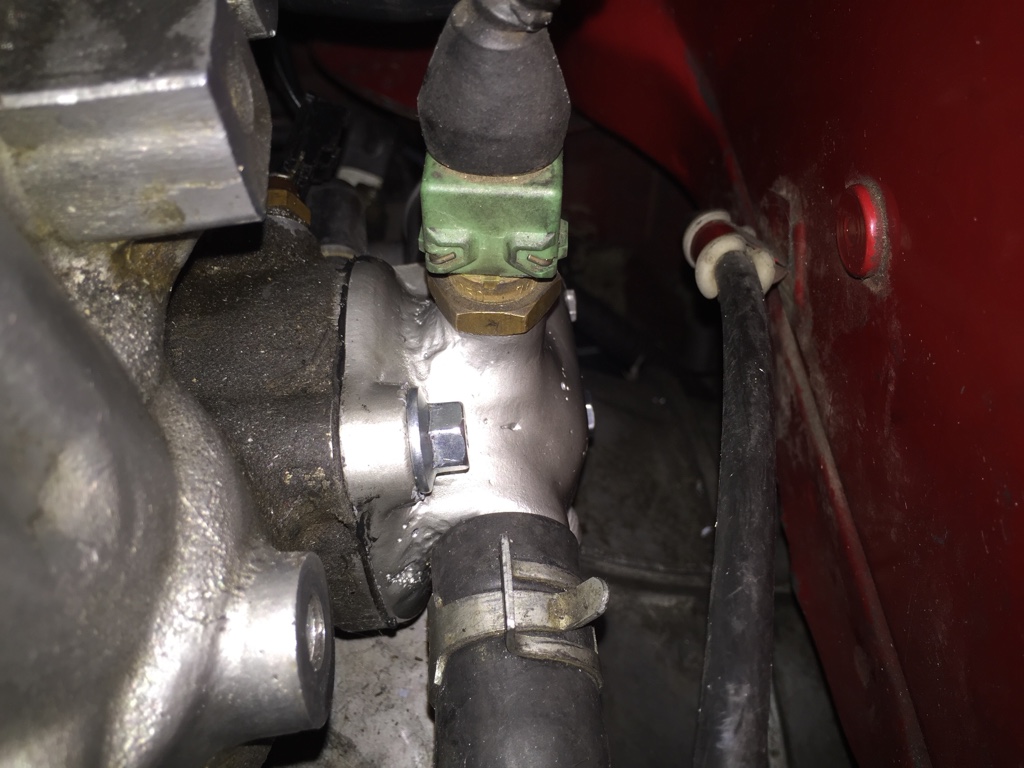
Now back to the reroute I got Alex from Speedworksgarage to make me a Kia waterneck to my specs.
I wanted to be able to remove the front waterneck all together and just block it off for a cleaner look. So started taking it all apart only to realize the blockoff plate I thought I had before ordering the waterneck was not big enough so I am having Alex make me one, and that will give me time to look up more stuff that i need.

I have an inline thermostat I forgot to take pictures of but that's in there too. So I need to get the back bolt off and replace that too, but the turbo will still be watercooled with the -6 an fitting, I can still have heat if wanted, and makes life easy.
That's it for now I will get more stuff done tomorrow hopefully.
Went a little further today, thought I had to take the dash out but I was very happy I didn't need to.
Went to the passenger side and starting taking the glove box out.
The bolts to bolt these in are pretty easy to find, 1 up top, 1 down low and 2 little connectors.
Curious to know what those are for, reason I'm so curious is the new condenser I have doesn't have a place to put them. Guess I'll either be returning the new one or it isn't super important but I'll find out one day.
Then took out the first box and opened it up, the little clips on it are easy, just place the flat head screw driver into the pieces and pry up they will stay on the flathead, vs just flying.
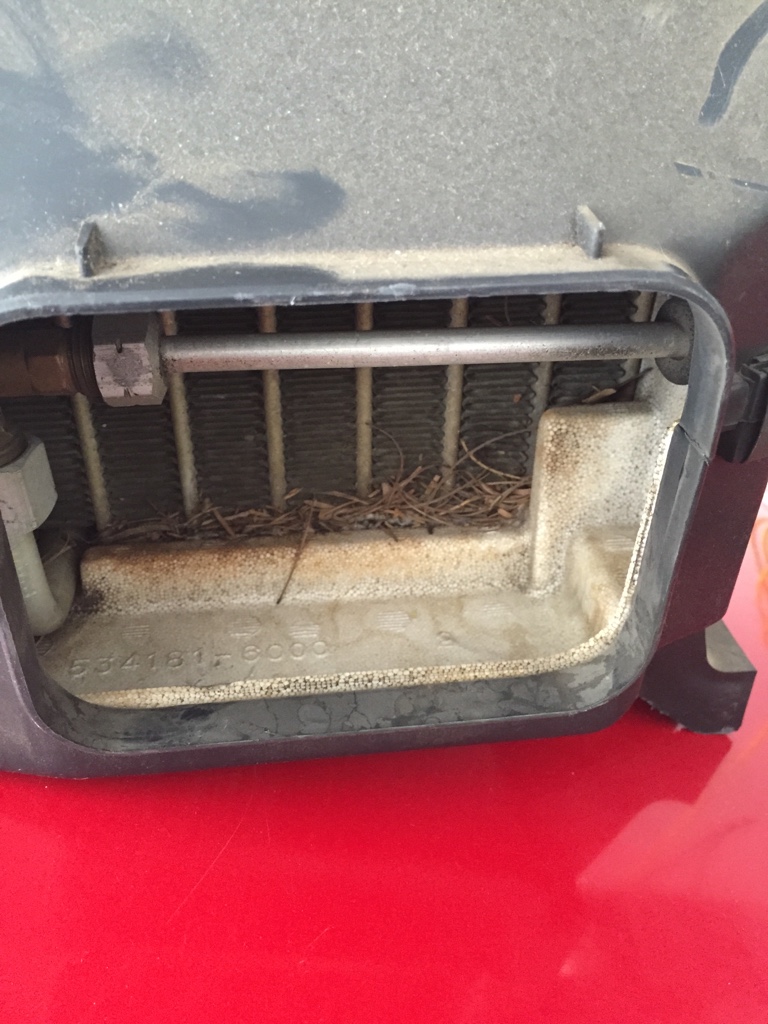
When I looked inside, I was very happy I decided to get a new condenser.
Just dirt dirt and more pine needles.
Once I took it apart I pulled the new condenser out and compared the 2
This piece was sticking out of the old condenser but nothing like that on the new, this is where the little green wires show but once again just not sure what they are really for.
Anywhoo replaced all the old stuff and replaced it with the new one, and just head wrapped the little temp piece since I didn't know what it was made out of but I figured it can't hurt.
Just looks so much better with the new one in there
Then I started to put it back in and realized the other side probably could use the same cleaning. So out came the second side. It was similar to the other side to get out. Pulled it out and disassembled, and mainly screws were holding it together.
Just looks filthy... So I took it apart and took the piece off, it is a flapper door with 2 screws at the bottom holding it in. Then a shield holding the flapper in. It is a solid piece of medal with this brown filth all over it.
Then I took it apart further and realized that the arm that opens and closes that flapper door was kind of clunky, and so I took it apart, and saw old grease, so I went ahead cleaned that out and replaced it with new grease.
Then need to look up a couple ways on getting something new and clean on there. Once I get that I will put it together.
Eventually I will take the dash out once I move again and will just clean it all down inside.
Also filled the compressor with PAC 100 3.1 fl oz and slowly turned the compressor as it was being filled to lubricate all the internals as well.
Now back to the reroute I got Alex from Speedworksgarage to make me a Kia waterneck to my specs.
I wanted to be able to remove the front waterneck all together and just block it off for a cleaner look. So started taking it all apart only to realize the blockoff plate I thought I had before ordering the waterneck was not big enough so I am having Alex make me one, and that will give me time to look up more stuff that i need.
I have an inline thermostat I forgot to take pictures of but that's in there too. So I need to get the back bolt off and replace that too, but the turbo will still be watercooled with the -6 an fitting, I can still have heat if wanted, and makes life easy.
That's it for now I will get more stuff done tomorrow hopefully.
Reply
0
0

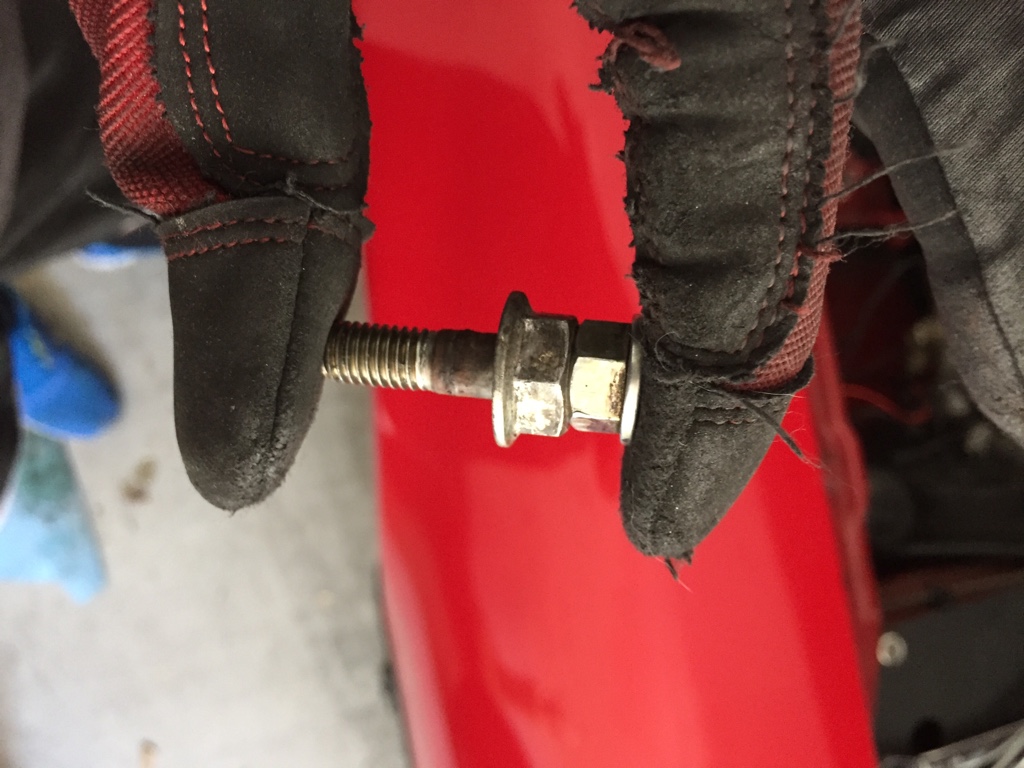
On the front, what really does the sealing is a 30mm freeze plug. The plate is just belt-and-suspenders to keep the freeze plug in. A simple strap would work just as well.
You've been living in PHX without AC?!? You must be one tough (fill-in-the-blank)!
Great work!
You've been living in PHX without AC?!? You must be one tough (fill-in-the-blank)!
Great work!
Reply
0
0
Thread Starter
Junior Member
Joined: Feb 2015
Posts: 223
Total Cats: 31
From: Arizona
The Arizona thing ya, it is a lot of heat I'm not too fond of, never had AC since high school so I guess you can say I'm use to it? Every summer it sucks but not this summer, my ***** shall remain cool this time!!!!
Reply
0
0
The box I got at O'Reilly's just says "30mm Freeze Plug" on the side. Parts guy found it right away -- didn't use the computer. Usually, there's someone at the store that knows what they're doing. The trick is to get directed to him (usually a him) without being a dick. I usually say things like "race car" to get to the right person.
A NAPA store is usually pretty good if you can't find competent help at the Zone/O'Reilly's.
A NAPA store is usually pretty good if you can't find competent help at the Zone/O'Reilly's.
Reply
0
0
Thread Starter
Junior Member
Joined: Feb 2015
Posts: 223
Total Cats: 31
From: Arizona
So got back out there today,
The condenser was just sitting waiting to go back in, I also put the coolant reroute in today as well.
I used the double nut method thanks to Alex on that one, and got the bolt off the back
Then I put the Kia neck on there without a spacer, so much room, debating getting a spacer at all, nothing I really need in there for maybe sensors later but not a biggie for now.
Then put the reroute in there, this was just a mockup I pushed it further underneath the gas lines to be a little more subtle.
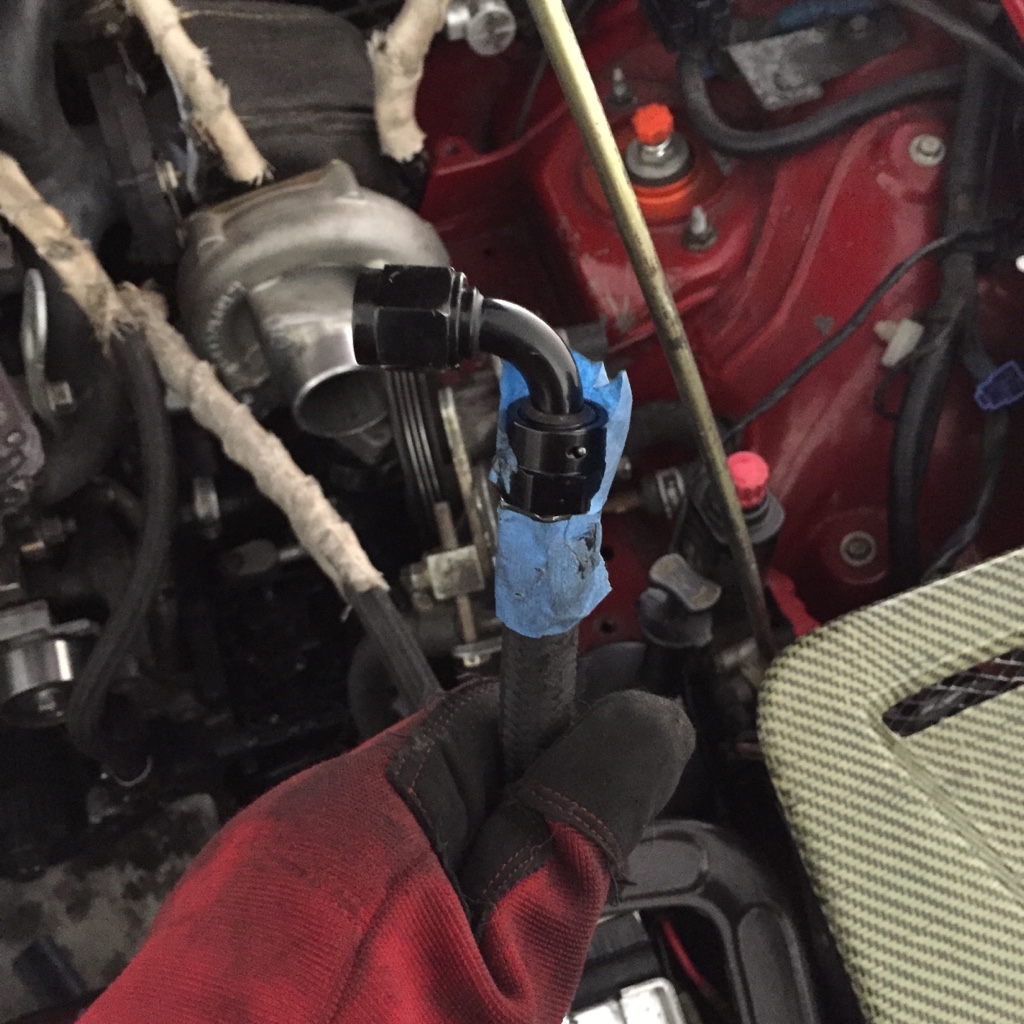
Then made another -6 AN fitting for the Kia neck. Since it will be sitting right above the manifold so I wanted to make sure it does not melt either.
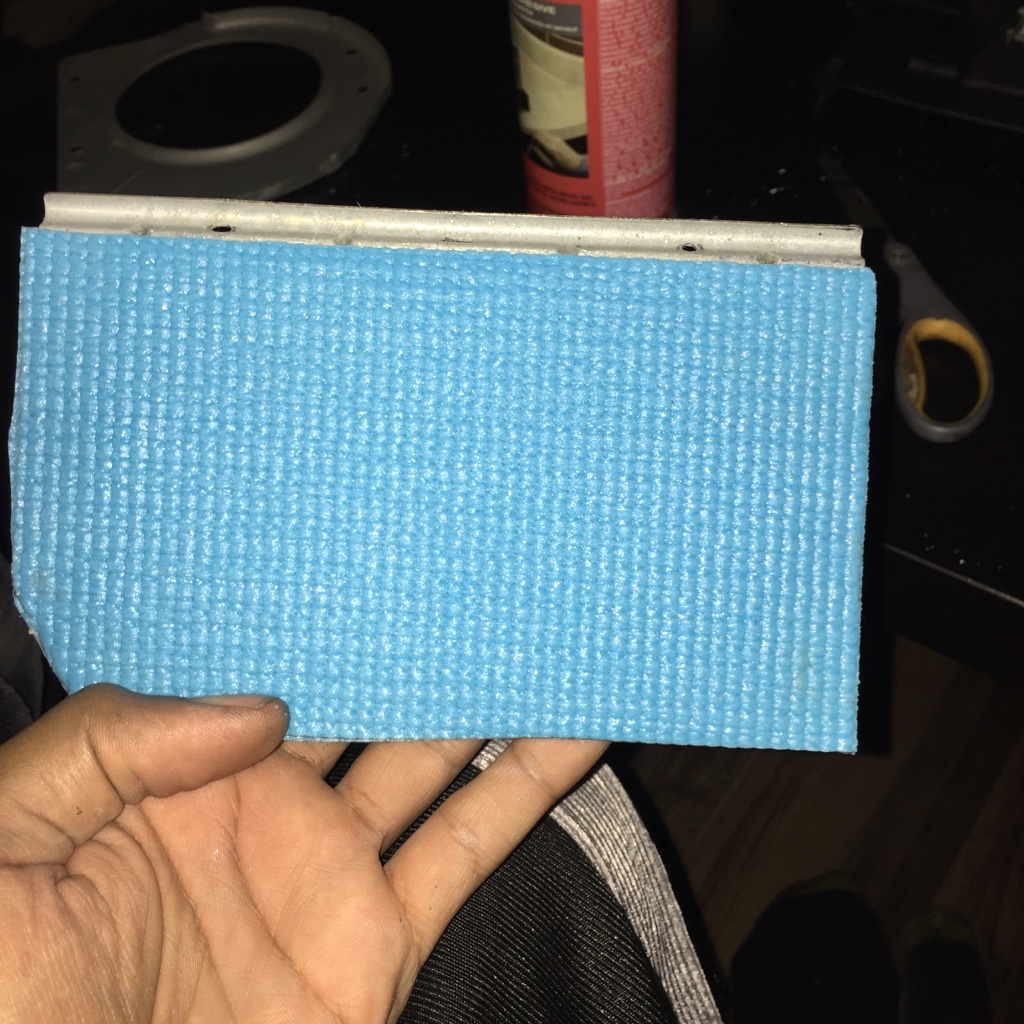
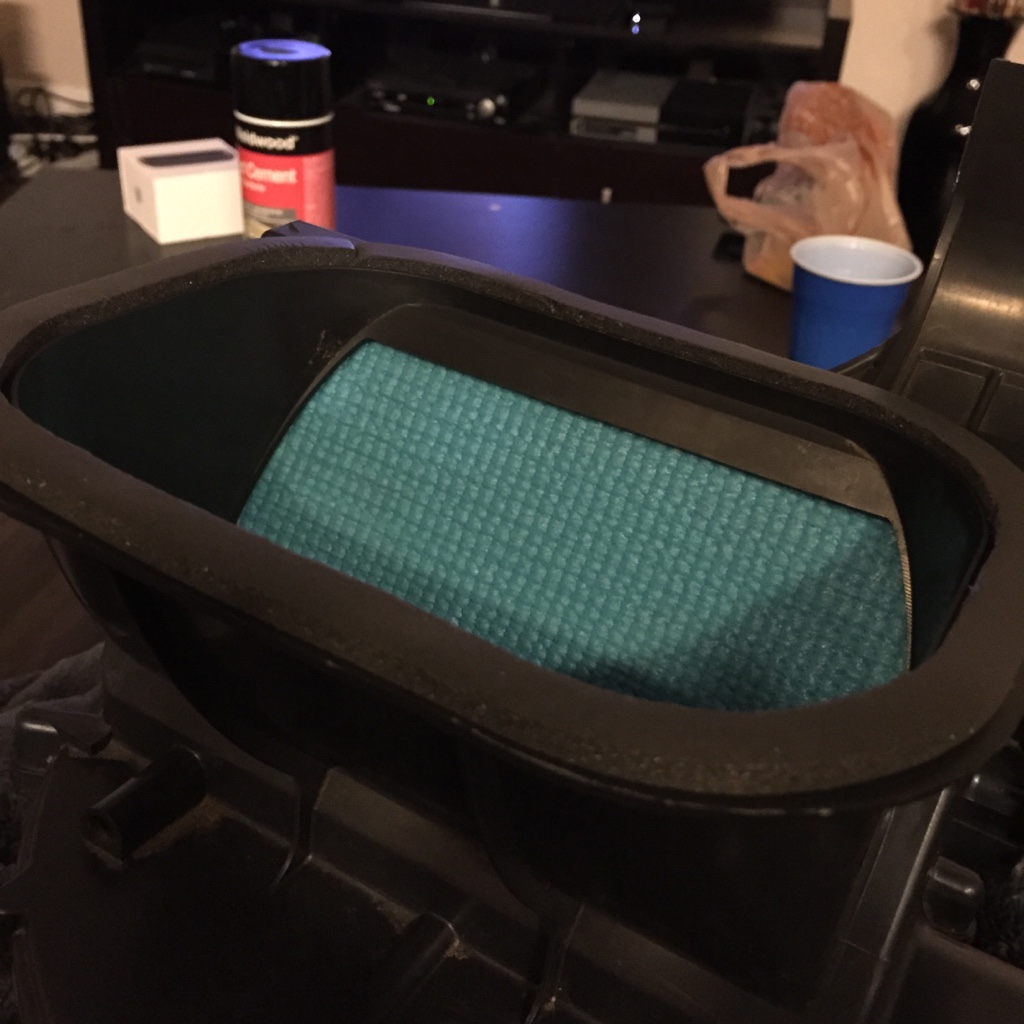
Then went onto the air blower, and just like I said earlier looked up things to do, off Jeff's build thread stole the yoga mat idea because it makes perfect sense. So I cut the fabric to length I may grind it down a bit like his was because I can see the leak of air it will cause if not done.
I actually enjoyed putting this all back together it was some how therapeutic to know how things work. Kind of scares me because I know I will catch the bug of just taking things apart and redoing them. Who knows. Regardless that will all go back in maybe in 2 weeks and will go get the system tested to make sure it has no leaks.
I should be able to put it all back together again next week, maybe Tuesday or Wednesday if I'm lucky and find time, if not Thursday. Then I will be headed for Vegas again so if I have more updates its cause I either broke even, or won money ha. Until next time.
The condenser was just sitting waiting to go back in, I also put the coolant reroute in today as well.
I used the double nut method thanks to Alex on that one, and got the bolt off the back
Then I put the Kia neck on there without a spacer, so much room, debating getting a spacer at all, nothing I really need in there for maybe sensors later but not a biggie for now.
Then put the reroute in there, this was just a mockup I pushed it further underneath the gas lines to be a little more subtle.
Then made another -6 AN fitting for the Kia neck. Since it will be sitting right above the manifold so I wanted to make sure it does not melt either.
Then went onto the air blower, and just like I said earlier looked up things to do, off Jeff's build thread stole the yoga mat idea because it makes perfect sense. So I cut the fabric to length I may grind it down a bit like his was because I can see the leak of air it will cause if not done.
I actually enjoyed putting this all back together it was some how therapeutic to know how things work. Kind of scares me because I know I will catch the bug of just taking things apart and redoing them. Who knows. Regardless that will all go back in maybe in 2 weeks and will go get the system tested to make sure it has no leaks.
I should be able to put it all back together again next week, maybe Tuesday or Wednesday if I'm lucky and find time, if not Thursday. Then I will be headed for Vegas again so if I have more updates its cause I either broke even, or won money ha. Until next time.
Reply
0
0
If you are running a remote thermostat, there is absolutely no reason to run a spacer. Enjoy the room.
With the remote thermostat, make sure to drill a small hole in the T-stat so that it can see the warming water and respond. Sorry, don't know what size is best, but there will be a thread here somewhere that gives a good answer.
With the remote thermostat, make sure to drill a small hole in the T-stat so that it can see the warming water and respond. Sorry, don't know what size is best, but there will be a thread here somewhere that gives a good answer.
Reply
0
0
Thread Starter
Junior Member
Joined: Feb 2015
Posts: 223
Total Cats: 31
From: Arizona
If you are running a remote thermostat, there is absolutely no reason to run a spacer. Enjoy the room.
With the remote thermostat, make sure to drill a small hole in the T-stat so that it can see the warming water and respond. Sorry, don't know what size is best, but there will be a thread here somewhere that gives a good answer.
With the remote thermostat, make sure to drill a small hole in the T-stat so that it can see the warming water and respond. Sorry, don't know what size is best, but there will be a thread here somewhere that gives a good answer.
https://www.miataturbo.net/engine-pe...-issues-71608/
The hole size seems to be 3/16 hole
https://www.miataturbo.net/engine-pe...estions-35554/
and
https://www.miataturbo.net/race-prep...-delete-67967/
Which seems better to do? 1, 2, 3 holes? Every one seems to be a bit different. I guess it doesn't really matter as long as the hole isn't too bad, just need the flow to continue to read temps right?
Reply
0
0

Reply
0
0
Thread Starter
Junior Member
Joined: Feb 2015
Posts: 223
Total Cats: 31
From: Arizona
I guess the real question is should i only drill 1 or more than 1? Most I've seen has been more than one. Not sure what their application is nor if that matters much either?
Reply
0
0
I'd only drill 1 and start smallish. There have been instances here where someone drilled a too-large hole or multiple holes and ended up with a car that wouldn't warm up. Not sure if any of them were in PHX though. Haha.
Reply
0
0
Thread Starter
Junior Member
Joined: Feb 2015
Posts: 223
Total Cats: 31
From: Arizona
Appreciate the help fellas

Reply
0
0
Elite Member

Joined: Mar 2007
Posts: 5,306
Total Cats: 887
From: Santa Clara, CA
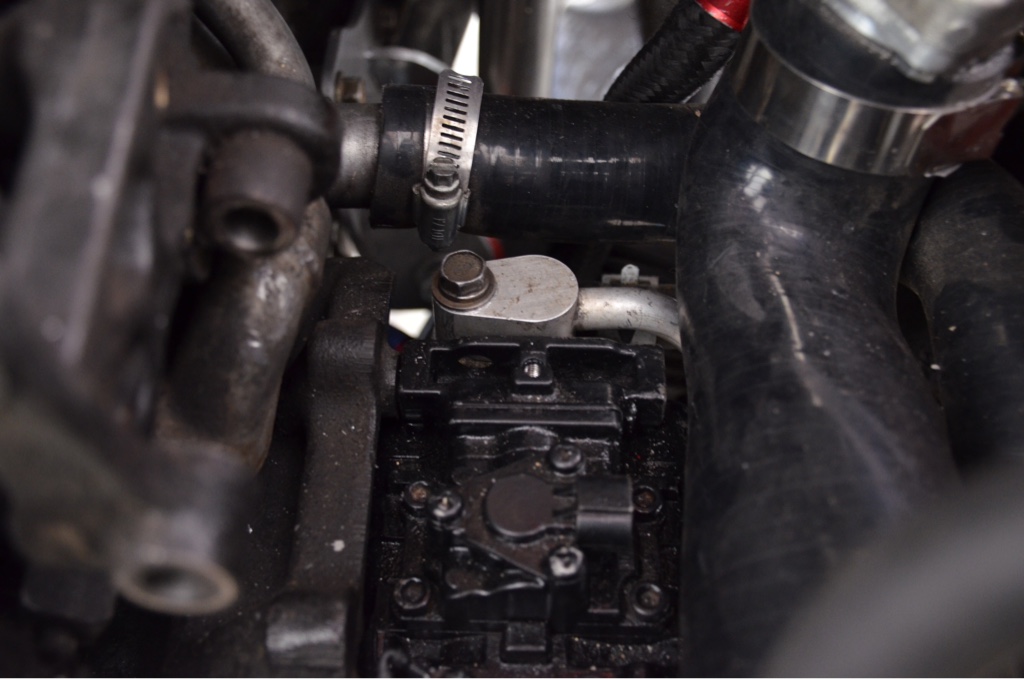
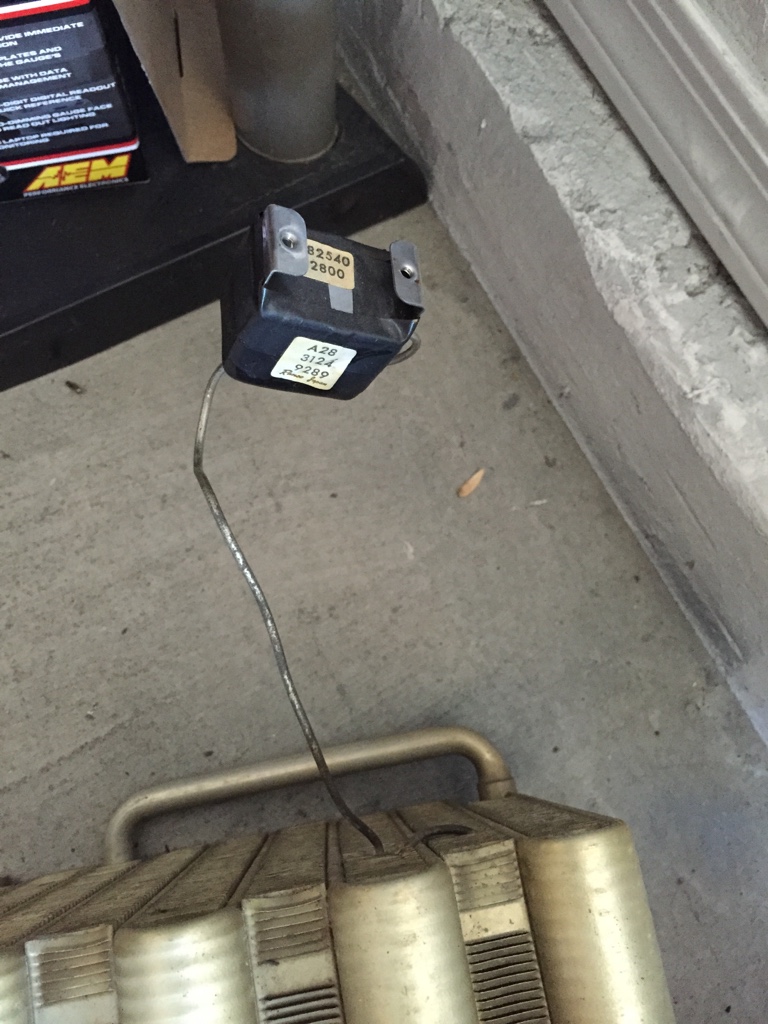
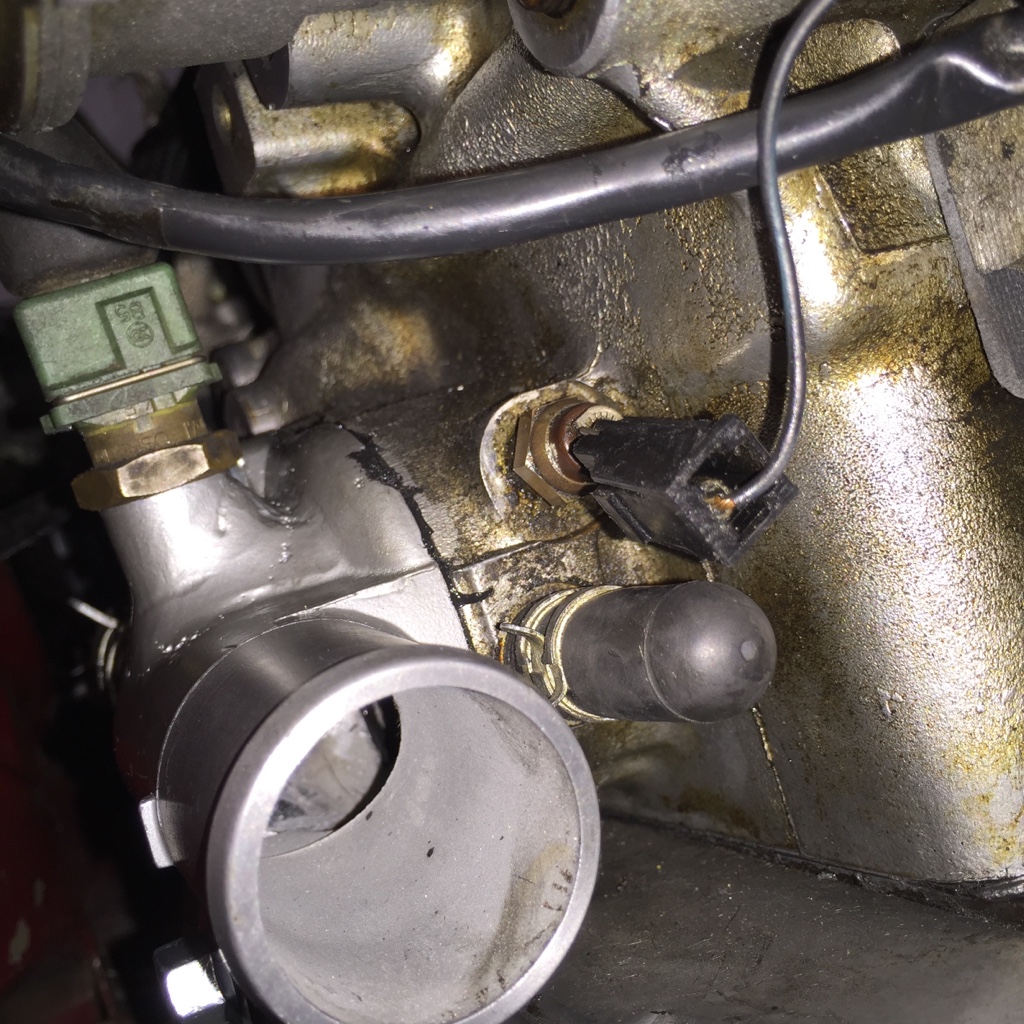
If that's your remote thermostat visible in the picture next to the #1 runner on the intake manifold, them IMHO it's too far from the back of the head. You want the coolant at the thermostat to be the same temperature as the coolant in the block, and that doesn't work well if there's a bunch of unmoving coolant in the hose between the neck and the remote thermostat. Drilling a teeny hole helps, but you still want to locate the thermostat as close as possible to the head. For example:
--Ian
--Ian
Reply
0
0
Thread Starter
Junior Member
Joined: Feb 2015
Posts: 223
Total Cats: 31
From: Arizona
If that's your remote thermostat visible in the picture next to the #1 runner on the intake manifold, them IMHO it's too far from the back of the head. You want the coolant at the thermostat to be the same temperature as the coolant in the block, and that doesn't work well if there's a bunch of unmoving coolant in the hose between the neck and the remote thermostat. Drilling a teeny hole helps, but you still want to locate the thermostat as close as possible to the head. For example:
--Ian
--Ian
I was thinking i should have moved it back if not only for a cleaner look but that makes more sense on top of it, I'll get another one and cut a different section guess i just thought it would be easier for future replacement when need be.
Reply
0
0
Thread Starter
Junior Member
Joined: Feb 2015
Posts: 223
Total Cats: 31
From: Arizona
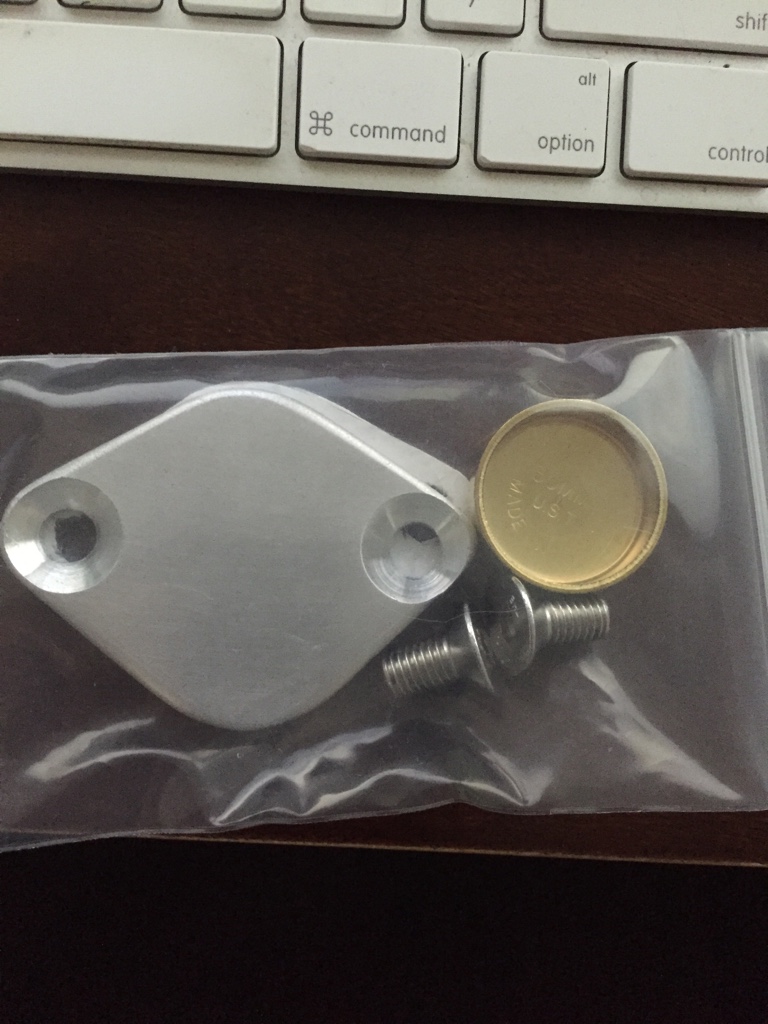
So I got my block off plate from Alex. Was hoping I had some scrap laying around to use but it's all good.
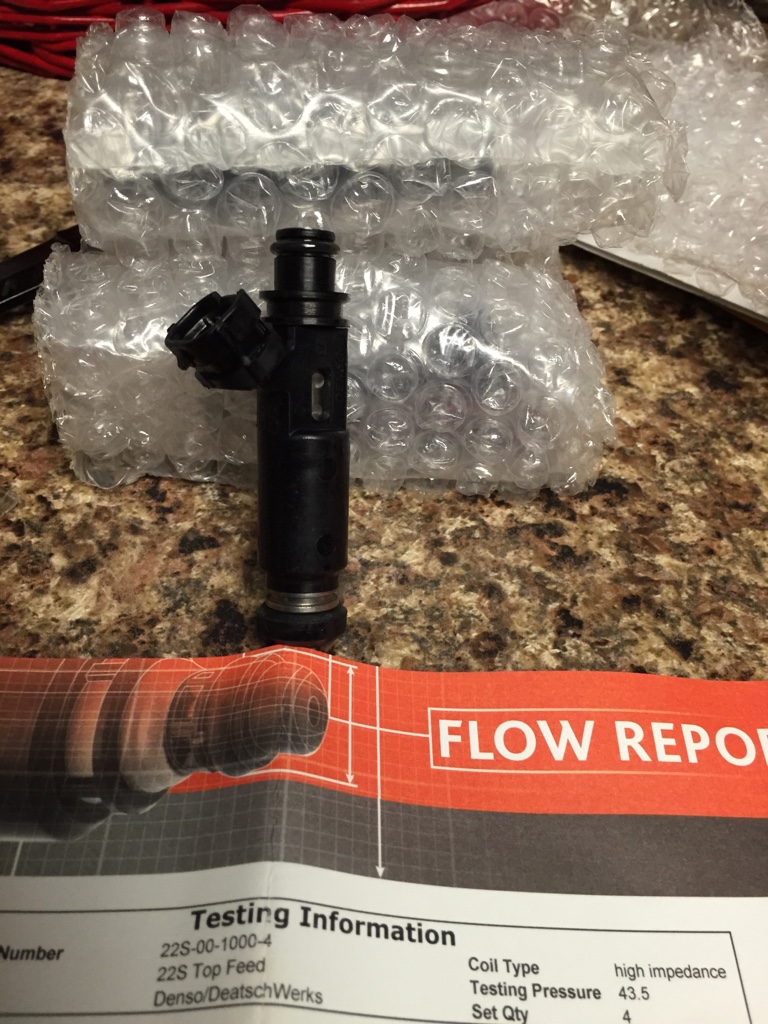
Also got my 1000cc injectors from Evan thanks again bud for when I want to go full retard.
I will be able to get the car back up and running this weekend. Just debating a few options. Since my Vegas trip I actually paid for my trip through gambling so because of that I want to get some goods. Thinking about FAB9's cop setup and flares, or flares and cv axels for Torsen to go in finally.
Debating debating, got some stuff started with carbonmiata just need to be patient hence the flares...
Who knows I'll just let the winnings sit for the time being and get the car up and just drive around and decide on what's next at some point
Reply
0
0


