
Crazyblackman's Brutus


Thread Starter
Junior Member
Joined: Feb 2015
Posts: 223
Total Cats: 31
From: Arizona
Ill let you know, heard of issues with deatschwerks but we will see if I have them or not. Got them new for a good deal so figured why not give em a shot.
Reply
 0
0

0

Senior Member
Joined: Dec 2007
Posts: 1,467
Total Cats: 132
From: ATL
FWIW: The early Fab9 COPs had problems. Supposedly, with the new igniter they're good to around 19psi.
Quote from Fab9 site;
I was going this route, then talked myself out of it - now I'm in the "GM coil camp".
Quote from Fab9 site;
This kit out of the box will support +/- 19PSI when paired with the included 4-Channel Coil Driver. If your setup requires more you can simply upgrade to the AEM Twin-Fire Ignition Module PN:30-2821. Our Pencil Coils paired with the AEM Twin-Fire result in a very serious 1000HP capable spark setup.
Reply
0
0
Thread Starter
Junior Member
Joined: Feb 2015
Posts: 223
Total Cats: 31
From: Arizona
I got the new igniter so we will see how well it works. I assume Bryan has been the test dummy in that department already, so if I need more I shall switch over no biggie.
Appreciate the help!
Reply
0
0

Thread Starter
Junior Member
Joined: Feb 2015
Posts: 223
Total Cats: 31
From: Arizona
Reply
0
0

Joined: Apr 2014
Posts: 18,643
Total Cats: 1,870
From: Beaverton, USA

Reply
0
0

Elite Member
Joined: Sep 2011
Posts: 1,654
Total Cats: 447
From: Sierra Vista, AZ

Reply
0
0
Thread Starter
Junior Member
Joined: Feb 2015
Posts: 223
Total Cats: 31
From: Arizona
Well it has been a while, I have purchased a few things.
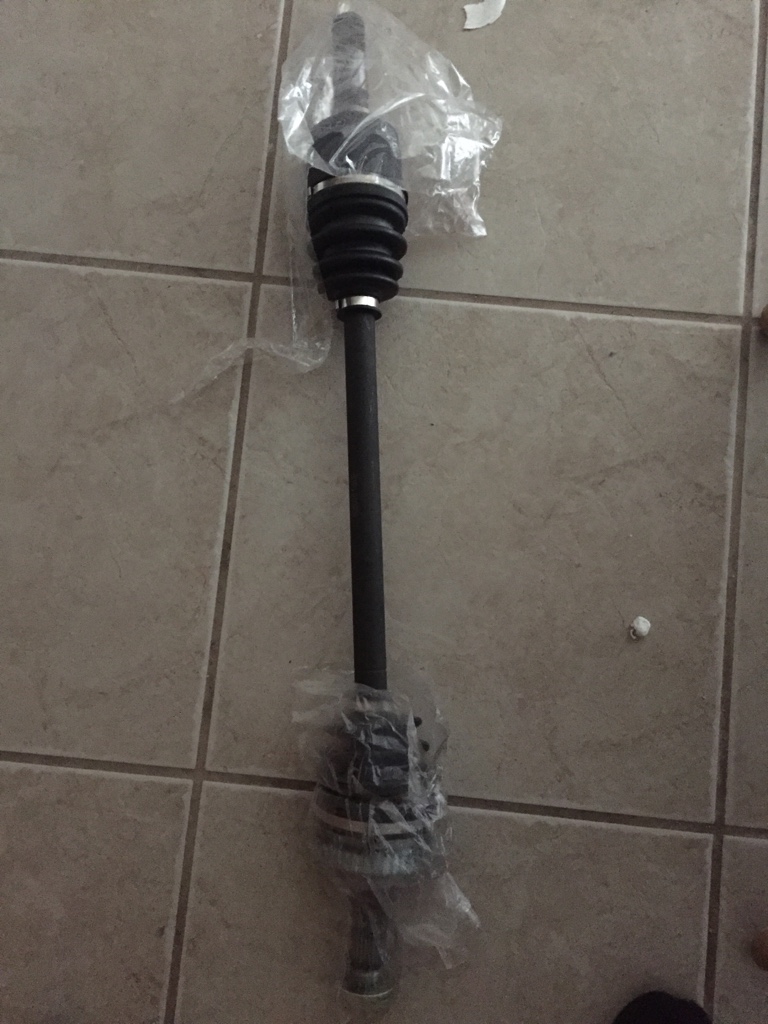
Finally ordered my axels from Autozone only cause they were $10 cheaper than advanced auto parts. Should be here soon.
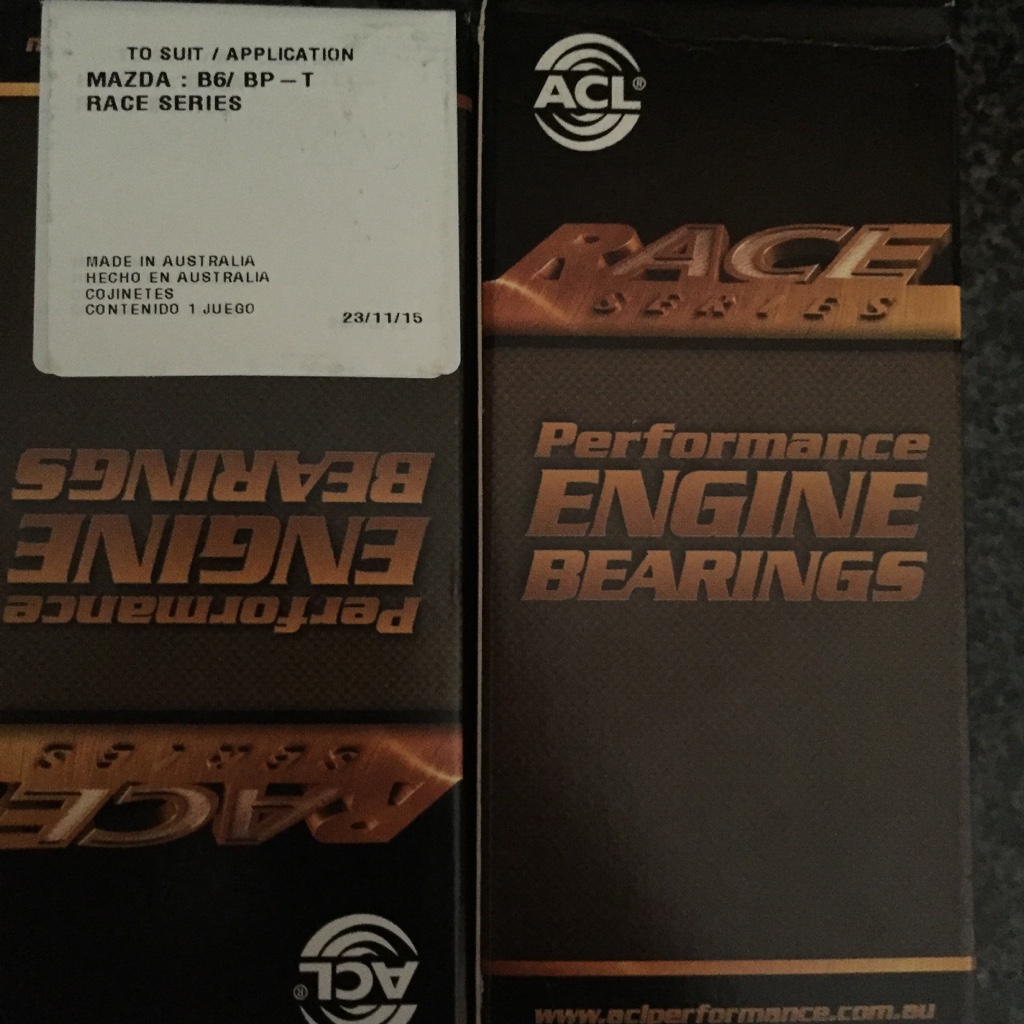
I purchased my bearings so I can now get the block and head cleaned up when this next paycheck comes in.
I will be purchasing new hubs soon enough and just press the extended lugs in there.
I should be able to drop the block and head off next week when I get paid some time hopefully. I have been working a crazy amount of OT to get some extra stuff too so that should kick in the next few paychecks.
Gonna be buying new connectors as well to clean up the engine bay a bit too and rewiring soon enough.
That's all she wrote for now.
Finally ordered my axels from Autozone only cause they were $10 cheaper than advanced auto parts. Should be here soon.
I purchased my bearings so I can now get the block and head cleaned up when this next paycheck comes in.
I will be purchasing new hubs soon enough and just press the extended lugs in there.
I should be able to drop the block and head off next week when I get paid some time hopefully. I have been working a crazy amount of OT to get some extra stuff too so that should kick in the next few paychecks.
Gonna be buying new connectors as well to clean up the engine bay a bit too and rewiring soon enough.
That's all she wrote for now.
Reply
0
0
Thread Starter
Junior Member
Joined: Feb 2015
Posts: 223
Total Cats: 31
From: Arizona
 Untitled by Evan Howard, on Flickr[/QUOTE]
Seems like I haven't updated this in a while. I have been trying to figure out which way I want to go with a few things. I did however get my pistons coated as well so now I can drop all this stuff off and bring it to the machine shop to put together.
I also got stuff from Bryan at Fab9Tuning as well.
I bought axels finally just need to go to robs house to get the bushing pressed out and in with the new ones I have.
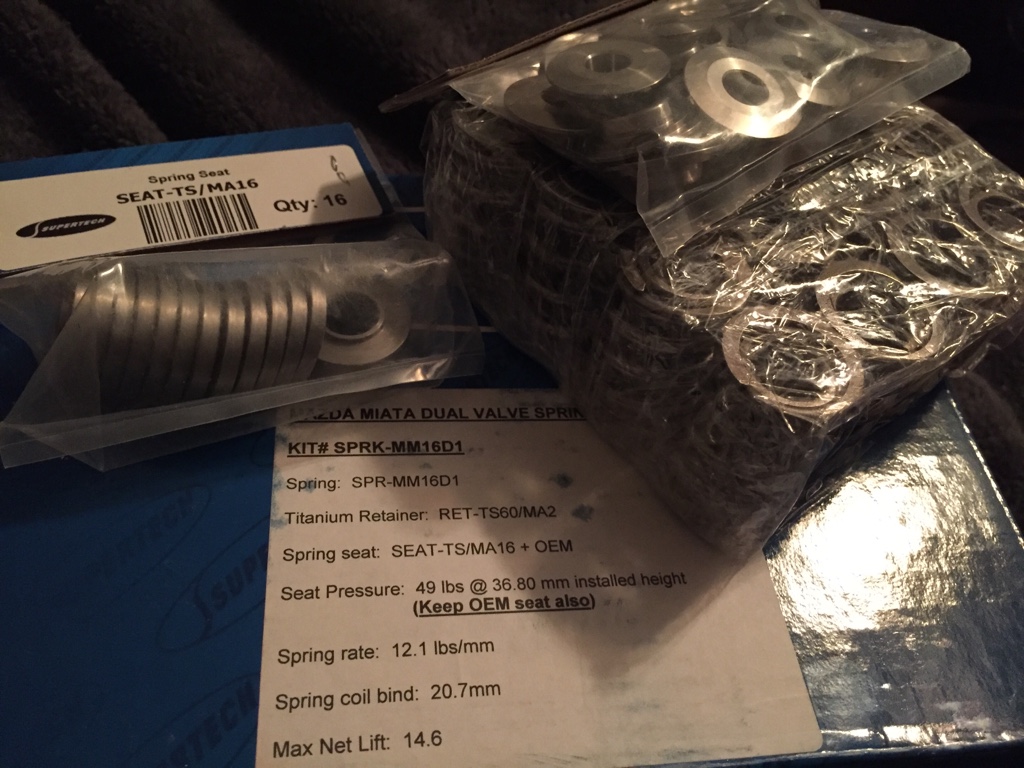
I also got new super tech complete valve spring kit I ended up getting the light double springs so I can rev up to 8400rpms but I'll probably stick to 7ish just to have the extra head room.
Now I need to drop this stuff off to get out together for once, then I can start with everything else, getting the cops setup, small wire tuck, etc.
Reply
0
0

Thread Starter
Junior Member
Joined: Feb 2015
Posts: 223
Total Cats: 31
From: Arizona
So for those following on insta old news.
I have received my new flares some lovely tuckin99 beauties.

Tried to fit my current 15x9 0 offset rota RKRs haha would need a 50mm spacer on all 4 corners to look decent. So I'm selling those.
I am going to be getting some new shoes eventually but it will take time I have other things to focus on. However the new wheels will be wide to fill these flares.
Still haven't dropped the motor off but I seriously have no choice but to do it this weekend cause I'm sick of waiting, I'm only doing it to myself, just don't want anything to go wrong.
Either way I told you a while back I took the dash out to clean up wiring and the air box.
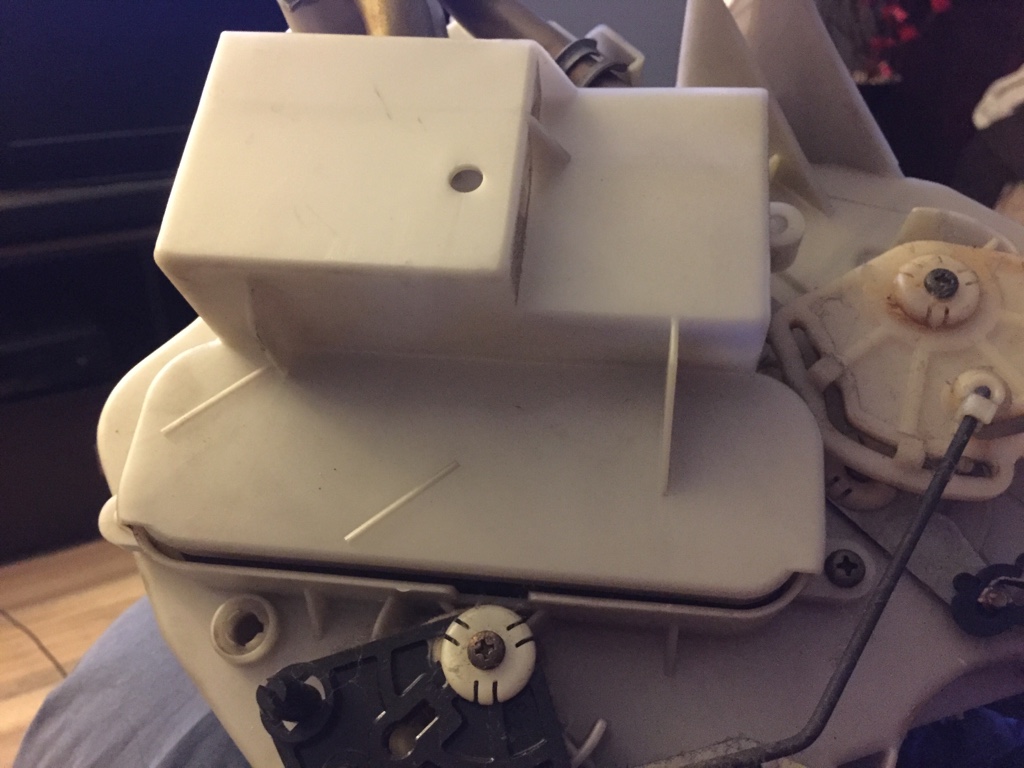
Well started the air box last night and need a few more things and that can go back in but it was FILTHY!!
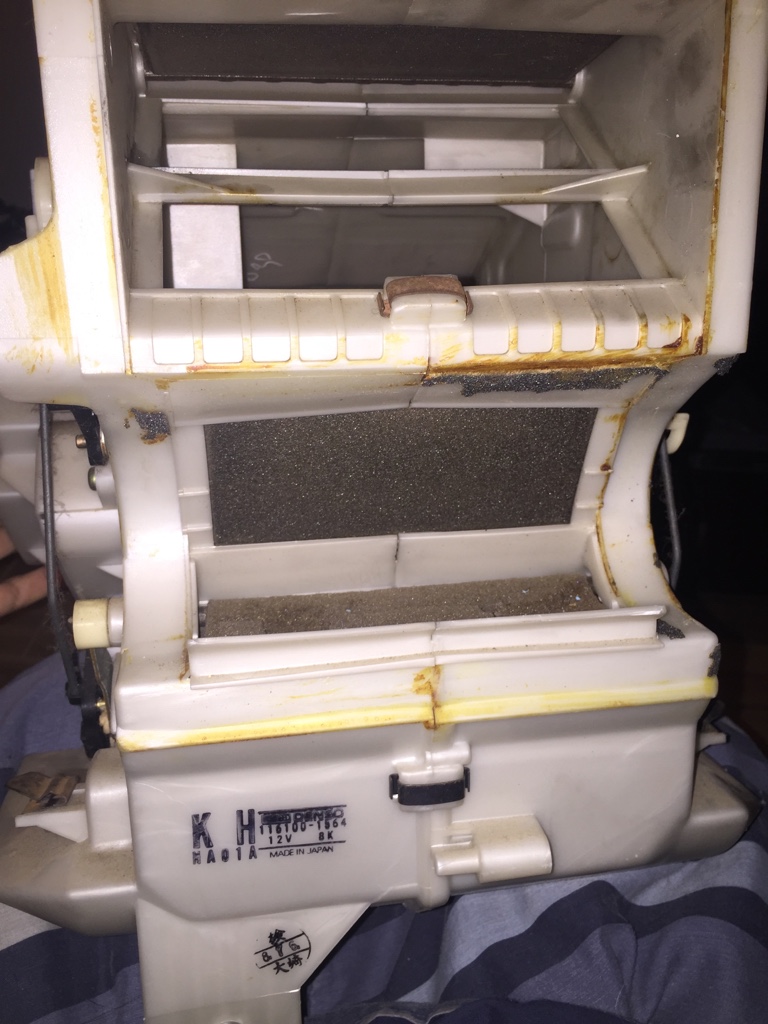
There was a least a film of just grit and dirt on it the entire time during disassembly. Little hairs and all.
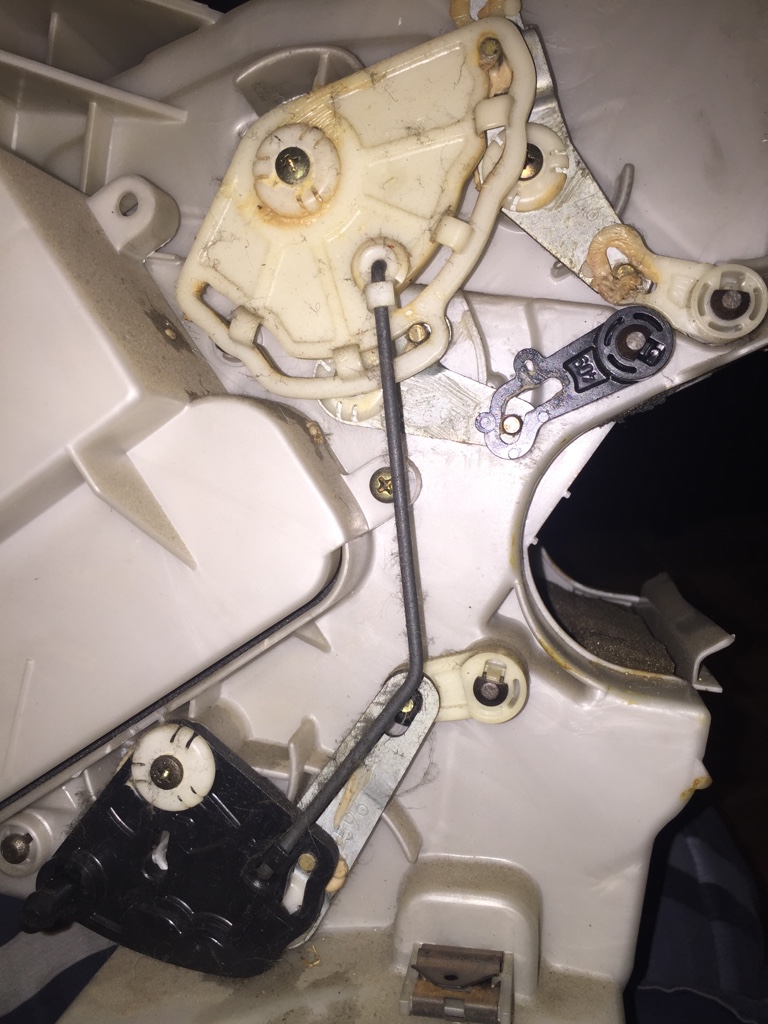
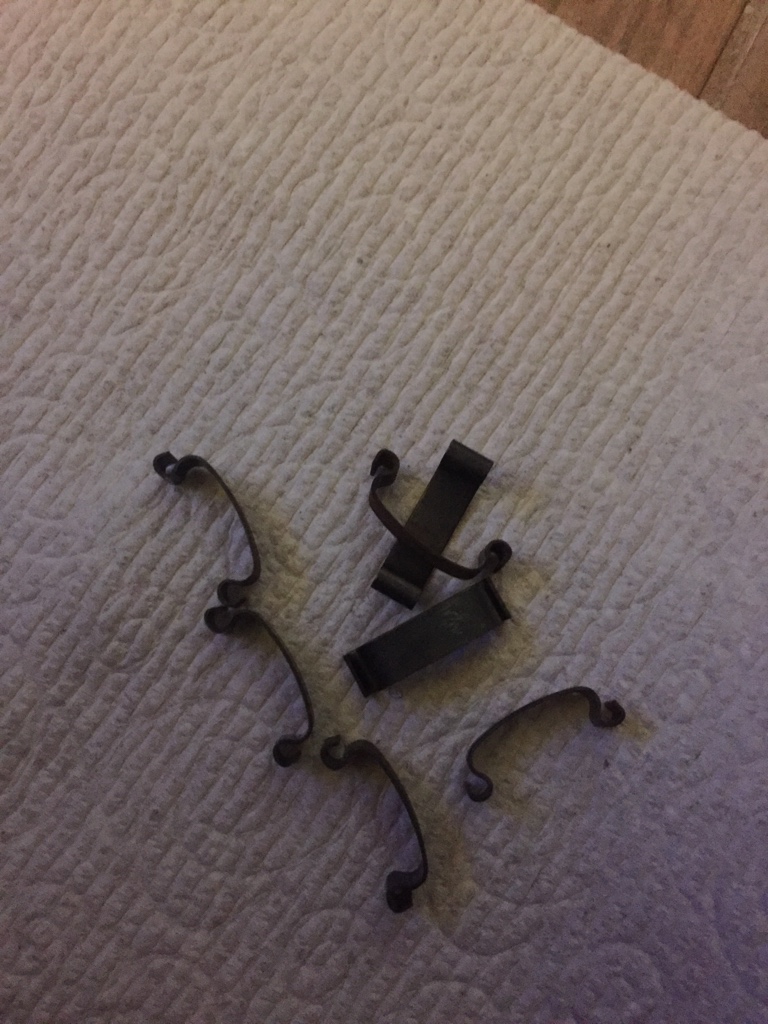
Took off all the little clips there are 7 just throughout the piece
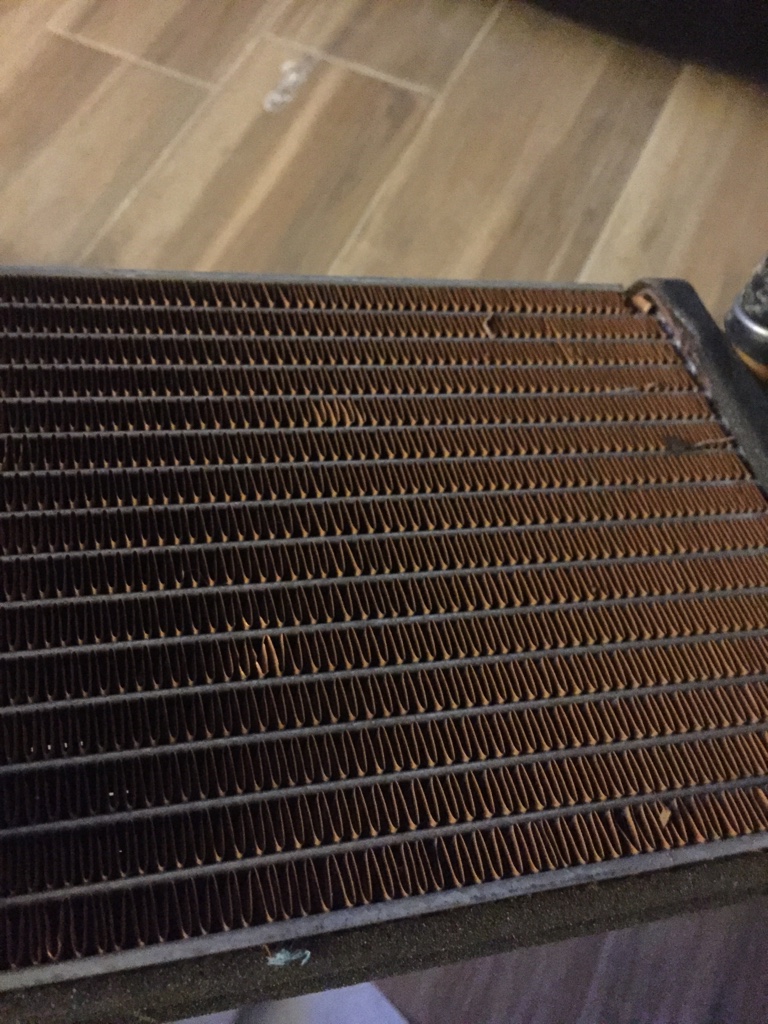
Also took the heater core out and was just completely rusted.
The heater core has 2 screws and one just for positioning, pretty straight forward. To be honest most of these pictures are for my reference but in case someone needed help out here figured I would post it.
 second screw not shown but on left side
Thinking about replacing the heater core just for good measure.
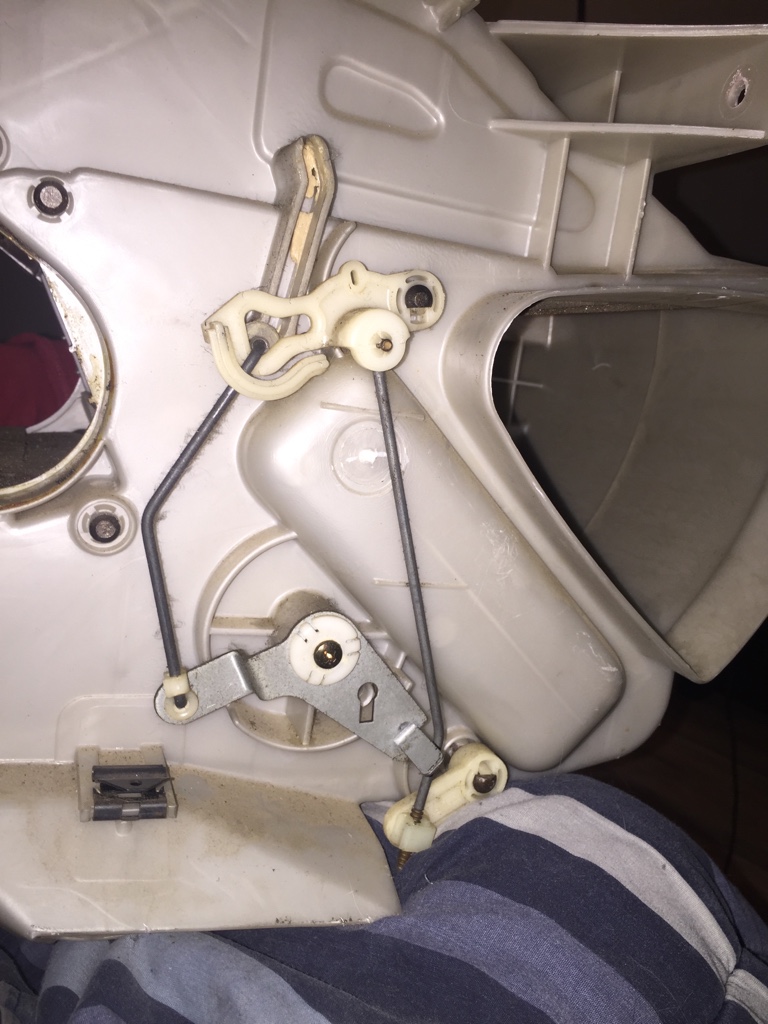
Then once you pull it apart you have these flappers on both sides. I believe they were all at different heights as well.
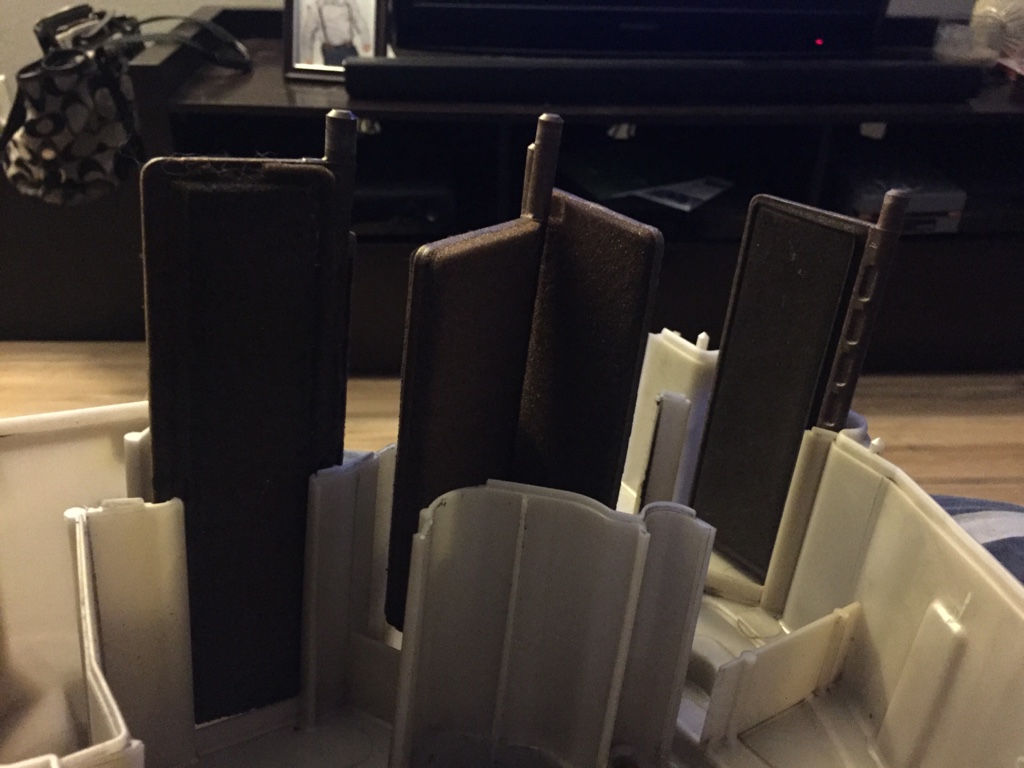

They were filthy just gross fuzz on there now. So I scrapped that off similar to how I did the AC stuff before. Gonna do the same and spray it with adhesive and put some of that yoga mat for them all.
That is todays or tomorrow's chore.
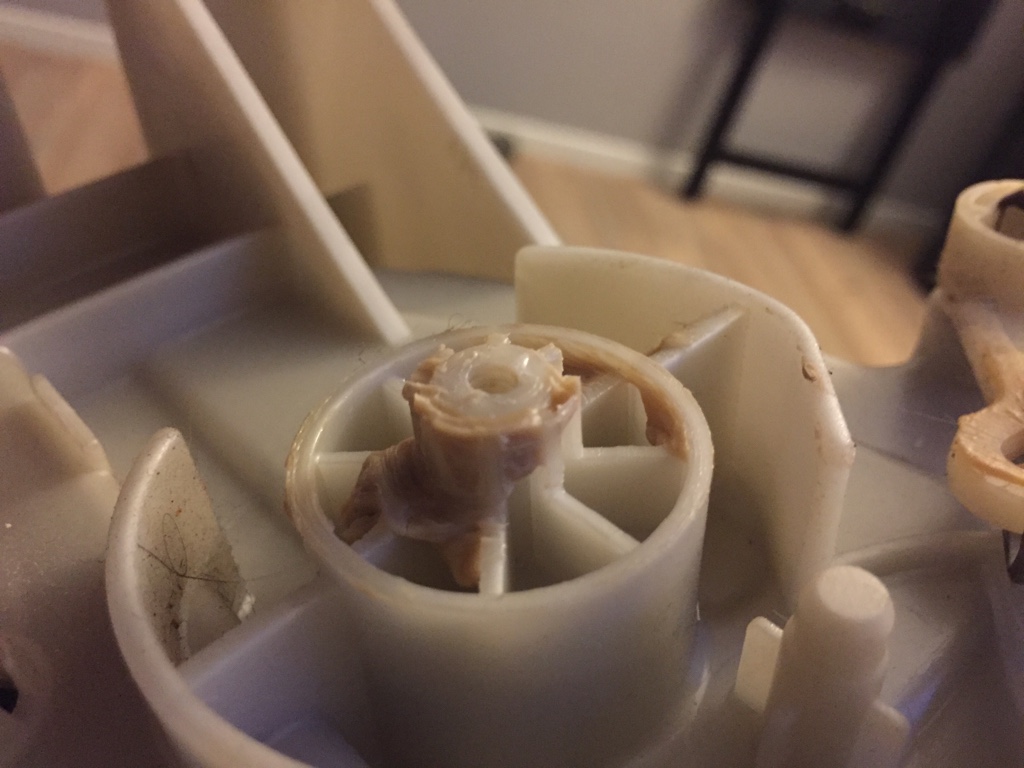
I did start replacing grease cause this is what it looked like when I opened it up. Yellow like all the window tracks and anything that had grease on it before.
I think that's it for now, should have a couple things coming in but nothing major so I'll update again then.
I have received my new flares some lovely tuckin99 beauties.
Tried to fit my current 15x9 0 offset rota RKRs haha would need a 50mm spacer on all 4 corners to look decent. So I'm selling those.
I am going to be getting some new shoes eventually but it will take time I have other things to focus on. However the new wheels will be wide to fill these flares.
Still haven't dropped the motor off but I seriously have no choice but to do it this weekend cause I'm sick of waiting, I'm only doing it to myself, just don't want anything to go wrong.
Either way I told you a while back I took the dash out to clean up wiring and the air box.
Well started the air box last night and need a few more things and that can go back in but it was FILTHY!!
There was a least a film of just grit and dirt on it the entire time during disassembly. Little hairs and all.
Took off all the little clips there are 7 just throughout the piece
Also took the heater core out and was just completely rusted.
The heater core has 2 screws and one just for positioning, pretty straight forward. To be honest most of these pictures are for my reference but in case someone needed help out here figured I would post it.
second screw not shown but on left side Thinking about replacing the heater core just for good measure.
Then once you pull it apart you have these flappers on both sides. I believe they were all at different heights as well.
They were filthy just gross fuzz on there now. So I scrapped that off similar to how I did the AC stuff before. Gonna do the same and spray it with adhesive and put some of that yoga mat for them all.
That is todays or tomorrow's chore.
I did start replacing grease cause this is what it looked like when I opened it up. Yellow like all the window tracks and anything that had grease on it before.
I think that's it for now, should have a couple things coming in but nothing major so I'll update again then.
Reply
0
0

Joined: Oct 2013
Posts: 520
Total Cats: 27
From: Goleta, Southern California
I did not, but only because I hadn't realized I could rent one from FM. Not sure about 1.6 though.
Are you boring over or just hone? If boring I'd recommend, but I don't think it matter much with just a hone.
Are you boring over or just hone? If boring I'd recommend, but I don't think it matter much with just a hone.
Reply
0
0
Elite Member

Joined: Mar 2007
Posts: 5,306
Total Cats: 887
From: Santa Clara, CA
Reply
0
0
Thread Starter
Junior Member
Joined: Feb 2015
Posts: 223
Total Cats: 31
From: Arizona
Thanks!
Thanks appreciate it.
Reply
0
0
Thread Starter
Junior Member
Joined: Feb 2015
Posts: 223
Total Cats: 31
From: Arizona
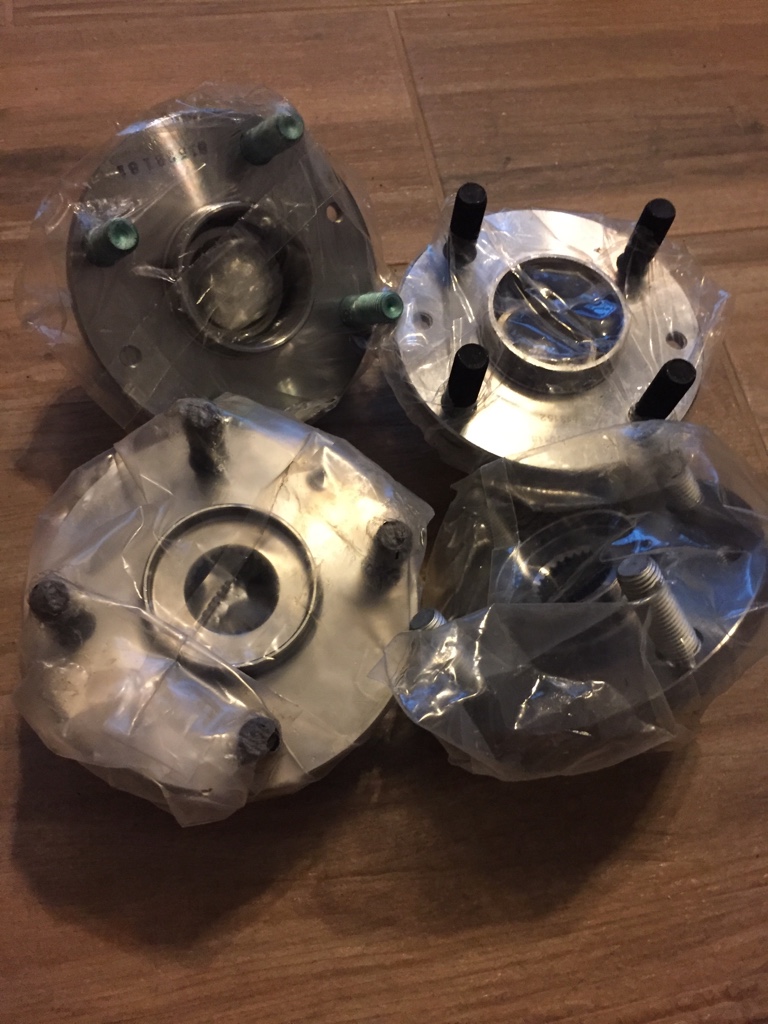
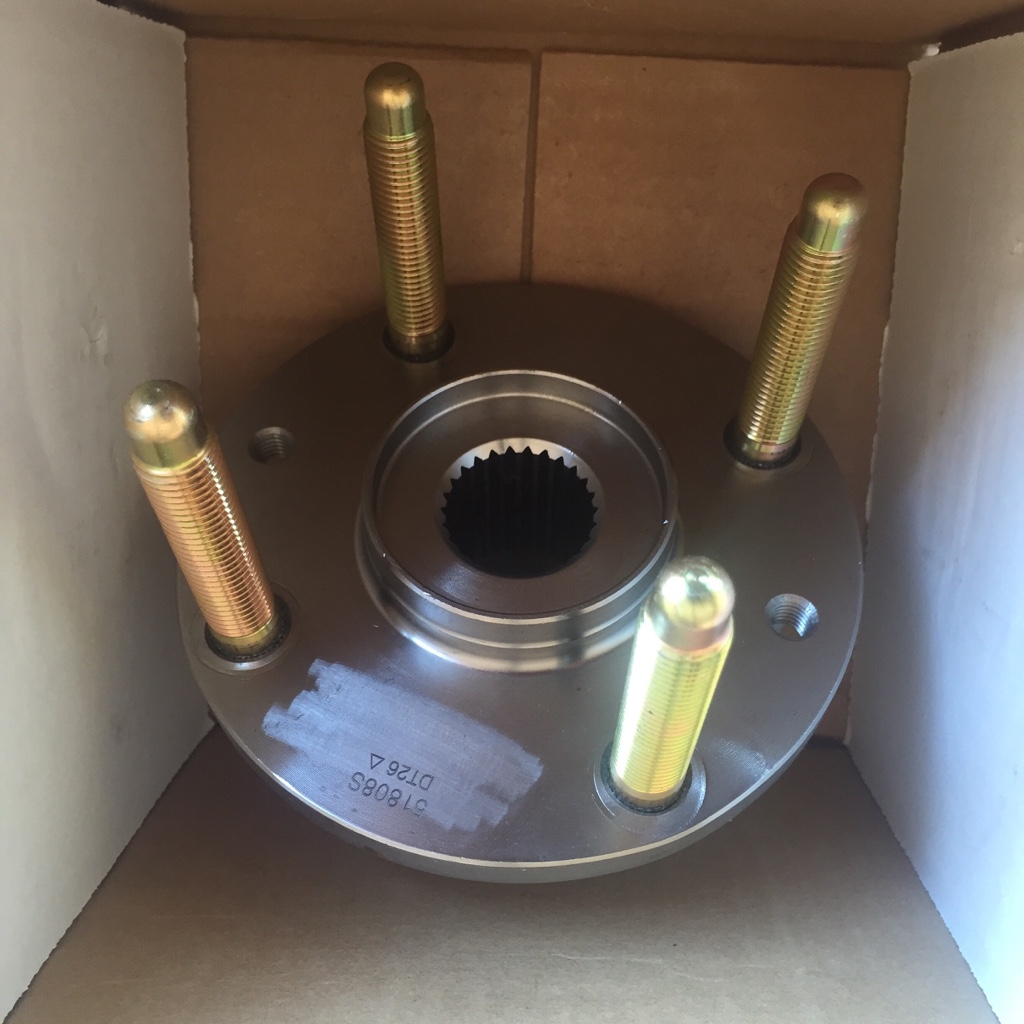
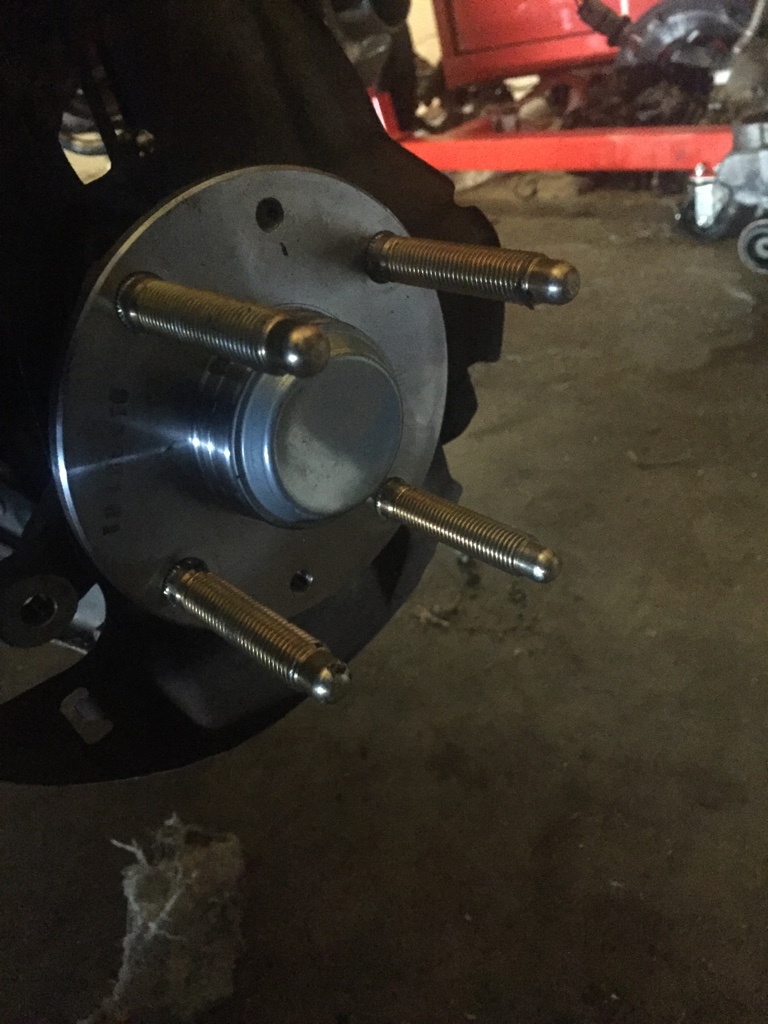
Got my hubs in the other day, and at the same time I went to Robs house aka Humming to hang out and get my ARP Extended studs pressed in. Pressing it was a lot easier than expected.
Need to do the diff but I'm going to see if I can get that done tomorrow possibly. I am also putting the flares on tomorrow and hope to get the flares and the diff bushing and front hubs in. I didn't realize I needed the bearings for the rear hubs separate so buying those as we speak.
Plan on getting new tie Rod ends as well from miataroadster.
However as you all know tuckin99 flares are +50mm so I will need wheels to fill that.
After talking with Rod from Tetsuyagarage he has helped me come across the wheels I have hoped for to do this with. Thank you again for he help finding them!!!! Such quick service it was crazy how fast I requested something and he was able to find something in a matter of days like it was nothing. Great great service!
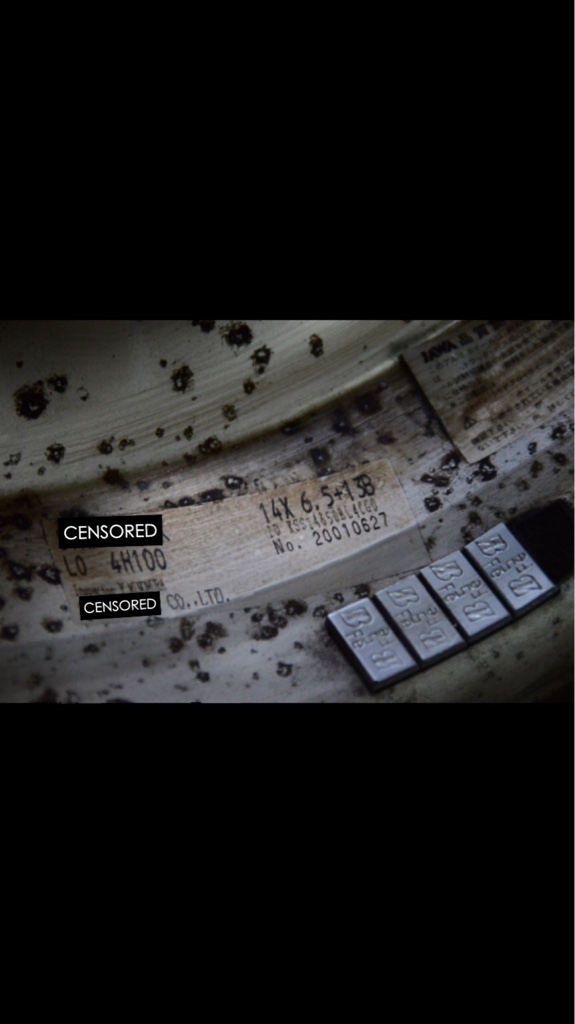
For you guys here is a teaser. If you know well don't say anything duh.
The size doesn't matter, I am going to have them custom made to the sizes I need. I'll probably update tomorrow with the diff stuff. Trying to do this right the first time around so I don't have to tear anything apart later.
That's it for now!
Need to do the diff but I'm going to see if I can get that done tomorrow possibly. I am also putting the flares on tomorrow and hope to get the flares and the diff bushing and front hubs in. I didn't realize I needed the bearings for the rear hubs separate so buying those as we speak.
Plan on getting new tie Rod ends as well from miataroadster.
However as you all know tuckin99 flares are +50mm so I will need wheels to fill that.
After talking with Rod from Tetsuyagarage he has helped me come across the wheels I have hoped for to do this with. Thank you again for he help finding them!!!! Such quick service it was crazy how fast I requested something and he was able to find something in a matter of days like it was nothing. Great great service!
For you guys here is a teaser. If you know well don't say anything duh.
The size doesn't matter, I am going to have them custom made to the sizes I need. I'll probably update tomorrow with the diff stuff. Trying to do this right the first time around so I don't have to tear anything apart later.
That's it for now!
Reply
1
1
Thread Starter
Junior Member
Joined: Feb 2015
Posts: 223
Total Cats: 31
From: Arizona
So today I got about 33% done with what I said I wanted to get done yesterday.
Thank you for whoever said to replace the hubs. I now fully understand why.
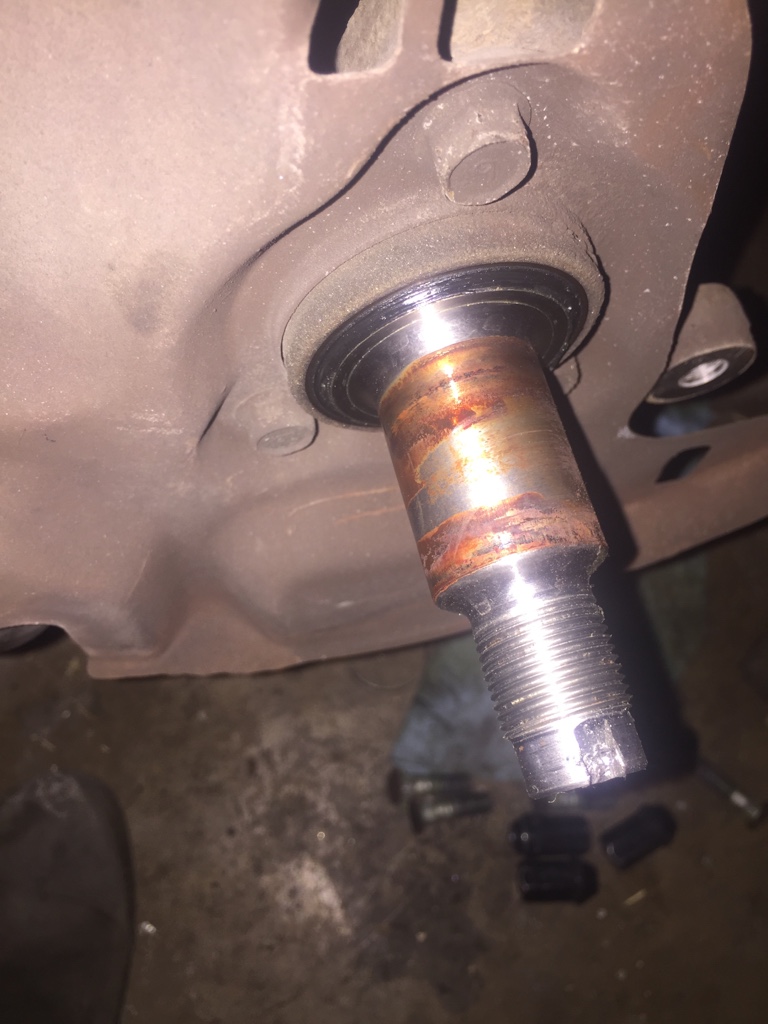
I did get the front hubs in that went pretty easy I think the most annoying part was getting the dust shields off to get access to the nut itself.
Regardless once I got the hubs off I instantly was glad I am replacing them now.
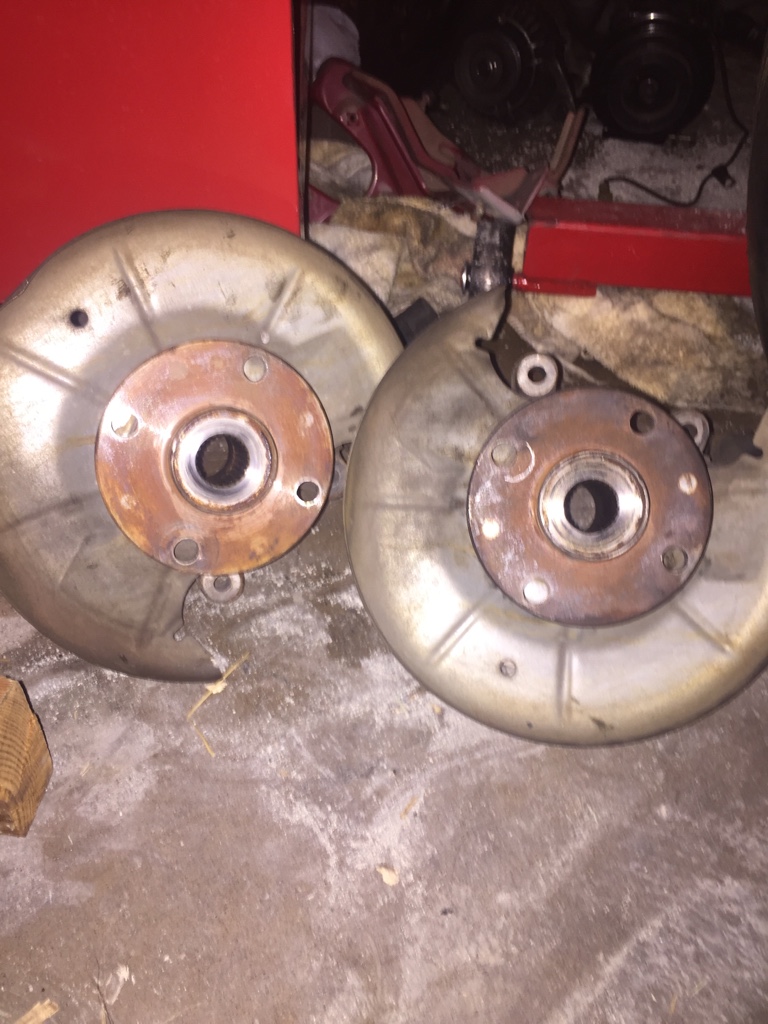
Drivers
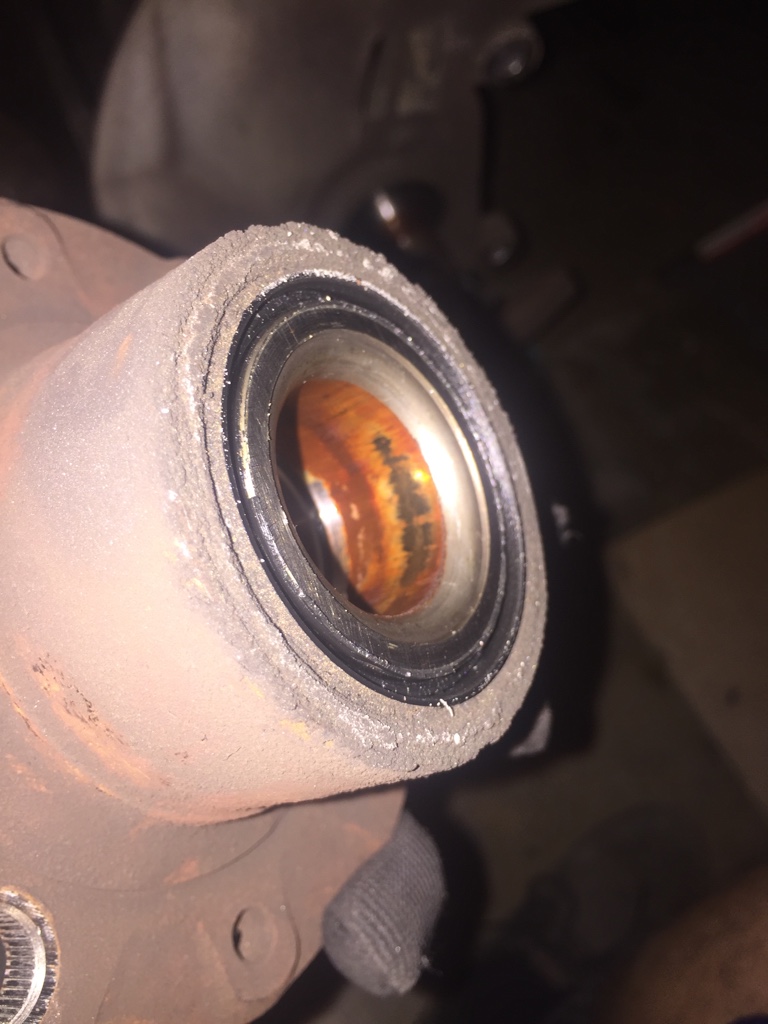
Passengers
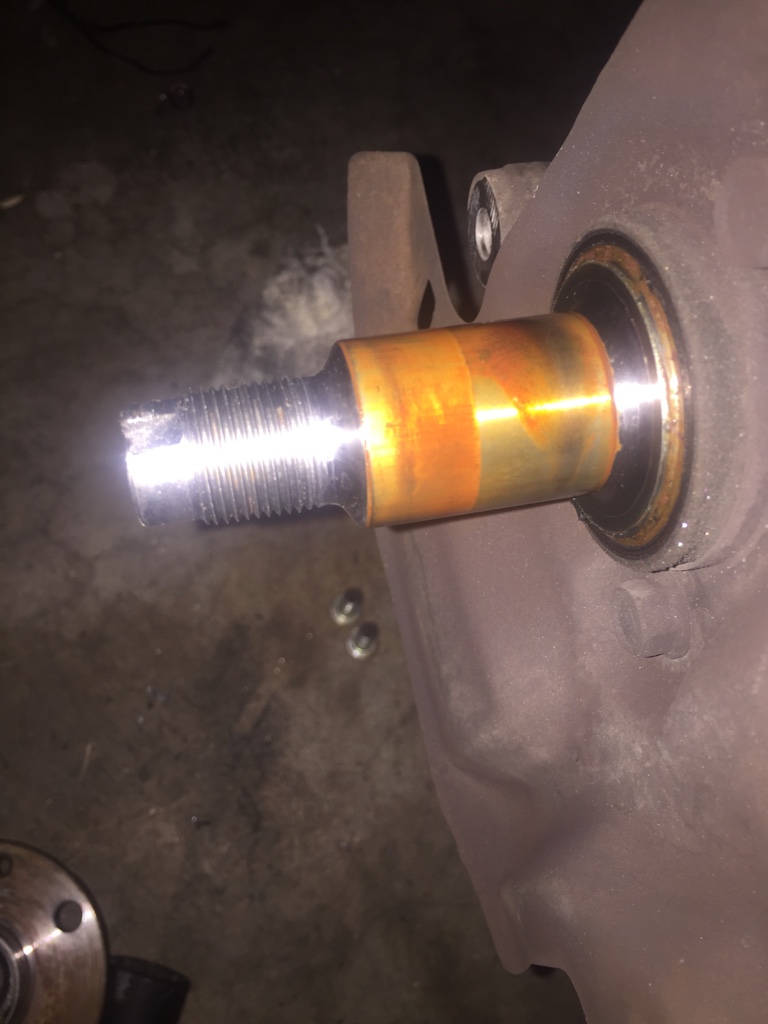

After cleaning them all up the both looked similar. Used lube I've used for all things.
The finished product with the new dust shields
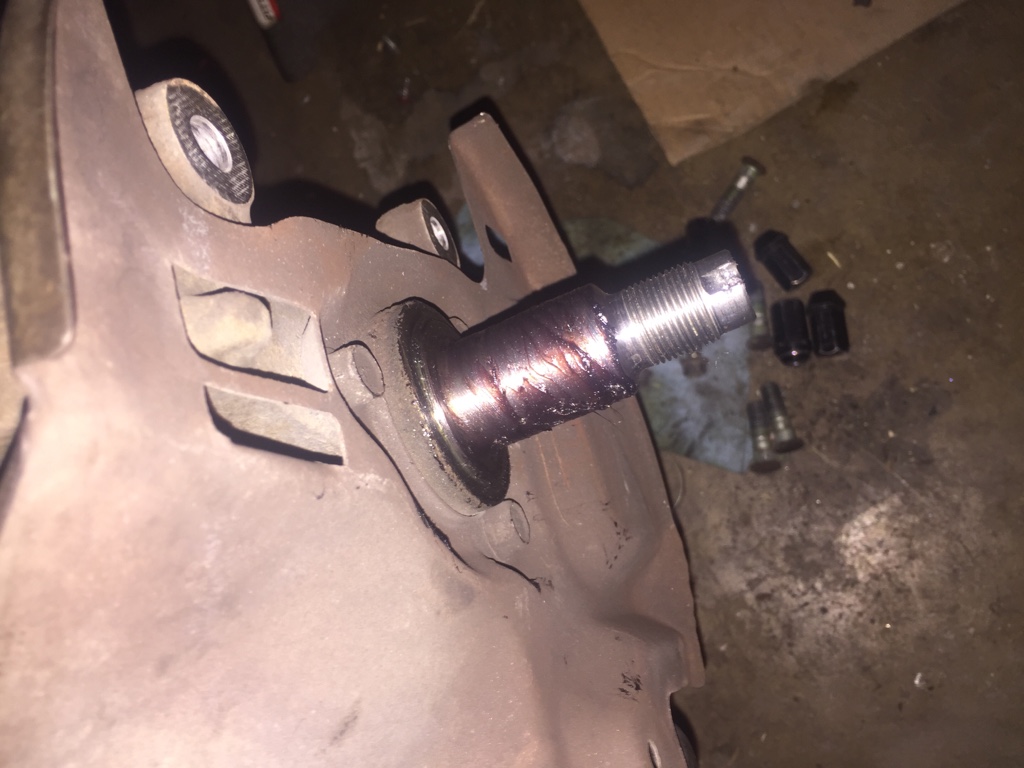
Was very happy to do that. I also got my rear hubs out. I just need to get to Robs house again for that press action again for the new bearings if he'll let me.
They've seen better days.
Then I moved onto doing the flares, or do I thought.
I get the tape out and lay it out on the fender and trace it all out and such and start drilling. No problems. Then I forgot what size rivnut fitting I needed. (I needed 6mm) so I just went to harbor freight found one looked good and kept going. Got home and it looked like it was used cause it had a fitting stuck inside but then I go through each one and none are right.
So I just need the right rivnut gun which will be here by the end of this month. (Hong Kong). I did snag a photo of the fitment.
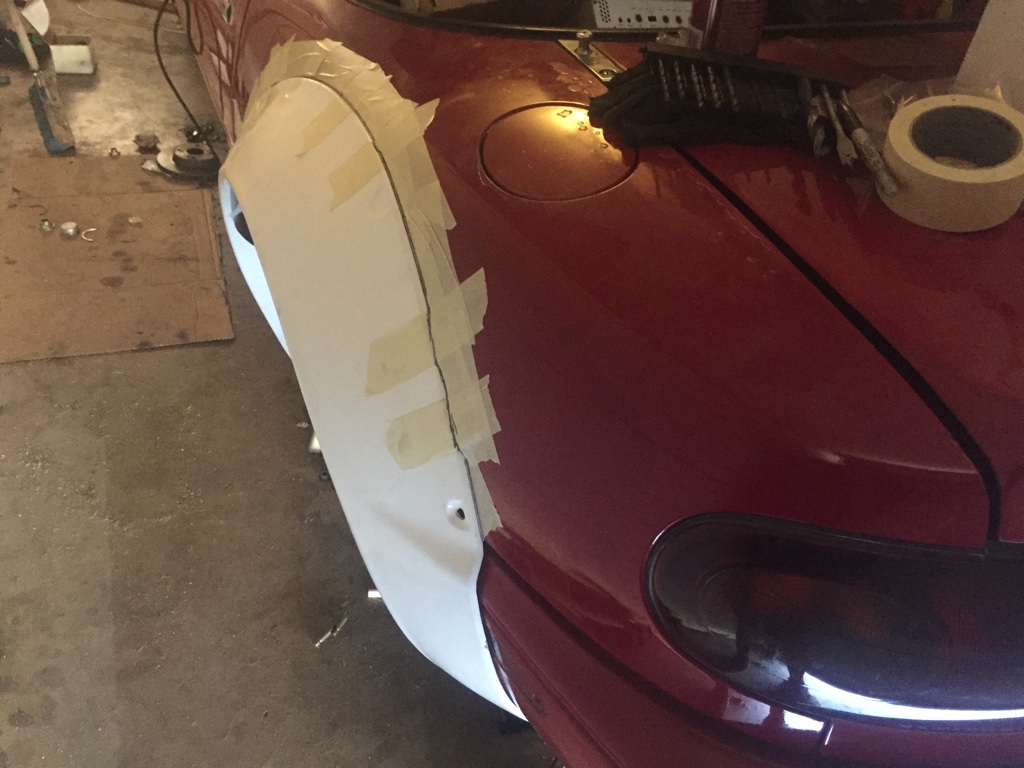
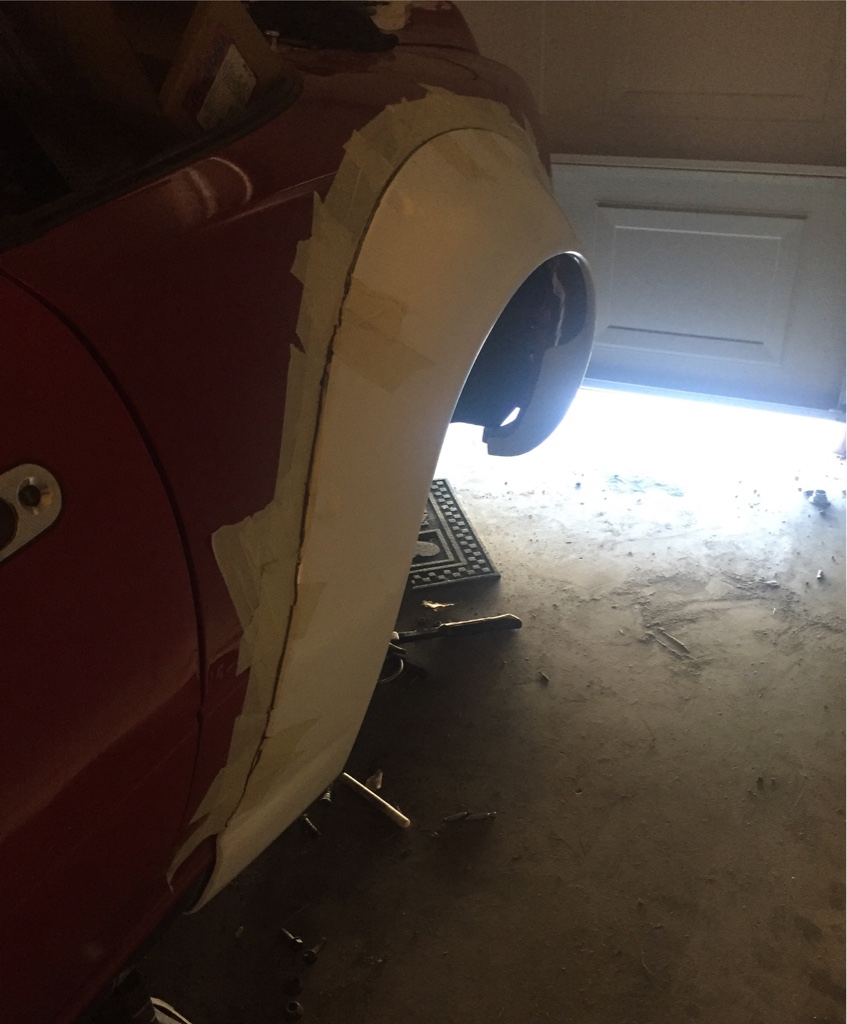
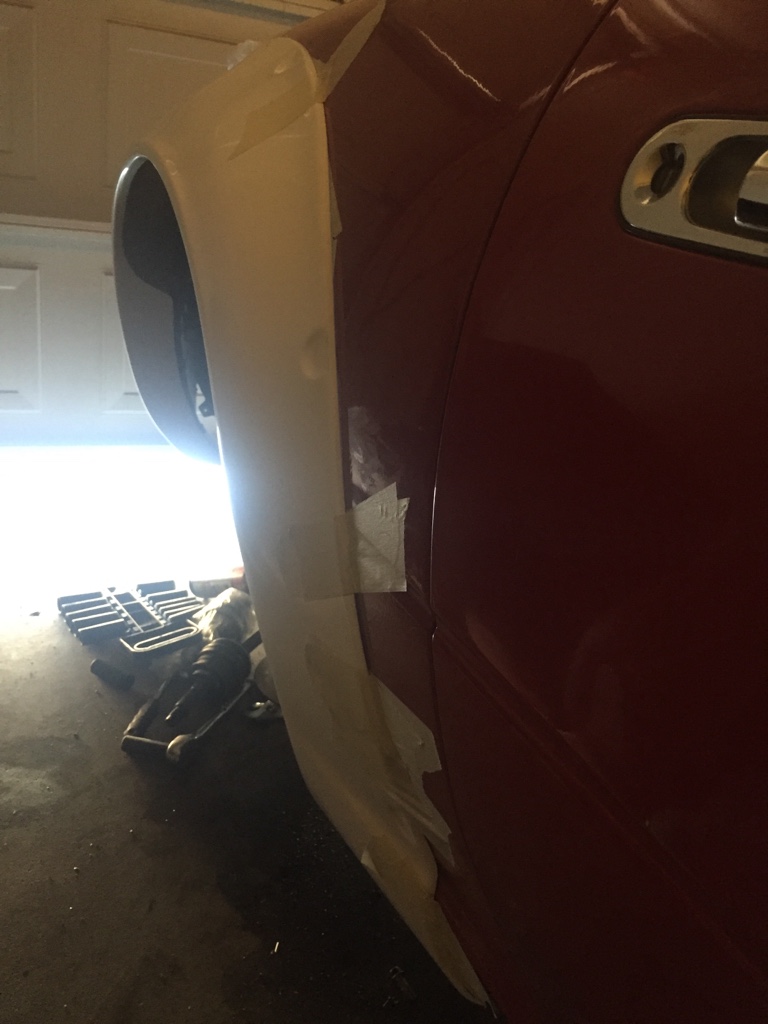
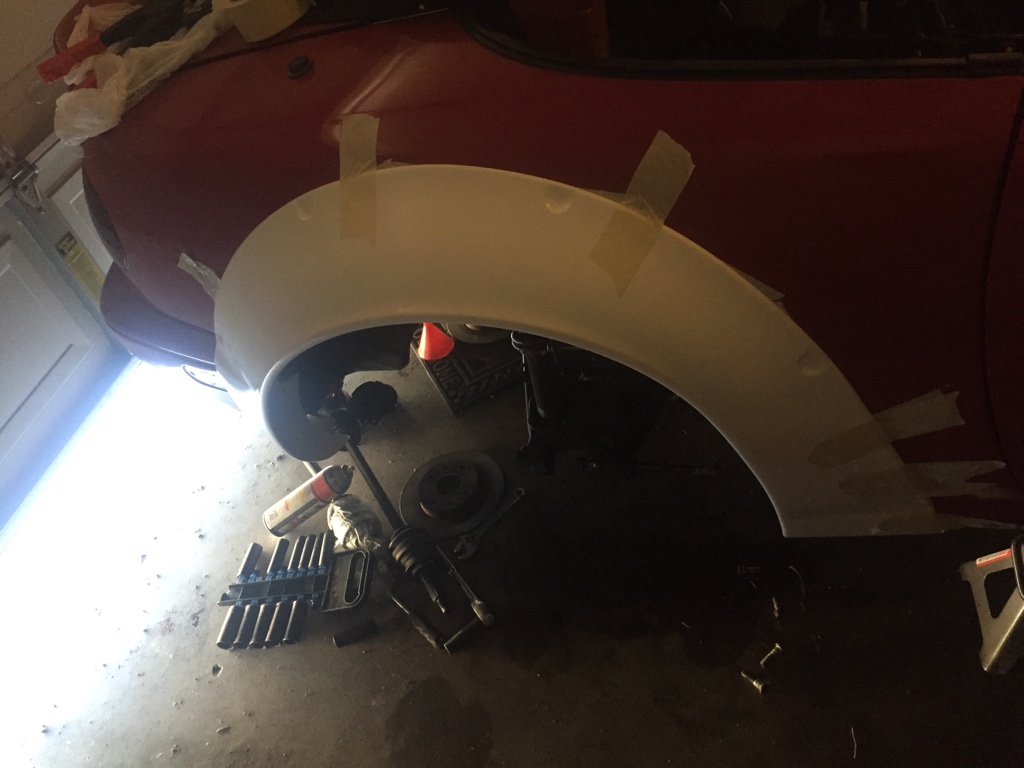
Loved the way they just kinda flow with the body. They really made these really well!
Aside from that now I'm just deciding on getting bearings next or tie Rod ends. But that's it for now.
Thank you for whoever said to replace the hubs. I now fully understand why.
I did get the front hubs in that went pretty easy I think the most annoying part was getting the dust shields off to get access to the nut itself.
Regardless once I got the hubs off I instantly was glad I am replacing them now.
Drivers
Passengers
After cleaning them all up the both looked similar. Used lube I've used for all things.
The finished product with the new dust shields
Was very happy to do that. I also got my rear hubs out. I just need to get to Robs house again for that press action again for the new bearings if he'll let me.
They've seen better days.
Then I moved onto doing the flares, or do I thought.
I get the tape out and lay it out on the fender and trace it all out and such and start drilling. No problems. Then I forgot what size rivnut fitting I needed. (I needed 6mm) so I just went to harbor freight found one looked good and kept going. Got home and it looked like it was used cause it had a fitting stuck inside but then I go through each one and none are right.
So I just need the right rivnut gun which will be here by the end of this month. (Hong Kong). I did snag a photo of the fitment.
Loved the way they just kinda flow with the body. They really made these really well!
Aside from that now I'm just deciding on getting bearings next or tie Rod ends. But that's it for now.
Reply
1
1


