EFR6258 on a VVT W PS/AC
 04-23-2014, 09:20 PM
#61
Senior Member
Thread Starter
iTrader: (2)

Join Date: Oct 2011
Location: Hickory, NC
Posts: 675
Total Cats: 9
So then I added this

and this

To make this.....
I hope to use this as Det Cans for the next dyno session. While she was in the shop for repairs I went ahead and installed one of my flat tops and the Skunks2 TB. I also did a mod for a real oil pressure gauge. I also fixed a problem with the nuts holding the turbo to the manifold. I guess I need to just go ahead and let the pictures tell their story.....

and this
To make this.....
I hope to use this as Det Cans for the next dyno session. While she was in the shop for repairs I went ahead and installed one of my flat tops and the Skunks2 TB. I also did a mod for a real oil pressure gauge. I also fixed a problem with the nuts holding the turbo to the manifold. I guess I need to just go ahead and let the pictures tell their story.....

Reply
 0
0

0
04-23-2014, 09:50 PM
#62
Senior Member
Thread Starter
iTrader: (2)
Join Date: Oct 2011
Location: Hickory, NC
Posts: 675
Total Cats: 9
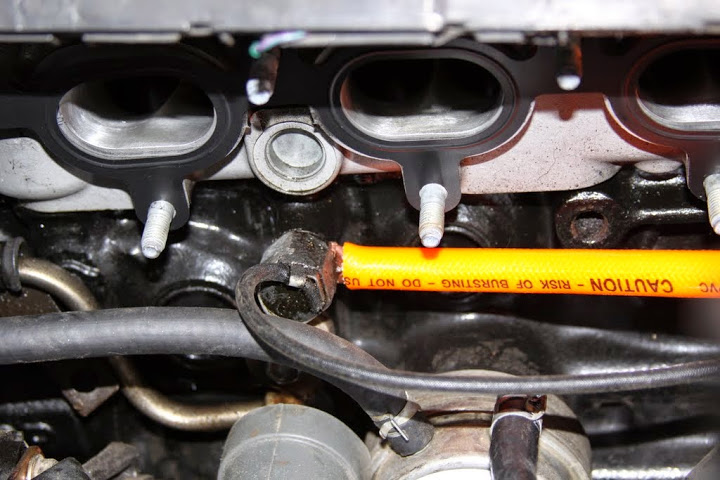
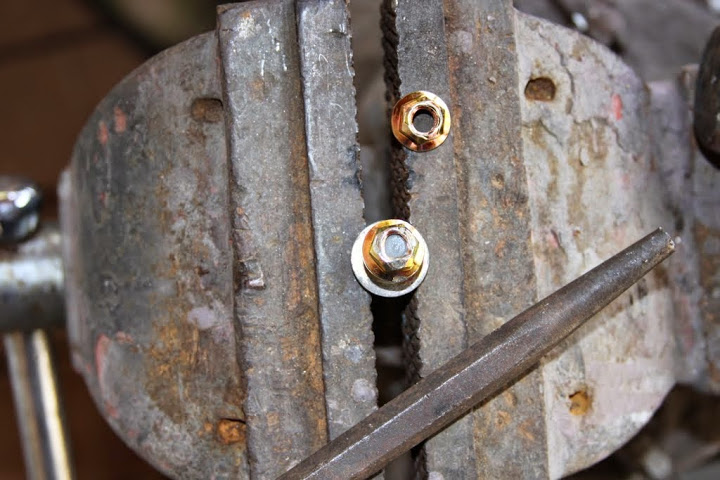
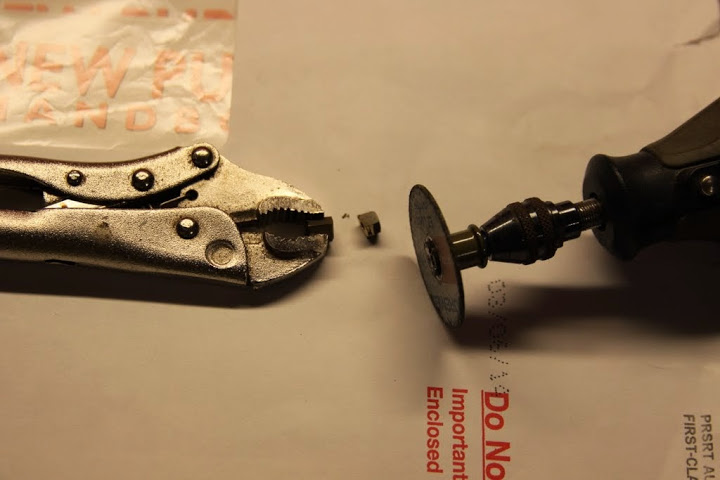
I first tried the Stage8 hardware but it didn't fit with the EFR. So I tried these crushed nuts. They kept backing off so I used a cold chisel and a hammer to make them more crushered. These bastards are TIGHT like a ten year old and I don't believe they will come off.
Here you can see the leak caused by the loose nuts warped my flange
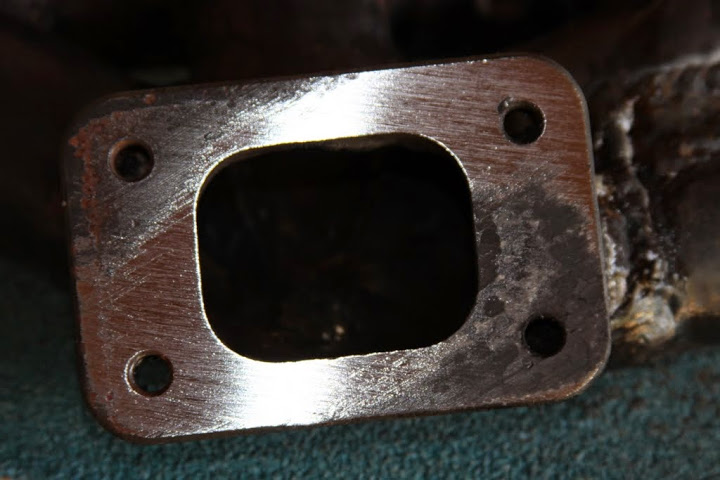
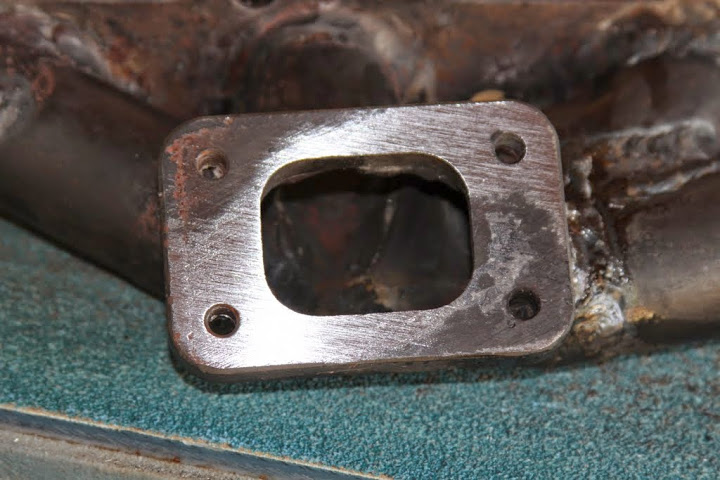
And after a few minutes on my belt sander
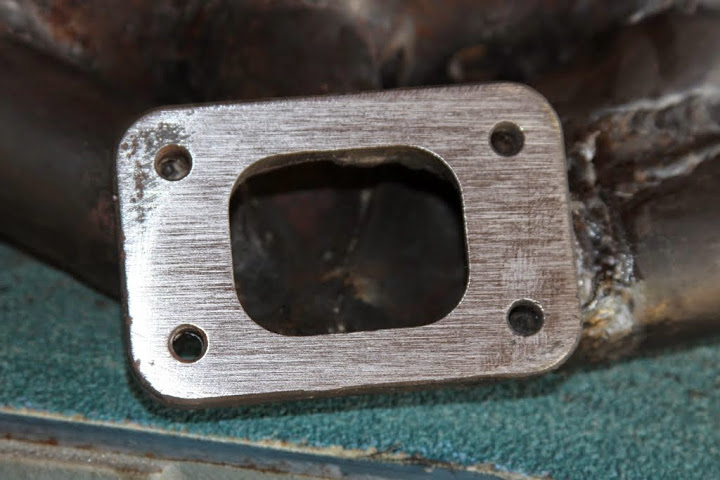
A center punch and a slow/steady hand with a drill yielded me this
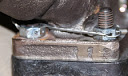
After I installed the super duper crushed nuts I went ahead and topped them with jamb nuts
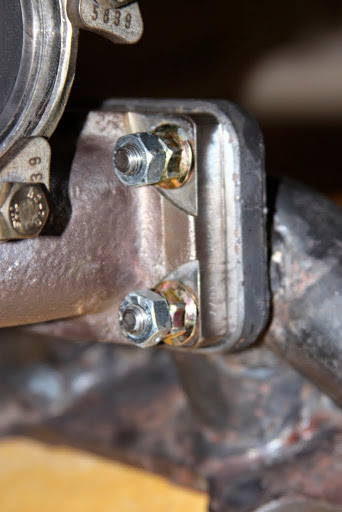
Not sure if Leafy is full of crap or not, I figure it can't hurt to take measures to ensure my expensive *** head doesn't eat any screws. But I wasn't sold on removing the bolts so I "staked" them. I used a deep socket to support the TB butterfly shaft on the back side, I used a punch to deform the threads on both the shaft and the bolt. This should prevent vibration from causing the bolts to come loose.
Close up
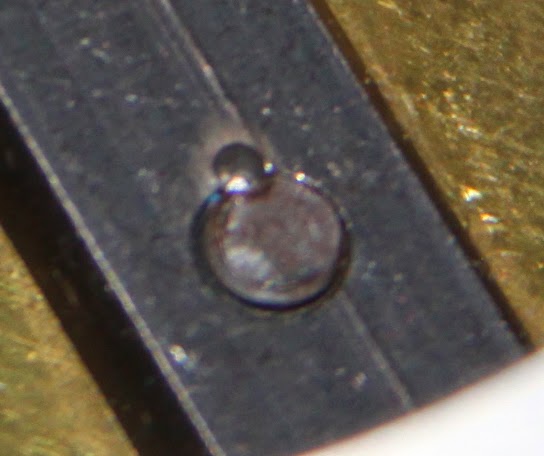
Here you can see the leak caused by the loose nuts warped my flange
And after a few minutes on my belt sander
A center punch and a slow/steady hand with a drill yielded me this
After I installed the super duper crushed nuts I went ahead and topped them with jamb nuts
Not sure if Leafy is full of crap or not, I figure it can't hurt to take measures to ensure my expensive *** head doesn't eat any screws. But I wasn't sold on removing the bolts so I "staked" them. I used a deep socket to support the TB butterfly shaft on the back side, I used a punch to deform the threads on both the shaft and the bolt. This should prevent vibration from causing the bolts to come loose.
Close up
Reply
0
0
04-23-2014, 10:05 PM
#63
Senior Member
Thread Starter
iTrader: (2)
Join Date: Oct 2011
Location: Hickory, NC
Posts: 675
Total Cats: 9
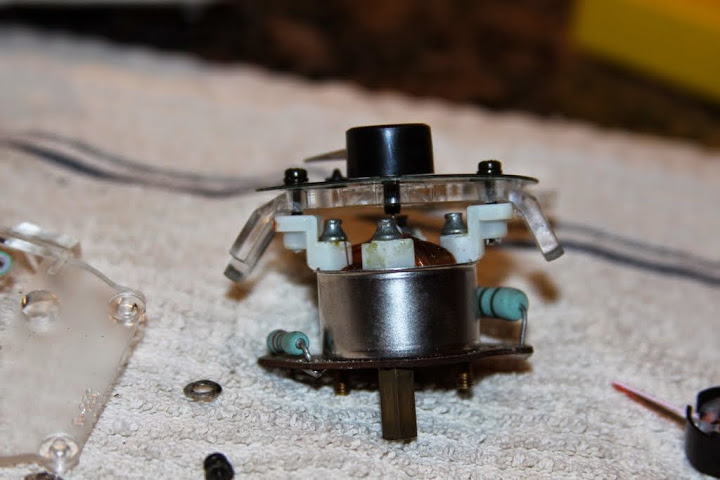
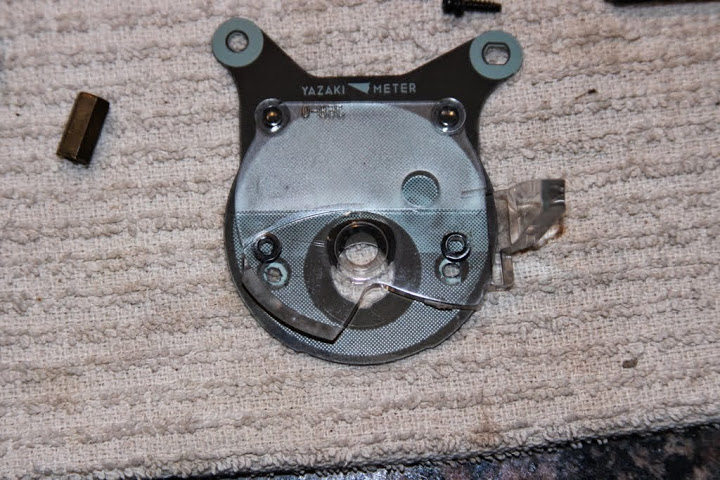
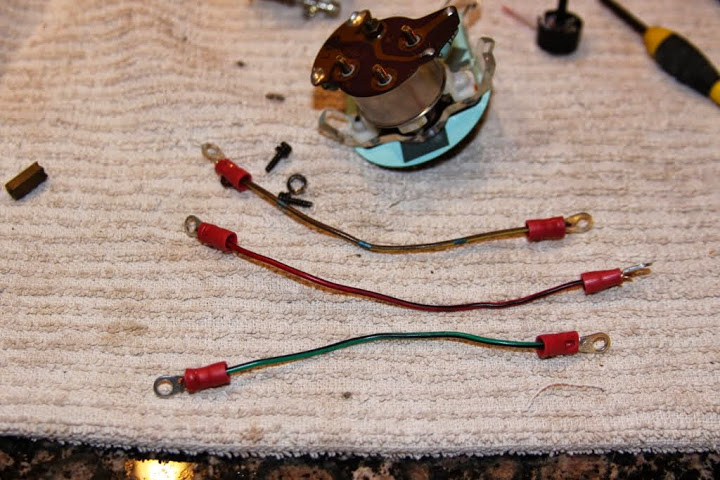
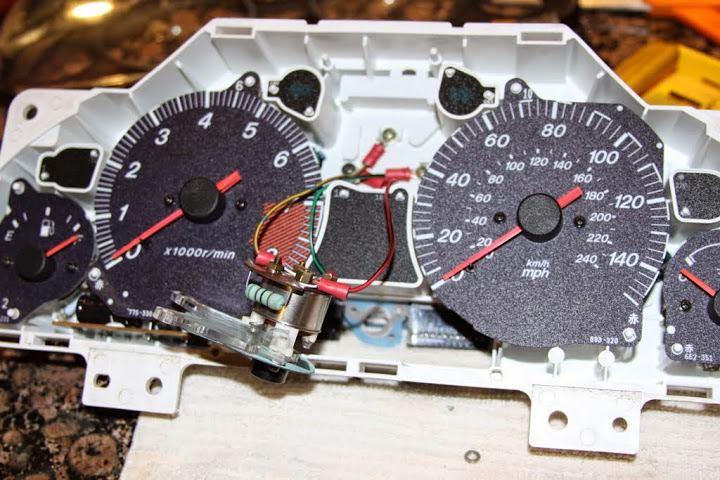
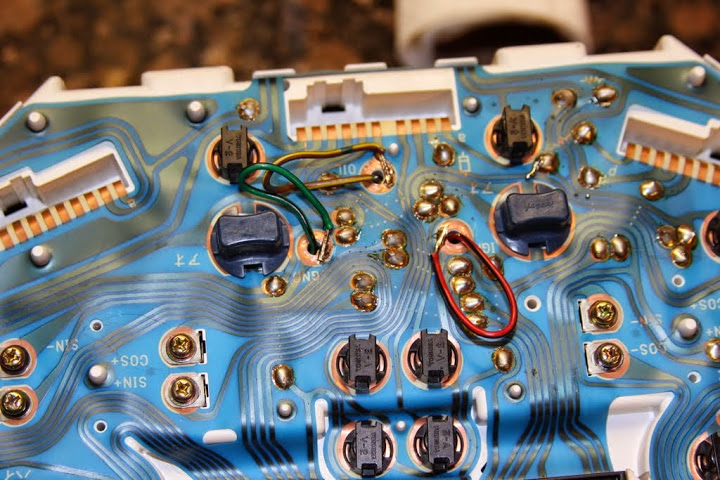
Moving to the inside I wanted a real oil pressure gauge. I have a Maxigauge on it's way but I like the idea of a factory gauge working as well. The following will half *** document what I did to make an early NA oil pressure gauge work in the NB cluster.
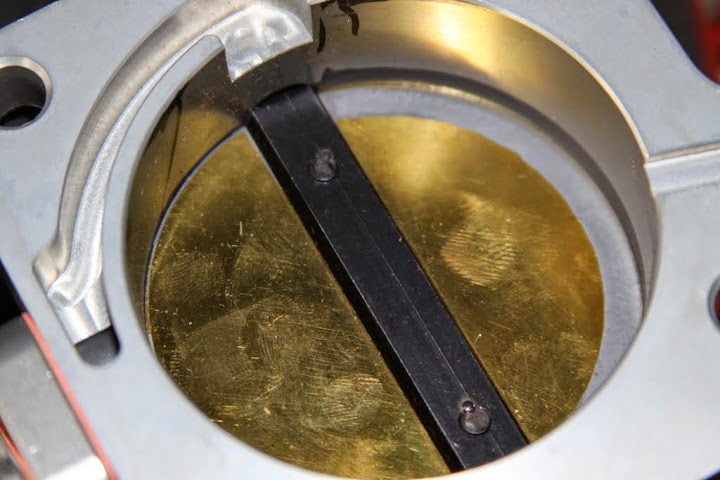
First I used the NB clear gauge backing. The nubs shown here had to be removed with a Dremel because the shaft on the gauge that the needle pointer thingy slides onto wasn't long enough.....that's right, my shaft was too short. I also had to use a drill and "mill" the screw holes so they were oval because the distance between centers was different from NA to NB. Have a look see.....
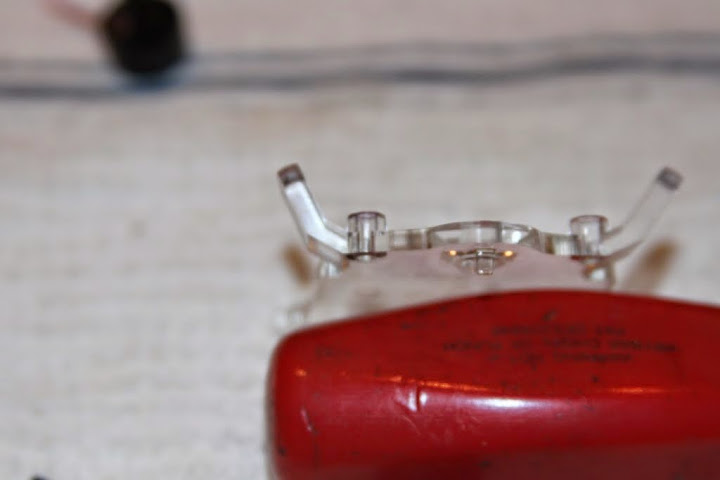
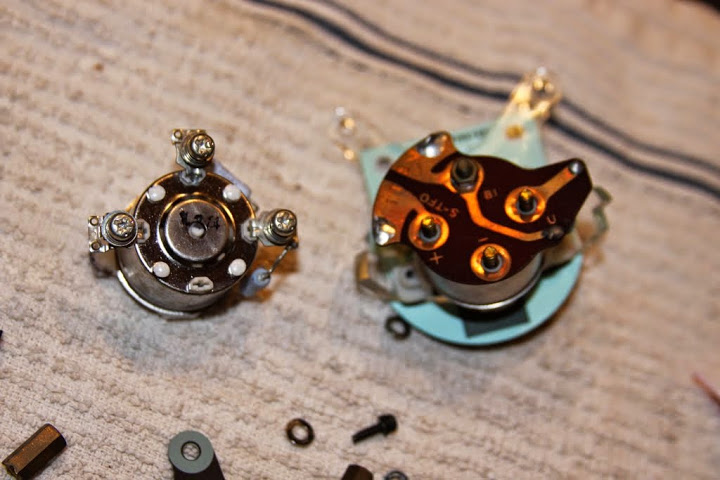
This shows the difference in spacing from one gauge to the other
The two gauges are really different and I had to make chit work. Look at the two gauges side by side

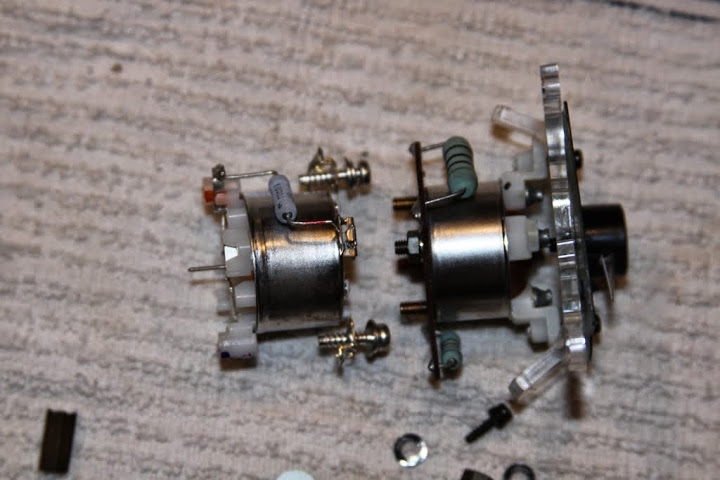
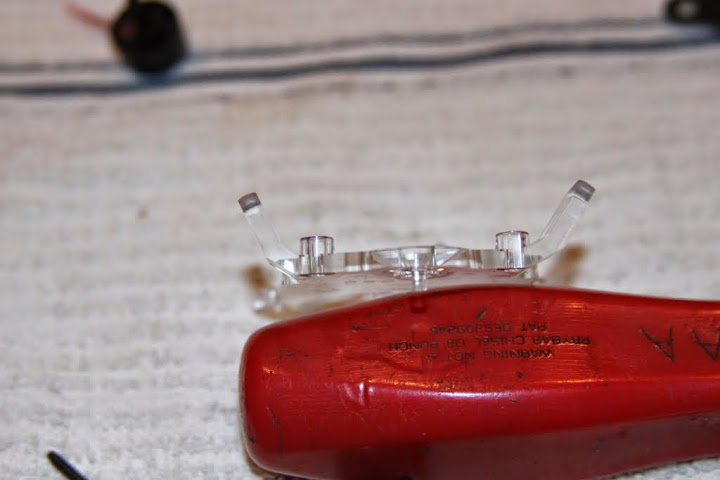
I used the stand offs from the NA gauge to make nuts. I cut the stand offs with a Dremel.
I made up some short leads to connect the electrical connections from the NA guage tot he NB cluster.
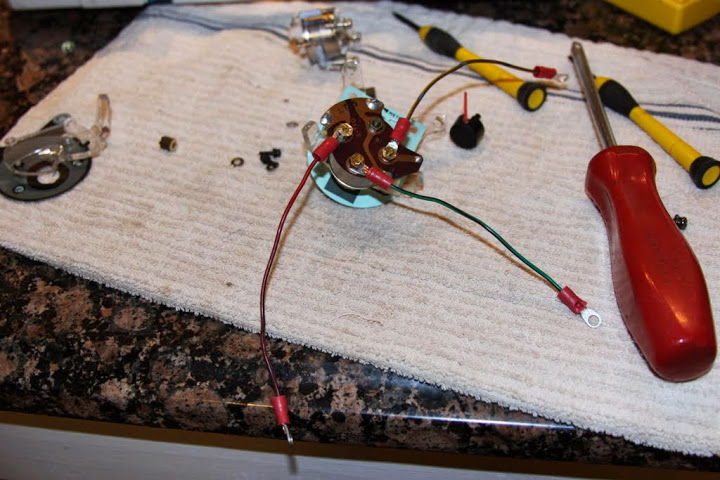
I look smart right about now right?
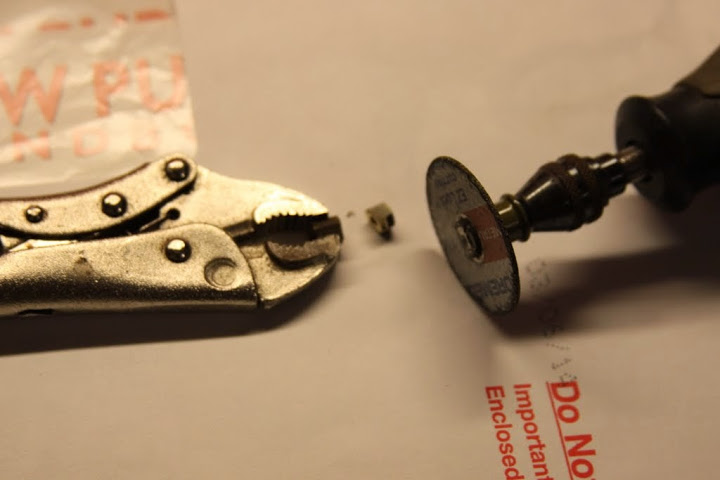
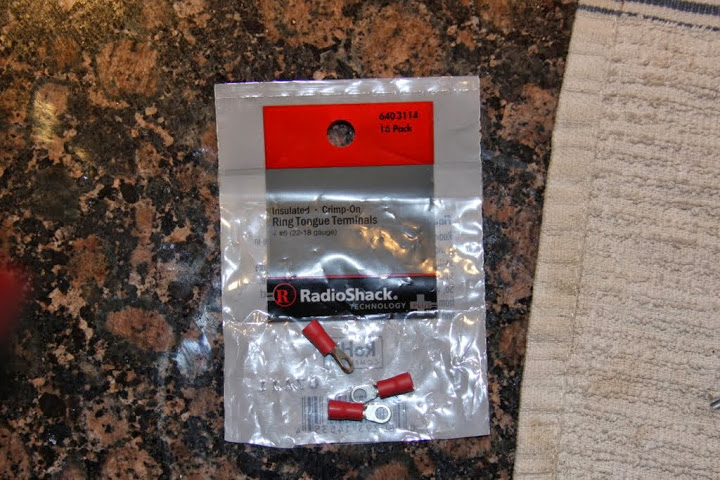
WRONG! The connectors were too big and the gauge didn't fit into the cluster deep enough to install the face benzel. I used these.....
So I had to remove one of the connectors from the leads and fish the wires through the wholes. Then I soldered them to the board in the appropriate places.
First I used the NB clear gauge backing. The nubs shown here had to be removed with a Dremel because the shaft on the gauge that the needle pointer thingy slides onto wasn't long enough.....that's right, my shaft was too short. I also had to use a drill and "mill" the screw holes so they were oval because the distance between centers was different from NA to NB. Have a look see.....
This shows the difference in spacing from one gauge to the other
The two gauges are really different and I had to make chit work. Look at the two gauges side by side
I used the stand offs from the NA gauge to make nuts. I cut the stand offs with a Dremel.
I made up some short leads to connect the electrical connections from the NA guage tot he NB cluster.
I look smart right about now right?
WRONG! The connectors were too big and the gauge didn't fit into the cluster deep enough to install the face benzel. I used these.....
So I had to remove one of the connectors from the leads and fish the wires through the wholes. Then I soldered them to the board in the appropriate places.
Reply
1
1

 07-18-2014, 02:47 PM
#66
Senior Member
Thread Starter
iTrader: (2)
Join Date: Oct 2011
Location: Hickory, NC
Posts: 675
Total Cats: 9
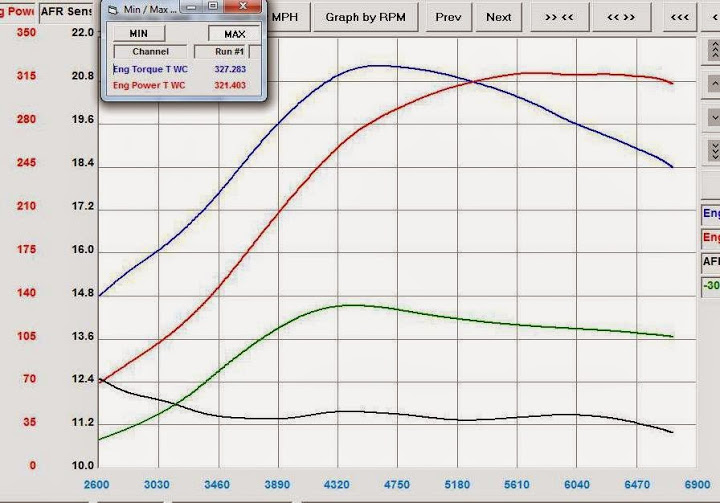
I had the knock control set to aggressive retard and have no idea what it was doing because I like gay ****. I am taking heterosexual vitamins now and hope to dyno again soon. I also think my manifold was hurting my top end power potential so I will be building a new manifold this weekend....
Reply
1
1
07-18-2014, 02:59 PM
#67
Senior Member
Thread Starter
iTrader: (2)
Join Date: Oct 2011
Location: Hickory, NC
Posts: 675
Total Cats: 9
So I plan to pull the engine this weekend (assuming I complete the two engine swaps currently in the garage) to install new FM2 clutch. I want to vent the block to aid in oil return. If I pull hard through the gears I notice my oil pressure starts to twitch as I enter fifth. I believe all my oil is stuck in the head trying to get back to the pan but internal engine pressure is trying to go the opposite direction through the two small oil return drains. I have searched but couldn't find anything, I know I have read about this. I think Leafy may have done it? My block is a 94.
Thoughts?
Can I get by with simply adding a -AN fitting to the oil pan above the oil level?
Thoughts?
Can I get by with simply adding a -AN fitting to the oil pan above the oil level?
Reply
0
0
07-18-2014, 03:12 PM
#68

So I plan to pull the engine this weekend (assuming I complete the two engine swaps currently in the garage) to install new FM2 clutch. I want to vent the block to aid in oil return. If I pull hard through the gears I notice my oil pressure starts to twitch as I enter fifth. I believe all my oil is stuck in the head trying to get back to the pan but internal engine pressure is trying to go the opposite direction through the two small oil return drains. I have searched but couldn't find anything, I know I have read about this. I think Leafy may have done it? My block is a 94.
Thoughts?
Can I get by with simply adding a -AN fitting to the oil pan above the oil level?
Thoughts?
Can I get by with simply adding a -AN fitting to the oil pan above the oil level?
Reply
0
0
07-18-2014, 03:30 PM
#69
Senior Member
Thread Starter
iTrader: (2)
Join Date: Oct 2011
Location: Hickory, NC
Posts: 675
Total Cats: 9
I don't understand this Leafy.....
My thoughts were to drill the block in an area that was simply shell casing. Are people drilling in other areas? I don't have any oil exiting my valve cover. I could probably get by with a -AN fitting in the top of the oil pan.
My thoughts were to drill the block in an area that was simply shell casing. Are people drilling in other areas? I don't have any oil exiting my valve cover. I could probably get by with a -AN fitting in the top of the oil pan.
Reply
0
0
07-18-2014, 03:36 PM
#72
There's two spots where you can drill the block. The spot behind the alternator is where certain factory race cars had a crank case vent. Its a boss in the casting that is all ready to be drilled and tapped. But you heed to switch to an alternator bolt that goes in the 1.6 direction (head of the bolt facing front) for it to work, or you have to remove the line in order to pull the alternator. The other spot is where two of us have drilled it so far and thats into the big cast drain route where the oil drains back from the head.
I started passing a shitload of oil through the valve cover vent after I did the bore out mod on the baffle, thats where you drill the hole between the two baffles up to like 1/4" from some tiny size.
I started passing a shitload of oil through the valve cover vent after I did the bore out mod on the baffle, thats where you drill the hole between the two baffles up to like 1/4" from some tiny size.
Reply
0
0
07-18-2014, 04:07 PM
#73
Elite Member
iTrader: (8)

Join Date: Dec 2008
Location: Kingston, Ontario
Posts: 2,910
Total Cats: 51
why does it matter where you drill the hole?
That factory boss is just open to the crank case. just drill and weld a fitting to the block wherever you want that doesn't have some kind of passage in the way.
That factory boss is just open to the crank case. just drill and weld a fitting to the block wherever you want that doesn't have some kind of passage in the way.
Reply
0
0
07-18-2014, 04:23 PM
#76
So I plan to pull the engine this weekend (assuming I complete the two engine swaps currently in the garage) to install new FM2 clutch. I want to vent the block to aid in oil return. If I pull hard through the gears I notice my oil pressure starts to twitch as I enter fifth. I believe all my oil is stuck in the head trying to get back to the pan but internal engine pressure is trying to go the opposite direction through the two small oil return drains. I have searched but couldn't find anything, I know I have read about this. I think Leafy may have done it? My block is a 94.
Thoughts?
Can I get by with simply adding a -AN fitting to the oil pan above the oil level?
Thoughts?
Can I get by with simply adding a -AN fitting to the oil pan above the oil level?
Reply
0
0
07-18-2014, 06:26 PM
#77

This is obviously old news (I'm catching up on your build) but on higher output builds I'll radius those edges. The rounded edges are less likely to create hot spots because it removes the sharp edge. Think of the sharp corners as thinner areas of the metal, they are more susceptible to heat.
Reply
0
0
07-21-2014, 08:30 AM
#79
I thought I was having problem at the specific spot I drilled the block. But I'm not sure anymore. Since I was still gushing oil when I plugged it up. Tomorrow I'm going to plug it back into the AOS and see what happens on sunday. And at worst. We know Bundy's spot behind the alternator works.
Reply
0
0

Thread
Thread Starter
Forum
Replies
Last Post
StratoBlue1109
Miata parts for sale/trade
21
09-30-2018 01:09 PM
StratoBlue1109
Miata parts for sale/trade
7
09-24-2015 03:50 PM


