When you click on links to various merchants on this site and make a purchase, this can result in this site earning a commission. Affiliate programs and affiliations include, but are not limited to, the eBay Partner Network.
Totally understand wanting to venture out past the "kits". LOL...there is a lot of cultish love for the rotary! Maybe the diesel from the CX-5 then? An oil burner should properly push all the **** off buttons. High torque low reving engine, that feels about as sacrilegious as it gets! Although I am joking (somewhat), I bet it would make for a good daily driver.
I totally understand the "too nice" build. I have done that and own one of those T-shirts. I'm trying very hard not to do that with this build since track car.
I'm using a SuperMiata radiator, but was looking at the Keisler kit for something else (I don't remember now) and realized he had two rubber hoses that worked for the radiator. Which made me look into it a bit further. I believe the RX8 rad is 1" shorter, which if anything would make it easier to move forward. Anyway, it just looked like it would fit and work well.
Feeling a bit foolish here. I didn't know they made a plug for the overflow & the thought of actually capping it never occurred to me. I'm sold on that idea. Super easy solution. Thank you!
I bought an aluminum tank from Summit the other day. https://www.summitracing.com/parts/ctr-80-200 I'm not crazy about it, but don't see much better (unless I'm willing to spend a bunch of money and I don't see value in spending that sort of cash.) When you do have a minute, I would love to see a picture. Thank you!
I see that we posted back to back. I purchased the 1.25 can, so looks like I'm on the right page with it. I was considering using the bracket that held the windshield washer fluid like you did too. That saves the firewall for a flex fuel sensor in the future if I want to run E85.
If memory serves me...You had fuel filter issues before. I had that problem with an old 60's Mustang I use to own. It was filling up filters every 100 miles or so with rust, keeping it from running. After the 3rd filter, we just bought a new tank. Solved our issues. Not sure if that will work for you, since you said you have cleaned up the tank. Sucks, but at least you know the issue now.
Thanks for the info & picture! That gives me an idea on placement of things too. (more specifically, what I was planning on doing should fit fine.)
I wish I had a picture of that bracket by itself - it's been pretty heavily cut up and modified, but it's not much more than some home depot steel and bending it over in the vise with some holes drilled and pieces cut off, maybe a threaded rod and nut to be fancy.
Since I'm not getting my butt down to the garage tonight to continue working on the exhaust, I figured I could at least write up the changes needed for the gas pedal.
The LFX is pedal by wire, where the Miata is pedal by an actual cable. This means, we have to change out the gas pedal to be the Chevy one with the sensors built in.
First things first...Go get that tetanus booster shot. I find it funny that almost all the rust I found on this car was under the dash. Instead of painting, plating, or powder coating, it seems like Mazda decided to rub some oil on bare metal thinking it wouldn't rust in a convertible. smh Really, mine really wasn't as bad as I'm making it.
I pulled the gas pedal off along with the spring etc. and was left with this.
Next step was to cut all of the "vertical" parts off on the right hand side. Basically cut right at the 90 degree bend, keeping as much metal that would be on the "firewall" as possible. Notice on the back there is a nut & little bumper attached. You want to keep that part, unscrew the bumper for now, but keep the nut. That part helps stabilize the pedal in the car when you mash it really hard.
(sorry, I didn't take a photo of this cut, but I do have a picture of the nut / little bumper attached to the back)
You should be left with a flat section to add some metal to form a mount for the Chevy pedal. I think I used a piece of 16 gauge here, but if you take an outline of the back of the Chevy pedal you will get the pattern you need. There are 2 centering posts on the back of the pedal, so you need to drill holes to allow the pedal to sit flush. I also drilled 3 holes (in the corners) to bolt the pedal to the metal.
Now the trick is figuring out exactly where to mount this new metal to the existing bracket to get the correct pedal placement. This ended up being a lot easier than it first looked. Basically, you just butt up the metal plate you made from tracing the back of the Chevy pedal to the bead in the metal on the Miata piece. You'll be square and have the right distance to the brake. For up and down, line up your bolt holes to connect the pedal to the threaded rod (used to hold the steering column up, so don't cut this off) that is on the Miata plate. (You will see in my pictures I'm a slight bit lower, I lucked out. Any lower and I would have had to redo the pedal because of it hitting the trans tunnel brace.)
I welded some screws that fit in the corner holes so I had studs to attach the pedal too. I also added a piece of metal across the top to firm things up a little bit.
From there I rounded the one corner so I didn't hit the trans tunnel brace on install.
All of this got cleaned up & sprayed a couple coats of paint. I also removed the two sensors on the clutch pedal, since one is for starting the car, and I believe the other is for cruise control. I won't be using either moving forward. I did keep the brake light sensor & I ordered up and put some new pedal pads to complete everything.
I would have liked to have pushed the pedal over closer to the brake to help with heal to toe, but any closer to the brake would have caused issues with the steering column being mount not getting on the stud & the connector for the gas pedal wouldn't fit. Not a great picture below, almost looks like there is room, but there really isn't.
Here is what it looks like in the car all completed.
There is a ton of work still to do. I don't have the coolant lines all finished (thus the very short clip, since I only ran the engine for 30 seconds). And my "wiring harness" would have made MacGyver blush (it's totally a throw away). BUT...She fired up and ran pretty well for the **** show wiring & only half completed.
First off...Thanks to Gooflophaze for his wiring write up. It helped me tremendously!
What's a post without pictures...Just look at the engine wiring harness I built in 1 day!...(Who says these take forever to build. Only the best Harbor Freight wire connectors & Fuses were used along with old crap wire & relays from the Miata wiring harness that I've been slowly whittling away at.)
"Fuse box" and Positive Post (note: the positive post that's seen on both sides of the car is part of the LFX starter to alternator wire)
Battery / Ground / Blue wire was to fire the starter solenoid
Fuel Relay (look closely and you can see the two wires through the windshield to the pump
ODBII Connection & all of the body harness wires that need to be pulled out of the harness. (Yellow tape on a wire means action needs to happen...i.e. it needs to be removed.) I also did a **** job of labels. They all keep wanting to peel off. I should have flagged them verses wrapping them around the wire.
ECM, MIL Light & the Fan Relay (I got lazy with that fuse, didn't even bother to wrap it with tape.)
The whole shabang in all of it's glory!
I also need to thank my buddy, he came over yesterday and helped me with the "first start" & figuring out issues along the way. I learned a lot from him yesterday.
We did have a few issues & getting the car started took the day...yup 2 days worth of work for a crummy 4 second video...
1. The first thing we did was test the fuel pump relay / that the fuel pump was working. This was done connecting the relay trigger wire & the positive to a battery, and nothing else was powered up. The relay clicked on & the pump worked a little too well. Someone only hand tightened a few of the fuel line connections & gas leaked (ok poured) out from under the car. After tightening all of the fittings, we tested again & no leaks! FYI...I can confirm that the ECM will run the fuel pump, it's 12+ to the relay, just like Goof thought it would.
2. Then we hooked up the car into a "run" state & the nothing would come on. HP Tunners wouldn't connect to the ECM either. This took a while to figure out. We did some research and even tested the original ECM that I have from the car (I bought an already tuned / VATS (security) turned off ECM from Keisler Automation). Nothing was working. We ended up taking a break from this, getting some carry out and after a late lunch...quickly figured out it was because I didn't connect power to the ECM battery back up circuit. I didn't realize that was needed for the car to run. I thought it was only used for memory storage. Once that was hooked up, all the cars electronics came alive, clicking & humming.
3. From here we tested things like turning on and off the fan from the computer, the MIL light (which for some reason I never got to work...still not sure about why on this one.) and started down the list of codes that popped up. The codes were really 4 items and although we "fixed" some problems we found a long the way, we never got any of the codes to go away:
Gas pedal not working...(no big deal, I didn't wire that up.)
MIL Light code...(I couldn't figure out this issues. Ran 12+ to a light bulb and the ground for the light bulb to the computer (circuit 419 a brown wire with a white stripe.)) & yes, I tested the light bulb works...about 10 times.
Ignition coil supply circuit on the drivers side bank was throwing a code (we cleaned up grounds & found a ground pin on one of the coils that needed to be fixed, but everything was getting full voltage. On a side note, the battery I was using was a bit weak & my crappy used wiring harness connections probably didn't help here...which I'm thinking might be the issue)
MAF / Temp wasn't reading correctly...(Since this is also on the drivers side, I kept thinking it was a grounding issue...again, not sure, but also wouldn't put it past the crappy wiring harness addition on my part & the weak battery)
Anyway, by this time it was getting late and we figured we would give it a try even though we thought it was doubtful with the Ignition. The weak Miata battery wouldn't turn over the engine. We moved the battery into the engine bay and shortened the leads we were using (a jumper cable) previously. That helped, it would do half a turn now. LOL I had another weak Miata battery that I wired up in parallel. We got a bit more movement, but the weak and punny Miata batteries were not going to cut it. So we jump started it from a running car with a good & big battery 750 cca, vs the Miata's 340 cca when it's actually fully charged. LOL Finally! The engine actually spun over and we got her to fire up.
This all may seem like a big waste of time, but it was a great test and lots of useful info came out of it.
1. Engine will run
2. Starter works
3. Alternator works (almost too well, I wired it up and when I pulled the 12+ from the battery to kill the car, it kept running.)
4. Fuel is all sorted out
5. Figured out how I'm going to wire Fuel pump and fan
6. Figured out how I'm going to wire up the ignition switches & fuses
7. I need to fix the MIL light & can start looking into a few codes / pay close attention to the wiring harness when I mess with the drivers side.
8. I may need a bigger battery. I am still thinking a "good" Miata battery should work once the wiring is good, and although they do weigh around 20 pounds, that's better than the 45+ pounds the Camaro battery weighs.
9. My exhaust isn't crazy loud (it's not 100% done & has some leaks, but we ran the engine in a closed garage and your ears were not ringing afterwards. (the exhaust gases wanted to get you, but we opened the door immediately afterwords)
So, I really want to just start the car up a few times & grin really big...but time to move on and get her done!
Last edited by rdb138; Jan 16, 2021 at 05:31 PM.
Reason: hooked on spelling
I'm running an Odyssey Extreme PC925 battery and although it weighs 23 pounds, I absolutely love it. It starts the car every time, no fail, ever. I also keep the smallest Odyssey trickle charger on it when not driving and the battery has outlasted every other battery I've ever owned. I know the Lion batteries are substantially lighter, but I have seen 18650's explode in person when stuff goes wrong and I'd prefer not to have my house burn down.
Nice - first fires are always a huge morale boost. But please tell me all that wiring is temporary before you install a real fusebox? Please?
RE: battery size - have the stock-sized good orielly #miata/napa equivalent AGM battery in both LFX and LS3 (same manufacturer). With 2AWG welding cables and a good charge, they're strong enough to crank (did I ever do a "fat wire" update in my thread? If not, I should..) both engines. Still, a larger battery might be wise - took the LS out a few weeks back right as the weather got cold here (30F), ended up needing a jump to get back home. LFX alternator... I really do need to finish that damn circuit.. but basically there's a smart controller in the BCM that tells the ECM what voltage to set (in the name of fuel economy, smart charging, etc etc). Disconnect the alternator wires (Lamp and.. field?) and it defaults to 13.6v output, which slightly undercharges the battery, which can lead to a confusing "engine spins but injectors don't fire" because of, I believe, injector boost voltage regulator brown out protection - for non electrical types - injector driver overheat protection.
MIL wiring sounds correct - so that's just.. weird. I used VCM Scanner - Vehicles - Controls and Special Functions - you can turn on/off fan relays and MIL control from there to test.
I'm running an Odyssey Extreme PC925 battery and although it weighs 23 pounds, I absolutely love it. It starts the car every time, no fail, ever. I also keep the smallest Odyssey trickle charger on it when not driving and the battery has outlasted every other battery I've ever owned. I know the Lion batteries are substantially lighter, but I have seen 18650's explode in person when stuff goes wrong and I'd prefer not to have my house burn down.
Thanks Luke! I'll check out the Odyssey. I'm not looking for the ultra light I need to baby sit & charge it between every start, but also don't want a 50+ lbs battery either. Keeping in the 20ish range sounds reasonable. I actually toasted one of the batteries I was using by leaving the key on in the ignition for a couple weeks this past summer. It charges, but it's weak & will be the Core for the new battery. The other battery is good and probably will start the car on a full charge. It was pulled out of my track car that's been sitting for a couple months and was used most of the day to test things with the car before starting. So I know it was low too.
Originally Posted by gooflophaze
Nice - first fires are always a huge morale boost. But please tell me all that wiring is temporary before you install a real fusebox? Please?
RE: battery size - have the stock-sized good orielly #miata/napa equivalent AGM battery in both LFX and LS3 (same manufacturer). With 2AWG welding cables and a good charge, they're strong enough to crank (did I ever do a "fat wire" update in my thread? If not, I should..) both engines. Still, a larger battery might be wise - took the LS out a few weeks back right as the weather got cold here (30F), ended up needing a jump to get back home. LFX alternator... I really do need to finish that damn circuit.. but basically there's a smart controller in the BCM that tells the ECM what voltage to set (in the name of fuel economy, smart charging, etc etc). Disconnect the alternator wires (Lamp and.. field?) and it defaults to 13.6v output, which slightly undercharges the battery, which can lead to a confusing "engine spins but injectors don't fire" because of, I believe, injector boost voltage regulator brown out protection - for non electrical types - injector driver overheat protection.
MIL wiring sounds correct - so that's just.. weird. I used VCM Scanner - Vehicles - Controls and Special Functions - you can turn on/off fan relays and MIL control from there to test.
LOL I guess my sarcasm wasn't coming across very well. That wiring harness is a throw away test model just to learn and figure things out. It's total crap and I think its probably responsible for half the codes I was getting. I haven't seen your fat wire write up, but 2 awg was what I was thinking about using for my battery cables. BTW...I got the fuel pump to run from the ECM. You wrote previously you thought it would work like the LS swap as 12+ to relay coil and it does. (part of my reasoning for the testing harness was to test that specifically)
My buddy did all the HP Tuners stuff. He was the one turning things on and off with it. I'm guessing he was using VCM Scanner to do it. I really should have paid more attention to what he was doing, but I was busy testing other stuff and we were trying to be socially distant / not huddle on top of the computer together. I don't understand the MIL issue either. That's about the simplest circuit I had to make. Thought for a moment maybe it was lower voltage for an LED, but thats not it since the ECM just switches ground on. I may have mislabeled a wire. (I depinned and labeled one at a time) but I'll pull out the meter and test the other brown with white stripe wires and see if I did. I think there are 3 of them in the connector.
Alright, I know I jumped ahead with that last post, but back to proper timeline. I did all of the stuff below around Labor Day weekend last year.
I spent a HUGE amount of time trying to figure out how I was going to paint the engine bay after all of the seam welding & other metal work I did to the engine bay. I did research and watched more youtube videos from PaintSociety and others than I care to admit. This ended up being bigger than I originally envisioned, and I wanted a more professional job than spray paint, but I was a bit worried about the HOA & neighbors if I tried to turn my garage into a spray booth and went to town with a spray gun. I live in a townhouse, so my neighbors are very close & they tolerate my car hobby well enough, but a big cloud of super strong smelling paint rolling out the garage door would use up that tolerance. I thought about paying someone like Maaco to paint it, but that was a logistical nightmare (no wheels or subframes installed on car & my driveway is a hill thats too steep for my dovetail trailer to back up into) So...I finally decided to just spray paint it as best as I could. This is a race car after all, not a trailer queen.
Prior to any real thought to painting, I sprayed everything with a Rustoleum Self Etcher primer after welding thinking I was doing the right thing & keeping things from rusting while I waited to paint everything properly. I found out later, that was probably a big mistake. The paint store guy said I could basically paint over anything as long as it wasn't oil based. Rustoleum is oil based. I thought I was going to have to sand off all the paint from the car down to bare metal. I was really not looking forward to that. So instead I did a few test sprays on some metal I had in my scrap pile & everything worked fine with the Rustoleum...no fisheyes or other crazy things...so I decided I was good to go. Moral of this story...if you are going to paint your car, make certain you're not using oil based paints.
Prep included taping everything off. Nothing hard here, just time consuming.
I had to paint some of the interior too...door sills seam welding / holes I drilled out for the frame rails / the behind the seat area that I seam welded / firewall holes that I filled in.
I wasn't going to do any real bodywork with filler or high build primer and sanding down. This was the engine bay after all. So I just gave it a quick sanding to get the gloss off the stock paint with a red scotch-brite pad so the new paint would adhere to the car. Before painting I used a wax and grease remover from Summit. One of those that said "you're going to die if you use this" stuff (wear your respirator!) After the bad boy stuff, I used Sprayway Glass Cleaner (Seriously, it was recommended by multiple people) and lastly a tack cloth.
I used seam sealer (my arch enemy from seam welding) next. After all the pain of half *** removing it to seam weld, here I was putting it back on the car. The goal is to keep stuff from rusting & seam sealer will definitely help with that.
I didn't try to make this look pretty. Mazda just slapped it on at the factory, so I figured I'd continue with that same look.
I used the tack cloth again & then I started with the primer from the spray cans. I thought it would be wise to use the white Duplicolor primer since it would work better with the white base coat...(The plan was to use a Duplicolor spray paint that was closest to the Miata white paint because nobody makes the exact white color and sells it off the shelf. I'd have to custom order online at 20ish bucks per can.)
1st coat of primer
2nd Coat of Primer...Can't even tell this is two coats.
Third Coat of primer...this level of coverage is what I was expecting after 1 coat
4th coat of primer...
After buying all the primer I could find (I think I went to 6 parts stores) and seeing how thin a coat I had on the car after those 4 cans...I decided this wasn't going to work for the base coat. So, the next day I went and bought a touch up gun from Harbor Freight reasoning that it wouldn't paint as fast and hopefully less of a cloud of paint pouring out of the garage versus a normal paint gun. After that a trip to the paint store to purchase real auto paint. Unfortunately for me this was Sunday on Labor Day weekend and the paint shop was closed until Tuesday. I could at least prime & paint inside the wheel wells, since I had already bought spray paint for that.
Duplicolor gray primer works MUCH better. I believe I did 2 coats, but 1 actually covered well.
This was just Rustoleum chassis undercoating.
Since I couldn't paint anymore, I looked around for what else I could work on. I was originally going to use power steering with the car, but changed my mind and decided I wanted to depower the rack. Now, I know you don't want to mix oil with paint, but the car was 5' from the workbench, and I had already drained the fluid from the rack. But obviously I didn't have it all out, because I moved one of the tie rods as I was trying to take things apart and sprayed power steering fluid all over the damn place. It was on the ceiling, on the far wall, all over the plastic I was using to cover the engine & trans on, and (as if you haven't guessed by now) all over my super clean, just finished spraying primer the day before car. After choice words...I grabbed the bad boy degreaser & wax remover with the you are going to die if you use this warning. Sprayed it on the car, and went to wipe off the power steering fluid. It did one better than the power steering fluid, it also wiped off the primer I had just sprayed on the car earlier. I was really pissed at myself & feeling pretty defeated again with this paint job.
It's hard to tell how much primer I just wiped off...with the original base coat being white.
I didn't even realize it was on the ceiling until after I cleaned everything else up and it dripped down on me. I didn't take any pictures of the real mess, I was irritated at myself after scrubbing off the primer with the degreaser.
On Tuesday I went to the paint store in the morning and got some white single stage paint. It was supposedly the same color as the Miata, but it�s not that close. Luckily all of my painting is engine bay / interior so not a huge deal if it�s a shade off. I don�t have any pictures of actually painting the car (since paint all in the air etc.) but everything painted up nice & really easily. I think I put 3 or 4 coats on the car and waited 20ish minutes between each coat. The little gun worked great, I can definitely see where you would want a bigger gun/fan if you were painting real body panels, but for the engine bay & interior parts I painted it was great. I also didn�t **** off the neighbors with a big paint cloud, they seemed more interested in seeing what I was doing verses angry about fumes. So big win on that one.
Car after done painting and rolled out towards the edge of the garage to get more sunlight on it.
Later on that night all done with tape removed. VERY HAPPY with the end result. It looks good & only 1 run!
With hind site�there are a few things I would have done differently.
Probably highest on the list�I wish I put the car more together and figured out firewall holes I should have welded up (in an earlier post I mentioned them) and changes I would need for the radiator (future thread). I didn�t realize how much �stuff� I still needed to change / weld still.
Start with painting the car with �proper� paint verses spray cans. It�s a lot easier than it�s made out to be.
I would have gone with a base/clear coat vs single stage. It costs a little more, but if you're going to this trouble... I�m sure it would be stronger paint in the end.
I would have painted the entire interior of the car vs touch up like I did. The thinking is that I will put a cage in the car & drop floor eventually, but it would have been easy enough to repaint at that time / touch up then.
I really couldn't make up my mind with the power or manual steering. I've owned a few manual steering cars in the past and never found it that hard to turn the steering wheel. That said, I wasn't driving those cars on a track in anger with a smaller than stock steering wheel either. Anyway...I started down the path of power steering and then changed my mind and decided to go with manual steering for now. If I don't like it, I'll change my mind again & change it to power steering. No biggie.
Since I started down the path of power and then swapped to manual steering. I figured I'd give some info on both.
Overall Steering Info...
The first thing I did was gave the steering rack a bath. I'm guessing the old engine was leaking oil from the front seal or something and as you can image, it was filthy.
After cleaning it up, I cut out the bushings and pushed in these aluminum bushings for a more direct steering feel. There really wasn't a lot of rubber in these bushings for flex anyway, so I'm not sure how much of a difference it will really make (although I have read good reviews). Note: If you are thinking of doing this...I recently saw someone selling derlin bushings for the steering rack. That might help with vibration and give better steering input. No idea, but something to consider.
4 of these little aluminum bushings needed to be pressed in
Anyway, I did the old freeze them and then put a coat of grease on them to press them in. I was hoping I could have just pushed them in with my hands, but they still required the press.
Since at this time I was still going power steering...I installed the rack on the V8Roadsters subframe using the stock bolts. You need to pay attention here (or else you may find yourself fixing threads like I ended up doing) but one of the bolts is too long and you think it's tightening down, when the bolt is actually bottoming out onto the subframe and screwing up your threads instead.
This is me testing the bolt after fixing the threads...but before shortening the bolt.
I couldn't really get a good picture of this, but you can see where the bolt rubbed off the power coat. I ended up going and buying a tap and chasing the threads to clean them up and then cut a couple mm off the end of the bolt and watched as I tightened it a second time. <--One of those items when you build a car that should have taken 5 minutes now took 2 hours.
Power Steering Info...
The LFX power steering pump is a pain in the *** to take off or put back on because you must remove the pulley to get to one of the bolts...The holes in the pulley don't allow you to reach through and undo the bolt. If you are new like me...The pulley has to be removed using a "steering pump" puller that pulls from the center and not the outside edges like a normal puller would do. (I bent my pulley using a normal puller before realizing this and going and getting a proper puller...so don't be an idiot like me.) To make things even more fun...you have to thread the pulley into the pump. My pump was used and the threads had surface rust & dirt in them. That's not a huge deal, but I couldn't for the life of me figure out what size bolt the threads were so I could use a tap to clean them out. That's because I assumed it was metric like every other single bolt / thread on the car. BUT...Chevy decided to use an SAE thread on the pump. (3/8 X 16 if you are trying to figure it out.) Needless to say...there is a Chevy engineer somewhere who should be beaten for all of this craptastic-ness with the steering pump.
Power Steering Pump...if you look closely, you can see the one PITA bolt that you can't remove without pulling the pulley off first.
Another thing to be aware of... V8 Roadsters sells a power steering kit that makes you think you need all new high pressure lines. In truth you only get one hose (high pressure pump to rack hose, that you can see in the picture above) and that is it. You need to reuse the Miata power rack hard lines (which is better in my opinion) but you will need to bend them by hand a bit so they don't rub against the oil pan. If I had decided to go this route, I would have also stuck a cooler between the rack & pump on the low pressure side. I also used a Dayco 5060815 belt (perfect size if you remove the AC compressor).
You can see where the lines touch the oil pan and need to be bent away a little bit
Manual Steering Info...
I depowered the rack the "correct" way by welding the pinion & removing the hydraulic collar. From what I can tell, Mazda used a few different power steering racks and all the directions for depowering a rack are very close but none seemed exact for an NB1. The instructions that helped the most were from Beavis Motorsports / Brendon. <--Thank you Brendon. His YouTube video goes step by step on what you want to do. If you are going to do this yourself, I recommend watching his video.
I didn't take great pictures during all of this, and since you can watch Brendon's "write up" I'll just go over a few things that might add to what Brendon went over / trouble spots for me.
1. If you didn't see or remember from my painting the engine bay write up, power steering fluid is going to squirt out all over the place, even if you think you have it all drained. It will also squirt out with enough force to shoot across the room. Not trying to be safety police here, but you want to wear safety glasses while doing this.
2. Like Brendon, I did not have the right size wrenches for this. I had an 8" and 12" adjustable wrenches, but had to go and purchase a 10" and 15" to do this project. (10" was to remove the inner tie rod, the 12" was too wide).
3. Because I didn't have the right wrenches, I attempted to remove the adjustment nut with my impact gun (just like Brendon did) although I ended up stripping mine verses removing it...(ouch) The metal is very soft.
4. When you go to pull the shaft out, you only need to remove one of the inner tie rods not both. (pull the tie rod off the side you want to pull through the housing)
5. The shaft is held in the power steering rack housing, by a large nut on each end. This nut was staked onto my rack (None of the stuff I read discussed this nut being staked on.) I had to drill out the staked part to get the nut to thread back on. Sorry the pictures that I have of this are afterthoughts. Hopefully this gives you an idea of what I'm talking about.
You can see the welded up pinion in this picture too. I brought it to a professional welder to be TIG. You can also see the collar that needs to be removed on the shaft still.
6. I didn't want to use the old fittings welded up for my plugs or RTV in the holes. The Miata plug kits are price gouging expensive, so I went and looked at the two fastener shops I've been using. The M12X1.0 is unobtainium here in the USA. So I went looking in the metric parts of the world. (Why doesn't the US use the metric system?!!) Anyway...I paid 25 bucks for mine (and half of that was shipping) from Racetronix in Canada. One of the plugs did interfere with the housing, and I just put a couple copper crush washers under it to raise the hight. (you can see that below)
I bought the power steering delete kit from Keisler Automation...It was the easy button. It's basically just a bushing and an idler pulley that gets bolted onto the engine. It also came with a belt, so extra points for being plug and play.
I'm looking forward to the steering feel with all of these changes!
After the steering rack had the new bushings in it (and I was planning on going with power steering) I put the steering rack on the front subframe. I had already put the suspension components on the front subframe and it was sitting there ready for the engine.
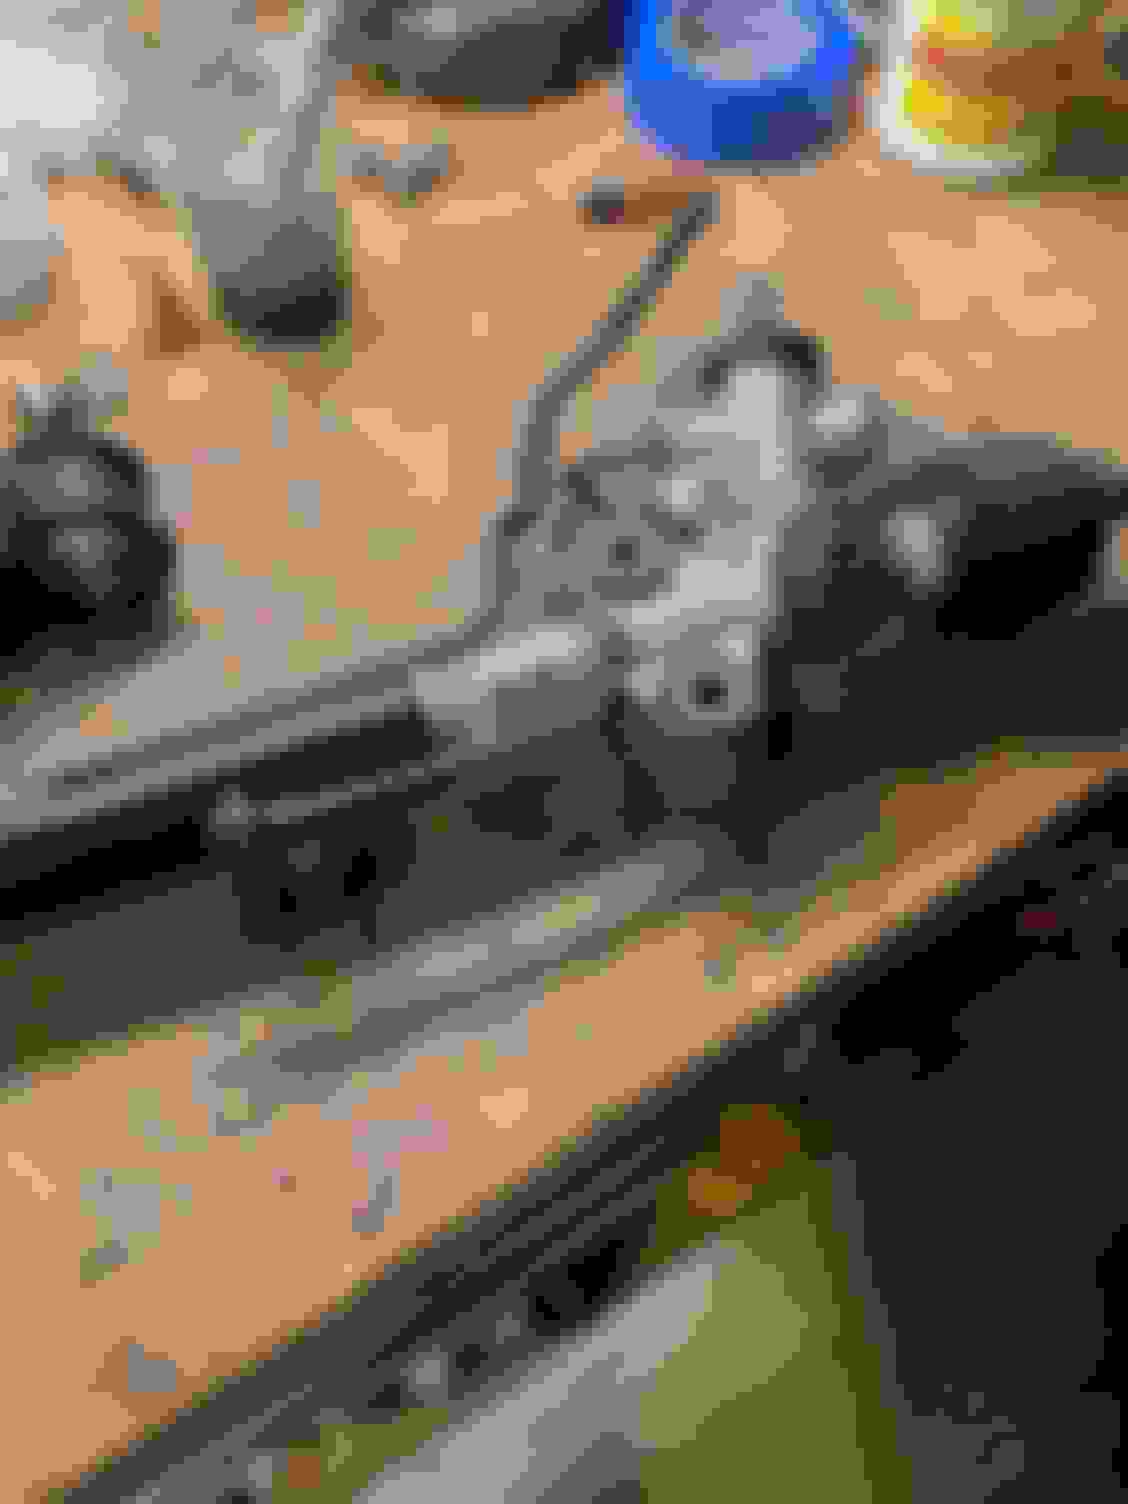
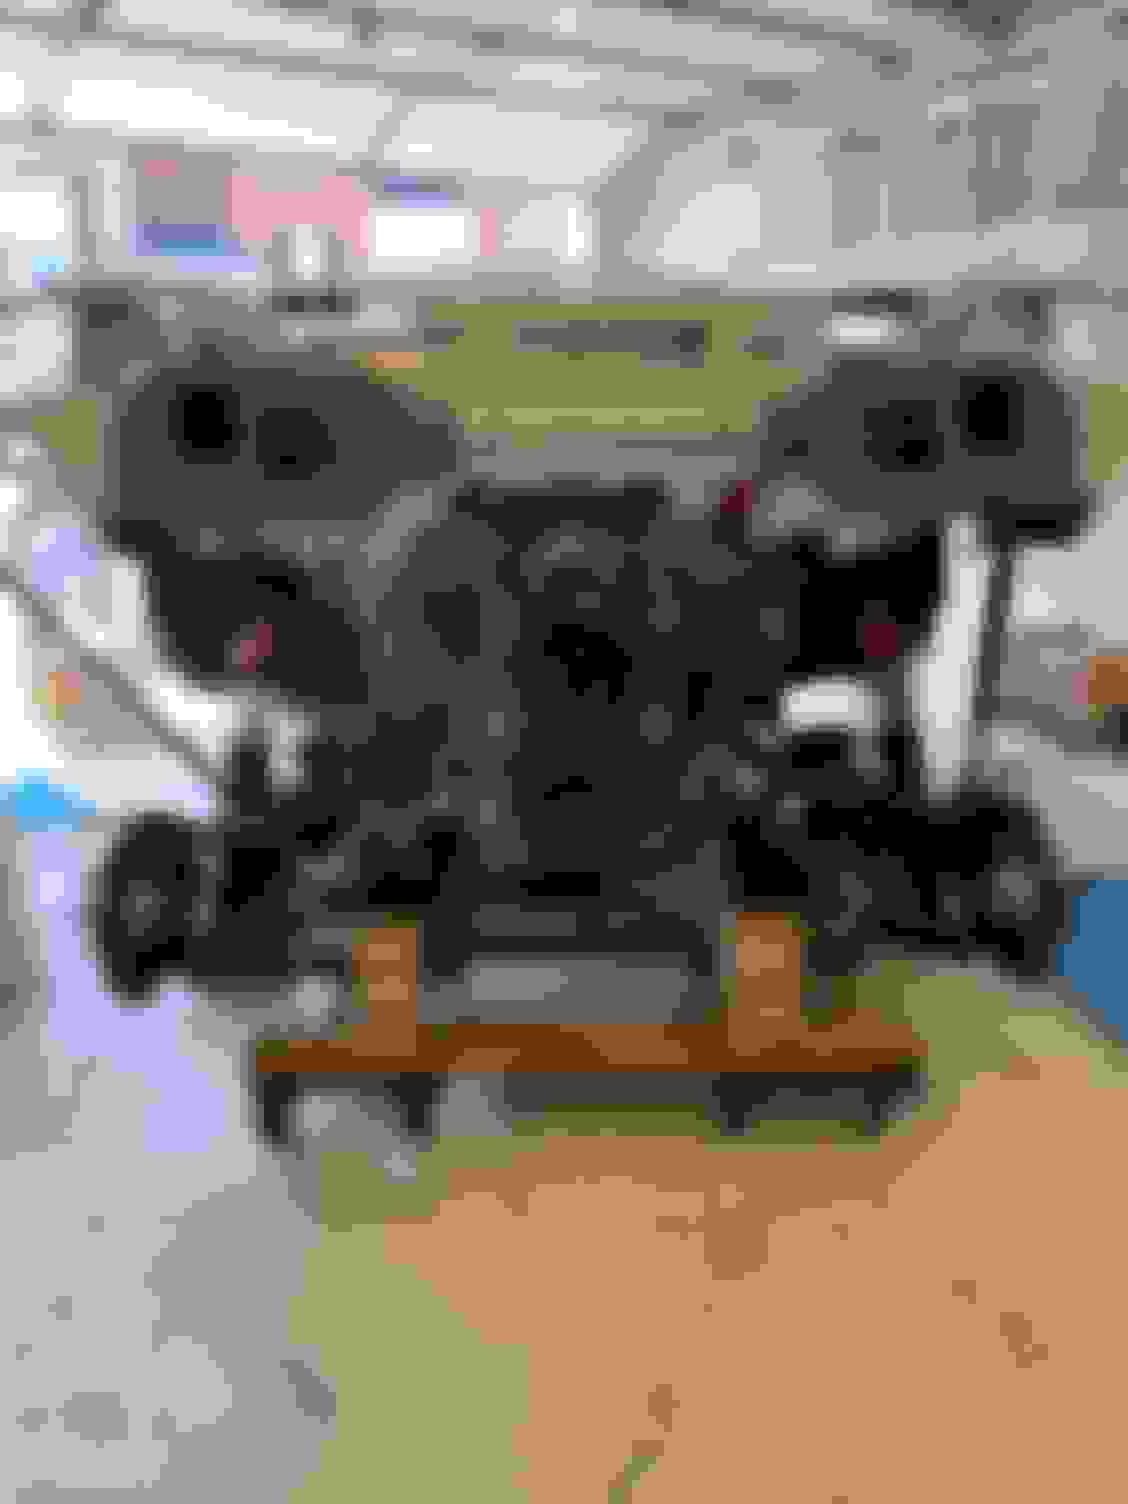
Besides removing the oil pan to send off to V8 Roadsters the engine basically had been a wall flower sitting on the engine stand for over a year. It was finally time to ask her to the dance. Here is a list of all the stuff I did to the engine to get it ready to be put back into the car.
Oil Pan The LFX oil pan will work without any modification on the Miata, but it sits about 3/4" lower than the subframe. So V8 Roadsters offers offered a modified pan where they shorten it an inch so its protected by the subframe. I figured this is a very good idea for a lowered track car and ordered an oil pan from V8 Roadsters when I first ordered the majority of the kit to build the car. (Feb 28, 2019 <--Almost 2 years ago!) The oil pan was on backorder, which wasn't a big deal since I had a lot of stuff that needed to be done before I would need it. In July 2019, I spoke to V8 Roadsters and they were having a hard time sourcing new oil pans and they said for me to send mine in and they would modify it. (Thus last time I touched the engine). Unfortunately, they ruined a few pans trying to modify them, so they shipped mine back to me unmodified. So, long story to say...I needed to reinstall the oil pan.
Nice shot of the crank!
Oil pan ready for windage tray and then to be installed.
I can't believe how much pink coolant fluid was still in the block when I flipped it. I though I had drained most of it earlier.
I don't have any pictures of the oil pan installed. The oil pan requires you to remove the harmonic balancer & reinstall it. The balancer is installed with a torque to yield bolt, so I installed a new bolt, but waiting to have everything in the car on the ground so I can actually torque the bolt.
Installing Engine into Subframe: After getting the oil pan back on, since I didn't need to rotate the engine anymore, I decided to put the engine onto the Front Subframe and work on it from there. It's three bolts on each side for the engine mounts.
Alternator & Alternator Bracket I lucked out, the 2014 Camaro alternator fits (albeit barely!) Some of the other years (I think the 2012 & 13) need for the alternator to be clocked so it fits without hitting the subframe. So if you are doing this swap & need to buy an alternator, get the 2014 or 2015 alternator to save yourself some trouble. One other thing you do need to change is the upper stud on the bracket to a bolt that holds the Alternator bracket in place...else you will not get the alternator off without pulling the engine from the bay.
Stud on alternator bracket you need to remove. It just screws out.
New bolt holding the alternator in place vs the stud.
Starter: Just installed it. Easiest thing on the list...
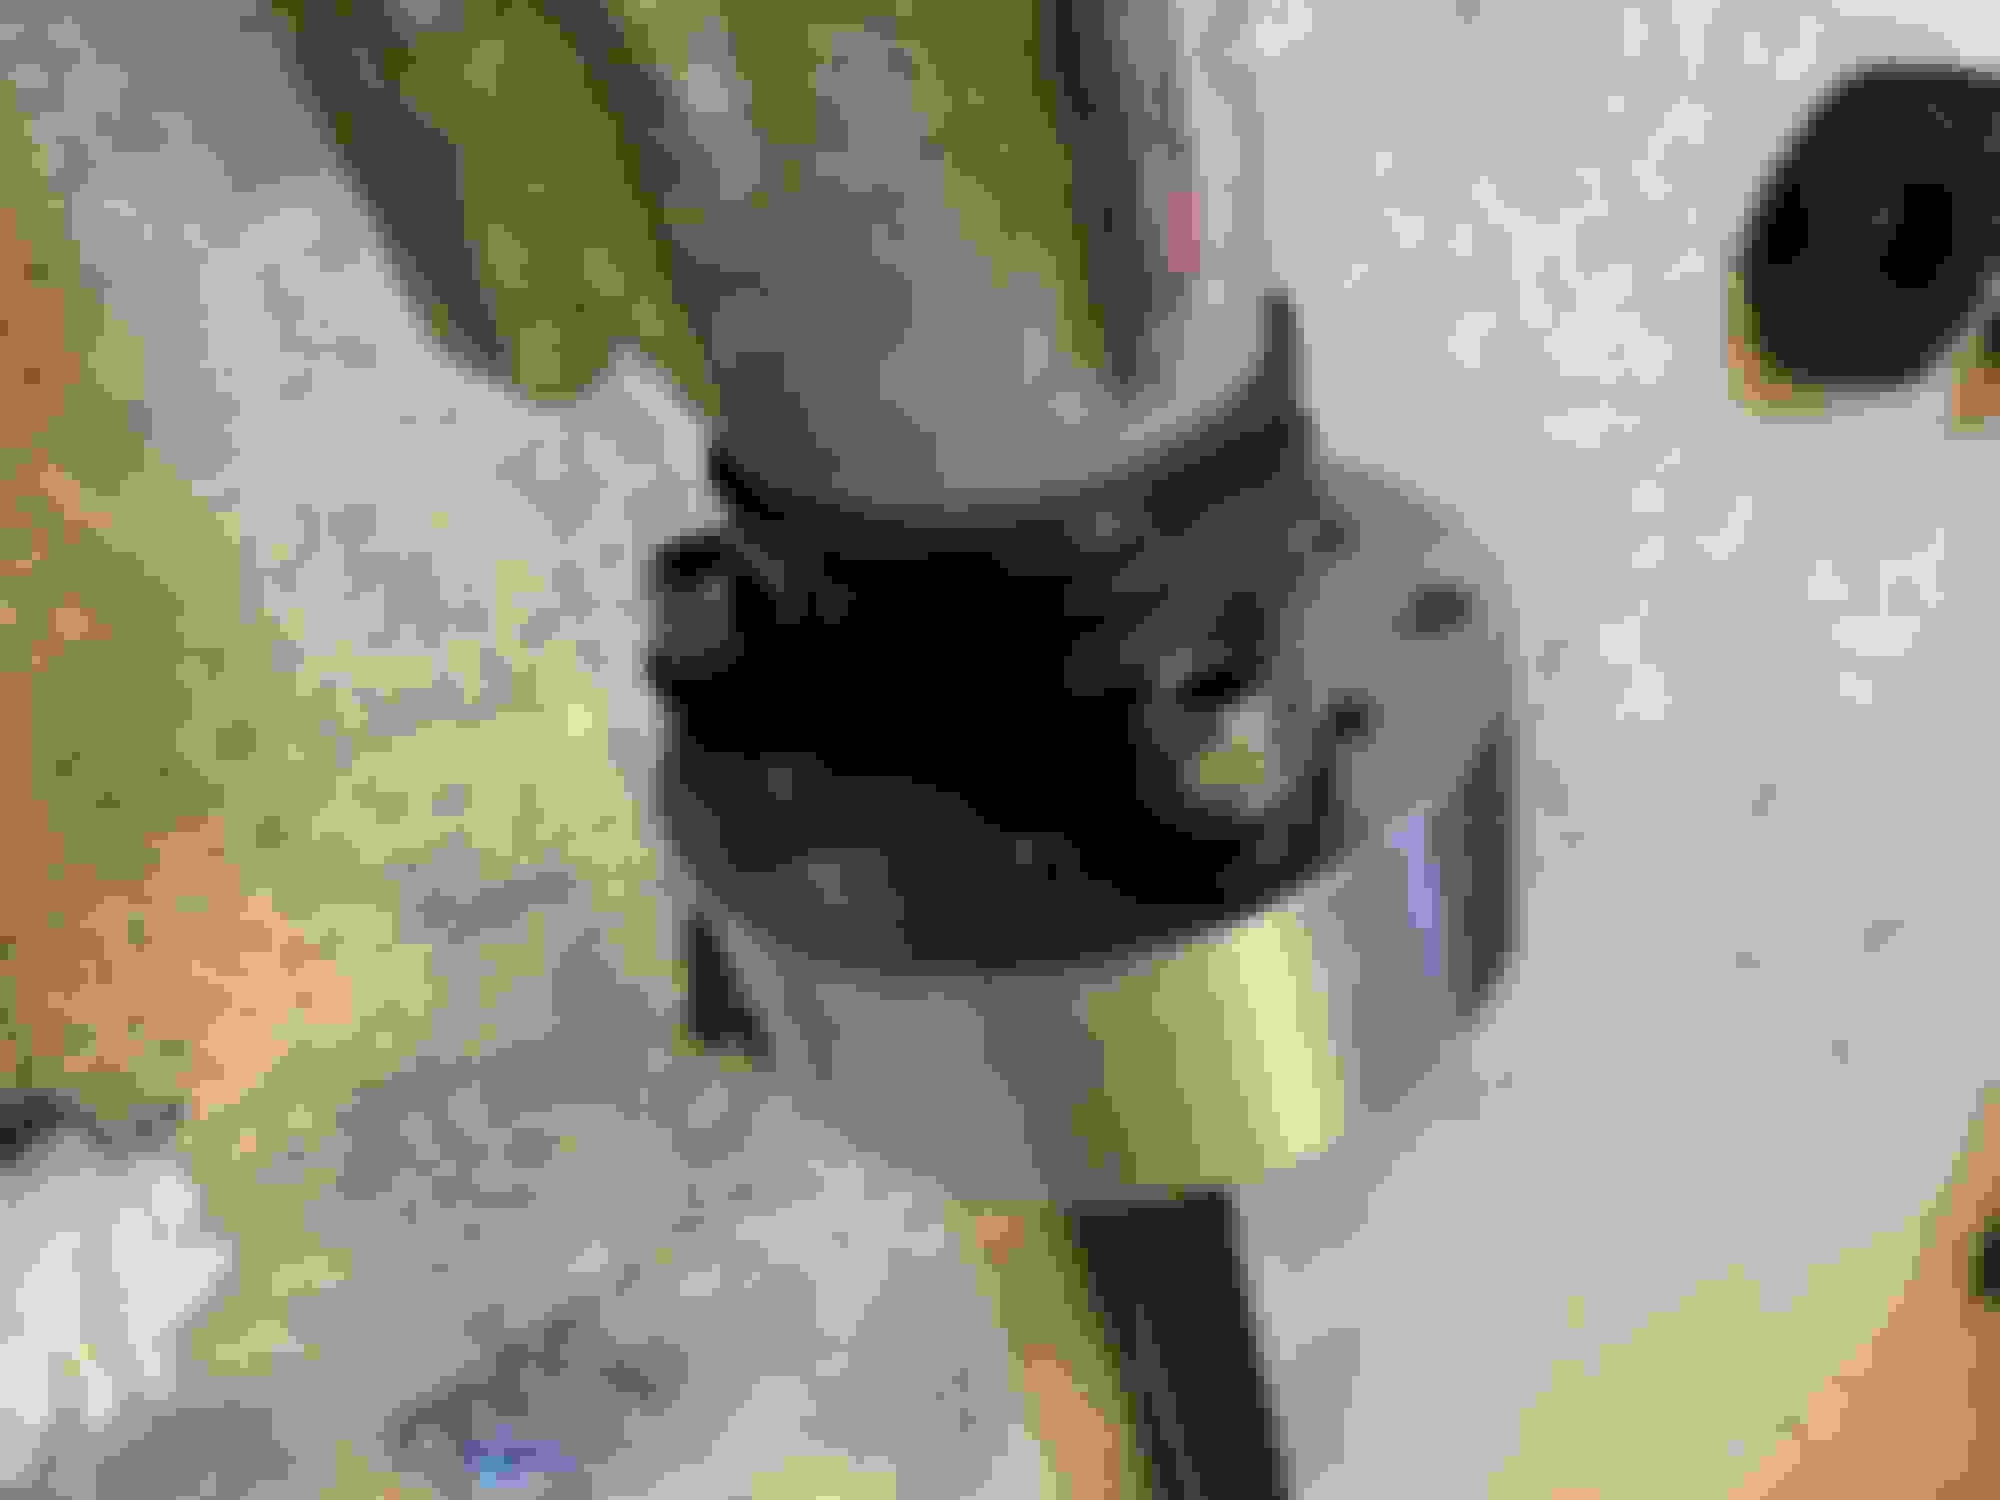
Heater Lines: I decided to not run coolant / heater lines. (race car) So I figured I needed to loop them off and that would look like crap. Keisler Automation has a more elegant solution and sells a heater core bypass that I bought and installed. This allows the coolant to circulate without hoses being looped etc. I think some others have used core / freeze plugs here with success, but that does keep the fluid from circulating. I have no clue if that makes any difference or not in this situation.
Heater core bypass Heater core bypass installed
Intake Manifold: The Intake Manifold needs to be trimmed down some so everything fits under the hood of an NB. (The NB hood needs some ribs cut out of it too...If you have an NA, I guess you don't have to do this mod since you have to cut a hole in the hood.) Anyway, I pulled out a hack saw and cut off the ends that held the decorative Chevy / Camaro cover and the tallest ribs. After that I pulled out the dremel and sanded things down to look a little better.
Initial rough cuts done with hacksaw
I took the intake manifold off to cleaned her up with a little soap and water and found this...
I'm not really that surprised...Direct Injection Engines! They should all come with oil catch cans from the factory. The engine only has 25k miles. I'd bet that's a good 10 hp worth of gunk that needs to be cleaned off right there. For now, I'm going to pretend I didn't see this and get her up and running before taking the time to clean up the valves. (They can be cleaned just as easily with the engine in the car & part of my decision to not work on something if not critical to getting the car running & only requires a small amount of rework / cost to do later.)
She's not going to win any beauty contests, but it's a huge improvement.
Power Steering delete: As already discussed in the thread above...This was all removed and a idler pulley & belt were installed to delete the power steering.
Evap Purge Valve: I wrote about this earlier, but this seems like where it actually belongs. I used an LSx evap delete cover (which fits) to close off this hole, since the car isn't going to have any emissions installed.
Oil Cooler
My plans are to install an oil cooler. I bought this oil filter housing with cooler line hookups from Keisler Automation to do just that. It replaces the tall housing that uses a cartridge oil filter to a smaller housing with oil cooler lines & uses a spin on filter. If you have power steering, you have to remove the pump to get to one of the bolts for the oil filter housing that this part replaces & probably best to swap this part right now. Since I deleted the power steering that won't be an issue moving forward. I decided against installing this for now, since I decided to get the car running as highest priority & to put off any work that is minimal re-work / cost if done later.
Next up was getting the new clutch installed & the engine / transmission back together again. (I did this before some of the engine work that I wrote about in the last thread, but besides the starter install, it could be done in either order)
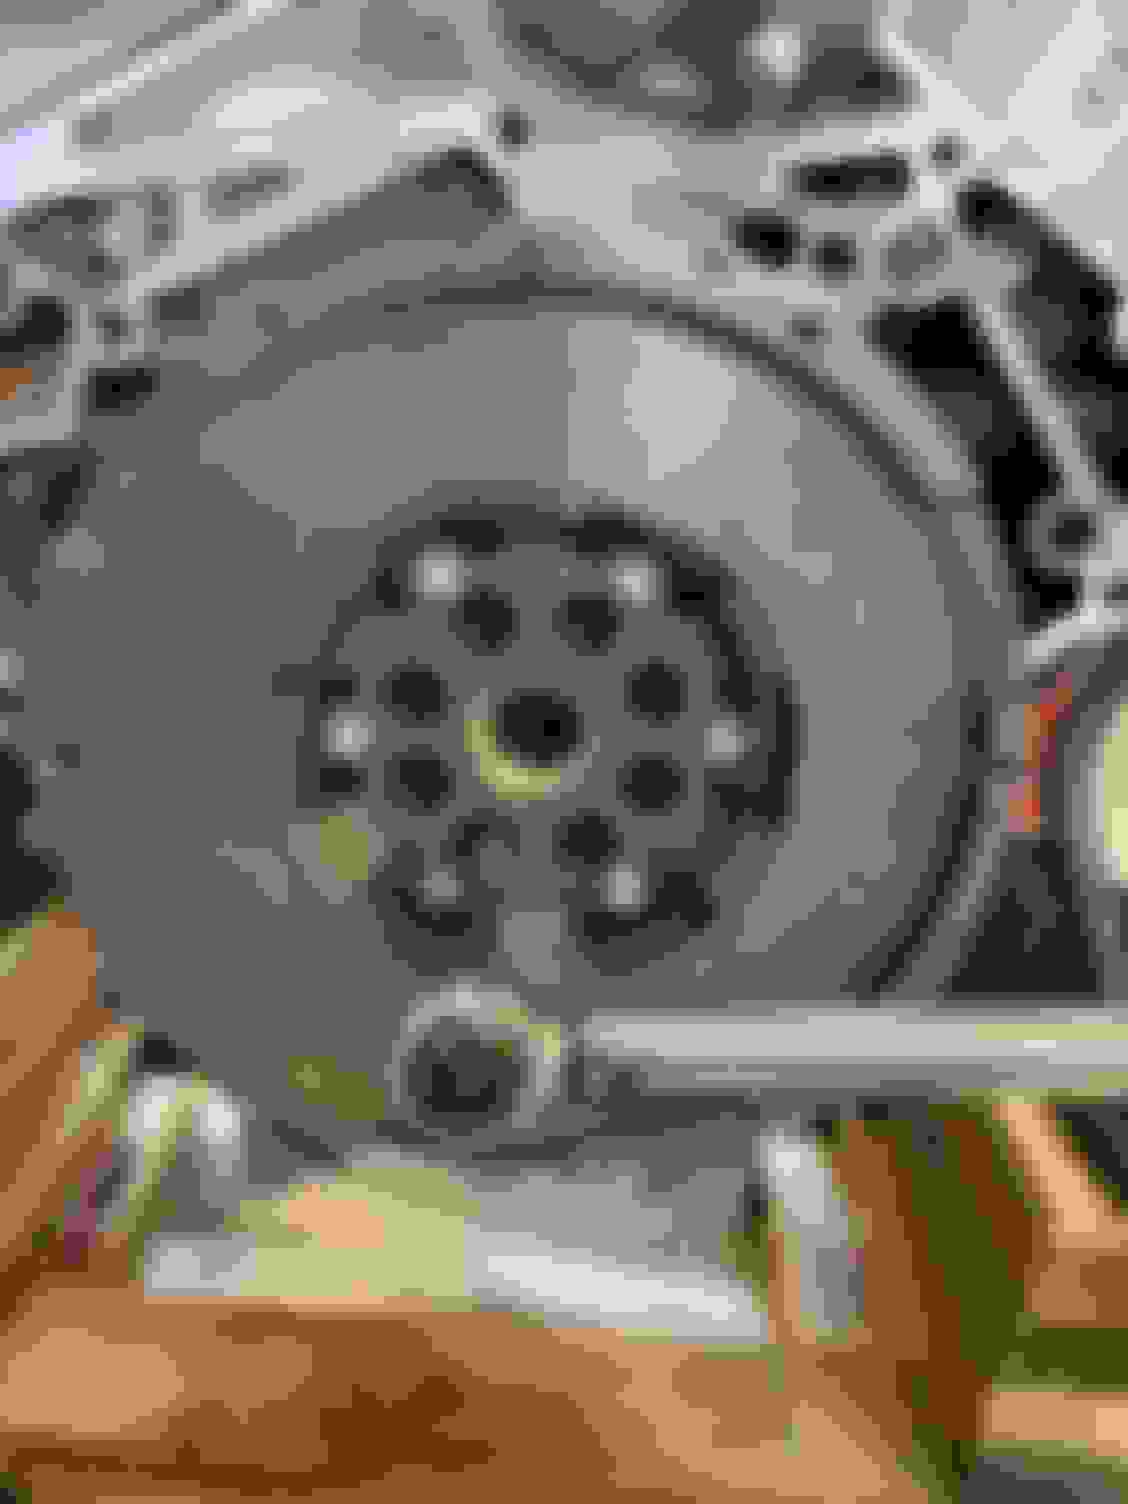
Clutch For the clutch, I went with an OEM (boat anchor) LuK clutch replacement. I wish I had weighed it for exact numbers, but its HEAVY...Easily 50ish pounds and there is real weight savings to be had here for a track build. That said, the few build threads for the LFX that I was reading at the time were having clutch/transmission issues. I believe they were both using SPEC clutches / flywheels, and when all was said and done, it looks like the SPEC parts were the problem. Anyway, at the advice of Gooflophaze, (who was going through the pain of the SPEC clutch) I purchased the stock clutch setup about a year ago and figured it can always be upgraded later.
Engine waiting for it’s new flywheel
Super Heavy flywheel…Installed & torque
Clutch & Pressure plate next.
The Pressure plate is torqued in a pattern (you can see the numbers I wrote on it) and they are torque to yield on the last pass. Sorry I don't remember the torque numbers or percent for the yield, but it's in the chevy manual.
The kit comes with a new Slave Cylinder, so I changed that out too.
Note, I had to special order the bolts from Chevy and the parts guy had trouble finding the right numbers. Here are the numbers & be prepared to wait 2-3 weeks for them. Chevy is mighty proud of these bolts too. I had to make certain I wasn't at the BMW dealership.
Engine & Transmission together again!
DriveShaft
The driveshaft comes with an aluminum spacer and the fasteners for the transmission side (you need to source fasteners for the diff side, the “chevy” ones, if you have them, are too long. You will need three M12 X 1.5 X 40 bolts, washers & nuts).
I wasn’t 100% sure what direction everything got installed, so I decided to test fit everything while not in the car. (and now that I look at the picture, I did this before installing the new clutch.)
Note: The spacer attaches to the transmission & the CV joint side of the driveshaft attaches to the spacer. Like this... Note: That metal ring on the floor that's also in the picture comes with the driveshaft, but isn't used. It's just for shipping.
I’m glad I did this little test fit. V8Roadsters supplied the wrong fasteners. <--This seems to be a theme with my build. The spacer bolts were semi close. The nut would thread on, but the bolt doesn’t touch the nylon when tightened.
The bolts for the CV to the spacer were not close, they wouldn’t thread. (Black bolts were V8Roadsters, the blue bolts were some I had & used for test fitting.) The blue bolts that were as long as you could use without tapping & adding more threads to the spacer. I feel like there needs to be a bit more thread engagement, but I reached out to V8 Roadsters and they said it was good & sent out the correct size bolts.
I haven't torqued anything with the driveshaft yet, but here are the torque settings you want to use when you tighten these parts together, along with using loctite. Thinking about it now, probably should have put the spacer on and torqued it while out of the car. One less thing to do on my back under the car.
Aluminum spacer to trans: 60 ft lbs
Driveshaft to aluminum spacer: 12 - 15 ft lbs
Driveshaft to Diff: 75 ft lbs
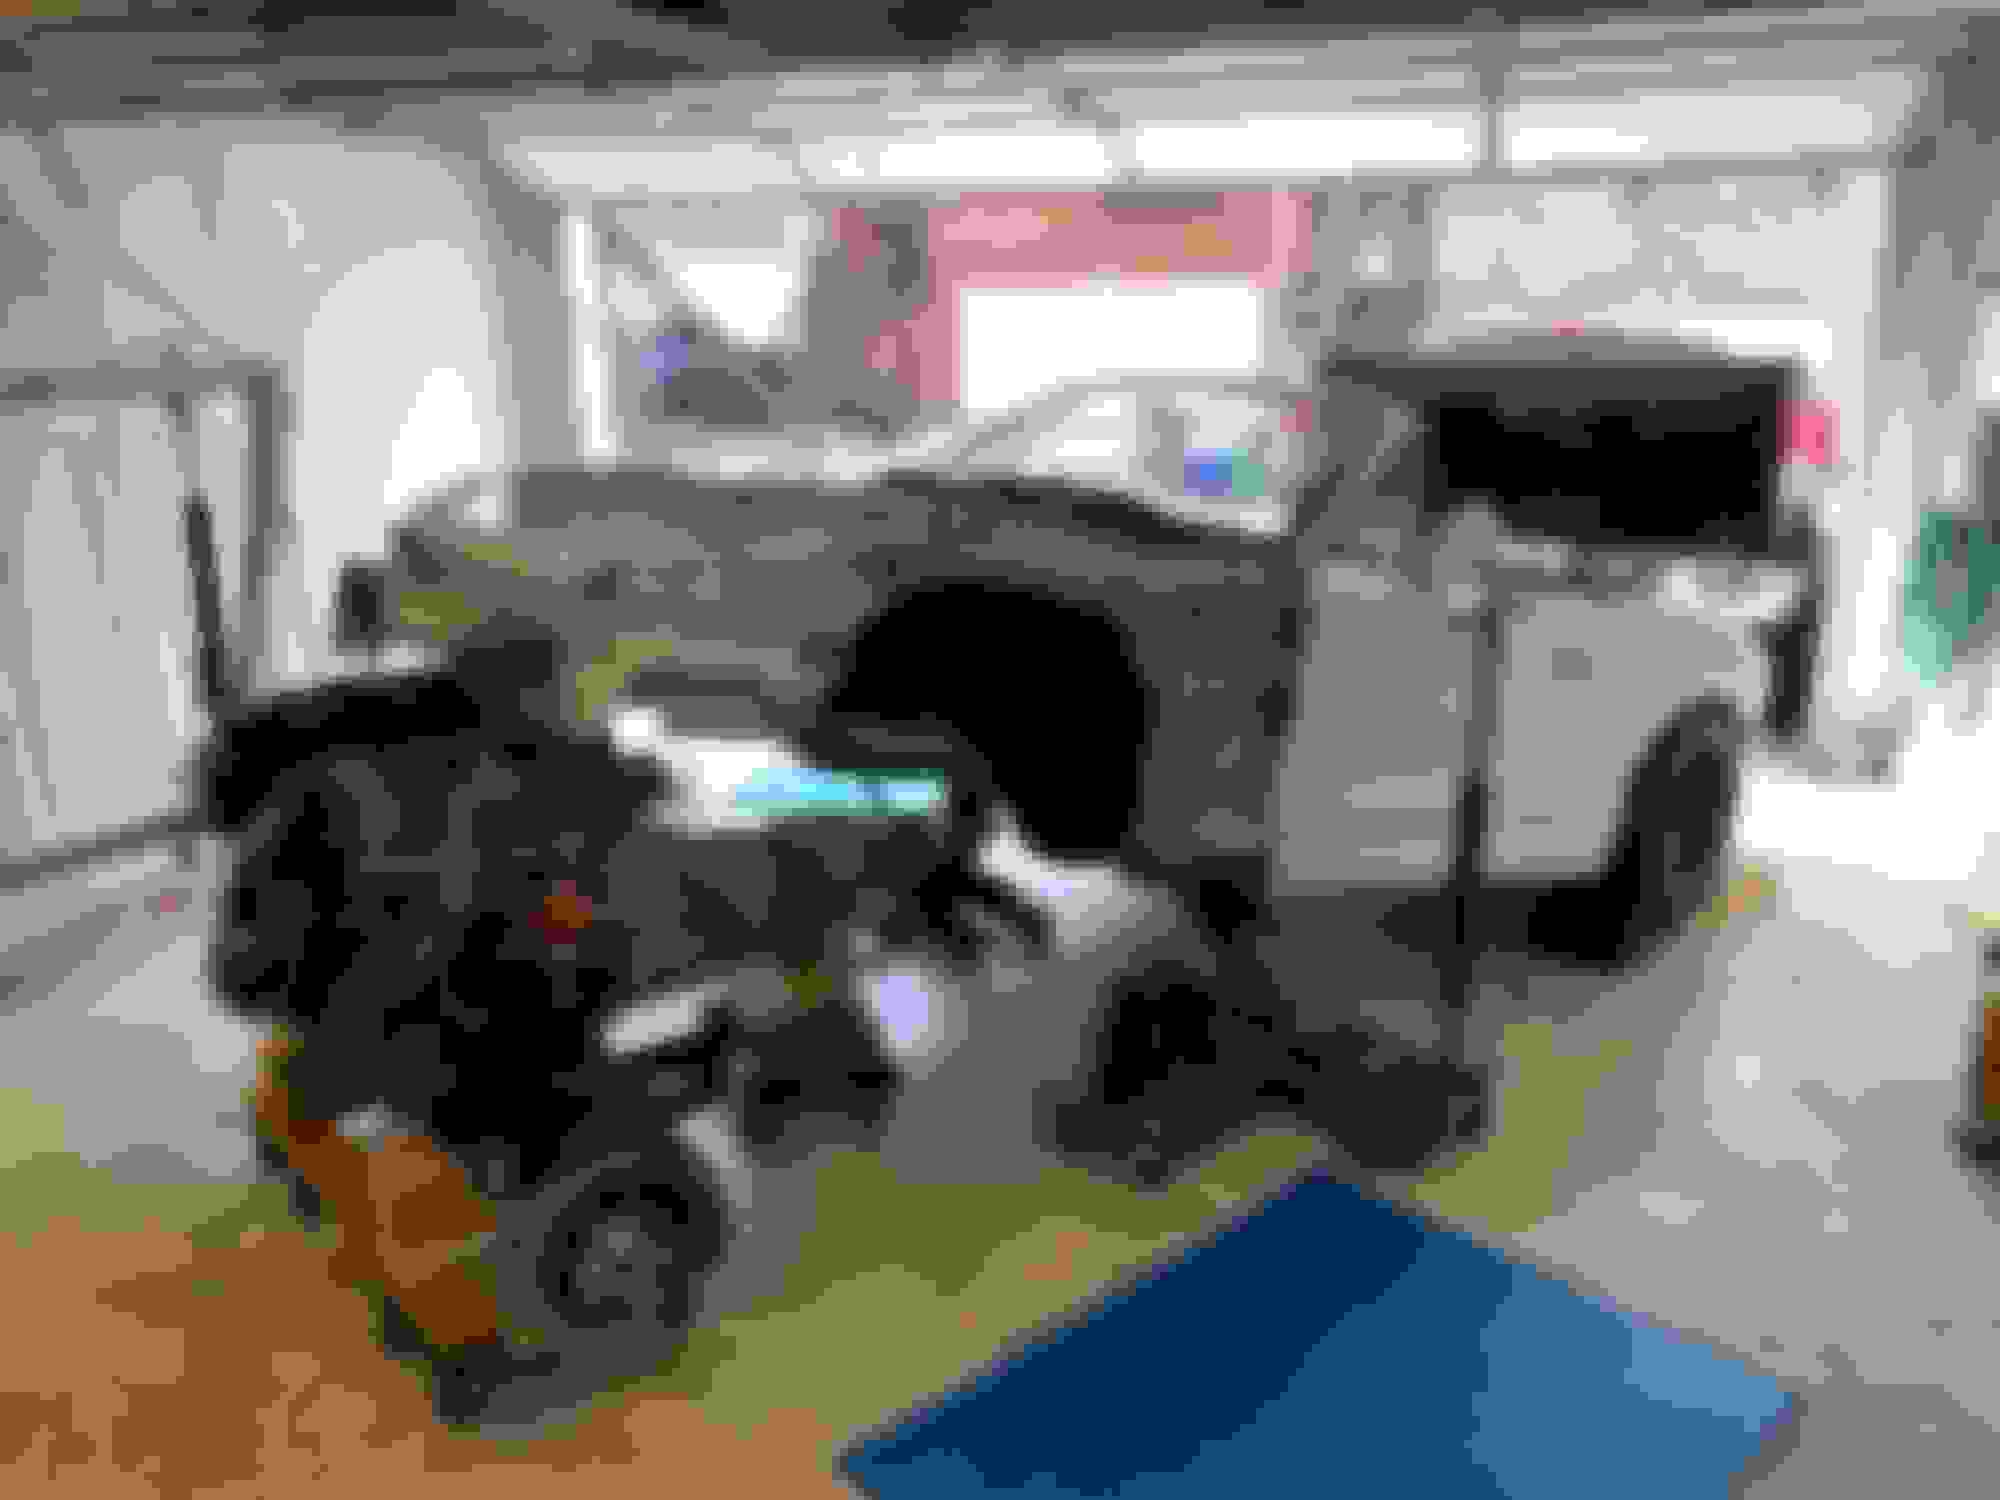
With the car painted, I could start putting it together again! I had already started putting sub-assemblies together, but now I would start putting them back onto the car itself.
Heat Shield I bought the DEI 48�X21� size thinking that would cover up the entire tunnel easily...the Miata is so small...but the tunnel is a bit larger. I also was hoping I could just slap it on and be done with it, but once under the car I realized that wasn�t going to work. So I made a template.
Since I needed a little more than I bought, I made certain to cover the drivers side & top the most, and the passenger side would get what was left. This didn�t run to the very end of the tunnel, but I got most of it and hopefully this helps keep down the temps.
It would have probably been better to install a thin piece of metal heat shielding with a little air gap. I may look into doing this later, or trying to cover up the exhaust pipes some if heat is a huge issue.
Note: I haven�t done this yet, but you want to tape down all the edges to keep water from getting into the insulation that�s on the backside of the heat shield. The water would easily absorb into the insulation and sit there and rust things. I originally didn�t realize that was why they recommended the tape. I thought it was to keep heat from getting through where you had little cracks and I wasn't worried about that.
Frame Rails
I also installed the frame rails (I had installed them previously to test fit / drill out holes, but removed them afterwards while doing all the metal work / painting.) and got a neighbor to hold a wrench up above while I torque down all those bolts from under the car. This was easy since everything had already been aligned and holes drilled. Sorry no picture of this happening...best I could find after the fact.
Rear Subframe The rear subframe had been completed for a while now, and was a quick win. Super easy...I rolled it under the car, stuck a jack under the pumpkin & jacked her up in place. Hardest part was going slow and lining up the coilovers to fit into their respective holes. After that, bolt her up and done. Note...It's much easier to get the drivers side coilover all bolted in without all the fuel hoses in the way. Mine were all still loose / off still. (I had waited to do that until the coilovers where back in.)
Flying Miata has some high level instructions on doing LS swaps on Miatas...which is very similar to the LFX swap. They recommend that you install the brake lines at this point, mainly because they are long & easily bent / broken, so this gets them out of the way. I thought this was a good idea, so I followed their lead and decided to install all of these pieces next.
Clutch Master Cylinder
Since I was going to install the lines, I also decided to install the Master Cylinders. I started with clutch master cylinder since it was furthest into the corner of the engine bay and big hands. I pushed the easy button and purchased V8Roadsters clutch kit for this. It comes with a larger master cylinder 7/8", adapter plate, & the hose. The very first step to installing this is to widen out the hole with a step bit so the new master will fit. I had already done this before painting. Next step is actually installing the clutch pedal, then the adapter plate. The adapter plate & clutch pedal hold each other in place. From there I installed the clutch master cylinder. Note: I put the hose on it loosely for now. It�s easier to attach at the transmission first and then the master cylinder when the time comes. (Note: pictures of this below�since same exact photos for the Brake Master Cylinder)
Brake Master Cylinder & Lines
I went with the The Wilwood 1� master brake cylinder. Supposedly, this will give me the brake feel that I�m really looking for (which is that you don�t have to push the pedal all the way to the floor to brake.) I much prefer the feeling of when you push harder to get more braking force, the pedal feels like it stays in place, just the force increases. Anyway, the brake master cylinder installs basically just like the clutch. You want to install the pedals first and then the booster. But, before you install the pedals, you will want to install the steering boot, otherwise you will be uninstalling everything to put it back on. (ask me how I know�LOL) The rest of assembly is easy�adapter plate on the booster, then install the master cylinder to it.
Pedals & boot installed (& the steering boot too)
Booster & adapter plates installed
Master Cylinders Installed
Also...Since I just painted the car and I�m fairly certain it will be a little while before all the lines are attached 100%, and who knows if I�ll have to remove these parts again for some reason...I decided to not put brake fluid in and bench bleed. When that time comes, I�ll �bench" bleed the clutch and brakes on the car and then attach the lines. I don�t think it�s worth doing on the bench and then trying to assemble back on the car without spilling any fluid. I�m sure I�ll spill enough fluid just trying to attach the lines.
And Lastly...I bought a Master Cylinder brace, which I installed a little later once the engine was in & the coilovers were in place.
Brake Lines
These just installed back on the firewall like originally installed. One of them goes to the passenger front wheel, the other under the car to the rear brakes. For the rear brakes line, I hooked the line up to the distribution box on the rear subframe to hold it for now. I still need to secure the line under the car going to the rear subframe before I drive the car, but this gets it out of the way and basically where it will ultimately sit.
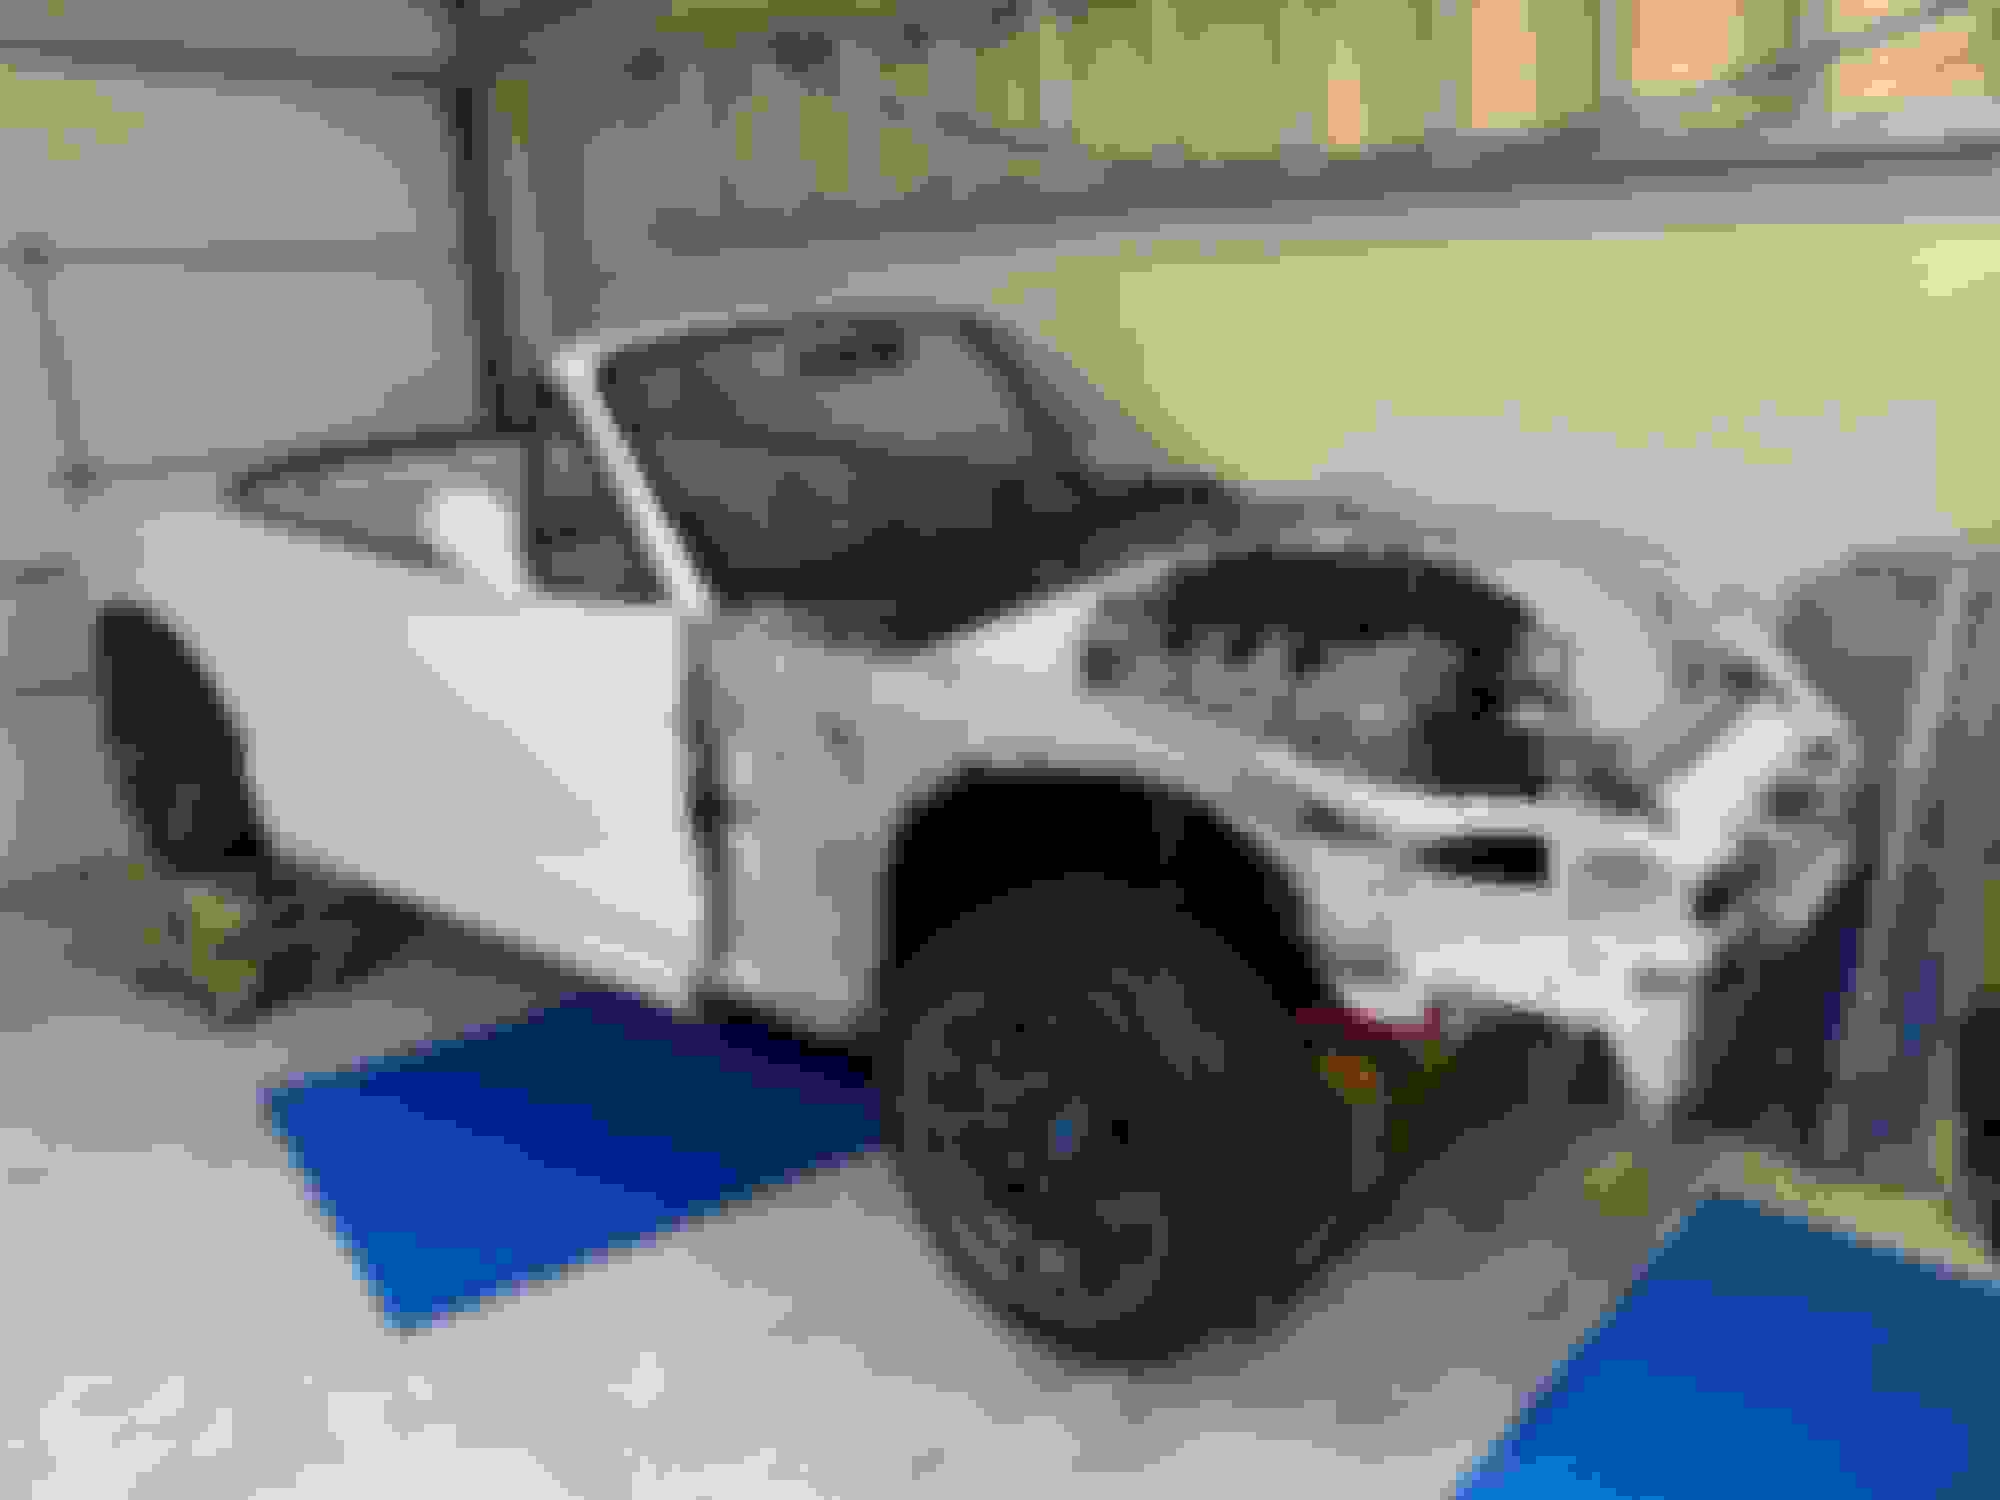
Next is finally installing the engine/transmission front subframe assemble, driveshaft & wheels! (gonna start looking like a car again!)
Engine & Trans
Installing the engine & trans...I discussed this before while test fitting, but easier to install the engine & trans from under the car verses stabbing it in from the top. You need 2 jacks, but otherwise this ends up being super simple...Raise the car up, roll the subframe assembly under the car, and lower it all back down.
Open Wide!!!
Looks like a lowrider about to bounce on the new engine! HA!
And she's in there!
Once the jacks are down & you have the subframe bolted up, you need to roll a jack under the transmission to move it around a bit and install the transmission brace. The 4 holes here were not 100% lined up, but I loosely got bolts in and moved stuff around until all 4 would go in. Then tighten them up. (Sorry, I didn't take pictures when I installed this time...these are from the test fit I did originally)
I actually installed the bolts facing up vs down like in this picture...just incase I bottom out...or more importantly hit my head on one when I'm under there working!
Drive Shaft
Once the engine & trans were back in...I installed the driveshaft. This just barely fits with the diff pin cut down. Originally I didn't have mine cut down enough, so I cut another 1/4" off. (Note: The directions I gave earlier on how much to cut is correct. I took those measurements after I did this.) For now the bolts are all hand tight & I put some reminders on to tighten. I'm unsure if there will be another reason to remove stuff or not, so figured this was the best choice for now.
Wheels
I knew I was getting close to needing some wheels for the car. Ultimately, I want to go with some 15X10's, but my goal is to get the car running & 15X10's will require more serious work to fit, so 15X9's as a set of rollers (need to fit over the brakes) was the "easy" button. So I stole the 15X9's off my other Miata as a temp fix, and the Miata Gods must have realized my need, because less than a week later, someone local stuck some 15X9 6ULs up for sale and I grabbed them. I tried one on, and decided I liked the look of the Gunmetal Storms (which also had a better fit with the brakes) better than the TiO2 6UL's on the LFX / white Miata. So...I swapped the wheels between the two cars and I'm really happy with the looks on both of them.
White on White...Wasn't feeling this, maybe if I had white sidewalls it would be perfect?!?
Black on White...Much better look imo
I still need to roll the fenders & maybe even pull them for 245's to fit, but the 225's will let me get the car running / rolling for now.
Feet still haven't touched the ground yet, but she could!
I really need to get to posting more. I realized I'm still 5 months behind on recording the build. (All the work I'm writing about today took place in early October 2020)
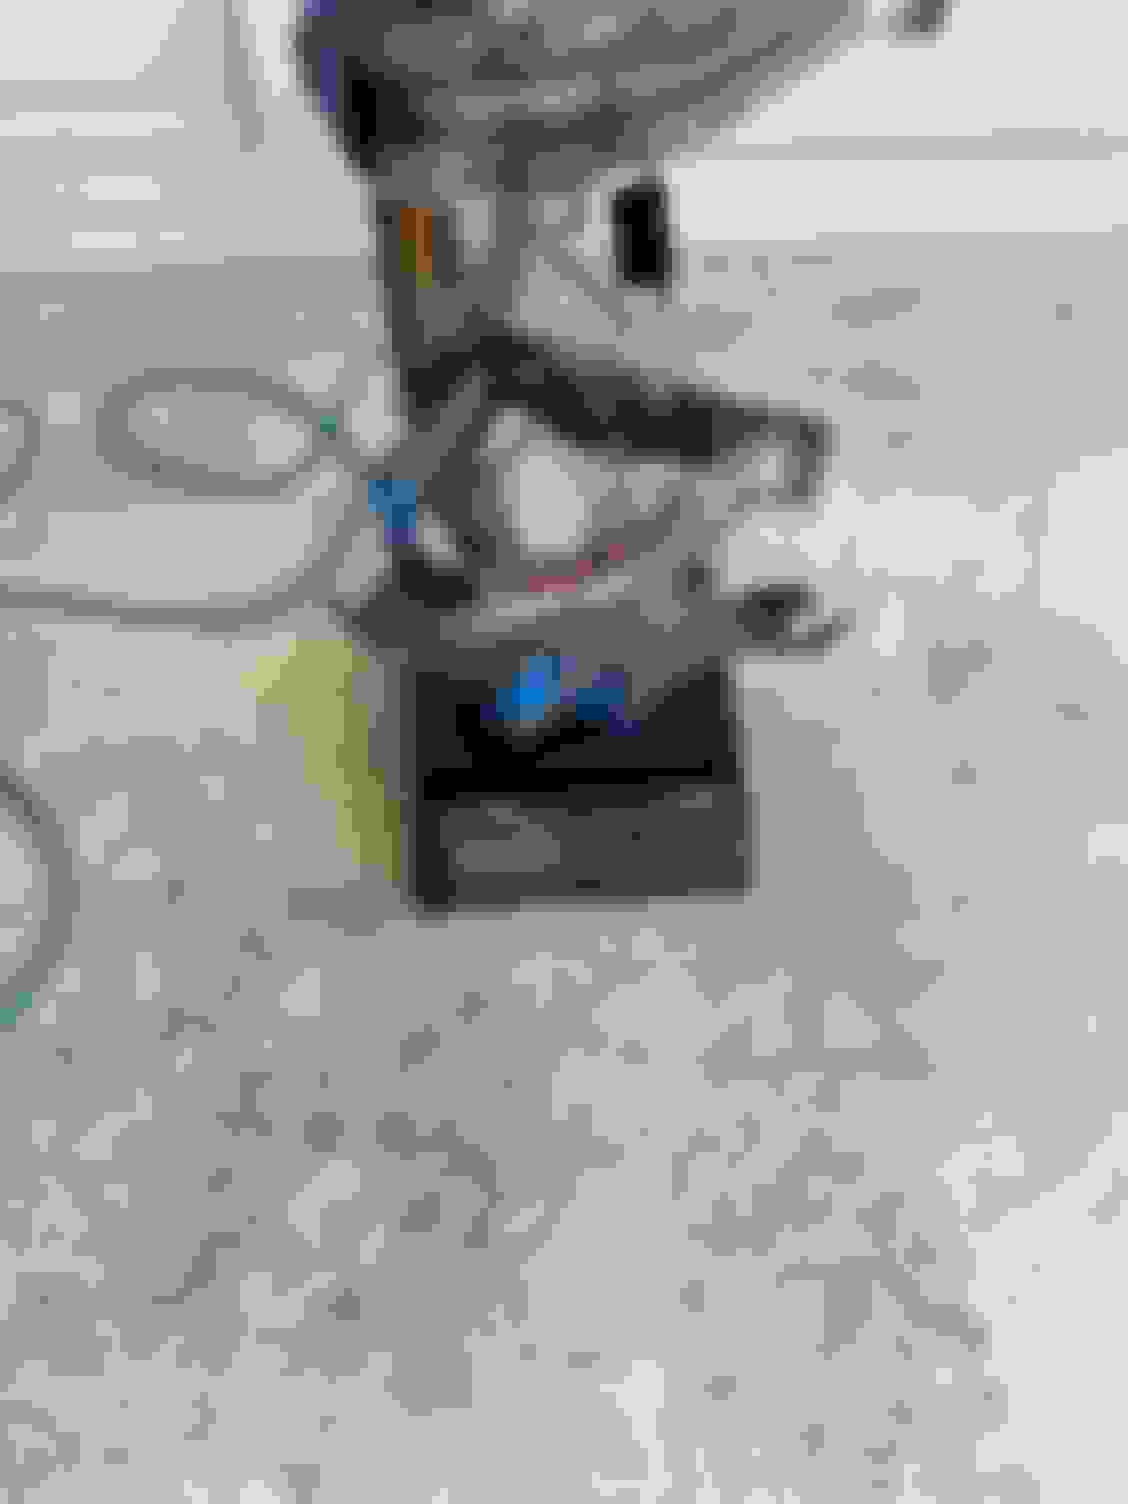
One thing I left off that I did before sticking the engine into the car, was taking the engine wiring harness and placing it on the engine & labeling every single connection. This has already helped me with the little bit of wiring work I've done already and I expect it to help me even more. I labeled anything that needs to be touched in "yellow" tape and everything else in blue. (best picture I could find of when I did this.)
With the engine in, I decided the next step would be to see if the Camaro exhaust pipes "stubs" I got with the engine would fit or not. I wasn't sure if I wanted to purchase the V8R exhaust pipes, modify the Camaro pipes, or buy the flanges from Keisler Automation and build my own. Since I already had the Camaro pipes, first step was to bolt them up and see if that was even an option. (Note: the exhaust manifold on the LFX is actually built into the head...so you use downpipes and not an exhaust header / manifold like typical cars.)
Previously when I first test fit the engine, the pipes wouldn't fit, but they still had the heat shields on them.
Picture of the downpipe stubs with the heat shields still attached. You can also see how the exhaust manifold is built into the head
This time, I cut off the heat shields and both barely would clear the sides of the engine bay. Unfortunately, they pointed directly at the subframe and would need to be modified / tucked in towards the engine.
This was actually a test fit before the engine was in the car...but better picture of the pipe without the heatshield & how it's pointing directly at the subframe.
Next, I went and tried installing the coolant pipe that goes from the back of the engine to the front. (think coolant reroute on a stock Miata) I saw one build where someone used it, and a couple where people did not. Goodlophaze also said it might work with an NB, but had issues with fitment on his NA. I figured I'd give it a try and see, since I already had it, and decide my next steps from there. The stock Camaro pipe almost works, it fits, but it's touching the side of the engine bay. It will need to be bent a little bit so there is some clearance for a little bit of engine movement.
This picture was taken a while afterwards, when I was trying to bend the pipe...thus why the paint is burnt off in the one area.
I also wanted to see how the steering column was going to fit with the downpipe on the drivers side, so I pulled it out of storage and just stuck it through the firewall for a quick fit...or should I say not fit. :-(
Oh wait ... I forgot the universal joint! Maybe that will allow it to fit. NOPE!
I was going to test fitment of the radiator next, but decided that needed to wait for now. I realized my next task needed to be installing the steering column. I consider the steering column a "bolder" (i.e. It's not moving, other stuff has to adjust / move around it) and it was time to install the steering column so I knew where things fit around it. Reinstalling the steering column sounds easy enough, but sent me down a rabbit hole of items that needed to be done first. (Dash modifications, steering column changes, & shifter install.)
Well, at least there's verification that stock camaro needs modification on the coolant pipe for NB - I think I have the cadillac PN in my thread somewhere. On the exhaust stuff - our exhaust stubs were a bit shorter and I extended them temporarily with flex pipe for first fire. After everything was semi-running, loaded it on a uhaul trailer down to exotic exhaust iirc (recommended by Enthuza) for fabrication (this is before we had learned tig welding - totally would've rolled our own nowdays). Passenger side just needs extending, and yeah, drivers side needs to hug the block more aggressively. Still, jealous of the extra NB space - in ours we have to remove exhaust bolts and studs for clearance to remove the pipes.
I'll go over it more here soon enough, I wasted too much time trying to make that coolant pipe work. Once I had the clearance sorted, I still had issues with the sway bar being in the way, with how the pipe pointed down at it, and there wasn't an elegant way to support the all that pipe going diagonally across the front of the engine. Ultimately, I ended up copying you and got the Caddy pipe & made modifications to that.
As far as the exhaust...First off, Thank you. Last night while writing this I kept using the word "stud" for "stub". (fixed now) Stud sort of felt wrong last night, but I couldn't think of a better word.
Also...Shoot me now...I got talked into building my own exhaust by a buddy. (I'm still working on it). I ended up cutting both stubs down to be much smaller and creating Frankenstien pipes from there. The drivers side will go in from the top without a problem, but the passenger side needs to go in via the bottom. Not sure if you ever noticed or not, but the engine isn't centered exactly, it sits maybe 3/4 of an inch closer towards the passenger side. (I believe for the steering rack clearance.) I also remove the exhaust nuts & studs to get the pipes on and off, I haven't tried leaving just the studs, mainly because the nuts are semi married to the stud and the whole thing threads in and out easily.
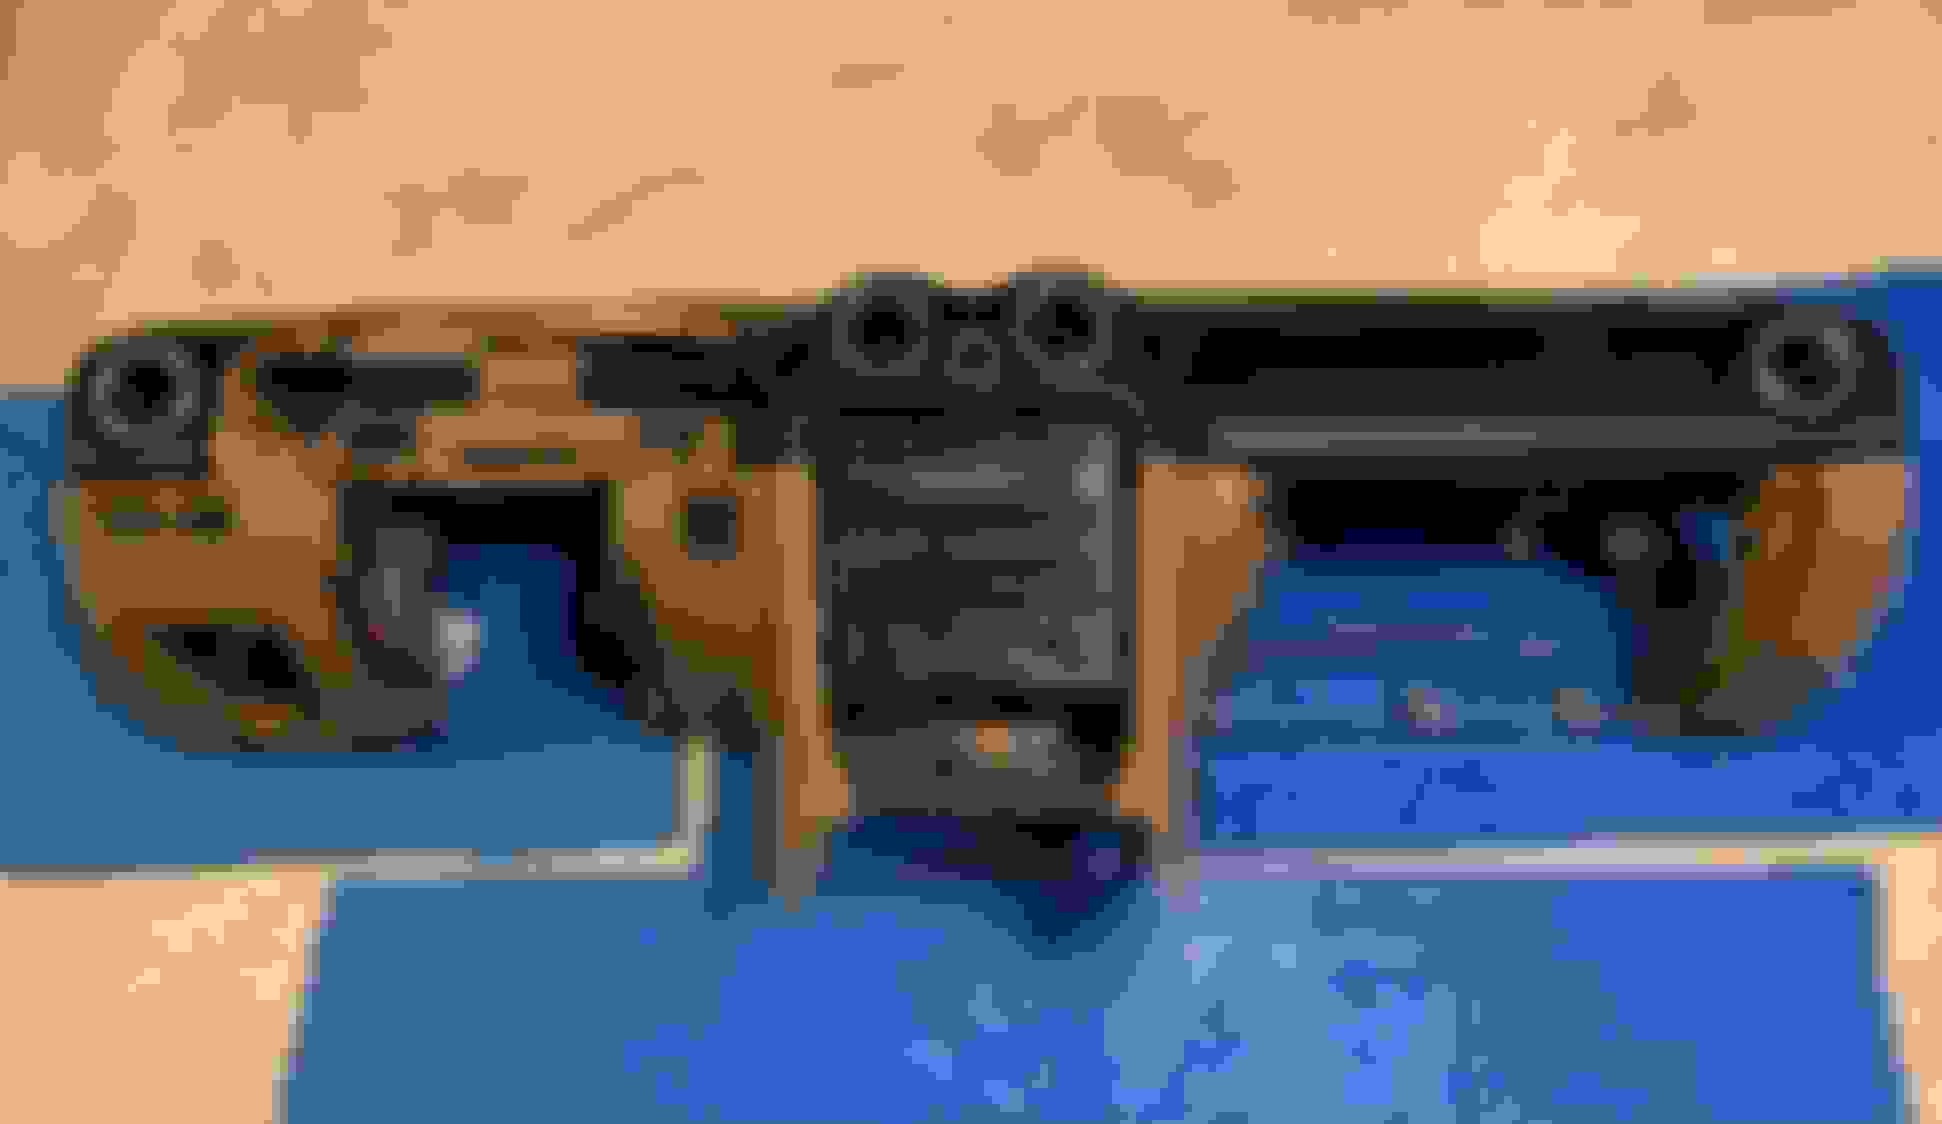
Since the goal was installing the steering column, I needed a way to support it in the car. Which meant the dash or at the very least the dash bar needed to be reinstalled. Of course I pulled the dash out as one big (heavy) piece and set it aside without touching it for the last year plus.
and all the **** behind it that needed to be removed...(sorry, not the best picture)
After pulling it all apart, I was left with the metal dash bar and the plastic outer shell.
I wasn't exactly sure what I wanted things to look like, so I tried a few different things. I tried removing just the very top of the dash (the black part) and just installing it. It looked flimsy and there was a good 1" strip across the top that didn't connect to the windshield.
Not the best picture, but you can see where it doesn't connect to the windshield if you look closely.
I didn't like the flimsy and the "holes" but I did like the minimalist look, and decided to cut off the bottom of the dash, and keep the top for the same look. I also realized that I could just keep the middle section (the NB tombstone if you will) and use it for all my switches verses building a panel. So...I put blue tape everywhere that I was going to cut to give myself an idea.
I realized the bar had a bunch of extra metal, so I also installed it and marked all the pieces I wanted to cut off.
I weighed the bar before cutting it. It was 14.9 lbs
I also weighed the plastic dash before cutting it down. It was 12.86 lbs (I missed adding the instrument hood in this weigh in)
After letting the sparks fly and cutting all the crap off the bar, I was down to 9.9lbs. 1/3 of it's weight removed, not bad
I cut all that bottom section of plastic off the dash, and removed a bunch of plastic from the cover of the passenger side airbag. (that's a pain to "pry" off the airbag, but it can be done.)
I used the coping saw to cut most of it off & to smooth the rough edges out, I used a palm sander.
You have to pry the air bag cover off those 7 little hooks...it wasn't as easy as you would have thought. I don't have pictures of it, but I cut a bunch of the plastic on the back of the airbag cover off too.
After all the cutting, I put it together and was at 20.9 lbs. (I had the hood this time, but was missing the little center console piece that I had purchased used from a MiataTurbo member.)
Here's the shorty center console piece that I bought used. It's a 3d printed end cap that was glued on. It's not perfect, but looks good for race car.
I test fit it all one more time...and I liked the look, although hate the tan 90's leather color.
So out came the plastic paint / dye. I tested a few scrap pieces that I had left from cutting the dash bottom off. In Krylon's (and as you will see, Rust-oleum's) defense, all 3 of these cans are old. I'd guess around 10 years. BTW...if you are going to paint / dye your plastic. Make certain it's SUPER CLEAN or else you will have fisheyes really bad.
Anyway, the Rust-oleum was close enough to the dash color, so I sprayed dash with it. It was late at night, so I sprayed things in the dark a bunch of times. It seemed like I was having a hard time getting coverage.
The next day showed me why...for some reason the paint started to turn grey / streaky.
The original test piece I painted was black, compared to other pieces I painted later in the night.
So off to the store to buy some more paint. I picked up some duplicolor and things came out great.
I also painted the dash bar on my back porch paint booth...you can see how much metal I removed in this picture.
Here's the look all back together. (with a sneak peak of the shifter & steering column done too)
For the center section (where the radio & such use to live) I'm going to cover that up with either some plastic or aluminum and put all my switches there. I'm really happy with how this came out. It's a clean look, without any "race holes" and weighs less than 23 lbs. Still need to remove those door panels and figure that out..but that's for another day.


 0
0