Love It Or Hate It - Another Exocet Build in Tampa
 10-03-2018, 09:46 AM
#123
Moderator


iTrader: (12)
Join Date: Nov 2008
Location: Tampa, Florida
Posts: 20,660
Total Cats: 3,011
It's much more important that it's distinct and recognizable, and yours is. Too many here are a year and the word Miata and they all blend together. Or letter/number combos that mean nothing to the rest of us.

Reply
 0
0

0
10-03-2018, 10:47 PM
#126
Junior Member
Join Date: Aug 2009
Location: Lakewood (Green Mountain) CO.
Posts: 250
Total Cats: -63
Darn it. Can't believe that I was in Tampa until May, and I missed the thread and your assembly!
I just drove an Exocet here in Boulder, oh was that a blast, and it wasn't even turbo yet!
COngrats on the great work, I'll PM you when I'm back in Tampa to see it in person.
I just drove an Exocet here in Boulder, oh was that a blast, and it wasn't even turbo yet!
COngrats on the great work, I'll PM you when I'm back in Tampa to see it in person.
Reply
0
0
10-04-2018, 08:13 AM
#127
Junior Member
Thread Starter

Join Date: Jan 2018
Location: Tampa, Fl
Posts: 227
Total Cats: 25
Darn it. Can't believe that I was in Tampa until May, and I missed the thread and your assembly!
I just drove an Exocet here in Boulder, oh was that a blast, and it wasn't even turbo yet!
COngrats on the great work, I'll PM you when I'm back in Tampa to see it in person.
I just drove an Exocet here in Boulder, oh was that a blast, and it wasn't even turbo yet!
COngrats on the great work, I'll PM you when I'm back in Tampa to see it in person.
Reply
0
0
10-04-2018, 10:27 AM
#128
Junior Member
Join Date: Aug 2009
Location: Lakewood (Green Mountain) CO.
Posts: 250
Total Cats: -63
There wasn't much to see back in May besides parts crammed in every corner of my garage. Next time you're around I should have something better to look at. Good ol' Colorado. I lived in Aurora for a couple years out of high school. LOVED IT. I miss skiing for sure. Don't miss the cold weather though. I'm right where I need to be in Tampa. Look me up when you're in town.
For sure, I'll PM you when I'm back in the 813!
Reply
0
0
01-07-2019, 03:24 PM
#130
Junior Member
Thread Starter
Join Date: Jan 2018
Location: Tampa, Fl
Posts: 227
Total Cats: 25
I can't believe it's been three months since I've updated on here but work, family, and the holidays all conspired to keep me from doing much work on the Exocet.
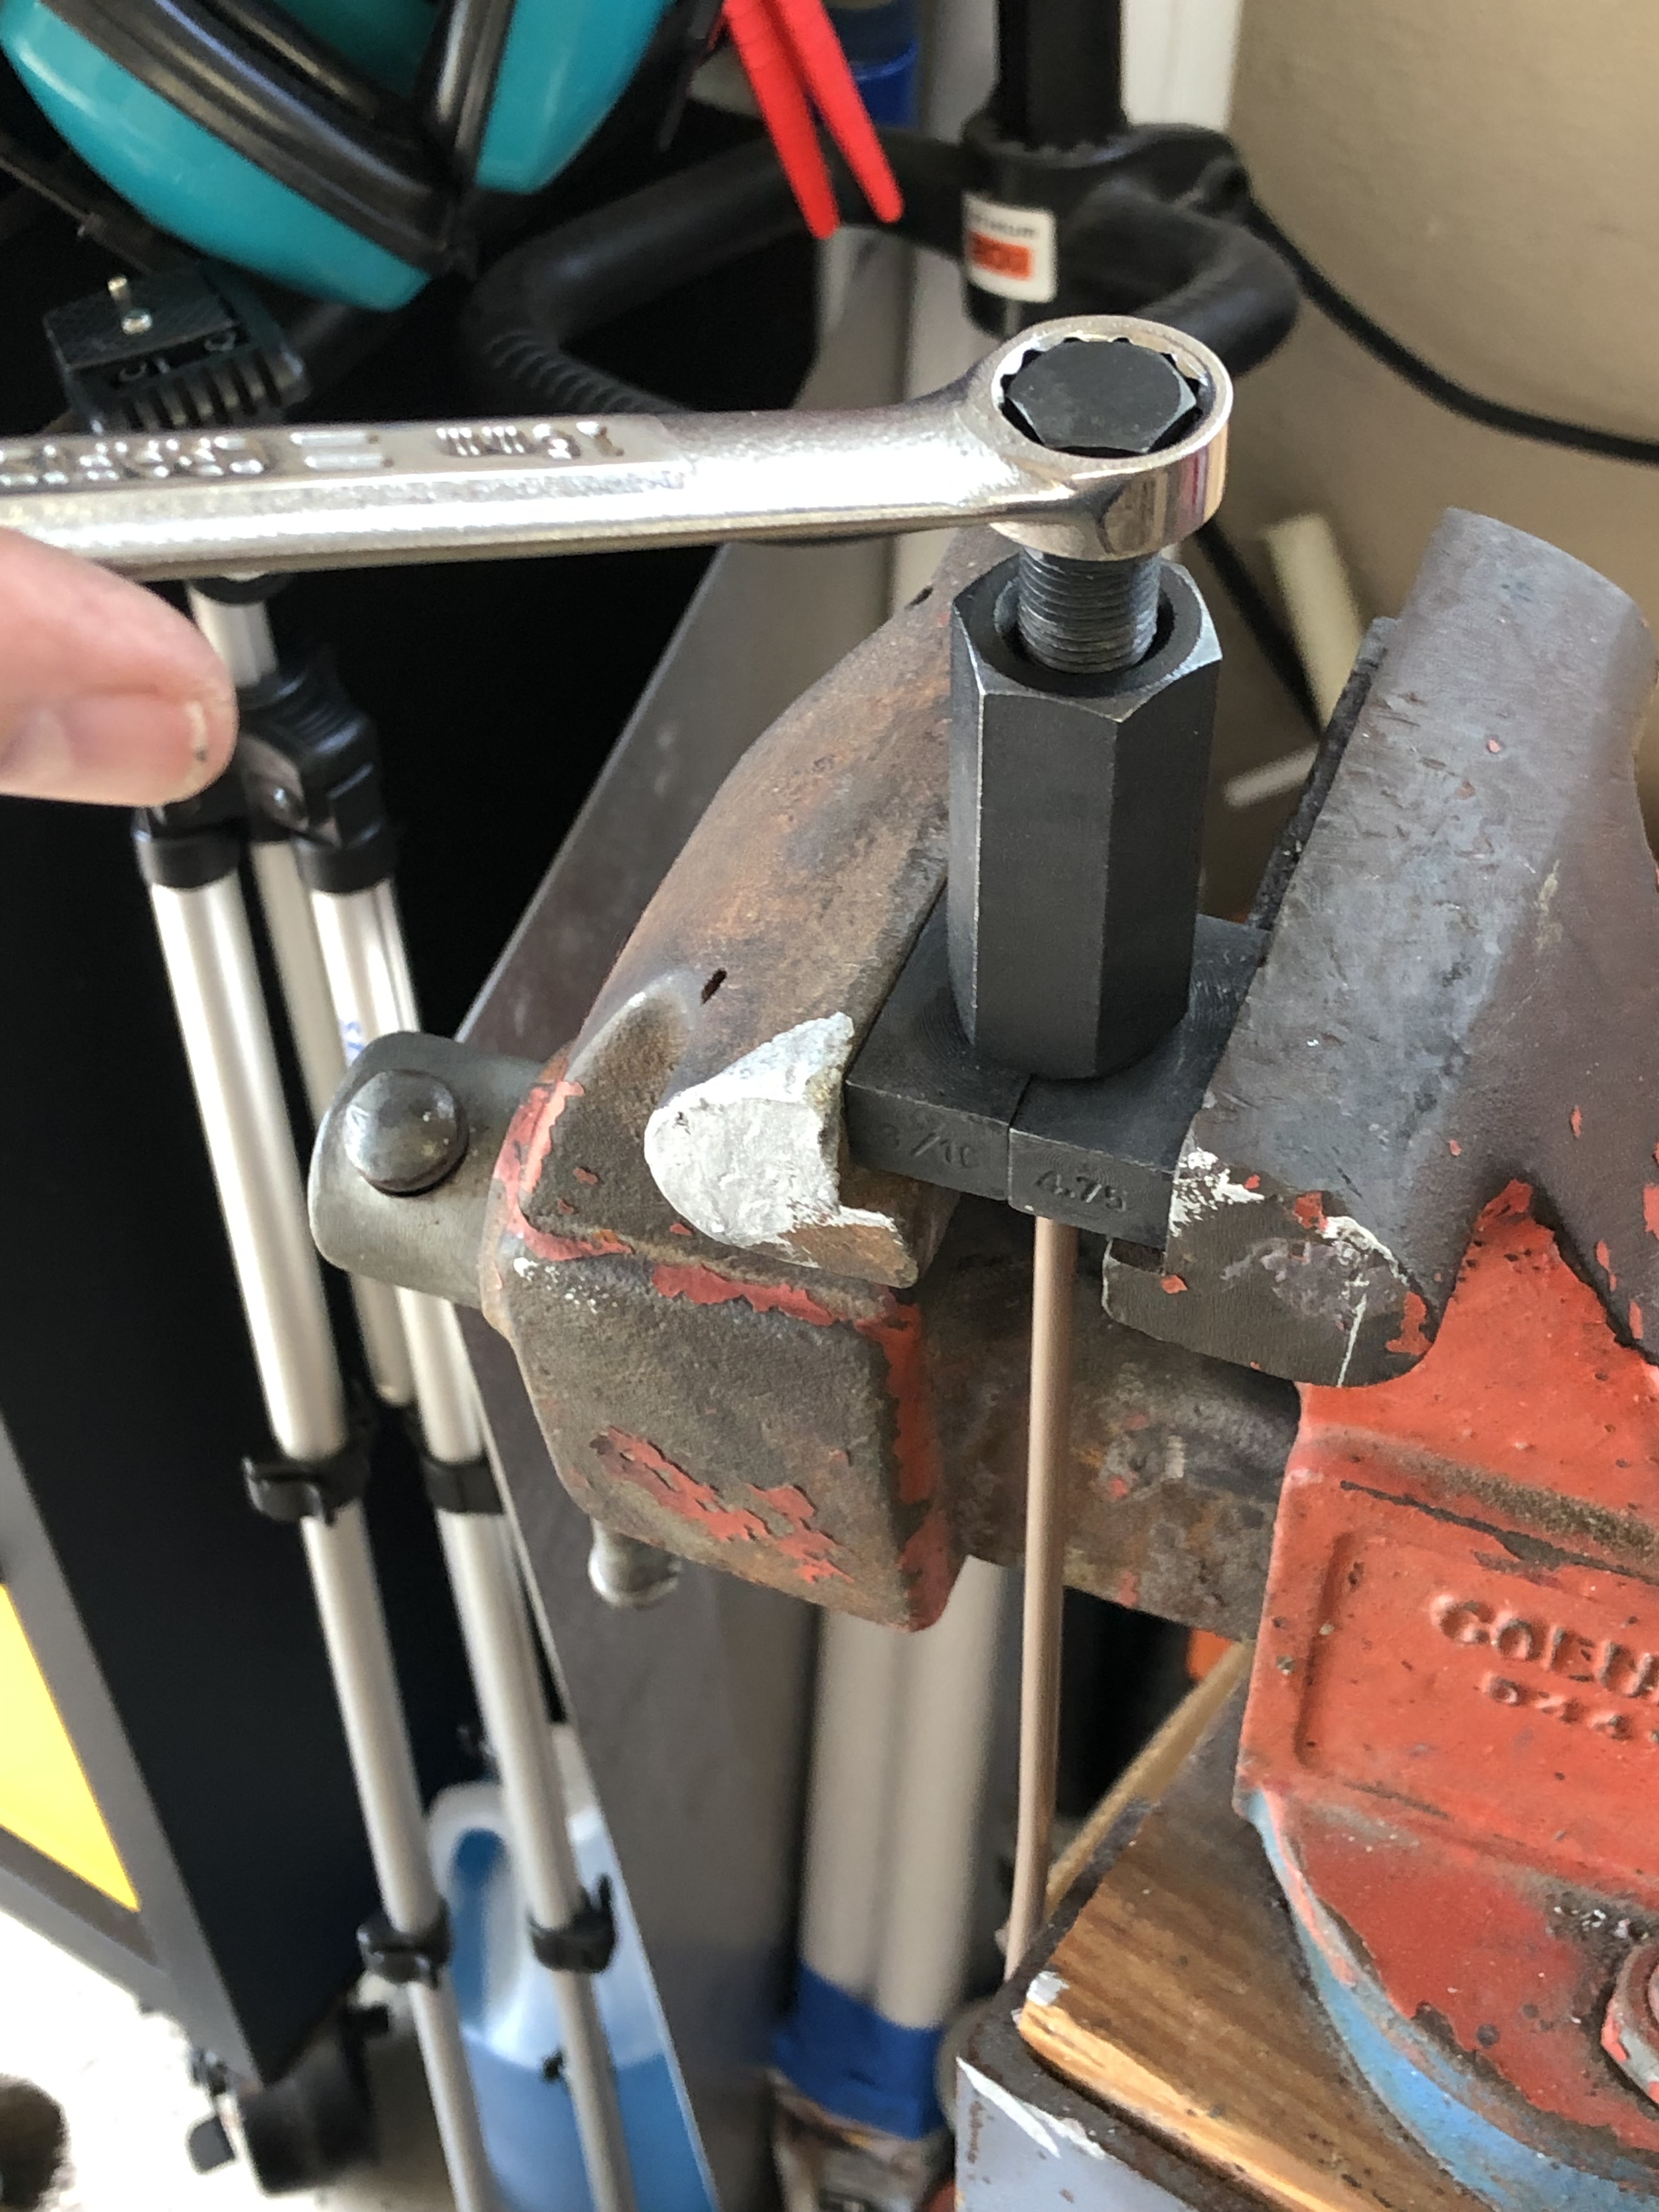
I finally gave in and bought the fuel line kit from Exomotive to make my life easier. I now have the fuel lines ran and hooked up. I kind of wish I had waited because now that I'm doing the brake lines I'm realizing I could have saved a lot of money and just ran hard lines for everything. I was nervous about making my own lines from everything I've read. I bought a flare kit off Amazon and I have to say it's a lot easier than I was led to believe.
I'm sure there have been many write ups on how to make a double flare with a cheapo flare kit but here's my experience:
Start by making sure there is a nice chamfered edge on the outside and inside of the tube
I took the jaws out of my vise for the clamping tool to rest nice and tight in the jaws
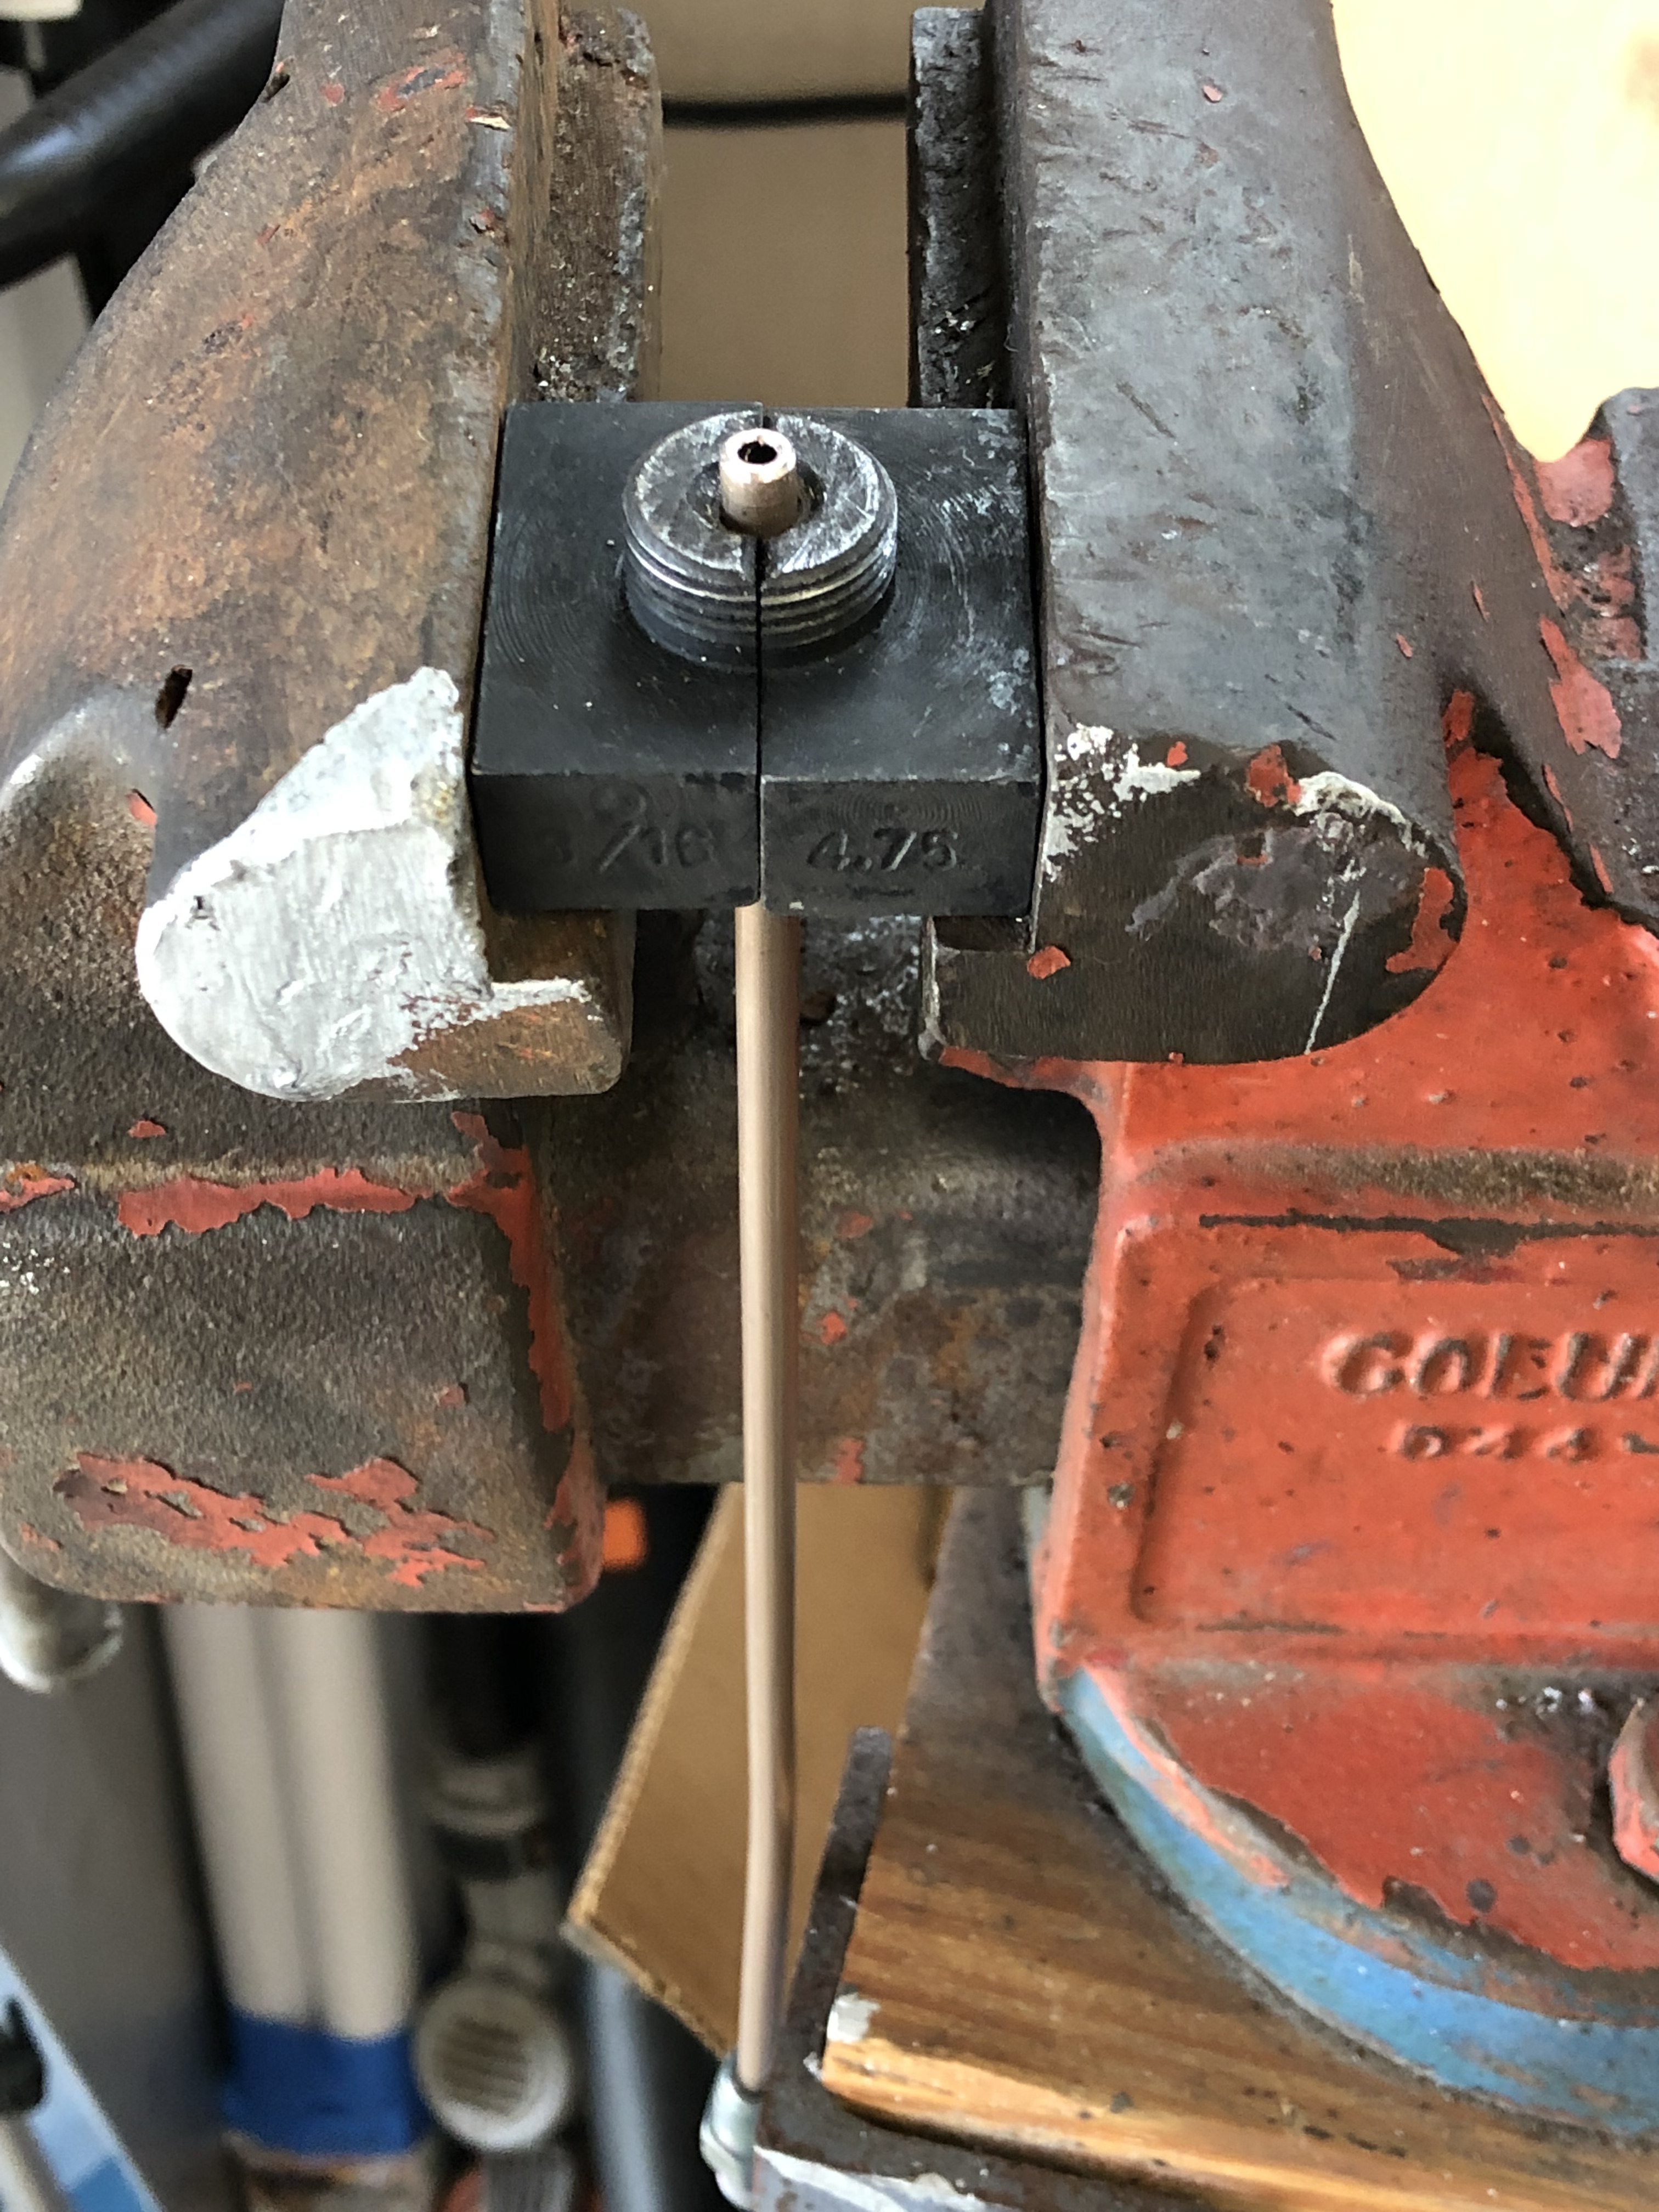
Insert the correct flaring tool into the tube
Screw the anvil holder onto the clamp until it is snug. No need to over tighten this at all.
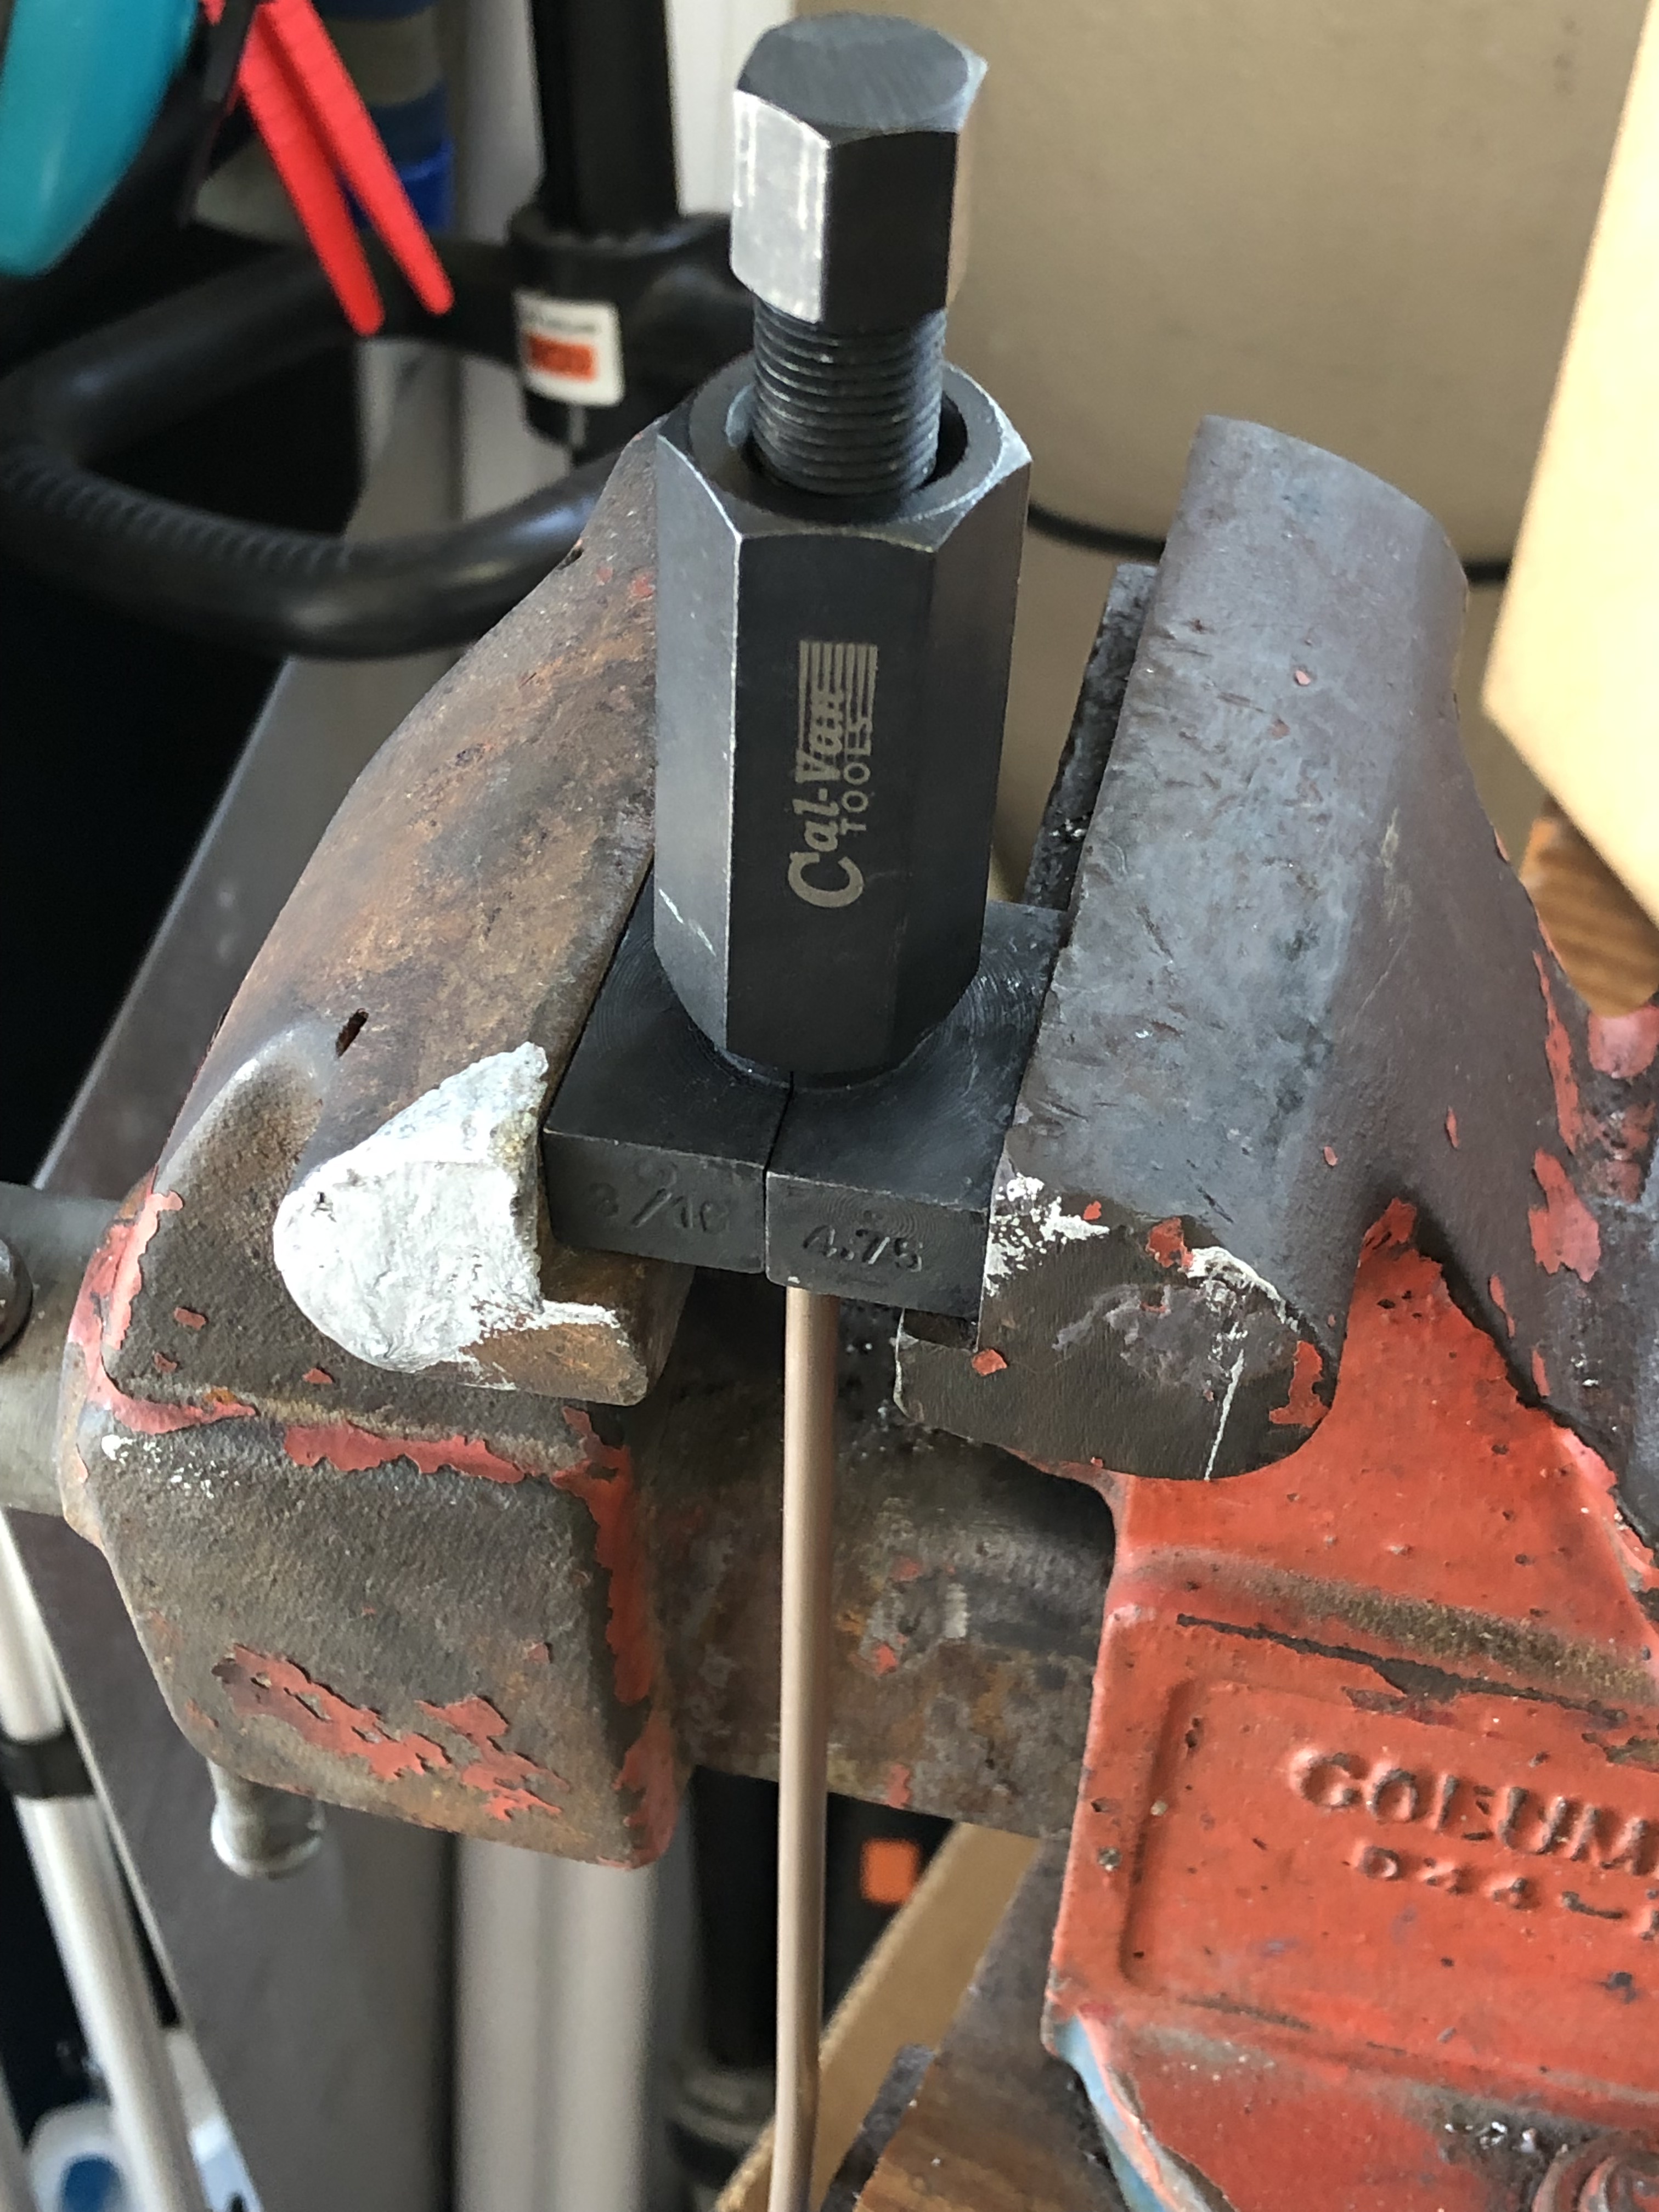
Now screw the anvil down until it bottoms out. You'll feel the resistance once the anvil reaches the bottom. Again, no need to wrench on this extremely hard.
Remove the flaring tool and you'll end up with a nice bubble flare something like this
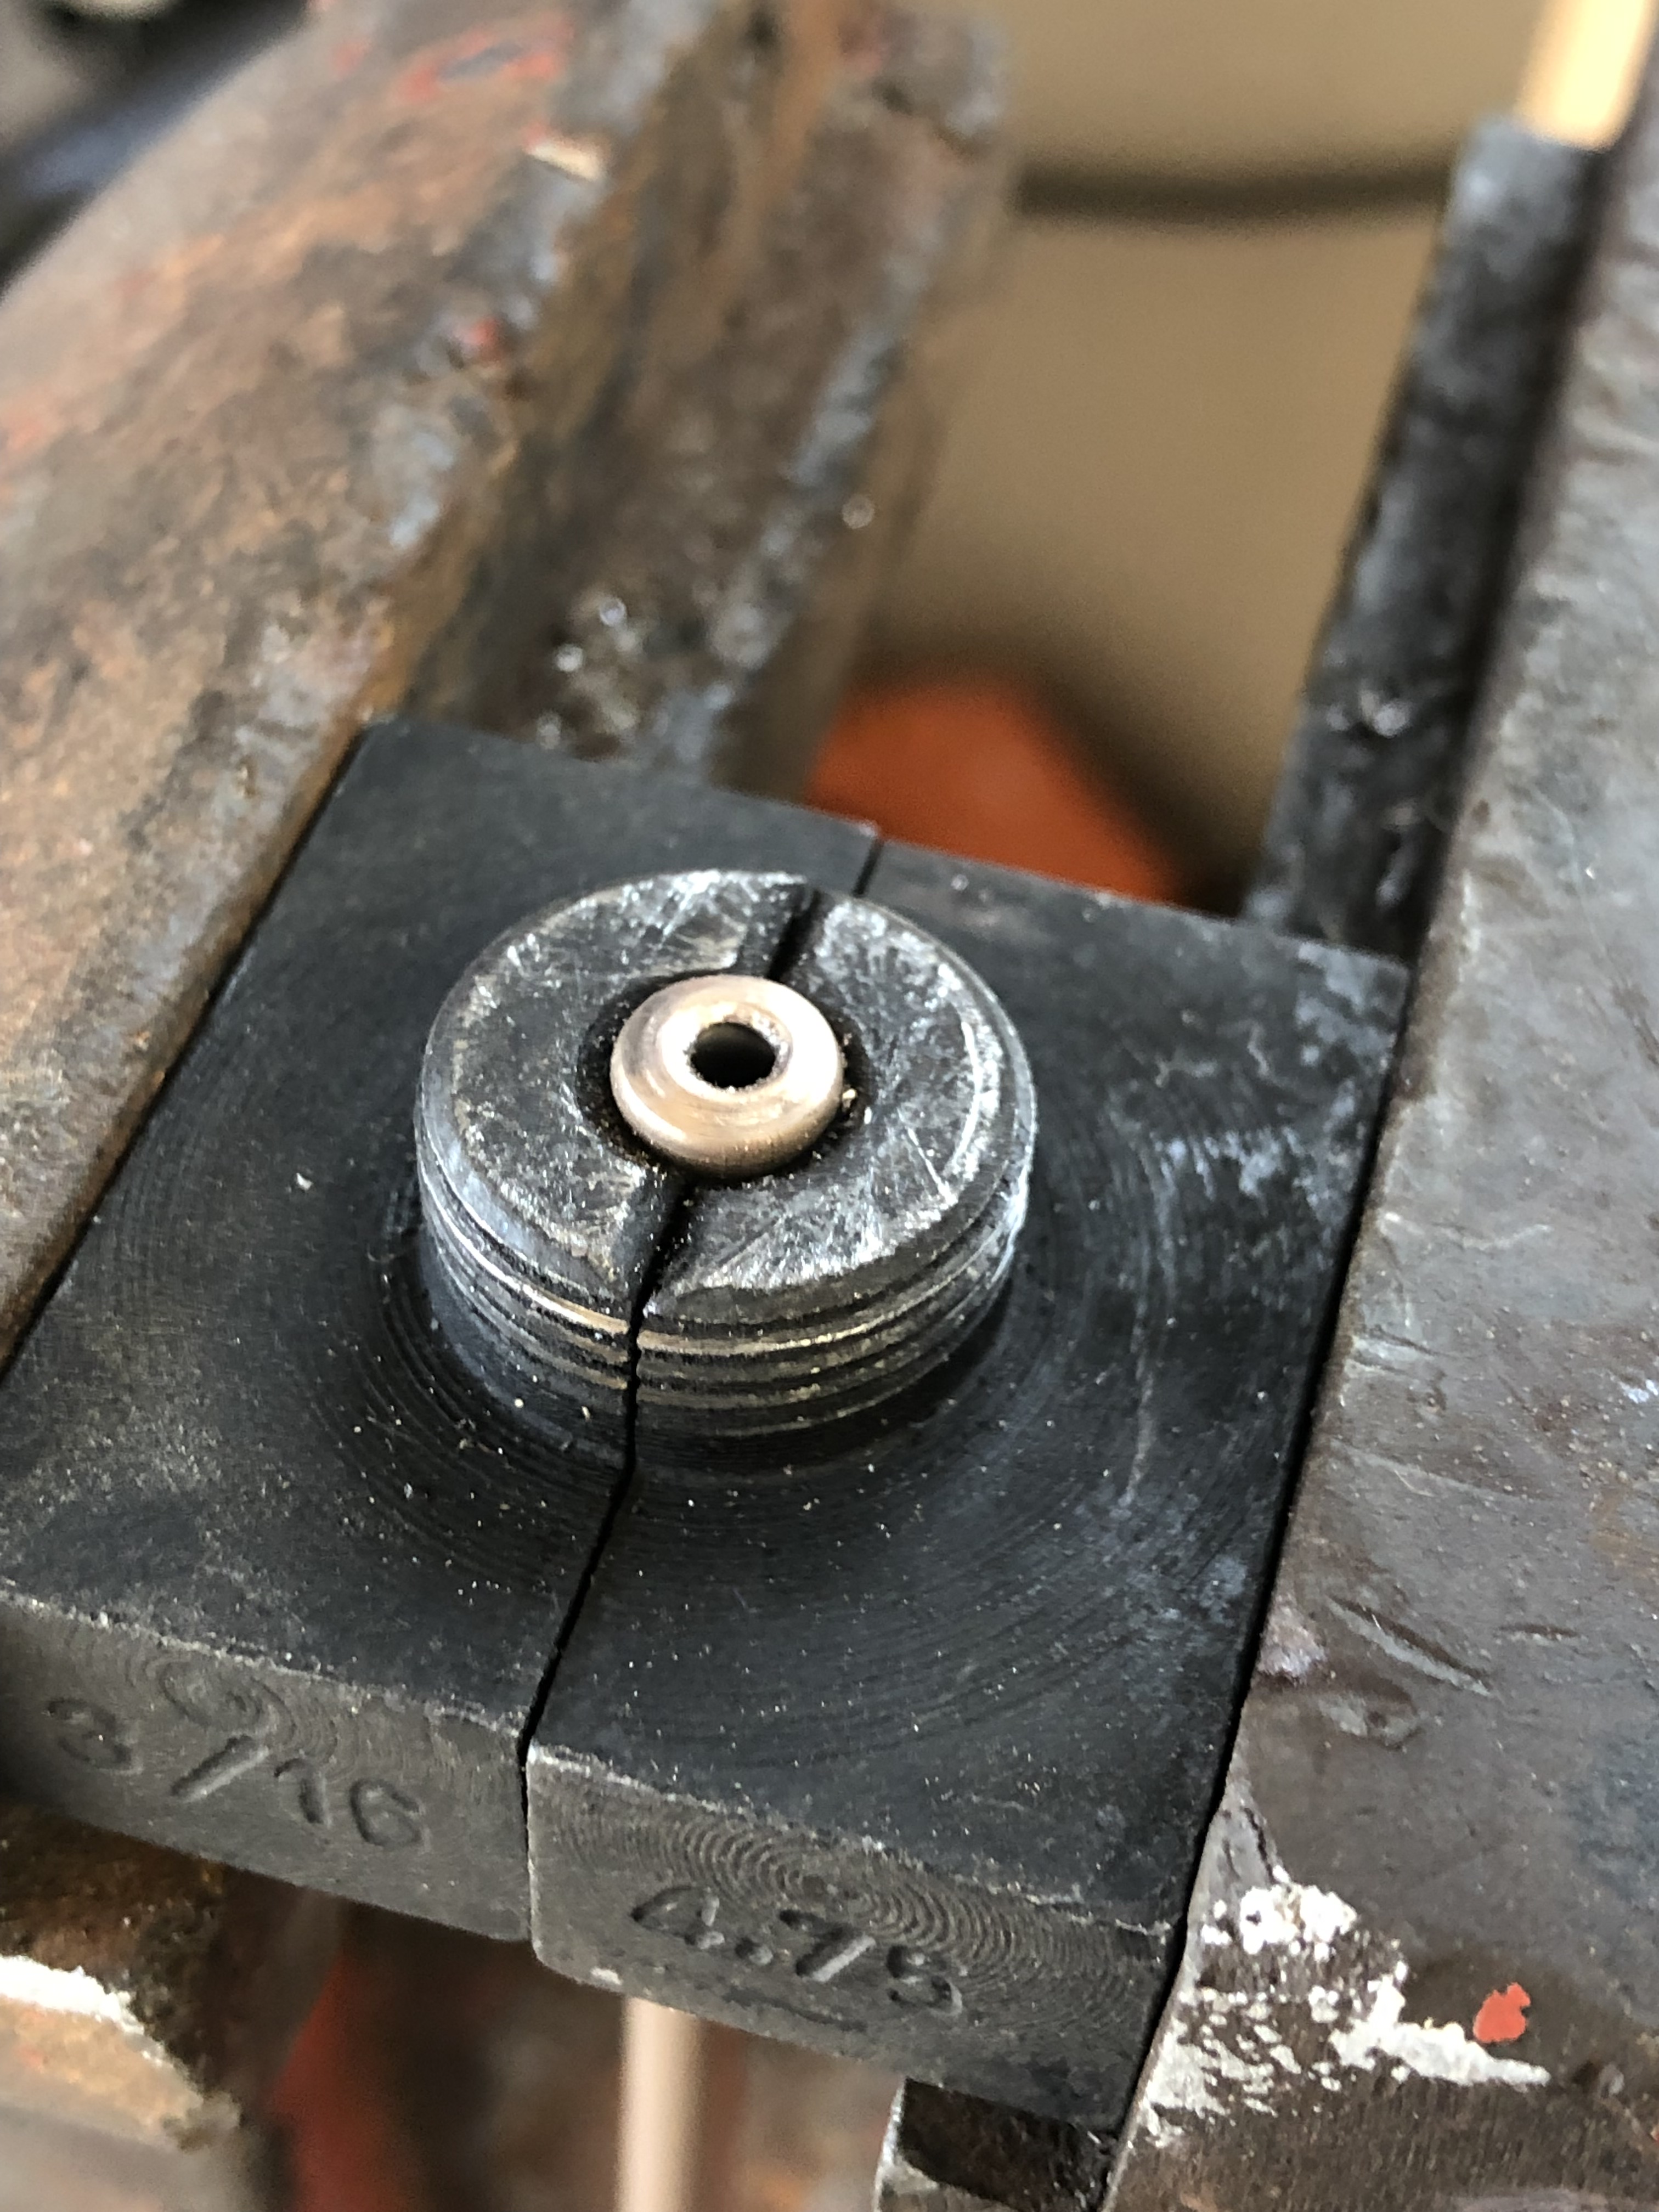
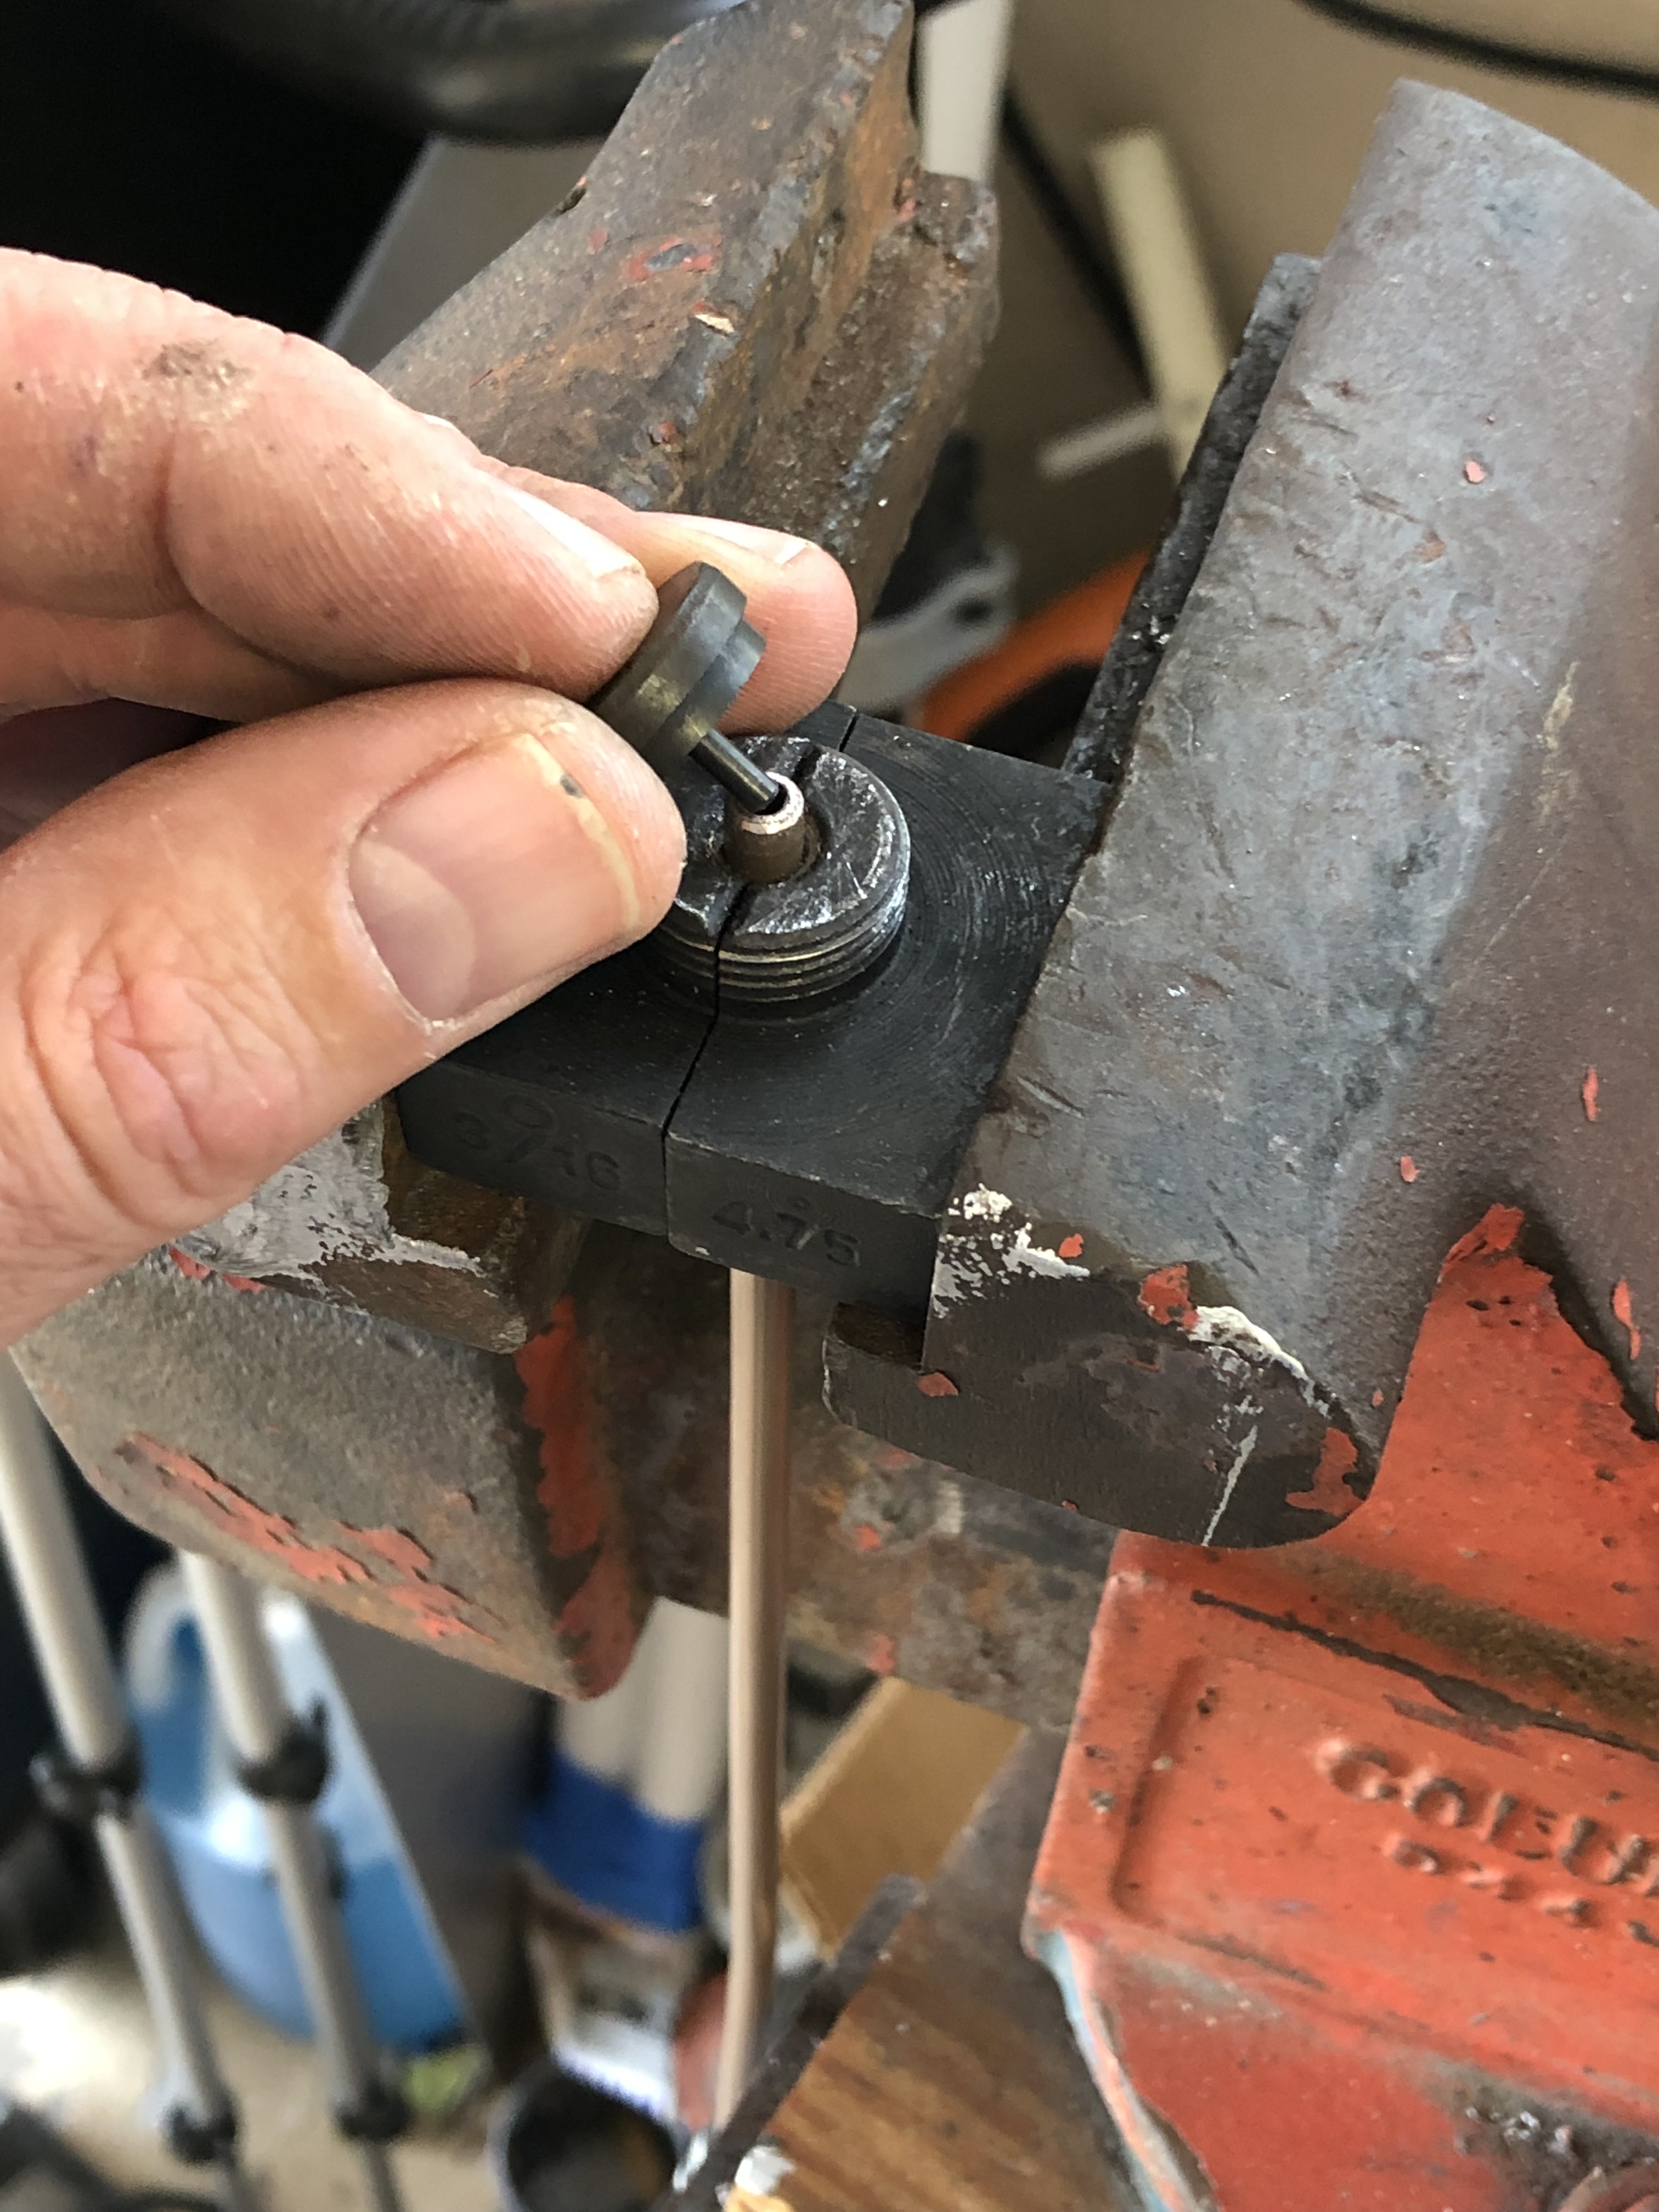
Remove the flaring tool from the center of the tube and reinstall the anvil. You need to screw down the anvil one more time to create the double flare. Screw the anvil down until there is heavy resistance. If you screw too tight the out side of the flare will be thin. If you screw too loose it will not give you the proper depth of angle for the double flare. It's a matter of feel but it's really not that difficult. Remove the anvil and you should have something like this
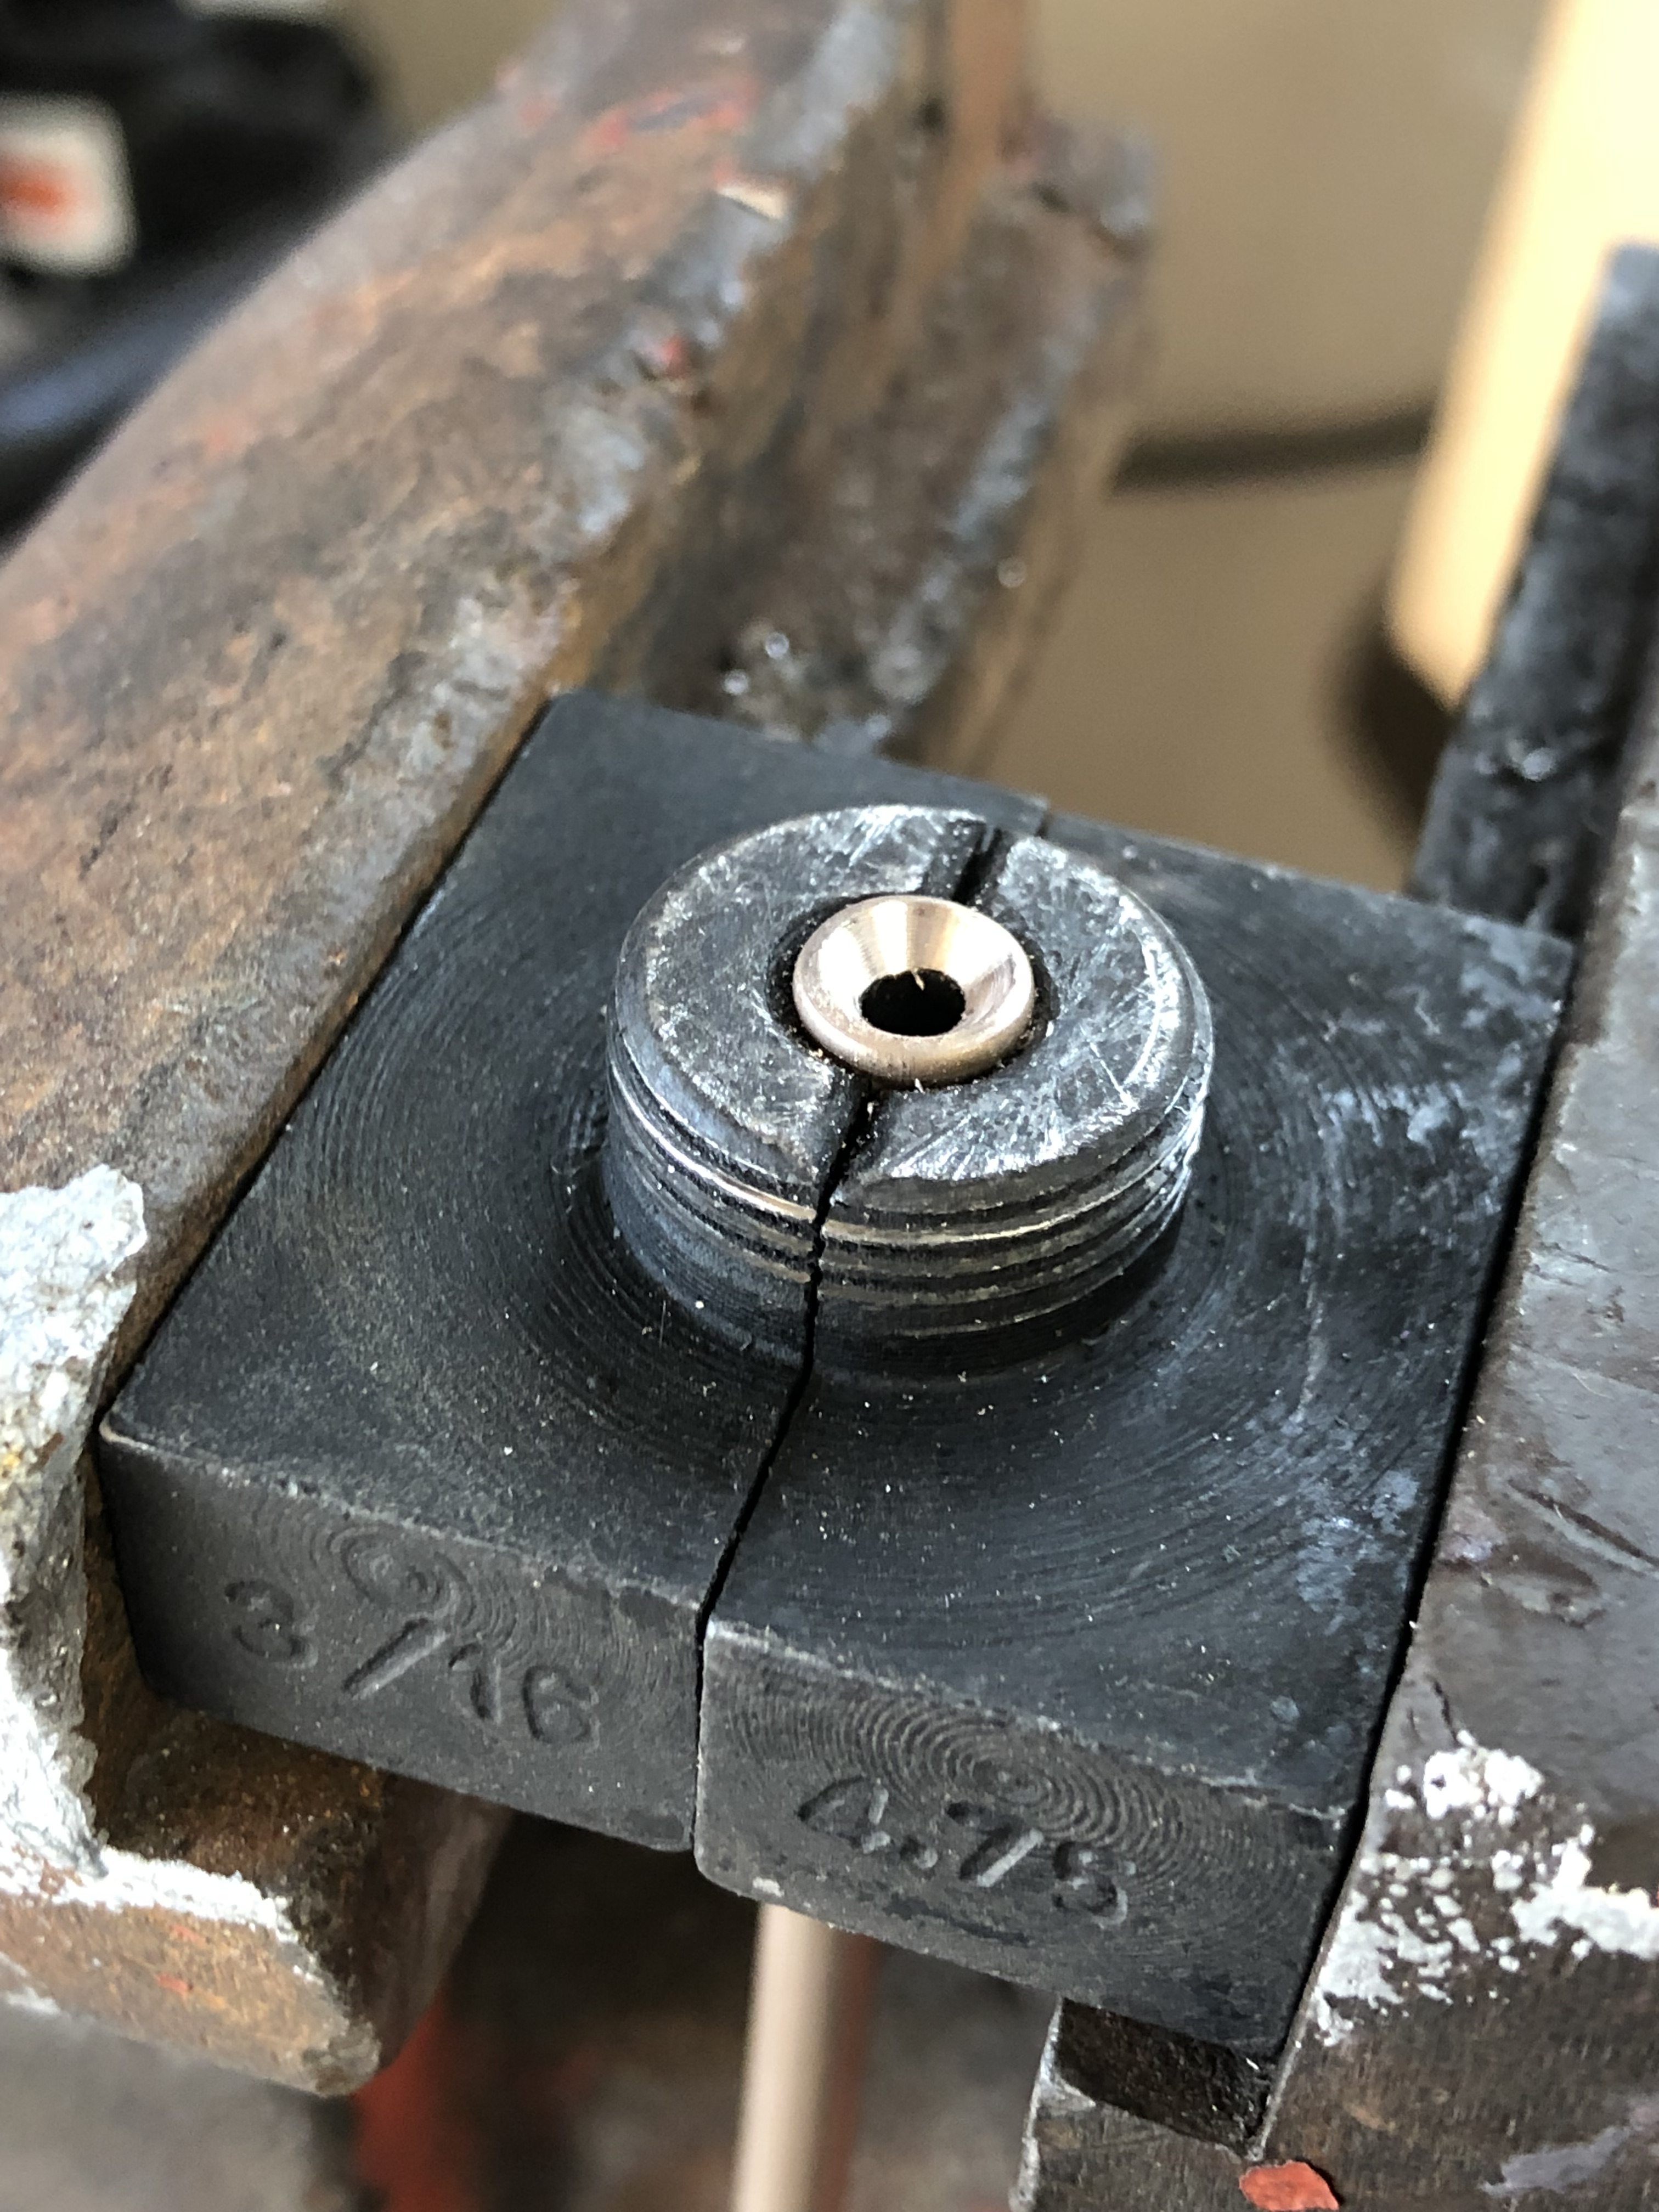
There will be some clamp marks around the tube but it's not a problem
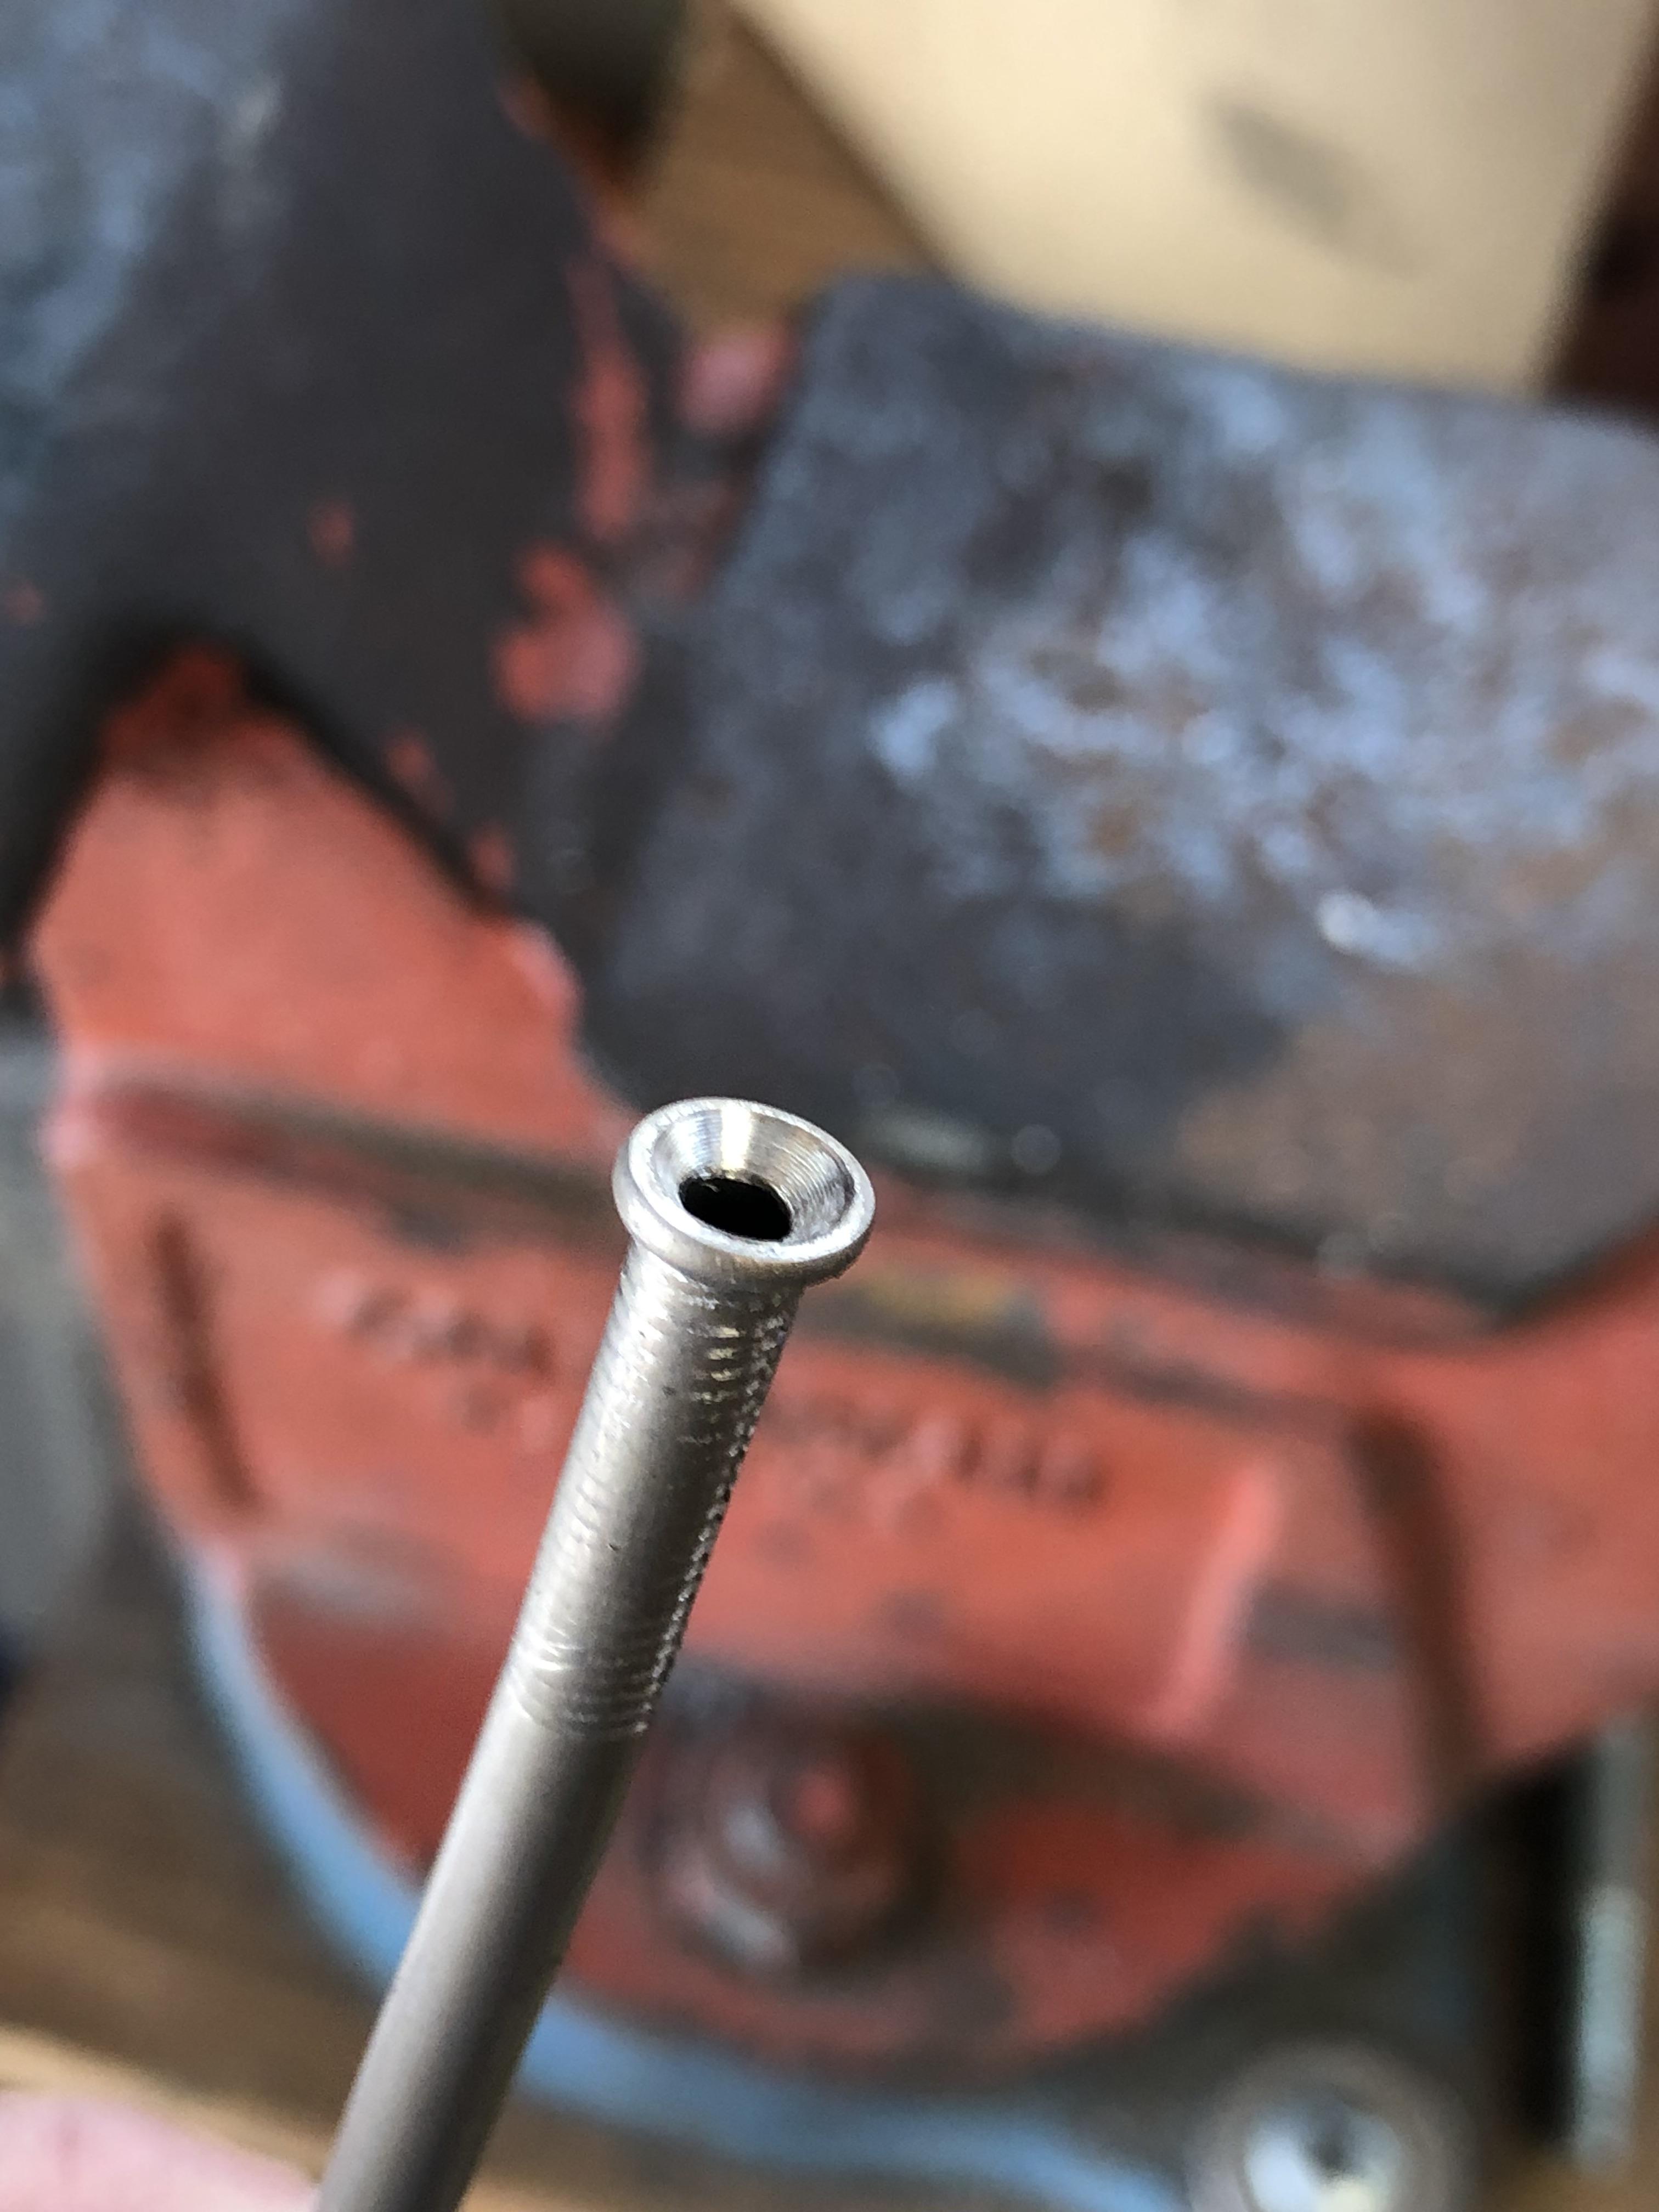
Every flare has been consistent and centered for me and it's a relatively easy process.
Hope this helps anybody considering doing this yourself.
I finally gave in and bought the fuel line kit from Exomotive to make my life easier. I now have the fuel lines ran and hooked up. I kind of wish I had waited because now that I'm doing the brake lines I'm realizing I could have saved a lot of money and just ran hard lines for everything. I was nervous about making my own lines from everything I've read. I bought a flare kit off Amazon and I have to say it's a lot easier than I was led to believe.
I'm sure there have been many write ups on how to make a double flare with a cheapo flare kit but here's my experience:
Start by making sure there is a nice chamfered edge on the outside and inside of the tube
I took the jaws out of my vise for the clamping tool to rest nice and tight in the jaws
Insert the correct flaring tool into the tube
Screw the anvil holder onto the clamp until it is snug. No need to over tighten this at all.
Now screw the anvil down until it bottoms out. You'll feel the resistance once the anvil reaches the bottom. Again, no need to wrench on this extremely hard.
Remove the flaring tool and you'll end up with a nice bubble flare something like this
Remove the flaring tool from the center of the tube and reinstall the anvil. You need to screw down the anvil one more time to create the double flare. Screw the anvil down until there is heavy resistance. If you screw too tight the out side of the flare will be thin. If you screw too loose it will not give you the proper depth of angle for the double flare. It's a matter of feel but it's really not that difficult. Remove the anvil and you should have something like this
There will be some clamp marks around the tube but it's not a problem
Every flare has been consistent and centered for me and it's a relatively easy process.
Hope this helps anybody considering doing this yourself.
Reply
1
1
01-07-2019, 03:36 PM
#131
Senior Member

Join Date: May 2017
Location: Austin, TX
Posts: 1,119
Total Cats: 166
For 15x10's, exomotive now sells wheels with the proper offsets so no spacers are needed.
Exomotive - US Manufacturer of Exocars & Kit Cars | Japan Racing JR19 Wheels
Any plans on going turbo? I have an exocet 1.8 FMII turbo setup with low miles (~4k) I'll be parting with soon since I'm going LFX. Has a custom enthuzacar exhaust as well. Put down 250+ to the wheels and it is nuts. Hit me up if you are interested. Would like to see the setup go to another exocet since some of the parts are exocet specific.
Edit: nvm, saw you already had the turbo parts.
Reply
0
0
 01-07-2019, 04:17 PM
#133
Junior Member
Thread Starter
Join Date: Jan 2018
Location: Tampa, Fl
Posts: 227
Total Cats: 25
HAHAHAHA!
Nothing really new except some new shoes.
I have a new set of 15x9 0 offset MST MT11's on 225/45 Hankook RS3's
and a almost new set of 15x8 +25 offset Konig Dial In's on another set of 225/45 RS3's
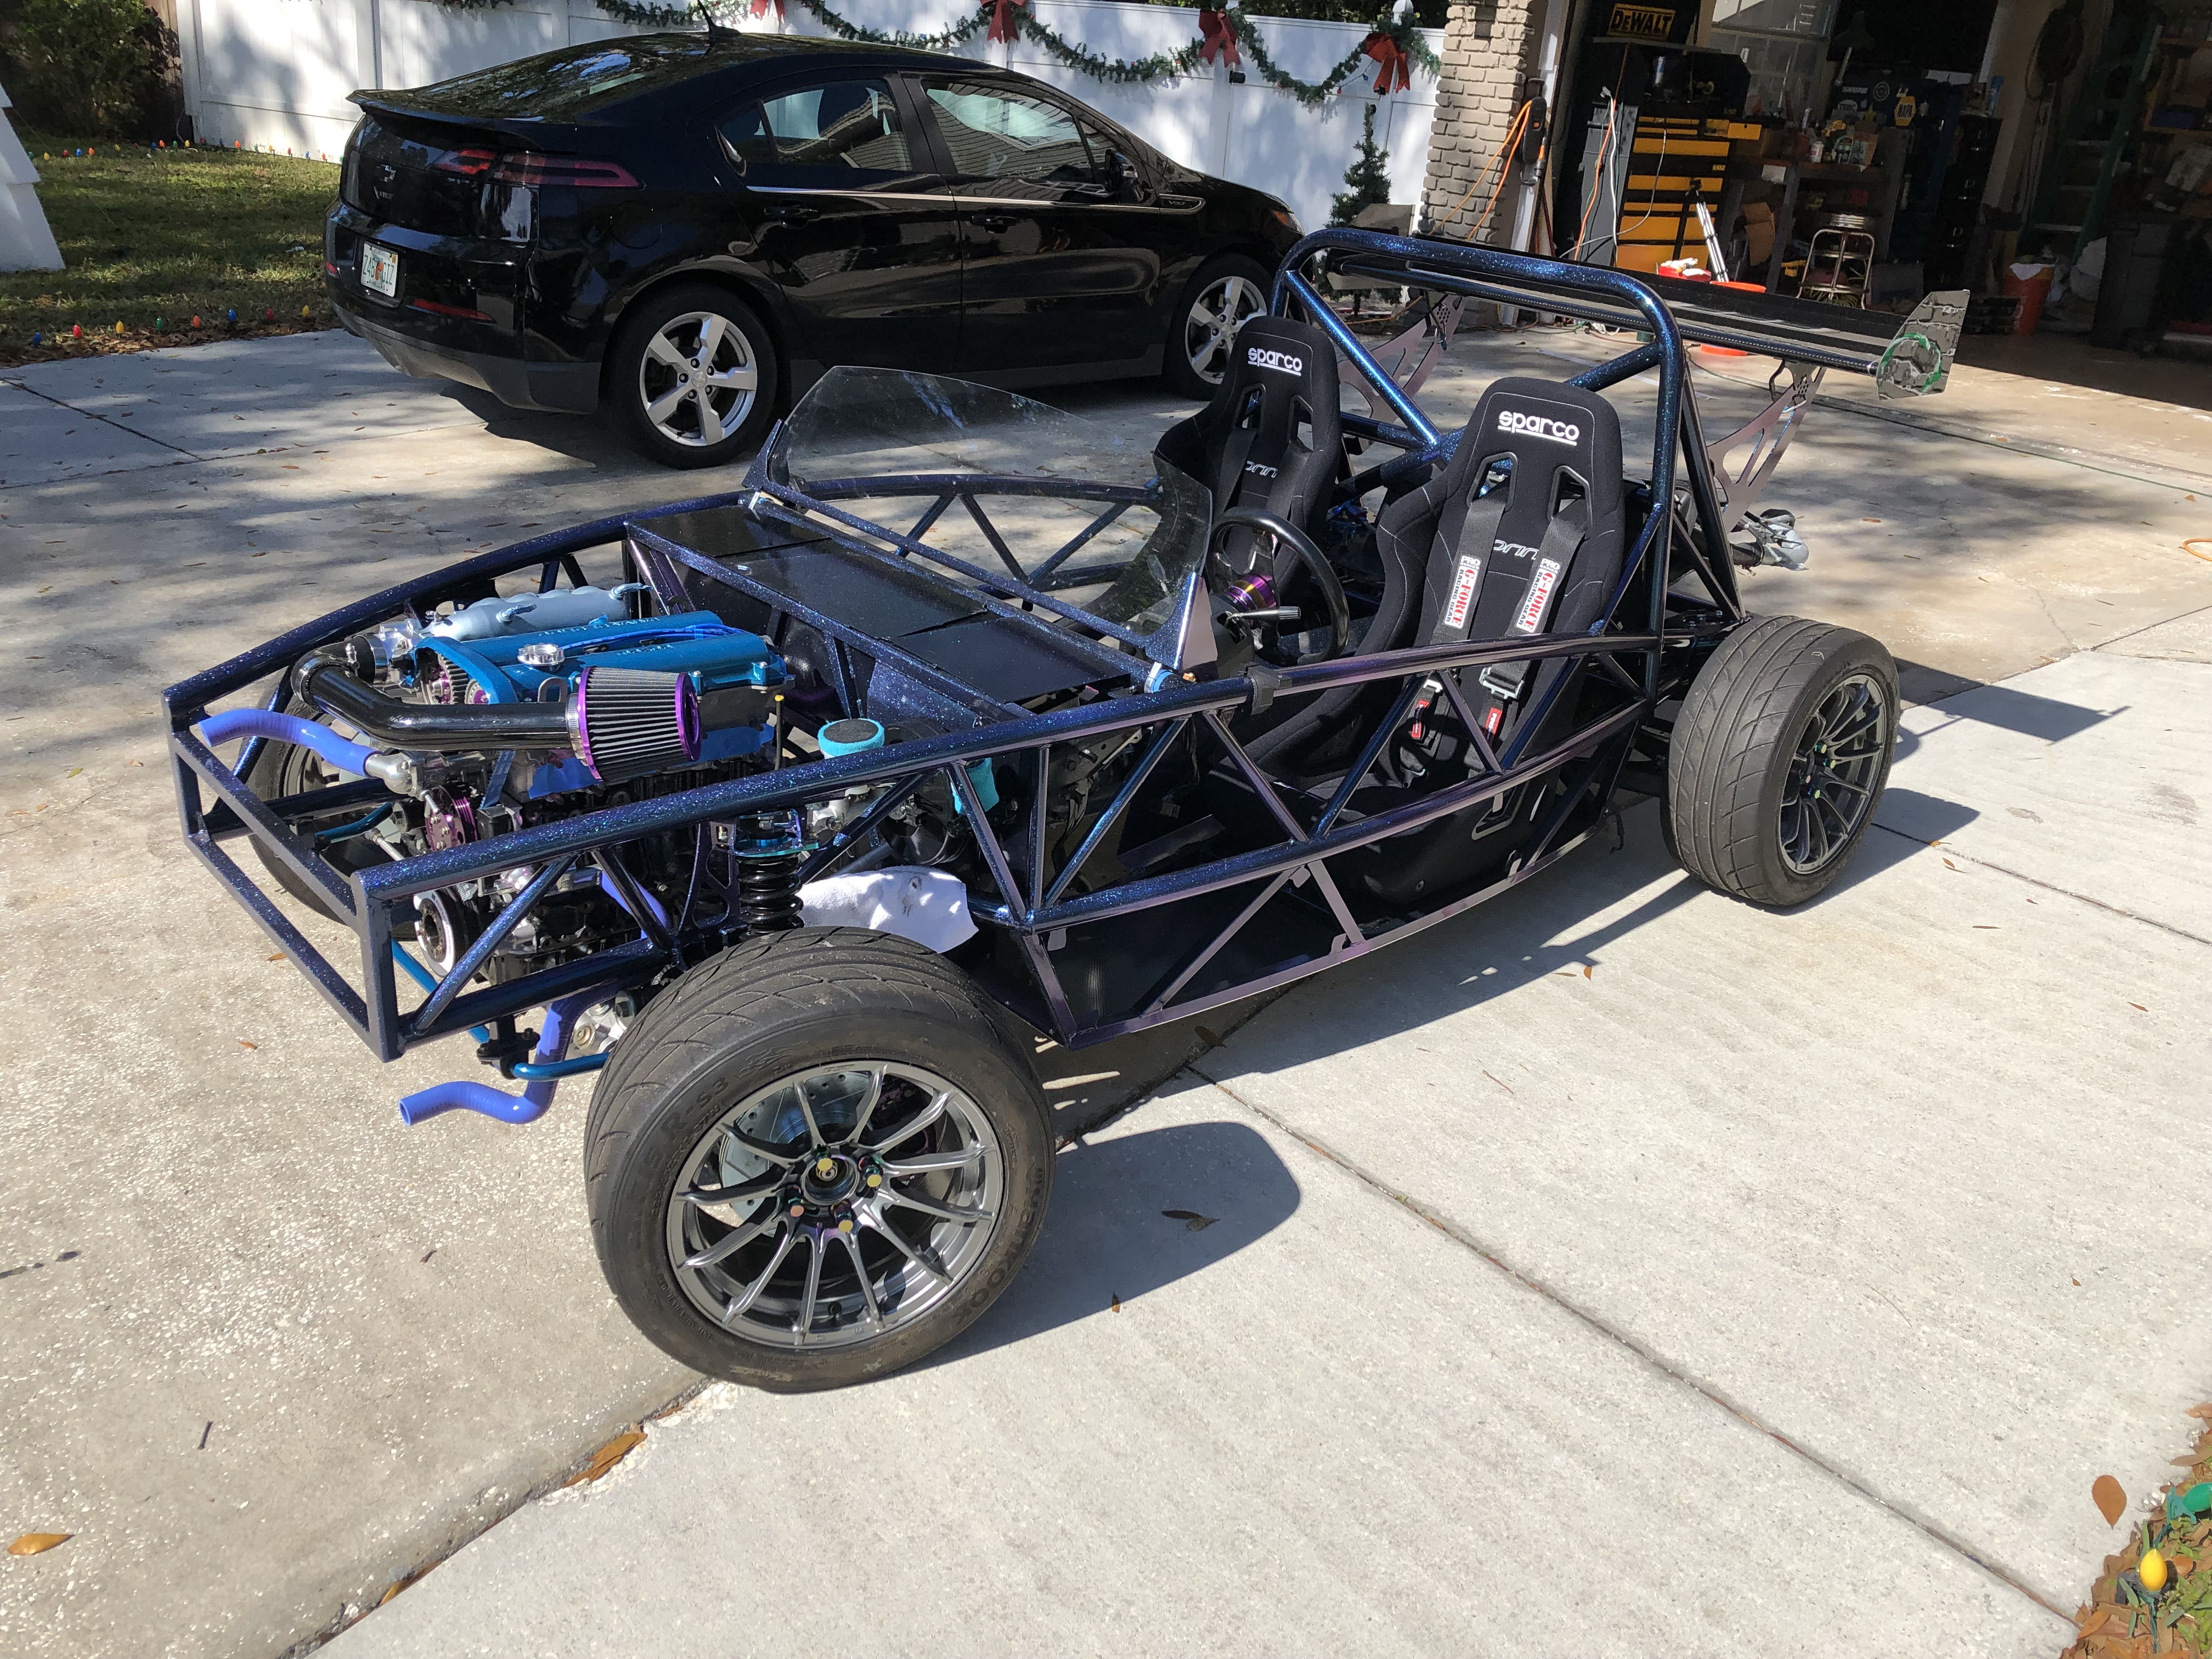
I think I like the Konigs better but I have to run a 25mm spacer in the rear because Exocet.
Nothing really new except some new shoes.
I have a new set of 15x9 0 offset MST MT11's on 225/45 Hankook RS3's
and a almost new set of 15x8 +25 offset Konig Dial In's on another set of 225/45 RS3's
I think I like the Konigs better but I have to run a 25mm spacer in the rear because Exocet.
Reply
0
0
01-07-2019, 04:23 PM
#134
Junior Member
Thread Starter
Join Date: Jan 2018
Location: Tampa, Fl
Posts: 227
Total Cats: 25
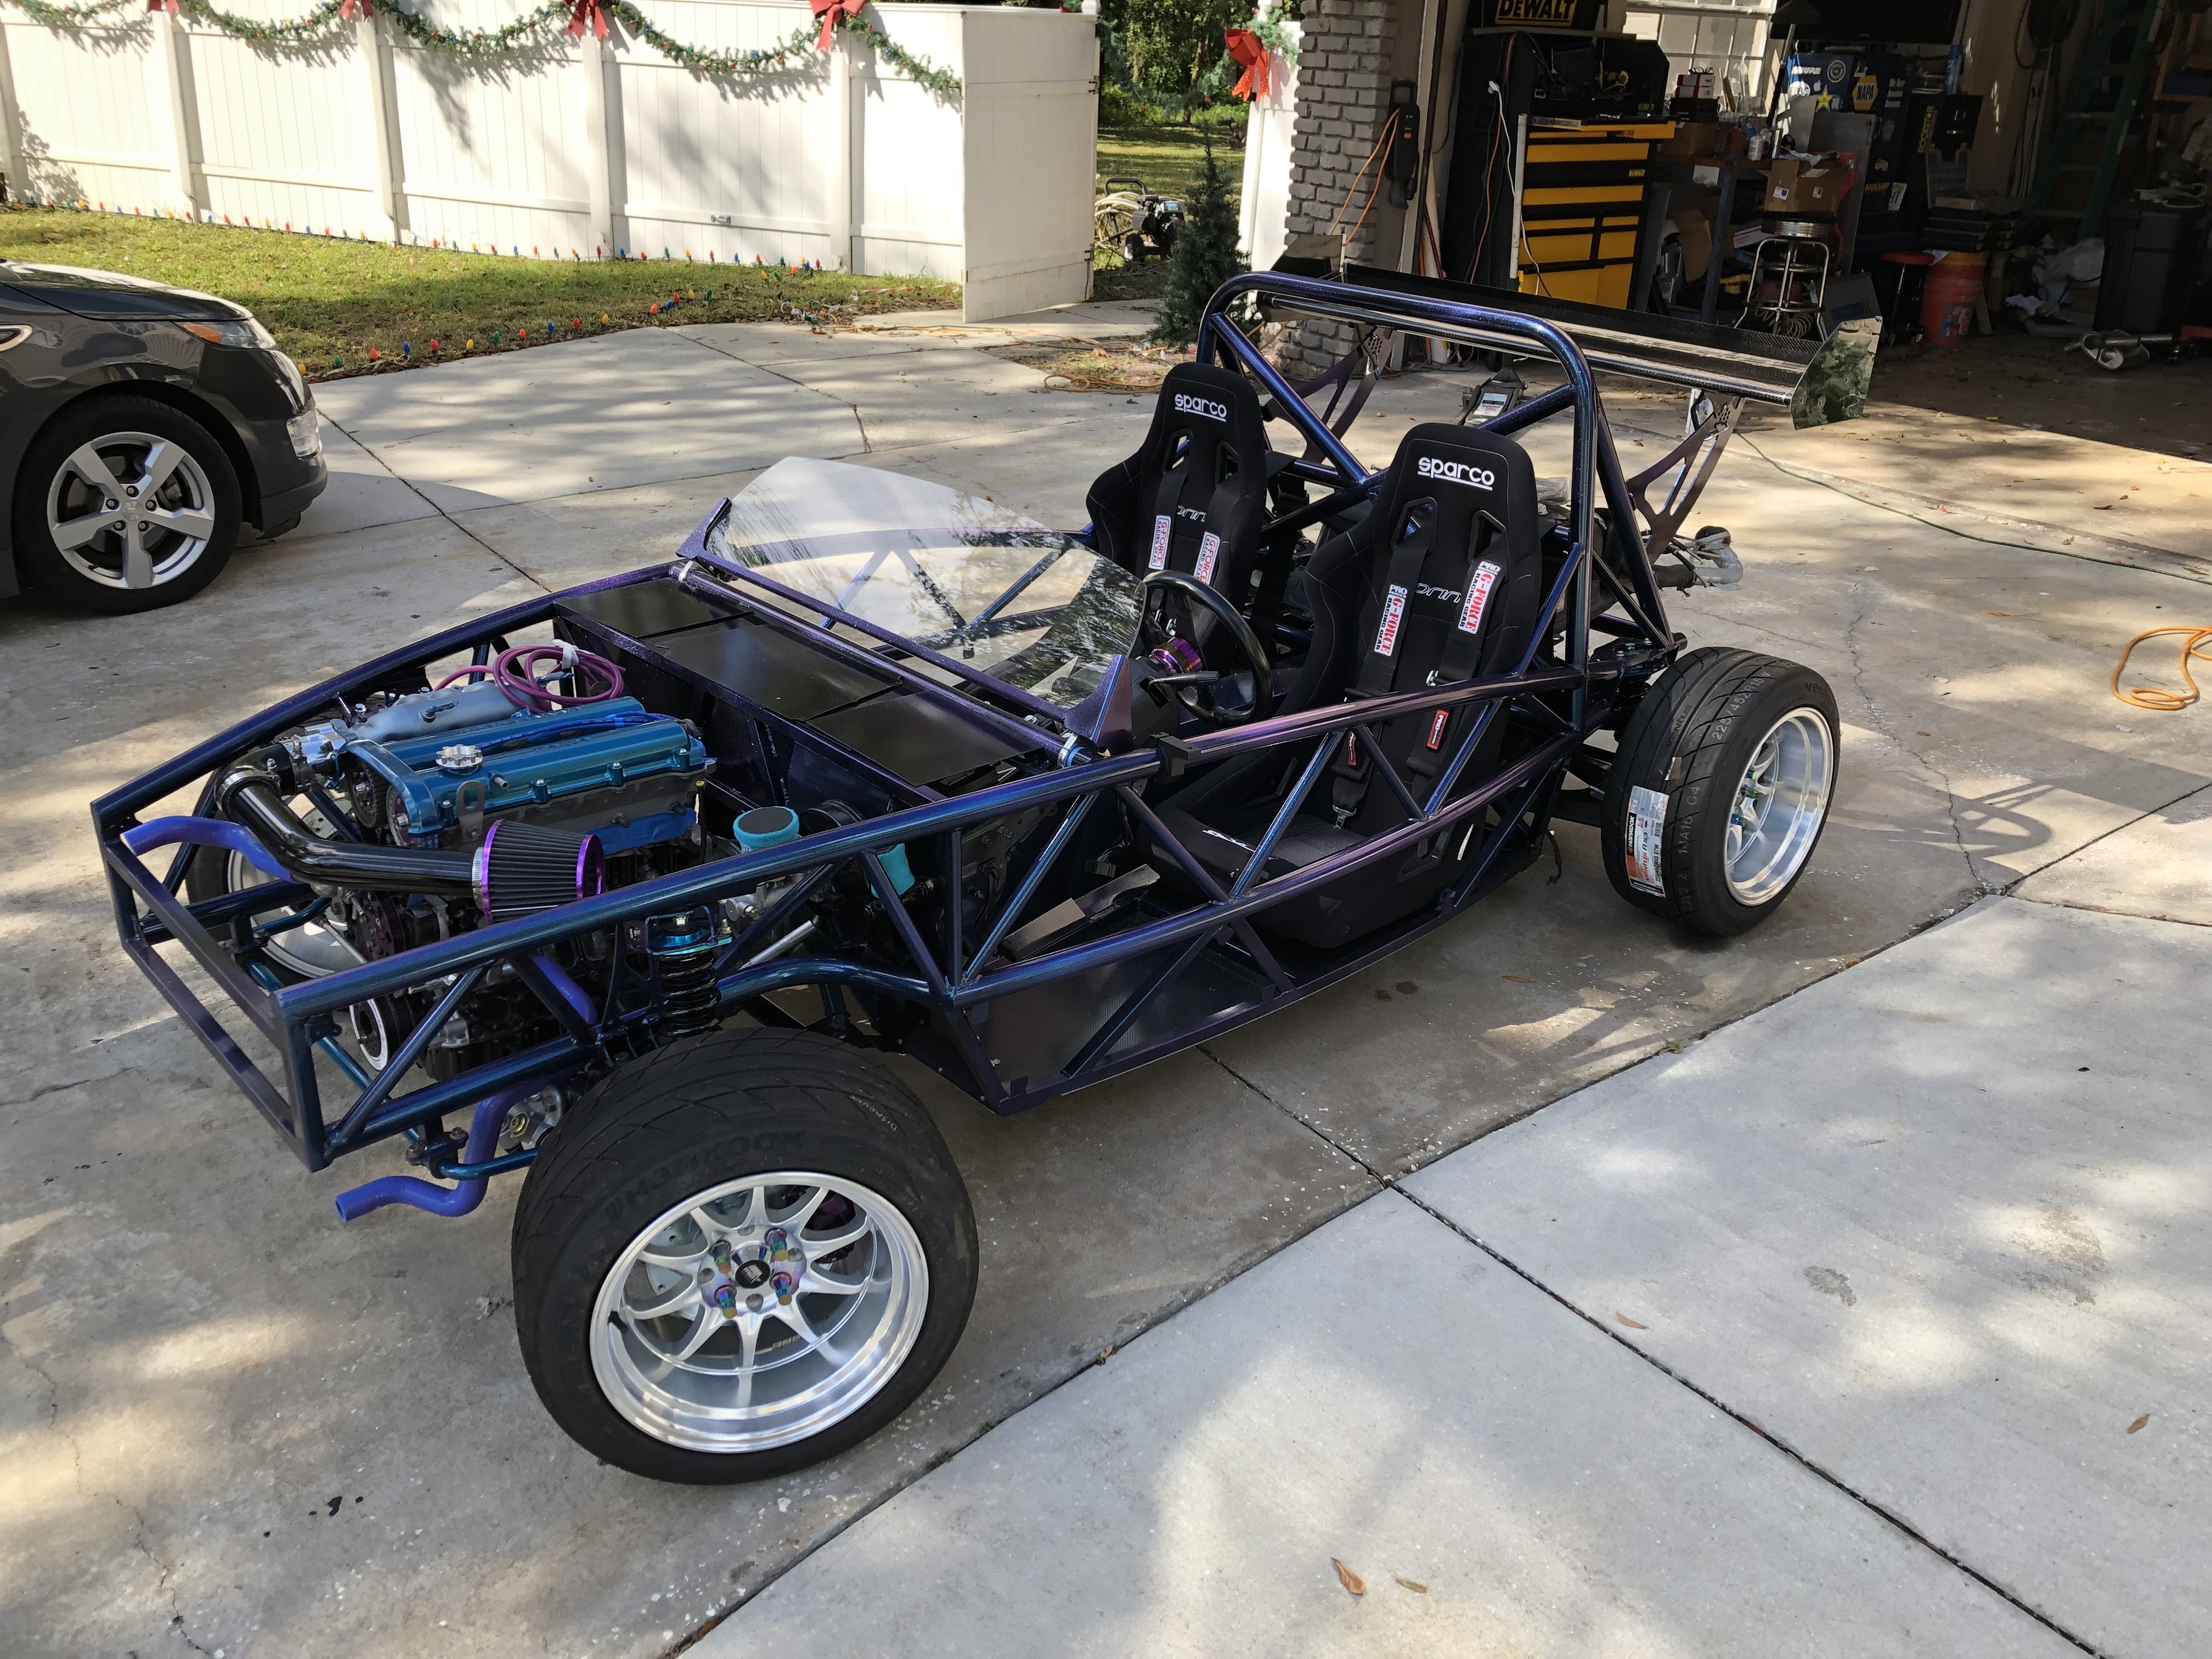
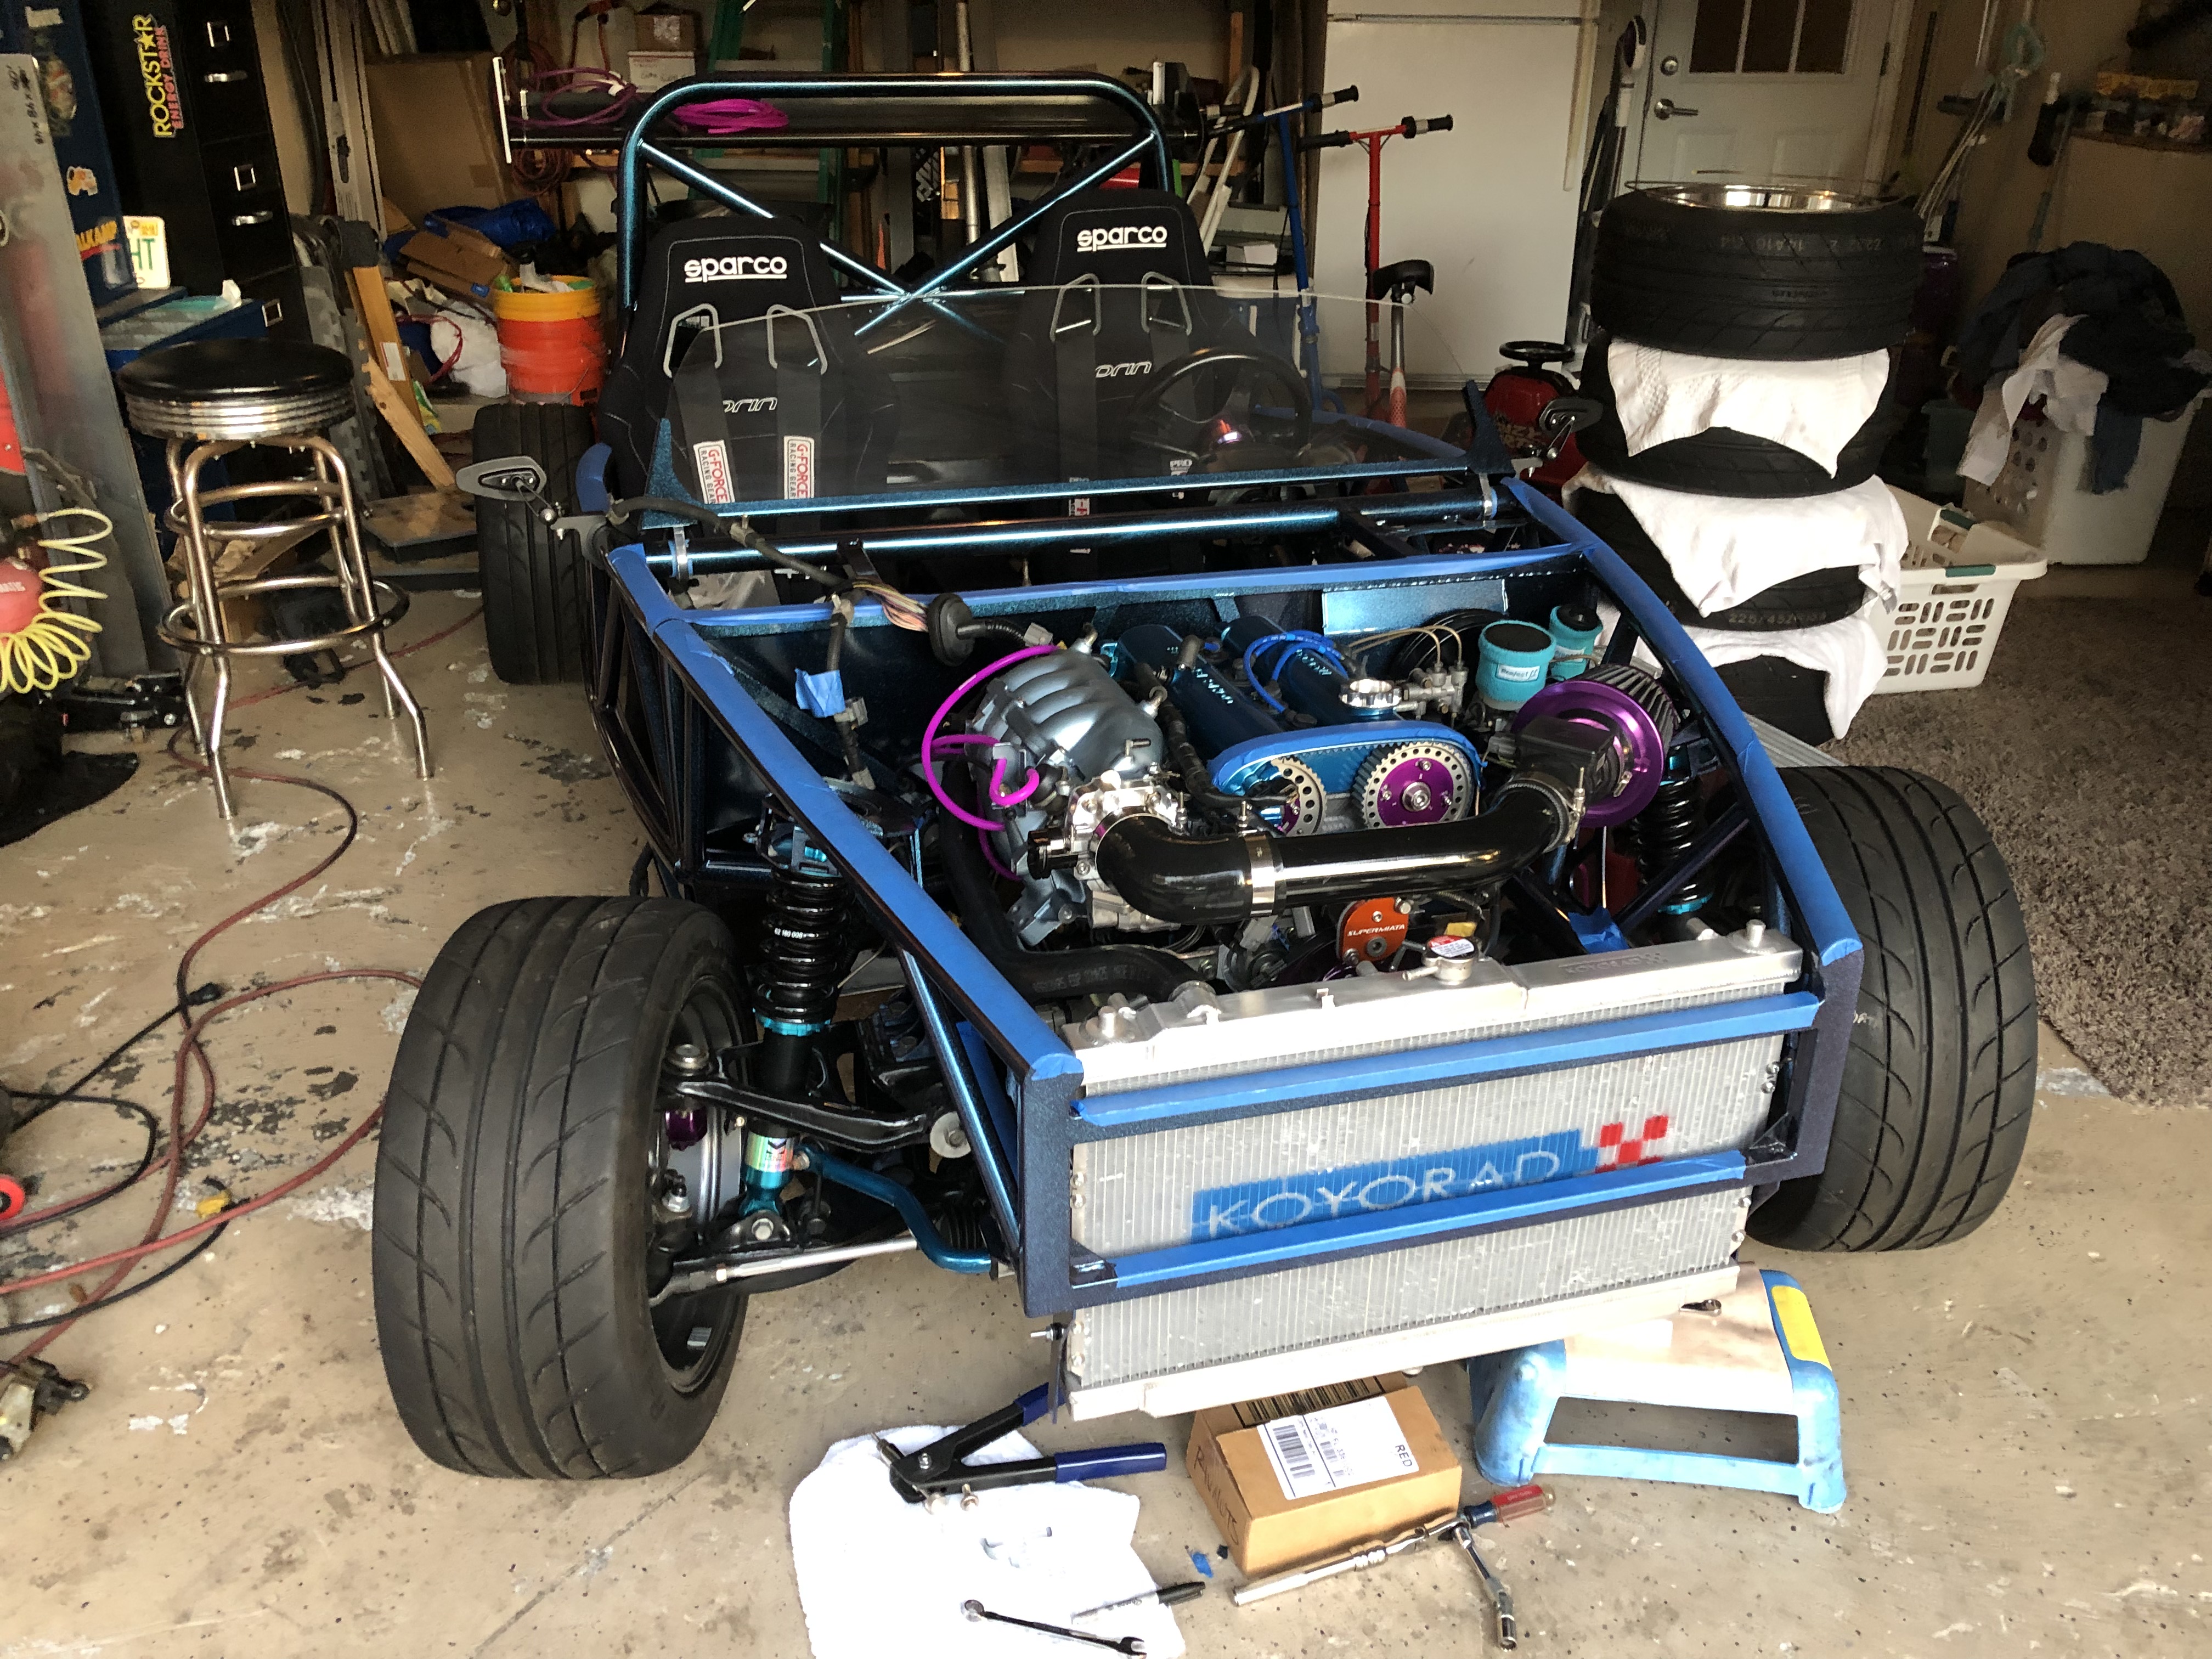
This weekend I got most of the intake back together and bolted on. Fuel lines are ran. I'm waiting on an EGR gasket to come in the mail along with some vacuum lines. Alternator and starter also hooked up. I purchased a coolant reroute from Curly so I'm hoping that gets here soon. Brake lines ordered from HEL were made wrong and needed to be remade. They should be shipping tomorrow. I've got the engine wiring harness almost completely wired in and the main harness ready to go in this weekend. I'm seriously hoping to turn the key by this Sunday but it'll probably be the following weekend. So close......
Reply
0
0
 01-15-2019, 05:03 PM
#136
Junior Member
Thread Starter
Join Date: Jan 2018
Location: Tampa, Fl
Posts: 227
Total Cats: 25
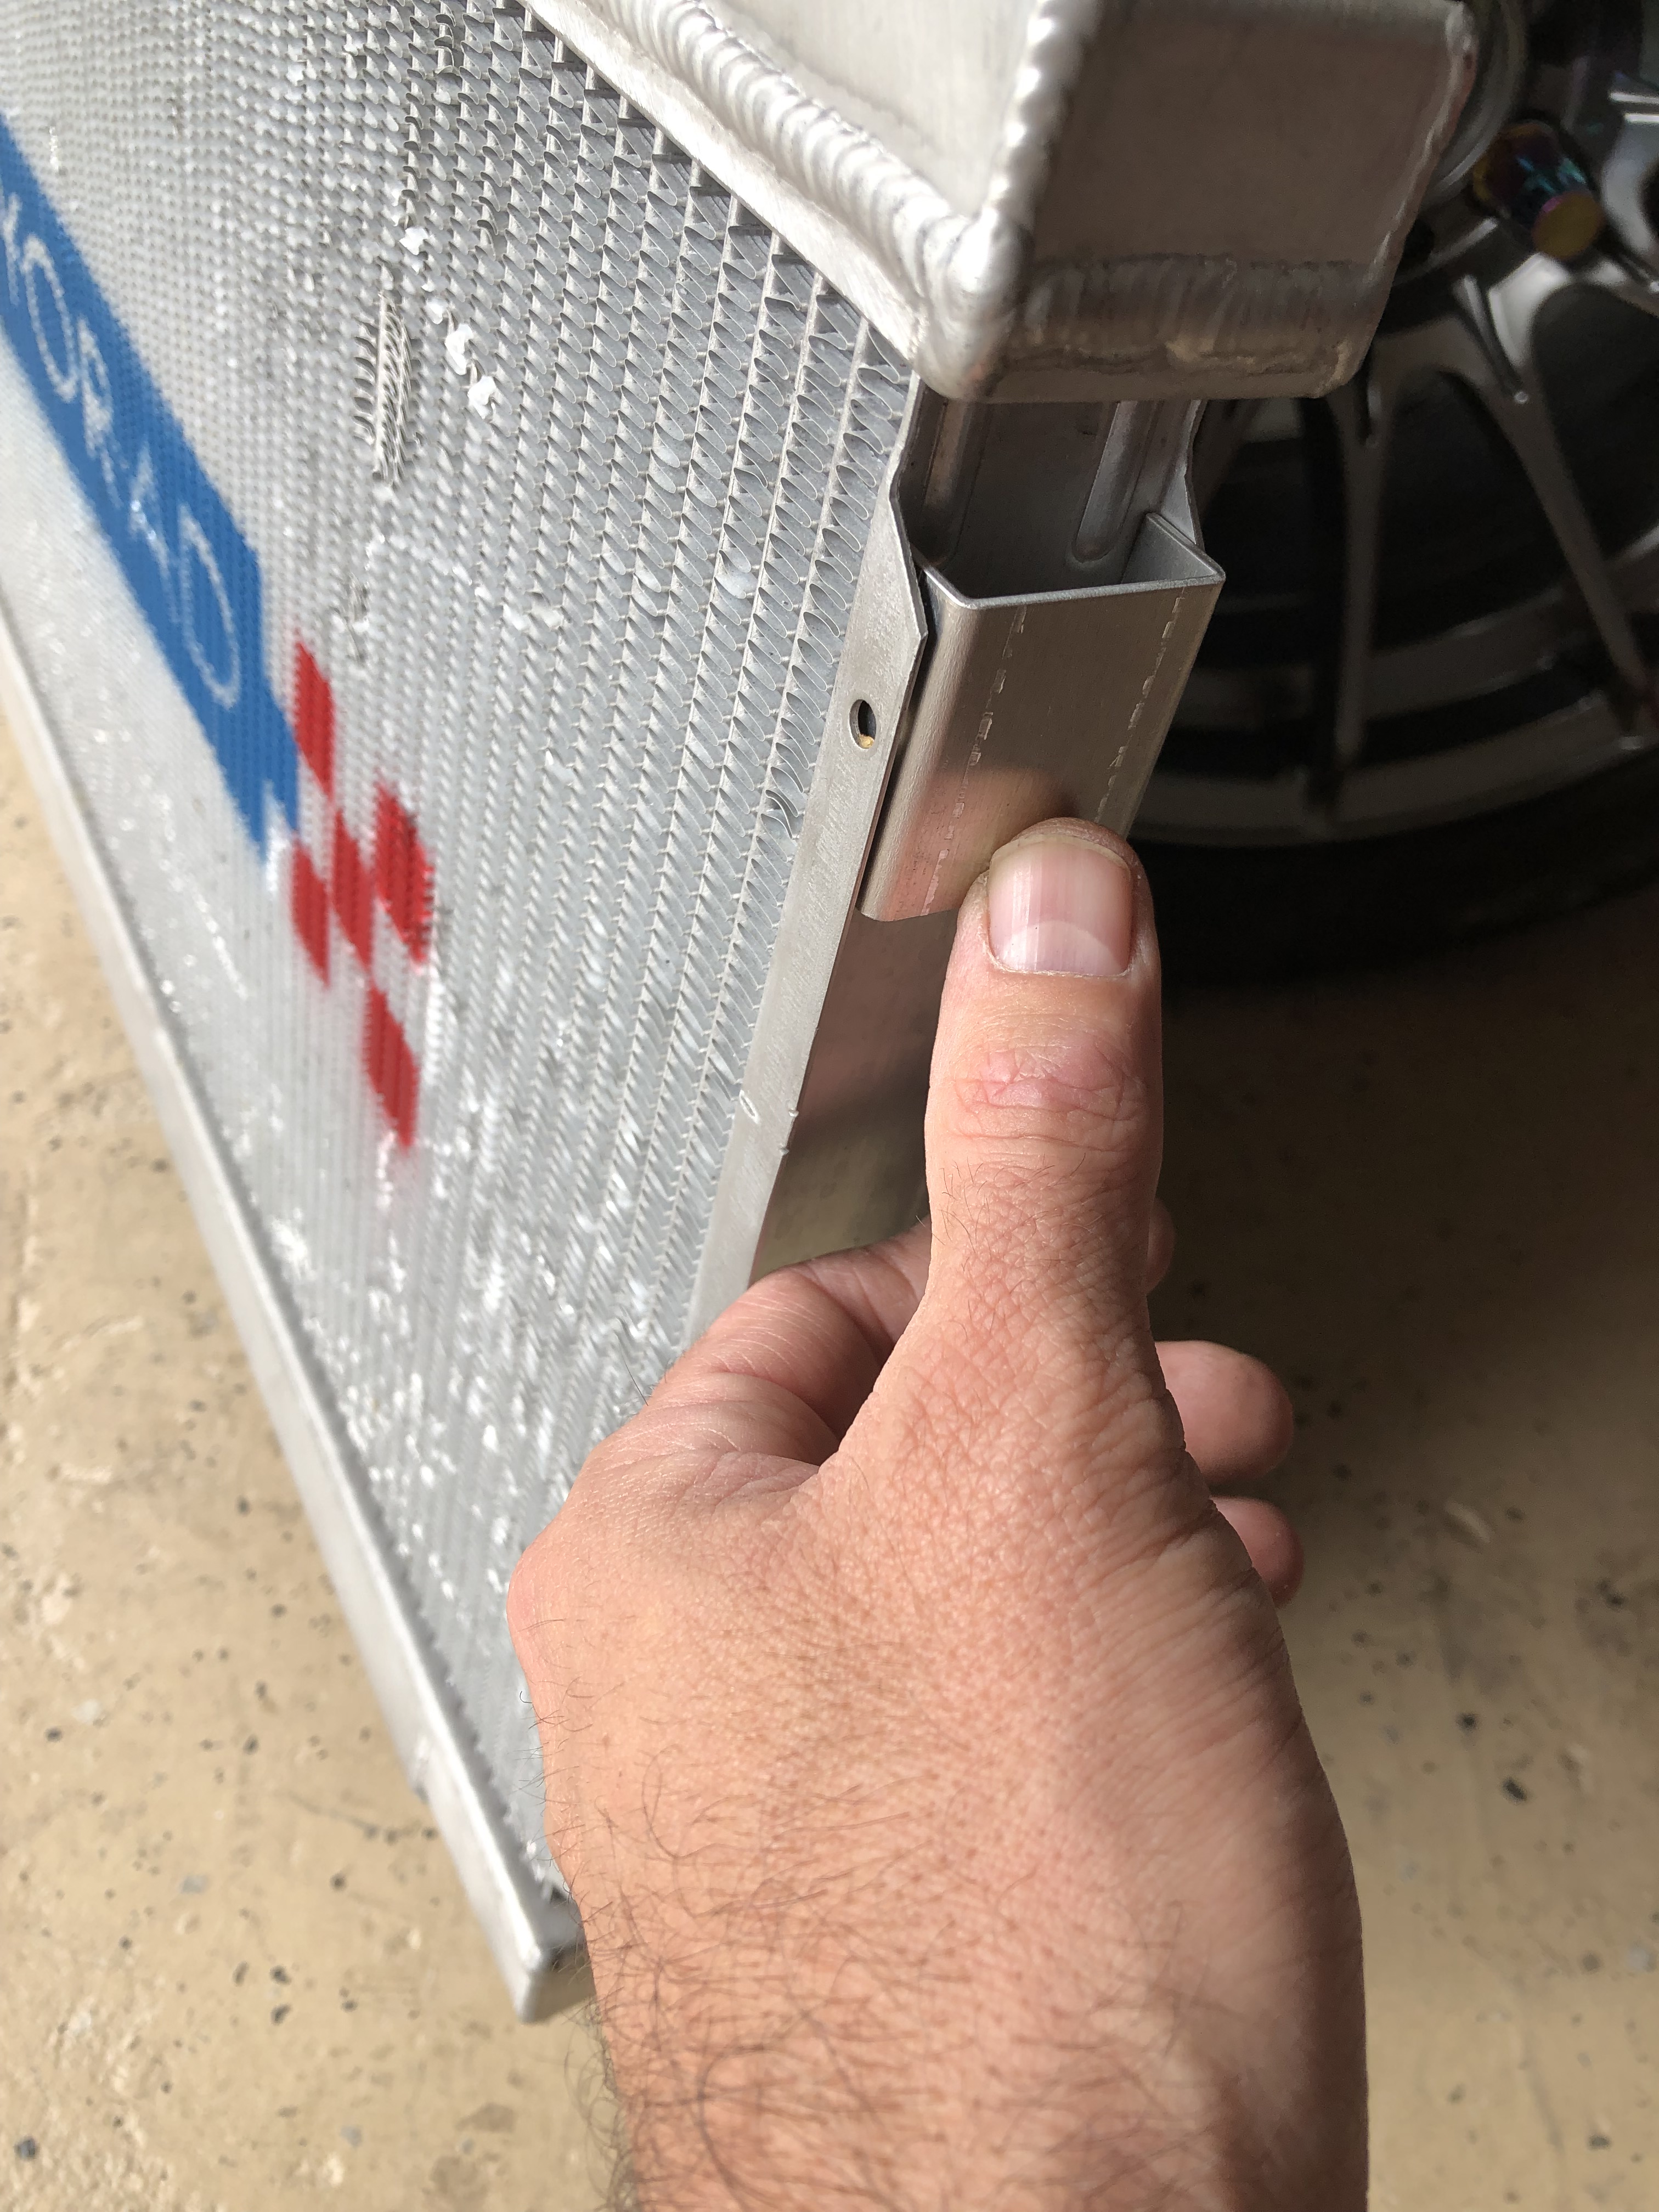
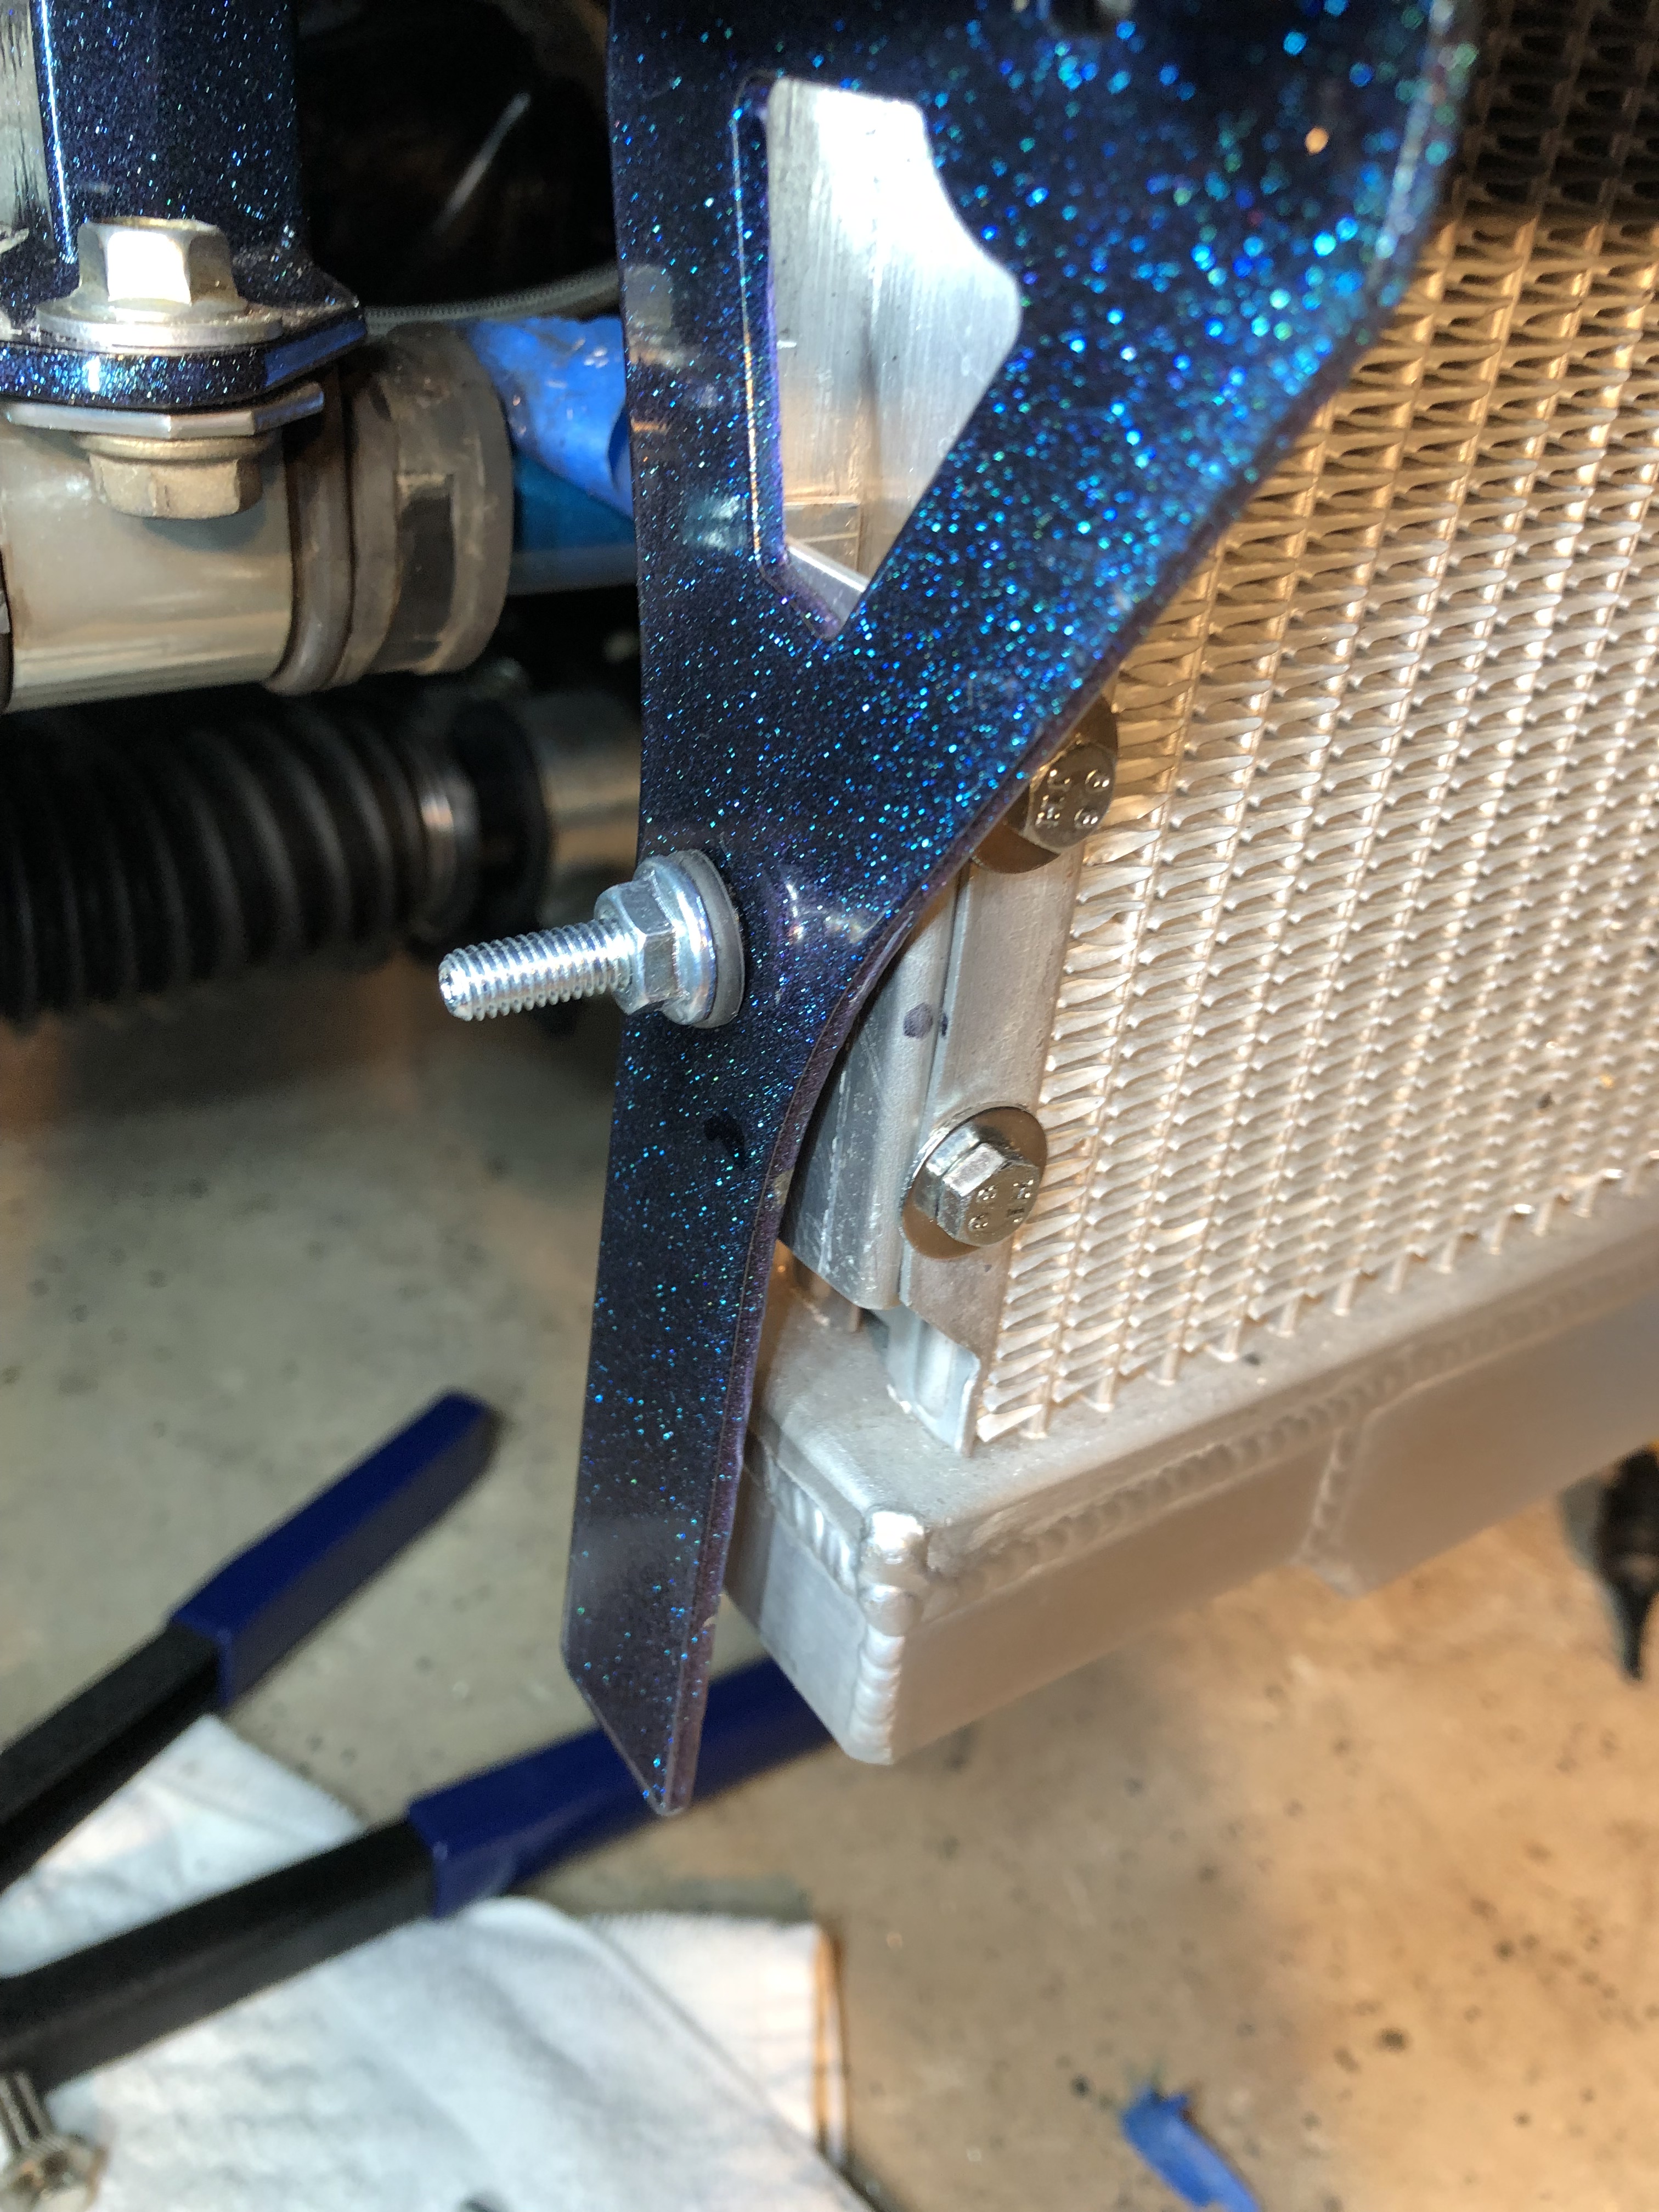
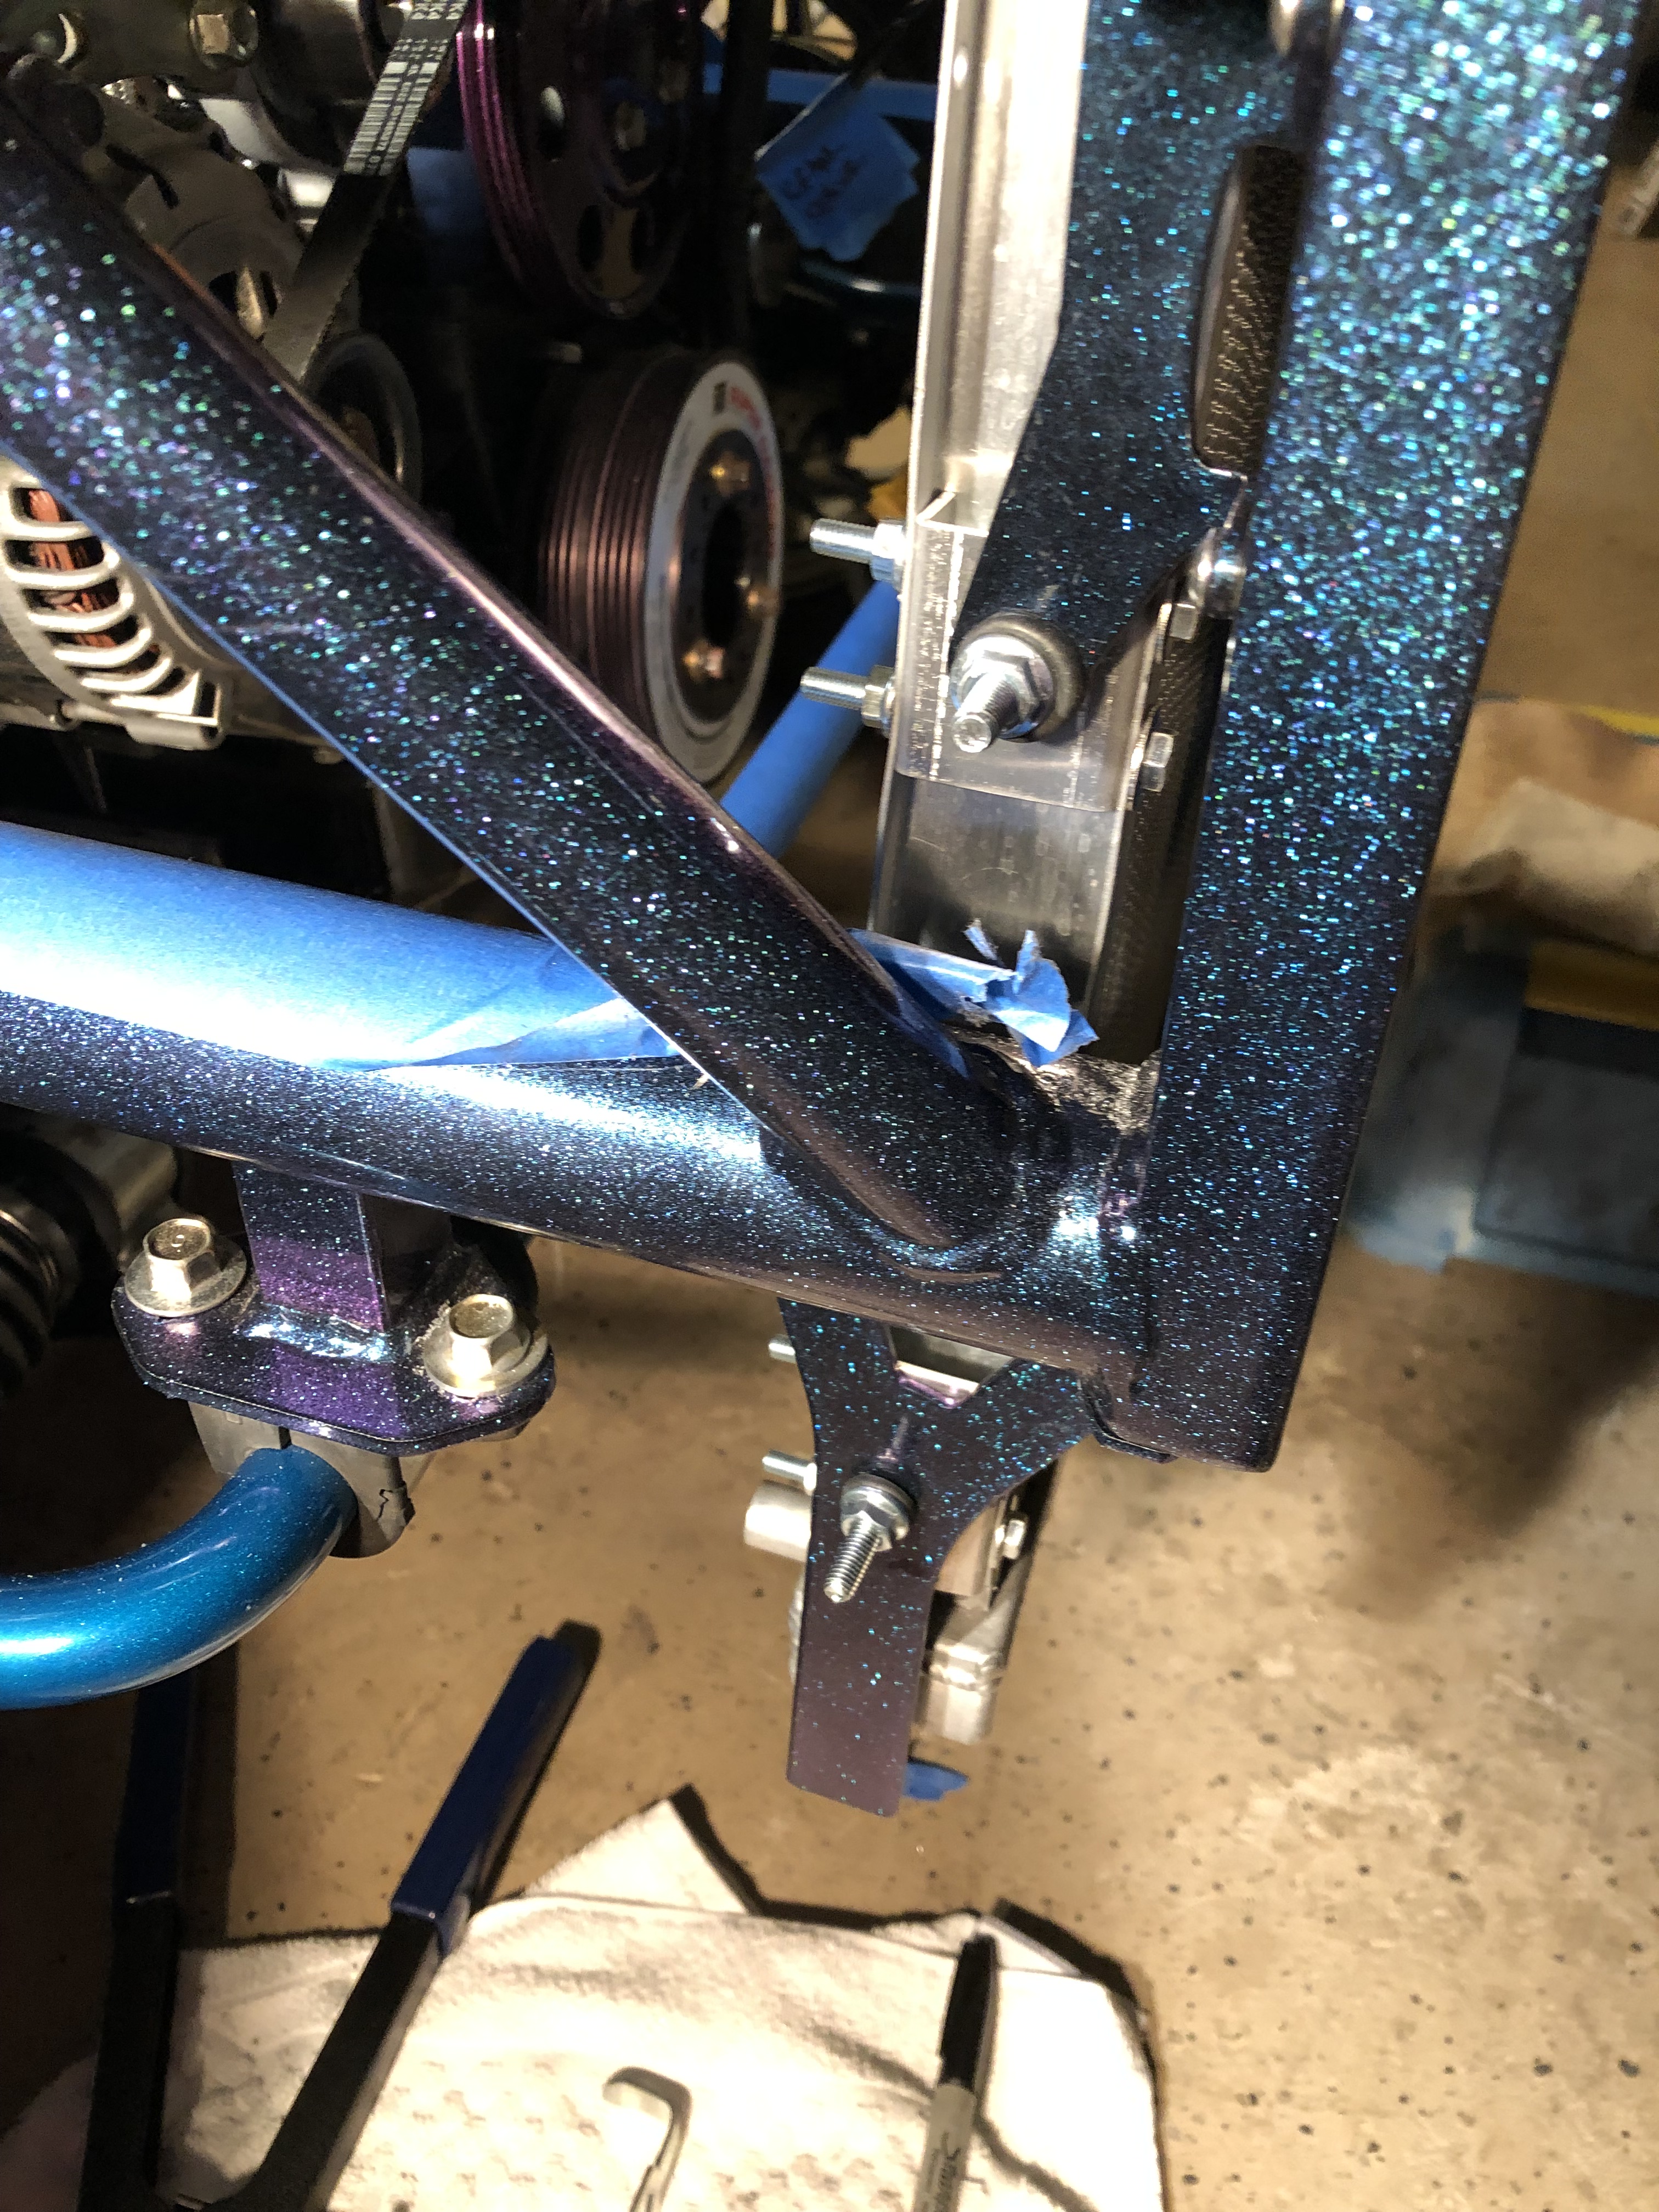
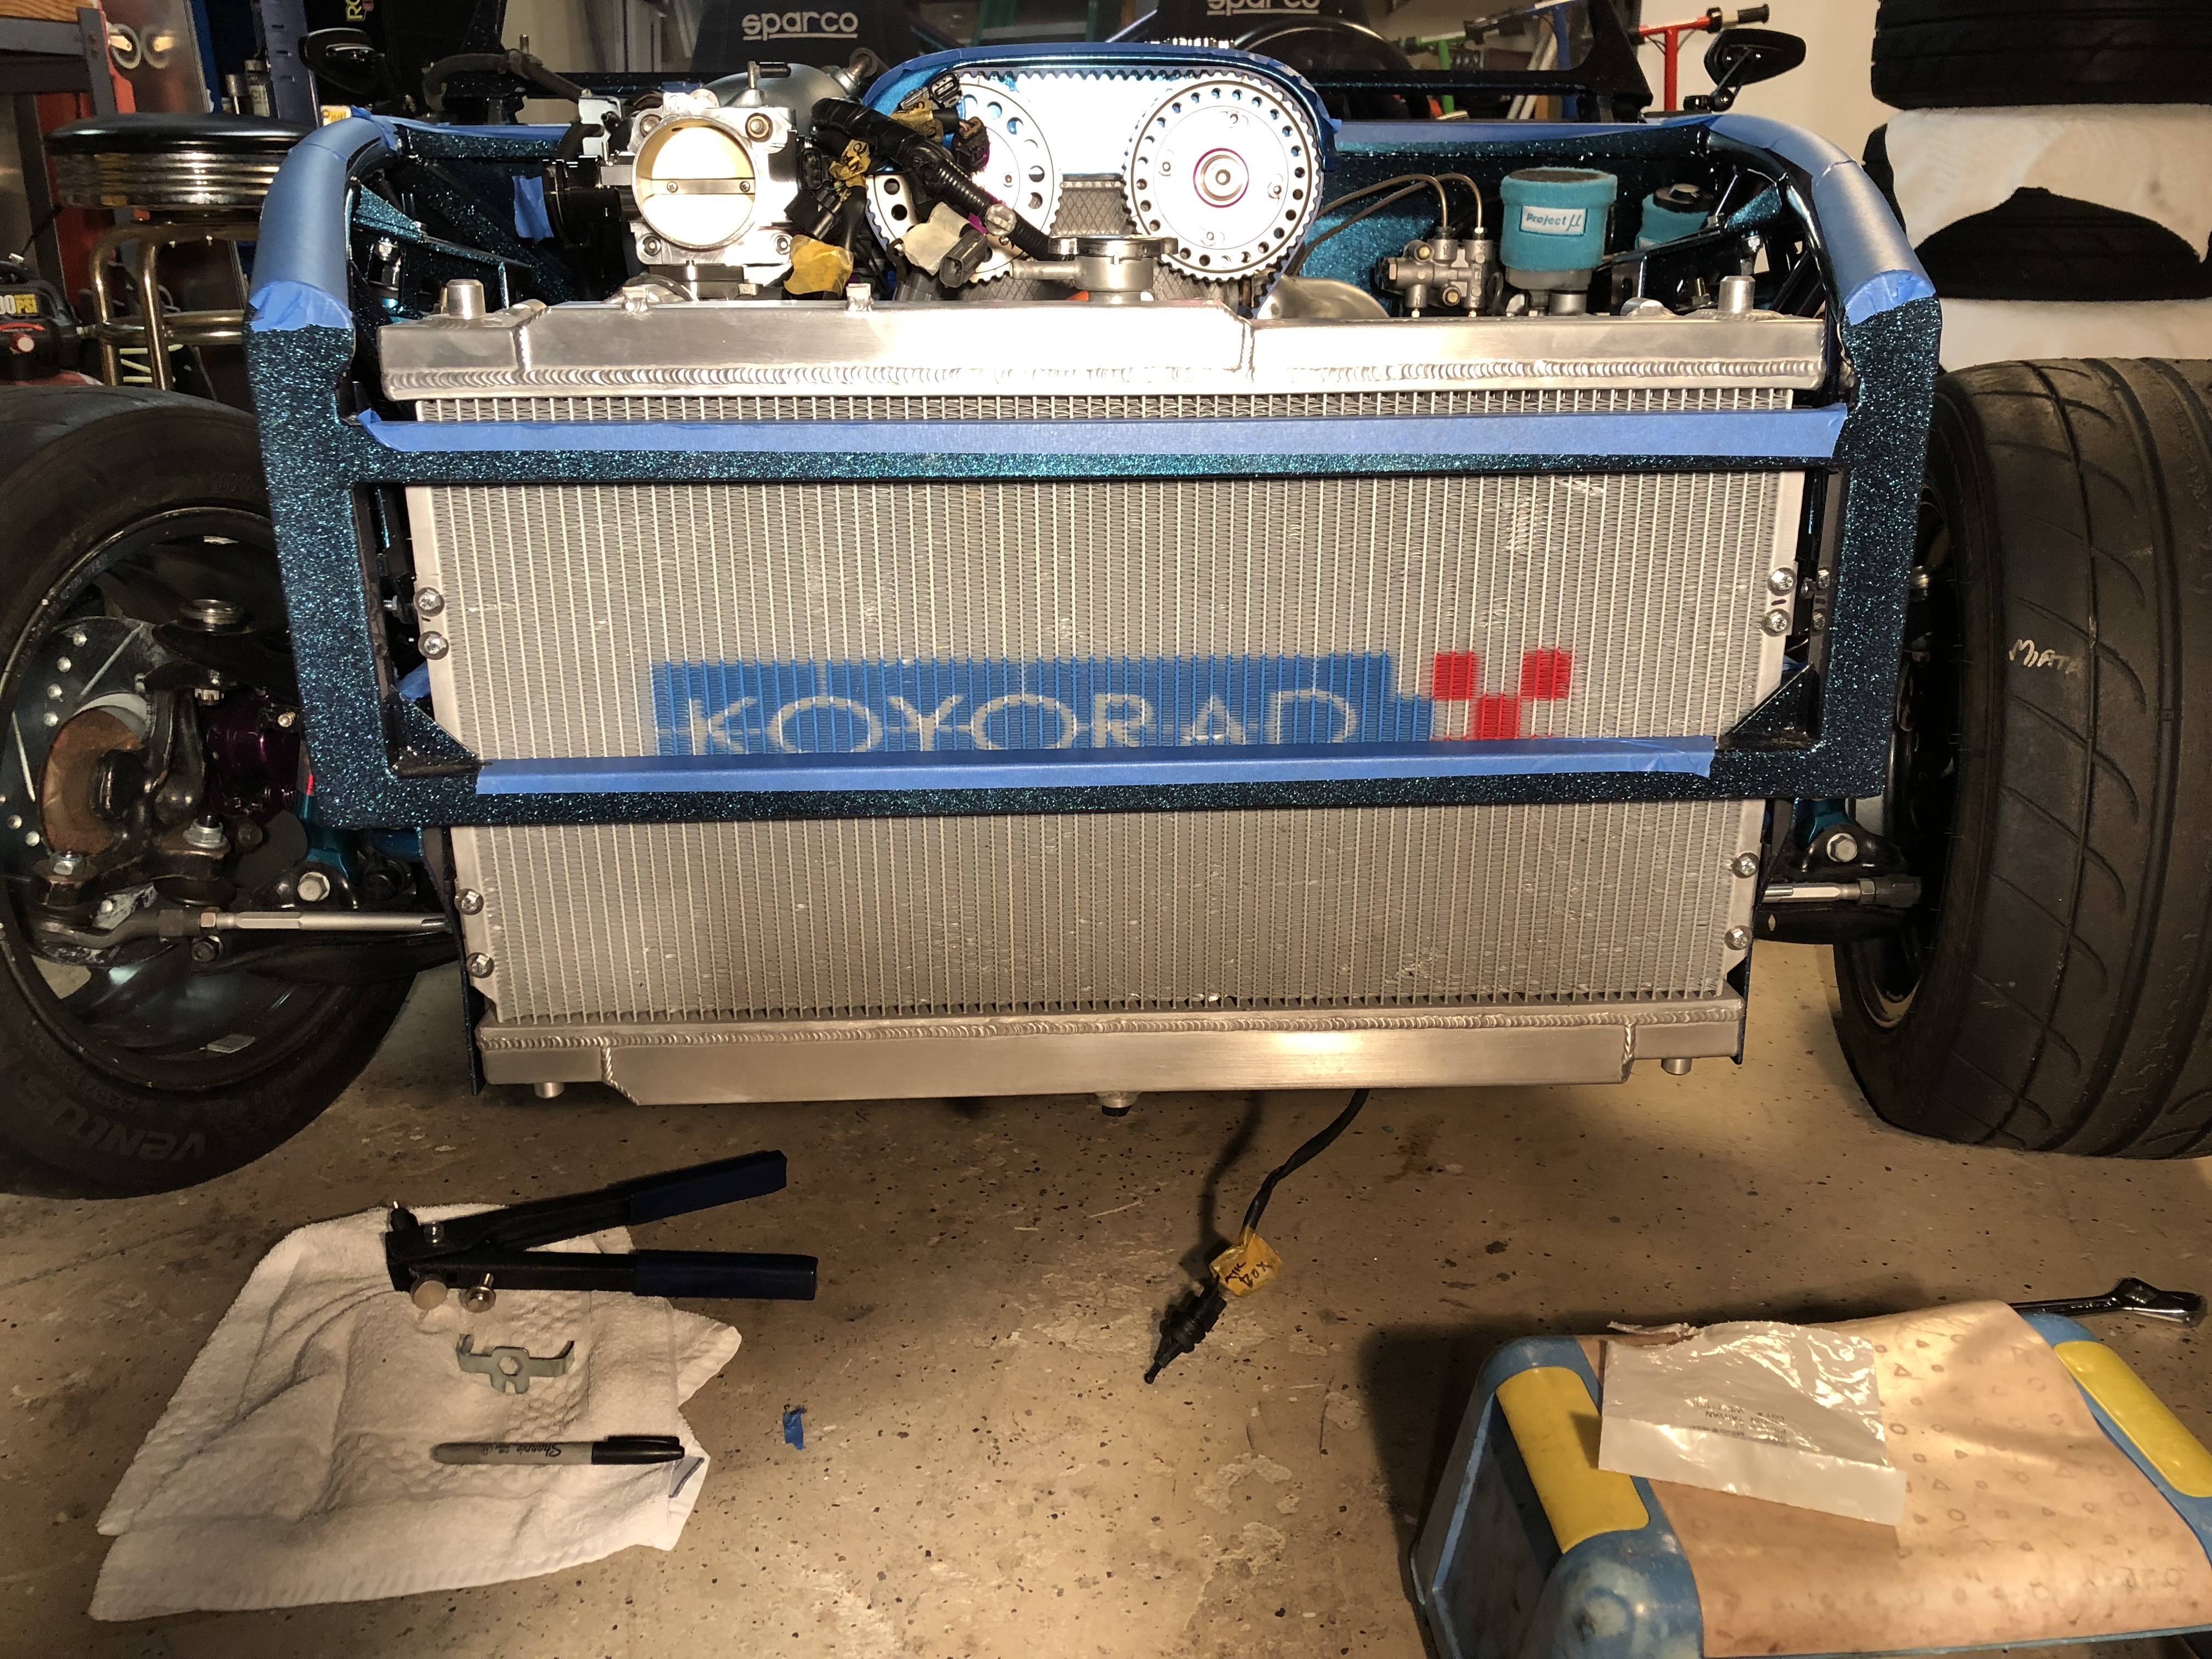
Mounted up my Koyorad radiator this weekend. Had to fab up some additional brackets to use the Exomotive supplied mounts but it wasn't too big of a deal.
Here's the brackets I made to fit inside the side rails
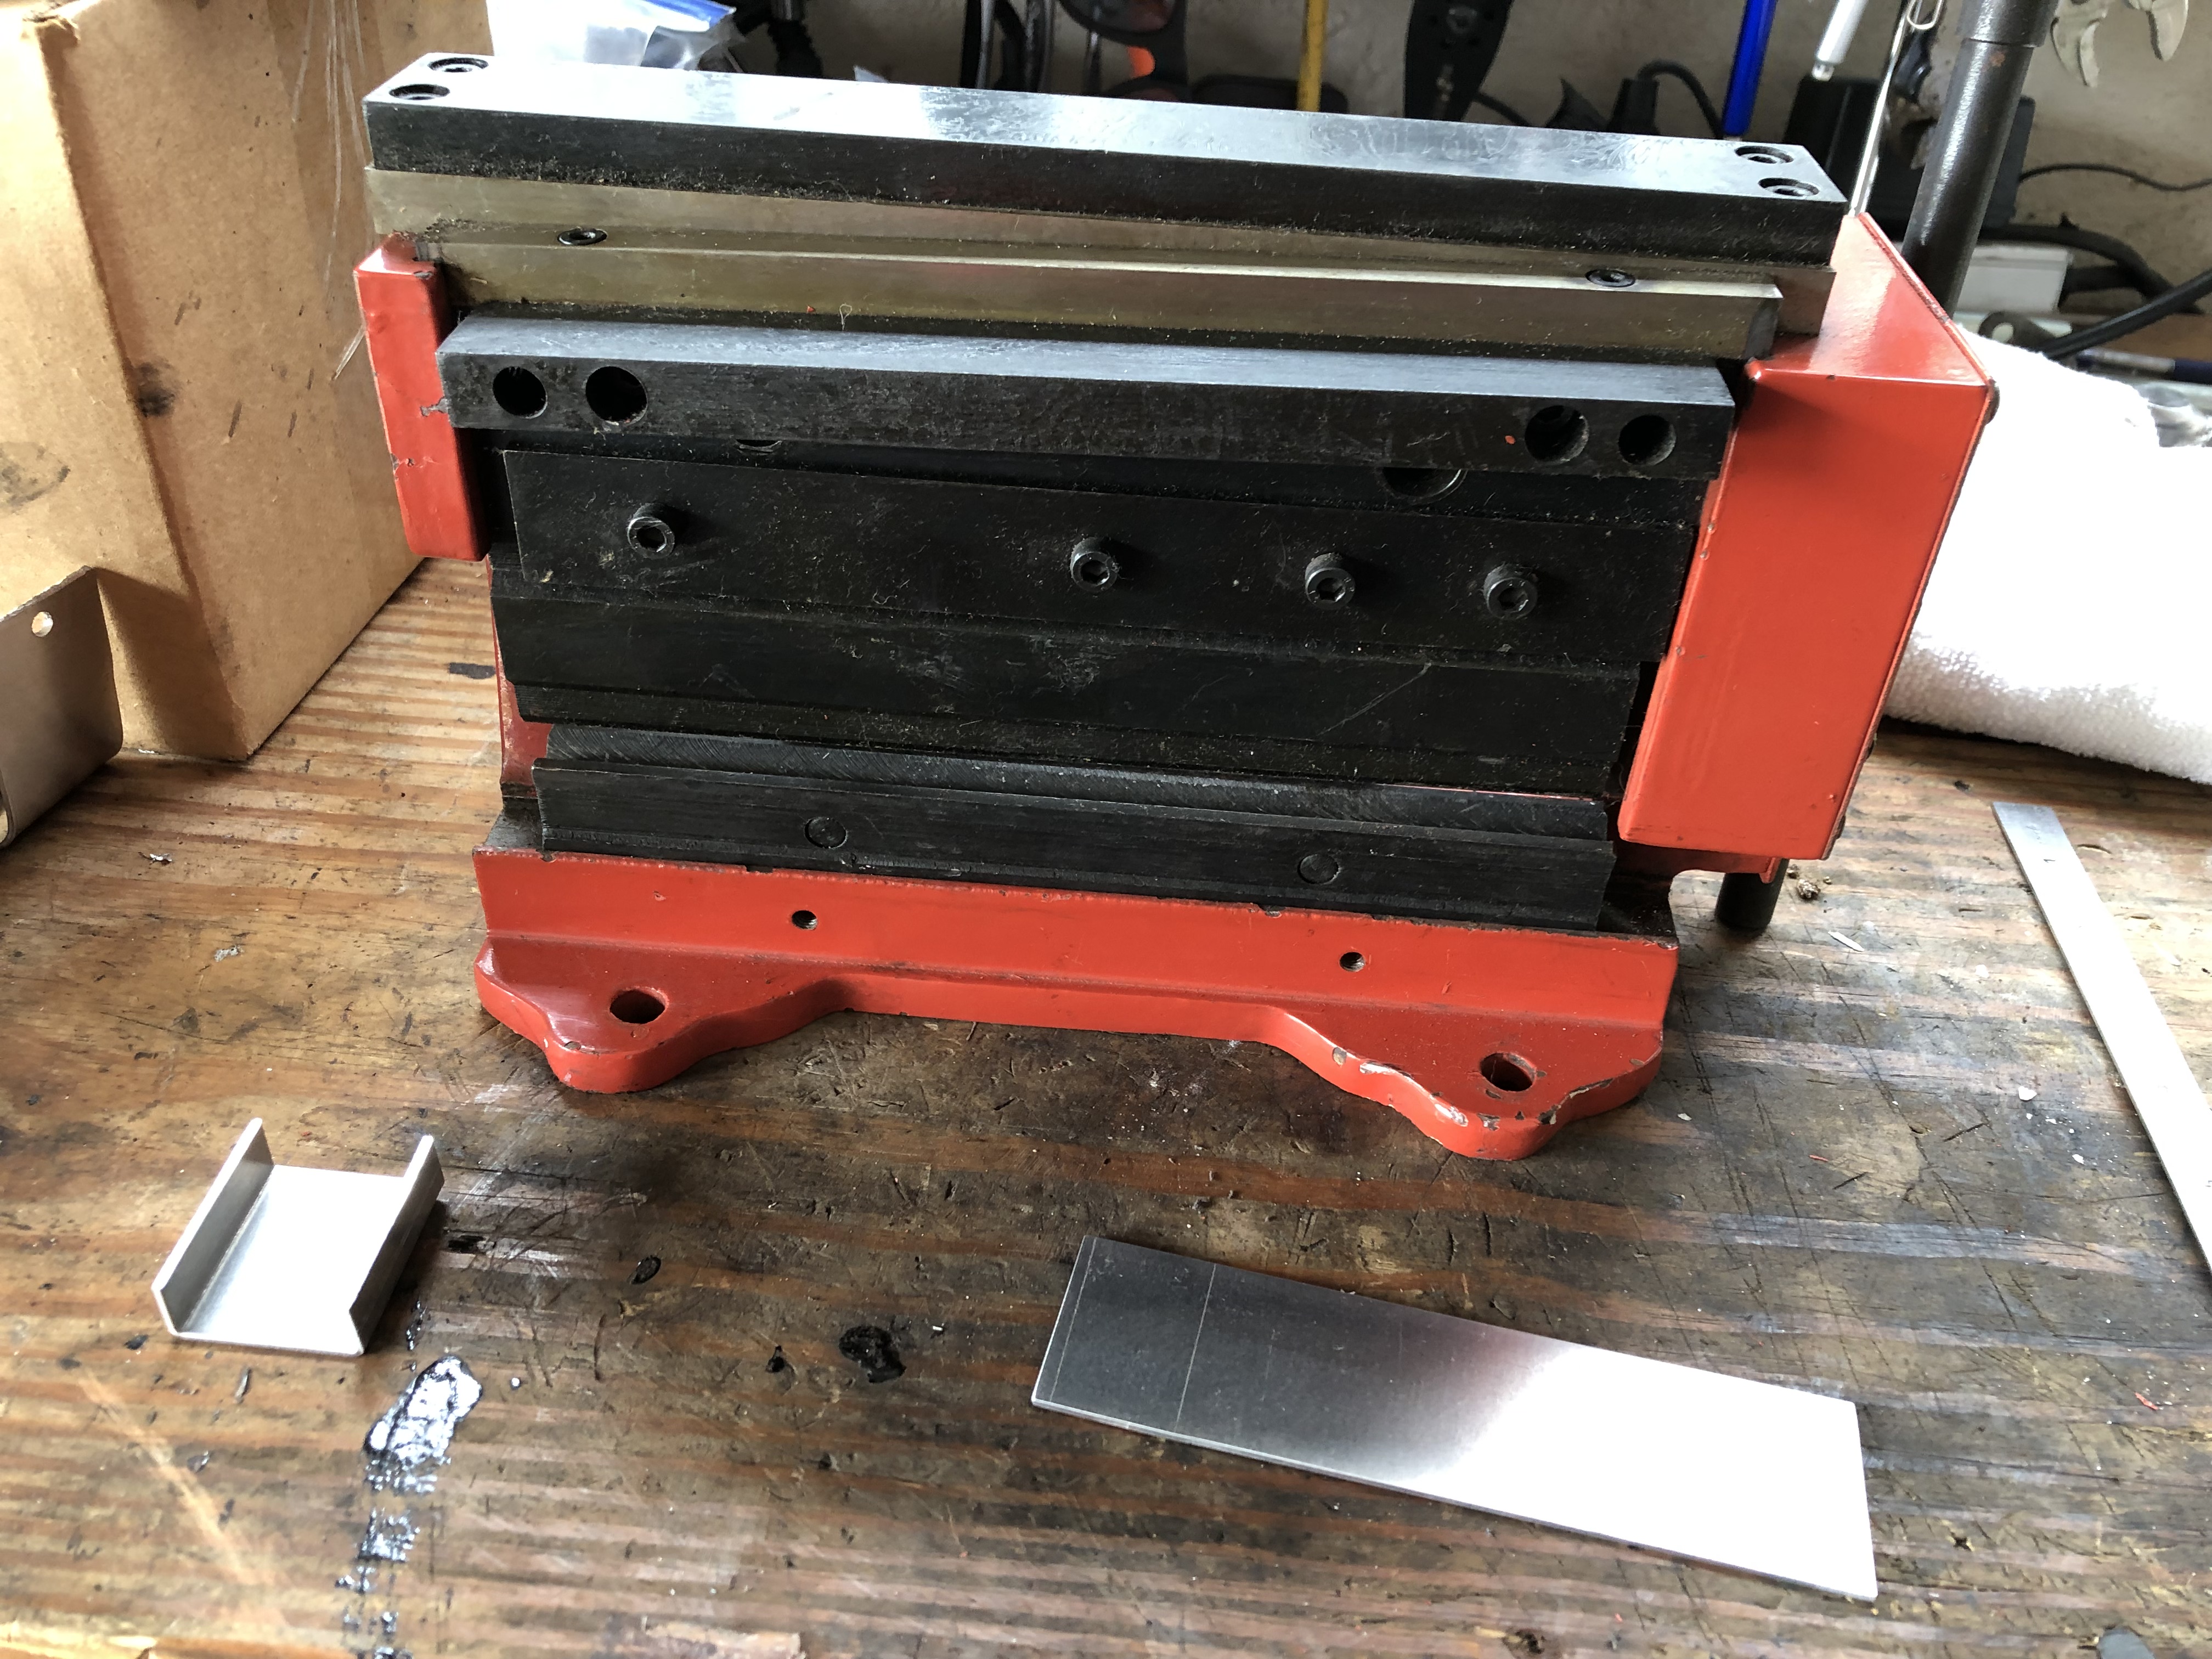
I used this little press brake/shear I picked up years ago to bend my brackets. I subsequently broke the main gear making my very last bracket. Bummer
Here's the brackets I made to fit inside the side rails
I used this little press brake/shear I picked up years ago to bend my brackets. I subsequently broke the main gear making my very last bracket. Bummer
Reply
0
0
 01-21-2019, 10:17 AM
#138
Junior Member
Thread Starter
Join Date: Jan 2018
Location: Tampa, Fl
Posts: 227
Total Cats: 25
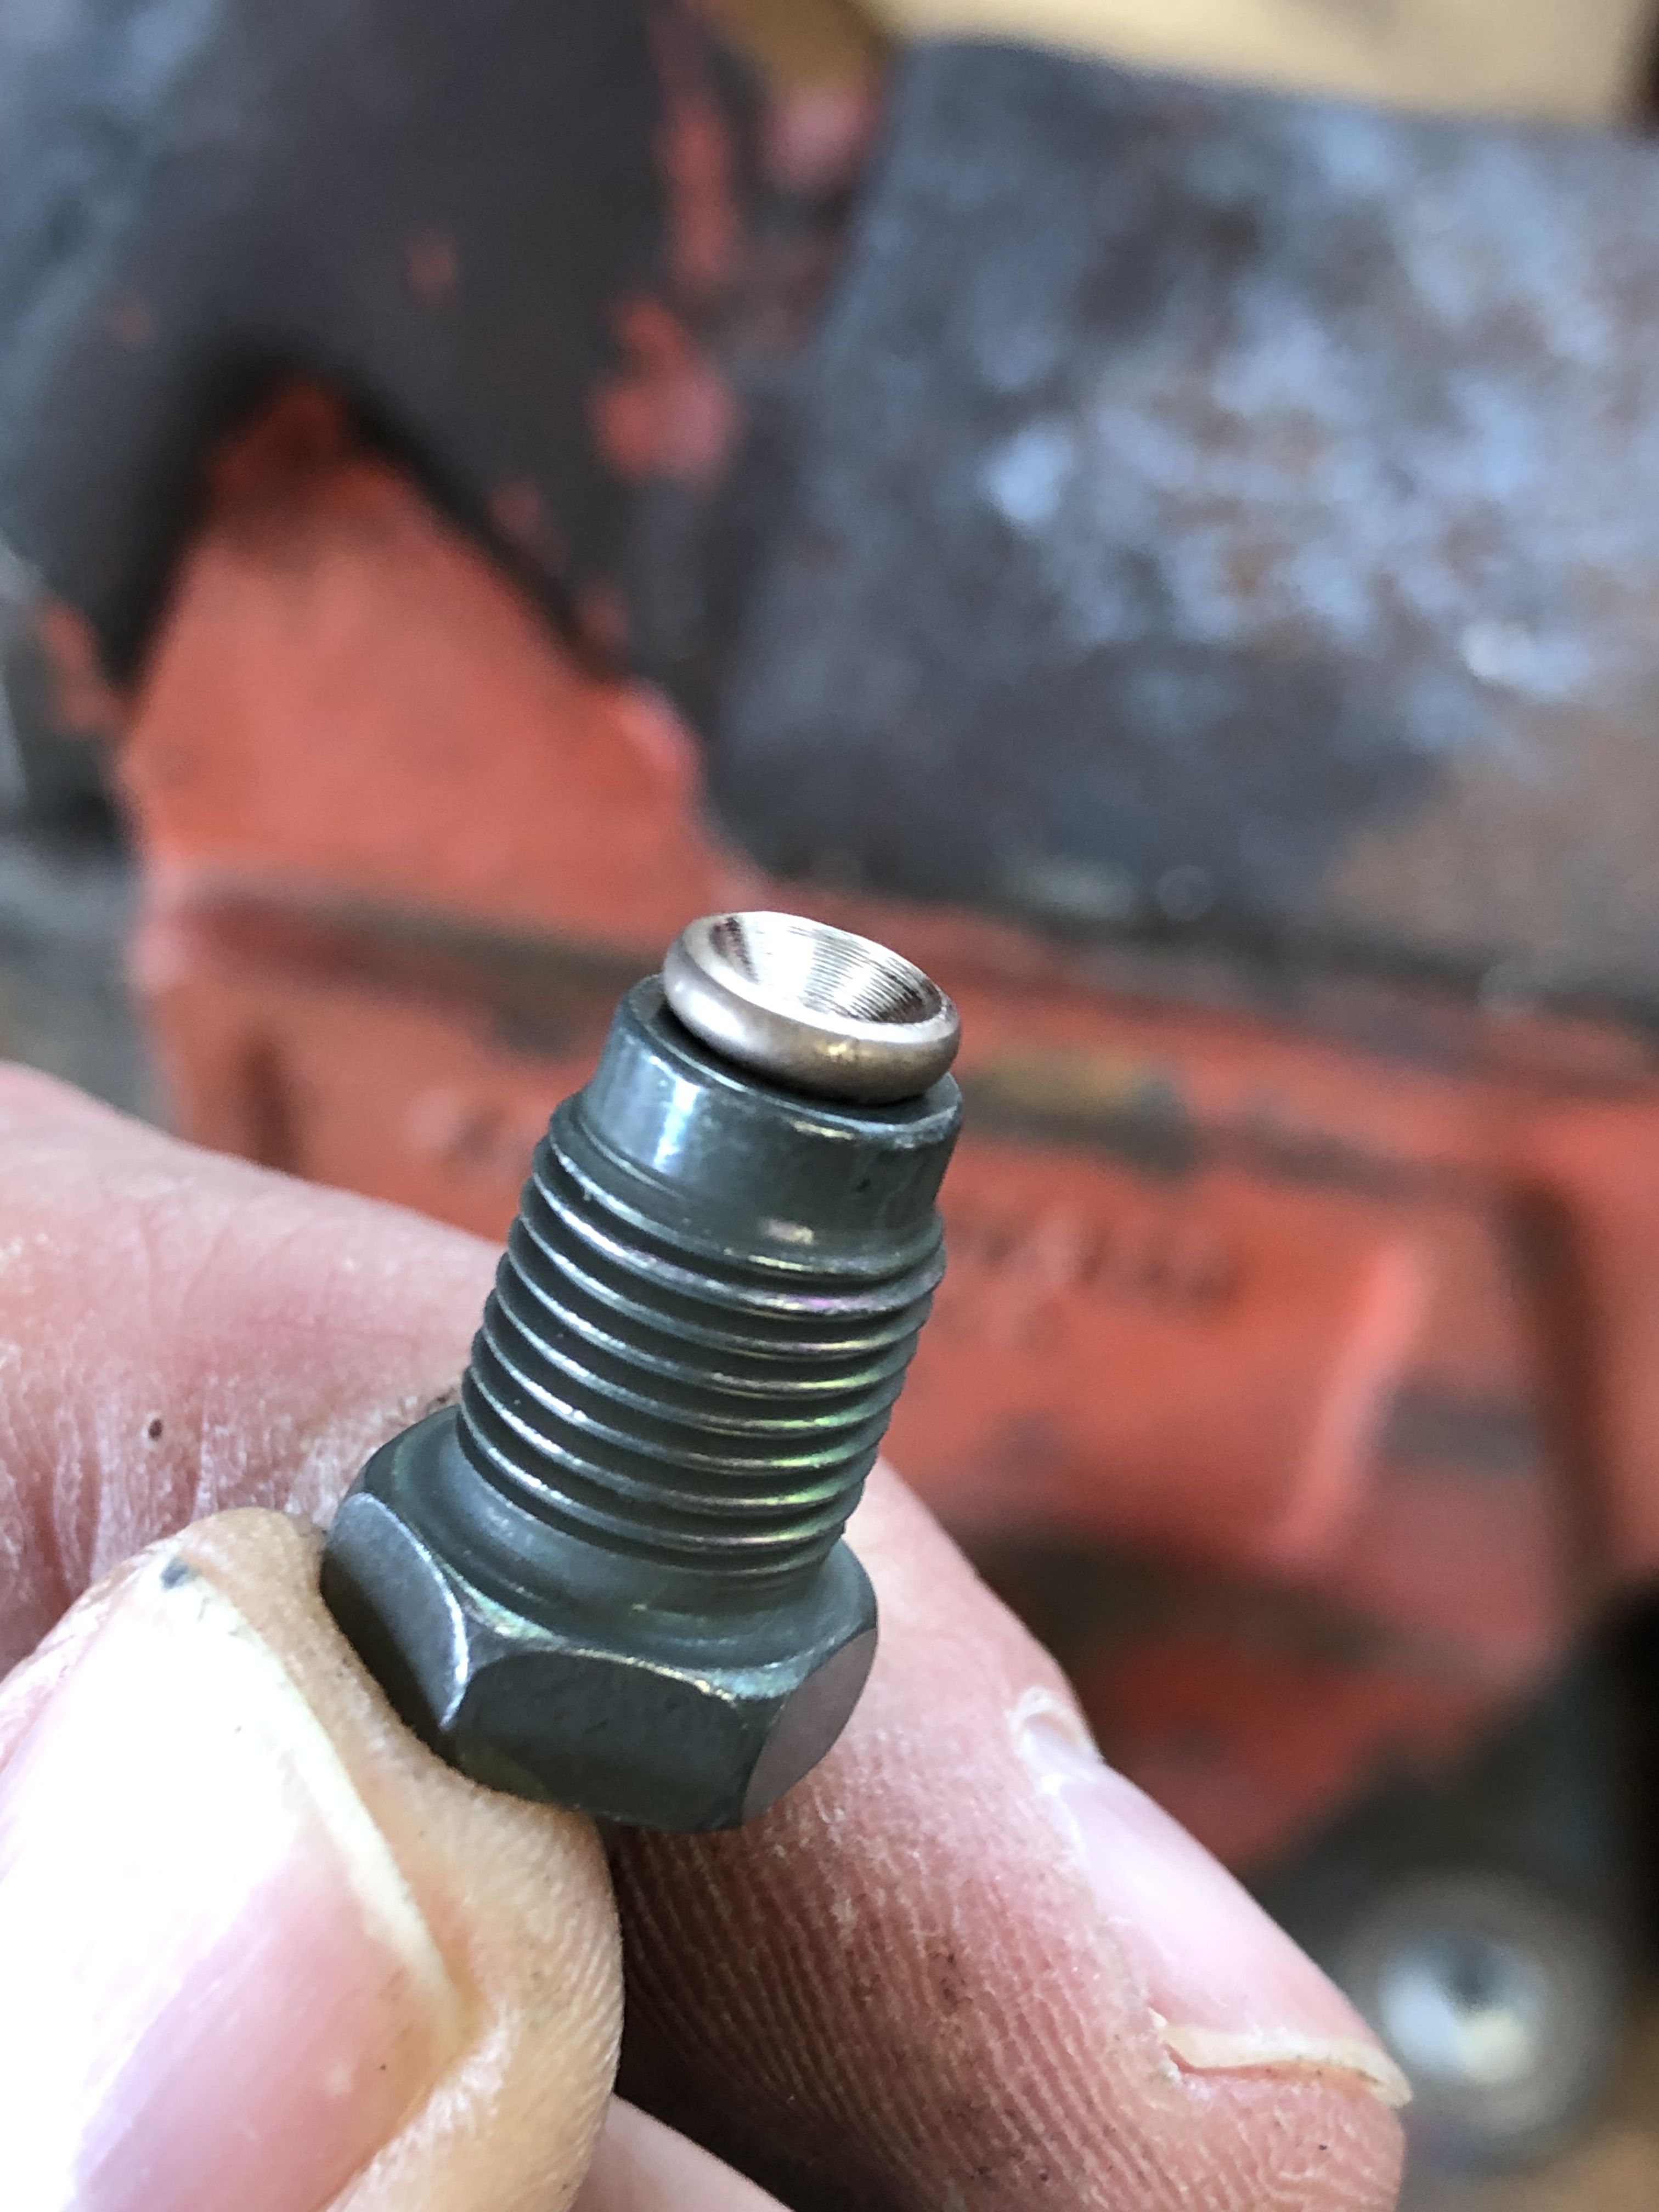
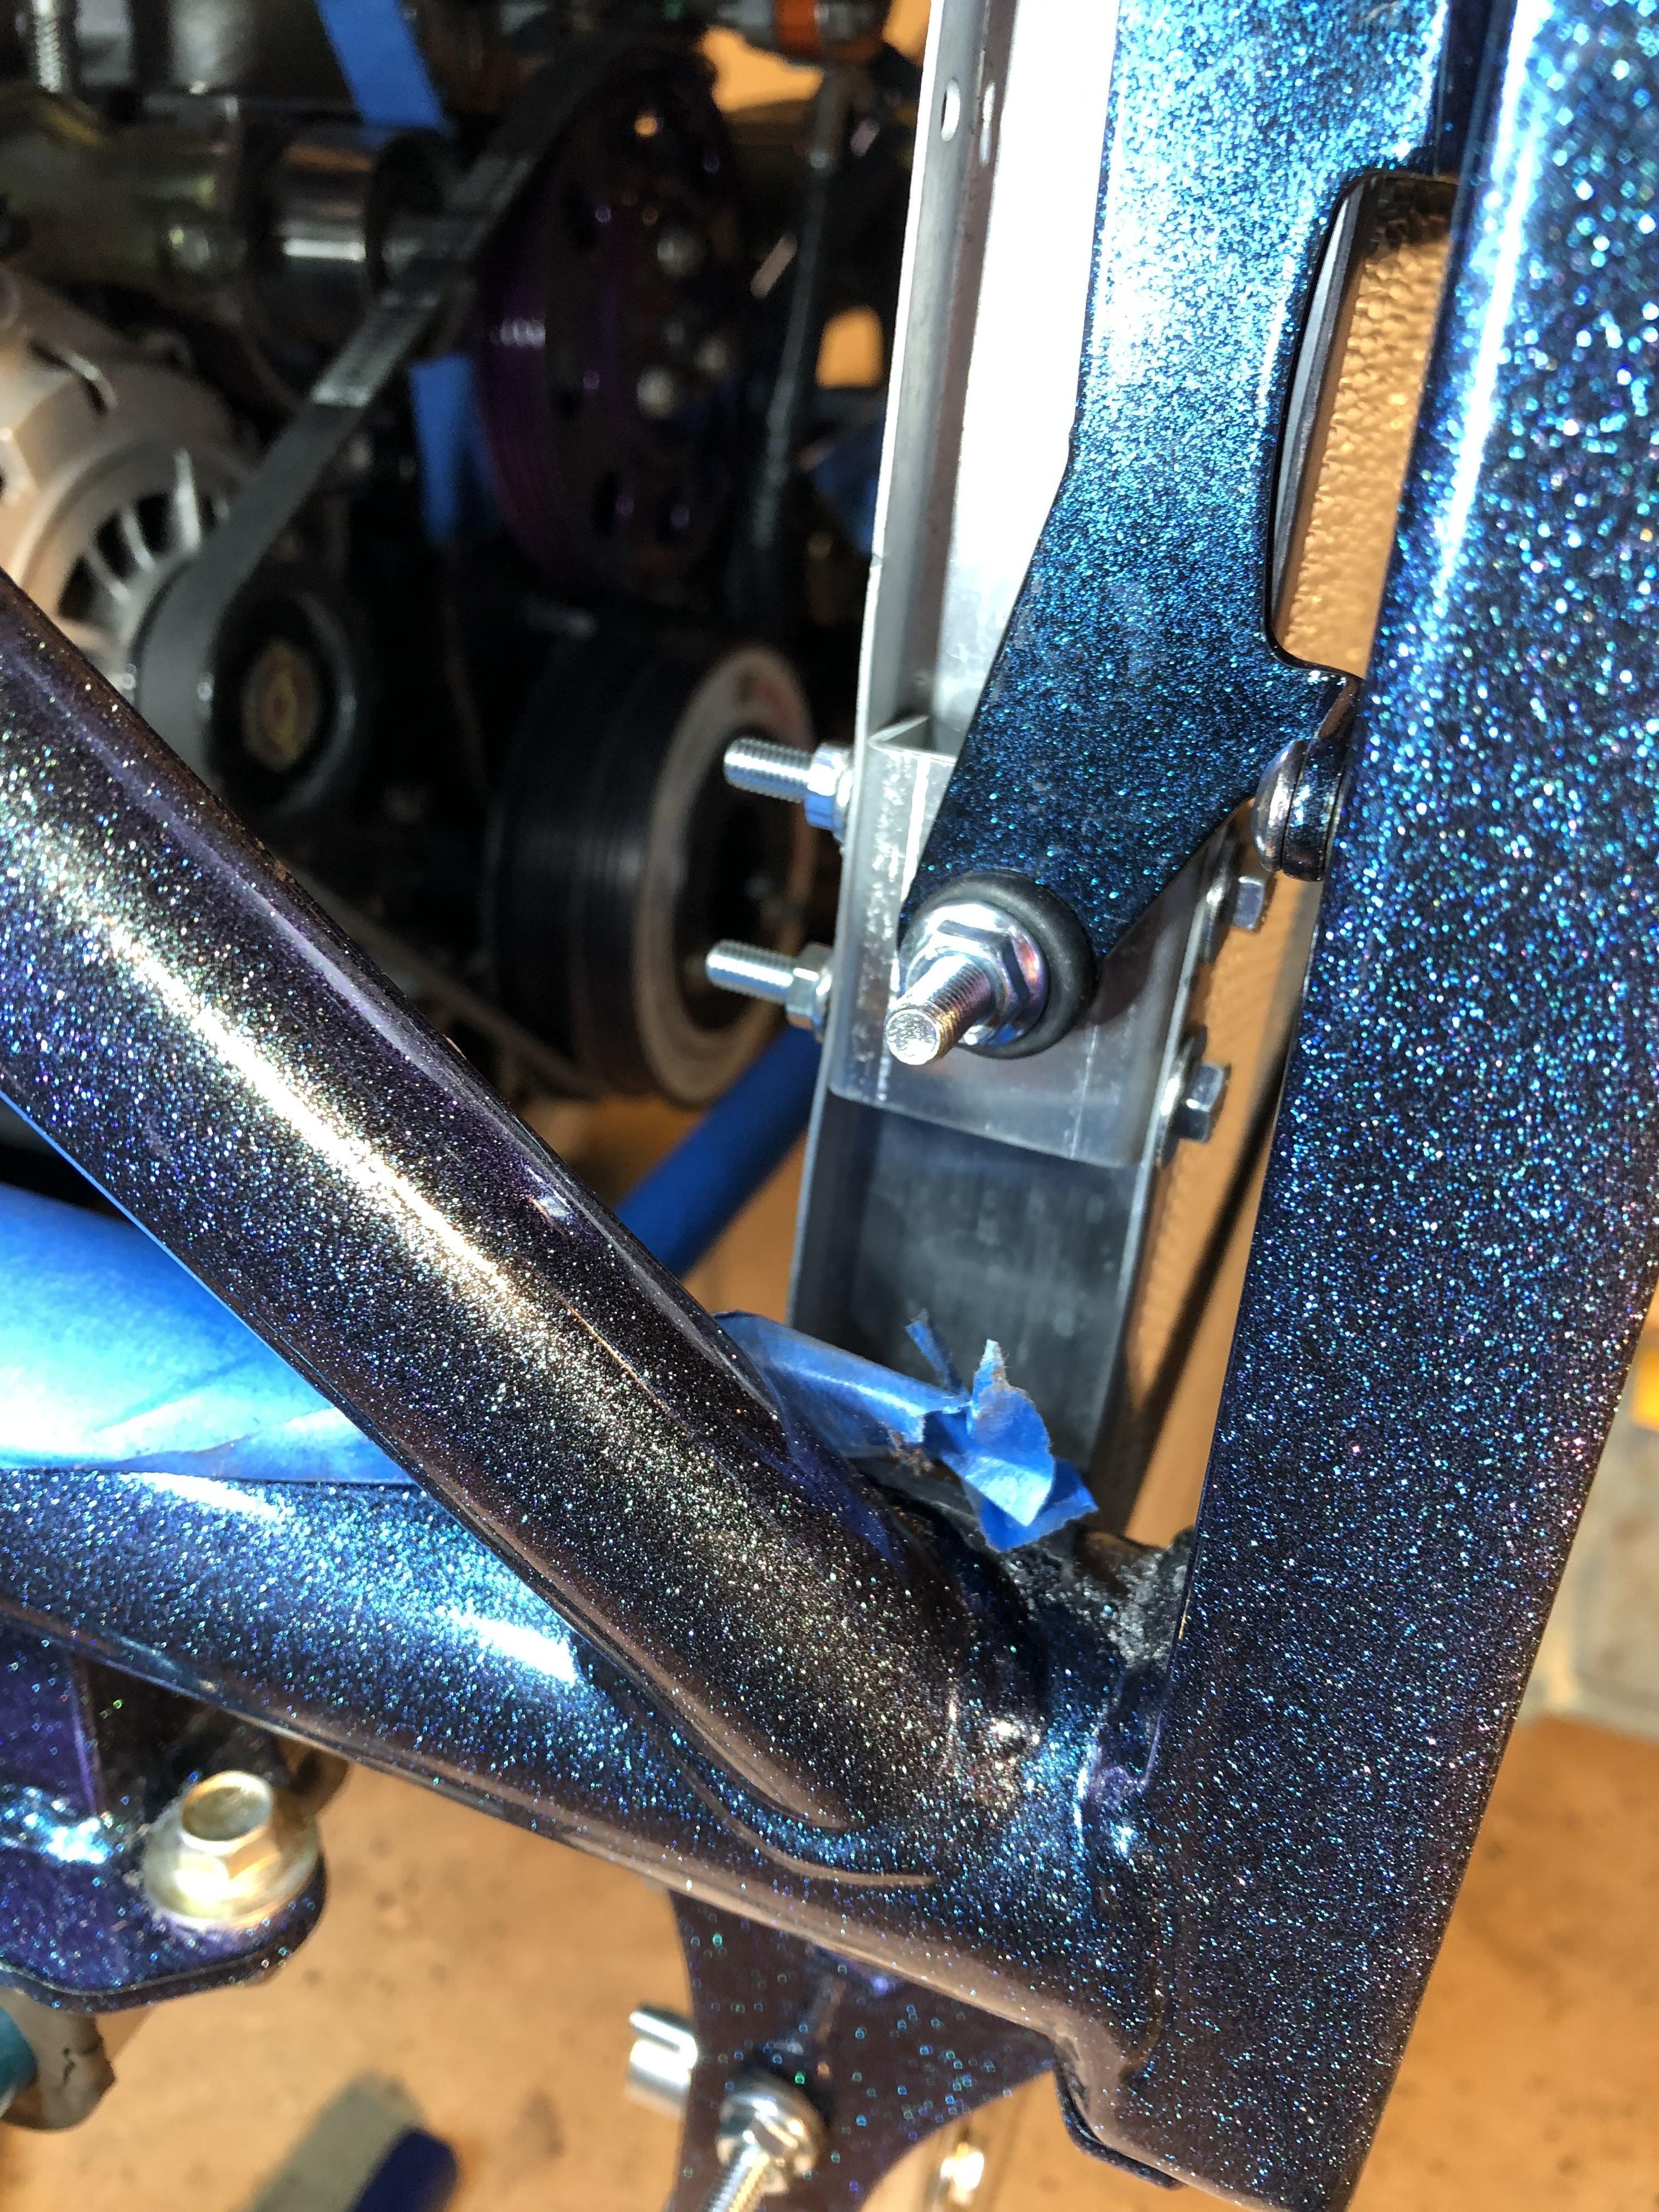
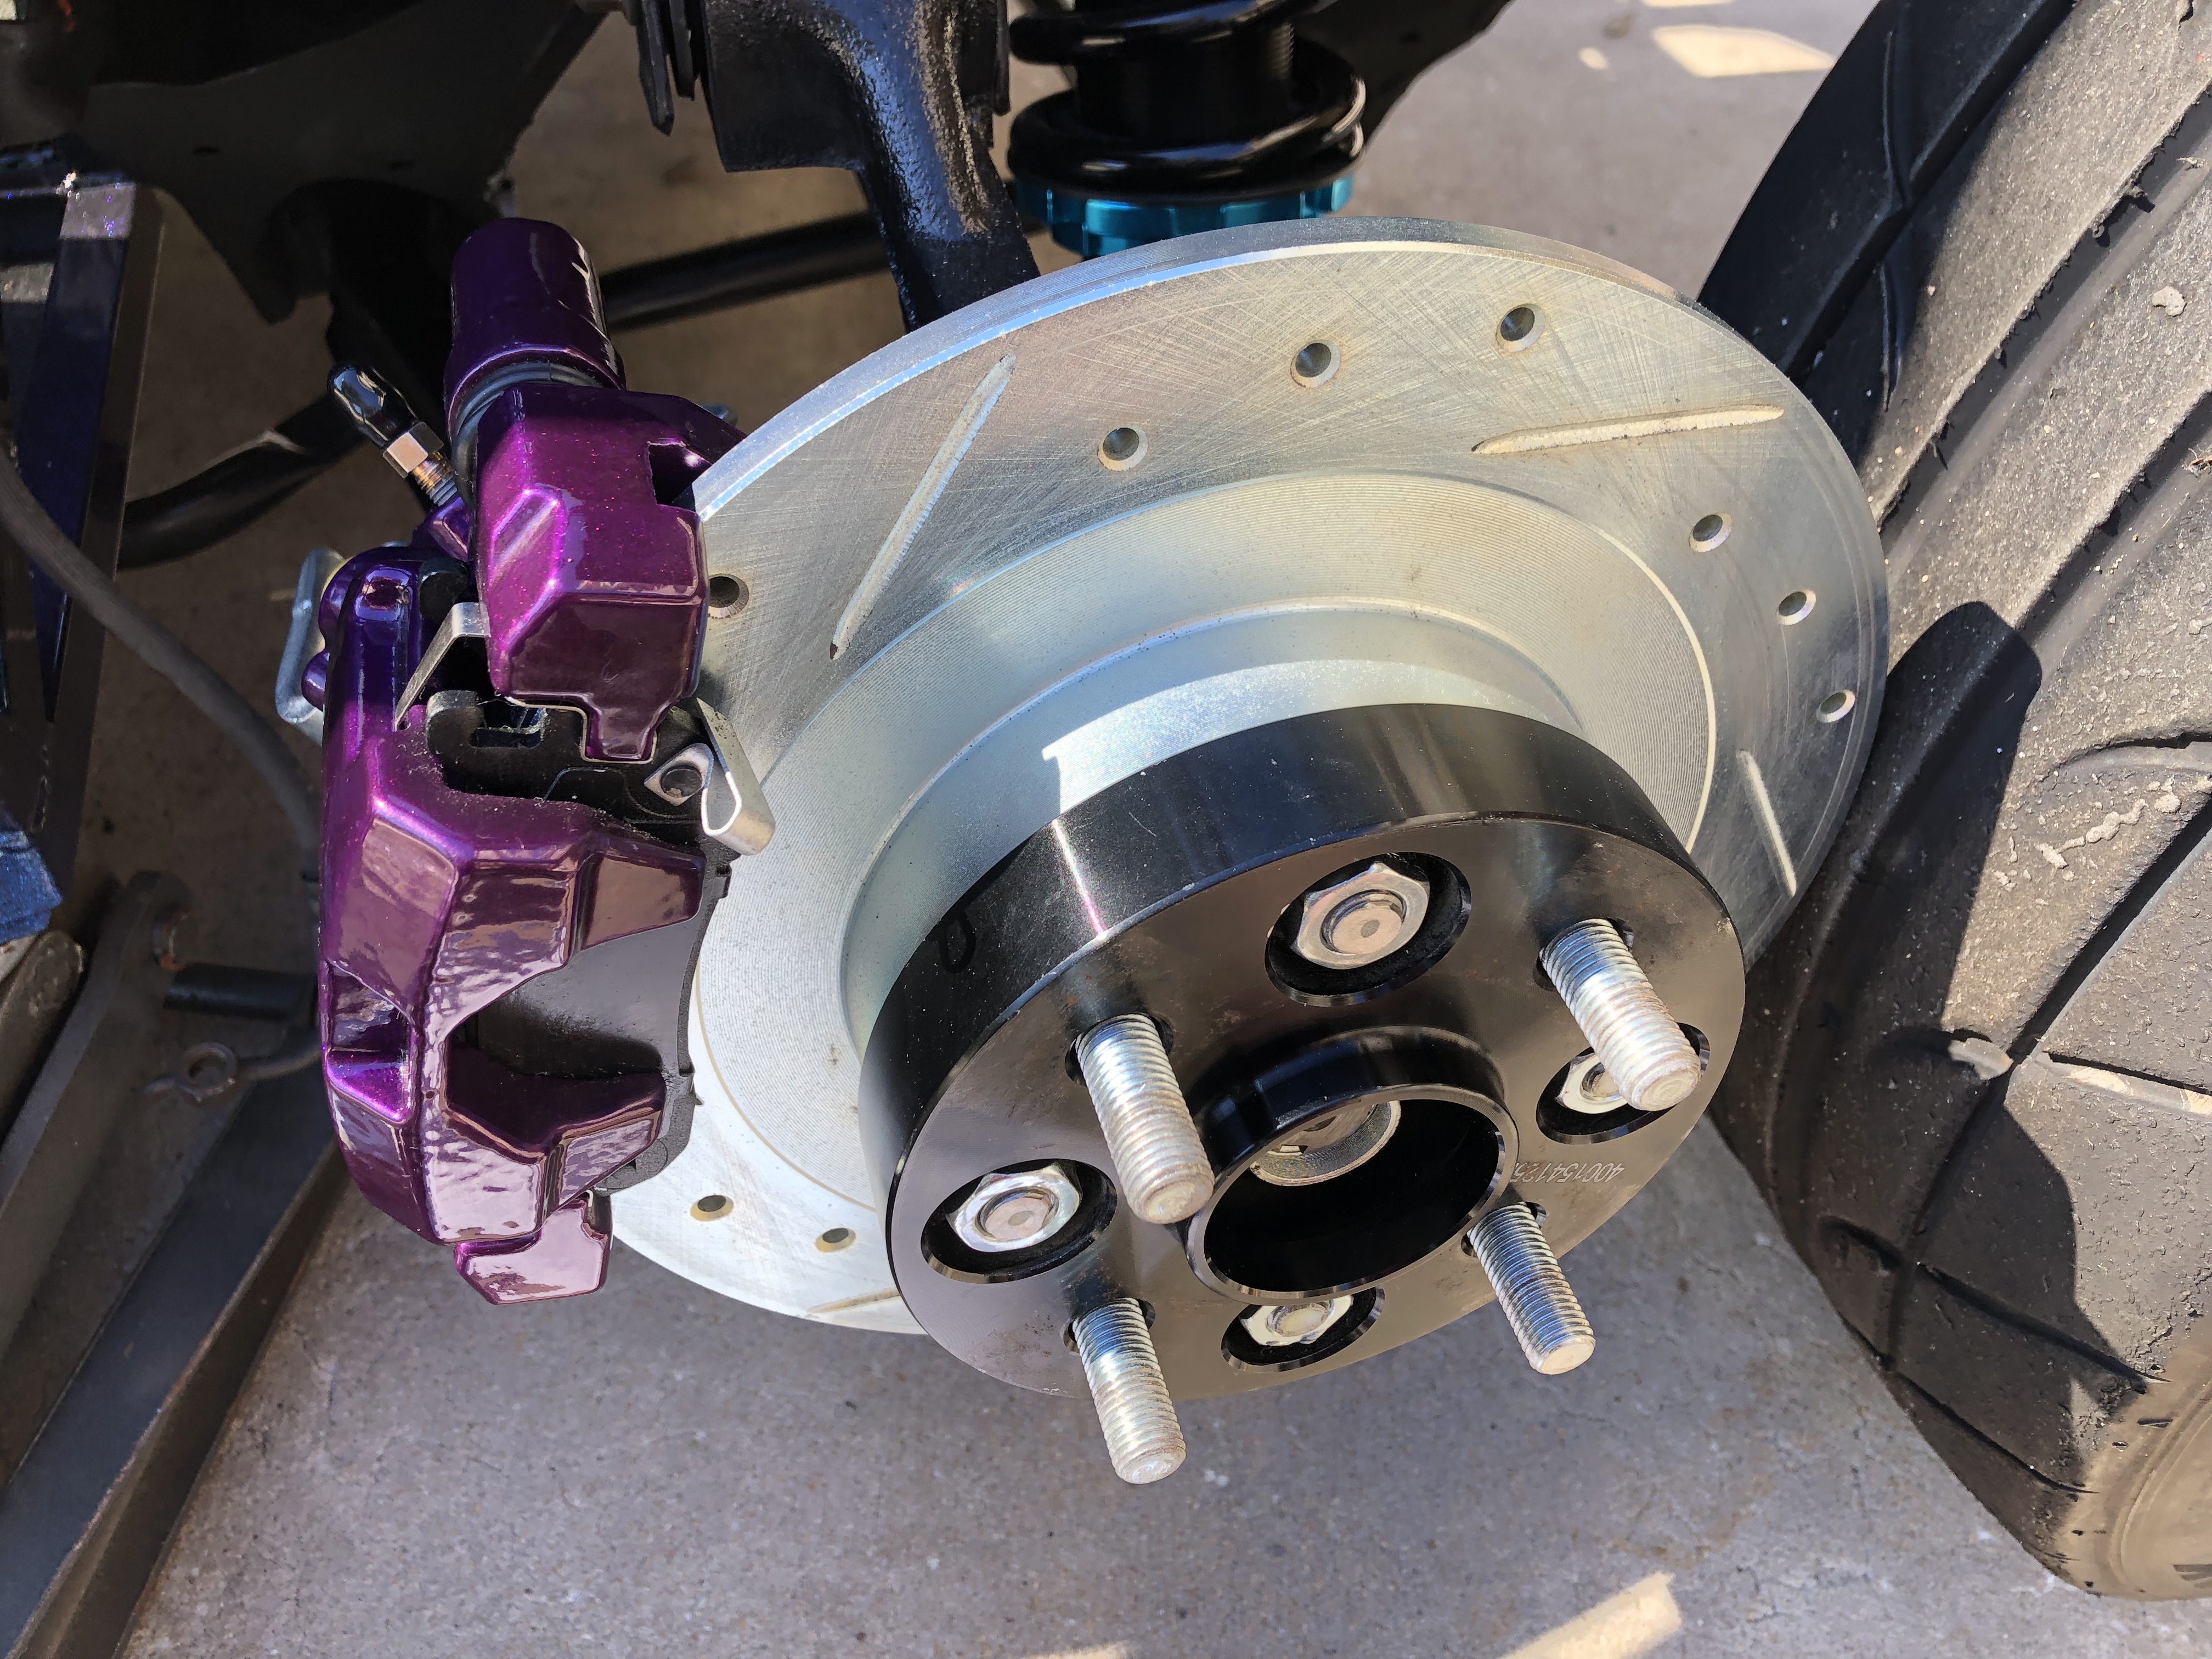
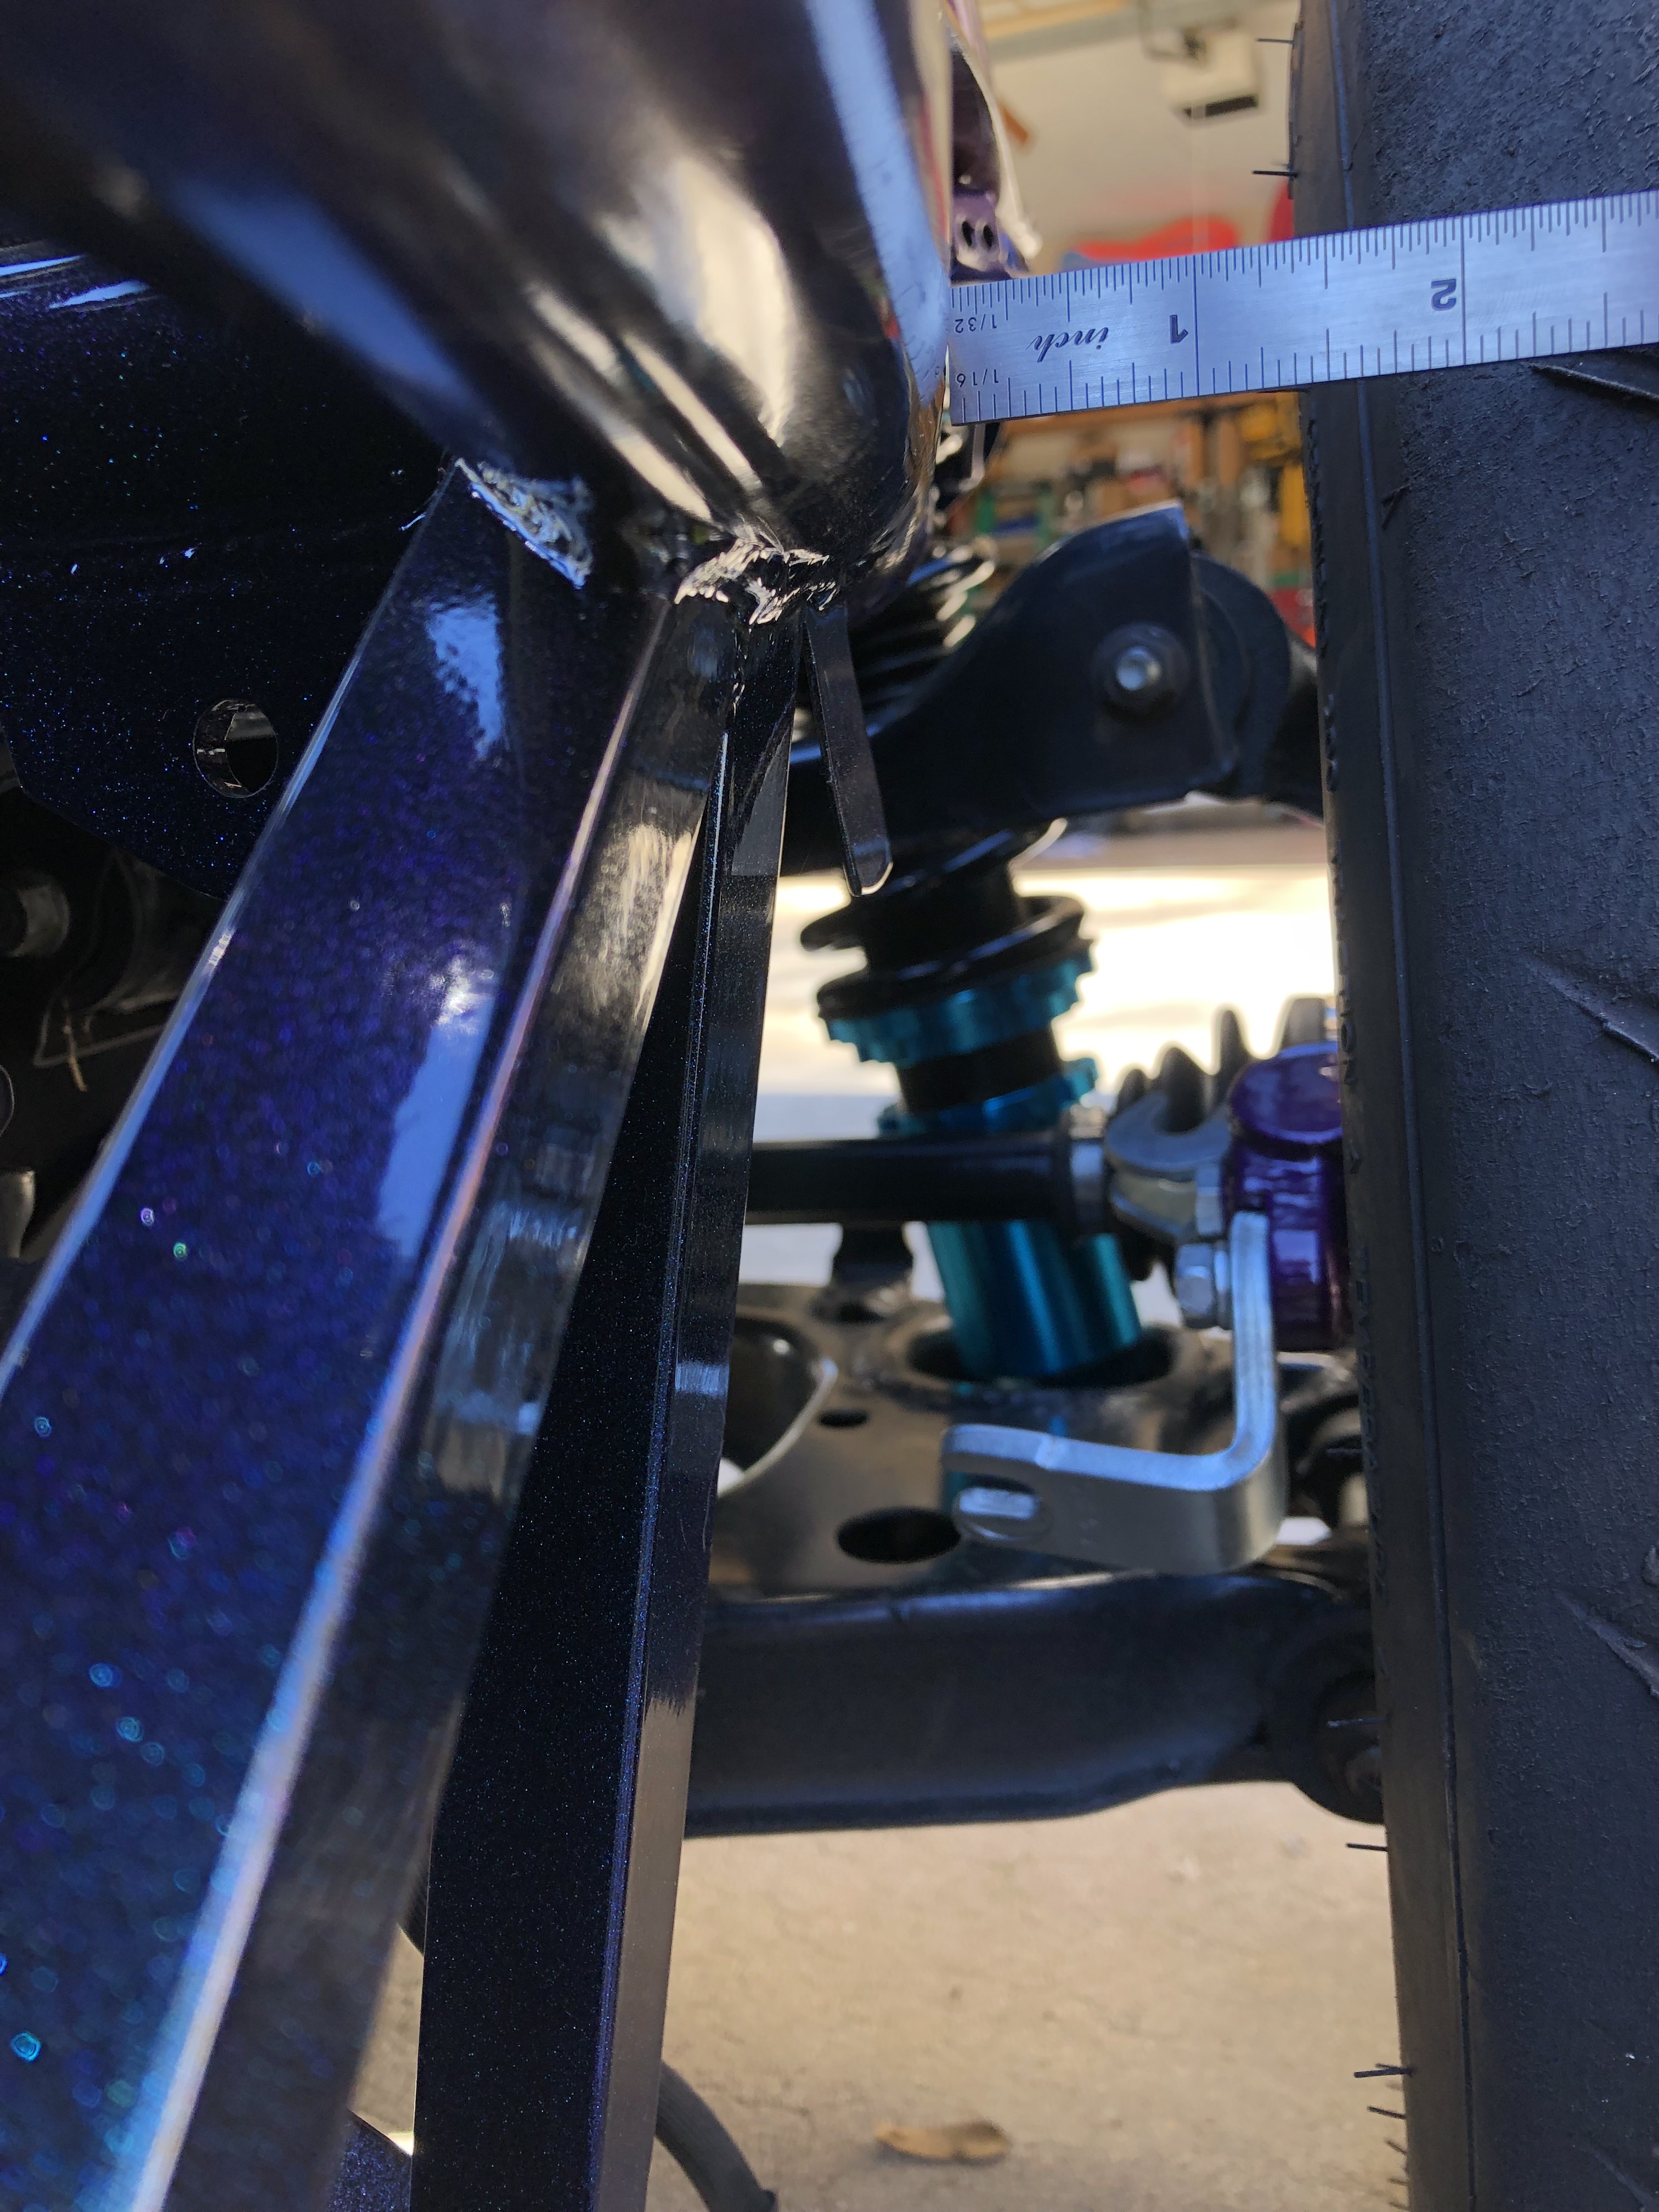
I've got about .750" gap between the tire and my frame without the spacer. I'm contemplating running without the spacer as long as tire deflection doesn't rub the frame. I don't need a spacer that big but it's what I have laying around.
Spacer:
Without spacer:
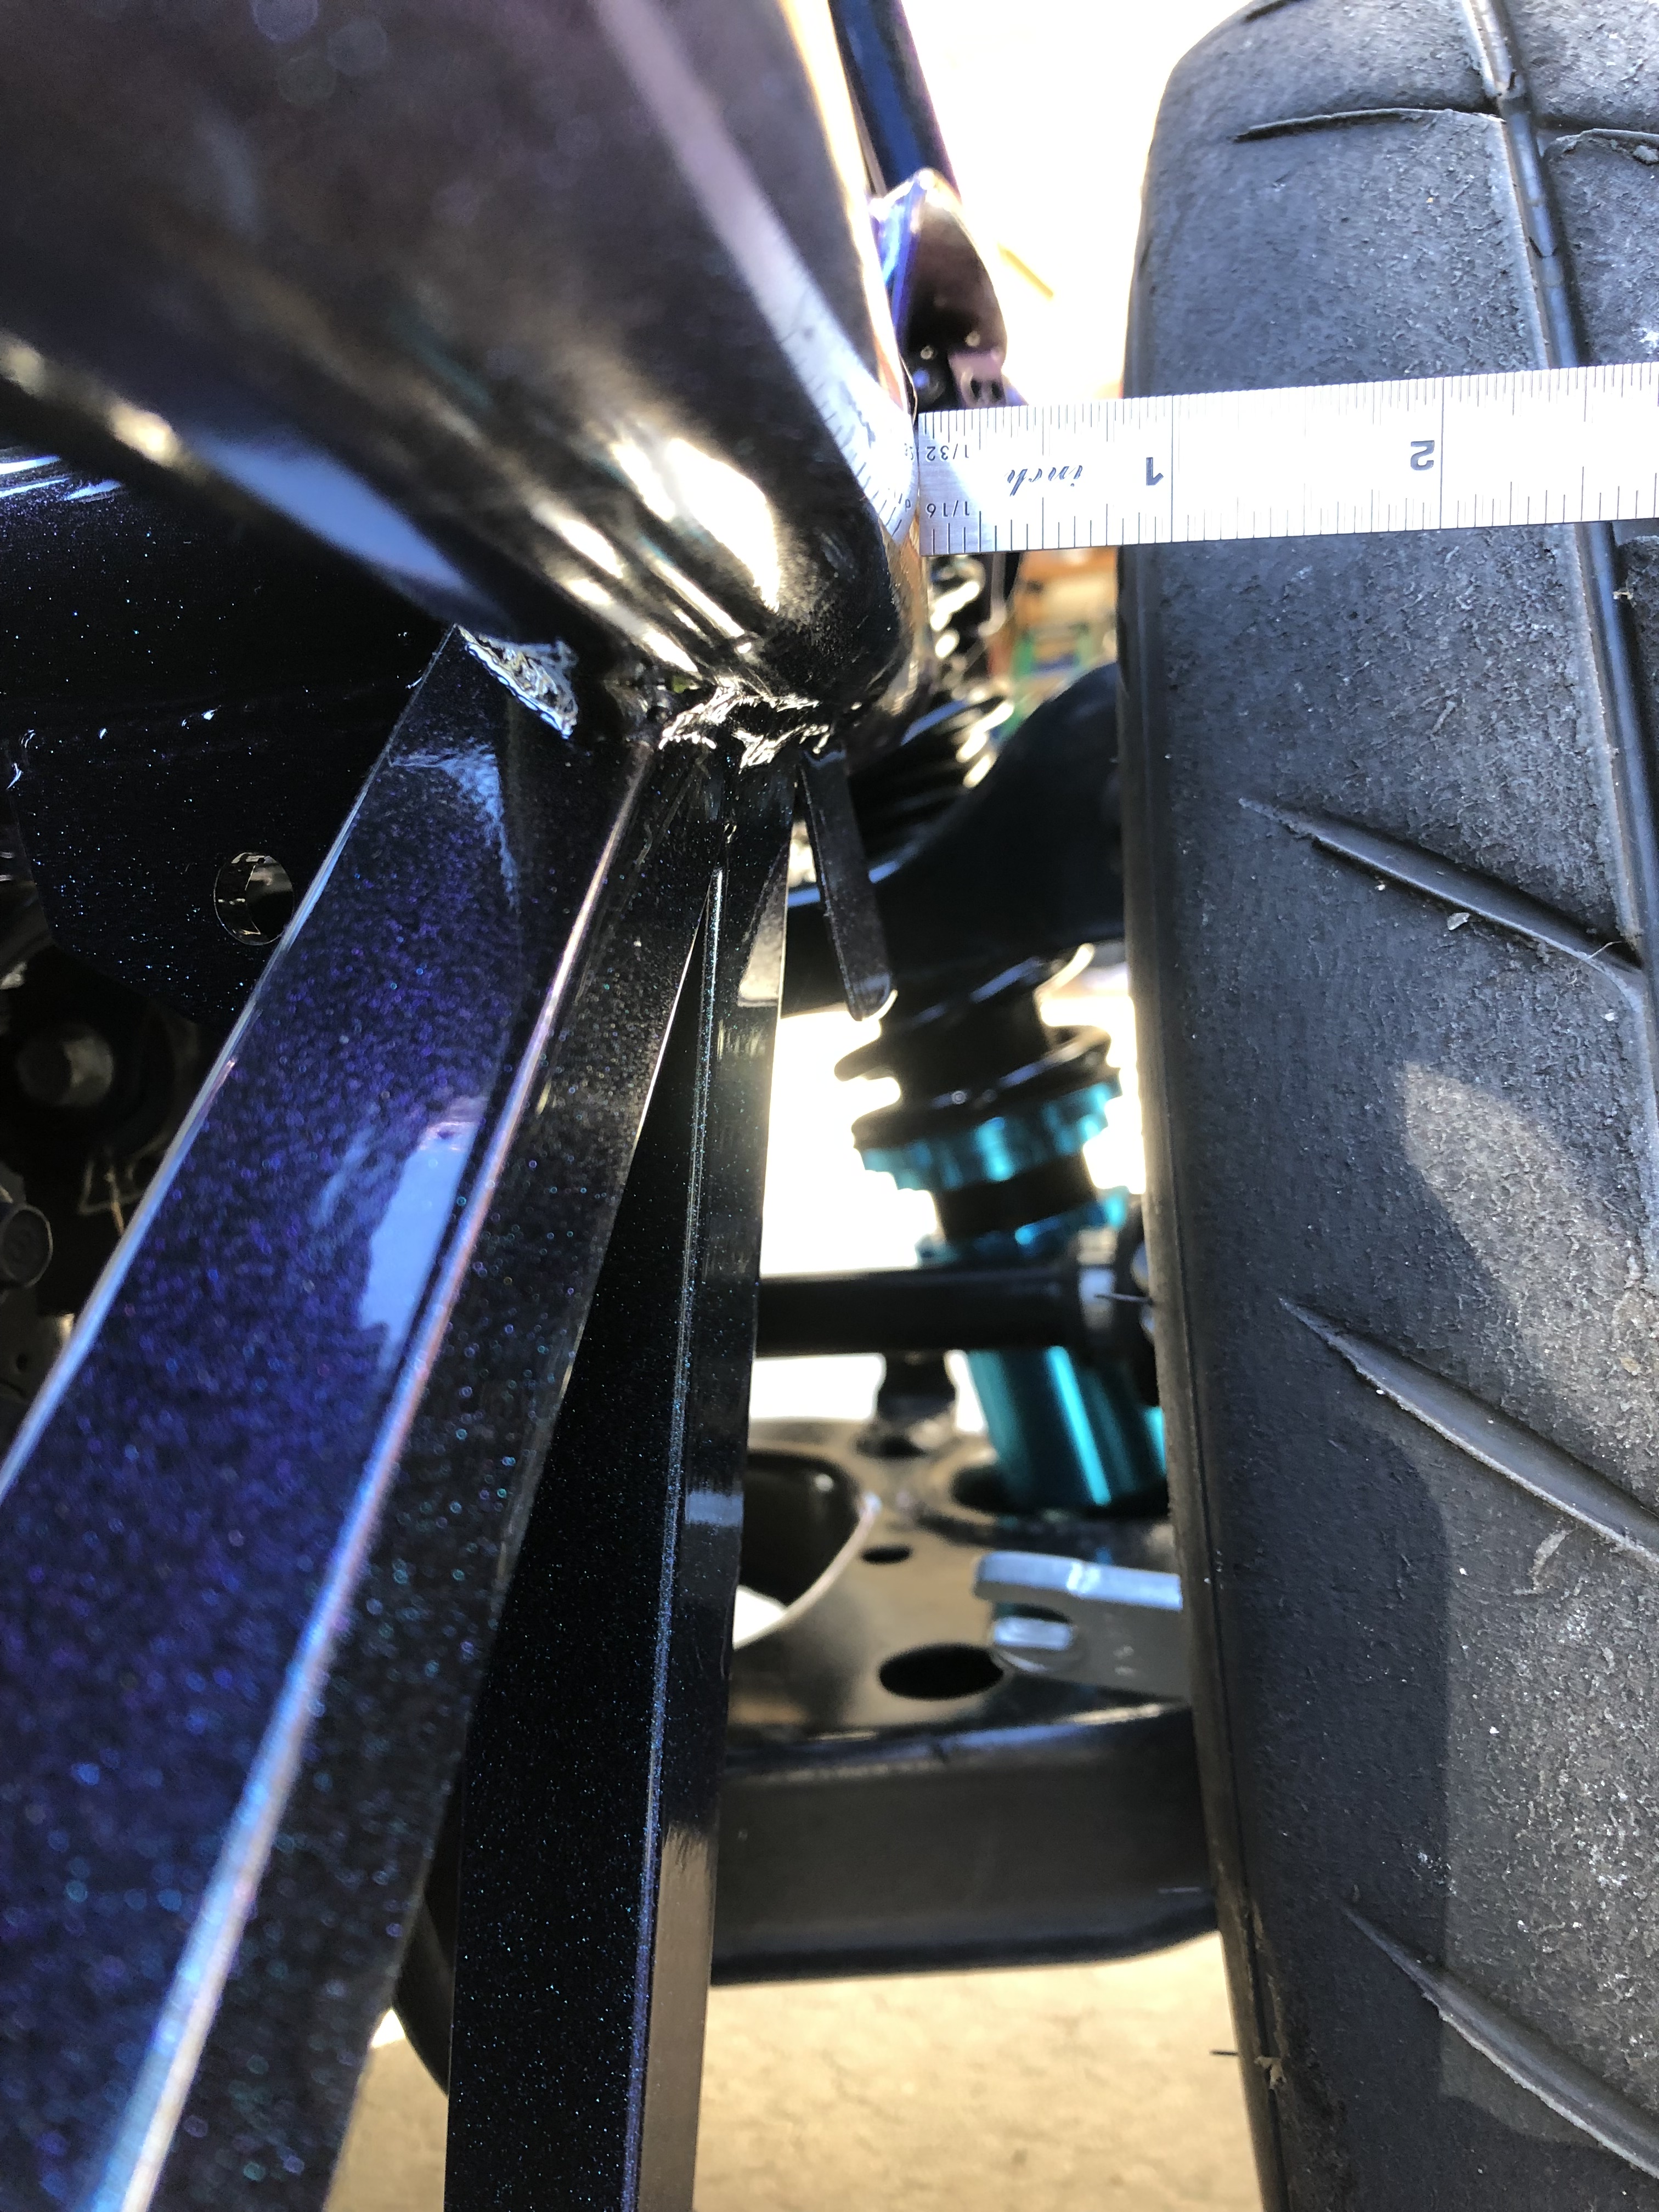
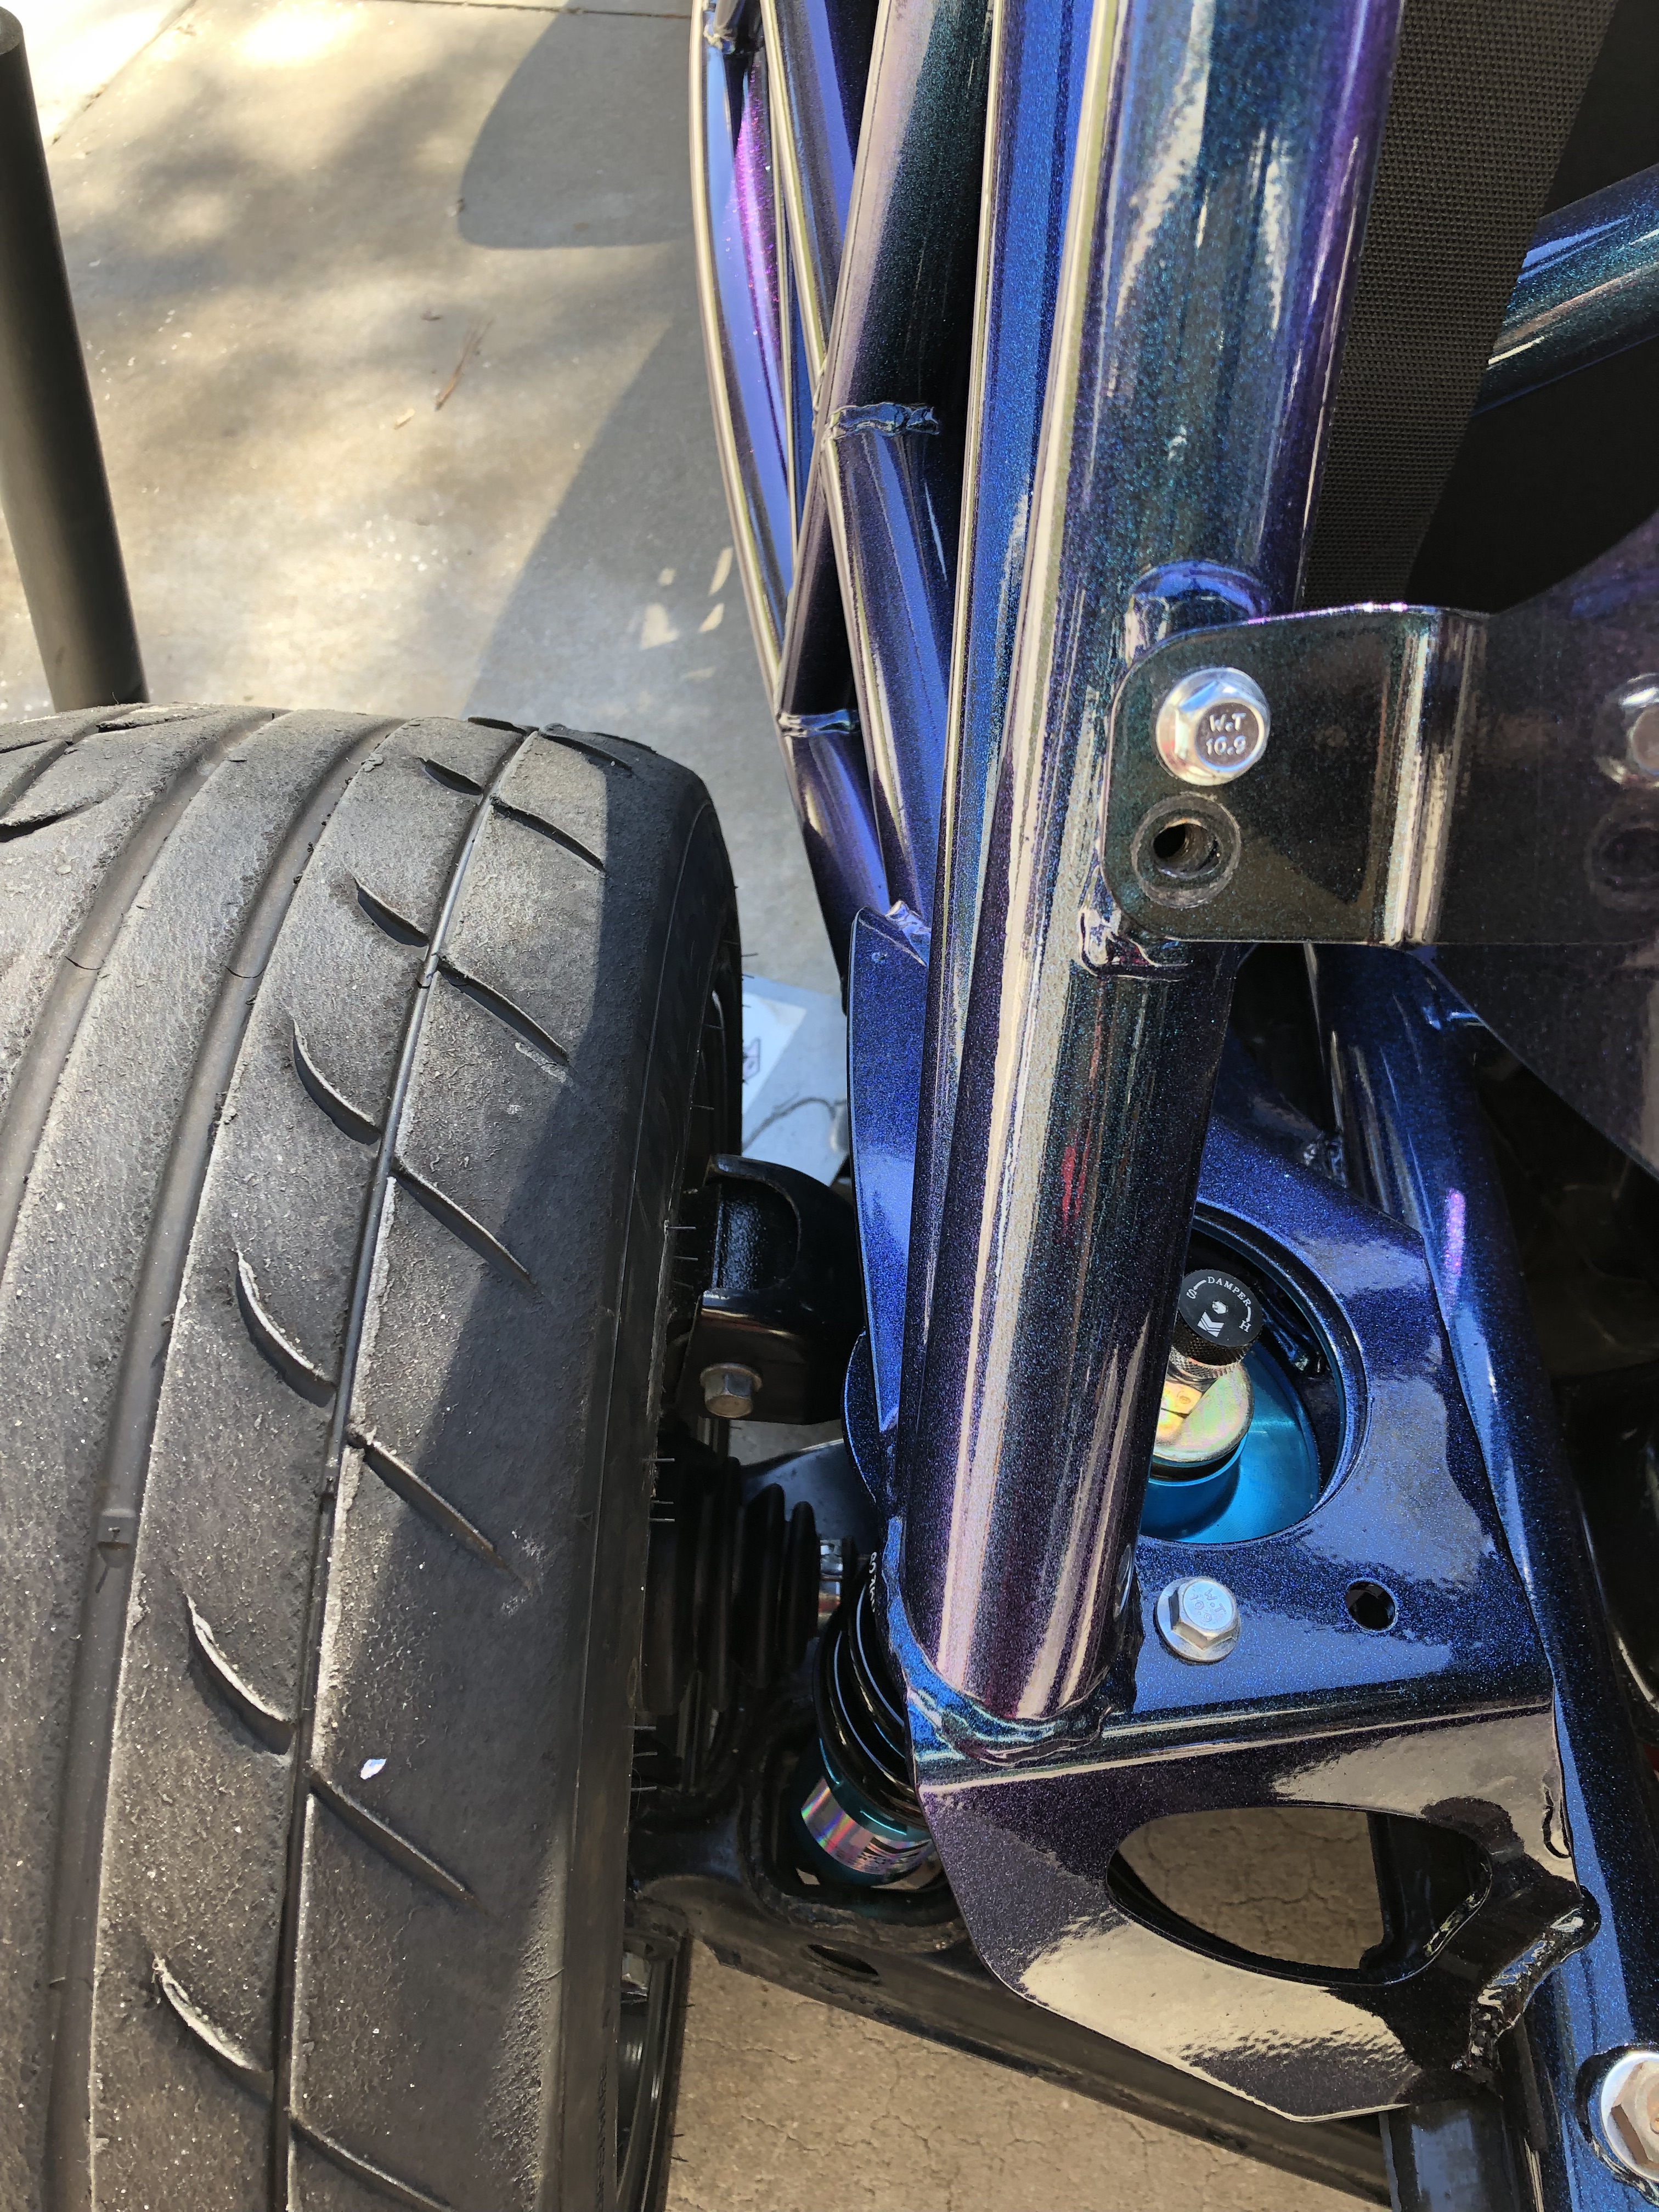
With spacer:

Spacer:
Without spacer:
With spacer:
Reply
0
0
01-25-2019, 04:03 PM
#140
Junior Member
Thread Starter
Join Date: Jan 2018
Location: Tampa, Fl
Posts: 227
Total Cats: 25
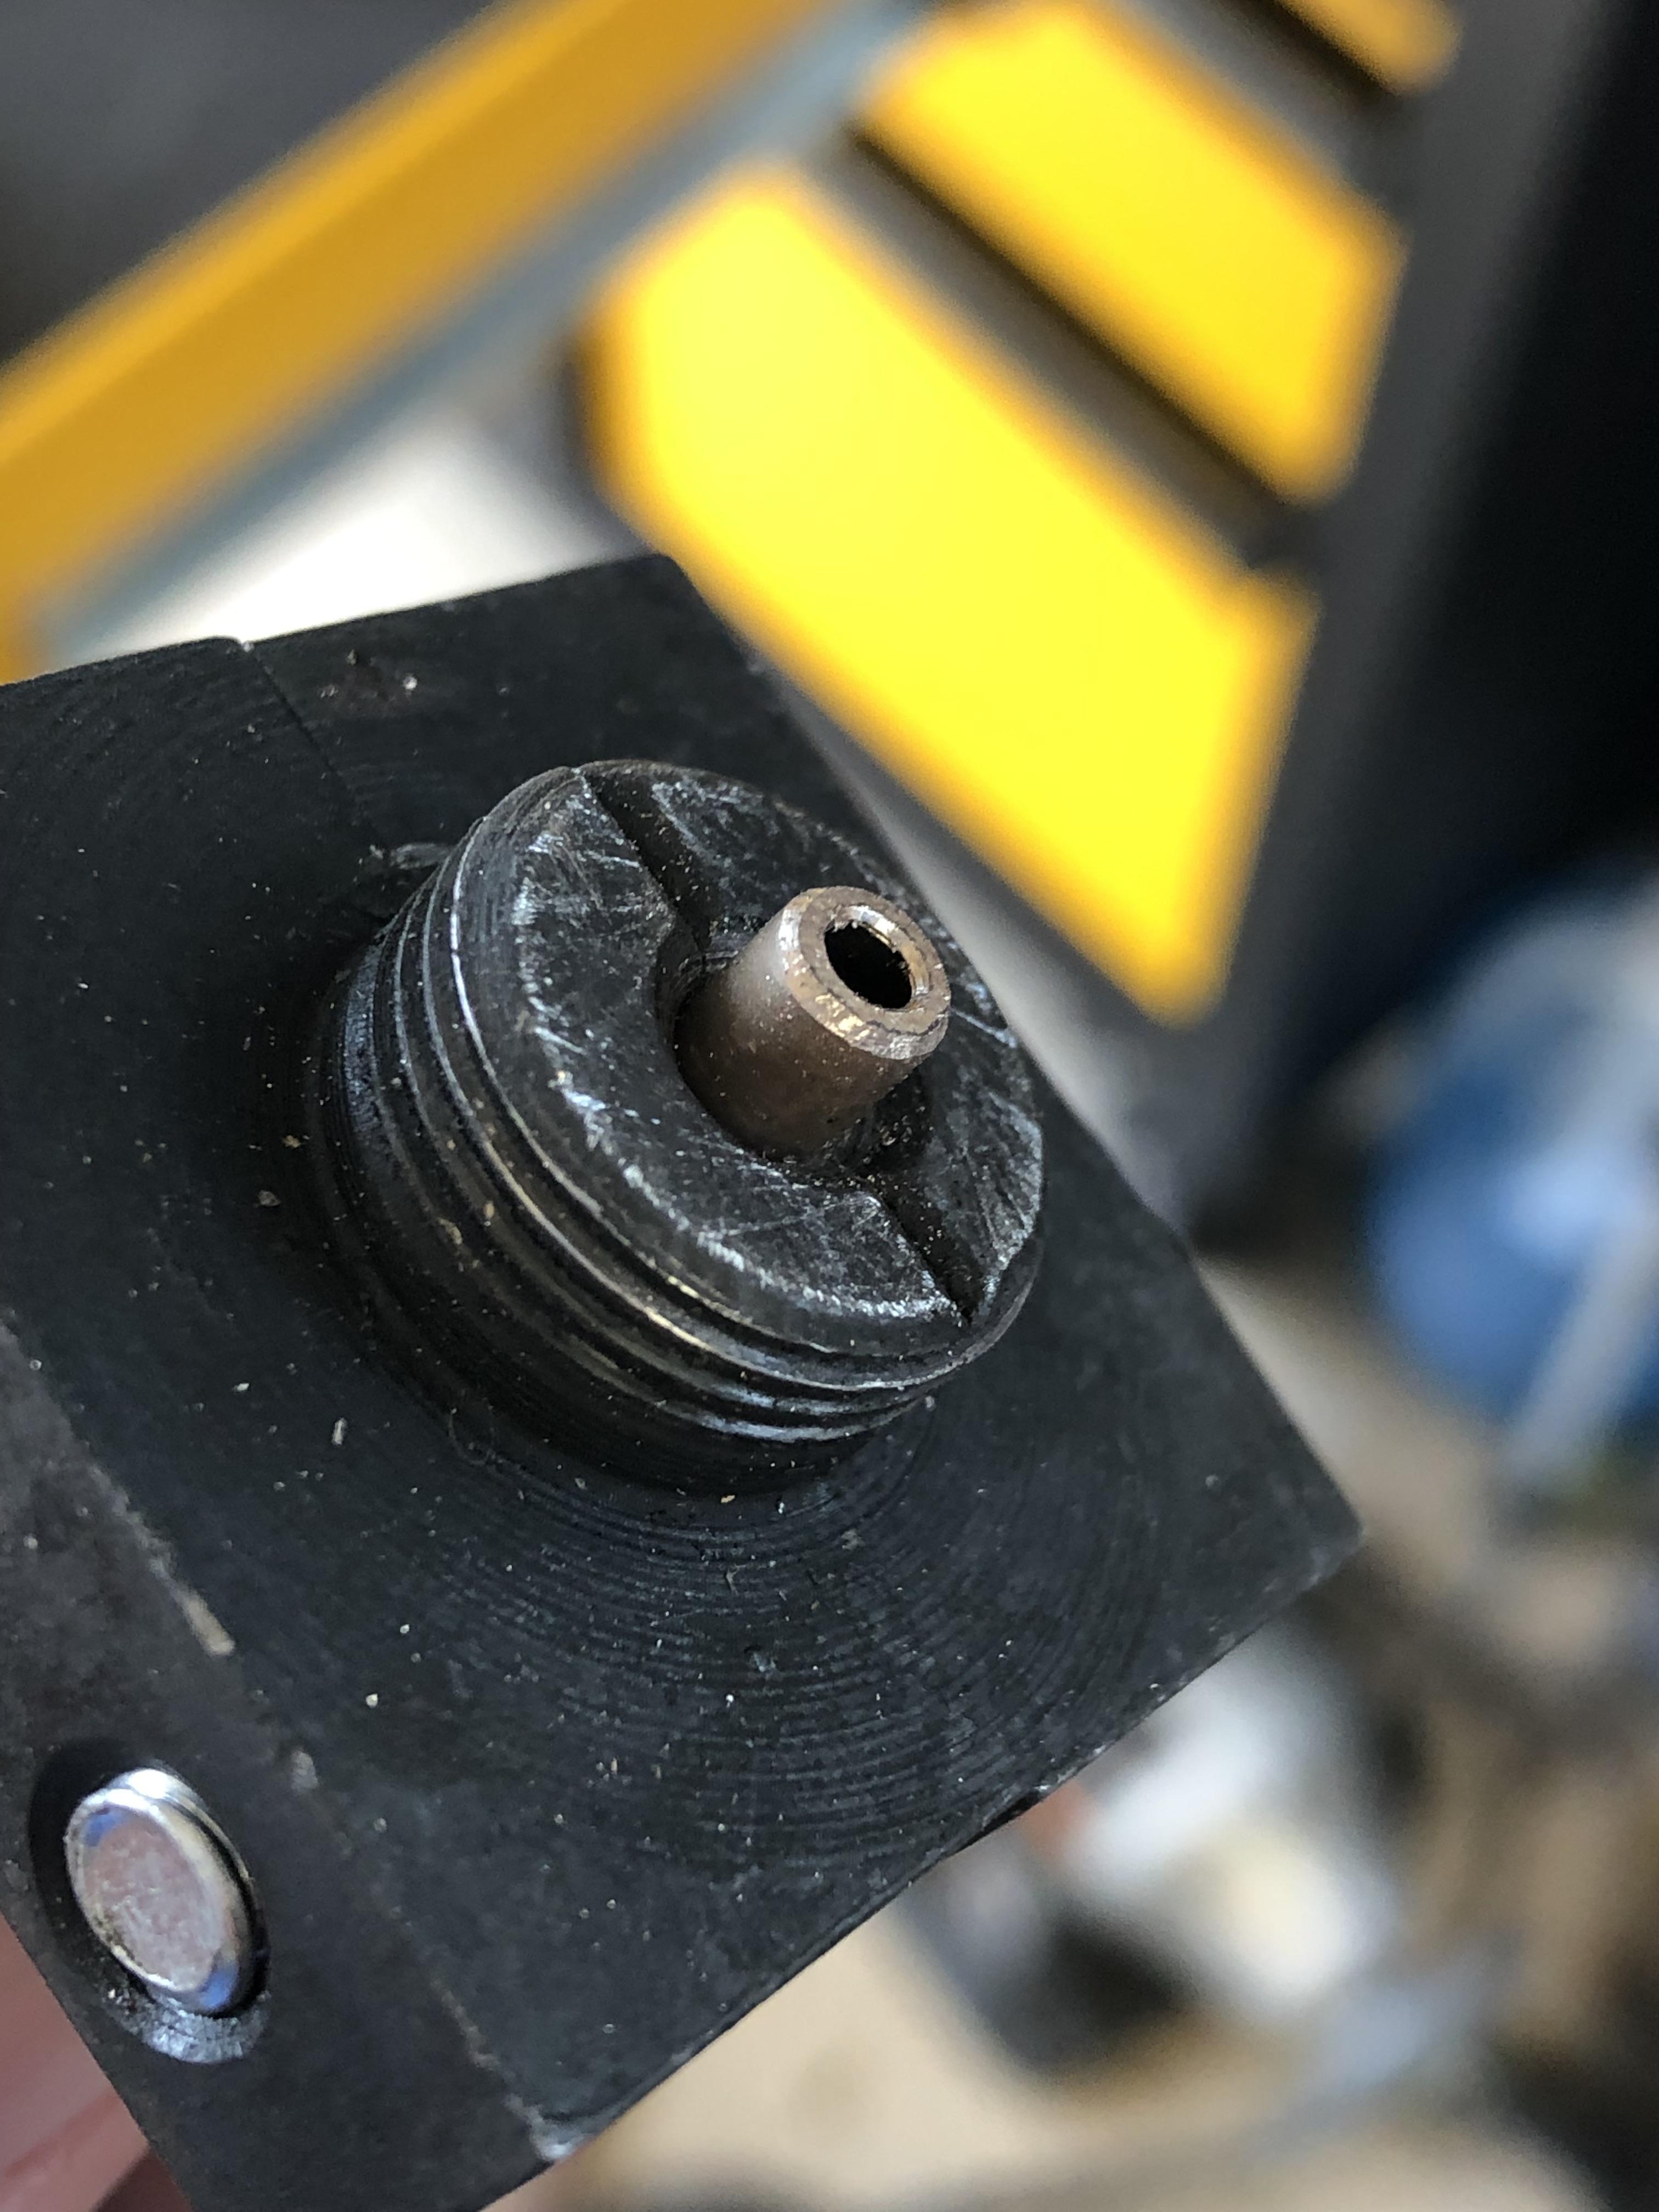
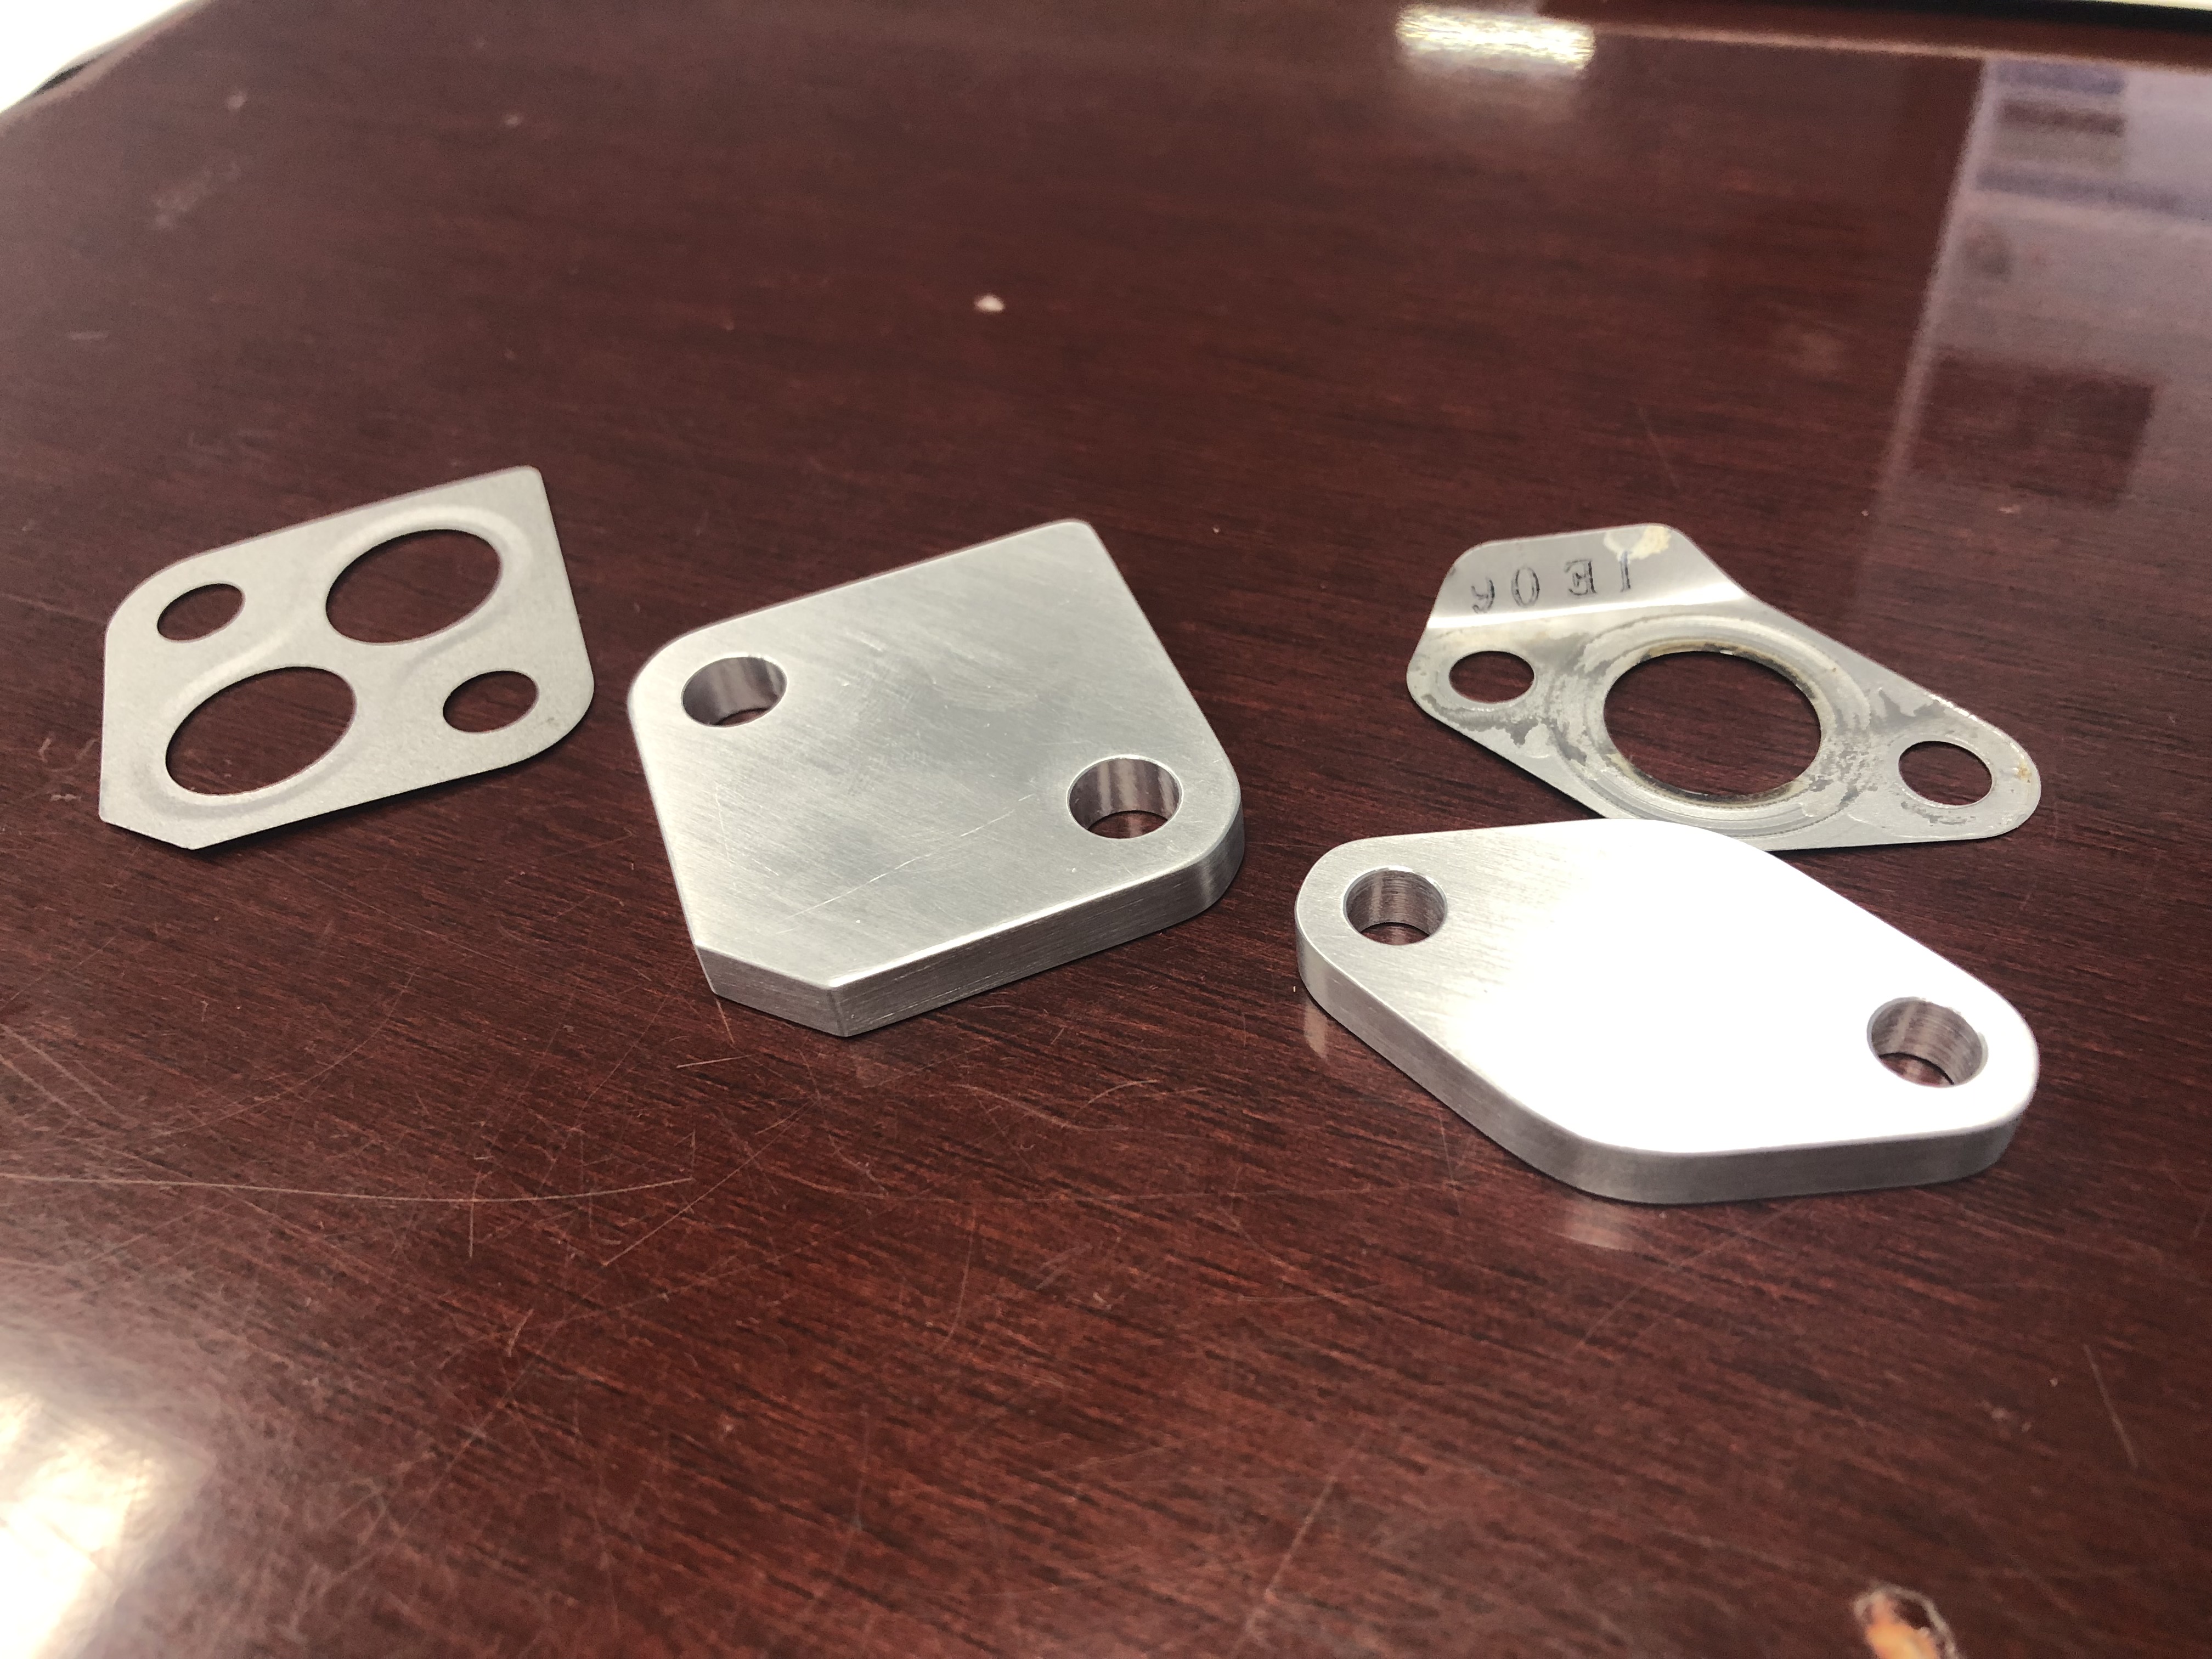
Finished up my coolant reroute using the SKOU reroute block I picked up from Curly.
I drilled two 1/8" holes in the thermostat to keep coolant flowing over the top since I blocked off the feed line on my "mixing bowl".
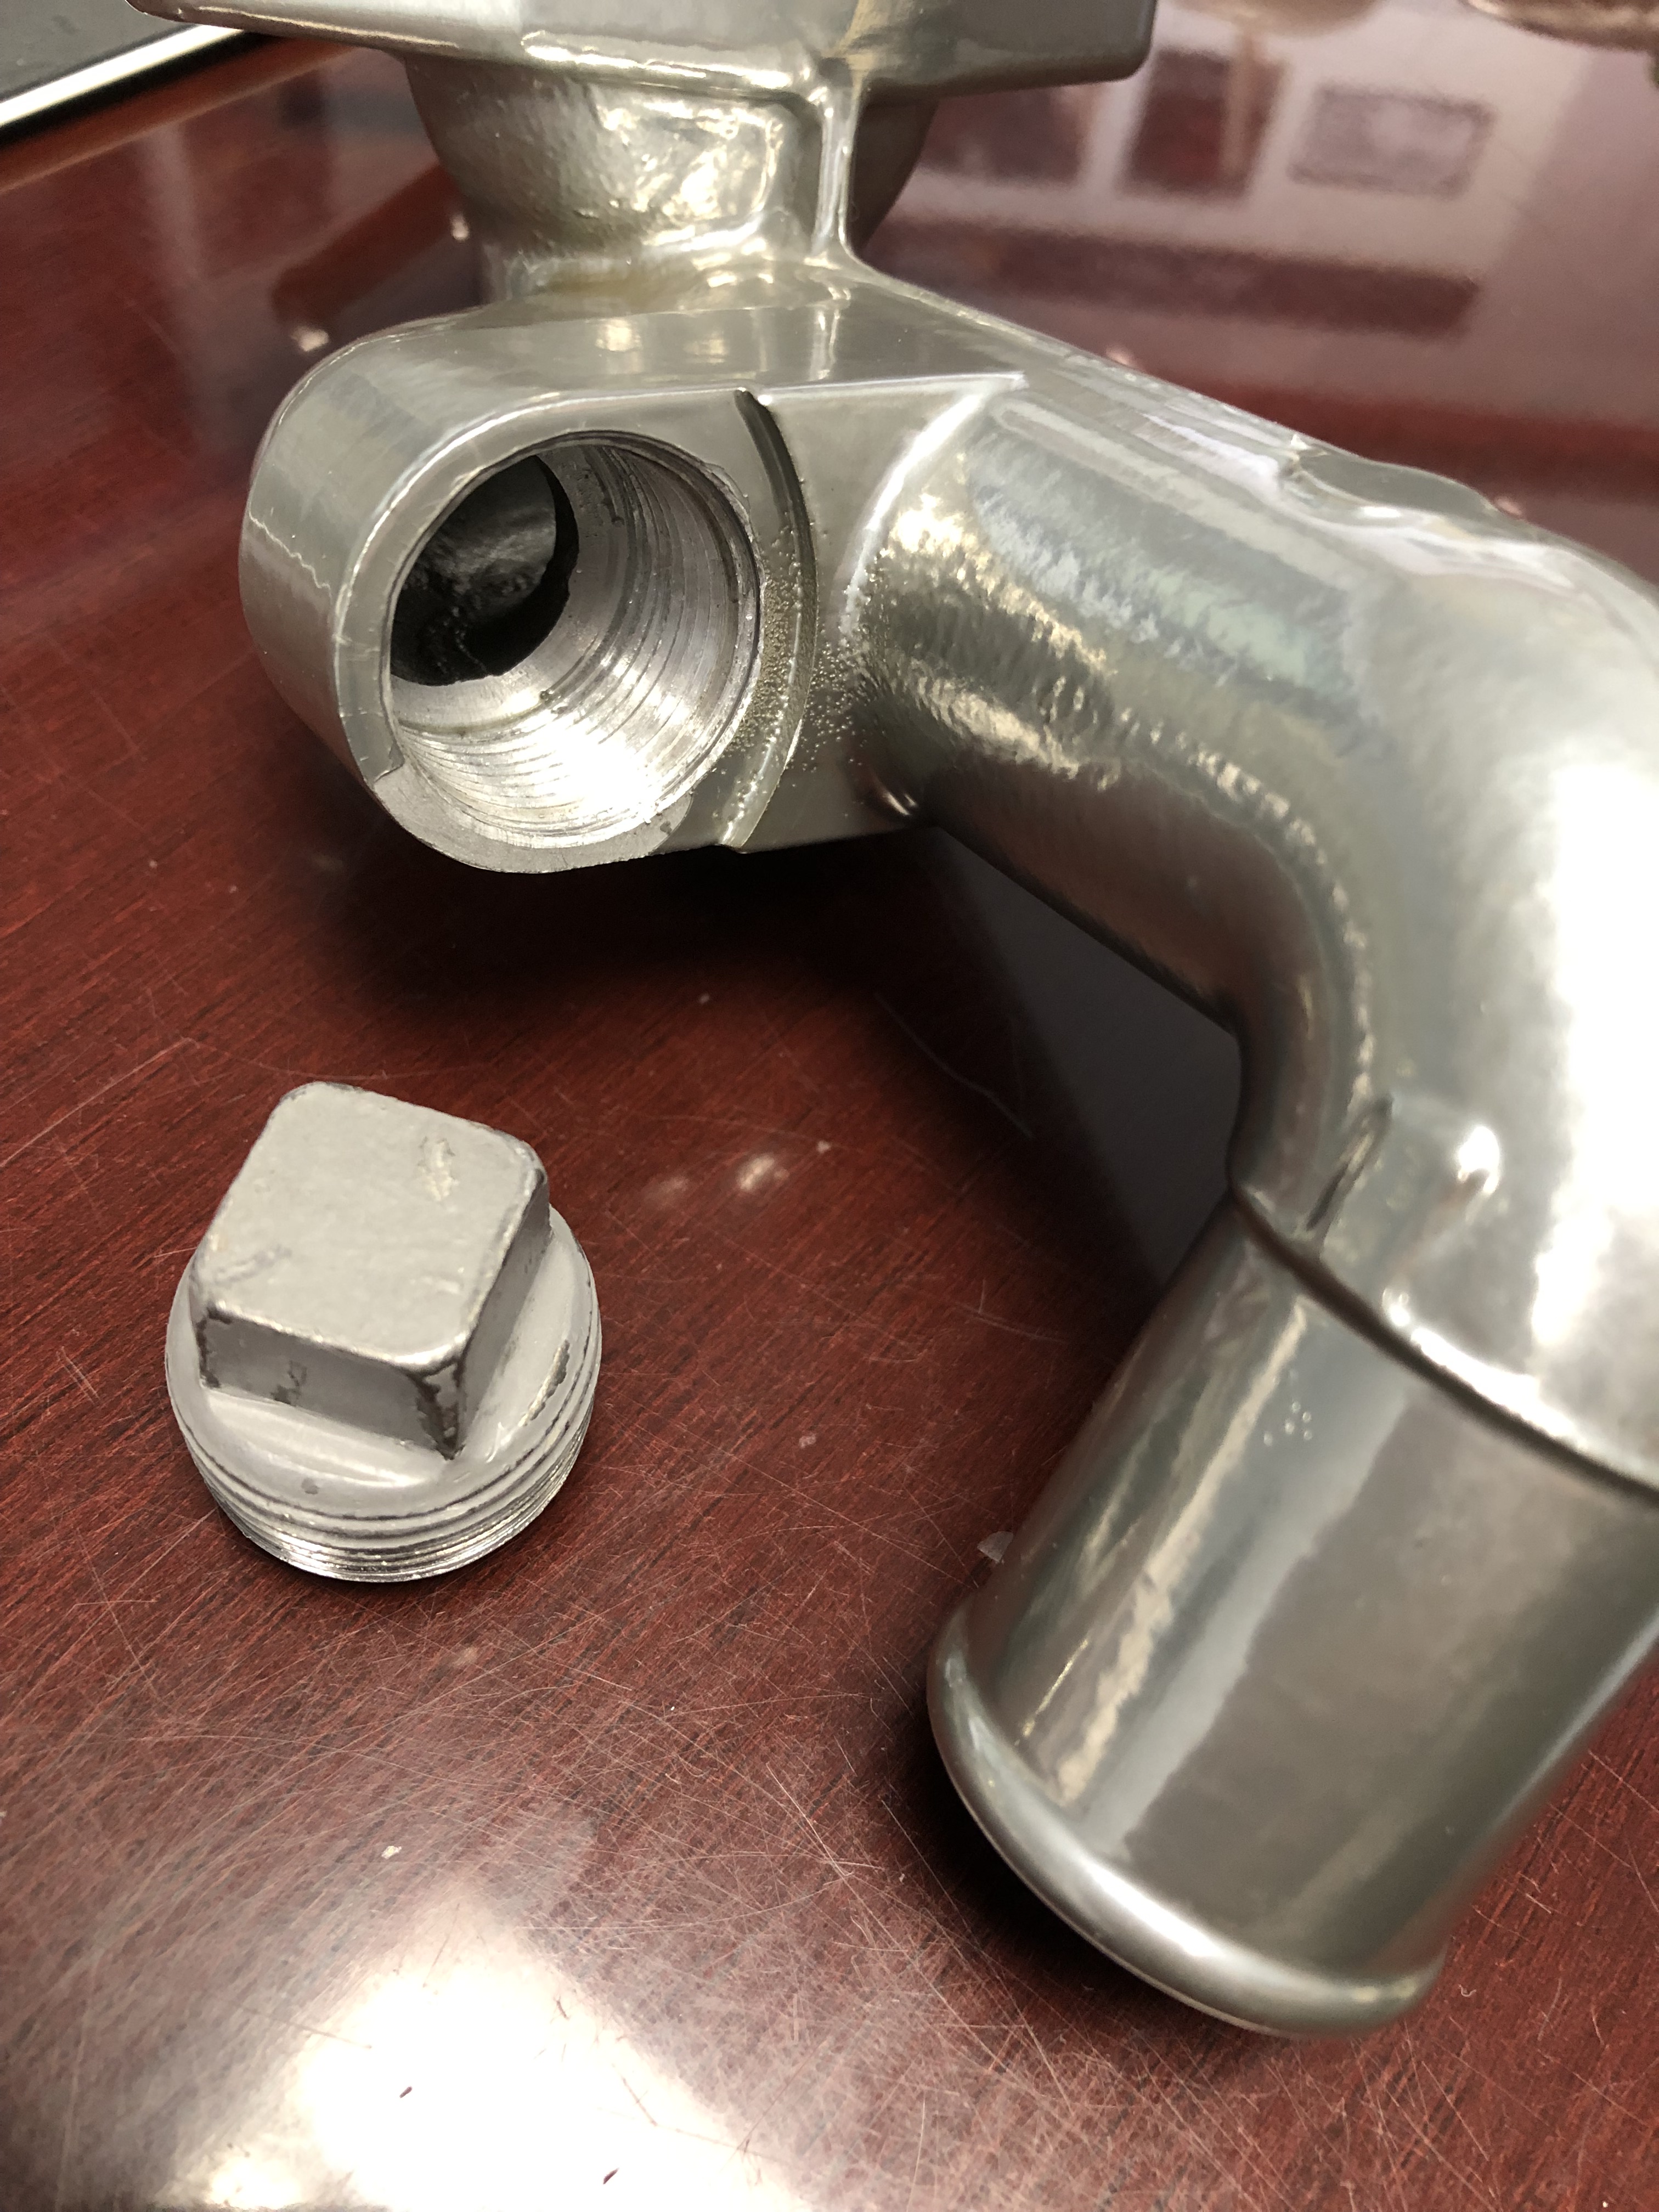
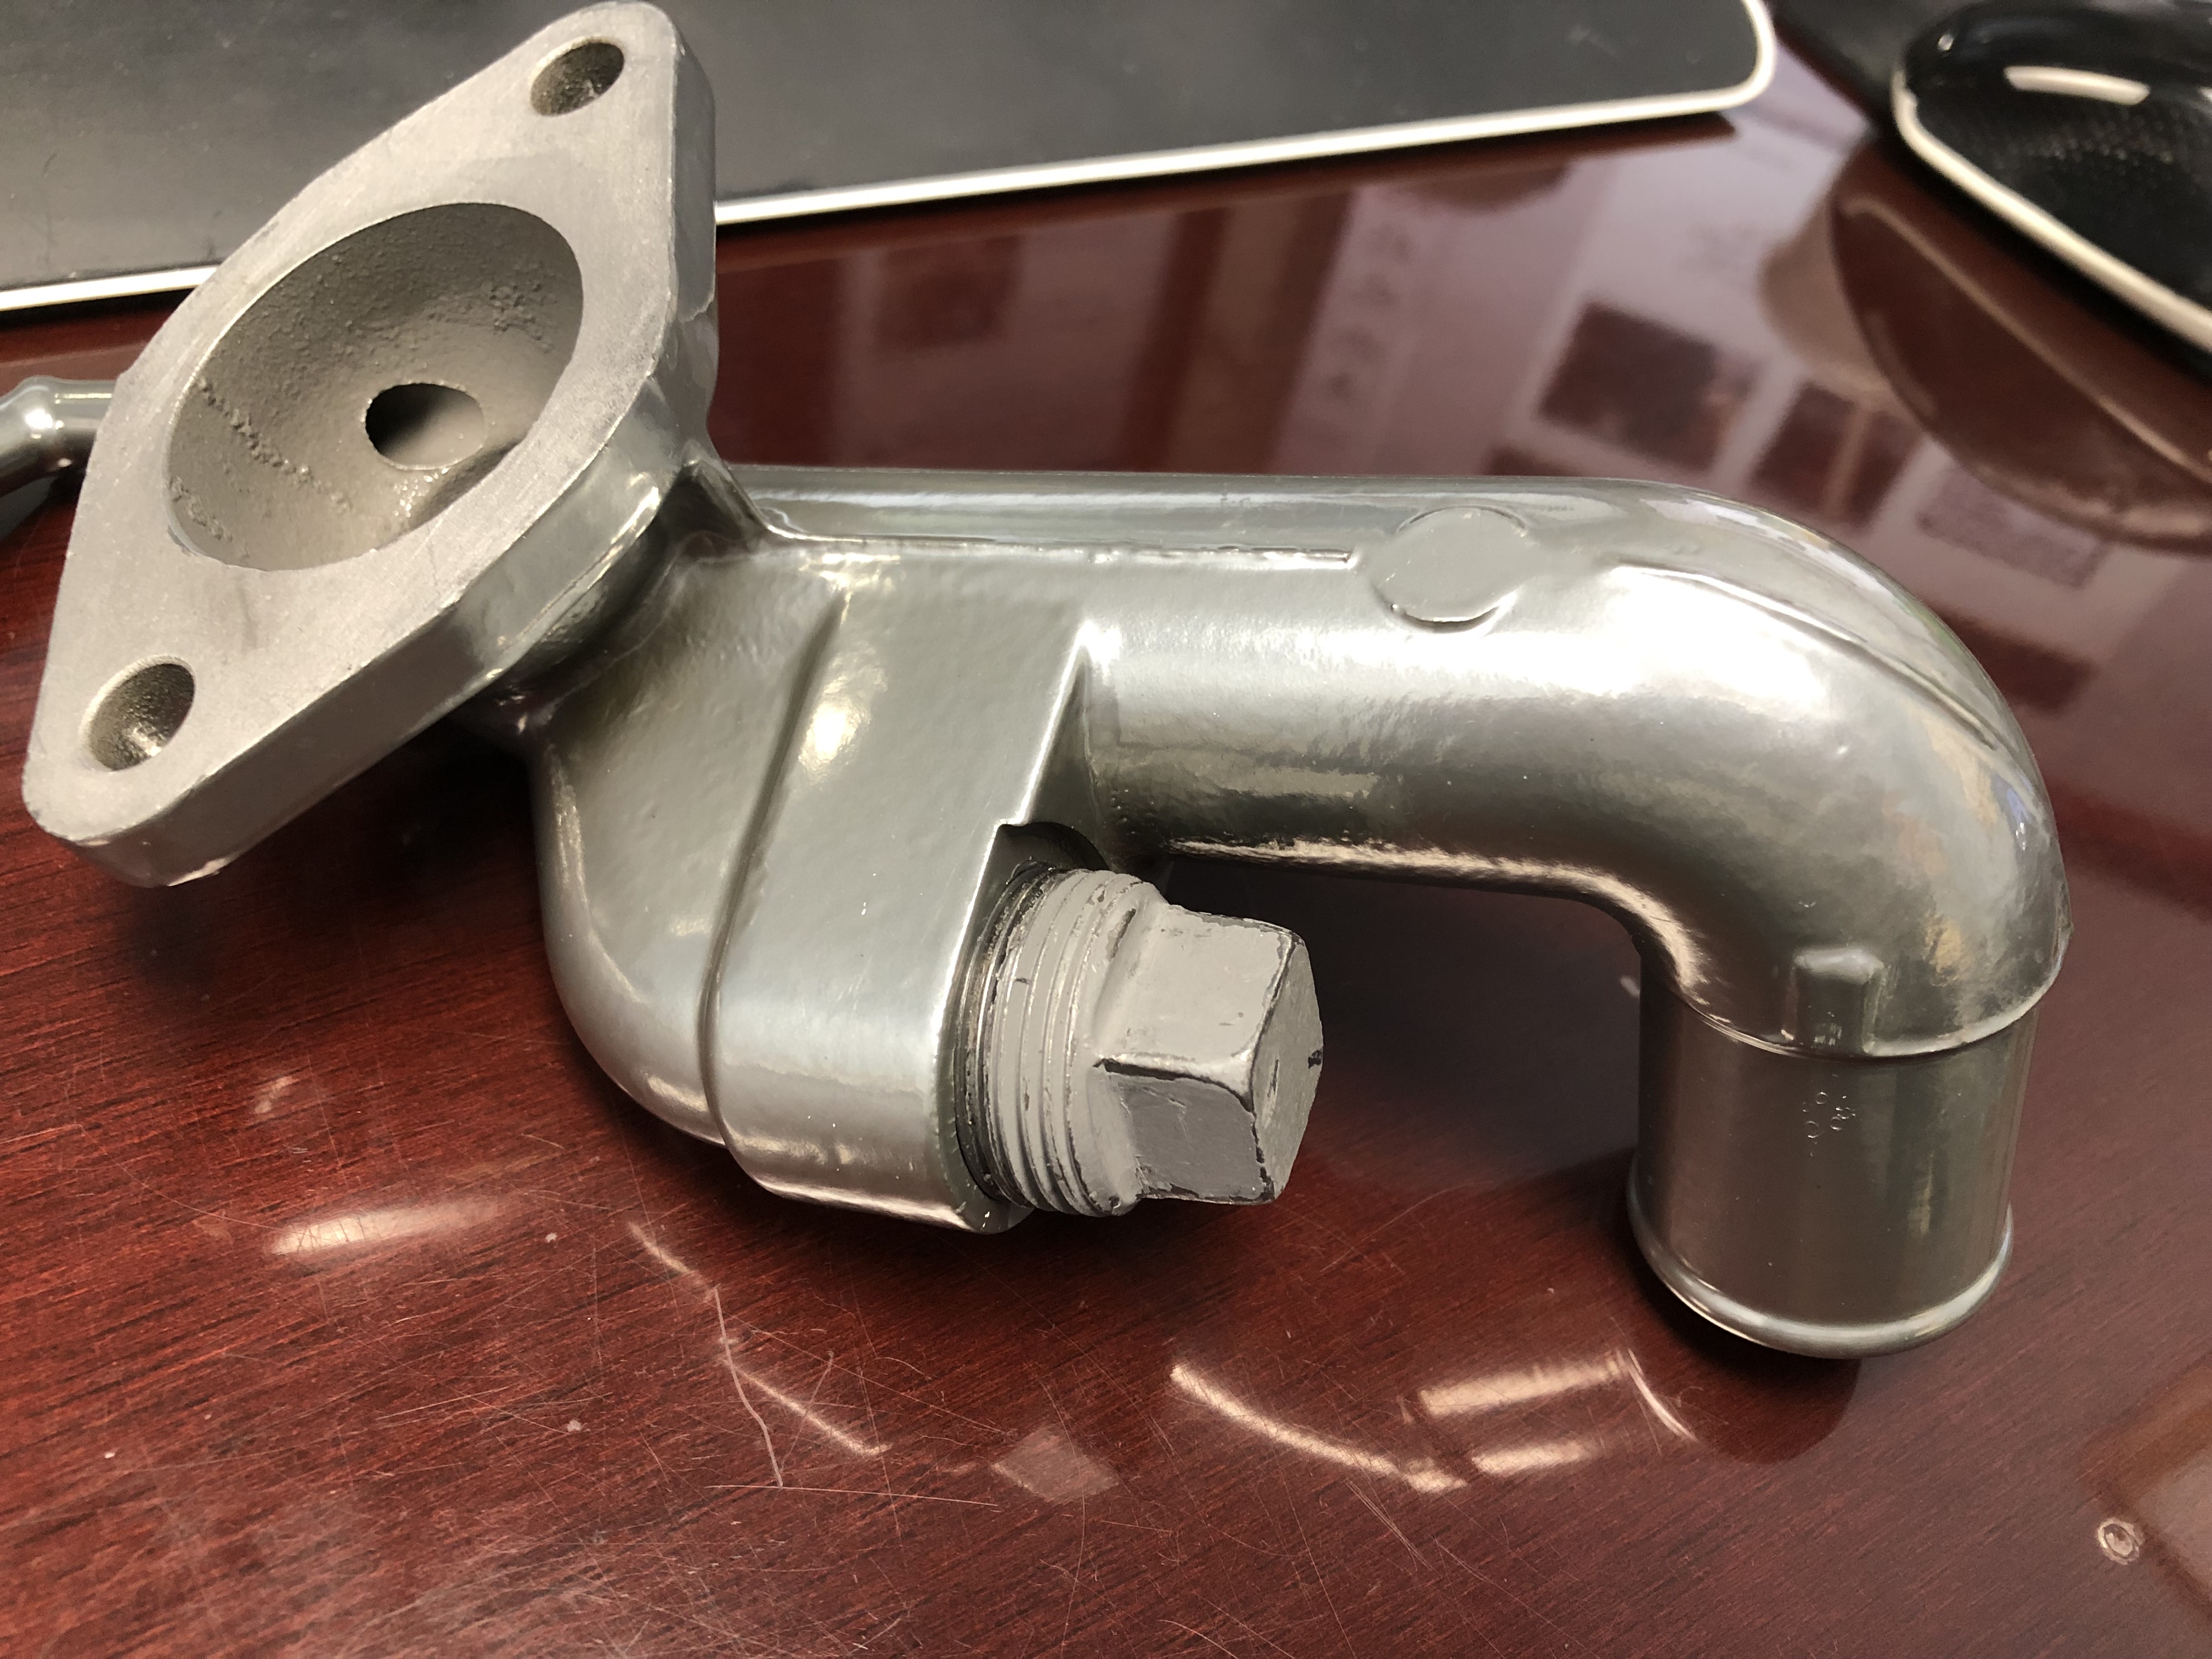
I found a tip from other Exocet owners that you can tap the port with a 3/4" NPT and then block it off. I'll be blocking off for now but I'll use it later for my turbo coolant line.
I drilled two 1/8" holes in the thermostat to keep coolant flowing over the top since I blocked off the feed line on my "mixing bowl".
I found a tip from other Exocet owners that you can tap the port with a 3/4" NPT and then block it off. I'll be blocking off for now but I'll use it later for my turbo coolant line.
Reply
0
0


