When you click on links to various merchants on this site and make a purchase, this can result in this site earning a commission. Affiliate programs and affiliations include, but are not limited to, the eBay Partner Network.
I learned something. I would have expected the pistons to be toast if the valves were bent.
This is when it's nice to be working on a non-interference motor. The two things I was most worried about were bent rods and broken oil pump gears, but neither of those things appear to be an issue.
I finally got around to pulling the head off of the 2000 motor. The good news:
Deck is completely flat, couldn't get a 0.001" feeler under the straight edge in any direction. So it's a viable head. I can't find any evidence at all of head gasket failure; no leakage pathways, and even carbon deposits on all the piston tops. Not sure why there was liquid in the #2 and 3 spark plug cavities, but I suppose it doesn't matter. Maybe it was left in the rain.
The bad news:
A bunch of effed-up valves and/or springs, like on the other head. Obviously this head's going to need a valve job. And obviously my leakdown testing skills suck. Actually I think I know what I did wrong- hooked the tool up to over 100 psi on the compressor and broke it. Should have read directions more carefully. Yay for shitty/cheap Harbor Freight tools.
I'm not building a 9,000 rpm race motor, and I'm running a stock bottom end (at least for a while). I've read Emilio's awesome thread and other good info here, and I'm thinking I should do a mostly OEM rebuild. Three angle valve job, OEM standard sized valves, OEM valve seals, OEM springs and SOB lifters. Somebody please talk me out of my hard earned money and tell me why I need to use fancy-*** Supertech stuff, I can't think of any good reasons.
when I rebuilt my first cam'd engine 18 years ago I learned that not all valves go down at the same time.
Did you turn the cam and the valves stuck up, or are you upset that one cylinders valve is up when you pulled it?
Sorry I don't know your mechanical experience but its hard to know if a pair of valves sitting proud is actually a problem or not.
The reason I ask is because they appear straight and parallel to each other and there is no evidence of contact.
Wow. This may be some epic noobishness that I'm laying down on MT.net. I need to check this when I get home.
OK, so apparently I don't know much about how motors work. I put the timing gear on the camshaft of the 2000 head and gave it a spin, the valves are fine. Chalk that one up to being a newb... this is the first time I've taken apart a motor.
DNMakinson, I tried to repeat this experiment on the 95 head that I thought had bent valves. It is hard to turn the camshafts, feels like something is binding. However, it seems likely that the valves are actually not bent, in which case you are correct- you actually didn't learn anything from me. That shouldn't surprise either of us.
Since pistons 1/4 and 2/3 travel up and down together, I always assumed that the valves on those cylinders opened and closed in sync as well. Turns out that's not the case, all the cylinders's valves do their own thing at their own time. My brain is hurting trying to figure out how motors work again. Gonna need a few days to soak this all in.
Anyway, it seems I have a good 95 bottom end, and a good 2000 head. Got some Mopar combustion chamber cleaner today, I'm going to clean them both up and put them together with my new 94-97 OEM head gasket and ARP head studs, then repeat the leakdown test while trying not to blow up another Harbor Freight tool. If everything seems good, it's time to start gathering things up for the swap.
In other news, the guy that I bought the '95 motor from was moving in a week, and getting rid of all of his stuff. I liberated him from these wheels, which came from the same car as the motor. figured I'd try them out on Rocinante.
They're the 15" BBS wheels from the '95 M Edition, complete with the center caps that I was too lazy to put on. He thought that one of them may have been bent; I took them to the Wheel Wizard today, who found that one was indeed slightly bent and the others were fine. After the repair, I paid less for the whole setup than a set of center caps alone sell for on Ebay. The 15x8 Dial-In's were not a lot of fun to drive around town with manual steering and a +25 offset... I'm going to save those for the track. The BBS wheel/tire combo is 4.8 lbs. lighter per corner than the Dial-In combo, and that's not a little bit. The car drives beautifully with these, and I know opinions vary, but I think these are the dead sexiest wheels ever to appear on a Miata. Need to find a good 195/50/15 tire for the street, thinking about the BFG Sport Comp 2's.
Last edited by Schroedinger; 08-04-2017 at 10:22 PM.
The difference between information and knowledge. Information is taking a 400 level thermodynamics class and spending the entire semester dissecting the mathematics of the Carnot cycle, while looking at a picture of a single cylinder. Knowledge is what you wrote above.
Well, finally took the 2000 cylinder head apart tonight. Every one of the cam journals and caps has some light scoring. Oddly, the cam bearing surfaces on the head itself look perfect. The scoring looks concentric around the shaft of the cams and the interior of the caps, and I don't see any galling or pitting.
Last edited by Schroedinger; 08-07-2017 at 07:24 AM.
The car made it 135,000 miles like this with no related issues; the motor was running fine when pulled except for bad timing due to the trashed crankshaft keyway. There was a good oil film on all of these surfaces. I haven't found any metal in the oil at all.
Alas, I'm taking this to the machine shop in the morning to get their opinions.
Last edited by Schroedinger; 08-07-2017 at 07:14 AM.
Dropped everything off at the machine shop this morning. They don't think the scoring on the cams/caps is any big deal, and are just going to lightly polish them. They quoted me $600 for a valve job (?!?!?) because of the amount of time it takes to set lash correctly with the shims, due to the solid lifters. I told them no thanks- these valves were sealing up really well before I took the head off in the first place. So they're going to do the aforementioned polishing, check the deck for flatness, and clean everything up. Should be ready tomorrow.
In retrospect I should have measured the lifter clearance before I took the cams out. I just ordered a valve spring compressor, lapping tool and compound. I'm going to lap the valves myself as minimally as possible/necessary, and hopefully the clearance will be within spec when I'm done so I don't have to re-do the shims.
Last edited by Schroedinger; 08-07-2017 at 04:37 PM.
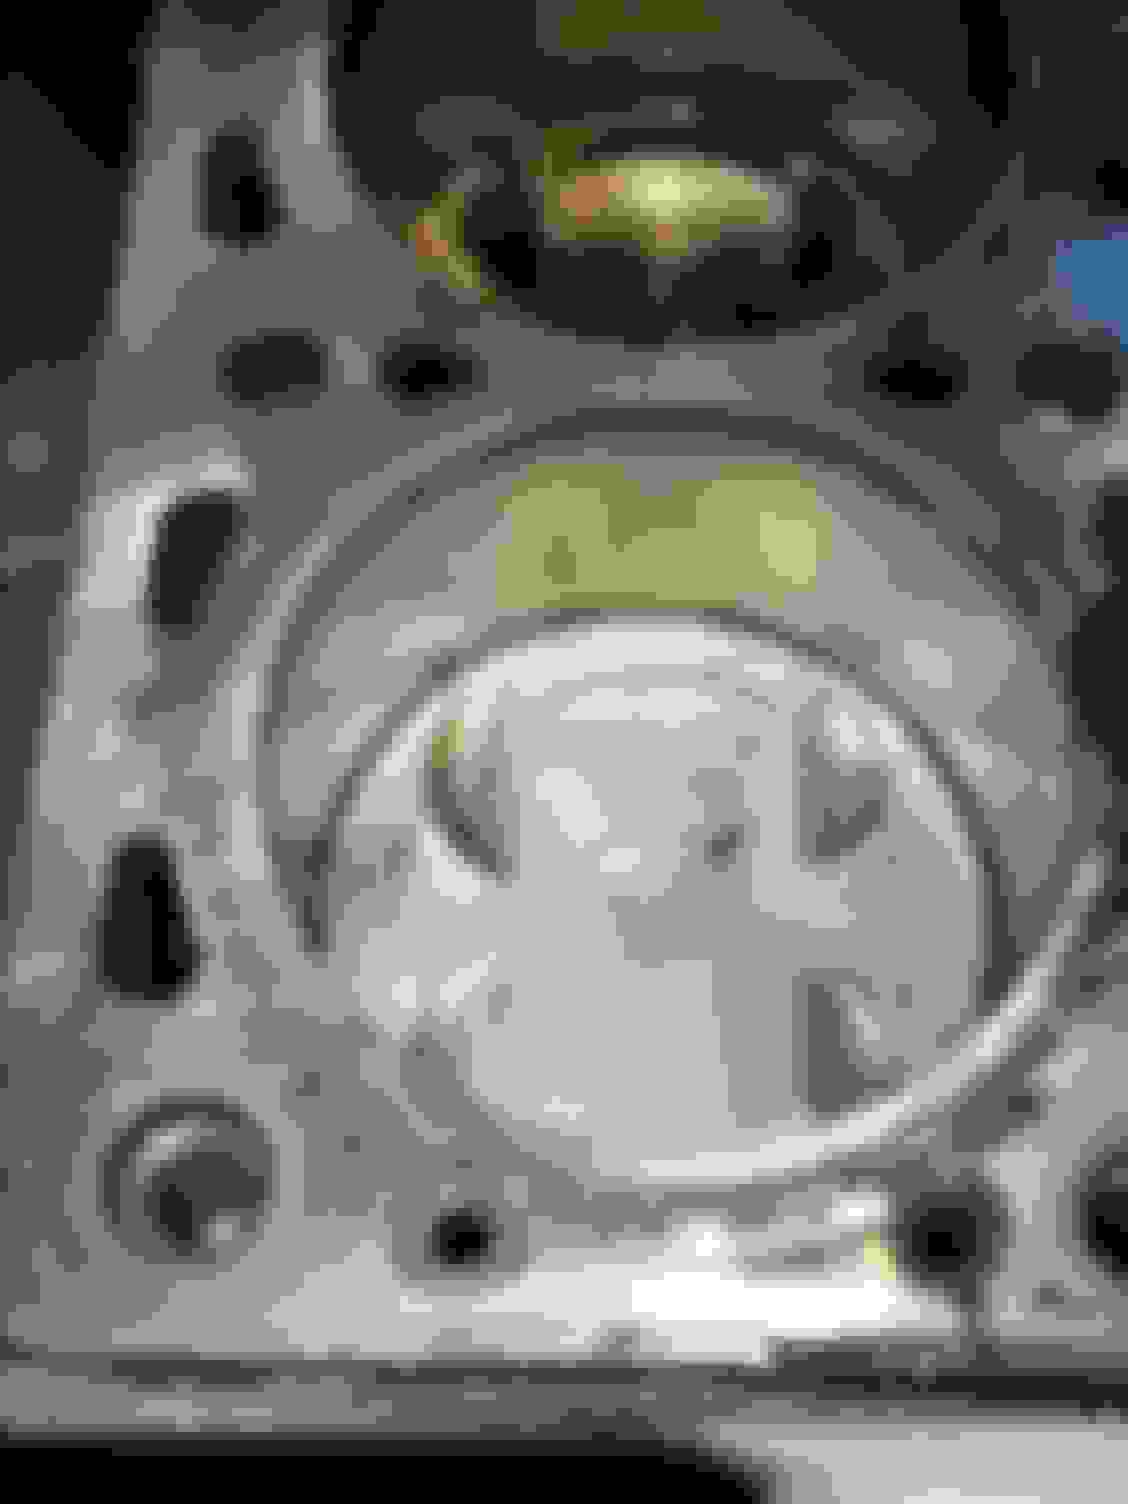
Behold the Harbor Freight "brass" brushes. Muthafukkas.
Behold the results from the Harbor Freight "brass" brush. Right on the HG sealing surface I believe.
Wonderful. I can barely feel the texture with my fingernail. I have some 1200 grit cloth that I use to polish guitar frets, I'm going to try using it gently with a metal surface plate to gently level it.
Last edited by Schroedinger; 08-08-2017 at 01:30 AM.
don't get too carried away with cleaning stuff up (piston tops).
it gets dirty the first few minutes of idling and there is a lot of time to screw something up.
scrape any old gasket off and if the deck is flat, your good to go. any more than that and you will want to do a proper rebuild and decking.
Yeah, I need to go easy with the cleaning. My shitpicking meticulous side wants everything to be sparkly clean, but it's not doing any good and might cause harm.
I taped over the oil drain holes to make sure that nothing gets down there. I may still pull the pan to check out the oil pump before I put everything together; might as well get it all done while the engine is out of the car.
I'm busting out all my old luthery tricks. Sharpie marker:
Then hit the area with a leveling block and very fine abrasive fabric:
Everything looks flat enough to seal, and the head gasket coverage should be more than adequate to keep coolant away from the scratched area.
Got the head back from the machine shop. So clean and pretty.
Since I didn't indulge in their $600 valve job, I'm going to inspect the valve/seat interfaces, and check the cam/lifter clearances. In the unlikely event that everything is good, I'll be ready to start reassembly. More likely I will be pulling the cams again, then the valves so I can lap them. I'll then see about reshimming the lifters to bring the clearance back to factory spec.
 08-01-2017, 03:01 PM


 0
0