
Project: Merlot r4cecar


Thread Starter

Joined: Jul 2012
Posts: 80
Total Cats: 1
From: Fredericksburg, VA
Many moons later, the harsh winter has passed and work begins again on the racecar. I did very little over the fall and winter because I was too busy wrecking Miatae. Technically, an entire build (and re-construction) took place from the last time I posted in this thread, but that's another story.
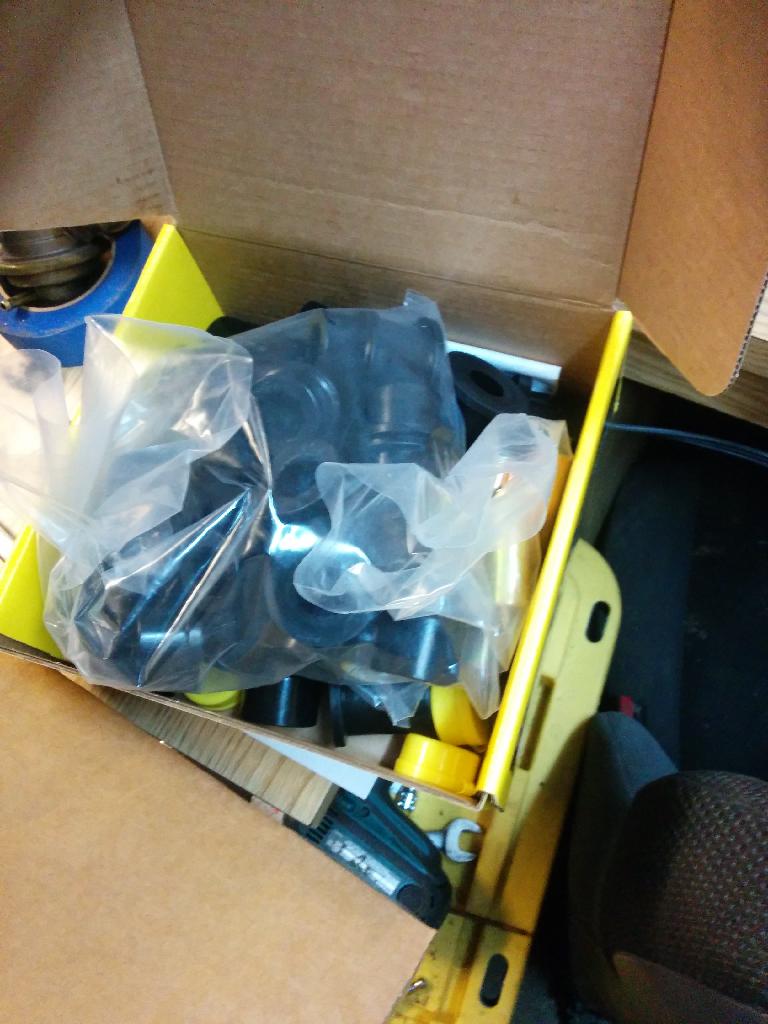
I'm gonna kick off this necro with details of all the new parts related to restoring original function of suspension and steerng bit - Ball joints, inners and outers, wheels bearings (front and rear). I'll add some pictures too.
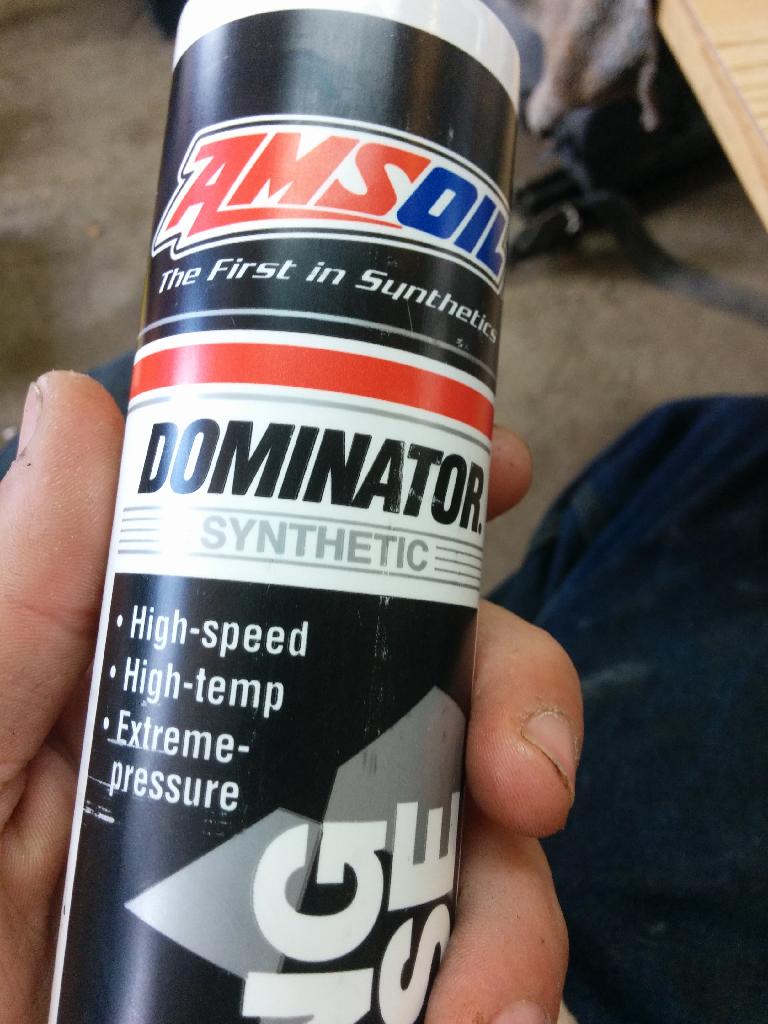
From my reading, Moog and Timken were about the best options (minus blueprinted) for ball joints and wheel bearings, respectively. Though I've heard I should be re-packing the Timken front wheel bearings with Amsoil2000 for better longevity. I also cheaped out a bit and went with MevoTech lower ball joints. Luckily the LBJ isn't too hard to change should these not last long.
Last time I looked at my options for the UBJ, it was a new OE UCA or V8r's rebuild-able ball joint. I've come to understand this isn't a huge wear item and Moog has started making UBJs for the the NA. I've ordered two and will report with pictures when they arrive in a few days.
All critique and suggestions welcome on those purchases, by the way.
Greasy hands!
I'm gonna kick off this necro with details of all the new parts related to restoring original function of suspension and steerng bit - Ball joints, inners and outers, wheels bearings (front and rear). I'll add some pictures too.
From my reading, Moog and Timken were about the best options (minus blueprinted) for ball joints and wheel bearings, respectively. Though I've heard I should be re-packing the Timken front wheel bearings with Amsoil2000 for better longevity. I also cheaped out a bit and went with MevoTech lower ball joints. Luckily the LBJ isn't too hard to change should these not last long.
Last time I looked at my options for the UBJ, it was a new OE UCA or V8r's rebuild-able ball joint. I've come to understand this isn't a huge wear item and Moog has started making UBJs for the the NA. I've ordered two and will report with pictures when they arrive in a few days.
All critique and suggestions welcome on those purchases, by the way.


Greasy hands!
Reply
 0
0

0

Damn, I should have sent you my valve cover!
I'm also interested to hear how these replacement UBJs turn out. I'm guessing they R&R with a press after you grind off the rivets?
I'm also interested to hear how these replacement UBJs turn out. I'm guessing they R&R with a press after you grind off the rivets?
Reply
0
0
Thread Starter
Joined: Jul 2012
Posts: 80
Total Cats: 1
From: Fredericksburg, VA
I pressed them straight out. I honestly can't remember if there were rivets on the NA UCA or not. It's been almost a year now since I pressed them out.
I'll be sure to take very detailed pictures. I tried researching the Moog ball joints before I committed to buying but..they were only $12 each so why not.
I'll be sure to take very detailed pictures. I tried researching the Moog ball joints before I committed to buying but..they were only $12 each so why not.
Reply
0
0
Thread Starter
Joined: Jul 2012
Posts: 80
Total Cats: 1
From: Fredericksburg, VA
I sent the crank out Monday to my machinist for mic'ing and polishing. Talked with him briefly about the head. I informed him I would be performing a dig gasket port match on both intake and exhaust and that I would need him to perform the valve work and assembly it since I don't have a dohc spring compressor, only one for pushrod setups.
I guess at this point I have to decide if I want to upgrade the valves, springs, or the whole enchilada...Which would mean getting 99-05 keepers at $4-5 each.
Opinions?
I guess at this point I have to decide if I want to upgrade the valves, springs, or the whole enchilada...Which would mean getting 99-05 keepers at $4-5 each.
Opinions?
Reply
0
0
Thread Starter
Joined: Jul 2012
Posts: 80
Total Cats: 1
From: Fredericksburg, VA
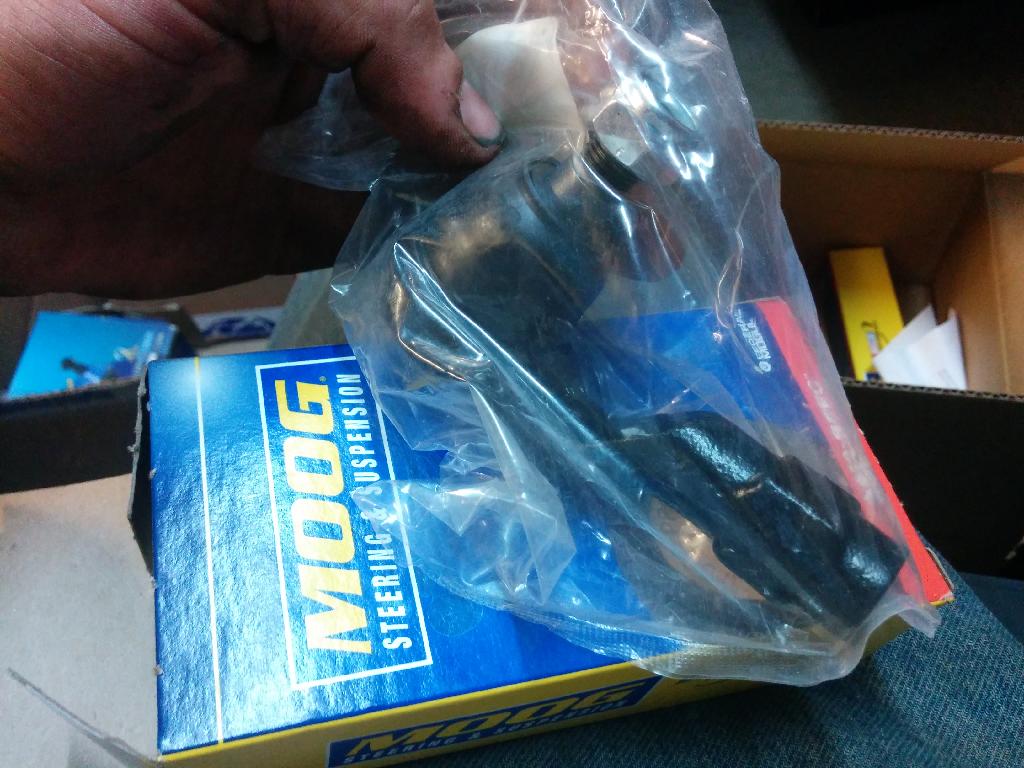
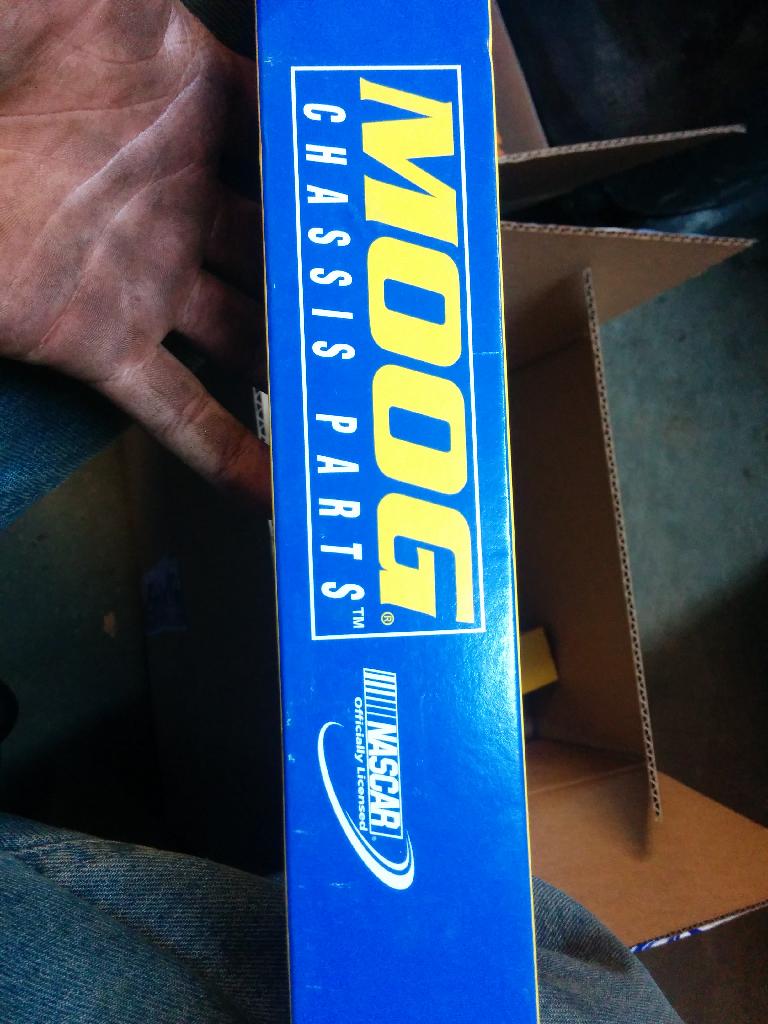
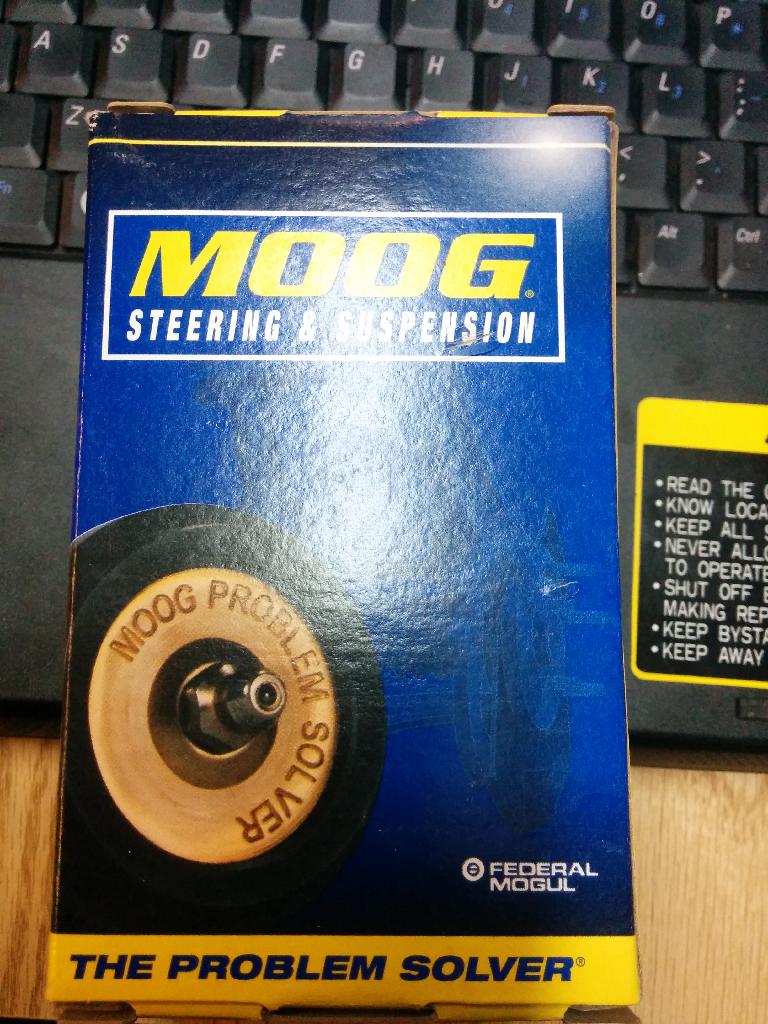
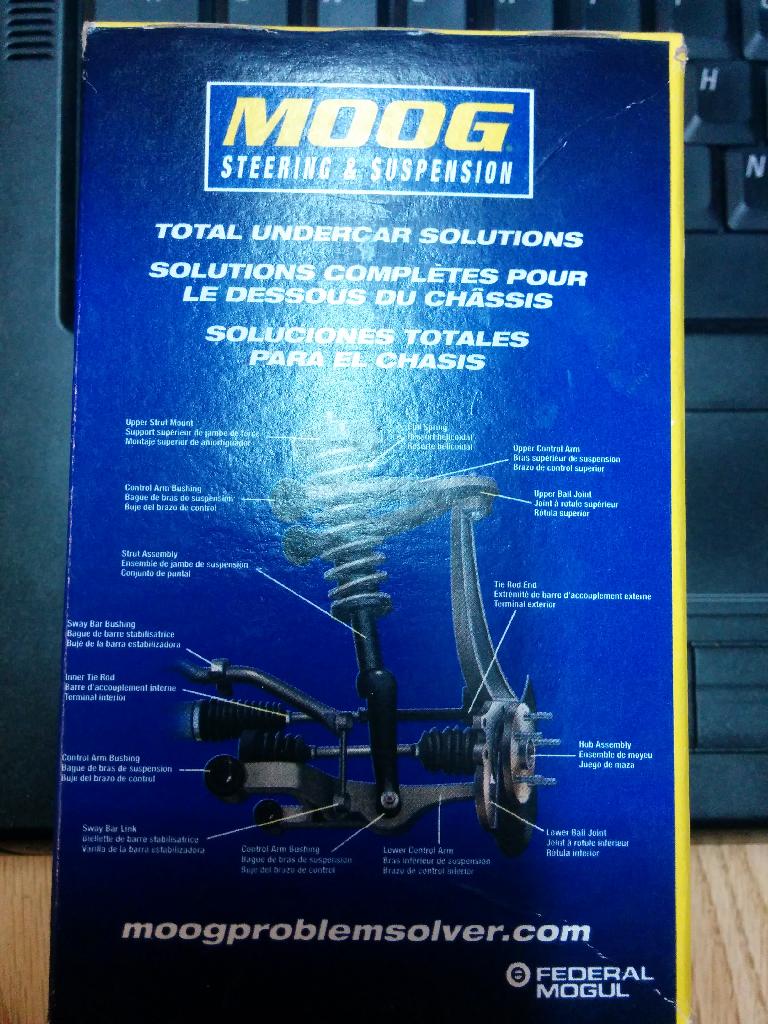
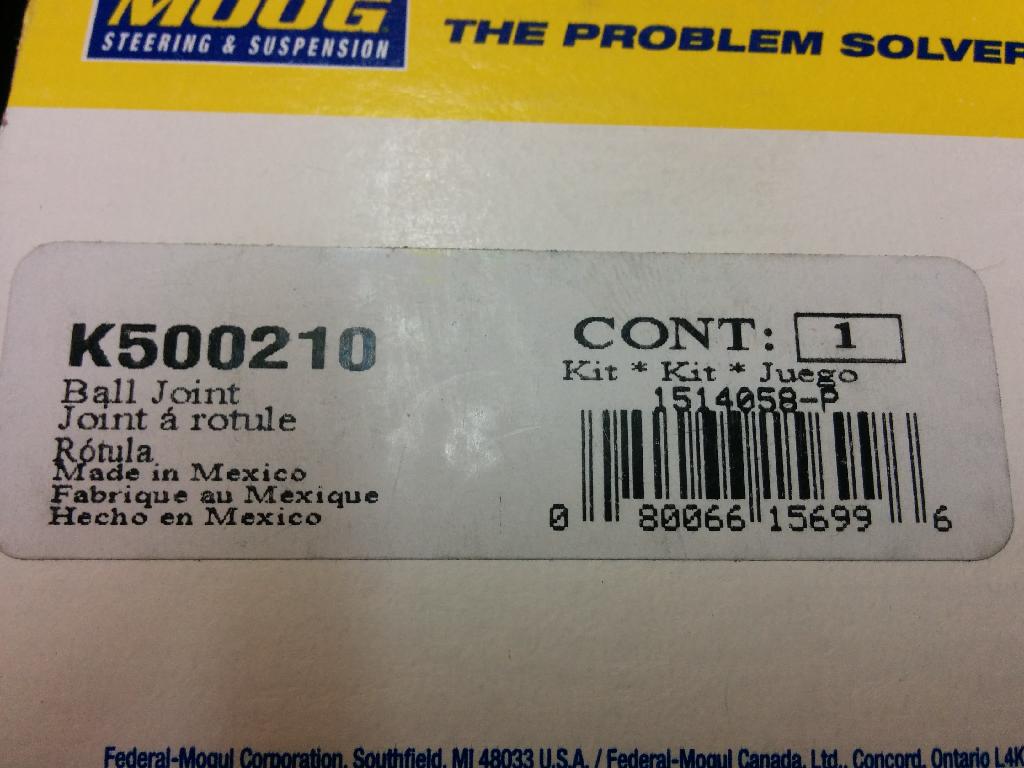
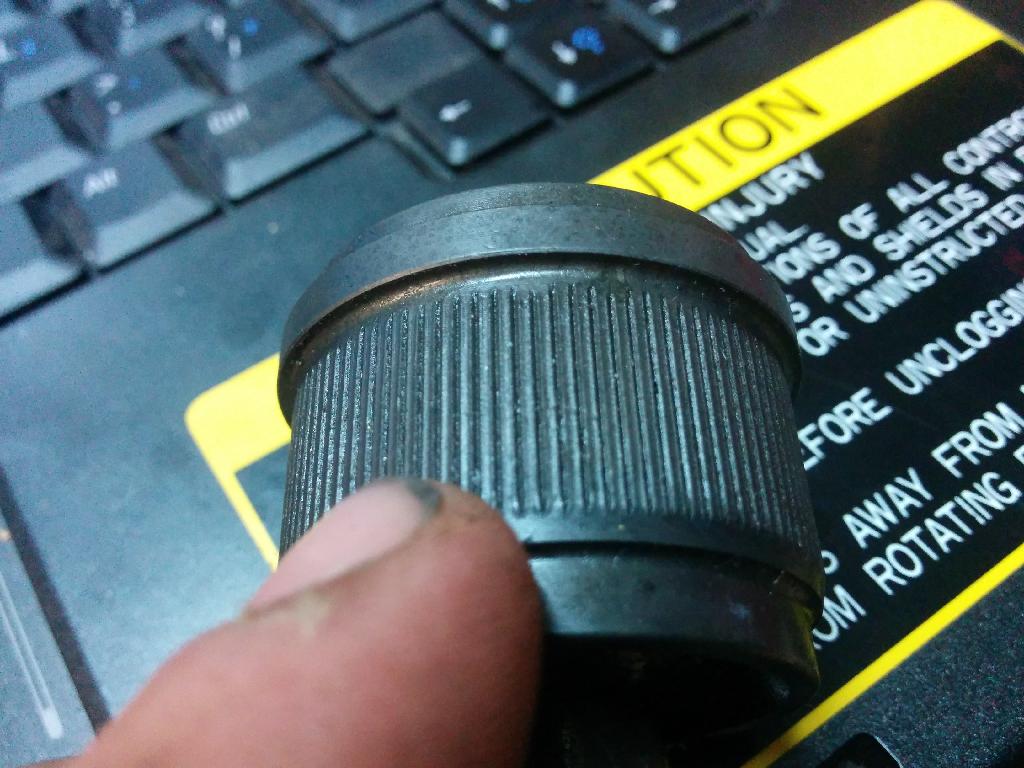
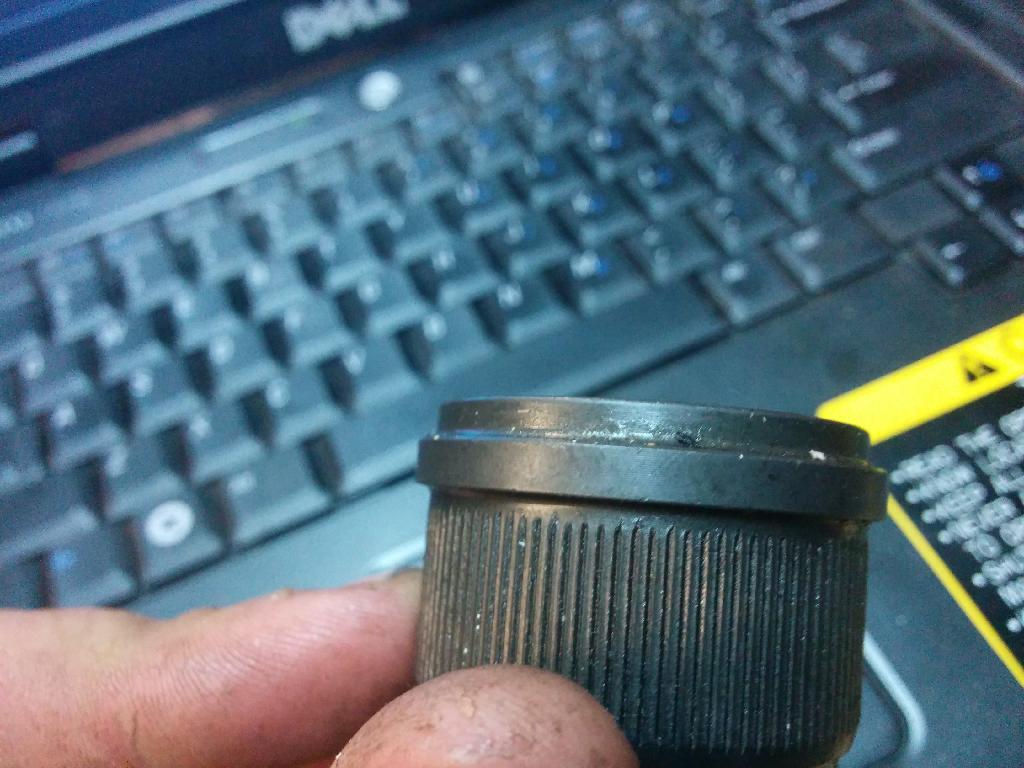
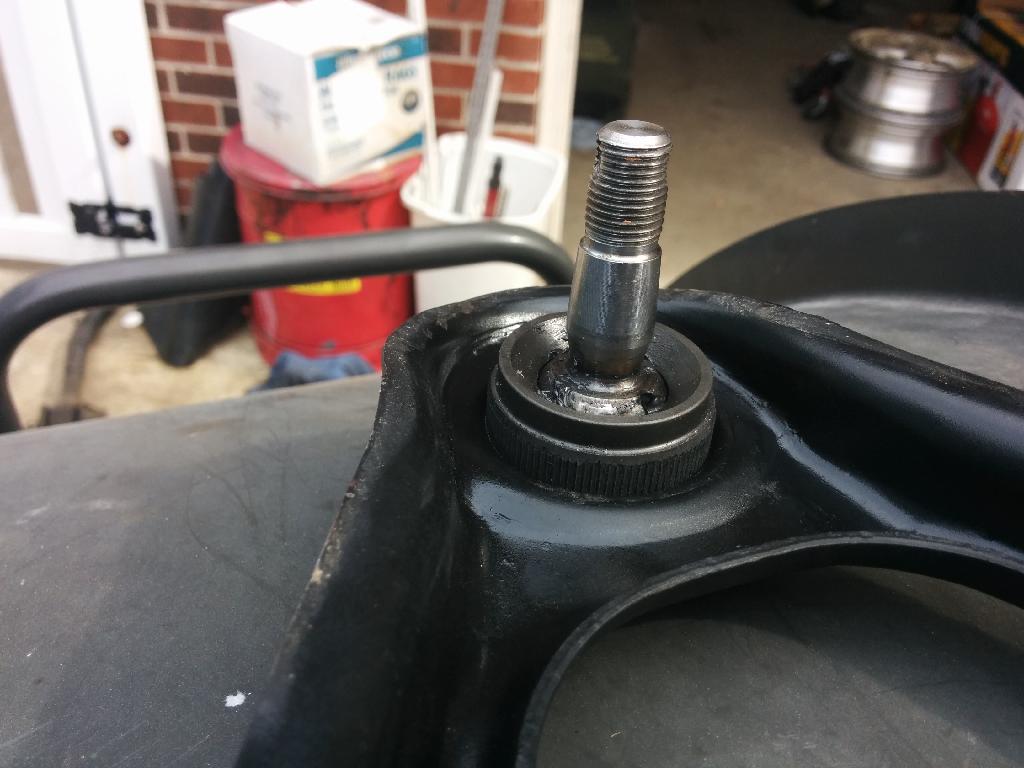
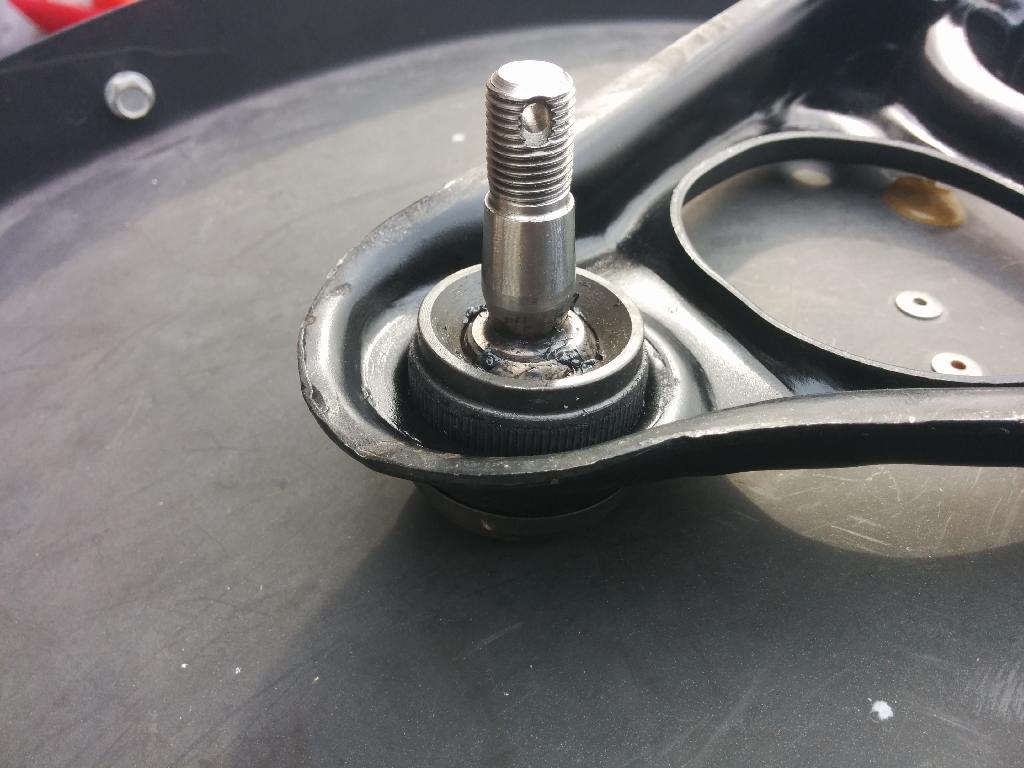
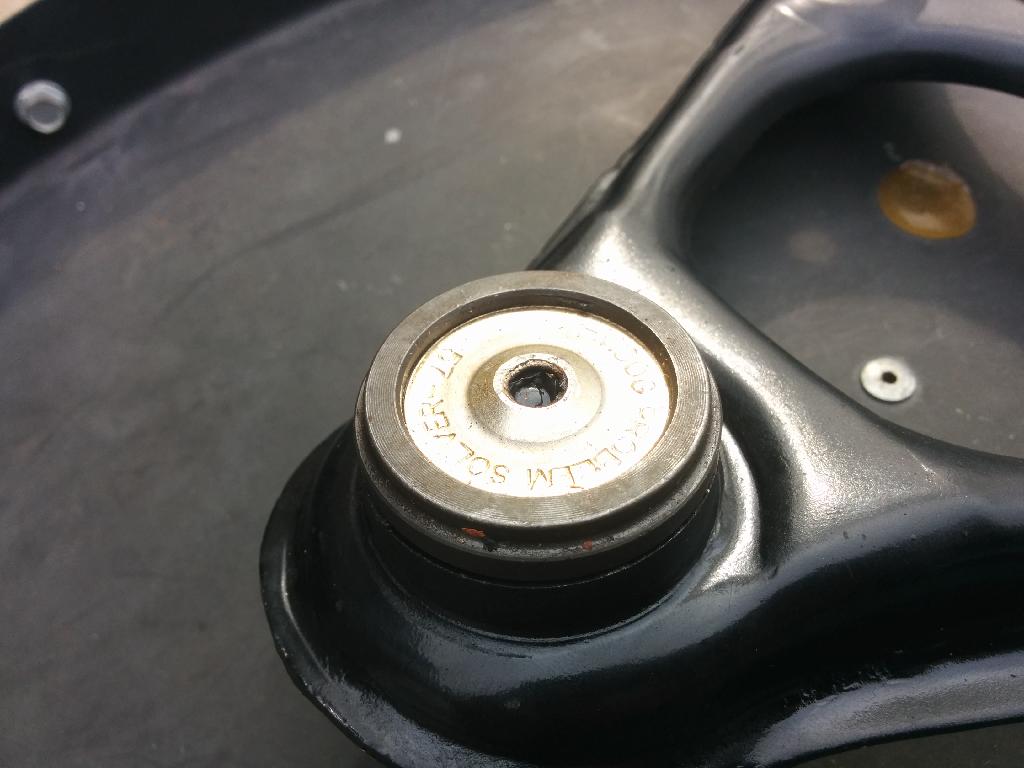
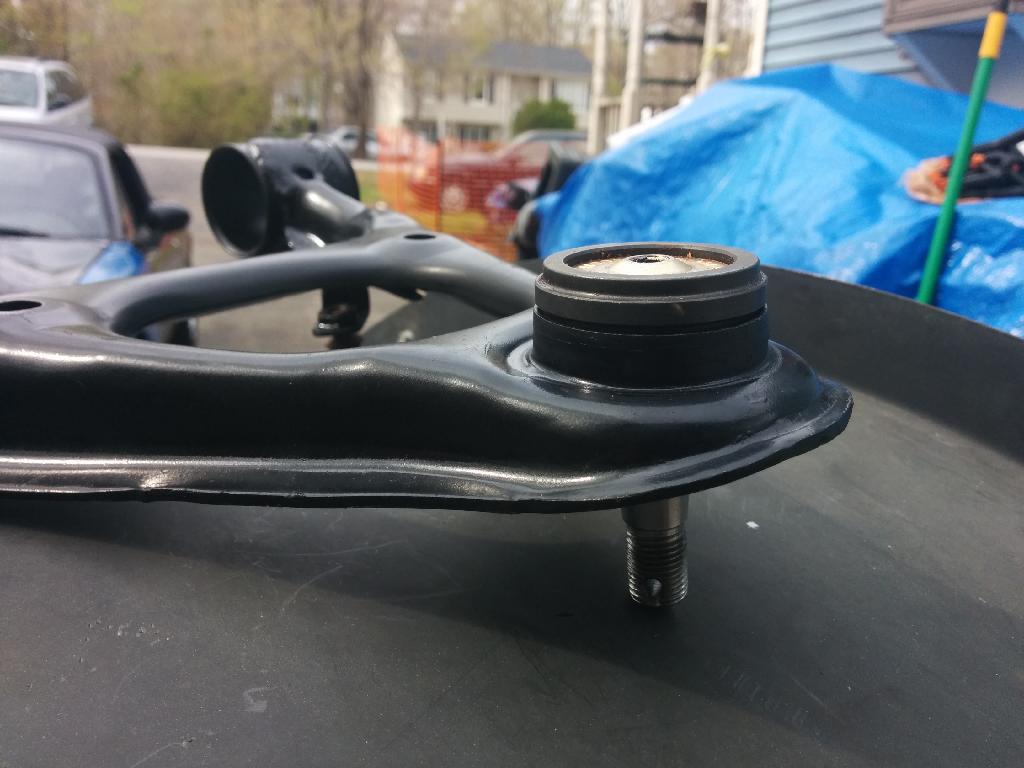
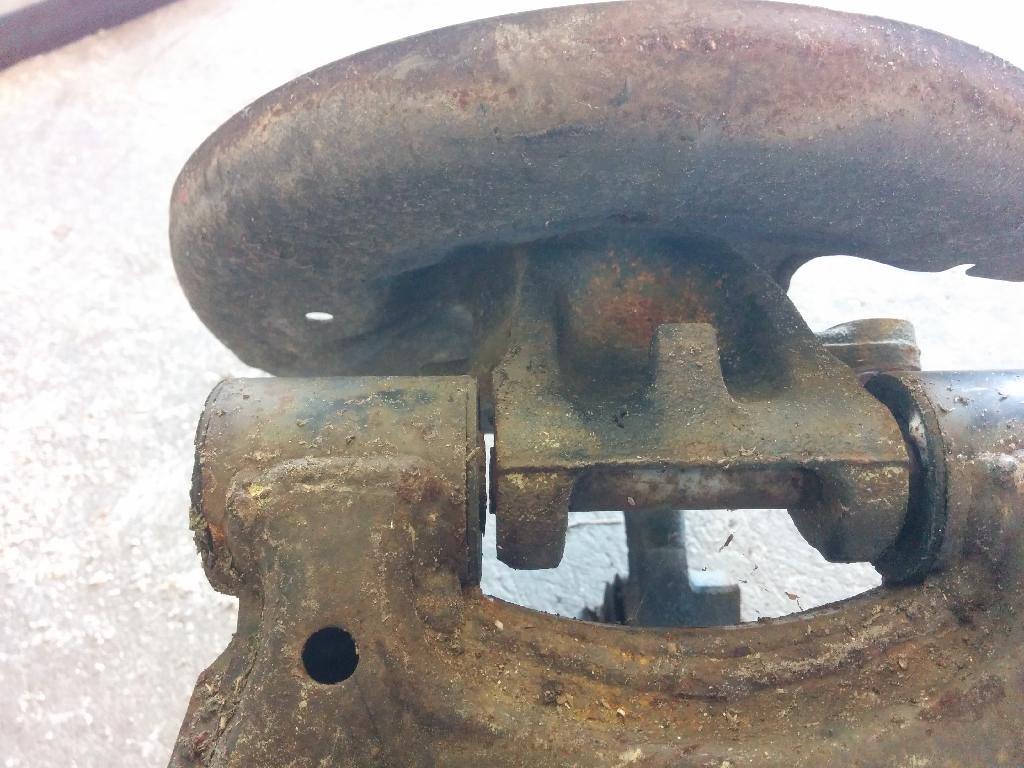
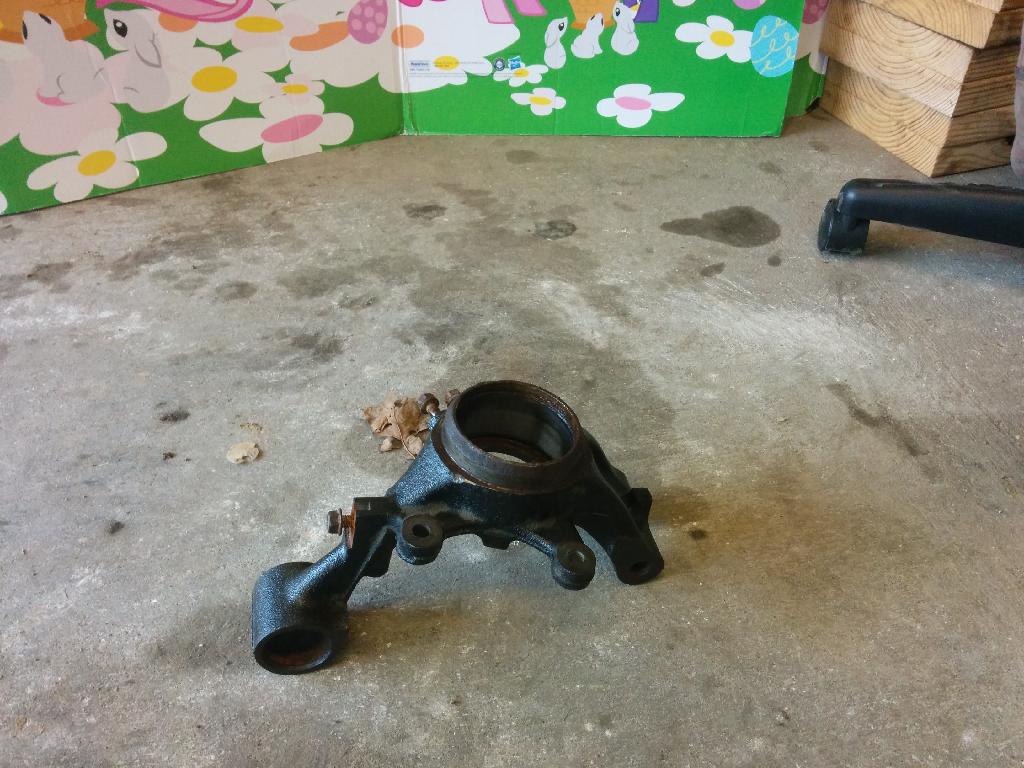
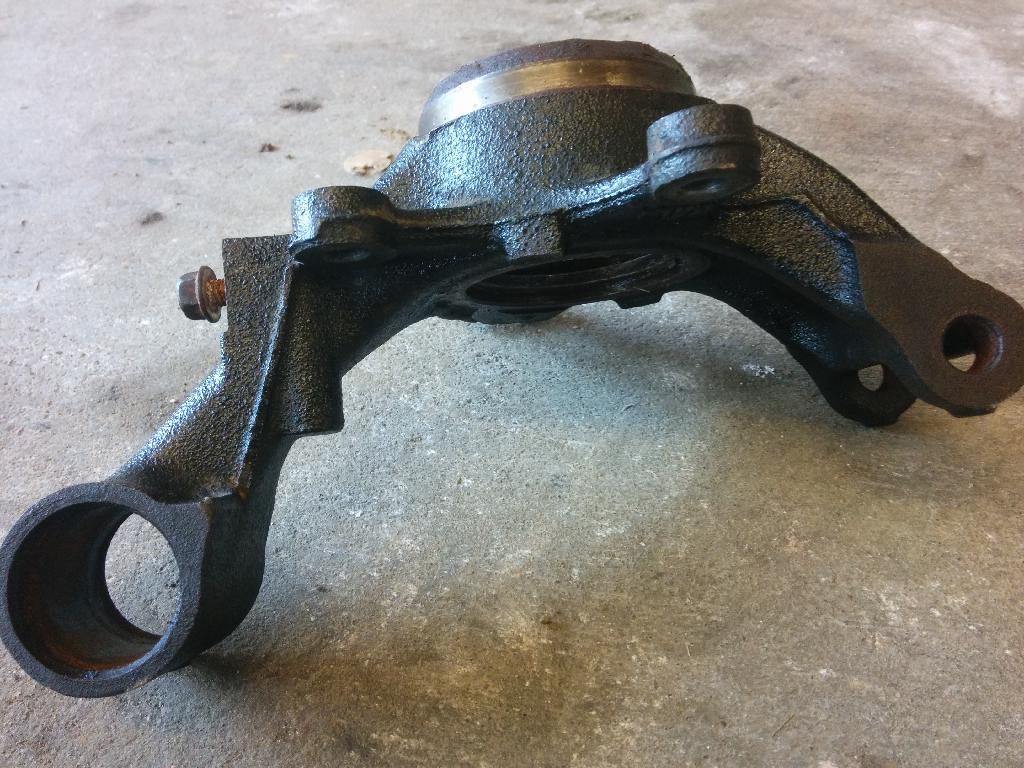
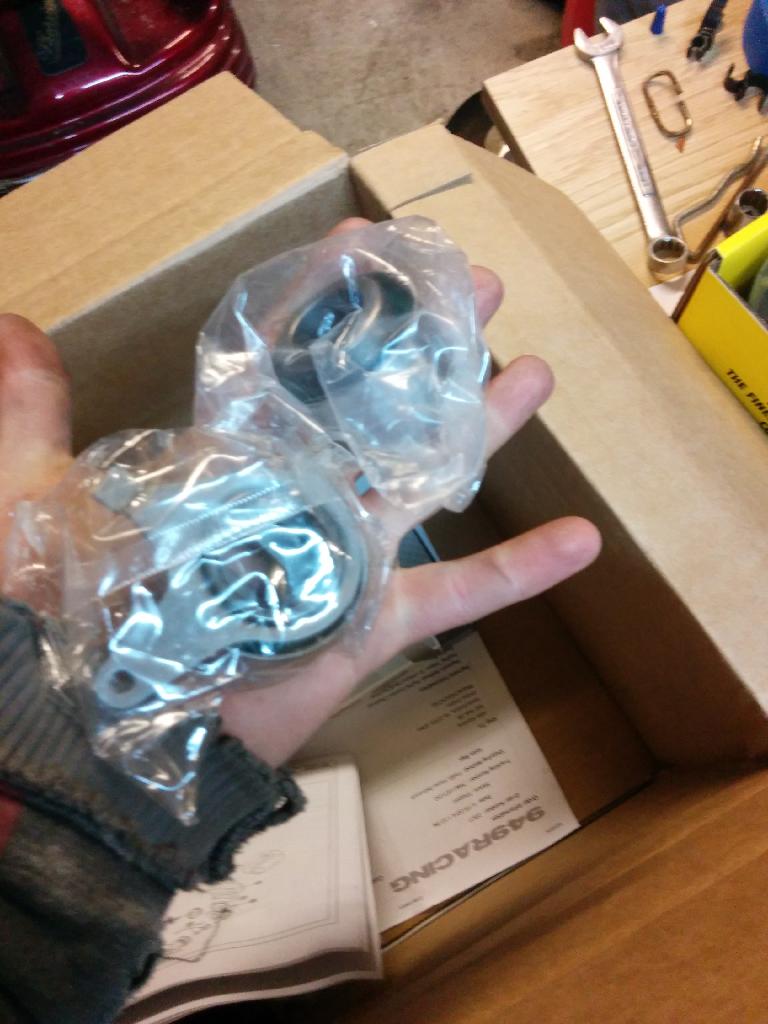
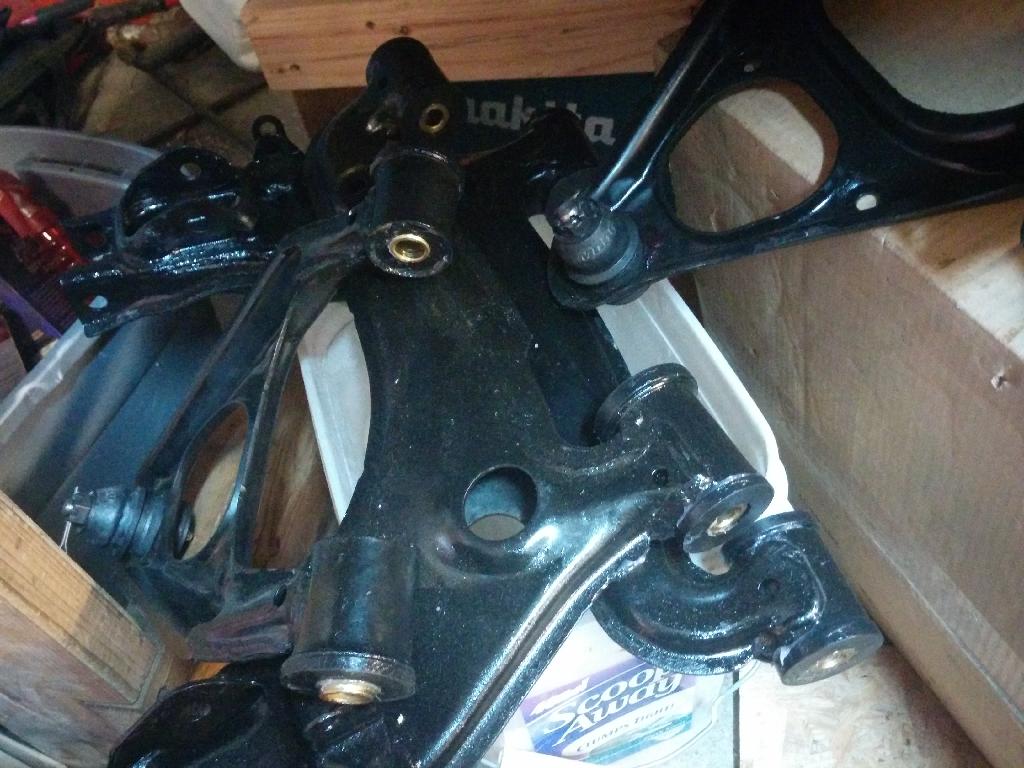
The Moog uppers arrived today, I'll share the pictures and a few notes I have about them.
MOOG Part # K500210
First off, I got these from RockAuto for $13.08 each which needless to say is a whole lot cheaper than a new upper control arm from Mazda. I'm willing to bet that the longevity of these things is much less than that of the V8r replacements though..YMMV
Second up, they've got more features than I expected! It's got some real weight to it, the splines for pressing look substantial and best of all, they come with zerks! The boot they've included feels like rubber but is quite thick; Only time will tell on that front.
Here's some pictures, if you'd like some more specific ones, ask away.
In relation to the valvetrain, I've decided to upgrade the valves only. FM's 1mm over for intake and exhaust in stainless steel should do nicely. I gather that the fancy springs and seats are really only for increased revving purposes and I don't think that's in the cards for this build. Luckily, I can always come back to it. I've learned that the keepers needed to upgrade the valves can be sourced from many Mazda motors starting in 2000, including the KLDE. That should help keep the costs down a bit.
MOOG Part # K500210
First off, I got these from RockAuto for $13.08 each which needless to say is a whole lot cheaper than a new upper control arm from Mazda. I'm willing to bet that the longevity of these things is much less than that of the V8r replacements though..YMMV
Second up, they've got more features than I expected! It's got some real weight to it, the splines for pressing look substantial and best of all, they come with zerks! The boot they've included feels like rubber but is quite thick; Only time will tell on that front.
Here's some pictures, if you'd like some more specific ones, ask away.


In relation to the valvetrain, I've decided to upgrade the valves only. FM's 1mm over for intake and exhaust in stainless steel should do nicely. I gather that the fancy springs and seats are really only for increased revving purposes and I don't think that's in the cards for this build. Luckily, I can always come back to it. I've learned that the keepers needed to upgrade the valves can be sourced from many Mazda motors starting in 2000, including the KLDE. That should help keep the costs down a bit.
Reply
1
1


Nice find on the ball joints. So these will press right in after removing the OEM ones? I had always read the v8r ones were the only ones you could do that with.. make sure to update us when they are installed.
Reply
0
0

Elite Member
Joined: Mar 2006
Posts: 1,574
Total Cats: 106
From: Schwarzenberg, Germany
Reply
0
0
Thread Starter
Joined: Jul 2012
Posts: 80
Total Cats: 1
From: Fredericksburg, VA
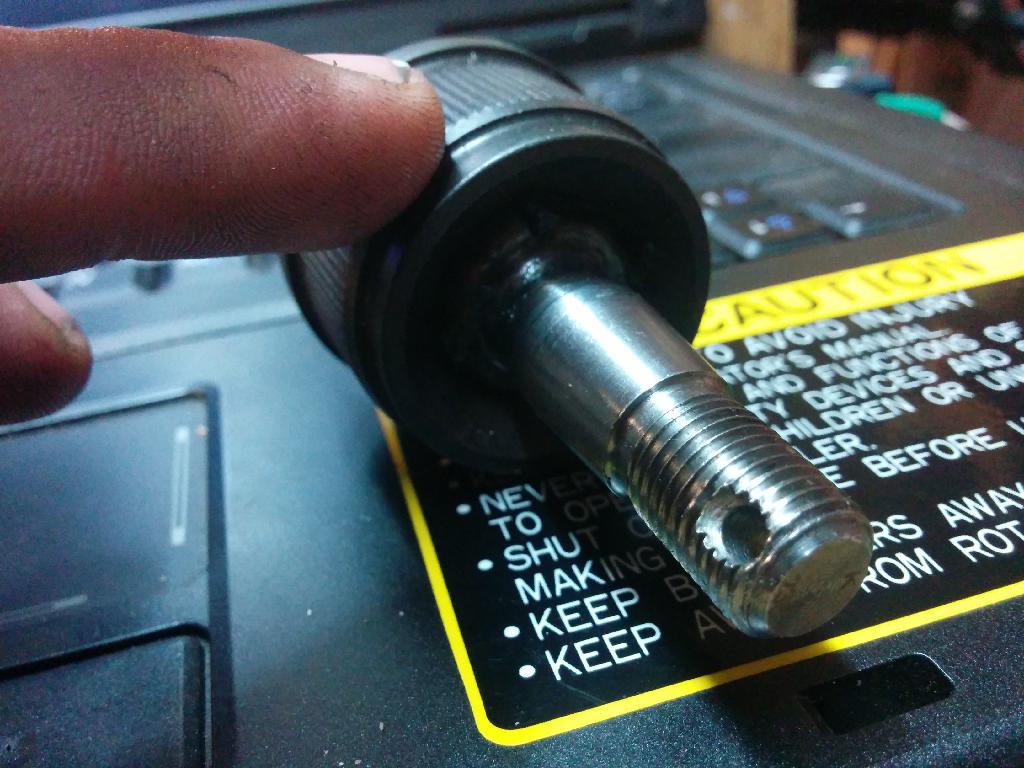
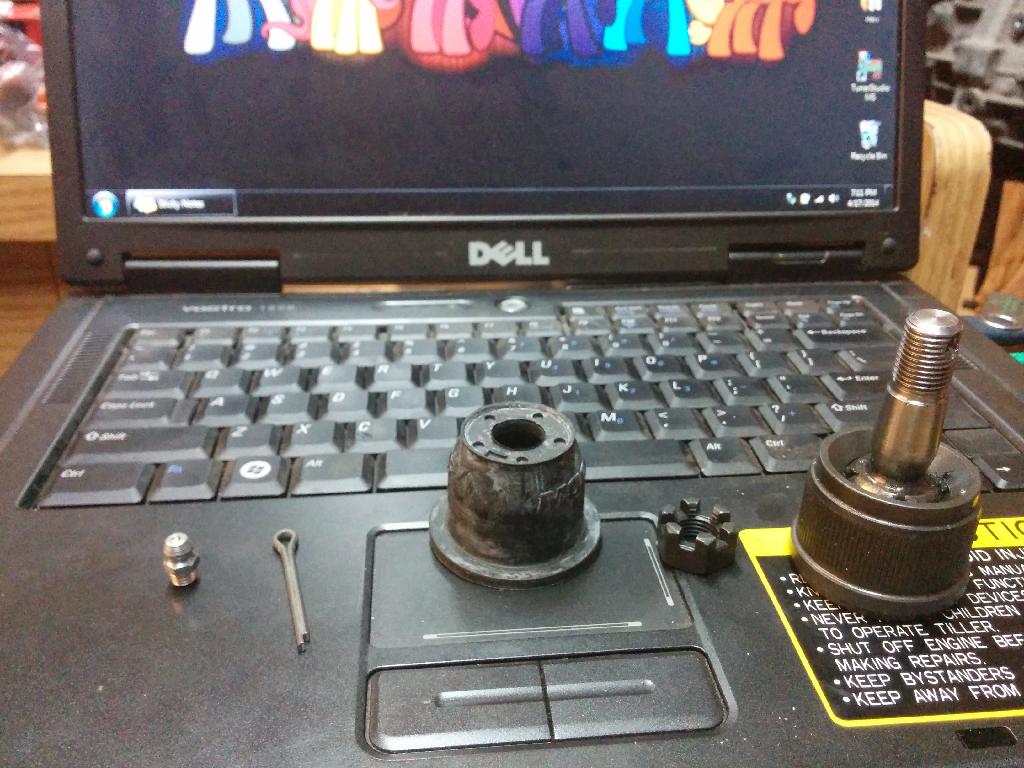
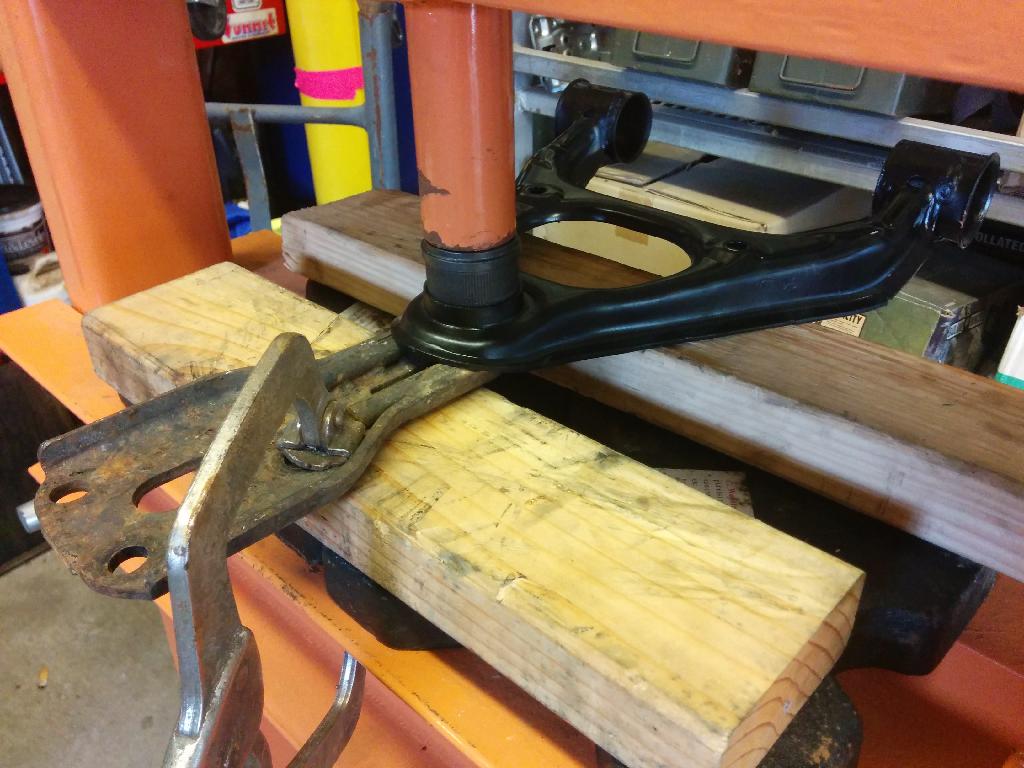
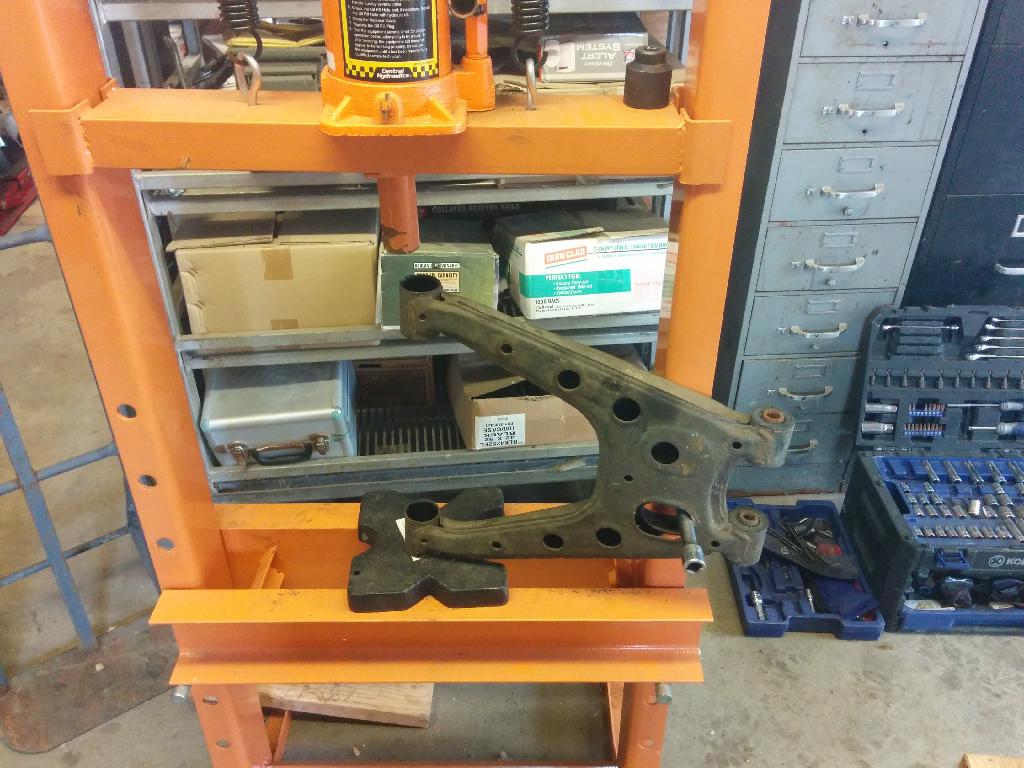
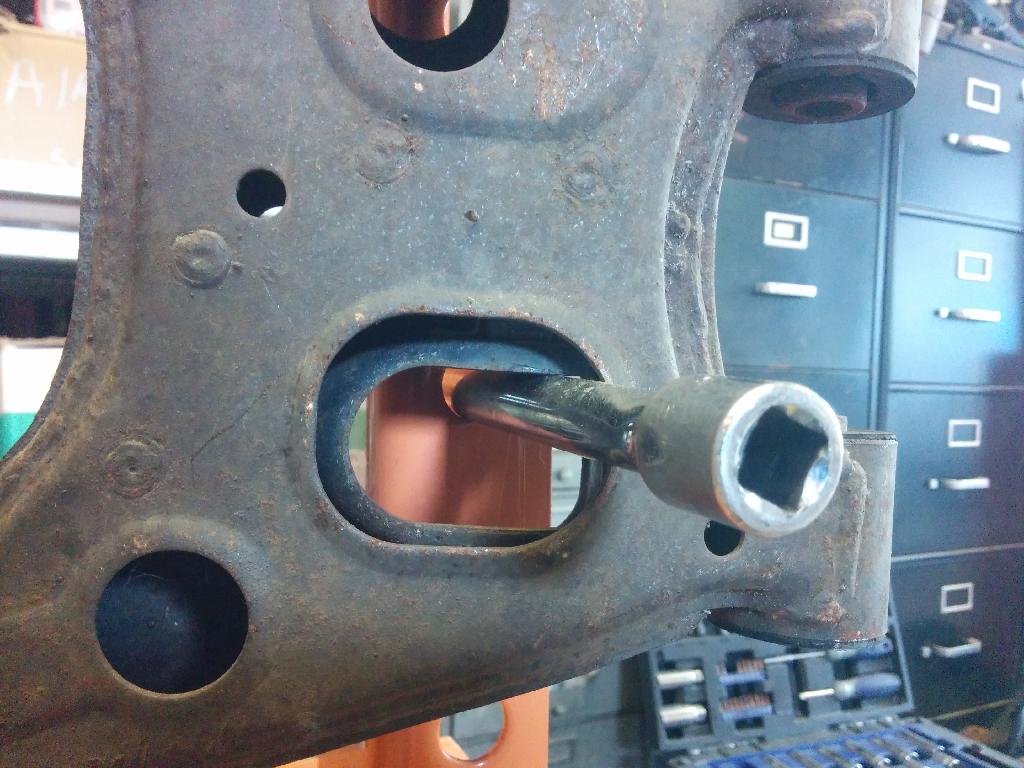
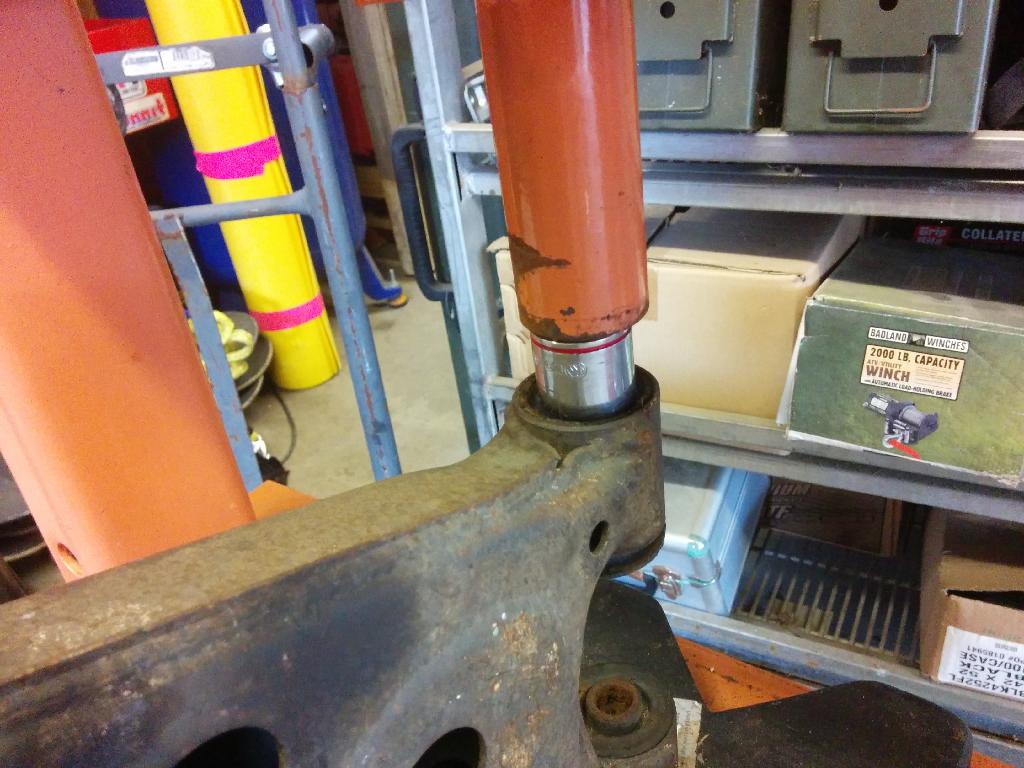
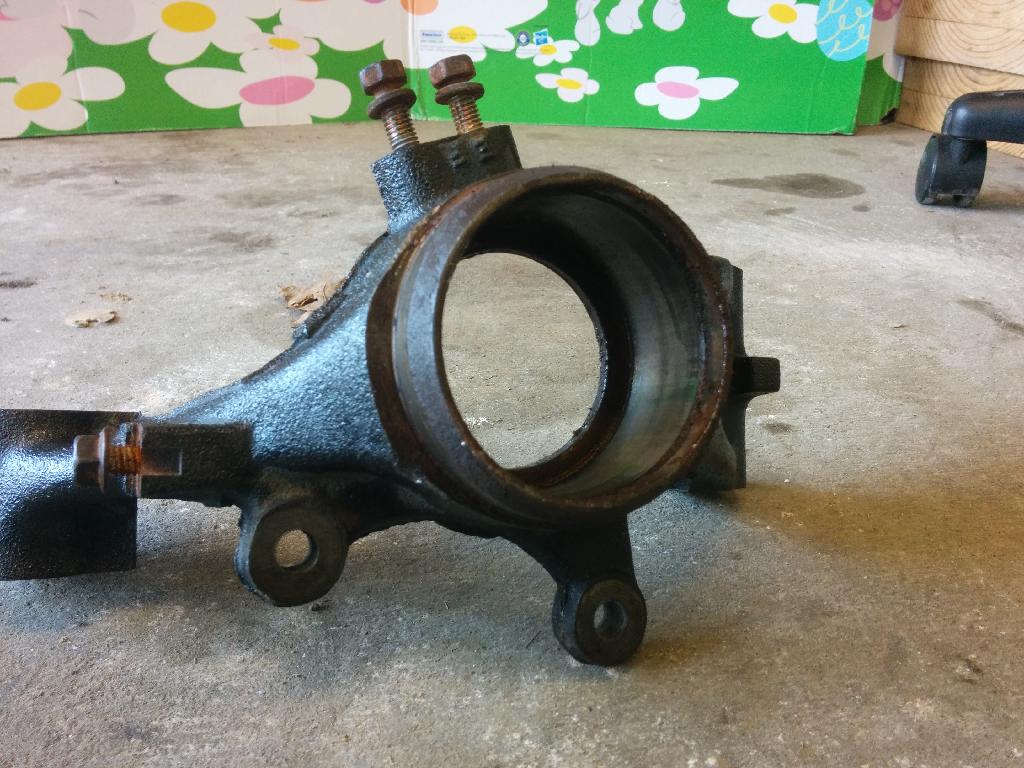
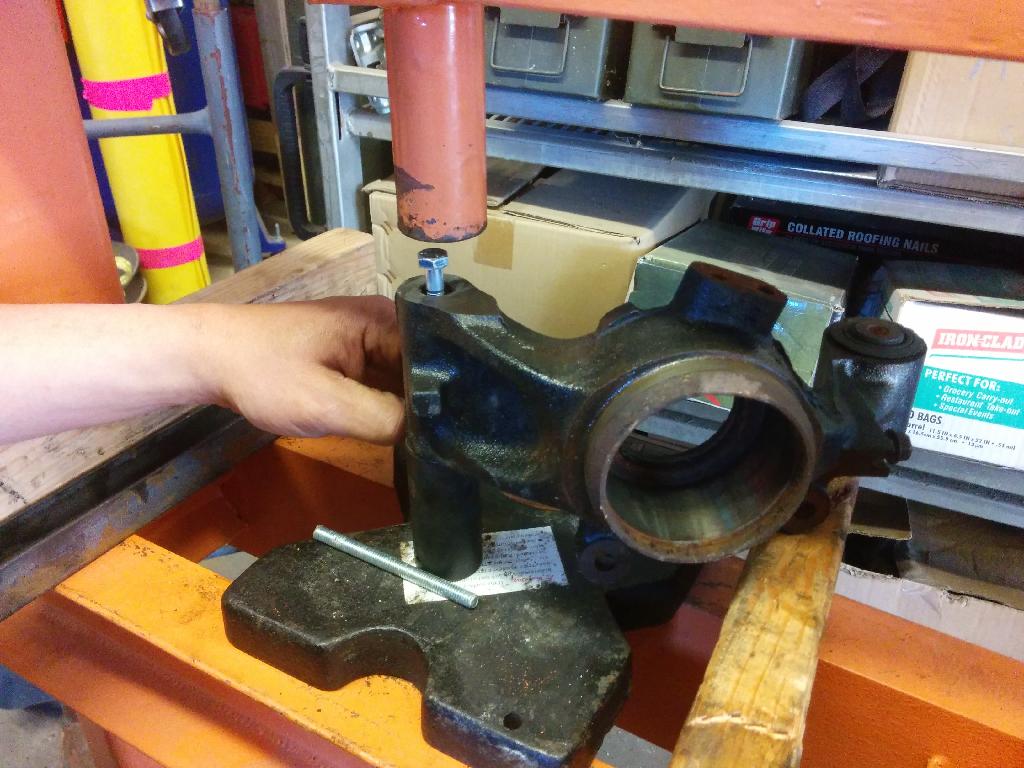
Ask and you shall receive!
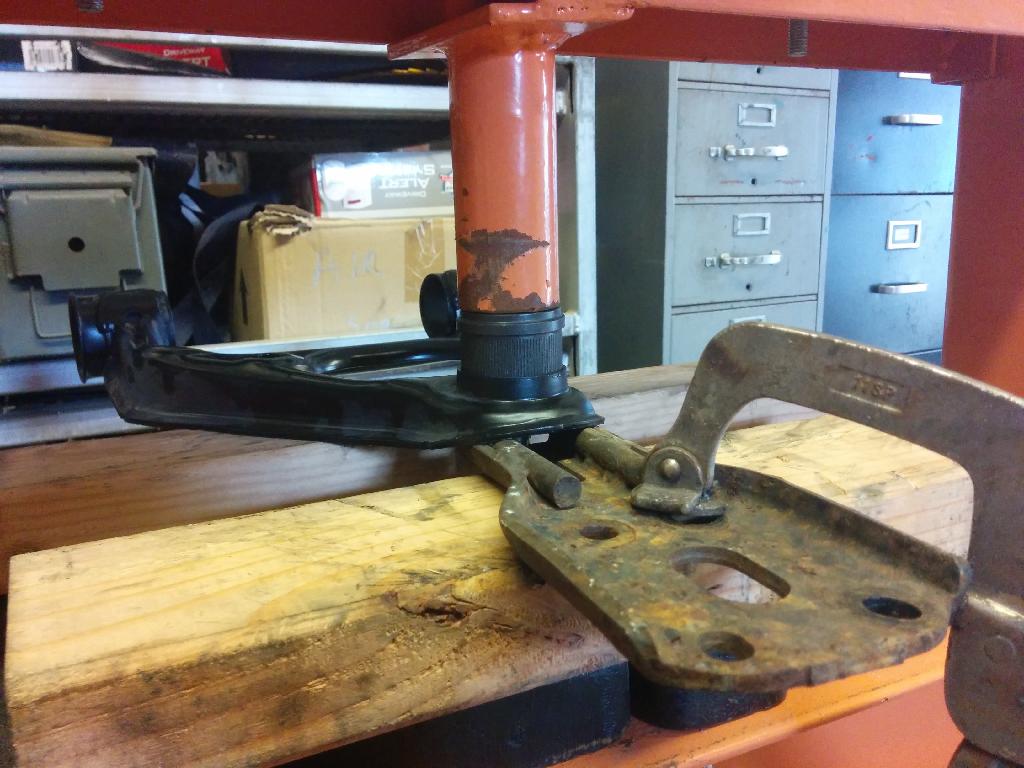
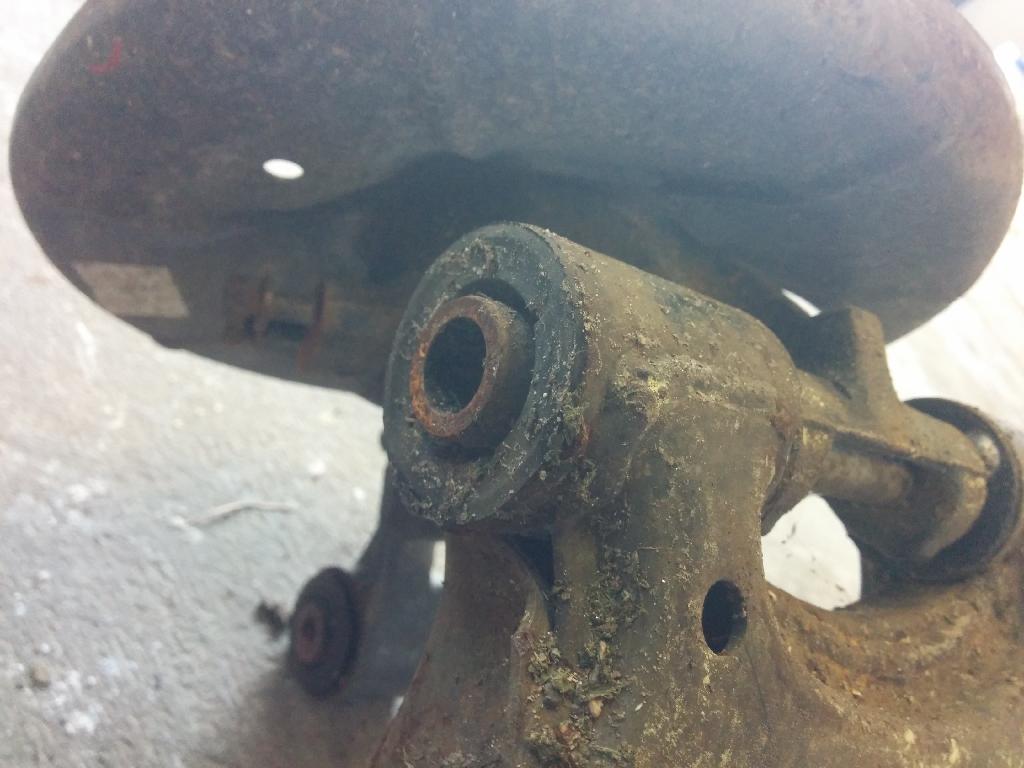
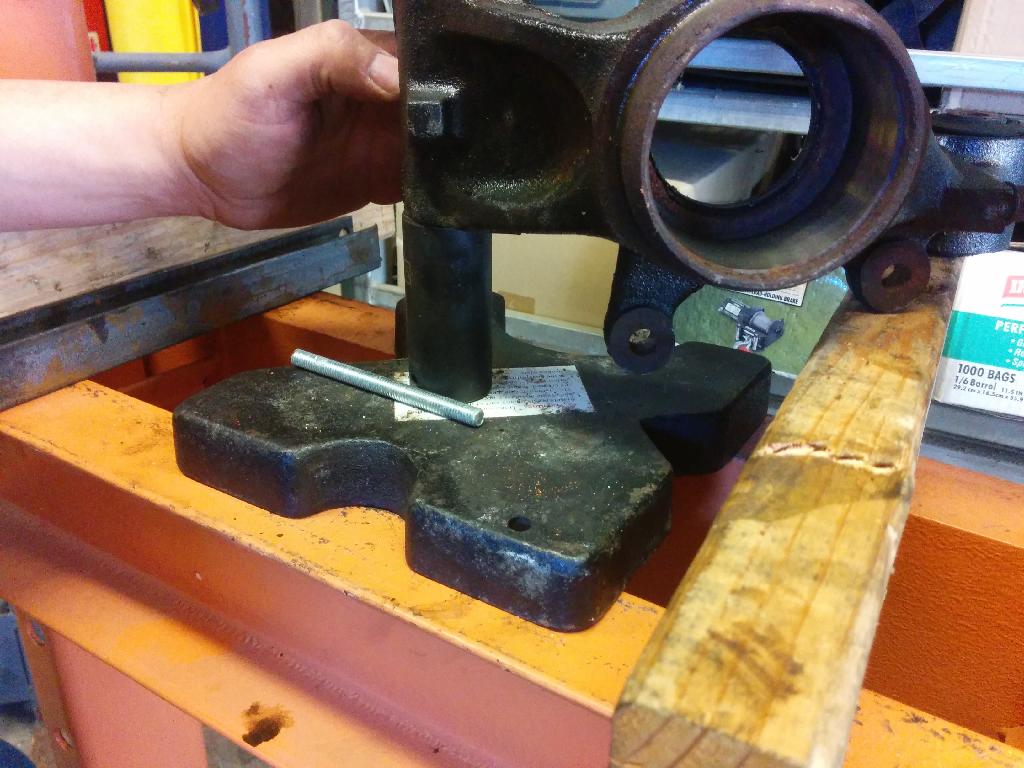
I went about pressing them today with my ghetto press and jig using some 2x4 and a baby tooth. It seems like they are a direct fit, only questions are now: How well do they work, and how long do they last? Another note I'd like to add is that if you're pressing these in yourself, take extra caution in how the splines seat before you lay the hammer down, the upper control arms are weak and don't like being pressed when the spline is catty in the seat. I, luckily, stopped and corrected it before it bent the arm up too bad.
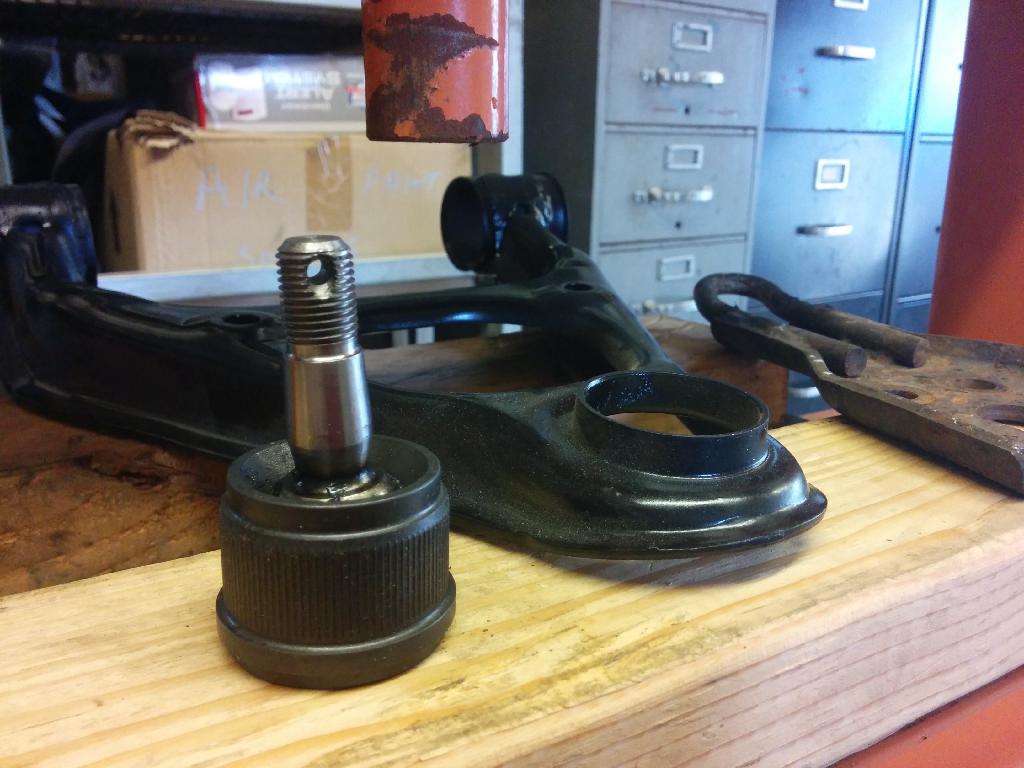
Also, I was at the yard picking up keepers for the valves today (which I may not need since I think the keepers are only needed for FM's upgraded spring and seats..)
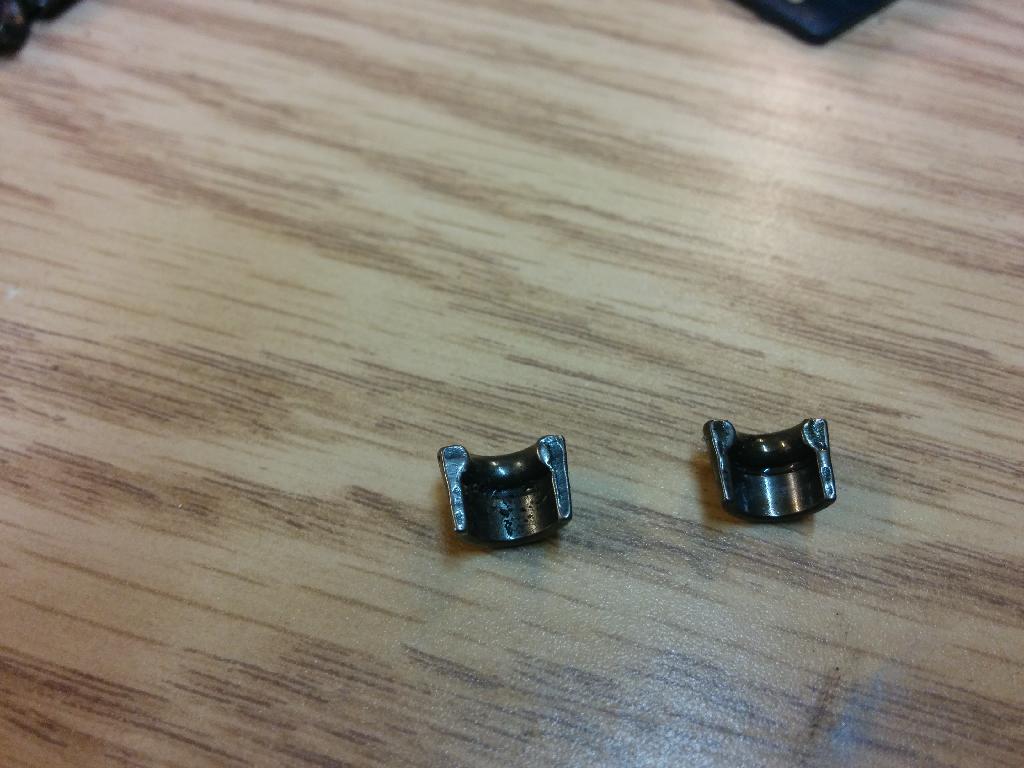
Either way, I can't tell the difference between the NB and NA keepers
NB on left, NA on right
I went about pressing them today with my ghetto press and jig using some 2x4 and a baby tooth. It seems like they are a direct fit, only questions are now: How well do they work, and how long do they last? Another note I'd like to add is that if you're pressing these in yourself, take extra caution in how the splines seat before you lay the hammer down, the upper control arms are weak and don't like being pressed when the spline is catty in the seat. I, luckily, stopped and corrected it before it bent the arm up too bad.


Also, I was at the yard picking up keepers for the valves today (which I may not need since I think the keepers are only needed for FM's upgraded spring and seats..)
Either way, I can't tell the difference between the NB and NA keepers
NB on left, NA on right

Reply
0
0
Thread Starter
Joined: Jul 2012
Posts: 80
Total Cats: 1
From: Fredericksburg, VA
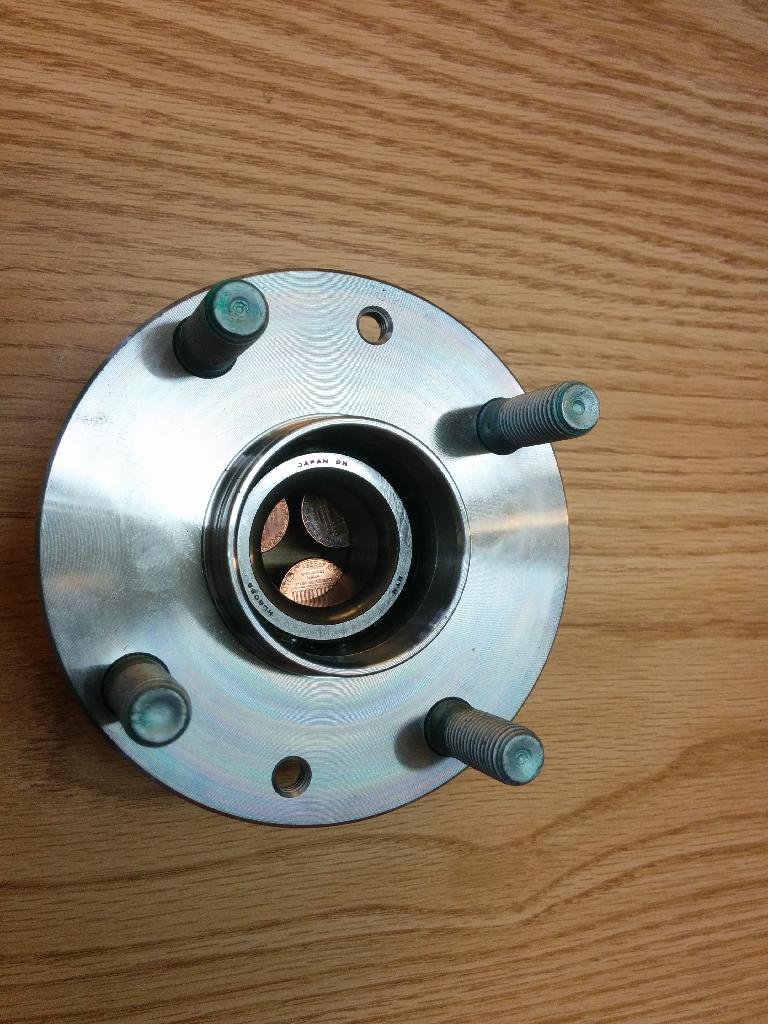
Also, just got the call from the machinist and the bearings are standard. I measured it with my HFT micrometers and checked it against spec here at the shop but I really couldn't trust them and I'm not in a big hurry. Plus, he polished the crank while it was there.
When my order for all the gaskets, o rings, etc comes in at Mazda, I'm going to port match the head, get the valves and POSSIBLY springs and seats then send it to him for grinding the seats and lapping.
Which brings me to my next question: Should I invest in a quality harmonic damper? I'm having the machinist balance the rotating assembly (including damper and flywheel with clutch and PP). Just not sure if the $300 for the SM or $500+ for the ATi super is worth it for a 350whp build.
Reply
0
0
Thread Starter
Joined: Jul 2012
Posts: 80
Total Cats: 1
From: Fredericksburg, VA
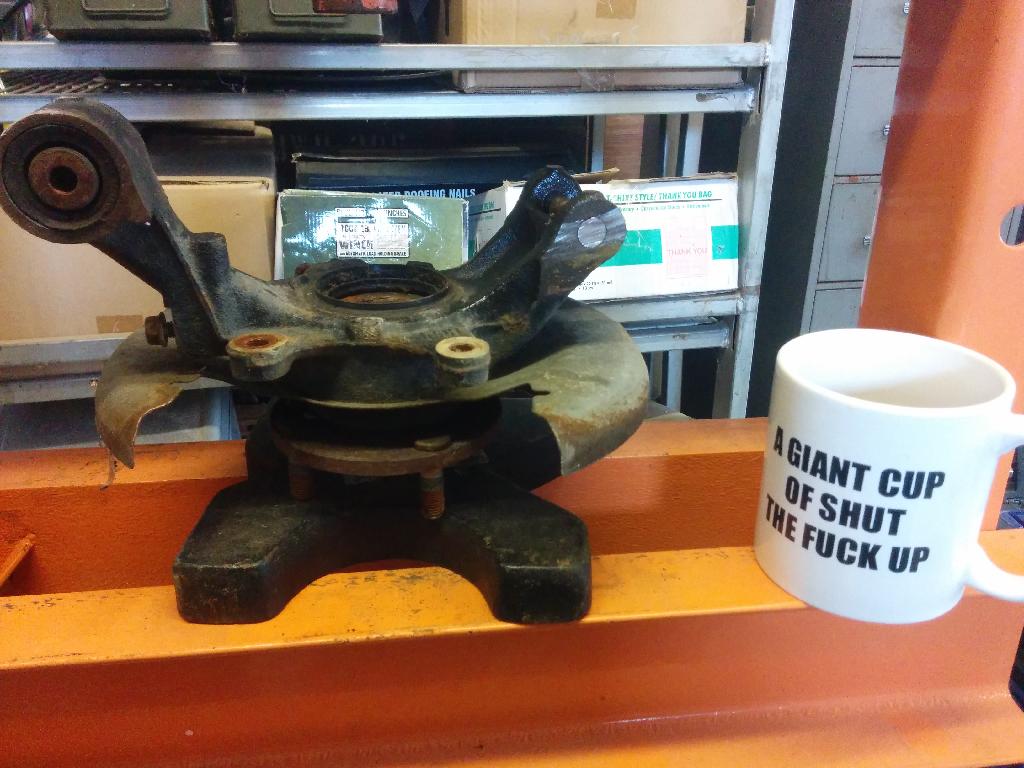
Much progress today! (and an unexpected gift haha)
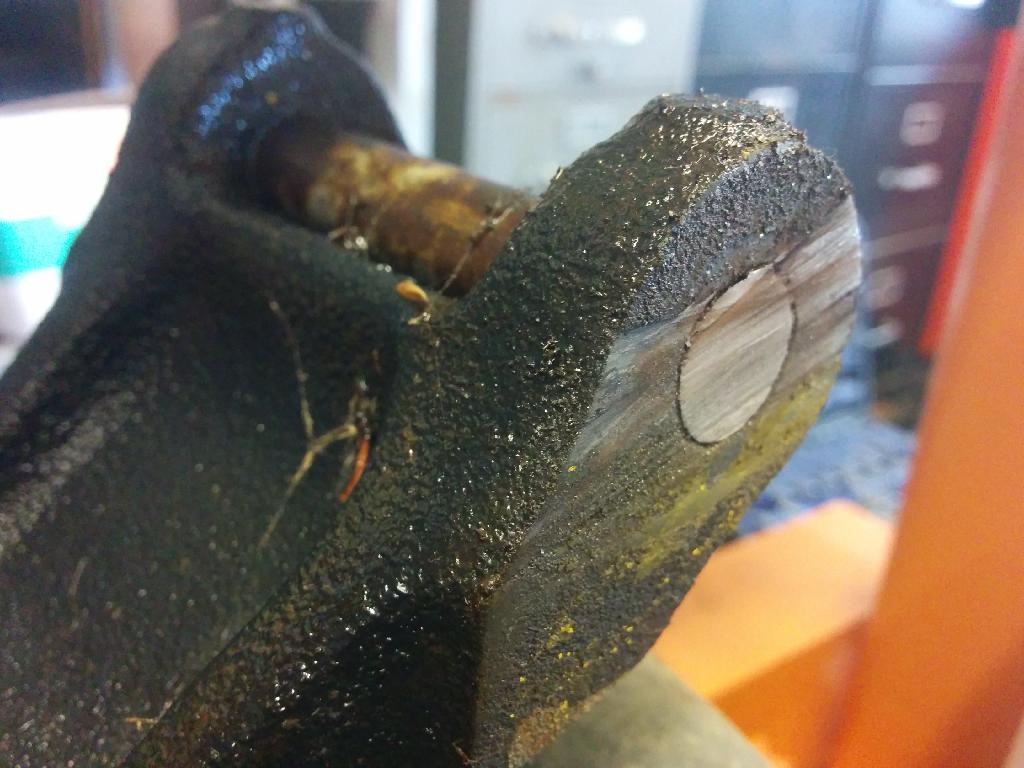
Finished removing the rear uprights from the lower control arm which...if the car is old (aren't they all?) is a huge pain in the ***. The bolt gets bent over time and becomes lodged in the lower bolt hole of the upright. No amount of wd-40 and impacting makes a difference. Ended up sawing the bolt on both sides to remove it from the LCA, then drilling the bolt out and pressing it out.
Finished pressing the last 10 bushings out from the LCA's and rear uprights. Just need to sandblast and paint the LCA's now.
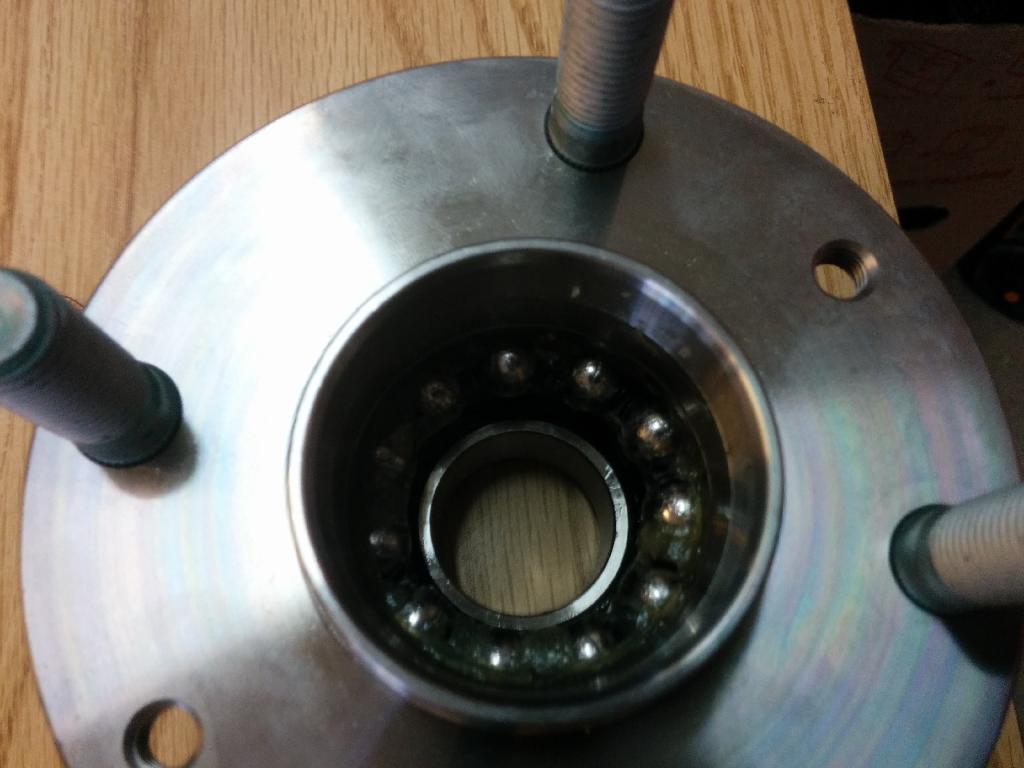
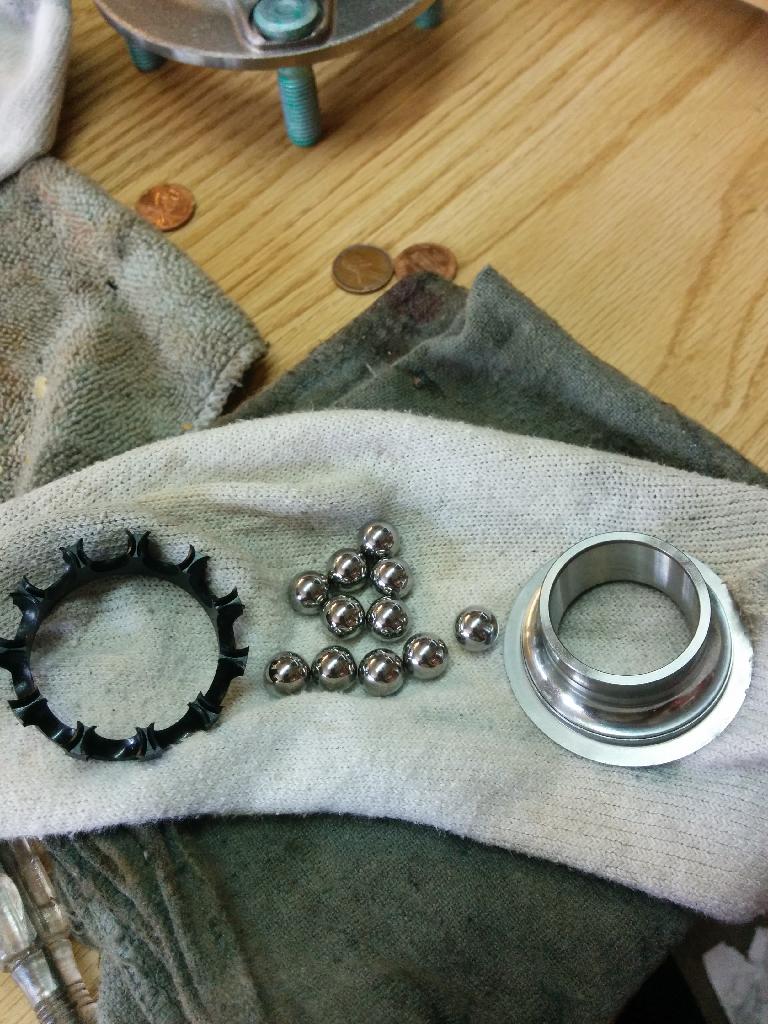
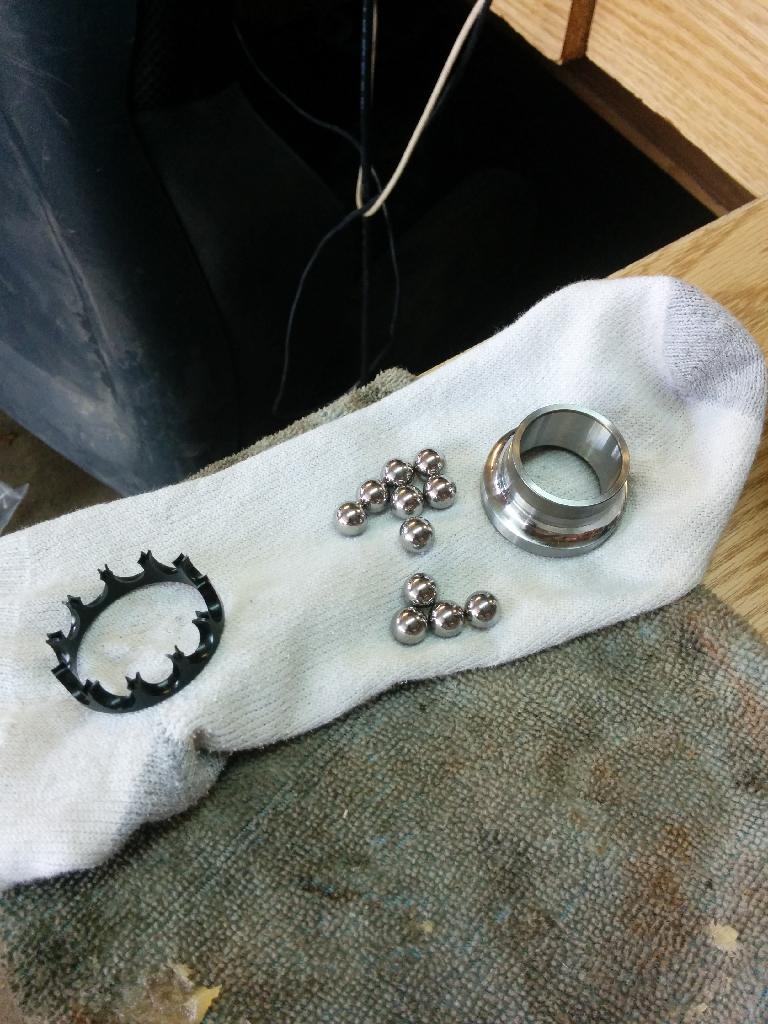
Pressed the bearings out of the uprights too. Got interesting when the roller cage shattered; Had to borrow thst from the second one to finish pressing out the first. I have the new bearings but want to receive my Dominator grease from Amsoil first to repack the fronts and rears.
Pictars!!
So...My sources tell me today was Easter Sunday. This, of course, did not prevent me from getting the things on my list done. Keep holy the Sabbath, right? Anyways, I get a text from a friend of mine this morning telling me he's getting me an Easter gift, which I thought a bit strange. Few hours later, he gets off work (merchandising for a soda company) and drops by the garage. He pulls out this massive display he picked up from a WalMart...I lol'd. He's not a brony but I appreciated the thought. Here it is.
My ridiculously large and benign mug.
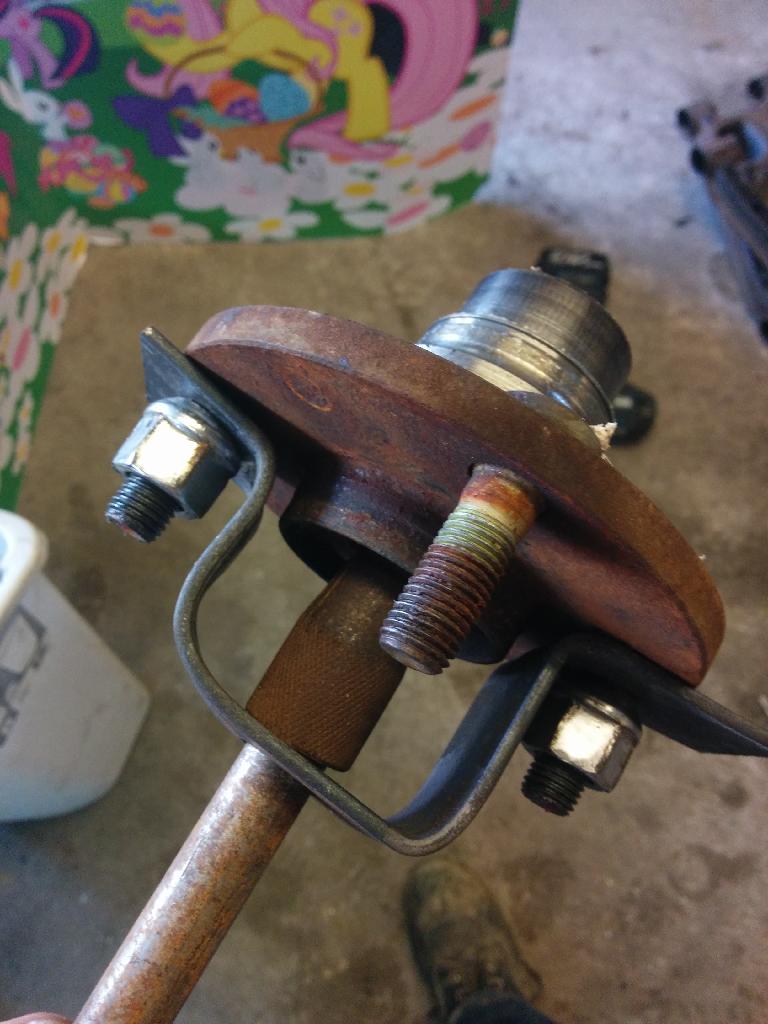
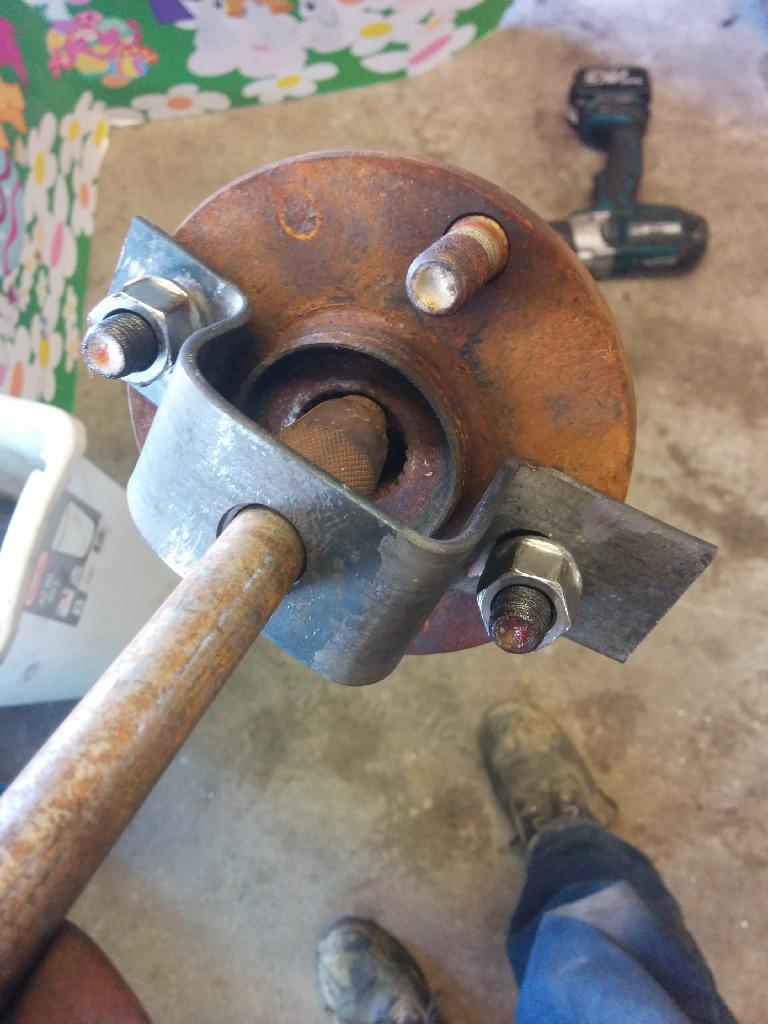
Quickly, and poorly, bent this attachment up for my slide hammer. 1/8" flat, a vice, and a hammer.
Here's me and another guy figuring out how the hell to remove the leftover bolt from the upright.
I should start working on depowering my third steering rack tonight. Guess I'll see how far I get on that.
That is all.
Finished removing the rear uprights from the lower control arm which...if the car is old (aren't they all?) is a huge pain in the ***. The bolt gets bent over time and becomes lodged in the lower bolt hole of the upright. No amount of wd-40 and impacting makes a difference. Ended up sawing the bolt on both sides to remove it from the LCA, then drilling the bolt out and pressing it out.
Finished pressing the last 10 bushings out from the LCA's and rear uprights. Just need to sandblast and paint the LCA's now.
Pressed the bearings out of the uprights too. Got interesting when the roller cage shattered; Had to borrow thst from the second one to finish pressing out the first. I have the new bearings but want to receive my Dominator grease from Amsoil first to repack the fronts and rears.
Pictars!!


So...My sources tell me today was Easter Sunday. This, of course, did not prevent me from getting the things on my list done. Keep holy the Sabbath, right? Anyways, I get a text from a friend of mine this morning telling me he's getting me an Easter gift, which I thought a bit strange. Few hours later, he gets off work (merchandising for a soda company) and drops by the garage. He pulls out this massive display he picked up from a WalMart...I lol'd. He's not a brony but I appreciated the thought. Here it is.

My ridiculously large and benign mug.


Quickly, and poorly, bent this attachment up for my slide hammer. 1/8" flat, a vice, and a hammer.


Here's me and another guy figuring out how the hell to remove the leftover bolt from the upright.


I should start working on depowering my third steering rack tonight. Guess I'll see how far I get on that.
That is all.
Reply
0
0
Good progress! I just ate ham and drank all weekend 
Ohhhh win! Please please please post up some detailed info about repacking and replacing the rear wheel bearings. I've yet to do this and need all the guidance/hints I can get.
Ohhhh win! Please please please post up some detailed info about repacking and replacing the rear wheel bearings. I've yet to do this and need all the guidance/hints I can get.
Reply
0
0
Thread Starter
Joined: Jul 2012
Posts: 80
Total Cats: 1
From: Fredericksburg, VA
I actually made even more progress on Sunday that I didn't add to the documentation. It was my first JKC rack I've ever done. I've done a lot of the 90-95 racks and I will be the first to say I like them more.
Anyways, it was a regular de-power operation. Only this time I decided to let Helen Keller (please thank Hustler for this 'phrase') weld the pinion to see if it REALLY does make a difference. Removed the ram and the spool valve then greased the the bitch up. Guess I'll see if my awful mig tacks hold up in the long run.


Big order coming from Emilio this Friday, including the ES poly bushings. I was going to go with the Mazda comp rubbers but I wanted to try poly out first. I'll decide if I'm going to tap for zerks soon.
Reply
0
0
Thread Starter
Joined: Jul 2012
Posts: 80
Total Cats: 1
From: Fredericksburg, VA
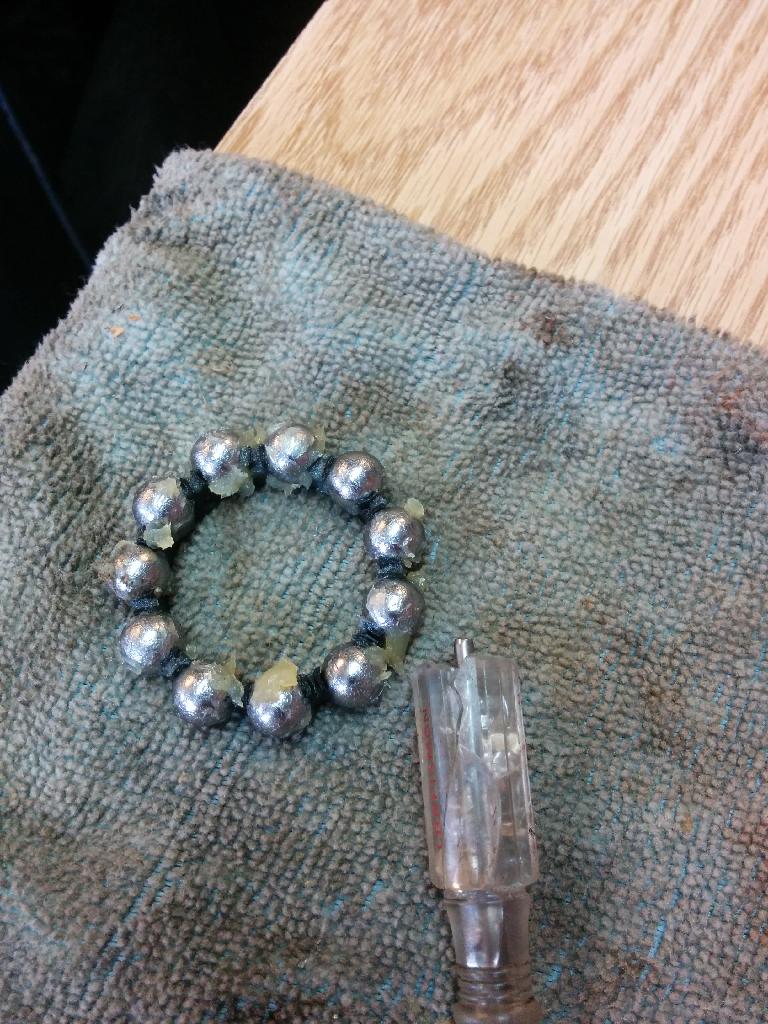
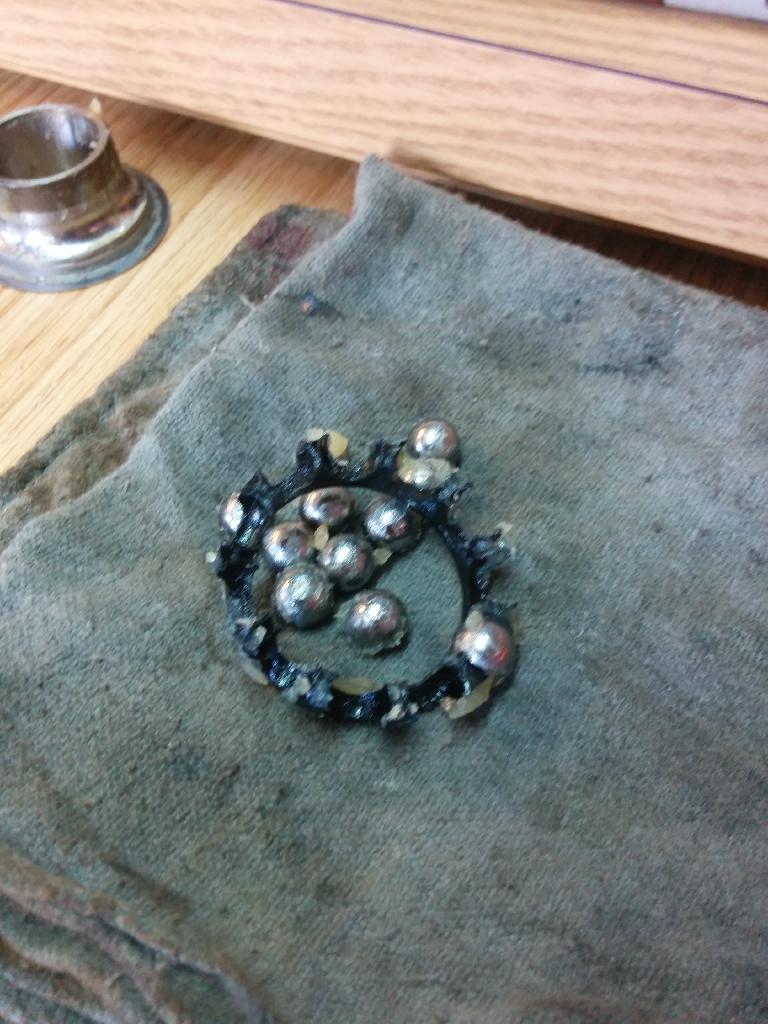
So I'm going through the guide for packing the fronts and I realize you're the OP, EO2K. I'm surprised you haven't done the rears; They're damn near the same as the fronts which you wrote an excellent guide for! The ***** are much harder to get out without damaging the seal, though. I ended up using the parts washer + air nozzle + very strong carb cleaning solution to clean the existing grease out of the rears and am going to pack them with the rollers and cages in place. Similar to cleaning and re-packing roller bearings.
I'll have pictures up tonight.
I'll have pictures up tonight.
Reply
0
0
Thread Starter
Joined: Jul 2012
Posts: 80
Total Cats: 1
From: Fredericksburg, VA
Lots of stuff got done today. Installed all of the poly bushings, minus the rear uprights since I still need to install the bearings I re-packed today. Need an oven for that and ovens don't treat bushings very nicely. FM doesn't lie when they say you're gonna have a bad time getting the hyper lube off your hands!
For those that need it: EO2K's Front Hub Re-pack Guide really came in handy. Same applies to the rear wheel bearings, basically.
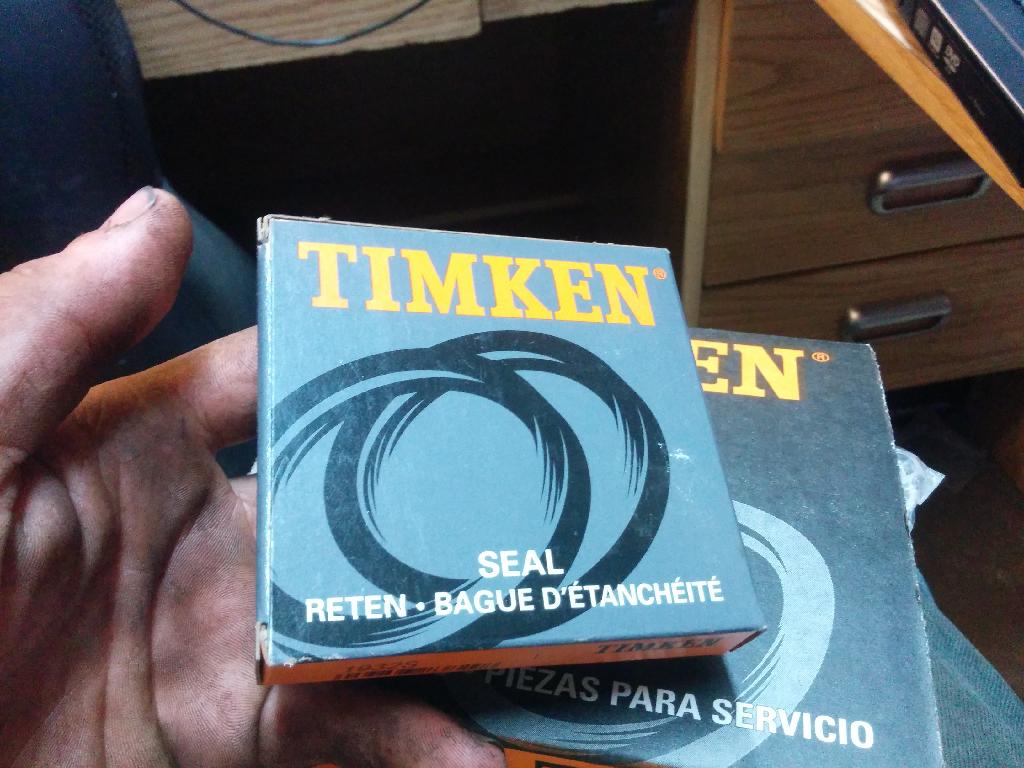
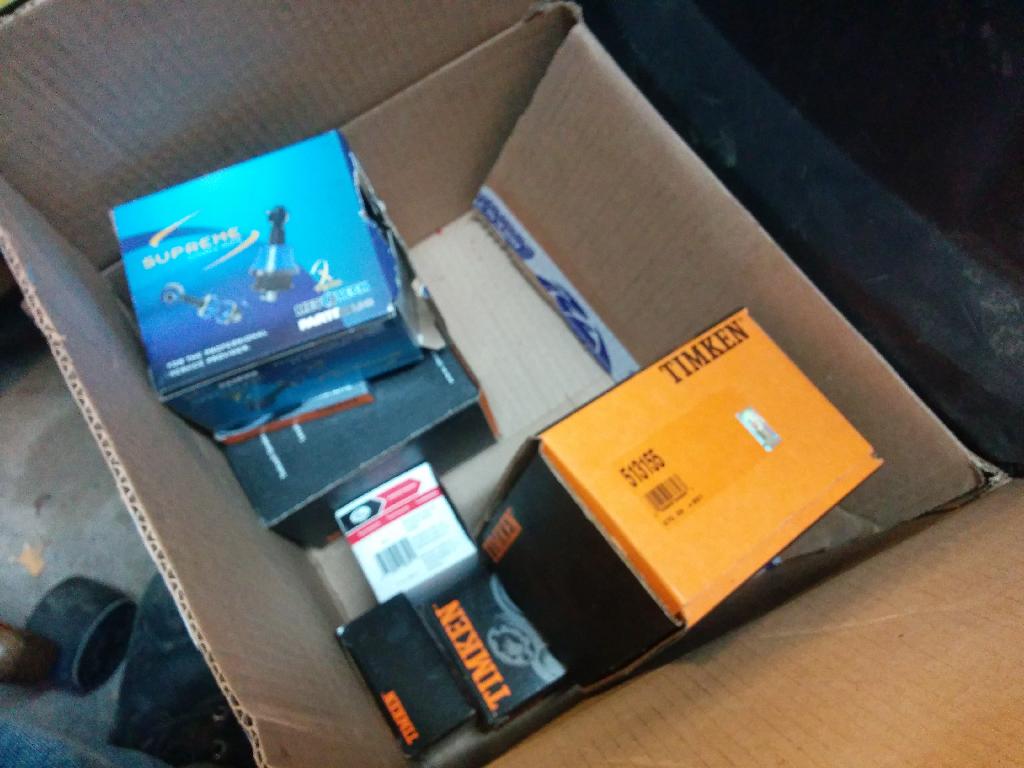
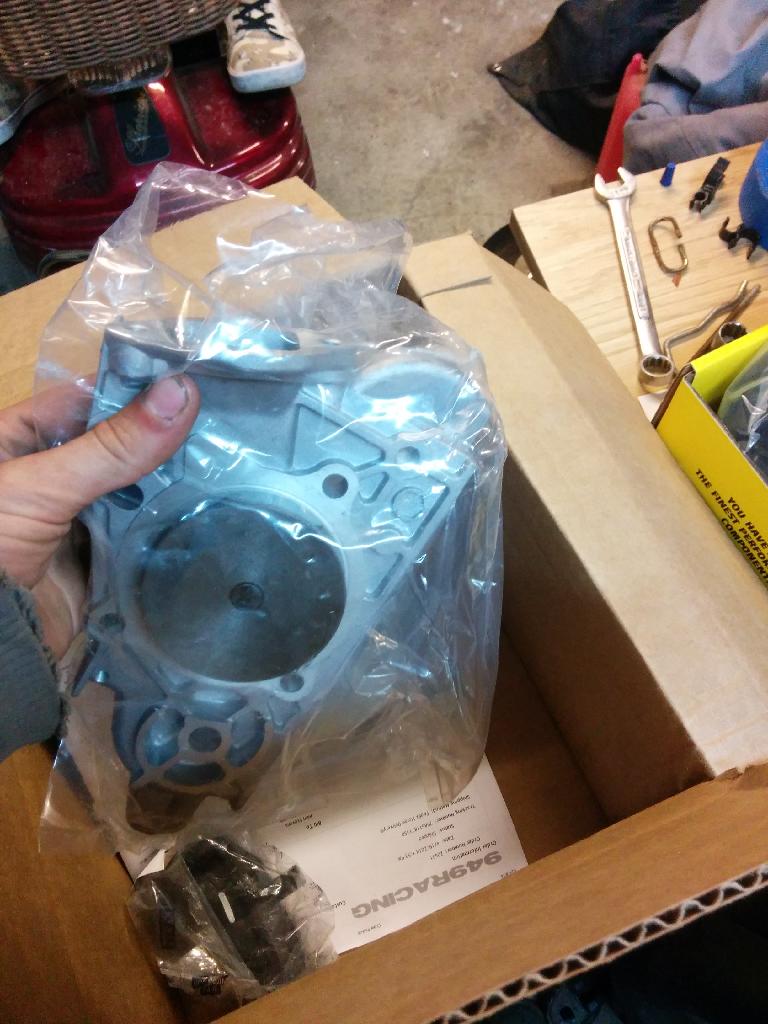
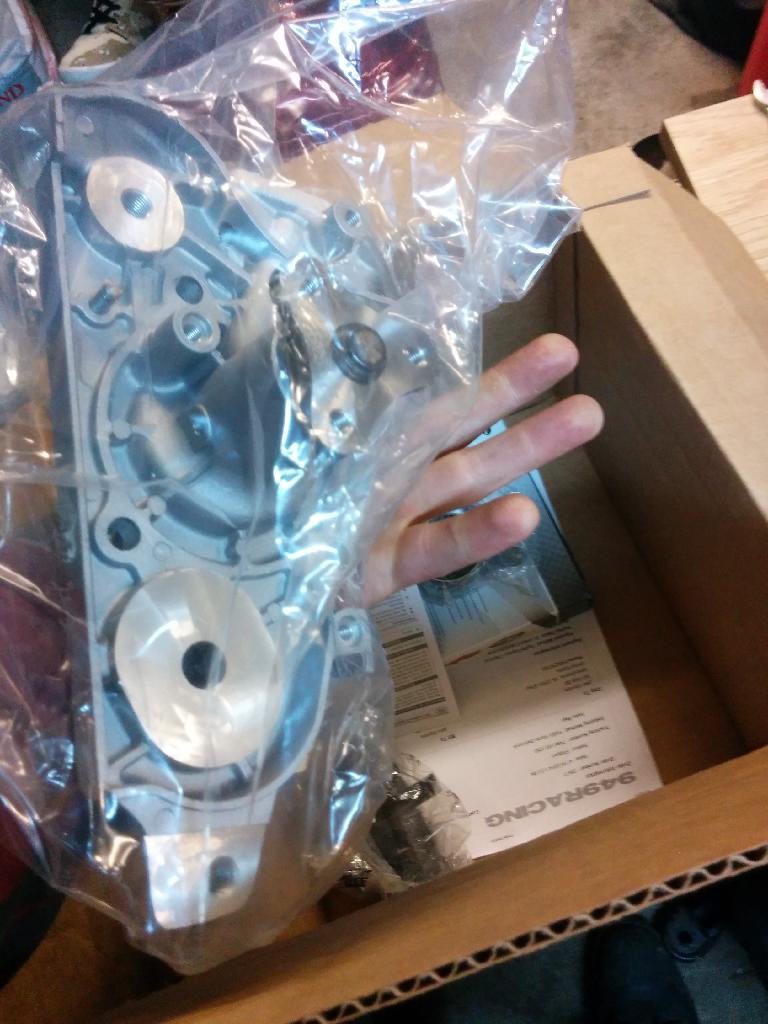
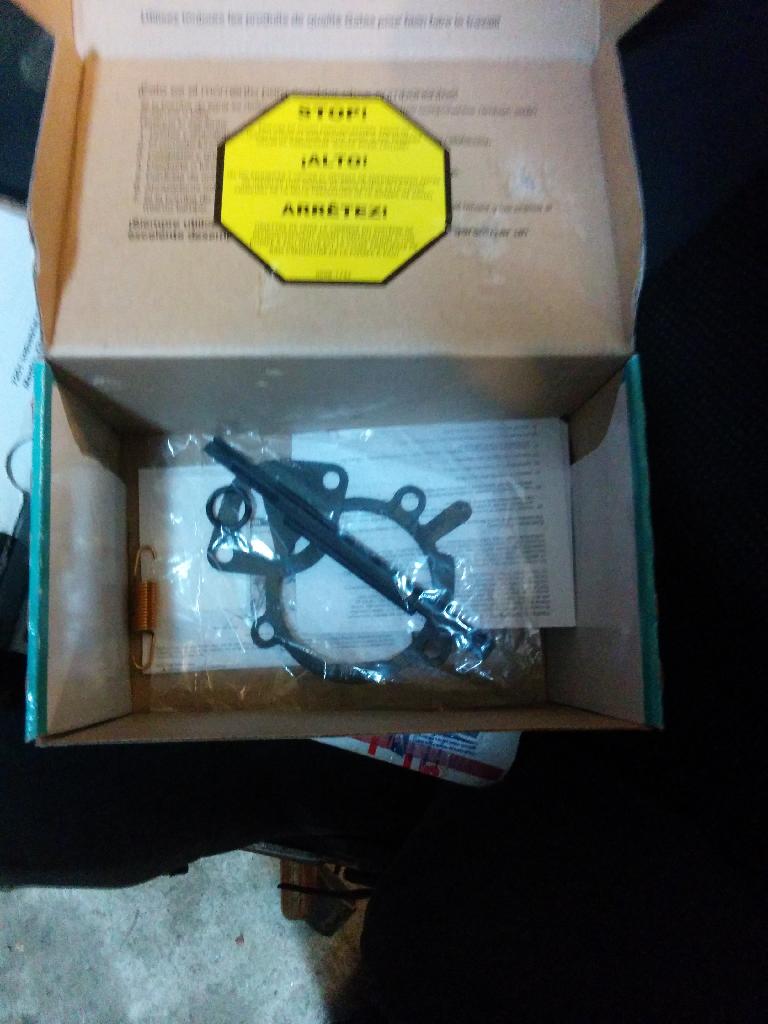
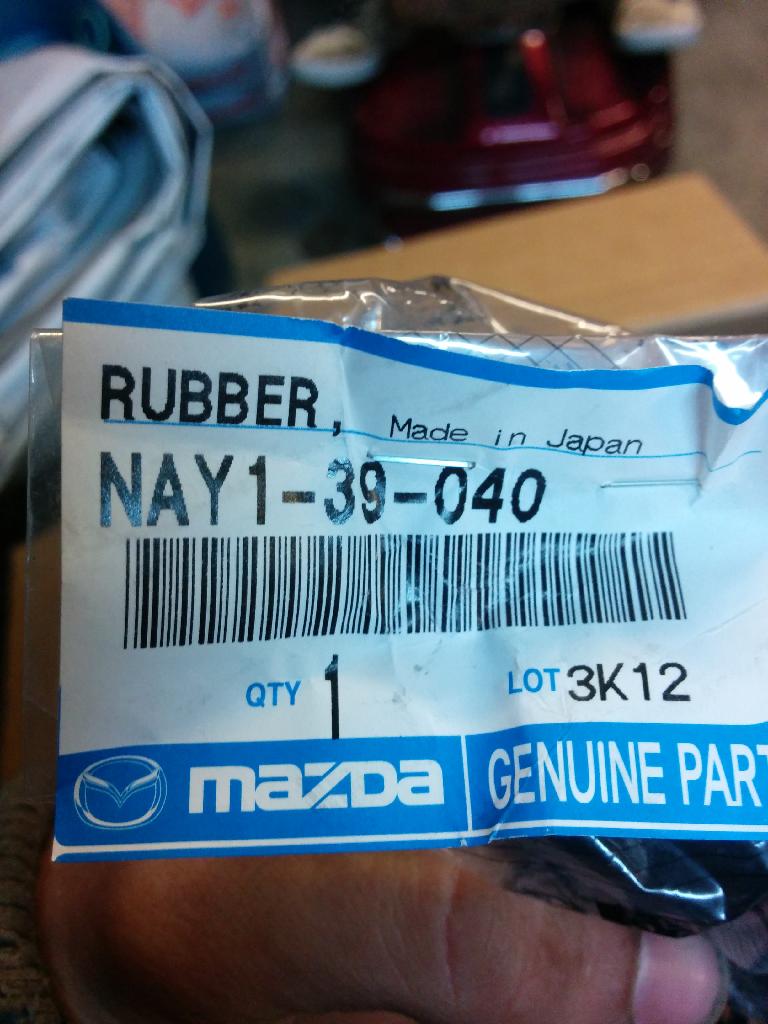
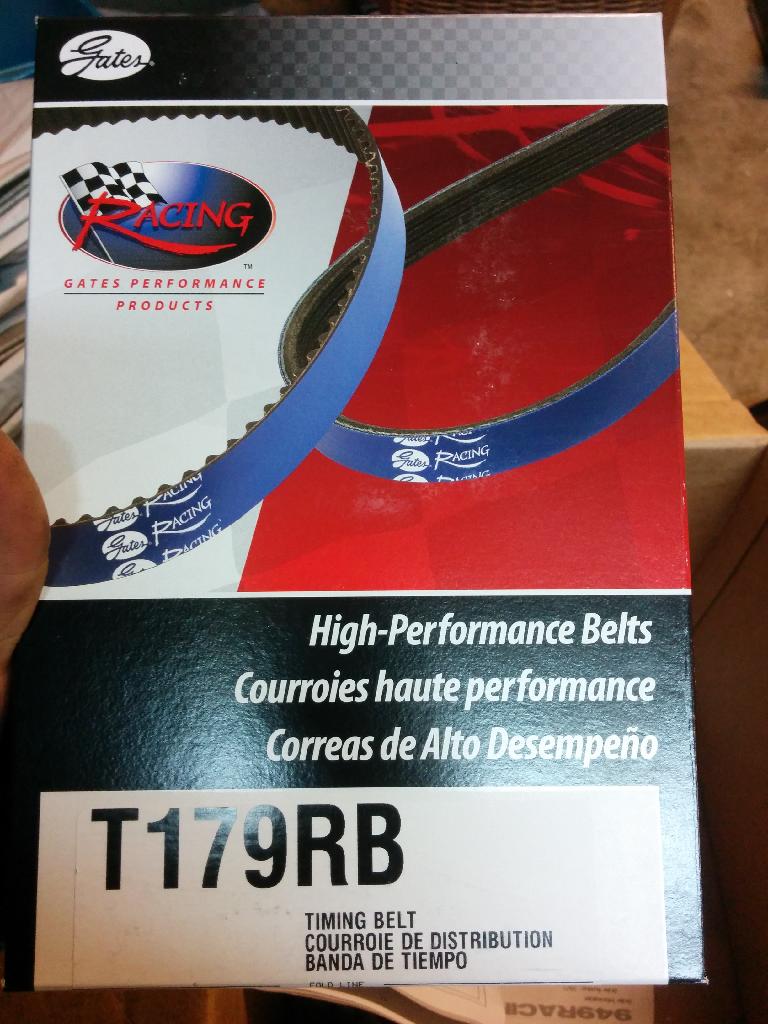
Anyways, I got my package from 949 Friday. Gates belt with pulleys, water pump, ACL bearing set, es poly bushings, Mazda comp motor mounts, and SuperTech valve seals.
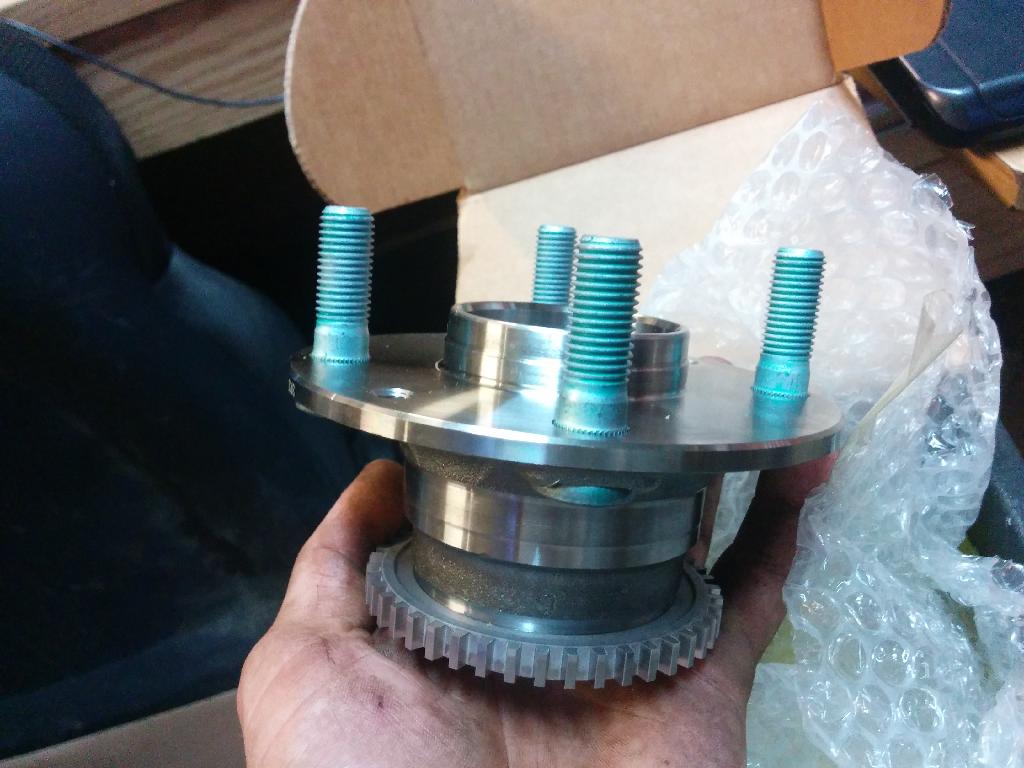
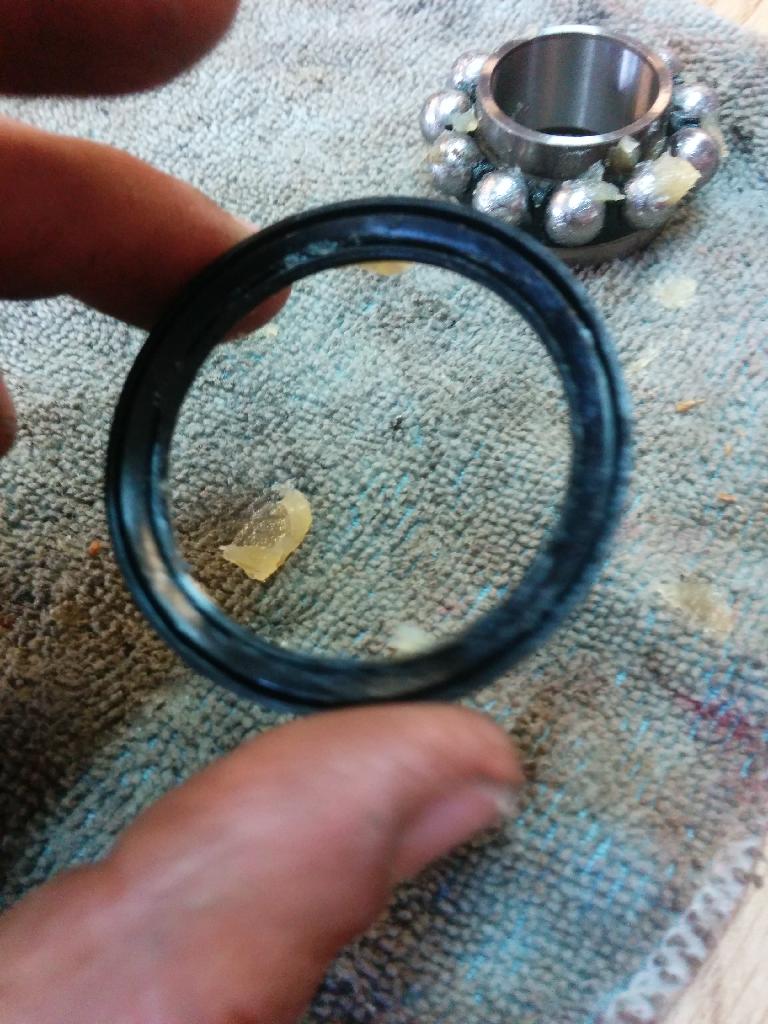
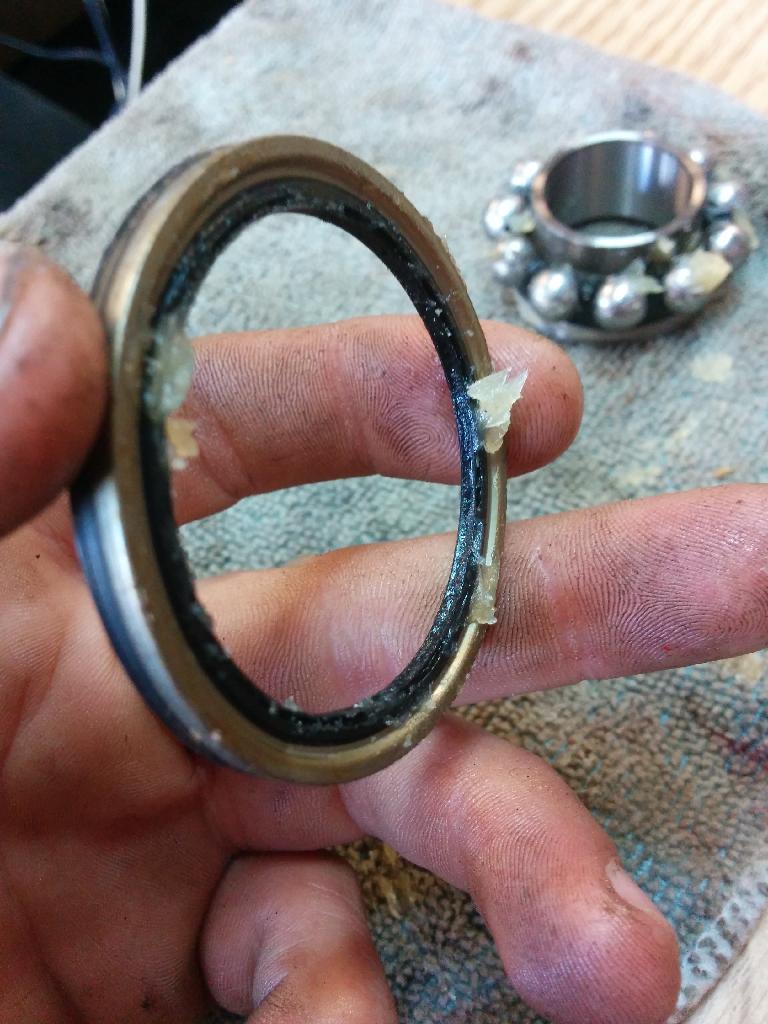
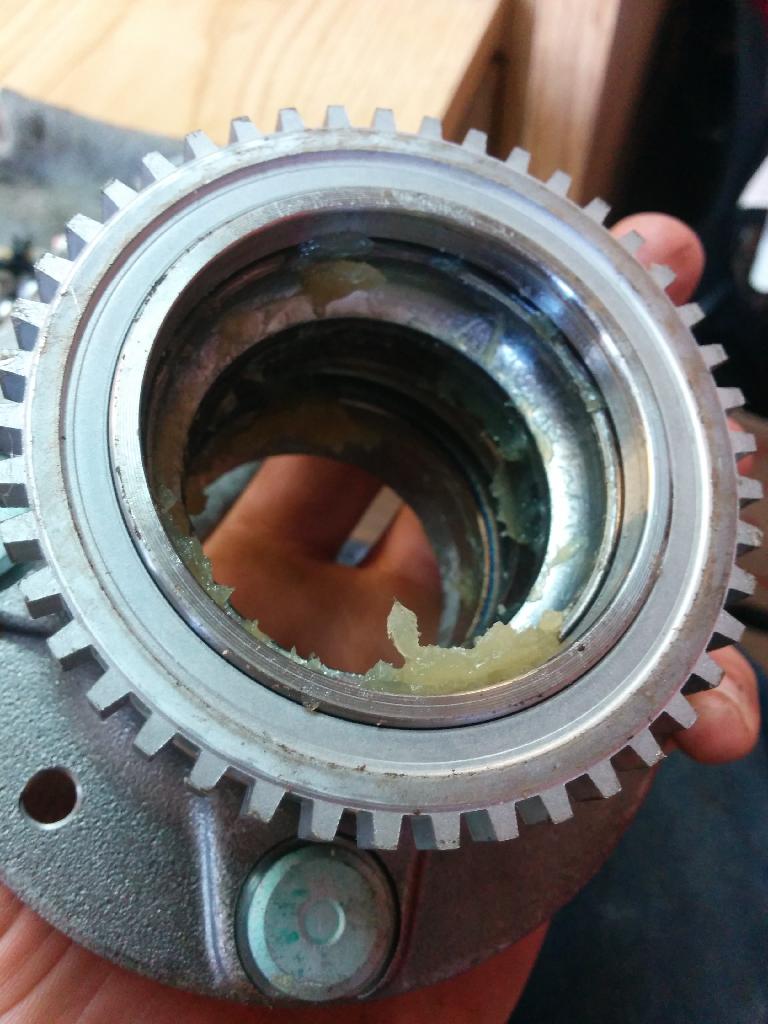
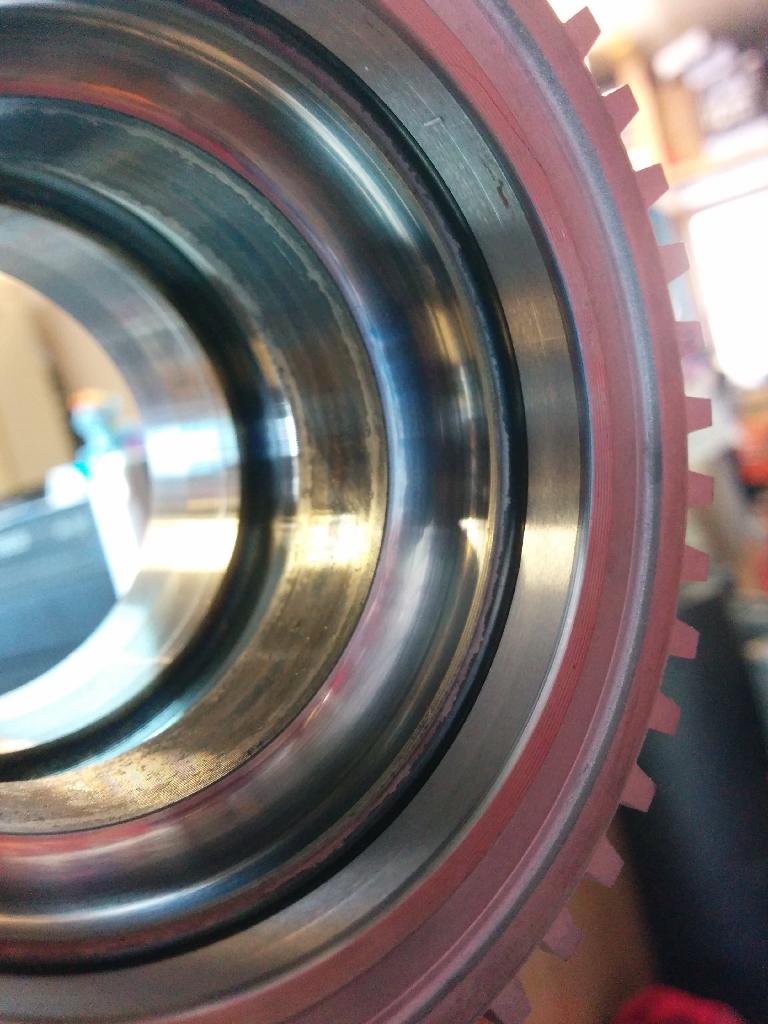
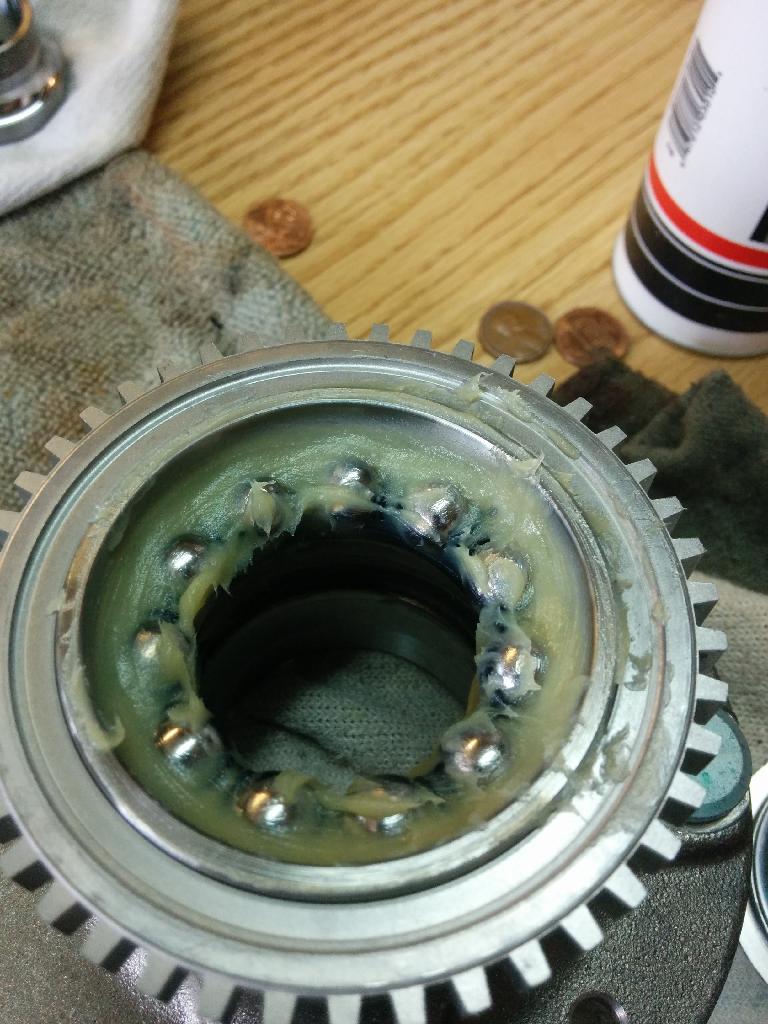
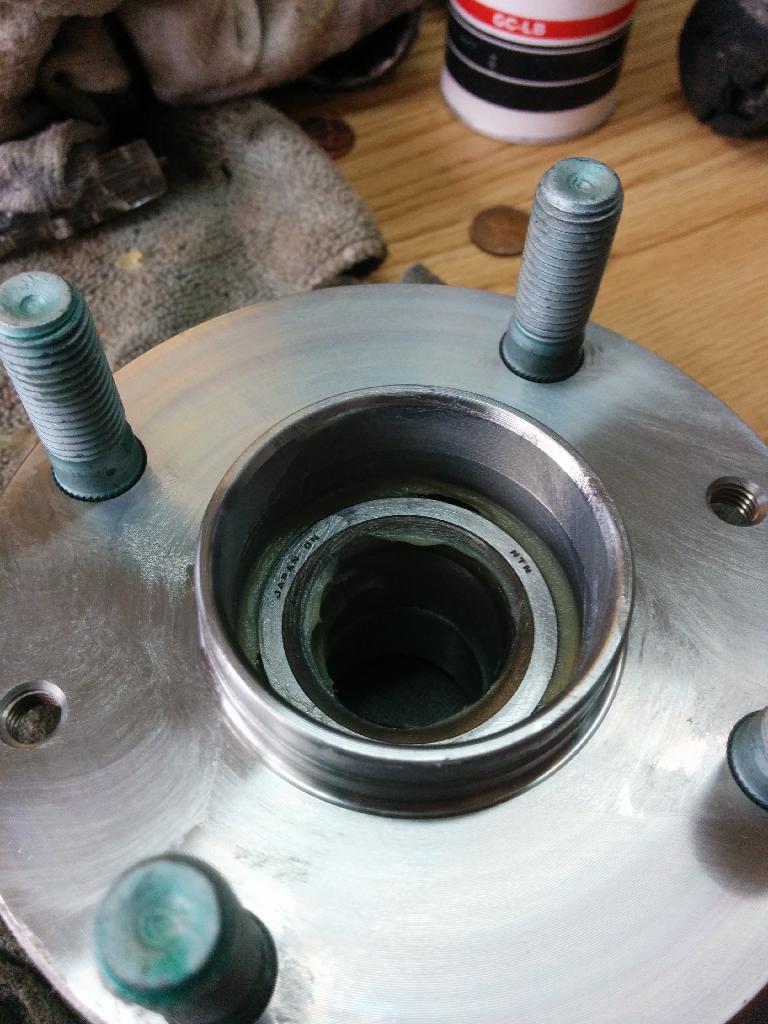
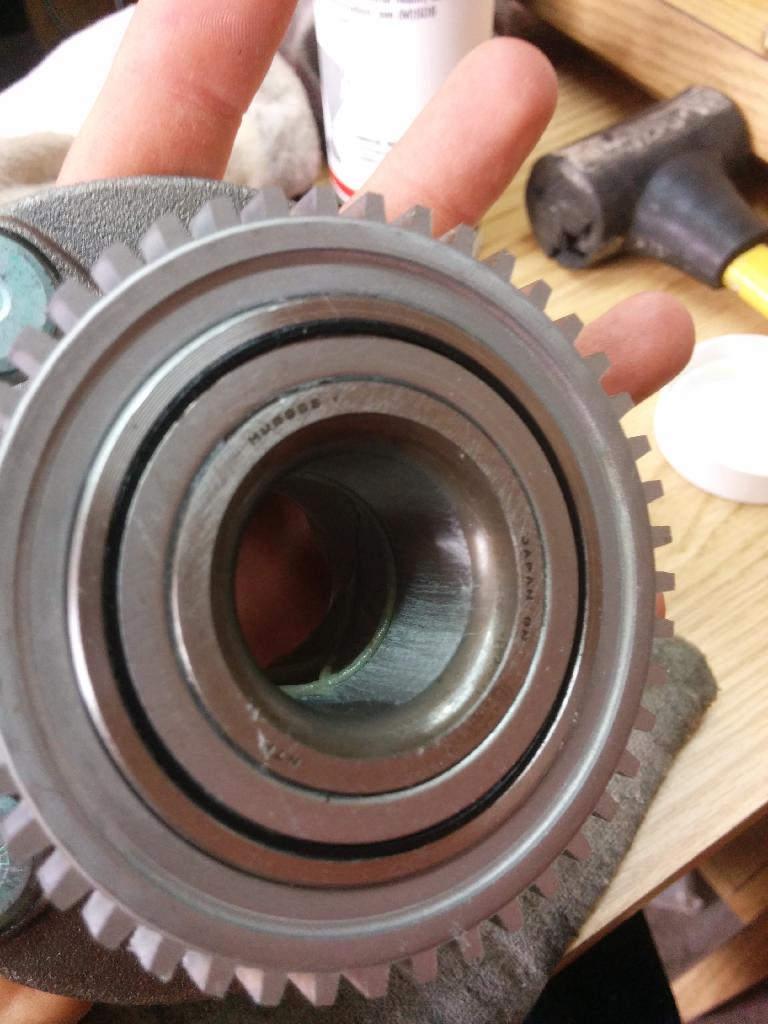
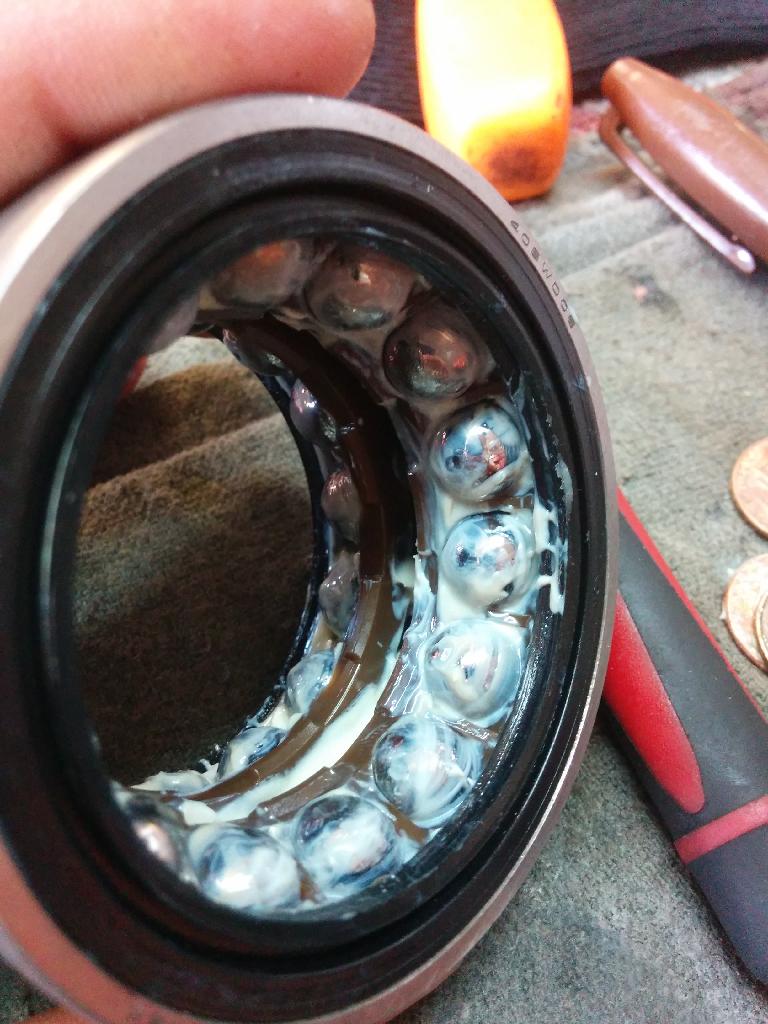
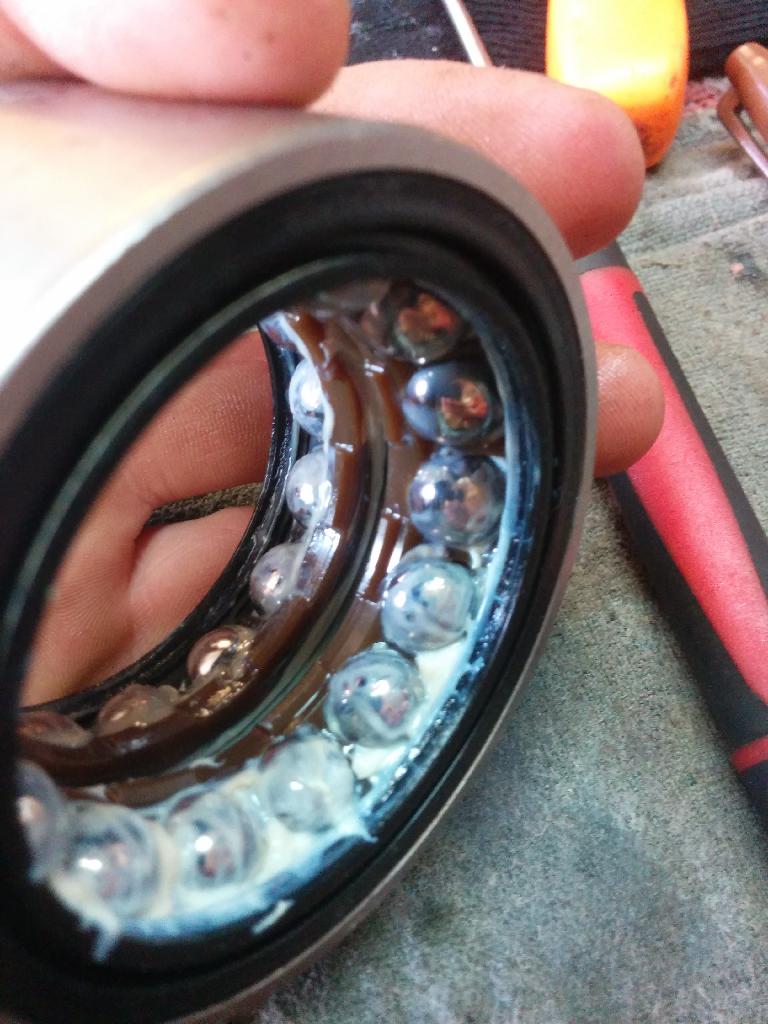
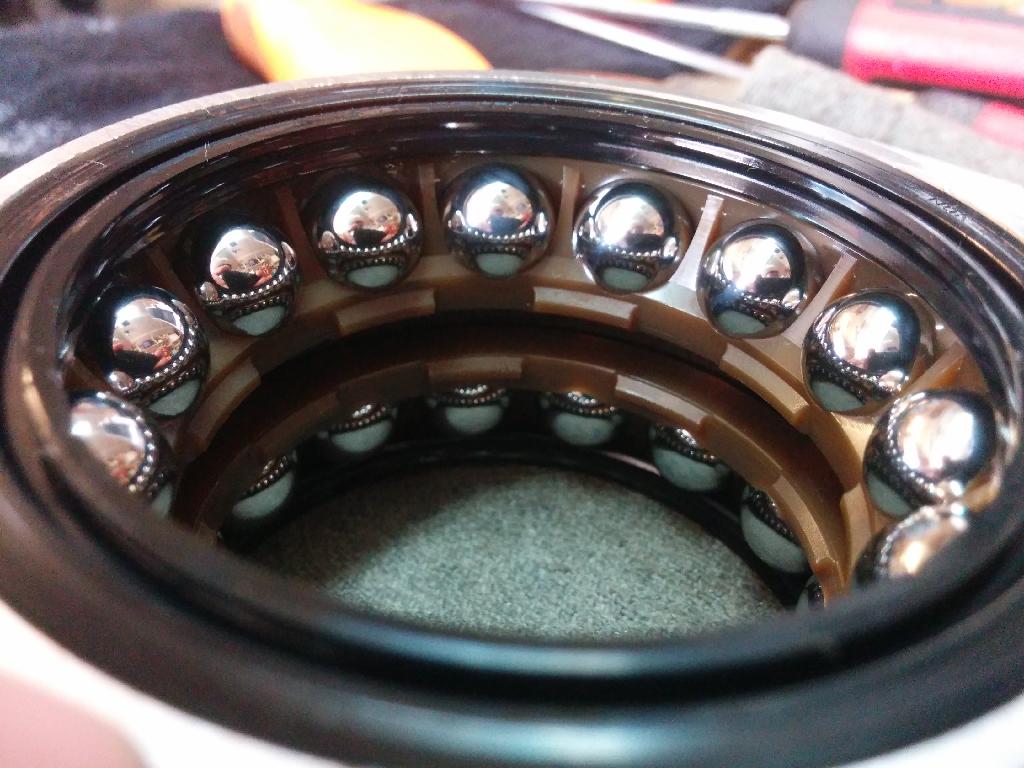
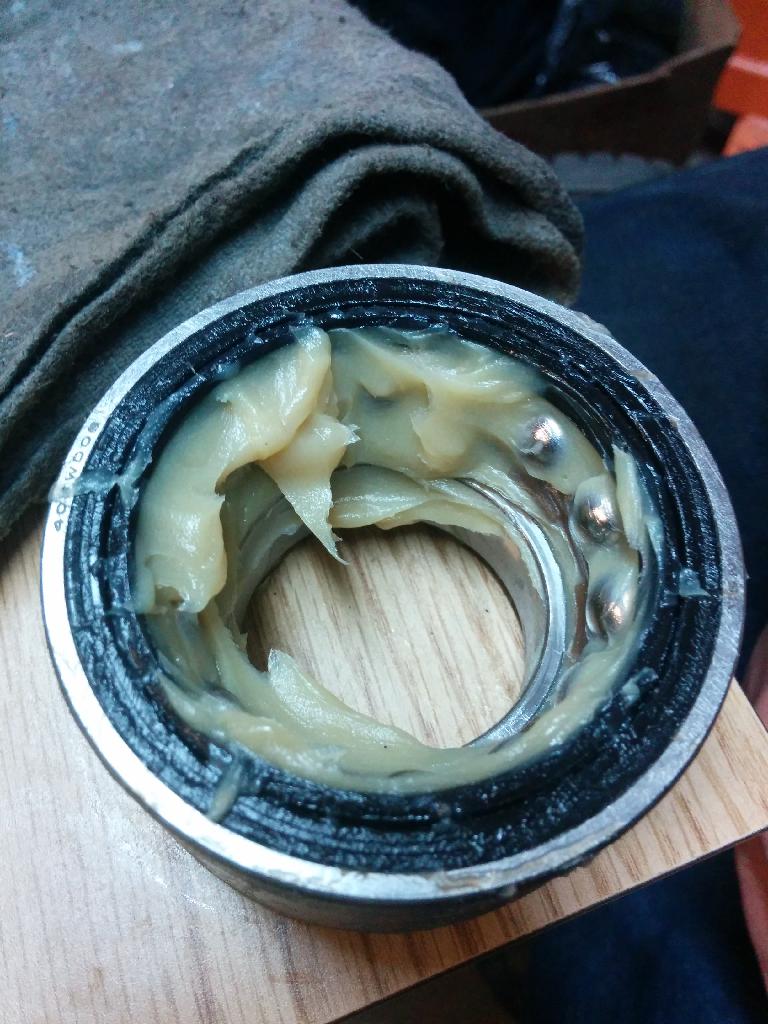
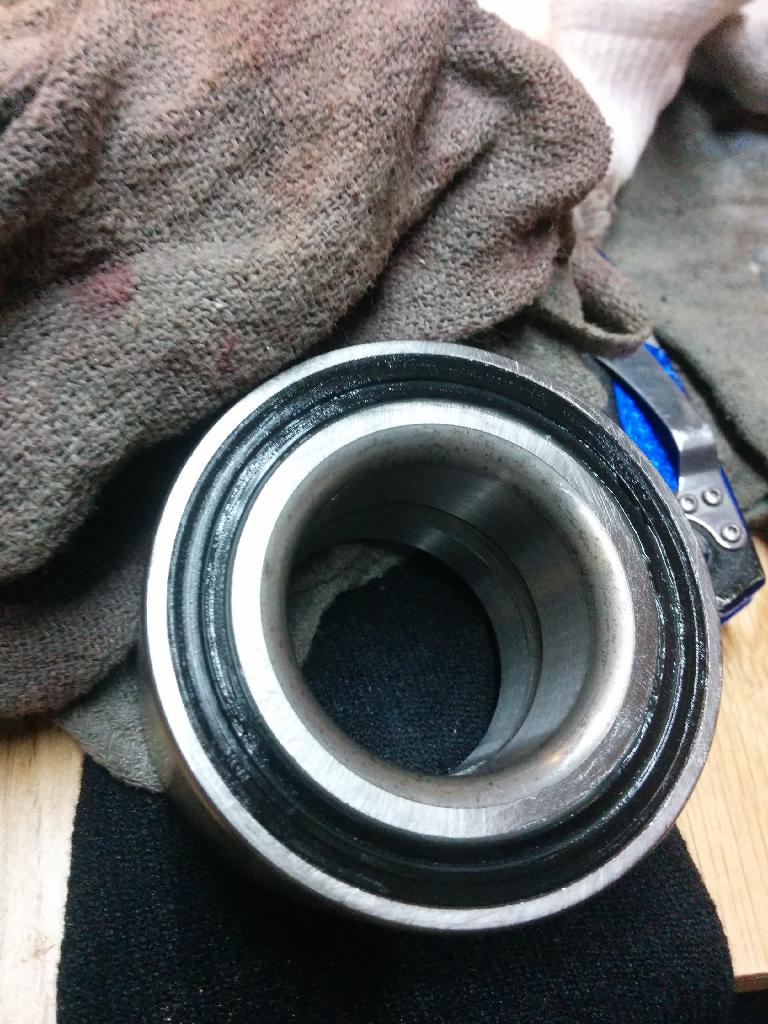
Also in this update: Wheel bearings - Front and rear. As I said earlier today, I went the easier route on the rears to avoid screwing the seals and potentially the cages. I think it went well as I'm certain I got all of the old grease out and packed the new grease in very well.
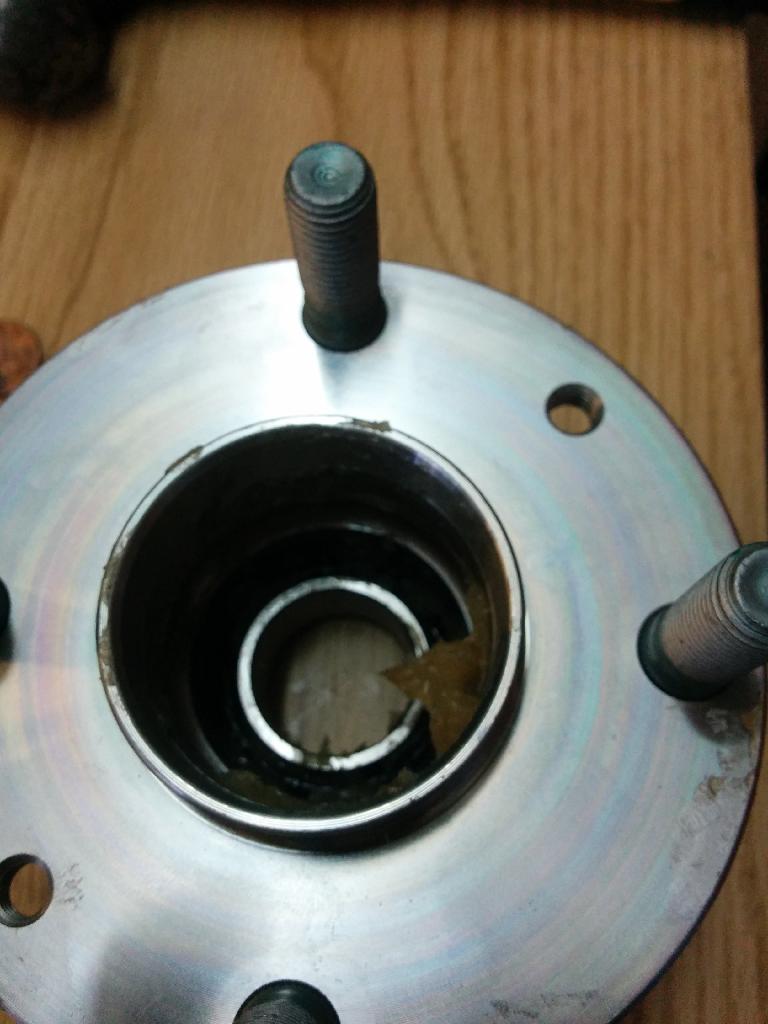
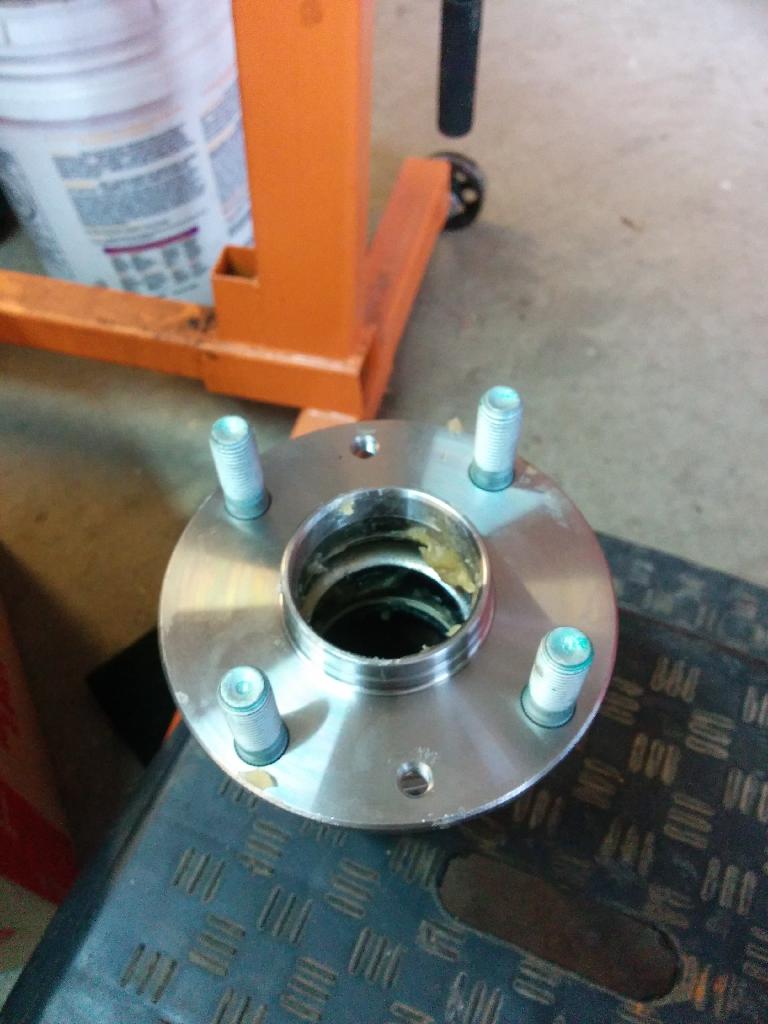
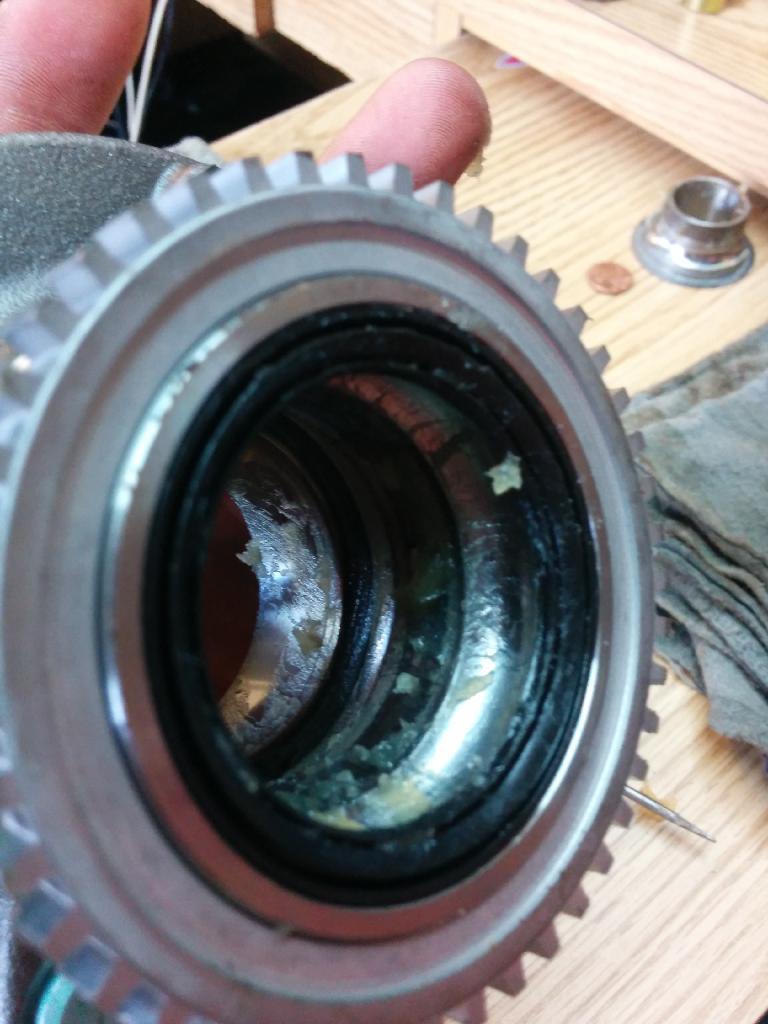
These seals are VERY easy to bend up, use extreme caution when tapping these out!
For those that need it: EO2K's Front Hub Re-pack Guide really came in handy. Same applies to the rear wheel bearings, basically.
Anyways, I got my package from 949 Friday. Gates belt with pulleys, water pump, ACL bearing set, es poly bushings, Mazda comp motor mounts, and SuperTech valve seals.


Also in this update: Wheel bearings - Front and rear. As I said earlier today, I went the easier route on the rears to avoid screwing the seals and potentially the cages. I think it went well as I'm certain I got all of the old grease out and packed the new grease in very well.


These seals are VERY easy to bend up, use extreme caution when tapping these out!


Reply
0
0
Thread Starter
Joined: Jul 2012
Posts: 80
Total Cats: 1
From: Fredericksburg, VA
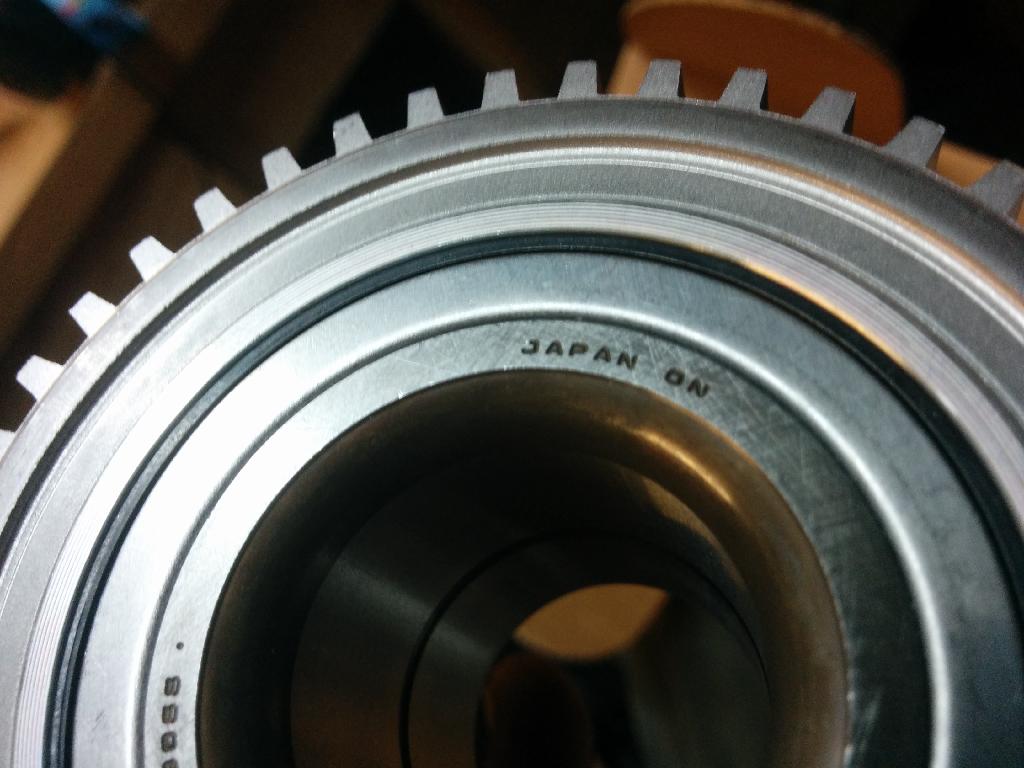
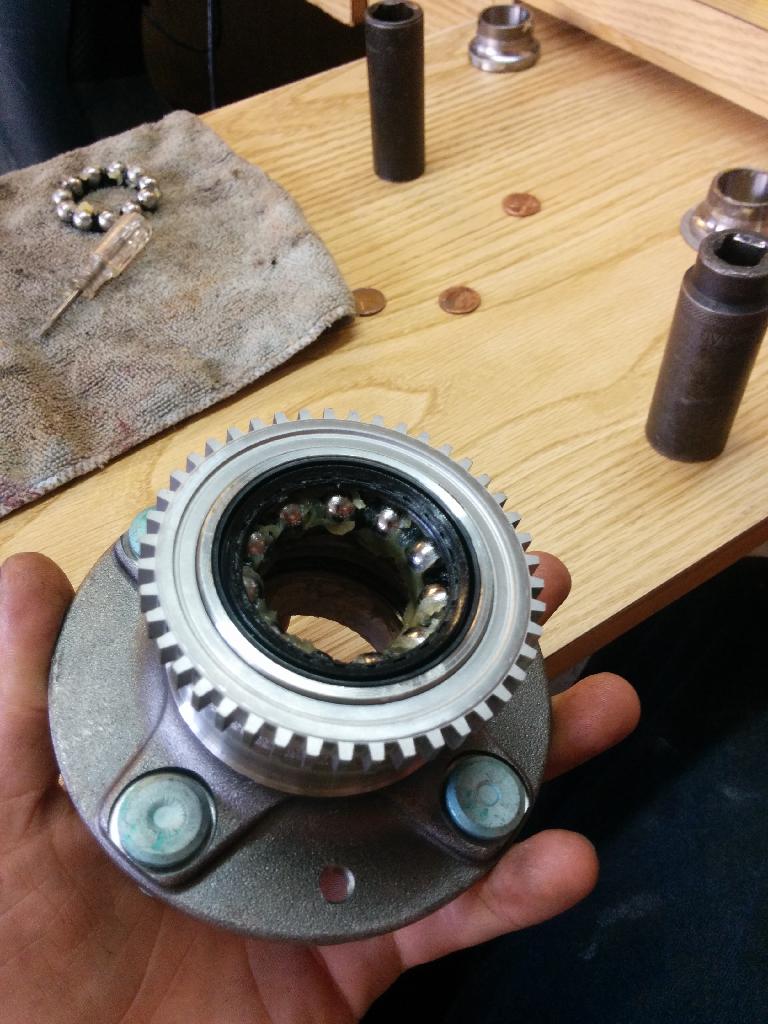
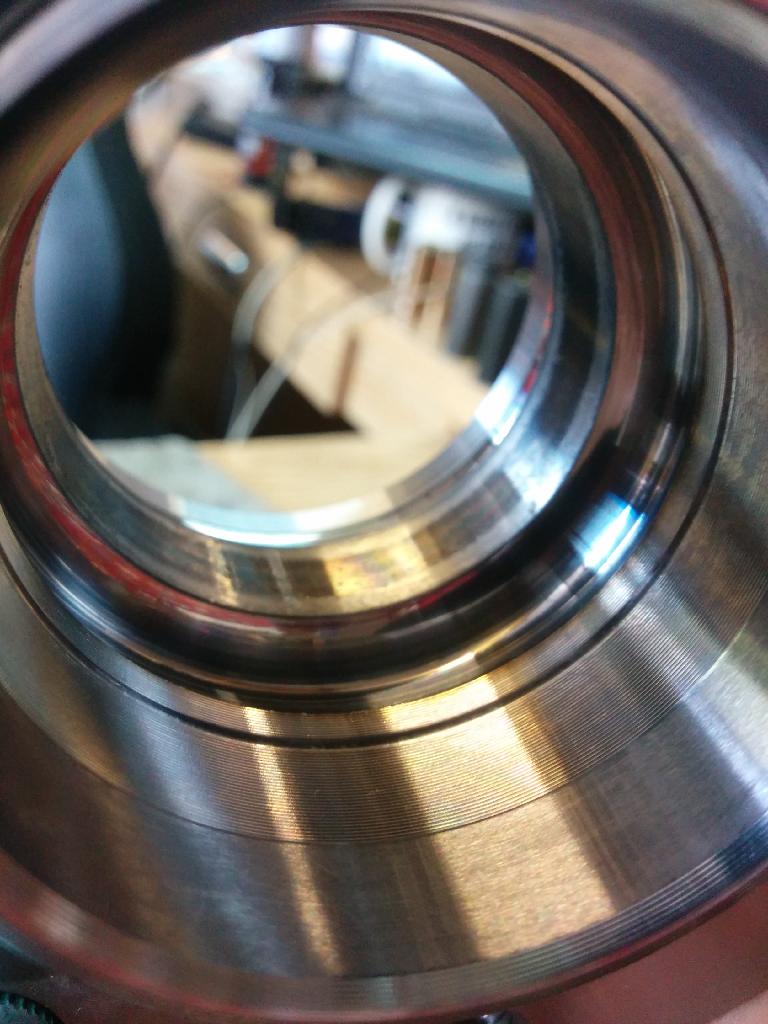
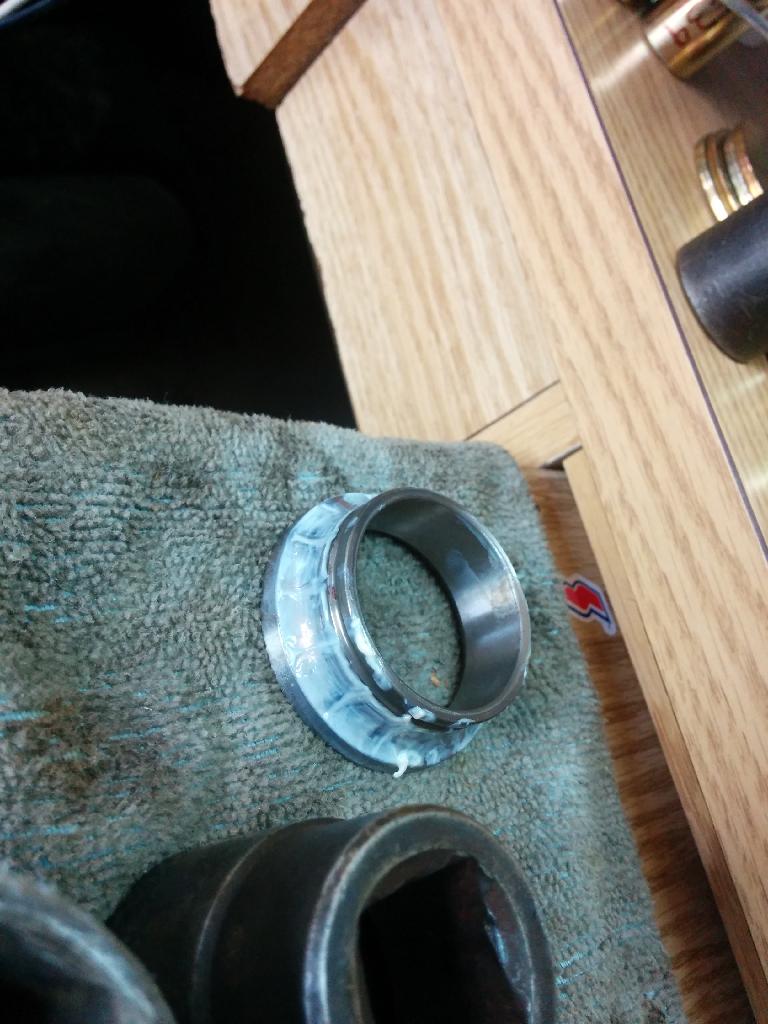
As for the rears, it's like I said earlier. Very much the same in design. Two ball bearing assemblies with inner races covering them. Unlike the fronts, these use two seals since there is an axle going through this one and no dust cap for the outer, only a "wheel seal" that seats on the machined surface of the spline-side cv knuckle on the halfshaft. I wouldn't call how I did them "lazy", just safe. I have lots of cleaning solutions including a parts washer so I opted to use that with the compressor to clean the old grease out instead of marring the outer races and damaging the seals. Packing was basically the same as packing a roller bearing. I rotated the cages as much as possible to verify the grease was getting behind them and into the race surface.


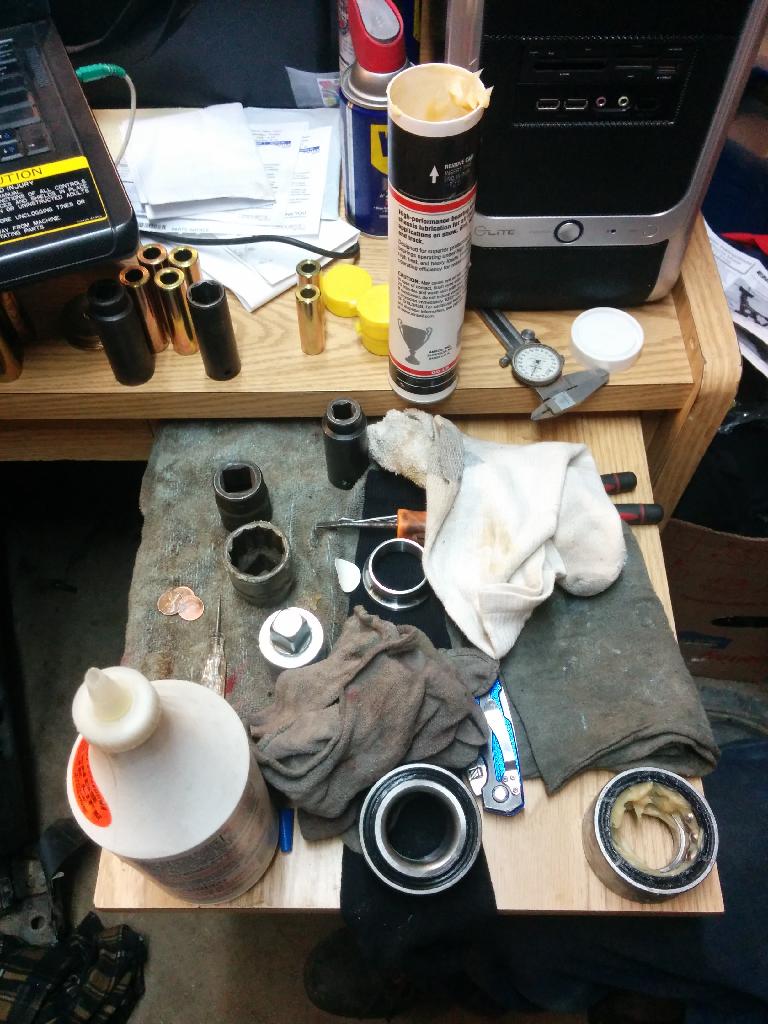
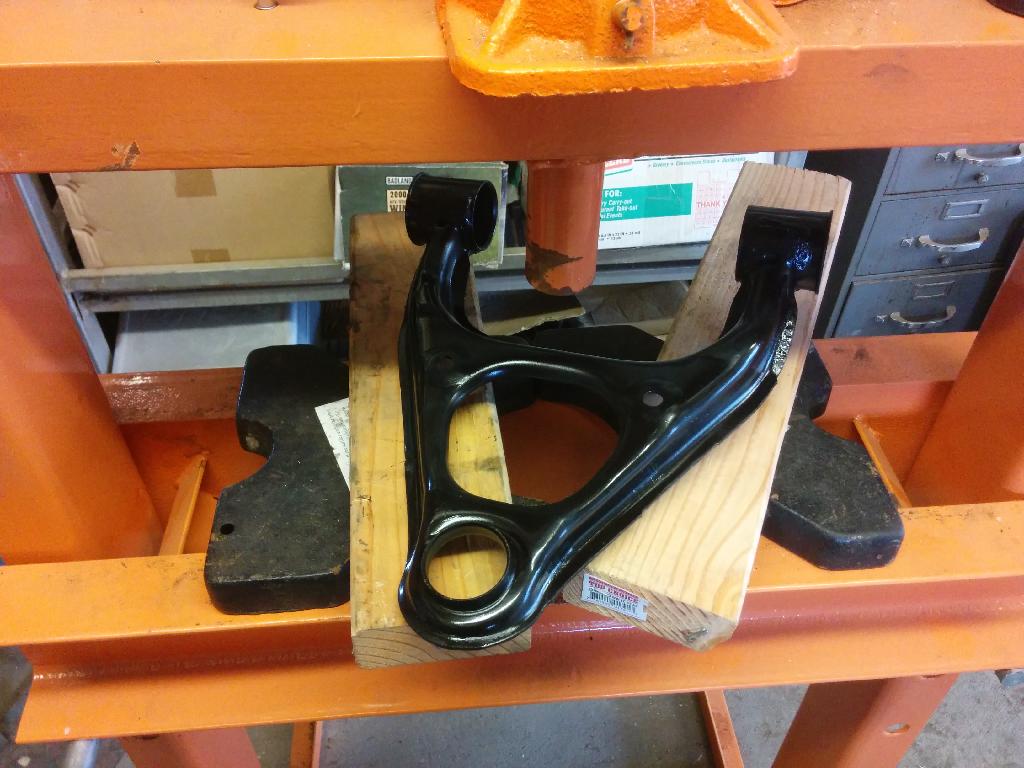
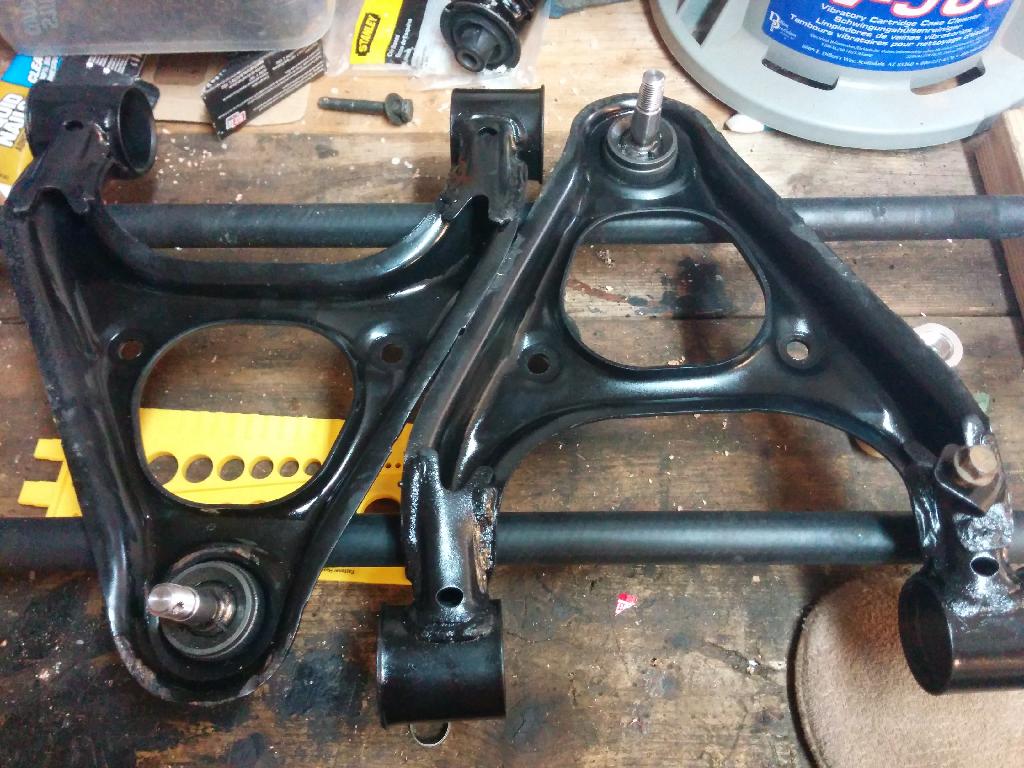
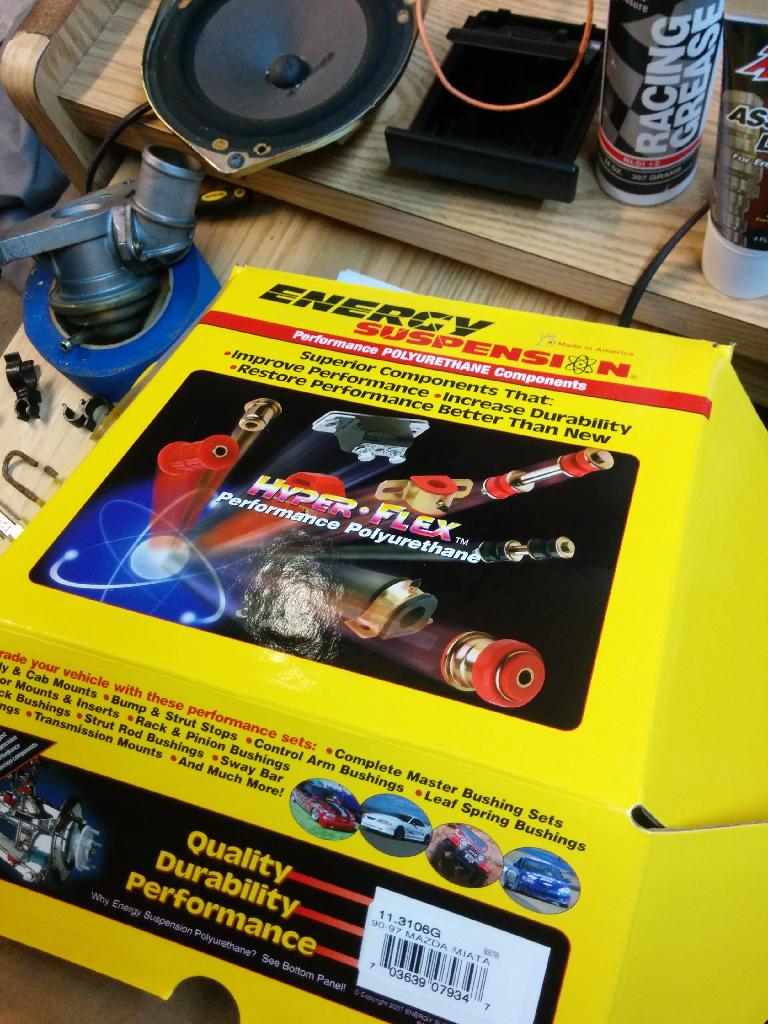
Last, but not least, I have two very awful pictures of the bushings installed in various control arms. Energy Suspension makes a quality product, no doubt...but their included documentation is very lacking. Let's be clear here - I don't need to have my hand held putting some two piece bushings in a hole but a more clear idea on WHICH metallic spacer to install would be awesome. They stamp a product code into each half of the bushing and that's all very nice but they don't label the spacers. You have to cross reference the inventory sheet (which has the P/N and includes the size OD/ID/length) with the part by using a caliper. There are only so many different ones so I'm probably over-dramatizing a bit. Anyways:
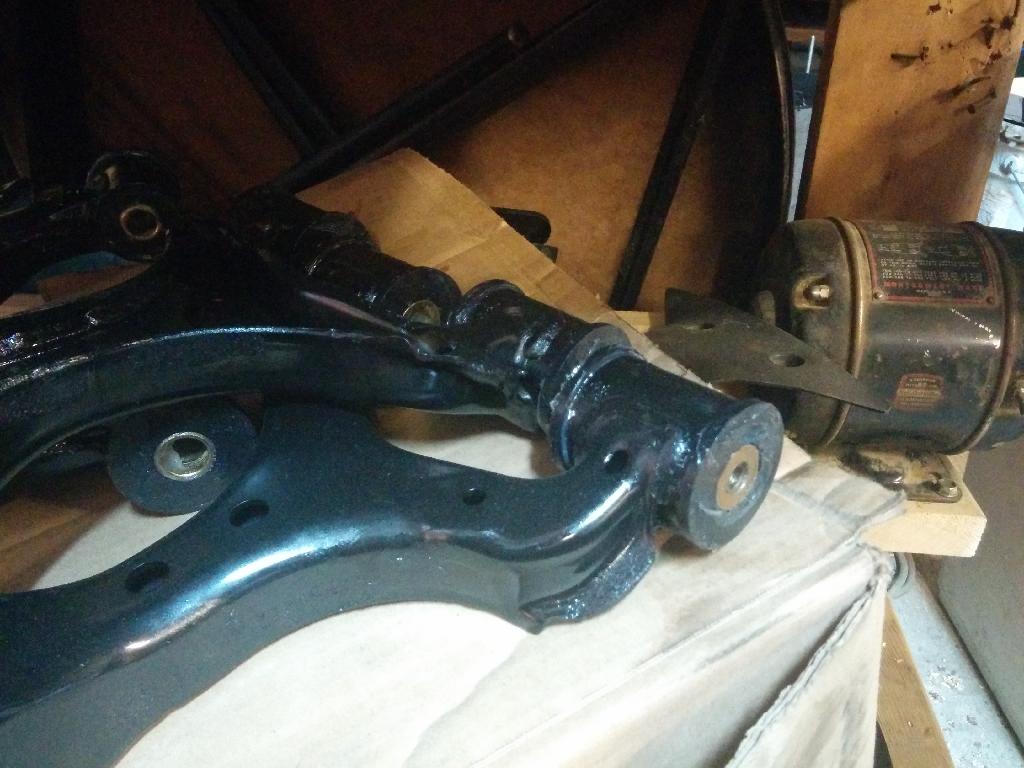
I'll have many more pictures of those in a week or two when I get rack and diff bushings. As well as some new halfshafts which I'll repack the CV's on. At which point, I can assemble the chassis. (Spoiler) ITT: I'm dropping the body onto the chassis with engine and trans installed.


Last, but not least, I have two very awful pictures of the bushings installed in various control arms. Energy Suspension makes a quality product, no doubt...but their included documentation is very lacking. Let's be clear here - I don't need to have my hand held putting some two piece bushings in a hole but a more clear idea on WHICH metallic spacer to install would be awesome. They stamp a product code into each half of the bushing and that's all very nice but they don't label the spacers. You have to cross reference the inventory sheet (which has the P/N and includes the size OD/ID/length) with the part by using a caliper. There are only so many different ones so I'm probably over-dramatizing a bit. Anyways:


I'll have many more pictures of those in a week or two when I get rack and diff bushings. As well as some new halfshafts which I'll repack the CV's on. At which point, I can assemble the chassis. (Spoiler) ITT: I'm dropping the body onto the chassis with engine and trans installed.
Reply
0
0


Thread
Thread Starter
Forum
Replies
Last Post


