
In Soviet Russia car build YOU!


I miss it dearly! We'll reunite soon, I'll come to pick up the hoist.
As long as it physically fits I'm good. I can figure out the wiring and input mods needed for MS to work.
I figured if it sucks that much I can bump the rev limiter to 7500, then it should hit same speeds as 5sp/4.1
I figured if it sucks that much I can bump the rev limiter to 7500, then it should hit same speeds as 5sp/4.1
Reply
 0
0

0


Time for another update. I was choosing/buying parts for last 3 weeks or so and working on the car for a few days.
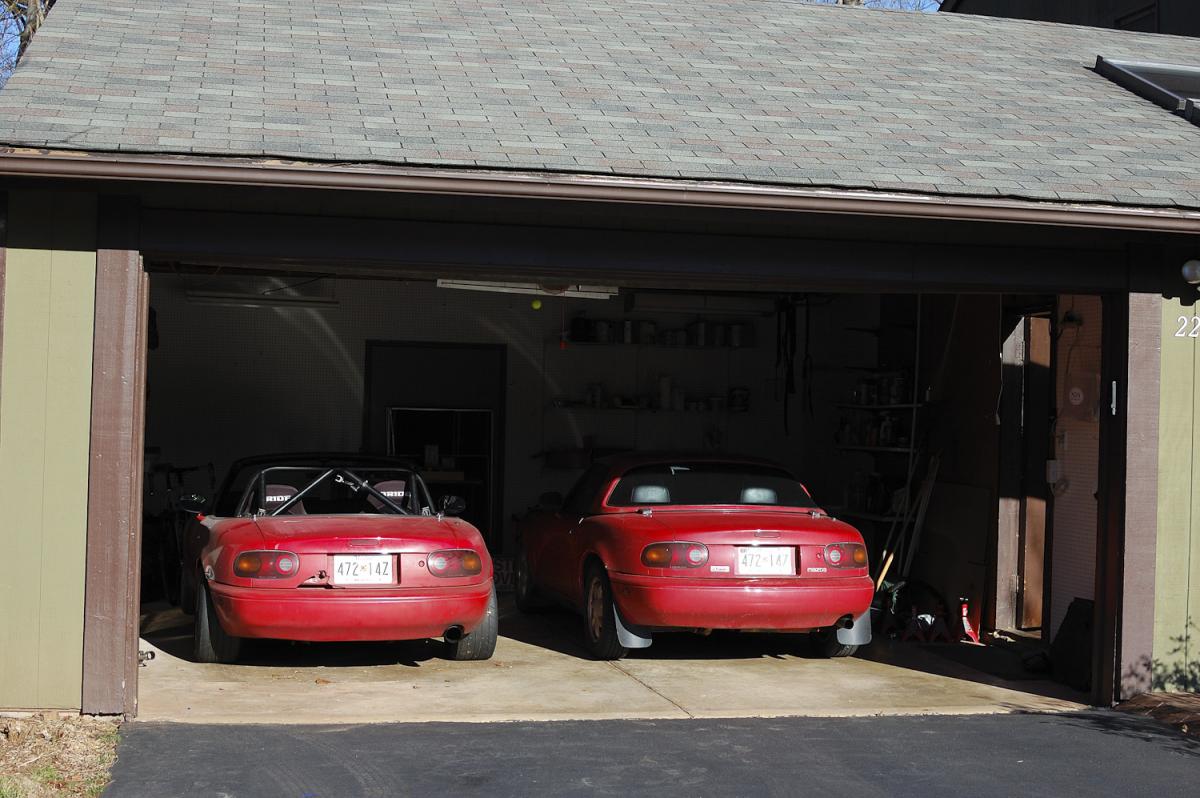
So first I bought a house. 2 car garage FTMFW
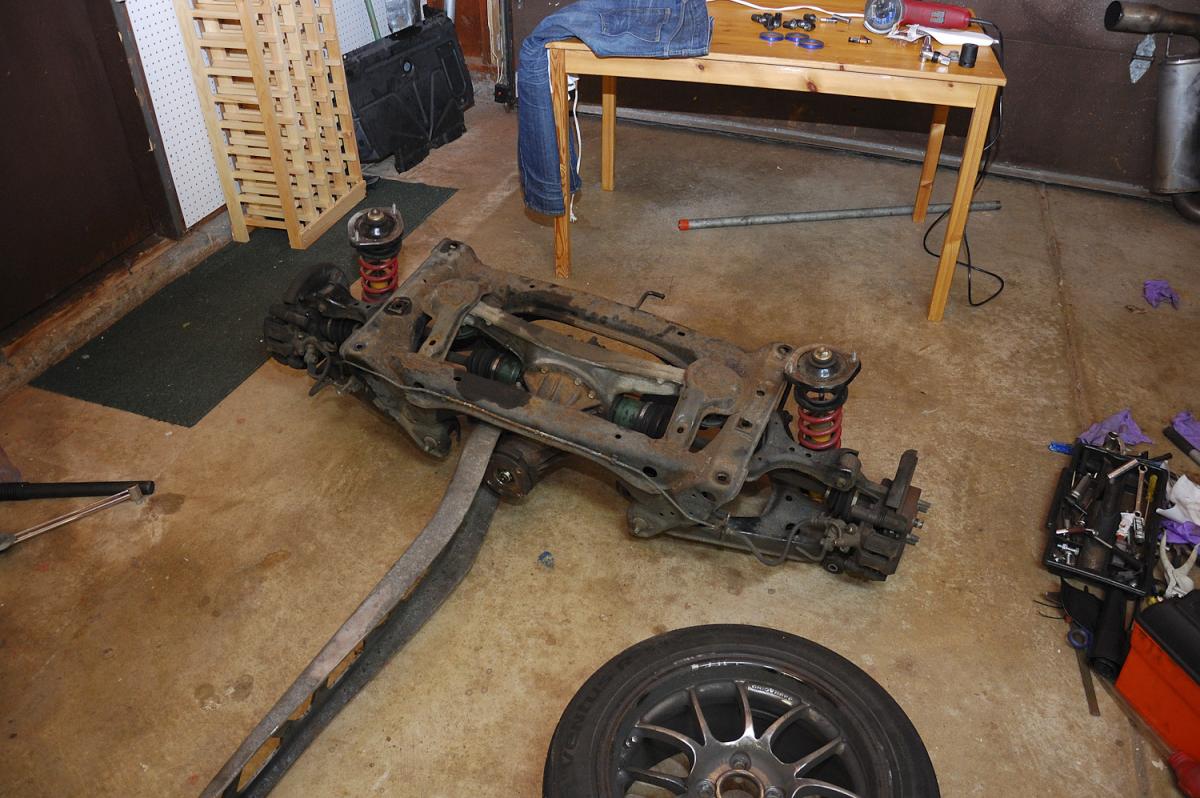
Then I jacked the ugly car and started removing the rear subframe.
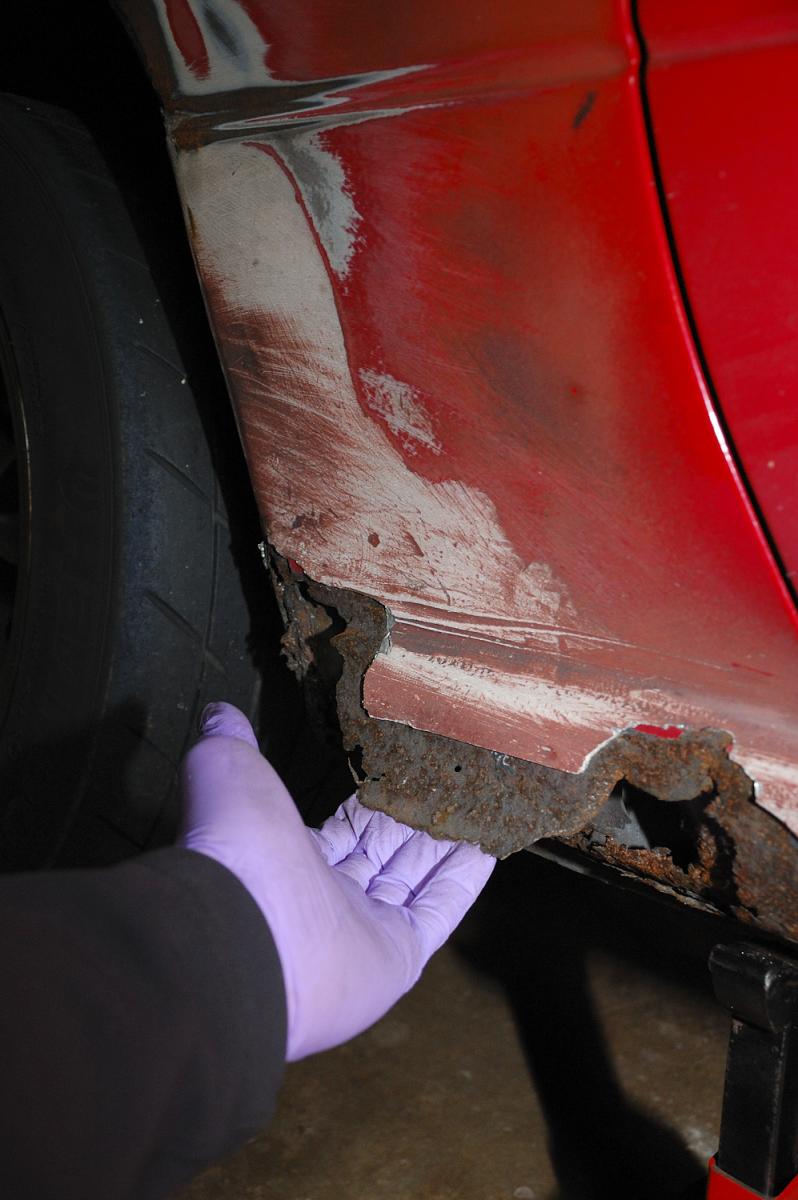
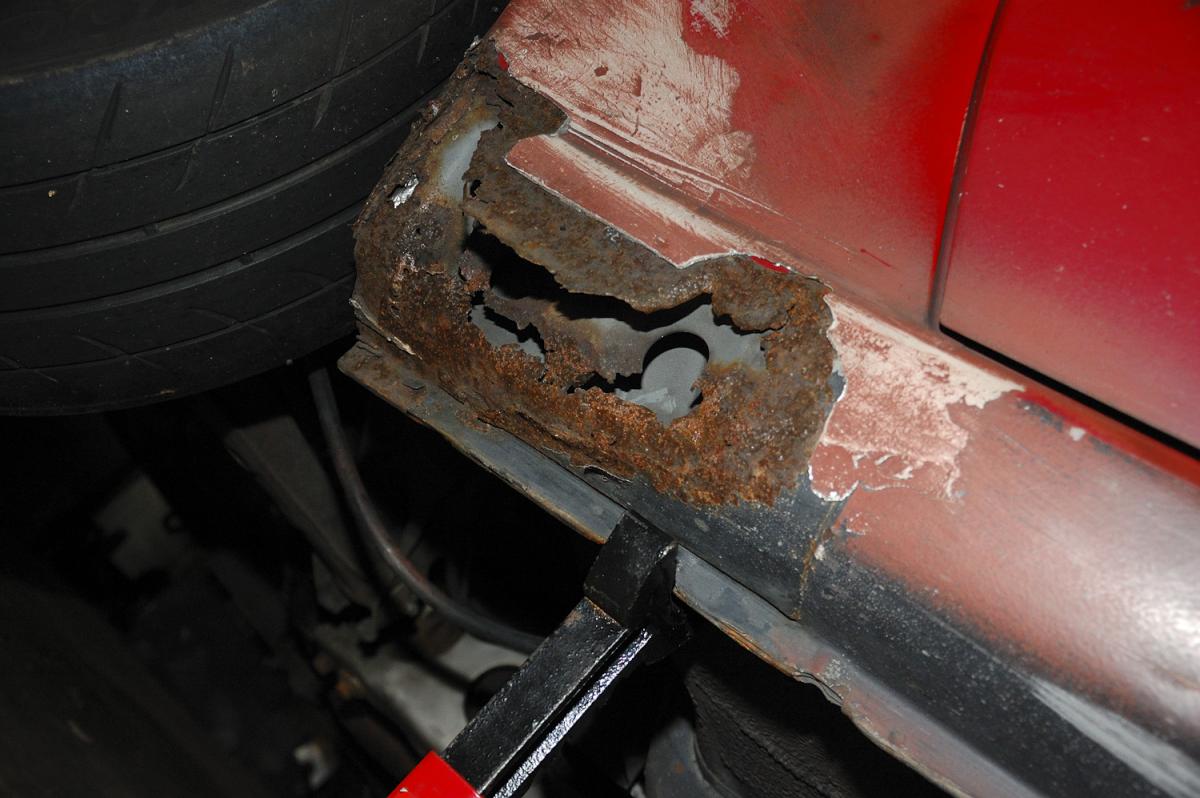
lol rust. ---- this ugly chassis!
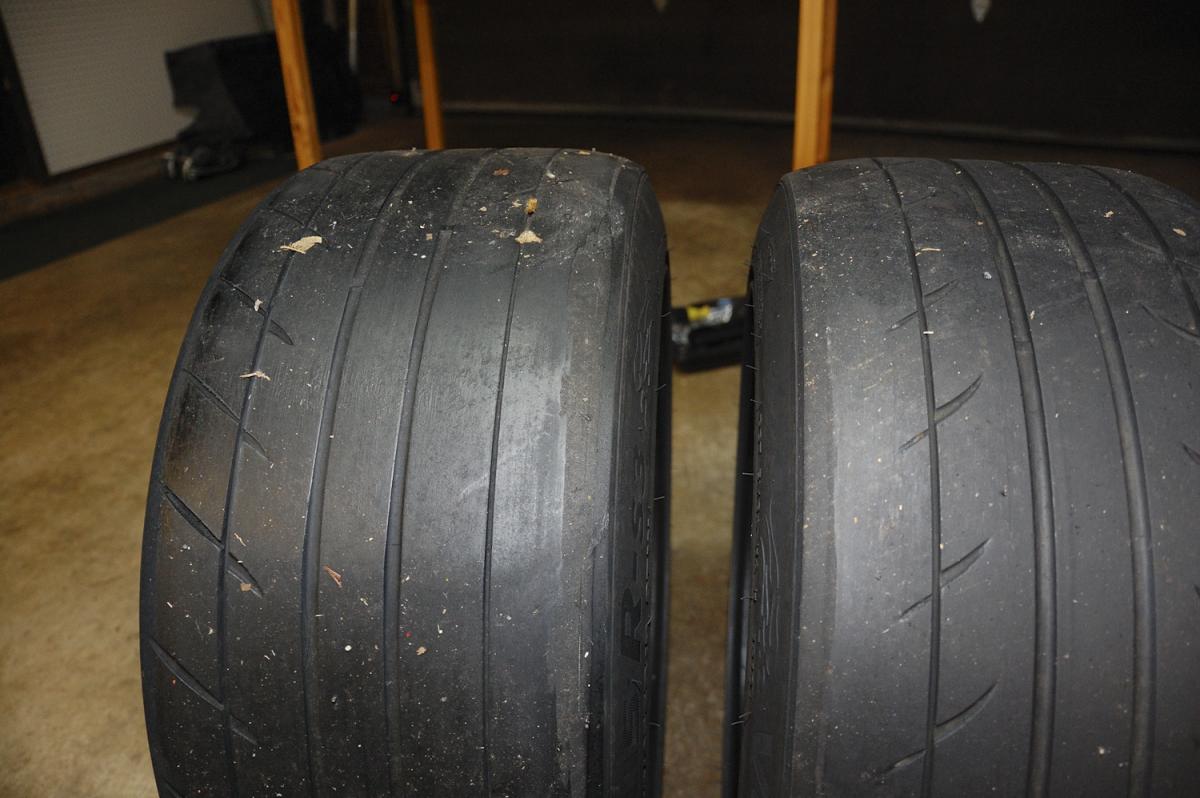
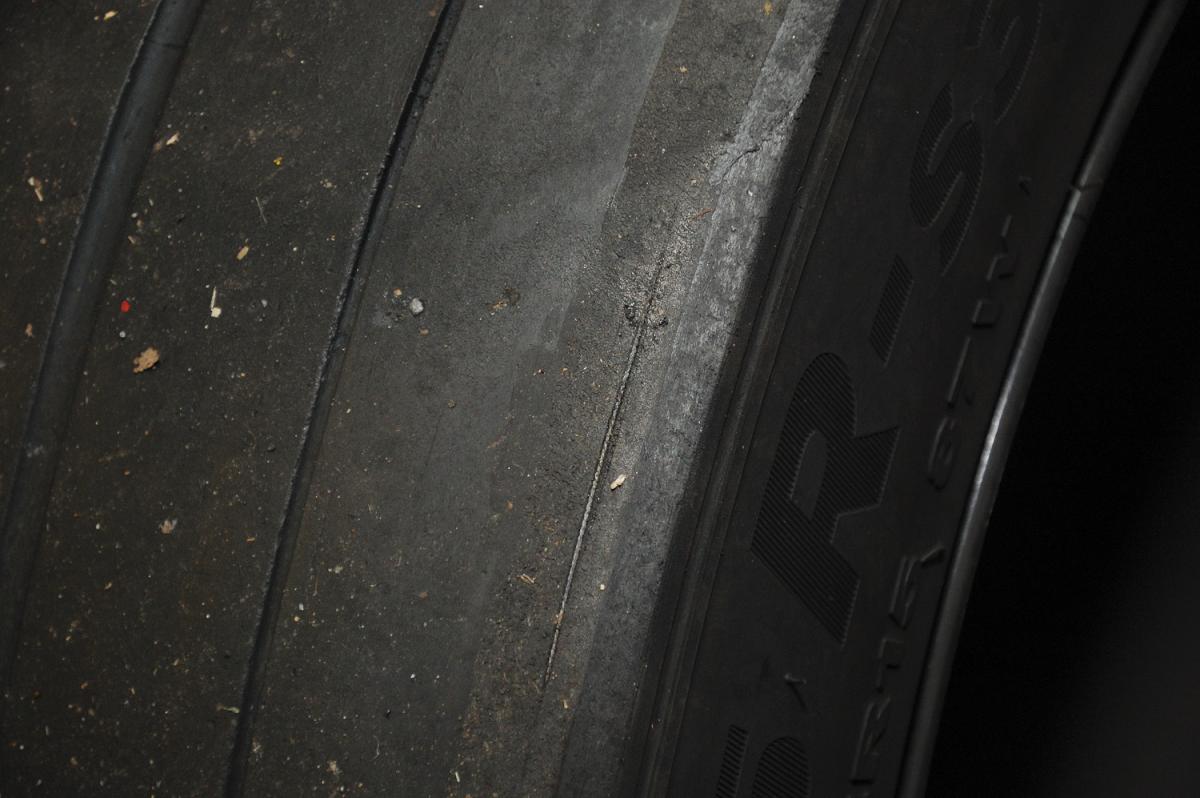
RS-3s after 15k street miles, like 100 autocross runs and an hour of sissy driving on a track. At almost 3* rear camber, lol.
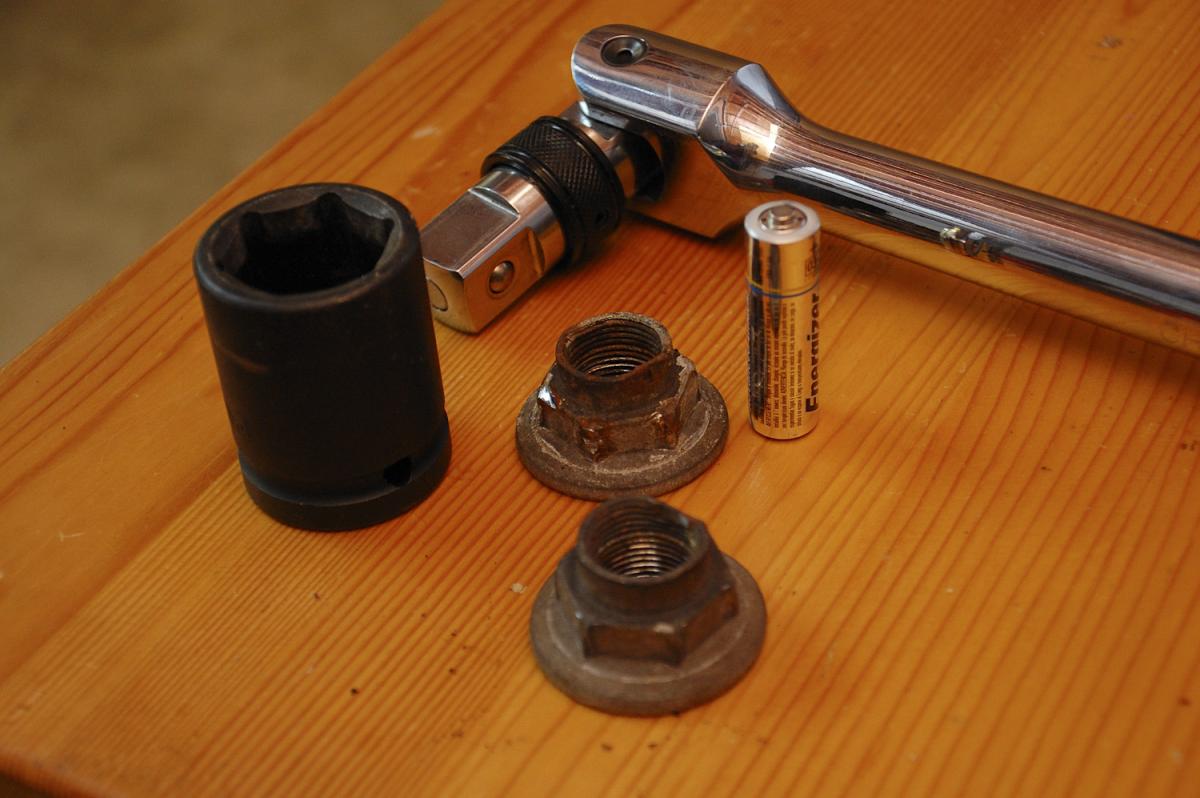
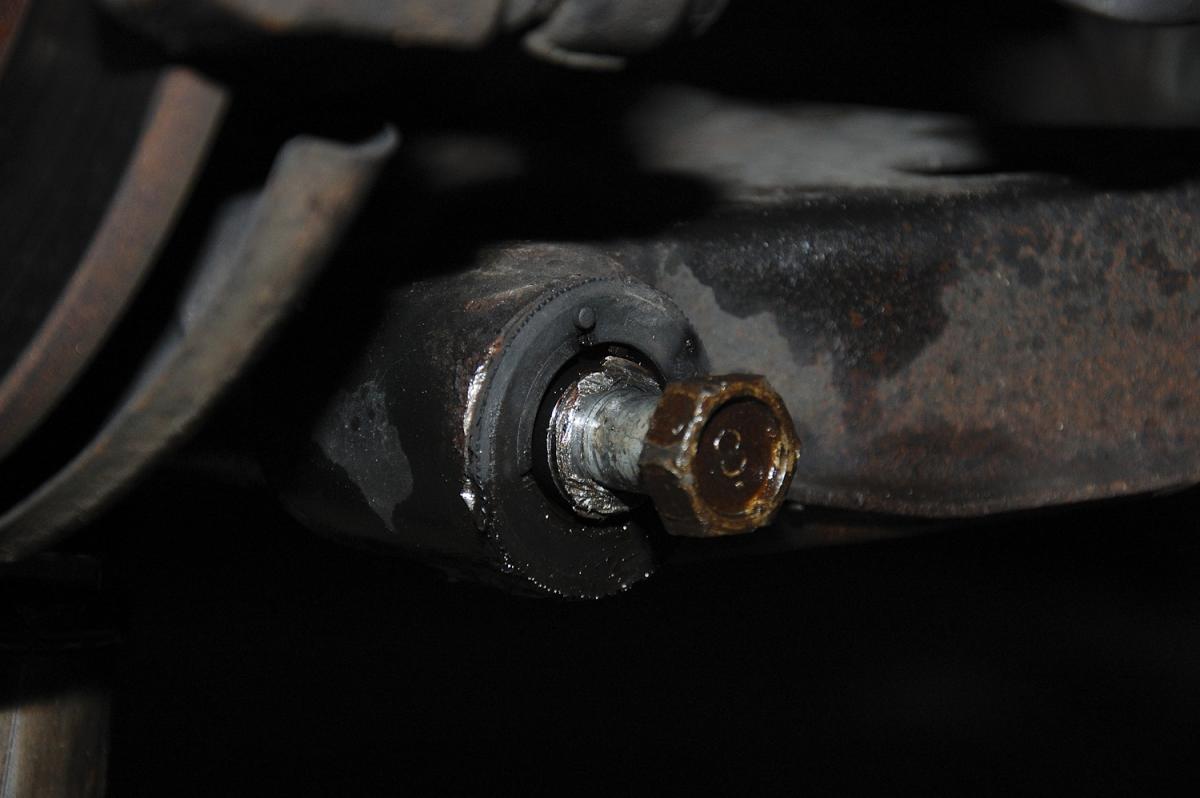
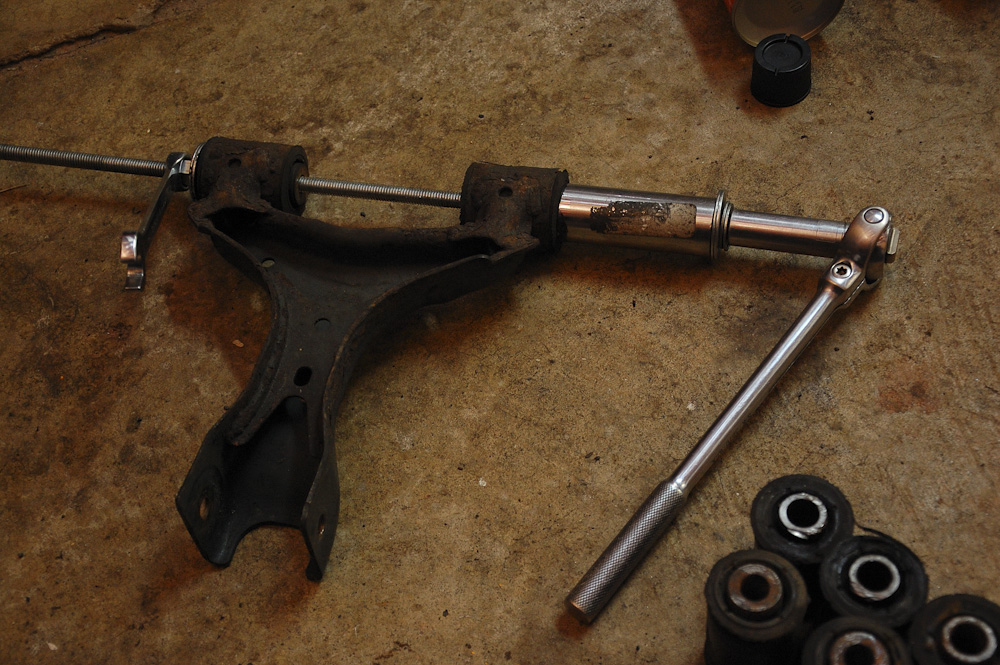
Removing lower subframe is a pita, because the lower control arm bolts are a major pain. I spent a day just on those.
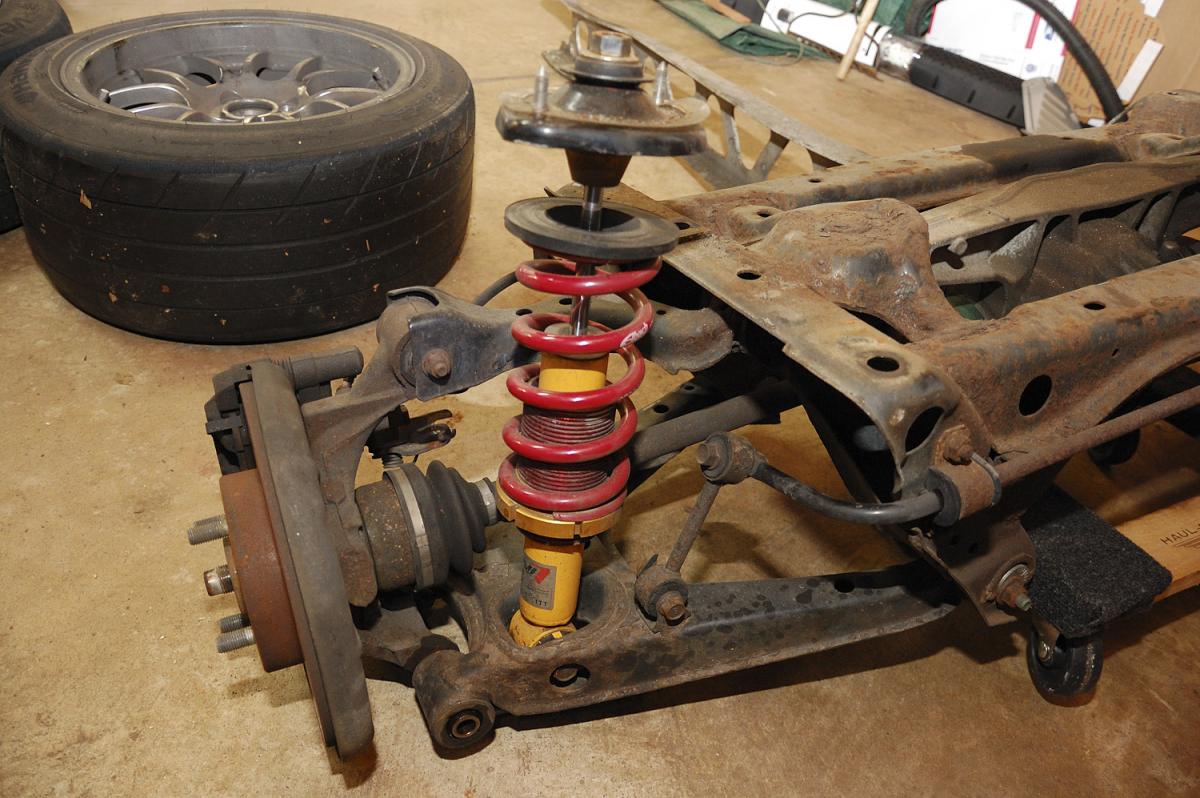
Rear subframe pulled
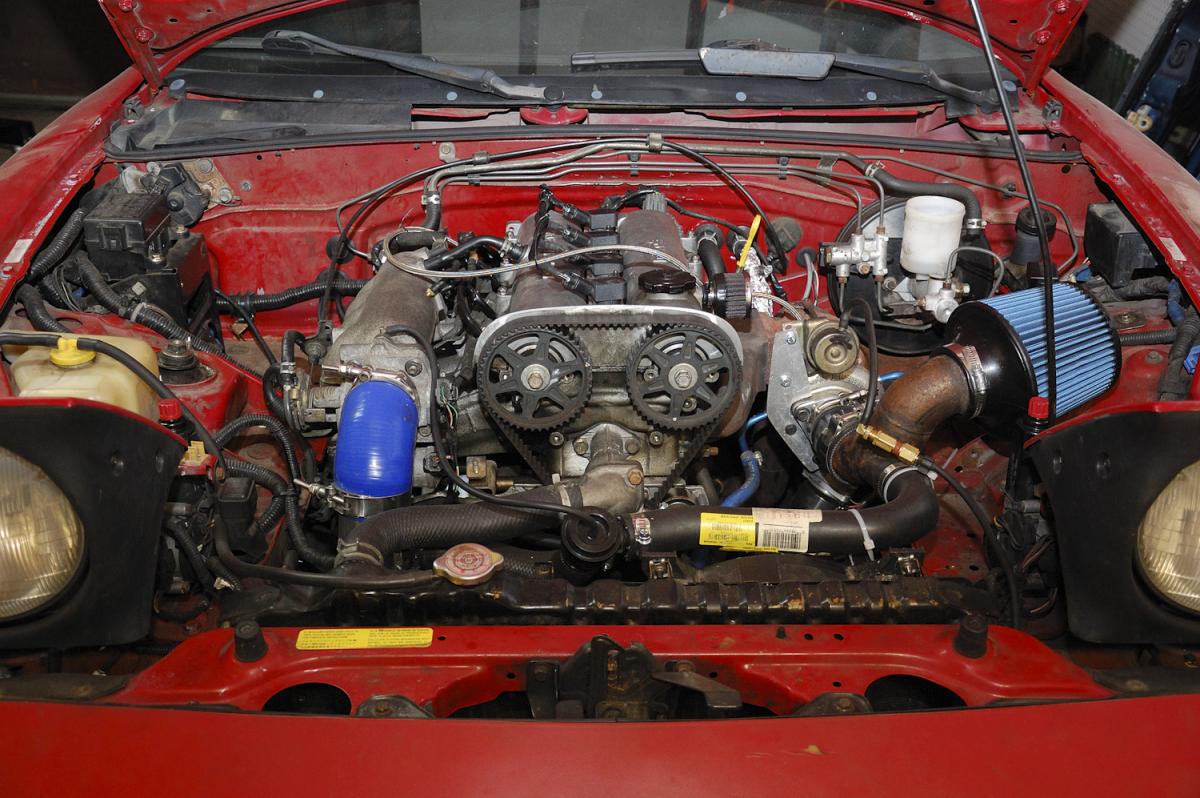
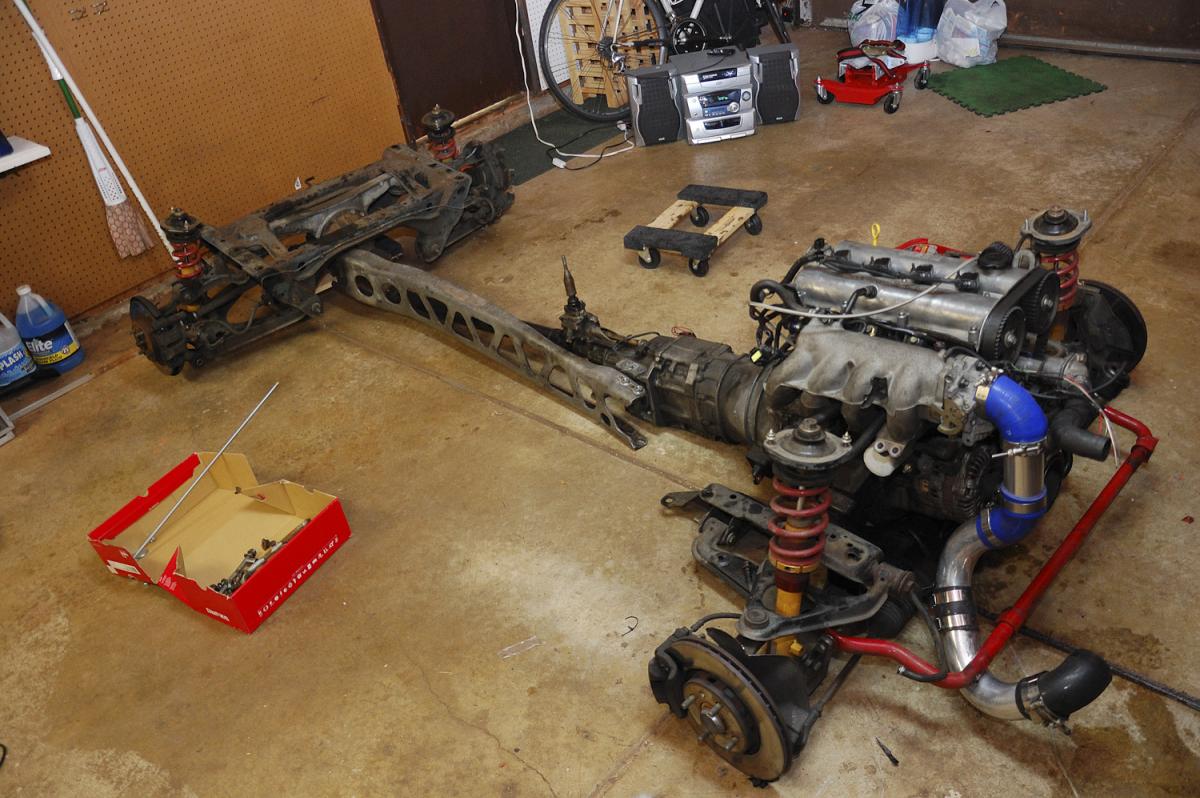
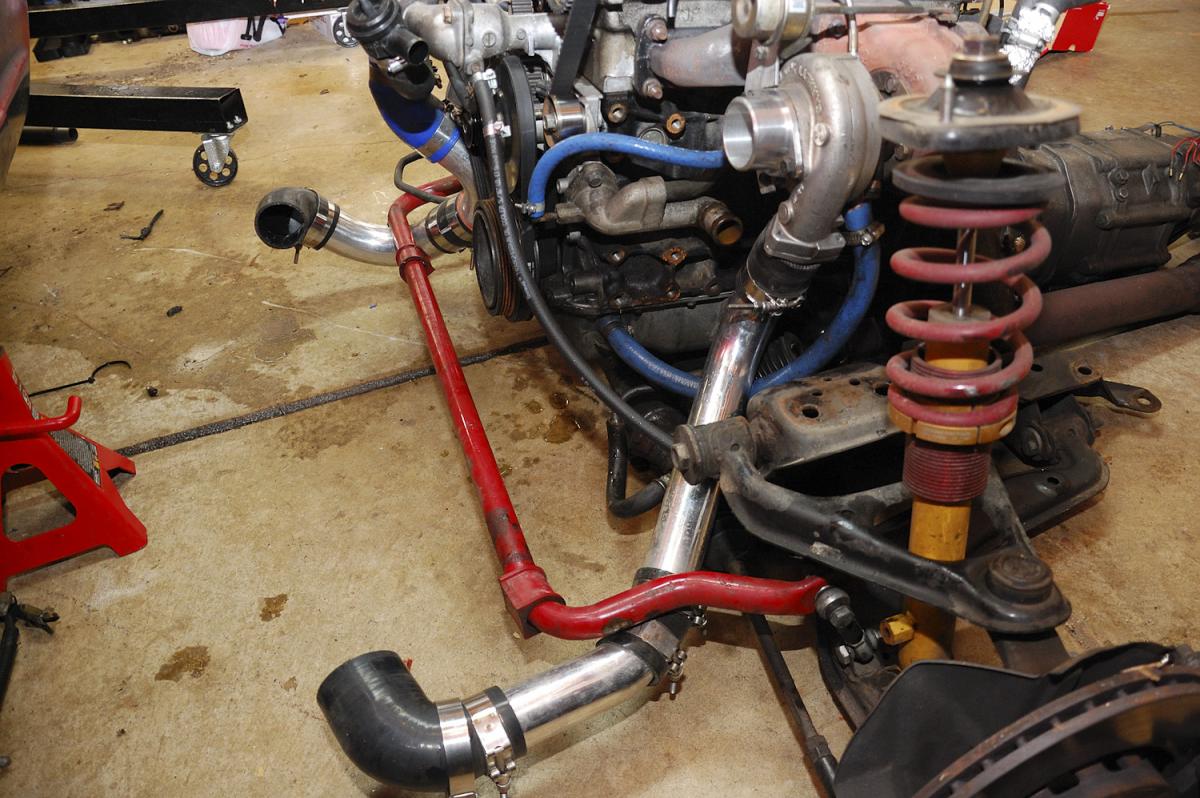
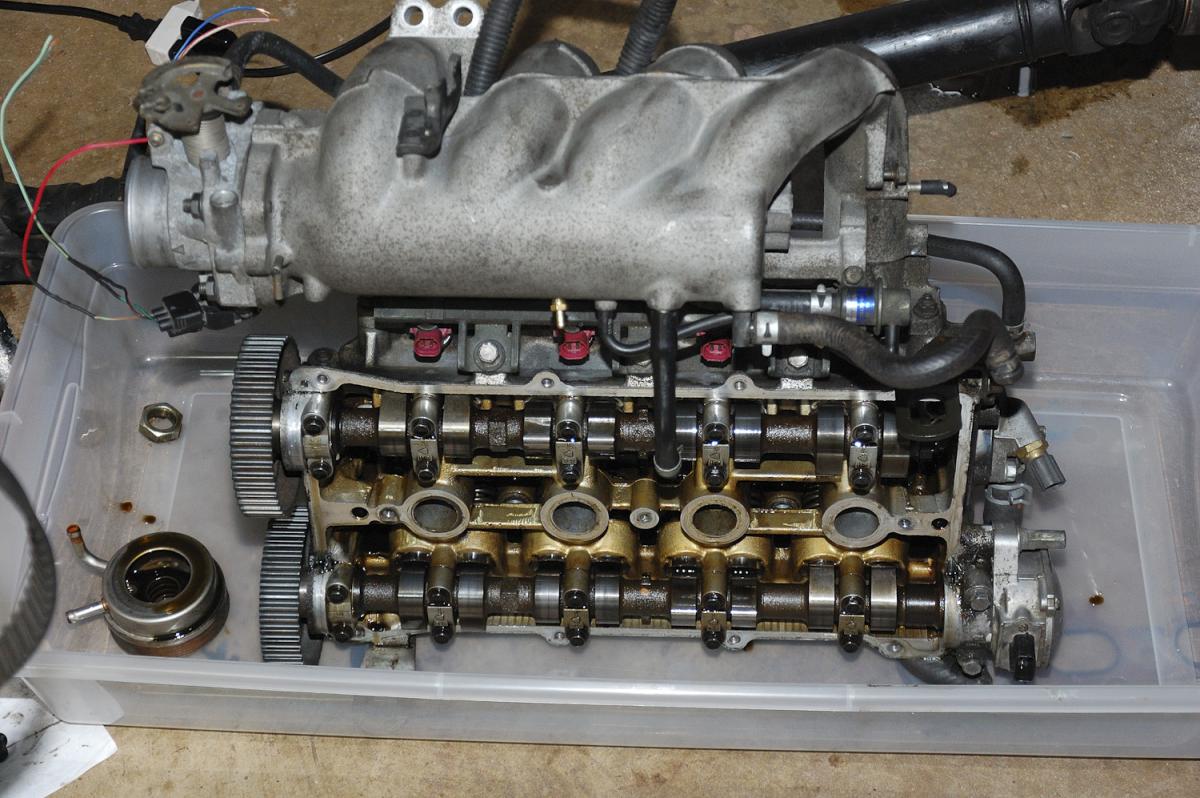
Engine before pulling the front subframe

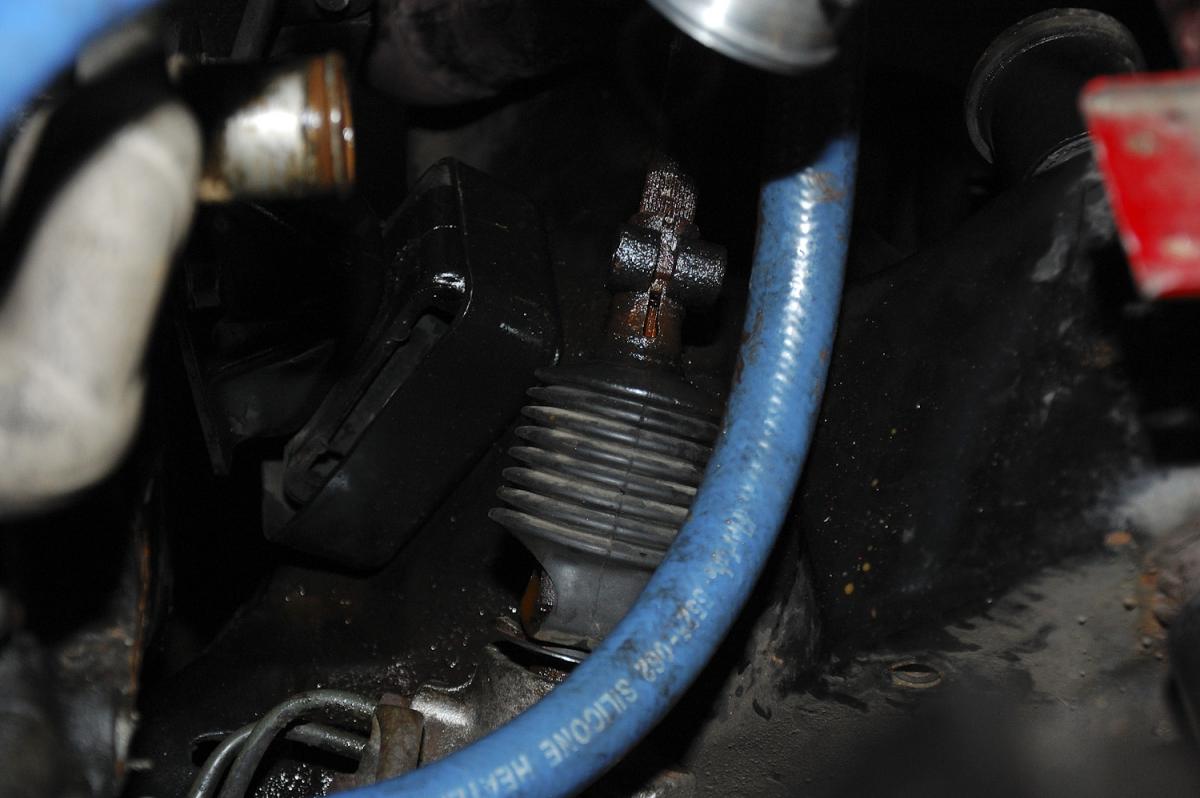
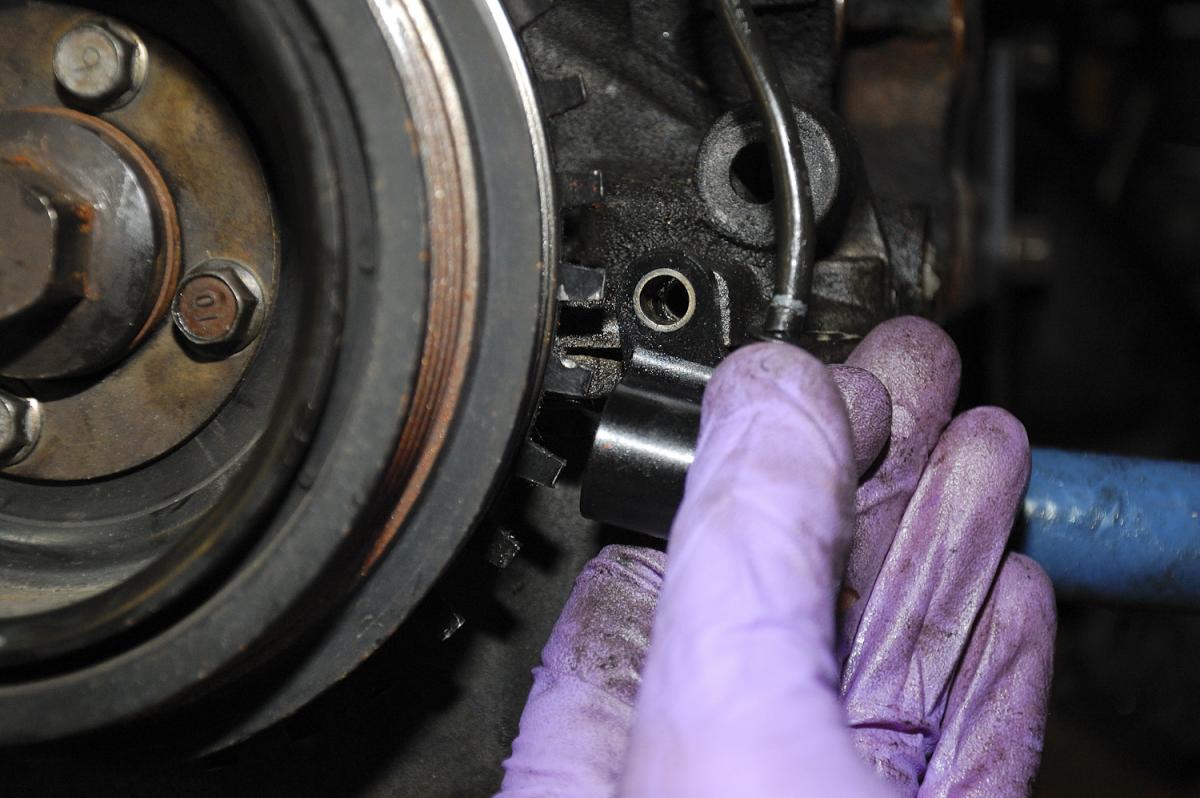
Steering rack was a bit of a pita. That bolt is rusted to ---- and hard to reach while the engine is in the car
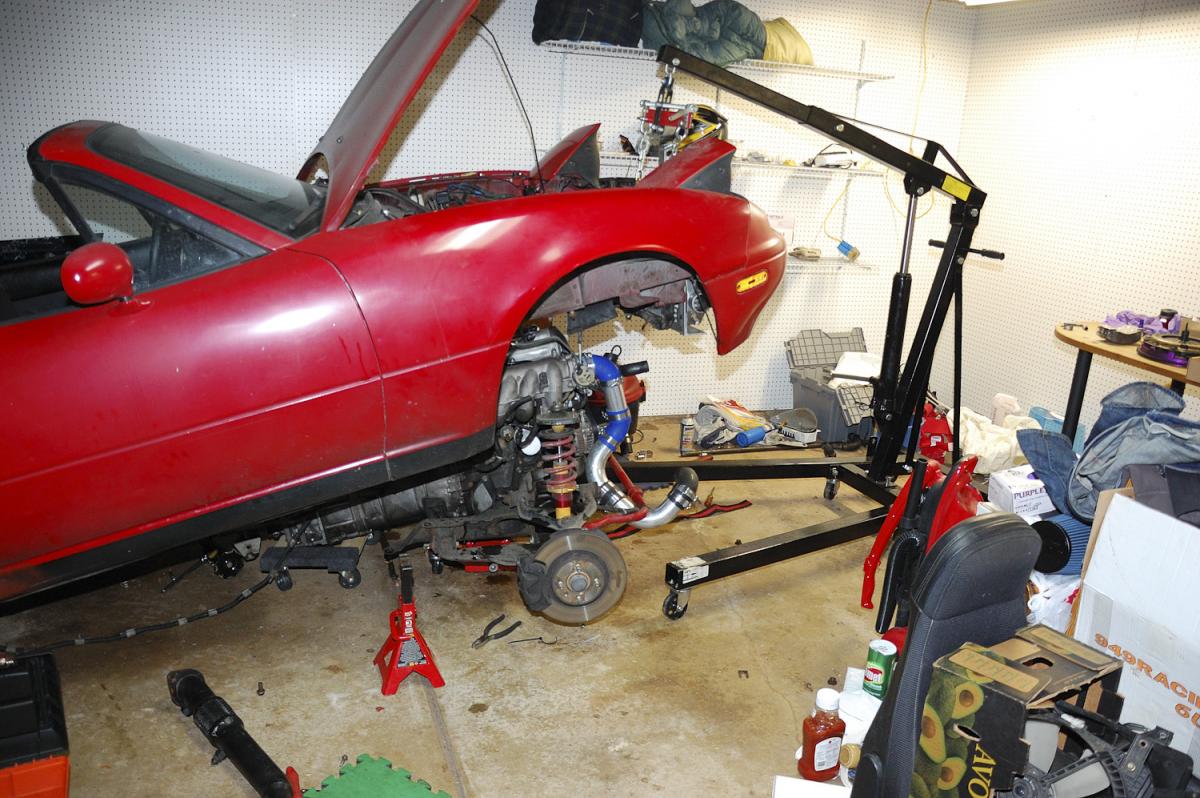
Lifted the front, dropped the subframe

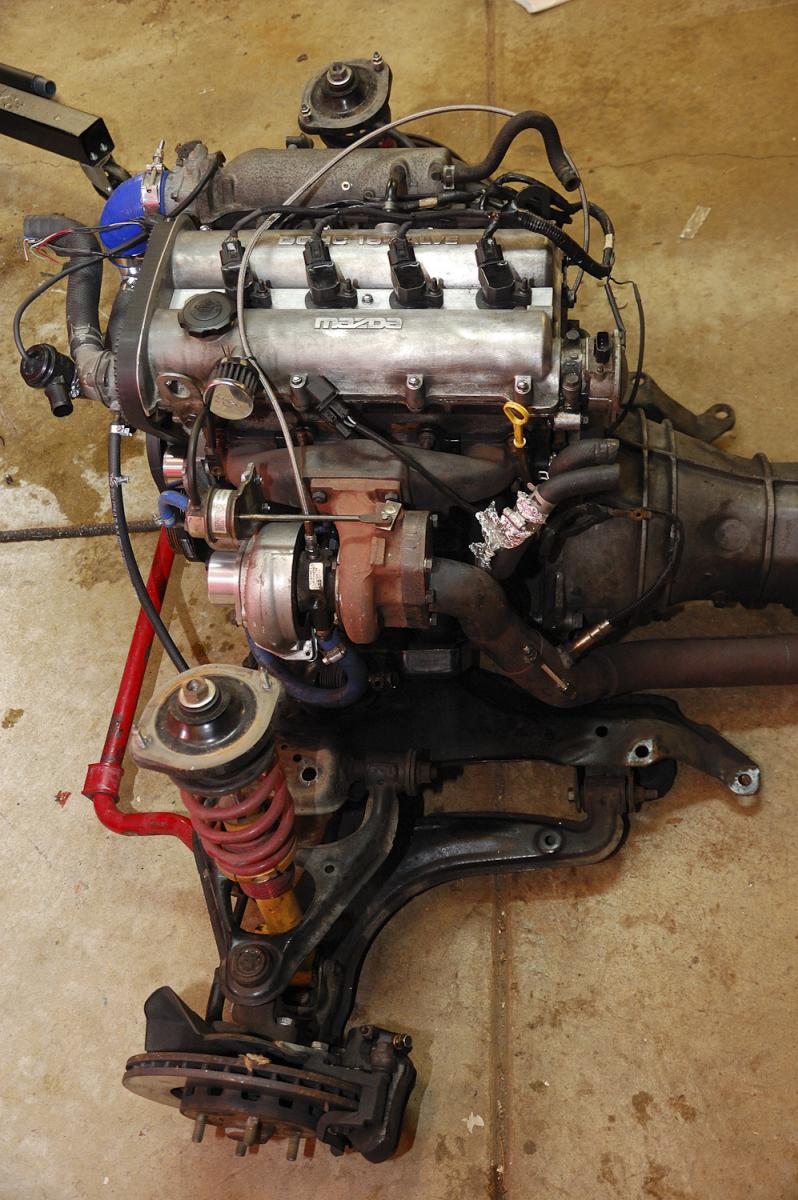
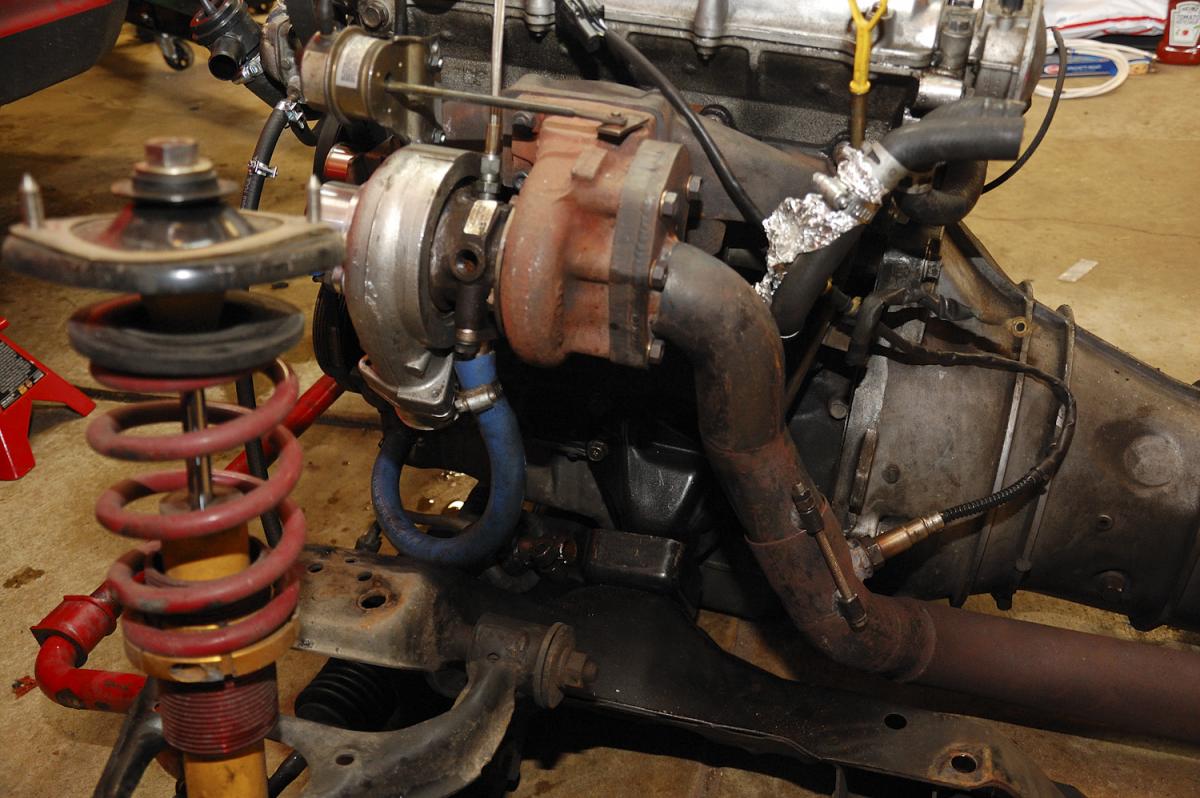
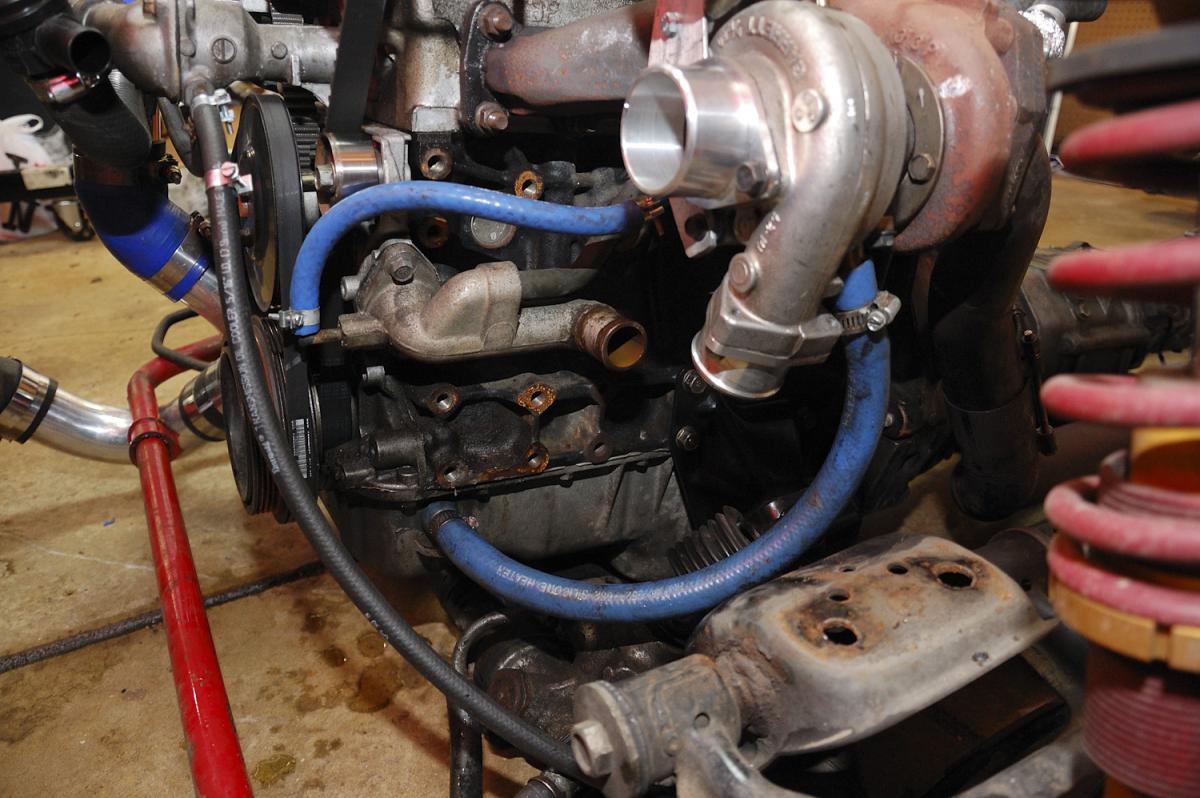
Entire drivetrain
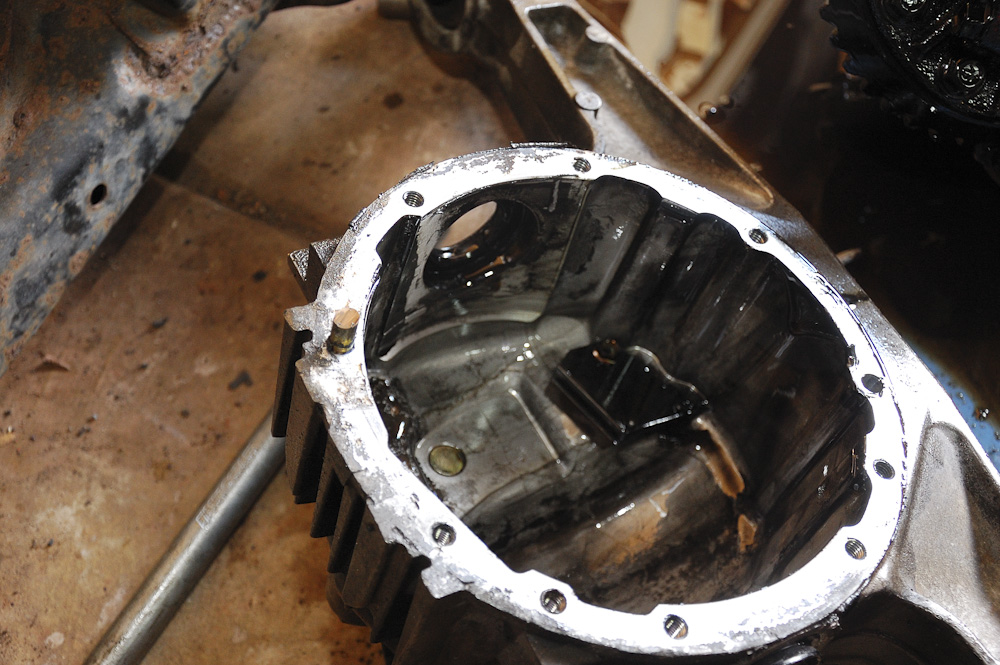
Oil drain details
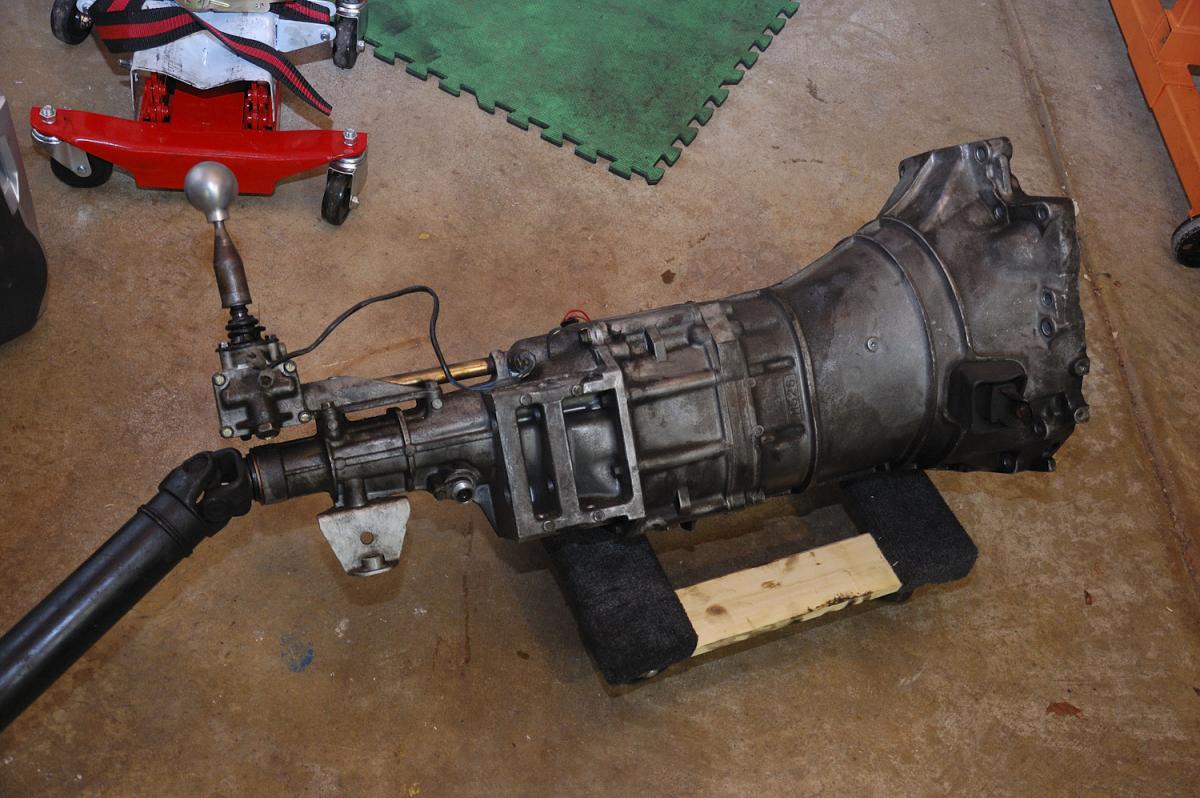
Tranny. Not reusing this one as I like the 5 speed in my "new car". 2 to 3rd seems smoother.
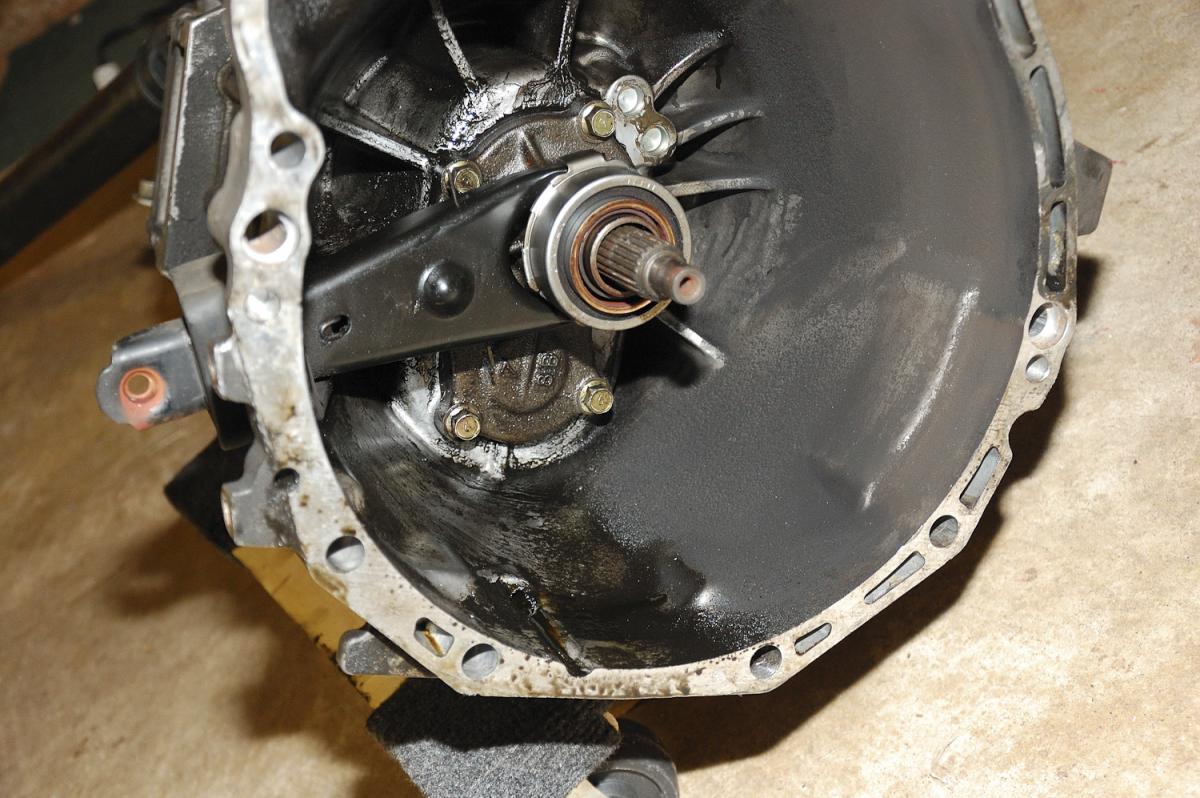
Oil leak? From trans or from rear seal? no care in any case.
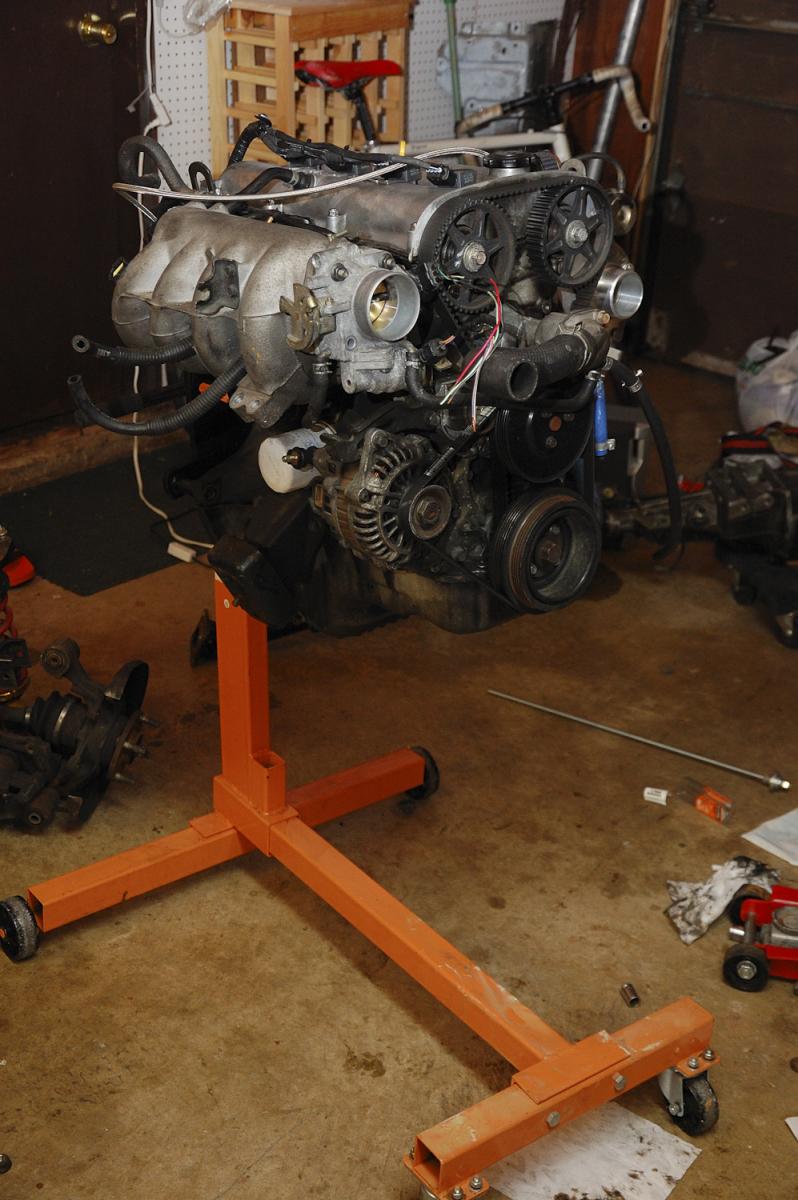
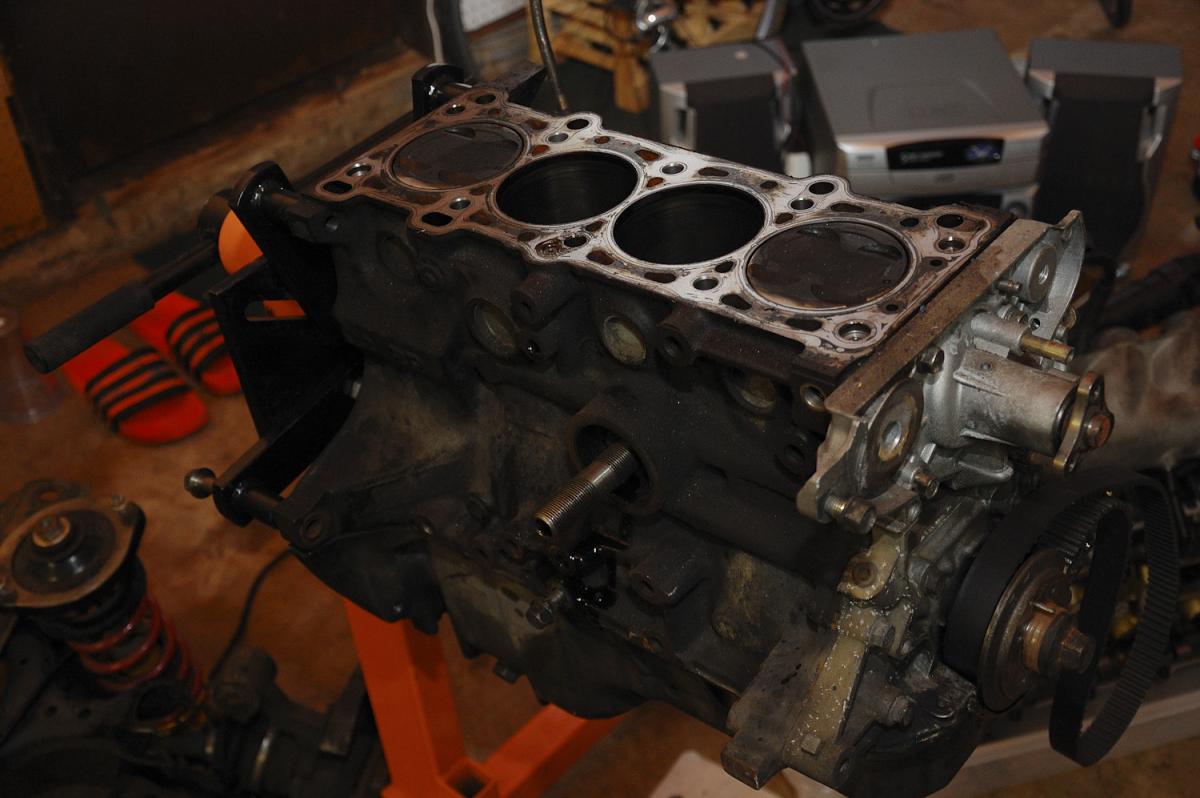
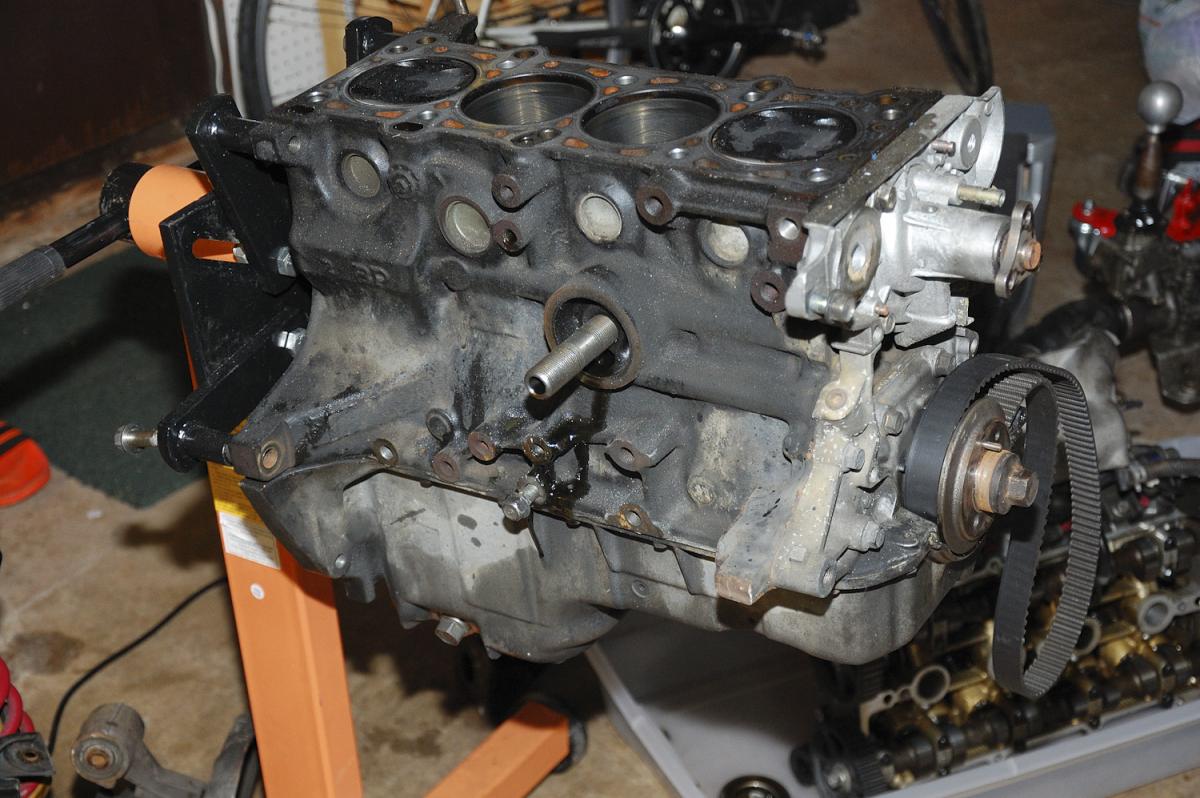
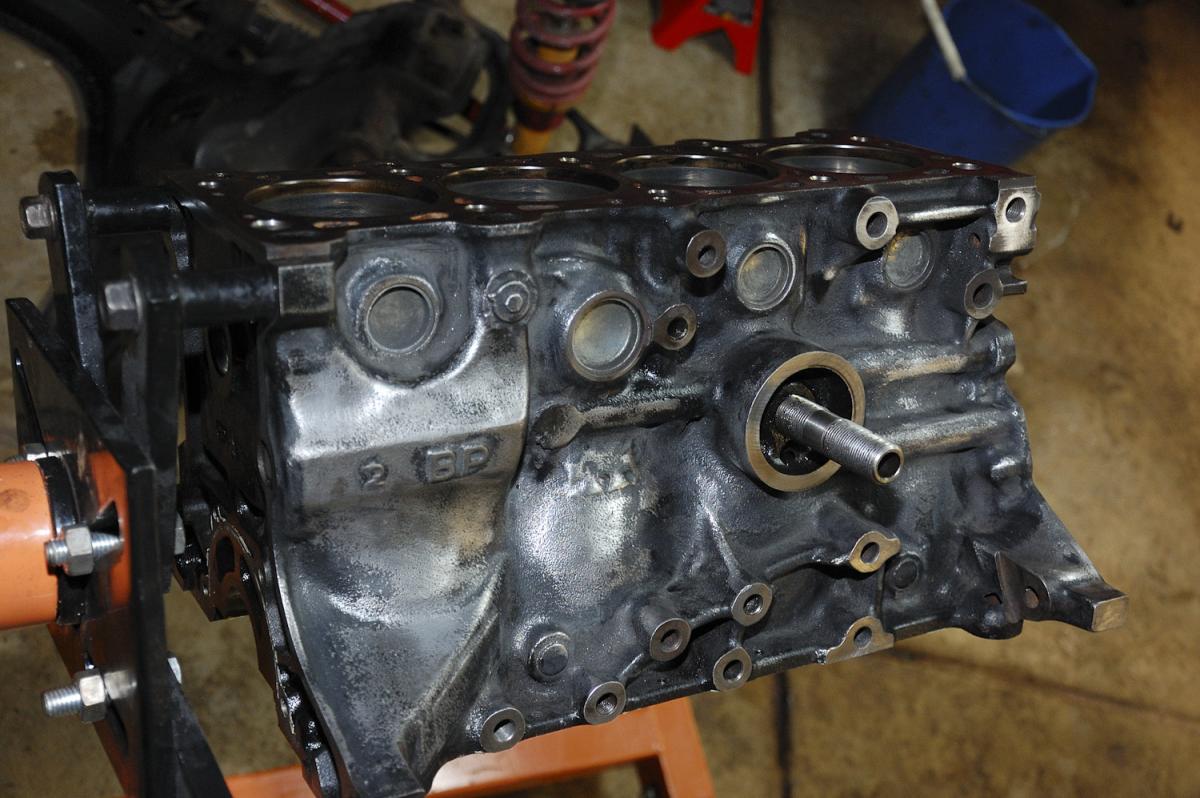
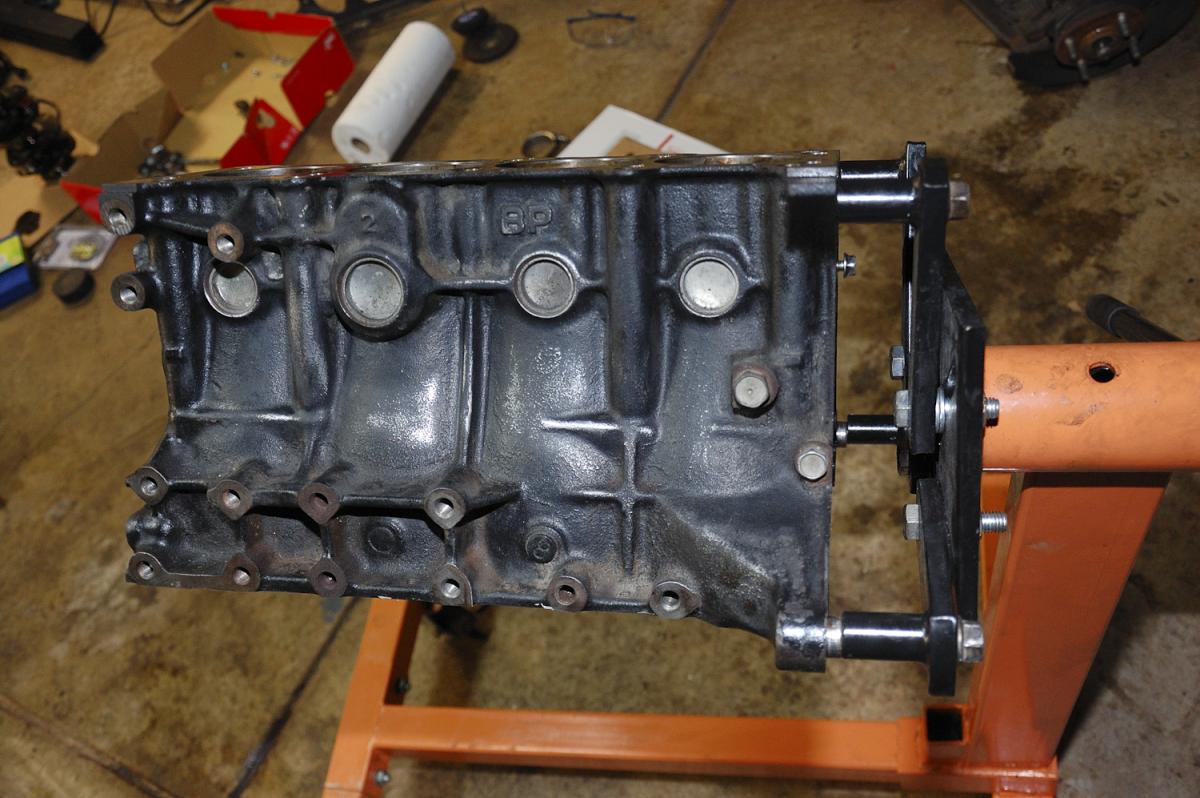
Engine on a stand, lik a boss.
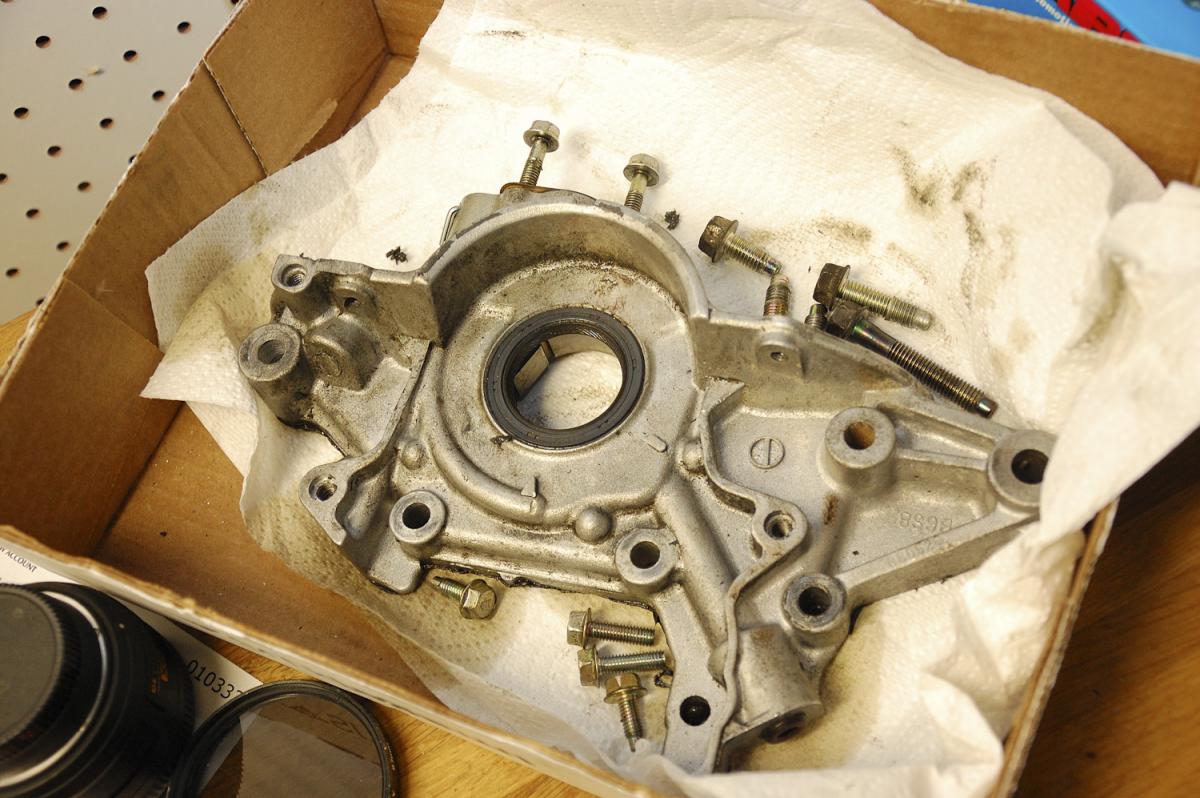
Test fitted my trigger wheel and protege crank sensor. Now, on THIS particular oil pump (block is 94) the hole is not threaded. On my new oil pump it is, so it should be a bolt on affair. Woo hoo!
However, I'm building the engine. So I won't upgrade to MS3, because troubleshooting new ECU + trying to break in an engine is trying to do 2 things at once. So for first week-month I'll run my already-tuned and wired MS2.

[img]http://s95367906.onlinehome.us/photo/mt.net/build/DSC_9
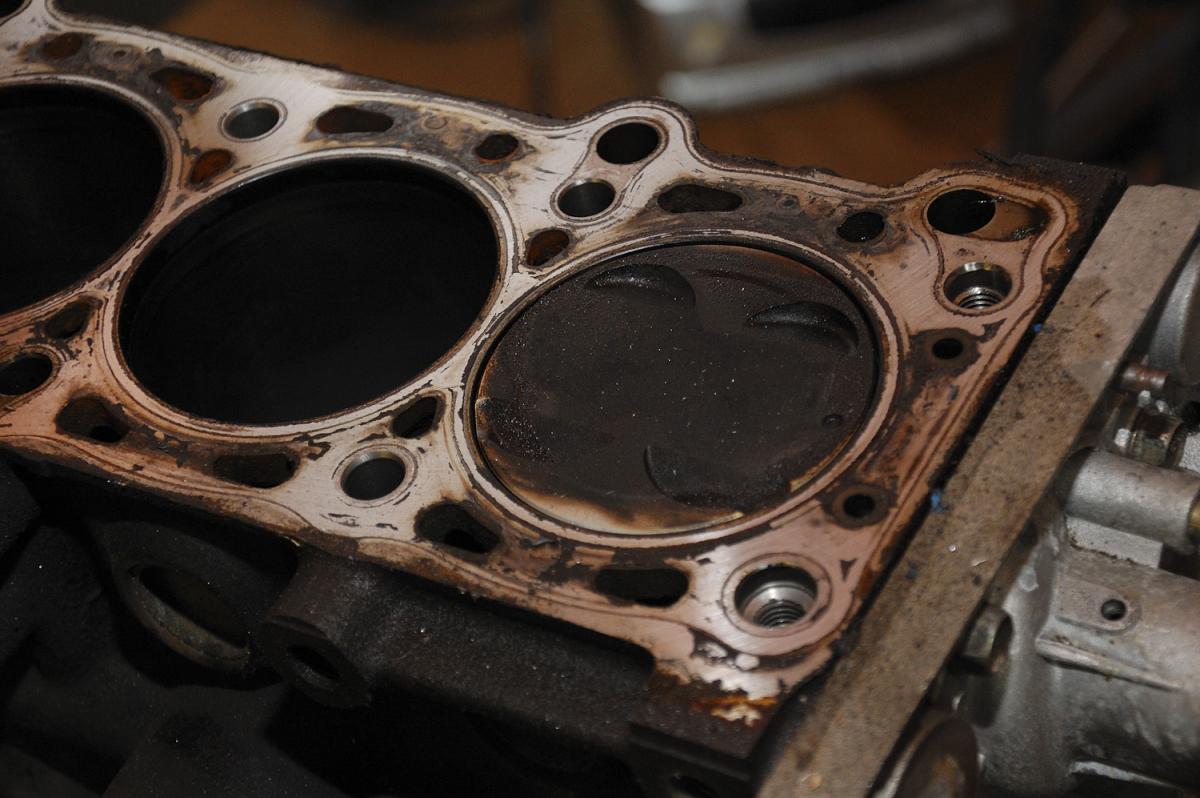
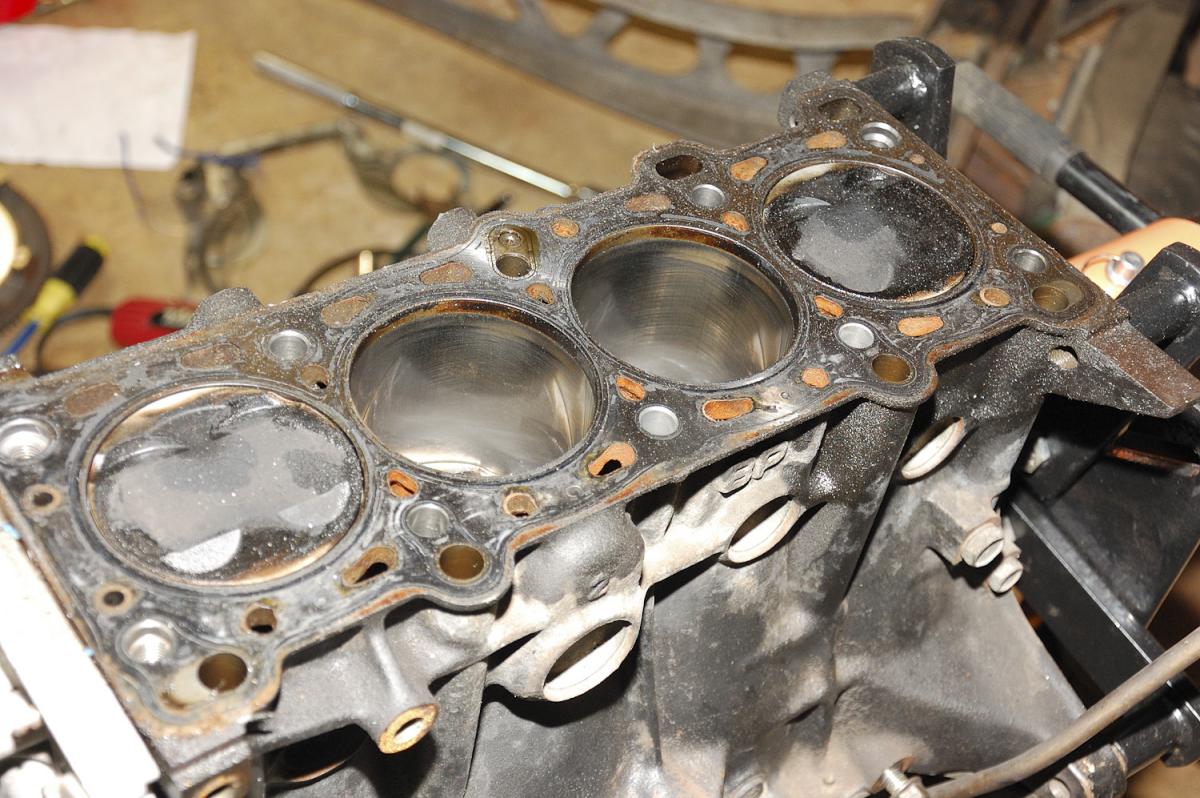
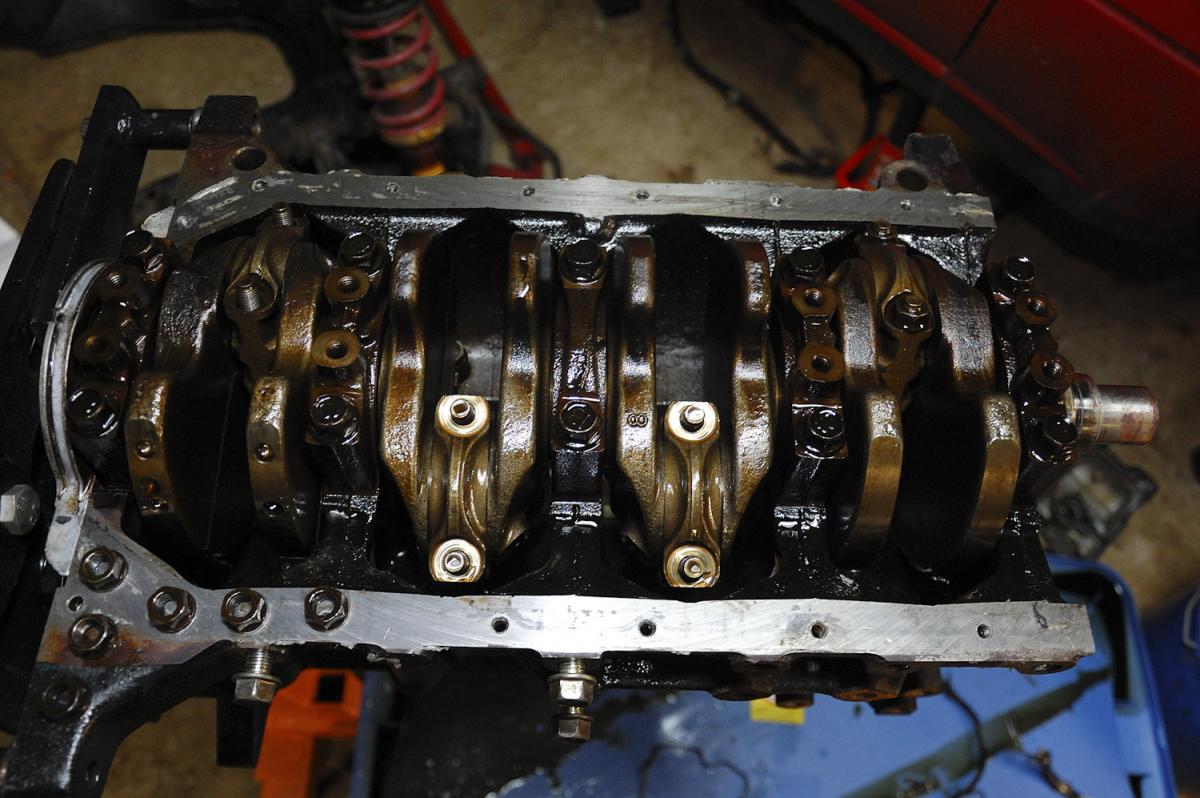
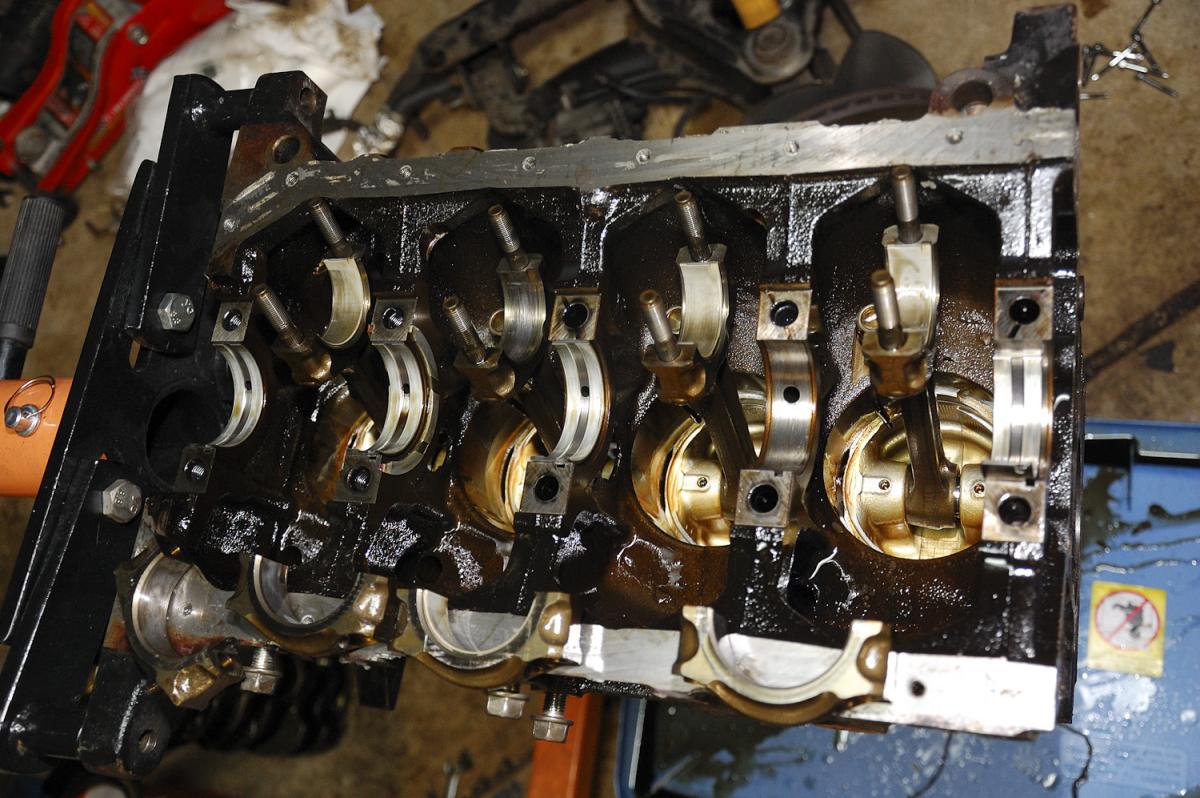
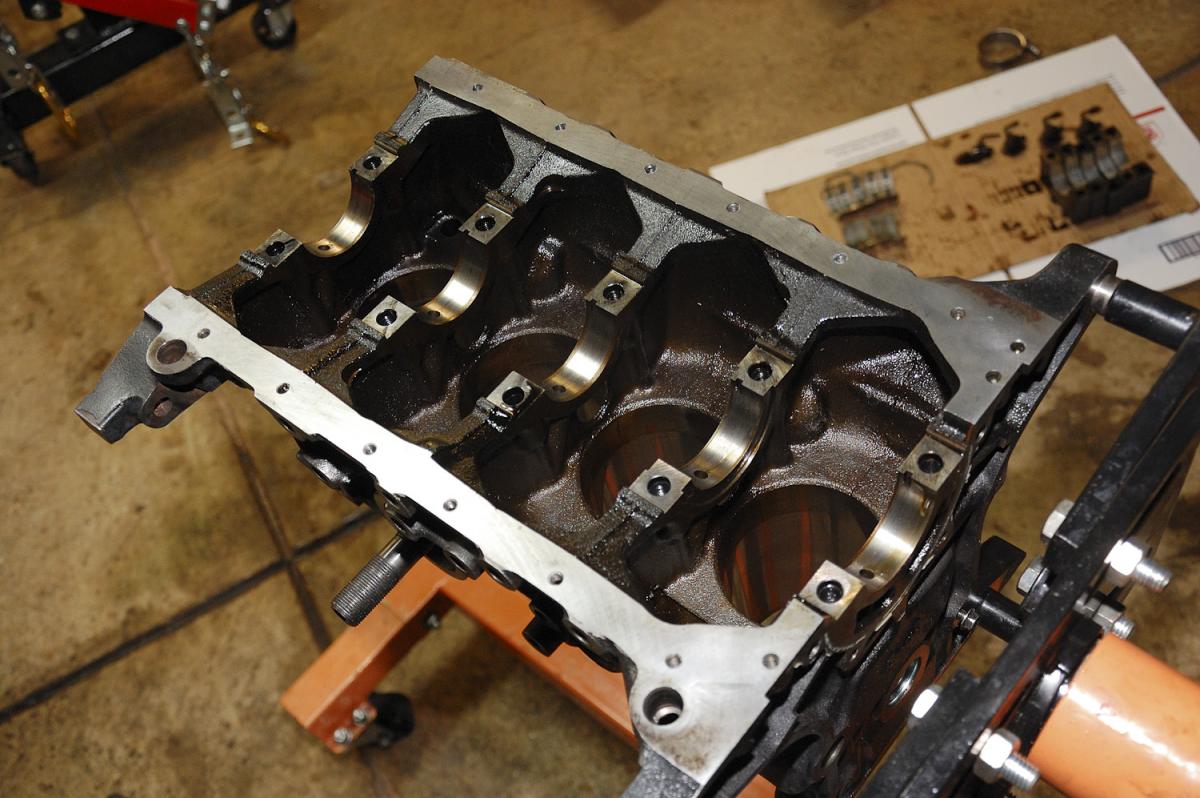
[img]http://s95367906.onlinehome.us/photo/mt.net/build/DSC_9Ripped the block apart. Like 70k miles on block? Don't know/care, really.
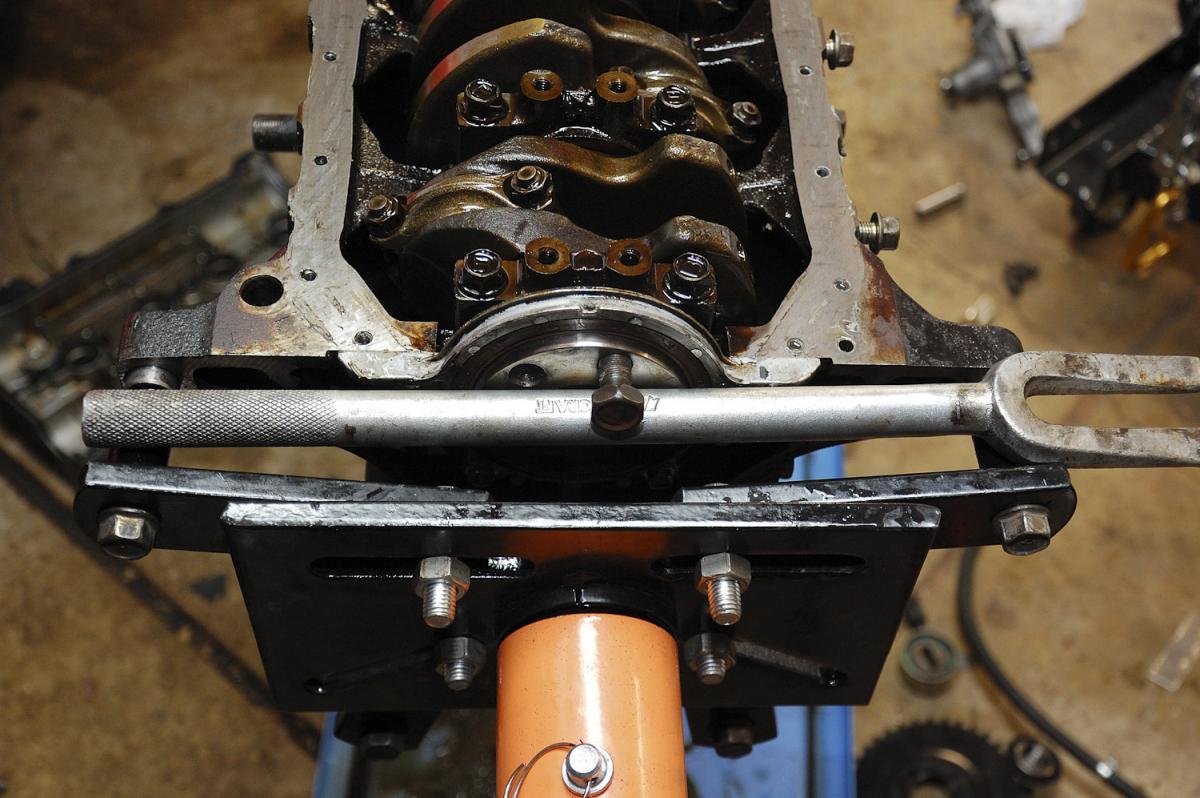
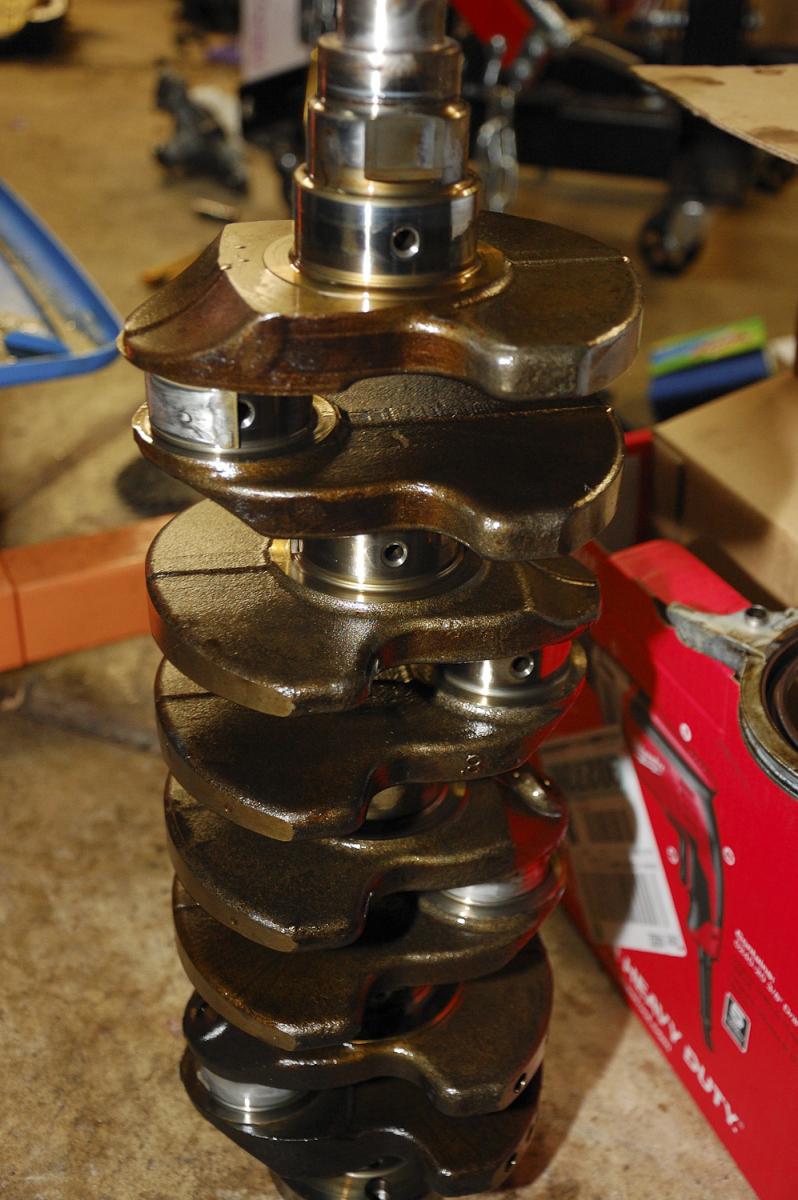
Forgot to remove crank bolt so I held the crank like this. Not reusing this flywheel bolt, obviously.
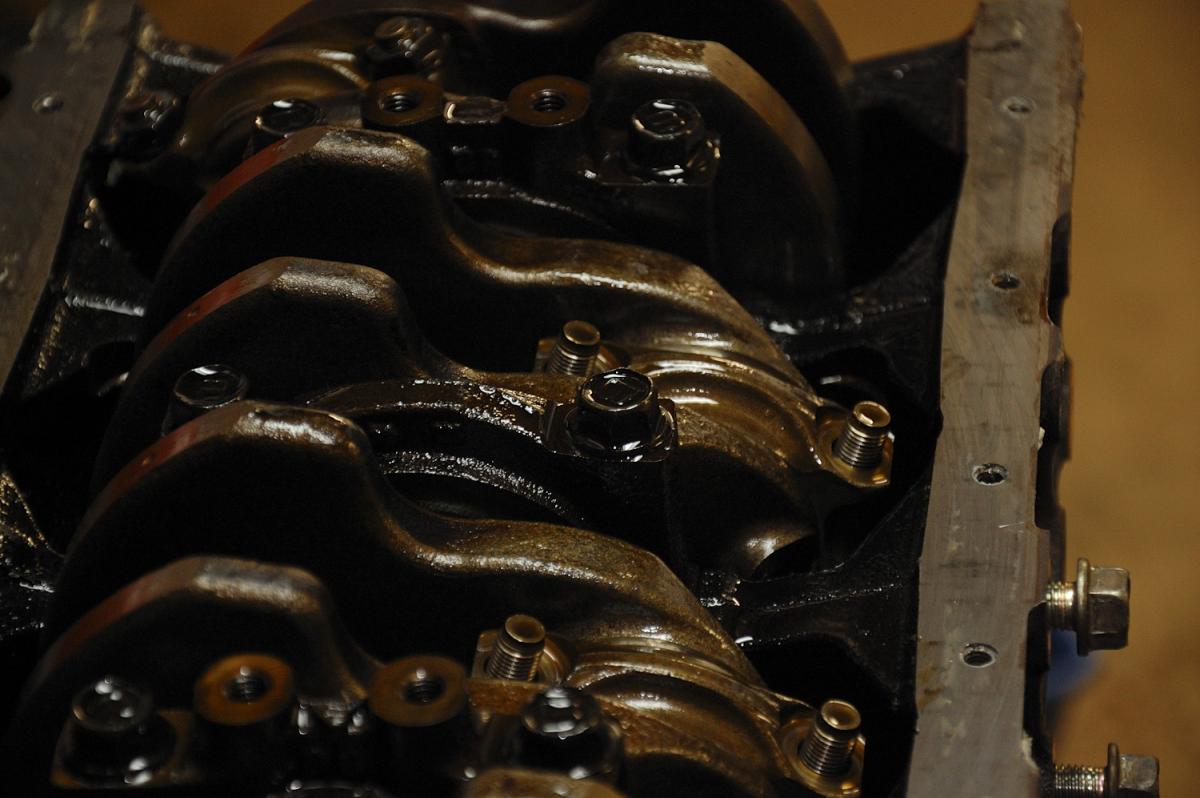
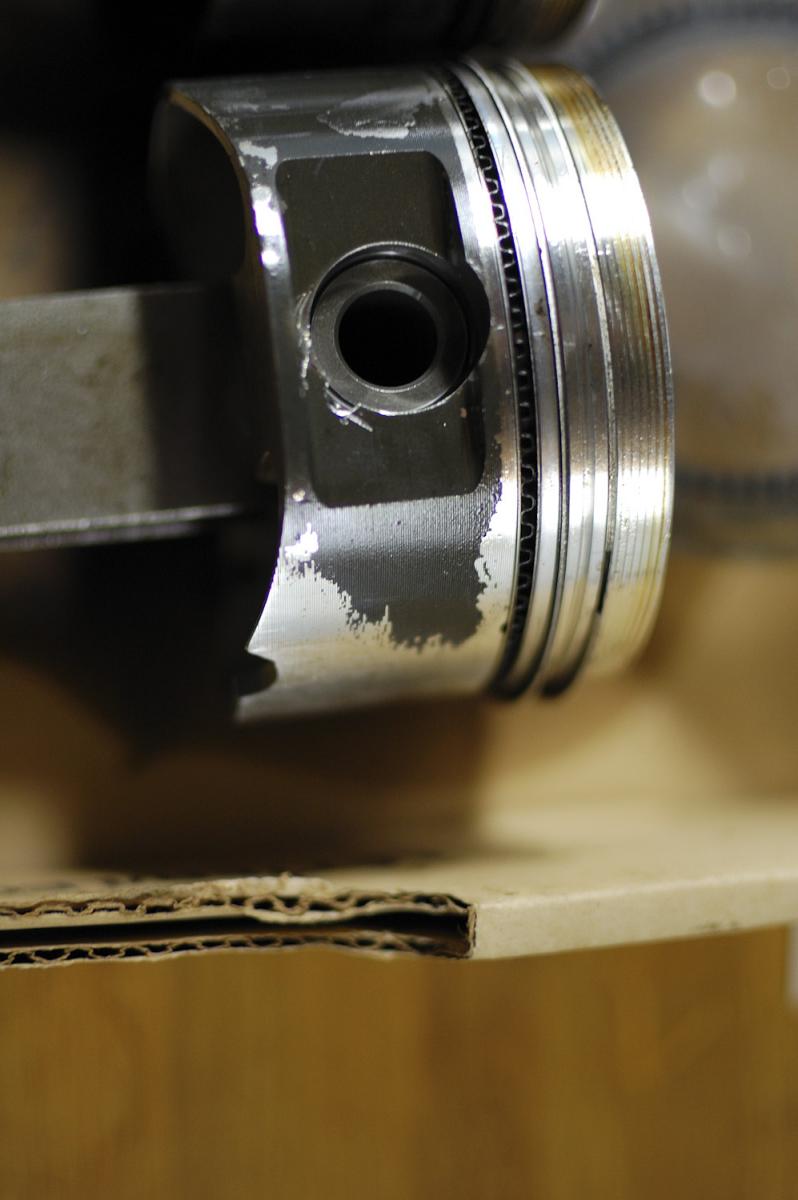
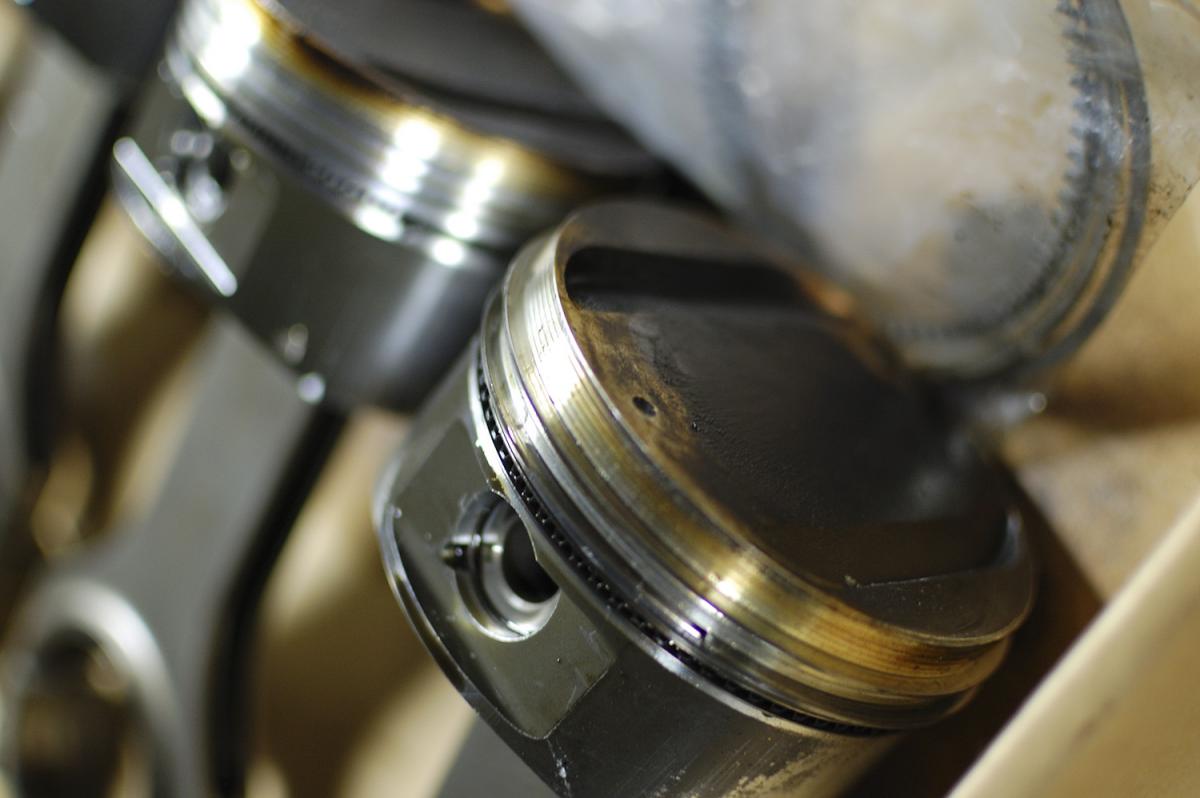
Old internals.
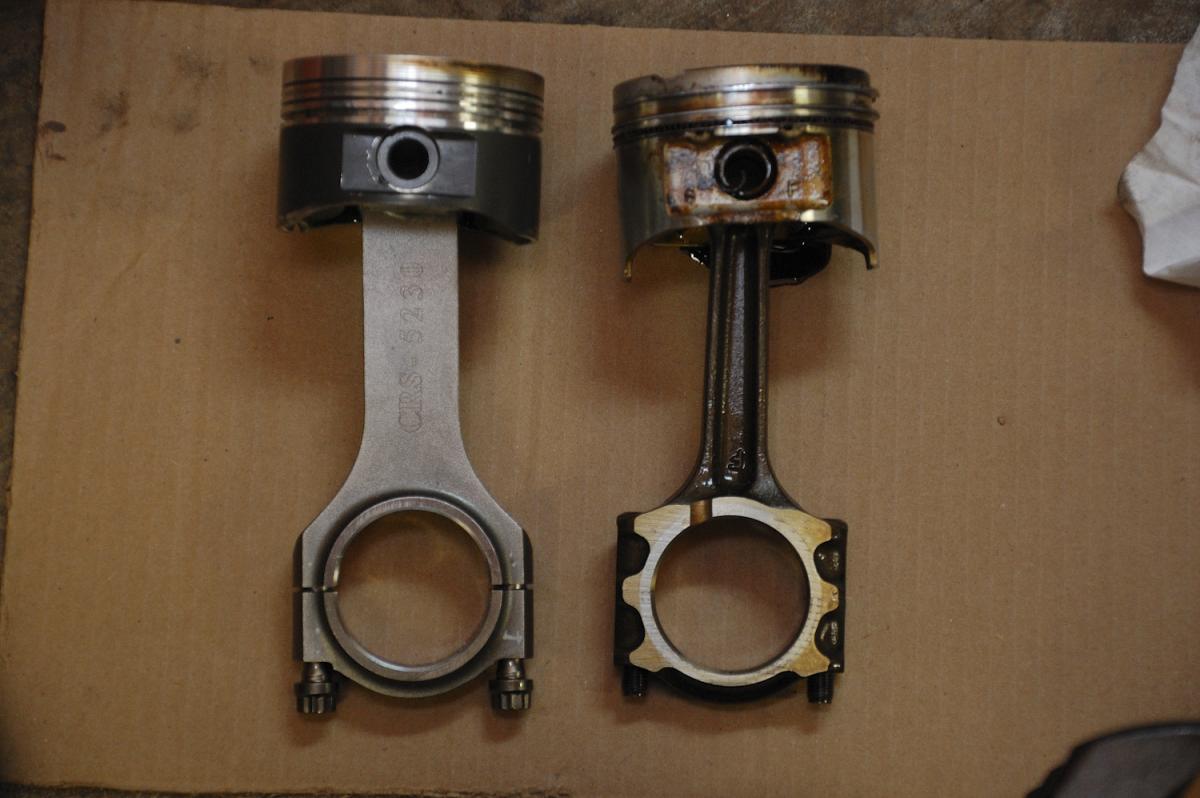
Old vs new pistons/rods. I'll make another post will all my new parts.
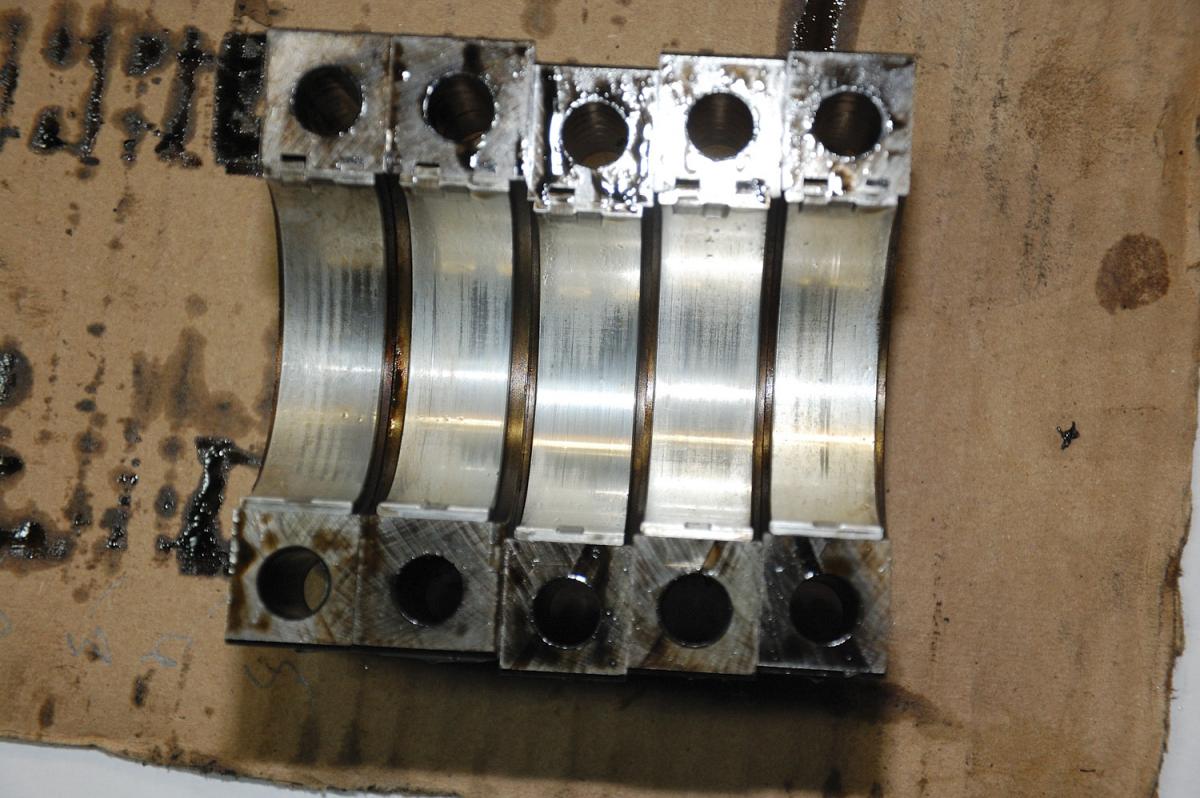
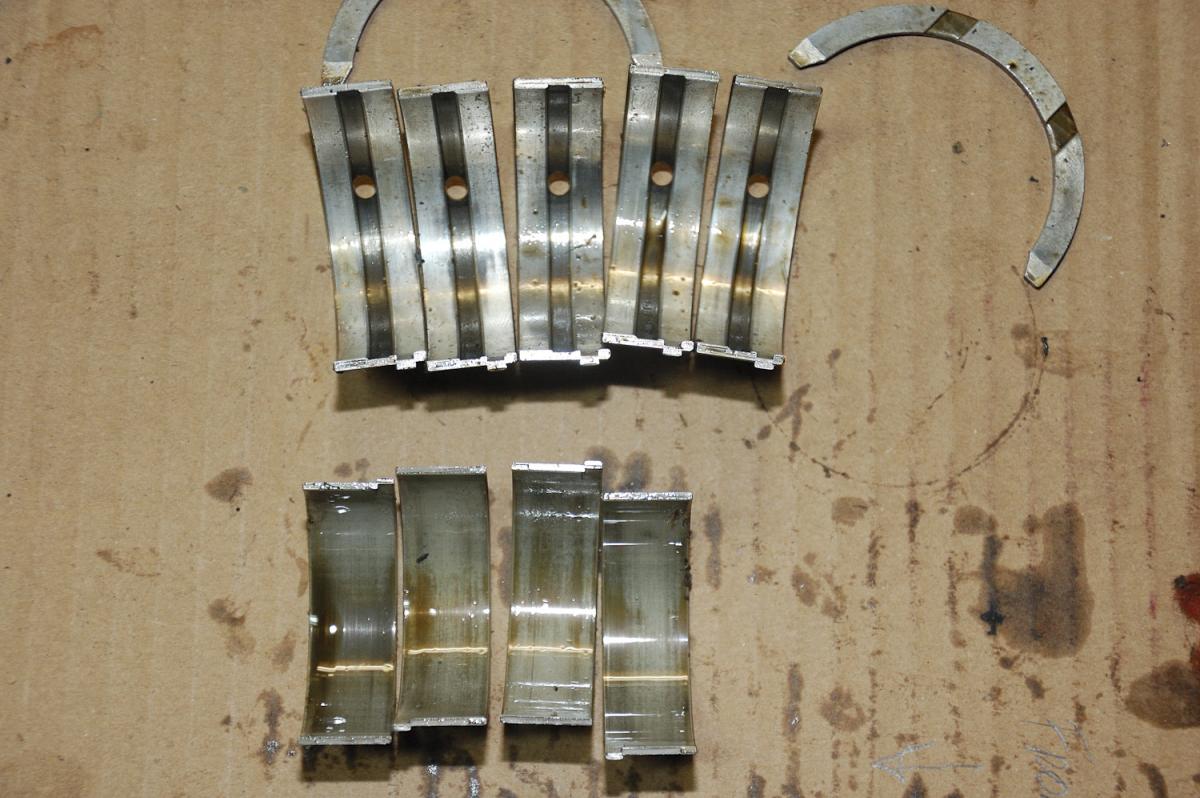
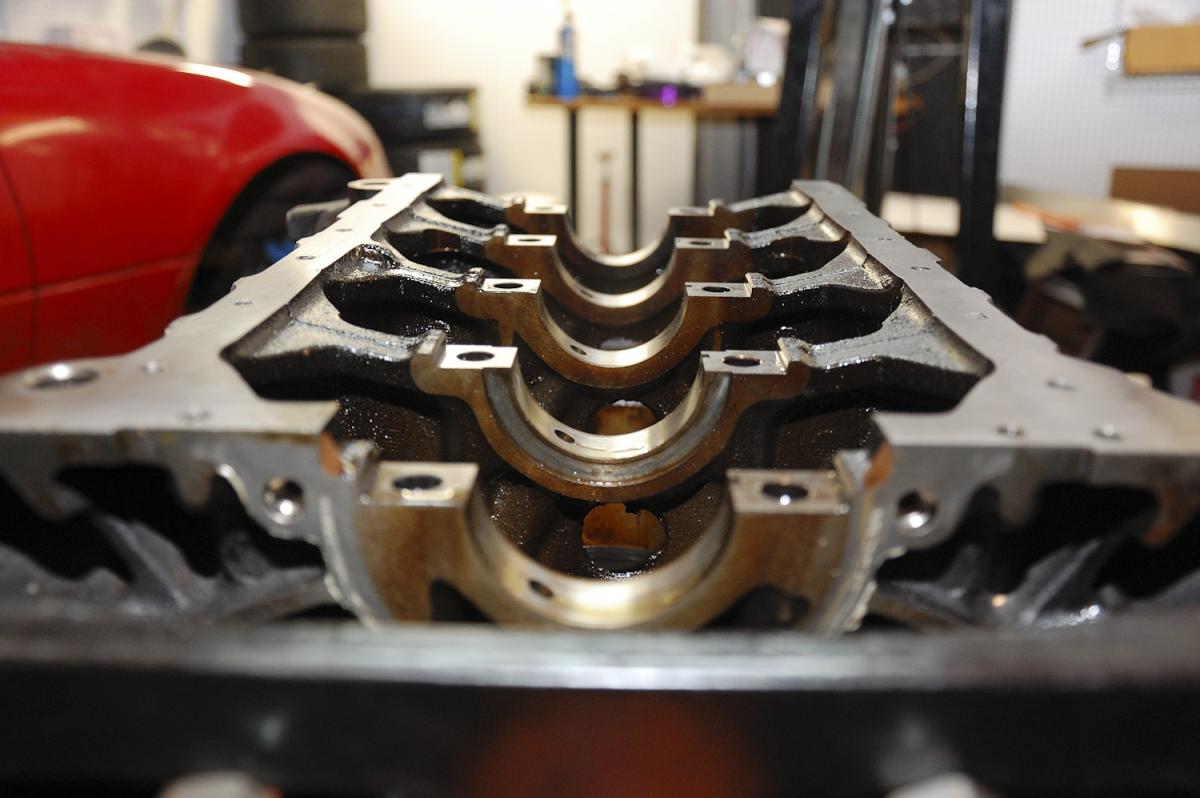
Bearings look good to me. There was a bit of forward play on the crankshaft. idk. hopefully I won't need oversized thrust bearings or anything like that.
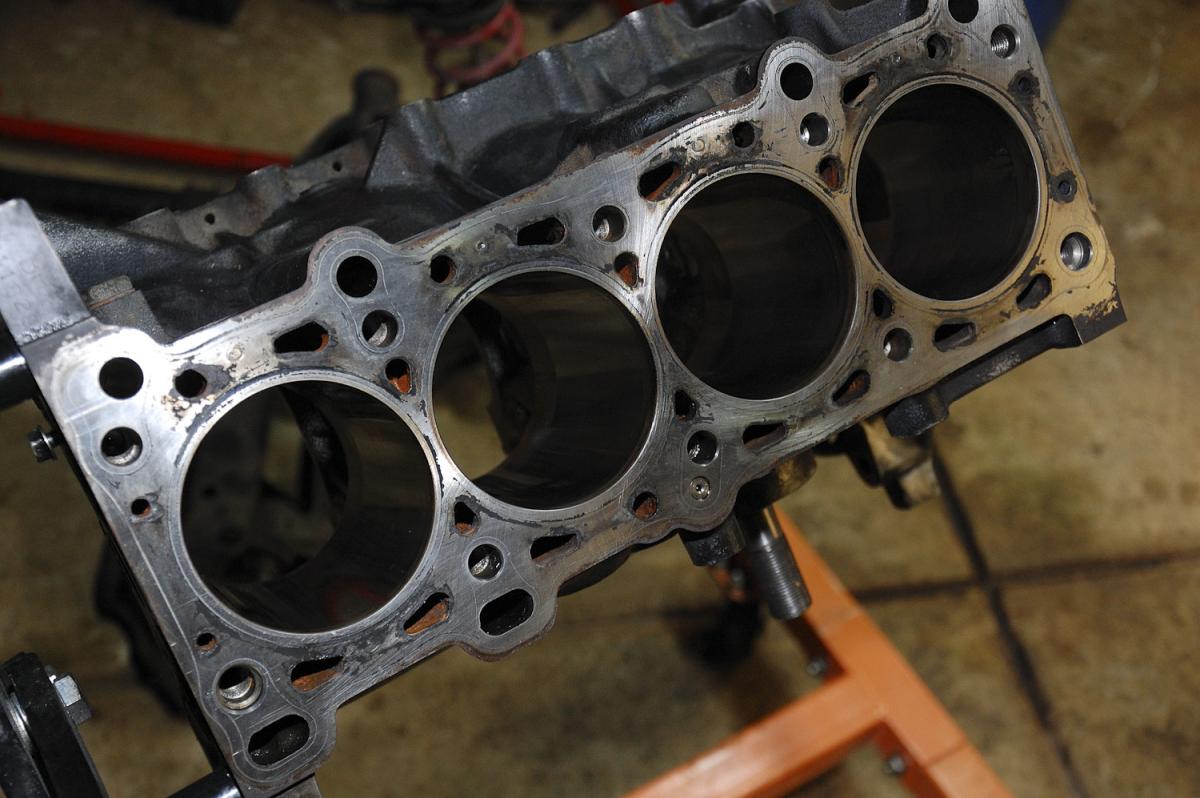
Cleaned the block by hand (OMG what a pita)
So first I bought a house. 2 car garage FTMFW
Then I jacked the ugly car and started removing the rear subframe.
lol rust. ---- this ugly chassis!
RS-3s after 15k street miles, like 100 autocross runs and an hour of sissy driving on a track. At almost 3* rear camber, lol.
Removing lower subframe is a pita, because the lower control arm bolts are a major pain. I spent a day just on those.
Rear subframe pulled
Engine before pulling the front subframe
Steering rack was a bit of a pita. That bolt is rusted to ---- and hard to reach while the engine is in the car
Lifted the front, dropped the subframe
Entire drivetrain
Oil drain details
Tranny. Not reusing this one as I like the 5 speed in my "new car". 2 to 3rd seems smoother.
Oil leak? From trans or from rear seal? no care in any case.
Engine on a stand, lik a boss.
Test fitted my trigger wheel and protege crank sensor. Now, on THIS particular oil pump (block is 94) the hole is not threaded. On my new oil pump it is, so it should be a bolt on affair. Woo hoo!
However, I'm building the engine. So I won't upgrade to MS3, because troubleshooting new ECU + trying to break in an engine is trying to do 2 things at once. So for first week-month I'll run my already-tuned and wired MS2.
[img]http://s95367906.onlinehome.us/photo/mt.net/build/DSC_9
[img]http://s95367906.onlinehome.us/photo/mt.net/build/DSC_9Ripped the block apart. Like 70k miles on block? Don't know/care, really.
Forgot to remove crank bolt so I held the crank like this. Not reusing this flywheel bolt, obviously.
Old internals.
Old vs new pistons/rods. I'll make another post will all my new parts.
Bearings look good to me. There was a bit of forward play on the crankshaft. idk. hopefully I won't need oversized thrust bearings or anything like that.
Cleaned the block by hand (OMG what a pita)
Reply
0
0
New parts:
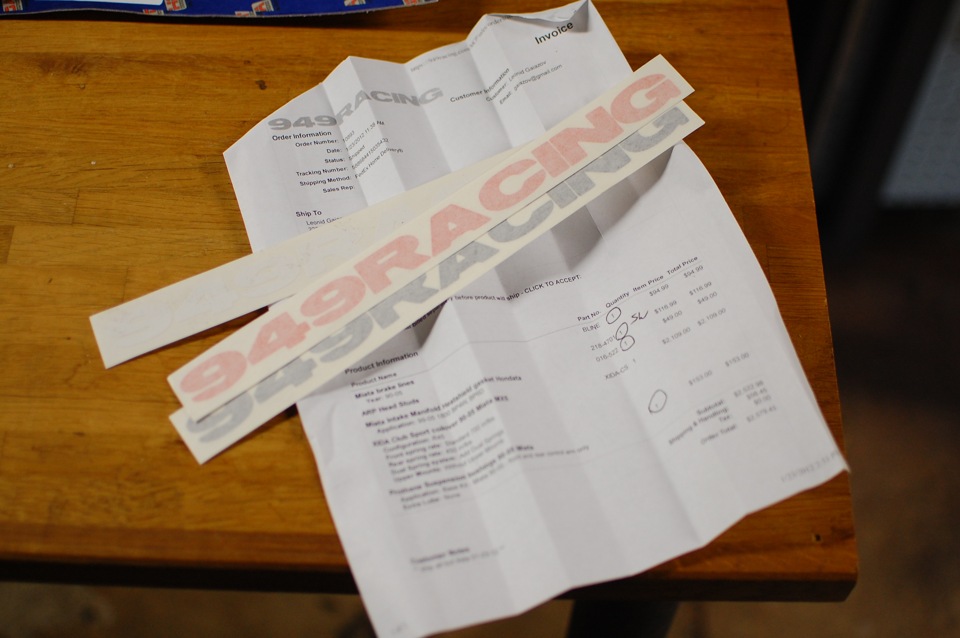
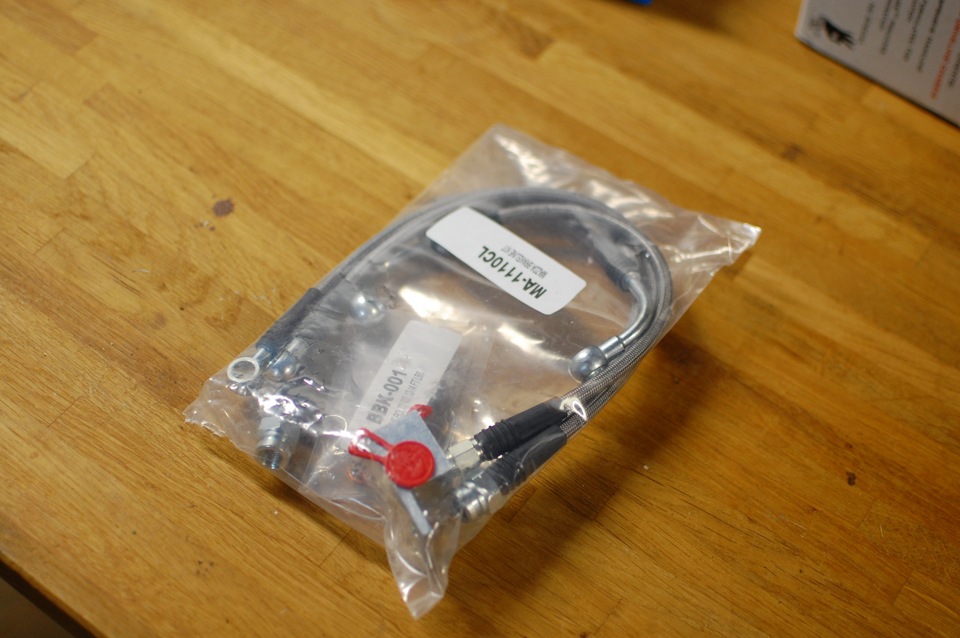
Xida Club Sports were also on the order, but they have a 3 week lead time. So technically they should be shipped next monday.
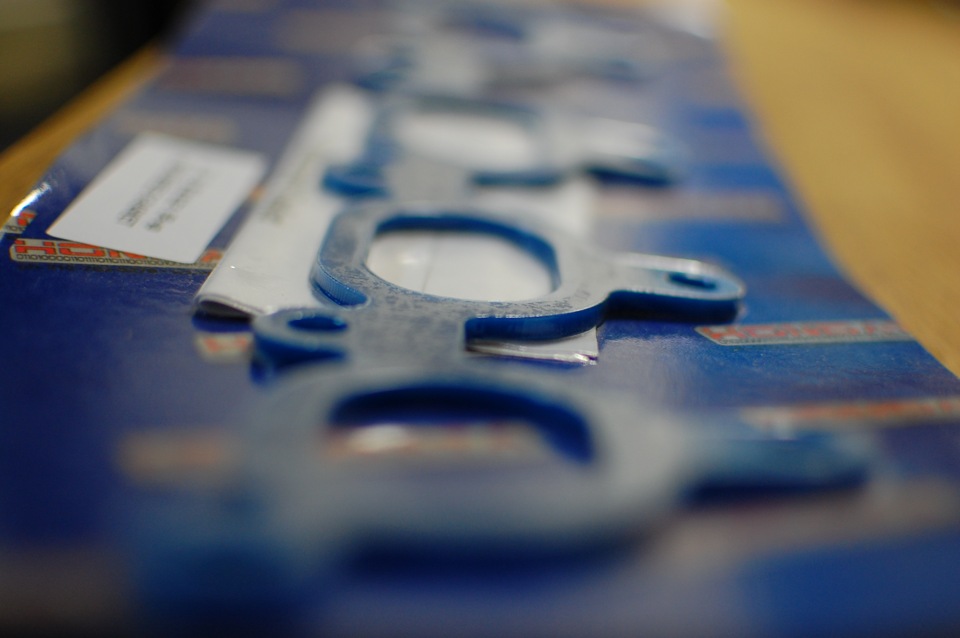
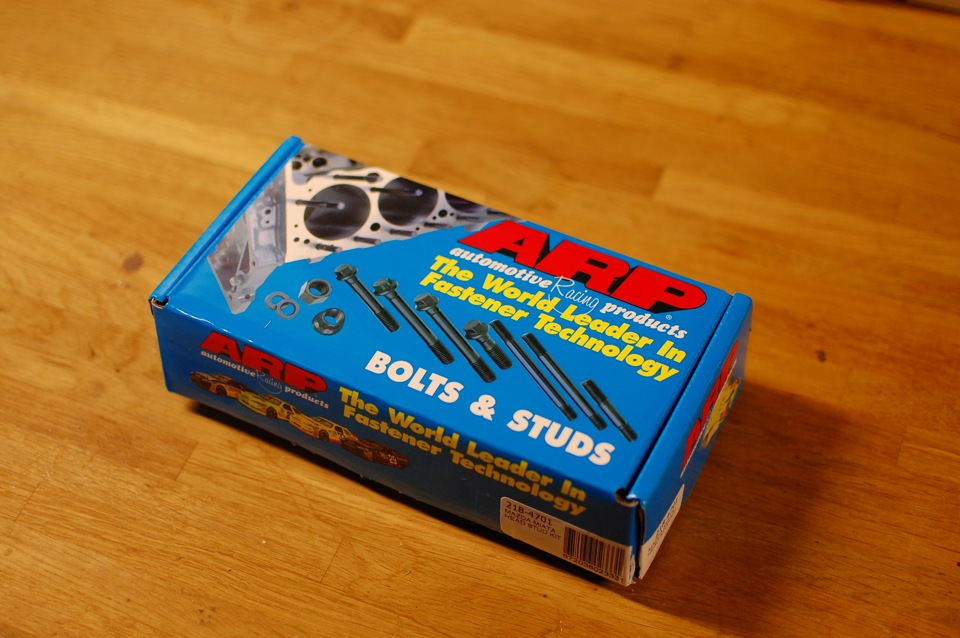
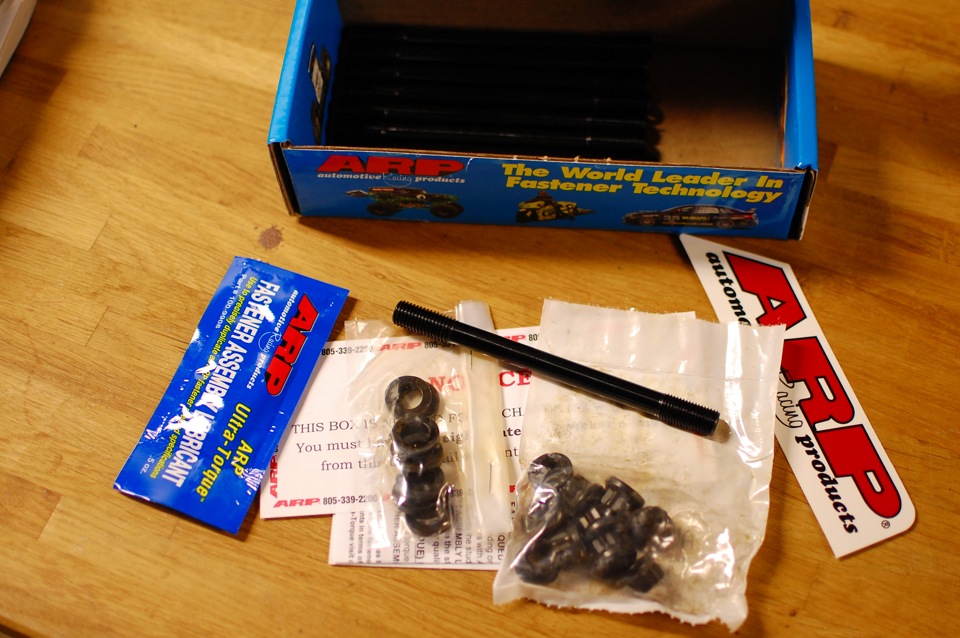
After seeing pschmidt's cheap *** internals, I decided, ---- it, I'll build my engine. I bought pistons, rods, billet oil pump in new casing and main cap bolts from him.
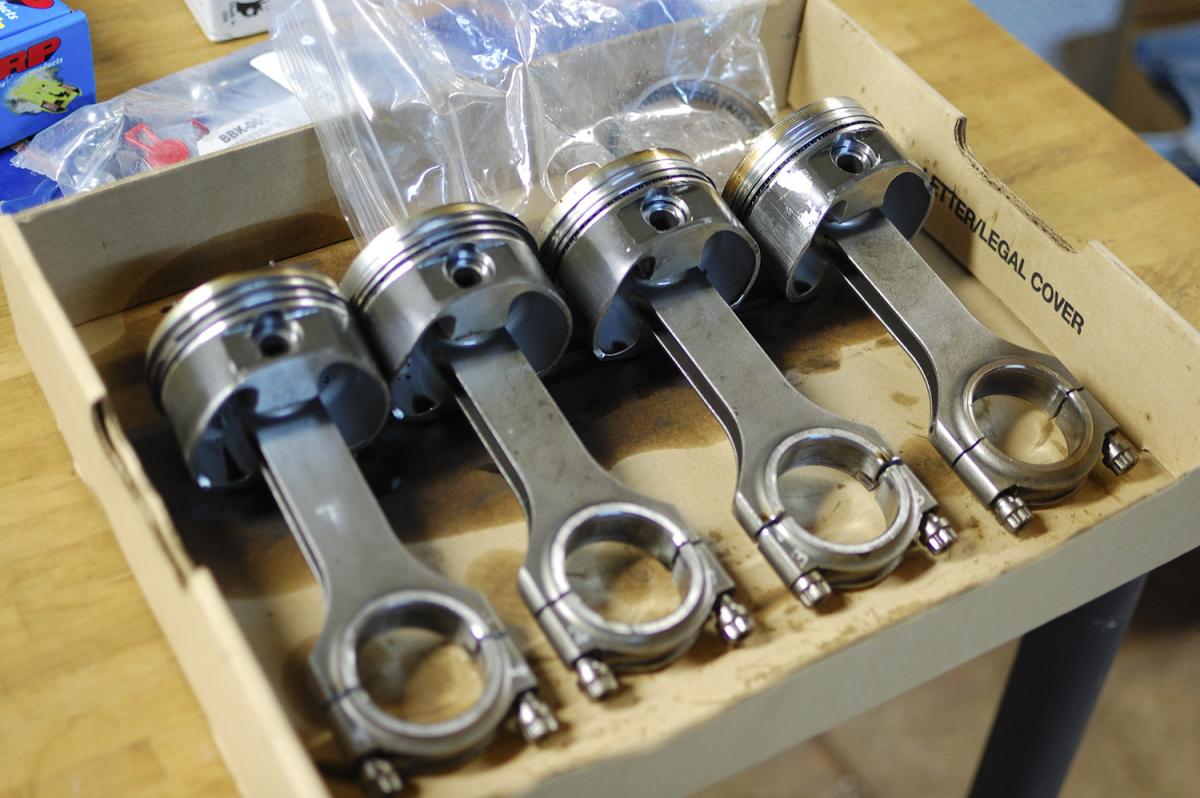
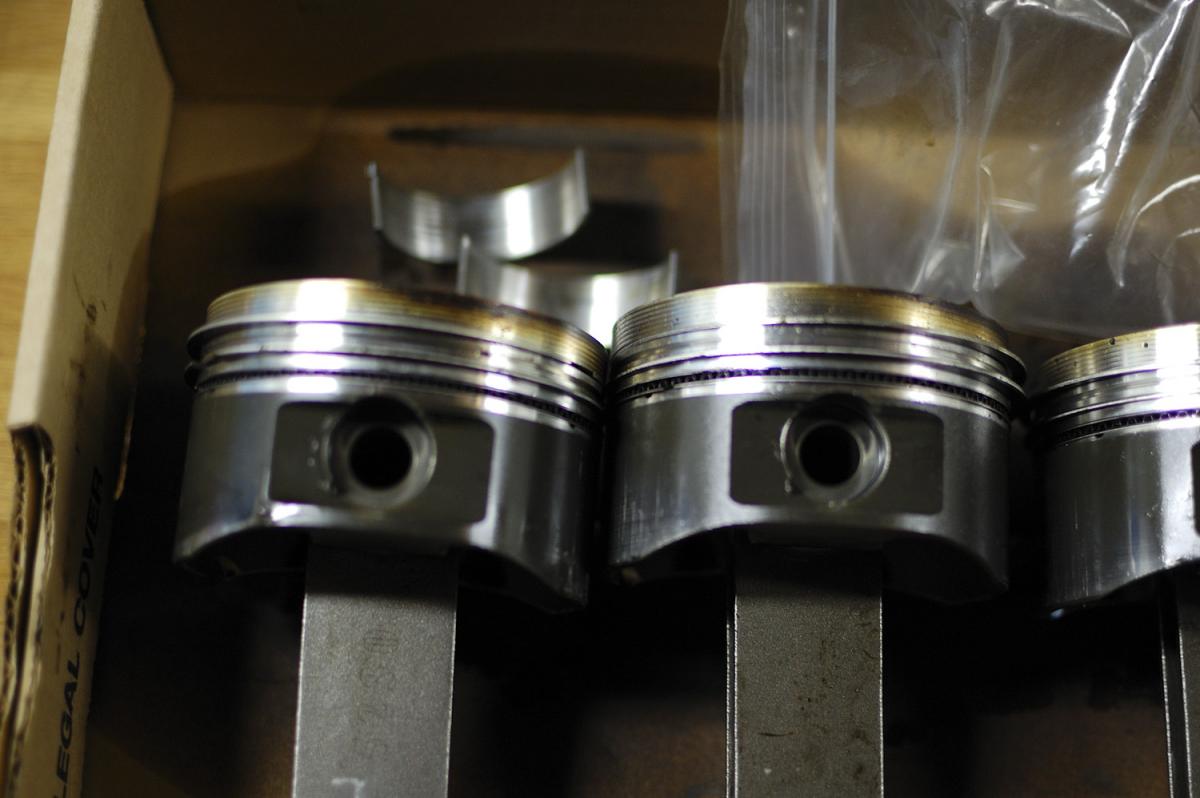
FM 9:1 84mm Wiseco pistons, billet oil pump, arp main studs.
Total cost: $760
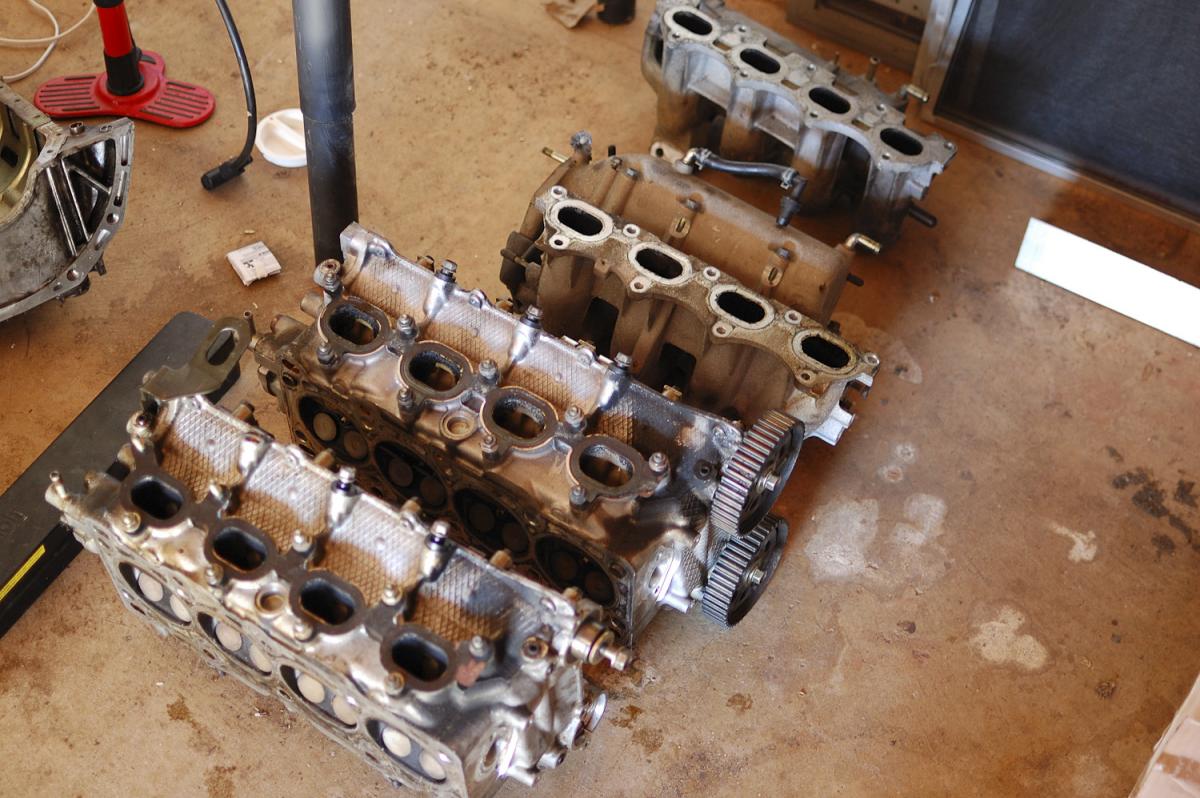
I had a 99 head/intake mani/fuel rail/throttle body already ($180 total at a junk yard, lol)
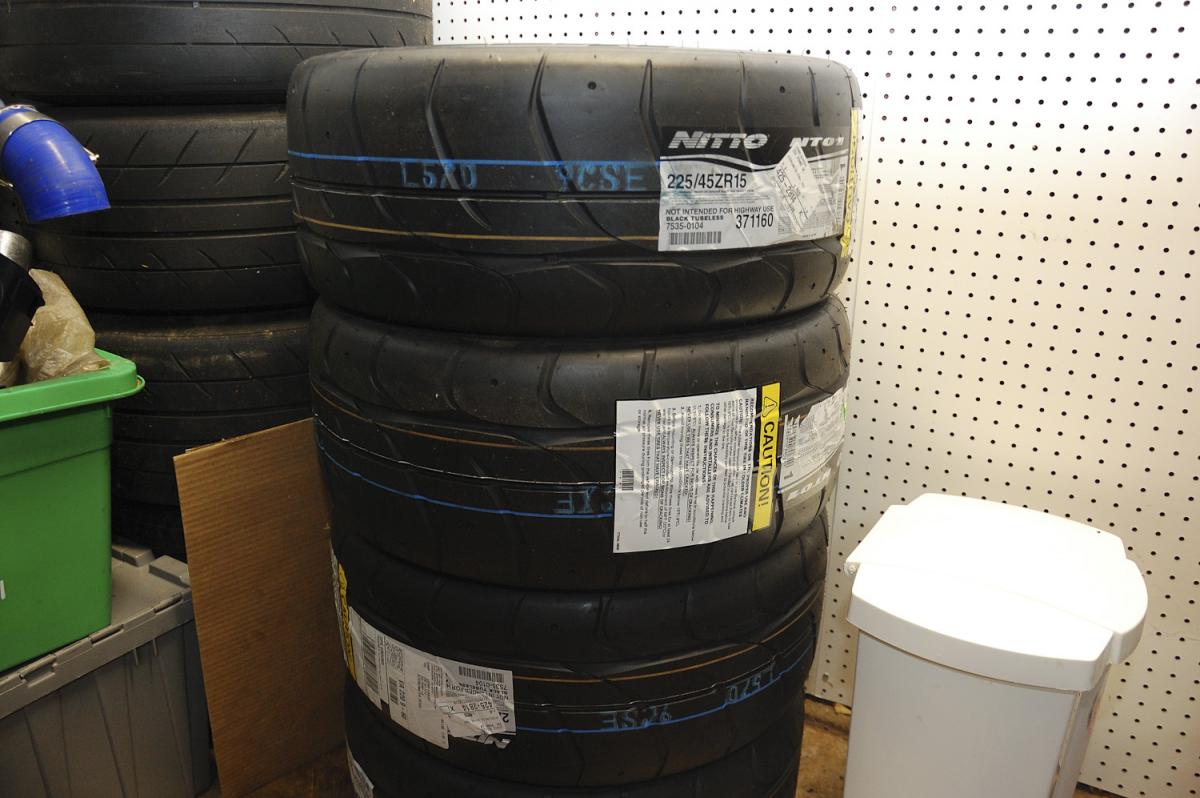
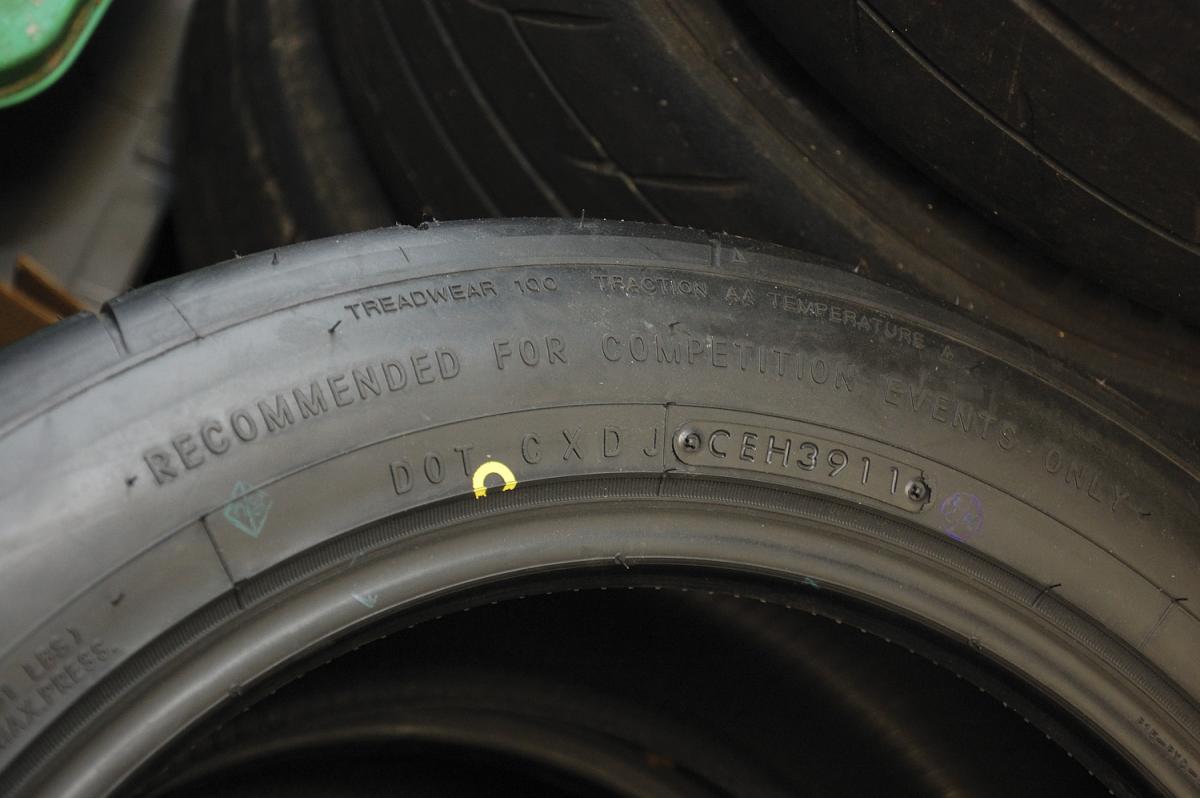
Nitto NT-01s. These will be on my 15x9s and I'll order 15x8 TRMotorsports C1 with Star Specs for normal driving.
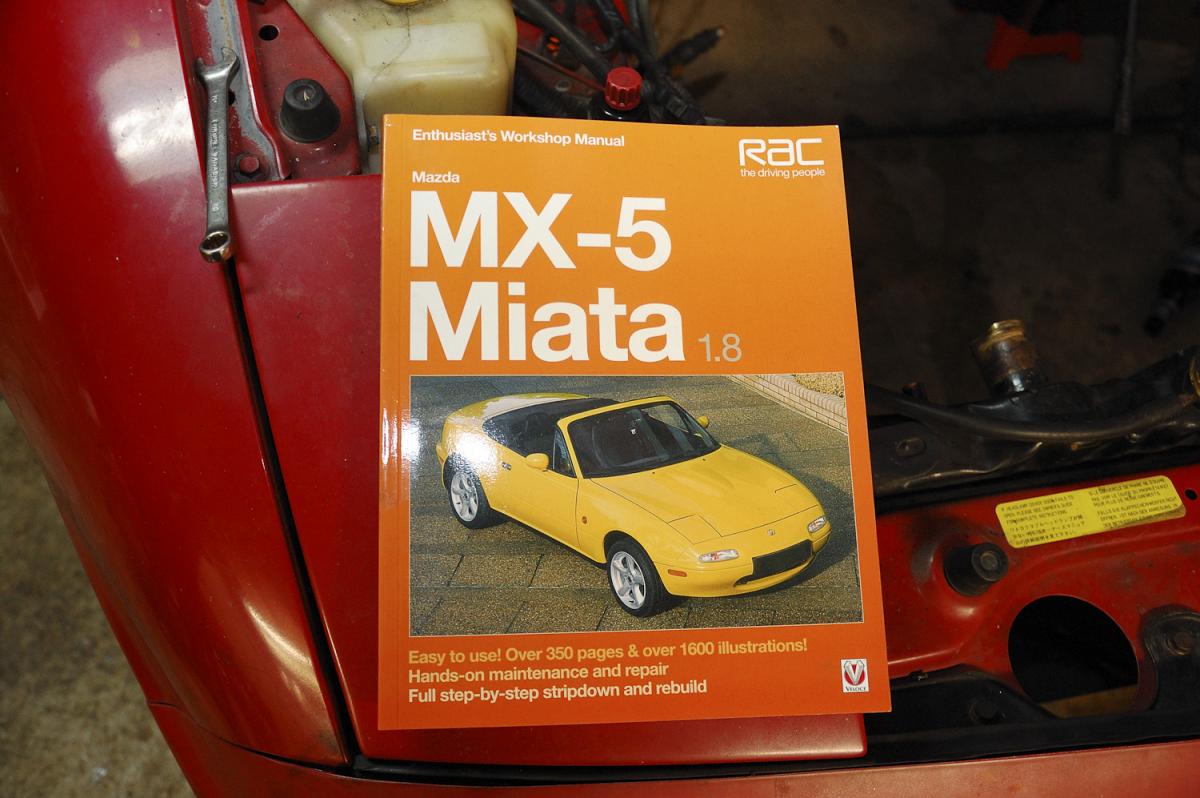
And a book with all clearances
Xida Club Sports were also on the order, but they have a 3 week lead time. So technically they should be shipped next monday.
After seeing pschmidt's cheap *** internals, I decided, ---- it, I'll build my engine. I bought pistons, rods, billet oil pump in new casing and main cap bolts from him.
FM 9:1 84mm Wiseco pistons, billet oil pump, arp main studs.
Total cost: $760
I had a 99 head/intake mani/fuel rail/throttle body already ($180 total at a junk yard, lol)
Nitto NT-01s. These will be on my 15x9s and I'll order 15x8 TRMotorsports C1 with Star Specs for normal driving.
And a book with all clearances
Reply
0
0
Tomorrow I'm taking the block/piston/head to Fairfax Auto Parts machine shop. It was between this one and Tyson's Automotive. First one said 2 week lead time, second said 3-4 weeks. I want to drive the car in March, so I went with the first one.
Going for bore/hone and resurface both engine block and head. Budgeted $300, got quoted around $250. We'll see.
Going for bore/hone and resurface both engine block and head. Budgeted $300, got quoted around $250. We'll see.
Reply
0
0

I cleaned up the engine block, head and pistons. Then on Thursday I dropped the whole deal off at the machine shop. Talked to the machinist a bit, apparently he worked on quite a few miata engines. Thanks MT for the machine shop recommendation.
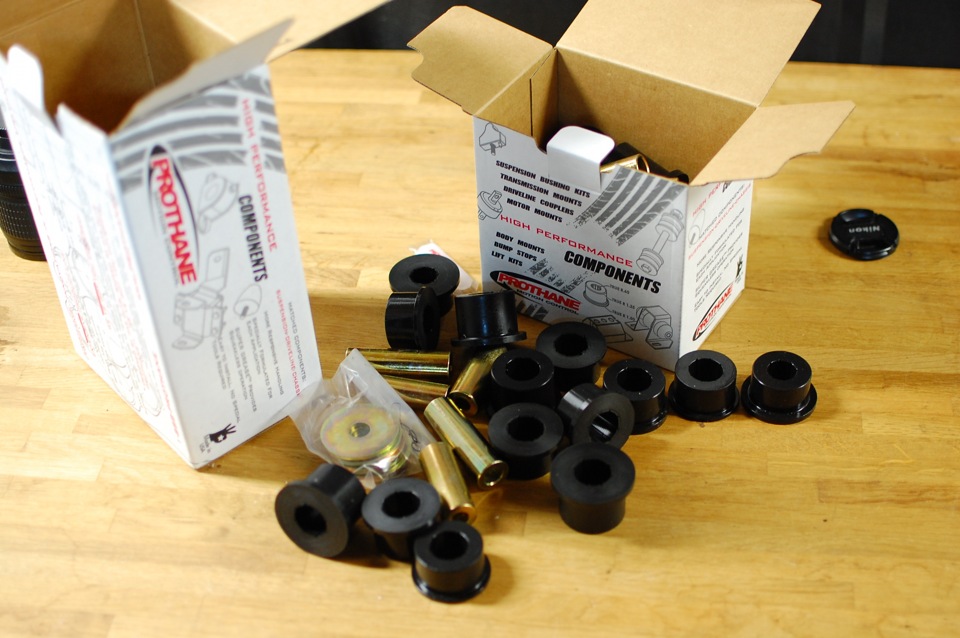
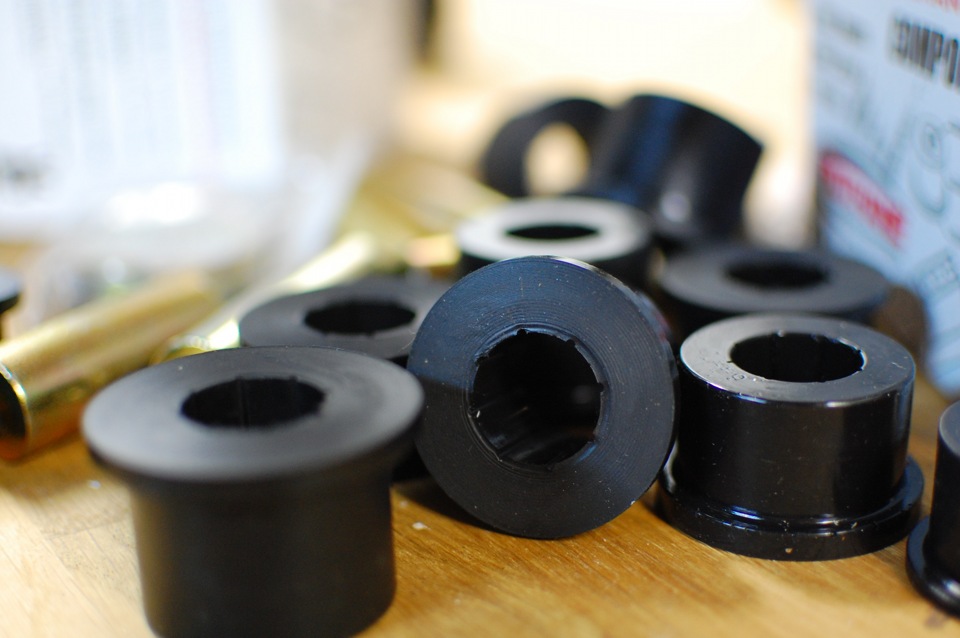
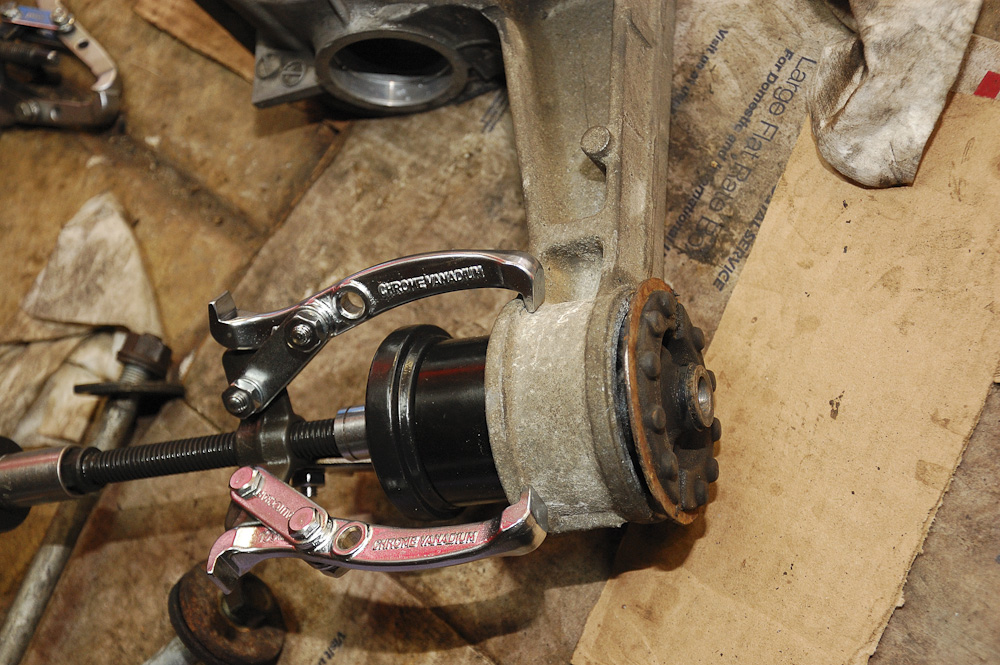
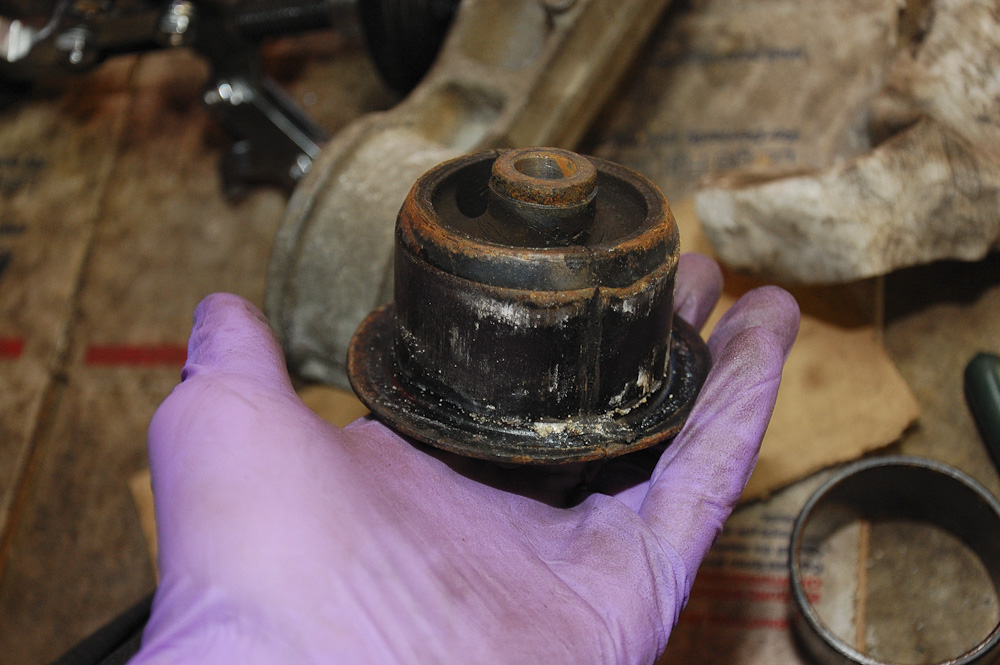
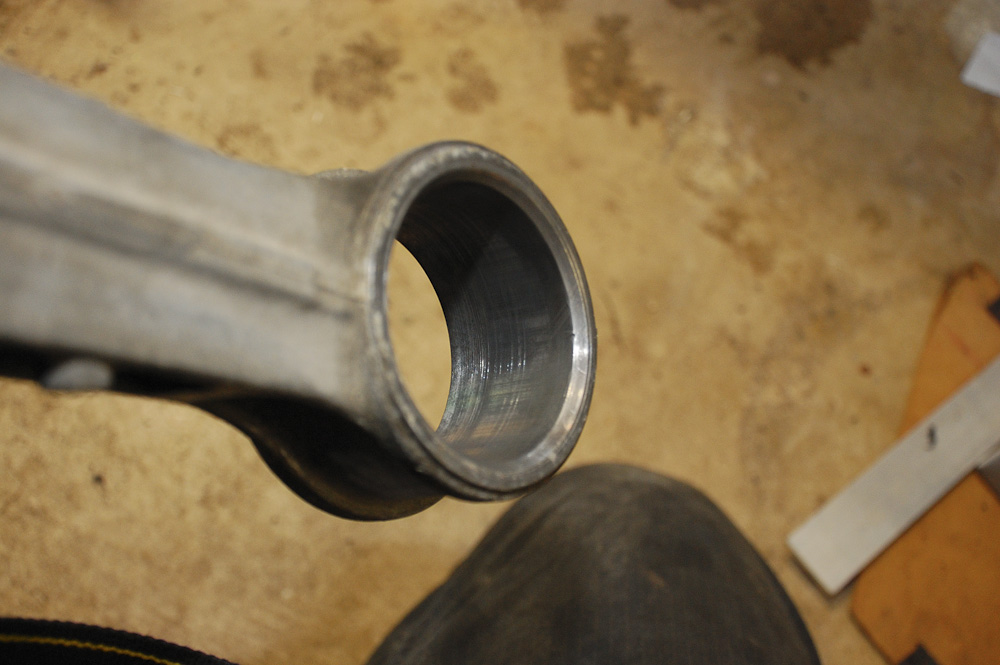
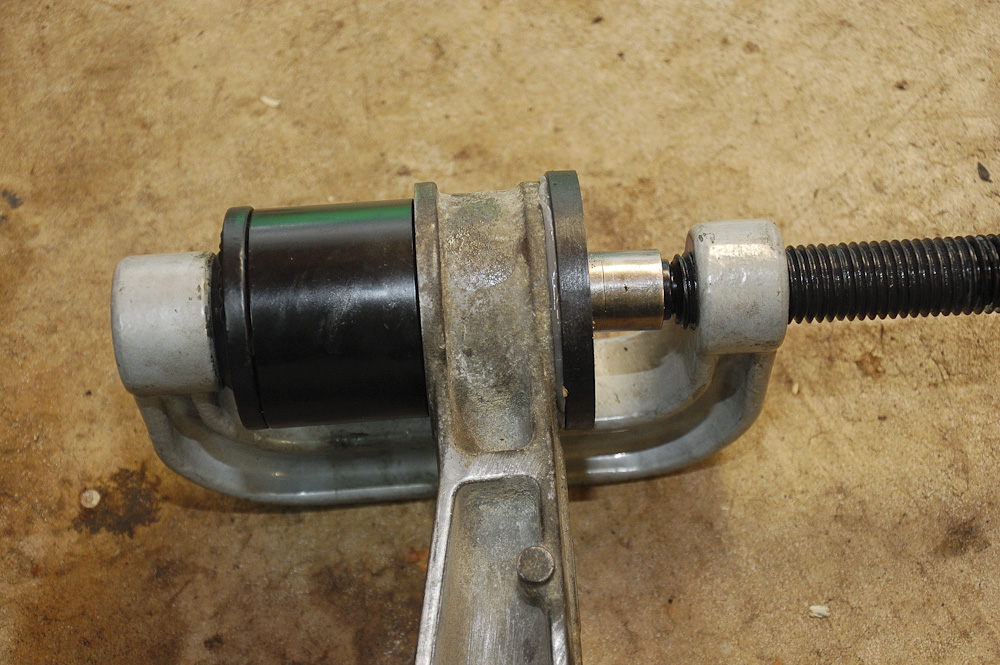
Anyways, took apart all the rear suspension and front suspension half way. Also took apart the diff and started putting it back. Removed 14 bushings from rear suspension, 8 to go.
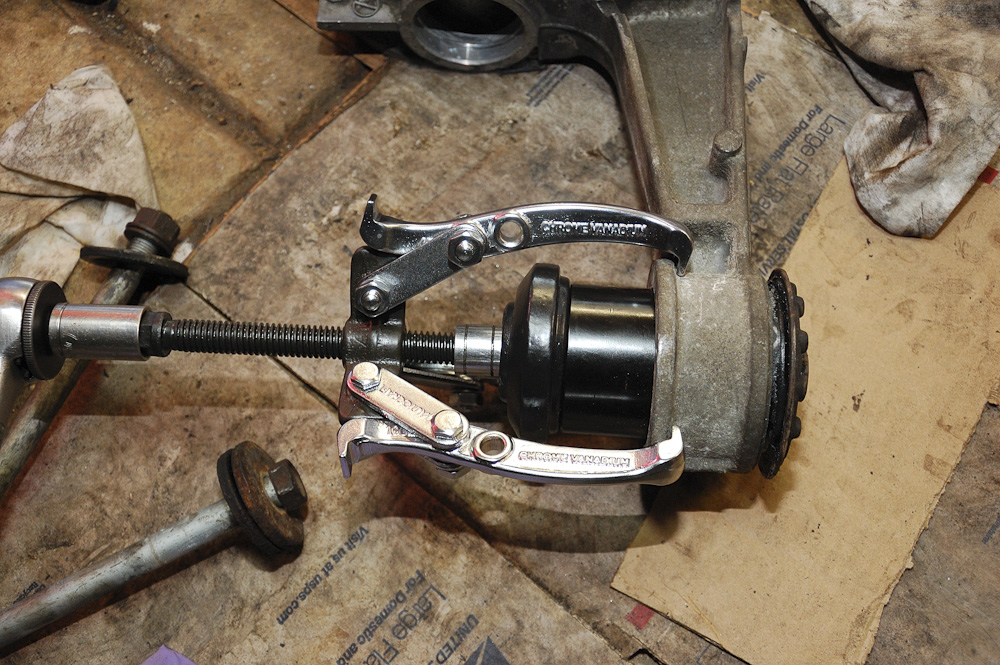
For anyone thinking of using the $5 tool, be warned that it bends control arms pretty easily. Especially the upper rear control arms (small ones).
The Harbor Freight ball joint press kit makes it A LOT easier. And you need it anyways to remove the 2 bushings from the rear knuckles. So buy it. Use a 20% off coupon, comes out to <$60.
Pictars.
fail
fail

WIN!

Anyways, took apart all the rear suspension and front suspension half way. Also took apart the diff and started putting it back. Removed 14 bushings from rear suspension, 8 to go.
For anyone thinking of using the $5 tool, be warned that it bends control arms pretty easily. Especially the upper rear control arms (small ones).
The Harbor Freight ball joint press kit makes it A LOT easier. And you need it anyways to remove the 2 bushings from the rear knuckles. So buy it. Use a 20% off coupon, comes out to <$60.
Pictars.
fail
fail
WIN!
Reply
0
0
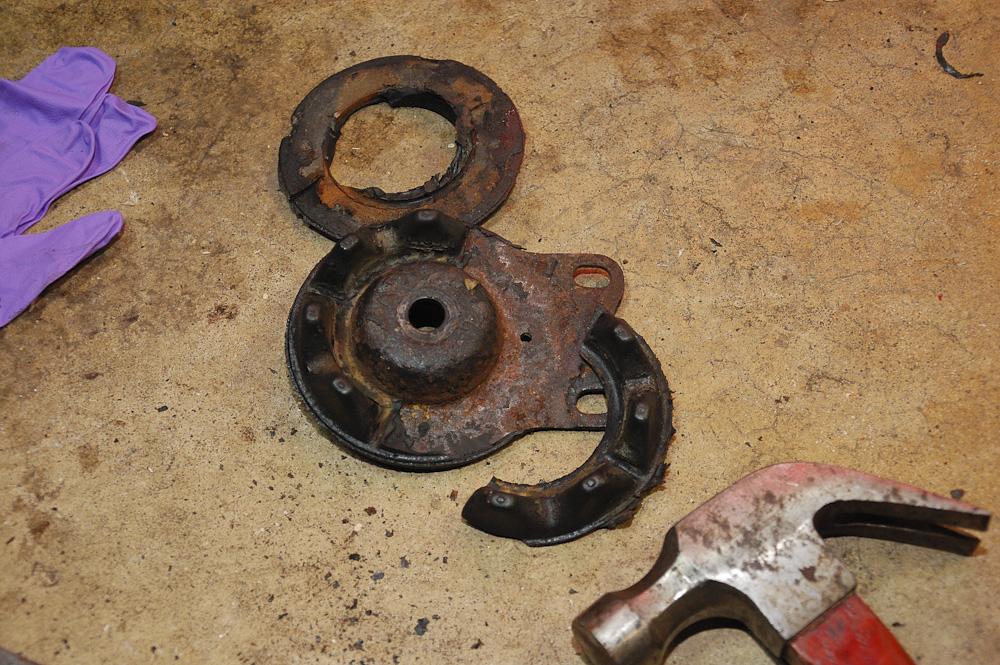
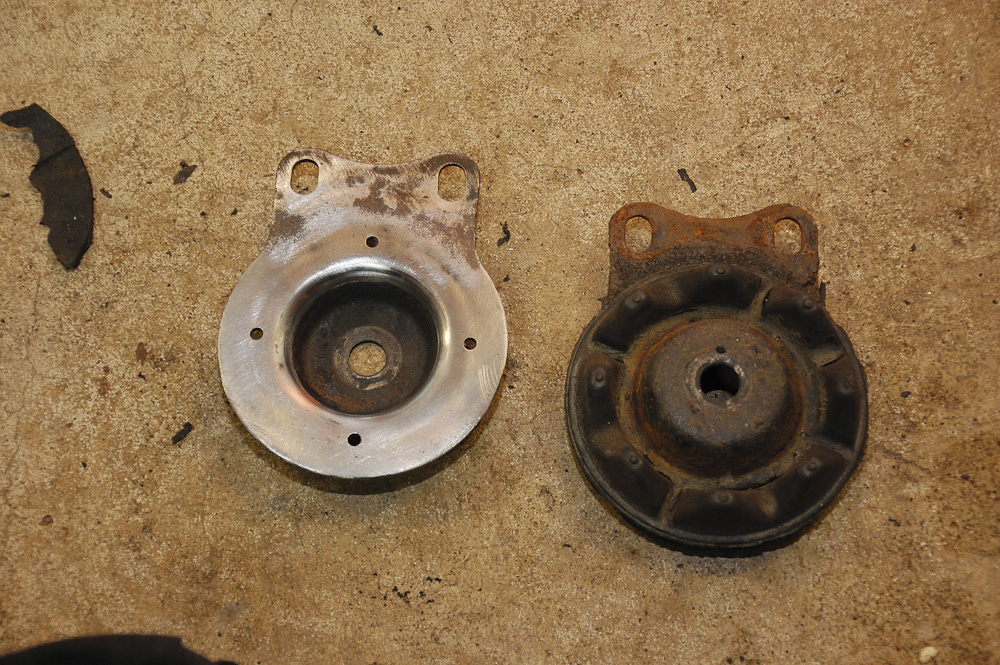
Now the diff. First, taking it apart, I stripped the longest bolt that holds the housing to the actual diff. No worries, out came my prying fork and an angle grinder.
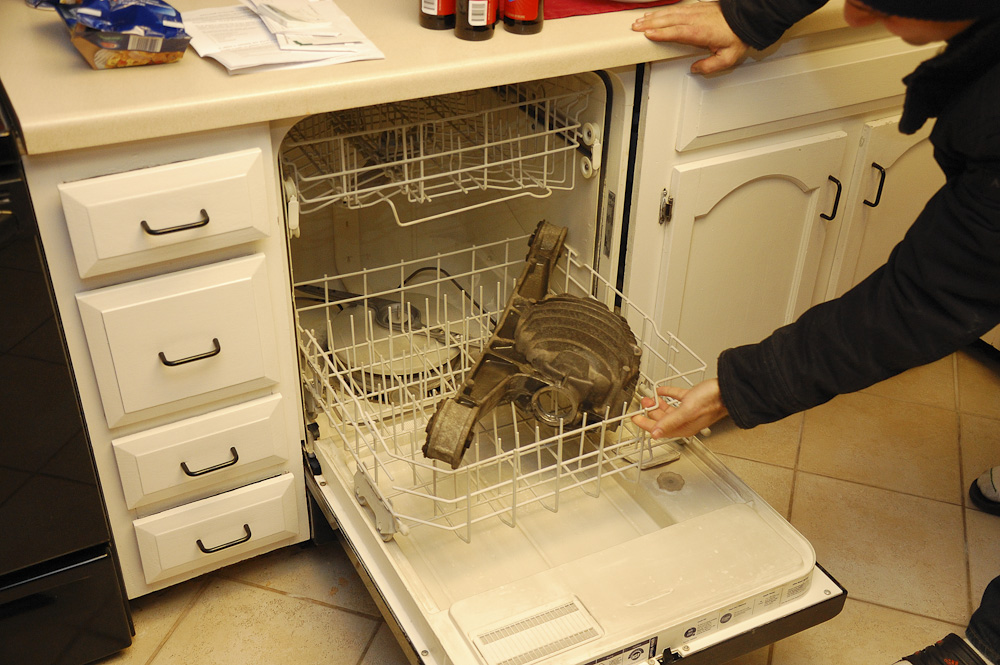
Then I washed it in my dishwasher. Washing stuff in the dishwasher is ok so far. Just make sure you don't wash IRON parts because they will be covered with surface rust after steam drying. Alu is fine. Dishwasher is fine too.
At this point the diff bushings were still in. I figured, damn, I don't have an easy way of getting them out. So today over lunch I went to a repair shop and asked if they could press the old bushings out. They basically bitched that it's too much work. I said ---- it, went to Advance Auto and bought a $25 4" puller. This, combined with the parts from the ball joint press from Harbor Freight = awesome tool for removing bushings. It's super easy.
Reply
0
0
Not really. I'll use the upper arms from my old 96, they are actually pretty good. I'll be painting all the control arms with POR15 (already arrived) so they should look like new.
Reply
0
0

For the $5 you need heat for it to really work well. Without heat my rears were starting to flex. Applied, heat, came out like butter.
How hard do you think it would be to put the engine in the same method you removed it?
How hard do you think it would be to put the engine in the same method you removed it?
Reply
0
0
The difficulty with doing it this way is that you can't get the legs of the engine hoist underneath the subframe. I haven't decided how I'll do it, yet.
I might do subframe without control arms + engine.
I might do subframe without control arms + engine.
Reply
0
0
I bought a cheap Borg Warner S246 off ebay. Really cheap. I'm not going to use it anytime soon (if ever?) but it's a cute little turbo.
Next to a my SR20 T25
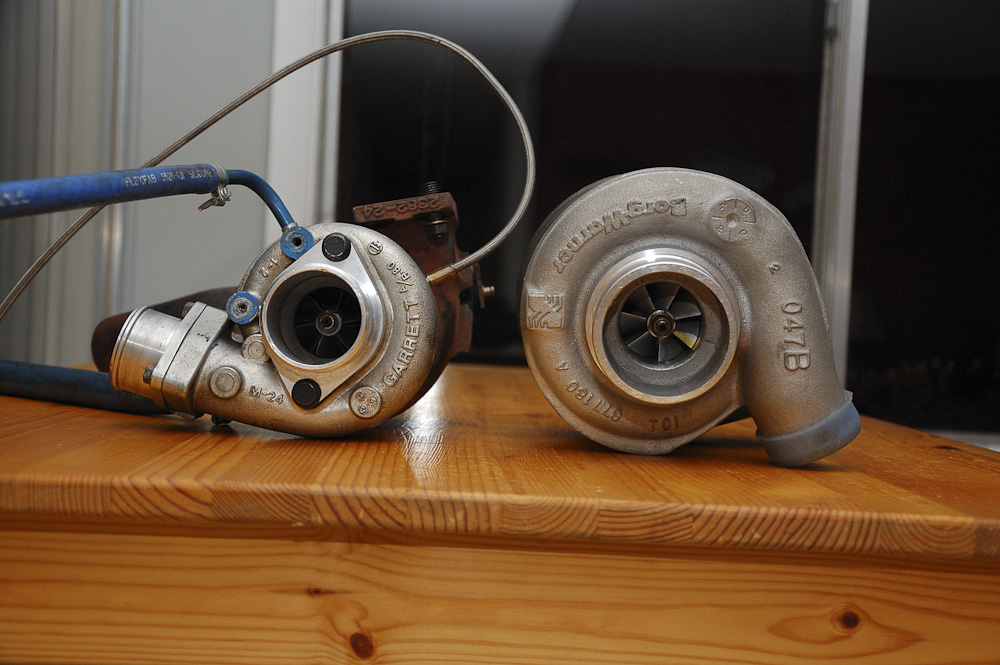
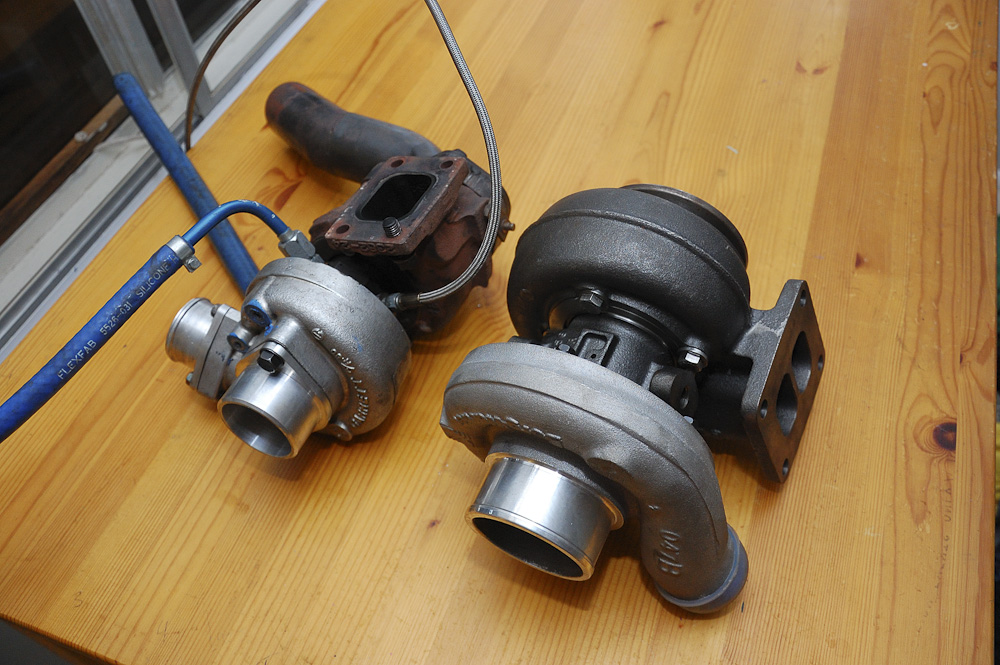
Journal bearings, twin scroll, oil only, easy and cheap to rebuild, should last approximately forever, gigantic.
4.21" v-band outlet, lol
Next to a my SR20 T25


Journal bearings, twin scroll, oil only, easy and cheap to rebuild, should last approximately forever, gigantic.
4.21" v-band outlet, lol
Reply
0
0

I can't PM you back since I don't have enough posts....but to paint my bay I used 4 cans of each:
Primer
Color
Clear
Came out amazing. I've rattle canned a lot of things, but the clear I used (Spraymax 2k) truly took this job to the next level. It just doesn't look like a rattle can job done in a tent...
Good score on the internals...I'm kinda wishing I would have jumped on that.
Bird
Primer
Color
Clear
Came out amazing. I've rattle canned a lot of things, but the clear I used (Spraymax 2k) truly took this job to the next level. It just doesn't look like a rattle can job done in a tent...
Good score on the internals...I'm kinda wishing I would have jumped on that.
Bird
Reply
0
0
thanks man! I feel kinda bad about doing the exact same engine bay. I thought about using duplicolor chrome and I think that'll just be aids and fail.
internals were relatively cheap but once you add everything else ($120 rings, for once) it stats adding up. Built engines aint cheap :(
edit: damn, that clear coat is like $20 a can. 4x20 = $80 D:
internals were relatively cheap but once you add everything else ($120 rings, for once) it stats adding up. Built engines aint cheap :(
edit: damn, that clear coat is like $20 a can. 4x20 = $80 D:
Reply
0
0


