When you click on links to various merchants on this site and make a purchase, this can result in this site earning a commission. Affiliate programs and affiliations include, but are not limited to, the eBay Partner Network.
I wanted to do something special for the valve cover. I always appreciated artistic painted valve covers. The B6 and BP engines get a nice aluminum cover that refinishes well and looks awesome. The Duratec-based L5-VE gets an injection molded plastic cover with tons of crevices and facets. Probably better suited to painting, but I took the valve cover to a local high school auto shop and they hydro dipped it for me. Turned out great, actually better than expected.
I chose a aesthetically neutral digital camo from TWN Industries. The pattern is WTP-460 Tiger Stripe Digital Snow. I kinda wanted something hip like pineapples over solid teal, but I think this fits the style of the car pretty well.
Took the opportunity to upgrade my fuel system to a return loop style. Eventually this car will run on E85. I'm in Wisconsin and we produce it right in my hometown. I get the impression the the E85 around the nation isn't equal, and content ranges down to the 60s even though its label 85. The ethanol fuel in this area has been proven by many to be true E85.
I did not get any pictures of dressing the new long block. That went as expected. New sensors all around and plenty of gasket maker sealed it back up.
Installing Dynotronics new thermostatic oil filter mount. A super slick oil filter block that has provisions for a turbo feed line, pressure sender and cooler circuit.
Engine back in cradle, transmission attached to engine and wire harness plugged back up. Time to lift it back into the car. Easy process and since I removed it, I know what to look for. Make sure the steering shaft is guided properly back to its rack connection. Also mind the brake line connection and the coolant lines that have a rub potential on the frame horns.
Next steps, all fluid lines reattached. Charge tubes and intercooler mounted. This is where I spend a lot of time wrapping wires with TESA tape and sleeve. Adding edge guard to run spots and generally routing things with care. This is where you can make major improvements in the system that simply paying a shop to swap your engine will miss.
Added a gas strut to the hood so I could delete the prop stay that was rubbing on the intake tube. That sort of stuff. This install is much cleaner than the previous two attempts.
Just before the power plant frame and driveshaft get reinstalled, now is the time to put that tasty 3.63 Tomei unit in its place.
Now Im looking at the front end of the car and I'm finding out exactly how the three aftermarket kits I intend to install here all interfere with each other. I knew the LRB aluminum under tray needs trimming for the splitter mounts. And the oil cooler mount uses a common location with the splitter mounts too.
Installing a loud *** horn. Something like this should be in every Miata build.
Mounting the horn in the stock location is not possible due to everything else I added to that area. So I inverted it and secured it one of the intercooler mounting bolts. I hope I don't have a issue with water collecting in the horn. I forgot to drill a small drain hole in the 'top' of the now upside down horn. But its behind the bumper right next to the intake, so I think it will be fine.
This is my solution to the LRB / Racebred / 1Goal oil cooler. Shown in green marker is the minimum trimming to the side scoops you will need to remove to allow for the splitter mounts.
The instructions for the oil cooler install call for a full window cut-out here to feed the cooler fins from the high pressure zone behind the tray. Since I trimmed one of the mounting tabs off the tray to fit the splitter brackets, I chose to just drill a field of holes (not quite a pattern.. lol) instead. Hopefully this will be enough flow to be chill in my climate and street use. The cooler has a puller fan, so good chance I'll be okay.
Oil cooler element mounted, spaced back to clear the splitter brackets and the remaining tray scoop. All wired in and ready for leak test.
That brings us up to current. next posts will be brake job, exhaust install and then fluid fill. Getting really close to first start and leak test. Soon this car will be back on the road with any luck!
Going turbo with basically stock brakes doesn't sound like the best idea to me. Everything else seems solid. Great build!
I do actually agree with you. This car had the factory brakes on it - down to the fluid prior to this rebuild. It was pretty inexpensive to refresh them back to OEM+ spec. I do anticipate figuring out a balanced BBK in the future when I turn the wick up and start going fast for real. I just haven't done my reading on that topic too much yet.
The car started, idled and warmed up to temp just fine without any leaks. Sounds sweet! But my tuning laptop has a junk battery after two years of no use and it wont take a charge. So now I am upgrading to the iFlash suite with EcuTek. No more laptop and cables, just android apps and Bluetooth.
Waiting for the Bluetooth dongle to arrive from Texas and I'll get the data logs. More coming soon, with videos hopefully.
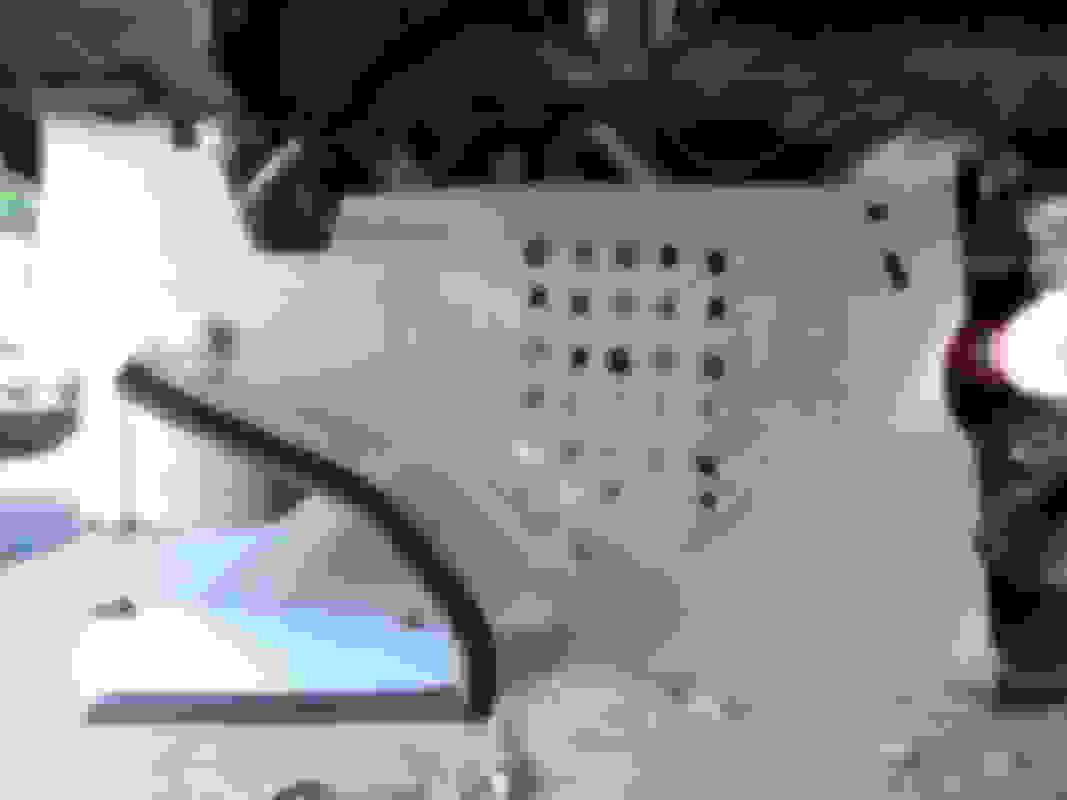
After having an otherwise very successful test run, I determined that I installed the incorrect coolant temperature sensor. The car starts and idles great with no leaks, exhaust or fluids! So thats good. But the temperature readout is over 200 degrees on cold start - as if its already at operating temperature - without a high idle and it stumbles with any throttle. After scratching my head for a bit, I discovered the part difference.
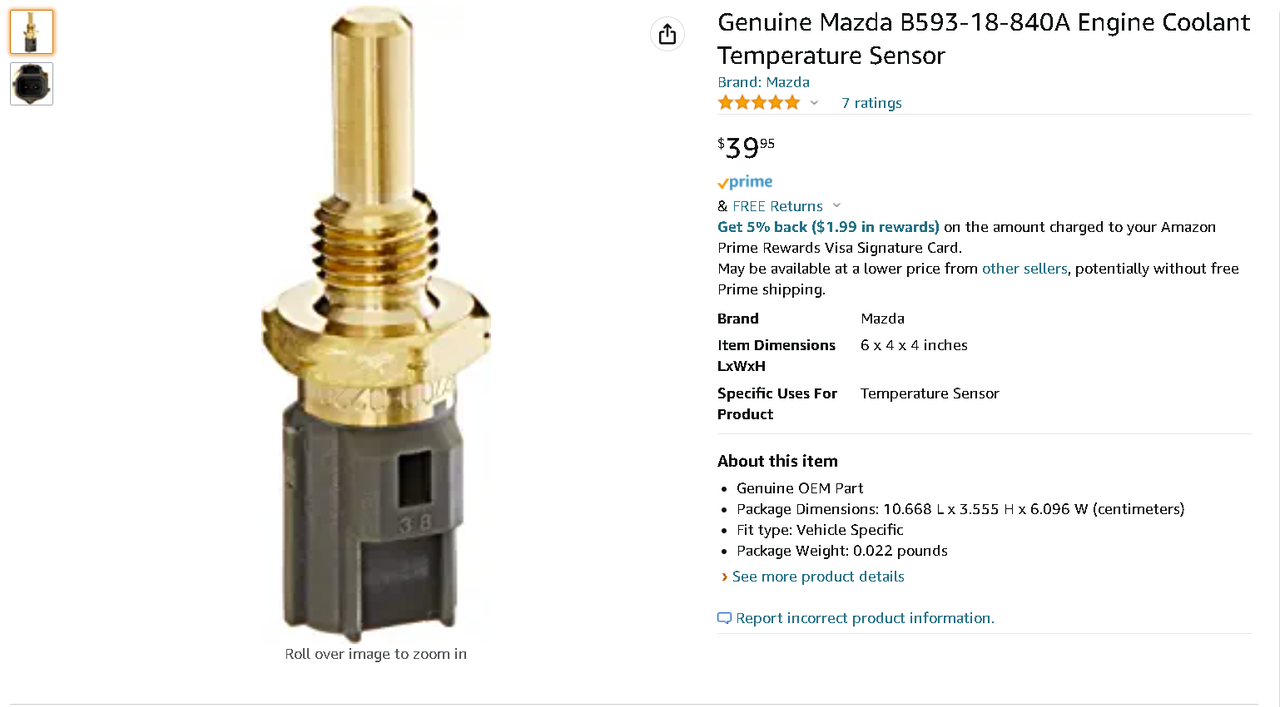
This is what I installed:
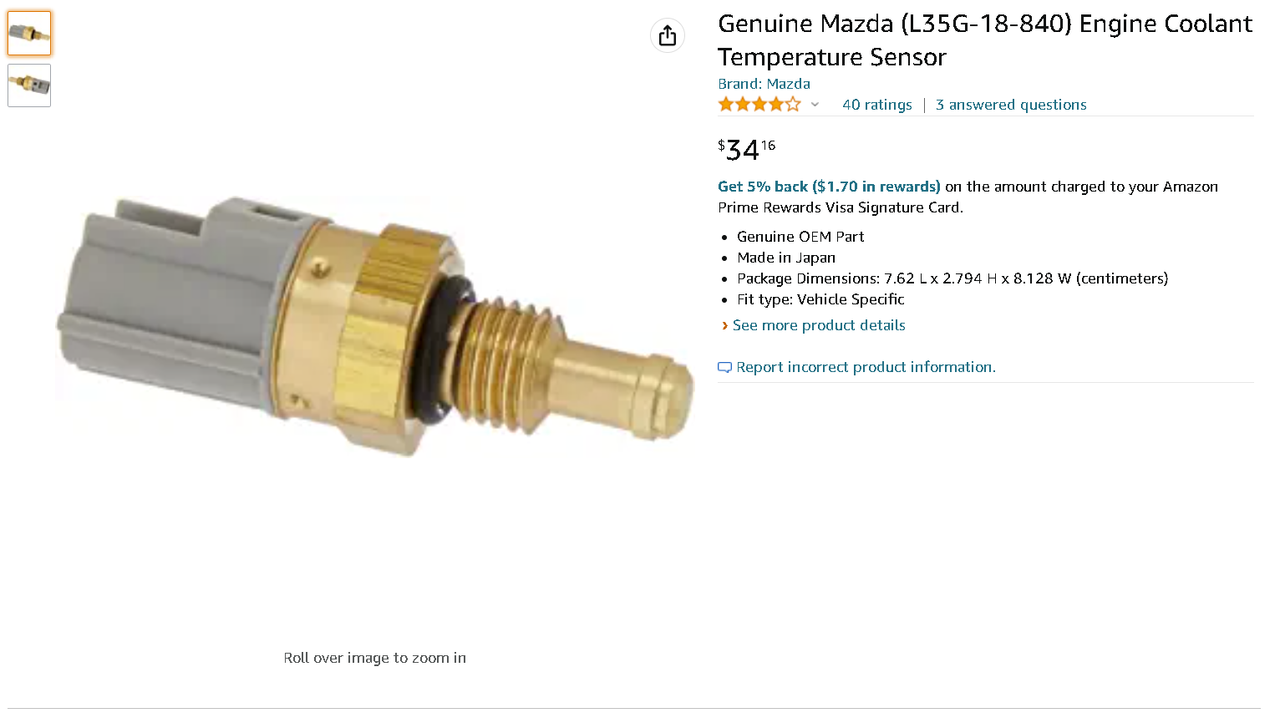
And this is what I should have installed:
Unfortunately, that means transmission must come out to access that sensor and replace it. Not exactly what I hoped for this late in the build.
Today is my birthday and a huge goal of mine was to be driving today. Oh well, I don't have the time to do the change right now so perhaps this weekend I can be driving.
Don't be like me and double check your part numbers for those inaccessible items.
You don't need to drop the trans for that. Just remove the middle bolt-in section of the wiper cowl. Getting all of the plastic loose is tedious but it's easy after that.
You don't need to drop the trans for that. Just remove the middle bolt-in section of the wiper cowl. Getting all of the plastic loose is tedious but it's easy after that.
Interesting, thanks for the information. I hadn't thought of removing the cowl. Looks like I need to open the coolant circuit to do this because of how the crossover tube is bolted to the cowl?
I think with my underbrace kit removed like I have it currently, transmission out might actually be quicker and easier.
I'm looking at 4 bolt for the driveshaft, eight for the PPF and then just the bell housing bolts. I have a transmission jack, so that will make it easier to get it out and moved.
I think my original plan is the way forward, since I've already done that and know exactly what I'm looking at.
I will take a serious look at this method this afternoon. Would be nice not to have to do any heavy lifting, just heaving leaning over the fender. I'm little wary as the image you posted is not technically and engine-in job and there is significantly less room to work with the engine fully installed against the firewall.
the fact you are considering transmission removal for a temp sensor replacement already shows you are far more ambitious of a person than I am. I'd be figuring out some awful backyard mechanic method of hacking it with 12 different wrenches fueled by hopes, dreams, and bloody knuckles
I'd be figuring out some awful backyard mechanic method of hacking it with 12 different wrenches fueled by hopes, dreams, and bloody knuckles
My buddy and I were just talking about how we need to stop trying stuff like that because of how frustrating it can be. haha.
Good news finally! I didn't need to remove the transmission. Turns out I have those small hands you need to get up in there with everything but the midpipe in place. Sensor fixed, double checks, tires on and we're rolling!
Feels great to move it under its own power again. Its half full of shitty two year-old gas so I need to run that through and start tuning. Brakes also need re-bleeding. First hit on the pedal goes soft to the floor but it pumps up by three tries. Every other system is working good.
 07-26-2022, 08:04 AM


 1
1