
Taifighter is building a Miata


IB Staff
Joined: Jun 2012
Posts: 4
Total Cats: 0
Core Width: 20" Width with End Tanks is 26
Core Height: 6.5
Core Thickness: 3.25
Inlet Diameter: 2.5"
Outlet Diameter: 2.5"
Inlet/Outlet Location: Center
Approx. Flow Rate for this intercooler: 520 CFM at 1.5PSi pressure drop
Approx. HP Rating for this intercooler: 350 HP
Core Height: 6.5
Core Thickness: 3.25
Inlet Diameter: 2.5"
Outlet Diameter: 2.5"
Inlet/Outlet Location: Center
Approx. Flow Rate for this intercooler: 520 CFM at 1.5PSi pressure drop
Approx. HP Rating for this intercooler: 350 HP
Reply
 0
0

0

Joined: Oct 2011
Posts: 5,731
Total Cats: 830
From: Detroit (the part with no rules or laws)
WTF staff?? ^^
I removed my tow hooks just like yours.
There is a bracket on the canister that has like a 10mm bolt. I just loosened it and pushed that canister up, and over to the passenger side a little. That gave me more than enough room. The rubber is a good idea though, i just slapped mine on using two of the existing two hook bolts.
I think i'm going to buy the HF heat knife to cut the top tabs on the bumper off.
I was gonna hit you up and ask how you mounted yours when I saw that the core would hit the AC canister if mounted to the frame where the tow hooks used to be. Upon further investigation of your build thread, I concluded it had to mount below it and I was just missing a piece off the car.
But I lost your number when I got this new WinMo phone from work ��
I bet yours went on faster.
But I lost your number when I got this new WinMo phone from work ��
I bet yours went on faster.
There is a bracket on the canister that has like a 10mm bolt. I just loosened it and pushed that canister up, and over to the passenger side a little. That gave me more than enough room. The rubber is a good idea though, i just slapped mine on using two of the existing two hook bolts.
I think i'm going to buy the HF heat knife to cut the top tabs on the bumper off.
Reply
0
0


Good to see my intercooler working out. I see you used some type of spacer? You can loosten the canister and lift it about 10mm. When I built these I actually had an NA with AC in the garage to test fit these. Looks great though! Thanks for the support.
Reply
0
0
Not that the way you did it won't work just fine but you'd get the IC to sit a little higher if you did this. I should have included these photos with the intercooler.
Take a marker and draw a line on the canister mount:
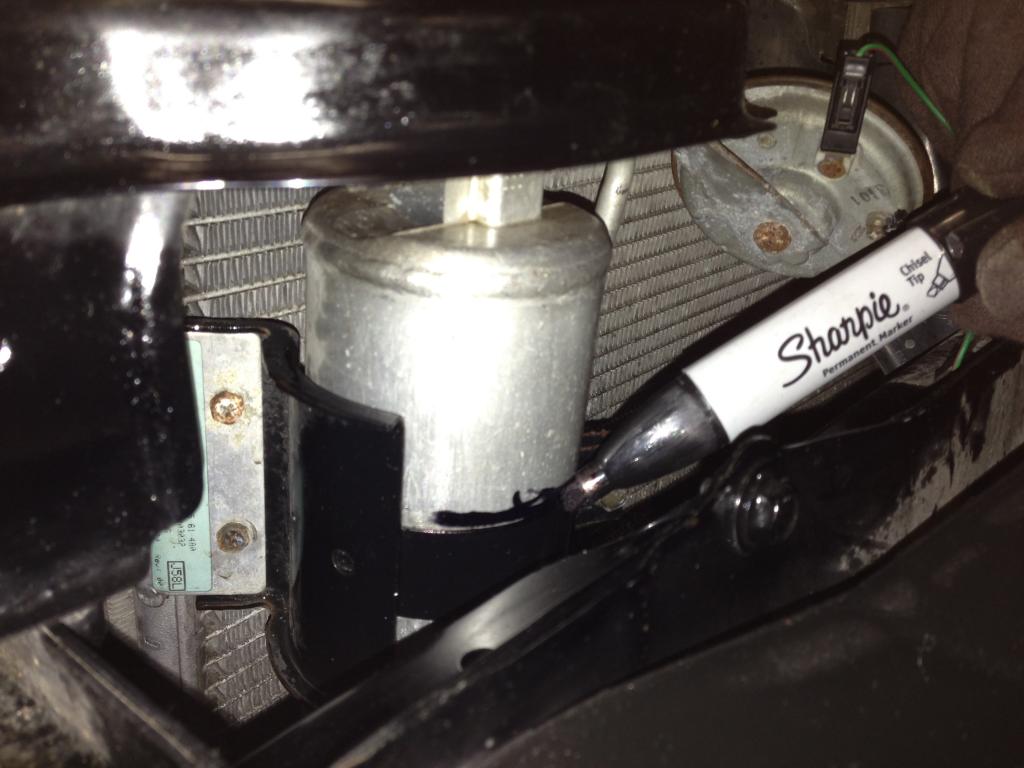
Then loosen the 10mm bolt on the mount, make sure it's free and the canister is broken loose from the clamp:
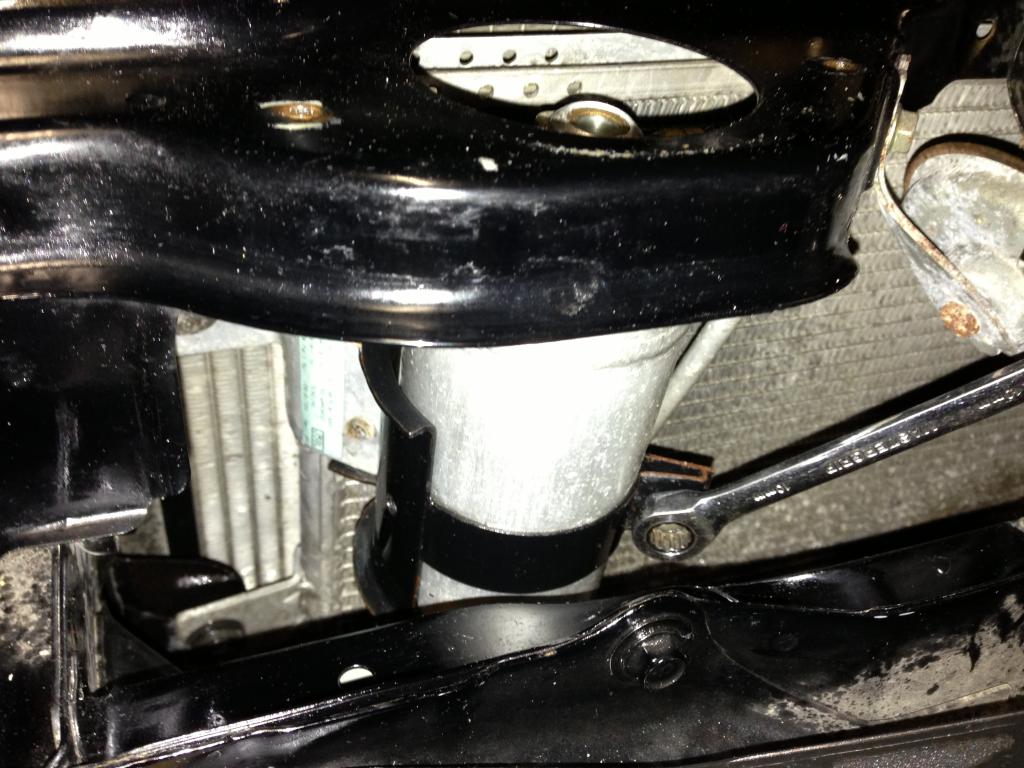
Then lift it up about 10-12mm and re-tighten:
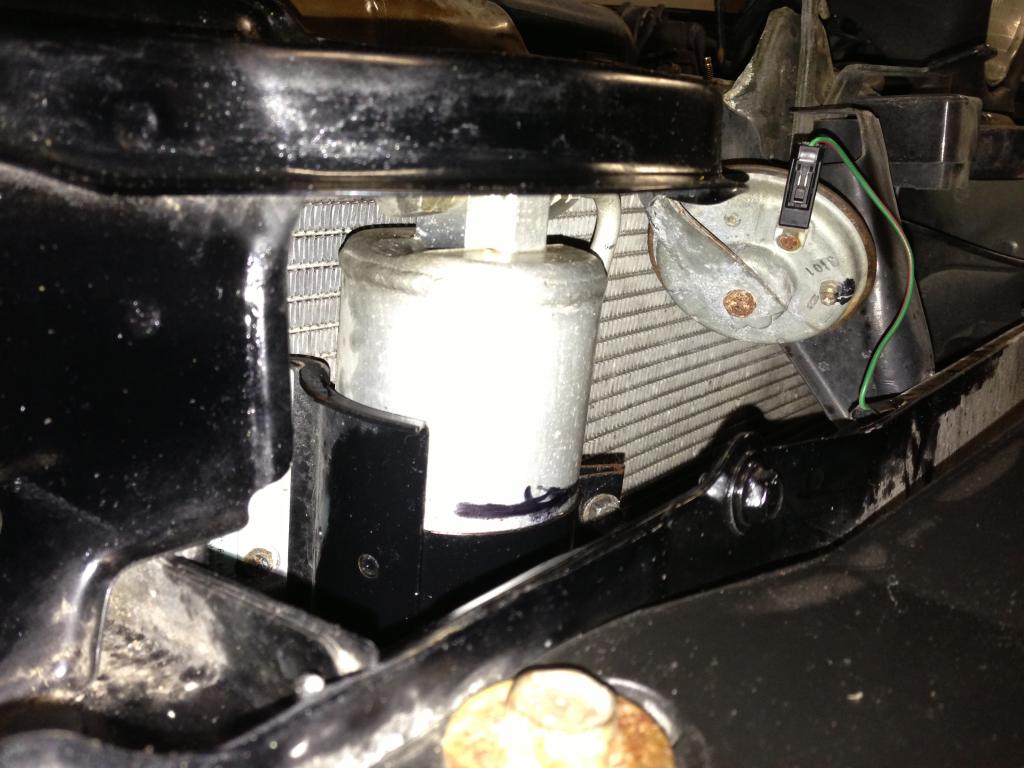
Should clear perfectly and you can get a nice flush mount with the mating surface on the tow hook mounting area. Should make the intercooler a little more ridged.
Take a marker and draw a line on the canister mount:
Then loosen the 10mm bolt on the mount, make sure it's free and the canister is broken loose from the clamp:
Then lift it up about 10-12mm and re-tighten:
Should clear perfectly and you can get a nice flush mount with the mating surface on the tow hook mounting area. Should make the intercooler a little more ridged.
Reply
0
0
Ok great - I just wanted to make sure it was not related to the fitment of the IC. I intended them to bolt right up. Good luck with the build boss. Looking great so far.
Reply
0
0

Thread Starter
Junior Member
iTrader: (1)
Joined: Mar 2012
Posts: 111
Total Cats: 0
From: Northwest Indiana
Good news: Innovate warrantied my mtx-l so it should be here soon. Yay.
Now I will hook up my dimming capabilities:
Also, you can take it from the back of the dimmer ****, same red/black wire goes there.
Pretty much anything in the interior that is backlit when the lights are on will have a red/black wire and a red wire going to it. The red/black is the switched +12, the red is the variable closure to ground through the dimmer ****. FYI- they're not using a rheostat, it's PWMed.
Last edited by Taifighter; Mar 17, 2013 at 08:05 PM.
Reply
0
0

Perfect for doing away with the tan lower dash. I used it on my lower dash in V8 Miata to great success. Mine was black but scratched up.
Have also used it on typical faded silver-looking black seats - right on the fabric. Nice black color that didn't come off.
Nice build thread so far.
Reply
0
0
Thread Starter
Junior Member
iTrader: (1)
Joined: Mar 2012
Posts: 111
Total Cats: 0
From: Northwest Indiana
Perfect for doing away with the tan lower dash. I used it on my lower dash in V8 Miata to great success. Mine was black but scratched up.
Have also used it on typical faded silver-looking black seats - right on the fabric. Nice black color that didn't come off.
Nice build thread so far.
Reply
0
0

I'm not sure if it would work on carpet. One thing to try -and you can test it under the seat to see if it takes - at the grocery store or drug store they will sell little bottles of dye - commonly they will have RIT brand. It's really cheap and because it's a dye there is no build-up so it can't rub off. Try it under the seat first if you want to test it.
EDIT:
I just did a quick search and boom, there it is. Writeup on another forum.
Dying your carpet with Rit dye - DSM Forums
EDIT:
I just did a quick search and boom, there it is. Writeup on another forum.
Dying your carpet with Rit dye - DSM Forums
Reply
0
0


