
DIY SS Bottom Mount Manifold


Thread Starter
Elite Member
iTrader: (8)
Joined: Aug 2007
Posts: 2,712
Total Cats: 5
From: Bellingham, Wa
Ya this whole having a job thing is really taking a toll on my progress. I dont have to go to work til 2pm and keep thinking i'll have all morning to work on it but I just feel like being lazy all morning instead of working on anything.
Plus its freezing ******* cold in my garage right now.
Going to the hardware store today to pick up 3/8-24 studs, a tap and a drill bit.
Question for you experts on building a downpipe: Do you start at the exhaust and work your way to the turbo or vice versa? Or do you start both ends and meet in the middle? Been developing my plan of attack in my head the last couple days.
Reply
 0
0

0

The head flange is laser-cut. Or watterjetted, but probably laser. Either way, the little slots for each hole means the laser can cut the outside profile of the flange AND cut the bolt holes in one continuous pass.
Reply
0
0
ahhhhhhhhhhhhhhhh I didn't think of that but it makes a ton of sense. Thanks!
Reply
0
0
Ya this whole having a job thing is really taking a toll on my progress. I dont have to go to work til 2pm and keep thinking i'll have all morning to work on it but I just feel like being lazy all morning instead of working on anything.
Plus its freezing ******* cold in my garage right now.
Going to the hardware store today to pick up 3/8-24 studs, a tap and a drill bit.
Question for you experts on building a downpipe: Do you start at the exhaust and work your way to the turbo or vice versa? Or do you start both ends and meet in the middle? Been developing my plan of attack in my head the last couple days.
Plus its freezing ******* cold in my garage right now.
Going to the hardware store today to pick up 3/8-24 studs, a tap and a drill bit.
Question for you experts on building a downpipe: Do you start at the exhaust and work your way to the turbo or vice versa? Or do you start both ends and meet in the middle? Been developing my plan of attack in my head the last couple days.
Reply
0
0

Reply
0
0
Thread Starter
Elite Member
iTrader: (8)
Joined: Aug 2007
Posts: 2,712
Total Cats: 5
From: Bellingham, Wa
Ok thats what I thought as well. Was just checking my logic.
I got 2 of the new studs in the manifold (after drilling/tapping) but there isn't really any room to fit a box ended wrench in between the turbine housing and the stud to make use of Tim's nuts. I'm considering grinding some of the casting away. We'll see.
I got 2 of the new studs in the manifold (after drilling/tapping) but there isn't really any room to fit a box ended wrench in between the turbine housing and the stud to make use of Tim's nuts. I'm considering grinding some of the casting away. We'll see.
Reply
0
0
Junior Member

Joined: Aug 2008
Posts: 390
Total Cats: 1
Easier - Ease would be from design front as cutting as like saying print and those slots will be more effort once the manifold design has been finished.
Faster - More cuts should equal more time but as you say one pass means less travel but given the speed of waterjets I doubt that 10 seconds would matter much.
Cheaper - Doubt it given cost of metal and time will be irrelevant as cuts are the same.
Admittedly the slits may help by allowing slight variance in head mounting holes but that seems to be only reason to CAD them in except for some thermal effects. Is the reason Tim and Curly have these cuts because they bought from the same supplier? I've got my own CAD files for 1.6 intake and exhaust which I've had cut into 1/2" thick steel plate for �80 (including T25 flanges and a custom 3" flange which I'm using to build an active exhaust). Seems like price for work isn't the problem or at least in the UK. Tim?
I really am enjoying this thread it's too wet here for me to start me build so I'm very excited to see such good work from someone with little experience like me (gives me hope
 ).
).
Reply
0
0
Ok thats what I thought as well. Was just checking my logic.
I got 2 of the new studs in the manifold (after drilling/tapping) but there isn't really any room to fit a box ended wrench in between the turbine housing and the stud to make use of Tim's nuts. I'm considering grinding some of the casting away. We'll see.
I got 2 of the new studs in the manifold (after drilling/tapping) but there isn't really any room to fit a box ended wrench in between the turbine housing and the stud to make use of Tim's nuts. I'm considering grinding some of the casting away. We'll see.
Reply
0
0
Thread Starter
Elite Member
iTrader: (8)
Joined: Aug 2007
Posts: 2,712
Total Cats: 5
From: Bellingham, Wa
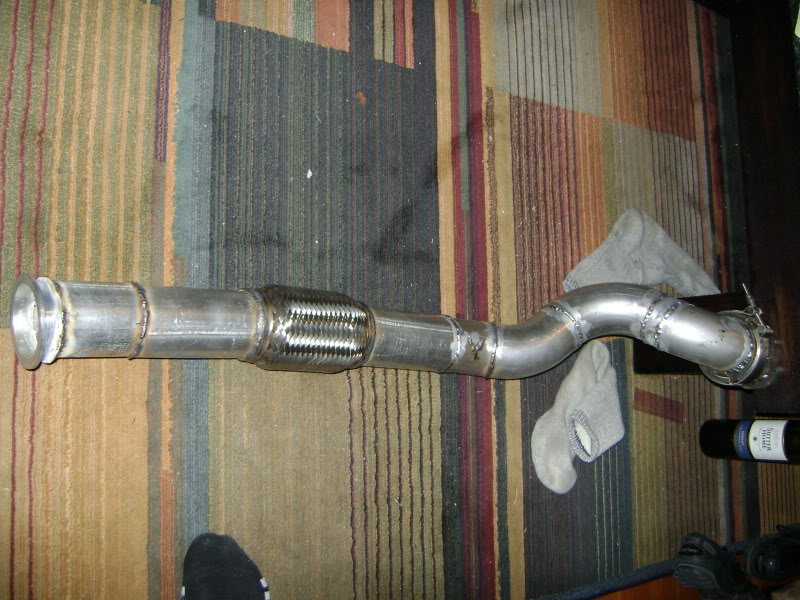
Woohoo! Update! Warning: Newb welding content.
Downpipe just about done. Going to grind down some of the welds to make sure there aren't any leaks and perhaps pretty some of them up.
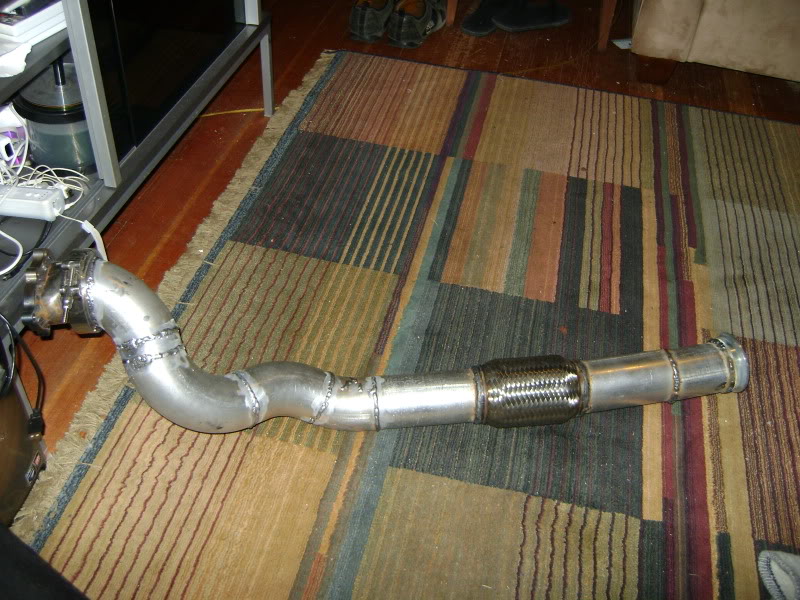
Some closeups of a couple of my best beads.
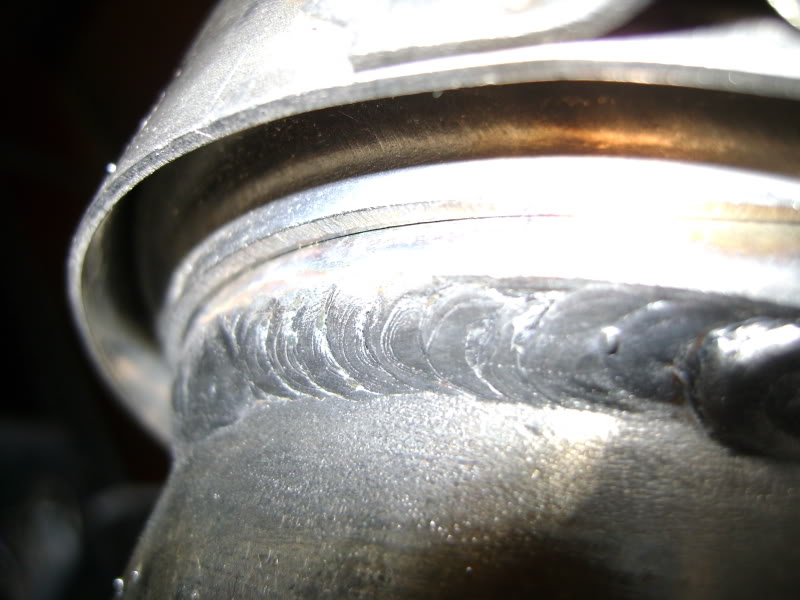
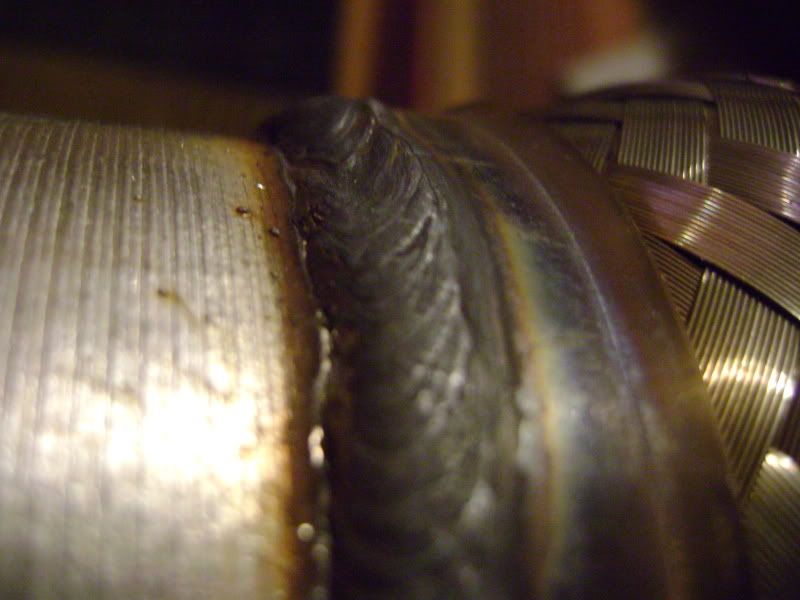
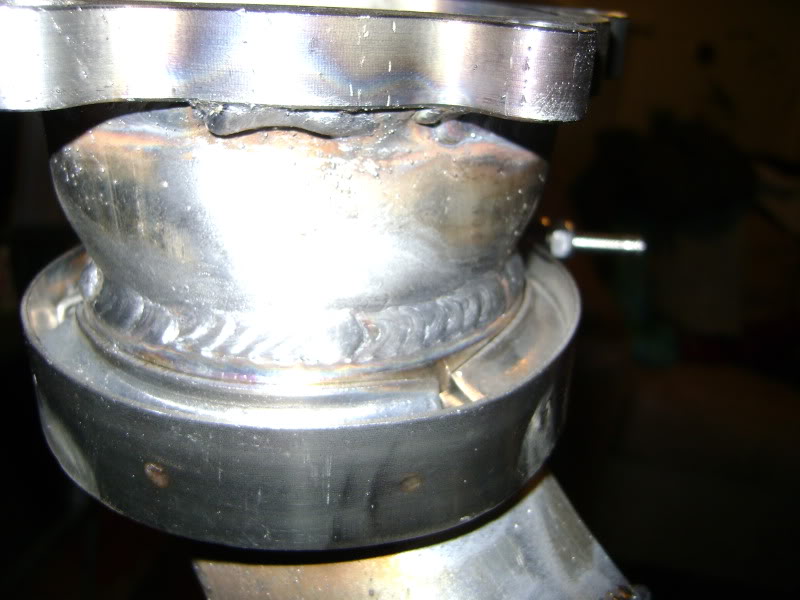
I've got about 30-40 minutes of actual welding experience at this point. I start rough when I begin welding and as I get some practice I get better. Some of the welds on the downpipe look like total **** because of my newbishness in cutting and fitting so there were big gaps to fill. Next time i'm doing this with a chop saw. No more cutoff wheels on the angle grinder.
Downpipe just about done. Going to grind down some of the welds to make sure there aren't any leaks and perhaps pretty some of them up.
Some closeups of a couple of my best beads.
I've got about 30-40 minutes of actual welding experience at this point. I start rough when I begin welding and as I get some practice I get better. Some of the welds on the downpipe look like total **** because of my newbishness in cutting and fitting so there were big gaps to fill. Next time i'm doing this with a chop saw. No more cutoff wheels on the angle grinder.
Last edited by wayne_curr; Dec 11, 2009 at 04:48 AM.
Reply
0
0

Thread Starter
Elite Member
iTrader: (8)
Joined: Aug 2007
Posts: 2,712
Total Cats: 5
From: Bellingham, Wa
Yep  It takes less than 60 seconds to put this downpipe in. Its an amazing experience versus the Begi downpipe which took roughly 48 hours and an act of god to get in and out.
Incidentally, I love the DIY aspect of being able to incorporate neat features like v-bands without that outrageous cost of paying someone else to make it all. Been a really fun build except that the cold outside is oppressive. Luckily my friend's kerosene heater keeps the garage just warm enough to kind of see some breath, but just barely.
Then you open the door to let all the welding smoke out and its freezing cold again in seconds :(
It takes less than 60 seconds to put this downpipe in. Its an amazing experience versus the Begi downpipe which took roughly 48 hours and an act of god to get in and out. Incidentally, I love the DIY aspect of being able to incorporate neat features like v-bands without that outrageous cost of paying someone else to make it all. Been a really fun build except that the cold outside is oppressive. Luckily my friend's kerosene heater keeps the garage just warm enough to kind of see some breath, but just barely.
Then you open the door to let all the welding smoke out and its freezing cold again in seconds :(
Reply
0
0
Looks like a great first start! Good job. EDIT: and definitely nice using v-bands!!
Reply
0
0


Thread Starter
Elite Member
iTrader: (8)
Joined: Aug 2007
Posts: 2,712
Total Cats: 5
From: Bellingham, Wa
Thanks guys. After I tidy up this downpipe and put in an O2 sensor bung all I need to do is figure out how i'm re-routing my coolant/modifying my mixing manifold. Thinking of freeze plugging the existing heatercore return hole and drilling/tapping a new one on top for a barbed fitting.
Reply
0
0


