
x8mrxjohn8x's Build Thread


Thread Starter
Junior Member
iTrader: (1)
Joined: Jun 2009
Posts: 176
Total Cats: 0
From: Los Angeles, California
Hello. I planned to turbo my miata about 2 years ago but felt that I didn't have the knowledge required to go through my build. After 2 years of reading through this forum, I am starting to build my turbo miata.
I have about 2 weeks to finish my build. I will be driving this car to UCSD for college and school is around the corner.
I already finished installing these: raceland coilover, 460cc injectors, MSPNP, 6uLs 1st gen, artech exhaust, cat back, and highflow cat, IAT sensor.
I pretty much have everything I need to finish the install.
How do I post pictures directly on the forum page so that people will not have to click the small attachment to expand the picture?
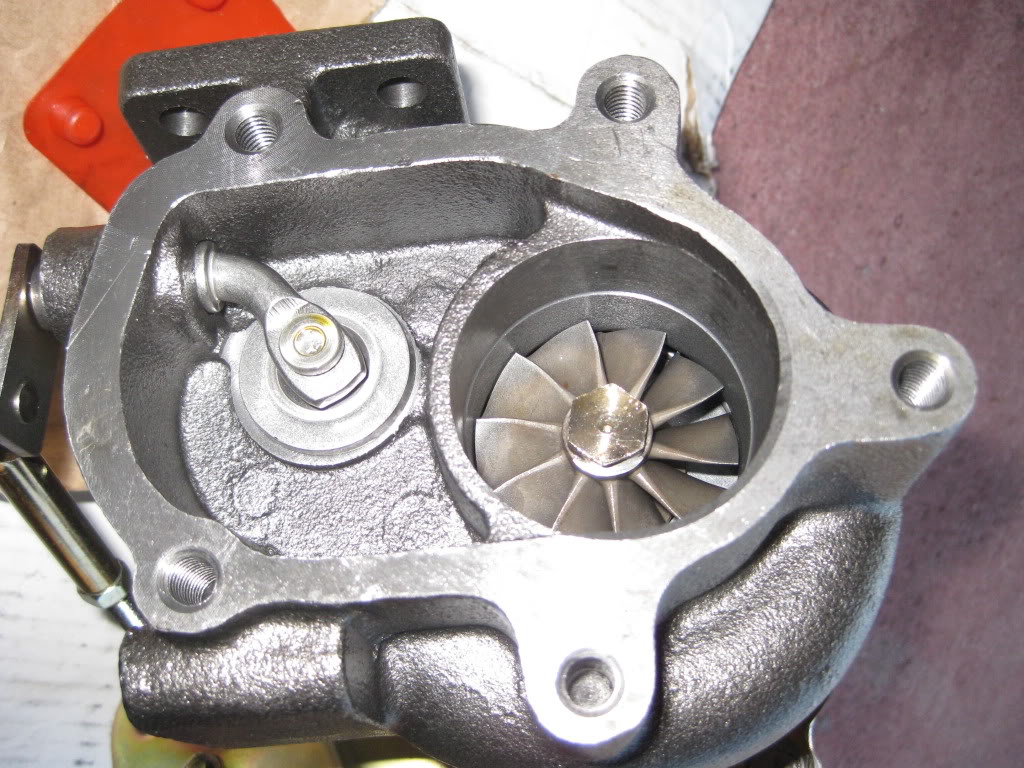
I bought the wrong turbo and the 5 bolt exhaust flange on the turbo won't fit the downpipe flange artech made for me. So, I am guessing that the turbo I bought is a different 5 bolt flange.
I will continue to post as soon as I learn how to post up pictures.
I have about 2 weeks to finish my build. I will be driving this car to UCSD for college and school is around the corner.
I already finished installing these: raceland coilover, 460cc injectors, MSPNP, 6uLs 1st gen, artech exhaust, cat back, and highflow cat, IAT sensor.
I pretty much have everything I need to finish the install.
How do I post pictures directly on the forum page so that people will not have to click the small attachment to expand the picture?
I bought the wrong turbo and the 5 bolt exhaust flange on the turbo won't fit the downpipe flange artech made for me. So, I am guessing that the turbo I bought is a different 5 bolt flange.
I will continue to post as soon as I learn how to post up pictures.
Reply
 0
0

0

Thread Starter
Junior Member
iTrader: (1)
Joined: Jun 2009
Posts: 176
Total Cats: 0
From: Los Angeles, California
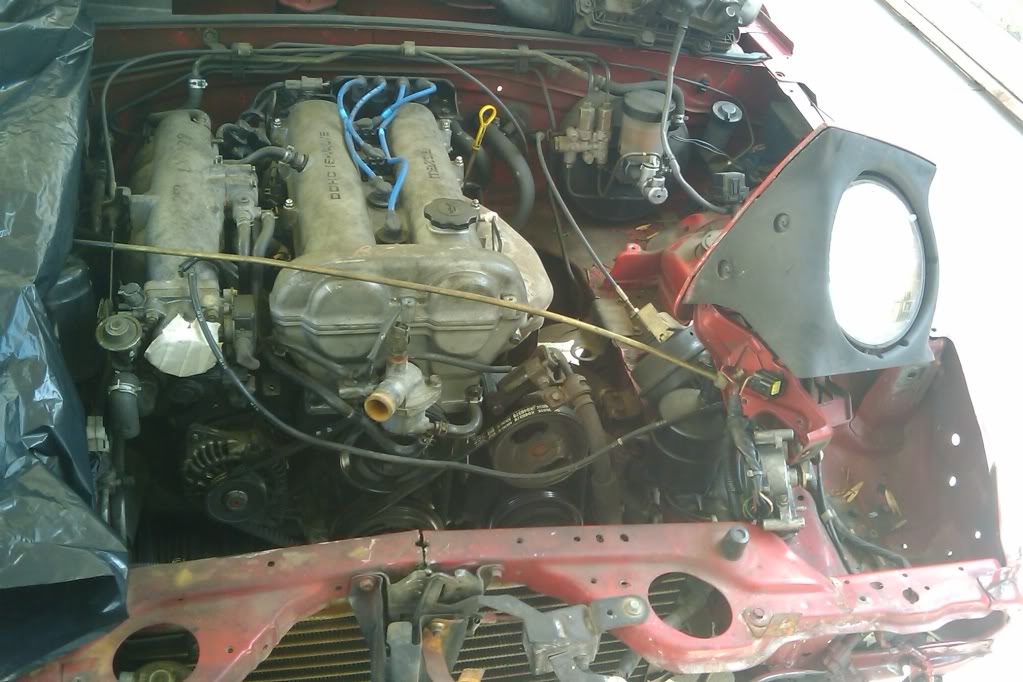
Old stock exhaust manifold is off. I will be running a topmount setup so I can keep PS and AC
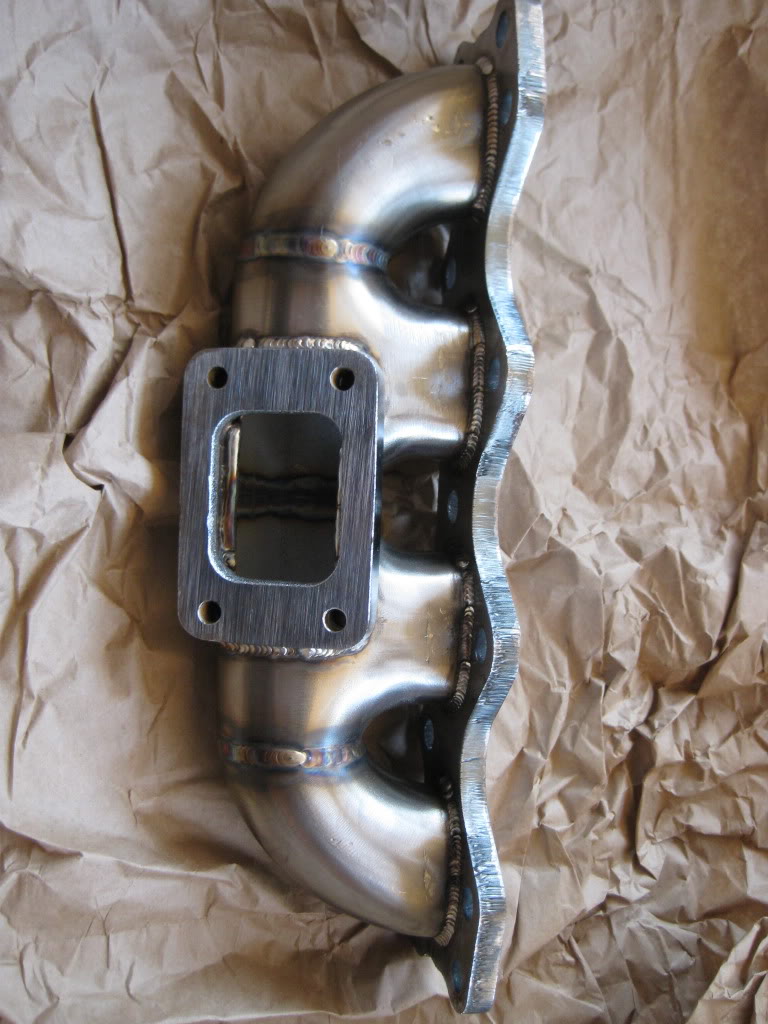
this is my simple log manifold built by artech.
All this is going in very soon
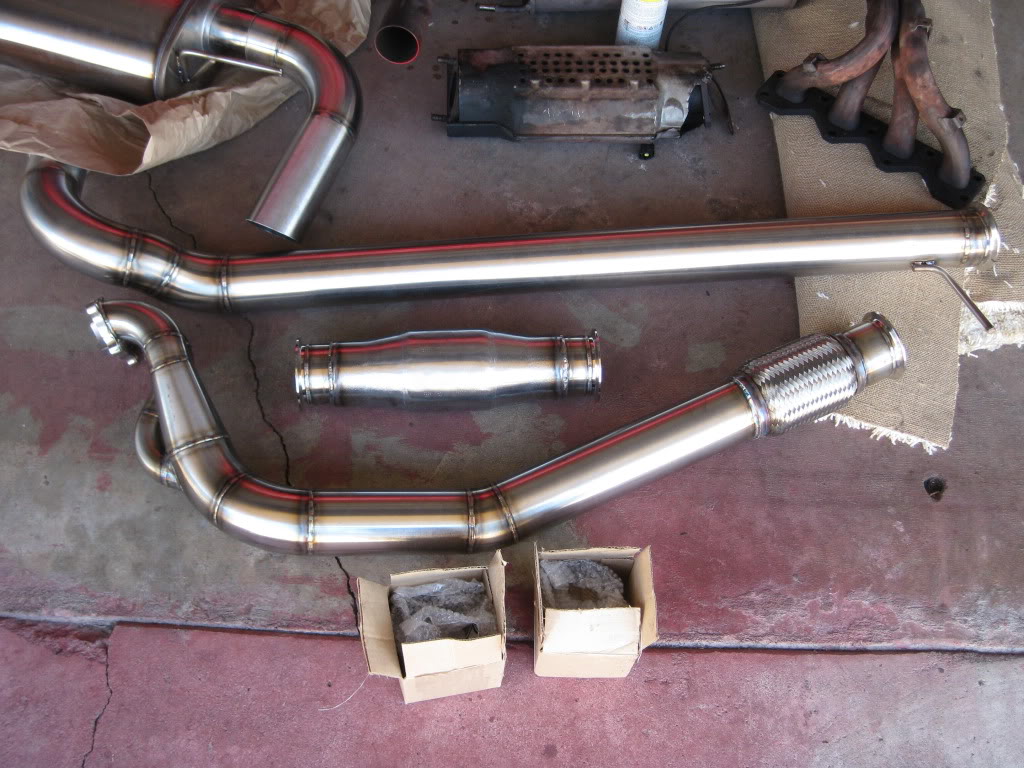
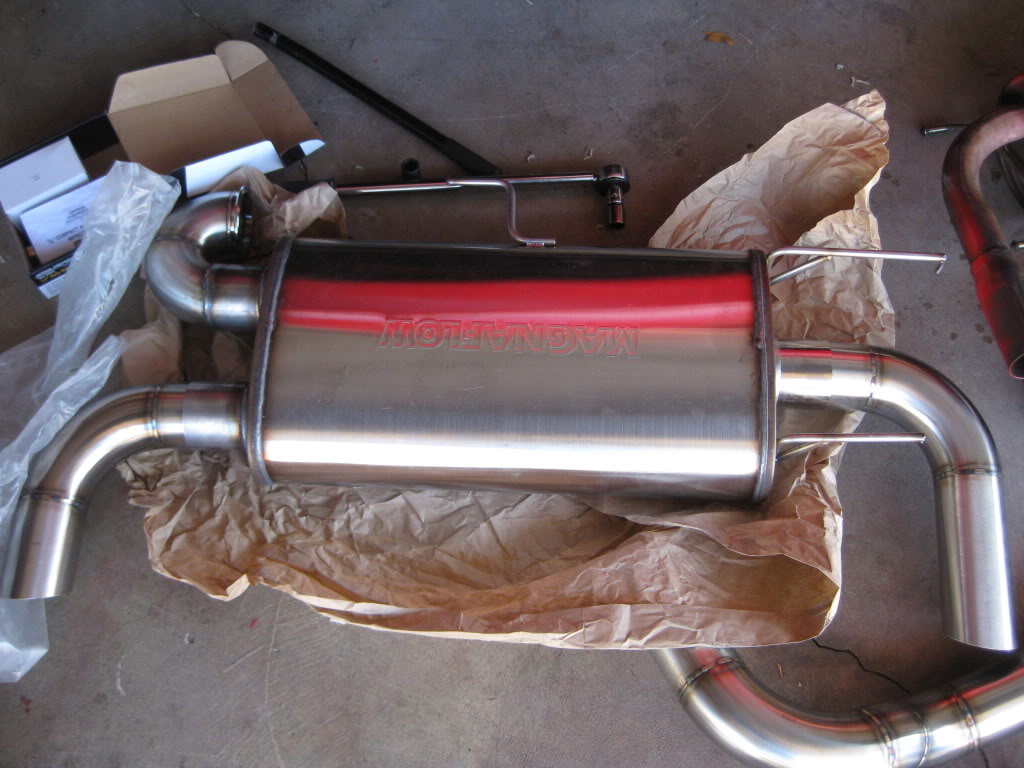
My dual exhaust built by artech again. It is too heavy when mounted and slants to one side so I need to make another hanger. Artech warned me about the problem beforehand.
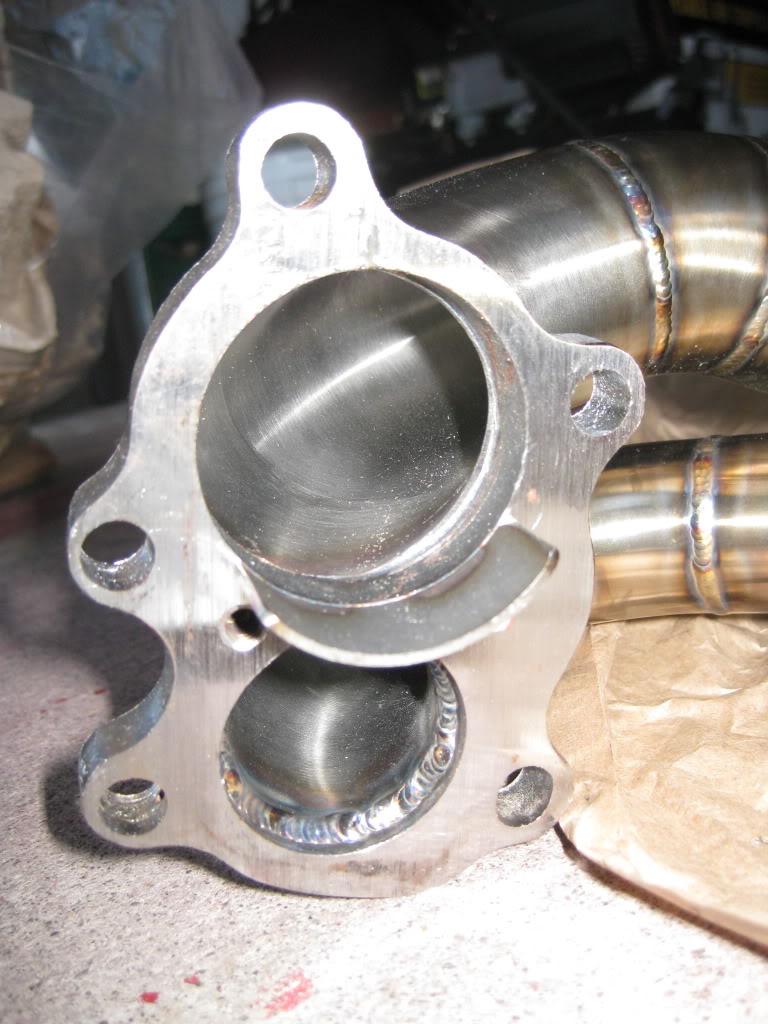
This is my turbo flange and downpipe flange. Both look idenitcal but the Downpipe flange is smaller than the turbo's flange. Can anyone lead me to a chinacharger turbo that has a similar flange as my downpipe??
I will need alot of help from all of you guys because this is my first project ever and my skill in auto mechanics isn't the greatest.
Reply
0
0

those exhaust parts....mmmmmm
the flanges could be different due to some chinachargers having a weird one off 5 bolt design while artech made your dp with the traditional t25 5 bolt flange
My godspeed turbo doesn't work with any traditional t25 dp flange. Same size, and very similar in design, but just a BIT different. Enough to confuse the hell out of you and frustrate you..lol
Reply
0
0

Junior Member
Joined: Sep 2010
Posts: 48
Total Cats: 0
From: San Diego, CA
Good to see another boosted miata will be hitting the streets of SD soon!
I myself just sold my SR s14 and am in the market for a cheap NA project to work on.
Looks like yours is coming along nicely

What are your power goals?
Best of luck with the build, I'll be following along with ya'.
Maybe by years end we can cruse up through del mar and PCH.
Reply
0
0
Thread Starter
Junior Member
iTrader: (1)
Joined: Jun 2009
Posts: 176
Total Cats: 0
From: Los Angeles, California
@BewstinSDx5
It's going to be my first year at UCSD. I am a transfer student. My power goals is 180hp. I know with the stuff I have, I can probably reach way higher goals, but I just want a reliable street car for now. I will probably be up and down PCH with my top down every weekend. =)
It's going to be my first year at UCSD. I am a transfer student. My power goals is 180hp. I know with the stuff I have, I can probably reach way higher goals, but I just want a reliable street car for now. I will probably be up and down PCH with my top down every weekend. =)
Reply
0
0


I'm Miserable!
Joined: May 2010
Posts: 44
Total Cats: 0
From: Raleigh
To add, a WBo2 is really only a necessity when it comes to tuning, and if you want to monitor your A/F ratio. Remember, the further downstream your sensor is mounted, the less fluctuation or readings you will get.
Reply
0
0


Where's the "take this advice with a grain of salt" icon?
You can replace the narrowband o2 with the wb02, MS needs one or the other. It doesn't just use MAP to adjust the "A/F changes" (pulsewidth), it can take in mind the a/f ratio it's reading and make adjustments in order to achieve more ideal ratios.
It is true, once you are tuned you don't "need" the o2, but there's no reason to not keep it installed 24/7 and keep closed loop fueling ON.
The further downstream the sensor, the less the exhaust heat can damage the sensor. You want to put it before the cat but far enough away from the turbo so the heat does not shorten the lifespan of the sensor.
Reply
0
0
I'm Miserable!
Joined: May 2010
Posts: 44
Total Cats: 0
From: Raleigh
Just so I can get this straight, are you saying that one should leave the downstream narrowband o2 in place, and install the wbo2 before the cat? I have had my wideband installed completely independent of the ecu before....whether that was right or not idk...
Reply
0
0
Thread Starter
Junior Member
iTrader: (1)
Joined: Jun 2009
Posts: 176
Total Cats: 0
From: Los Angeles, California
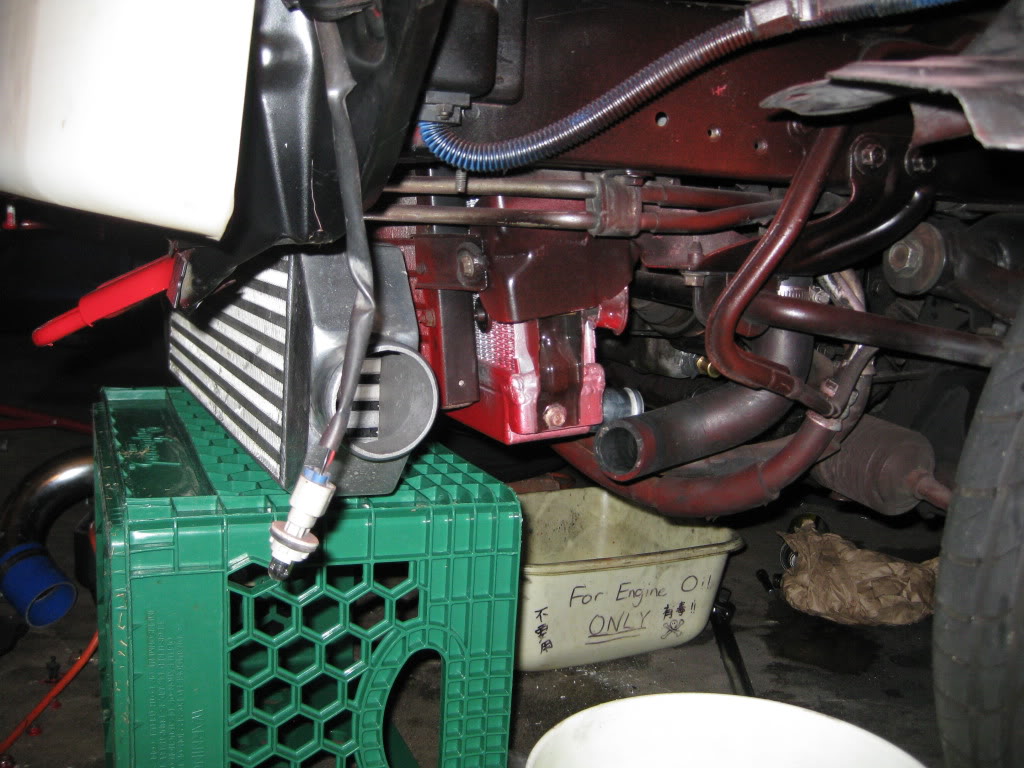
I finally got around to install the downpipe and manifold. I had to remove the bracket that was holding the stock exhaust. One bolt wouldn't come loose so I cut the whole metal piece off.
I test fitted the turbo and everything seems like it will fit 100%.
Here is a picture of the downpipe and manifold in.
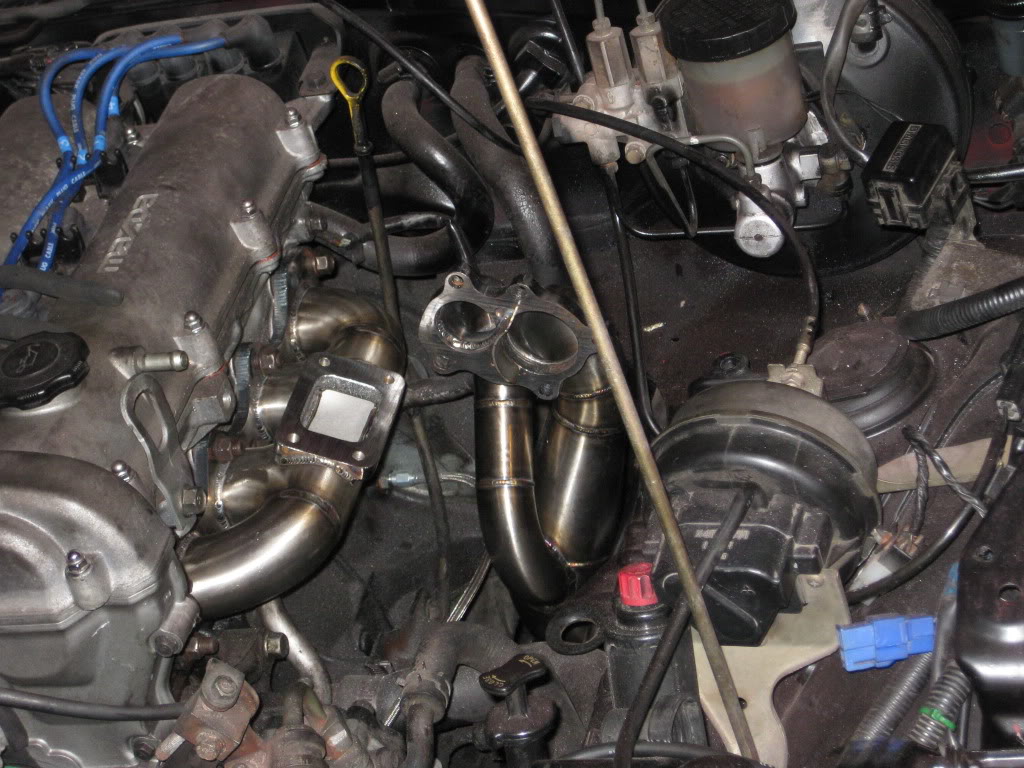
Now I have some questions, do you guys think that the intercooler is too low positioned? I know this intercooler is a little big to have, considering I will be keeping AC and PS. But, I already had this intercooler from a long time ago and do not want to buy another one.

I test fitted the turbo and everything seems like it will fit 100%.
Here is a picture of the downpipe and manifold in.
Now I have some questions, do you guys think that the intercooler is too low positioned? I know this intercooler is a little big to have, considering I will be keeping AC and PS. But, I already had this intercooler from a long time ago and do not want to buy another one.
Last edited by x8mrxjohn8x; Sep 13, 2010 at 03:34 AM.
Reply
0
0
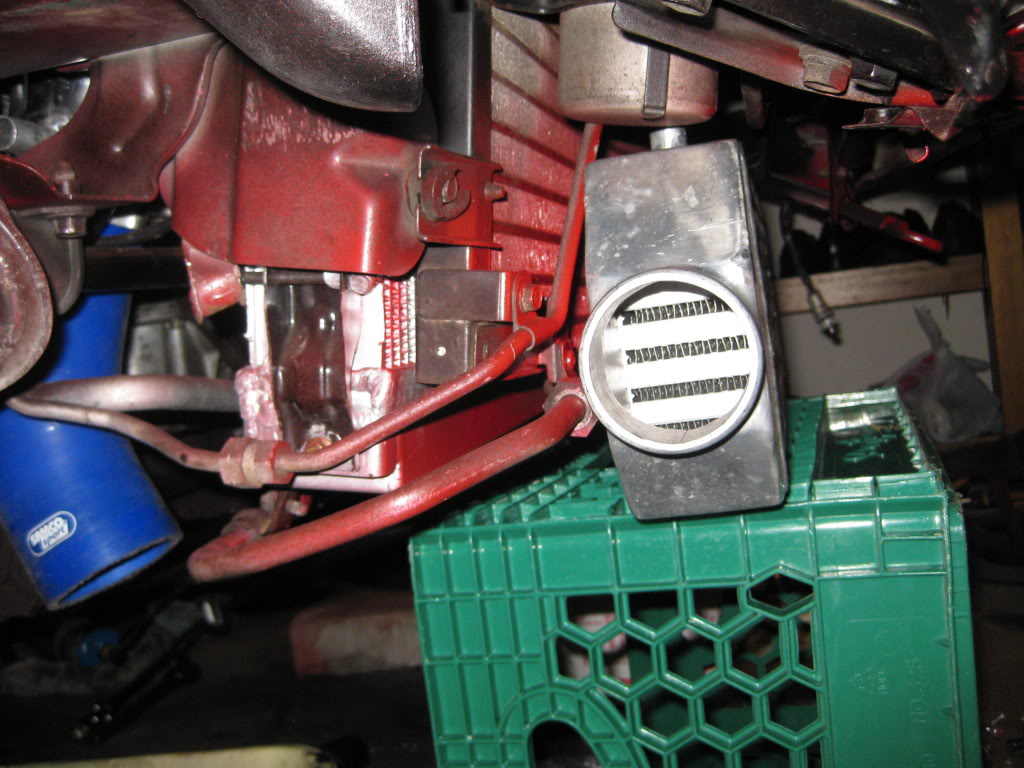
that shouldn't be too low, but I'd raise it as much as you can, even make it not centered if you have to.
take mine for example:
looks good straight on:

at an angle:

there's a lot of runners that aren't directly exposed
take mine for example:
looks good straight on:
at an angle:
there's a lot of runners that aren't directly exposed
Reply
0
0
Thread Starter
Junior Member
iTrader: (1)
Joined: Jun 2009
Posts: 176
Total Cats: 0
From: Los Angeles, California
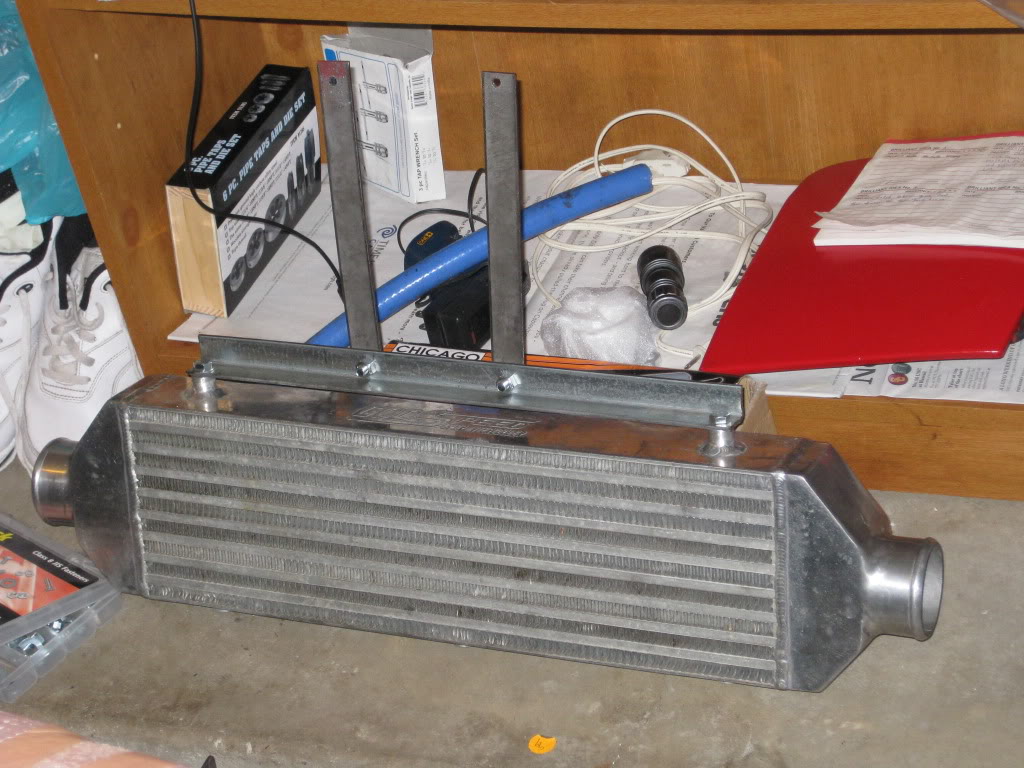
It took me about an hour and a half to make the intercooler mounts. It isn't perfect like something joe will do, but it works. Got the idea from FM. Anyways, going to buy some more aluminum pipes tomorrow to finish my intercooler system.
Reply
0
0
Thread Starter
Junior Member
iTrader: (1)
Joined: Jun 2009
Posts: 176
Total Cats: 0
From: Los Angeles, California
Tomorrow I will be installing my LC1 wideband and gauge. Before I do so, I always like to verify that what I plan on doing is correct before actually doing the job.
To install my LC-1:
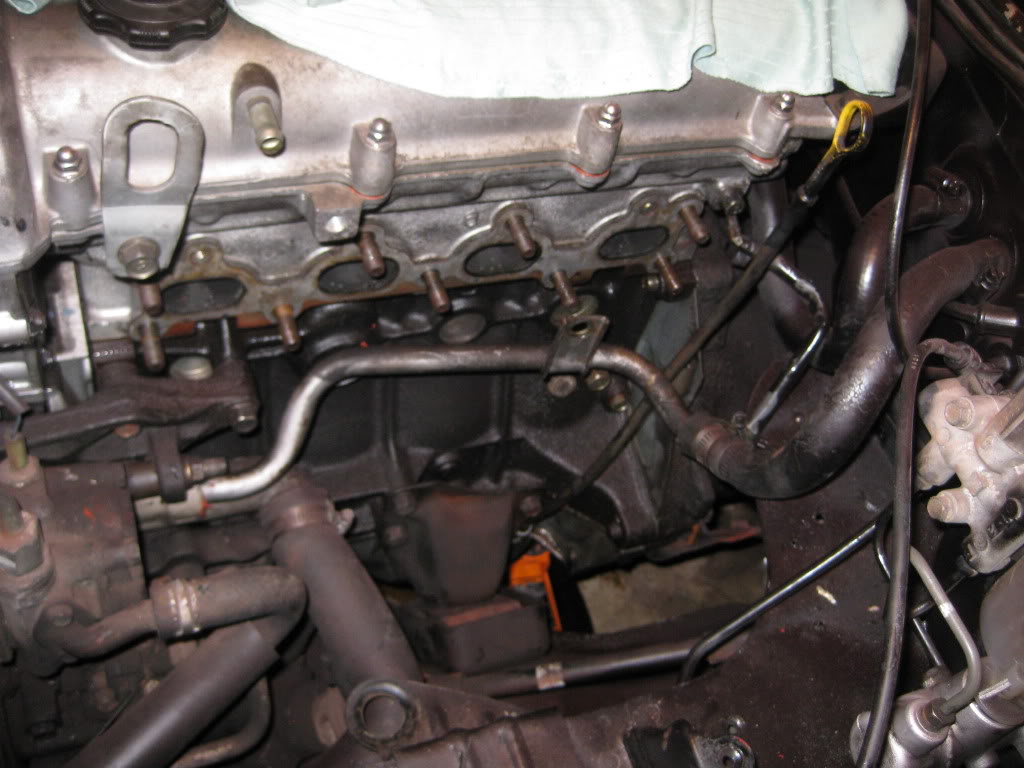
1. The red wire (12V power source) is going to the white/pink wire on my fuel pump relay as pictured below
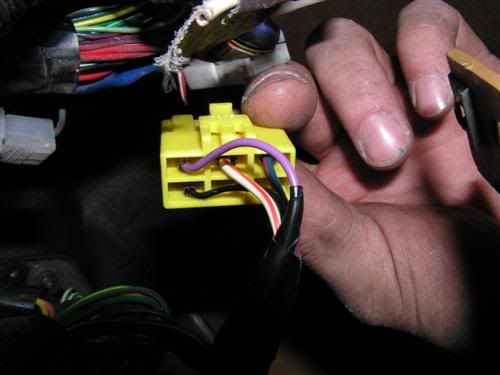
2. The blue and white wire will be grounded right on the chassis where the ecu mounts to the floorboard.
3. Yellow wire is going to MS.
4. Brown wire is going to DB gauge
5. Black wire (pretty sure I know how to hook this up)
For the gauge:
1. Can the red wire also be soldered to the pink/white wire on the fuel pump relay?
2. Black (ground) grounded to the same ground as white wire of LC-1
3. white wire will be connected to the brown (output 2) lc1 wire.
4. The yellow wire, does this wire have to be connected to the headlight power wire or can I just connect it to any 12v power source so the gauge can be lit up brightly whenever the car is on?
To install my LC-1:
1. The red wire (12V power source) is going to the white/pink wire on my fuel pump relay as pictured below
2. The blue and white wire will be grounded right on the chassis where the ecu mounts to the floorboard.
3. Yellow wire is going to MS.
4. Brown wire is going to DB gauge
5. Black wire (pretty sure I know how to hook this up)
For the gauge:
1. Can the red wire also be soldered to the pink/white wire on the fuel pump relay?
2. Black (ground) grounded to the same ground as white wire of LC-1
3. white wire will be connected to the brown (output 2) lc1 wire.
4. The yellow wire, does this wire have to be connected to the headlight power wire or can I just connect it to any 12v power source so the gauge can be lit up brightly whenever the car is on?
Reply
0
0


