1.8 BP Engine Rebuild (block)-slow progress
 05-13-2008, 03:32 PM
#21
Elite Member

Thread Starter
iTrader: (39)
Join Date: Sep 2007
Location: High Point NC
Posts: 4,850
Total Cats: 8
Wait to see if this one holds up, I am not brave enough to put my name on a motor other than my own yet.
btw-I think it would be cheaper to get me a ticket to the DR then it would be to send me an engine and then have to ship it back
I plan on to documenting the entire process as well as $$ spent so everyone has a pretty good idea of what to expect if they want to tacle this on their own.
Should be lots of fun, i can't want to get in over my head.
Cross yo' fingas!

Reply
 0
0

0


 05-13-2008, 04:26 PM
#24
Elite Member
iTrader: (22)

Join Date: Dec 2006
Location: Sunny Spanish speaking Non US Caribbean
Posts: 3,224
Total Cats: 3
Wait to see if this one holds up, I am not brave enough to put my name on a motor other than my own yet.
btw-I think it would be cheaper to get me a ticket to the DR then it would be to send me an engine and then have to ship it back
I plan on to documenting the entire process as well as $$ spent so everyone has a pretty good idea of what to expect if they want to tacle this on their own.
Should be lots of fun, i can't want to get in over my head.
Cross yo' fingas!
btw-I think it would be cheaper to get me a ticket to the DR then it would be to send me an engine and then have to ship it back
I plan on to documenting the entire process as well as $$ spent so everyone has a pretty good idea of what to expect if they want to tacle this on their own.
Should be lots of fun, i can't want to get in over my head.
Cross yo' fingas!

Reply
0
0
05-13-2008, 04:27 PM
#25
Elite Member
Thread Starter
iTrader: (39)
Join Date: Sep 2007
Location: High Point NC
Posts: 4,850
Total Cats: 8
Oh snap, what have I done? lol
j/k
I plan on satisfying all questions the best I can and post lots a pics for you with learning dissabilities. I will also have lots of questions myself so feel free to contribute your $.02 as well when I get stuck.
j/k
I plan on satisfying all questions the best I can and post lots a pics for you with learning dissabilities. I will also have lots of questions myself so feel free to contribute your $.02 as well when I get stuck.
Reply
0
0
05-15-2008, 12:12 AM
#26
Elite Member
Thread Starter
iTrader: (39)
Join Date: Sep 2007
Location: High Point NC
Posts: 4,850
Total Cats: 8
OK, so got the block apart, took all of one hour including eating some pizza and drinking some cold brew while watching Seinfeld, IOW it's pretty easy.
Not to insult any of the pros, but these are noob directions since I figured that's who would need them and I am pretty much a noob myself
I started of with the block upside down and broke all the 14mm crank bearing support bolts and all the 14mm Rod bearing nuts loose. (appologize if I use the wrong terminology-ESL here)
Like this:
Crank bearing support
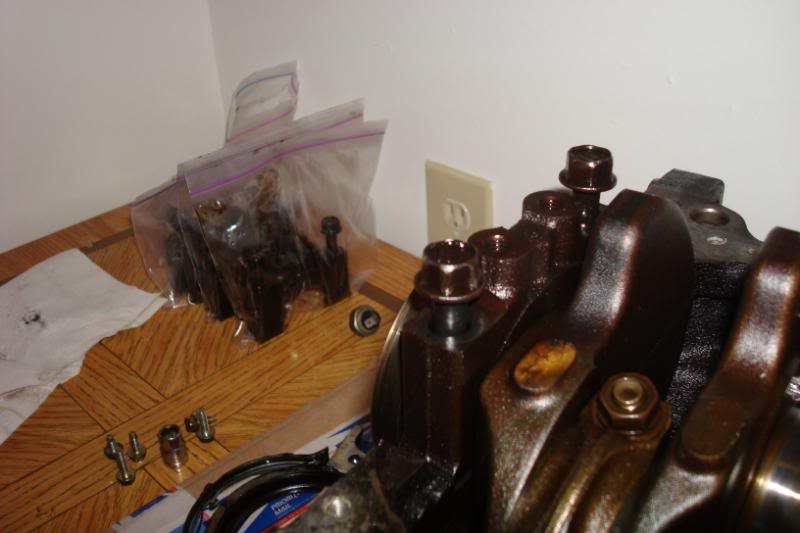
Once you have loosened all the nuts and bolts, you remove the crank bearing support by wiggling it back and forth to get it loose.
In the corner of the pic you can see how I placed the crank bearing supports in individual bags with their respective bolts. No idea if that is neccasary, but what the hell. The crank bearing support are numbered from 1-5 so you can't really mess them up.
Rod bearing support
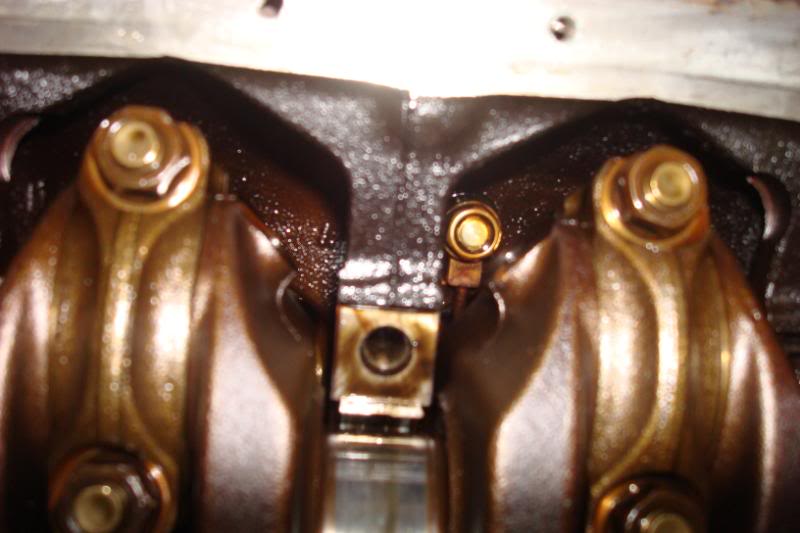
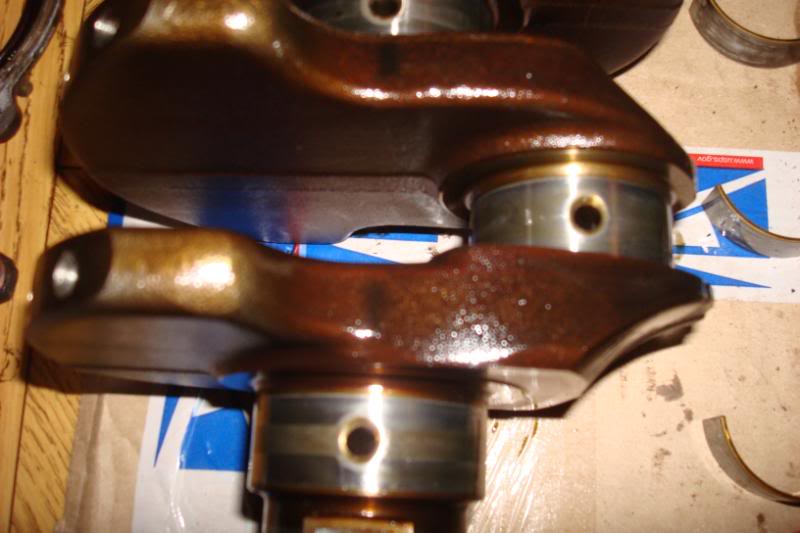
You can loosen the rod bearing support loose by tapping the studs until it separates and then you just pull it off.
In the above pic you can also see where the oil squirters are, you will need to remove them as well and now is a good time, or you can do it once you have the crank out.
Next, I went ahead and separated the rod bearings from the rod bearing supports.

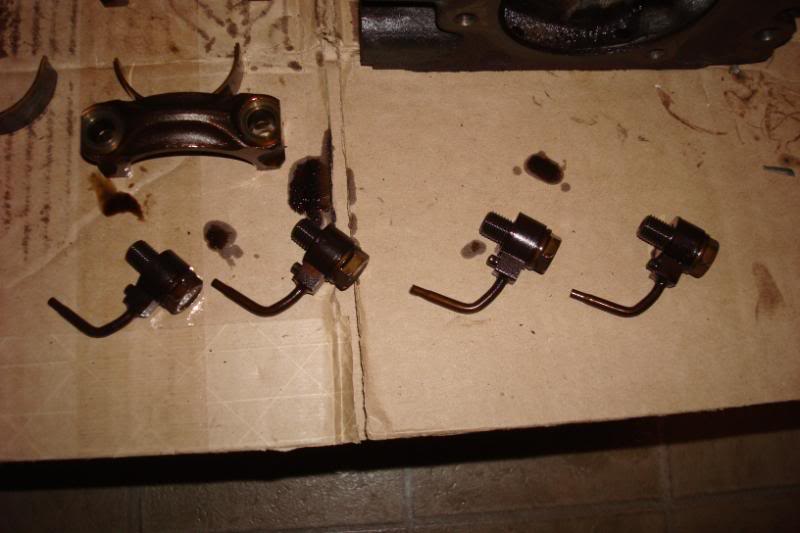
The oil squirters with their bolts and washers.
This is what you should have left.
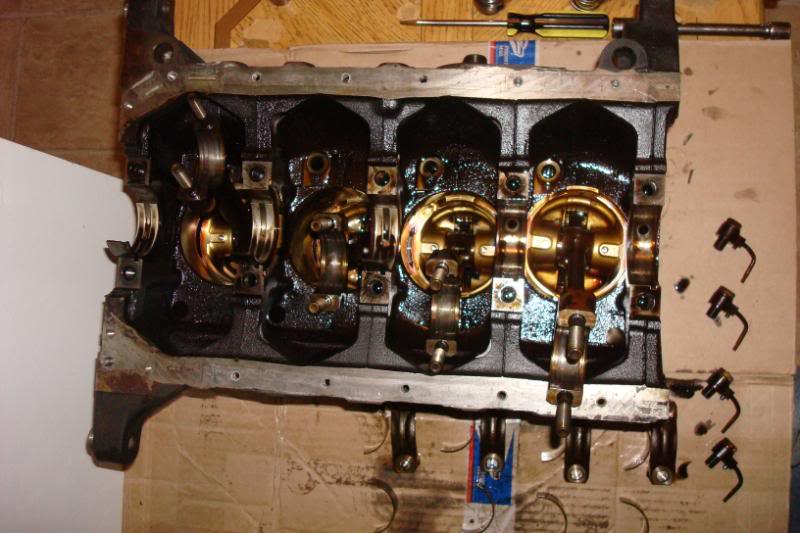
You cannot remove the pistons from this side, you have to stand the block up like this in order to get them out, when they stop coming out, just wiggle them gently until they come out.
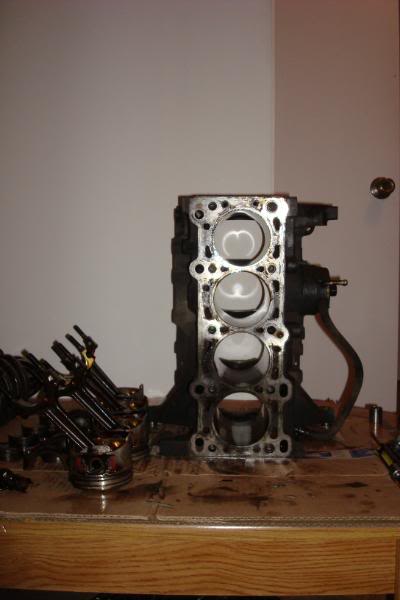
The cyl walls look good, this is the part that gets honed so your new rings can get properly seated and broken in. More on this later.
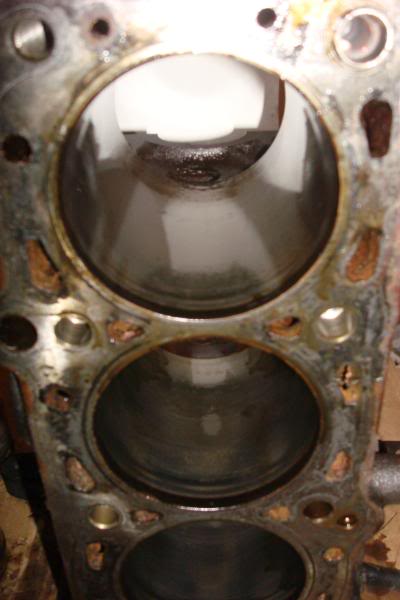
The crank also looks good as there are no aparant scratches, I will more than likely use standard size bearings, but do not know for sure until I hear from the shop cause the crank still needs to get polished at these "bearing seats".
Once the shop is done with the crank they will tell me what bearings I need for sure.
Next I have to separate the Pistons from the rods by removing the wrist pins, i forgot the pliers at the house so I have to wait till tomorrow to do so. Once I do that, well, it's time to look for a local reputable shop to do the machine work on the crank and block and take pistons to HPC to recieve their Ceramic makeover.
Hopefully more to come soon.
ps-If anyone feels I makde a mistake somewhere please let me know, input is appreciated.
Not to insult any of the pros, but these are noob directions since I figured that's who would need them and I am pretty much a noob myself
I started of with the block upside down and broke all the 14mm crank bearing support bolts and all the 14mm Rod bearing nuts loose. (appologize if I use the wrong terminology-ESL here)
Like this:
Crank bearing support
Once you have loosened all the nuts and bolts, you remove the crank bearing support by wiggling it back and forth to get it loose.
In the corner of the pic you can see how I placed the crank bearing supports in individual bags with their respective bolts. No idea if that is neccasary, but what the hell. The crank bearing support are numbered from 1-5 so you can't really mess them up.
Rod bearing support
You can loosen the rod bearing support loose by tapping the studs until it separates and then you just pull it off.
In the above pic you can also see where the oil squirters are, you will need to remove them as well and now is a good time, or you can do it once you have the crank out.
Next, I went ahead and separated the rod bearings from the rod bearing supports.
The oil squirters with their bolts and washers.
This is what you should have left.
You cannot remove the pistons from this side, you have to stand the block up like this in order to get them out, when they stop coming out, just wiggle them gently until they come out.
The cyl walls look good, this is the part that gets honed so your new rings can get properly seated and broken in. More on this later.
The crank also looks good as there are no aparant scratches, I will more than likely use standard size bearings, but do not know for sure until I hear from the shop cause the crank still needs to get polished at these "bearing seats".
Once the shop is done with the crank they will tell me what bearings I need for sure.
Next I have to separate the Pistons from the rods by removing the wrist pins, i forgot the pliers at the house so I have to wait till tomorrow to do so. Once I do that, well, it's time to look for a local reputable shop to do the machine work on the crank and block and take pistons to HPC to recieve their Ceramic makeover.
Hopefully more to come soon.
ps-If anyone feels I makde a mistake somewhere please let me know, input is appreciated.
Reply
0
0
05-15-2008, 12:32 PM
#28

I don't trust myself to keep bearing and rod caps in the proper order... I usually stamp them or engrave them to ensure they stay a matched set on re-assembly. This will also help you out if the shop that balances them doesn't keep them in the right order, your box falls over during transport to/from the shop, your wife trips on the **** and scatters it all over the living room floor, etc etc.
*edit* worst grammar ever.
*edit* worst grammar ever.
Reply
0
0
05-15-2008, 02:06 PM
#29
Elite Member
Thread Starter
iTrader: (39)
Join Date: Sep 2007
Location: High Point NC
Posts: 4,850
Total Cats: 8
The bearing caps are numbered, so no issues there, the rod caps are getting replaced since I am using ETD rods and their caps, so no biggie there, reason I mention anything is for the people who will be re-using their so they know to keep them in order. Thanks for pointing that out.
Reply
0
0
 05-15-2008, 06:23 PM
#32
Elite Member
Thread Starter
iTrader: (39)
Join Date: Sep 2007
Location: High Point NC
Posts: 4,850
Total Cats: 8
On the driver side of the block, there are two holes.
They are capped of by bolts, the 14mm bolt is the oil feed, thread pattern is 10mm x 1.5.
More usefull info here
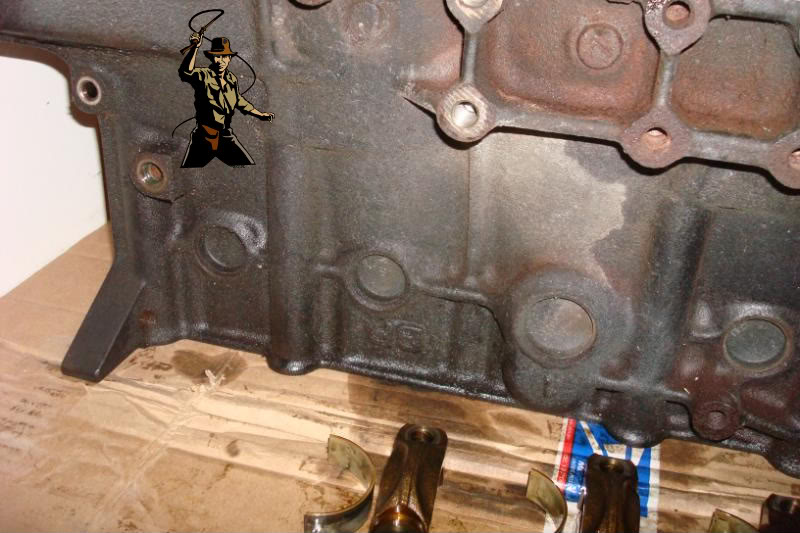
Question-Does anyone know what the other hole is for?
They are capped of by bolts, the 14mm bolt is the oil feed, thread pattern is 10mm x 1.5.
More usefull info here
Question-Does anyone know what the other hole is for?
Reply
0
0
05-16-2008, 12:43 AM
#33
Elite Member
iTrader: (11)

Join Date: Jun 2007
Location: Overland Park, Kansas
Posts: 5,360
Total Cats: 43
I see one small problem with reusing your factory pistons..
If the machine shop (which they will) over-bores your cylinders, you'll need physically larger diameter pistons.. ie, .020, .030, .040 overbore, etc...
Other than that, Subscribe!
If the machine shop (which they will) over-bores your cylinders, you'll need physically larger diameter pistons.. ie, .020, .030, .040 overbore, etc...
Other than that, Subscribe!
Reply
0
0
05-16-2008, 10:03 AM
#34
2 Props,3 Dildos,& 1 Cat

iTrader: (8)
Join Date: Jun 2005
Location: Fake Virginia
Posts: 19,338
Total Cats: 573
he wont need an overbore if the bores aren't scored. just a light re-hone to put a cross-hatch back in and remove any lip from the top edge. shouldn't change the bore diameter significantly.
Reply
0
0
05-16-2008, 01:34 PM
#36
Elite Member
Thread Starter
iTrader: (39)
Join Date: Sep 2007
Location: High Point NC
Posts: 4,850
Total Cats: 8
I am not boring it out, the walls look pretty good, no scoring that I see yet. A light hone is all it needs (I hope) which removes less than 2/1000" of metal, should still be within sepc even.
Reply
0
0
05-16-2008, 05:12 PM
#37
Elite Member
iTrader: (11)
Join Date: Jun 2007
Location: Overland Park, Kansas
Posts: 5,360
Total Cats: 43
I'm pretty skeptical of that, with low compression and high mileage I seriously doubt a hone will bring it true -- I could be wrong.
The second hole is a coolant jacket. Leave that plug out for the cleaning, it'll help things a bit.
The second hole is a coolant jacket. Leave that plug out for the cleaning, it'll help things a bit.
Reply
0
0
 05-17-2008, 02:33 PM
#39
Elite Member
Thread Starter
iTrader: (39)
Join Date: Sep 2007
Location: High Point NC
Posts: 4,850
Total Cats: 8
I found the shop I was looking for!!!
This guy does not advertise, he's been in business for longer than I've been alive, and he is a racer himself. I got referred to him by the guy who painted my car, he says he would never take any of his motors anywhere else.
I'll let everyone know what he says about my block once he cleans in and hones, if he says it's ok and withon spec, OE pisotons go back in, if not, well then I'll bend over and get soe forged ones.
Reply
0
0
05-26-2008, 05:34 PM
#40

any updates? this is an interesting thread.
as a few others have said i'd be a bit surprised if a reputable machine shop was ok with recommending a hone without boring the block, but you could get lucky....these engines a quite a bit different than a lot of the older v8 types.
either way good luck with the build.
as a few others have said i'd be a bit surprised if a reputable machine shop was ok with recommending a hone without boring the block, but you could get lucky....these engines a quite a bit different than a lot of the older v8 types.
either way good luck with the build.
Reply
0
0


