BeGI coolant reroute - Upper radiator S-hose fitment issues
 08-07-2013, 04:41 AM
#1
Senior Member
Thread Starter
iTrader: (2)

Join Date: Nov 2007
Location: Saint Paul, MN
Posts: 1,489
Total Cats: 28
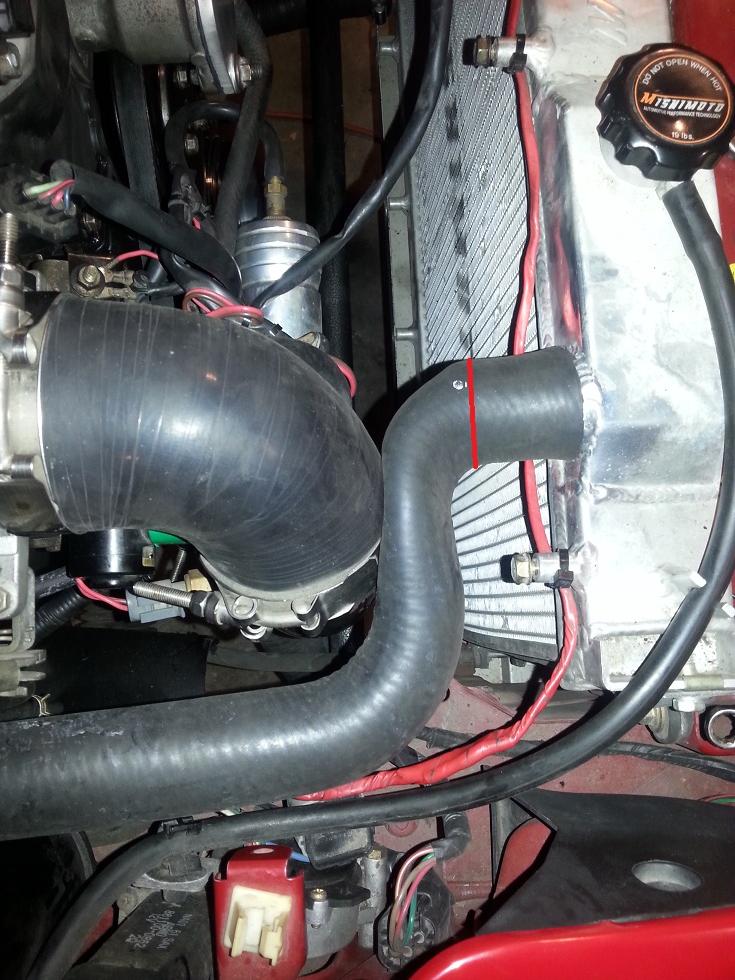
I edited this earlier, but I have since determined that I can't figure out a way to make this work. My radiator appears to sit too close to the FM downpipe to allow for the re-route hose to make it around it without significant kinking in the hose. The red line is where my radiator fitting ends:
The same re-route on another Miata:
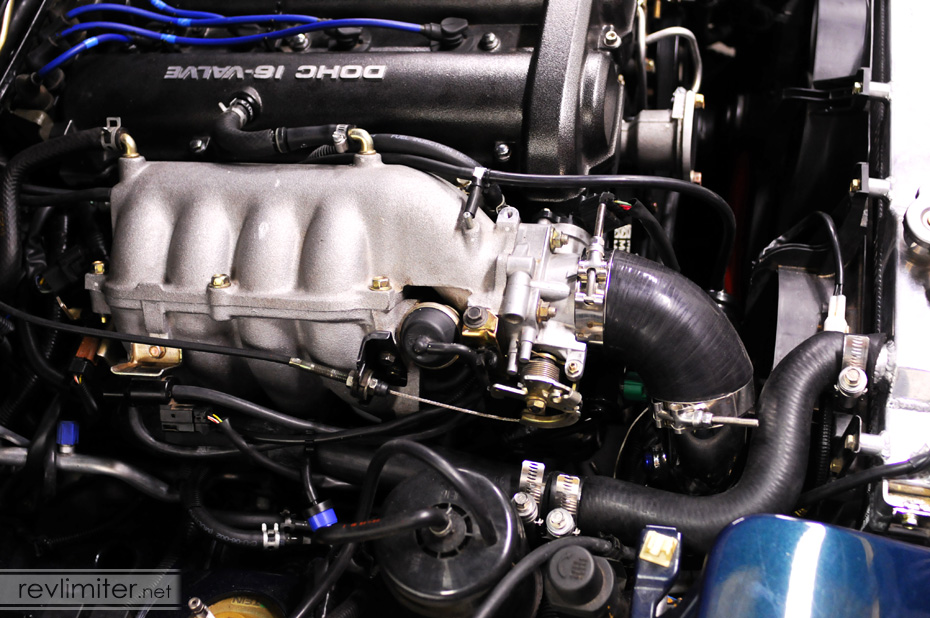
According to his page and pictures here, he has a different amount of clearance compared to my engine, maybe because of the swap to a 99 head? I'm still on the 97 tbody so I have a slanted fitting from FM that includes an IAC hose, the attachment neck is also already bumping up on the IAC wiring, so I can't trim that closer to tbody either.
Any suggestions? I considered going over the engine and adding a bleeder neck but that's a last resort.
The same re-route on another Miata:
According to his page and pictures here, he has a different amount of clearance compared to my engine, maybe because of the swap to a 99 head? I'm still on the 97 tbody so I have a slanted fitting from FM that includes an IAC hose, the attachment neck is also already bumping up on the IAC wiring, so I can't trim that closer to tbody either.
Any suggestions? I considered going over the engine and adding a bleeder neck but that's a last resort.
Last edited by Der_Idiot; 08-07-2013 at 12:57 PM.

Reply
 0
0

0
08-07-2013, 01:06 PM
#2
Senior Member
Thread Starter
iTrader: (2)
Join Date: Nov 2007
Location: Saint Paul, MN
Posts: 1,489
Total Cats: 28
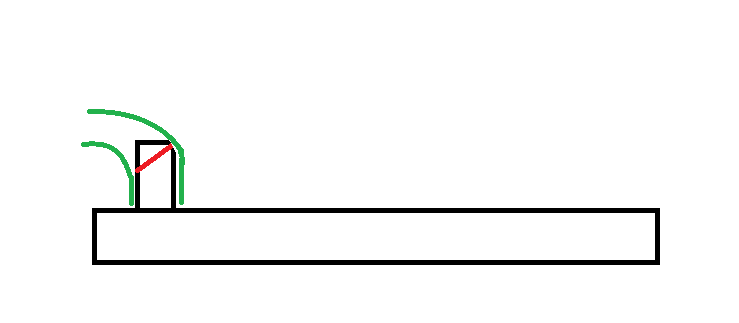
I'm considering taking a sawsall to the radiator fitting and cutting the passenger side at an angle so when the hose is bent at that extremely close angle it can still flow through. Something like this:
Dad was considering cutting off the fitting and angling it so it points left instead. Not sure that's something we can do since I don't have a TIG welder on retainer. :-/
A third option is to go on the driver's side and through where the IAC hose goes, but there's not enough room for the hose that I currently have..
Reply
0
0
 08-07-2013, 03:07 PM
#7
Senior Member
Thread Starter
iTrader: (2)
Join Date: Nov 2007
Location: Saint Paul, MN
Posts: 1,489
Total Cats: 28
The issue with cutting off the tbody elbow is that the solid pipe below it is already riding almost directly on the fastener for the IAC (green plug above). I wonder if the radiator in the 2nd picture is a 37mm and that's where they get the extra clearance?
Reply
0
0
08-07-2013, 03:50 PM
#9
Elite Member
iTrader: (13)

Join Date: Dec 2006
Location: Taos, New mexico
Posts: 6,612
Total Cats: 567
I had this issue and resovled it. Scope my build thread.
Mine ended up like this:
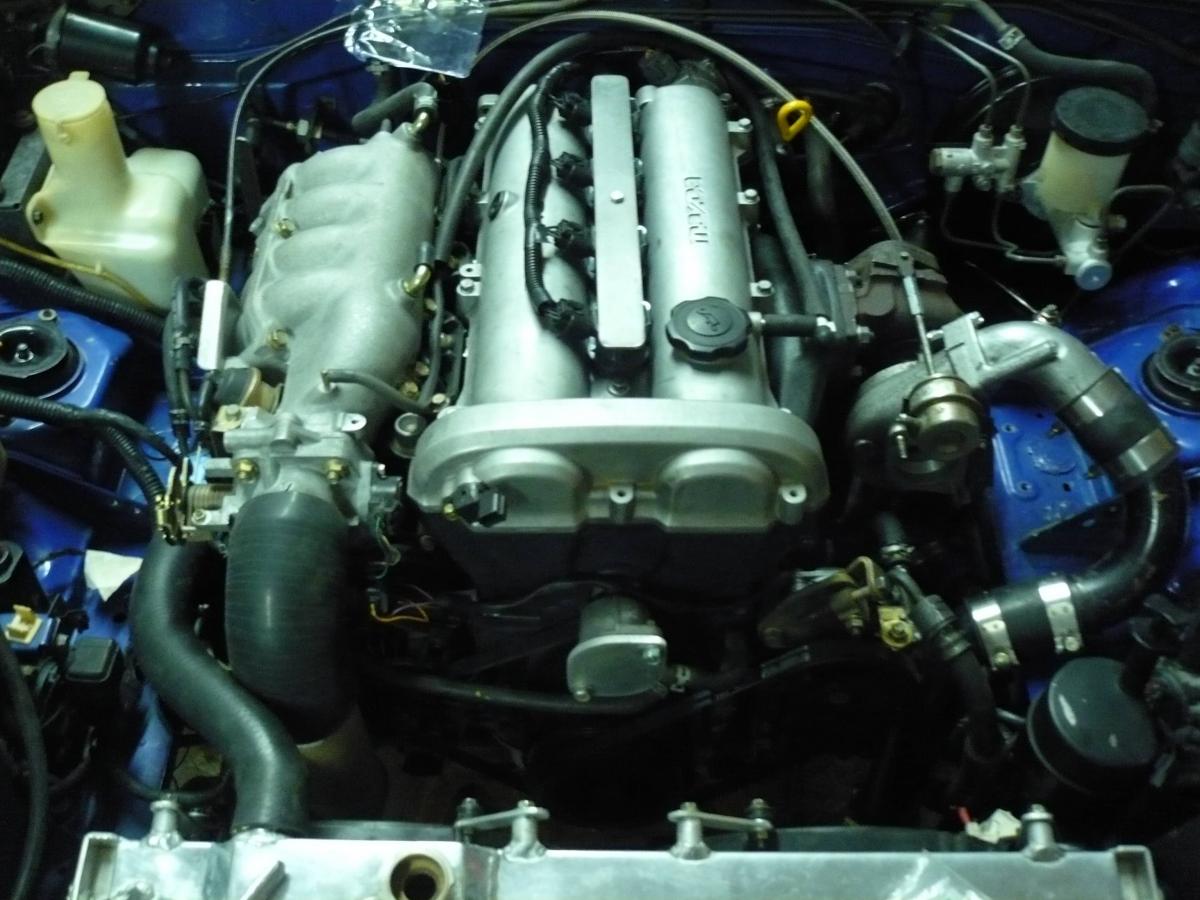
I use a silicone 90 like yours, but cut it short as possible. I also cut the radiator hose short as possible.
They run now, but nothing crazy. So far it's holding up great.
Mine ended up like this:
I use a silicone 90 like yours, but cut it short as possible. I also cut the radiator hose short as possible.
They run now, but nothing crazy. So far it's holding up great.
Reply
0
0
08-08-2013, 12:42 AM
#12
Senior Member
Thread Starter
iTrader: (2)
Join Date: Nov 2007
Location: Saint Paul, MN
Posts: 1,489
Total Cats: 28
Good news! I made it fit (marginally) better. Sadly, I filled the car with coolant and almost immediately the rear water neck started a slow drip. Is that common? Black RTV should seal this thing right?
Reply
0
0
08-08-2013, 01:15 AM
#13
Senior Member
Thread Starter
iTrader: (2)
Join Date: Nov 2007
Location: Saint Paul, MN
Posts: 1,489
Total Cats: 28
I'm really hoping I get some gaskets tomorrow that seal better, I'm going to use some black rtv, just hope I can get this **** back on the back of the motor while not ******* up the RTV at the same time.. Dilemma!
Reply
0
0
08-08-2013, 02:34 AM
#14

What I would want is a "Z-pipe" to add the the inlet to be able to attach the hose in the frame rail location/height, making the most possible room for intake pipe routing.
Asking for a radiator with the inlet at the edge (with internal piping to make the inlet lower) would be too much I guess.
Hm, asking a welder to add a Z-pipe to relocate the inlet would not be too complicated I guess.
At least for NB there is nothing in the way for doing so (not in my engine bay).
Asking for a radiator with the inlet at the edge (with internal piping to make the inlet lower) would be too much I guess.
Hm, asking a welder to add a Z-pipe to relocate the inlet would not be too complicated I guess.
At least for NB there is nothing in the way for doing so (not in my engine bay).
Reply
0
0
08-08-2013, 09:03 AM
#15
Boost Czar


iTrader: (62)
Join Date: May 2005
Location: Chantilly, VA
Posts: 79,501
Total Cats: 4,080
if i was forced to, i would have used gray not black. black is for oil, gray for water.
Reply
0
0
08-08-2013, 09:54 AM
#16
Cpt. Slow
iTrader: (25)
Join Date: Oct 2005
Location: Oregon City, OR
Posts: 14,206
Total Cats: 1,139
Supposedly it's all possible with the engine in, but my slow drip was one small reason I decided to pull the engine a while back (the bigger reason was a leaking RMS and failing clutch) and used the opportunity to seal it up properly.

Reply
0
0
08-08-2013, 01:46 PM
#17

Make 100000x sure there's no old gasket material left on the rear flange. I checked mine about 50x for any debris, and found a little more old gasket clinging each time. I went in with a razor by hand, and just kept working at the area from different angles doing my best not to scratch the metal.
I also used the Mazda thermostat gasket, as it seemed more substantial than the slightly thinner more papery aftermarket ones. I didn't use any additional goop/sealer or anything.
I wanted to make sure it sealed right cause I never, ever, ever wanted to have to go back in there to fix a leak in that god forsaken area of the engine bay. So far it's been leak free for 2-3 months ~2k miles.
Reply
0
0
08-09-2013, 09:27 AM
#19
Using two probably wouldn't help the seal at all (did you mean stacked one on the other?).
Just make sure the surfaces are both super clean and completely flat.
Reply
0
0
08-09-2013, 10:43 AM
#20
Senior Member
Thread Starter
iTrader: (2)
Join Date: Nov 2007
Location: Saint Paul, MN
Posts: 1,489
Total Cats: 28
We got creative last night. I used a pair of bolts long enough to RTV both sides of the gasket for the coolant neck as well as the sandwich plate, then put rtv on the other side of the plate and stuck the other gasket on (both rubber sides were facing the coolant neck).
I didn't put any RTV on the outside of the neck-to-block gasket and used the old neck to finger-tight the assembly together. This let it set outside the car. After an hour or so I put RTV on the last part and put it in the car, finger tight. 4 hours later I torqued down, and I'll fill the coolant tonight after work; a good 16-17 hours later.
I didn't put any RTV on the outside of the neck-to-block gasket and used the old neck to finger-tight the assembly together. This let it set outside the car. After an hour or so I put RTV on the last part and put it in the car, finger tight. 4 hours later I torqued down, and I'll fill the coolant tonight after work; a good 16-17 hours later.
Reply
0
0


