
DIY door panels?


Thread Starter
Elite Member
iTrader: (1)
Joined: Feb 2008
Posts: 7,930
Total Cats: 44
From: Birmingham Alabama

No, I was going to, then lost interest or got tied up in other ----, and never went and picked up my ABS from Grainger. With my speaker install last weekend I got another taste of how much I despise my current door panels, so I was compelled to finish what I had started, finally.
Reply
 0
0

0


So you bought $9 worth of whiteboard material? Am I reading this right?
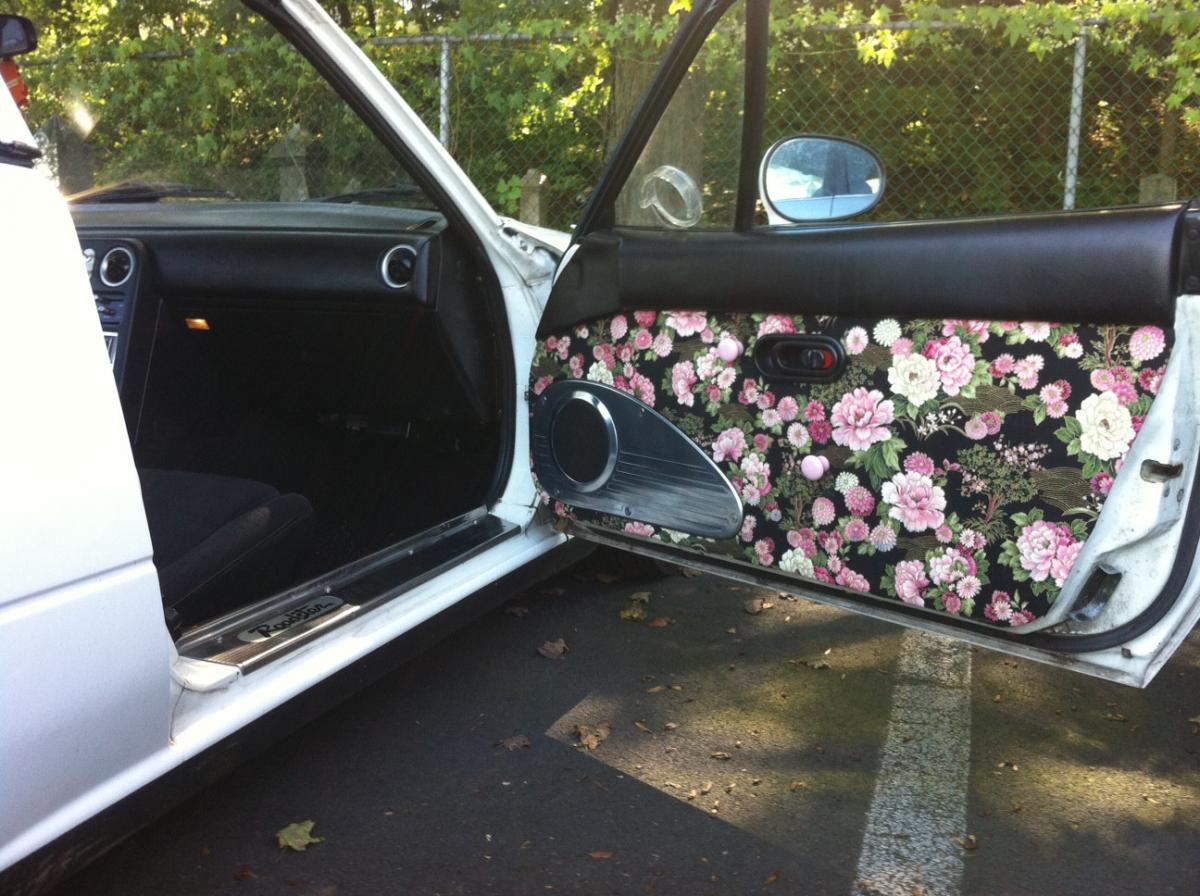
Was this HD or Lowes? If I'm ever truly motivated I'll do the same, utilizing the stock speaker covers. The holes from the deleted armrest have been getting to me.
Was this HD or Lowes? If I'm ever truly motivated I'll do the same, utilizing the stock speaker covers. The holes from the deleted armrest have been getting to me.
Reply
0
0

Senior Member
Joined: May 2011
Posts: 638
Total Cats: 76
FWIW i paid $28 for 4'x8' .090" Black textured 1 side abs plastic. I had the sheet cut in half and only used 48x48 to make the door cards. I still have a 6" rip of that 4by left over and the entire other 4x4 sheet left un touched.
Reply
0
0
Thread Starter
Elite Member
iTrader: (1)
Joined: Feb 2008
Posts: 7,930
Total Cats: 44
From: Birmingham Alabama
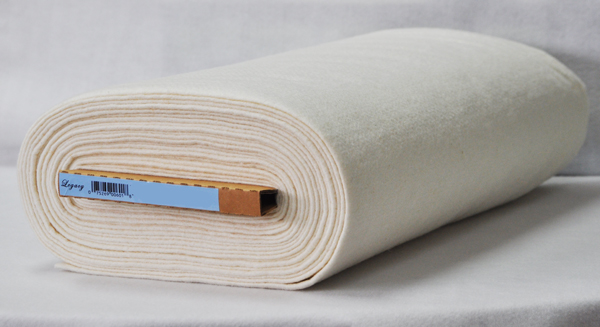
Got my fabric. These panels will either be bad ***, or complete fail. It could go either way, since I can't tell with the fabric off the panel. Going to start with the cutting at first light this morning. Should at least finish one today.
Reply
0
0
Thread Starter
Elite Member
iTrader: (1)
Joined: Feb 2008
Posts: 7,930
Total Cats: 44
From: Birmingham Alabama
Bah. This may be a test run. It came out well, except for the fabric picked up some dirt and ---- that I don't know if it will clean off well or not. It also has one small area of wrinkles around the door latch "cup" that I couldn't get out before the adhesive set. I'll let it finish drying and check it when I wake up and see if I can clean it up a bit, and see how it looks mounted maybe tomorrow. But for the cost, even if it turns out like I think it will, it's an improvement, and I won't feel bad scrapping it and trying again if I need to. Just one panel is worth about 2 hours work and about $20.
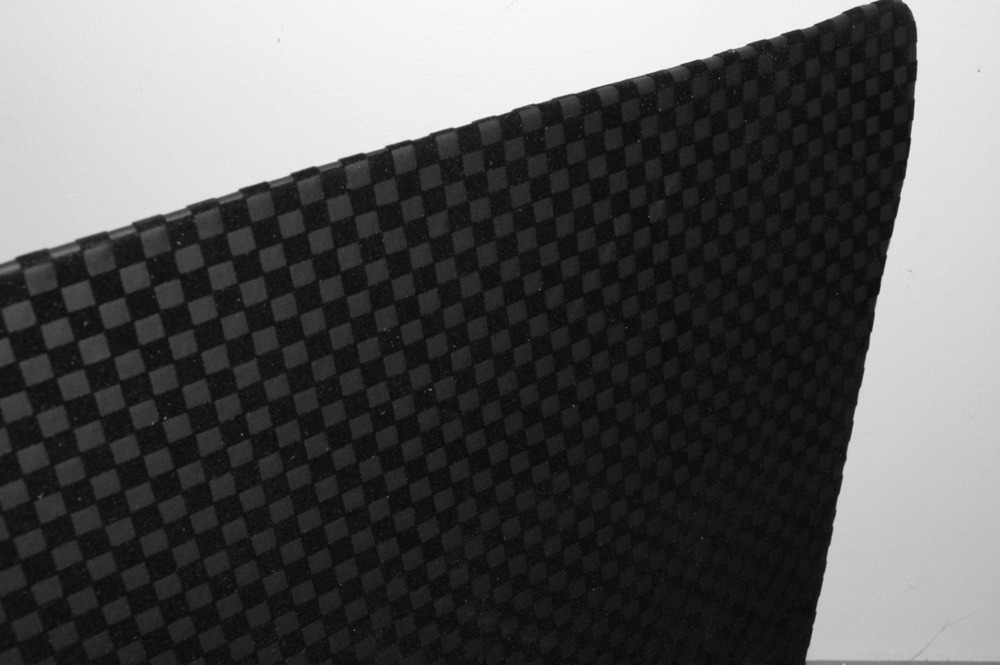
Dust and dirt speckles stuck all over that ----. Ignore the crooked lines at the top, that is a crooked cut, not a crooked fabric, at least I think. The bottom edge is straight to within 1/2 square over the length of the panel, and the top will be covered by the top bolster part of the stock door.
Dust and dirt speckles stuck all over that ----. Ignore the crooked lines at the top, that is a crooked cut, not a crooked fabric, at least I think. The bottom edge is straight to within 1/2 square over the length of the panel, and the top will be covered by the top bolster part of the stock door.
Reply
0
0

Thread Starter
Elite Member
iTrader: (1)
Joined: Feb 2008
Posts: 7,930
Total Cats: 44
From: Birmingham Alabama
It may actually be the adhesive I'm seeing. The material isn't very thick, and I put the adhesive on pretty heavy, so it may have leached through in some places. I'll see later. In sunlight though, it's hardly noticeable.
Reply
0
0

Thread Starter
Elite Member
iTrader: (1)
Joined: Feb 2008
Posts: 7,930
Total Cats: 44
From: Birmingham Alabama
Did. Well, the Loctite variant. I did have some 3M 77, but it's pretty old. I do think I need something stronger at least for the extra that gets pulled tight and bonded to the back of the panel. Anything strong enough for my liking has too long of a cure time. I got the Loctite medium spray, which has the fastest tac time and bonds much faster, but doesn't hold quite as well as their heavier stuff.
Now my concern is fastening it to the door. I have to drill pilot holes, and I'm scared the bit is going to rip at the fabric and ****** it loose around the screws. I guess I should have done that prior to adhering the fabric, but it didn't occur to me at the time. Any ideas that might save my ***? I guess I could use a really hot punch to burn the fabric away, then drill. Maybe that would prevent fraying and ripping/twisting around the bit.
Now my concern is fastening it to the door. I have to drill pilot holes, and I'm scared the bit is going to rip at the fabric and ****** it loose around the screws. I guess I should have done that prior to adhering the fabric, but it didn't occur to me at the time. Any ideas that might save my ***? I guess I could use a really hot punch to burn the fabric away, then drill. Maybe that would prevent fraying and ripping/twisting around the bit.
Reply
0
0

You fooked up. Shoulda drilled the holes first, and then after covering done the hot nail/punch to make the hole in the fabric.
Are you planning on using any type of decorative screw backers? If so (they're cheap), you can punch out a hole with a Harbor Freight hole punch and you don't have to be that accurate.
Are you planning on using any type of decorative screw backers? If so (they're cheap), you can punch out a hole with a Harbor Freight hole punch and you don't have to be that accurate.
Reply
0
0
Use these: http://www.mcmaster.com/#standard-co...ashers/=hyq5od for a more finished look. Or, buy those press-in tree things.
Reply
0
0
Thread Starter
Elite Member
iTrader: (1)
Joined: Feb 2008
Posts: 7,930
Total Cats: 44
From: Birmingham Alabama
Probably will use something like that. I do think these will be just a practice run. Turns out I have enough board and fabric to do 4 panels. I learned what to do and not to do on this first one, so I have one more practice panel, then two for the final makes.
Reply
0
0
Thread Starter
Elite Member
iTrader: (1)
Joined: Feb 2008
Posts: 7,930
Total Cats: 44
From: Birmingham Alabama
I wish I could shrink myself down to a much smaller size to fit in tight areas. Not only for working on cars, but for crawling in slave ***. Just looking at the ------- door shell, and the two small holes full of mechanics that I have to access to apply the fatmat to the door skin. Looks like frustration. Anyone think it would be a problem using Great Stuff in places that might see dampness? Does that stuff hold moisture? I don't want to rot my relatively rust free body away. I want to fill those holes that pass beside the fuel tank hump leading into the trunk.
Reply
0
0
Thread Starter
Elite Member
iTrader: (1)
Joined: Feb 2008
Posts: 7,930
Total Cats: 44
From: Birmingham Alabama
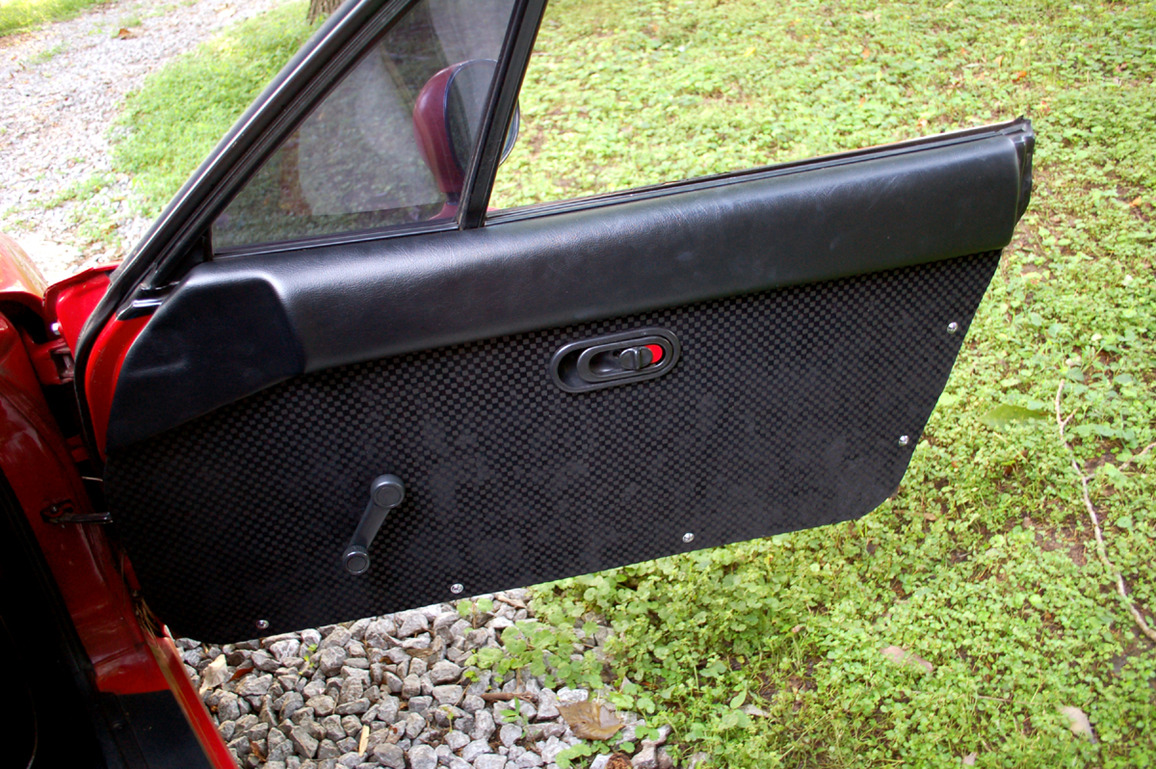
I have to say... for once I am somewhat pleasantly surprised by something I did on this car turning out better than expected. Not perfect for a first attempt, but not bad compared to what I had. Excuse the rest of the wrecked interior. It's a bit of a workshop/daily/storage lately.
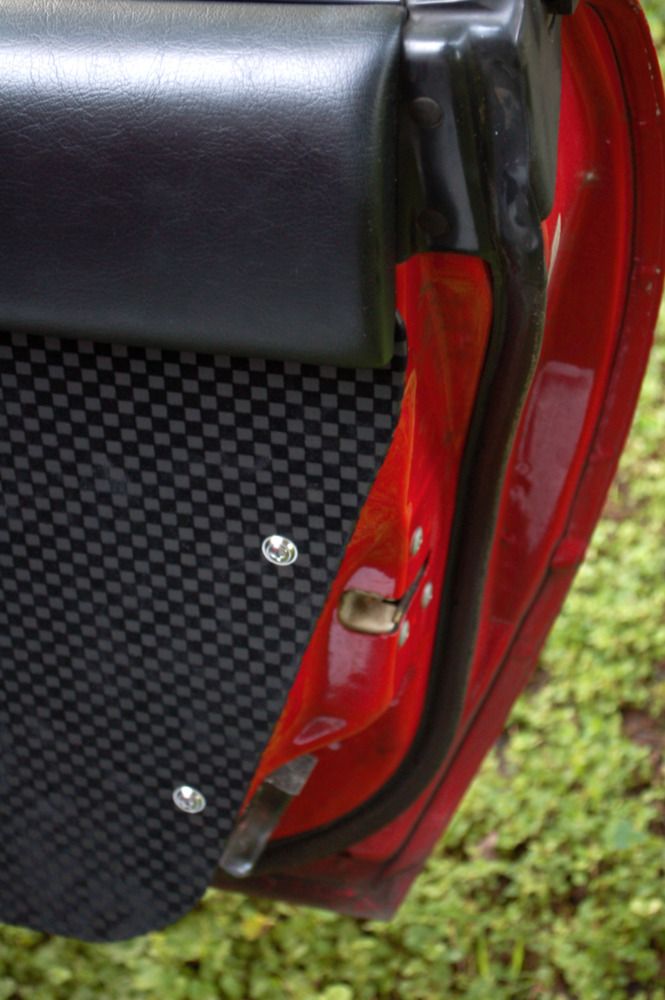
As usual the flash makes every shade of black look different, and it looks a lot worse than it does in person. The screws I got were countersunk with washer, which I didn't realize. You can see the variations in color on the fabric. It's sort of a suede leather effect with the raised squares, I think anyway. Also less noticeable in person. Overall, I'm pleased for the 3 hours total, and around $15 investment for that one panel.
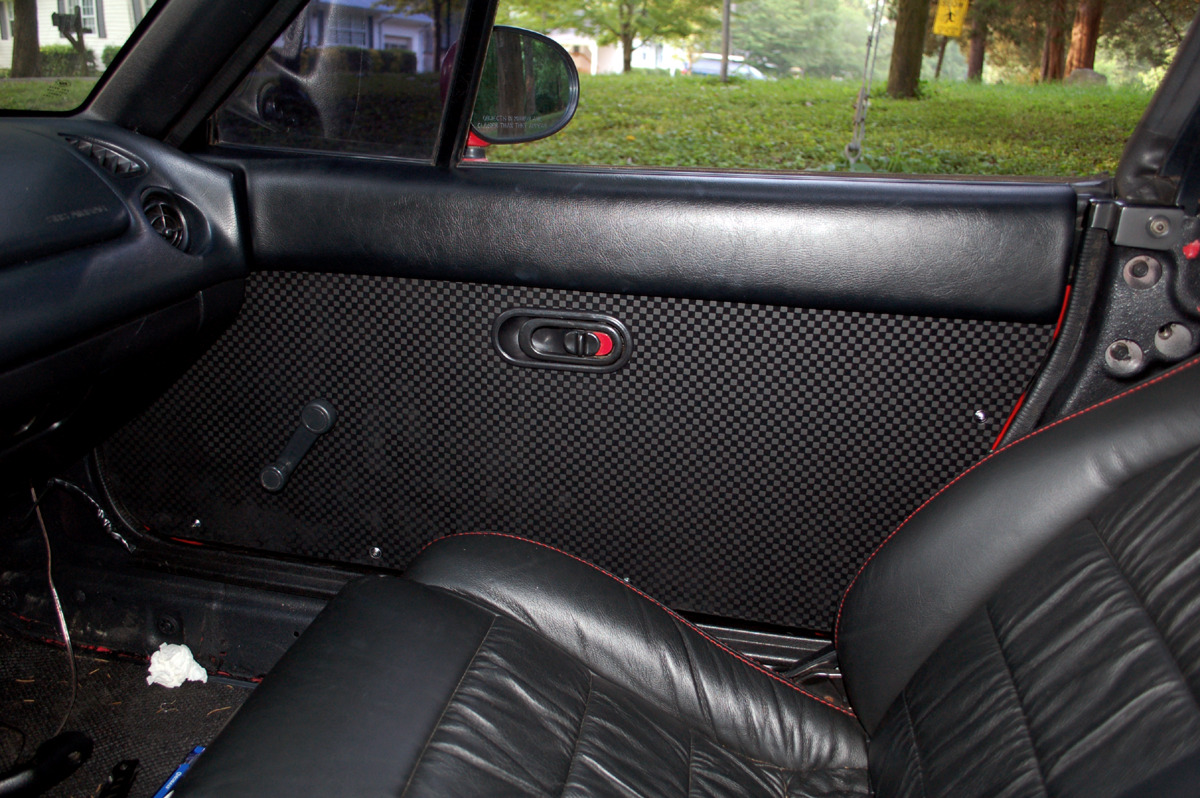
I can't wait to get this car back into a condition where I give a ---- about it again. At one point, dirt in the door jambs would have been unacceptable. Now... ---- it. New paint and getting the interior back to stockish level clean will respark my interest in keeping it clean and looking nice.
As usual the flash makes every shade of black look different, and it looks a lot worse than it does in person. The screws I got were countersunk with washer, which I didn't realize. You can see the variations in color on the fabric. It's sort of a suede leather effect with the raised squares, I think anyway. Also less noticeable in person. Overall, I'm pleased for the 3 hours total, and around $15 investment for that one panel.
I can't wait to get this car back into a condition where I give a ---- about it again. At one point, dirt in the door jambs would have been unacceptable. Now... ---- it. New paint and getting the interior back to stockish level clean will respark my interest in keeping it clean and looking nice.
Last edited by NA6C-Guy; Jun 14, 2012 at 08:57 AM.
Reply
0
0


