DIY door panels?


Thread Starter
Elite Member
iTrader: (1)
Joined: Feb 2008
Posts: 7,930
Total Cats: 44
From: Birmingham Alabama
Thanks. Yeah. It's sort of half finished at this point. I'll have to take it back off and cut out for the speaker grill, and cut the slot for the vinyl webbing for a pull. I can't decide if I want subtle accents, black to match the panels. Or do I want a chrome speaker grill and a red door pull, to sort of match the red stitched seats...? Choices.
Reply
 0
0

0
Black straps, and I'm going to try just putting pinholes int he ABS to let the sound though. Anything that sticks out and it will clip the **** every time you roll the window down. My PO had a screen over the speakers that did that.
*Edit*
What about a piece of the speaker screen wrapped around and sandwiched between a piece of the ABS or whatever you used, then bolted to the other piece? Make it thin, clean, and functional. I think I'm actually going to do that haha.
*Edit*
What about a piece of the speaker screen wrapped around and sandwiched between a piece of the ABS or whatever you used, then bolted to the other piece? Make it thin, clean, and functional. I think I'm actually going to do that haha.
Reply
0
0

Thread Starter
Elite Member
iTrader: (1)
Joined: Feb 2008
Posts: 7,930
Total Cats: 44
From: Birmingham Alabama
Black straps, and I'm going to try just putting pinholes int he ABS to let the sound though. Anything that sticks out and it will clip the **** every time you roll the window down. My PO had a screen over the speakers that did that.
*Edit*
What about a piece of the speaker screen wrapped around and sandwiched between a piece of the ABS or whatever you used, then bolted to the other piece? Make it thin, clean, and functional. I think I'm actually going to do that haha.
*Edit*
What about a piece of the speaker screen wrapped around and sandwiched between a piece of the ABS or whatever you used, then bolted to the other piece? Make it thin, clean, and functional. I think I'm actually going to do that haha.
Reply
0
0

I stuck garbage bags up in those holes and then stuffed it as full as I could with pillow stuffing material. It worked pretty well. Killed a lot of the exhaust drone coming through. It's also much easier to remove than great stuff should you ever need to. Either that, or you can do the same trash bag trick and then fill it with great stuff foam. If you ever have to remove it, stab it a million times with a screw driver and pull it out.
Reply
0
0
Thread Starter
Elite Member
iTrader: (1)
Joined: Feb 2008
Posts: 7,930
Total Cats: 44
From: Birmingham Alabama
I stuck garbage bags up in those holes and then stuffed it as full as I could with pillow stuffing material. It worked pretty well. Killed a lot of the exhaust drone coming through. It's also much easier to remove than great stuff should you ever need to. Either that, or you can do the same trash bag trick and then fill it with great stuff foam. If you ever have to remove it, stab it a million times with a screw driver and pull it out.
Reply
0
0

Junior Member
Joined: Apr 2007
Posts: 122
Total Cats: 0
From: Asheville, NC
Reply
0
0
Thread Starter
Elite Member
iTrader: (1)
Joined: Feb 2008
Posts: 7,930
Total Cats: 44
From: Birmingham Alabama
Panel 2.0 is mostly complete. Took the first model off and stripped the fabric off and traced the pattern onto a new board. My speaker hole was going to be too hard to alter, so I just started new. Board is cut and new fabric is on, but I still need to cut out the fabric from around the holes, find some edging to go around the speaker opening, then screw it back on. This one even fits a little better I think. The bottom had a 1/2" gap last time, and the back edge near the latch nearly snagged. I wish I could just make a pattern and have someone with a laser or something to cut them out. ---- is sort of tough to cut and get a smooth edge. Spent more time with a razor blade cleaning up frayed edges than I did actually tracing and cutting.
This new speaker hole is approximately the size of the 6.5" speaker, out to the rubber surround around the woofer. So all of the sound should make it out unimpeded, no grill or fabric to block it.
This new speaker hole is approximately the size of the 6.5" speaker, out to the rubber surround around the woofer. So all of the sound should make it out unimpeded, no grill or fabric to block it.
Reply
0
0
Thread Starter
Elite Member
iTrader: (1)
Joined: Feb 2008
Posts: 7,930
Total Cats: 44
From: Birmingham Alabama
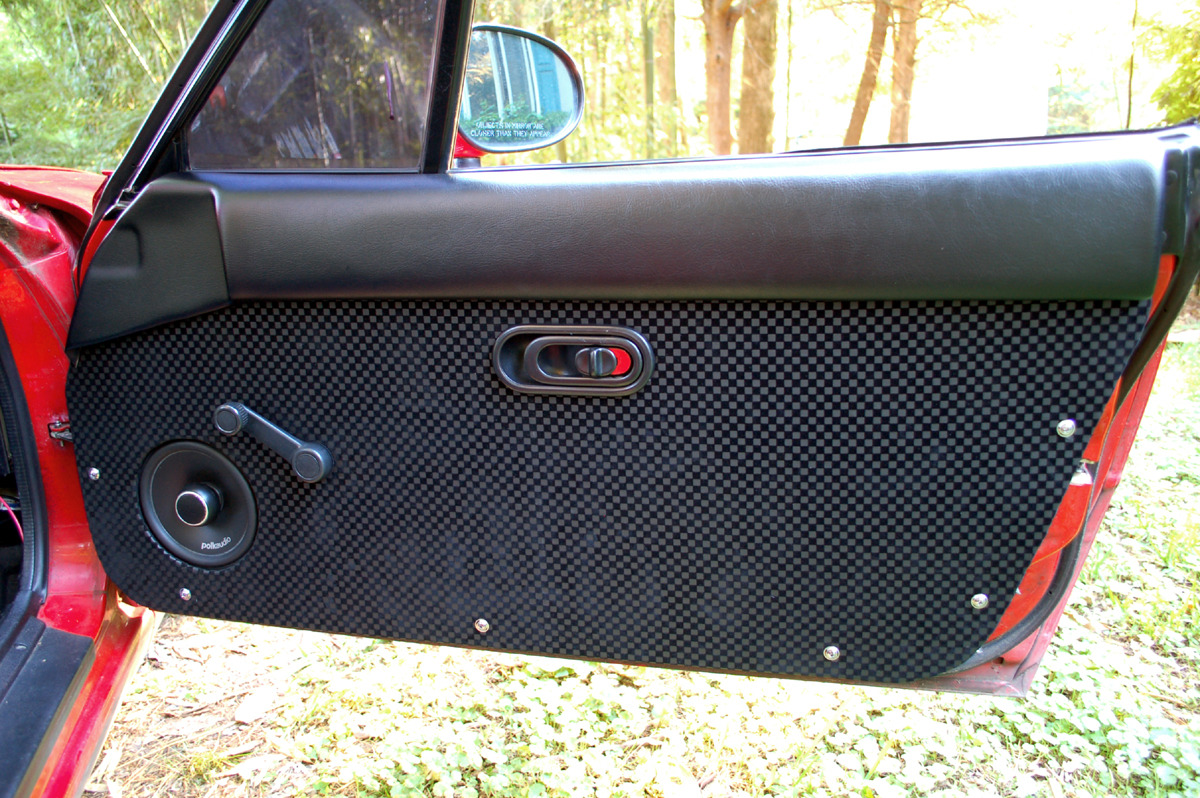
Mark II complete. Well, except for the pulls, which I am redeciding at the moment. Hole already in the board, just need to put the screw through the fabric.
I also wired in a 4 channel Alpine amp today. Quite a bit more power. Though I ended up bridging it to 2 channel since I'm only running fronts. Fatmat in both doors, and now all I lack is the trans tunnel and floors. I'll probably just do the sides of the tunnel and the top where I can get to it, since I don't feel like pulling the dash right now. Also take care of the floors once I get some carpet in hand. Having trouble finding used carpet on ebay or from partsgroup.

Again, I must say, not bad for a ~$20 investment for each panel.
I also wired in a 4 channel Alpine amp today. Quite a bit more power. Though I ended up bridging it to 2 channel since I'm only running fronts. Fatmat in both doors, and now all I lack is the trans tunnel and floors. I'll probably just do the sides of the tunnel and the top where I can get to it, since I don't feel like pulling the dash right now. Also take care of the floors once I get some carpet in hand. Having trouble finding used carpet on ebay or from partsgroup.
Again, I must say, not bad for a ~$20 investment for each panel.
Reply
0
0

To clean them up more you might consider using the industrial self-adhesive velcro on the back of the panels. They have 1" and 2" wide strips at Lowes or HD and the adhesive holds well. Just rip them off if you need to remove them.
NO SCREWS!
NO SCREWS!
Reply
0
0
Thread Starter
Elite Member
iTrader: (1)
Joined: Feb 2008
Posts: 7,930
Total Cats: 44
From: Birmingham Alabama
One thing I really don't like is the stock window cranks. Makes me want power windows. Or at least a crank that looked better than the faded black plastic stockers. Same for the door latches/handles. I could go for some of those ballin' ***, straight out of Nippon silver/chrome metal handles that some of the Miata sites sell. Just looked as I was typing that... ------- $450-$500 for just the ------- aluminum pull handle, not even the surround/cup part. They are out of their ------- minds! Or I'm in the wrong business.
I actually sort of like the screws. Though I wish I had gotten the spacing on the back edge by the latch a bit better. They are both a bit too low to my eyes.
And knowing that I can do it pretty well, I may venture into ABS and do it fully proper. Though this hardboard might hold up fine. It's slightly more flimsy than I thought, and seeing what just morning dew did to the piece I left on the back porch overnight sort of worries me. Hopefully I don't forgot to roll my windows up and get them soaked. Come out to a flimsy, twisted up mess of fabric. Hell, even the water getting in past my destroyed beltline weatherstripping may do some damage. At least the white board lamination side is facing out. The untreated brown part is fabric covered. Plus I have the plastic covered in evil sticky black ---- covering the openings in the door shell. ---- that black stuff.
Reply
0
0
Thread Starter
Elite Member
iTrader: (1)
Joined: Feb 2008
Posts: 7,930
Total Cats: 44
From: Birmingham Alabama
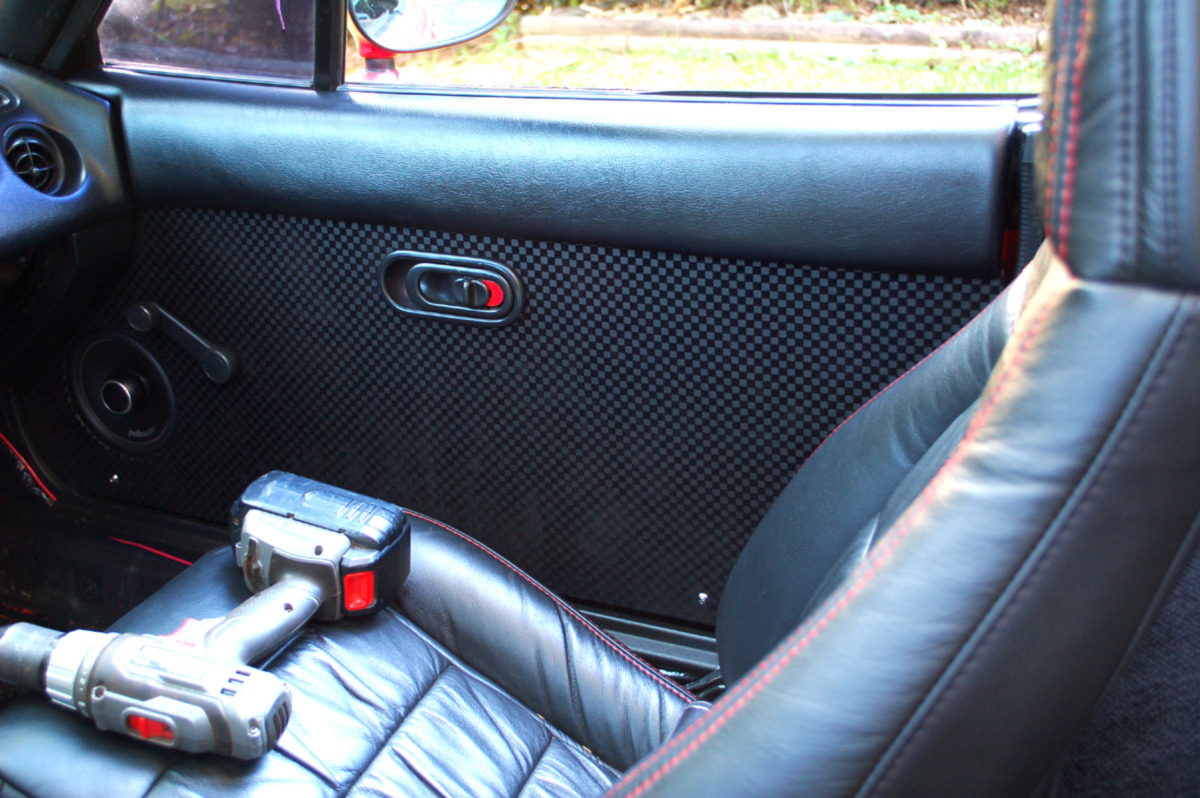
For comparison, old vs new.
I really liked my old ones, before they starting coming loose from the tattered board under the leather, and before I cut the damn holes too large and the ---- sagged and exposed padding and board behind. This is just after install. Still pretty baller status.

New
I'm excited to see them with carpet installed, and center console back in the car for the first time in years.
PS. If anyone wants the Katzkin leather door coverings, they are still in great shape and intact. The only issue that is possibly not fixable, is where I cut the drive side door handle/latch hole maybe 1/2" too large and the leather never stayed tucked behind the cup very well. Probably fixable by sewing a strap behind it to hold it taut. Someone taking their time could definitely make some awesome door panels out of them. I just installed them hurried onto already destroyed cardboard junk door cards, so they never looked quite right and always fit loose and wrinkly like my *****. $50 shipped. $129 new before shipping.
I really liked my old ones, before they starting coming loose from the tattered board under the leather, and before I cut the damn holes too large and the ---- sagged and exposed padding and board behind. This is just after install. Still pretty baller status.
New
I'm excited to see them with carpet installed, and center console back in the car for the first time in years.
PS. If anyone wants the Katzkin leather door coverings, they are still in great shape and intact. The only issue that is possibly not fixable, is where I cut the drive side door handle/latch hole maybe 1/2" too large and the leather never stayed tucked behind the cup very well. Probably fixable by sewing a strap behind it to hold it taut. Someone taking their time could definitely make some awesome door panels out of them. I just installed them hurried onto already destroyed cardboard junk door cards, so they never looked quite right and always fit loose and wrinkly like my *****. $50 shipped. $129 new before shipping.
Reply
0
0
Thread Starter
Elite Member
iTrader: (1)
Joined: Feb 2008
Posts: 7,930
Total Cats: 44
From: Birmingham Alabama
After blasting some more base through the speakers, the passenger side panel has failed my QC check. I cut the fabric around the speaker hole too close, and didn't give myself enough overlap. I was originally going to put some sort of c channel trim around the hole, but discovered that the fabric was pretty flexible and would fold around the edge and glue down. I did this on the driver side and it seems to be holding very well, but the passenger side is now peeling away around the speaker hole. So I'll either have to recover it, or go with the trim idea.
Reply
0
0