
installing a miata CAS onto an FE3N


Thread Starter
Senior Member
Joined: Jan 2011
Posts: 608
Total Cats: 172
From: sacramento ,ca
here come the pics:
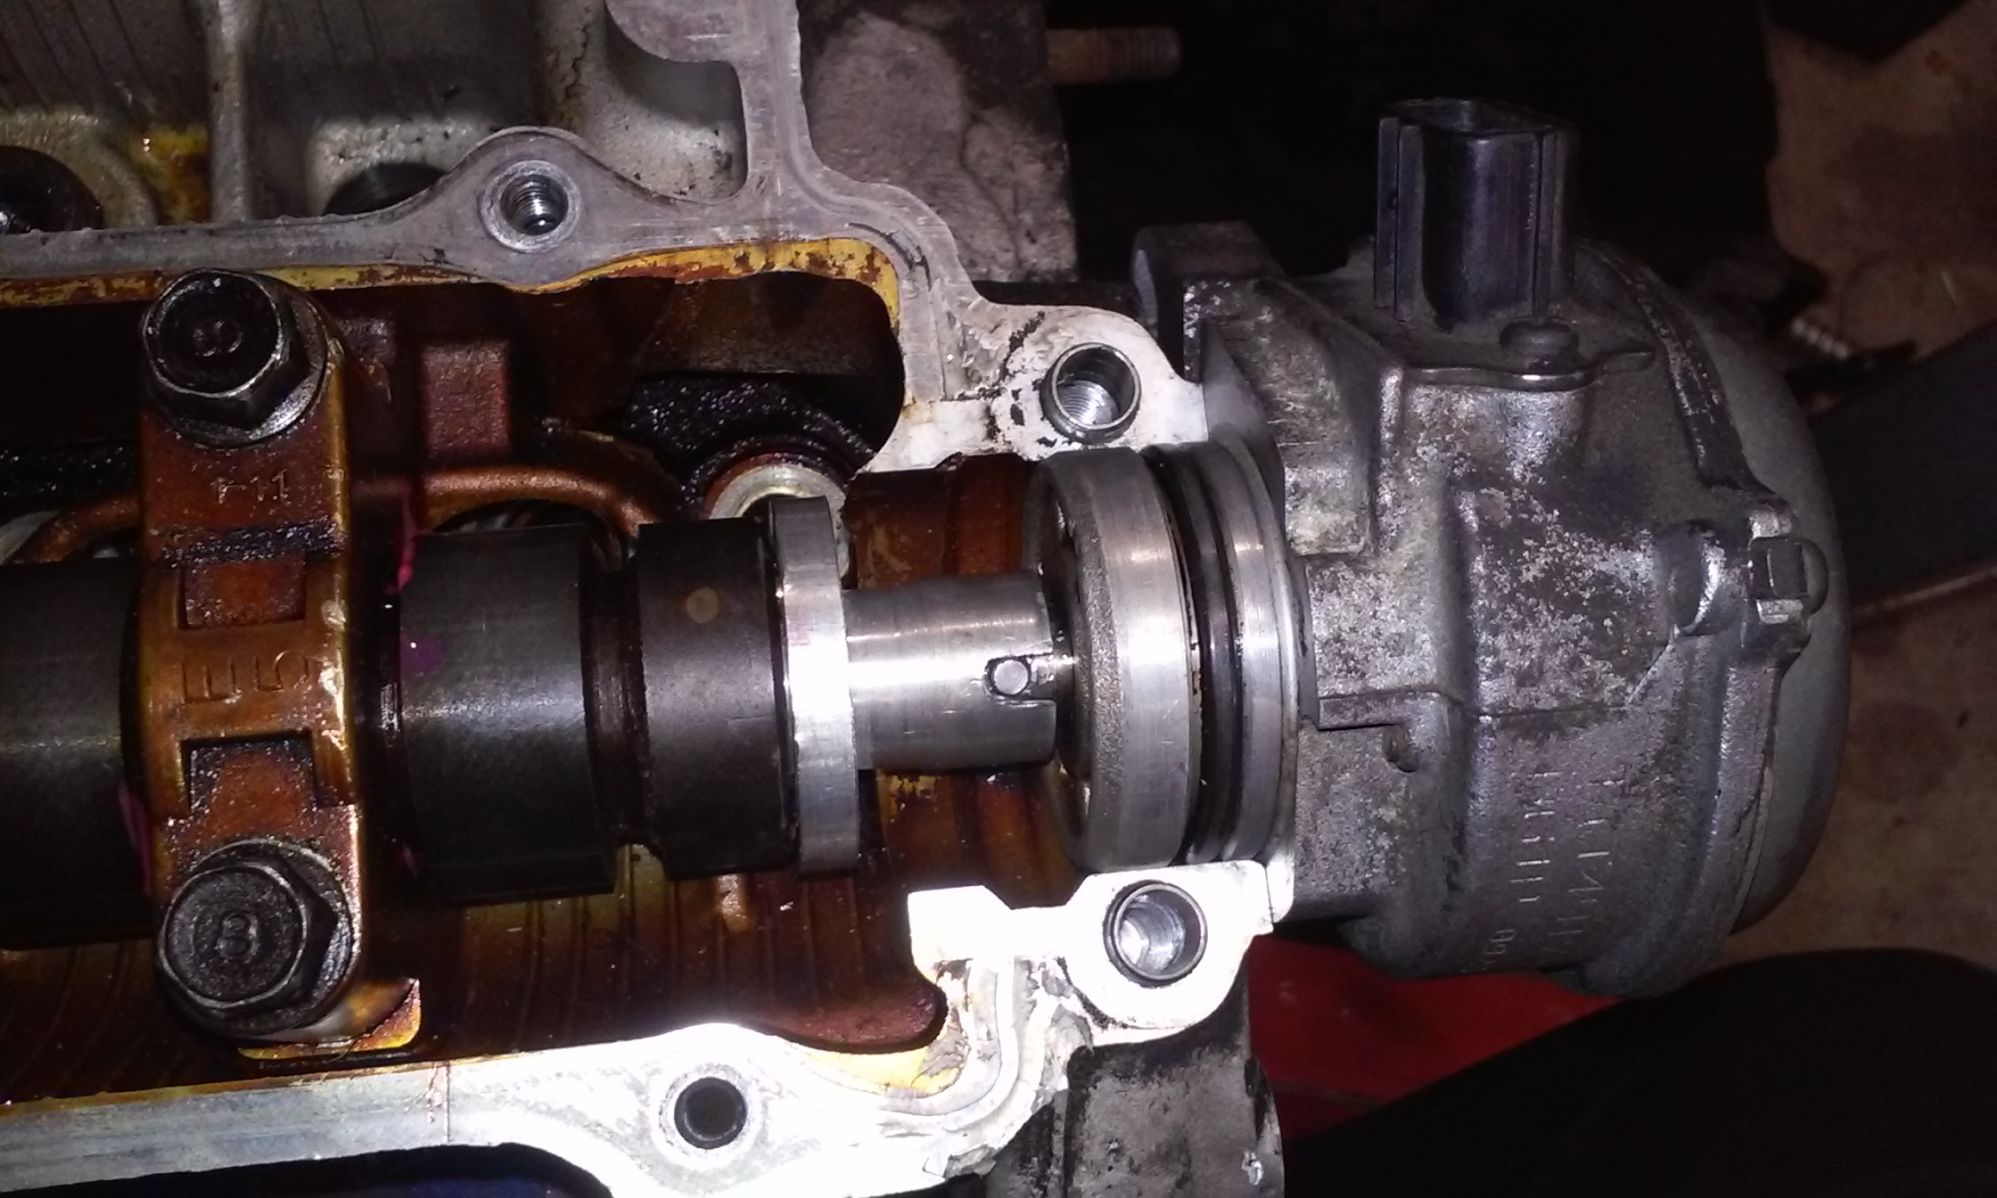
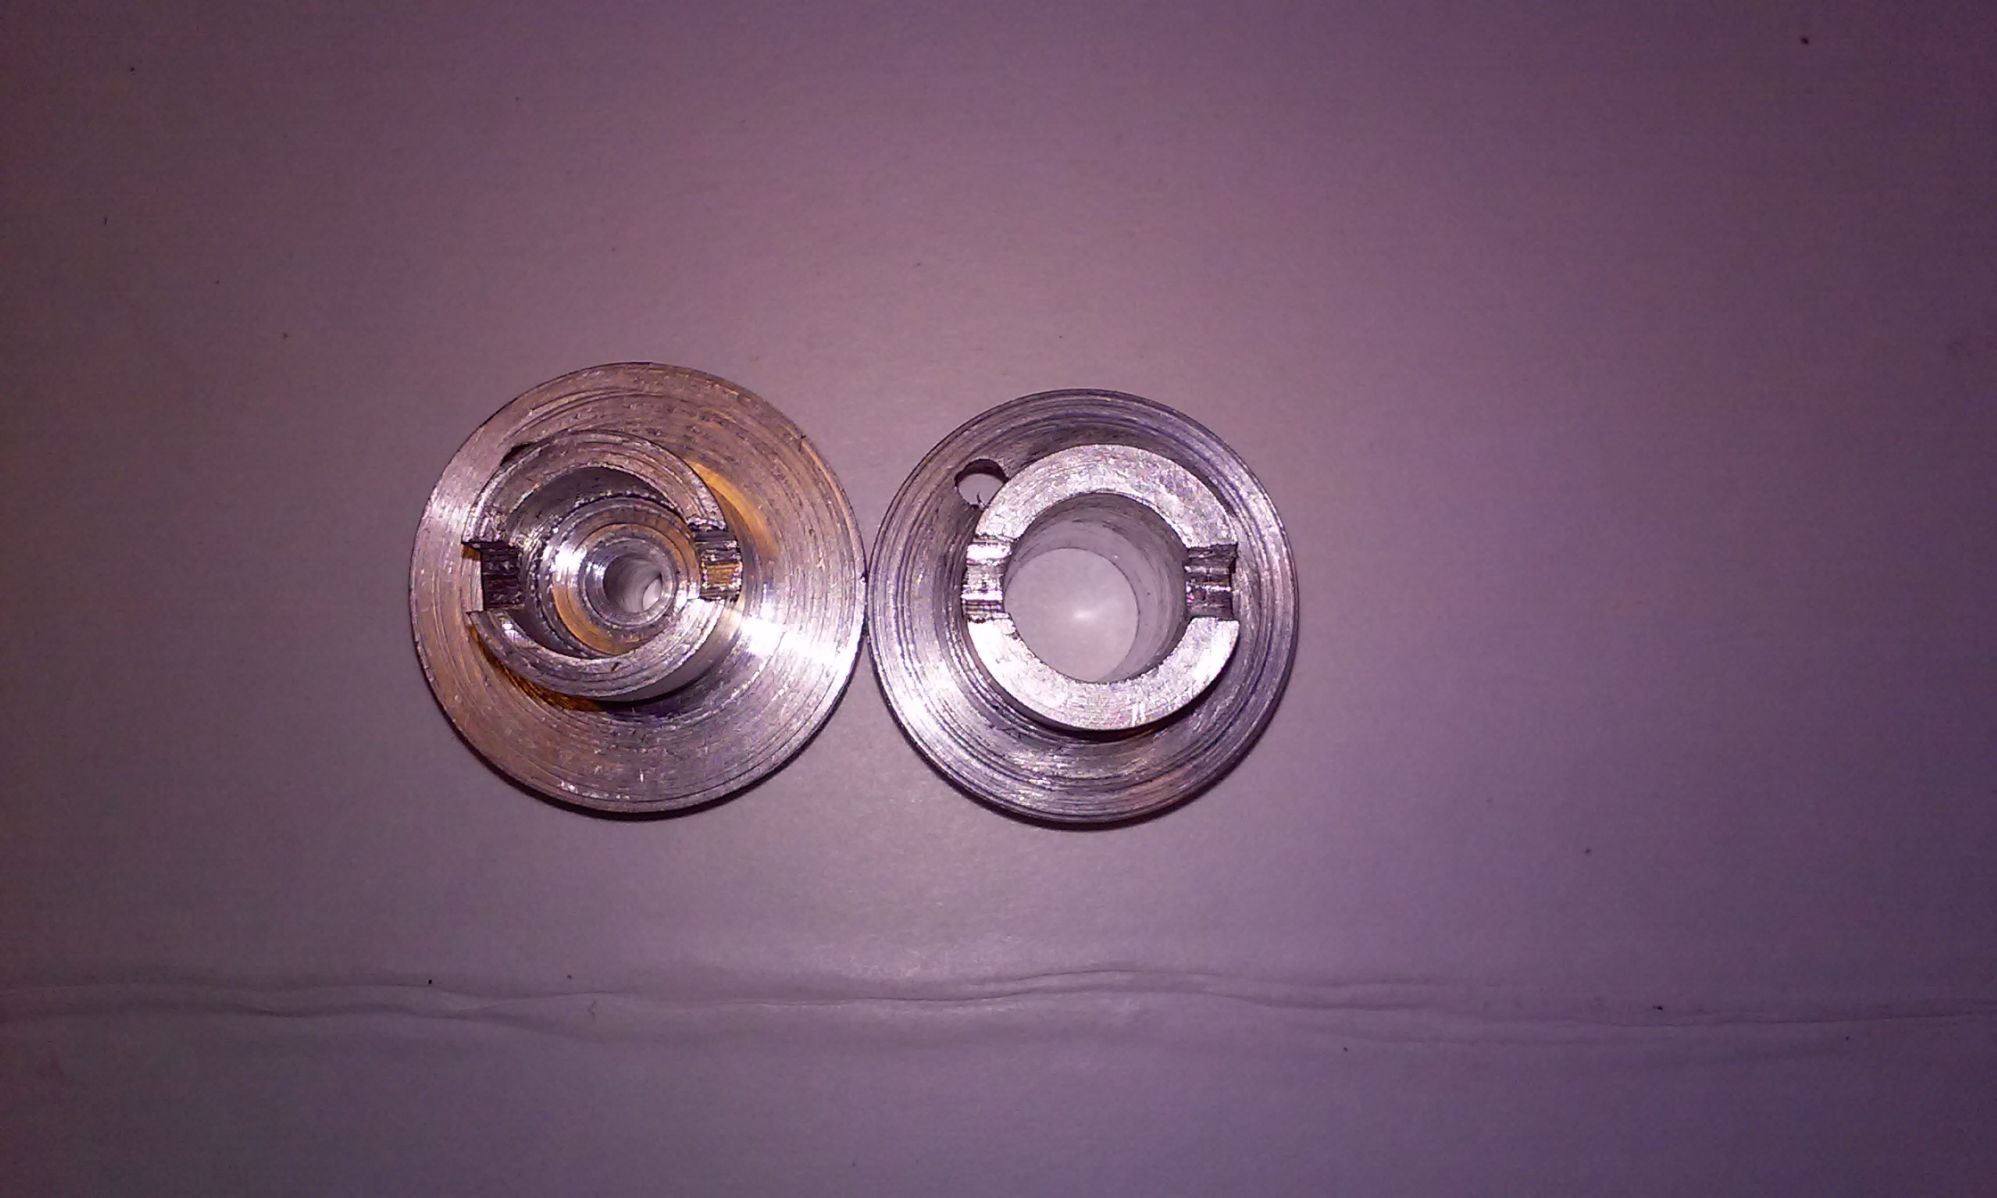
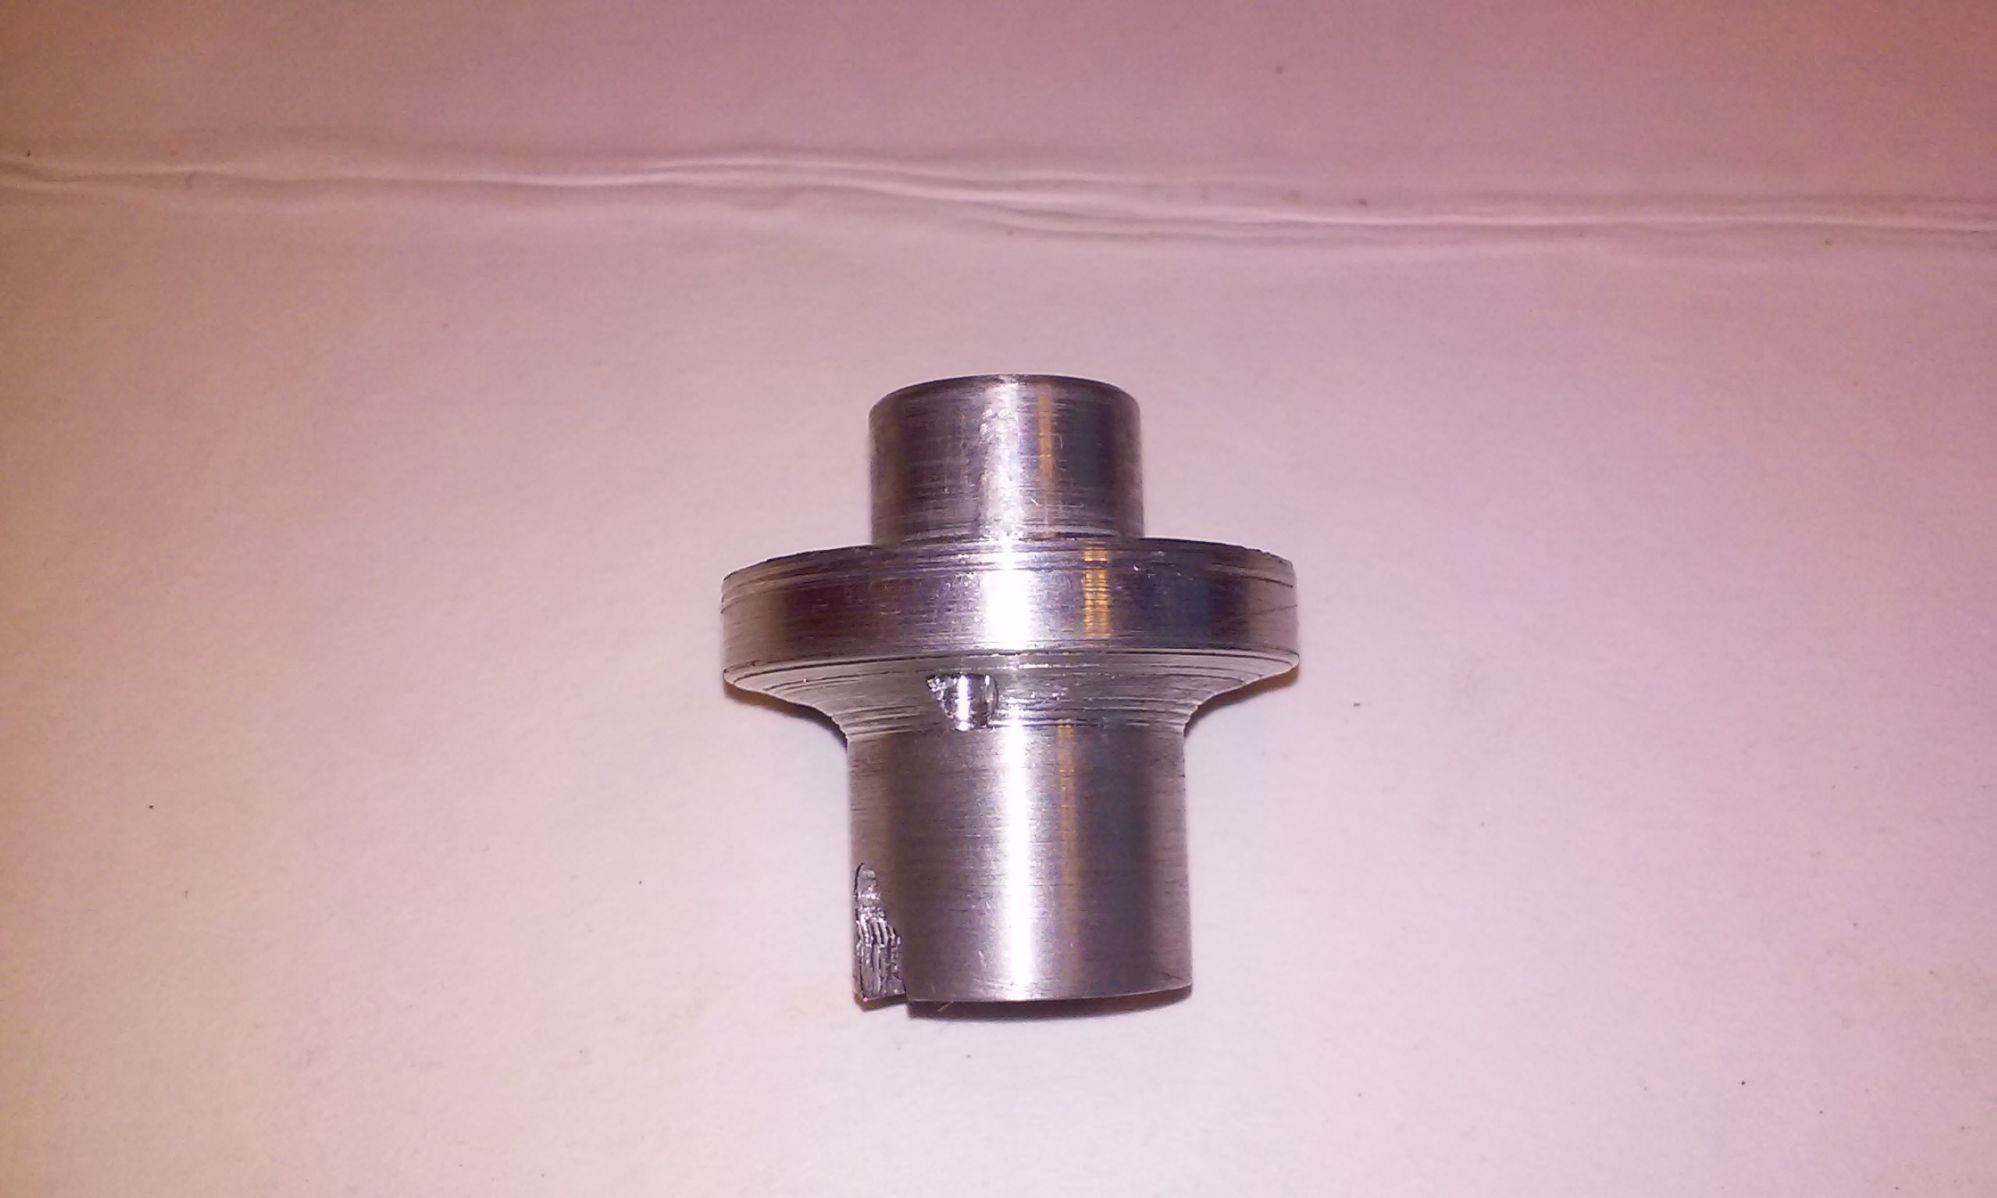
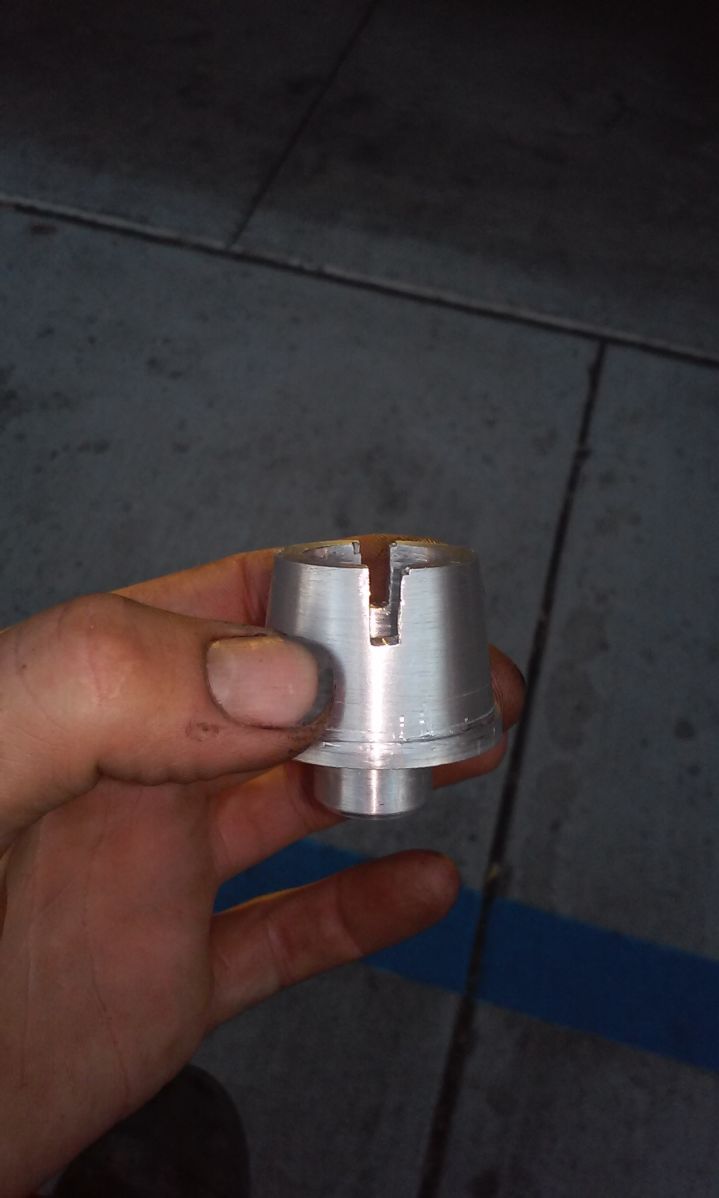
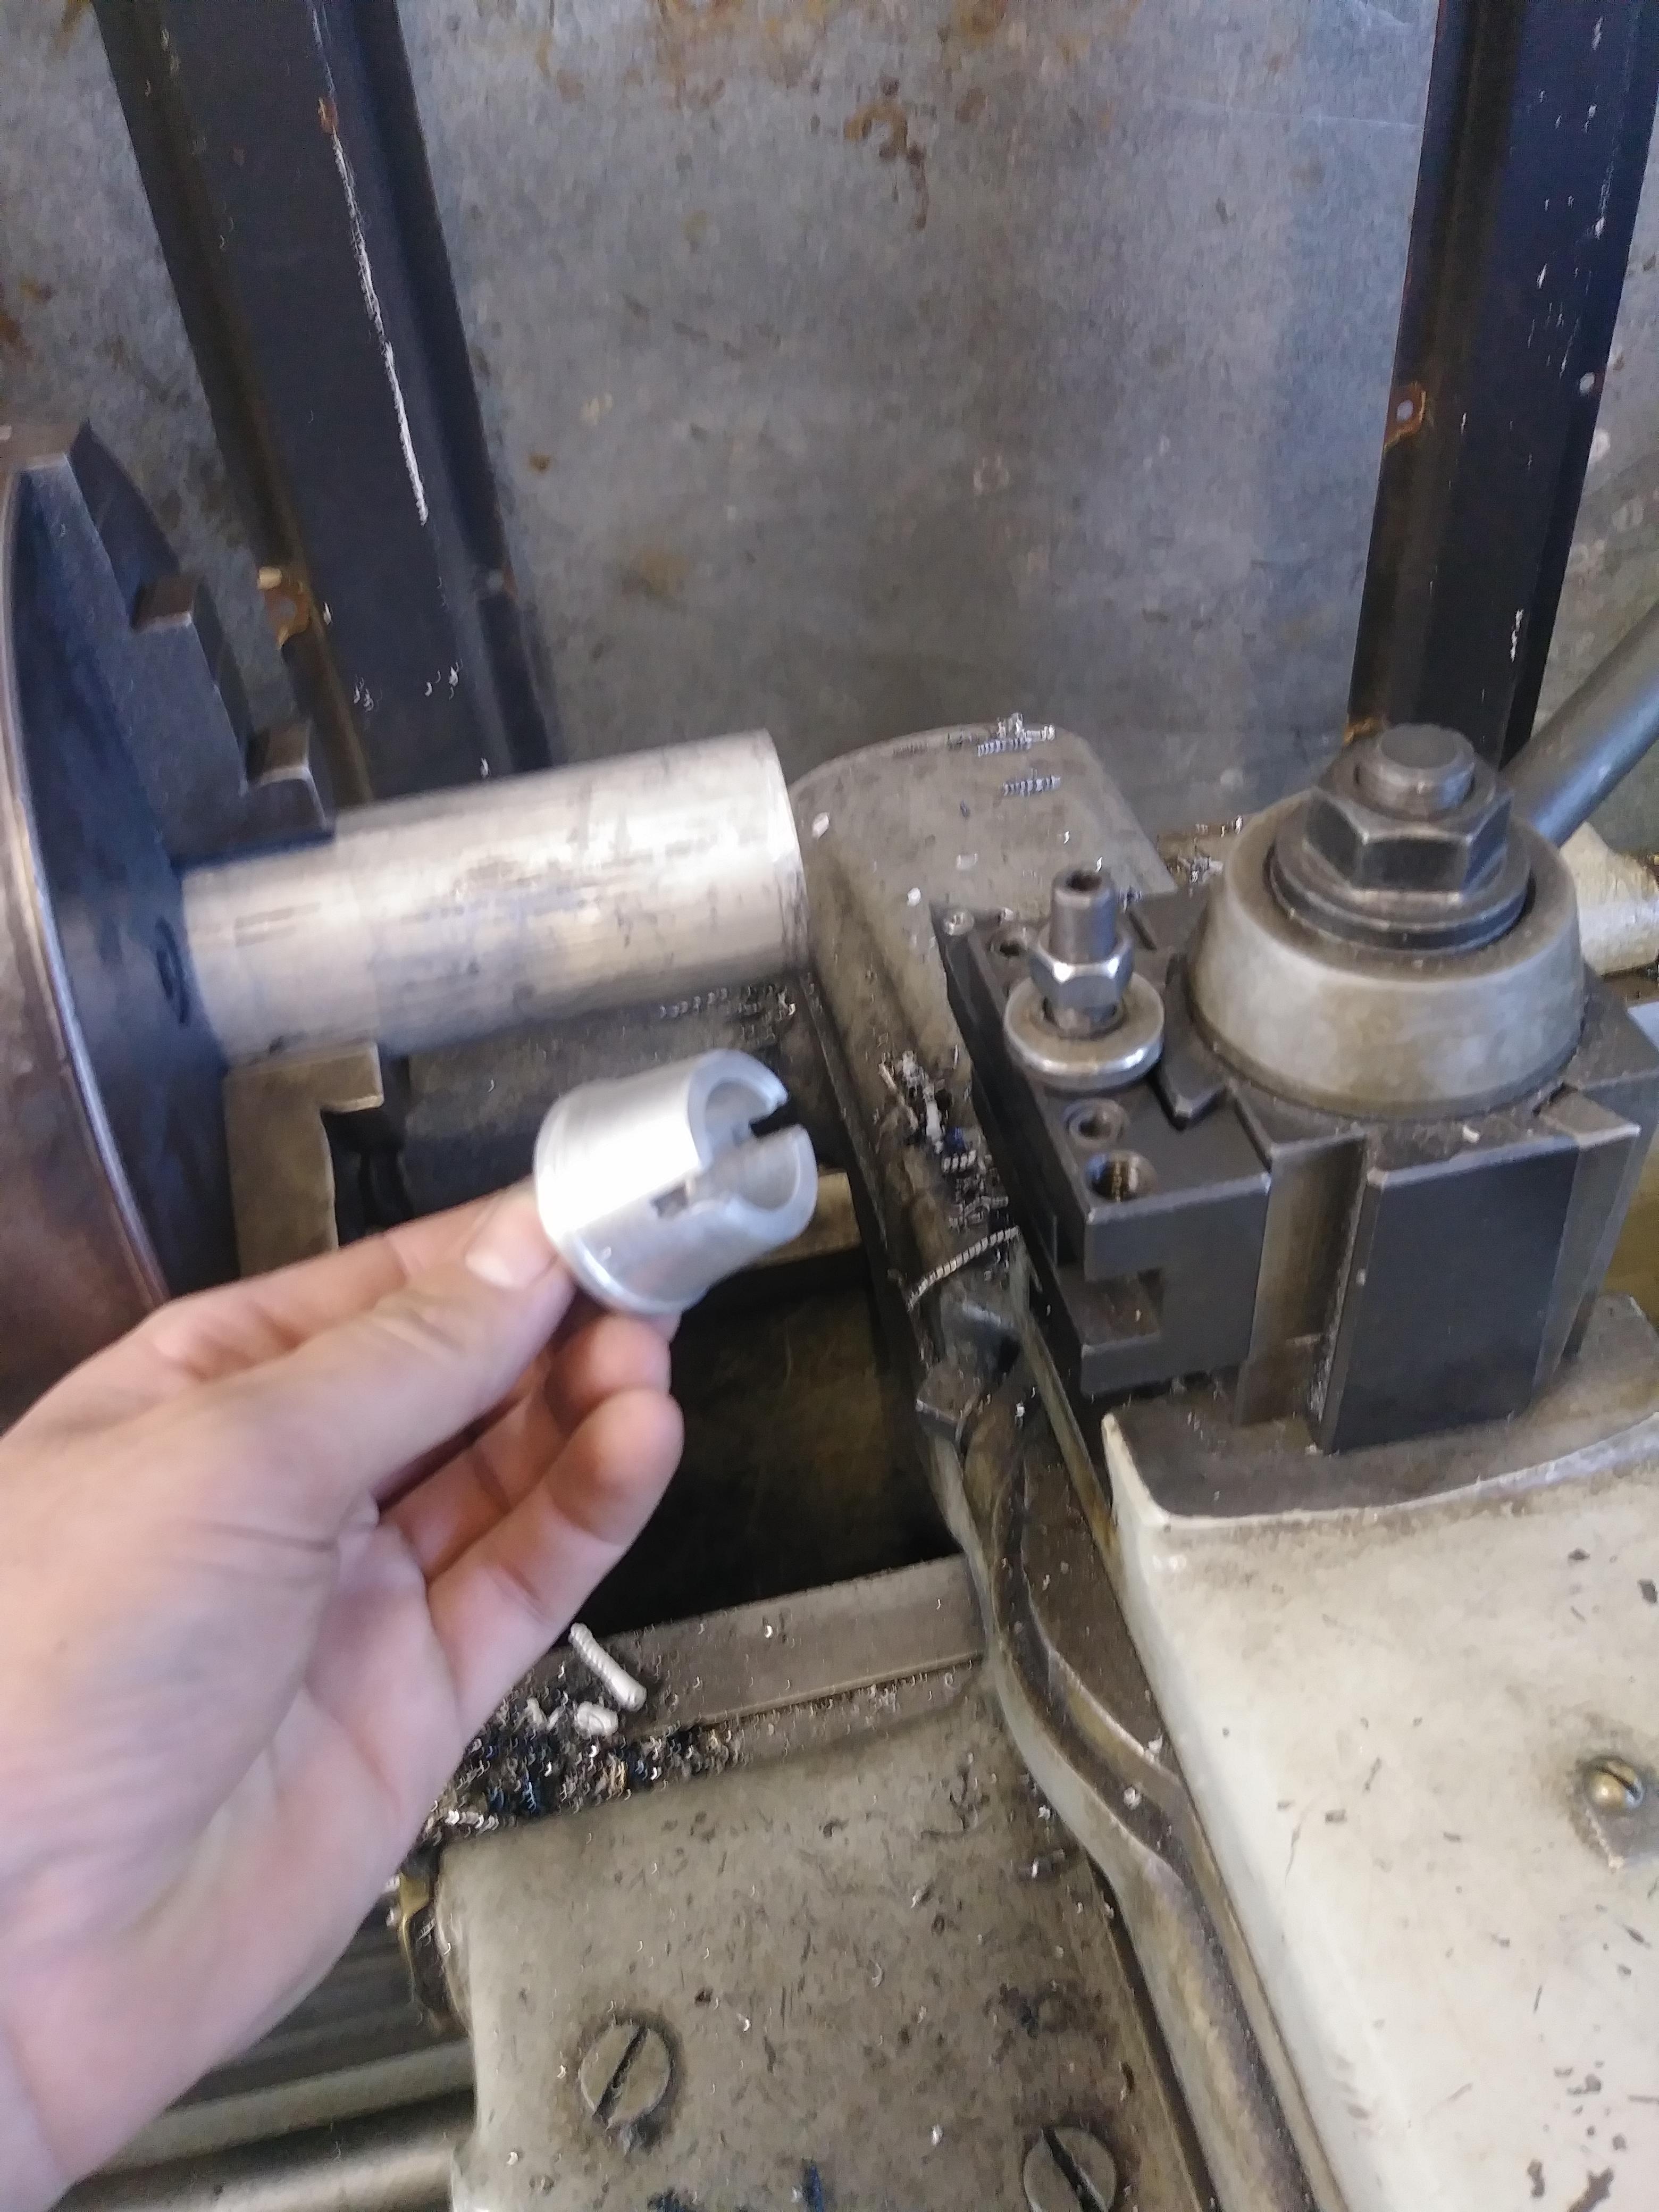
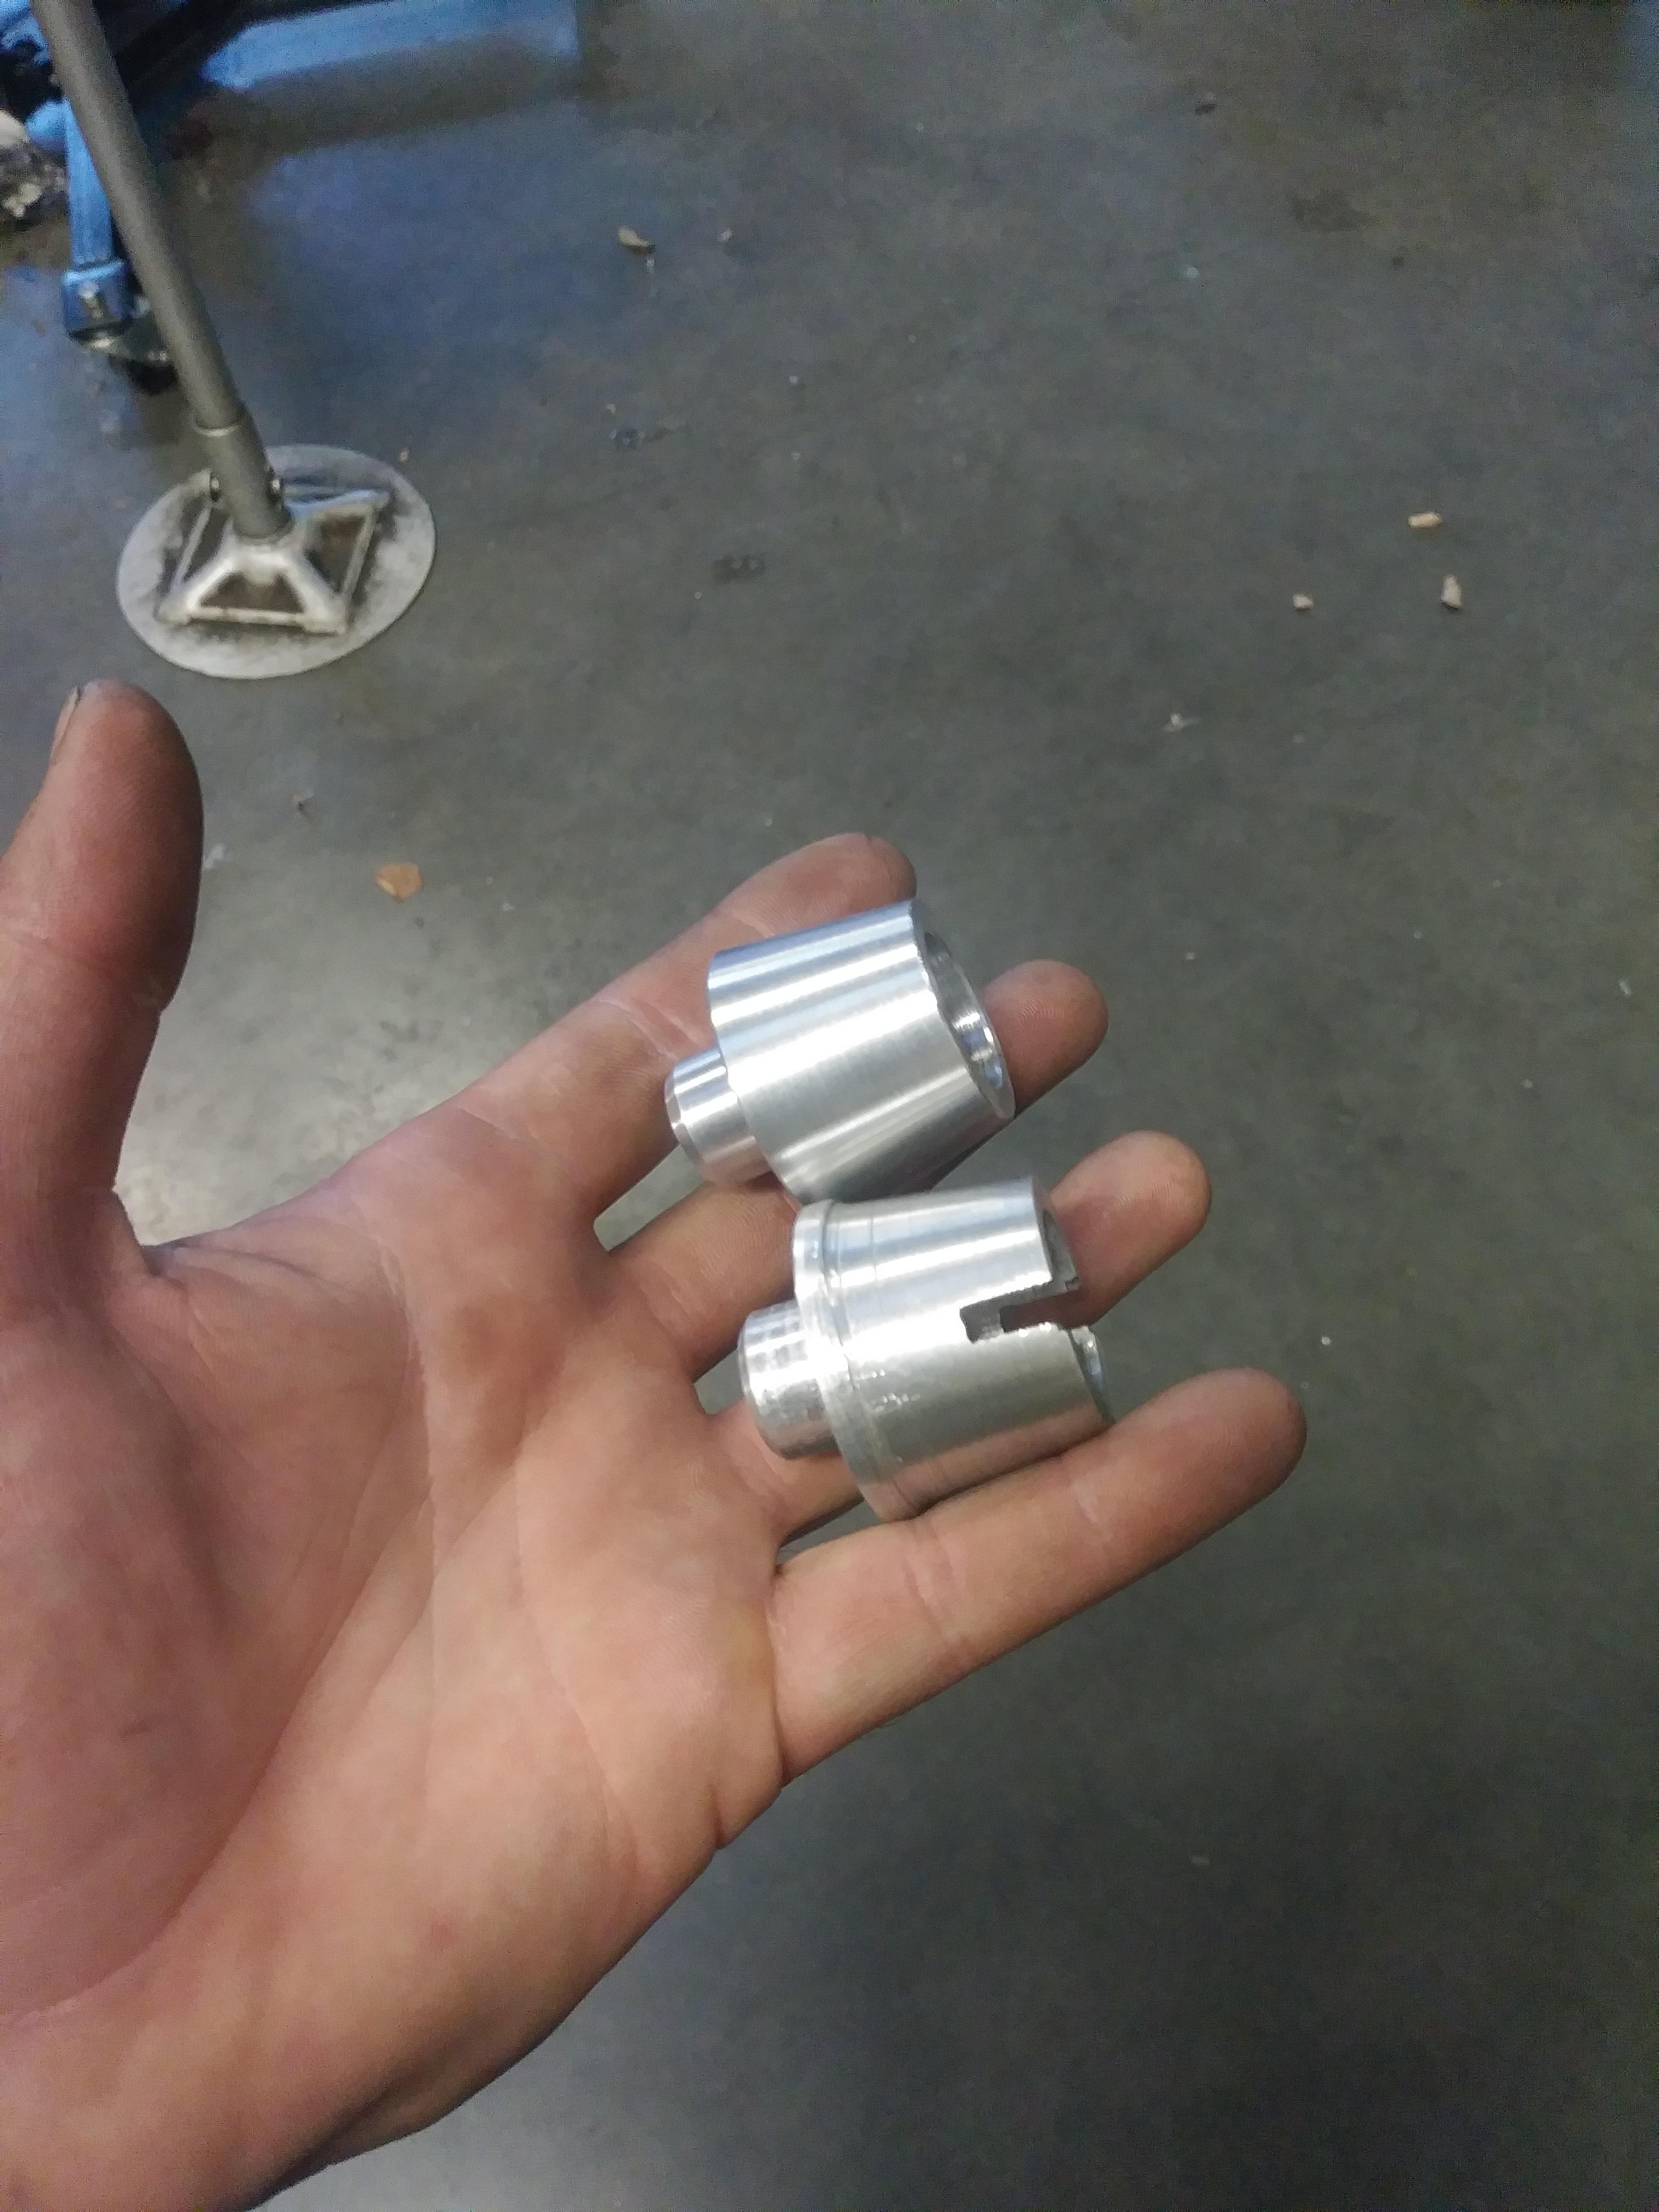
final prototype:
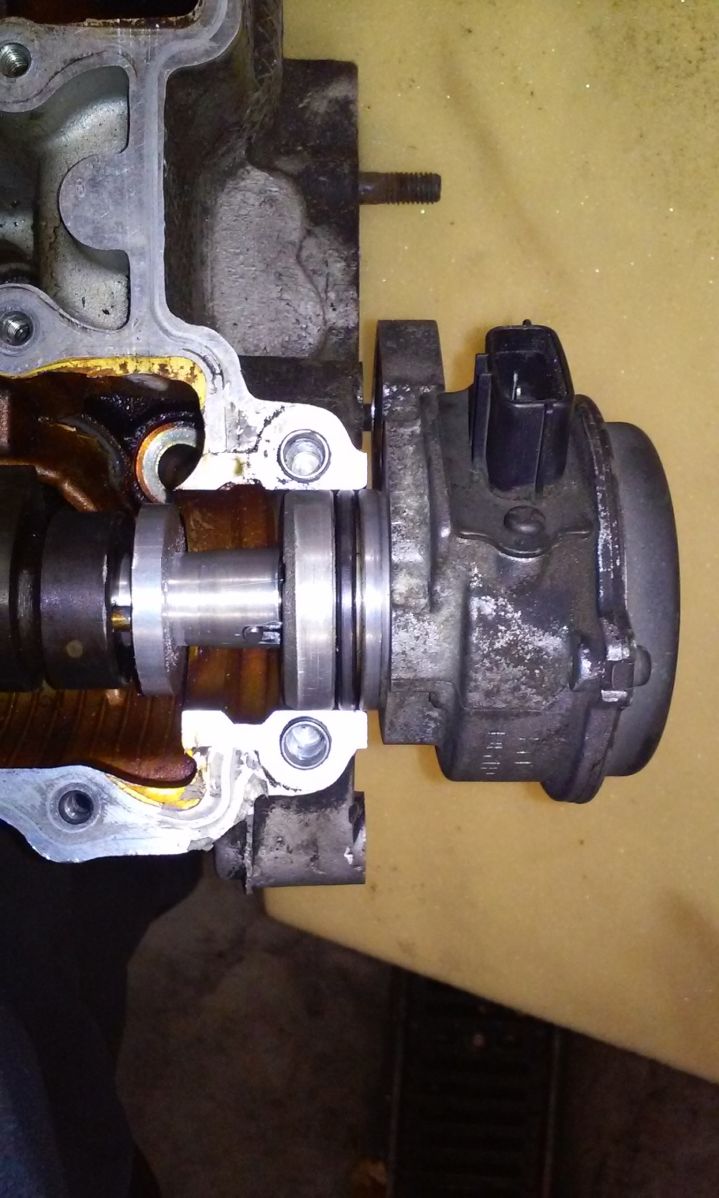
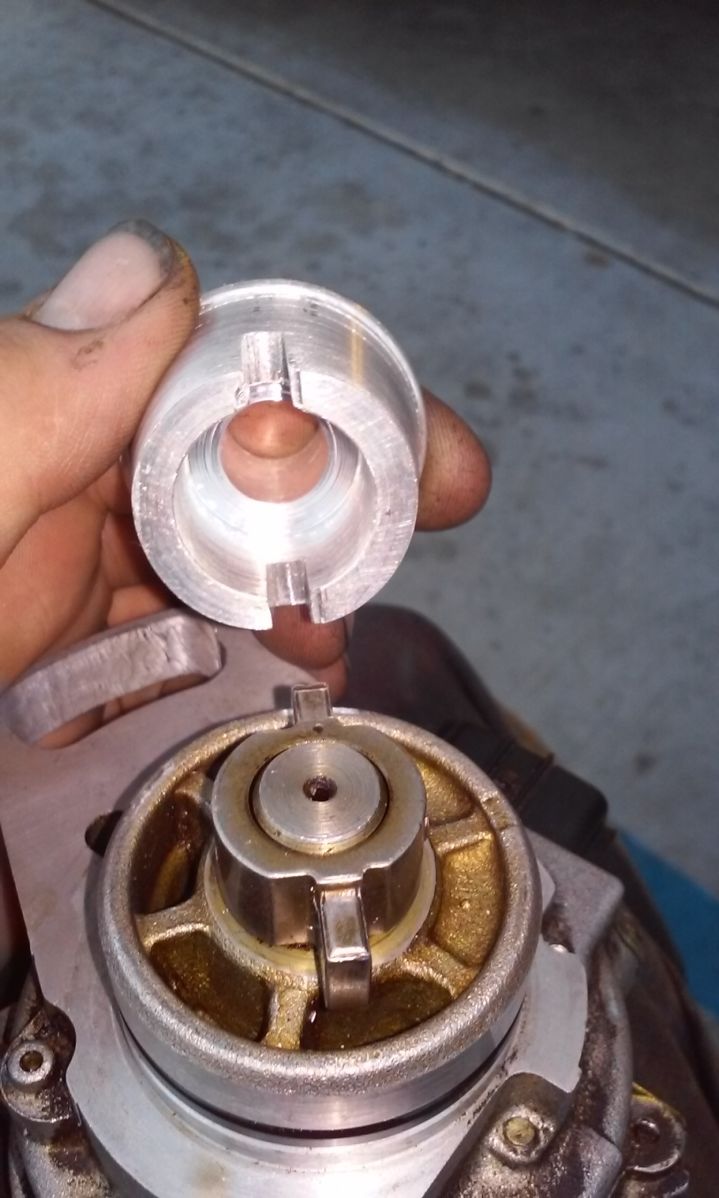
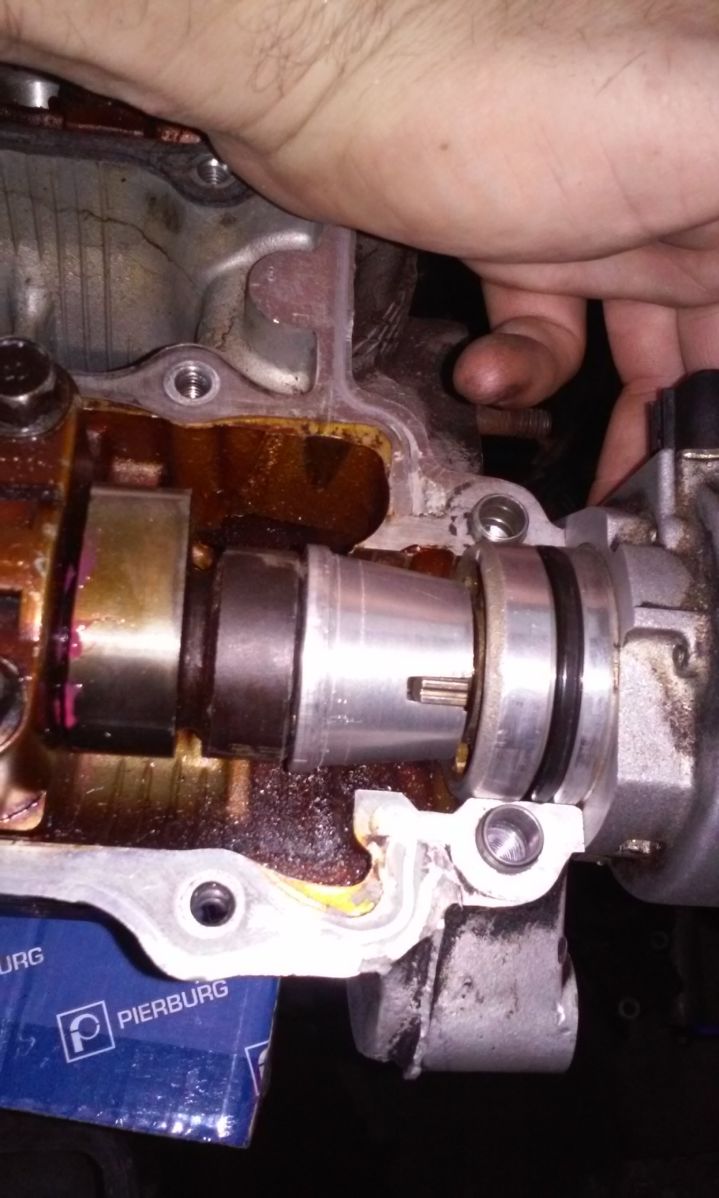
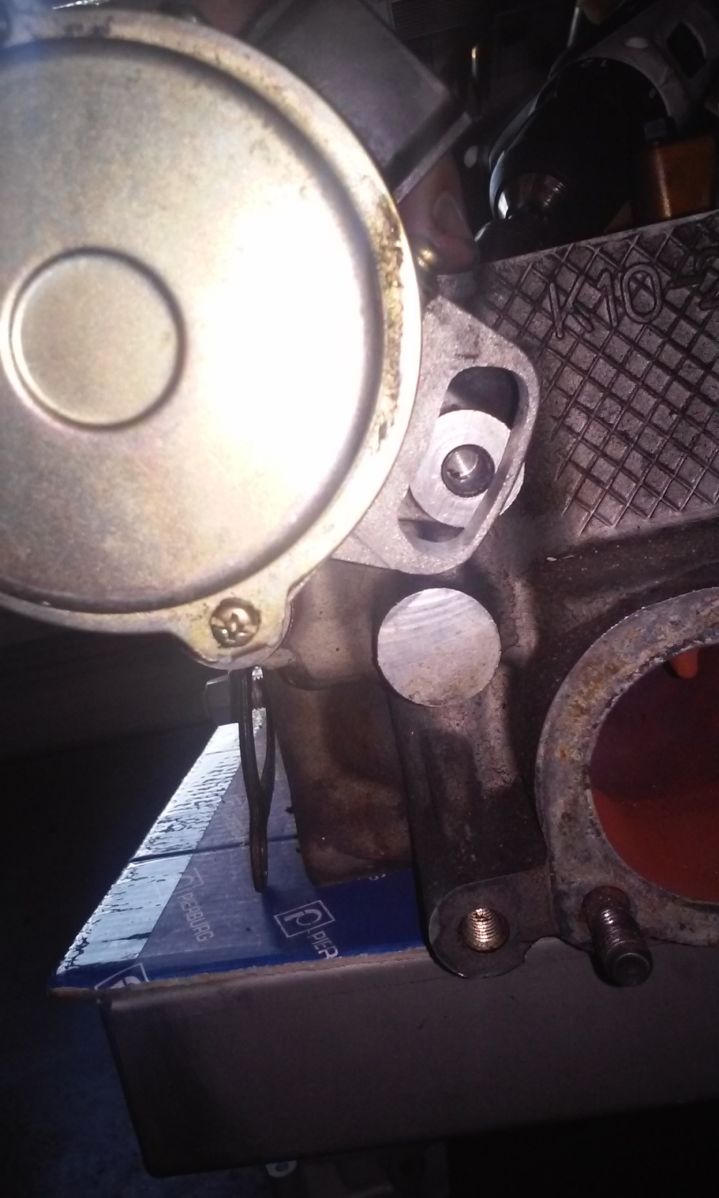
how far the cas has to come out of the head for the adapter to fall out:
how far the cas has to come out before it will disengage the locating pin on tha cam
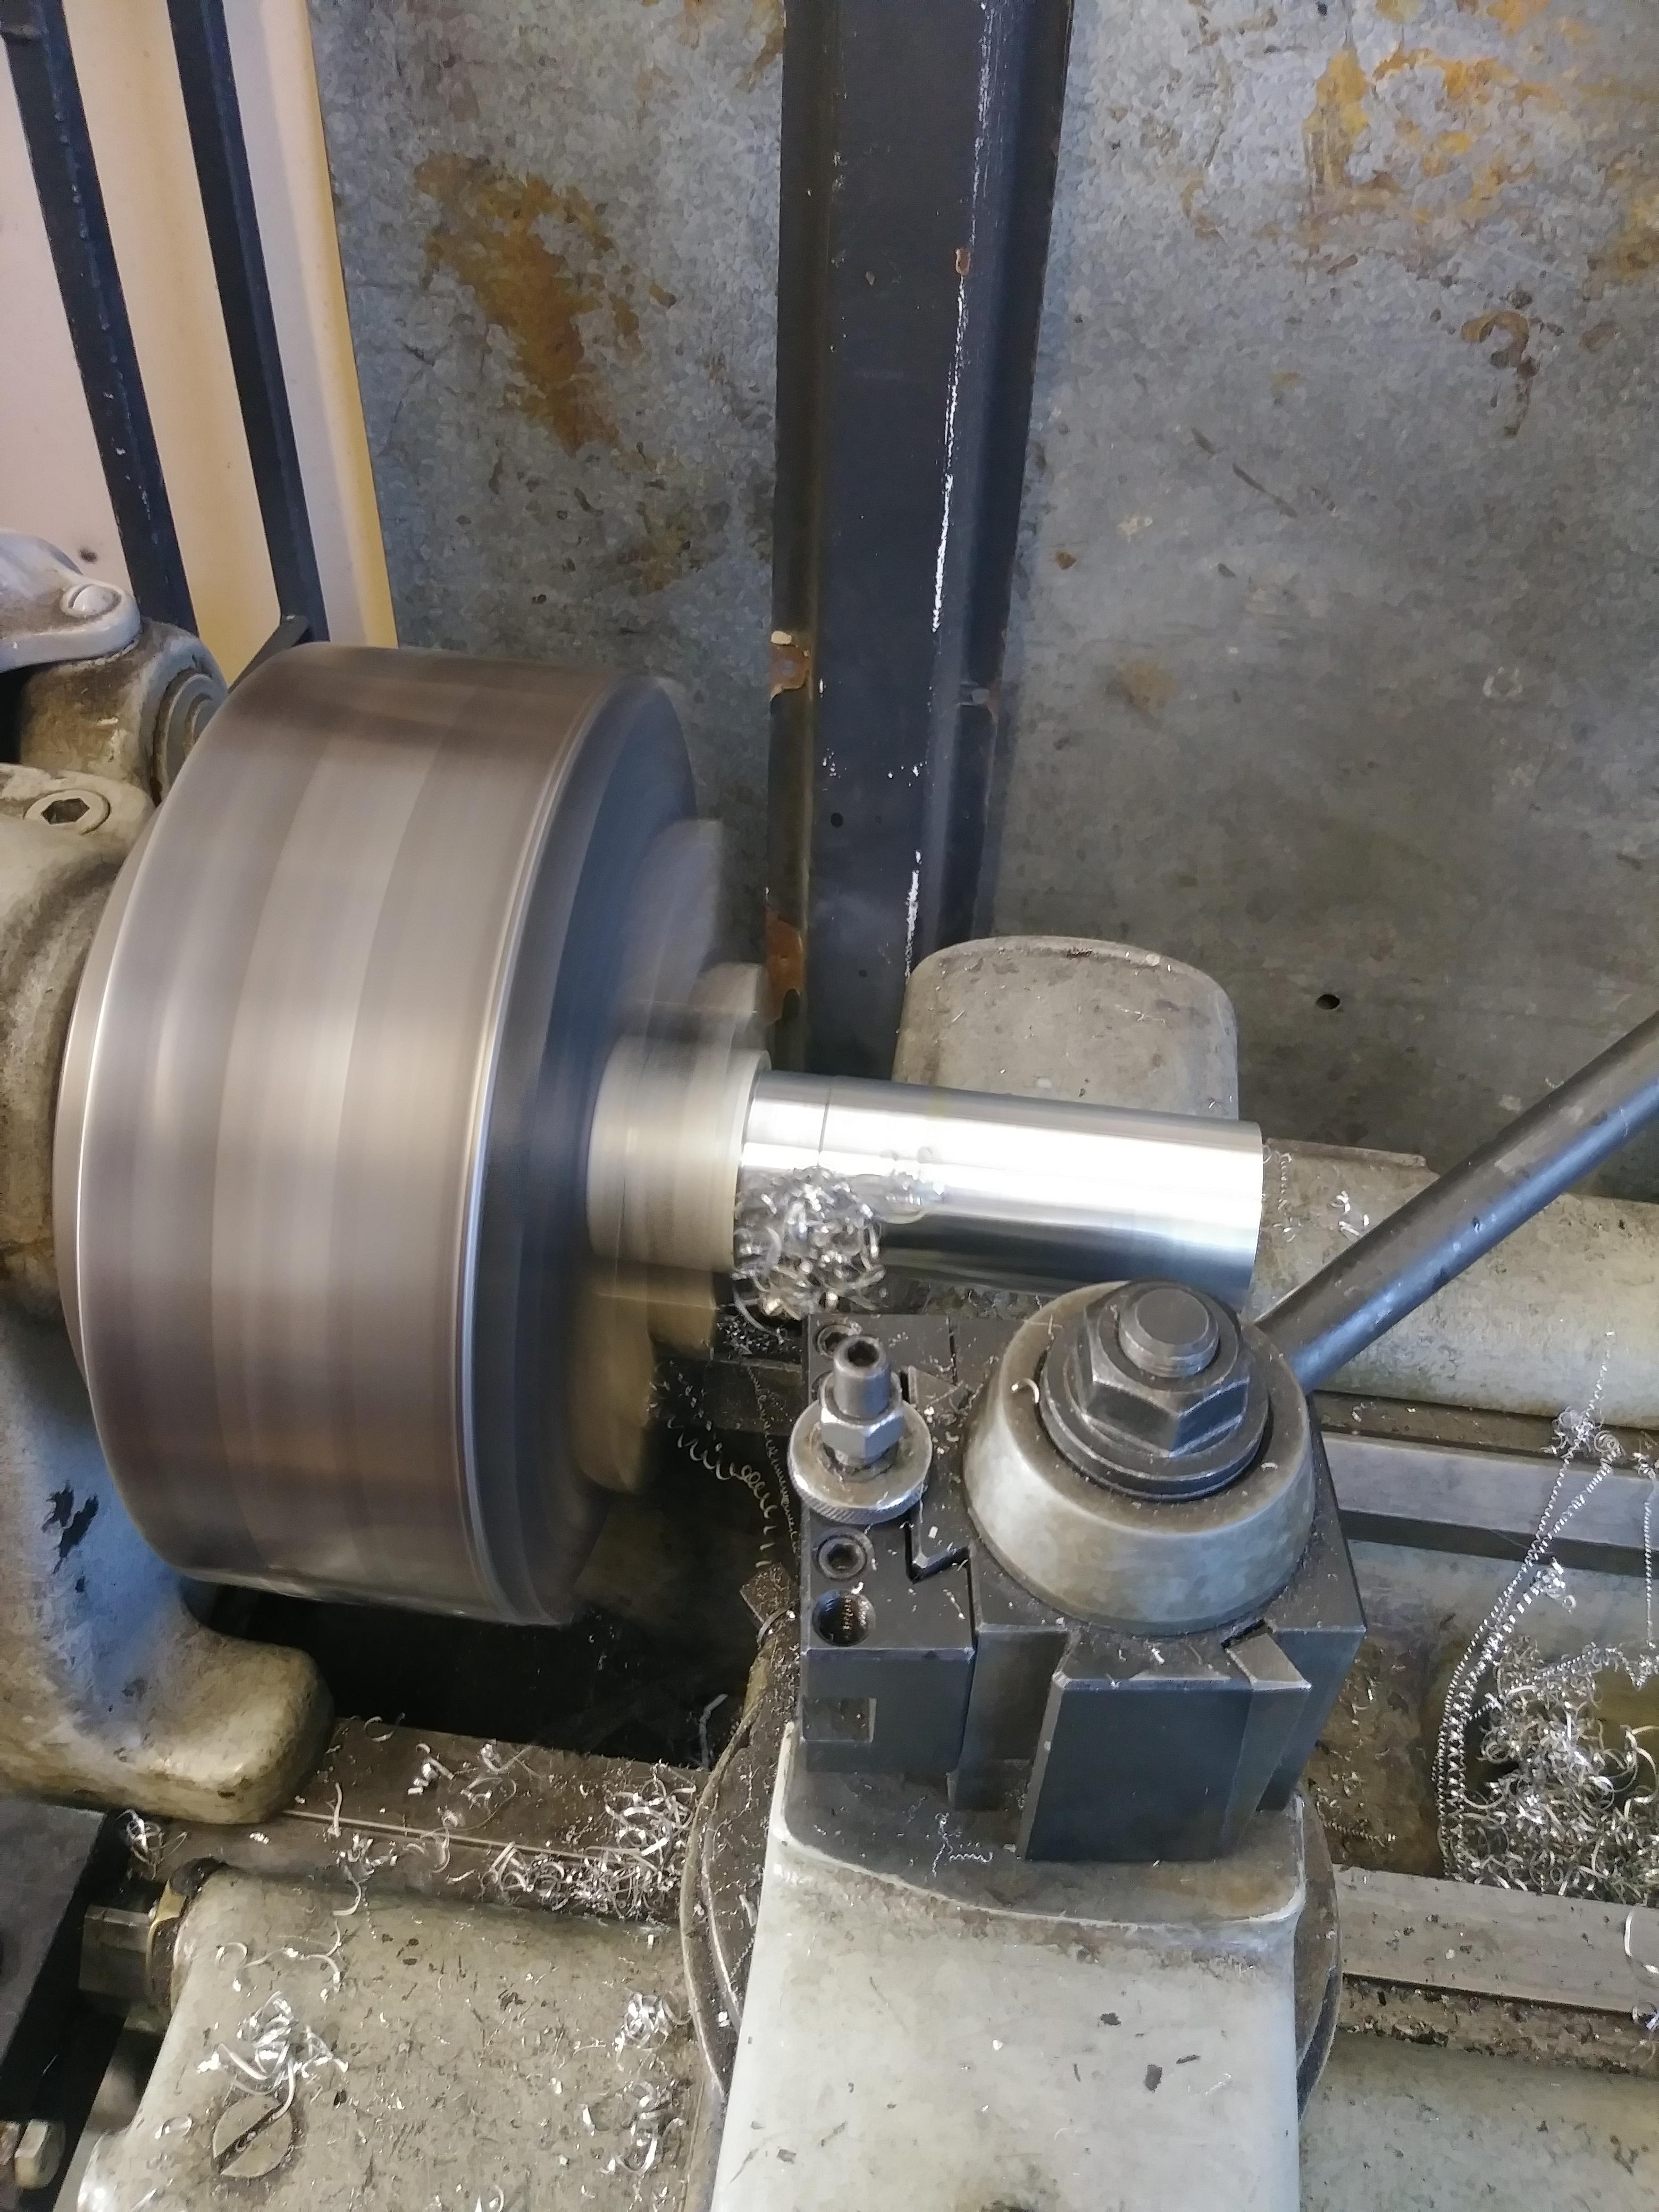
video of me spinning it with a drill with the cas not bolted down to see if it was off center. looked straight to me. i used a ton of assembly lube oin the bearings to make sure they wouldnt be damaged by spinning.
https://www.youtube.com/watch?v=2esZ...ature=youtu.be
final prototype:
how far the cas has to come out of the head for the adapter to fall out:
how far the cas has to come out before it will disengage the locating pin on tha cam
video of me spinning it with a drill with the cas not bolted down to see if it was off center. looked straight to me. i used a ton of assembly lube oin the bearings to make sure they wouldnt be damaged by spinning.
https://www.youtube.com/watch?v=2esZ...ature=youtu.be
Reply
 0
0

0
Thread Starter
Senior Member
Joined: Jan 2011
Posts: 608
Total Cats: 172
From: sacramento ,ca
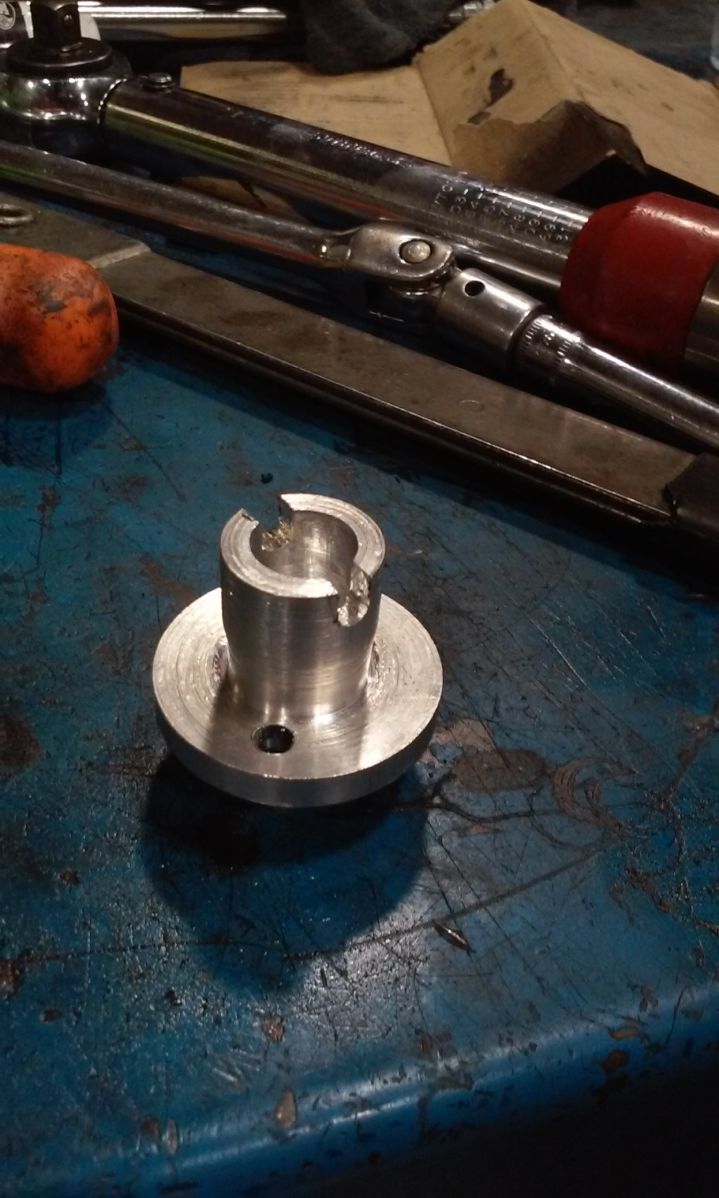
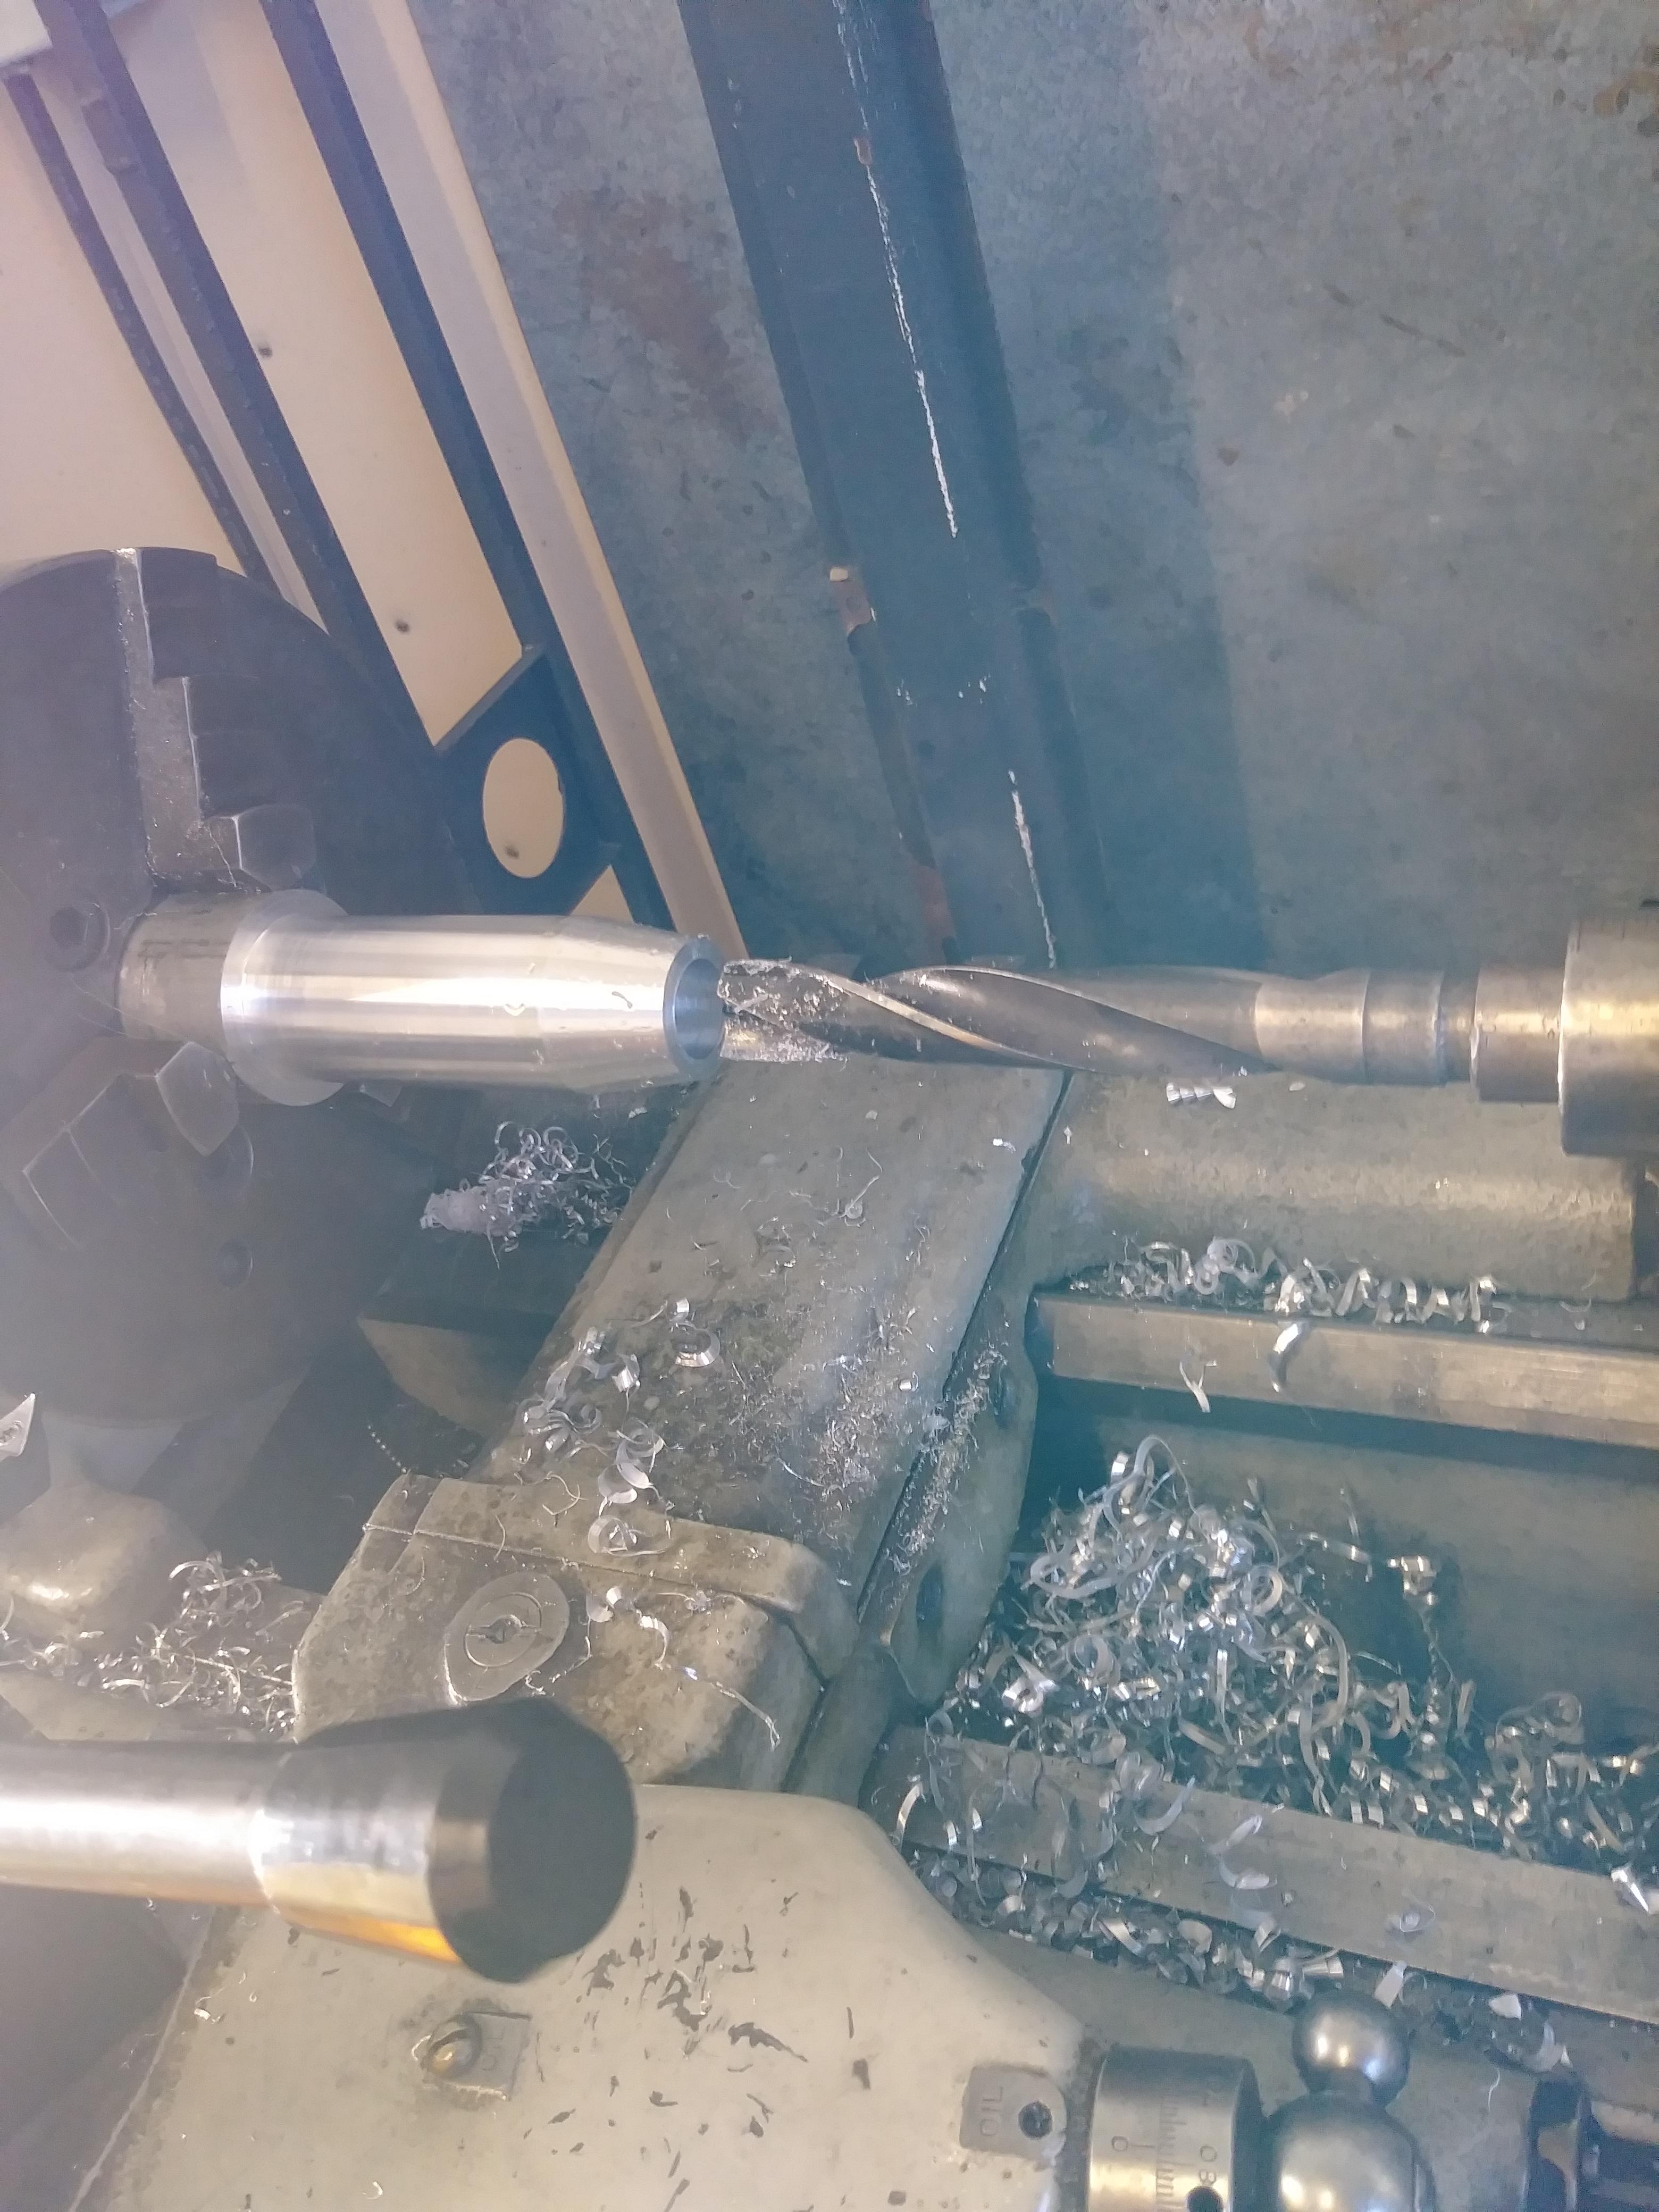
i think im going to build the final one out of steel so i dont have to worry about durability or having thermal expansion bind anything up. im new to using a lathe(this is my first precision piece) so i had to slightly oversize the center hole to make up for it not being perfectly centered.
i didnt measure the clearances but if i had to guess id say i had around .010" rotational play and .090"-.110" before it bottoms out in the key way.
i didnt measure the clearances but if i had to guess id say i had around .010" rotational play and .090"-.110" before it bottoms out in the key way.
Reply
0
0


Thread Starter
Senior Member
Joined: Jan 2011
Posts: 608
Total Cats: 172
From: sacramento ,ca
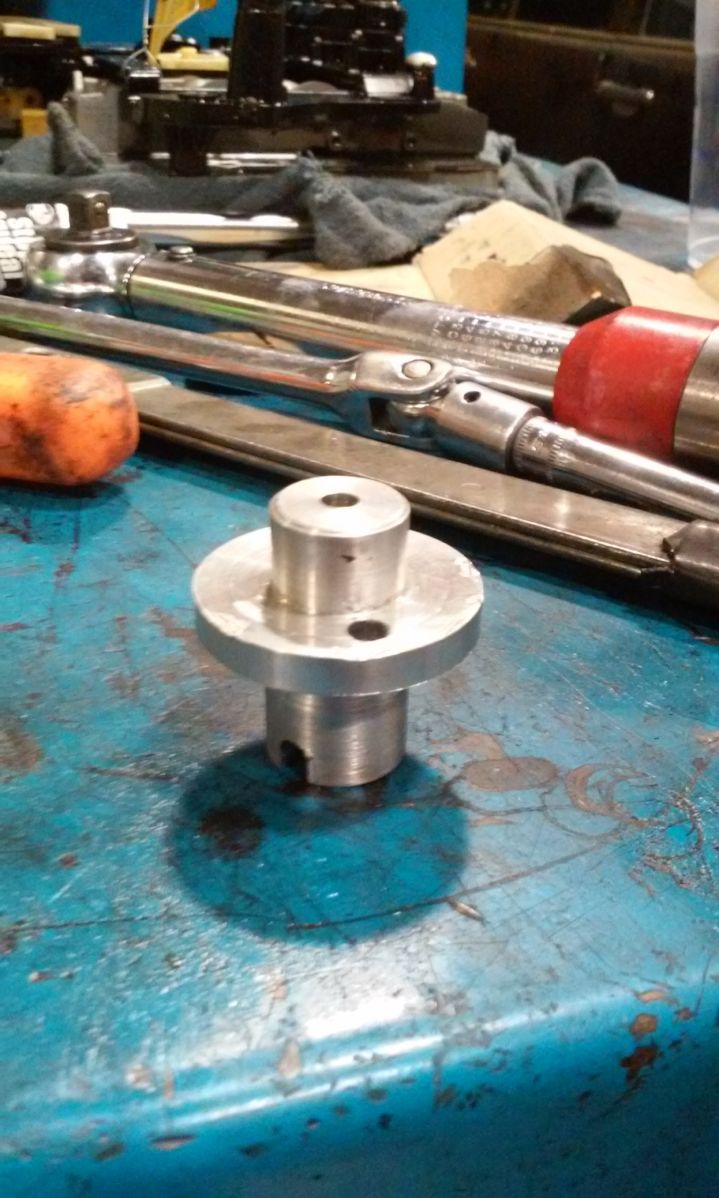
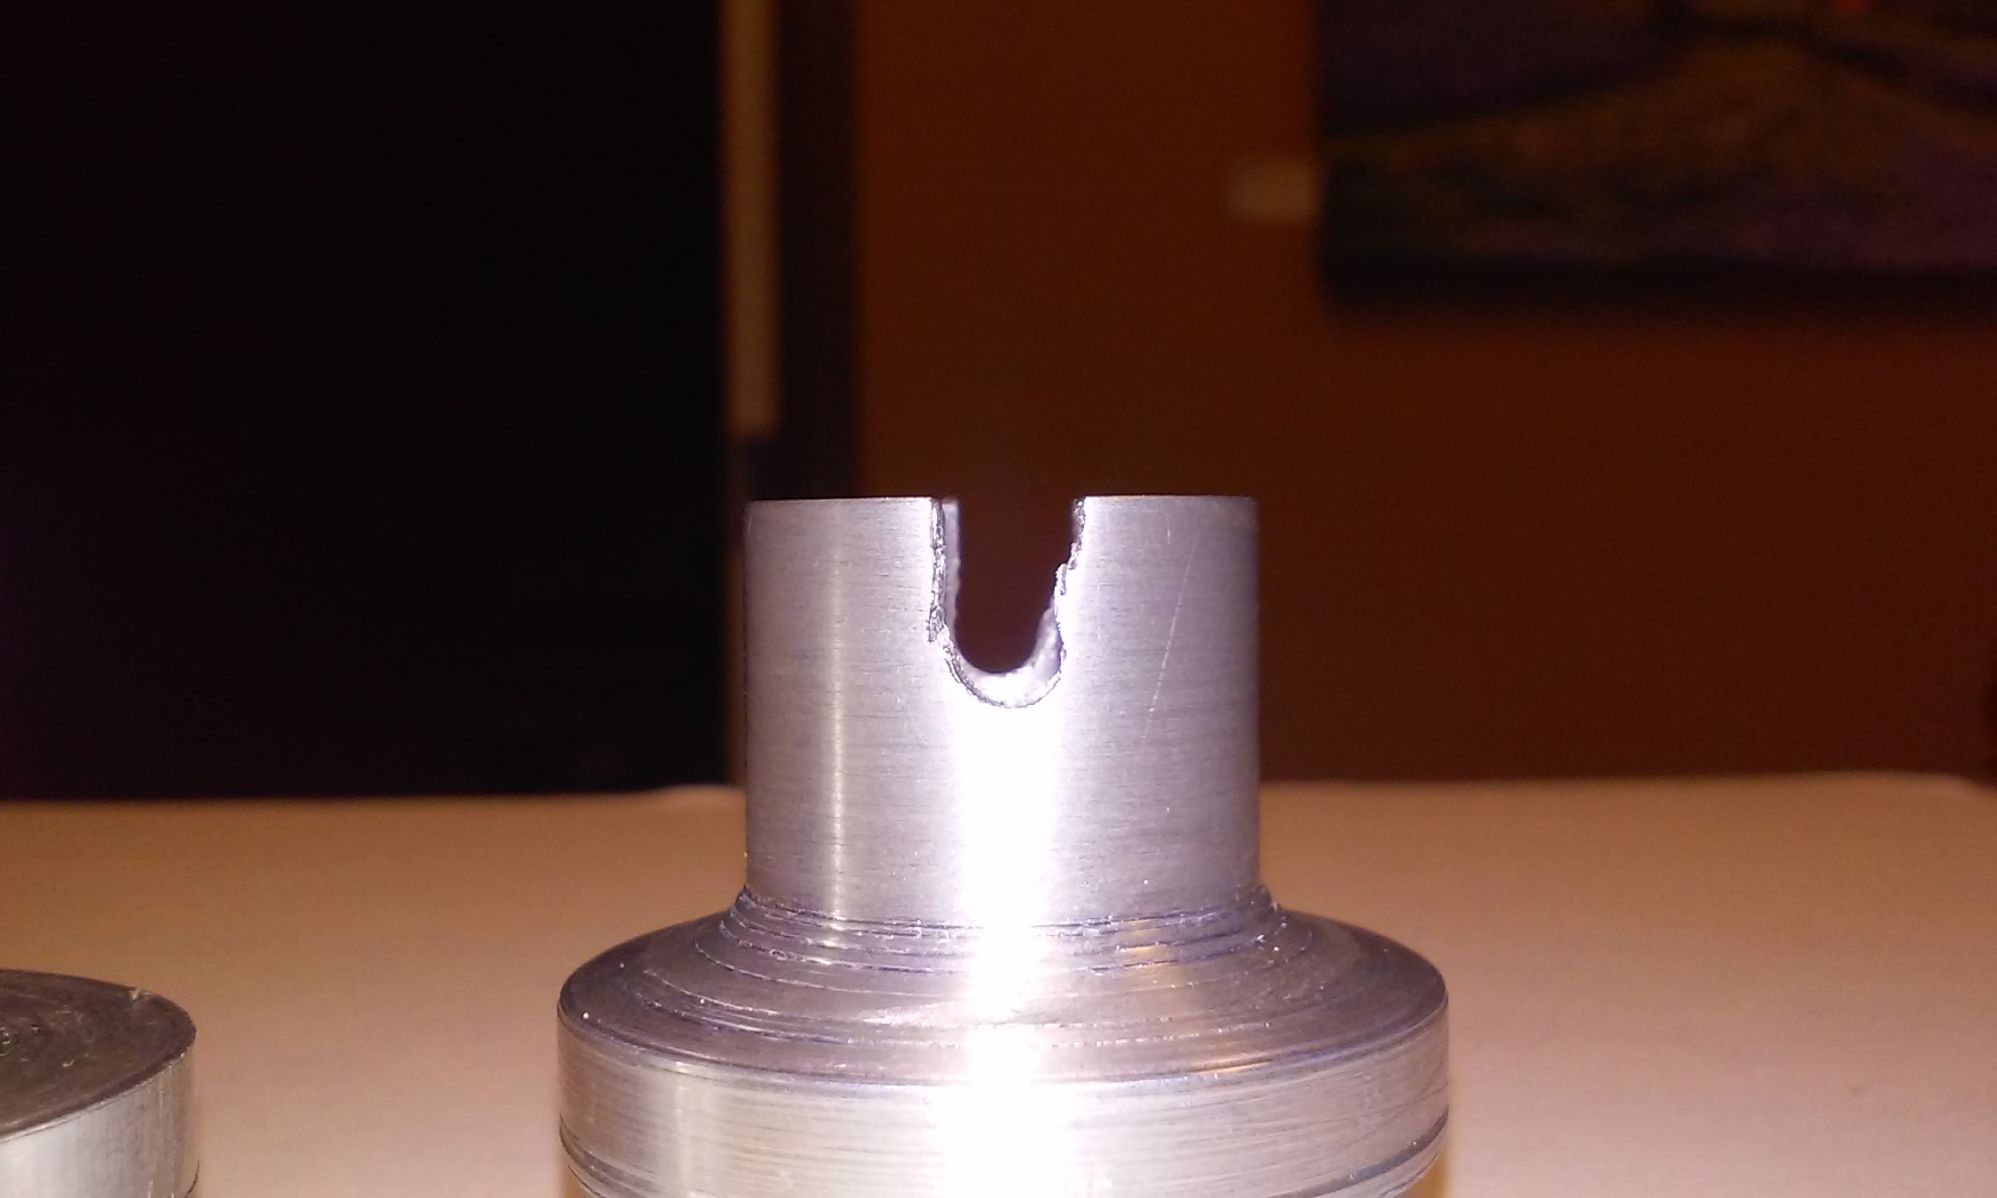
Number 2 doesn't look much different but the alignment is way more precise. It has less rotational slop than the stock cas to cam engagement. I still can't figure out the damn slot cutting though.
Reply
0
0
Joined: Apr 2014
Posts: 18,643
Total Cats: 1,870
From: Beaverton, USA
Reply
0
0
Joined: Sep 2012
Posts: 4,560
Total Cats: 1,143
From: your mom's house phoenix, AZ
Yea that wont work, the geometry of a drill bit is for chip evacuation, not edge cutting. I would use a drill to drill the end of the slot, then cut in from the edge with a hack saw or dremel cut-off, then square it all up with a file. Or just buy a cheap chinese end mill from ebay in the size you need, less than $10 for that size. What size is it, 4mm?
Reply
0
0
Joined: Sep 2012
Posts: 4,560
Total Cats: 1,143
From: your mom's house phoenix, AZ
if it is 4mm-
4mm x 6mm Straight Shank 4 Flutes End Mill Milling Cutter Gray | eBay
Or just search the size you need.
Do it in 20 or 30 thou steps, dont do full DOC at once.
And regarding the earlier concerns in this thread; I wouldnt be concerned at all about the CAS holing that piece in. Although the above remarks about the CAS not being designed to take an axial load are true, that piece wont put any appreciable load onto the CAS, more than maybe its weight as the car accelerates, all 200 grams or so. Also I think aluminum is just fine, steel would be unnecessary IMO.
Reply
0
0
Thread Starter
Senior Member
Joined: Jan 2011
Posts: 608
Total Cats: 172
From: sacramento ,ca
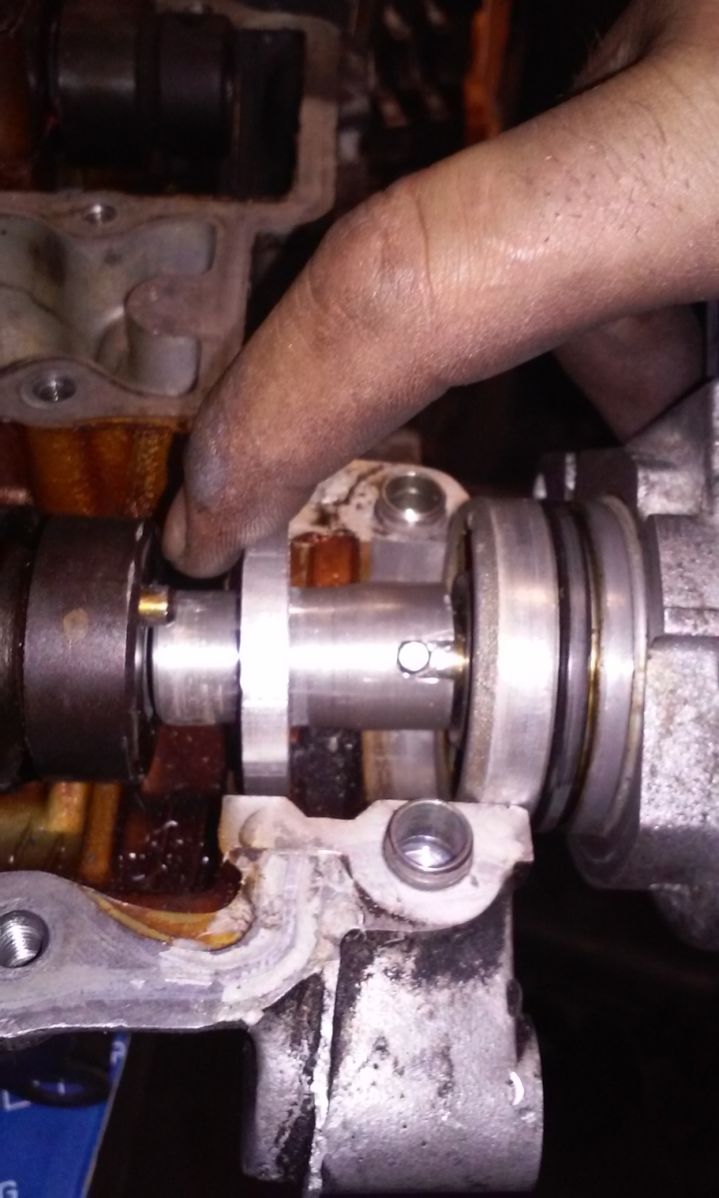
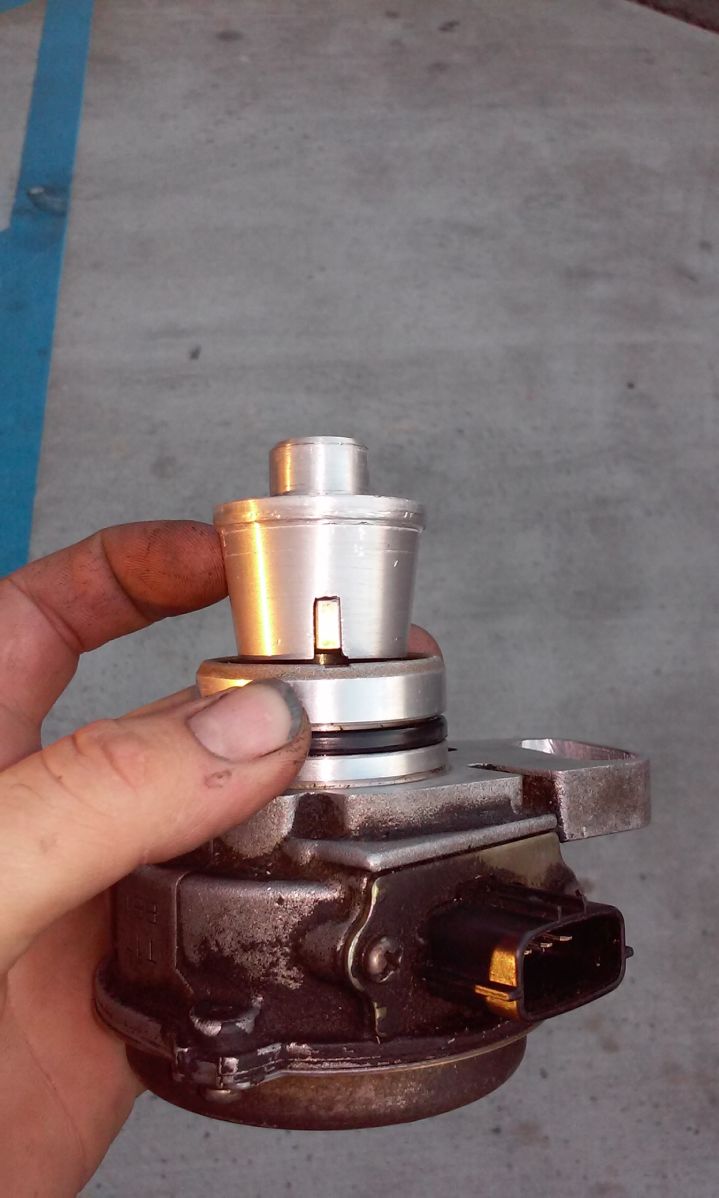
The flapper and pin are both 5mm.I ended up finding a box with a few small bits in the bottom of our mill cabnet. I also picked up a new cas today and changed my design making the cas fit without removing the flapper. The slot for adjusting timing had to be widened 6mm or so to fit the head. The adapter bottoms out pin the flapper before it contacts the cas body and only pulls out 1mm or so from the cam before doing so

Reply
0
0

Thread Starter
Senior Member
Joined: Jan 2011
Posts: 608
Total Cats: 172
From: sacramento ,ca
there have been quite a few of you that have asked about getting one of these so i decided id use up the aluminum i have left and make a few to sell. keep in mind i am no machinist so it takes over 3 1/2 hours for me to make just one and my tolerances are around +/- .005" from the original i made 3 years ago. i have yet to get my swap running yet but there is zero reason these wont work.
Reply
0
0


