When you click on links to various merchants on this site and make a purchase, this can result in this site earning a commission. Affiliate programs and affiliations include, but are not limited to, the eBay Partner Network.
Yo
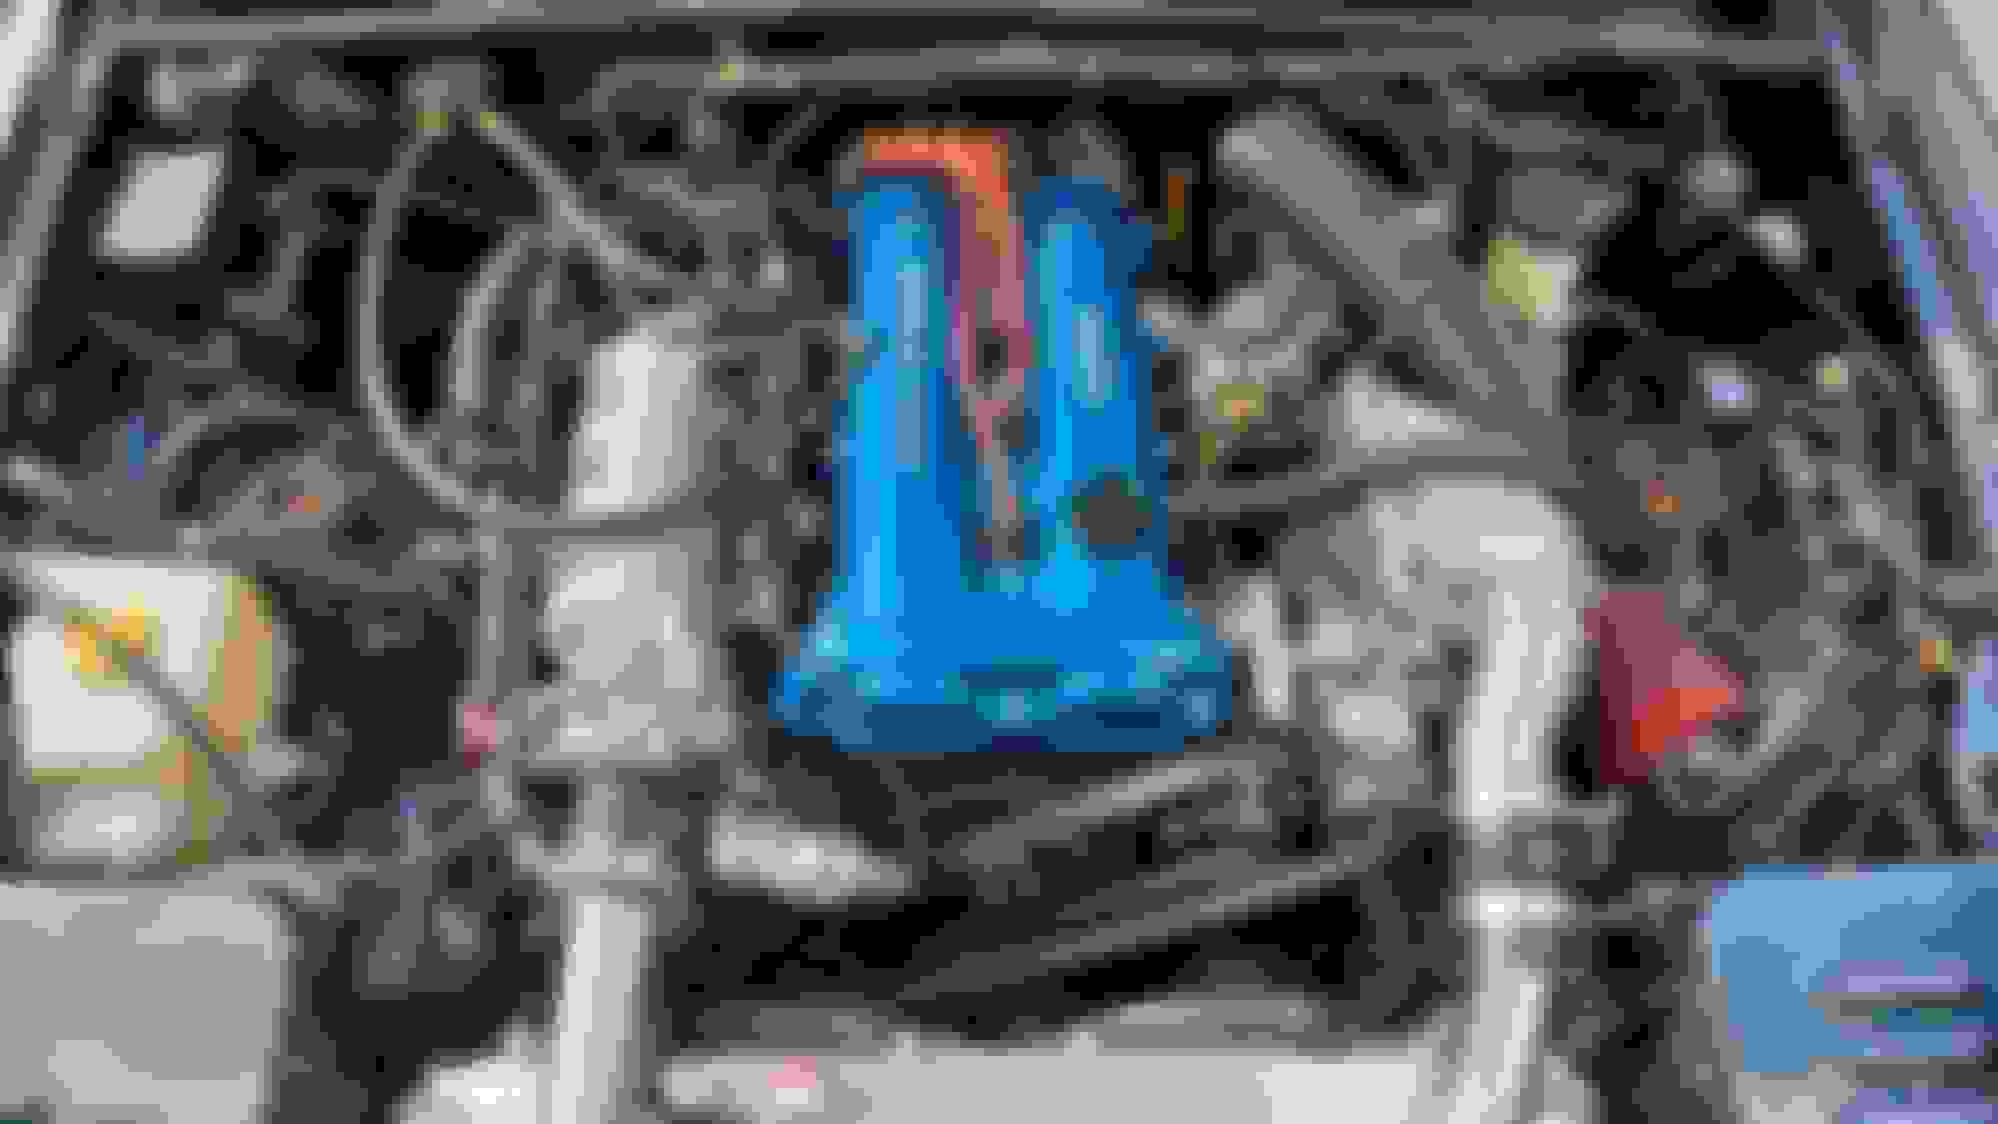
I'm in the middle of converting from my JR M45 kit over to a BRP MP62 one and decide to take some pic's for you guys because I know most ya can't read. lol's
A few weeks ago when I first joined MT.net I fully intended on a TSE or Kraken EFR kit because MP62 kits are rare to come by and most of the time missing parts that you cannot source. Sure enough as soon as I was fully committed to a turbo kit a guy on a FB post solicited me and now I have a late model BRP 6Rib MP62 kit. I know this thing is a dinosaur but I love these hotside kits, the look, the sound and the power delivery is great for the street. I got this for $2,200 and since I already have a TDR intercooler setup after I sell my m45 kit I feel like my HP per dollar amount is gonna be very good with this.
My goal with this kit is 250ish wheel, keep my stock engine safe and while not overspinning the cat **** outta this blower, meow. The kit I bought came with a 67mm snout pulley and I sourced a 140mm crank pulley from Tom at Fast Forward Super Chargers. I purchased new header mount studs (FFS), a new BPV (Track Dog Racing), new oil to refresh the charger and some Loctite 510 to reseal the blower. Also this blower has a 70mm throttle body but it's pretty cheap and I'm worried about hang so I got a replacement 70mm 96 GT Mustang TB coming (I think it'll fit.)
Since I've never done it I decided to crack open my first blower just to do it. As much as I wanted to clean the casing while I had it like this it seemed the consensus was to not touch it or the rotors. The rotors looked good with only a very small piece of the teflon coating come off on of the two rotors. I'm a newb when it comes to reading the wear on these cases but nothing about this screams immediate rebuild so I'm gonna run it and possibly have it fully rebuilt over the winter. I was gonna change the coupler in the snout but the one I sourced I was unsure of so I'm gonna run what it came with. After cleaning the throttle body, setting the BPV, setting the tb, and sealing it back up with Loctite 510 I called it good enough.
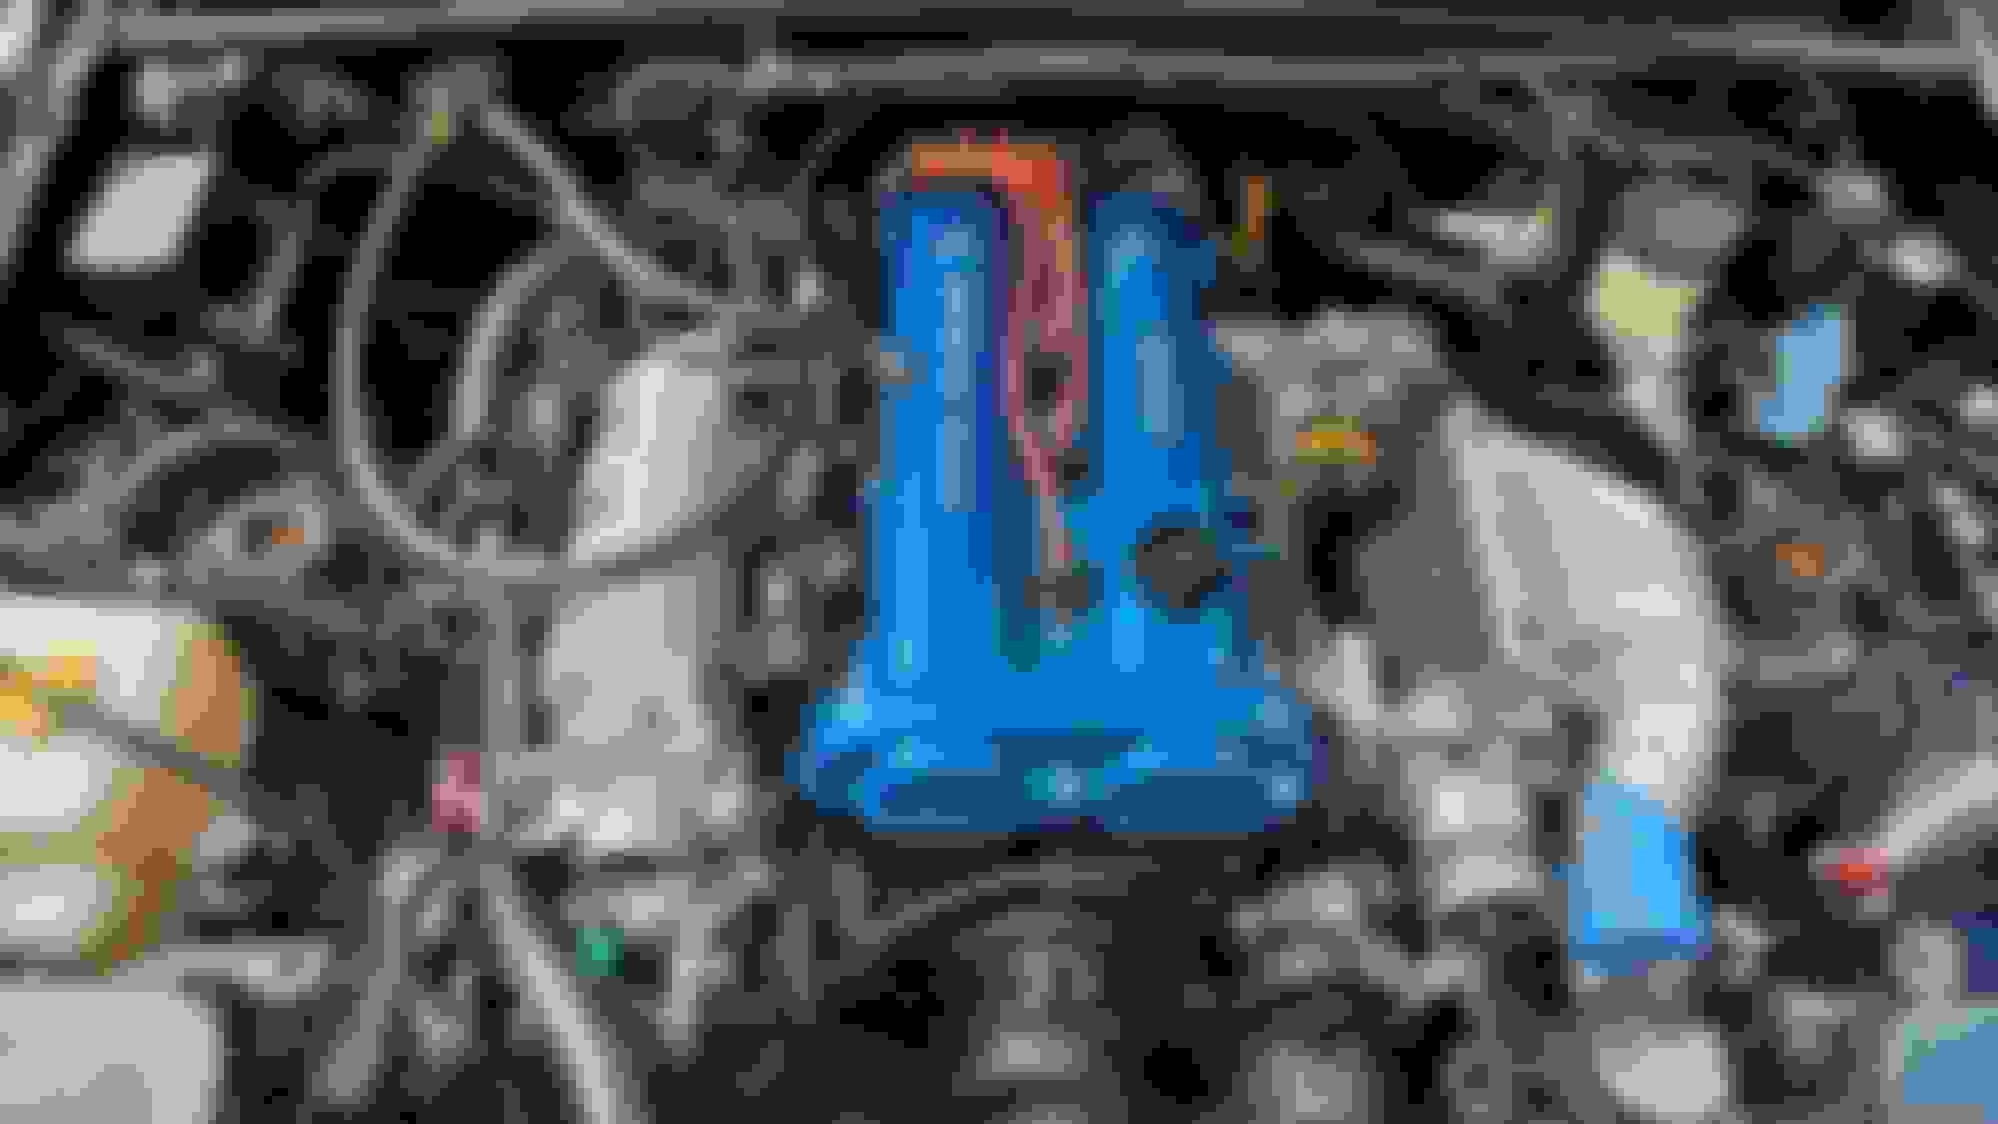
These pieces (above) were coated in some nasty *** textured coating so I had them stripped. I was gonna powder coat the blower outlet manifold but I ended up sourcing a custom better flowing piece so I decided to not go all out even though I might use this outlet mani to get everything setup.
First thing I had to do was rip out the M45 kit. I had it maxed out on e85 @180whp/170wt and after a year of owning it I have the chassis to the point where it's begging for a lil more. RIP homie.
Bye Felecia.
I had to change the accessory belt drive back to stock as the 6 rib supercharger has it's own belt.
This is my last obstacle I have not fixed yet and it's not mentioned often in this conversion. The tab circled in red needs to be cut for the SC belt to clear. I'm grateful for this because I needed a reason to buy a cordless angle grinder, Harbor Freight I'm coming for ya! The nut sticking out of the "pinch block" is also in the way. I'm gonna probably buy a counter sink bit and use a bolt with a head that will sit flush so solve this issue. Converting back to the stock P/S tensioner setup was a pain in my lazy *** and the power steering wouldn't take the factory belt size so I sourced on .3in bigger and everything seems to be happy now.
"But Cincykemo, BPR MP62 kits don't fit under an na's hood"
Shut up fool, that's why I got these tight *** Black Bird Fabworx 1/2 in drop mounts! These were a pain in my vag to get in and I had to losen the header (Jackson Racing) nuts to get to the mount bolt nearest the fire wall. An impact gun and creative use of extensions were the key to success especially on the driver side. 100% These were worth doing as the MP62 even with the larger outlet manifold looks to have good clearance now.
One thing I was worried about is clearance between the throttle body and firewall. After so quick measurements the MP62 looks like it will sit about an inch closer to the firewall.
I installed a new TDR headshield but unfortunately you can only use one of the header mounts for it as the BPR mount uses the whole header stud. I really like the way you can form this around the headers and I'm not worried about it sliding out of place. Getting to this point was also a challenge. You have to replace the top 3 forward header studs with extended ones and although the 1st two came out easy I had to get a stud extractor for the 3rd. I found torqueing the new studs in to be a challenge with the "two bolt" method and couldn't reach the desired 30 ft/lbs so I did the best I could (20ish ft/lbs?) and used high temp Loctite. The only reference I had from BRP for this kit was for an NB and it makes no mention of the 4th mounting stud from the stock engine hook location (nut next to the BRP logo.) I used one of the original header studs here with a nut on each side of the BRP bracket and was careful not to put stress on the bracket but just to clamp it in place between each nut. I could not have done have of this stuff it it were not for a cheap thread chaser kit I got on Amazon. Most of this hardware was not fit for reuse and what I couldn't source new I chased the threads so I didn't run into any trouble that I couldn't easily get out of.
As I'm shouting obscenities at my old *** piece of **** car what do I see? I see the biggest pecker I've ever seen! Nature and ****.
One fitment issue I an into was this lower support brace for the SC was resting on top an outlet from the p/s not allowing it to mount up to the blower bracket. After scratching my head wonder how the fudge I was gonna work around this I just pushed down on the support brace and the pipe bent. If only it were all this easy.
Finally after 3 days of swearing, 90 degree heat, syphilis (from unclean women) and 2 weed pens I'm now at this point. Looks like I'll have to run the original BPR outlet manifold because the hot side charge pipe does not line up with the custom manifold (pictured above). So now to get this thing up and running again I need to modify the P/S bracket/block, find a belt for the SC and to hook up the intake tubing. Luckily my last kit was a dual throttle body setup like this one so everything in that regard is setup the same. I know it's not pictured but I already installed the crank pulley as well.
It's not far off. I may look at trimming the outlet manifold to use the TDR charge pipe.
Modified the p/s bracket and "pillow block." I'm not super happy with the hardware but at least it's metric.
Had an hour before work so I figured I see if I could make the TDR charge pipe fit up with the custom intake plenum. Fortunately taking an inch of the bottom of the pipe and adjusting the angle at he mouth of it was all it took. Just waiting on couplers, t bolt clamps and a few other fitting to get the intake built at this point!
-Thanks for reading
-Sorry About The Grammar
-More 2 *** lol
Last edited by Cincykemo; Aug 2, 2021 at 04:52 PM.
Noce job! If you measured the SC pulley from the lip you might actually have the standard 65mm pulley.
Watch out for the proportioning valve.
The heim joint support beam being so close to the hoses can be a problem. I solved that with a very long bolt running through that outer bracket so I could put the eyelet wherever I wanted. Then just locked it in with some lock/star washers and nuts on both sides. The lower eyelet didn't mount to the PS on mine. Later kits just came with an L Bracket so you could sorta put it wherever you felt would work best. So you can do the same if you absolutely had to.
Yes I measured the pulley from the lip so probably is the 65. I was thinking about doing something similar with the lower support beam and just running a longer bolt but the further out you mount it the less support it provides. It fits fine after bending the p/s hard line a little bit.
Well it was a long 10 days. I worked on this thing before work, after work and even during work (ordering parts and finding solutions to problems.)
This is pretty much where I ended up although I fine tuned the routing on certain things after this pic. I ended up getting a TDR 62.5 mm nose pulley because of how tight the fitment is between the charge pipe coupler and the pulley itself. I'm still playing with the dual throttle body setup and haven't got it right. When I let he clutch out from a stop the car almost dies no matter what I do with the throttle but once it catches itself it goes, this happens every time. I also had a coolant leak that caused me to get up at 6am on dyno day to remove the super charger for the 20th time so I could check it out.
And on the 10th day it hit the dyno. First thing that went wrong was the belt would not stay on the TDR 62.5mm pulley. No matter how far forward I moved the charger it wasn't enough, I think I need a spacer behind this pulley. I had to switch out to the 67mm pulley (or possibly 65mm depending on how you measure it.) With the 140mm crank pulley the car made just over 12.5 lbs at redline. I am happy nothing broke and everything seems to be good with the kit and my install but that was the only good thing from the day. On this mustang dyno the car made 165/145 (pump 93.) Even accounting for the 15% loss you get on these types of dyno's I believe the car should have made much closer to 200whp. I never got a chance to test for boost leaks as I literally just got this thing together 12hrs before it was on the dyno. I guess my next step is a boost leak check and a compression check, neither which I've ever done. Not only did the car make bad numbers but it also felt weak as well on the drive home. The power delivery was kind of strange, the torque didn't come in like a roots blower. The hp and torque just kind of built together like a centrifugal style blower. It certainly felt like it had more horsepower than it did on the m45 I took off but the torque was not there. My m45 had been feeling slower and slower to me since getting it tuned last summer but I thought that might be me just getting used to it.
Last edited by Cincykemo; Aug 7, 2021 at 10:03 AM.
Sorry to hear that. Maybe posting the dyno could help. There might be a boost leak, but that psi is about right assuming it's mostly stock. I was at 11-11.5-ish at 130/65.
Shame to hear about the dyno frustrations, definitely should be making more power than that. I think even your 200whp estimation is very conservative.
12.5lbs sounds about right - where is your boost gauge and ECU vacuum signal being taken from?
Was it / is it running on all cylinders?
Checking that both throttle bodies are fully opening in sync would be another good idea.
My boost is being taken at the manifold
It's on all 4 cylinders.
I was fooling with the throttle bodies earlier today. They appear to be in sync although I had to much slack in the SC TB that caused the problem I had with almost stalling taking off from a stop. At WOT the SC TB only opens about 85%.
I also did a compression check and the compression is spot on, not 4psi between all 4.
Sorry to hear that. Maybe posting the dyno could help. There might be a boost leak, but that psi is about right assuming it's mostly stock. I was at 11-11.5-ish at 130/65.
I'll have the dyno sheet up soon as well as the tune file.
The person who tuned the car said it's possible to make the target boost and still have a leak.
I was fooling with the throttle bodies earlier today. They appear to be in sync although I had to much slack in the SC TB that caused the problem I had with almost stalling taking off from a stop. At WOT the SC TB only opens about 85%.
I also did a compression check and the compression is spot on, not 4psi between all 4.
I'll be doing a boost leak check this week.
Hmm that's weird. The fact you are seeing 12.5lbs in the intake manifold shows the air is getting to and being pressurised against the intake valves, as it should. There might be some boost leaks, and the 85% max tb opening won't help, but despite any / all of those issues enough air to create a 12.5lb restriction against the intake valves is being supplied. That sort of air flow should be making an awful lot more than 165whp, which makes me think there's an issue with how the engine is processing and extracting power from this air rather than the supply of air itself.
You've done the comp check which is good.
Fuelling seems to be fine at 11ish AFR
Cam timing - any issue would probably show up in the comp check and you don't have vvt that could be playing up, but maybe worth a check?
Ignition - could be an issue that presents only under high load. The dyno chart may show this as power no longer climbing after a certain rpm, maybe not. May be worth swapping out coils, leads and plugs. Check plug gap and also maybe try a smaller gap to see if you are suffering blow out.
I agree with TChaps, maybe you're off a tooth. Remove the valve cover, give the crank a turn and check for TDC and gear alignment. That might also explain why it felt slow on both systems, not just the MP62.
I did have to gap my plugs down at this level, but if there was blowout, the tuner should've seen it on the dyno and hopefully felt it.
Yes, you can still hit a certain psi with a leak. But let's say you were supposed to hit 15, you got 12. The ECU would still fuel for that. The tuner may not know Miatas very well, but 12psi -you should be making way more than 165rwhp.
Yeah, I had a friend suggest the same thing last night. Is it common for cars to get "out of time?" When I had the car tuned last summer it made the power it was supposed to on that setup so I can only imagine it was in time at that point. I haven't messed with anything having to do with the timing since (or ever.)
As far as plugs the tuner would have seen any blowout on the dyno. I do run 1 step colder plugs gapped at 32-34.
For my pulley setup 140/65 I think the boost is pretty close to where it should be. I just got everything I need to do a proper boost leak check.
I may look into running 1 throttle body at the blower instead of the dual setup.
I guess the cam belt could slip a tooth or two but I don't think this is a common occurrence. You'd probably notice it running really rough too. May well be a non starter but worth a check.
Maybe double check spark timing is set correctly, damper timing marks align with timing table in the ECU. Check the notch in the crank cambelt pulley is at TDC at the same time the marks on the pulley show TDC (checking the outer ring of the pulley hasn't slipped out of position)
If you still have the M45 setup maybe quickly swap back over if you can just to see if the issue follows the supercharger or stays with the engine.
If I think of anything else I will drop it in the thread
Hey, I know you! Well not personally, from OMO. Thanks for posting about Exigent, I'm going to get in touch with them when I get home in a month or so to see if they will tune mine.
As far as your header blanket goes, I used one of the L-shaped brackets at the rear with some safety wire to hold it in place. For the front I just ran some safety wire around the closest extended mounting stud. If you have any concern for yours moving around just do that next time you have the 'charger off. Over time the 'charger is going to rub on the top of the blanket and take some of the foil off but it doesn't seem to affect anything besides looks (and it's covered anyway).
The goal is to be back on the dyno Friday the 27th. With work it's tough to iron out all the little things I'd like to get right and check. I'm taking the blower outlet manifold to get resurfaced flat because it certainly couldn't hurt. I also have everything I need to make a nice silicon intake because well, it could hurt lol. I'll be doing a boost leak check and pulling the timing belt cover next weekend.
In its natural habitat. lol
I bought a replacement 70mm throttle body when I first got the kit but the spring was to weak to work with the dual throttle body setup. This isn't finished but I think this second helper spring will do the trick. It doesn't apply the most linear force but this seems to be the best spring and mounting location I've come up with. I've sourced what I hope is a bigger throttle wheel to help get the two TBs to synchronize. I hope this ratio will put the blower TB at WOT when the intake TB is WOT.
Last edited by Cincykemo; Aug 13, 2021 at 09:33 PM.
Dyno from last week:
Exactly what it felt like to drive. So weird the torque just falling off so early. It's down on power and not even delivering the power how you'd expect. I can't wait to get this thing sorted.
The shape of the curve looks alright, its just atleast 50ftlb lower across the board than most '62 sized charger dyno plots I have seen, particularly as your pulley ratio is pretty healthy.
Worth checking actual piston TDC corresponds to the TDC markings on the damper, a few degrees accidental spark retardation would create an effect like this.
Looks like you have been using overlays bolted more directly to the crank, rather than the bonded stock pulley drives so the likelihood they misaligned is relatively low. Worth a check though.
AC compressor and water spinning alright? Check anything you can for parasitic drag.
I'm more used to seeing dyno graph's such as this one. I think it's weird where the torque falls off but again I'm certainly no expert and have a lot to learn.
Checking timing is on the top of my list but it's supposed to rain all week and working in the driveway makes it a slower process than I'd like.
Yes my m45 kit used a crank overlay pulley and when I installed my 6 rib pulley I made sure to align the dowel pin that runs through the crank pulley with the spacers and SC crank pulley but I'll be checking that when I can. I noticed yesterday with my car idling that the crank pulley assembly had a wobble to it I'm not happy with, maybe this could explain some of my troubles. Considering ordering a new crank pulley, timing belt pulley, woodruff key and a "crank saver" kit (https://www.ebay.com/itm/154493211422). Again I have not got a good look at anything having to do with the crank or timing at this point. The last time I looked at this assembly is when I removed my overlay pulley and installed the new 6 rip crank pulley for the mp62. At that time nothing in that assembly appeared loose and I was careful to install everything as instructed.
My AC, PS and alternator all appear to be pretty happy although I did pick up some extra belt squeal on start up after taking the overlay pulley off and putting PS pump bracket back to stock.
I finally got around to doing what I should've checked first. Both cam gears were off a tooth. Looking from the top I noticed the intake cam gear wasn't aligned with the exhaust cam gear, it was at an angle. Somehow the cam gear got on top the dowl pin that comes out of the cam and was sitting on top the pin instead of flush with cam. You could see an indentation in the cam gear from where the dowl had been. I didn't take a pic but the dowl pin looked pretty far into the cam not giving the gear a whole lot of bite. When I looked at the exhaust cam gear it was sitting fine and aligned with the dowl pin but it to had the same indentation as the intake gear. I switched cam gears so the indentations wouldn't be where the dowl pin would be riding against and tightened everything back down.
This isn't a picture of mine but a photo of the dowl pin I'm referring to (this one is bent in the pic.)
Last edited by Cincykemo; Aug 16, 2021 at 03:02 PM.
OUCH! I have a 99 intake cam in the garage doing nothing. PM if you can use it for cost of shipping.
Since you have a nut on the afternarket throttle body, technically you can try to rotate it 180*. Then you don't need the throttle cable travelling all over creation.
Not totally scientific, but a fun read, plus periodically searching for vacuum leaks when the flex tube rubbed got tiresome:
I went with a 135 and 90 for the intake elbow at the firewall. That is probably the worst for flow, but I wasn't sure if I could get a pure 180 to fit under the hood, firewall and brake components. This was also after adding the drop mounts. I finally gave up and cut a rib from the hood.
The cam offer is much appreciated. I switched the gears and retorqued them higher than factory spec, I'll see how it goes.
Slack in my throttle cable line isn't an issue. The ratio between the pulleys at the intake manifold and the SC is the issue I'm currently faced with. I have a different pulley I ordered just come in for this but haven't gotten around to messing with it. I hope it will solve my issue trying to get the SC TB at WOT instead of 85% WOT like it is currently.
Definitely a great read! Ideally I want to run a 90 from the SC TB pointed straight up, put a filter on it and have the filter coming out of a hole in the hood. I'd like to design a cover I can rivet to the hood over the filter that will take advantage of the high pressure air at the base of the windshield for a CAI. That'll be in revision 3. lol
Last edited by Cincykemo; Aug 17, 2021 at 12:45 PM.


 5
5