Prepping for turbo build
 09-29-2014, 04:24 PM
#401
Elite Member

Join Date: Oct 2013
Location: Cedar City, UT
Posts: 2,764
Total Cats: 951
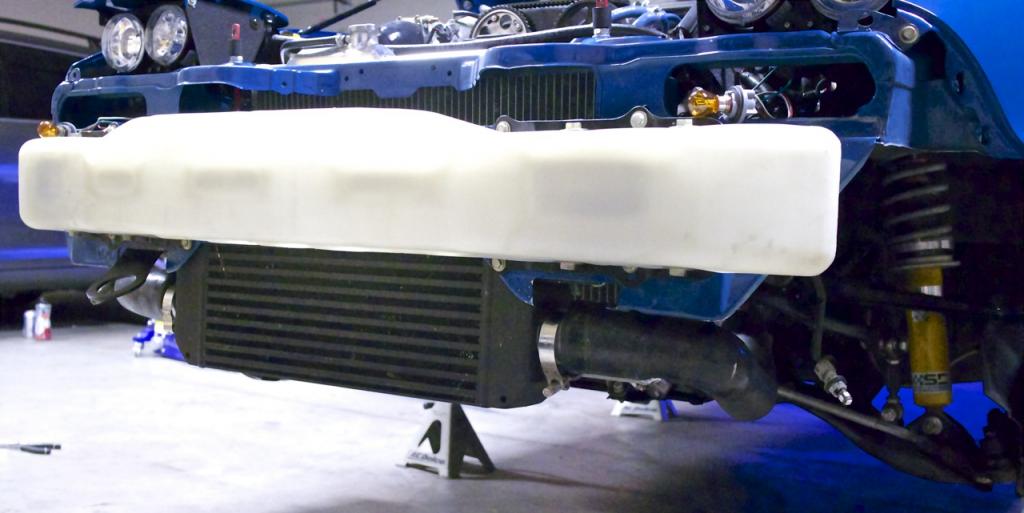
It is more expensive, but the Flyin' Miata one piece silicone pipes are soooo nice. I have the FAB9 intercooler and it works perfectly. An easier solution then trying to piece together an entire kit.


Reply
 0
0

0
09-29-2014, 04:42 PM
#402
Elite Member
Thread Starter
iTrader: (5)

Join Date: Aug 2011
Location: South Jersey
Posts: 1,512
Total Cats: 30
Does FM sell a silicone hose for the cold side that mates perfectly to this guy?

Reply
0
0
 09-29-2014, 06:55 PM
#404
Elite Member
Thread Starter
iTrader: (5)
Join Date: Aug 2011
Location: South Jersey
Posts: 1,512
Total Cats: 30
I'm also going to just suck it up and de-power my p/s..... I completely abandoned my original thoughts for this car.... It was supposed to be a semi- comfy (a/c & p/s) daily racecar... Now it will be a part time weekend toy lol.... If I knew that I probably would have had Artech make me a better flowing manifold that didn't have to be built around those accessories haha... Oh well ish happens
Reply
0
0
 09-29-2014, 07:29 PM
#408
Retired Mech Design Engr

iTrader: (3)
Join Date: Jan 2013
Location: Seneca, SC
Posts: 5,009
Total Cats: 856
+1 to both above. Keep to your plan, and have what you want.
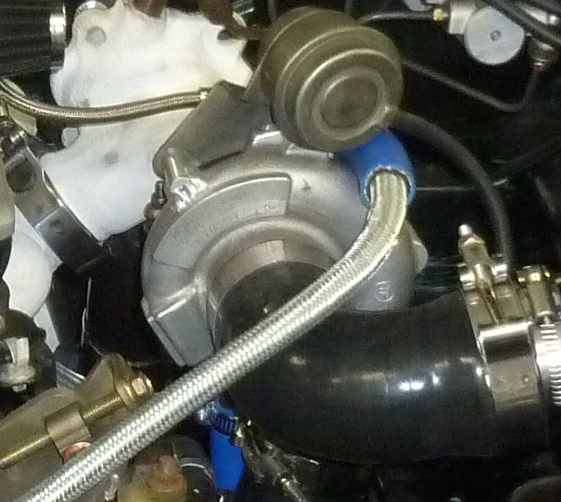
Clock it to the proper, classical position.
Then, it depends on if you feel the need to keep the turbo pure. In order, from least to most molestation:
1) Put a spacer between the WG and the cover / downpipe part to hold the WG closed. Might be tricky do do this. Possibly that cover could have a boss added and tapped, and a bolt / locknut used to hold the WG in, or some other push system, rather than a pull system that acts on the external WG arm.
2) Weld tapped, aluminum bosses on the compressor housing wherever you need to and use the bracket you already have.
3) Weld the WG shut.
Reply
0
0
09-29-2014, 07:44 PM
#409
Elite Member
Thread Starter
iTrader: (5)
Join Date: Aug 2011
Location: South Jersey
Posts: 1,512
Total Cats: 30
+1 to both above. Keep to your plan, and have what you want.
Clock it to the proper, classical position.
Then, it depends on if you feel the need to keep the turbo pure. In order, from least to most molestation:
1) Put a spacer between the WG and the cover / downpipe part to hold the WG closed. Might be tricky do do this. Possibly that cover could have a boss added and tapped, and a bolt / locknut used to hold the WG in, or some other push system, rather than a pull system that acts on the external WG arm.
2) Weld tapped, aluminum bosses on the compressor housing wherever you need to and use the bracket you already have.
3) Weld the WG shut.
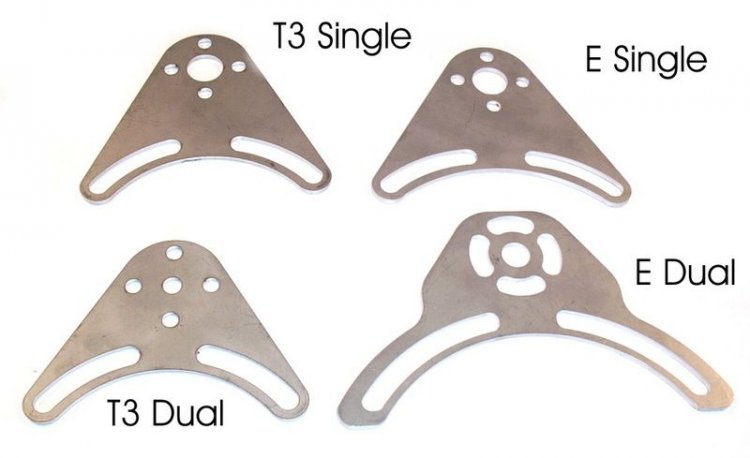
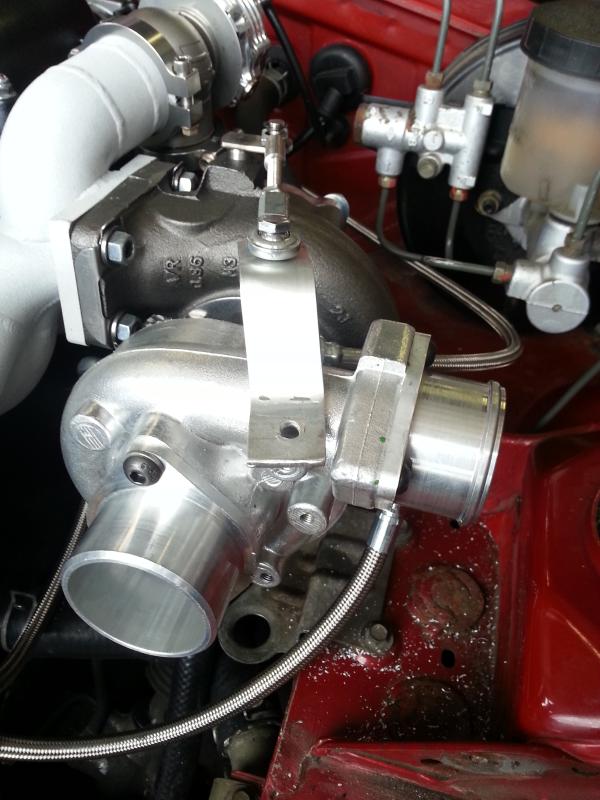
Earlier today I devised a small bracket that allowed me to clock the turbo a tad bit more... With a larger bracket I might be able to clock it more.... BUT I would prefer to have the bracket on the opposite side of the turbo. I might end up trying to make #2 work

Reply
0
0
09-29-2014, 07:54 PM
#410
Elite Member
Thread Starter
iTrader: (5)
Join Date: Aug 2011
Location: South Jersey
Posts: 1,512
Total Cats: 30
Oh also.... I removed that black canister with (3)? vacuum lines going to it (Charcoal canister?)
What should I do with those hard lines? Connect them with a hose? Cap them off?
*Edit found a write-up where they just joined the lines with some Fuel line.... I will do that tomorrow
What should I do with those hard lines? Connect them with a hose? Cap them off?
*Edit found a write-up where they just joined the lines with some Fuel line.... I will do that tomorrow
Last edited by BTMiata; 09-29-2014 at 08:09 PM.
Reply
0
0
 09-30-2014, 02:31 AM
#412
Elite Member
Join Date: Oct 2013
Location: Cedar City, UT
Posts: 2,764
Total Cats: 951
Oh also.... I removed that black canister with (3)? vacuum lines going to it (Charcoal canister?)
What should I do with those hard lines? Connect them with a hose? Cap them off?
*Edit found a write-up where they just joined the lines with some Fuel line.... I will do that tomorrow
What should I do with those hard lines? Connect them with a hose? Cap them off?
*Edit found a write-up where they just joined the lines with some Fuel line.... I will do that tomorrow
I only had one hardline...need to see what happened to my other one now. I haven't had issues though so maybe you can delete the unnecessary one as I did.

Reply
0
0
09-30-2014, 07:55 AM
#413
Elite Member
Thread Starter
iTrader: (5)
Join Date: Aug 2011
Location: South Jersey
Posts: 1,512
Total Cats: 30
Any idea if I could drill/tap these two nubs on the turbo? Will it affect the strength or anything? Looks like I might be able to put the bracket there if I can make 2 holes....


Reply
0
0

 10-02-2014, 12:30 PM
#418
Elite Member
Thread Starter
iTrader: (5)
Join Date: Aug 2011
Location: South Jersey
Posts: 1,512
Total Cats: 30
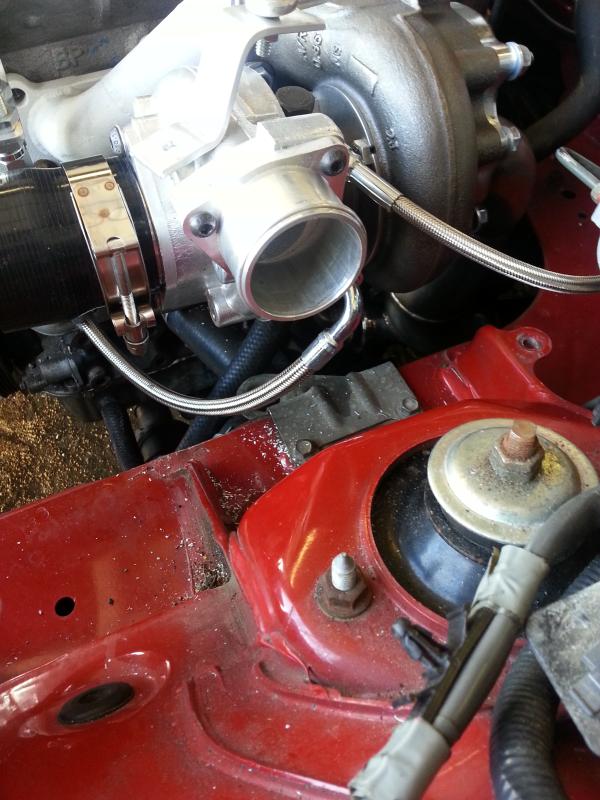
So the BS continues.... I should have checked the bracket to see if it would fit before I started drilling... thankfully I only drilled a tiny hole before I thought about it
Bracket wont work here
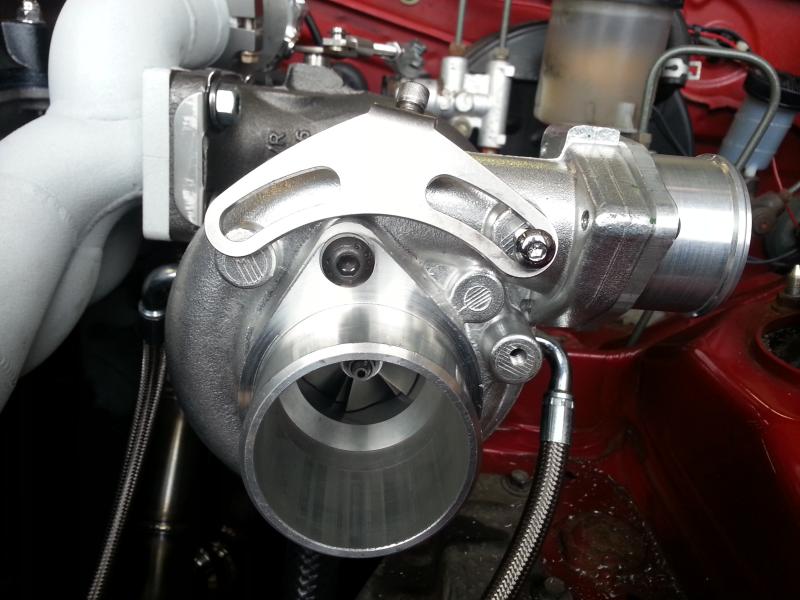
So my new plan (Have to bend a new bracket)
Does anyone know if Flyin Miata makes the one piece hose with 2.0" on one end (my turbo flange has a 2" outlet) and 2.5 on the other end for the intercooler? I wonder if I will have to find a 2.5" flange for my turbo...
Bracket wont work here

So my new plan (Have to bend a new bracket)

Does anyone know if Flyin Miata makes the one piece hose with 2.0" on one end (my turbo flange has a 2" outlet) and 2.5 on the other end for the intercooler? I wonder if I will have to find a 2.5" flange for my turbo...

Reply
0
0


