$2018 GRM challenge turbo miata build. with added insanity.
 01-17-2018, 07:29 PM
#41

There's a whole thread in the racing section that lists out where there is weight to be lost. Cliff notes are, interior, tiny battery and gutting anything metal that isn't needed. It's my opinion, which others may challenge, that all the bumper substructure is for 5mph impact regulations and simply isn't needed on a car that is expendable (race car). Yeah if you have a minor fender bender you'll probably bend a frame horn and total the car......but then again a swift kick will total most Miata's since they aren't worth much. If you do door bars with your cage there is a lot of weight to be lost in the doors.

Reply
 0
0

0
01-21-2018, 07:58 PM
#42
Junior Member
Thread Starter

Join Date: Nov 2017
Posts: 112
Total Cats: 7
Challenge budget so far revious challenge budget: 1135.71
recoup: 822ok, some parts came in.amazon coilover kit with unknown rate springs: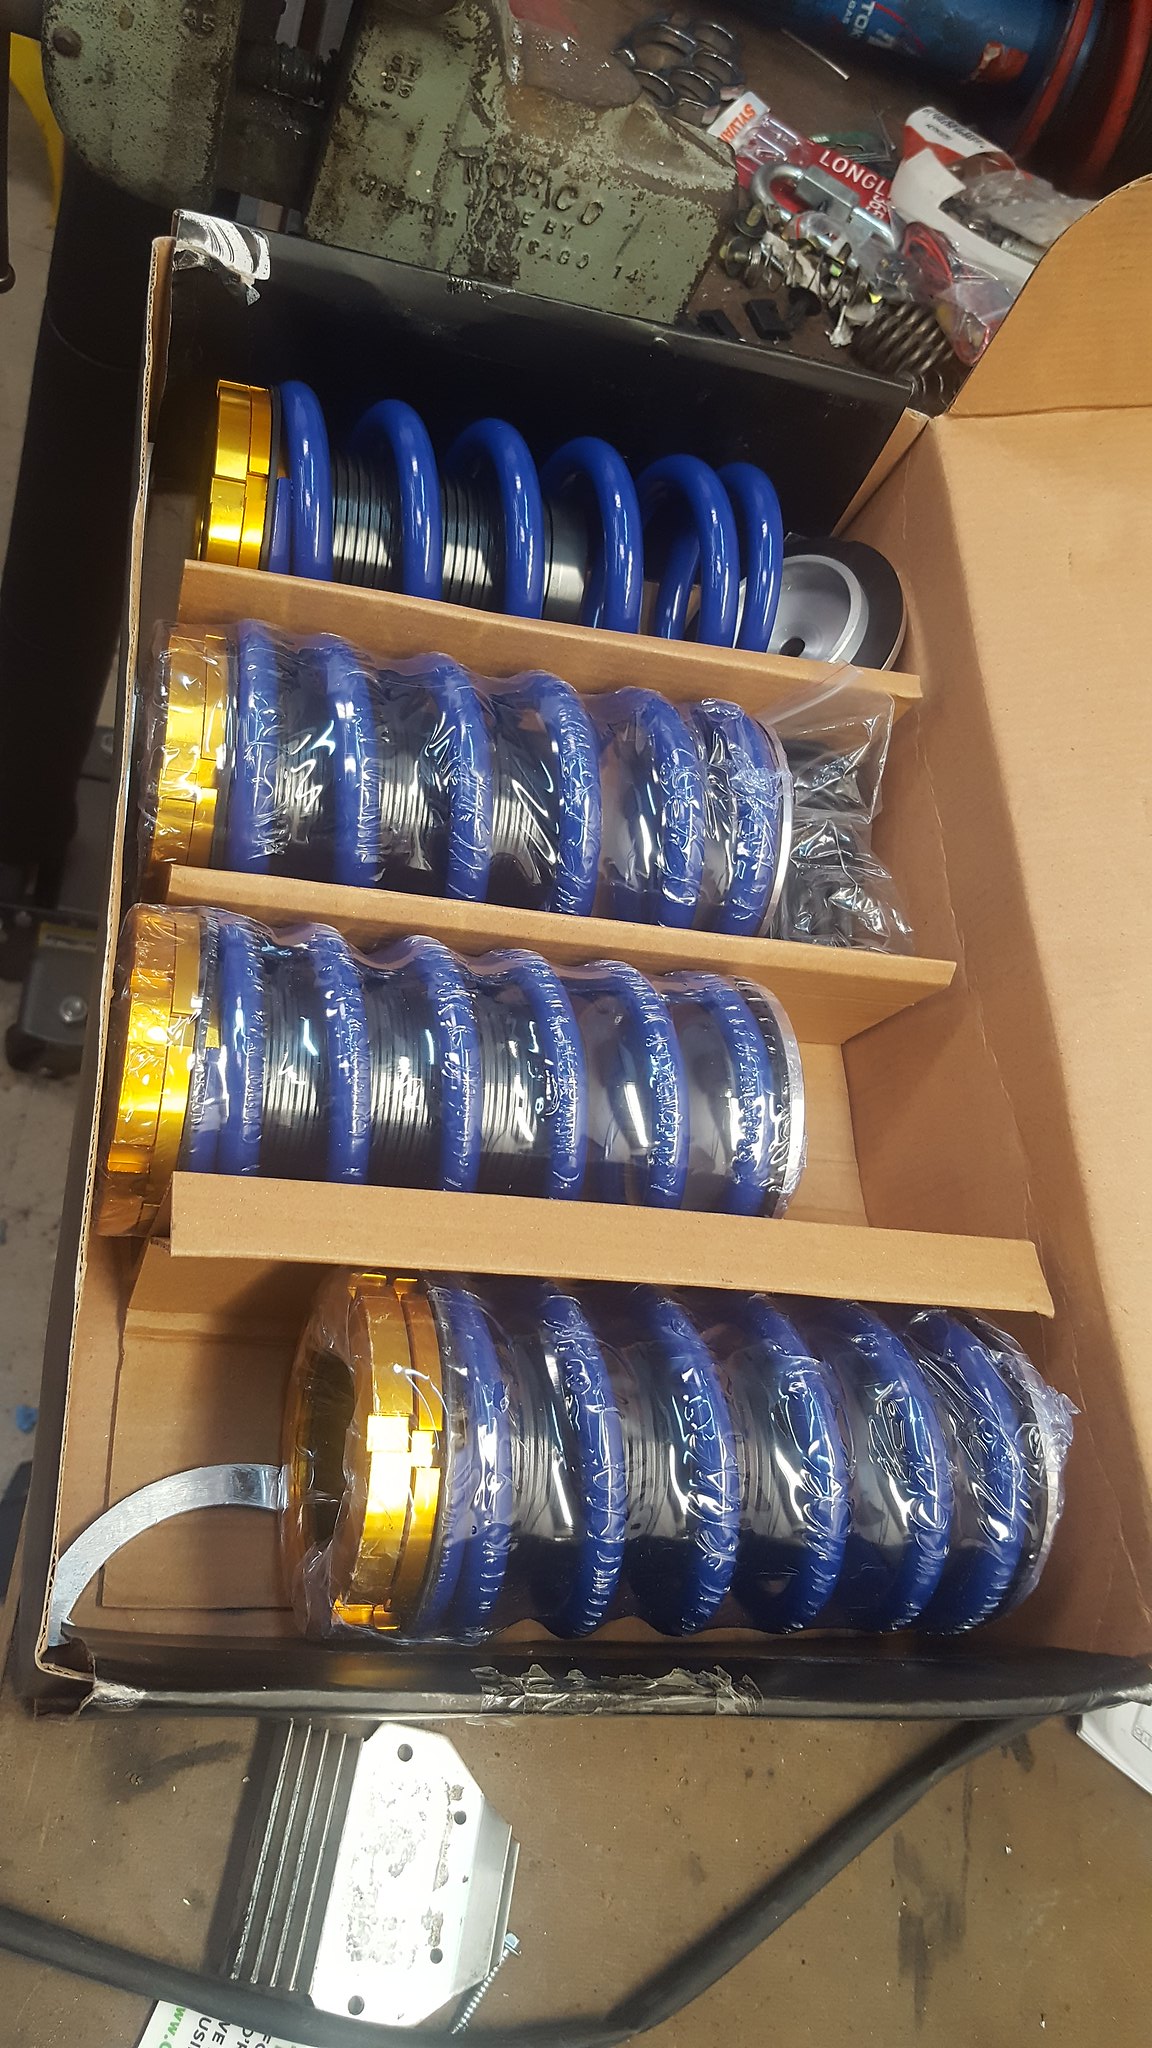
20180117_153520 by Michael Crawford, on FlickrI tried the measuring process to determine what spring rates. Seems like 450/250 is what they are, near as I can tell. No way to know for certain with the equipment I have on hand though.Fuel pump came in as well. This is the 14 dollar ebay special that's supposedly 255lph. Hopefully it is, but it will work. I went ahead and installed it, as well as deleted the in tank fuel pressure regulator. I unfortunately didn't label the outlet/return on the top of the tank, so if someone knows which is which, id greatly appreciate it. I already put it all back together to close up the fuel tank, which brings me to...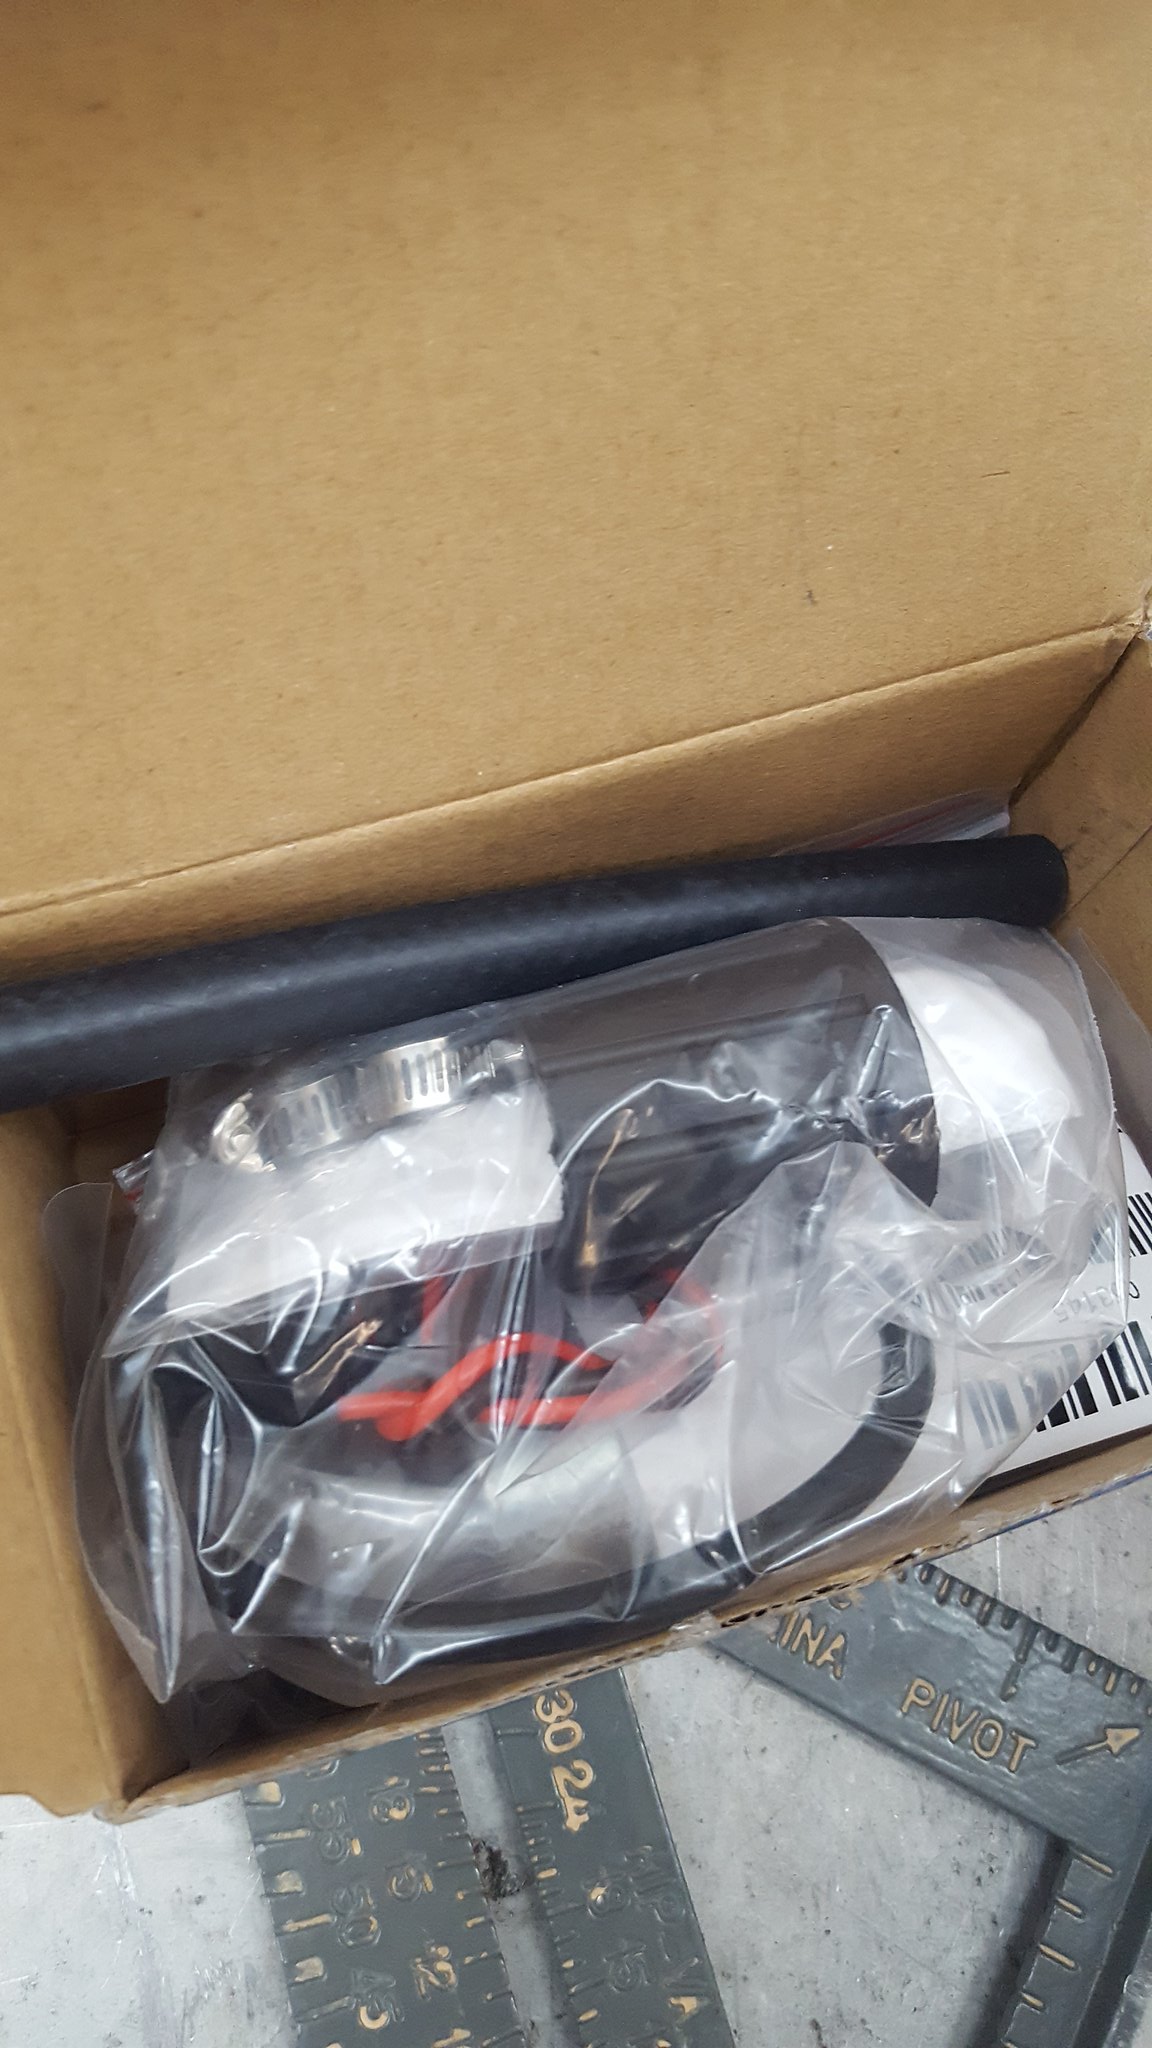
20180120_095954 by Michael Crawford, on Flickr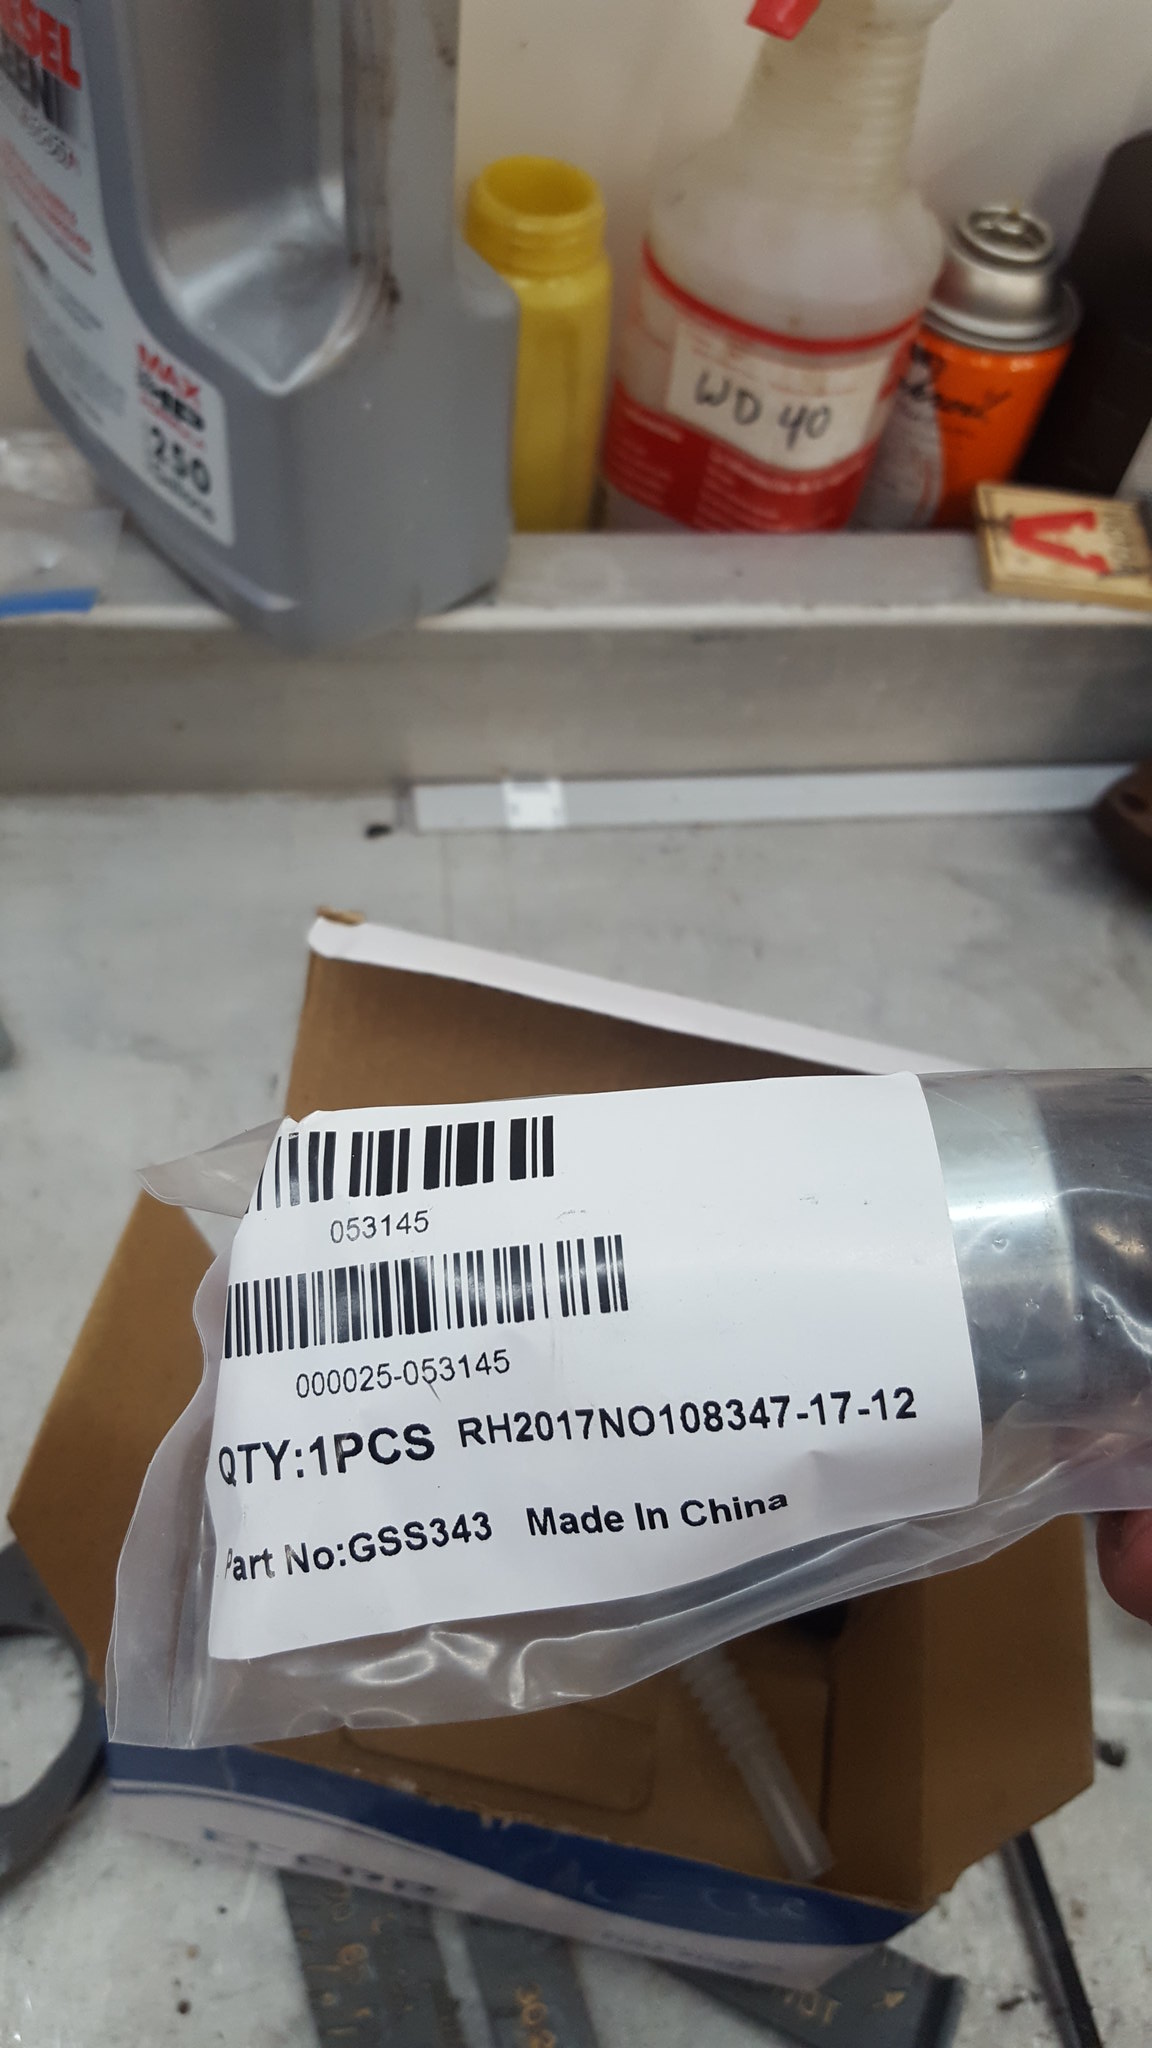
20180120_100003 by Michael Crawford, on Flickr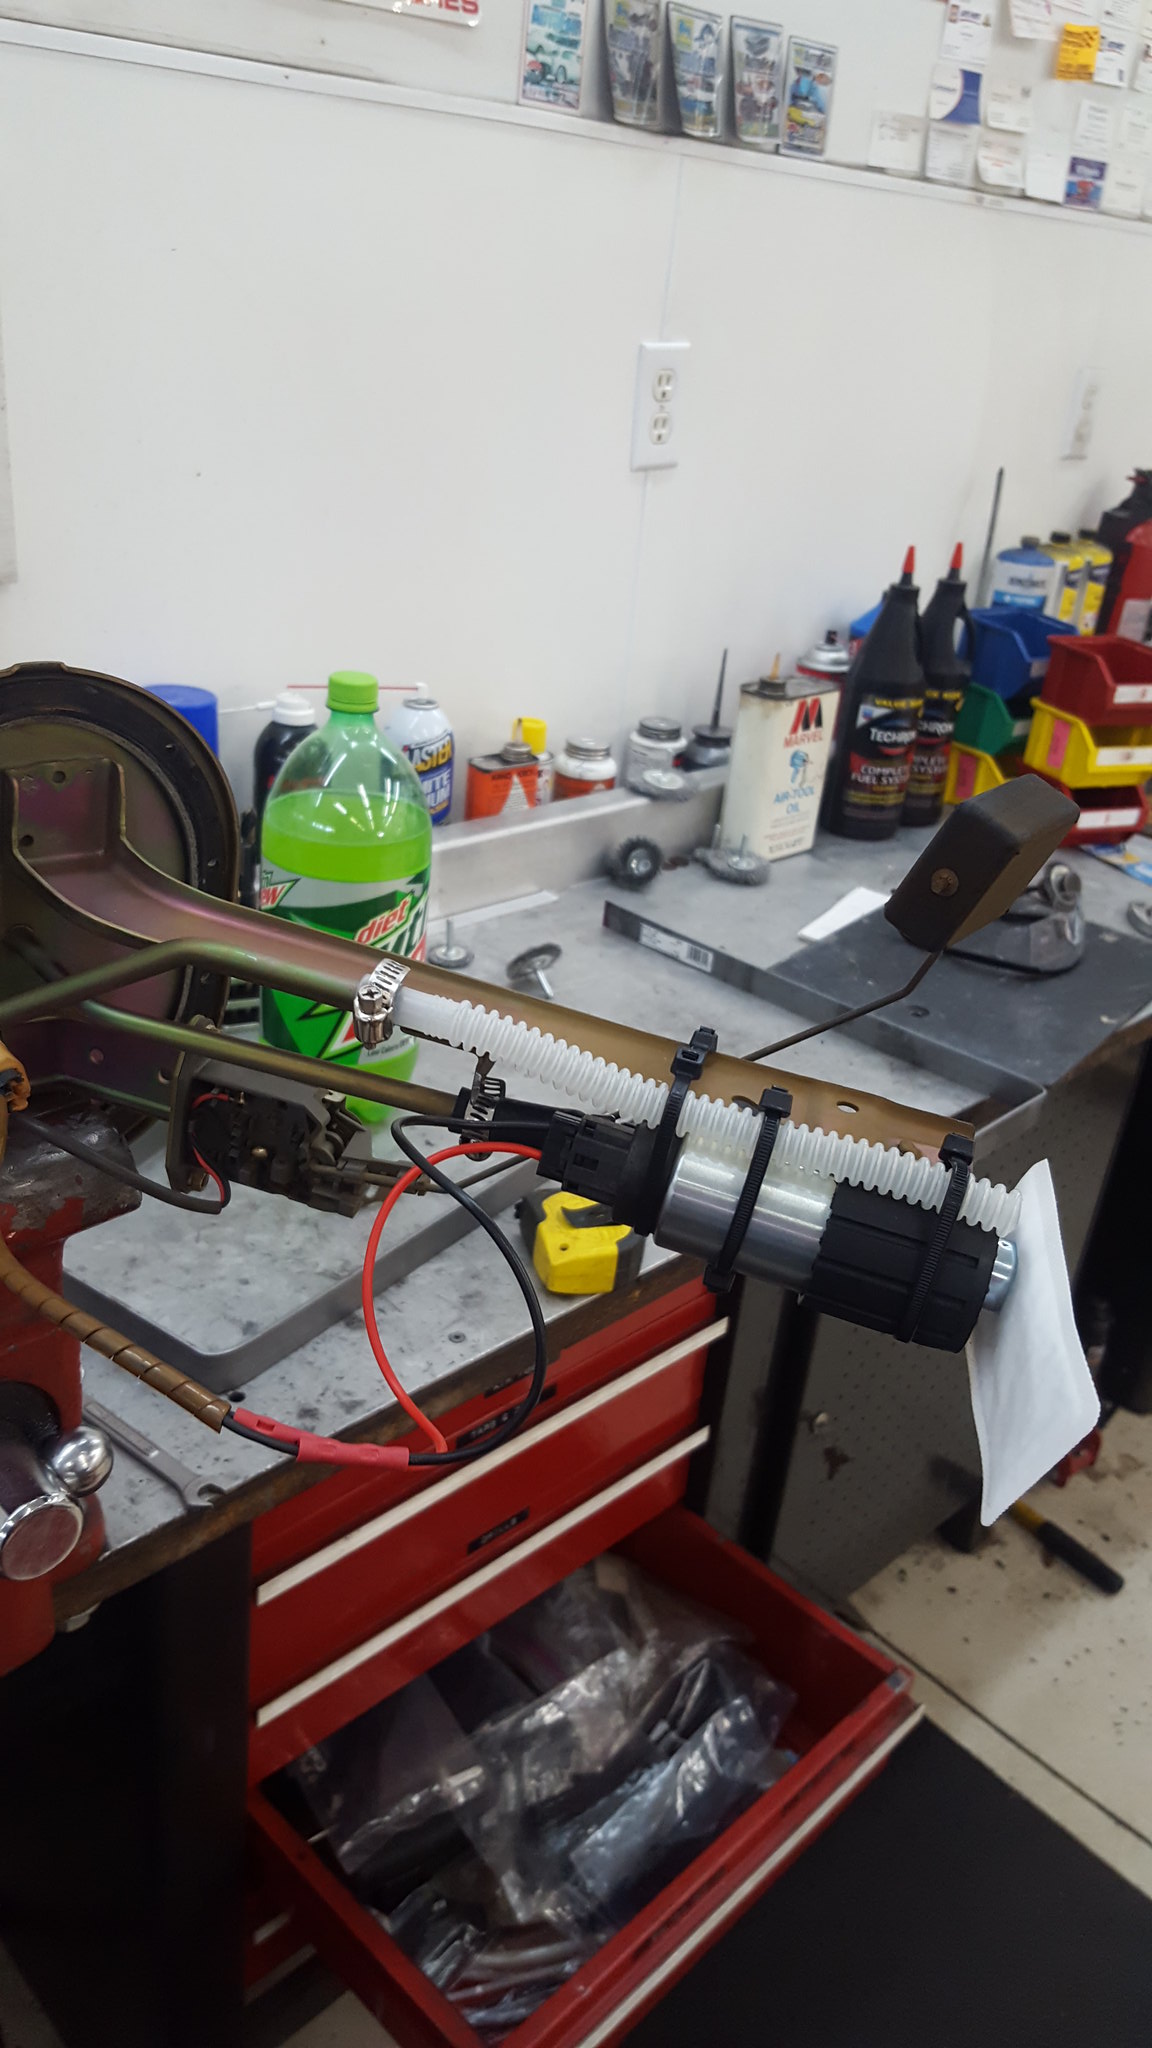
20180120_102313 by Michael Crawford, on Flickrspent all day Saturday (well 4-5 hours) working on cage tubes. Got the rear feet made, downtubes, and uninterrupted diagonal from the drivers side main hoop to passengers floor. I was planning to do a full X, but im concerned about the weight im adding. Additionally, with the door bars, im not sure ill have enough tube left from what I got with the purchase. The setup is not fully welded yet, and there's some news on that. Dad has a friend from church that is a professional welder in a pipe facility. He had come over when we were fighting with the welder to give us some help. He offered to weld up the cage when we got that far. So, hes supposed to stop by a few nights after work in the next couple of weeks and do the welding for us. Which means that getting it finished takes highest priority. I also wanted to make sure that I liked how its laying out. I would have loved to make the rear legs extend further, but with it being a bolt in I could find no good way of doing it where the feet would be a solid dual plated connection. So I essentially copied my hard dog instead.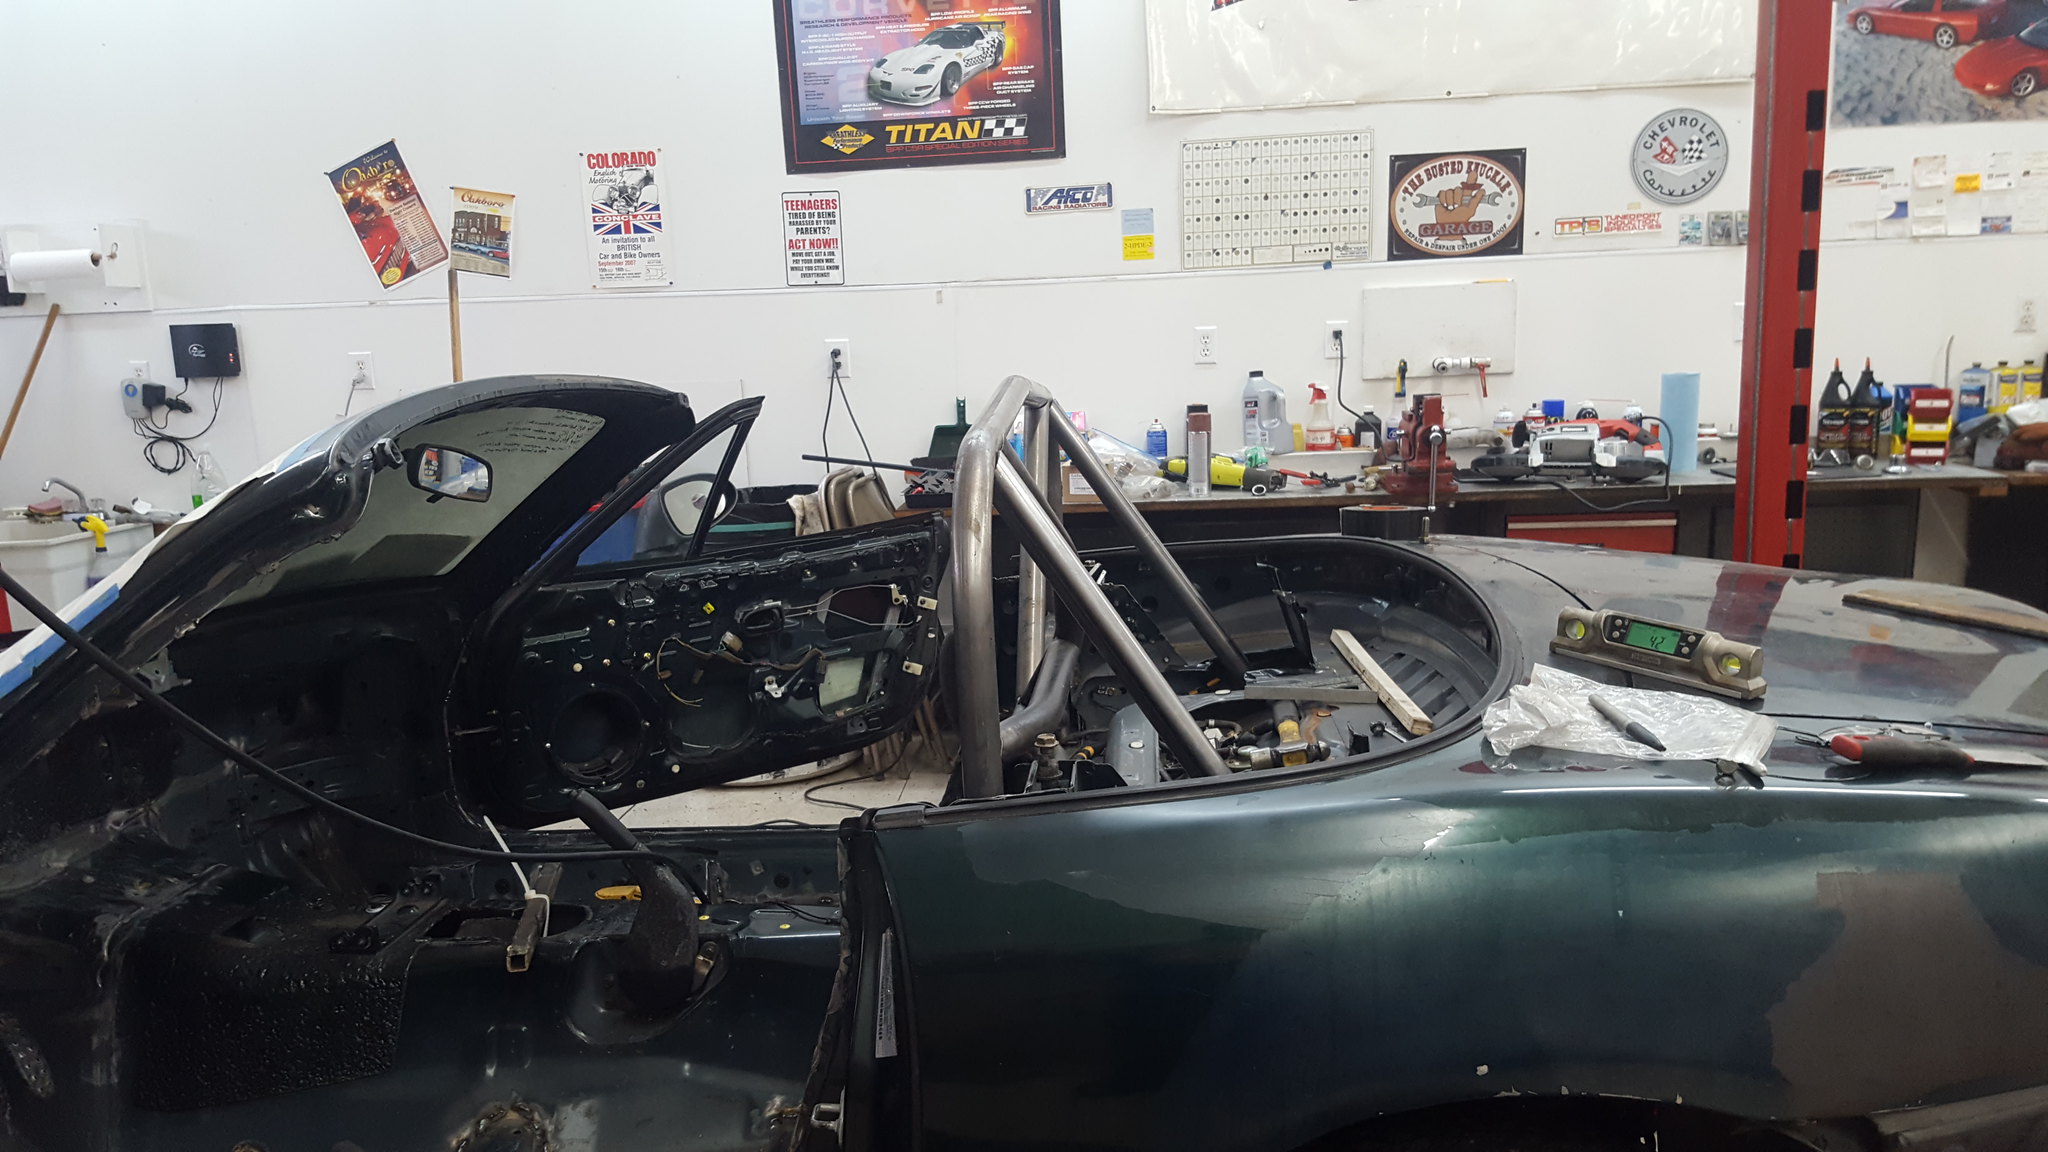
20180120_134620 by Michael Crawford, on Flickr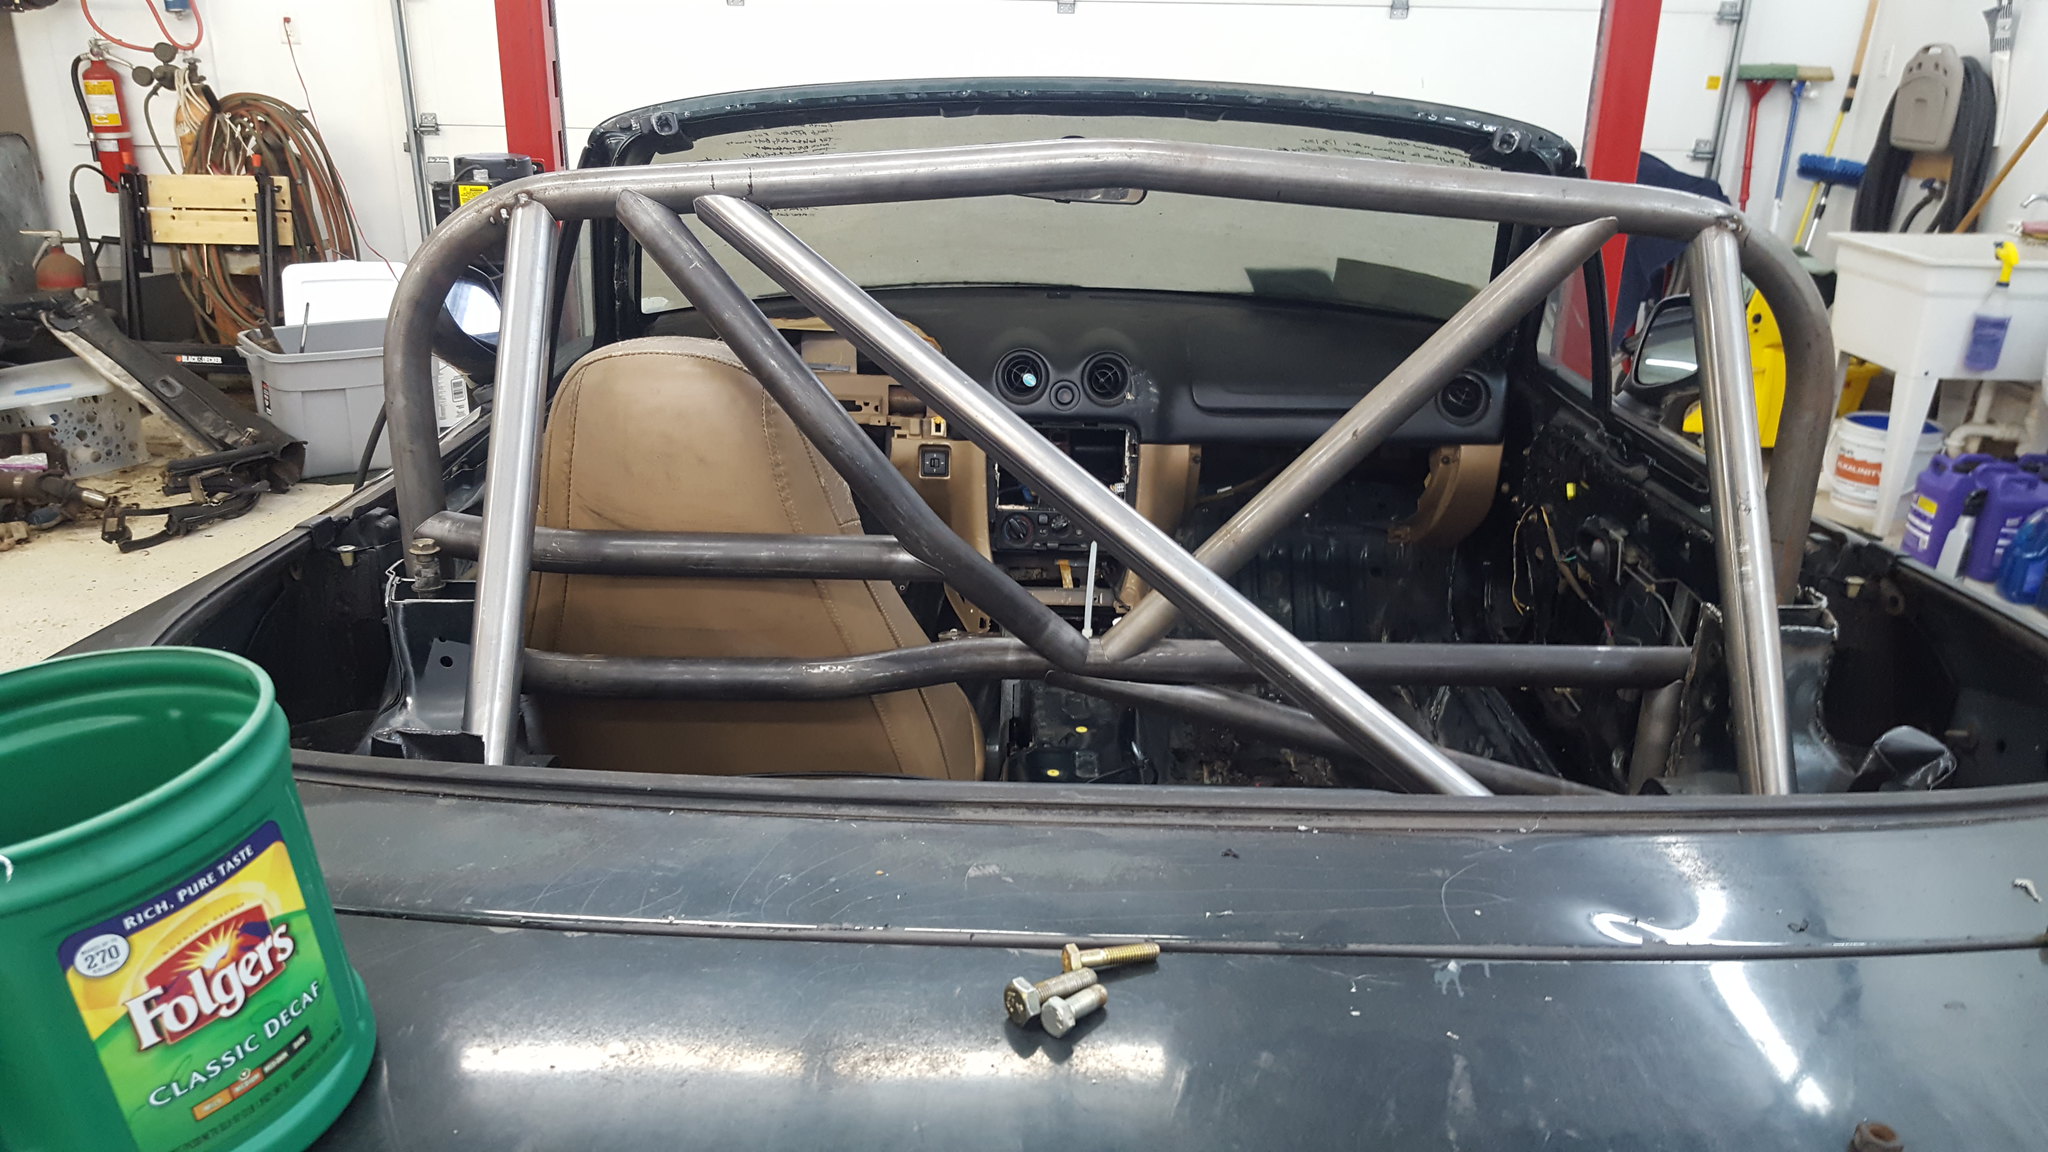
20180121_101930 by Michael Crawford, on Flickr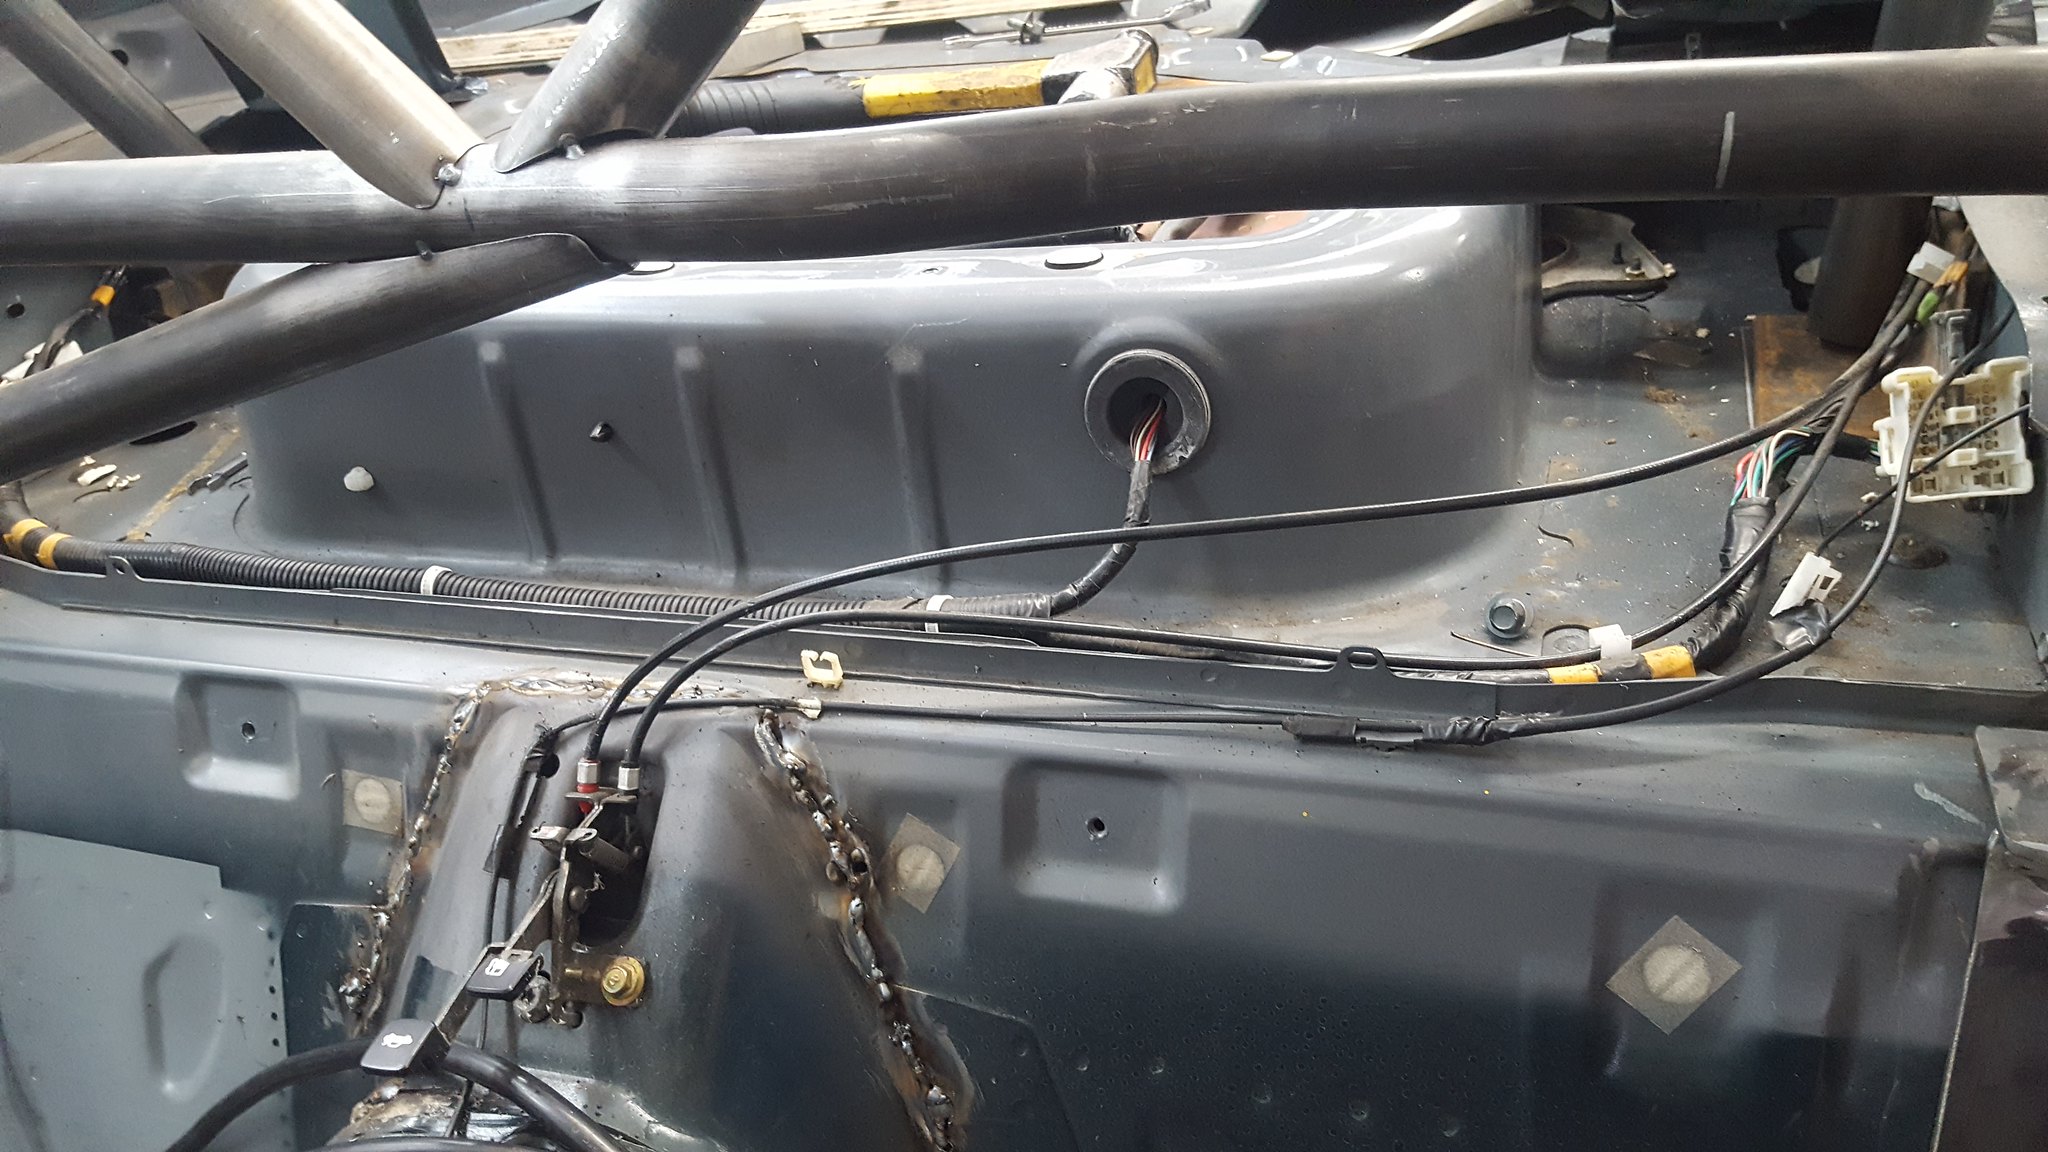
20180120_134634 by Michael Crawford, on Flickrtoday I took the drivers seat, dash, my helmet, etc with me to family lunch. One of the next big hurdles is headers, and the other is door bars. Ill explain headers in a minute. For doorbars, NHRA requires the bar to pass between your shoulder and elbow. So I took the seat and helmet with me so I could find my driving position. This unfortunately brought to light a few things I had suspected, but was conveniently ignoring.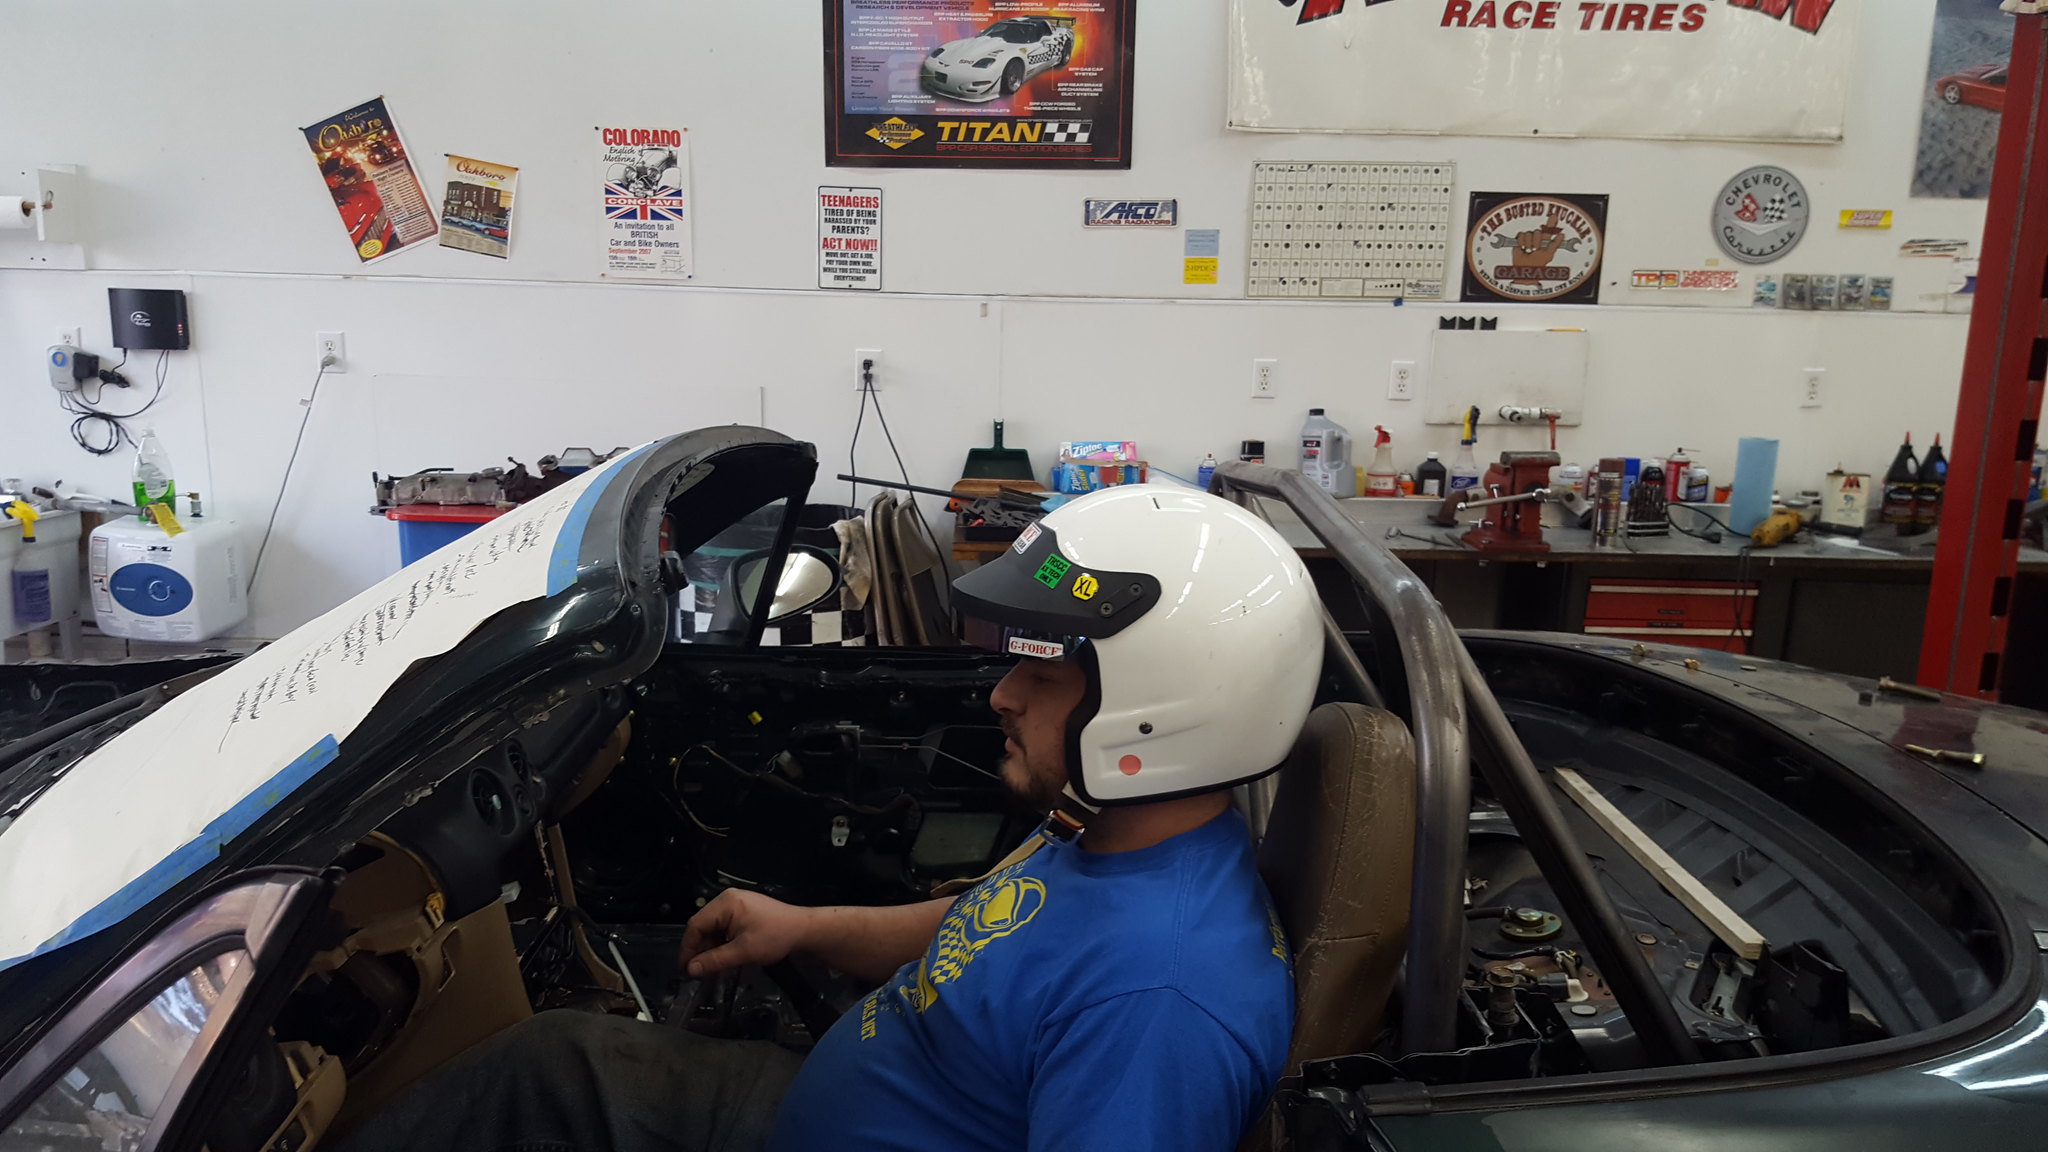
20180121_133607_001 by Michael Crawford, on Flickr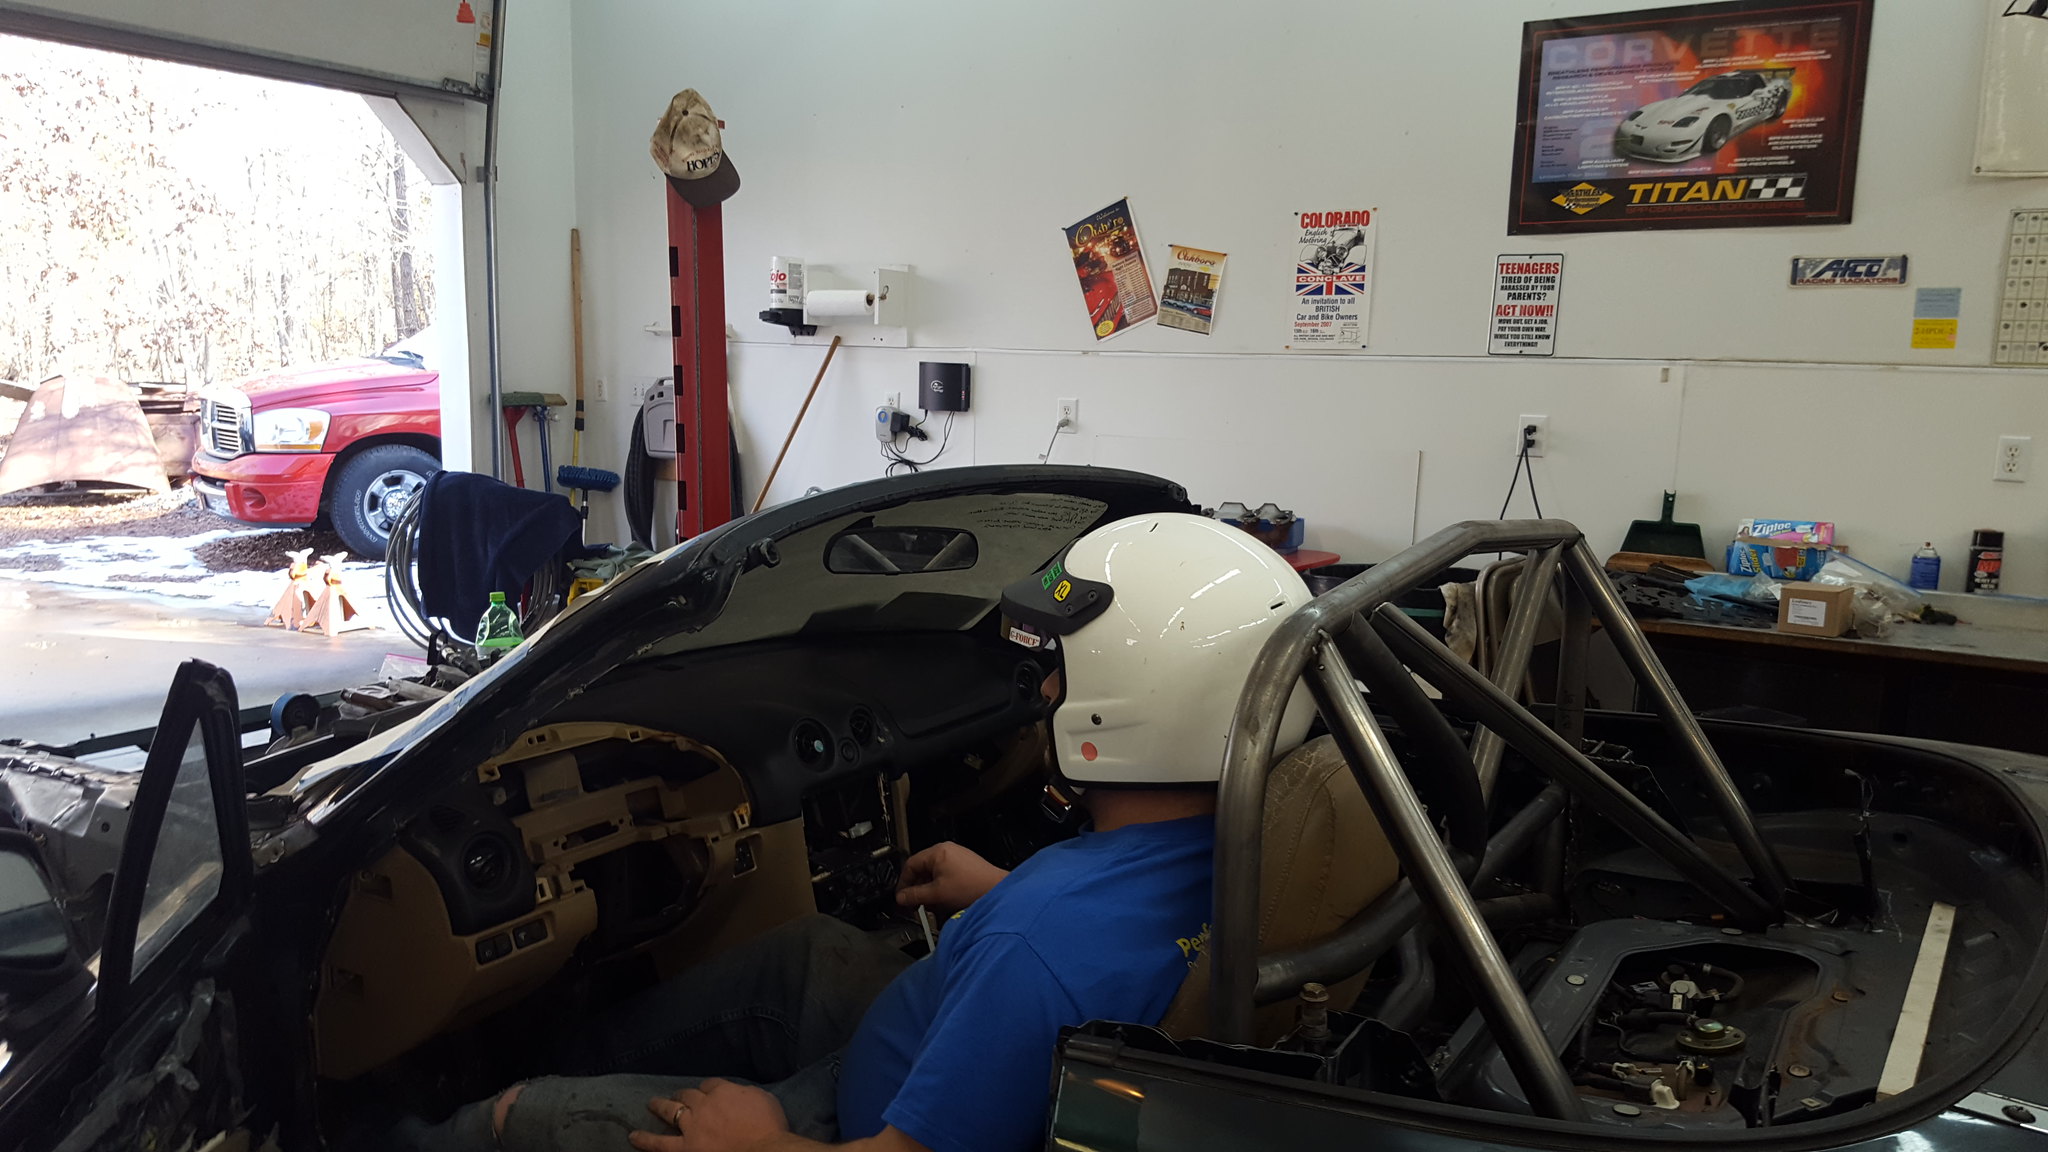
20180121_133615 by Michael Crawford, on Flickrim pretty sure that this is greater than a foamectomy can solve. Am I right? Am I relegated to finding an aluminum seat and mounting it directly to the floor? I'm not opposed to that in principle, but would much rather keep the stock seat if at all possible for budget reasons.The reason I put the dash in is that I also need to get headers built. Im planning an entire day for each header, being focused and zen like on one at a time. Not working on anything but the header that day. To do this properly, you need as much **** in the way as possible. Like everything that the headers need to clear. In this case, all that is located on the drivers side: steering shaft, oil filter, starter, motor mount, alternator, water pump, lower radiator hose. The passengers side is wide open, which is good for when I get boosted. (for those that have forgotten, this is a multi stage build. NA. NA N02, FI N02). The drivers side is going to be a cast iron bitch regardless of which end of the engine I choose to exit from.Anyway, started by bolting in a starter. I didn't realize how small this thing was until today, and just how much room it DOESN'T occupy.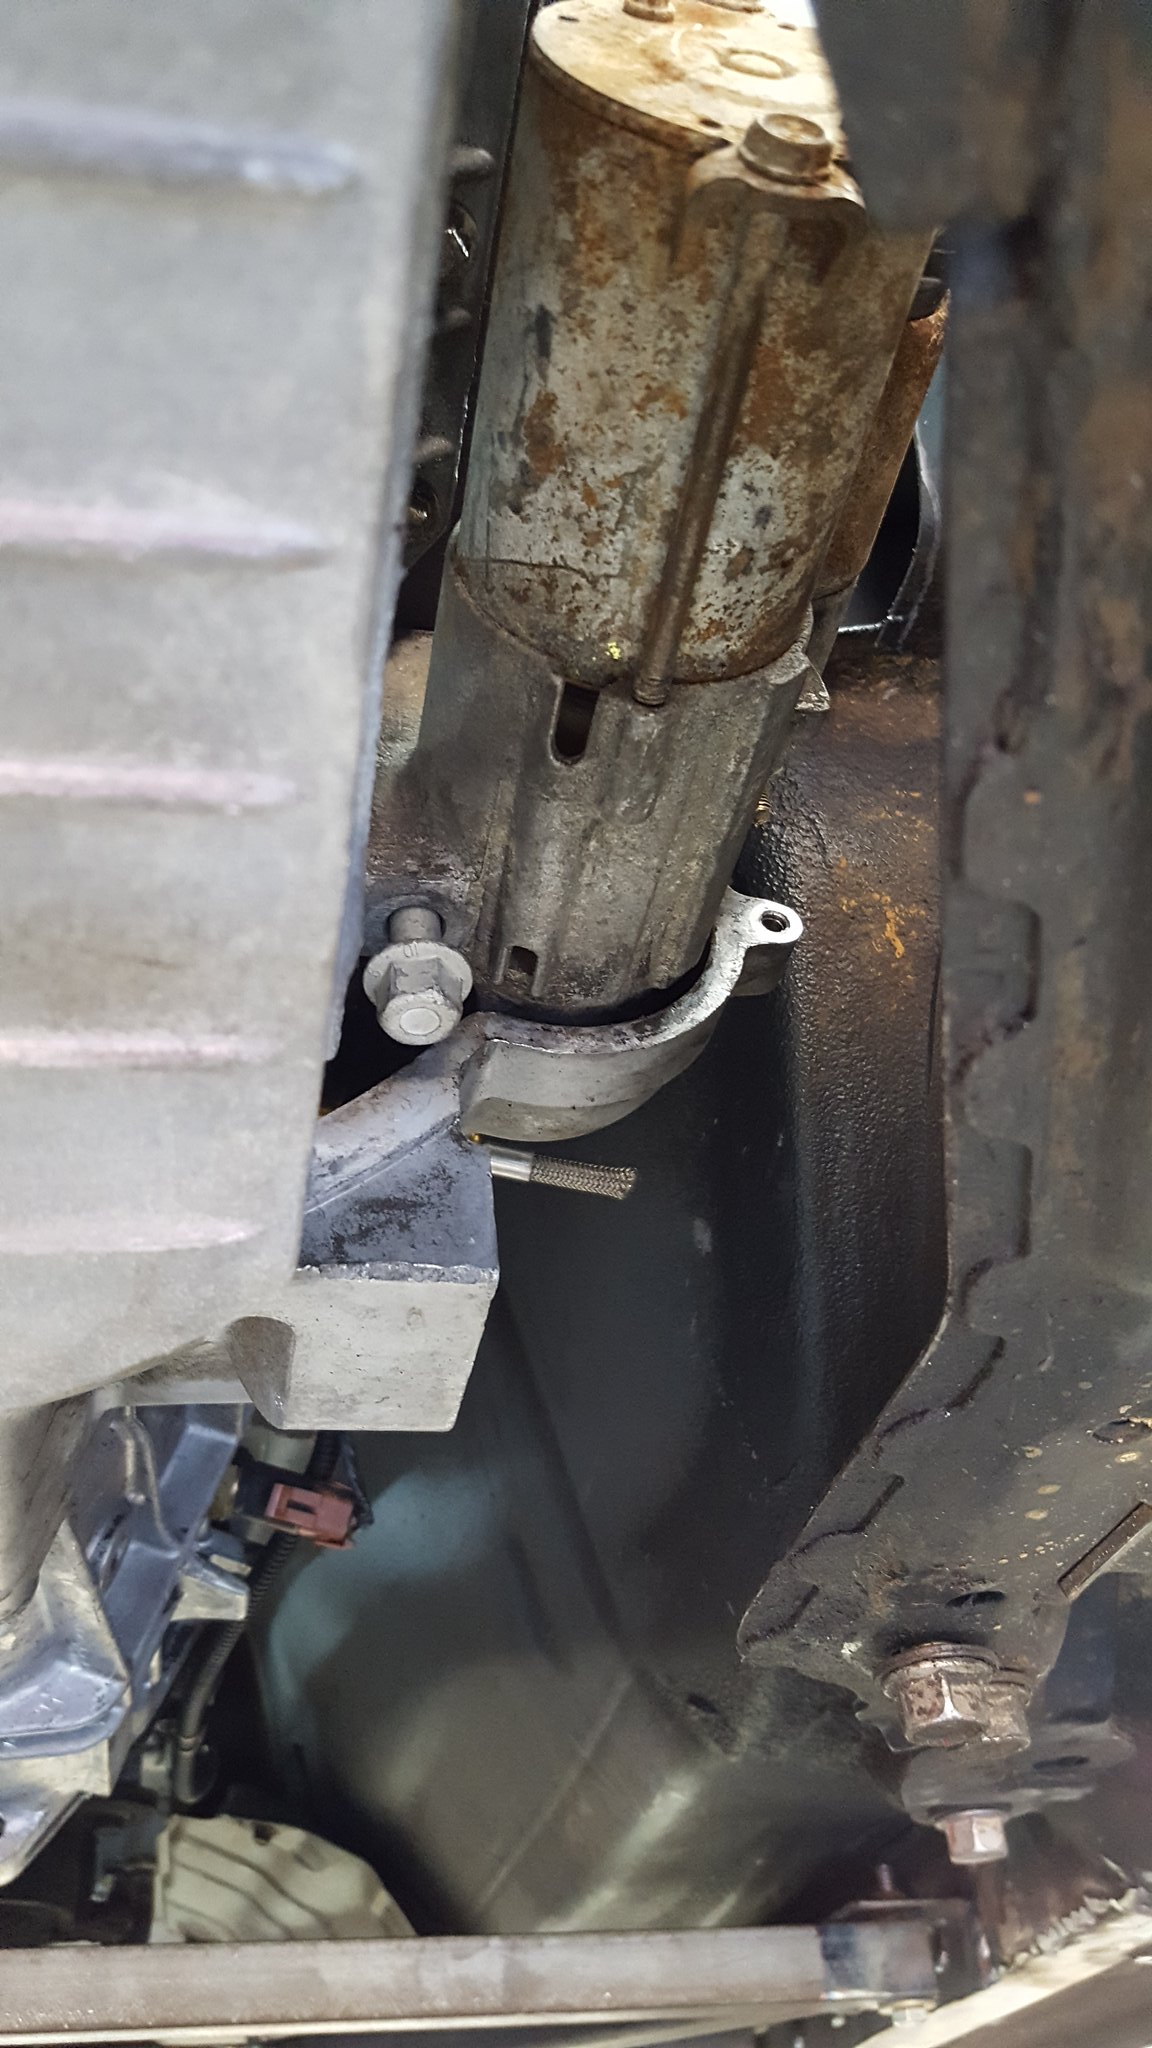
20180121_150125 by Michael Crawford, on Flickr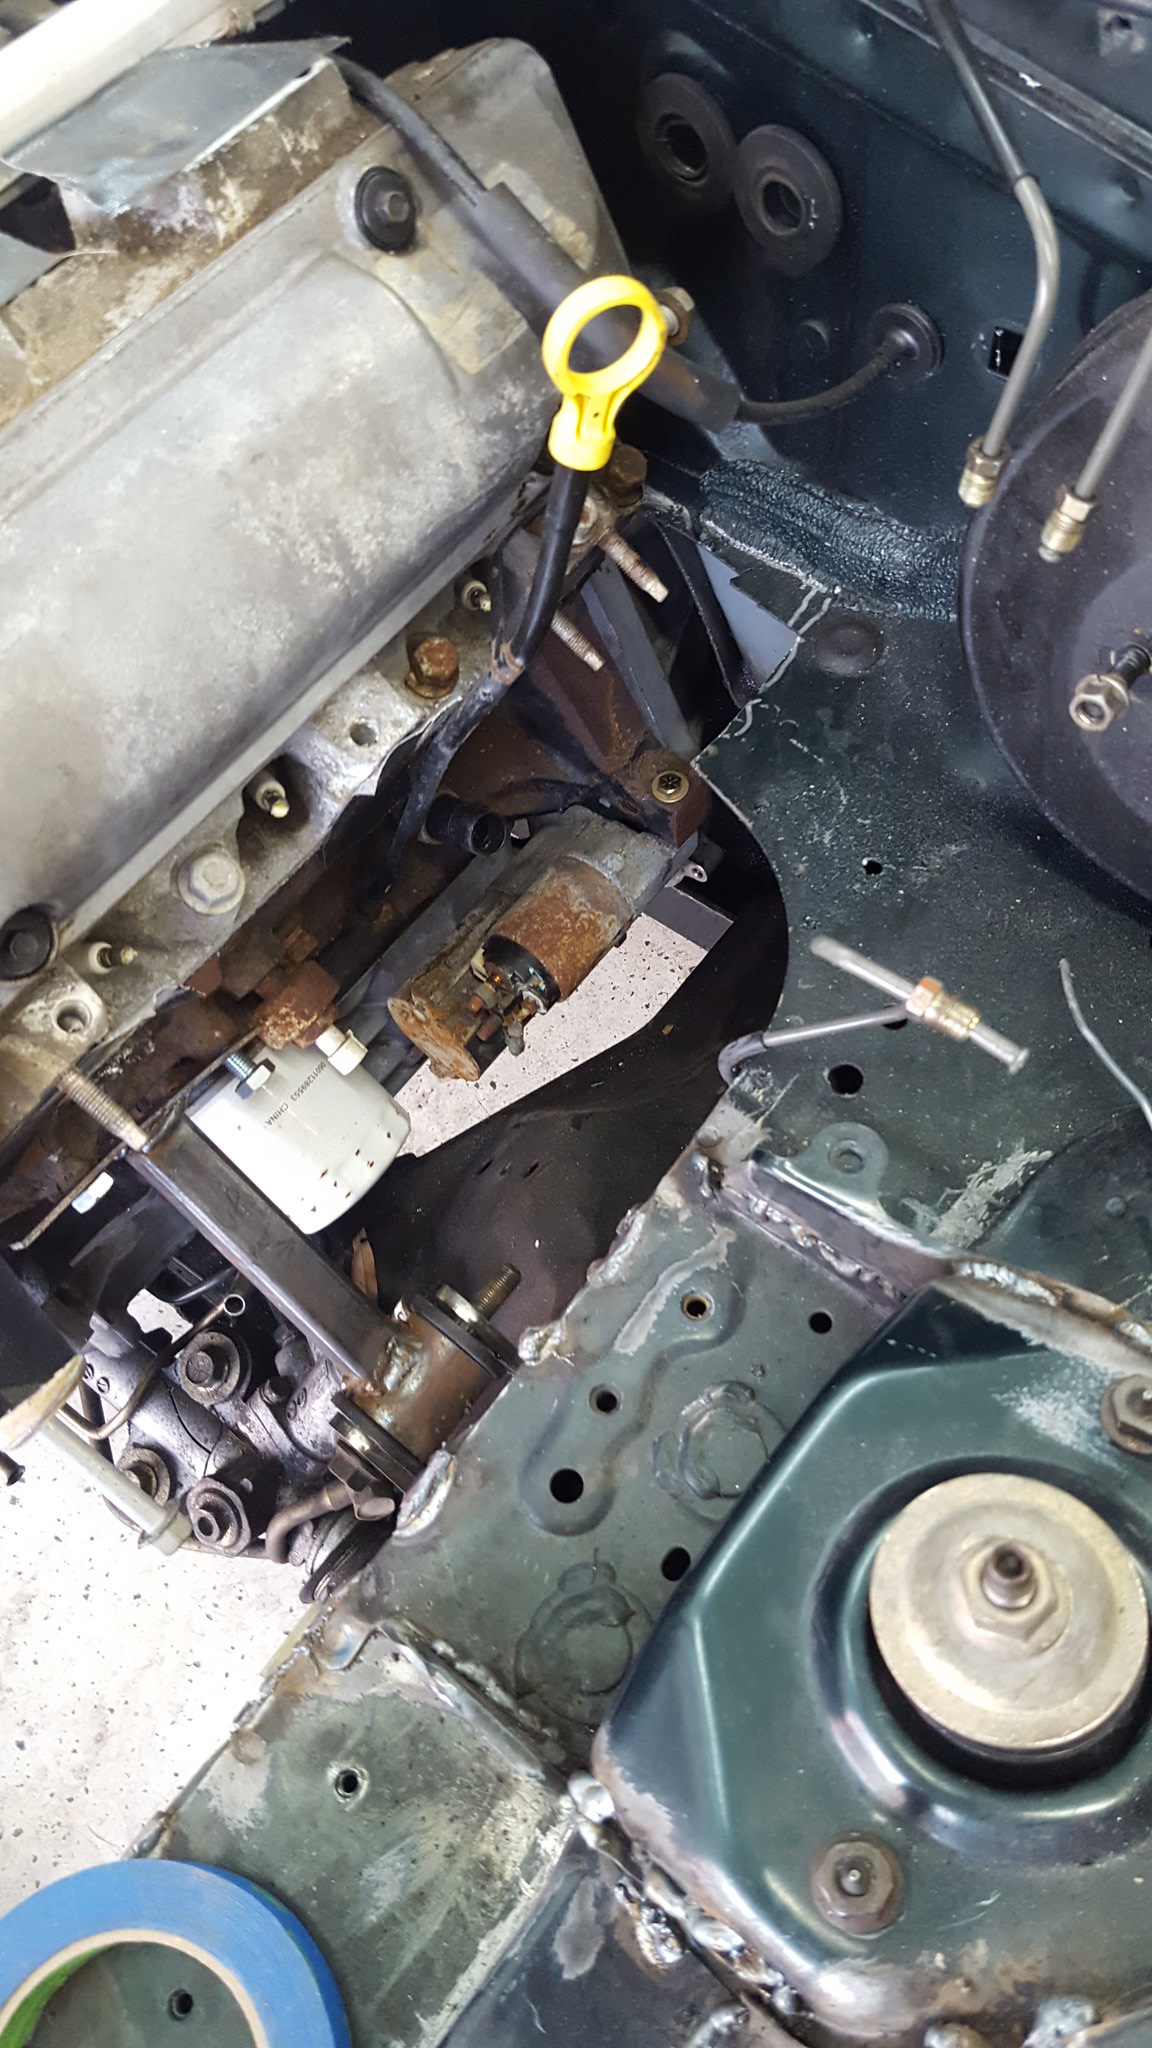
20180121_150448 by Michael Crawford, on FlickrI then went on to accessories. Another thing ive been avoiding due to the mental gymnastics required for a serpentine system. I did hear a good tidbit about designing these though. If the pulley is smooth, and it drives an accessory, it HAS to run on the backside of the belt to keep it rotation correct. Same with grooves. Which means the idler pulleys are fair game to monkey with, but water pump and alternator are not. I've also been led to believe that the more belt wrap you can get on an accessory, the better it will perform. So, armed with that staggering amount of knowledge, all the idlers and tensions that came with the engine, an alternator, some zip ties, and some painters tape, I went to work. After staring at it and getting more and more turned around, I decided that id try the factory brackets and see what that got me, in addition to all the factory accessories. It at least let me know where things were put by GM, and how the belt went on. I then ditched the AC compressor and PS pump again, as I have no intention of using them. They are now in the scrap pile. Permanently. I relocated the alternator to where the ac compressor lived previously and zip tied it into place. Put the tensioner in the alternate location on the timing cover, and started creating a belt with the blue painters tape. This is where we wound up: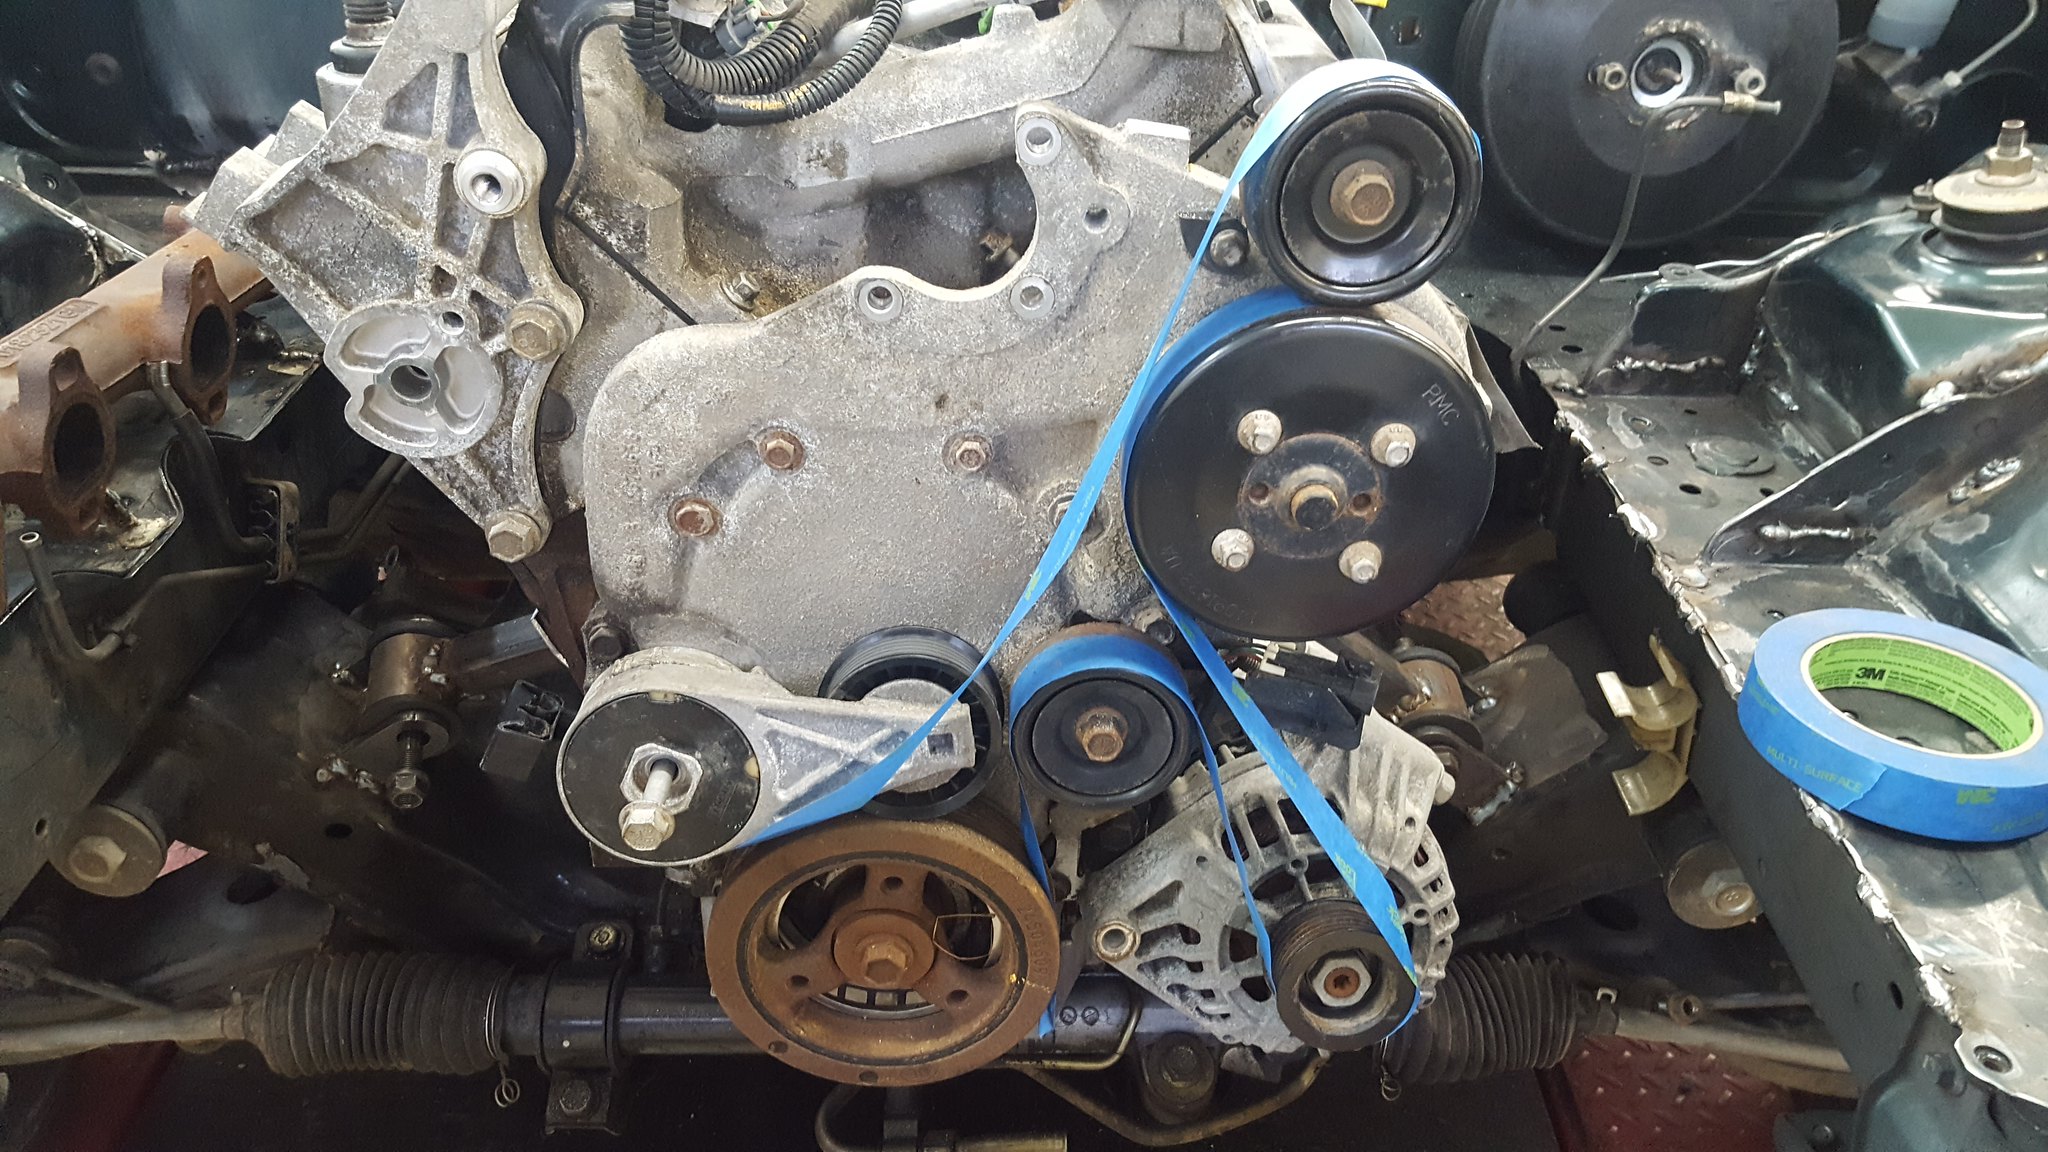
20180121_111422 by Michael Crawford, on Flickrthe uppermost idler will need to be converted to grooved, and have a mount made. The alternator will fit properly with a fully depowered rack using some spacers and a custom bracket. I will need to source a tensioner that tensions in the opposite direction and is clocked differently. And possibly add an idler in the center of the really long belt run to keep it from flapping like a pissed off peacock. But, its entirely doable, and relatively simple compared to a couple of others ive built.While I was up there, I needed to also figure out the clearance to the radiator and how the lower hose needed to run. Oddly enough, after cutting about 2 inches from one end, and 4 from the other, the factory 99 radiator hose fit perfectly. It also appears that the 2003 escalade hose that guys are running on stock engine coolant reroutes will work perfectly for my back of the engine thermostat. I need to get that sorted, by the way. But it does fit!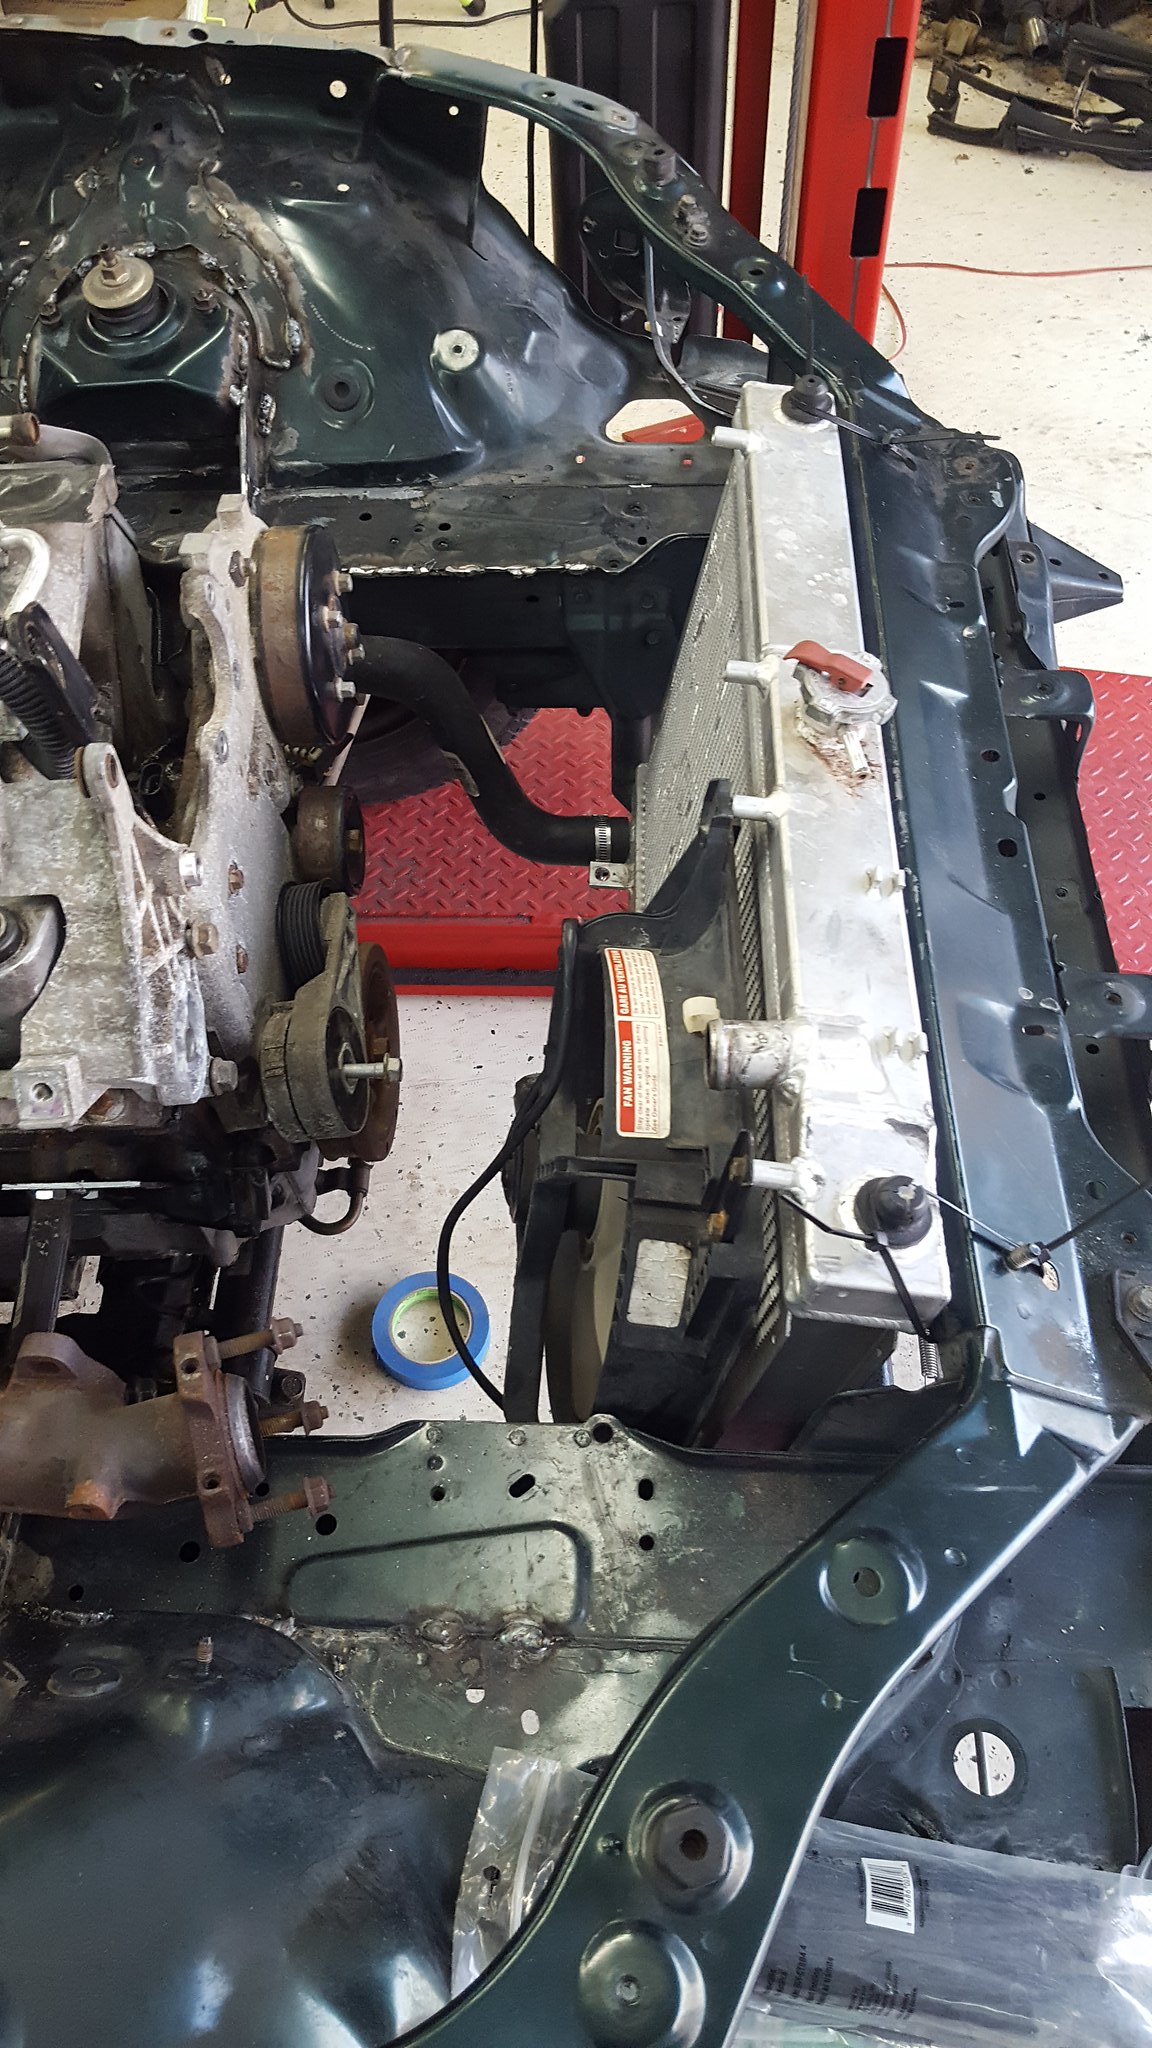
20180121_151048 by Michael Crawford, on Flickrlast thing needed to do before building headers was finally make the transmission mount instead of the trains being ziptied to a stick over the shifter hole. Which meant I finally needed to cut the tunnel for clearance.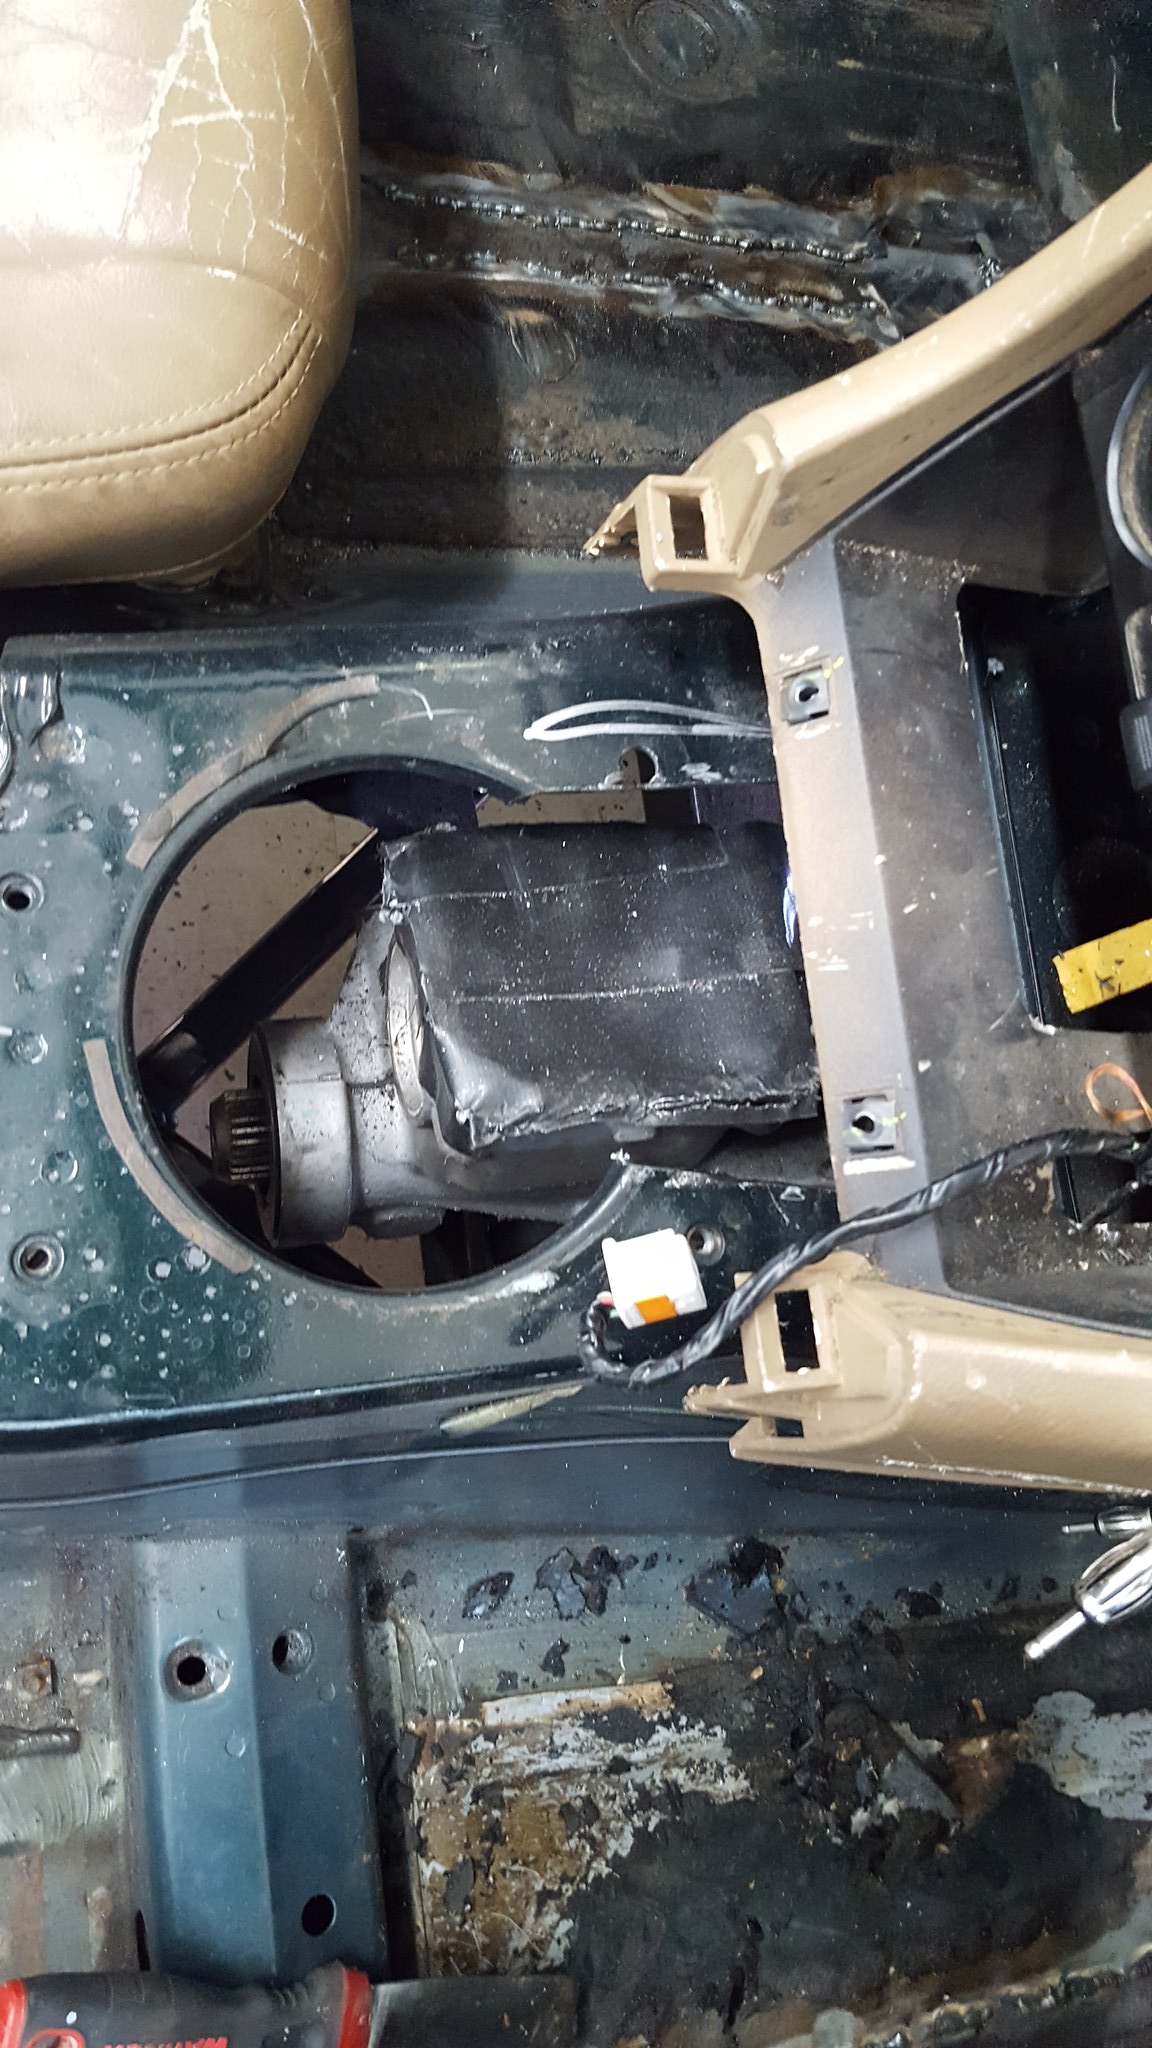
20180121_150509 by Michael Crawford, on FlickrI then went ahead and made a mount from scraps in the five gallon bucket of fab metal. Piece of 3/4x3/4 square, chunk of 2x2 angle, and a wedge shaped piece from mitering the rear downtubes yesterday for a gusset. And a nut for the magic bolt bin. And the trans is firmly mounted!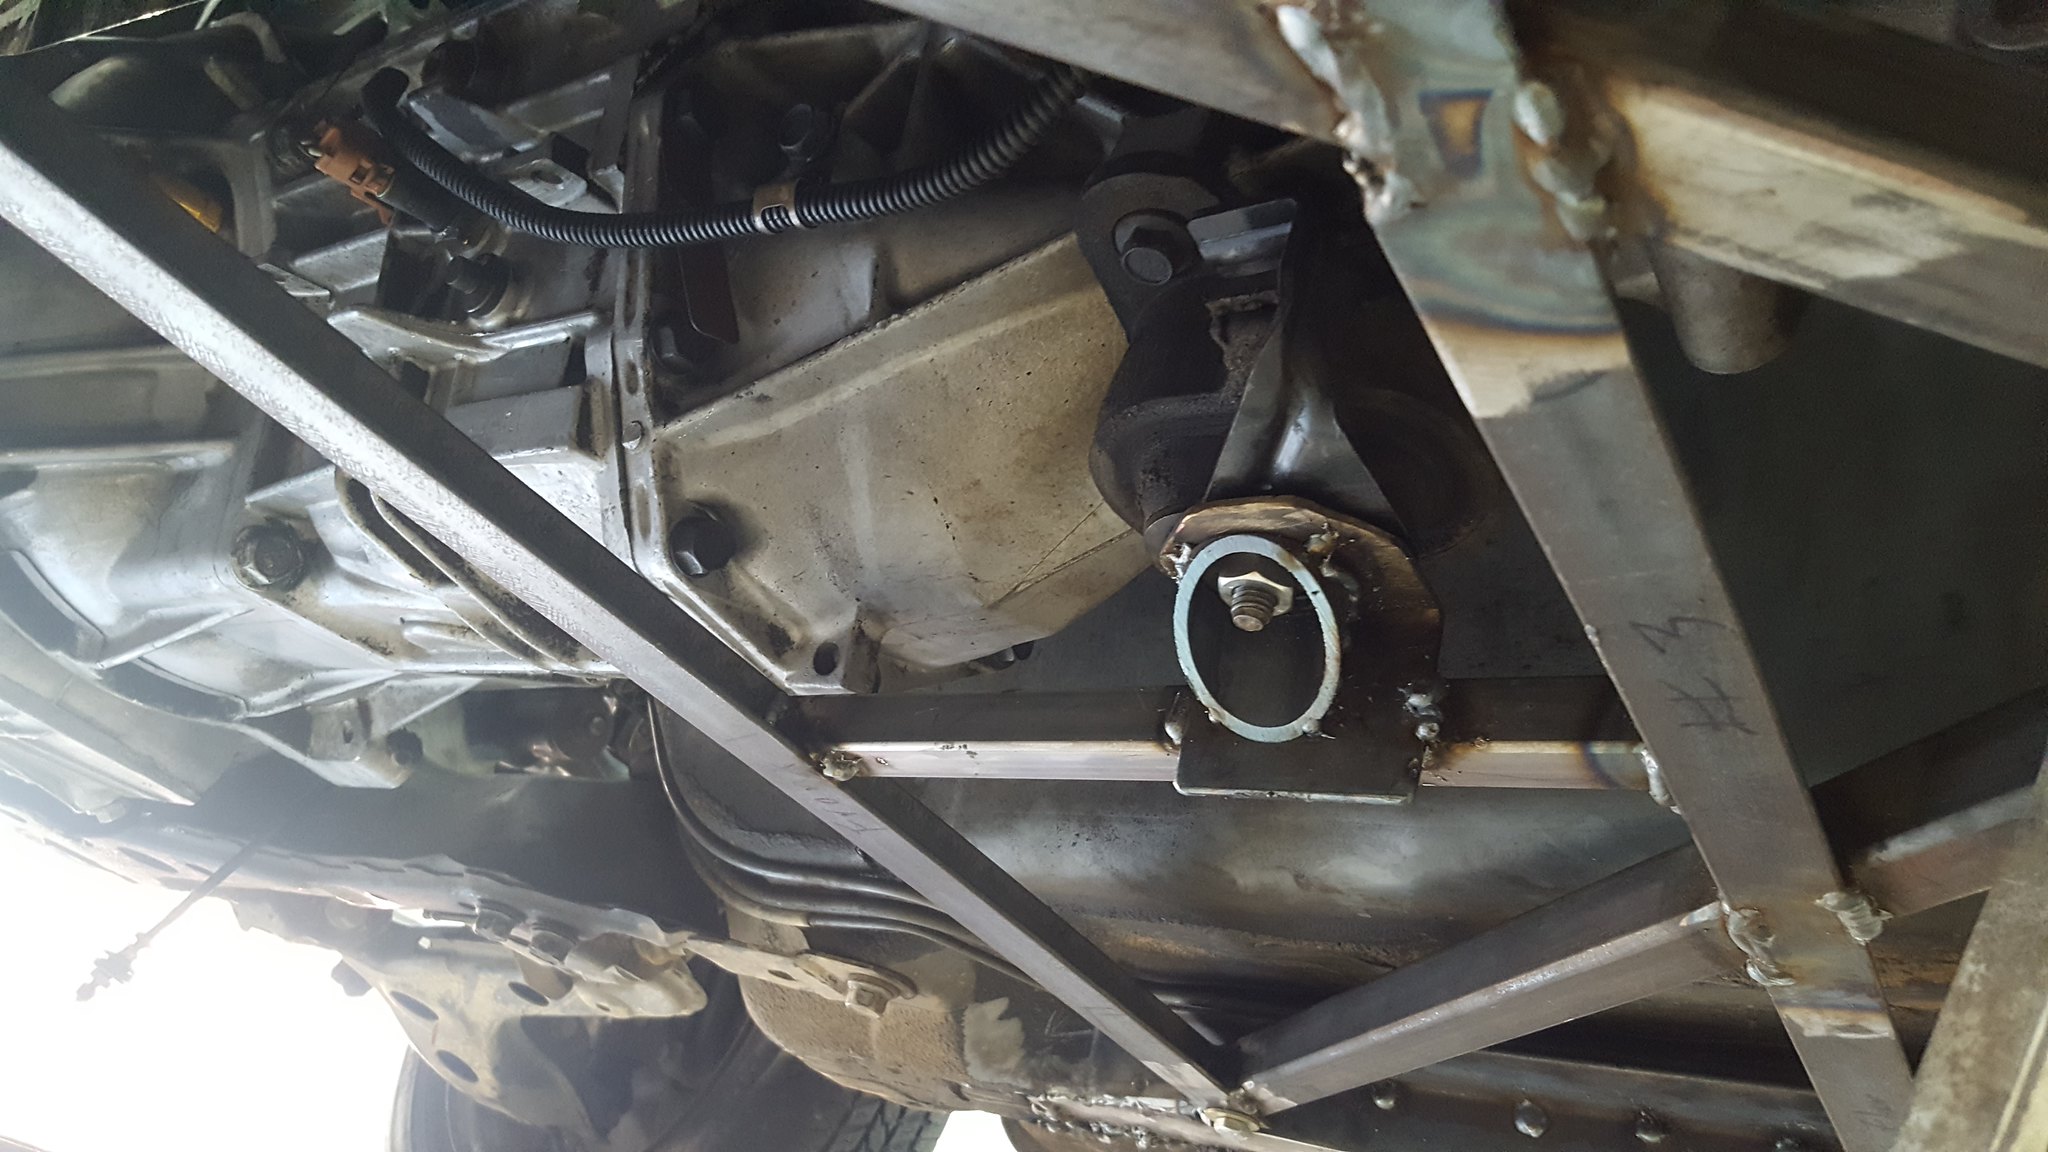
20180121_144402 by Michael Crawford, on Flickrwhile I was under there I finished welding in the butterfly brace rails.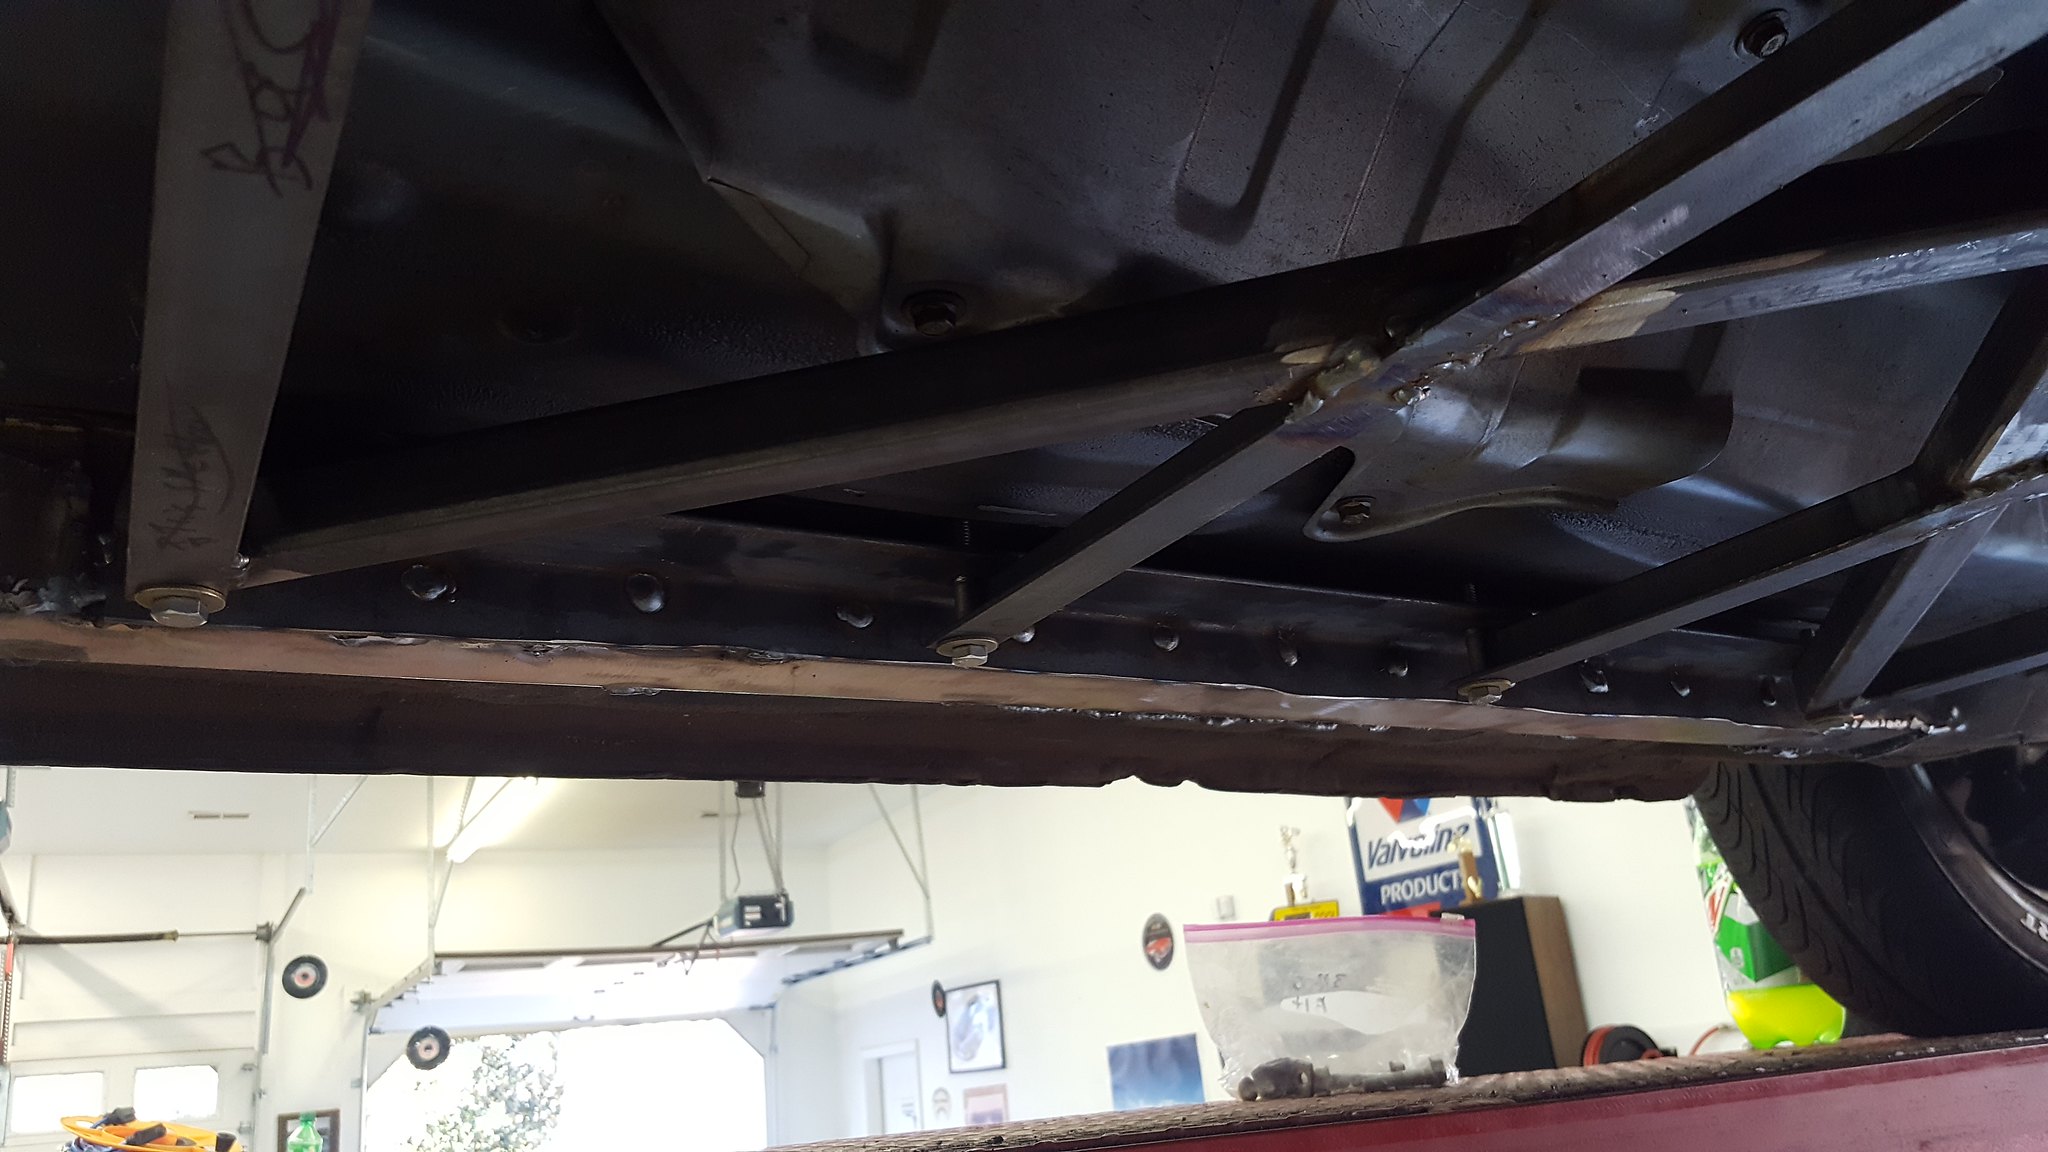
20180121_144354 by Michael Crawford, on Flickr flat bottomed goodness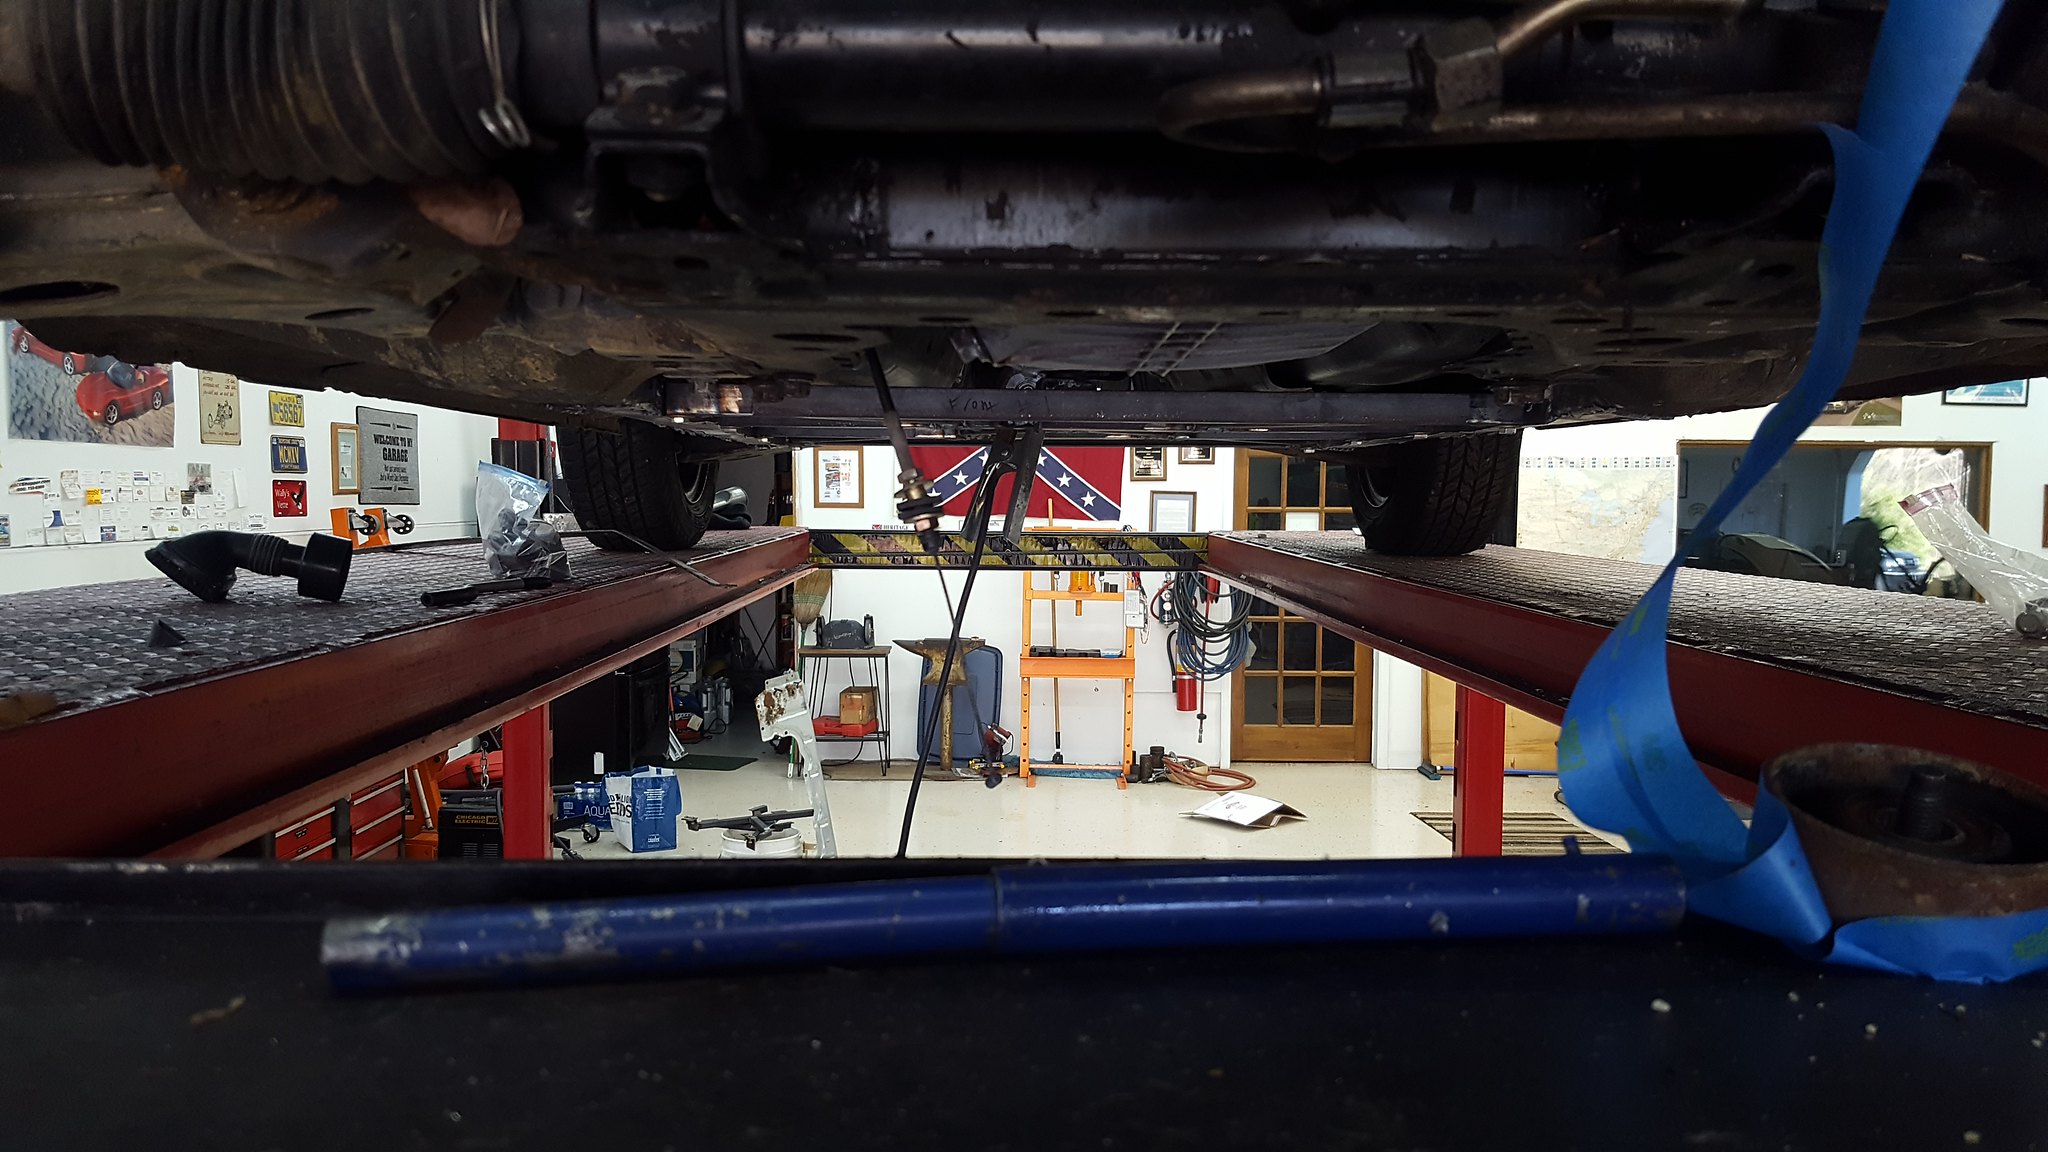
20180121_144414 by Michael Crawford, on Flickra friend of mine here in town has been helping me make my header flanges. These were done on his mill, and so far hes refused payment. They will be added to the budget one way or another, just a matter of how much.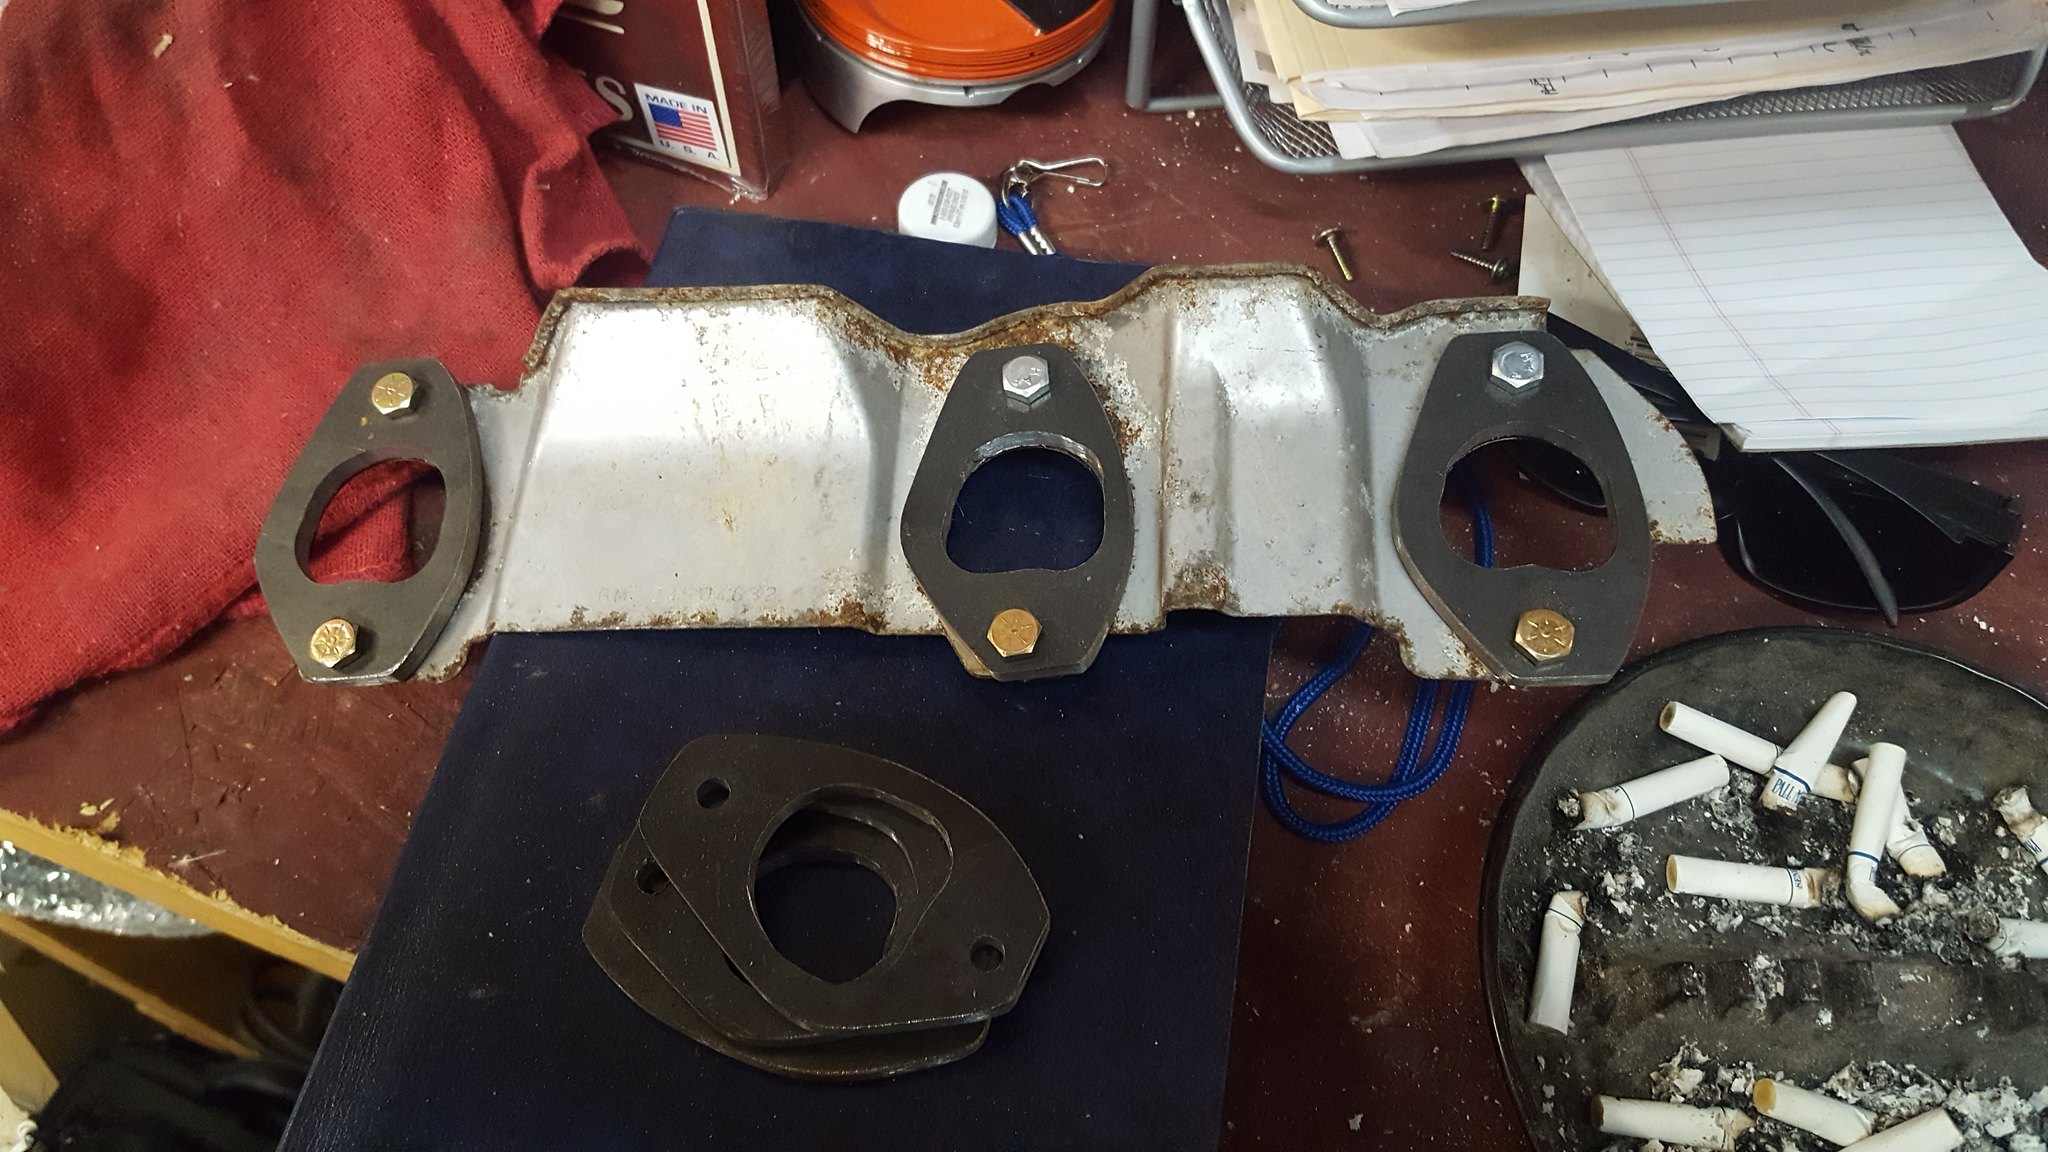
20180116_170759 by Michael Crawford, on Flickr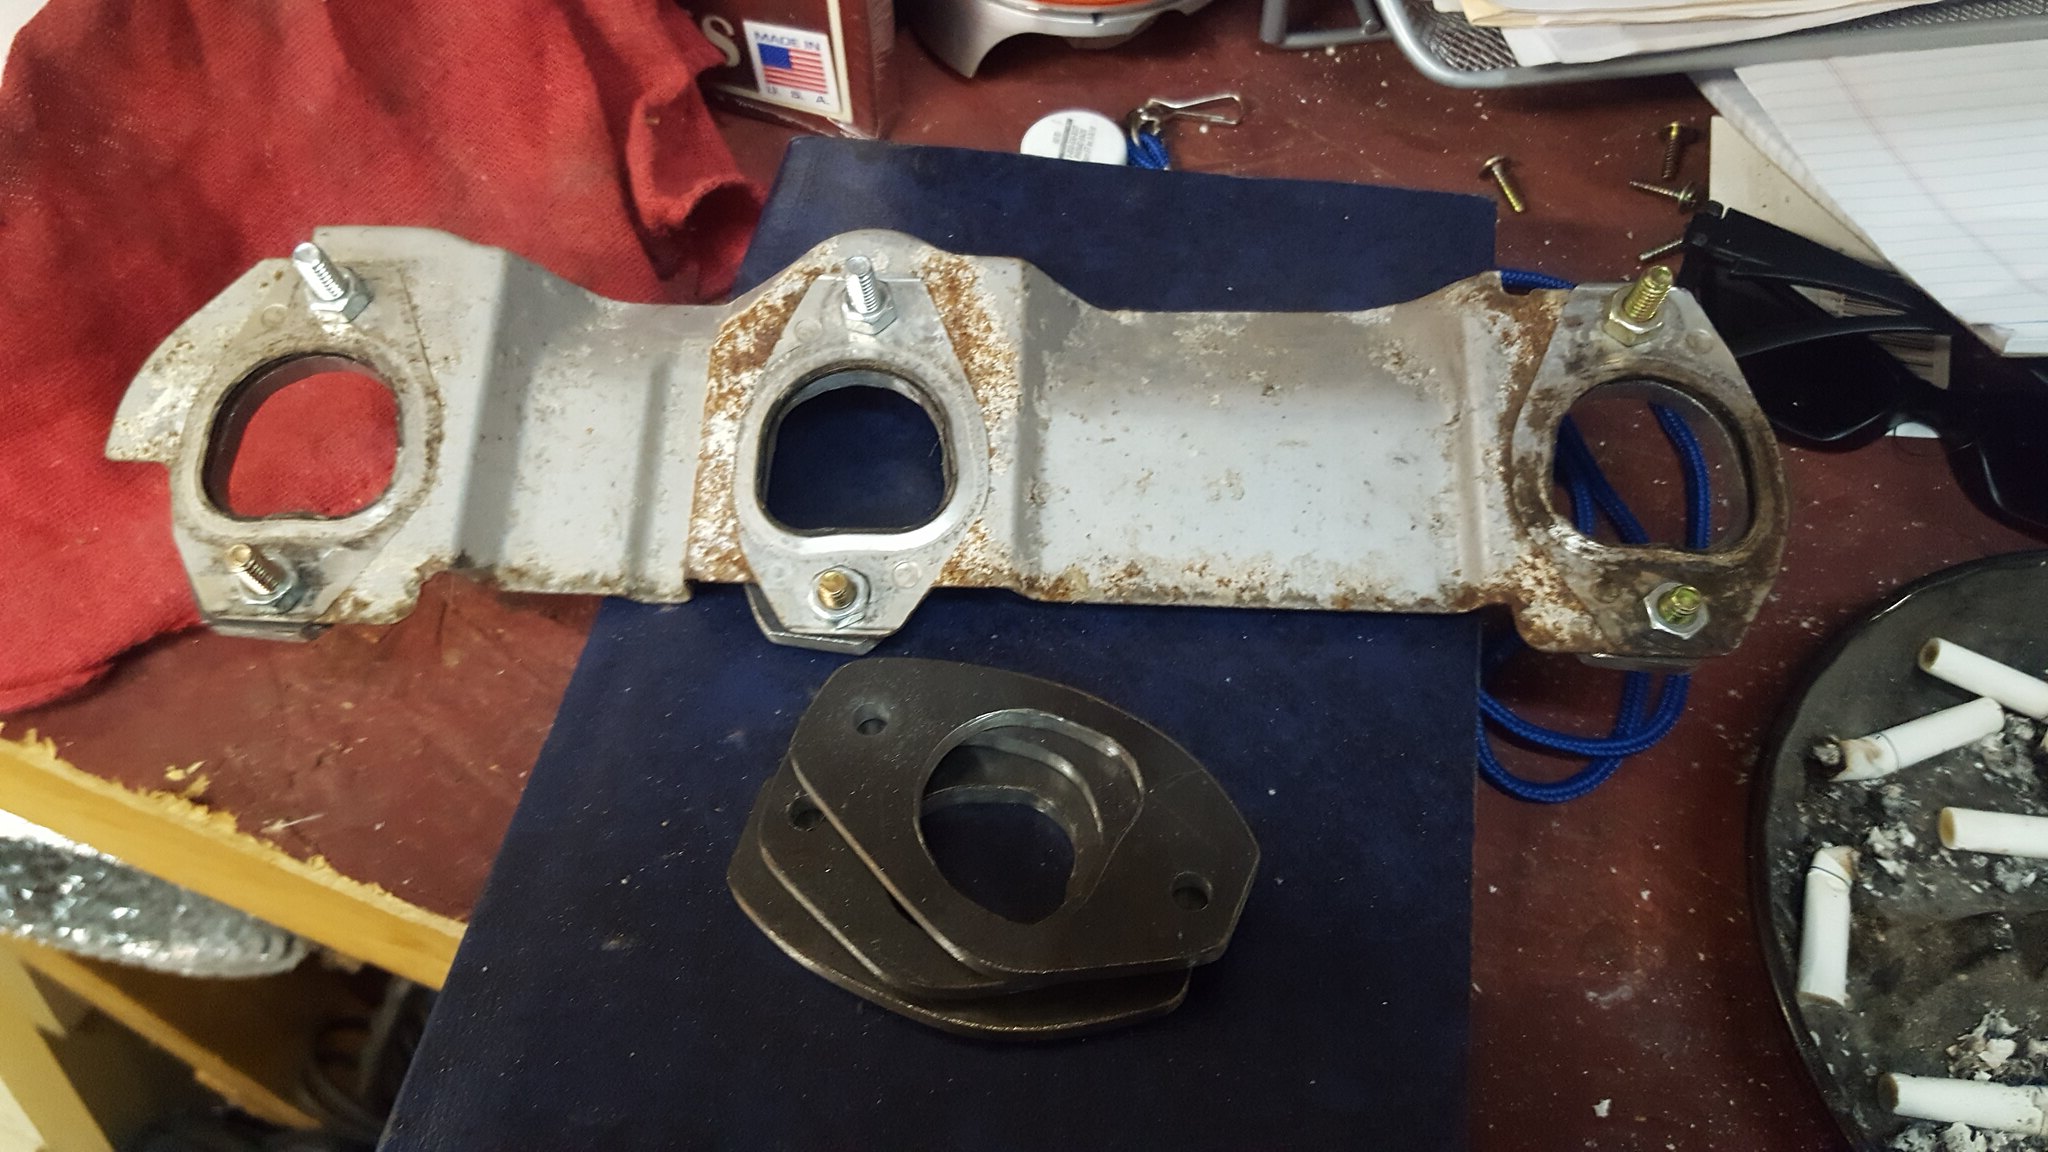
20180116_170752 by Michael Crawford, on Flickr
revious challenge budget: 1135.71recoup: 822ok, some parts came in.amazon coilover kit with unknown rate springs:
20180117_153520 by Michael Crawford, on FlickrI tried the measuring process to determine what spring rates. Seems like 450/250 is what they are, near as I can tell. No way to know for certain with the equipment I have on hand though.Fuel pump came in as well. This is the 14 dollar ebay special that's supposedly 255lph. Hopefully it is, but it will work. I went ahead and installed it, as well as deleted the in tank fuel pressure regulator. I unfortunately didn't label the outlet/return on the top of the tank, so if someone knows which is which, id greatly appreciate it. I already put it all back together to close up the fuel tank, which brings me to...
20180120_095954 by Michael Crawford, on Flickr
20180120_100003 by Michael Crawford, on Flickr
20180120_102313 by Michael Crawford, on Flickrspent all day Saturday (well 4-5 hours) working on cage tubes. Got the rear feet made, downtubes, and uninterrupted diagonal from the drivers side main hoop to passengers floor. I was planning to do a full X, but im concerned about the weight im adding. Additionally, with the door bars, im not sure ill have enough tube left from what I got with the purchase. The setup is not fully welded yet, and there's some news on that. Dad has a friend from church that is a professional welder in a pipe facility. He had come over when we were fighting with the welder to give us some help. He offered to weld up the cage when we got that far. So, hes supposed to stop by a few nights after work in the next couple of weeks and do the welding for us. Which means that getting it finished takes highest priority. I also wanted to make sure that I liked how its laying out. I would have loved to make the rear legs extend further, but with it being a bolt in I could find no good way of doing it where the feet would be a solid dual plated connection. So I essentially copied my hard dog instead.
20180120_134620 by Michael Crawford, on Flickr
20180121_101930 by Michael Crawford, on Flickr
20180120_134634 by Michael Crawford, on Flickrtoday I took the drivers seat, dash, my helmet, etc with me to family lunch. One of the next big hurdles is headers, and the other is door bars. Ill explain headers in a minute. For doorbars, NHRA requires the bar to pass between your shoulder and elbow. So I took the seat and helmet with me so I could find my driving position. This unfortunately brought to light a few things I had suspected, but was conveniently ignoring.
- im fat.
- My helmet sticks about 3 inches above the windshield/rollbar
- the harness bar isn't in the right location, as its too low.
20180121_133607_001 by Michael Crawford, on Flickr
20180121_133615 by Michael Crawford, on Flickrim pretty sure that this is greater than a foamectomy can solve. Am I right? Am I relegated to finding an aluminum seat and mounting it directly to the floor? I'm not opposed to that in principle, but would much rather keep the stock seat if at all possible for budget reasons.The reason I put the dash in is that I also need to get headers built. Im planning an entire day for each header, being focused and zen like on one at a time. Not working on anything but the header that day. To do this properly, you need as much **** in the way as possible. Like everything that the headers need to clear. In this case, all that is located on the drivers side: steering shaft, oil filter, starter, motor mount, alternator, water pump, lower radiator hose. The passengers side is wide open, which is good for when I get boosted. (for those that have forgotten, this is a multi stage build. NA. NA N02, FI N02). The drivers side is going to be a cast iron bitch regardless of which end of the engine I choose to exit from.Anyway, started by bolting in a starter. I didn't realize how small this thing was until today, and just how much room it DOESN'T occupy.
20180121_150125 by Michael Crawford, on Flickr
20180121_150448 by Michael Crawford, on FlickrI then went on to accessories. Another thing ive been avoiding due to the mental gymnastics required for a serpentine system. I did hear a good tidbit about designing these though. If the pulley is smooth, and it drives an accessory, it HAS to run on the backside of the belt to keep it rotation correct. Same with grooves. Which means the idler pulleys are fair game to monkey with, but water pump and alternator are not. I've also been led to believe that the more belt wrap you can get on an accessory, the better it will perform. So, armed with that staggering amount of knowledge, all the idlers and tensions that came with the engine, an alternator, some zip ties, and some painters tape, I went to work. After staring at it and getting more and more turned around, I decided that id try the factory brackets and see what that got me, in addition to all the factory accessories. It at least let me know where things were put by GM, and how the belt went on. I then ditched the AC compressor and PS pump again, as I have no intention of using them. They are now in the scrap pile. Permanently. I relocated the alternator to where the ac compressor lived previously and zip tied it into place. Put the tensioner in the alternate location on the timing cover, and started creating a belt with the blue painters tape. This is where we wound up:
20180121_111422 by Michael Crawford, on Flickrthe uppermost idler will need to be converted to grooved, and have a mount made. The alternator will fit properly with a fully depowered rack using some spacers and a custom bracket. I will need to source a tensioner that tensions in the opposite direction and is clocked differently. And possibly add an idler in the center of the really long belt run to keep it from flapping like a pissed off peacock. But, its entirely doable, and relatively simple compared to a couple of others ive built.While I was up there, I needed to also figure out the clearance to the radiator and how the lower hose needed to run. Oddly enough, after cutting about 2 inches from one end, and 4 from the other, the factory 99 radiator hose fit perfectly. It also appears that the 2003 escalade hose that guys are running on stock engine coolant reroutes will work perfectly for my back of the engine thermostat. I need to get that sorted, by the way. But it does fit!
20180121_151048 by Michael Crawford, on Flickrlast thing needed to do before building headers was finally make the transmission mount instead of the trains being ziptied to a stick over the shifter hole. Which meant I finally needed to cut the tunnel for clearance.
20180121_150509 by Michael Crawford, on FlickrI then went ahead and made a mount from scraps in the five gallon bucket of fab metal. Piece of 3/4x3/4 square, chunk of 2x2 angle, and a wedge shaped piece from mitering the rear downtubes yesterday for a gusset. And a nut for the magic bolt bin. And the trans is firmly mounted!
20180121_144402 by Michael Crawford, on Flickrwhile I was under there I finished welding in the butterfly brace rails.
20180121_144354 by Michael Crawford, on Flickr flat bottomed goodness
20180121_144414 by Michael Crawford, on Flickra friend of mine here in town has been helping me make my header flanges. These were done on his mill, and so far hes refused payment. They will be added to the budget one way or another, just a matter of how much.
20180116_170759 by Michael Crawford, on Flickr
20180116_170752 by Michael Crawford, on Flickr
Reply
0
0
01-28-2018, 09:41 PM
#43
Junior Member
Thread Starter
Join Date: Nov 2017
Posts: 112
Total Cats: 7
Challenge budget so farrevious challenge budget: 1135.71
recoup: 800 money spent:
header flanges: I gave sonny $40bought used stock c5 exhaust and some new in box header collectors from Charlie Tew for $20bought dinner ($26.87) in exchange for 3x unknown brand nitrous nozzles, used fuel pressure regulator for carb, 2x mangled and used headers, 1 wire alternator, 3x autometer ultralight gauges covered in tar, some exhaust flex pipe, and a pair of 3 inch to 2.5 exhaust reducersFMV $2 for a couple of pullies and a spare tensioner from my scrap bucketbought used s10 2.2 flywheel and clutch on eBay $40 shipped Current budget: 1286.58
recoup: 800so, Friday night I went to see a jeep owned by an old corvette customer of mine. He got out of vettes a while back, and asked me to fix the jeep. While there, he tried to give me his leftover vette stuff. I made him take $20 for the 2.5 collectors and stock exhaust. Didn't seem right getting 4x collectors NIB for free.Afterwards, I went to Dallas place to help sort trans issues with the AMC, and help him go through the barn and fill a dumpster. While doing this, we came across 3x unknown brand nitrous nozzles, used fuel pressure regulator for carb, 2x mangled and used headers, 1 wire alternator, 3x autometer ultralight gauges covered in tar, 2x 3-2.5 reducers, and some exhaust flex pipe. I asked him how much, and he said to buy dinner. I added in the cost of dinner at La Unica, his favorite Mexican restaurant.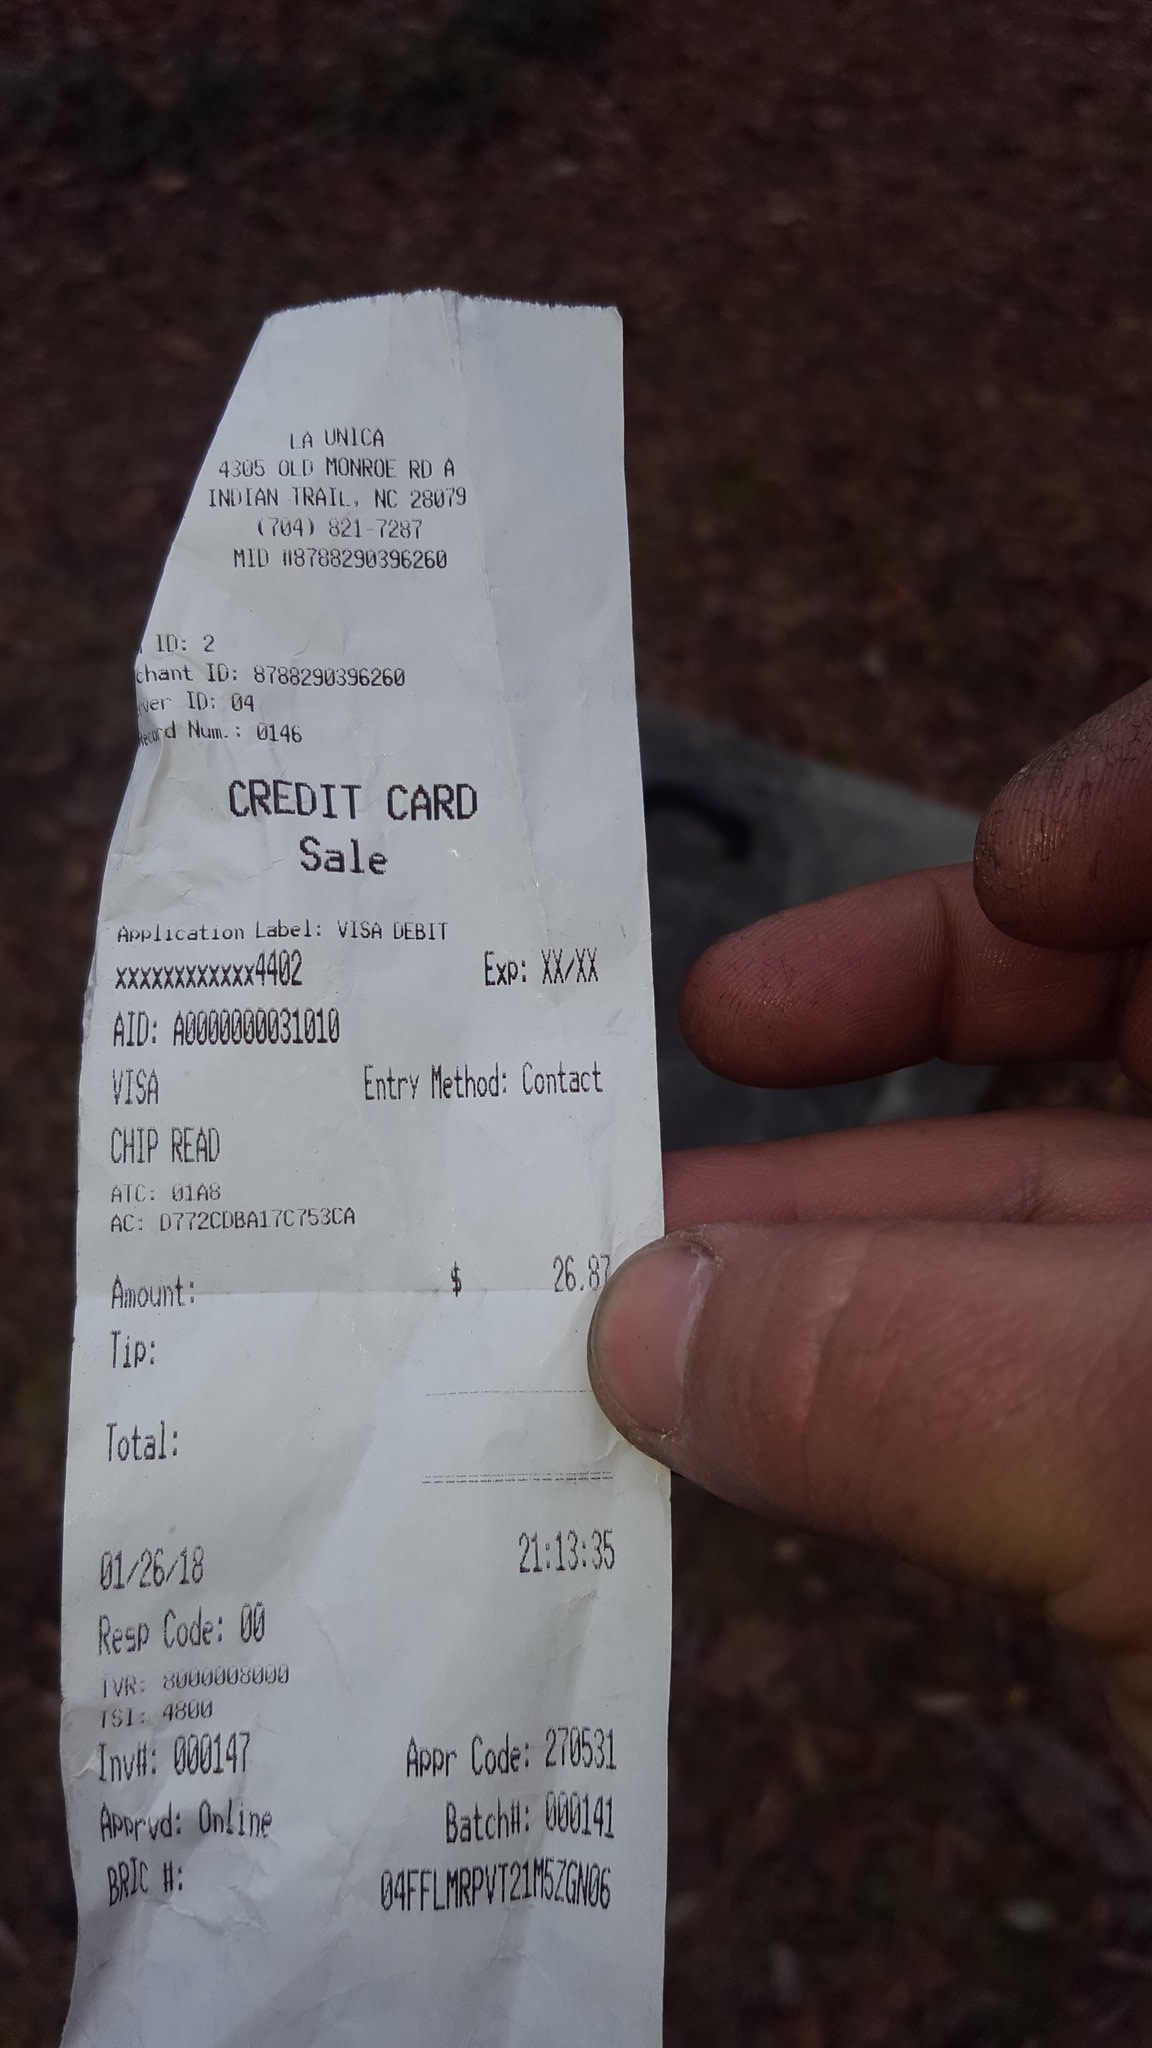
20180127_111628 by Michael Crawford, on Flickron the way back from dinner, I got t-boned by a 17 year old girl that was texting. I was turning left, she swerved into the oncoming lane to miss the people stopped behind me and slammed the drivers door of my 64 el camino into my ribs. Door is pushed in about 14 inches.....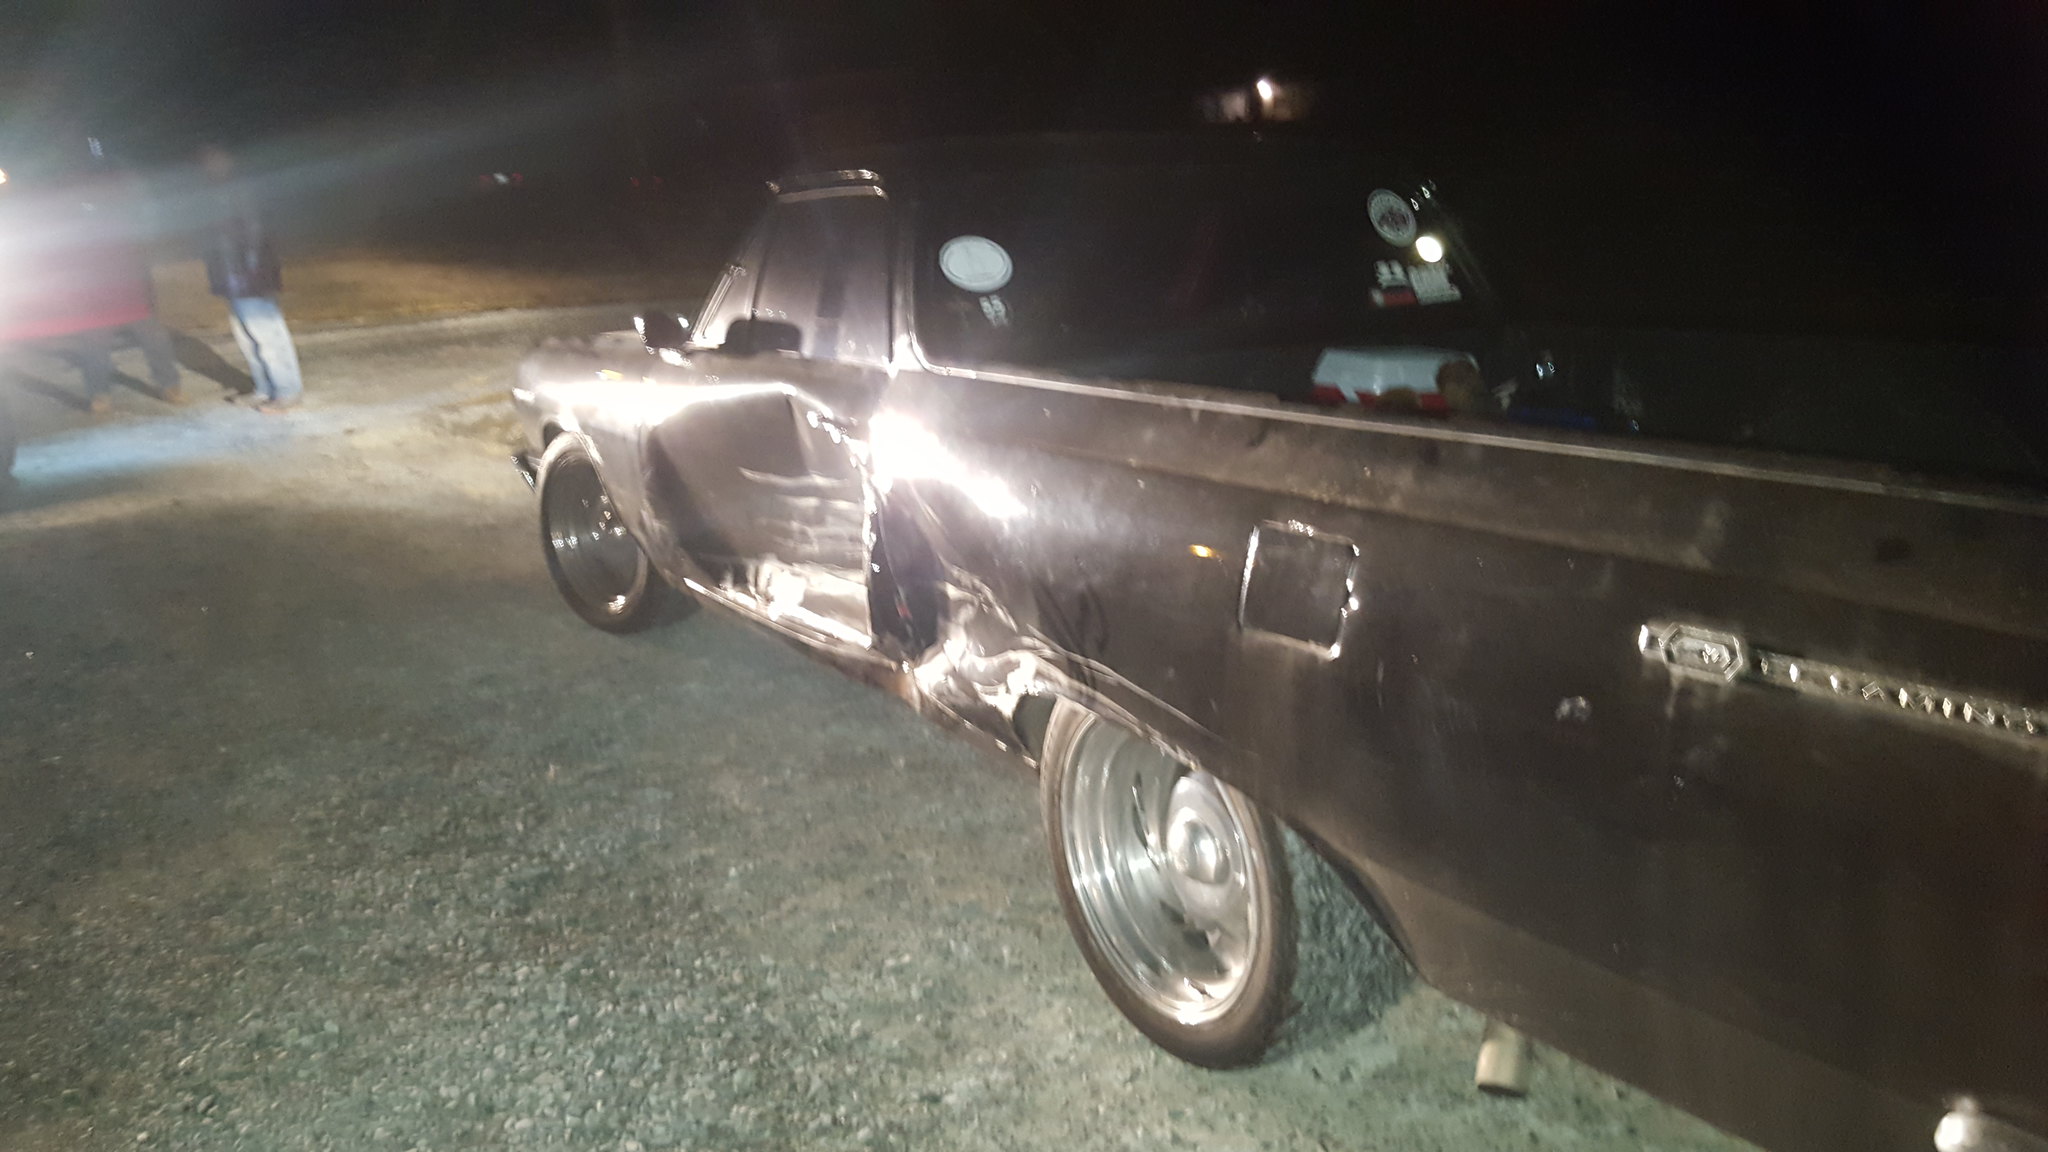
20180126_214146 by Michael Crawford, on Flickrwe both walked away. Dallas may have whiplash. I have bruised ribs, minor concussion, and somethings torn in both my left knee and shoulder. Trucks probably totaled.Anyway, needless to say, I didn't get much progress after that. This weekend ive been moving pretty damned slow. So I took it easy.I built a header.I started with some presumably Chevy headers that I had bought a while back from pat. Theyre roughly 1.5 primaries. The other set I got from Dallas are 1 �, and ill use them when I build the turbo manifolds later.
20171202_103045 by Michael Crawford, on FlickrI took the portaband to them to make sections. Kept a minimum of 1 inch of pipe around all the bends. Then dressed the ends on mt bench grinder and with a wire wheel.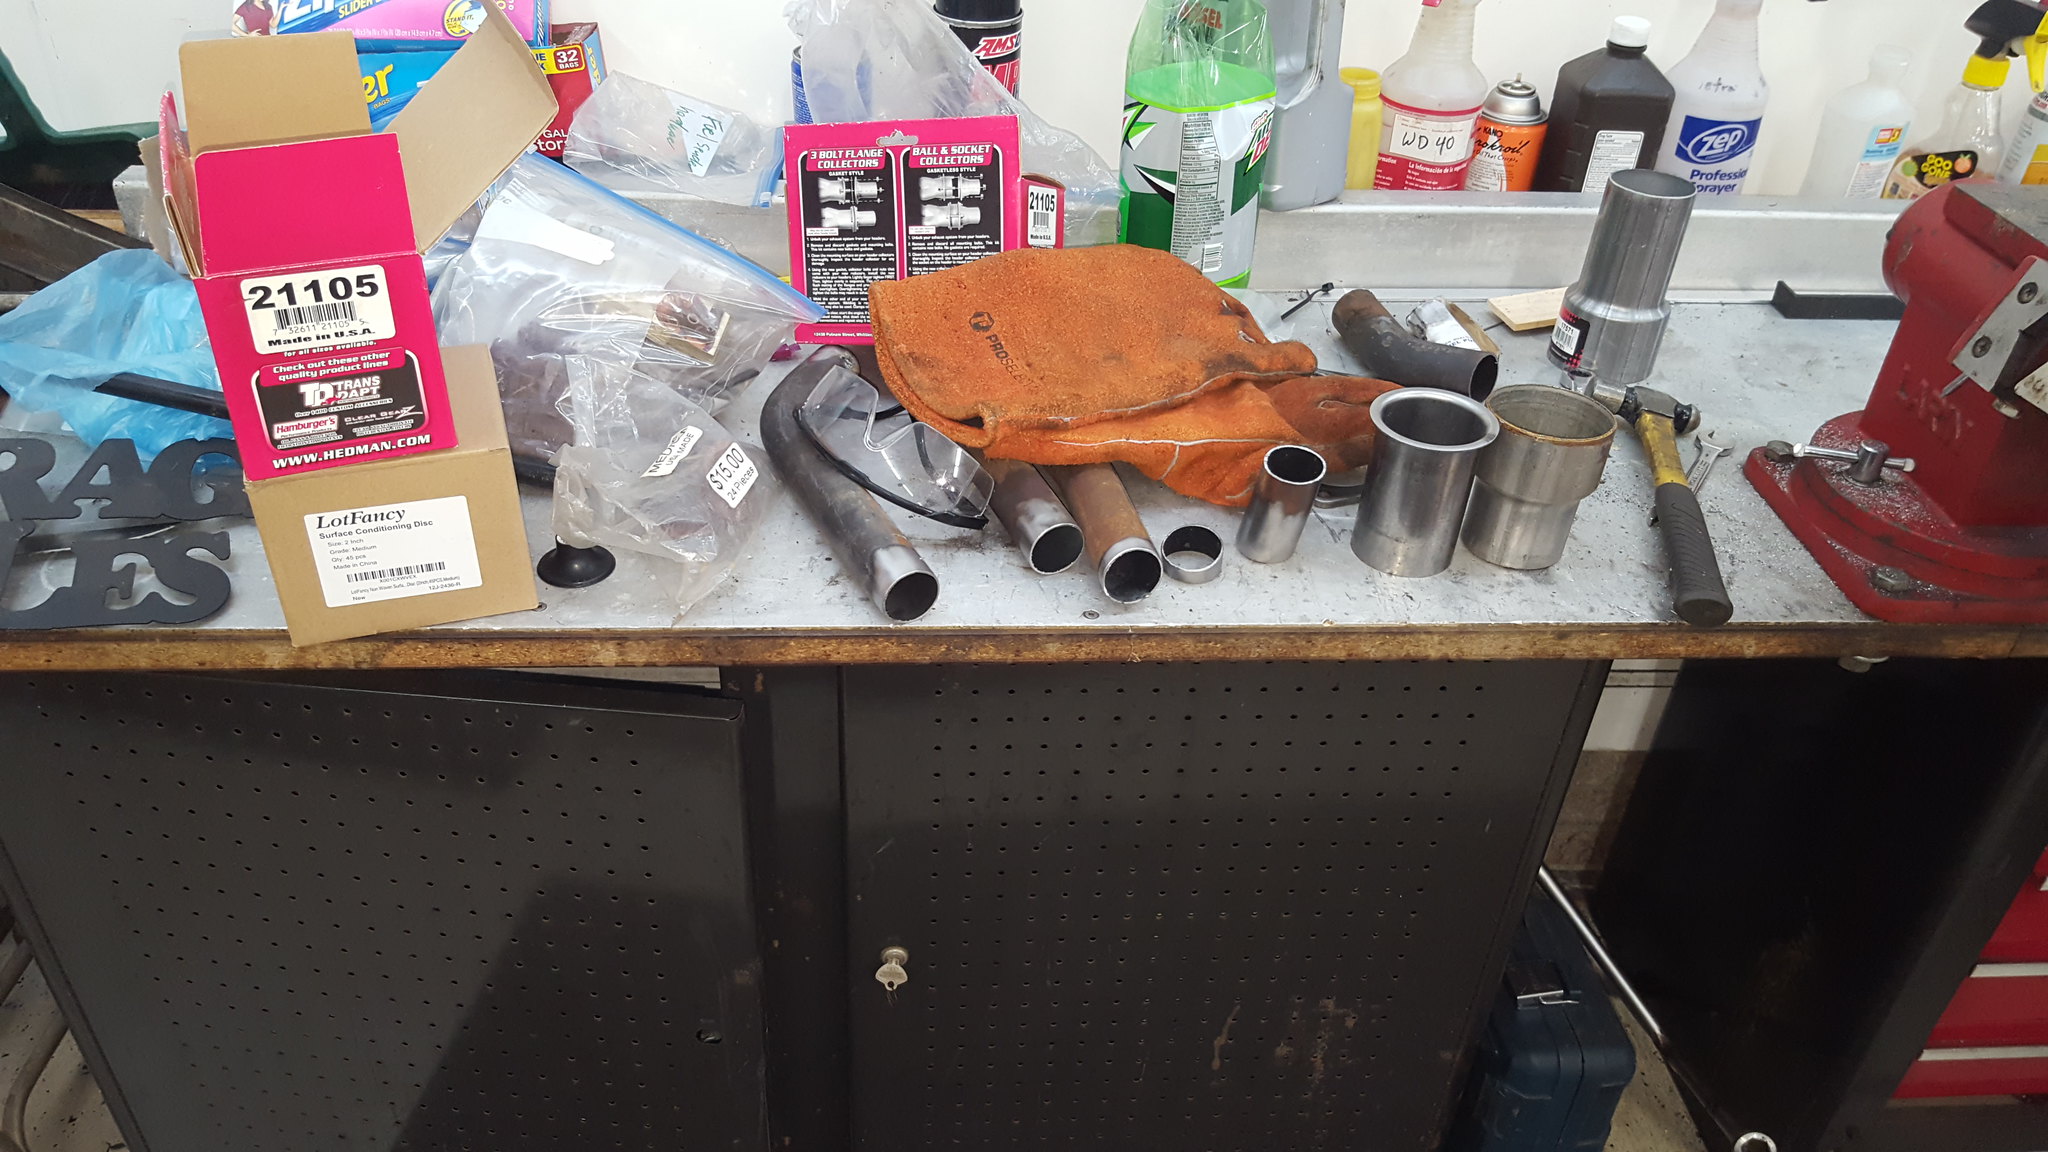
20180128_153627 by Michael Crawford, on Flickrgrabbed the flanges sonny and I had made
20180116_170759 by Michael Crawford, on Flickrto get the pipe into the flanges, I cut a series of relief notches through the end of the pipe. Bent them all in a little, worked the pipe into the flange, clocked it where I wanted it, tacked it, bent and beat the flaps outward to match the contours of the flange, and welded them up.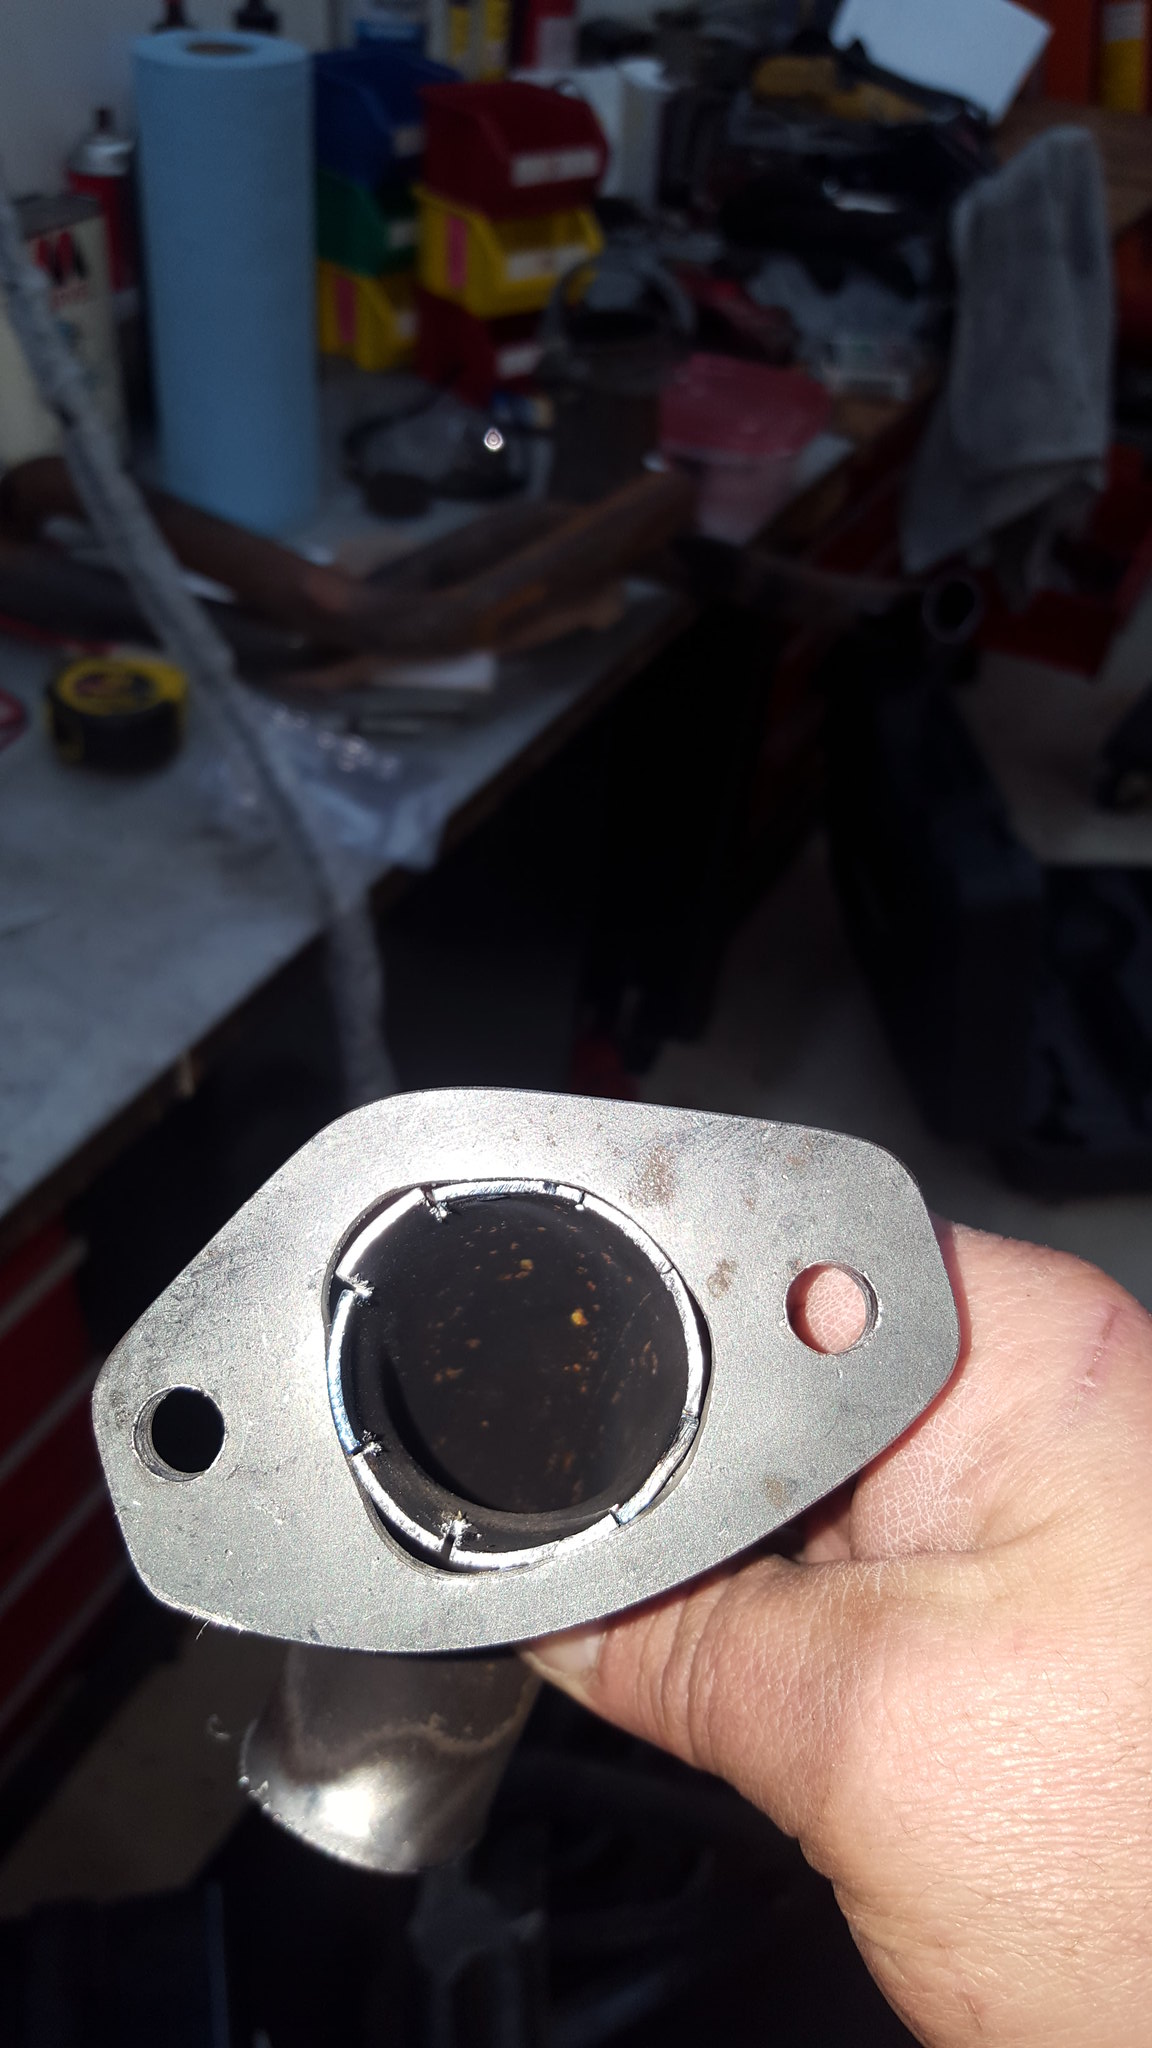
20180127_133551 by Michael Crawford, on Flickr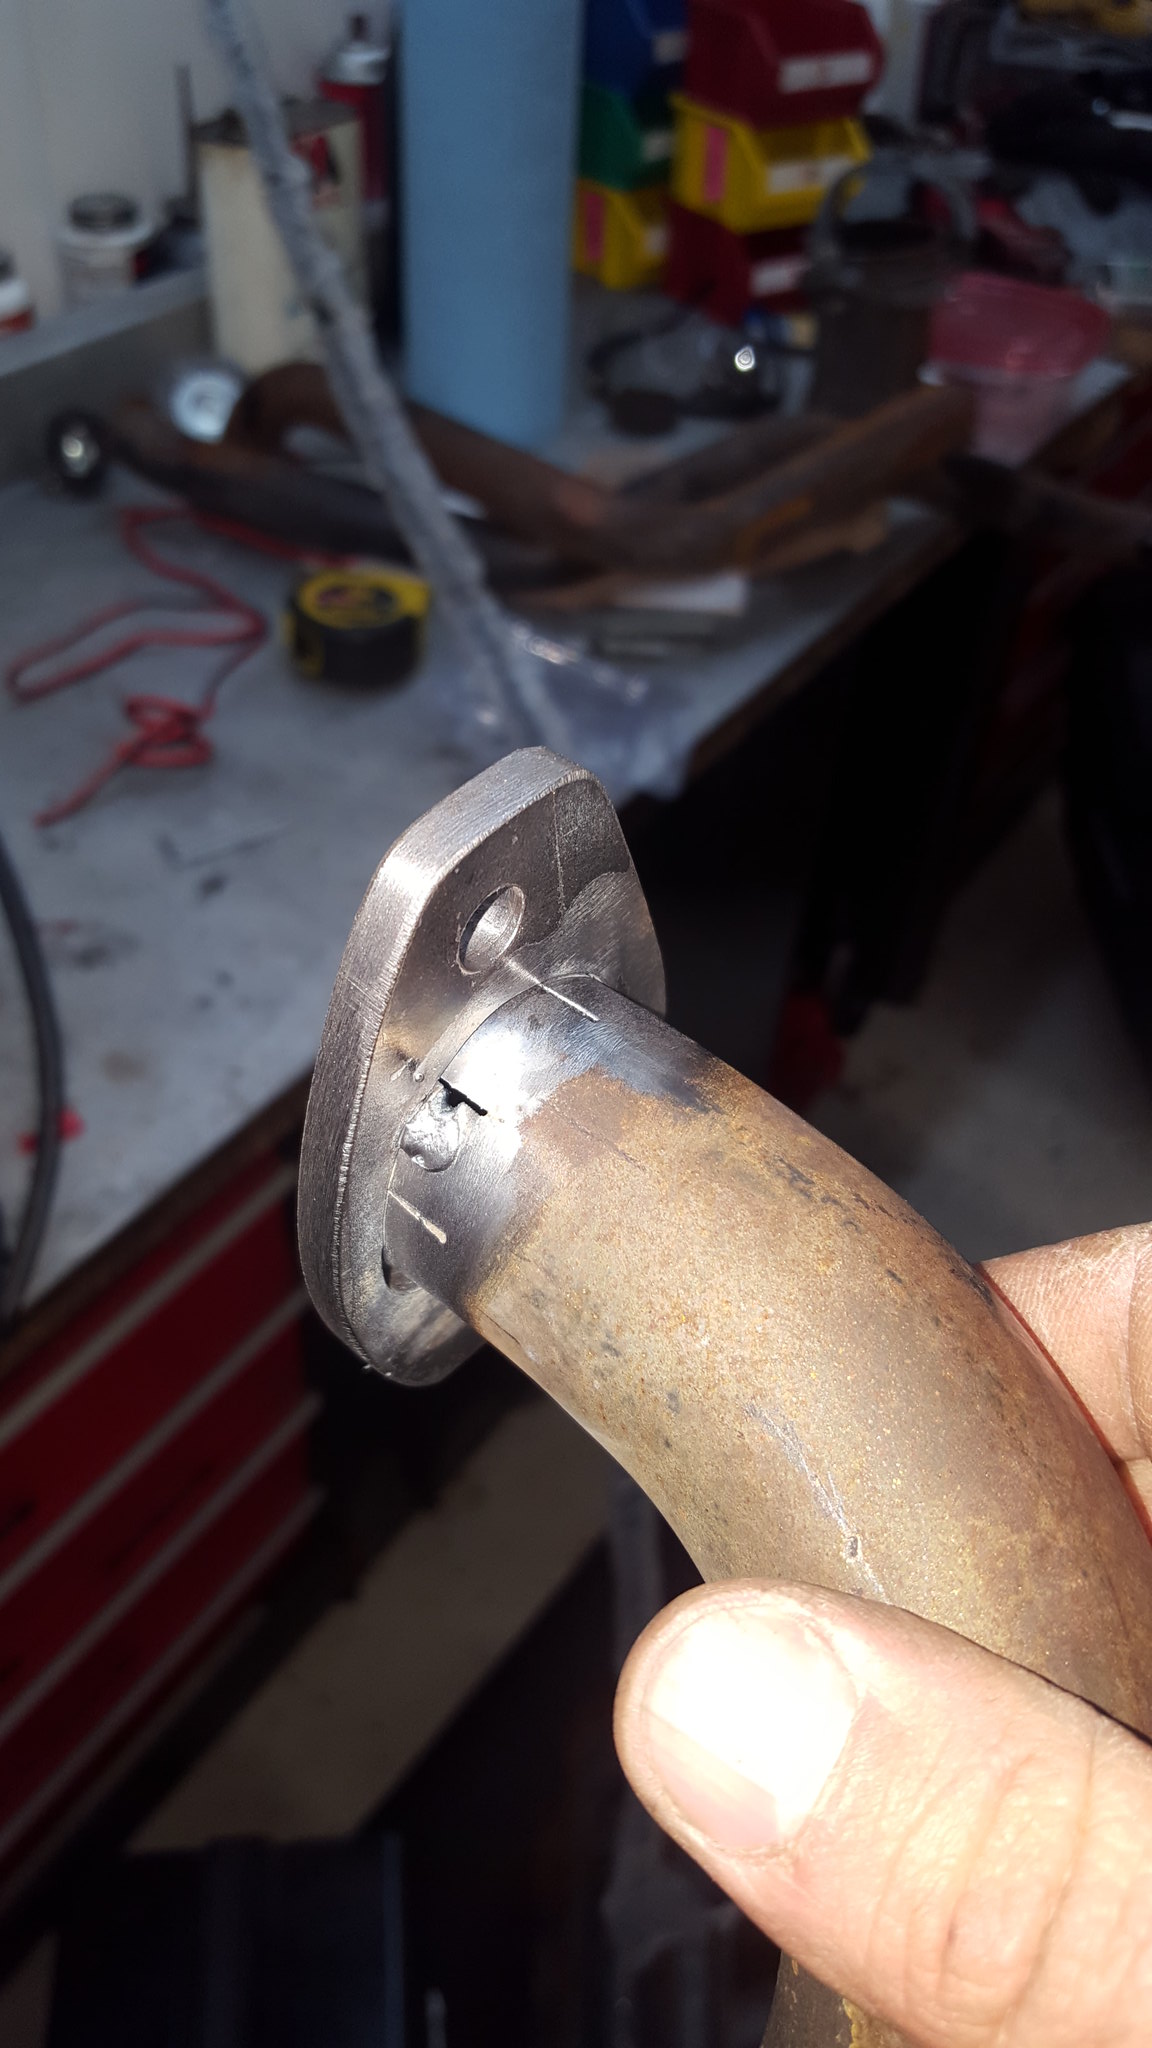
20180127_133547 by Michael Crawford, on FlickrI then played with pieces and angles and such until I had all the primary tubes pointed in the same direction, and into a direction that would allow me to bolt up exhaust.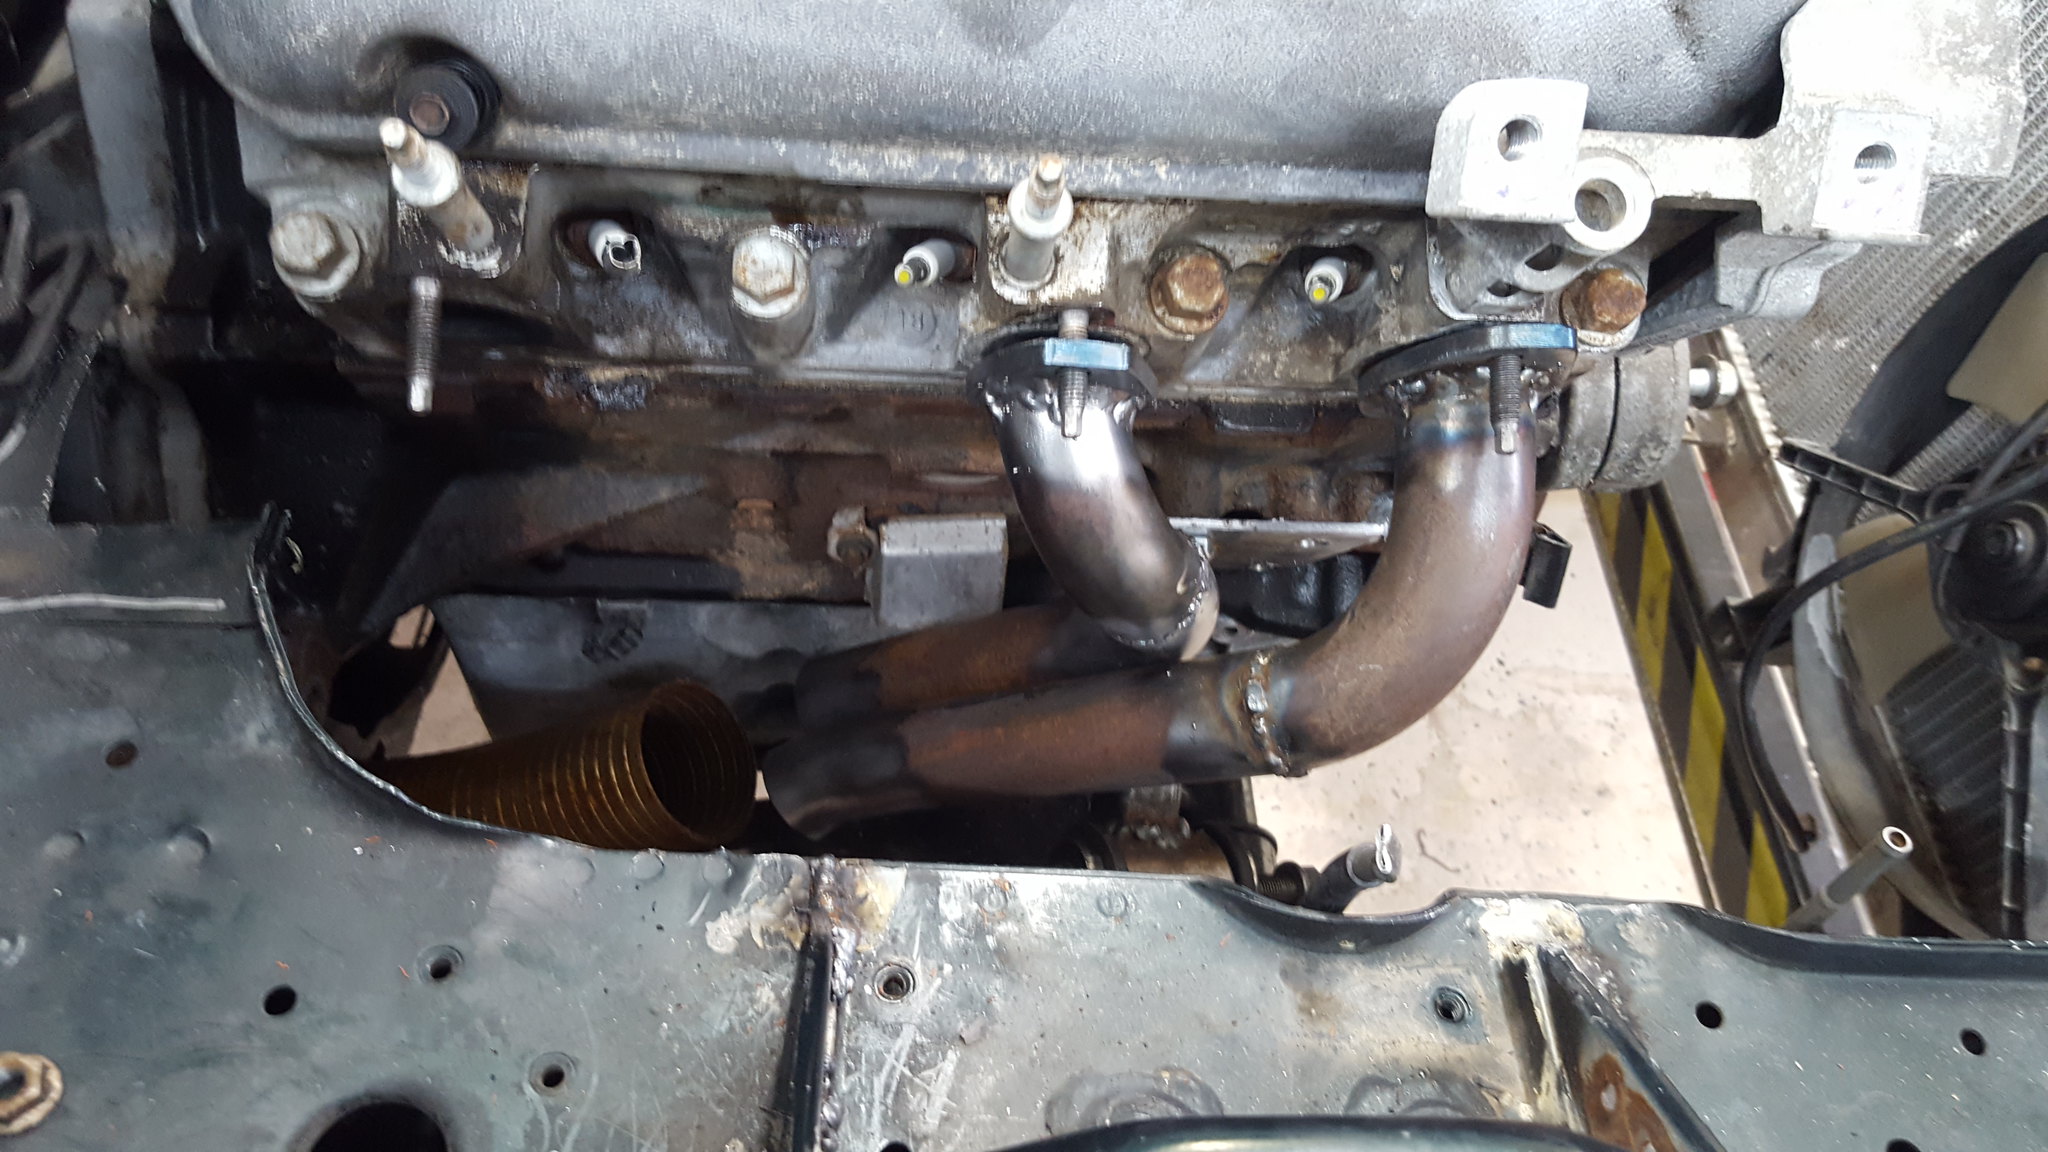
20180128_134000 by Michael Crawford, on Flickrthe tubes wound up moving a bit when I fully welded everything. So I bolted all 3 sections to one of the factory cast iron manifolds, and then hose clamped the tubes together.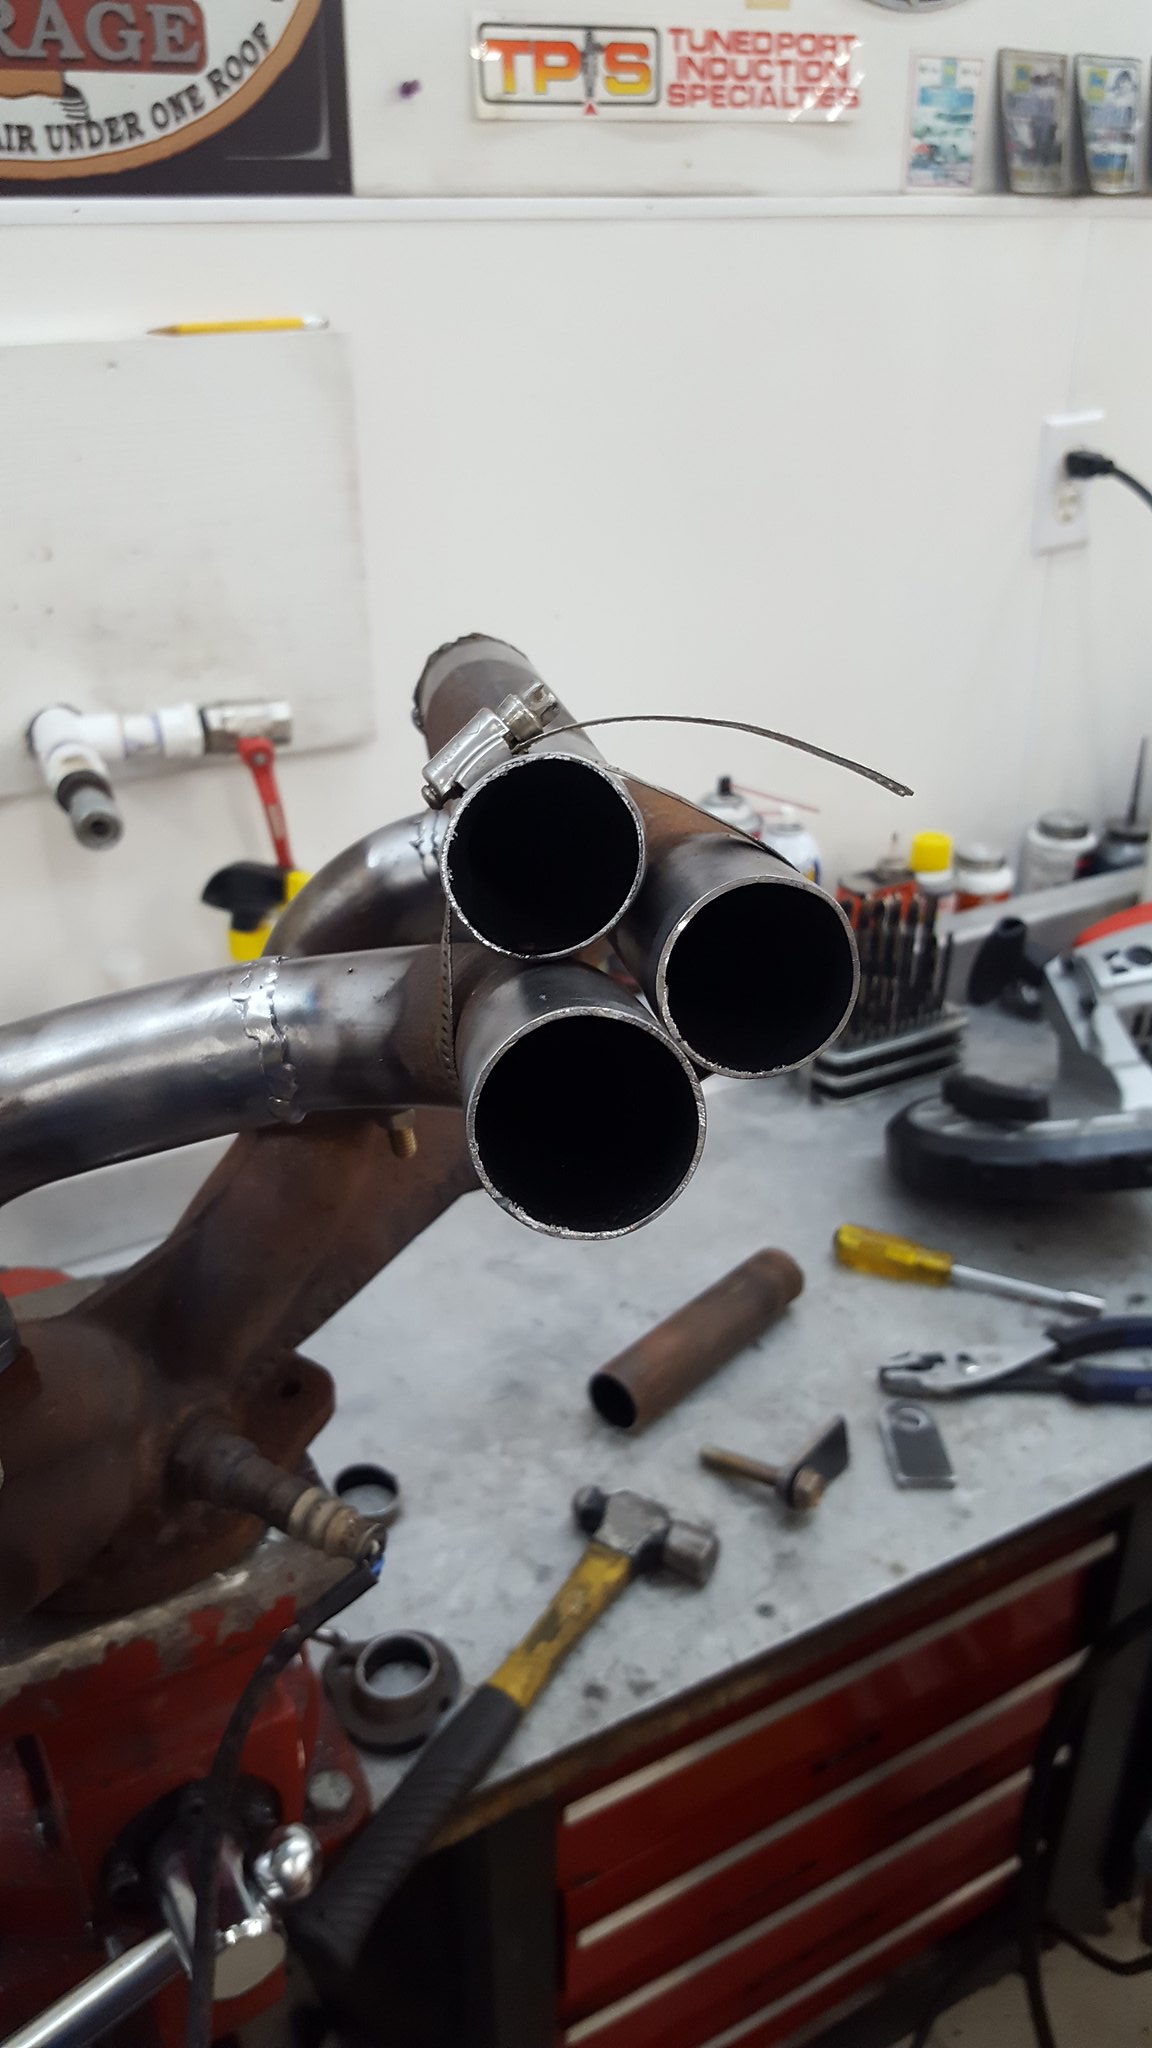
20180128_135159 by Michael Crawford, on Flickr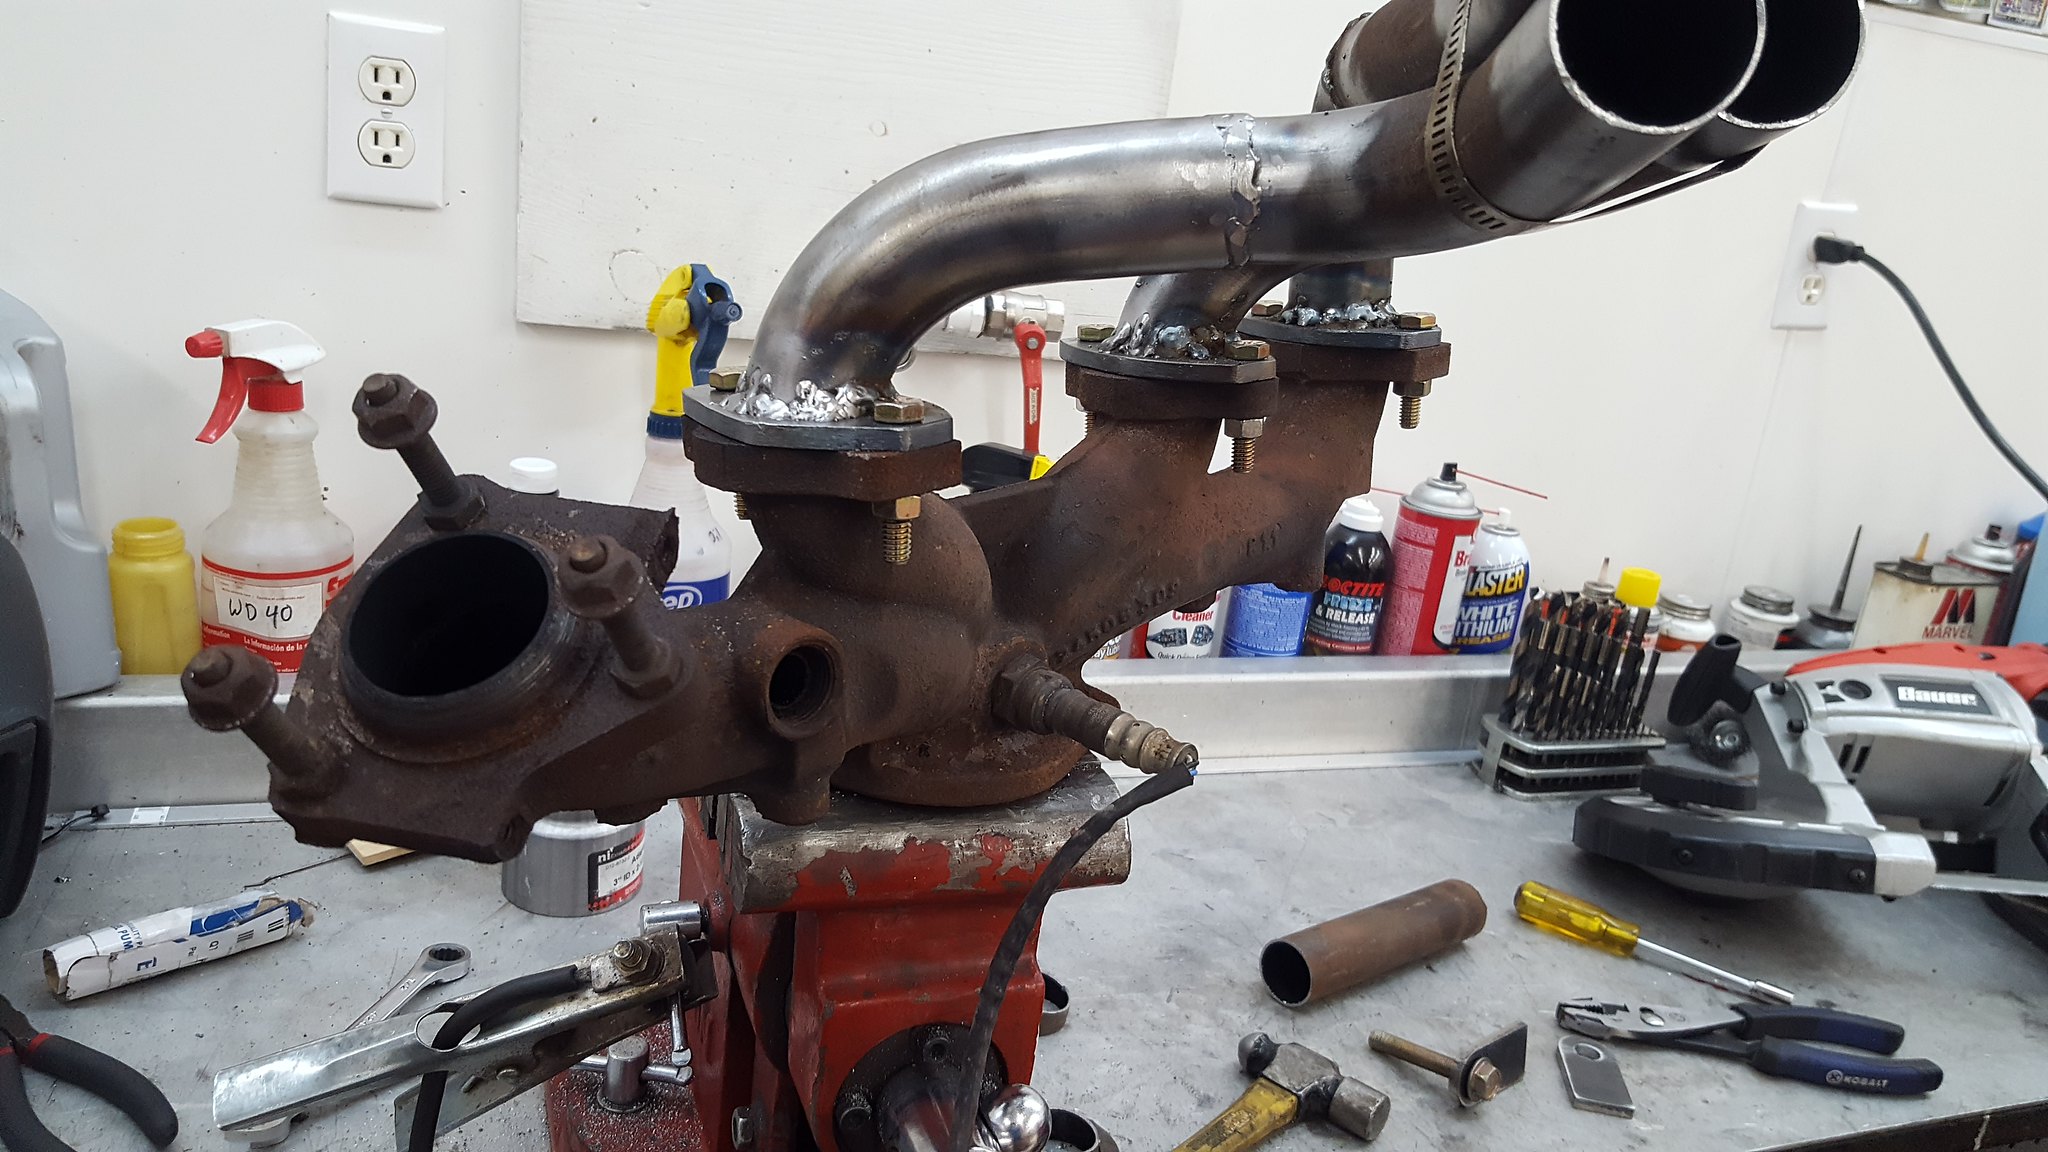
20180128_135204 by Michael Crawford, on Flickrproceeded to use one of the 3-2.5 adapters as a collector. Beat tubes with a ball peen and bent the walls of the reducer until everything fit. Then tacked in place, heated the reducer up, beat it to shape with a bigger ball peen, and wended it up solid. Then I made a mistake. Well actually 2, but at the same time.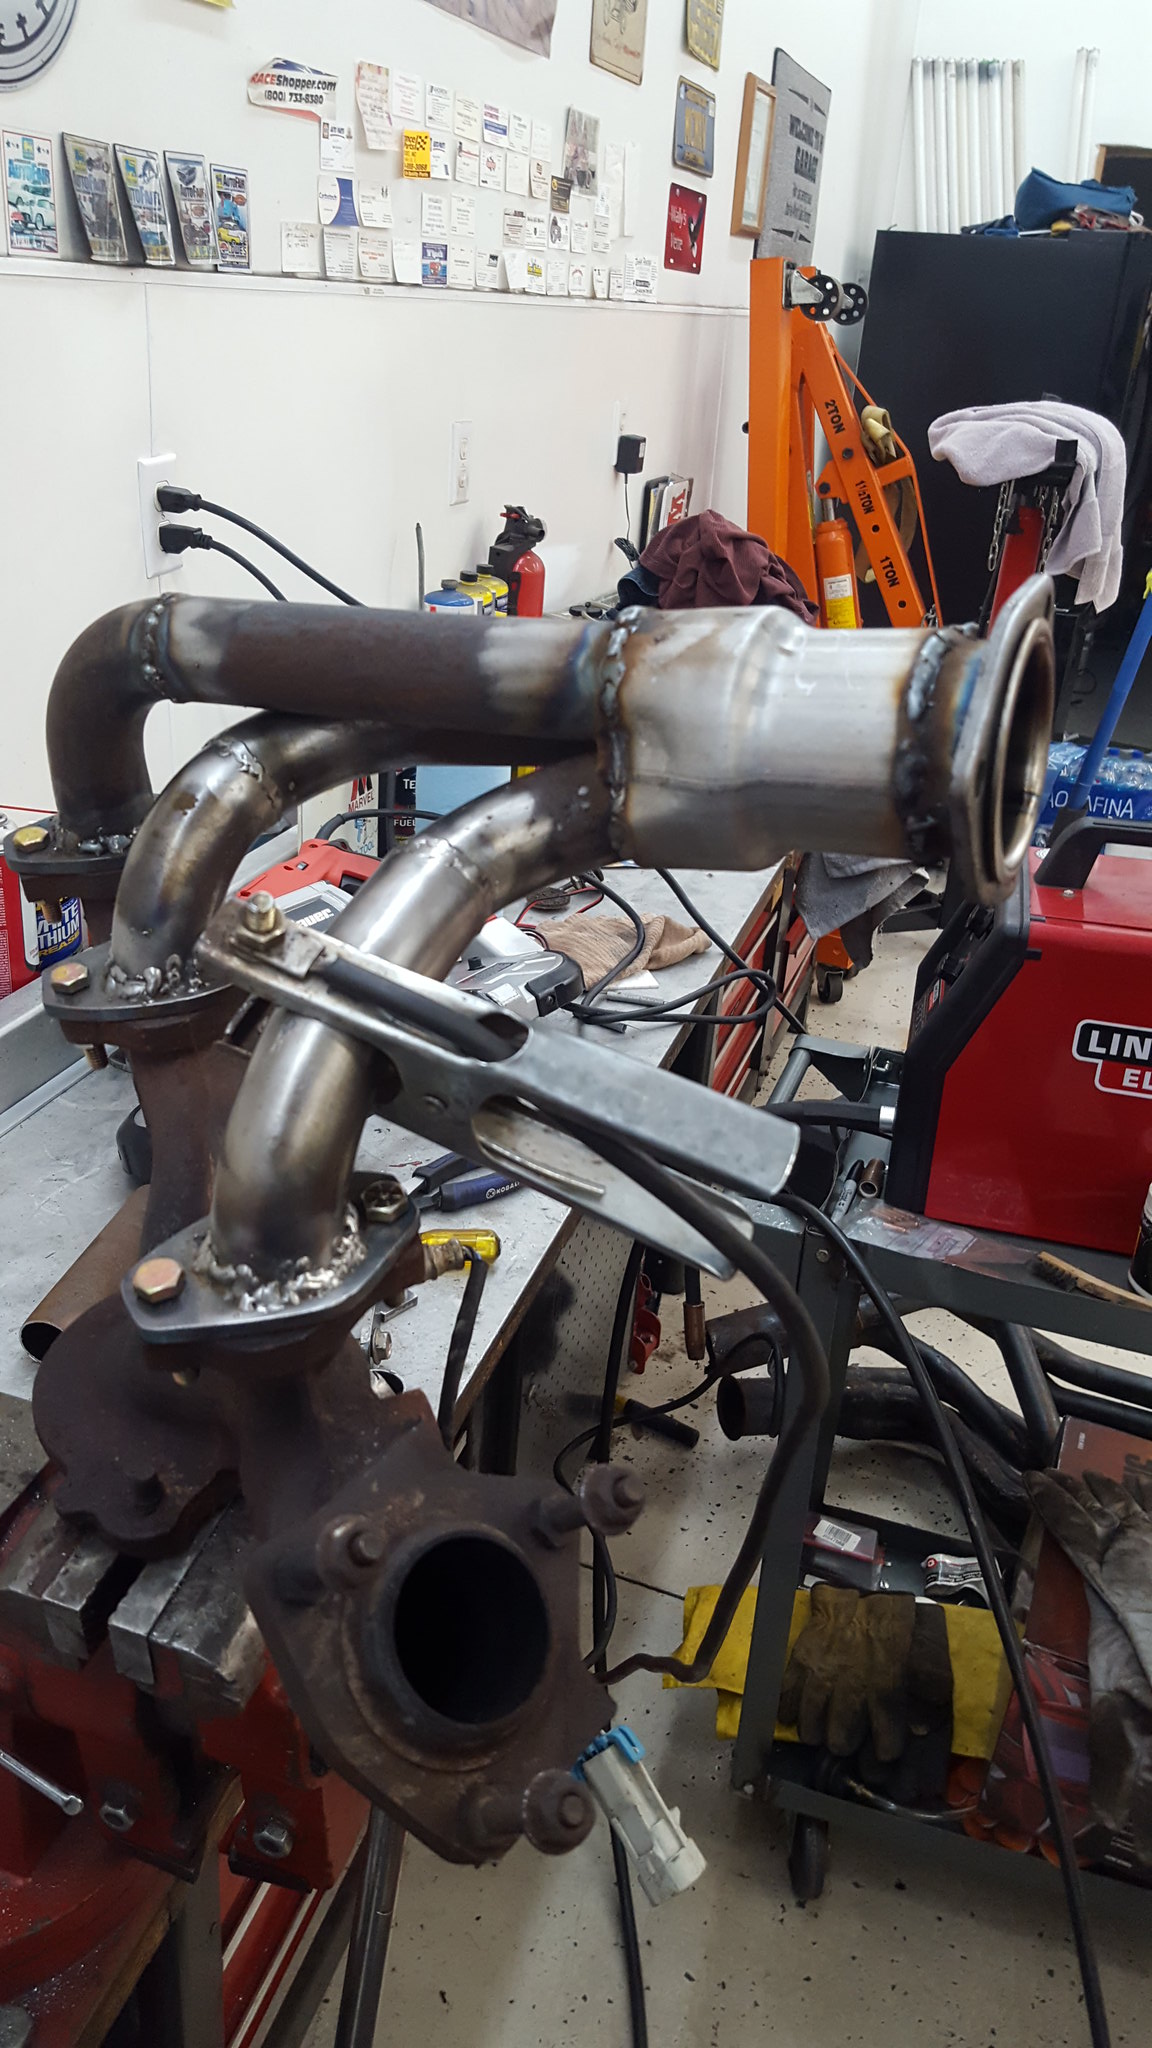
20180128_152706 by Michael Crawford, on Flickr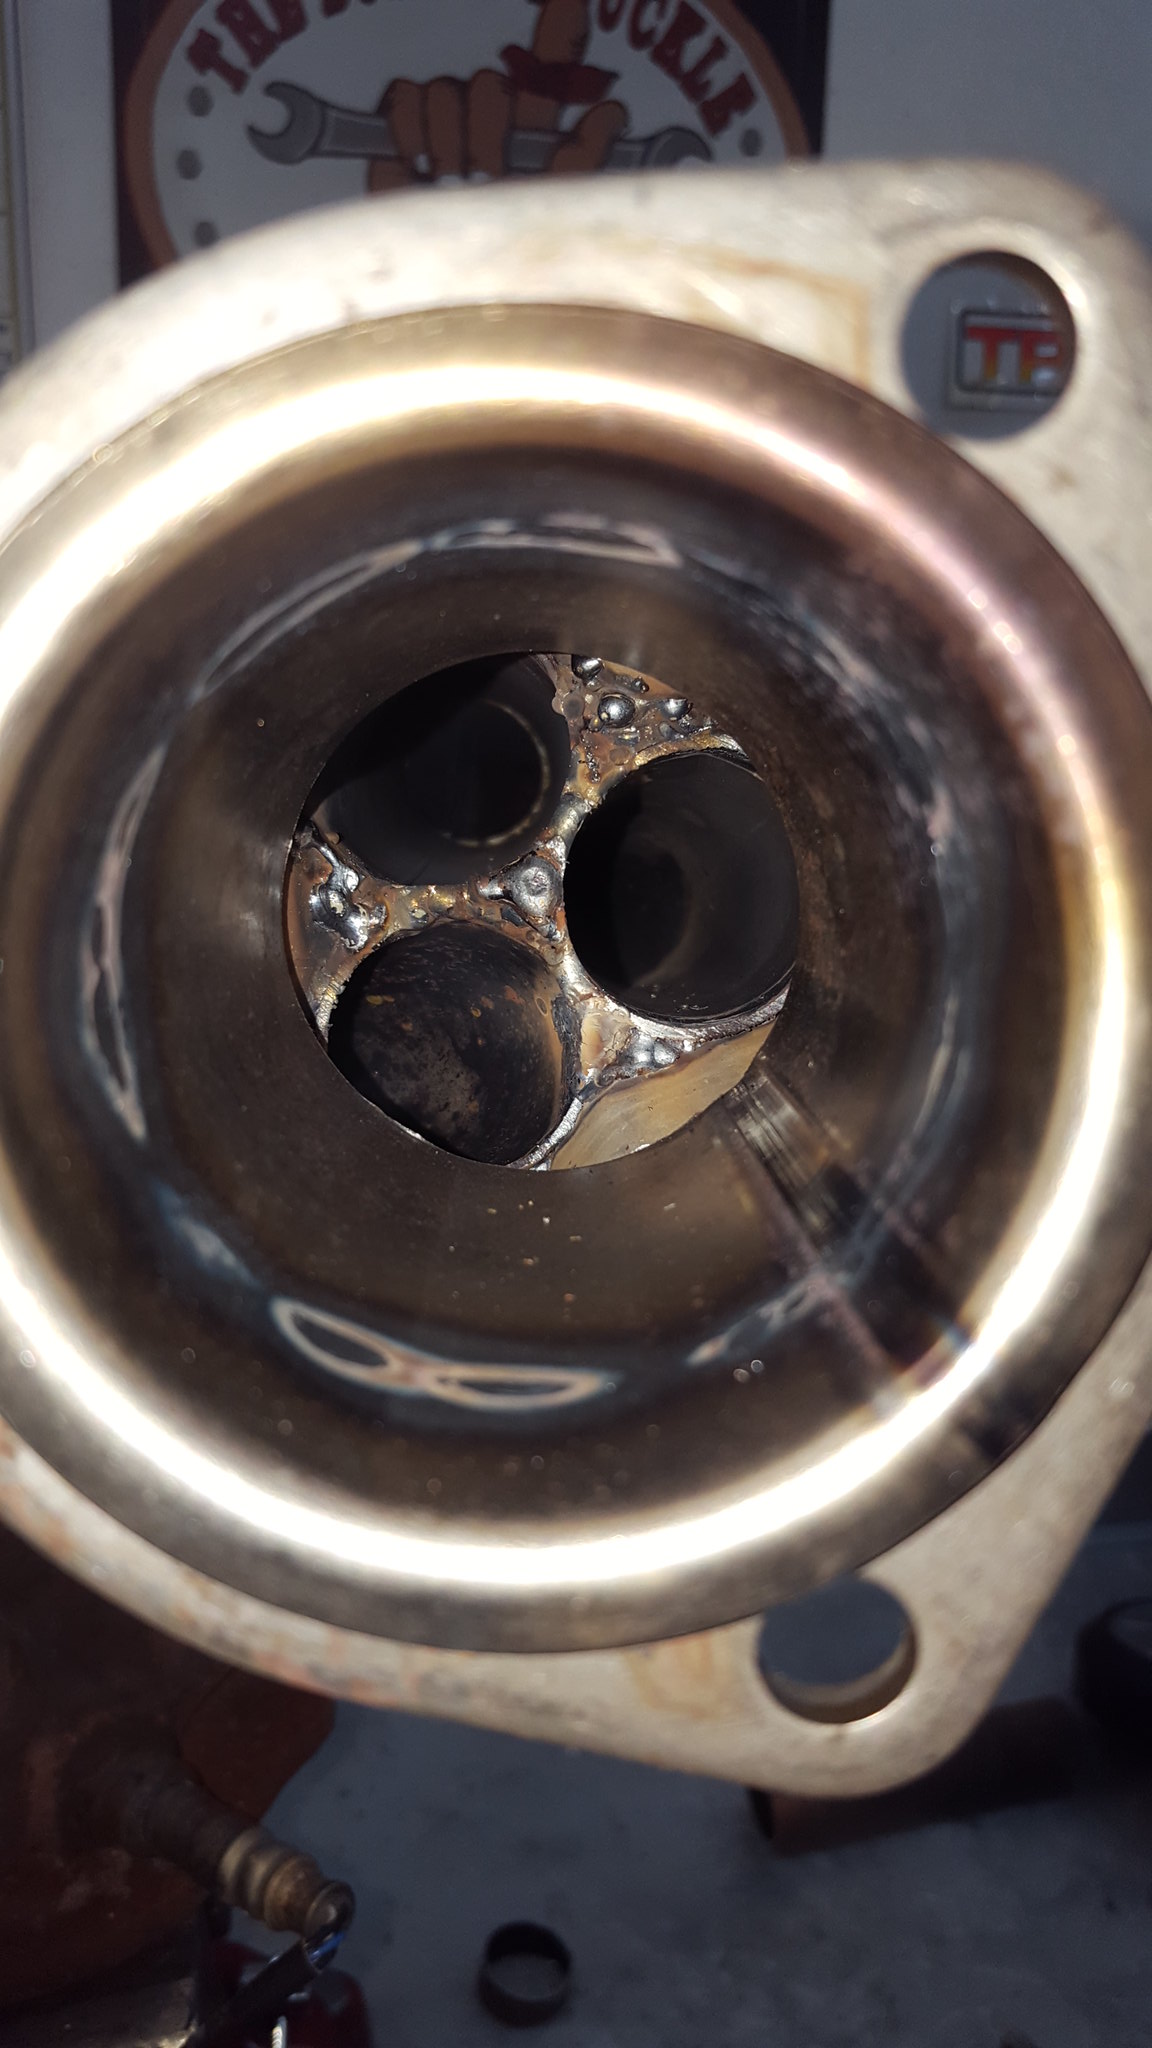
20180128_152723 by Michael Crawford, on Flickrdid you see the mistake yet? I hadn't at this point.So I bolted the header up, all impressed with myself and feeling pretty awesome.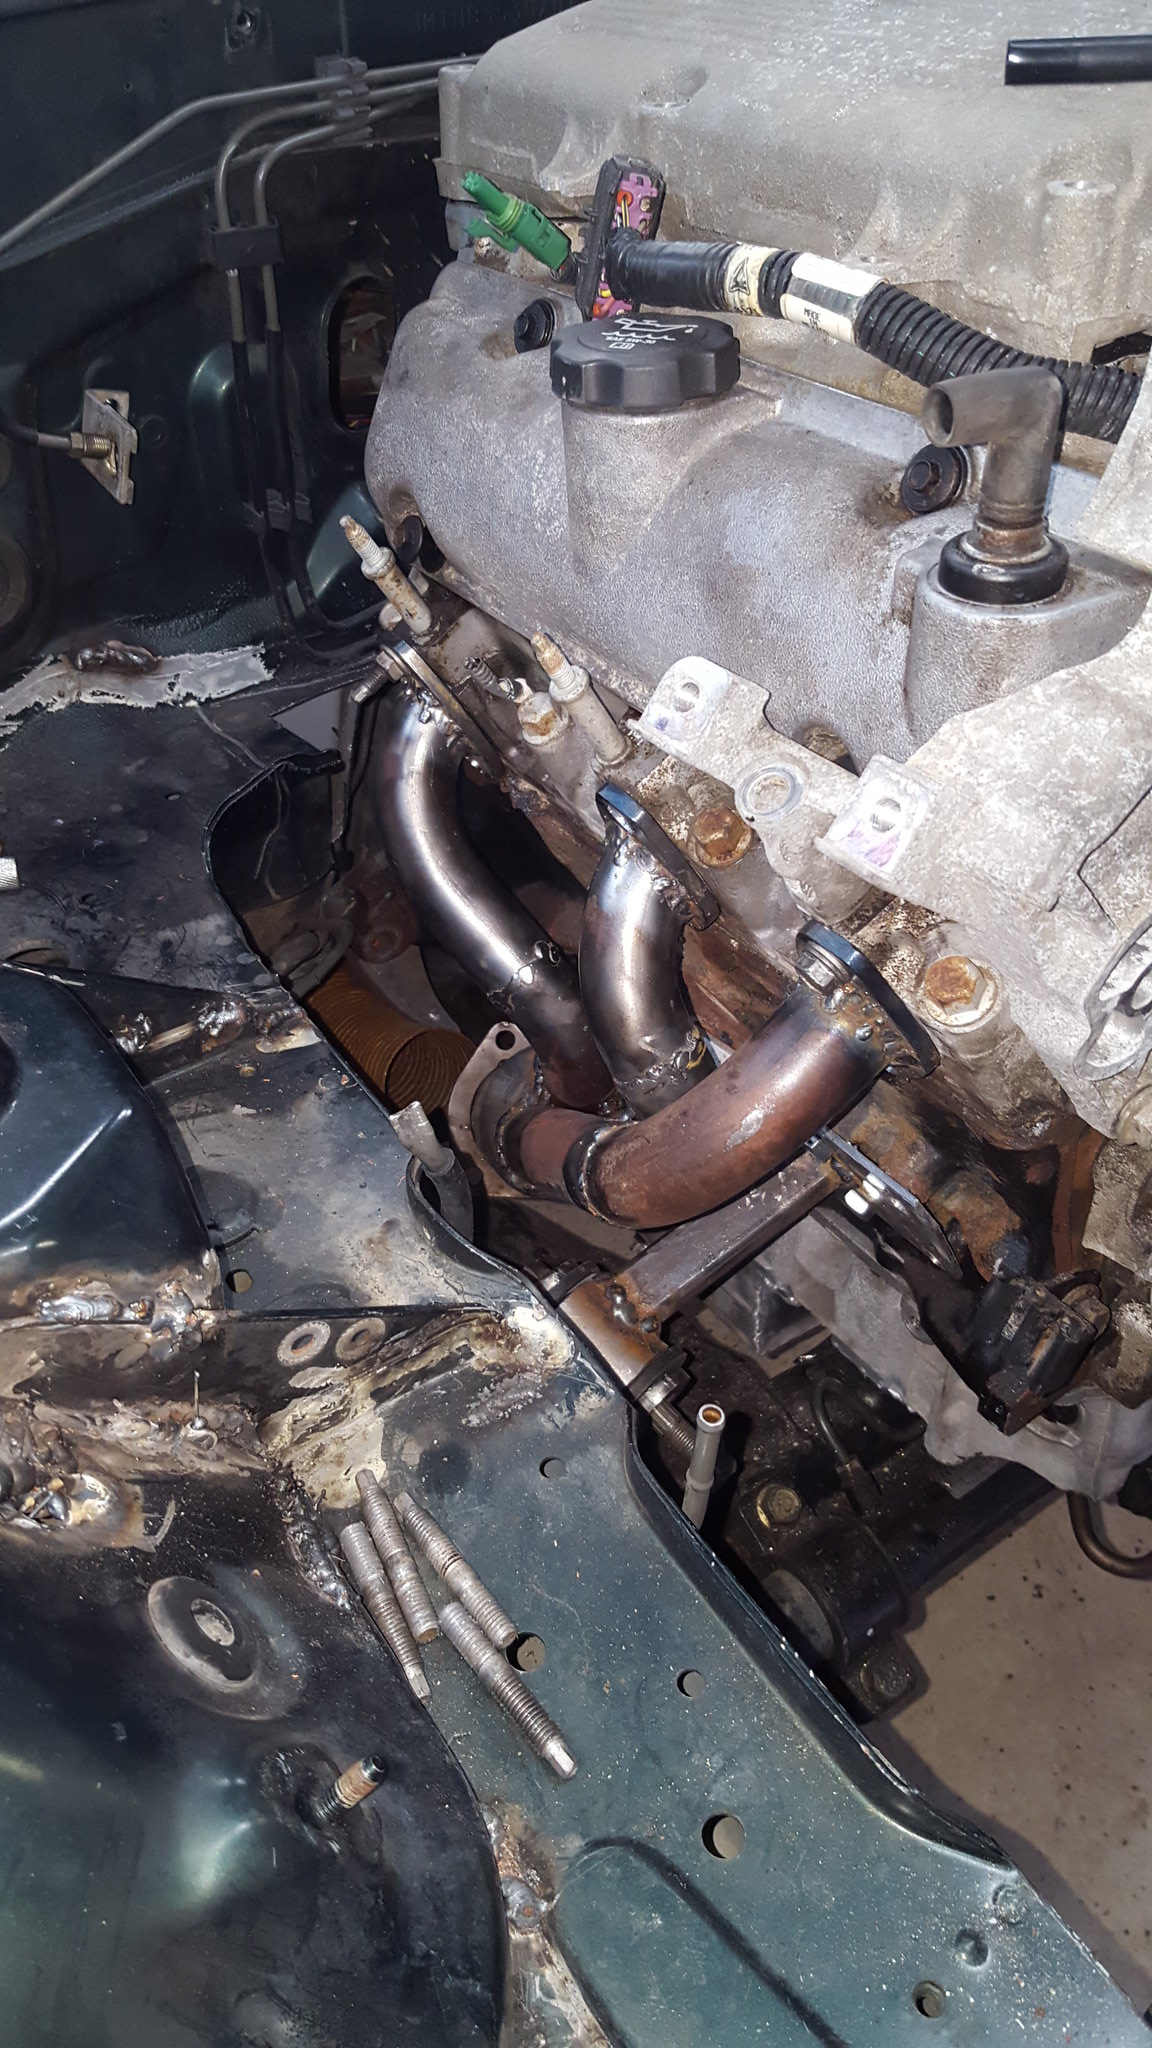
20180128_160822 by Michael Crawford, on Flickr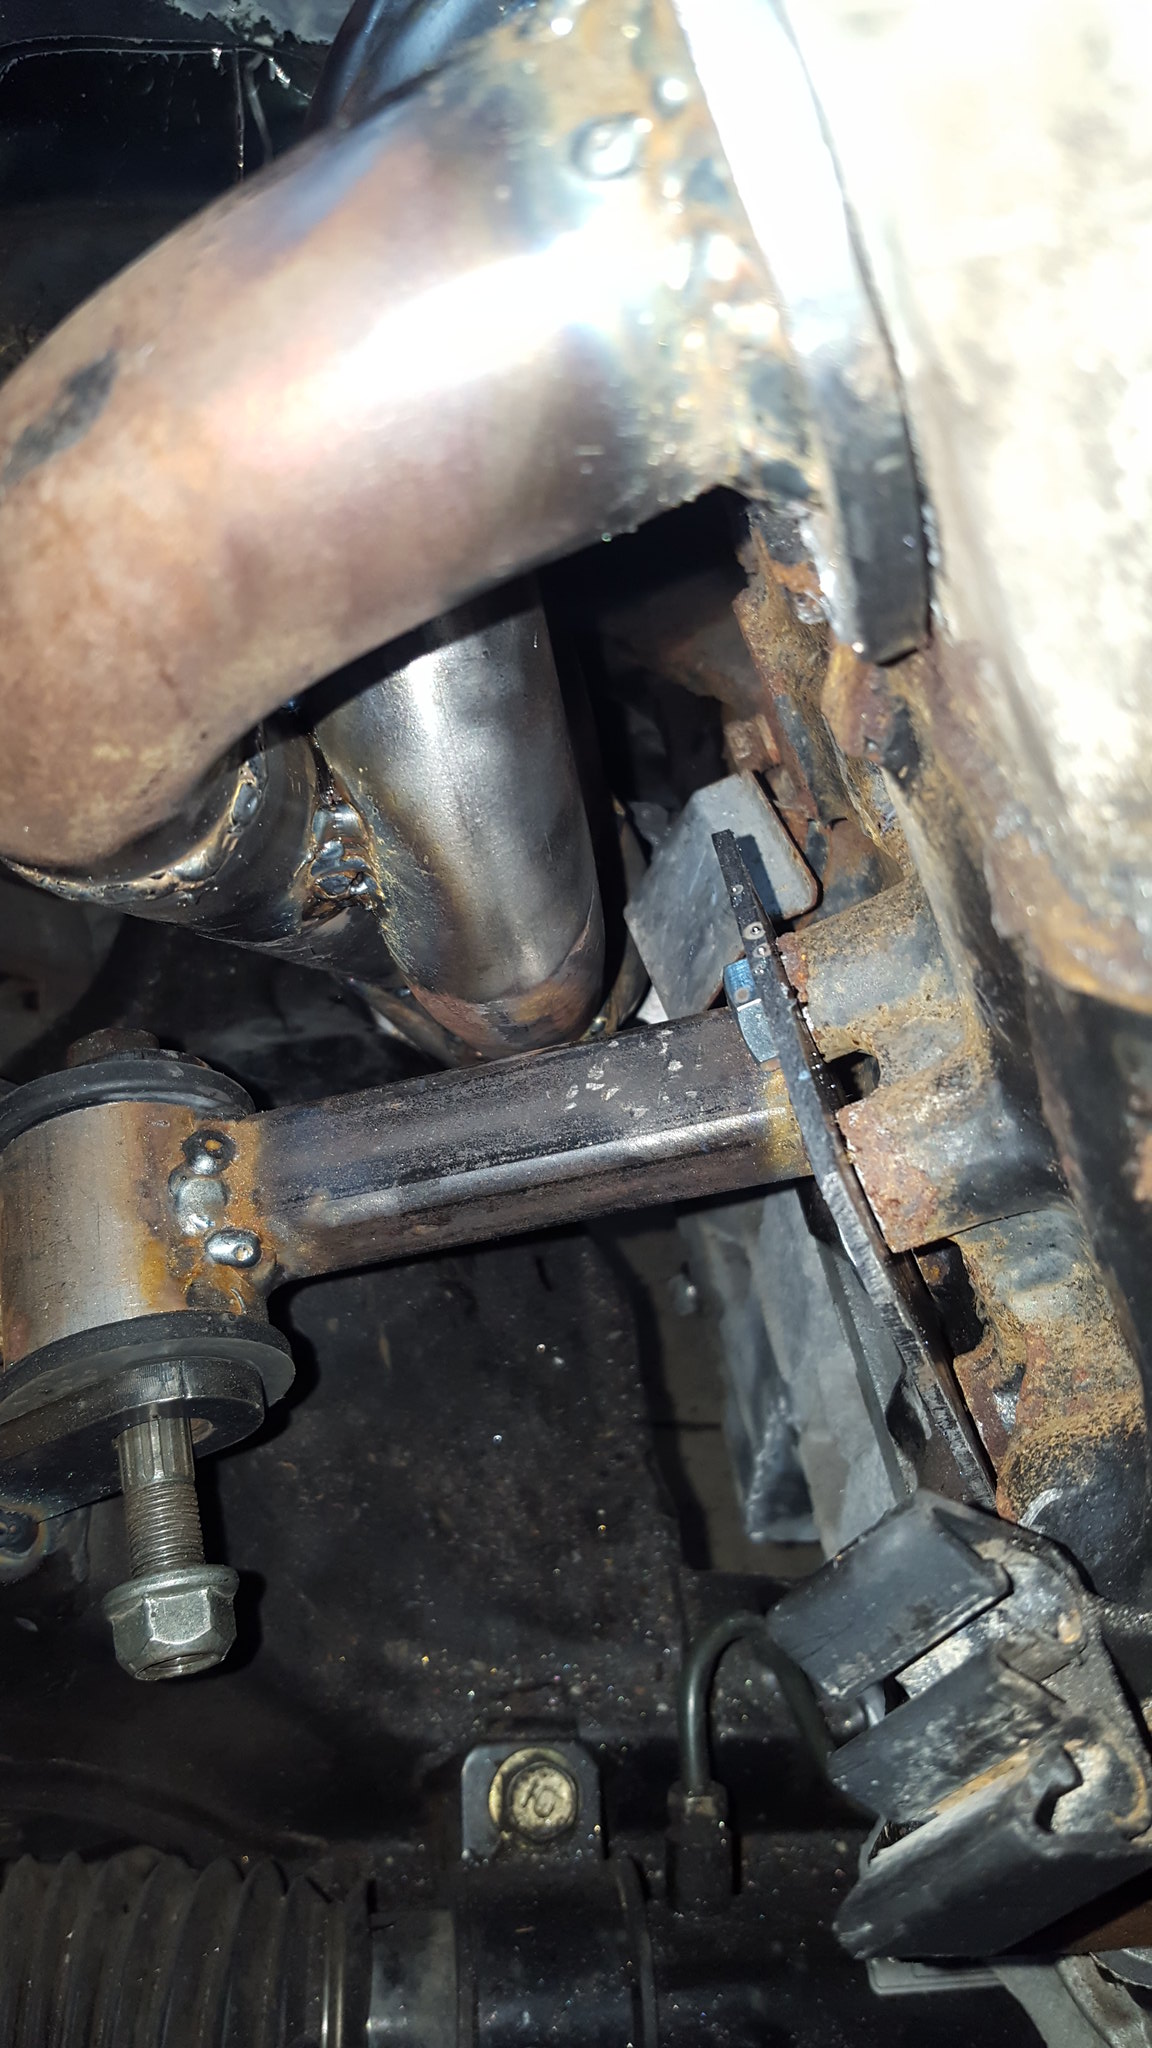
20180128_160831 by Michael Crawford, on Flickr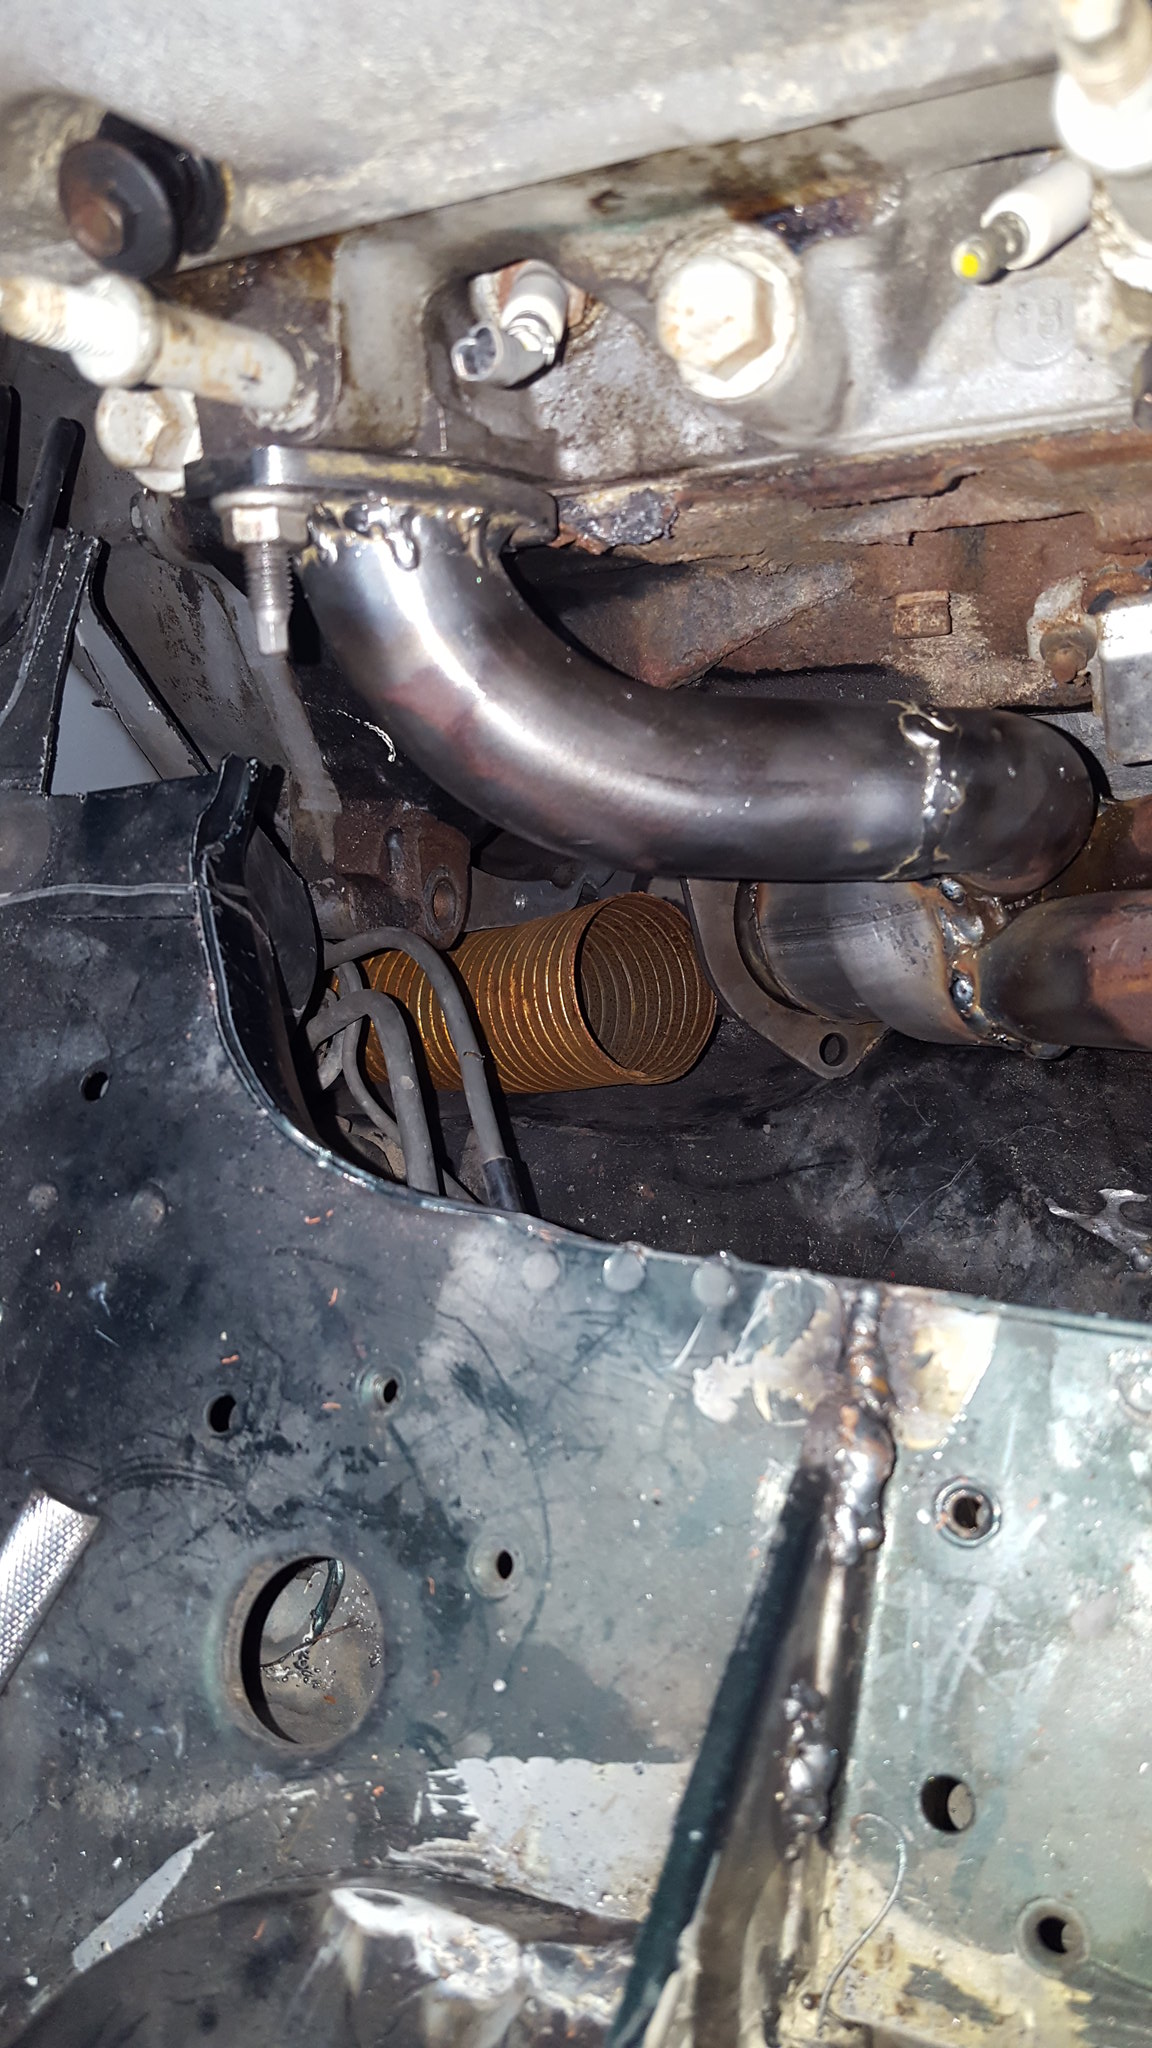
20180128_160842 by Michael Crawford, on Flickrif the problem isnt obvious yet, lets look at it from underneath.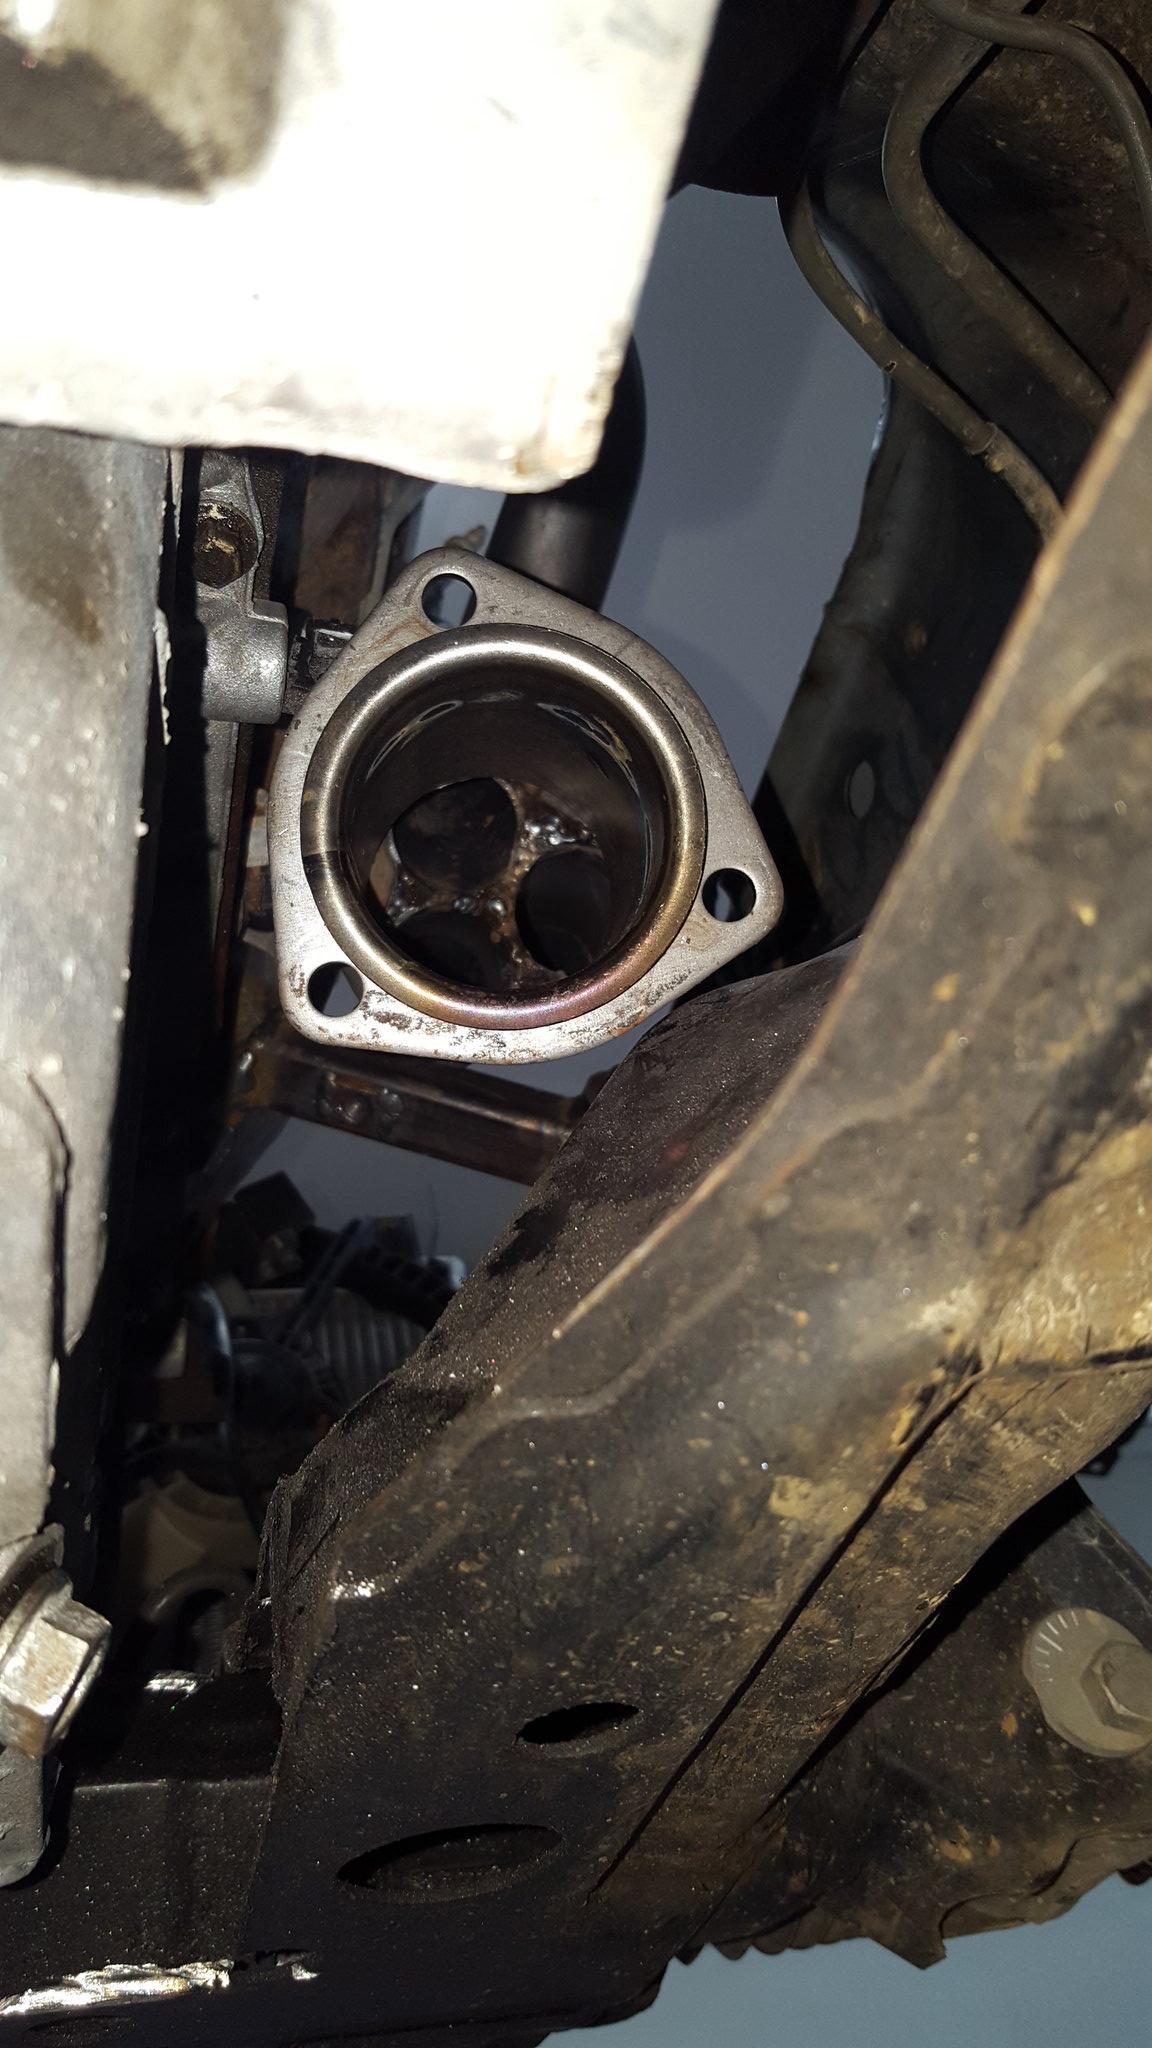
20180128_161248 by Michael Crawford, on Flickrif you still havent figured out where I went wrong, ill tell you: there's no way to get the midpipe out of this side with the engine in. which means I couldn't remove the transmission. Which makes the car all but un-serviceable in the pits. The other mistake was not cutting down the collector before welding it in. it really chokes off the exhaust path on that side. So what ill need to do is carefully cut behind the weld, remove the collector, attach some strategically bent pipe, re-weld the collector flange on that strategically bent pipe, and then connect the midpipe. Should be fun......
revious challenge budget: 1135.71recoup: 800 money spent:
header flanges: I gave sonny $40bought used stock c5 exhaust and some new in box header collectors from Charlie Tew for $20bought dinner ($26.87) in exchange for 3x unknown brand nitrous nozzles, used fuel pressure regulator for carb, 2x mangled and used headers, 1 wire alternator, 3x autometer ultralight gauges covered in tar, some exhaust flex pipe, and a pair of 3 inch to 2.5 exhaust reducersFMV $2 for a couple of pullies and a spare tensioner from my scrap bucketbought used s10 2.2 flywheel and clutch on eBay $40 shipped Current budget: 1286.58
recoup: 800so, Friday night I went to see a jeep owned by an old corvette customer of mine. He got out of vettes a while back, and asked me to fix the jeep. While there, he tried to give me his leftover vette stuff. I made him take $20 for the 2.5 collectors and stock exhaust. Didn't seem right getting 4x collectors NIB for free.Afterwards, I went to Dallas place to help sort trans issues with the AMC, and help him go through the barn and fill a dumpster. While doing this, we came across 3x unknown brand nitrous nozzles, used fuel pressure regulator for carb, 2x mangled and used headers, 1 wire alternator, 3x autometer ultralight gauges covered in tar, 2x 3-2.5 reducers, and some exhaust flex pipe. I asked him how much, and he said to buy dinner. I added in the cost of dinner at La Unica, his favorite Mexican restaurant.
20180127_111628 by Michael Crawford, on Flickron the way back from dinner, I got t-boned by a 17 year old girl that was texting. I was turning left, she swerved into the oncoming lane to miss the people stopped behind me and slammed the drivers door of my 64 el camino into my ribs. Door is pushed in about 14 inches.....
20180126_214146 by Michael Crawford, on Flickrwe both walked away. Dallas may have whiplash. I have bruised ribs, minor concussion, and somethings torn in both my left knee and shoulder. Trucks probably totaled.Anyway, needless to say, I didn't get much progress after that. This weekend ive been moving pretty damned slow. So I took it easy.I built a header.I started with some presumably Chevy headers that I had bought a while back from pat. Theyre roughly 1.5 primaries. The other set I got from Dallas are 1 �, and ill use them when I build the turbo manifolds later.
20171202_103045 by Michael Crawford, on FlickrI took the portaband to them to make sections. Kept a minimum of 1 inch of pipe around all the bends. Then dressed the ends on mt bench grinder and with a wire wheel.
20180128_153627 by Michael Crawford, on Flickrgrabbed the flanges sonny and I had made
20180116_170759 by Michael Crawford, on Flickrto get the pipe into the flanges, I cut a series of relief notches through the end of the pipe. Bent them all in a little, worked the pipe into the flange, clocked it where I wanted it, tacked it, bent and beat the flaps outward to match the contours of the flange, and welded them up.
20180127_133551 by Michael Crawford, on Flickr
20180127_133547 by Michael Crawford, on FlickrI then played with pieces and angles and such until I had all the primary tubes pointed in the same direction, and into a direction that would allow me to bolt up exhaust.
20180128_134000 by Michael Crawford, on Flickrthe tubes wound up moving a bit when I fully welded everything. So I bolted all 3 sections to one of the factory cast iron manifolds, and then hose clamped the tubes together.
20180128_135159 by Michael Crawford, on Flickr
20180128_135204 by Michael Crawford, on Flickrproceeded to use one of the 3-2.5 adapters as a collector. Beat tubes with a ball peen and bent the walls of the reducer until everything fit. Then tacked in place, heated the reducer up, beat it to shape with a bigger ball peen, and wended it up solid. Then I made a mistake. Well actually 2, but at the same time.
20180128_152706 by Michael Crawford, on Flickr
20180128_152723 by Michael Crawford, on Flickrdid you see the mistake yet? I hadn't at this point.So I bolted the header up, all impressed with myself and feeling pretty awesome.
20180128_160822 by Michael Crawford, on Flickr
20180128_160831 by Michael Crawford, on Flickr
20180128_160842 by Michael Crawford, on Flickrif the problem isnt obvious yet, lets look at it from underneath.
20180128_161248 by Michael Crawford, on Flickrif you still havent figured out where I went wrong, ill tell you: there's no way to get the midpipe out of this side with the engine in. which means I couldn't remove the transmission. Which makes the car all but un-serviceable in the pits. The other mistake was not cutting down the collector before welding it in. it really chokes off the exhaust path on that side. So what ill need to do is carefully cut behind the weld, remove the collector, attach some strategically bent pipe, re-weld the collector flange on that strategically bent pipe, and then connect the midpipe. Should be fun......
Reply
0
0

 01-29-2018, 08:29 AM
#47
Junior Member
Thread Starter
Join Date: Nov 2017
Posts: 112
Total Cats: 7
lol. Its been my daily off and on for 50k. The really sad part? Theres a pile of new interior, including seats and carpet, more audio gear, aftermarket ecm, full autometer sport comp gauge package in a custom gauge cluster made, a tilt steering column, cruise, keyless entry, and some new sheetmetal and trim in my shop. I was getting my **** together for after the challenge car and duster were done to take this truck up a few notches.
Last edited by Dusterbd13; 01-29-2018 at 08:42 AM.
Reply
0
0
02-11-2018, 06:28 PM
#48
Junior Member
Thread Starter
Join Date: Nov 2017
Posts: 112
Total Cats: 7
Challenge budget so farrevious challenge budget: 1286.58 recoup total: 800new money:bought an aluminum seat sand cover from a grm member: 40 new total: 1326.58
recoup: 800I haven't been moving to quick the last few weeks. Migraines have been the worst they've been in years, which has dramatically slowed progress, and lessened the quality of my work.Anyway, last week john (untouchabl from grm) came over to see what I am doing to the car he sold me. He also brought an aluminum seat for me to try (too big for him). Seat fit me and the available space in the car. So I bought it at asking price ($40). I haven't figured out how I want to mount it yet, and am open to suggestions. Needs to be low in the car though. And sturdy. And cheap. Im thinking 3x3 angle iron bolted through the floor, then the sides of the seats. But there's gotta be a more elegant solution....
20180203_164639 by Michael Crawford, on Flickr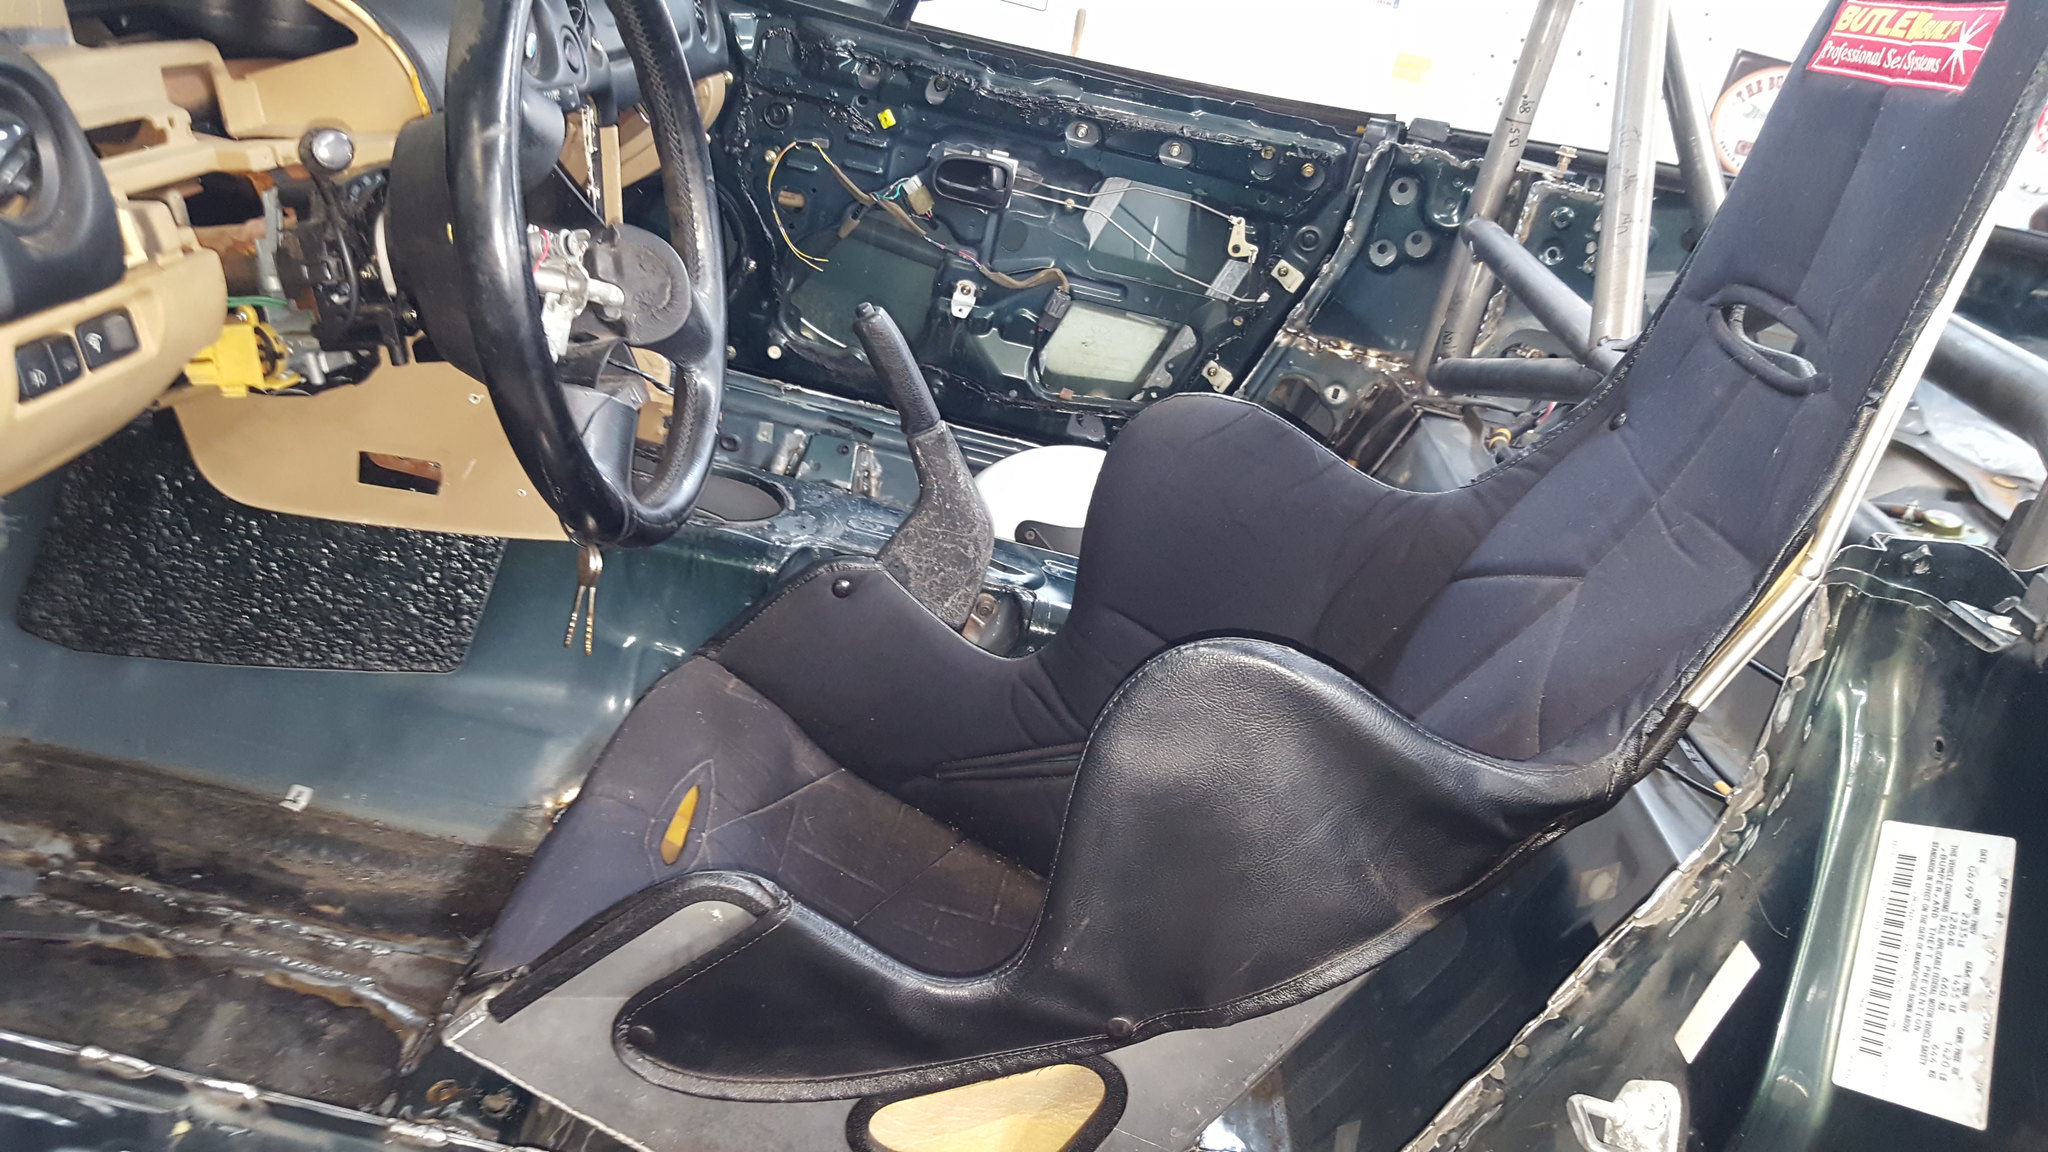
20180203_185333 by Michael Crawford, on Flickrive also been working on the drivers side header. You know, the hard one.I ran out of correct bends, and necessity is a mother. So I pie cut one of the tubes and welded it back together.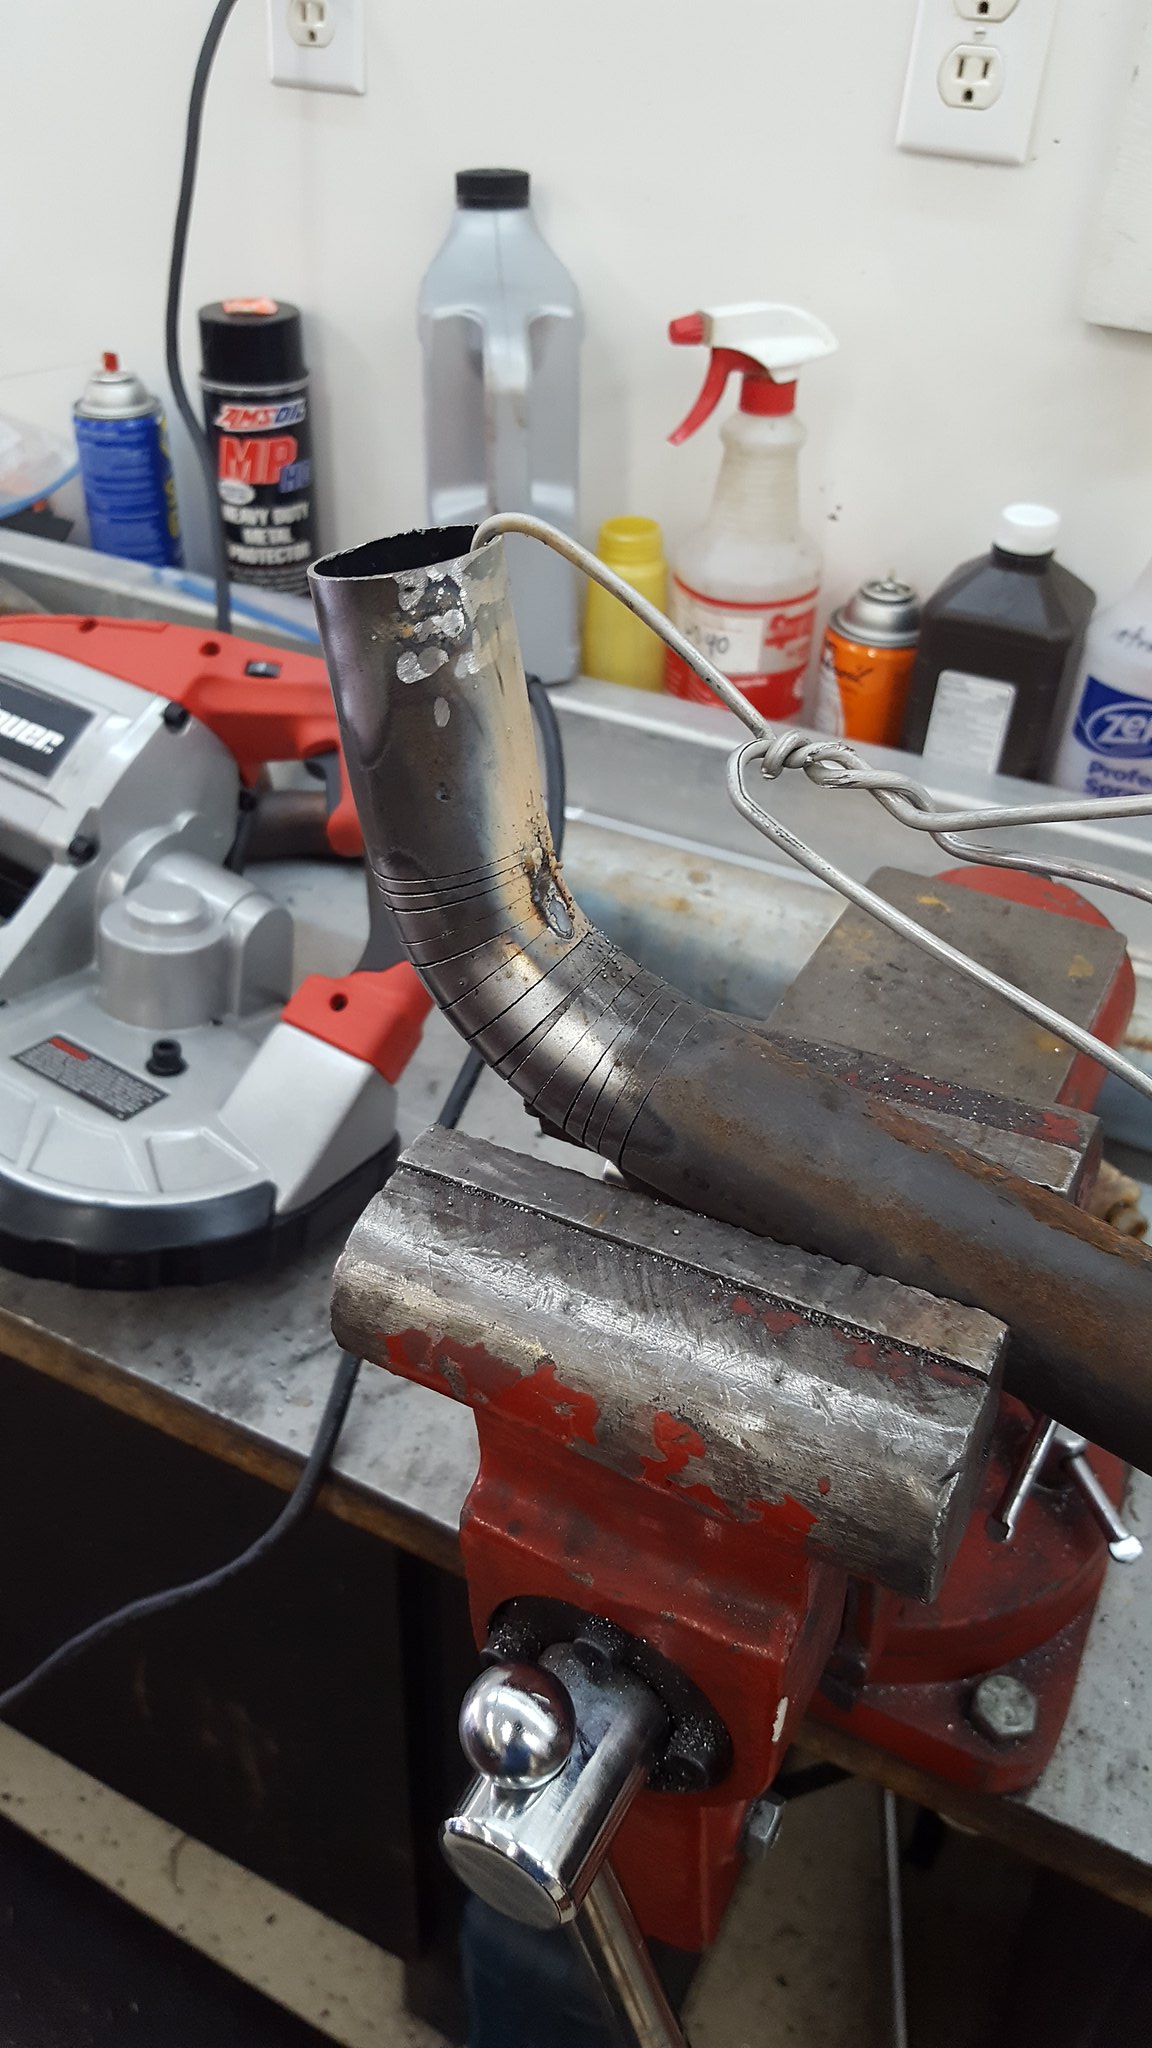
20180203_143220 by Michael Crawford, on Flickr
20180203_144619 by Michael Crawford, on Flickrlots of cursing and cutting later, I had a header for the drivers side.
20180211_121115 by Michael Crawford, on FlickrI then cut up one of the c5 muffler assemblies and used the 2.5 bends to get out to a slip fit with the flexible exhaust pipe chunks, then cut and sectioned the merge collector from the big block chevy truck pat sold me. Again, lots of cutting, grinding, and welding....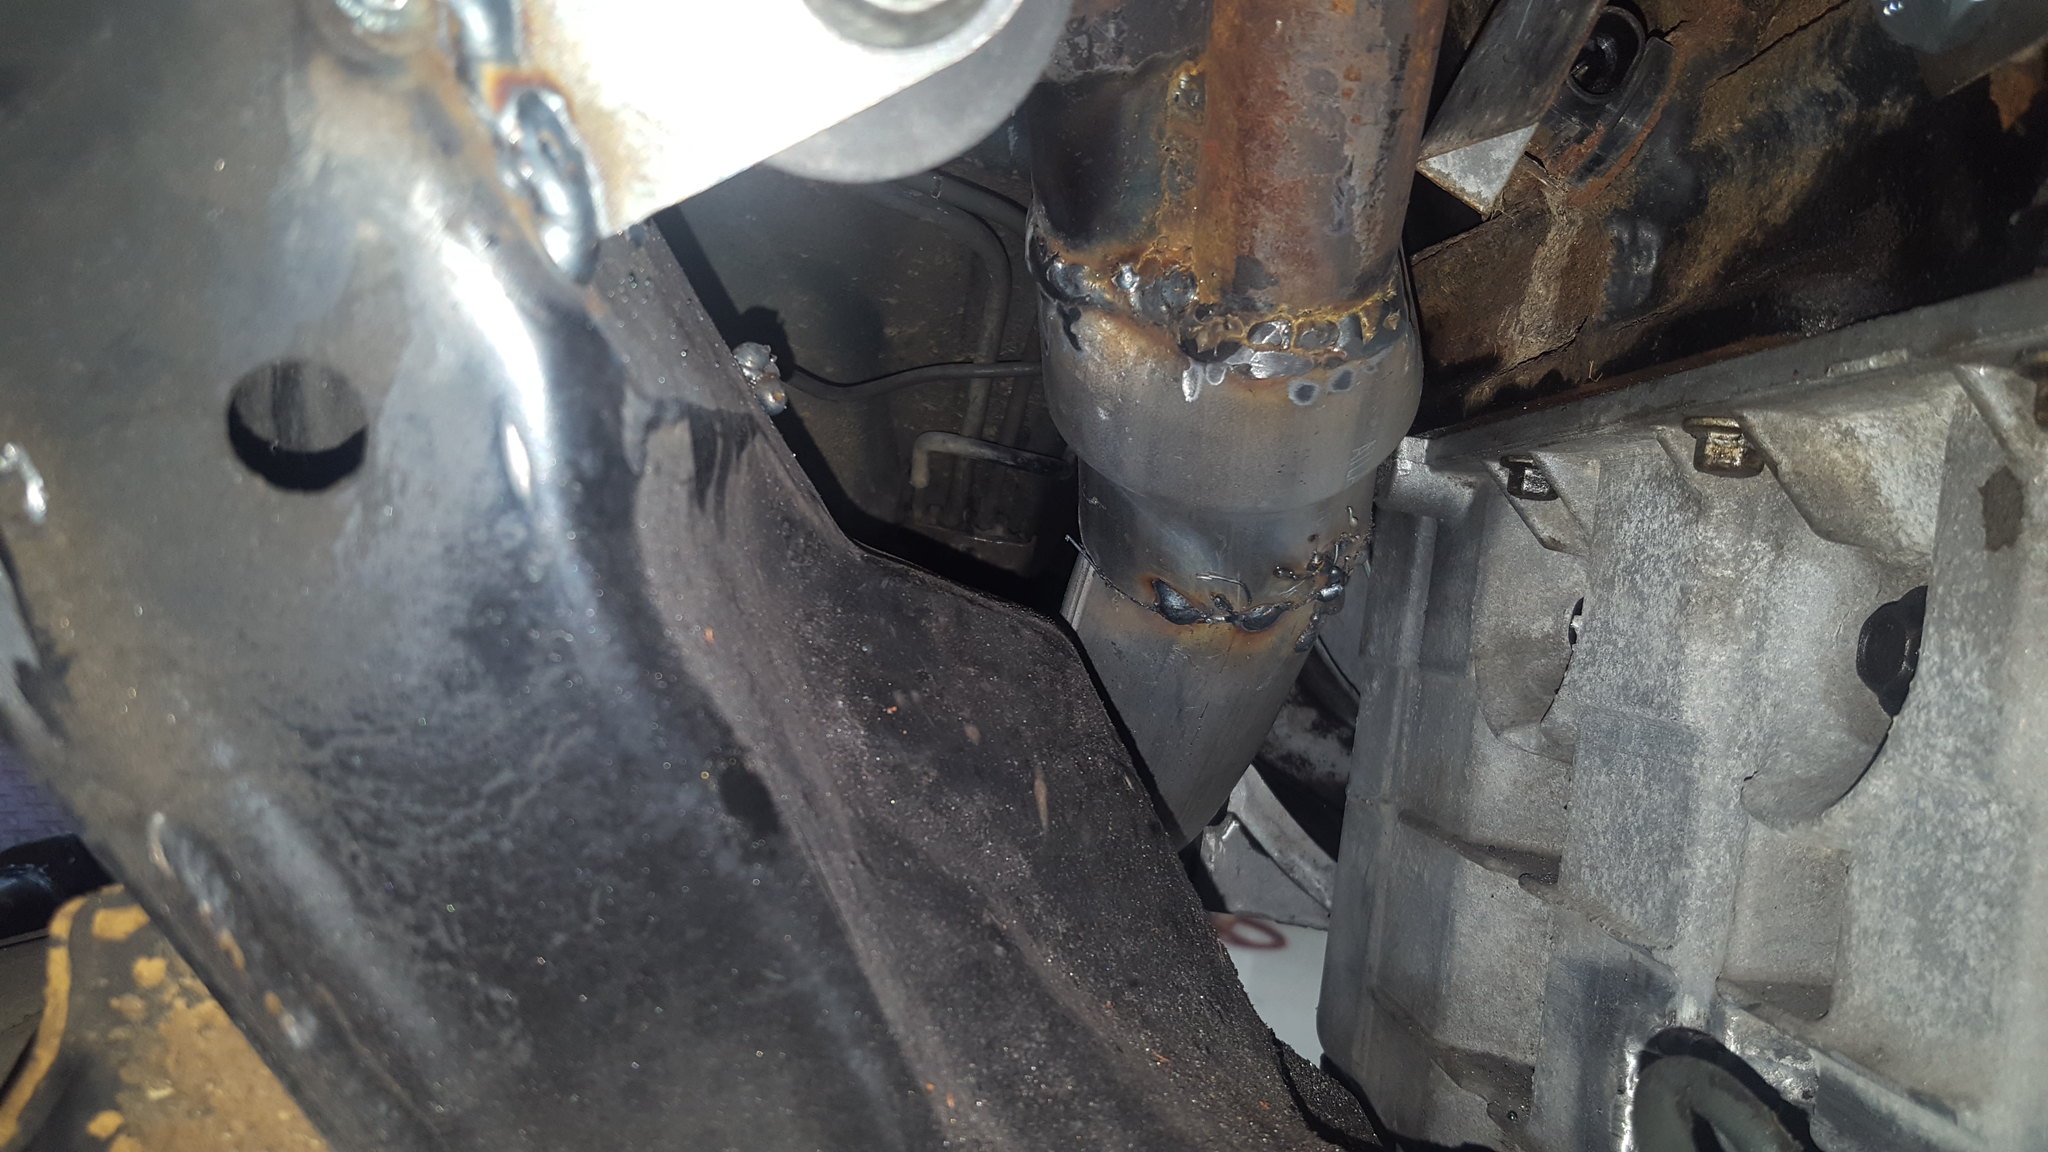
20180211_154135 by Michael Crawford, on Flickr
20180211_154113 by Michael Crawford, on Flickr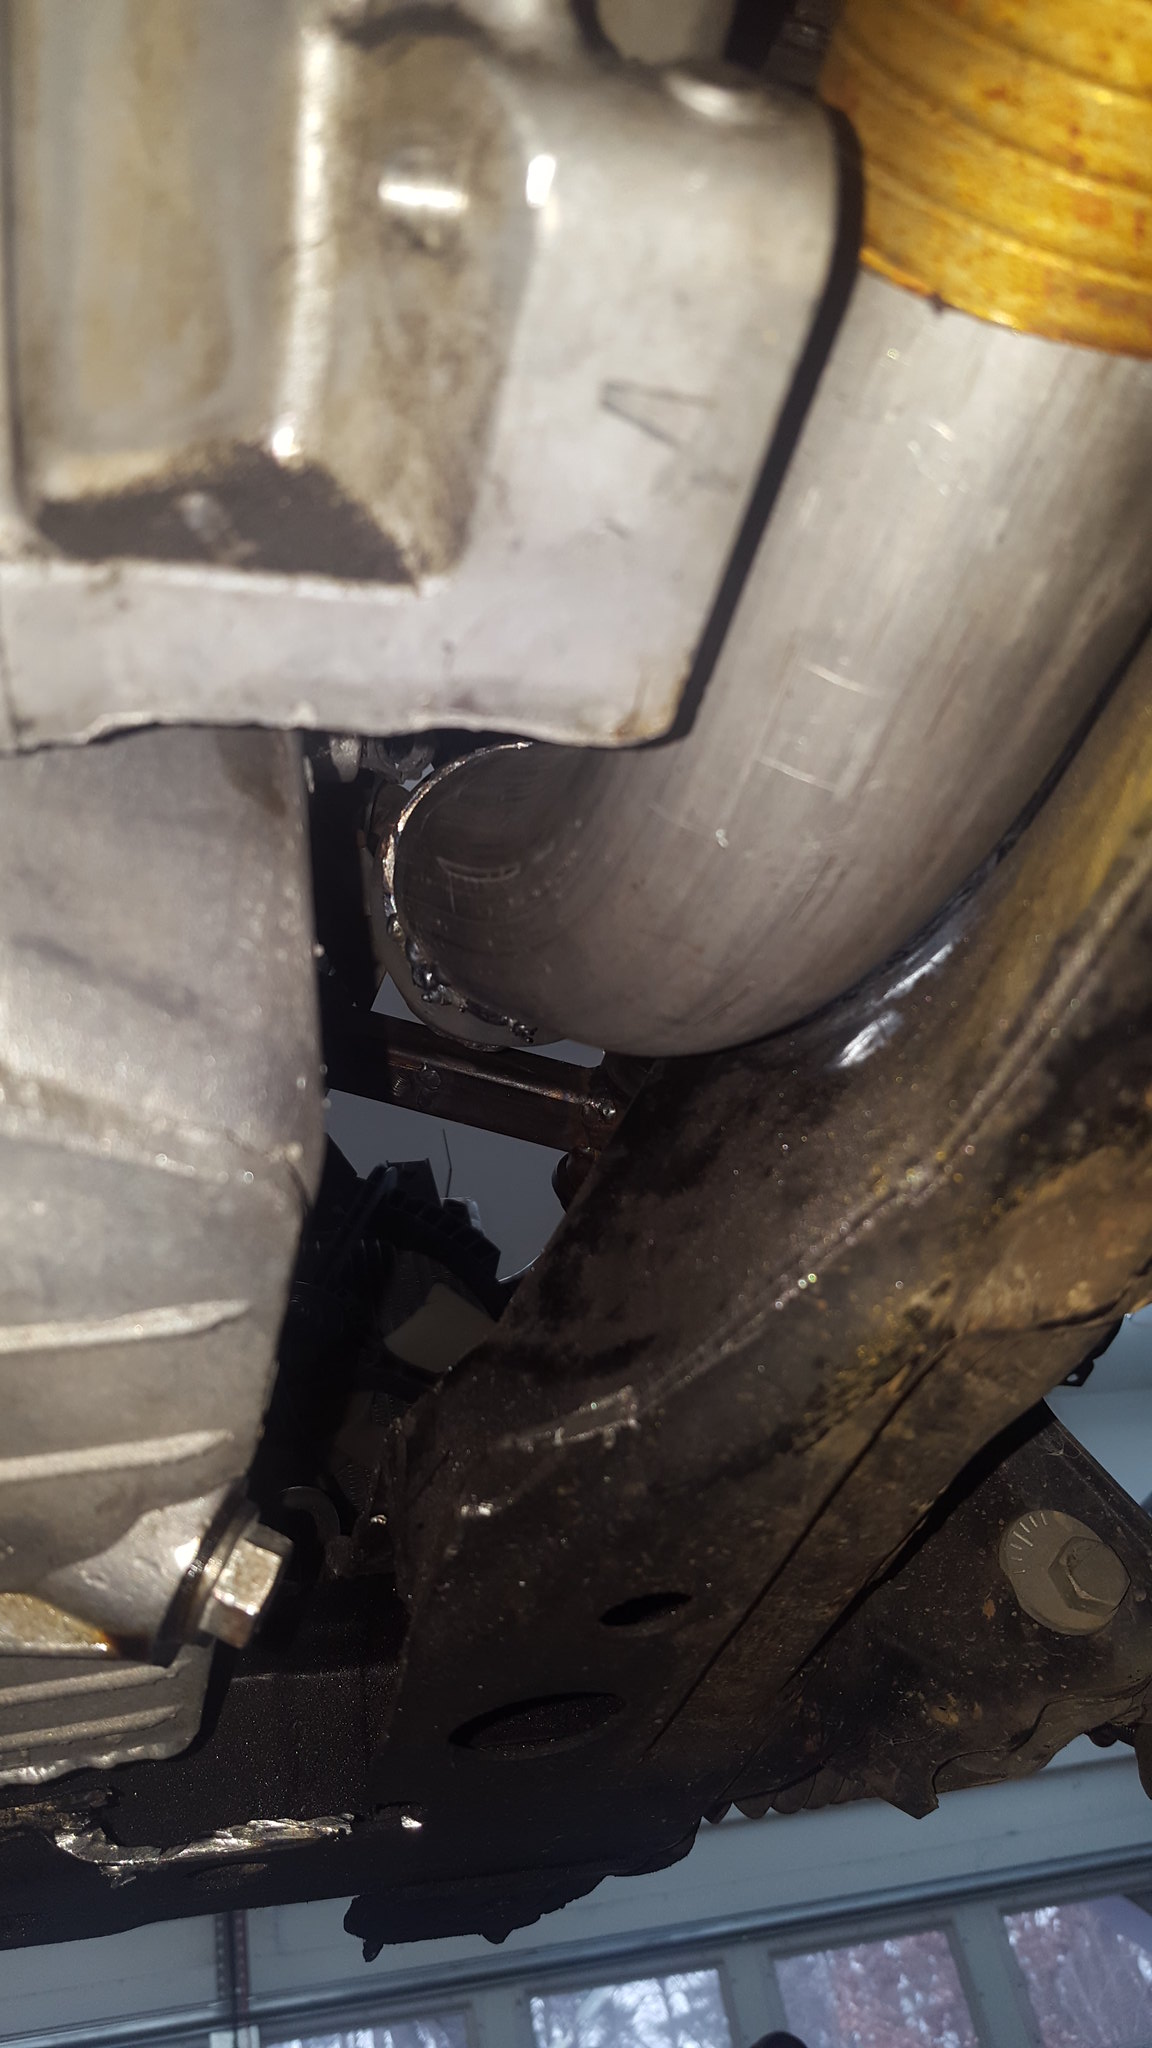
20180211_154120 by Michael Crawford, on Flickr
20180211_154107 by Michael Crawford, on Flickrim ready to mount the glasspack and build the tailpipe now. Some judicious beating of sheetmetal and pipe will be needed for clearance. Then build some hangars, take it all apart for final welding and grinding and.....also, I discovered that the stock miata driveshaft is exactly the right length for the swap, and I found a yoke in storage that fits the camaro trans. I think the yoke came as a tail shaft plug in a 700r4 I bought from the junkyard. Dads going to take both parts to the local driveshaft shop this week to see if we can get the two joined reasonably cheaply. Ive built a couple of driveshafts at home, and really DONT want to do that again.Lastly, ive been working on making intake and stuff fit. I cut the EGR boss off the 3500 intake, which let it sit down perfectly. Steve is going to weld up the holes for me, and that job will be finished. Also, we discovered that after notching one of the hood braces, this should fit under a stock hood with room to spare. We think.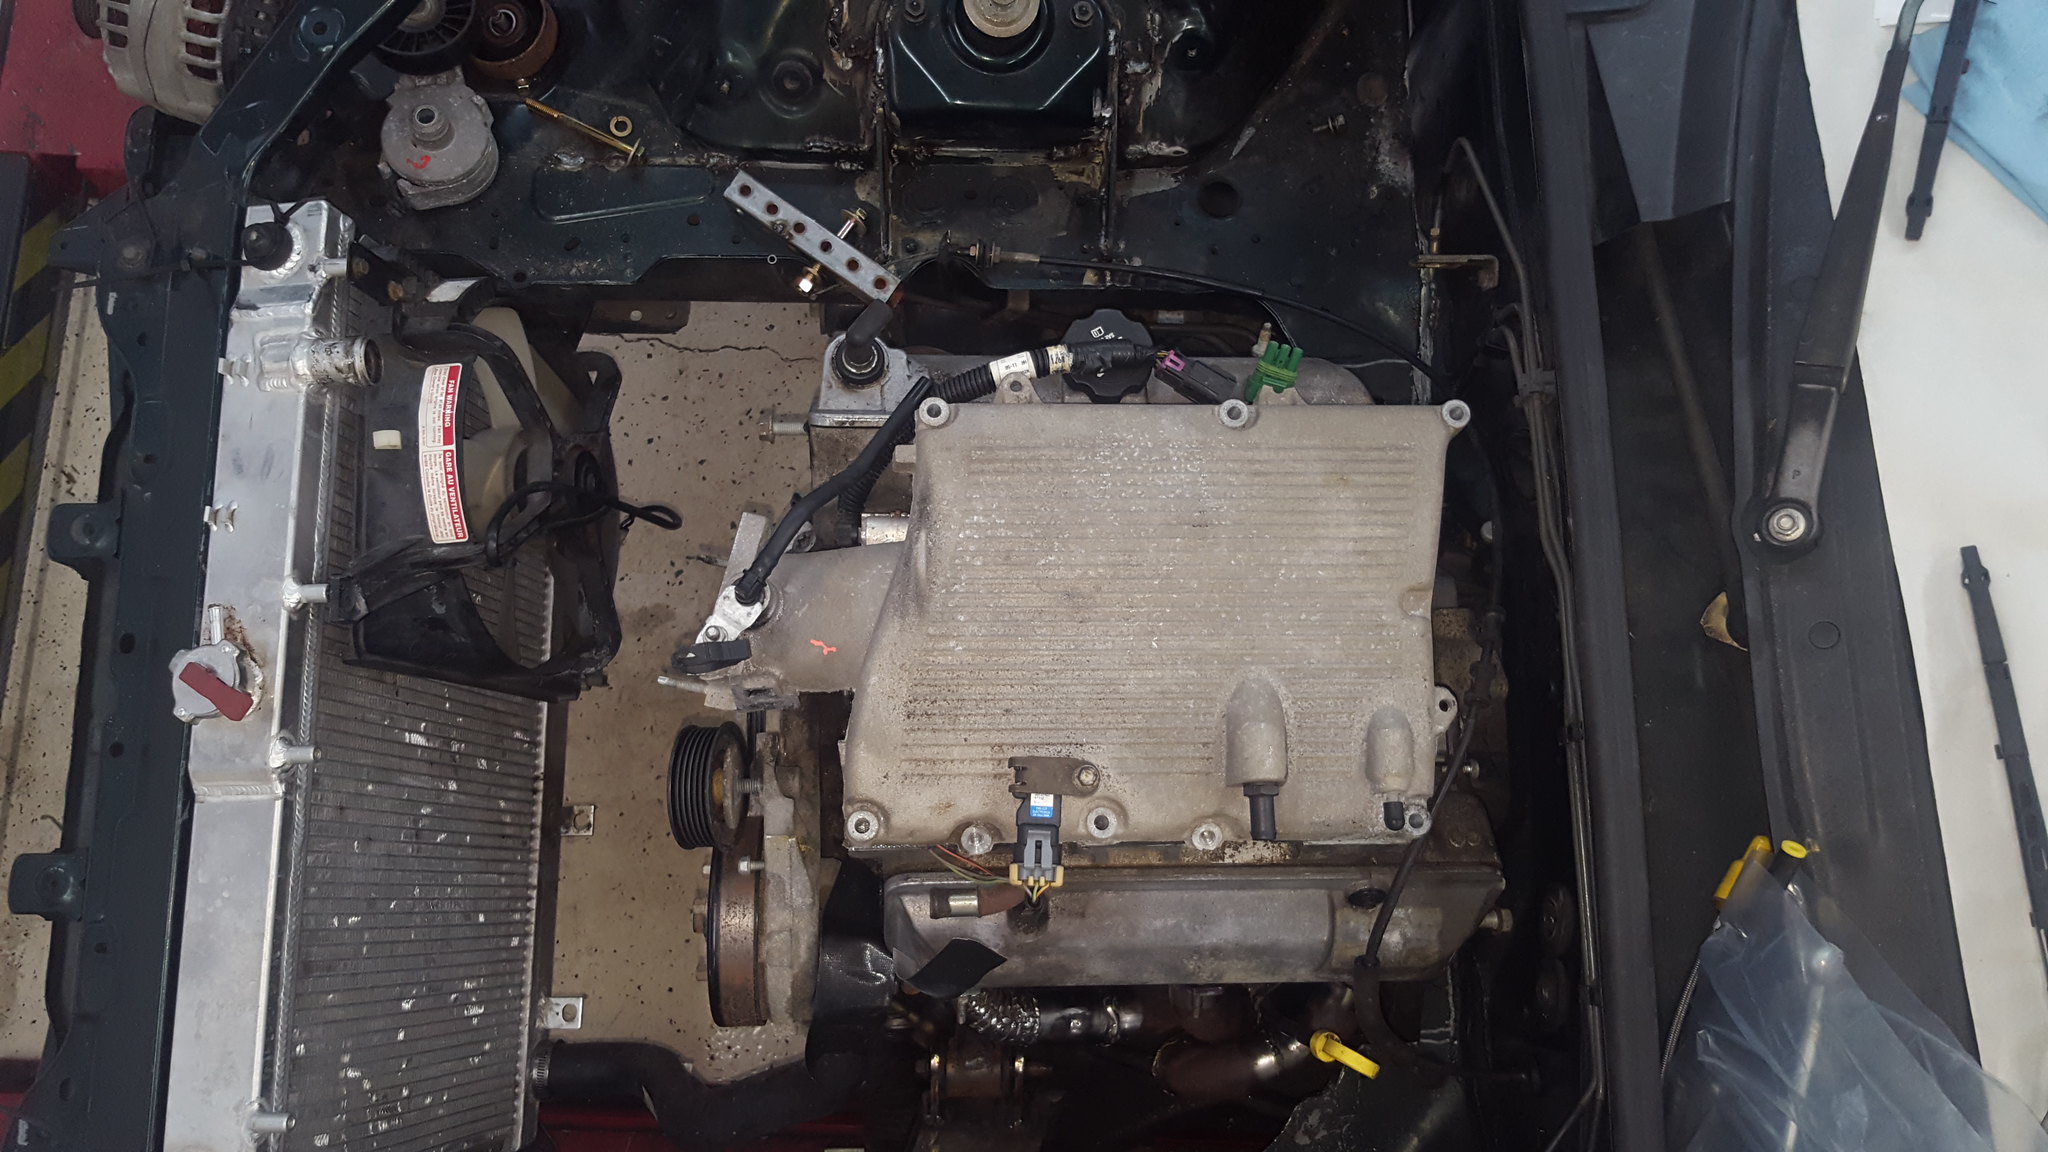
20180211_160307 by Michael Crawford, on Flickr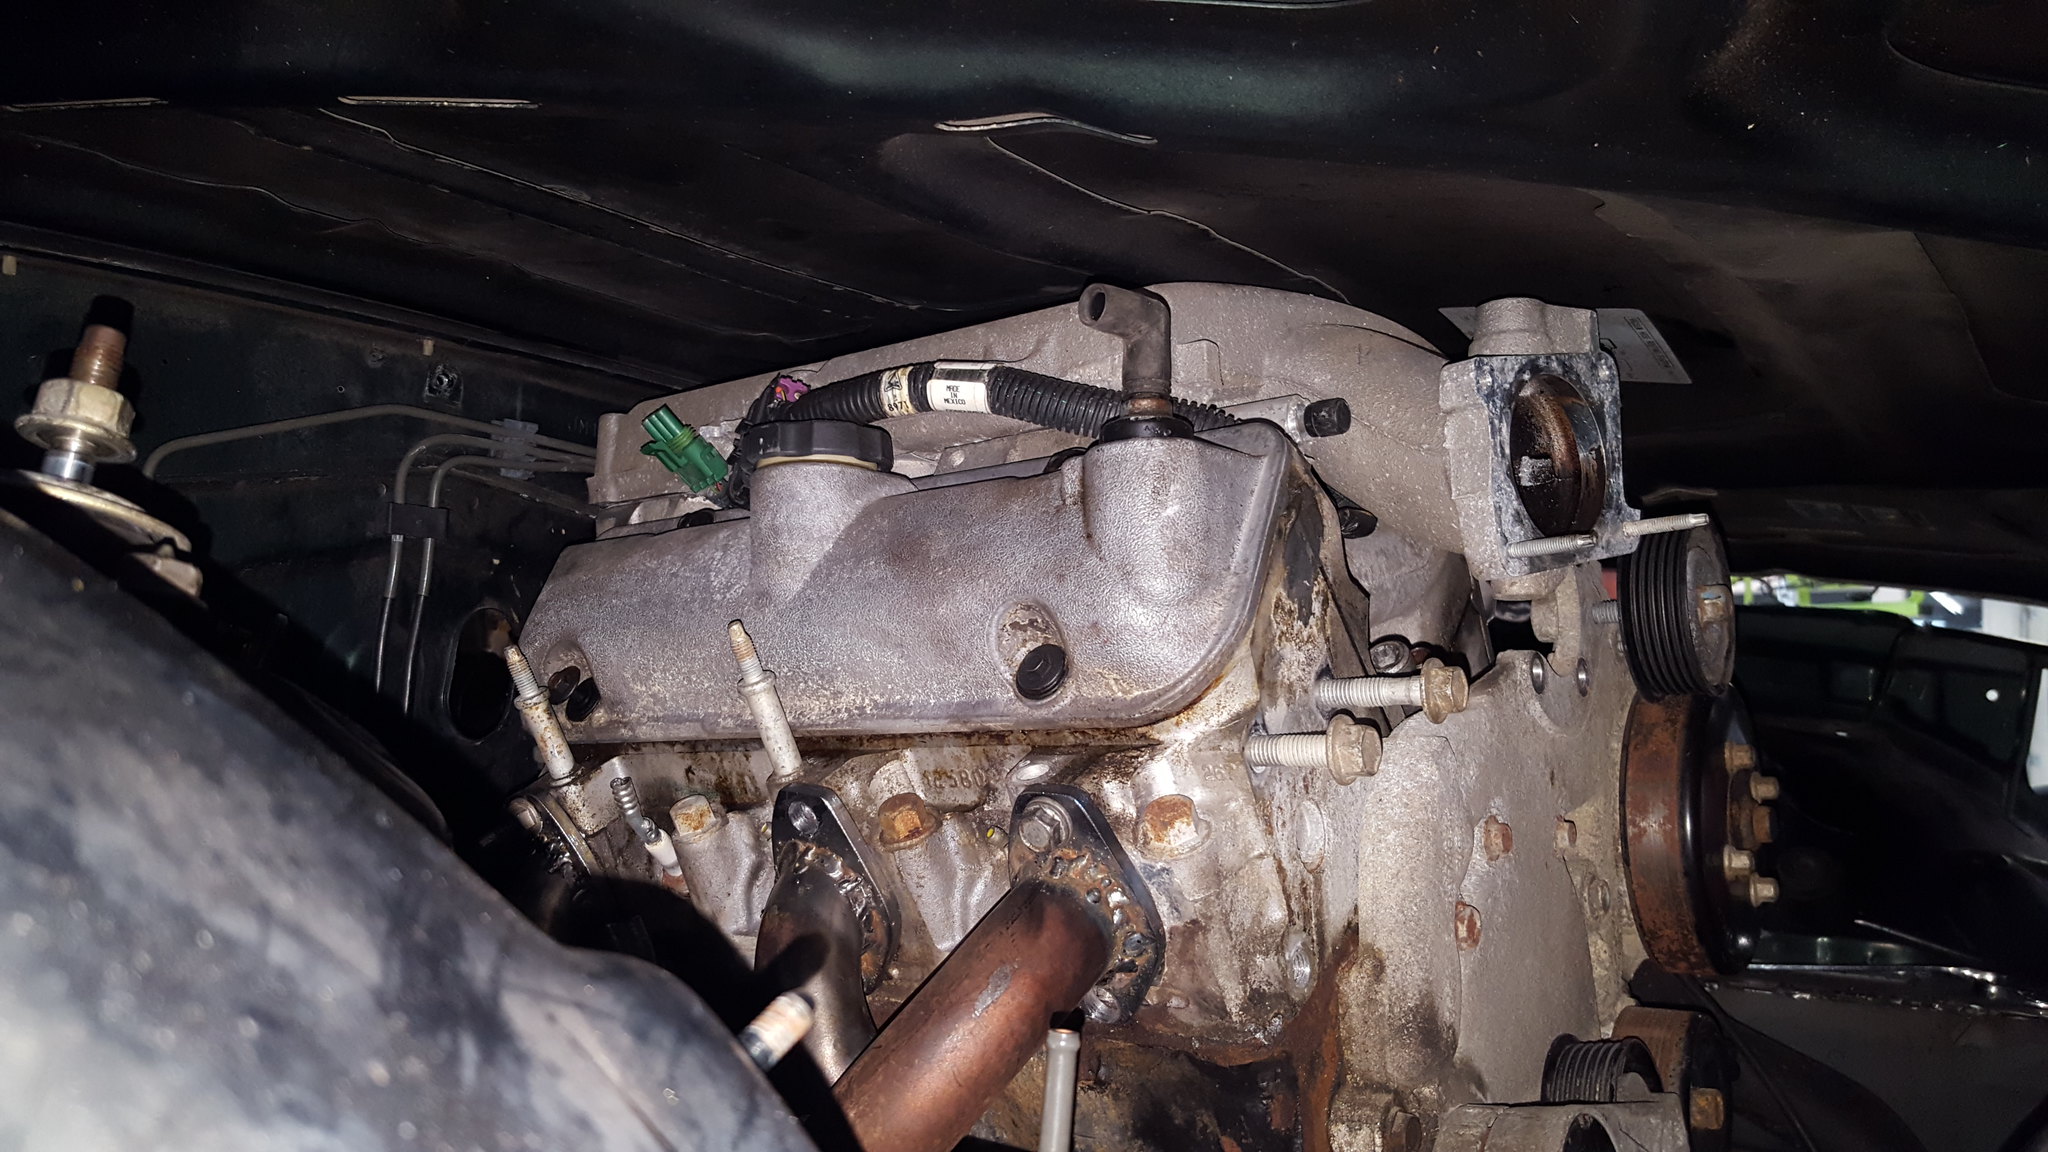
20180202_202832 by Michael Crawford, on FlickrI still need to build the alternator mount as well, and then we can pull the car completely back apart for cleaning/seam sealing/painting, and start final assembly. We will be doing a good port and polish job on everything while we have it torn down for gaskets, and seeing if we can find hundreds of places to make things ounces lighter.
revious challenge budget: 1286.58 recoup total: 800new money:bought an aluminum seat sand cover from a grm member: 40 new total: 1326.58recoup: 800I haven't been moving to quick the last few weeks. Migraines have been the worst they've been in years, which has dramatically slowed progress, and lessened the quality of my work.Anyway, last week john (untouchabl from grm) came over to see what I am doing to the car he sold me. He also brought an aluminum seat for me to try (too big for him). Seat fit me and the available space in the car. So I bought it at asking price ($40). I haven't figured out how I want to mount it yet, and am open to suggestions. Needs to be low in the car though. And sturdy. And cheap. Im thinking 3x3 angle iron bolted through the floor, then the sides of the seats. But there's gotta be a more elegant solution....
20180203_164639 by Michael Crawford, on Flickr
20180203_185333 by Michael Crawford, on Flickrive also been working on the drivers side header. You know, the hard one.I ran out of correct bends, and necessity is a mother. So I pie cut one of the tubes and welded it back together.
20180203_143220 by Michael Crawford, on Flickr
20180203_144619 by Michael Crawford, on Flickrlots of cursing and cutting later, I had a header for the drivers side.
20180211_121115 by Michael Crawford, on FlickrI then cut up one of the c5 muffler assemblies and used the 2.5 bends to get out to a slip fit with the flexible exhaust pipe chunks, then cut and sectioned the merge collector from the big block chevy truck pat sold me. Again, lots of cutting, grinding, and welding....
20180211_154135 by Michael Crawford, on Flickr
20180211_154113 by Michael Crawford, on Flickr
20180211_154120 by Michael Crawford, on Flickr
20180211_154107 by Michael Crawford, on Flickrim ready to mount the glasspack and build the tailpipe now. Some judicious beating of sheetmetal and pipe will be needed for clearance. Then build some hangars, take it all apart for final welding and grinding and.....also, I discovered that the stock miata driveshaft is exactly the right length for the swap, and I found a yoke in storage that fits the camaro trans. I think the yoke came as a tail shaft plug in a 700r4 I bought from the junkyard. Dads going to take both parts to the local driveshaft shop this week to see if we can get the two joined reasonably cheaply. Ive built a couple of driveshafts at home, and really DONT want to do that again.Lastly, ive been working on making intake and stuff fit. I cut the EGR boss off the 3500 intake, which let it sit down perfectly. Steve is going to weld up the holes for me, and that job will be finished. Also, we discovered that after notching one of the hood braces, this should fit under a stock hood with room to spare. We think.
20180211_160307 by Michael Crawford, on Flickr
20180202_202832 by Michael Crawford, on FlickrI still need to build the alternator mount as well, and then we can pull the car completely back apart for cleaning/seam sealing/painting, and start final assembly. We will be doing a good port and polish job on everything while we have it torn down for gaskets, and seeing if we can find hundreds of places to make things ounces lighter.
Reply
0
0
04-08-2018, 08:40 PM
#49
Junior Member
Thread Starter
Join Date: Nov 2017
Posts: 112
Total Cats: 7
Challenge budget so farrevious challenge budget: 1326.58 recoup total: 800new money: had a driveshaft made: 220
3 sway bars: 20
new total: 1566.58
recoup: 800so, its been a minute. But im back on this one. Trying to regain momentum, but struggling. Especially with everything thats been happening in life.However, over the past week, ive found my bearings on this project again. Got the exhaust all final welded and ground down.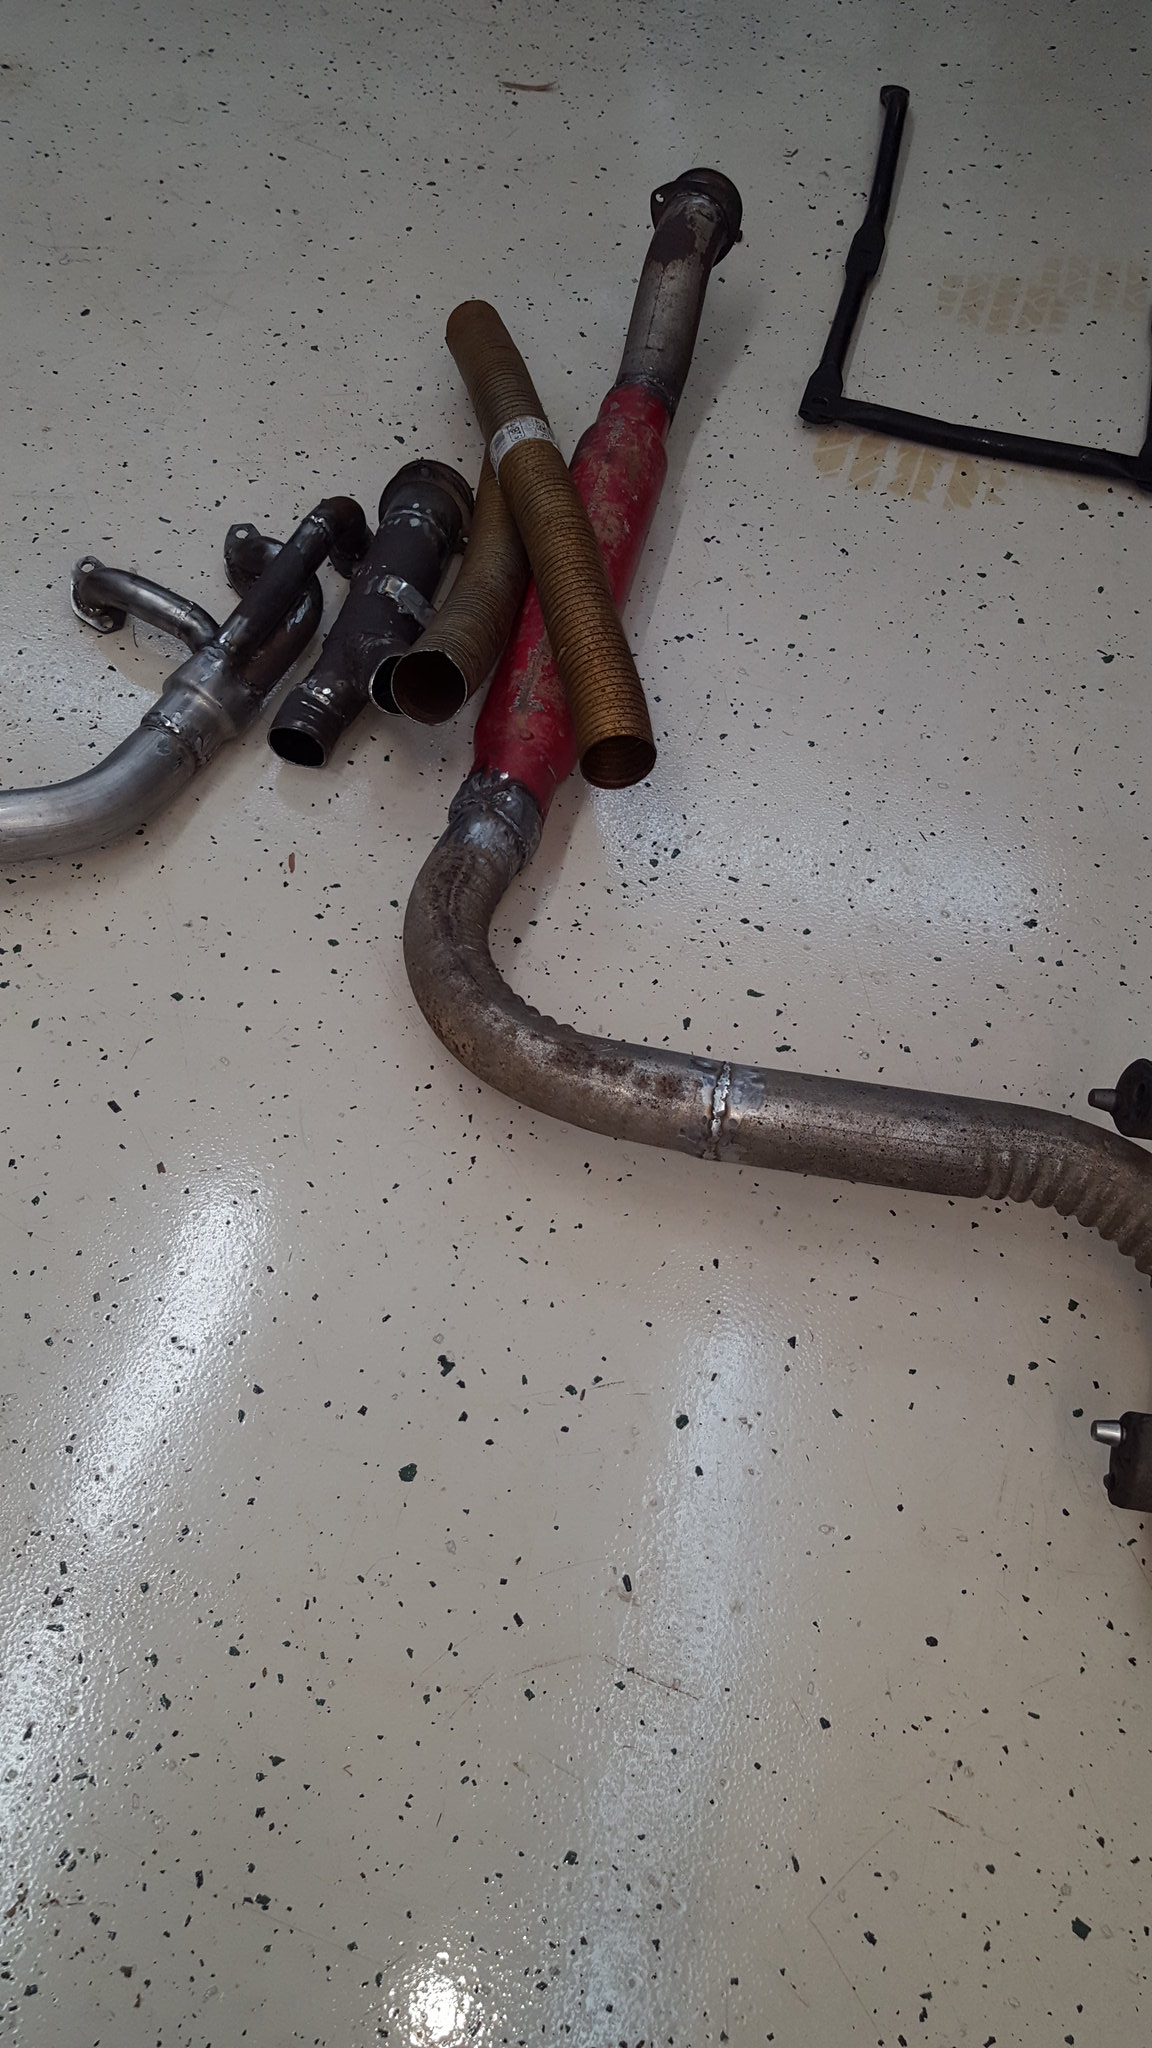
20180408_081012 by Michael Crawford, on Flickrgot the alternator mount mocked up and tacked in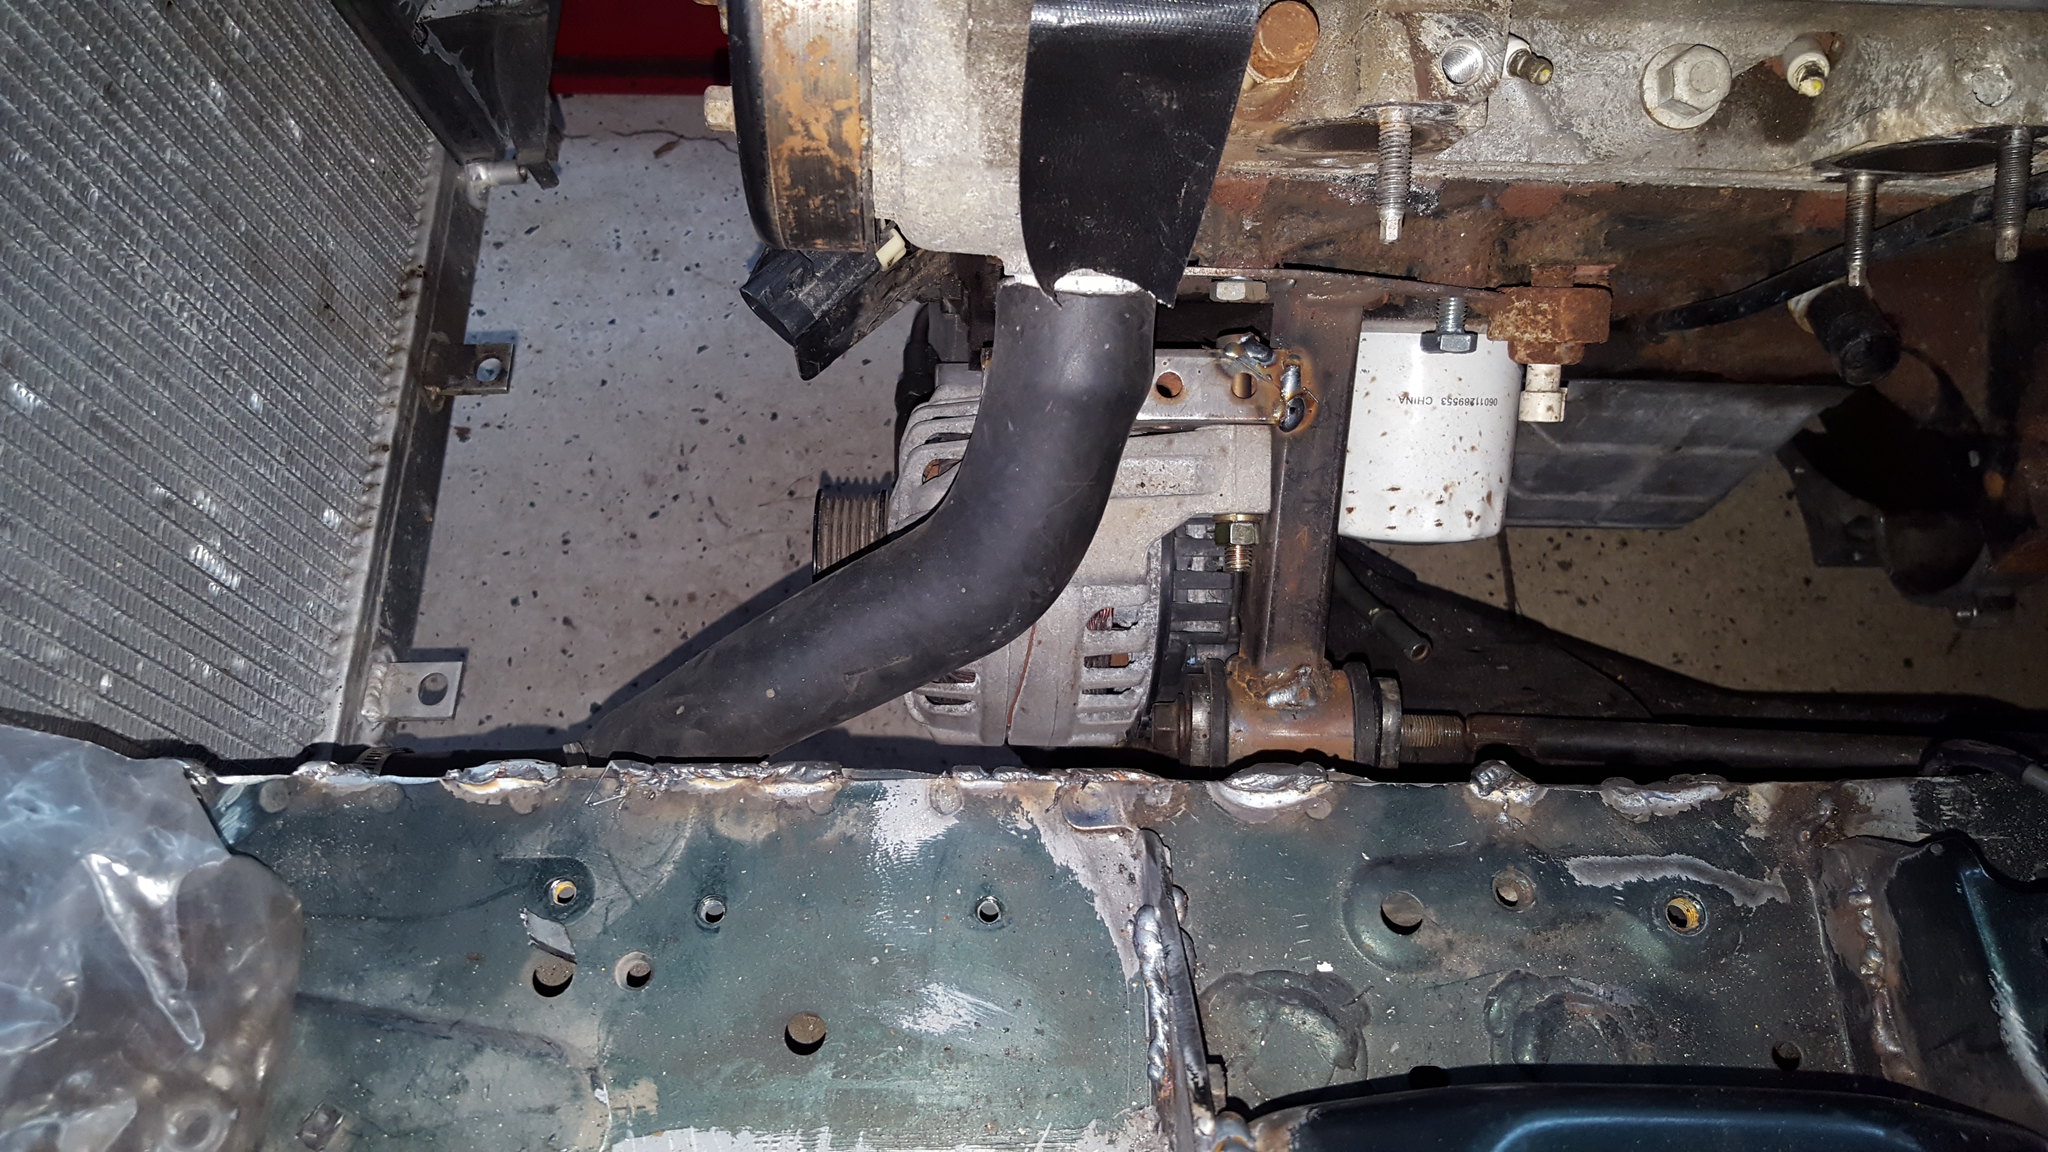
20180408_081042 by Michael Crawford, on Flickr seat is mounted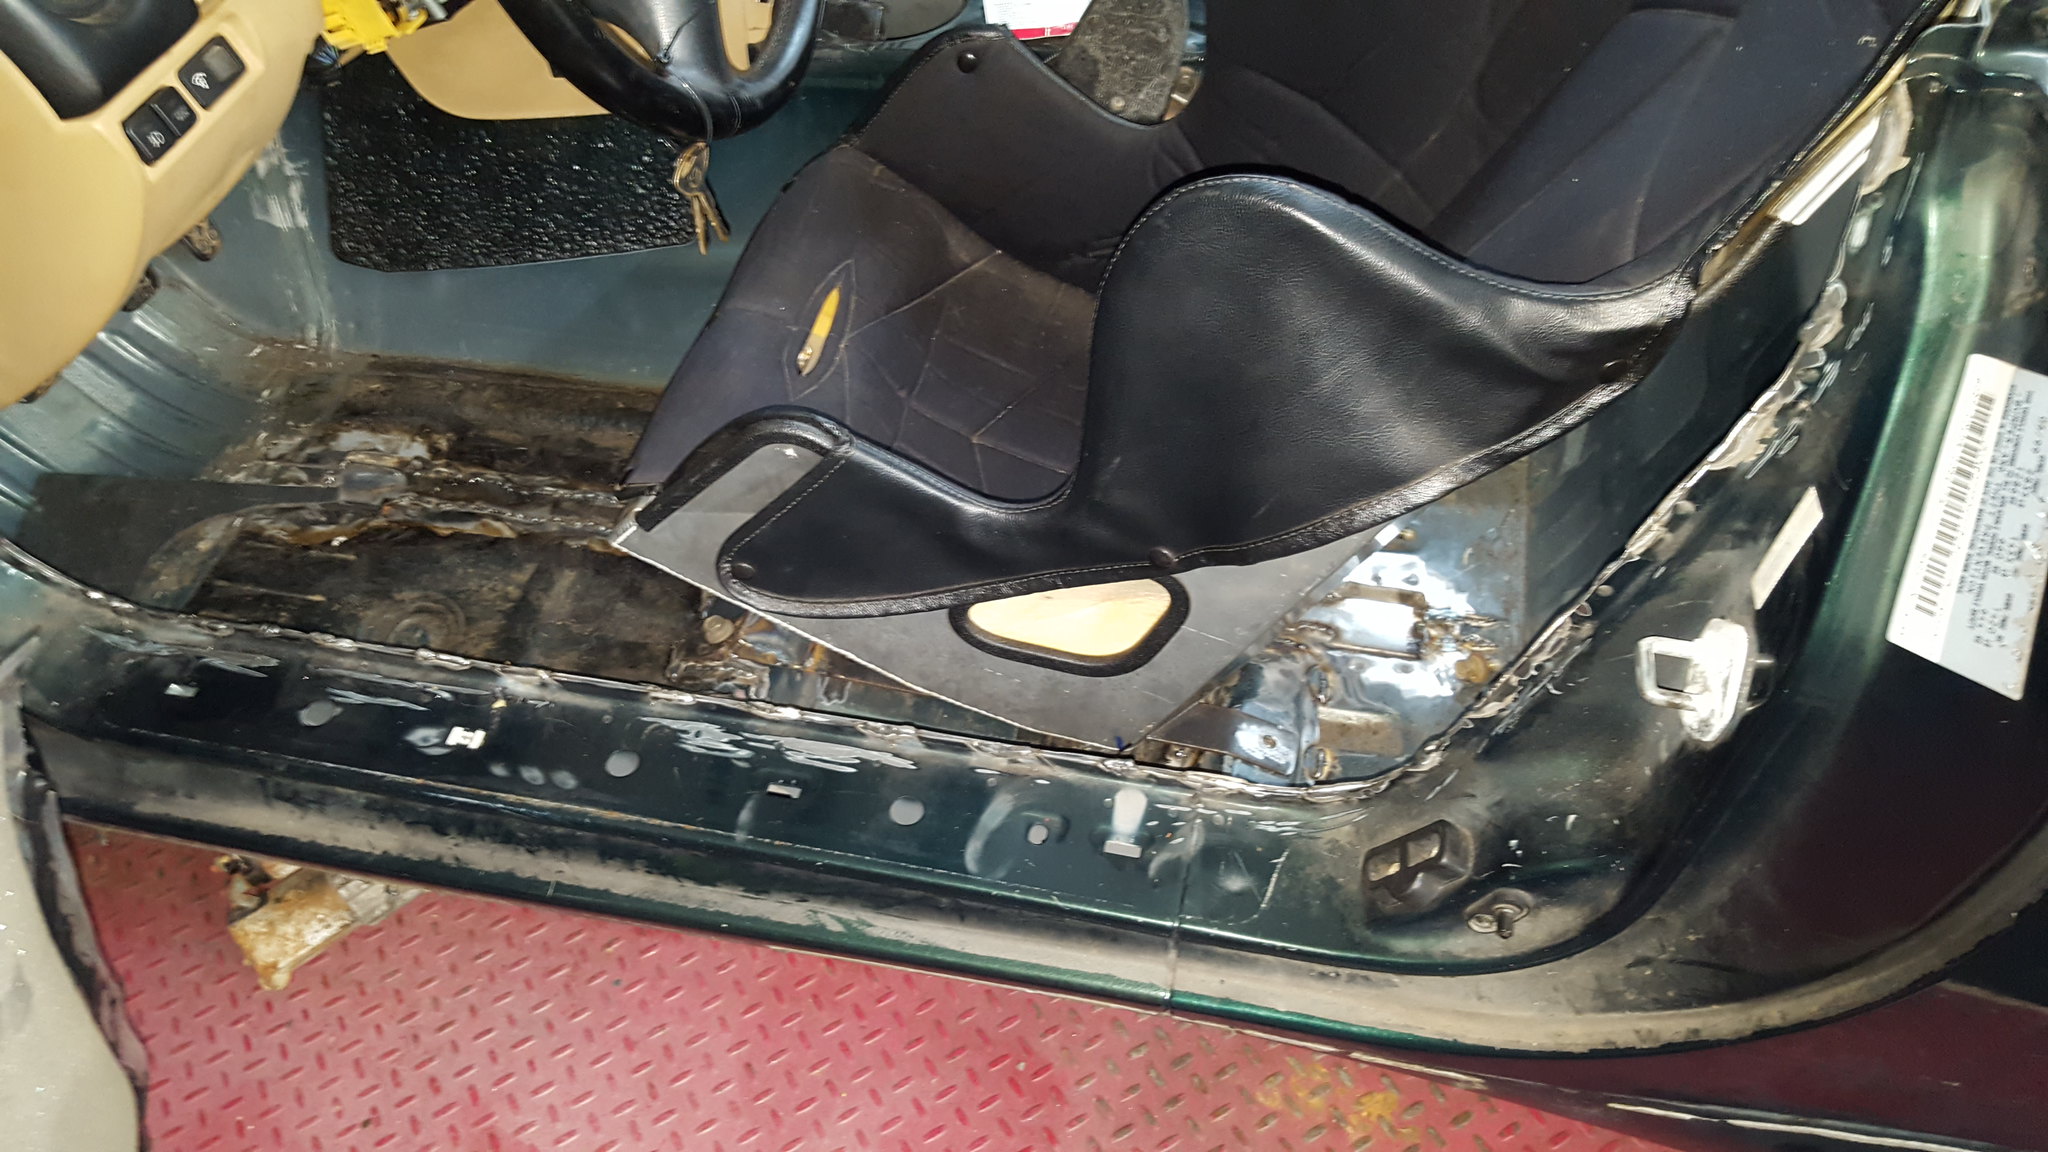
20180408_081027 by Michael Crawford, on Flickrand got the coilovers put together.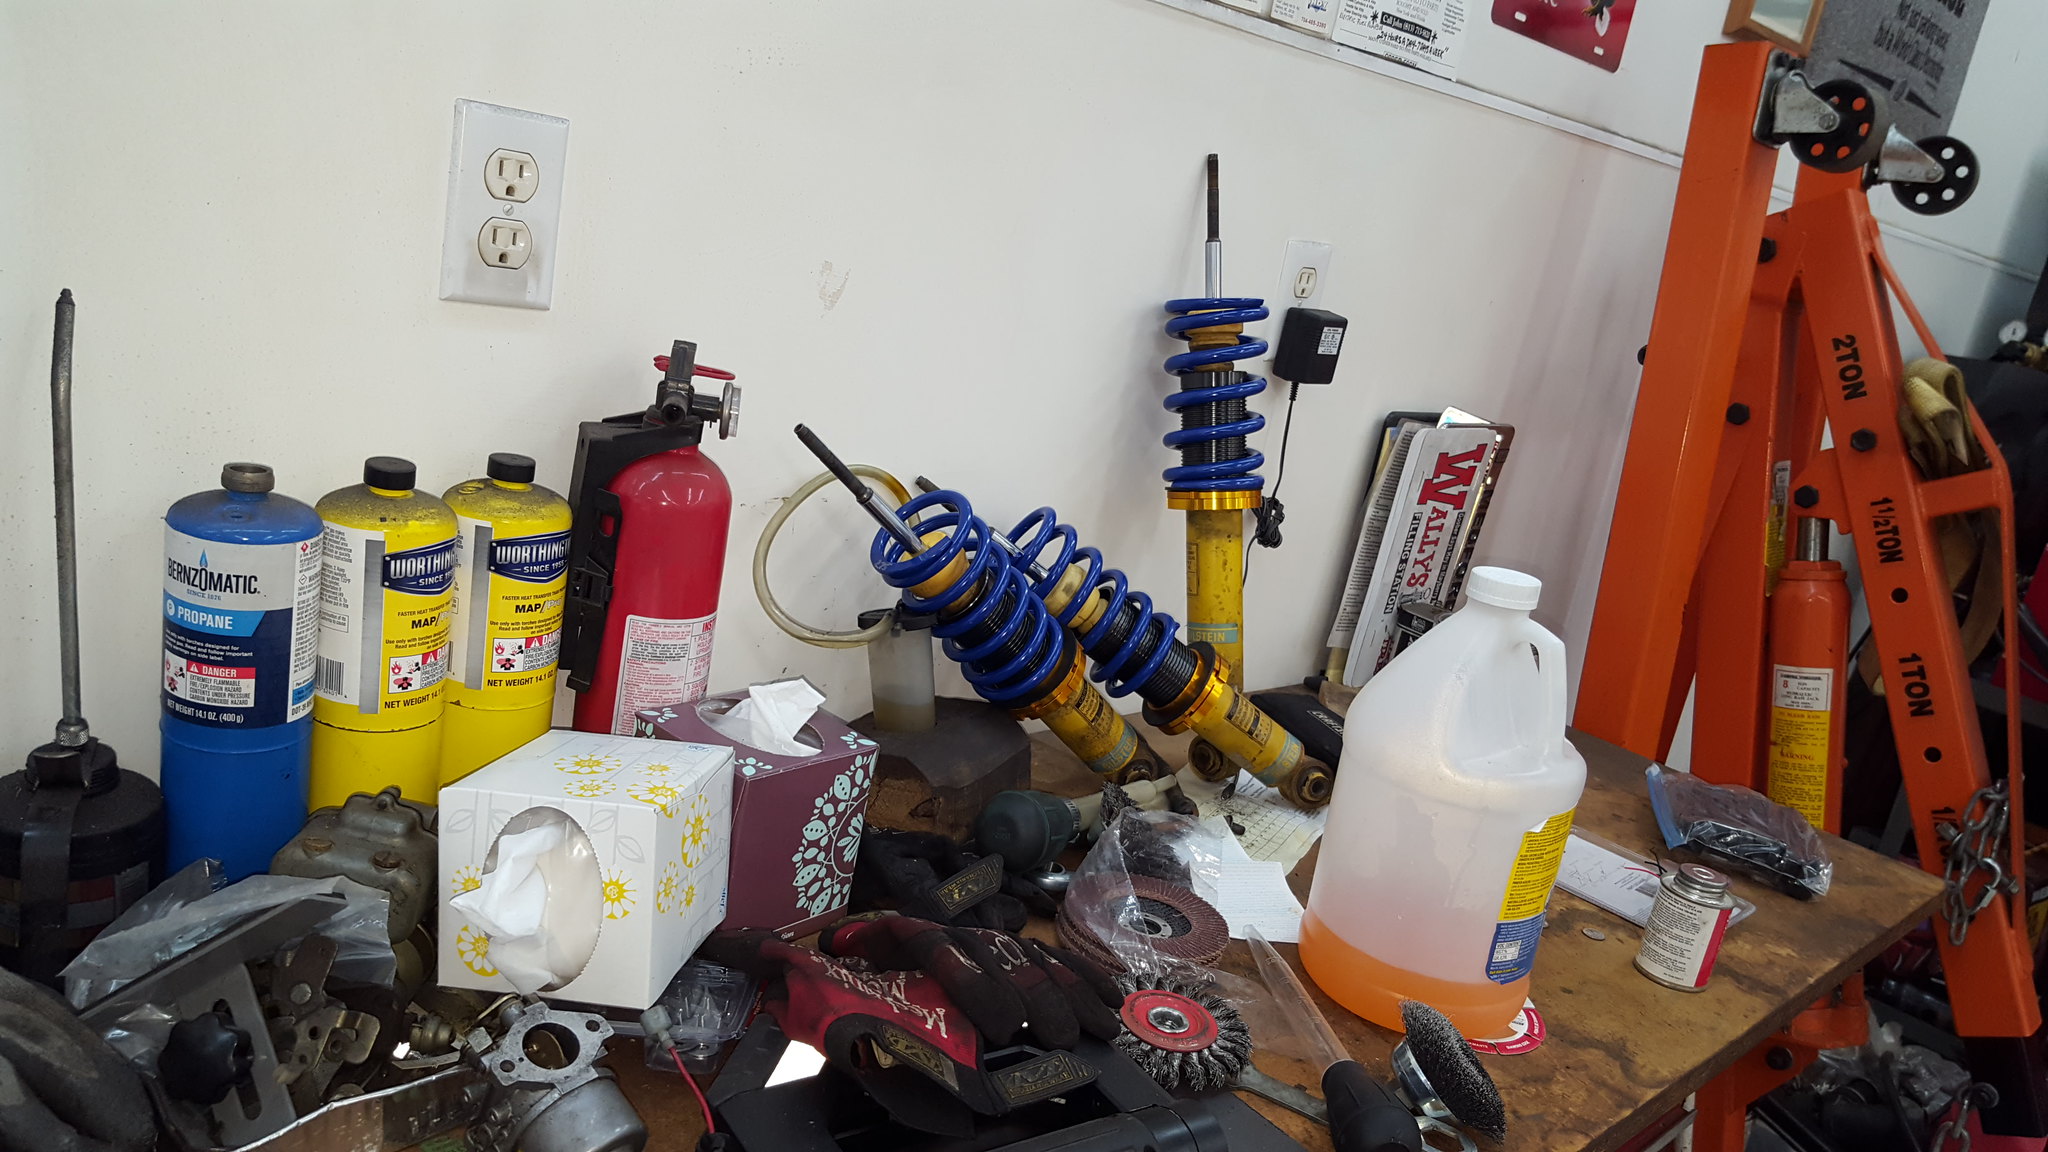
20180407_114910 by Michael Crawford, on Flickr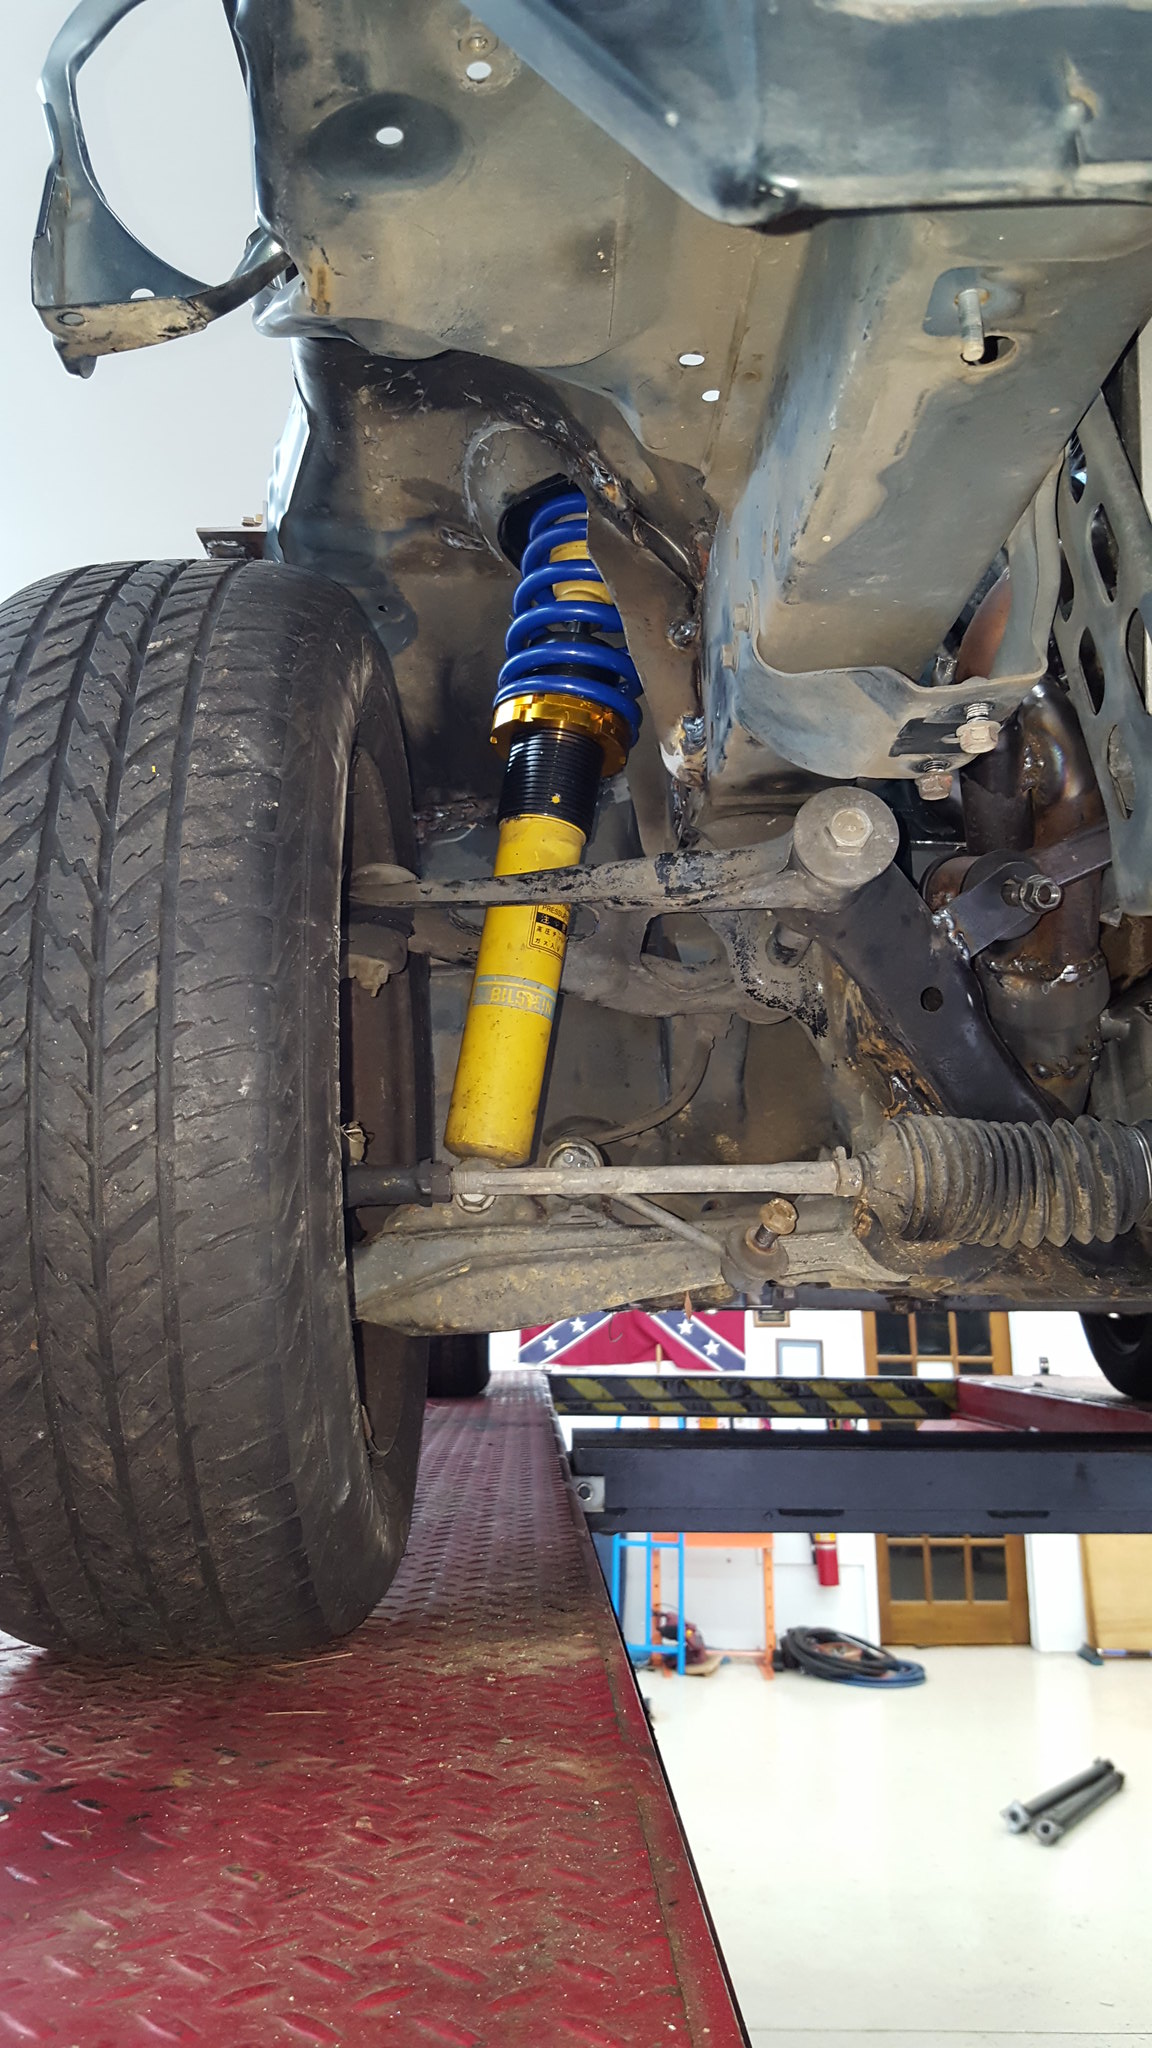
20180407_114901 by Michael Crawford, on Flickrlastly, I began on the shifter. Needs to have the handle about 4 inches back, so I cut it apart right where the console will clear, and plan to put a dog leg in it with a 1x1 piece of steel.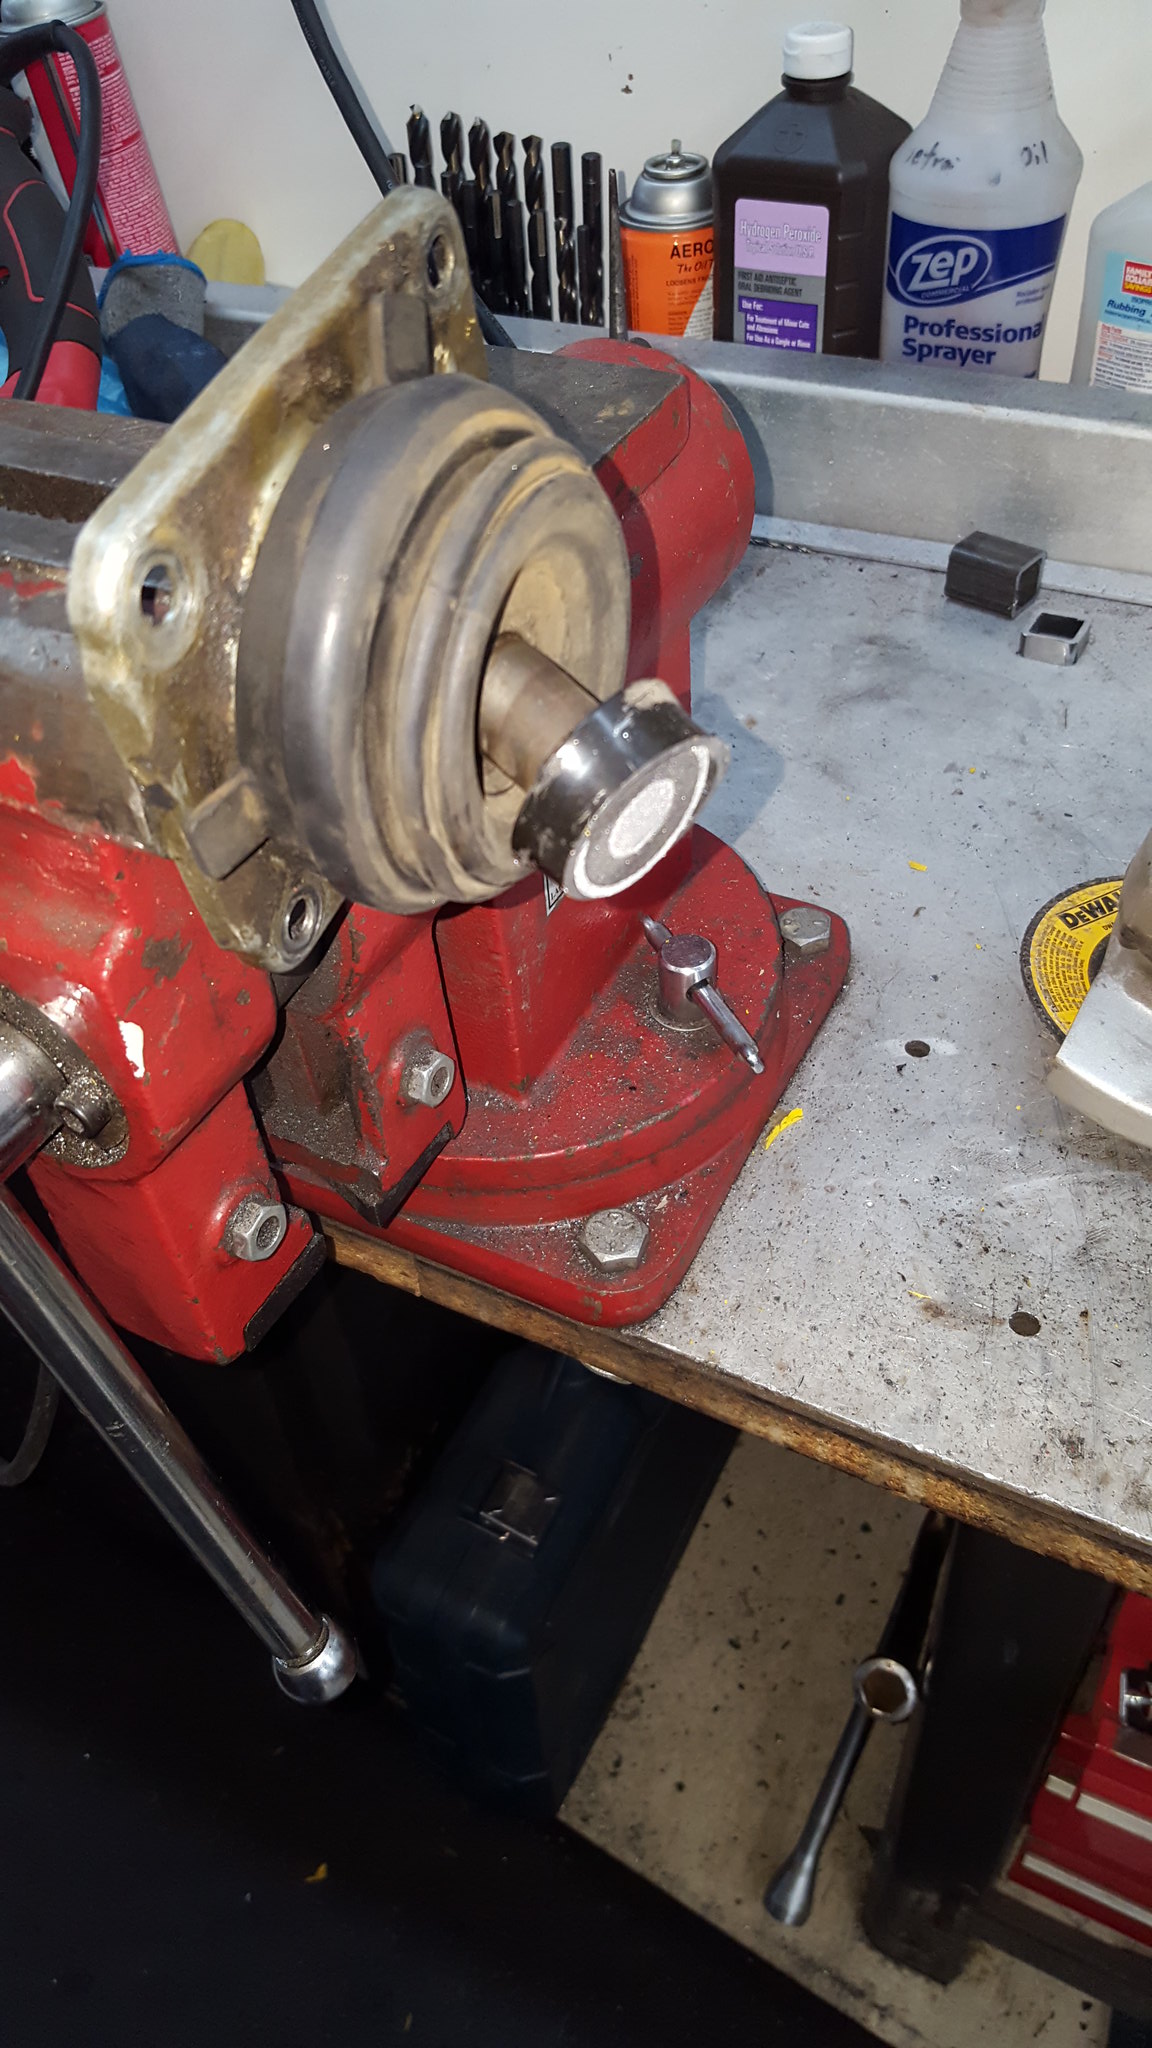
20180408_081819 by Michael Crawford, on Flickr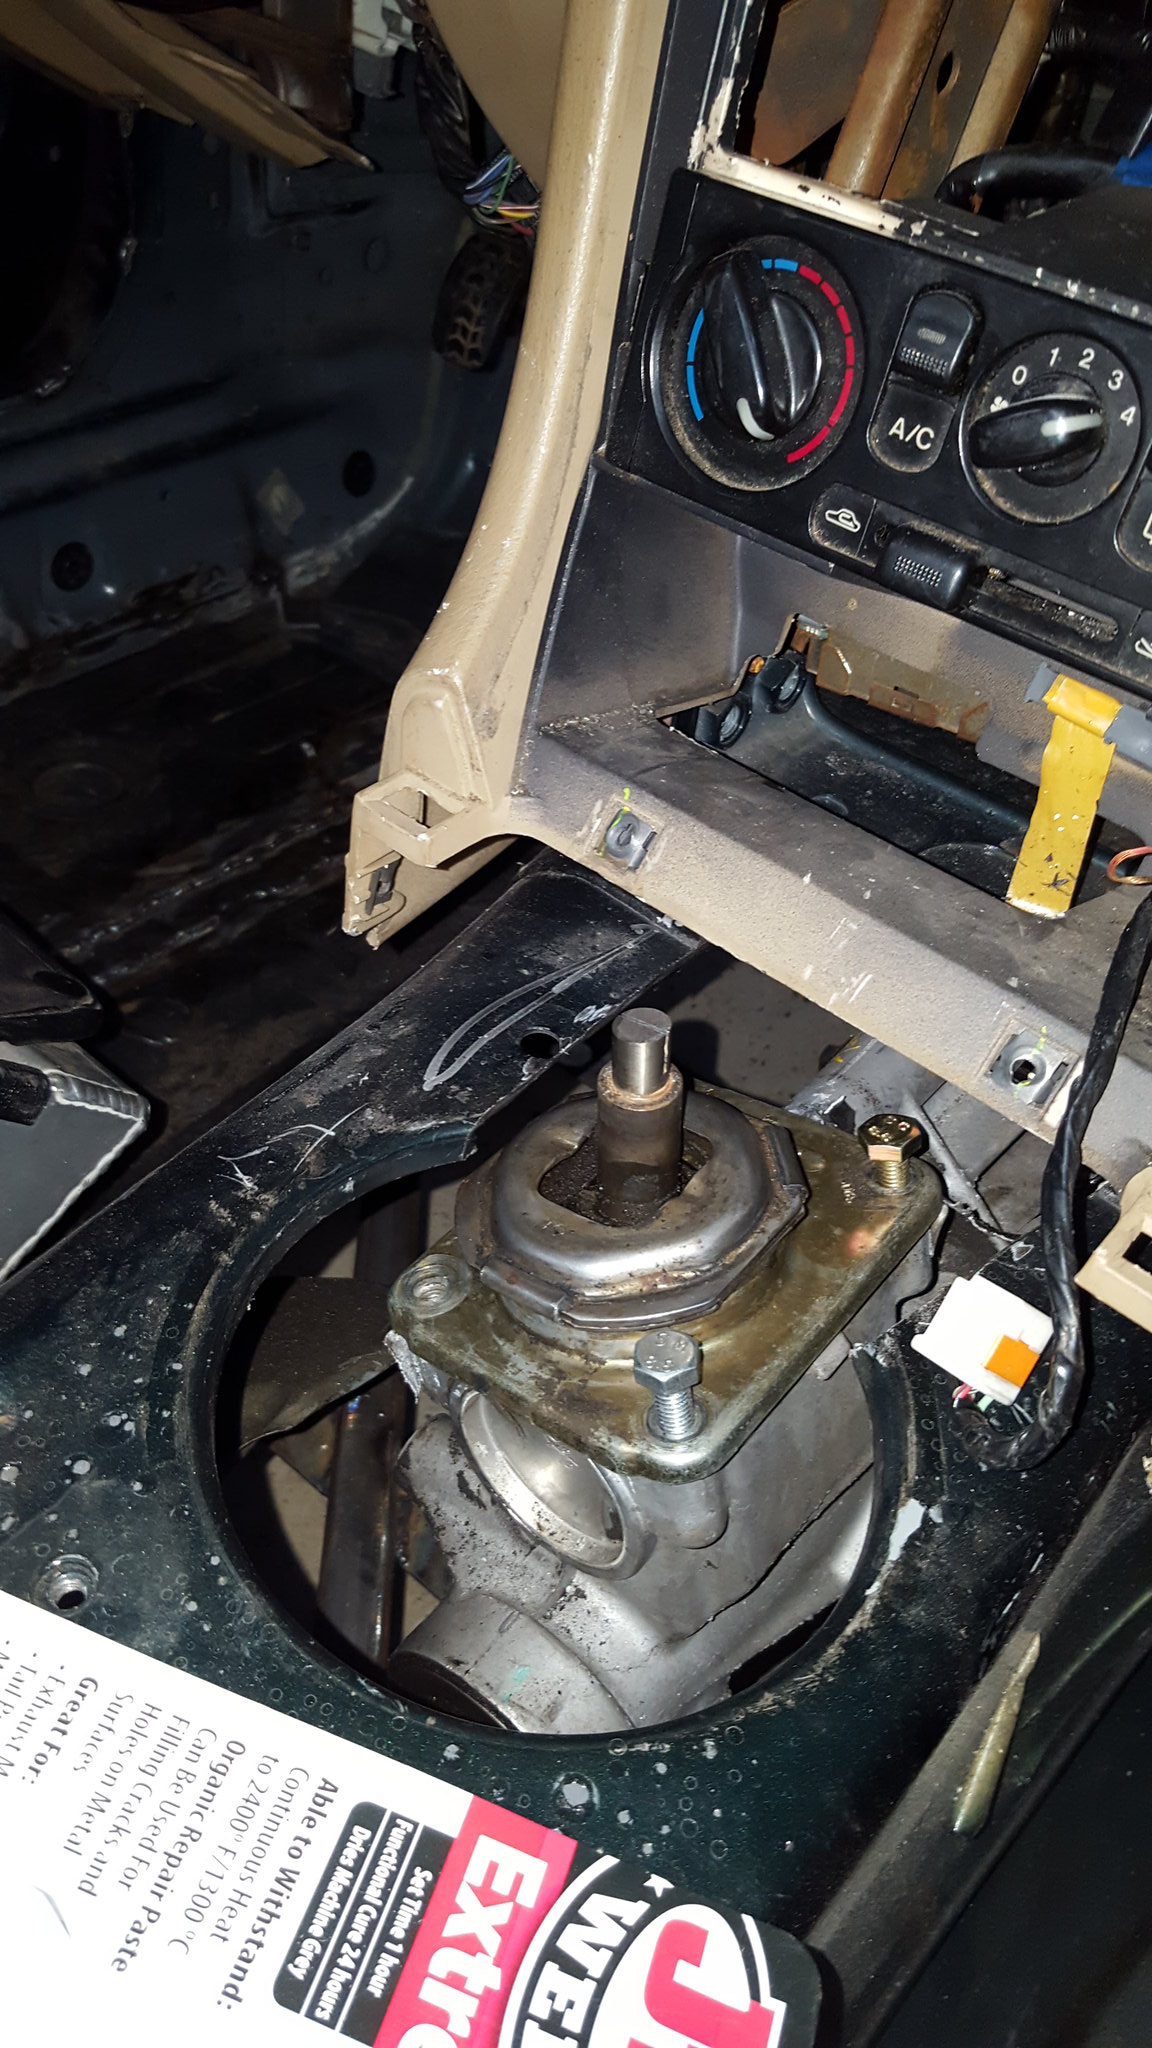
20180408_084015 by Michael Crawford, on Flickr
revious challenge budget: 1326.58 recoup total: 800new money: had a driveshaft made: 2203 sway bars: 20
new total: 1566.58
recoup: 800so, its been a minute. But im back on this one. Trying to regain momentum, but struggling. Especially with everything thats been happening in life.However, over the past week, ive found my bearings on this project again. Got the exhaust all final welded and ground down.
20180408_081012 by Michael Crawford, on Flickrgot the alternator mount mocked up and tacked in
20180408_081042 by Michael Crawford, on Flickr seat is mounted
20180408_081027 by Michael Crawford, on Flickrand got the coilovers put together.
20180407_114910 by Michael Crawford, on Flickr
20180407_114901 by Michael Crawford, on Flickrlastly, I began on the shifter. Needs to have the handle about 4 inches back, so I cut it apart right where the console will clear, and plan to put a dog leg in it with a 1x1 piece of steel.
20180408_081819 by Michael Crawford, on Flickr
20180408_084015 by Michael Crawford, on Flickr
Reply
0
0
04-15-2018, 01:45 PM
#50
Junior Member
Thread Starter
Join Date: Nov 2017
Posts: 112
Total Cats: 7
Challenge budget so farrevious challenge budget: 1326.58 recoup total: 800new money: had a driveshaft made: 220
3 sway bars: 20
new total: 1566.58
recoup: 800im leaving the last budget update just as a reminder to myself.This weekend saw small, but major progress.First, I finished my shifter.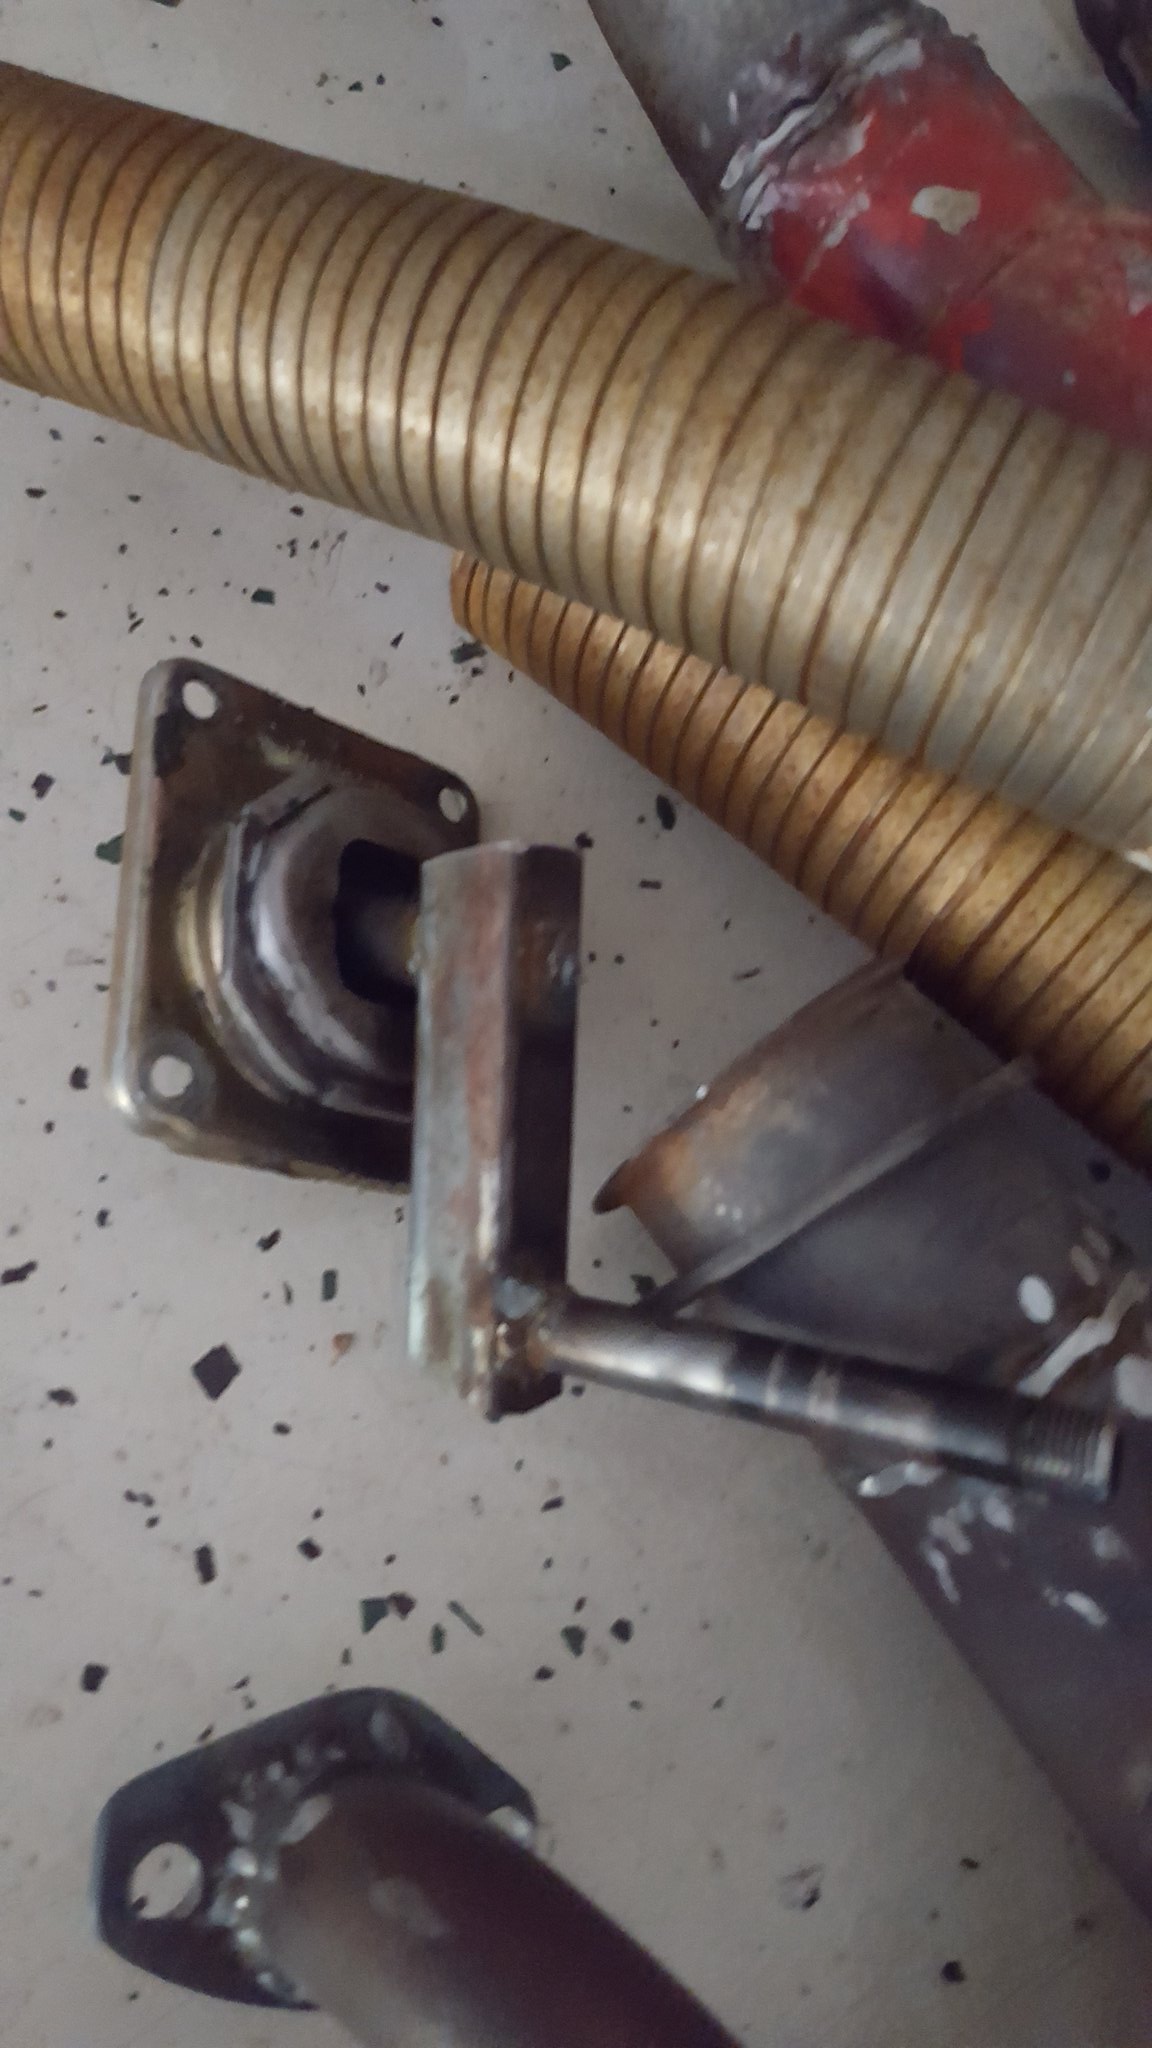
20180414_175135 by Michael Crawford, on Flickrfits my had perfectly, and provides nice short throws.The reason this was so major is that this was the last thing that needed to be fabricated to mate the new Gmv6 drivetrain to the miata. The last thing. The rest is simply connecting the dots.This means that I can now focus on finishing the seam welding, finishing the crossmember surgery, finsihing the firewall, clean, paint, etc. but all pushes it towards the light of first fire! Due to the challenges of the last few months, I don't believe its on track for the $2018 challenge any more. I have far too far to go in the next few months, which would leave me with no testing time. Which is why we didn't finish higher with the AMC. And with as off the wall as this one is, I definitely need testing time. So, im going to keep plugging away at it. See where/when it gets done, and how much time till the show I have.But first, I probably need to deal with this.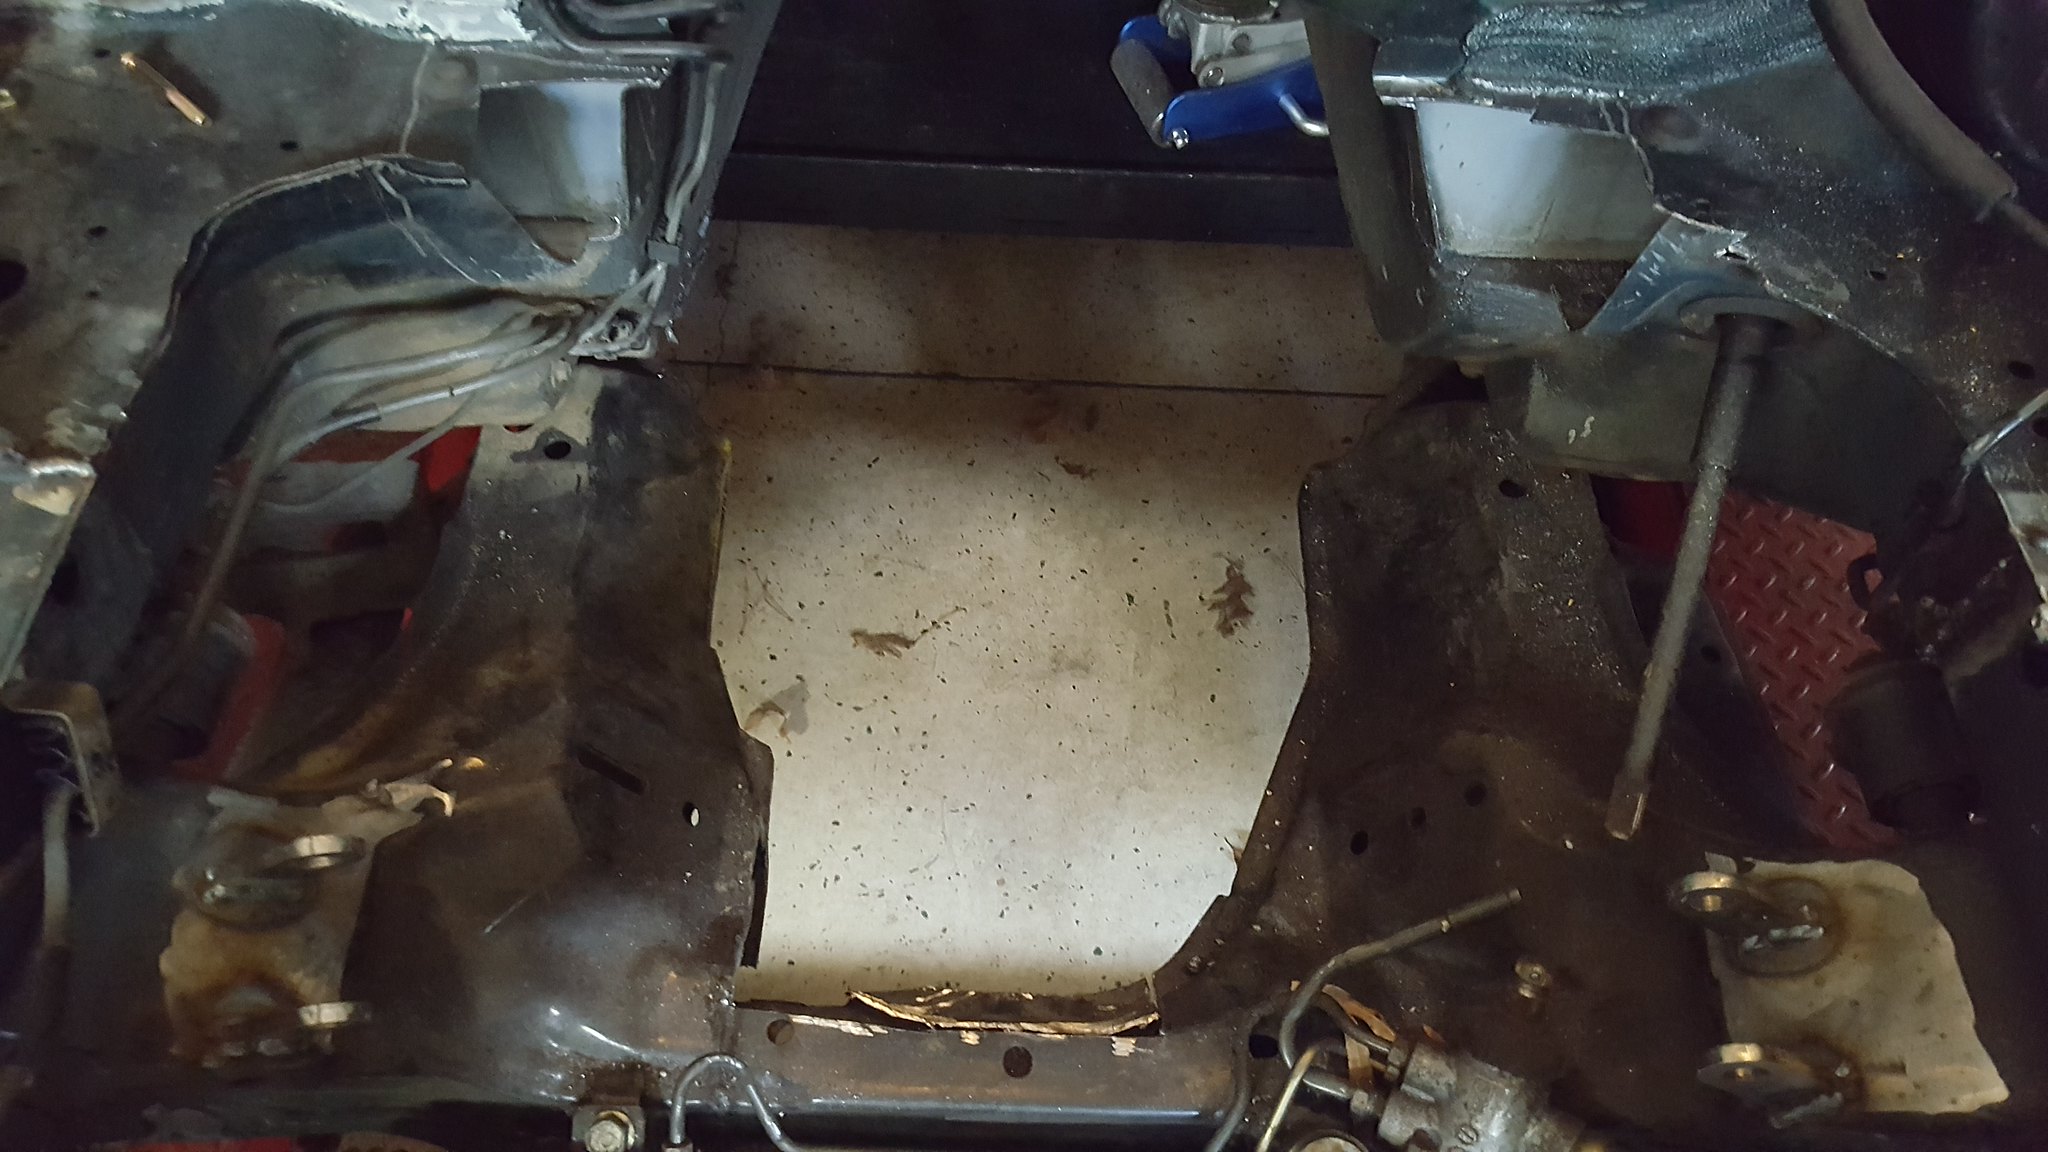
20180414_175157 by Michael Crawford, on Flickr
revious challenge budget: 1326.58 recoup total: 800new money: had a driveshaft made: 2203 sway bars: 20
new total: 1566.58
recoup: 800im leaving the last budget update just as a reminder to myself.This weekend saw small, but major progress.First, I finished my shifter.
20180414_175135 by Michael Crawford, on Flickrfits my had perfectly, and provides nice short throws.The reason this was so major is that this was the last thing that needed to be fabricated to mate the new Gmv6 drivetrain to the miata. The last thing. The rest is simply connecting the dots.This means that I can now focus on finishing the seam welding, finishing the crossmember surgery, finsihing the firewall, clean, paint, etc. but all pushes it towards the light of first fire! Due to the challenges of the last few months, I don't believe its on track for the $2018 challenge any more. I have far too far to go in the next few months, which would leave me with no testing time. Which is why we didn't finish higher with the AMC. And with as off the wall as this one is, I definitely need testing time. So, im going to keep plugging away at it. See where/when it gets done, and how much time till the show I have.But first, I probably need to deal with this.
20180414_175157 by Michael Crawford, on Flickr
Reply
0
0
04-29-2018, 05:45 PM
#51
Junior Member
Thread Starter
Join Date: Nov 2017
Posts: 112
Total Cats: 7
Challenge budget so farrevious challenge budget: 1326.58 recoup total: 800new money: seam sealer: 33.61 from amazonprimer and exhaust paint (free from trash day) white valspar: 14.97
black valspar: 32..50
safety red: 9.97goody box of 3400 parts: free (wvtumbler wouldn't take my money, but I owe him beer when I meet him) hydraulic clutch fittings: amazon 18.99
36 inch clutch line, ebay: 15.75 new total: 1692.37
recoup: 800for those that care, the current budget total is everything that ive purchased for this project. I have not prorated my latest supplies, as I don't know how much I am going to use yet. But im CERTAIN I wont use the full gallon of black. Also, the budget still contains things that I no longer plan to use at this time, like the SAFC. But im keeping it all tallied in at this time for my own records.Anyway, a couple of times a year my town does hazardous materials pickup free on curbside. So I went riding around as its also a good time to score bulk trash items as well. Didn't really get anything good except some rusty metal primer and silver high heat paint in half used cans from a couple of blocks over. So I used the high heat on the exhaust. Its damn near chrome. Not a fan, but who will see it?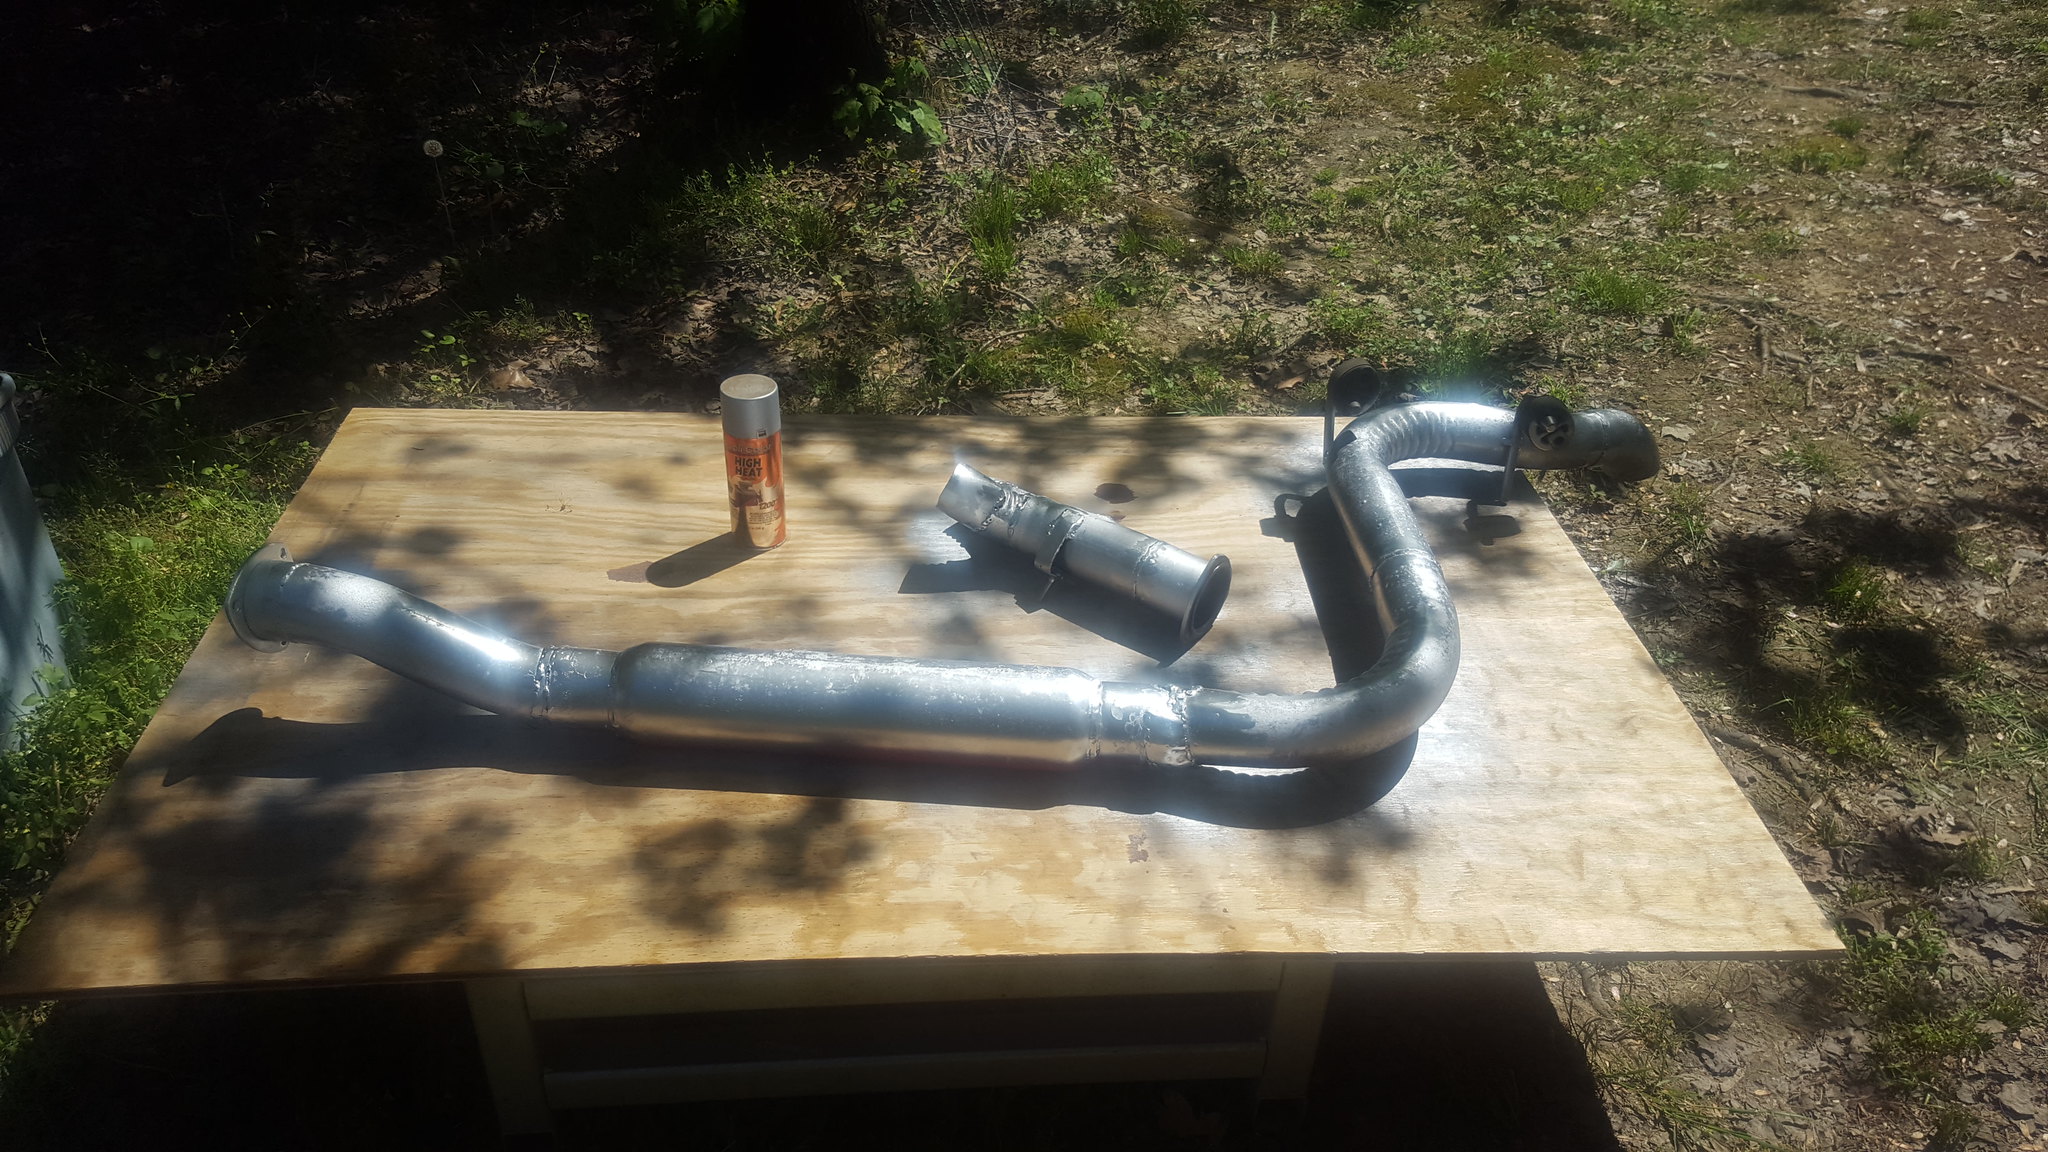
20180420_151121 by Michael Crawford, on Flickrive also begun the tedious task of grinding down welds. And re-welding some spots that need it. And welding some spots that I missed. Or dad missed. Or we both missed. After grinding and im happy with them, im shooting them with the free rusty metal primer. That then tells me whether I need to grind more, or im good. Again, tedious. The passengers side is fully welded except for capping the wing I cut in the engine bay. The driver side has a ways to go yet. While welding, this happened.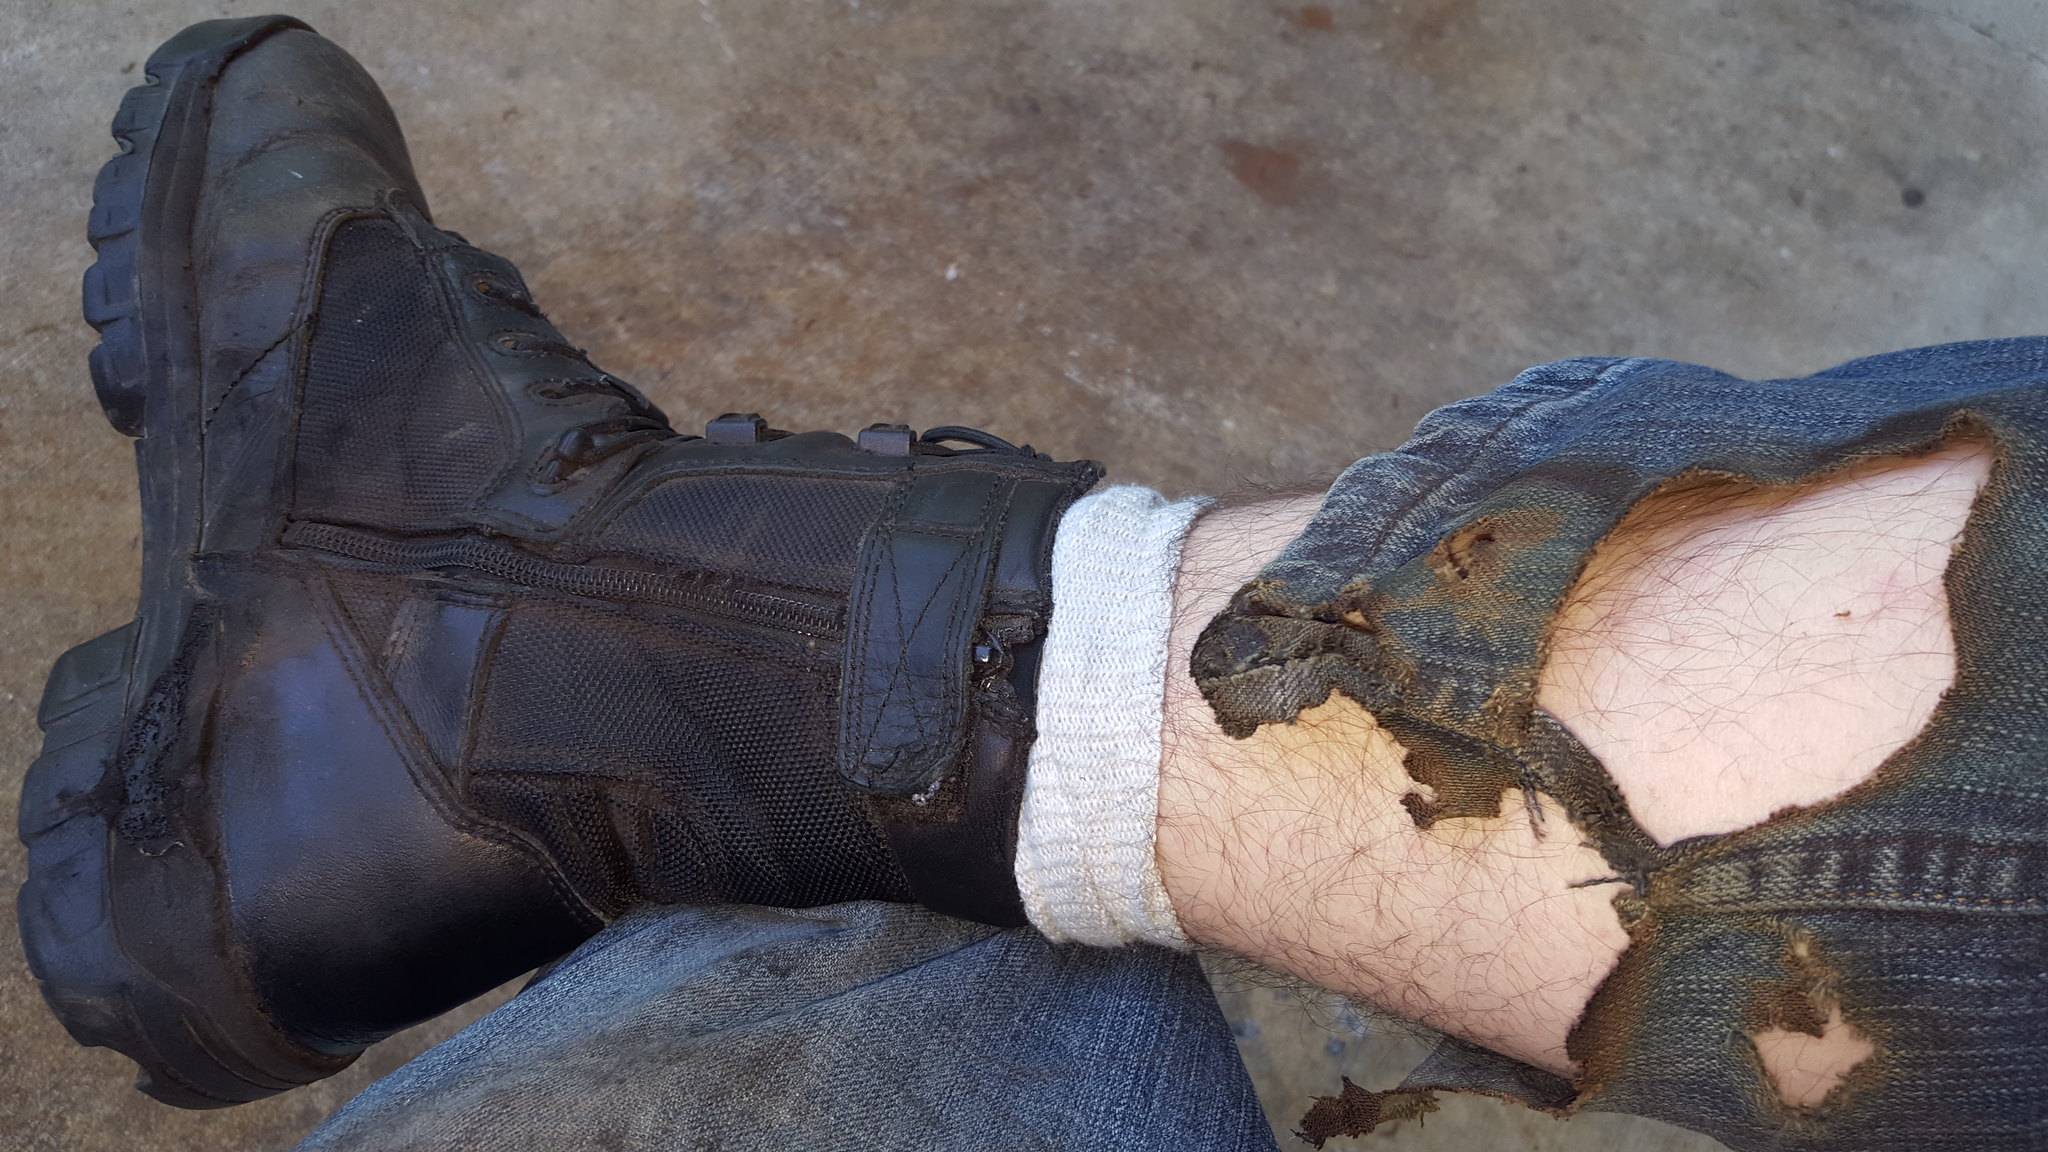
20180427_183342 by Michael Crawford, on Flickrthat sucked. But no injury, just a hot foot and some lost hair. But here's the passengers side after grinding and welding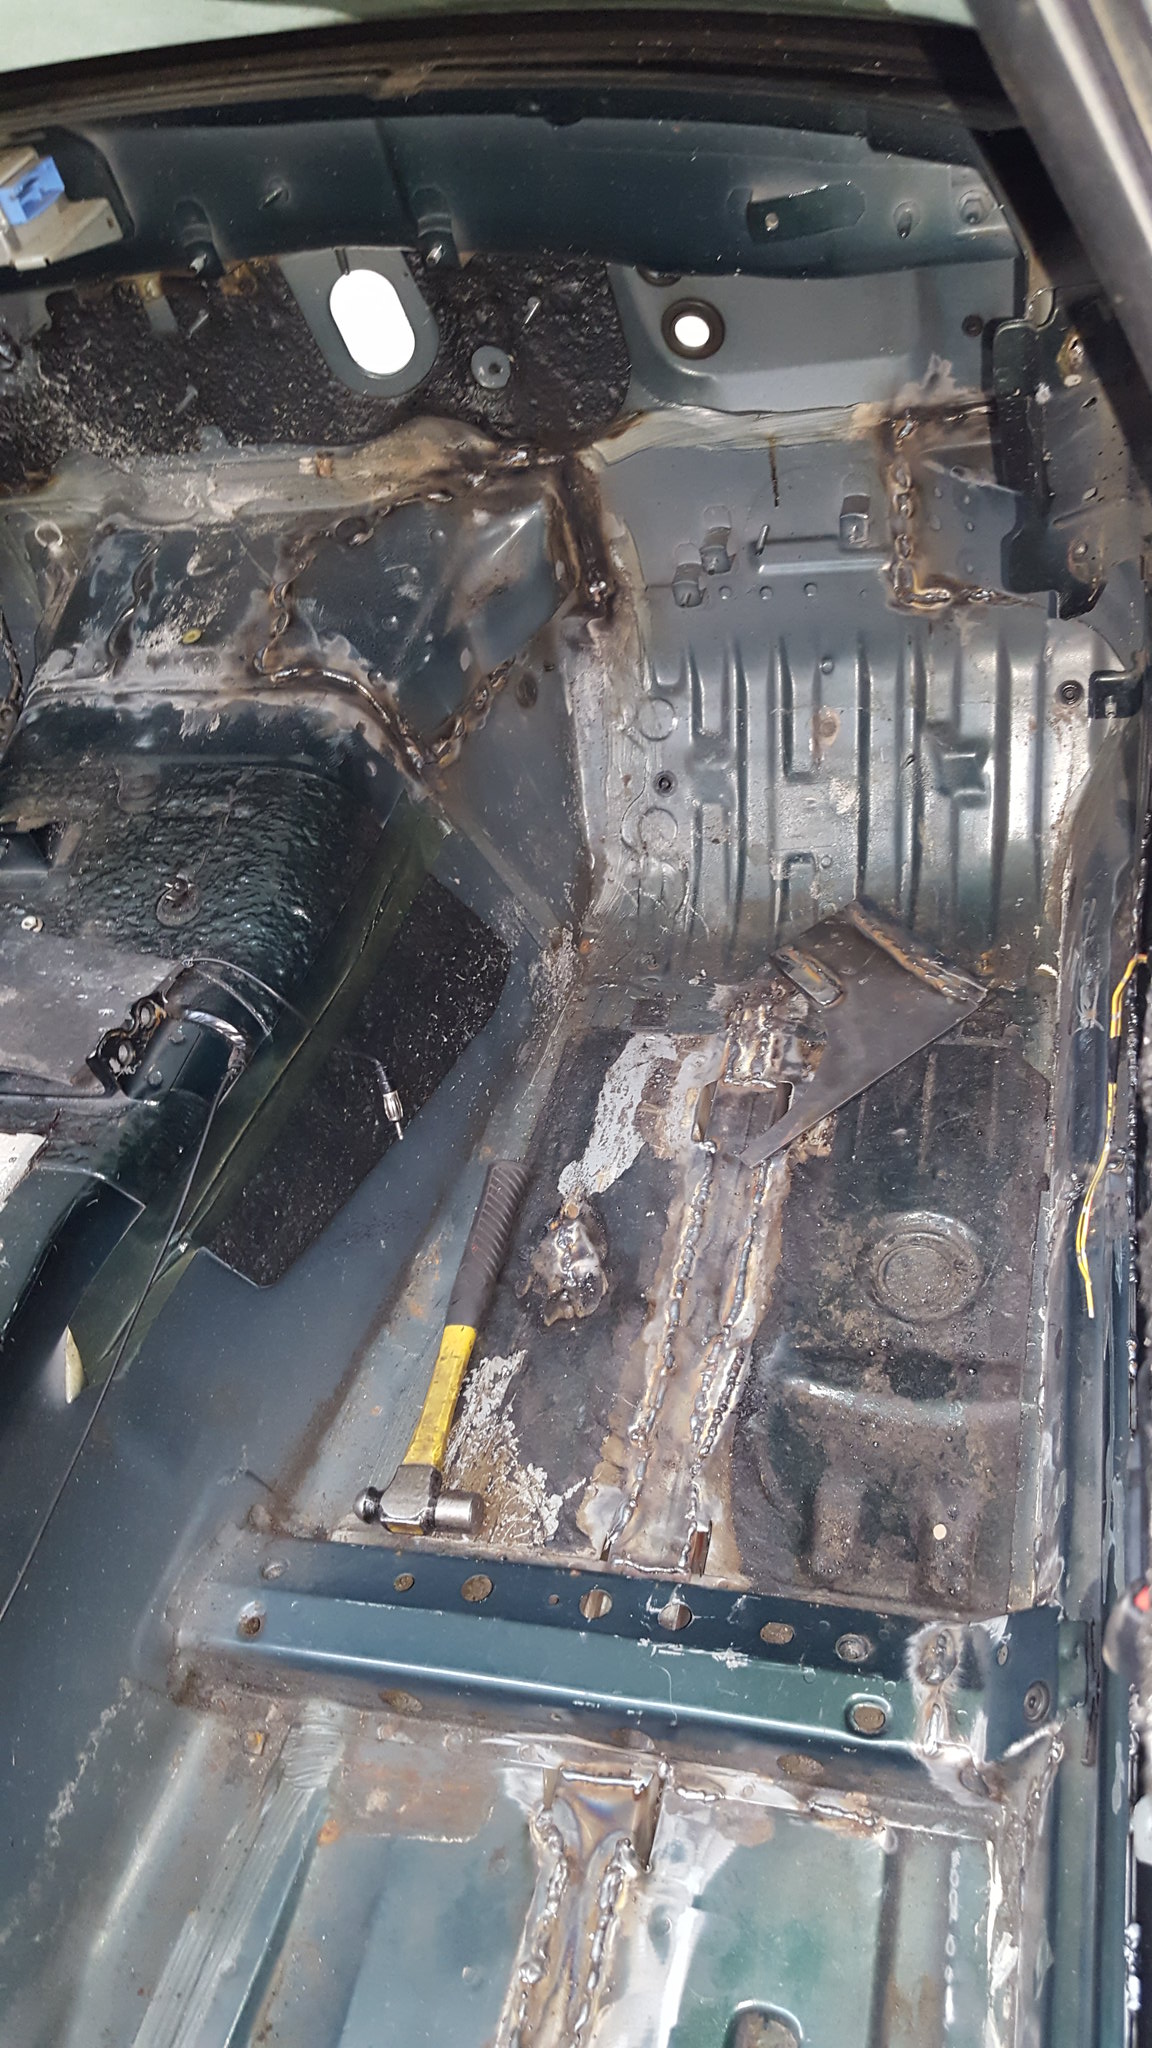
20180427_183209 by Michael Crawford, on Flickr
20180427_183219 by Michael Crawford, on Flickrapparently I didn't take a closeup of the ground down welds primed. But I experimented with a section I though was good enough. Used a cut down 1 inch brush and out some seam sealer down on the welded joints, then covered in my white vlaspar. Its good enough for my race car. But I learned much from these small sections, so the rest will be that much better.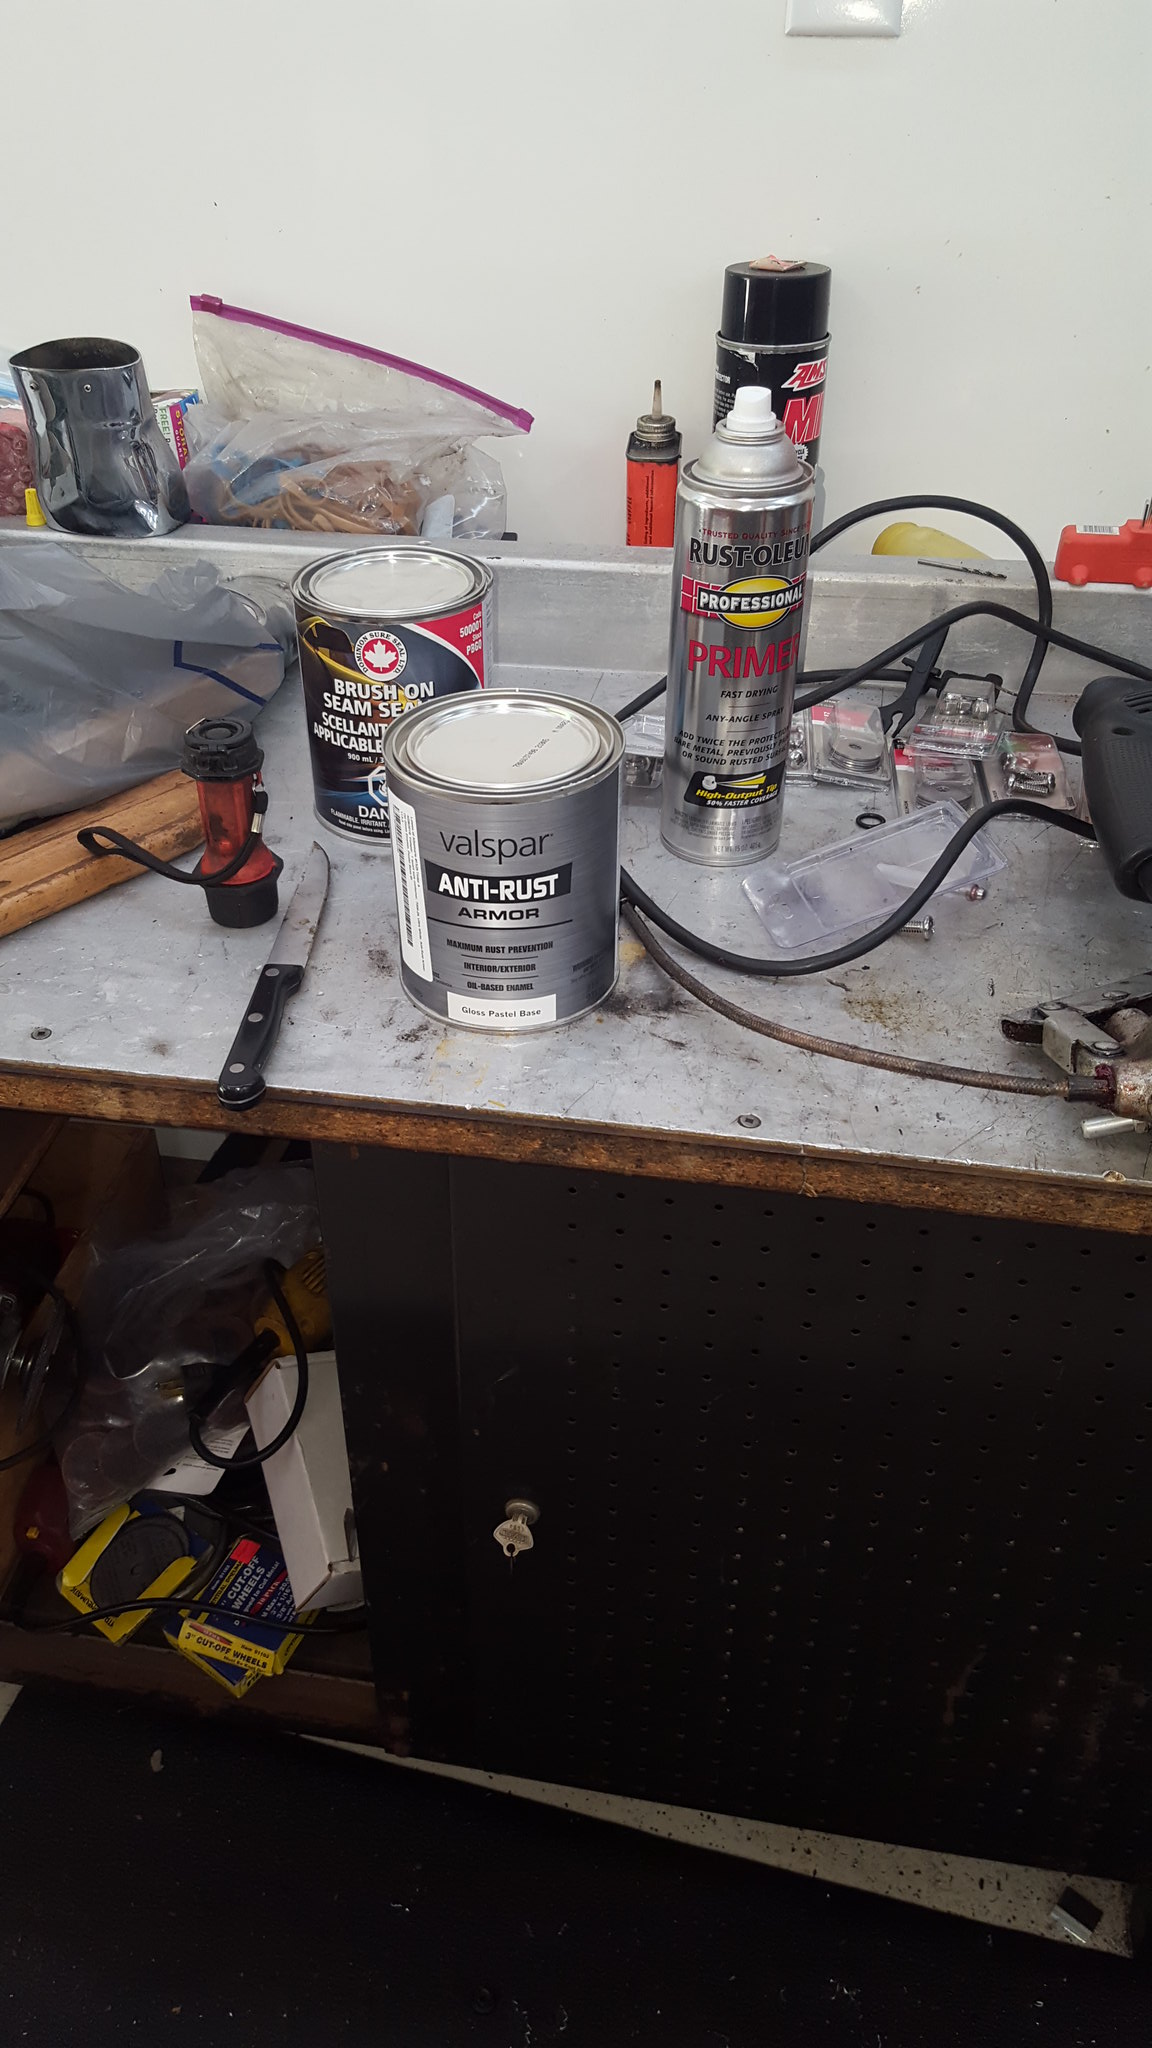
20180429_124608 by Michael Crawford, on Flickr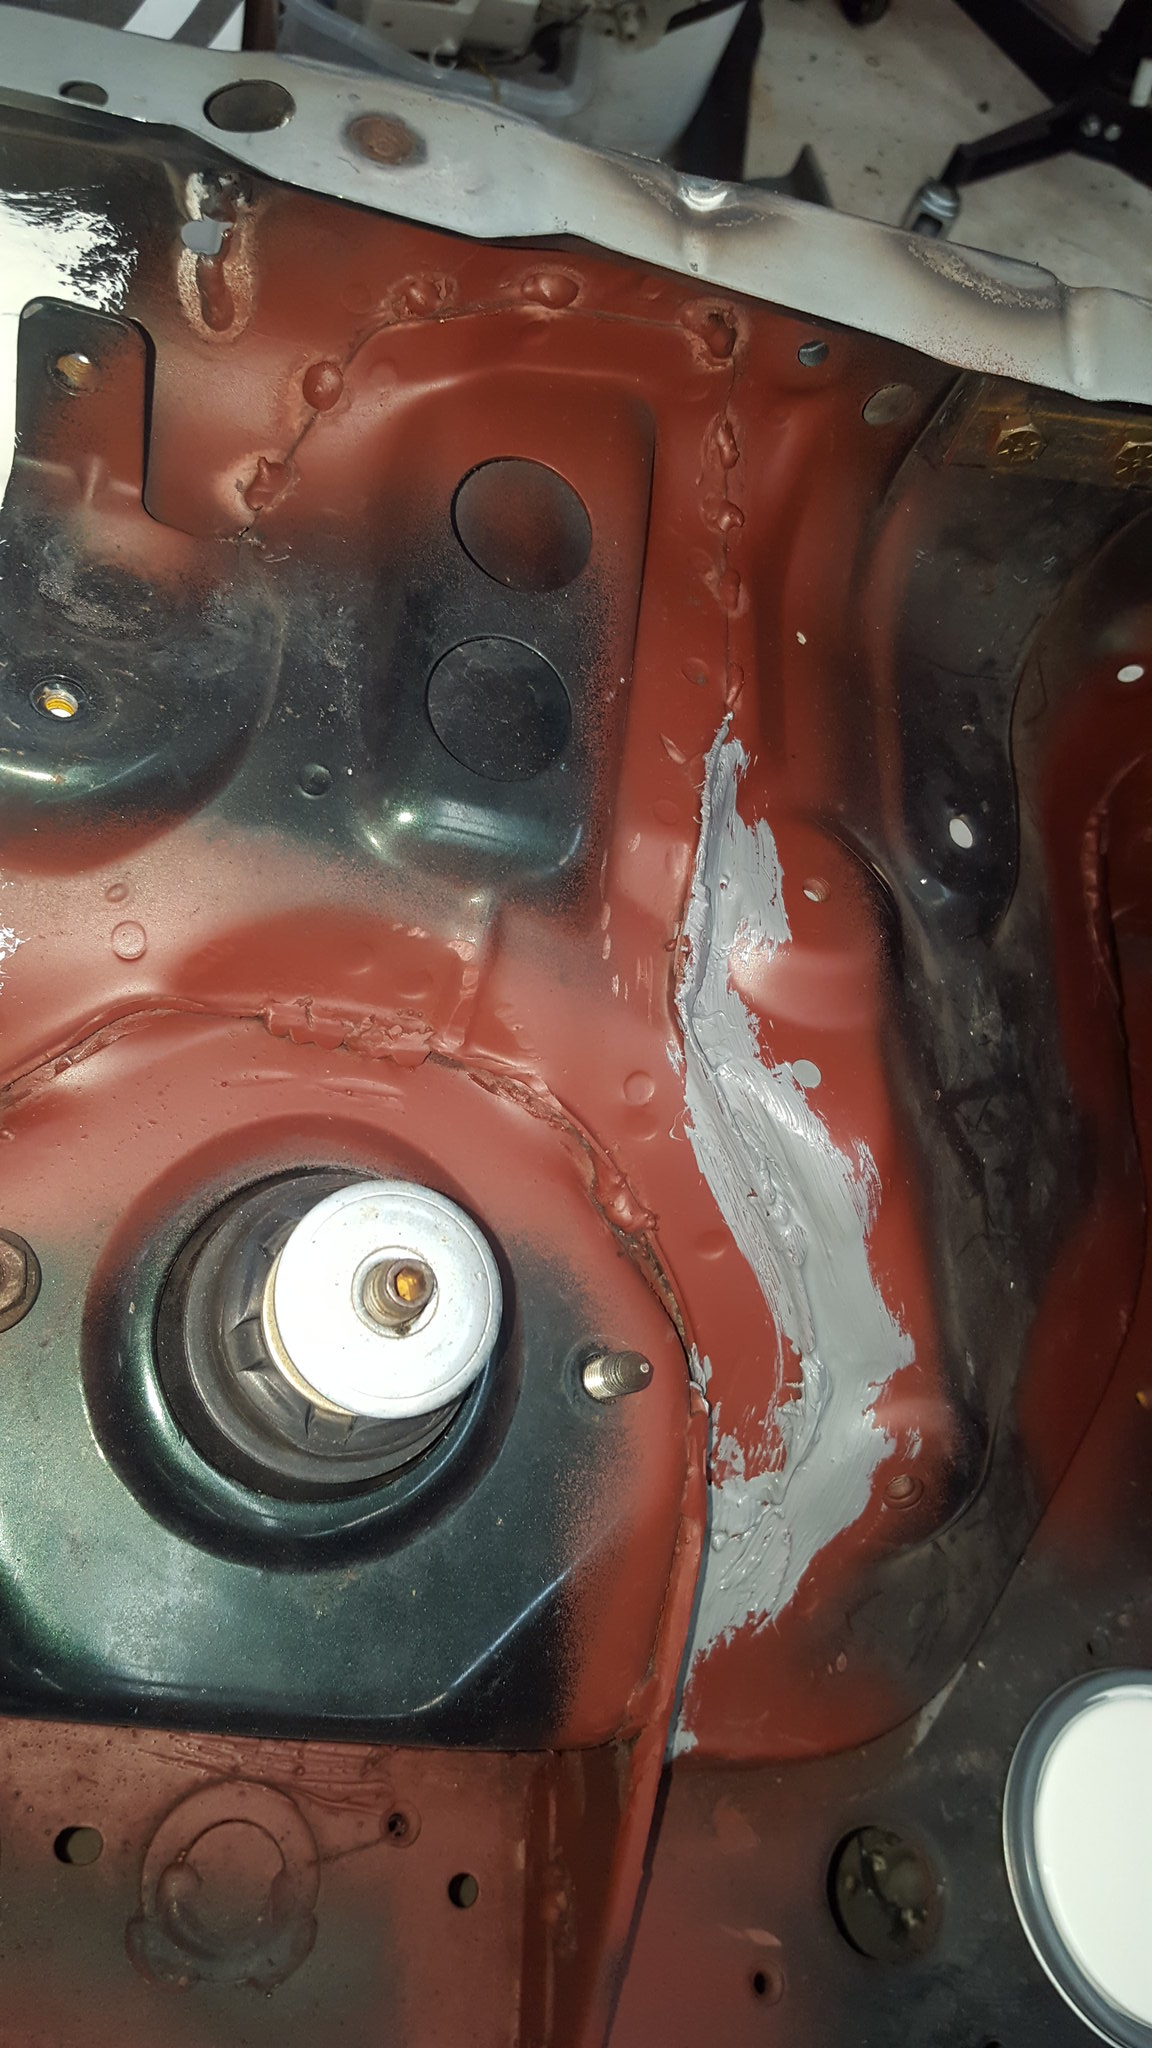
20180429_124508 by Michael Crawford, on Flickr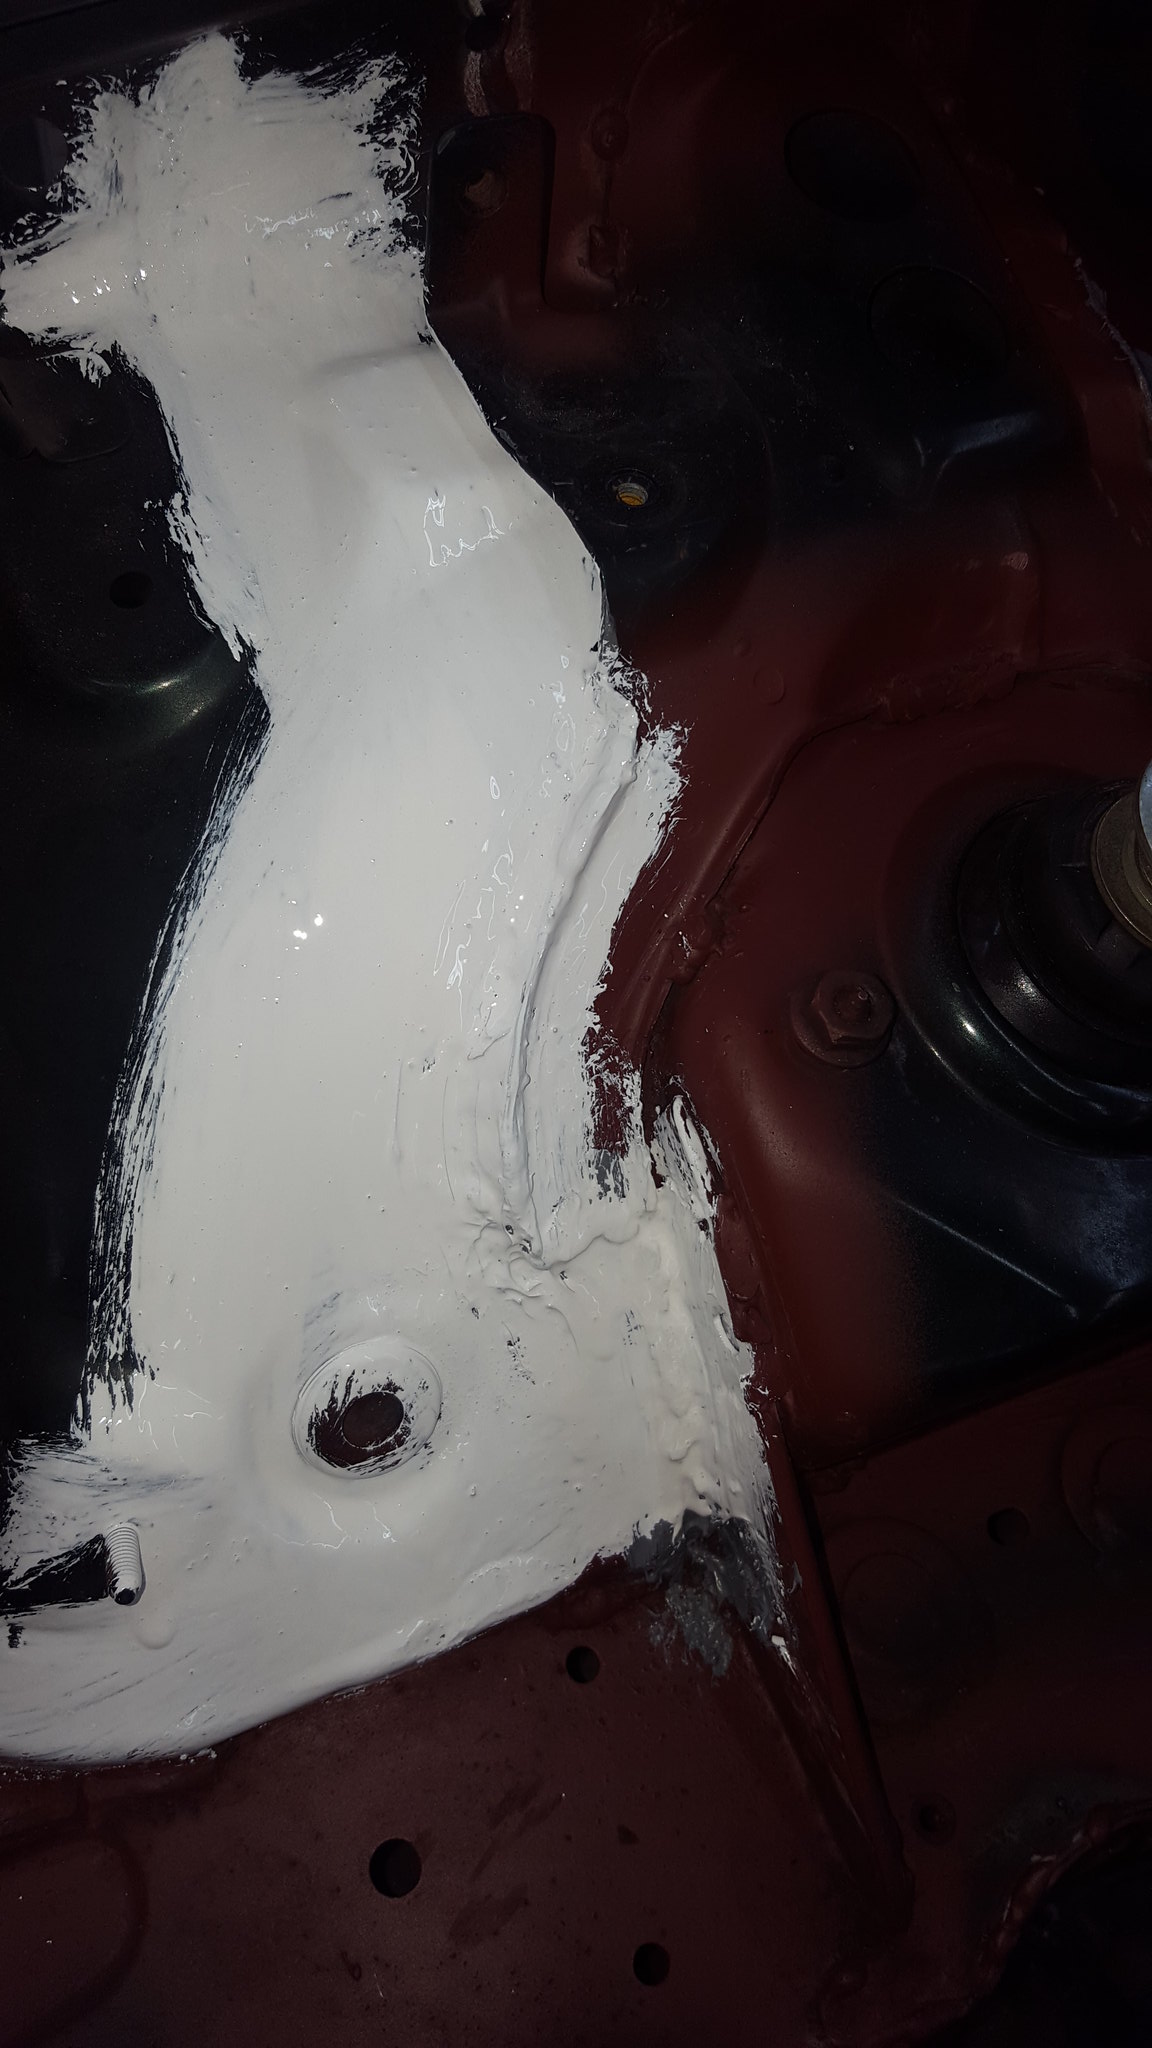
20180429_124502 by Michael Crawford, on Flickr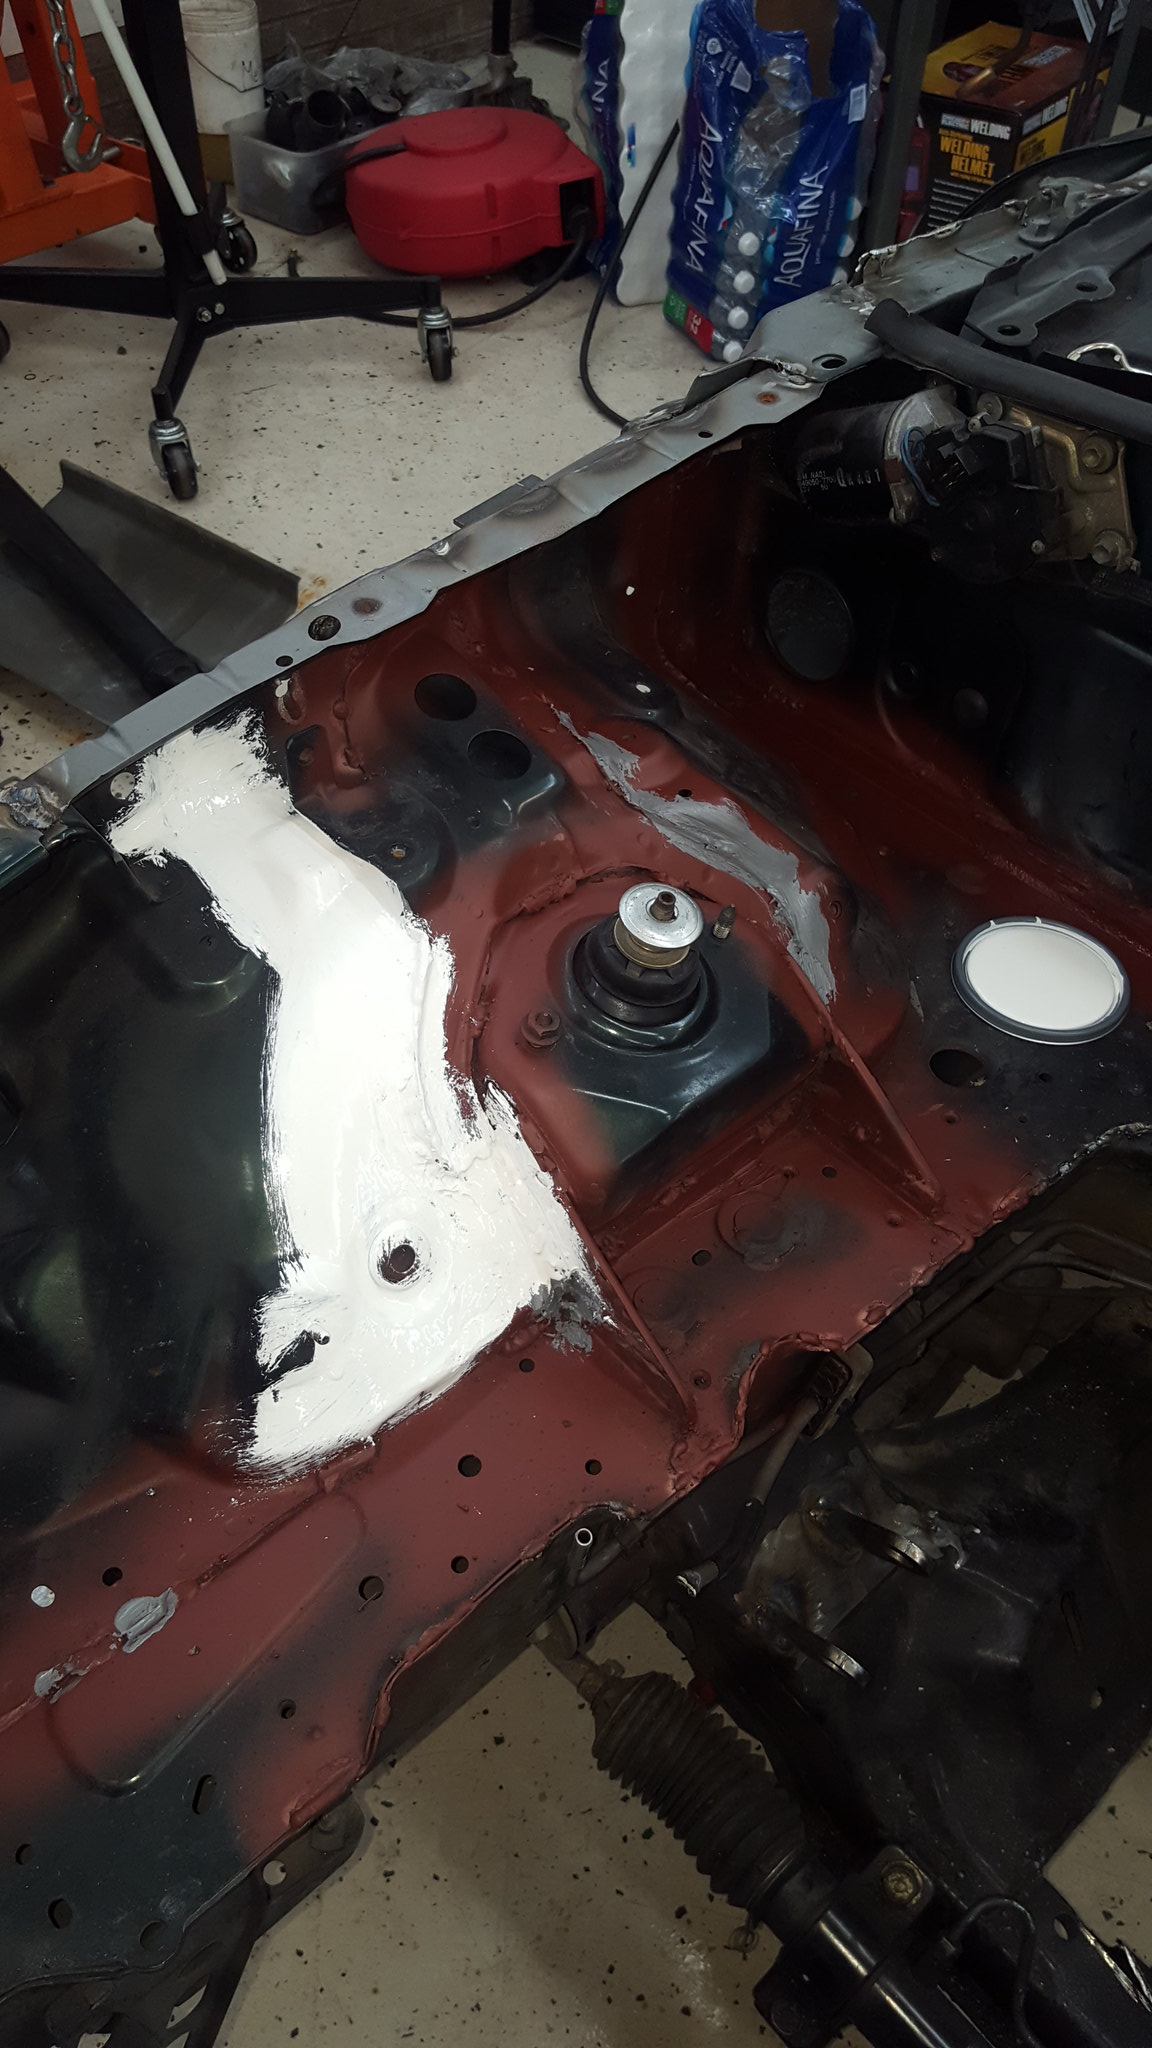
20180429_124455 by Michael Crawford, on Flickrive also ground down and primed the underside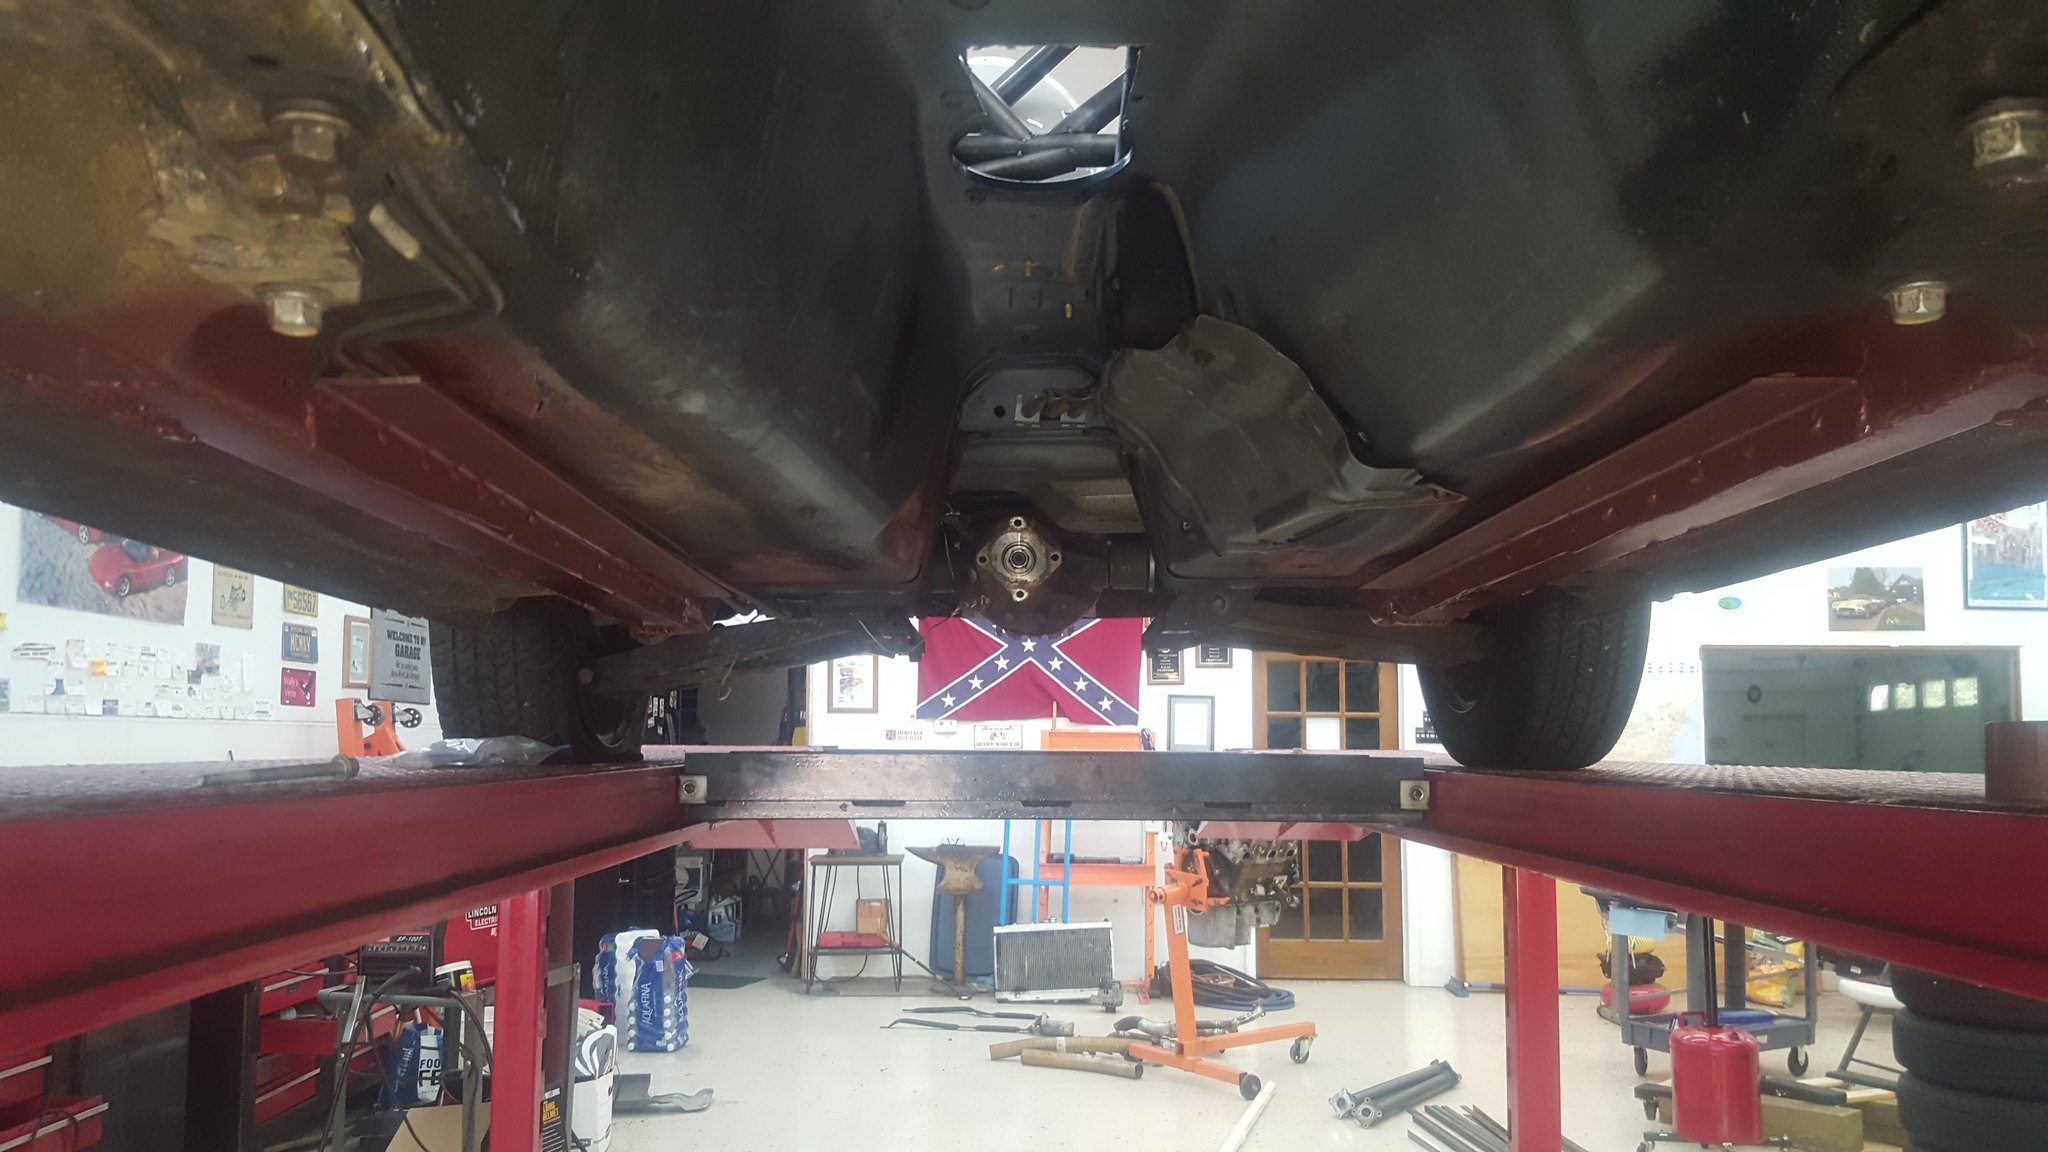
20180420_151337 by Michael Crawford, on Flickr and the butterfly brace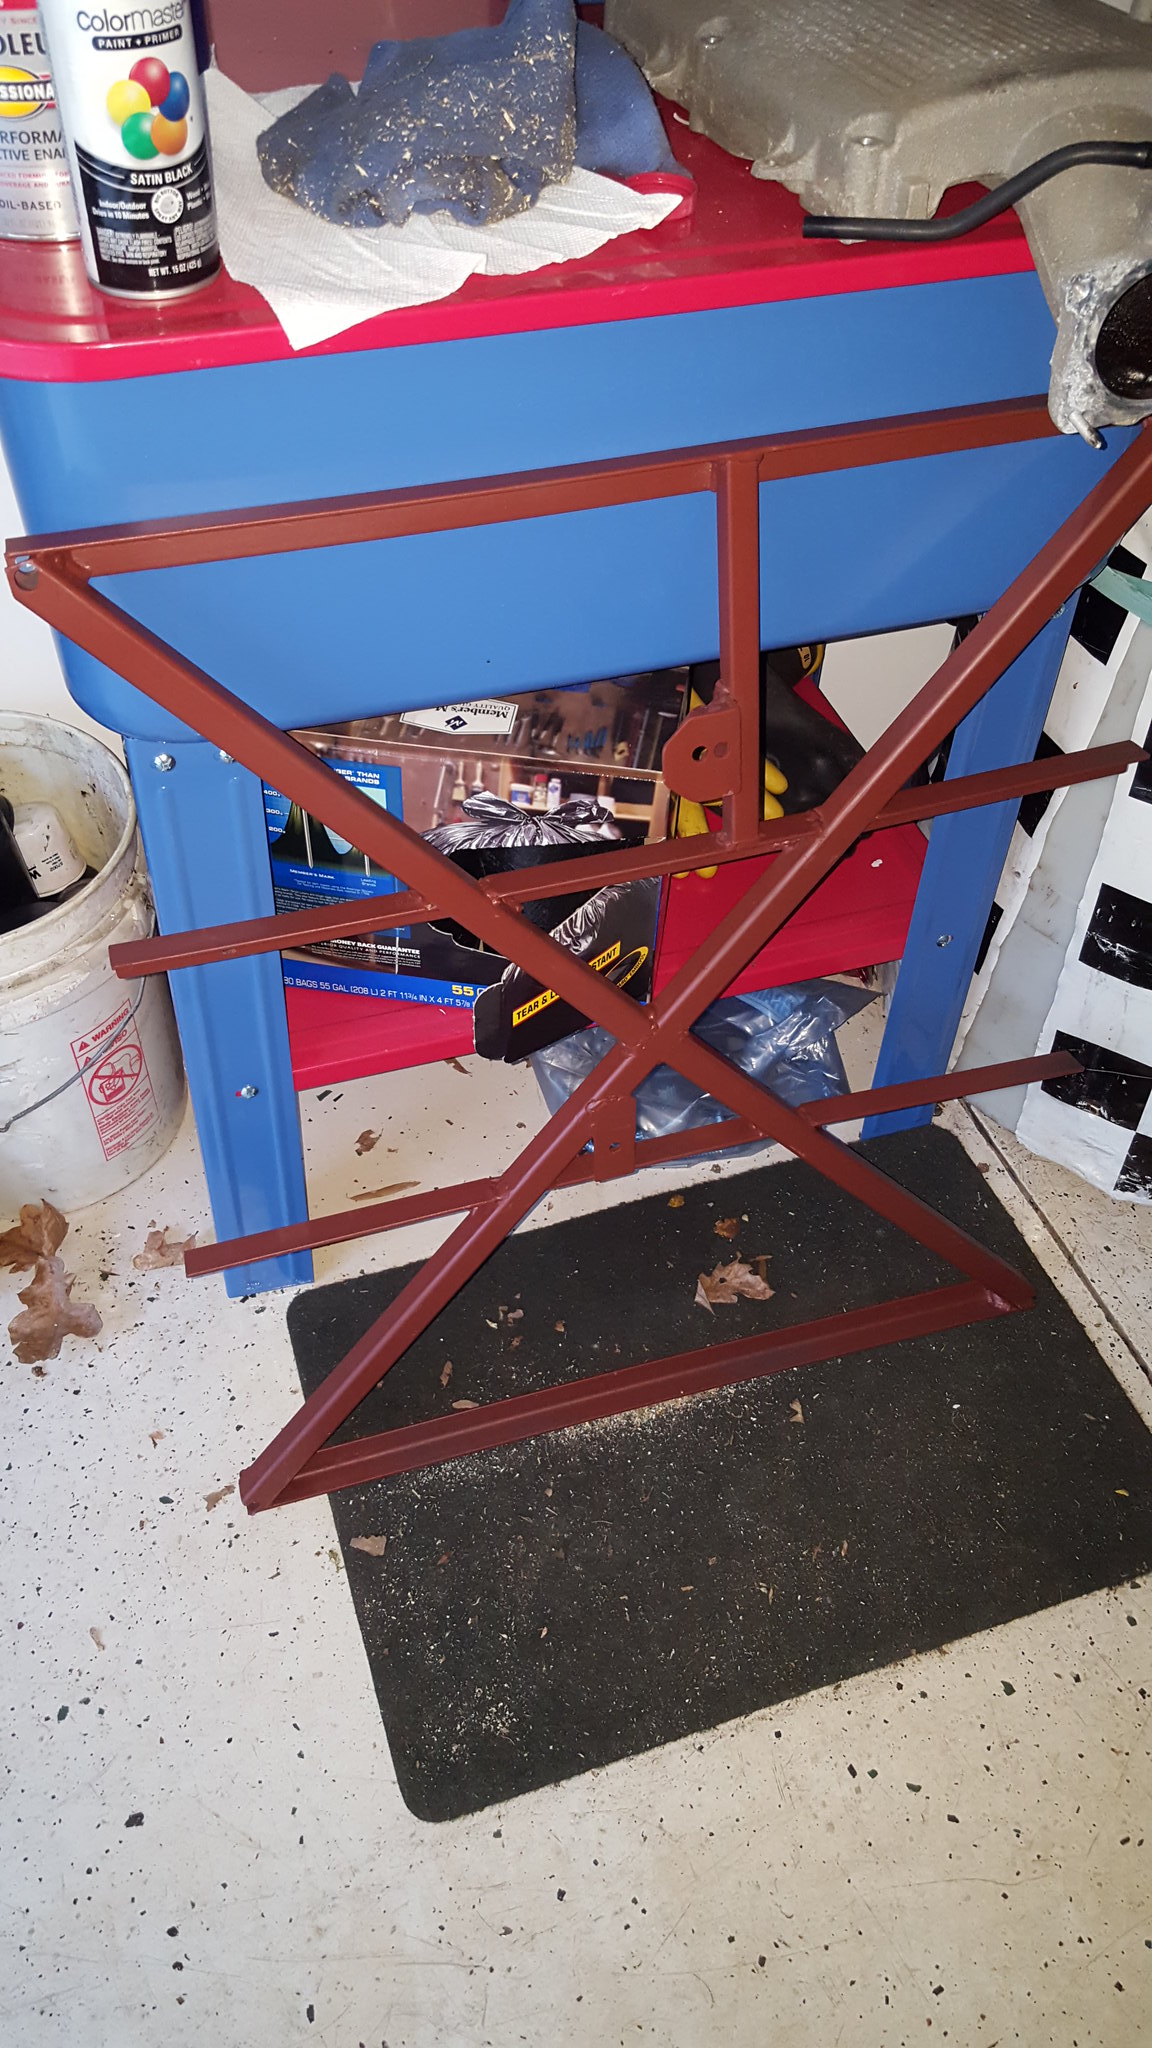
20180427_192724 by Michael Crawford, on Flickrim painting the butterfly, frog arms, seat mount, tow hooks, and engine lift points red. The trans tunnel and engine bay will be white. The interior gloss black. The car has a definite theme coming, and its laid out in my head pretty fully, but it will be quite a while until the full look is realized. But its a tribute to the man I admire the most in this life, and that has fostered my love of cars, god, and family.Lastly, ive been collecting parts. Hydraulic clutch line stuff. Gaskets. Some maintenance parts. Lots were given to me by a fellow forum member that did this same swap in a chumpcar RX7. I want to say a big public shout out to ROB!!! thanks man, and as I said I owe you beer and a burger next time were in the same state.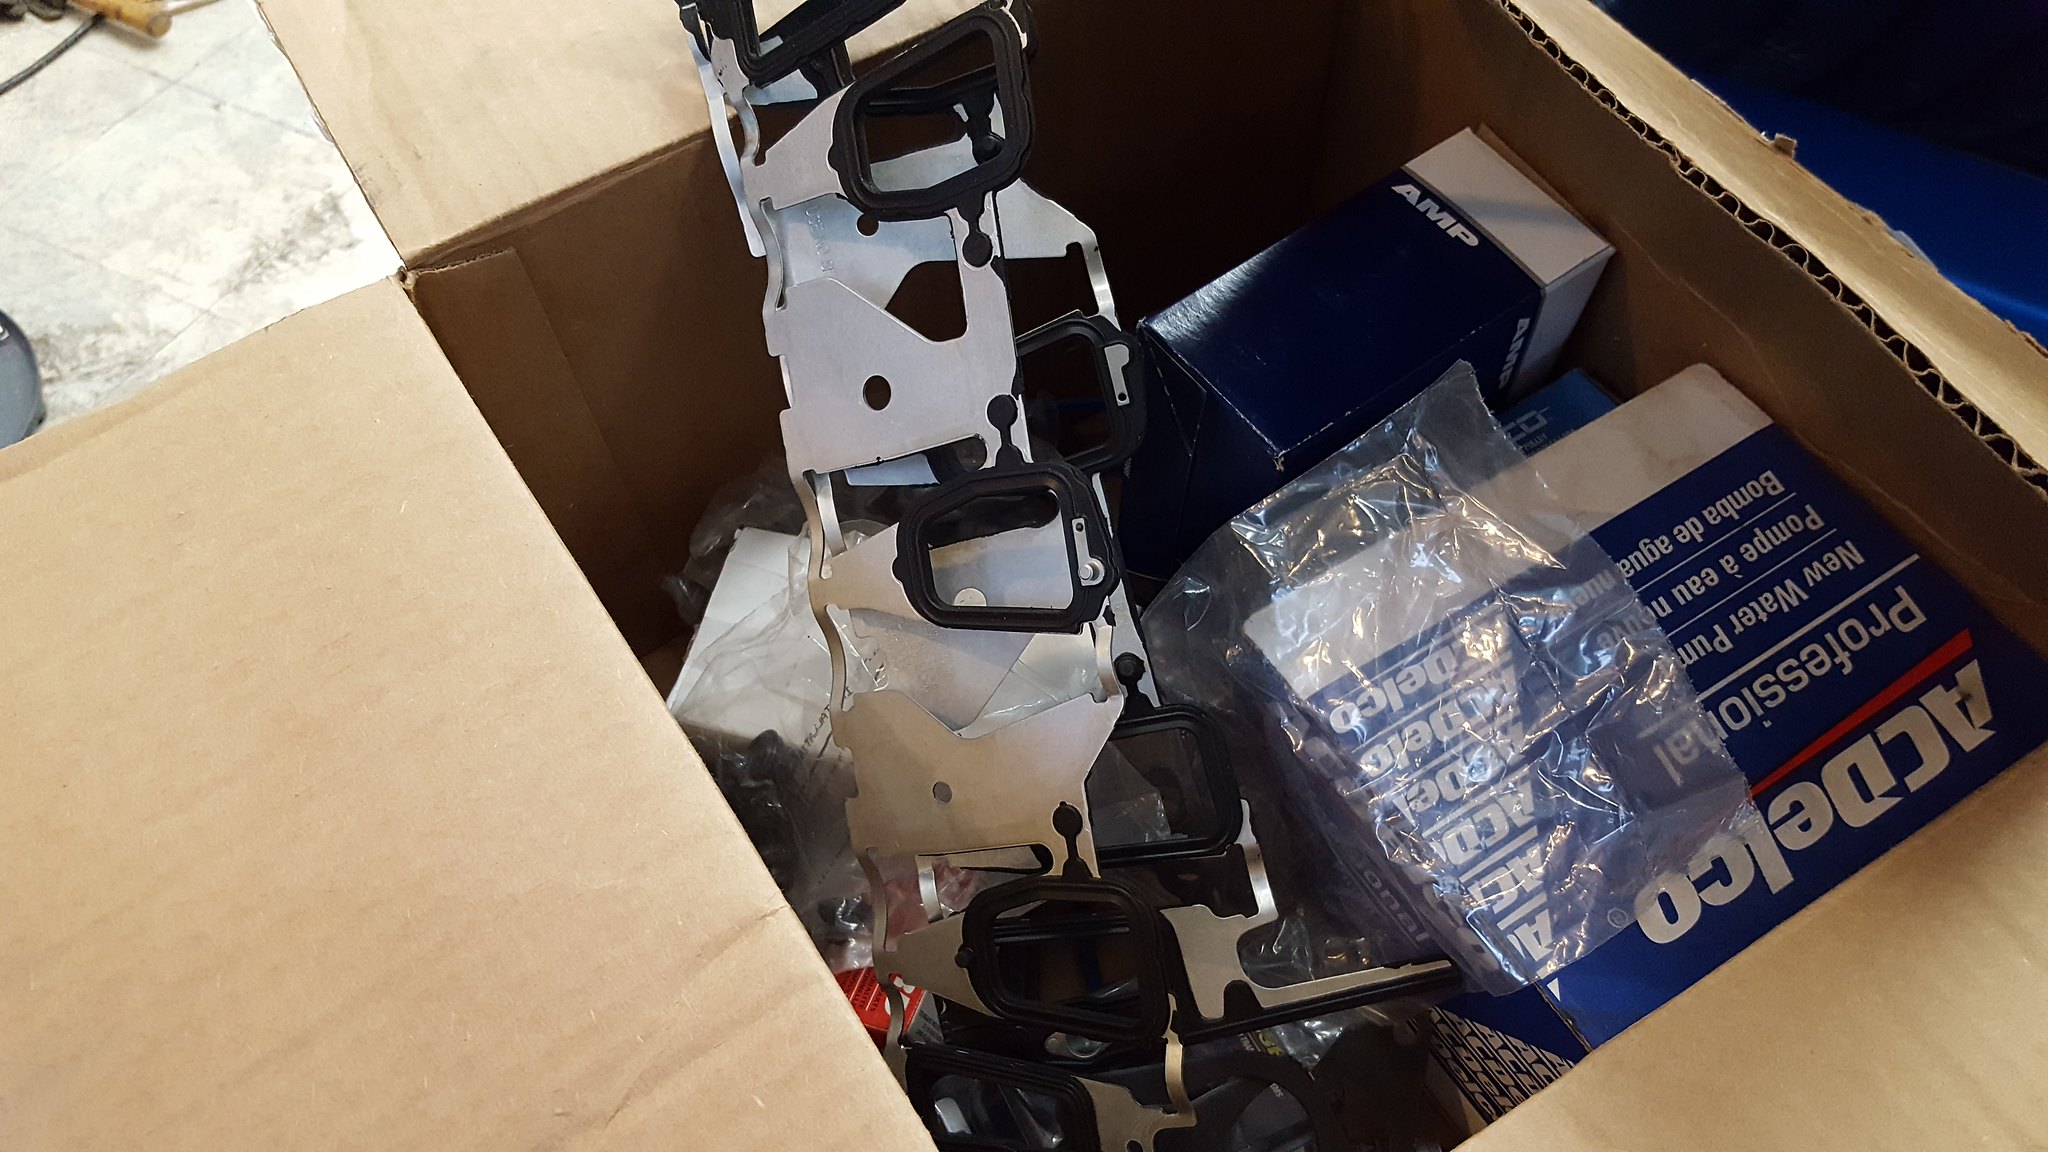
20180416_181453 by Michael Crawford, on Flickruntil next time friends. Itll be a couple of weeks until the next update, as were headed to Colorado for vacation at the end of the week. Meeting the rest of the family out there for my parents 50th wedding anniversary.
revious challenge budget: 1326.58 recoup total: 800new money: seam sealer: 33.61 from amazonprimer and exhaust paint (free from trash day) white valspar: 14.97black valspar: 32..50
safety red: 9.97goody box of 3400 parts: free (wvtumbler wouldn't take my money, but I owe him beer when I meet him) hydraulic clutch fittings: amazon 18.99
36 inch clutch line, ebay: 15.75 new total: 1692.37
recoup: 800for those that care, the current budget total is everything that ive purchased for this project. I have not prorated my latest supplies, as I don't know how much I am going to use yet. But im CERTAIN I wont use the full gallon of black. Also, the budget still contains things that I no longer plan to use at this time, like the SAFC. But im keeping it all tallied in at this time for my own records.Anyway, a couple of times a year my town does hazardous materials pickup free on curbside. So I went riding around as its also a good time to score bulk trash items as well. Didn't really get anything good except some rusty metal primer and silver high heat paint in half used cans from a couple of blocks over. So I used the high heat on the exhaust. Its damn near chrome. Not a fan, but who will see it?
20180420_151121 by Michael Crawford, on Flickrive also begun the tedious task of grinding down welds. And re-welding some spots that need it. And welding some spots that I missed. Or dad missed. Or we both missed. After grinding and im happy with them, im shooting them with the free rusty metal primer. That then tells me whether I need to grind more, or im good. Again, tedious. The passengers side is fully welded except for capping the wing I cut in the engine bay. The driver side has a ways to go yet. While welding, this happened.
20180427_183342 by Michael Crawford, on Flickrthat sucked. But no injury, just a hot foot and some lost hair. But here's the passengers side after grinding and welding
20180427_183209 by Michael Crawford, on Flickr
20180427_183219 by Michael Crawford, on Flickrapparently I didn't take a closeup of the ground down welds primed. But I experimented with a section I though was good enough. Used a cut down 1 inch brush and out some seam sealer down on the welded joints, then covered in my white vlaspar. Its good enough for my race car. But I learned much from these small sections, so the rest will be that much better.
20180429_124608 by Michael Crawford, on Flickr
20180429_124508 by Michael Crawford, on Flickr
20180429_124502 by Michael Crawford, on Flickr
20180429_124455 by Michael Crawford, on Flickrive also ground down and primed the underside
20180420_151337 by Michael Crawford, on Flickr and the butterfly brace
20180427_192724 by Michael Crawford, on Flickrim painting the butterfly, frog arms, seat mount, tow hooks, and engine lift points red. The trans tunnel and engine bay will be white. The interior gloss black. The car has a definite theme coming, and its laid out in my head pretty fully, but it will be quite a while until the full look is realized. But its a tribute to the man I admire the most in this life, and that has fostered my love of cars, god, and family.Lastly, ive been collecting parts. Hydraulic clutch line stuff. Gaskets. Some maintenance parts. Lots were given to me by a fellow forum member that did this same swap in a chumpcar RX7. I want to say a big public shout out to ROB!!! thanks man, and as I said I owe you beer and a burger next time were in the same state.
20180416_181453 by Michael Crawford, on Flickruntil next time friends. Itll be a couple of weeks until the next update, as were headed to Colorado for vacation at the end of the week. Meeting the rest of the family out there for my parents 50th wedding anniversary.
Reply
0
0
05-03-2018, 07:10 PM
#52
Junior Member
Thread Starter
Join Date: Nov 2017
Posts: 112
Total Cats: 7
I lied. One more update before I leave.Ive been chipping away on lunch breaks this week. Grinding and cleaning up from the seam welding, then spraying the rustoleum primer on the bare metal. Every bit of brown you see is where we seam welded (that I have final prepped. Lots to go on the drivers side, and still some around the door and kick panel on the passengers)
20180501_191051 by Michael Crawford, on Flickr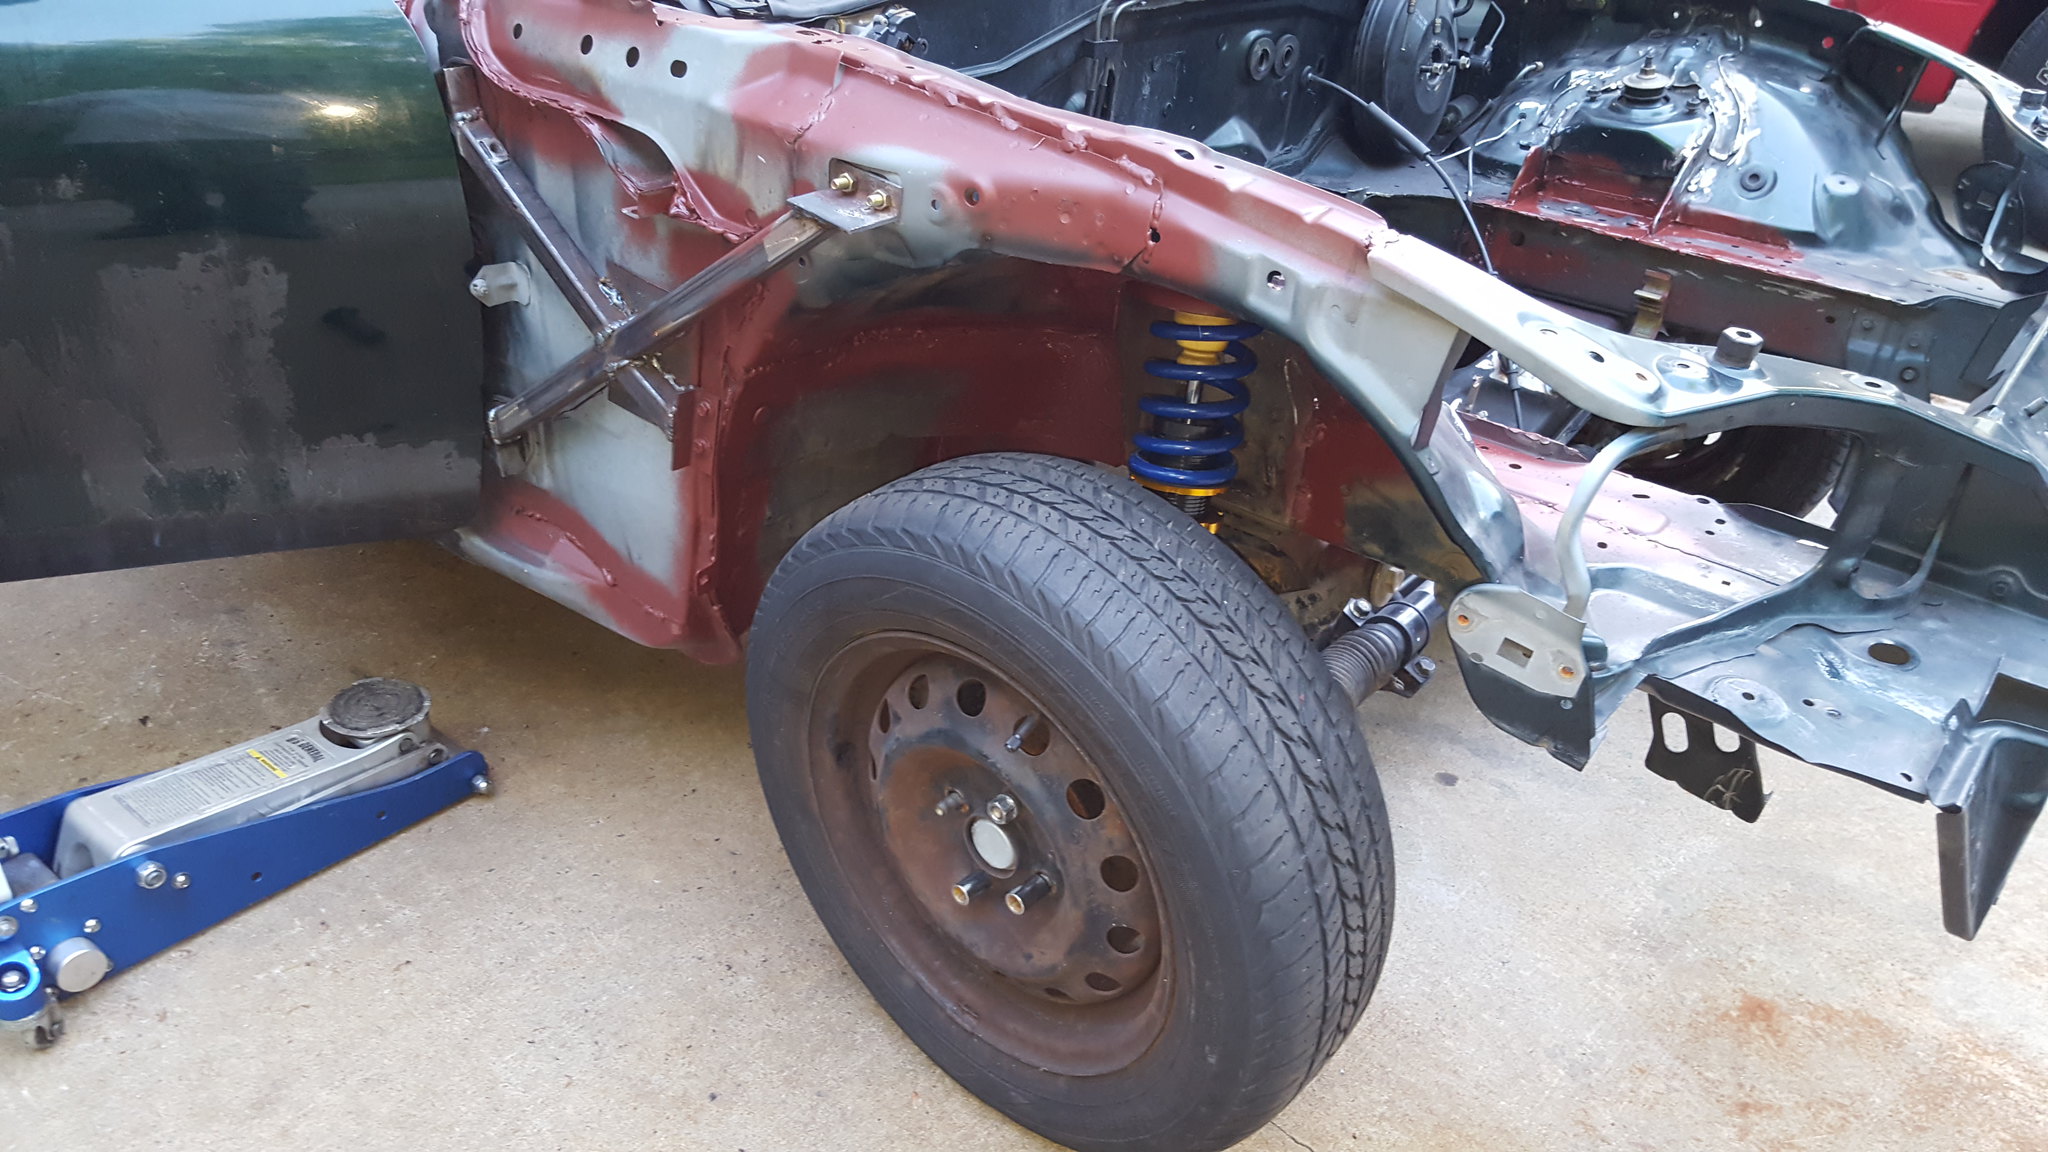
20180501_191103 by Michael Crawford, on Flickr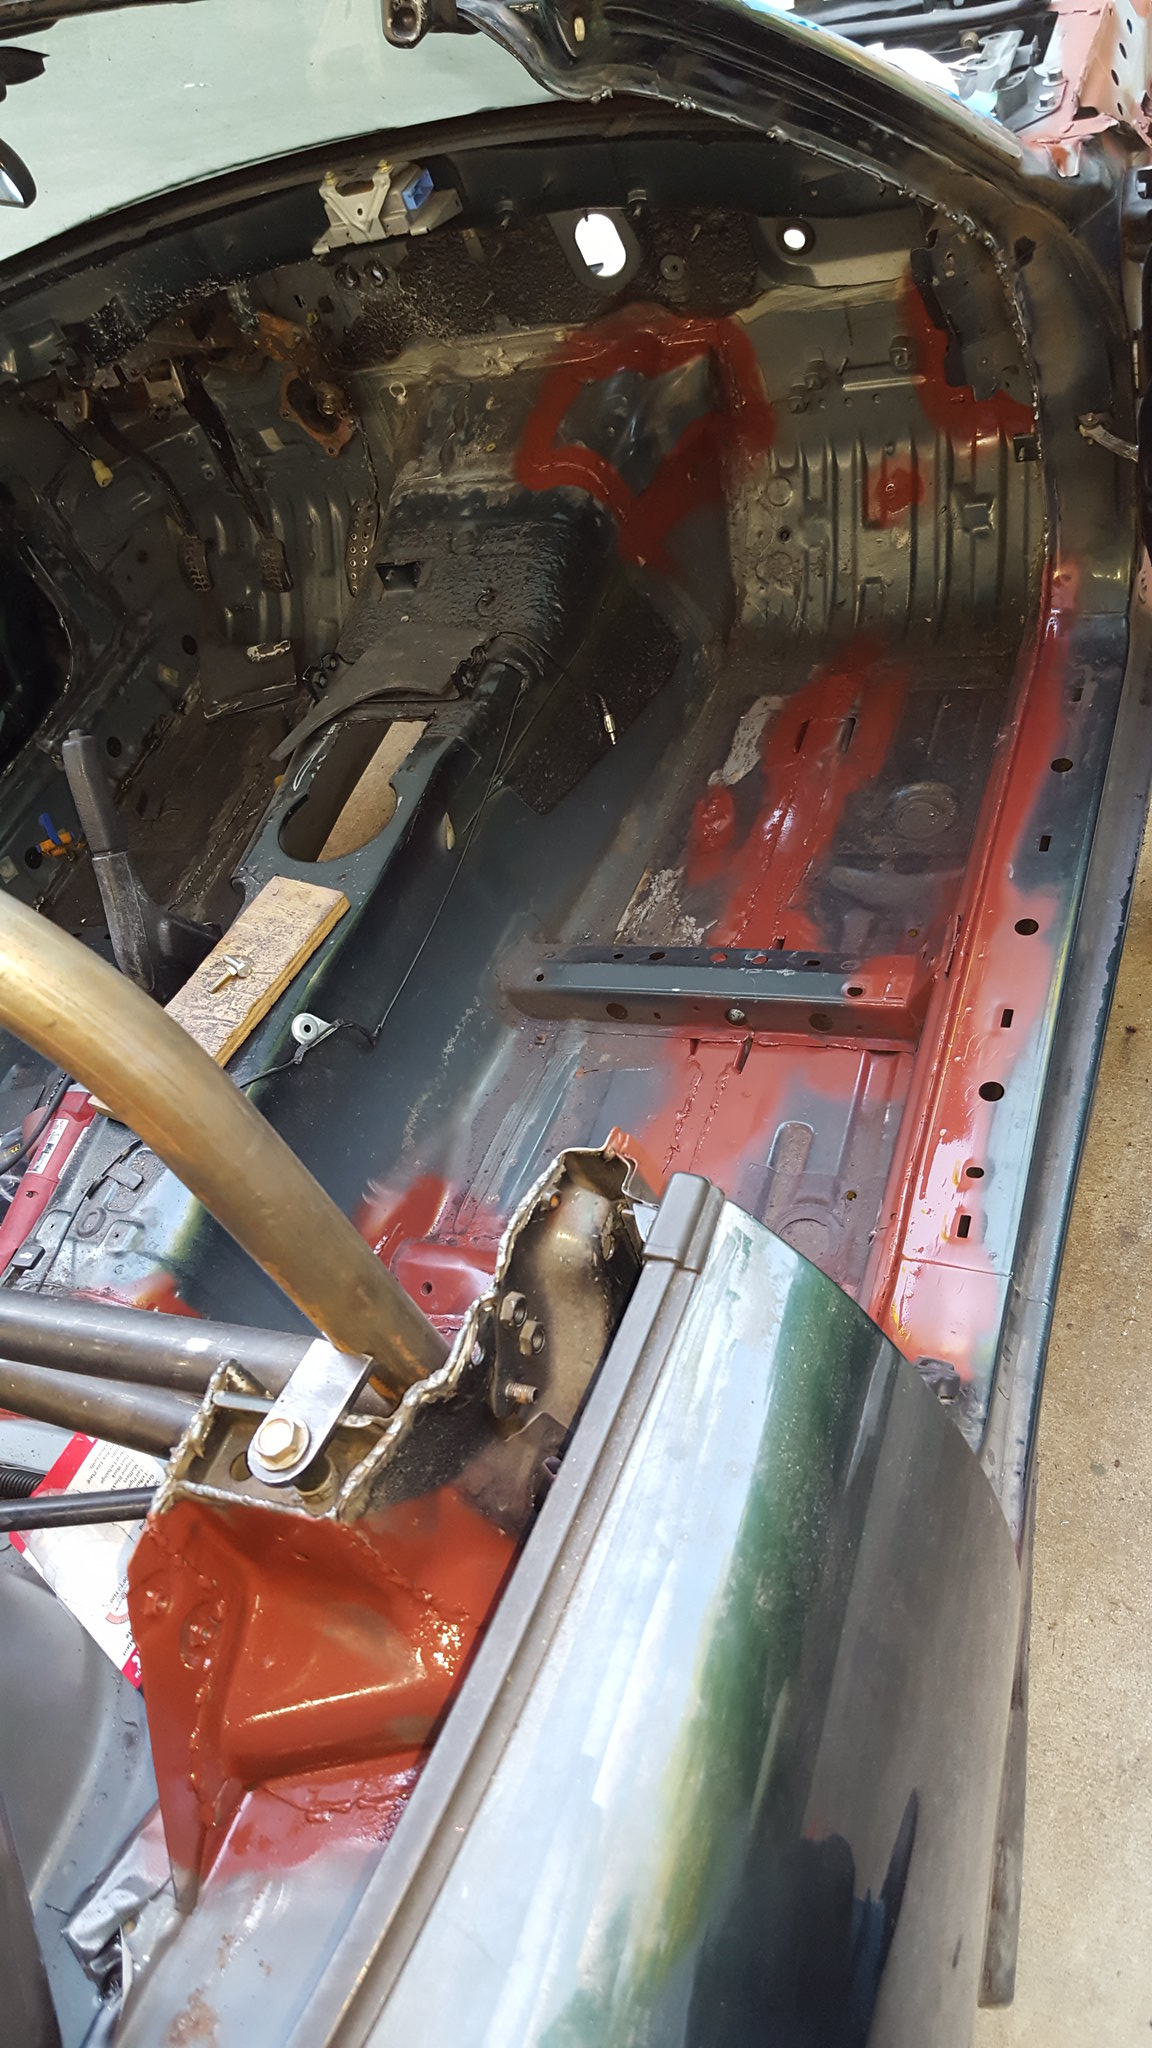
20180501_191124 by Michael Crawford, on FlickrI then moved onto seam sealer. There's only two main areas I want to make sure are “pretty”. The floor, and the engine bay. The rest will never really be seen, and if it is, its either because somebody is buying the car, or I ran them over. Neither of which is very likely.Remember im using the cheap brush-able seam sealer from amazon. It also looks far better in person than in the pictures. I think this stuff slightly self levels as it dries.In the engine bay, on the 90-ish degree joints, I wanted a fillet look like you would with bathtub caulk. I could NOT find a way to get it in there I was happy with. In the end, I dipped my finger in the can and worked in it with a finger painting motion. I did wear rubber gloves. The gloves did rip. There is seam sealer under my fingernails on my right hand that got me funny looks at work.The flatter sections, where the factory did a lap weld seam, I used a 1 inch bristle brush to apply, making sure I worked it into the cracks and crevasses. I smoothed it with a foam brush afterwards, but it really didn't change the cosmetic properties any, if at all. Im still not super happy with how it came out, and hopefully another round (light coating for appearance purposes) makes them come out better.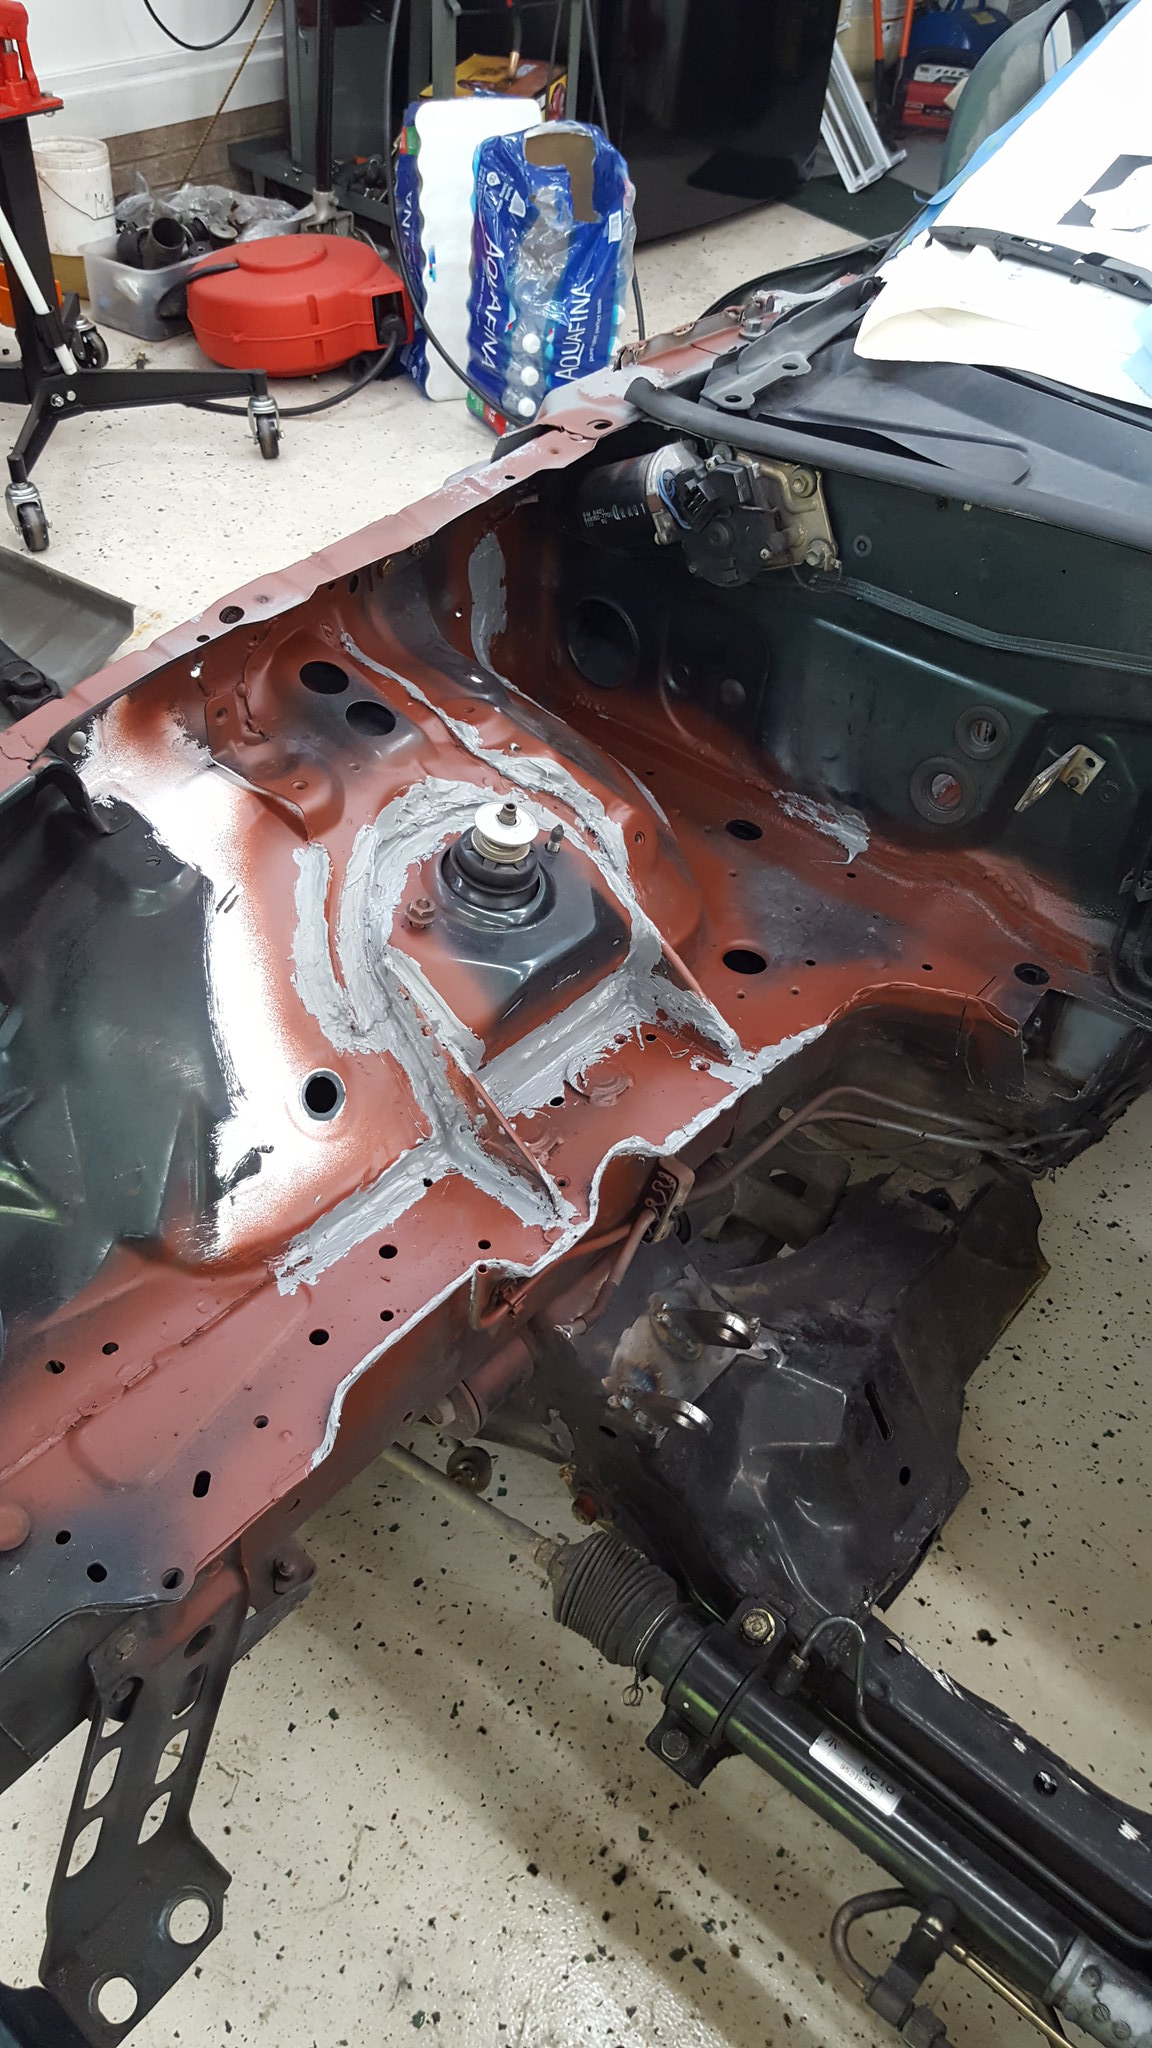
20180503_160323 by Michael Crawford, on Flickrthe floors were all lap welds. So all done with the 1 inch brush. I laid it down THICK on the subframe connectors. I need to put something in the gaps where the body plugs were, and do another coat here as well. Im also debating skinning the whole floor with some .030 aluminum to give it a better appearance. Well see what I think after paint and lizard skin. I may do some stucco mesh over the black floor pans for visual contrast and floor traction. Haven't gotten there yet.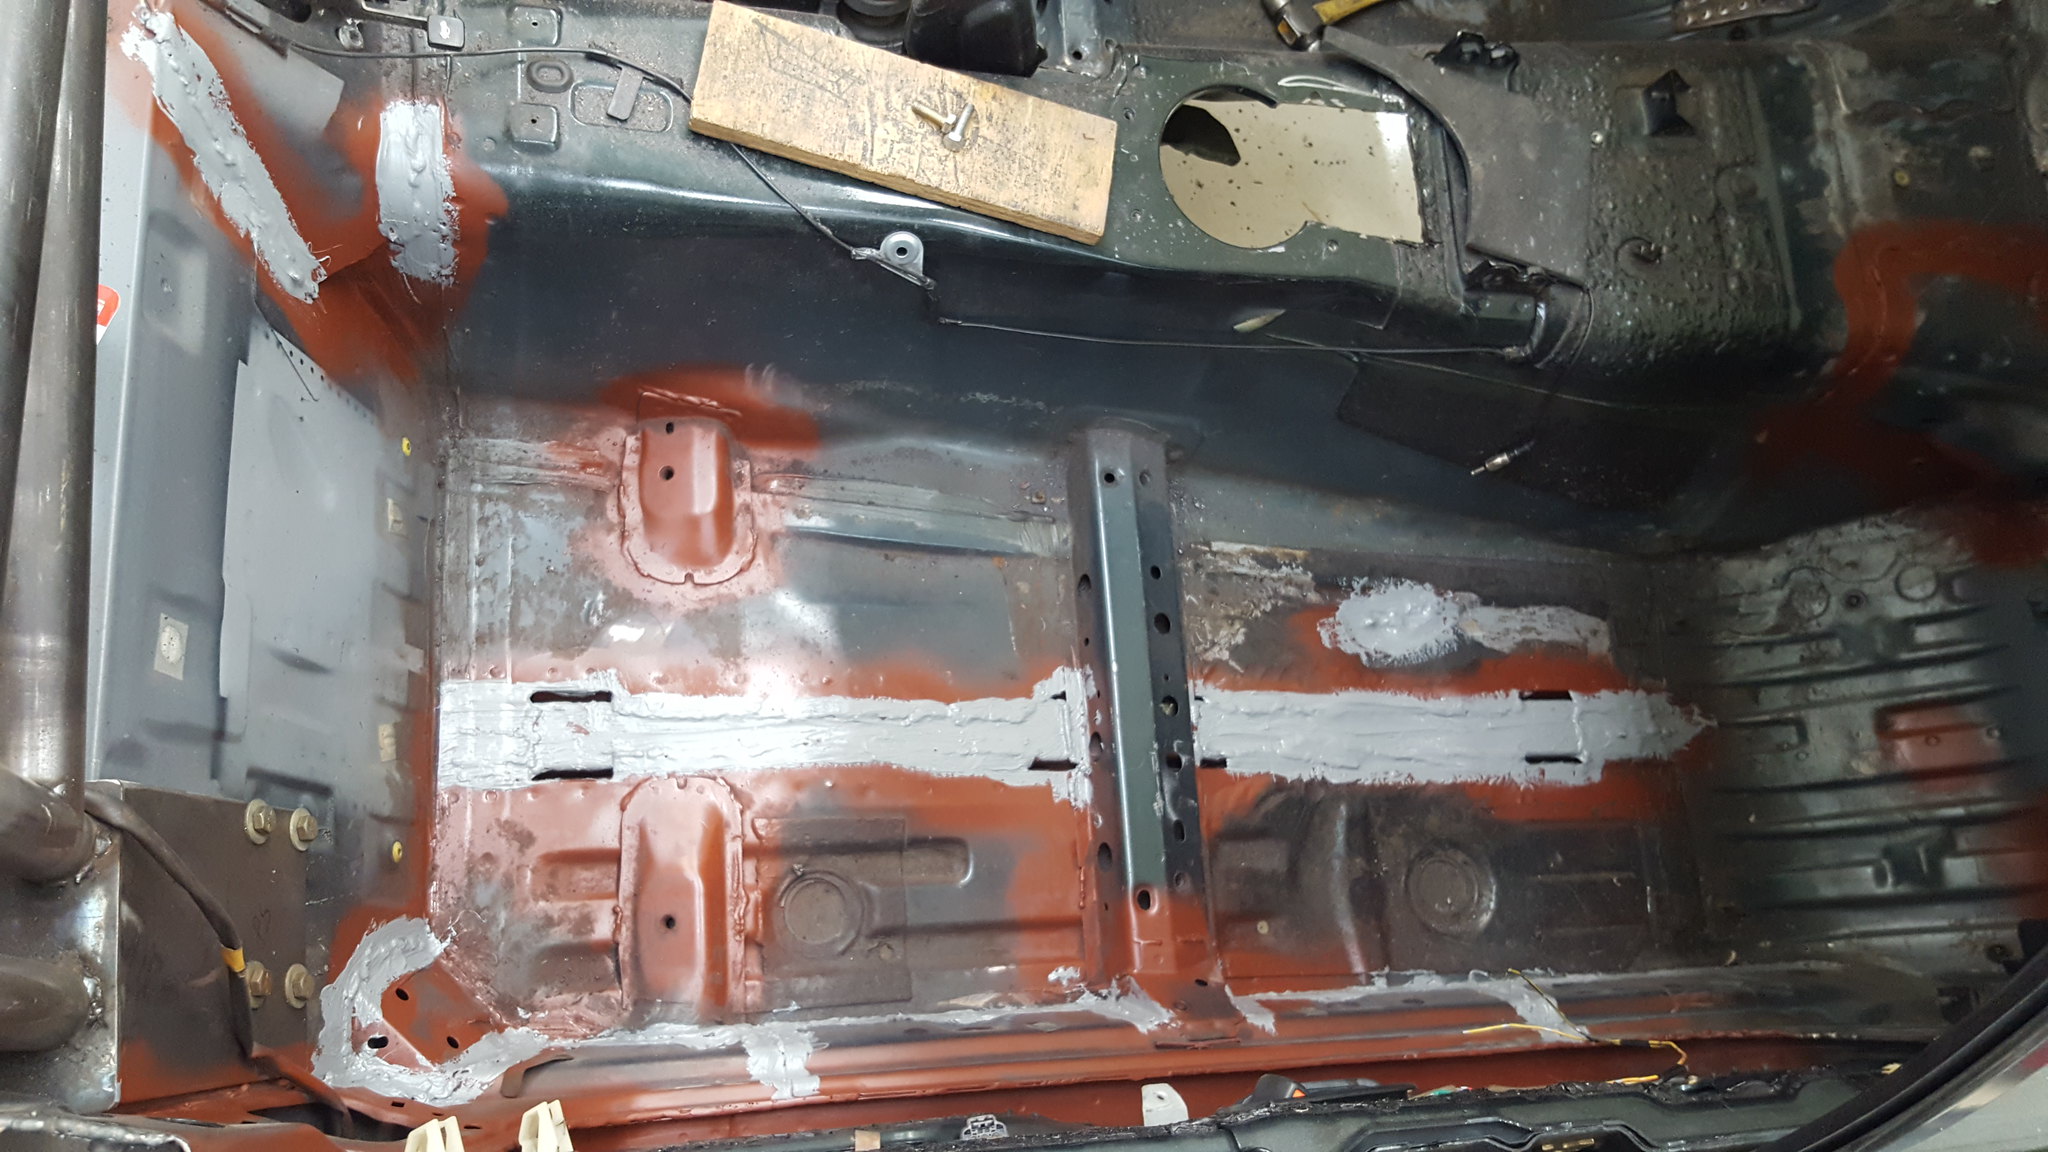
20180503_160340 by Michael Crawford, on Flickrin the wheel well, where I don't really care about appearance, I could've used a putty knife or trowel. Instead, I used the 1 inch brush and just worked it in. this will be topcoated in satin black and tire marbles, so should disappear pretty quickly. It definitely needs another coat though.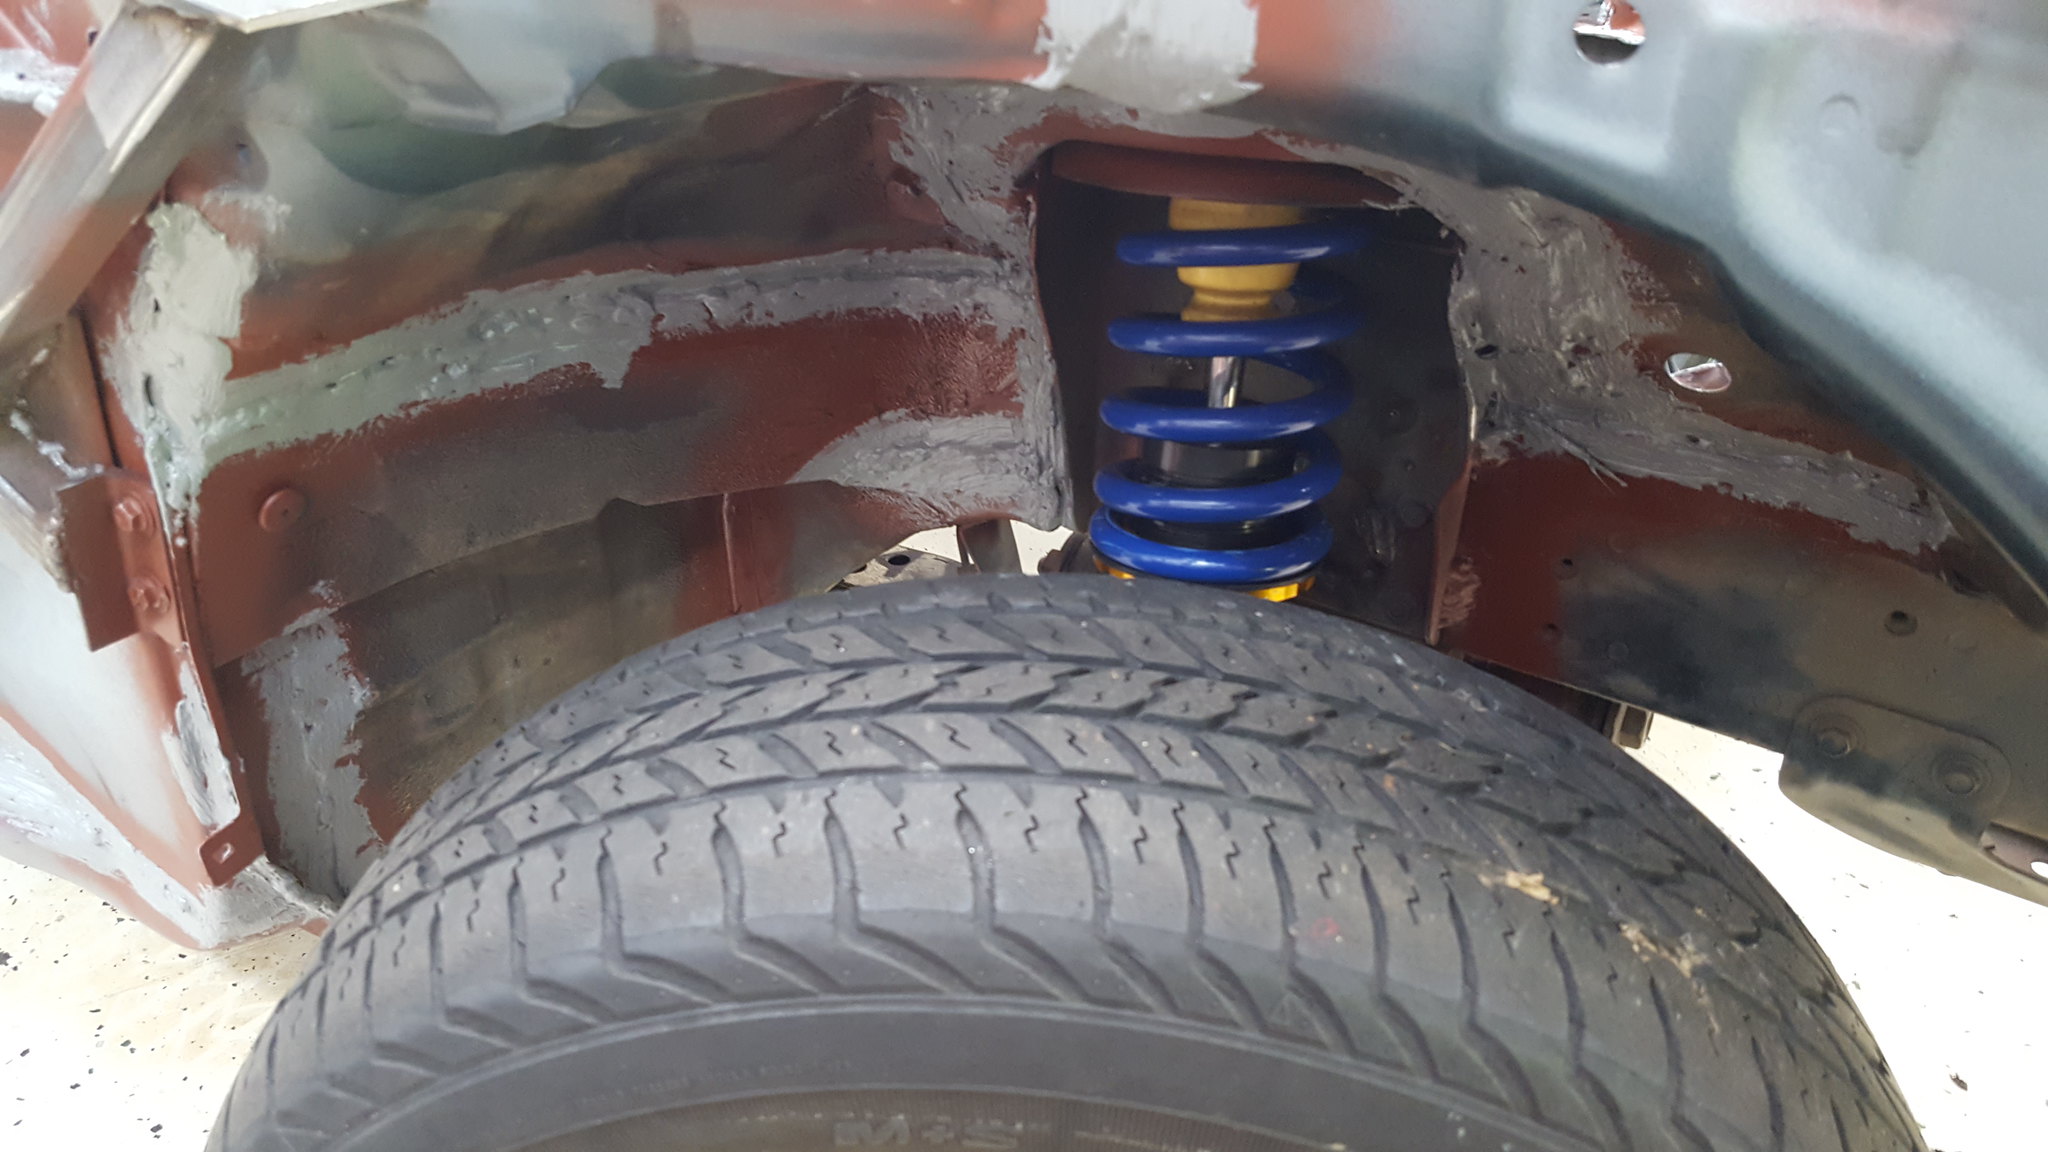
20180503_160331 by Michael Crawford, on Flickralso, I found out just how well all the chassis work is paying off. To grind the welds in the passengers wheel well, I put my floor jack under the rear front lower control arm mount. And picked up 3 wheels. With no sway bars. And the struts not bolted in at the top. And no door bars yet. Freaking STIFF.
Reply
0
0
05-13-2018, 06:47 PM
#53
Junior Member
Thread Starter
Join Date: Nov 2017
Posts: 112
Total Cats: 7
today was my first day back from vacation. So I finished prepping and welding the rest of the car.Step one was capping the wings in the engine bay.I had scored 3 pieces of sheet metal that were covers for the ballasts in fluorescent light fixtures. One was used for the caps.Start out with your pieces.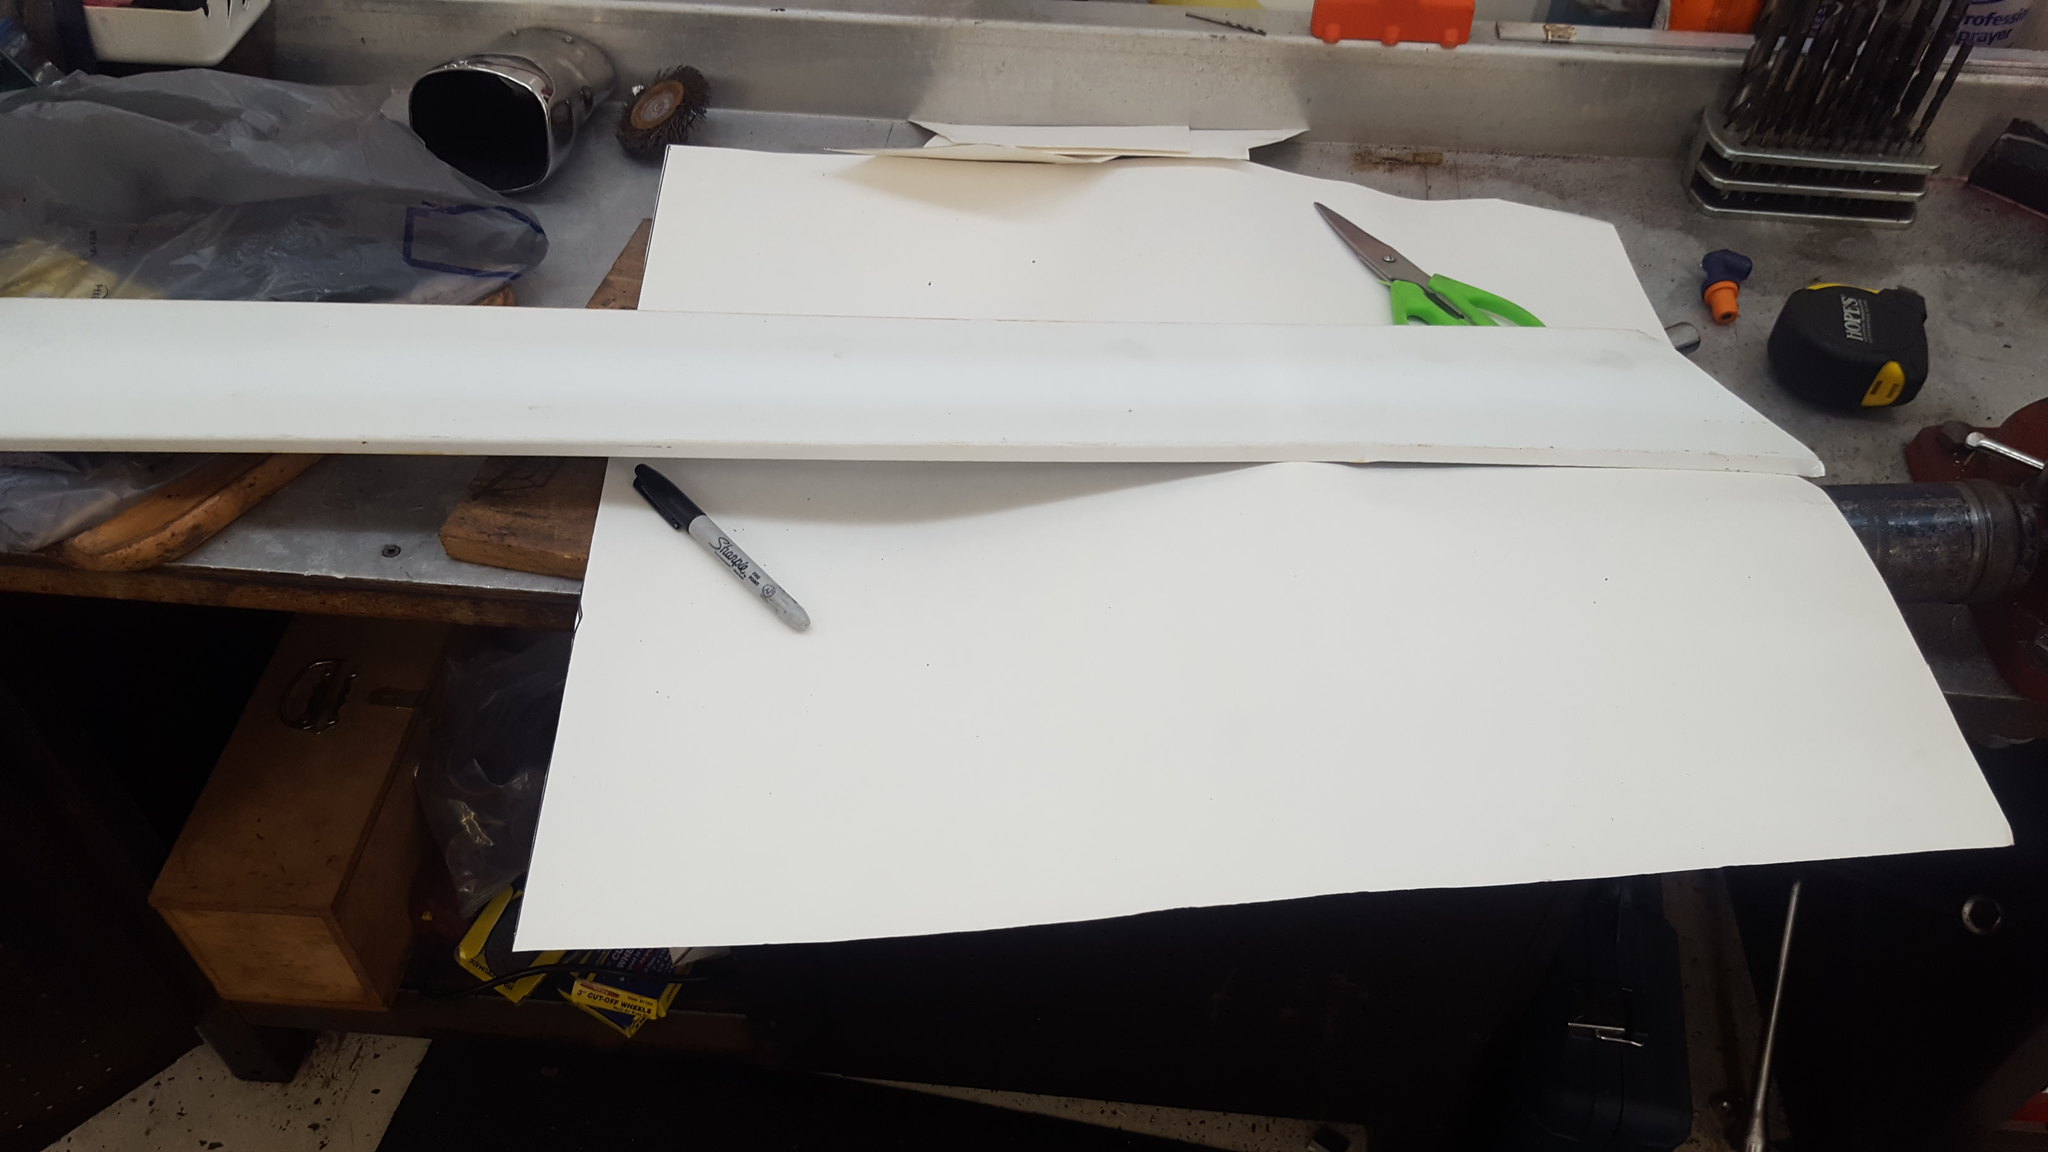
20180513_113300 by Michael Crawford, on Flickrmake a CAD (cardboard aided design) template of what you need, and transfer to metal.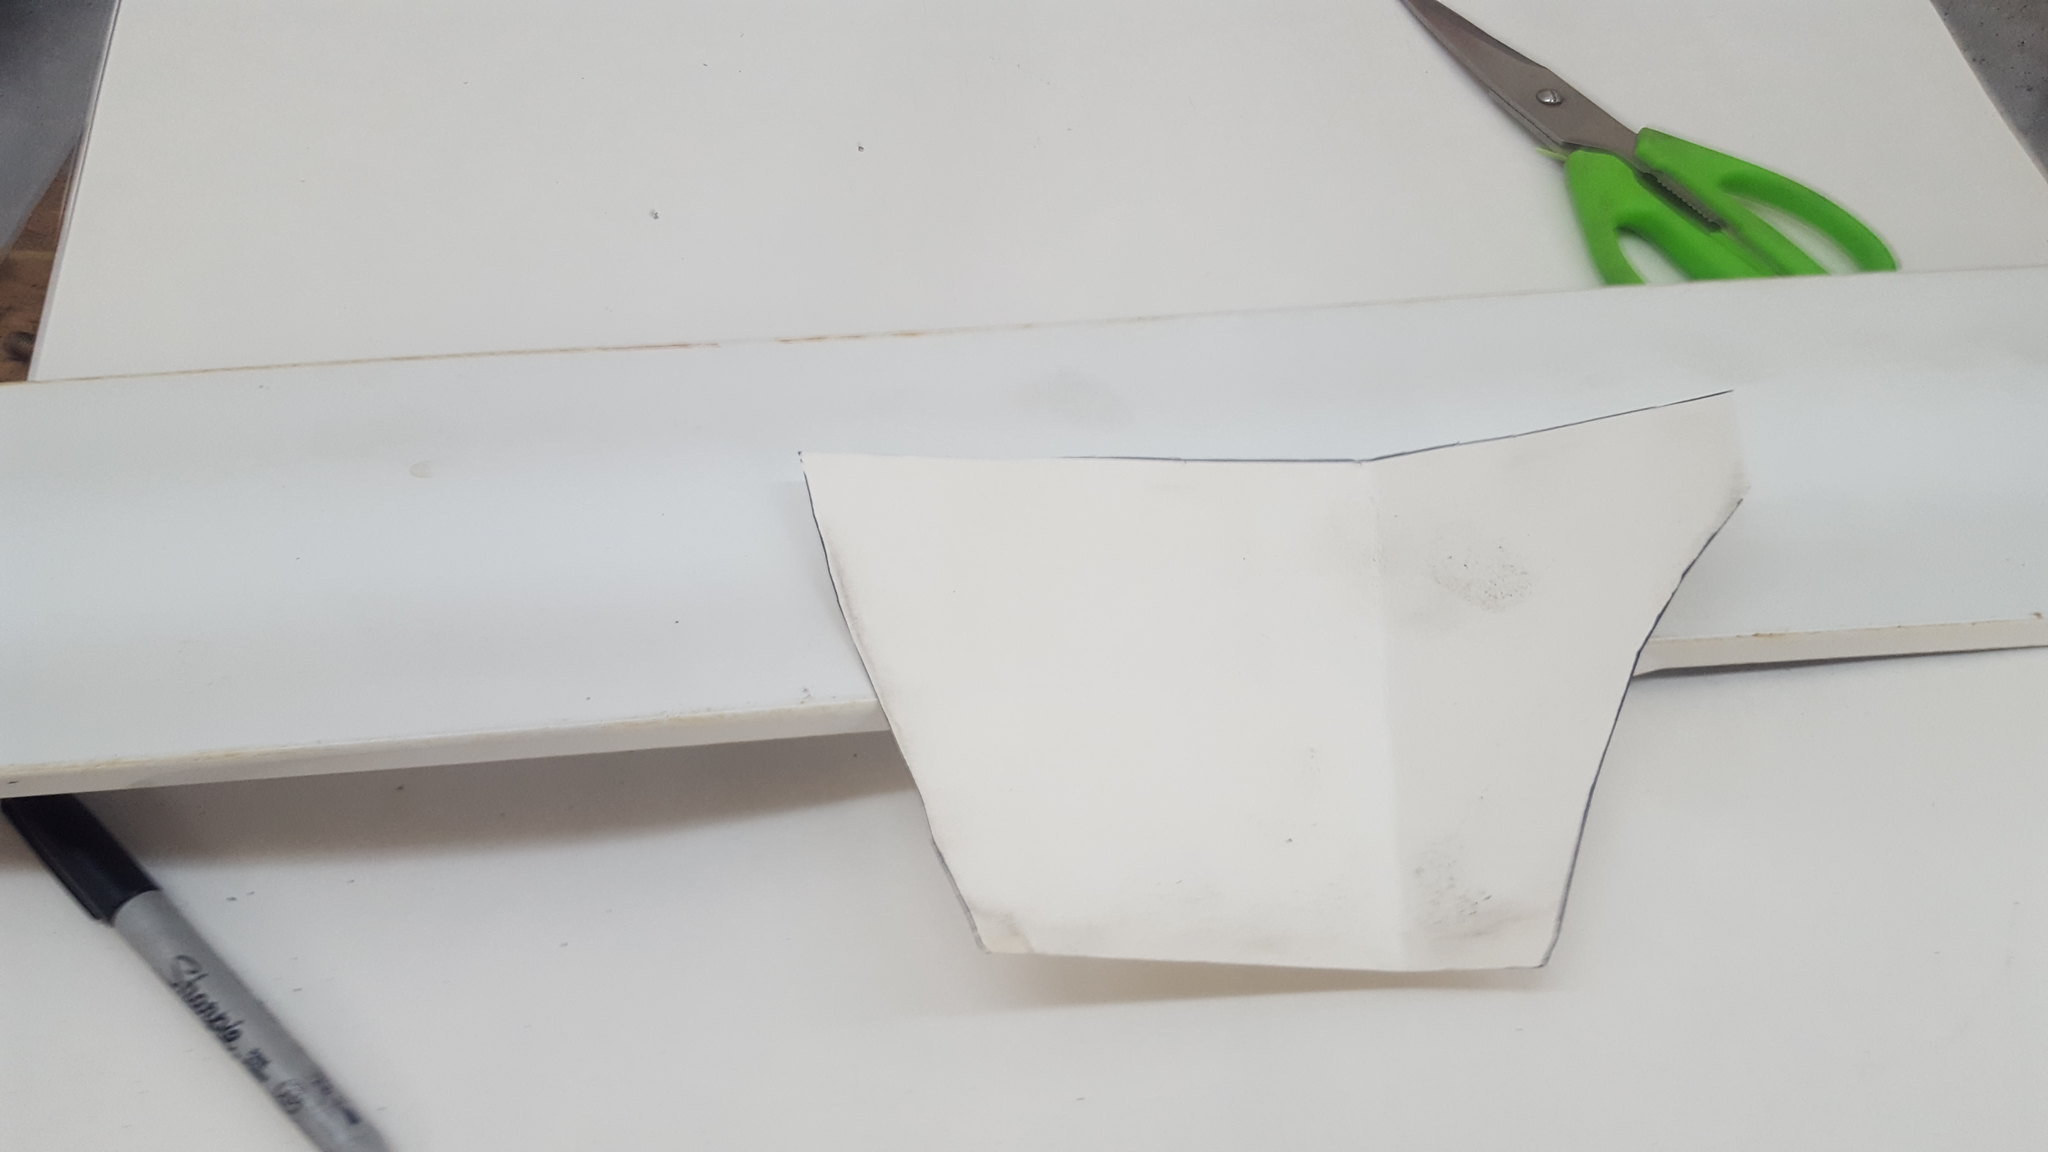
20180513_113304 by Michael Crawford, on Flickrbend metal and test fit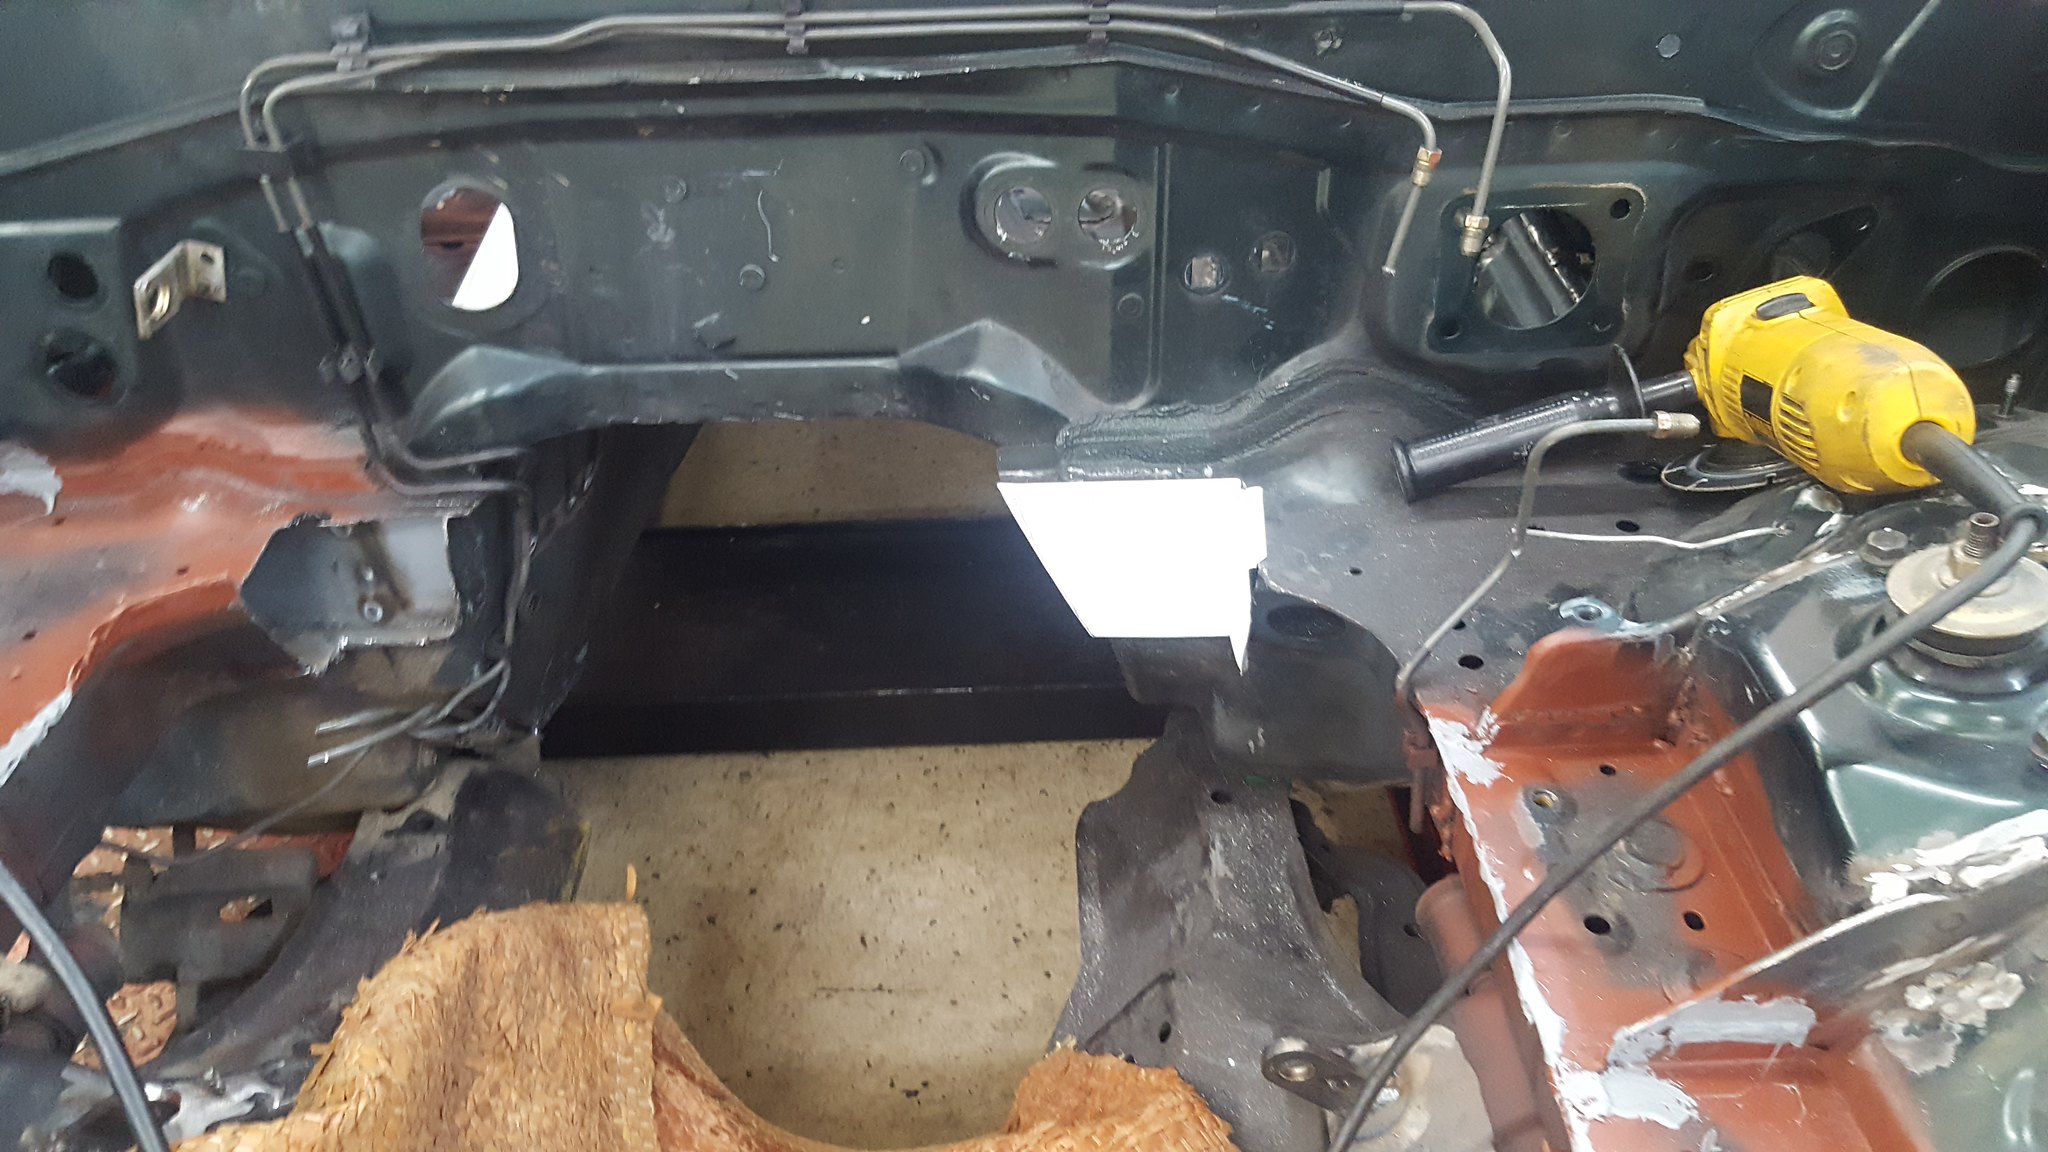
20180513_113310 by Michael Crawford, on Flickrweld in place, hammer forming as necessary. Finish prepping and seam welding the engine bay while you're at it.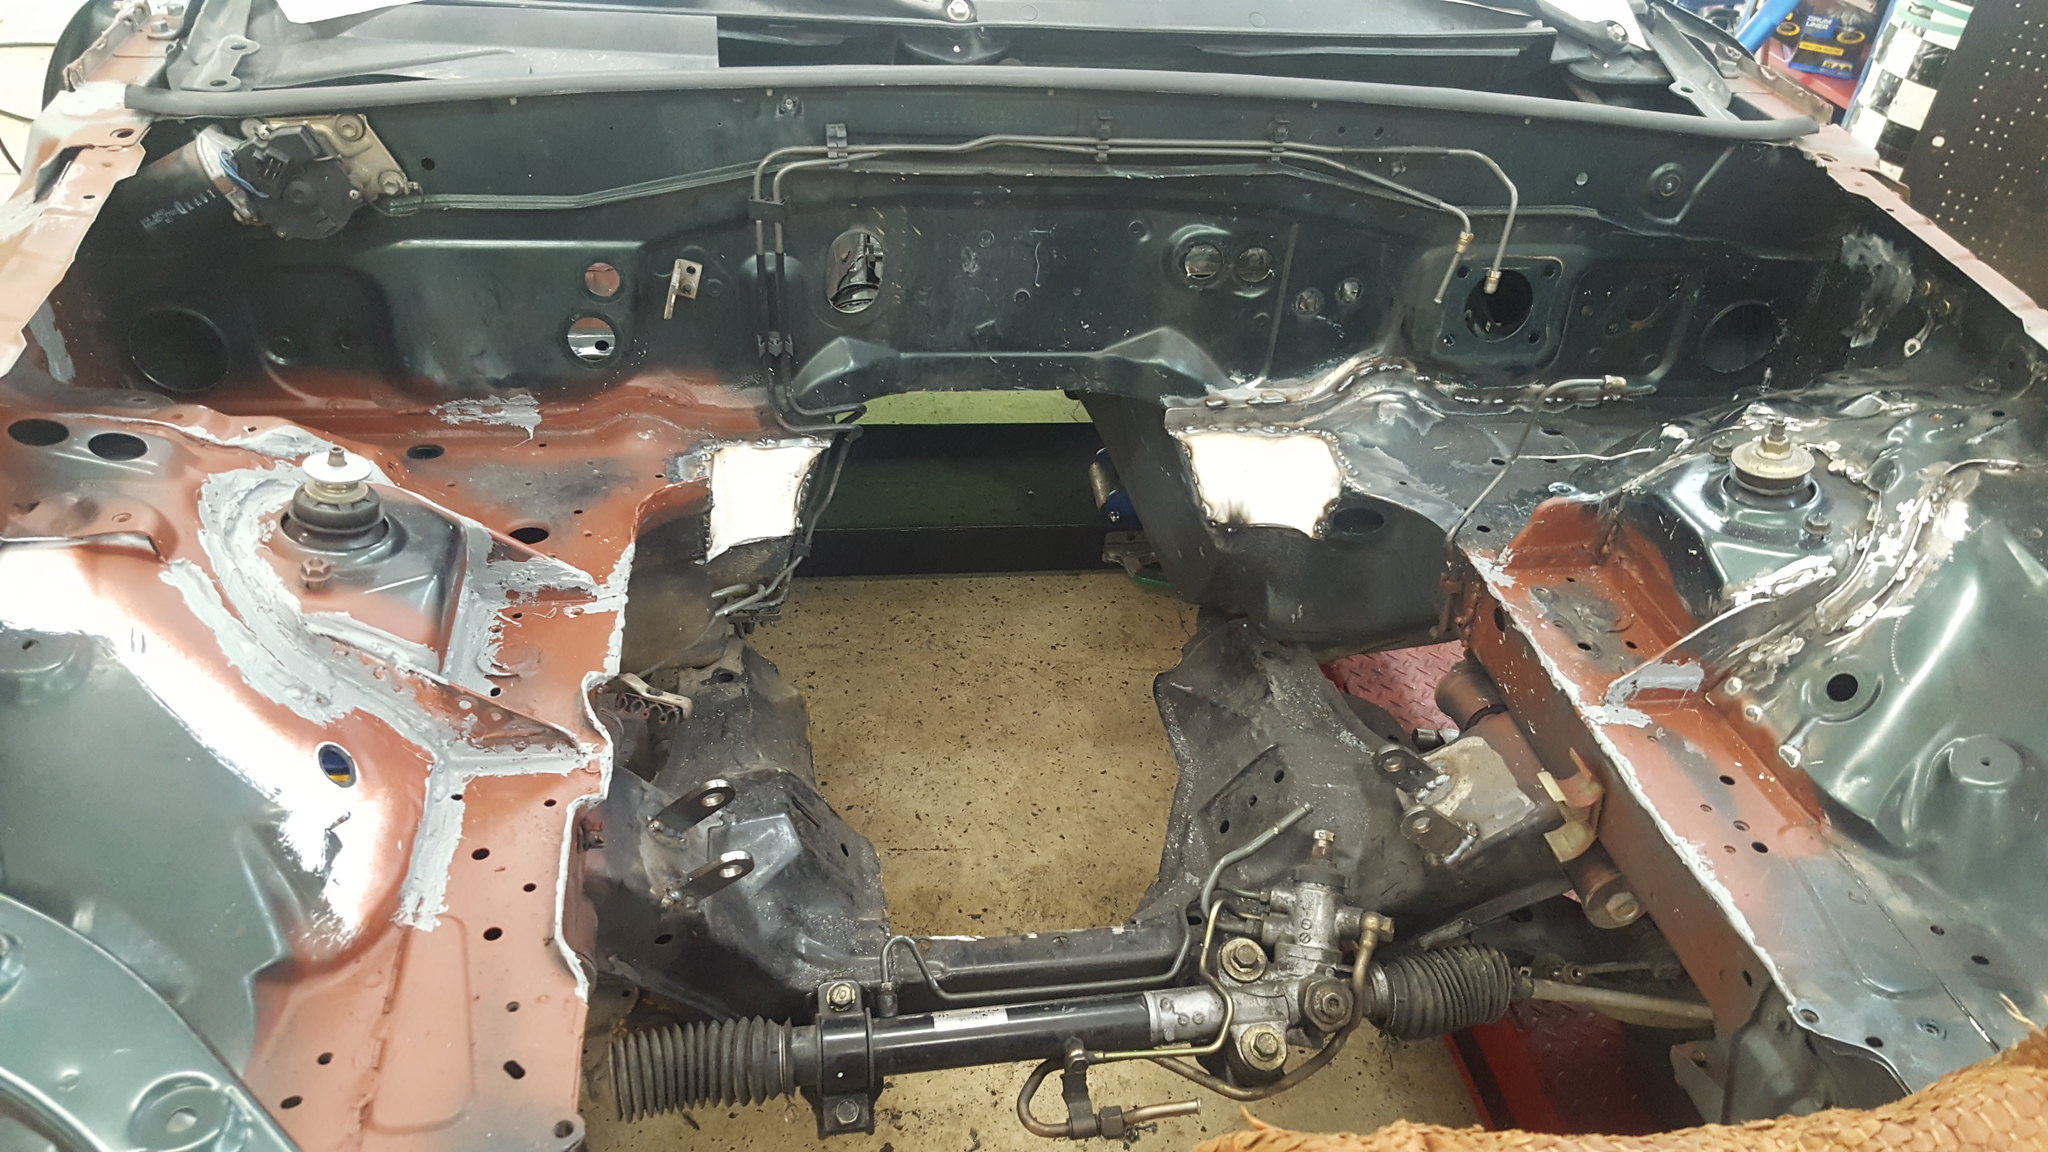
20180513_135634 by Michael Crawford, on Flickrfinish the rest of the welding, take pictures, go home and watch THOR with the family while updating build threads and drinking tea.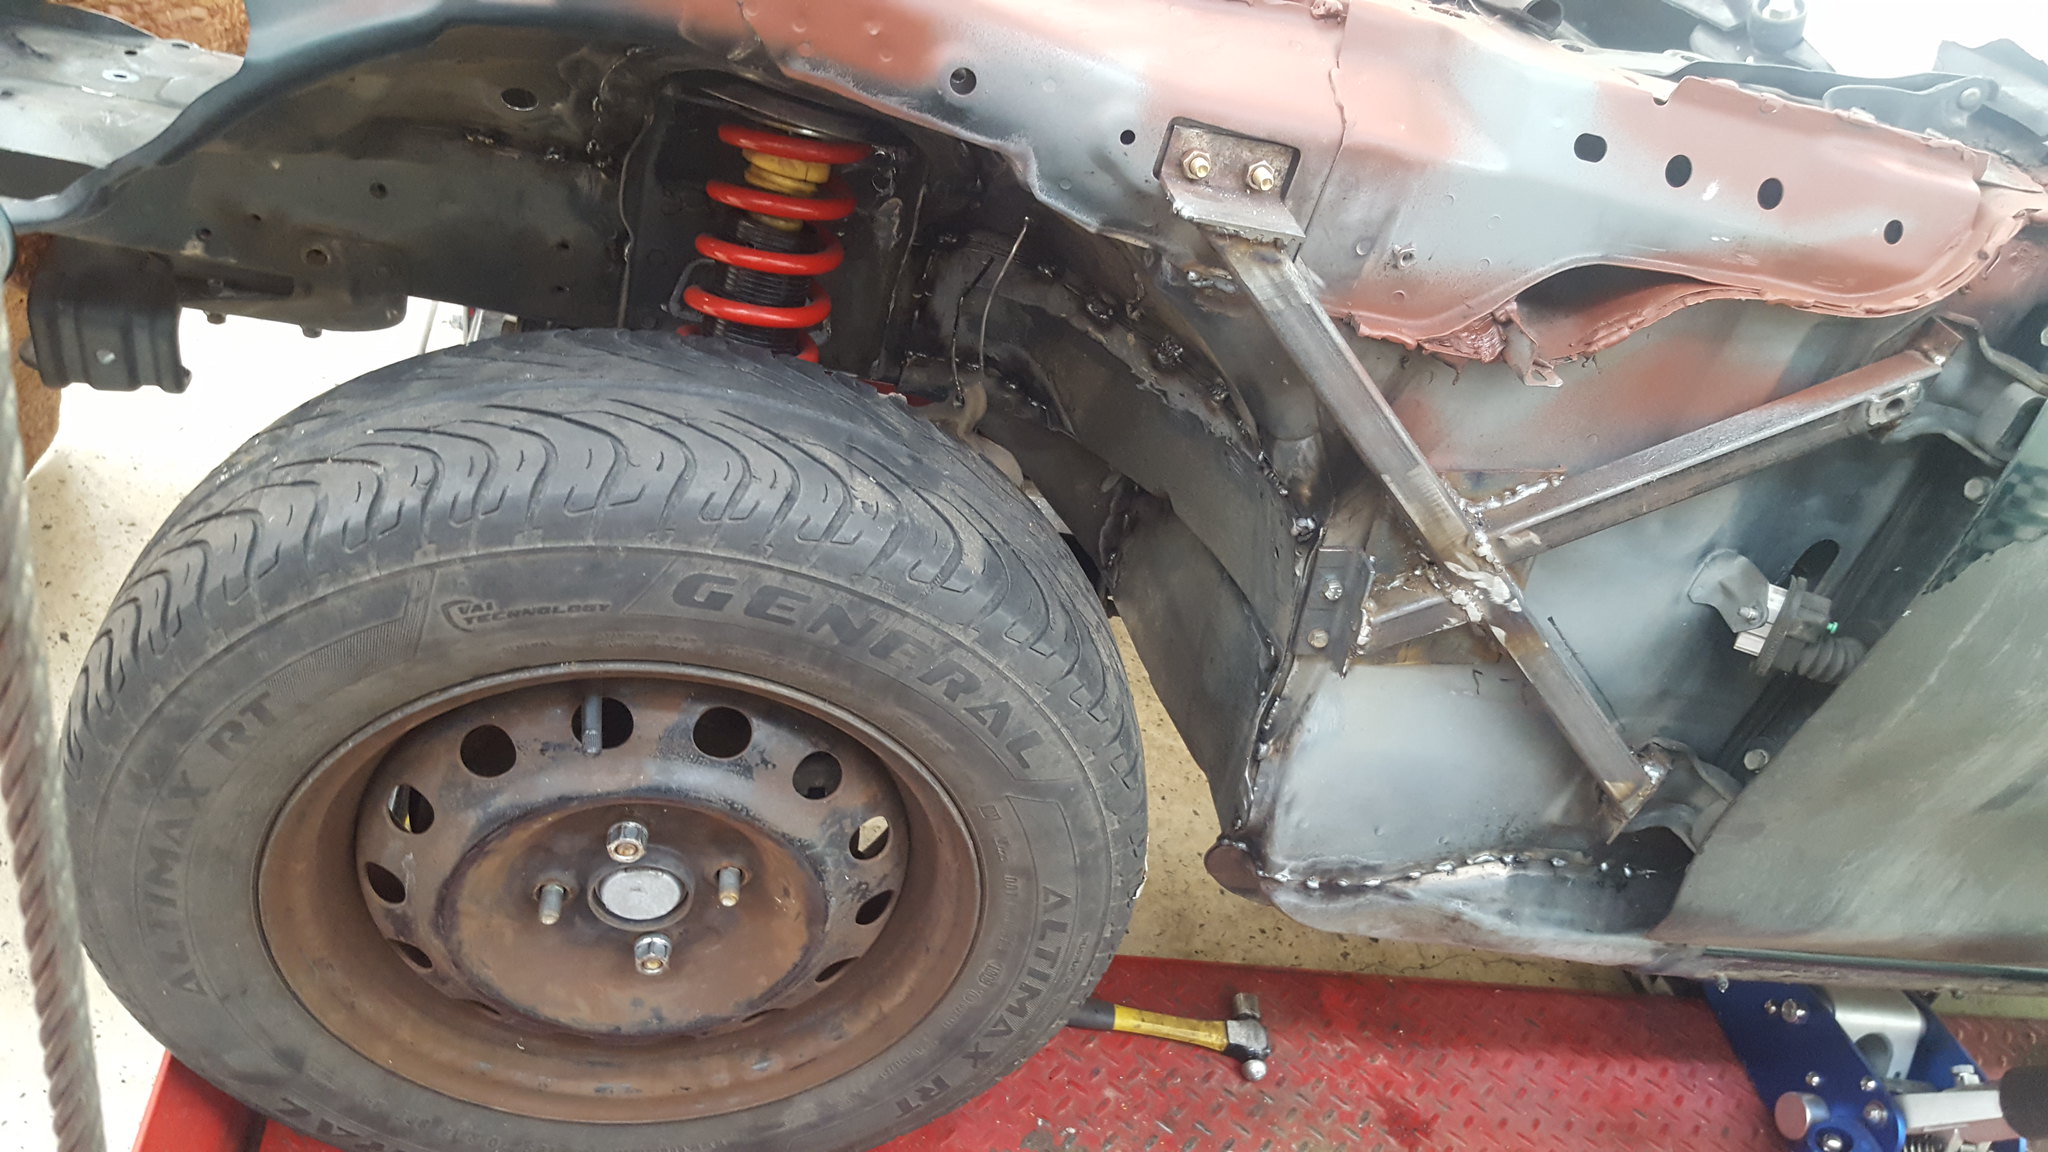
20180513_135642 by Michael Crawford, on Flickr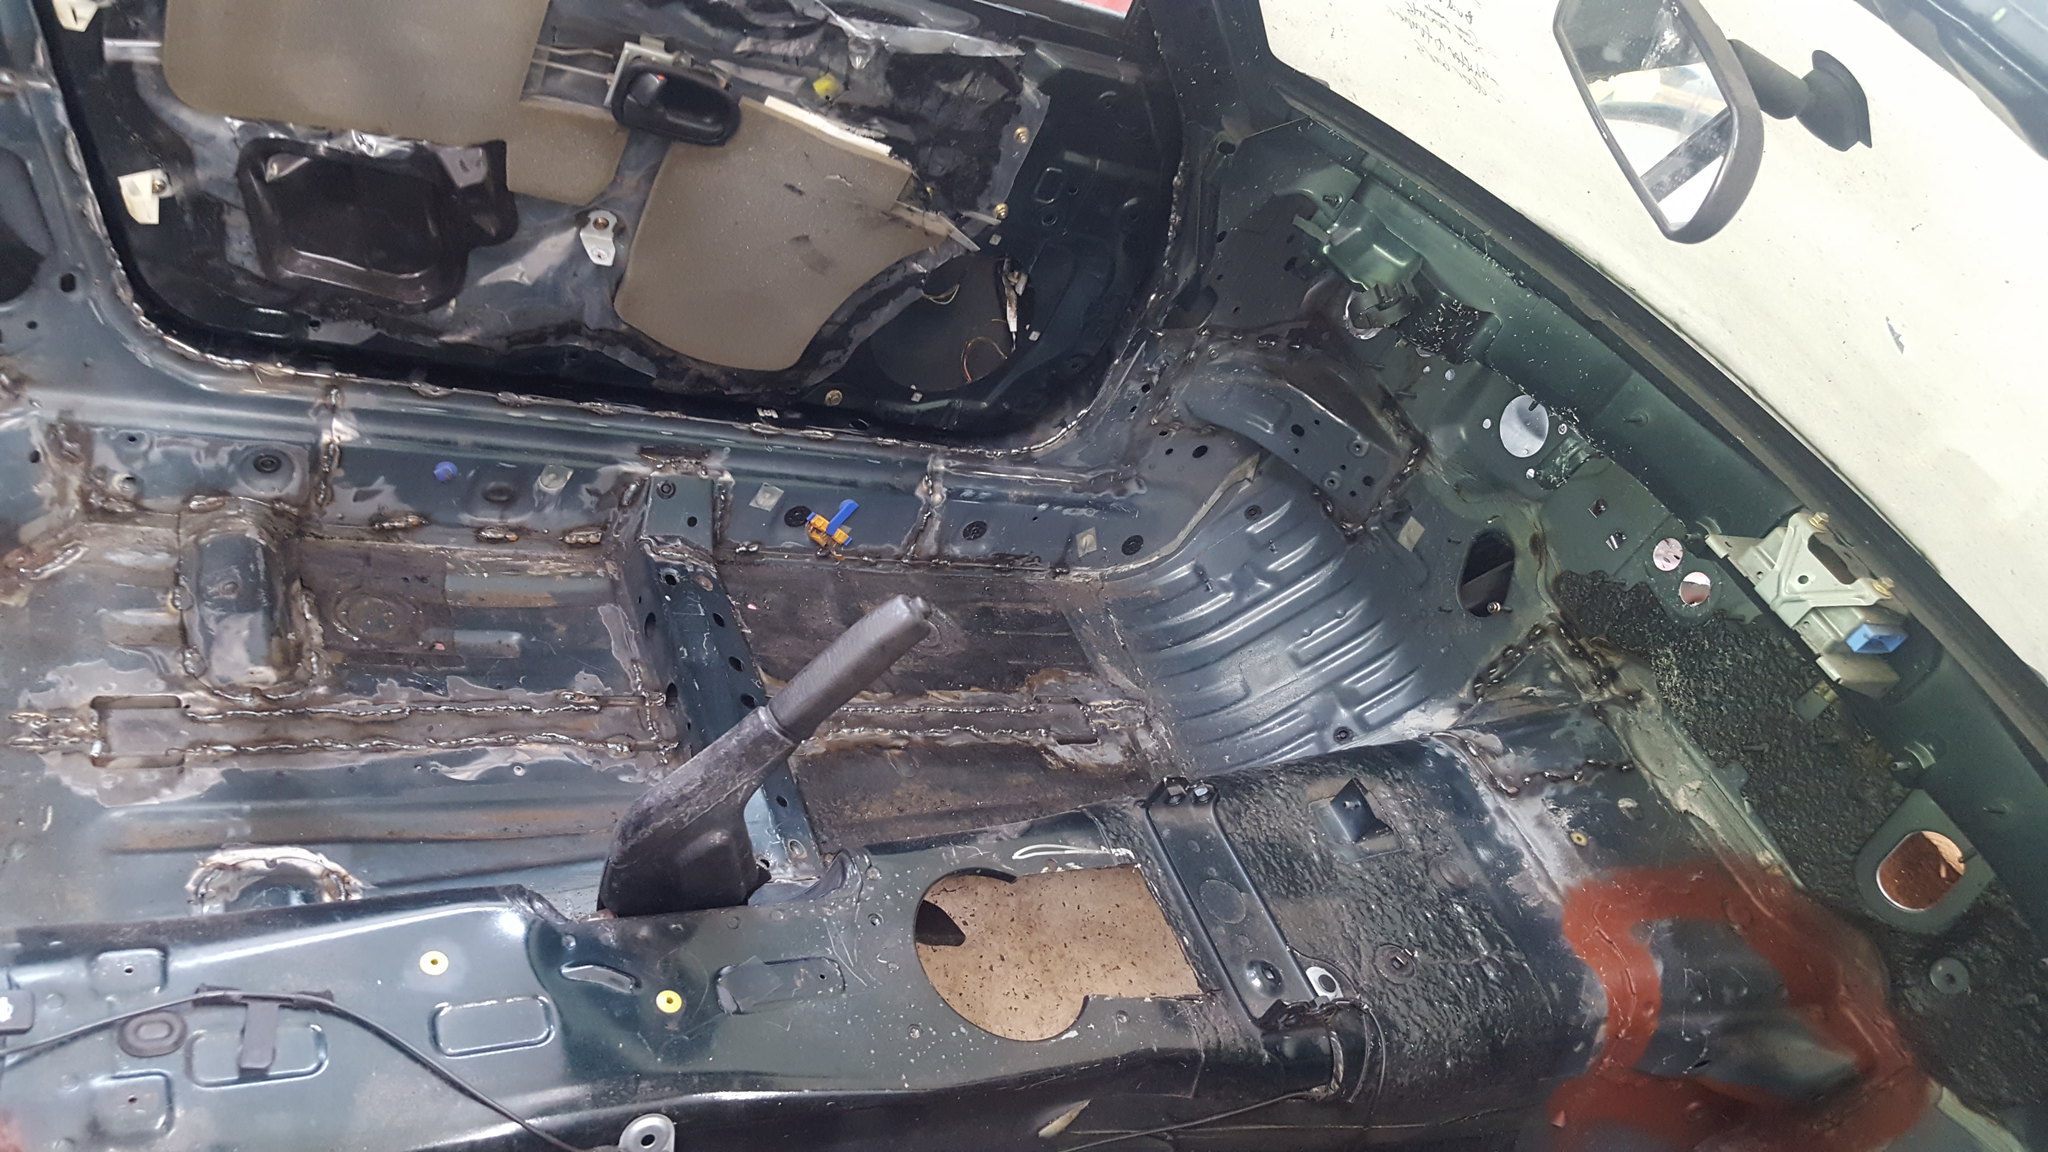
20180513_135627 by Michael Crawford, on Flickrnext up is grinding, priming, and seam sealing.Until next time friends.
Reply
0
0
05-20-2018, 03:01 PM
#54
Junior Member
Thread Starter
Join Date: Nov 2017
Posts: 112
Total Cats: 7
Challenge budget so farrevious challenge budget: 1692.37 recoup total: 800new money: white rustoleum spray: 3.98also went through the budget sheet and pulled stuff that im not using to clean up the total to a more accurate numbersold the cruise/ac compressor/alt bracket from the 3400 for 20 new total: 1612.35
recoup: 820lots of progress, but not photoworthy....Dallas and I spent part of yesterday grinding welds. And doing more grinding. And cleaning. And grinding. And.....we sprayed the last of the rusty metal primer on the cleaned and ground welds. Today, I pushed the car outside, and pressure washed every square inch. Except the underside at the rear end. LOTS of dirt came off. Lots. Then I went ahead and sprayed a can of white rustoleum on the underside of the trans tunnel. Im still debating weather or not to use the redneck lizard skin under there, but im leaning heavily towards yes. My stock miata gets blistering hot through the sides of the trans tunnel, and it has extra insulation. And carpet. And a much smaller engine, with more clearance. And.....anyway, heres where I got today. Tomorrow while the wife and daughter are at girl scouts, I hope to get the rest of the seam sealer done. Then on to painting!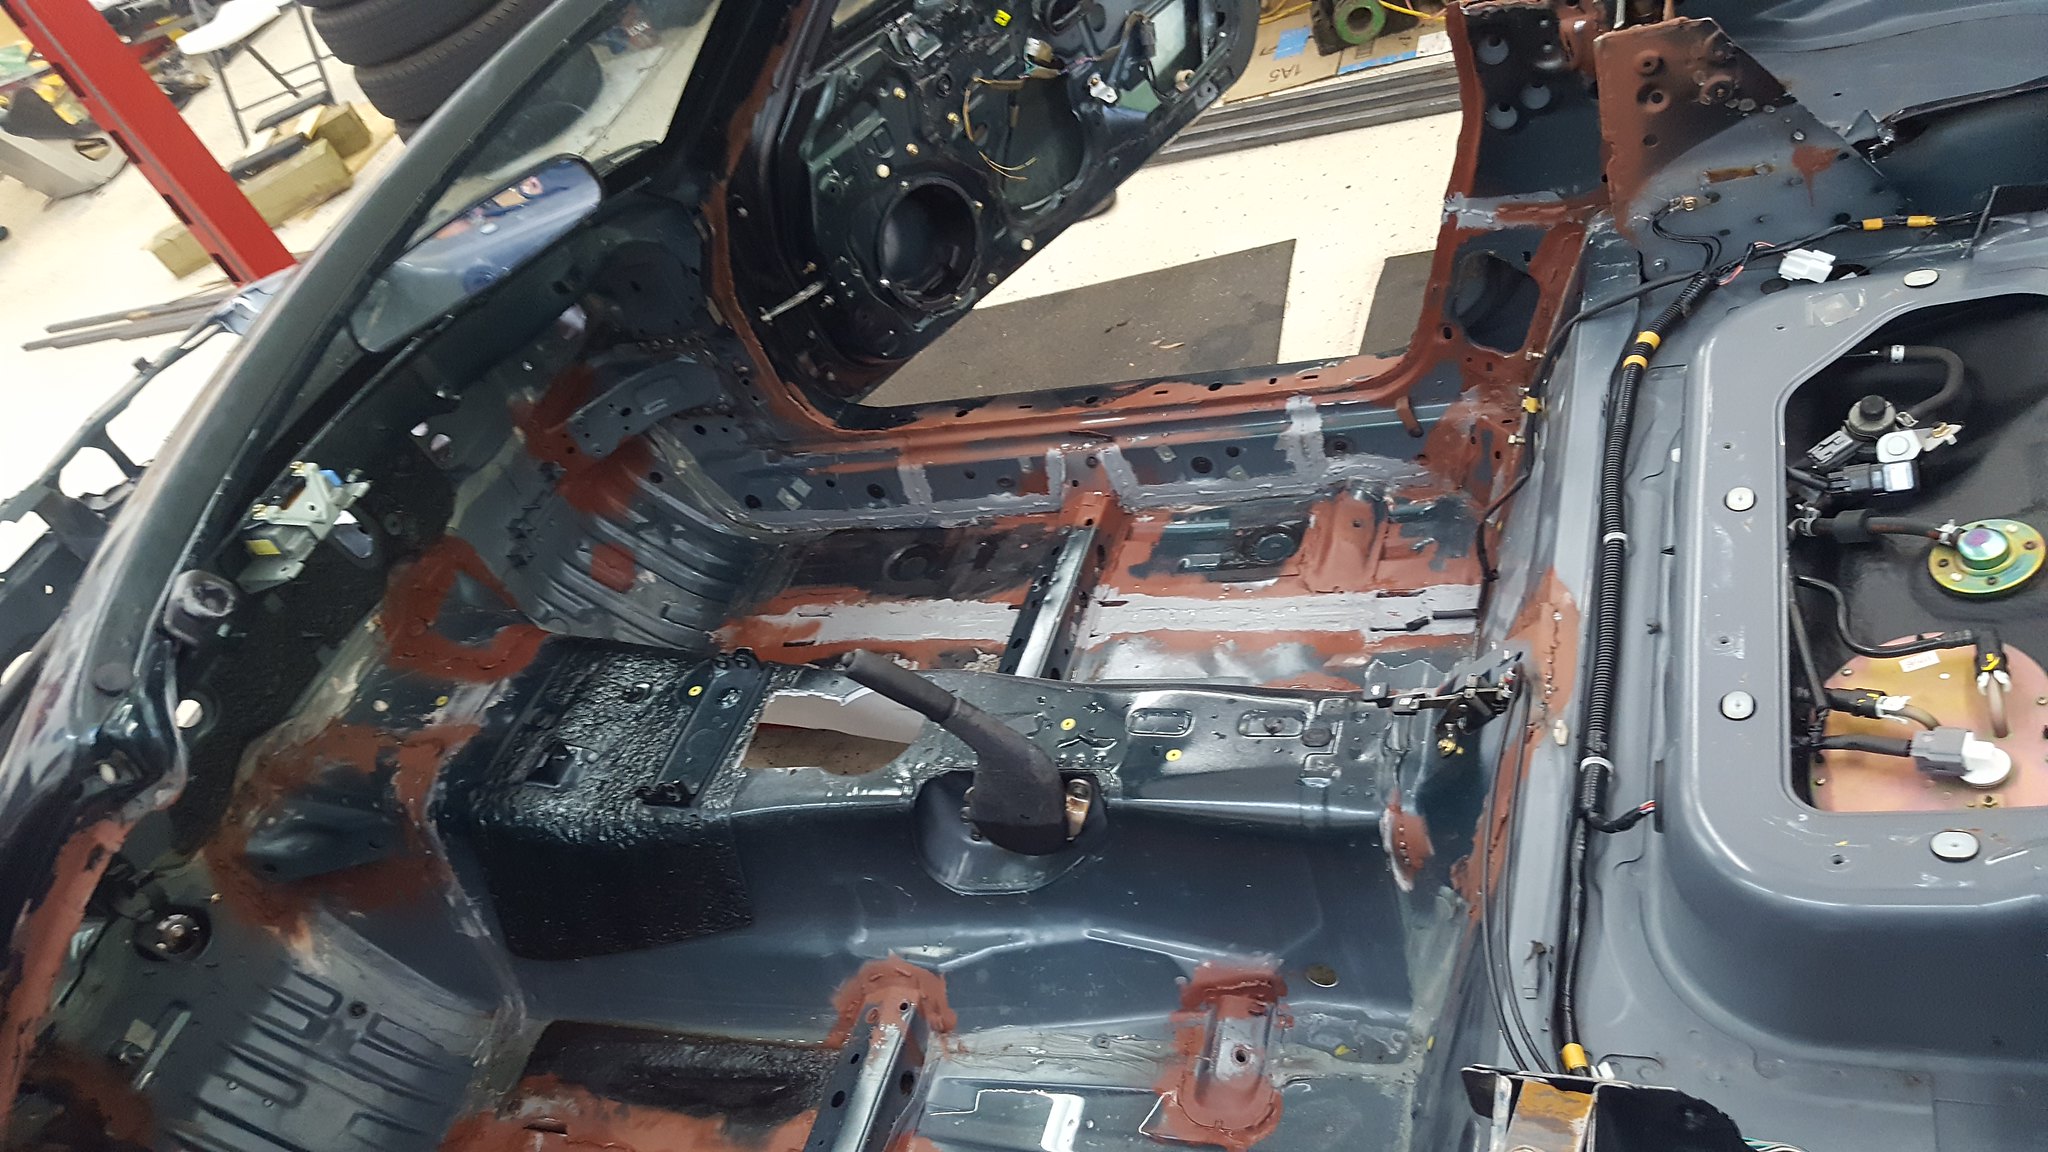
20180520_130619 by Michael Crawford, on Flickr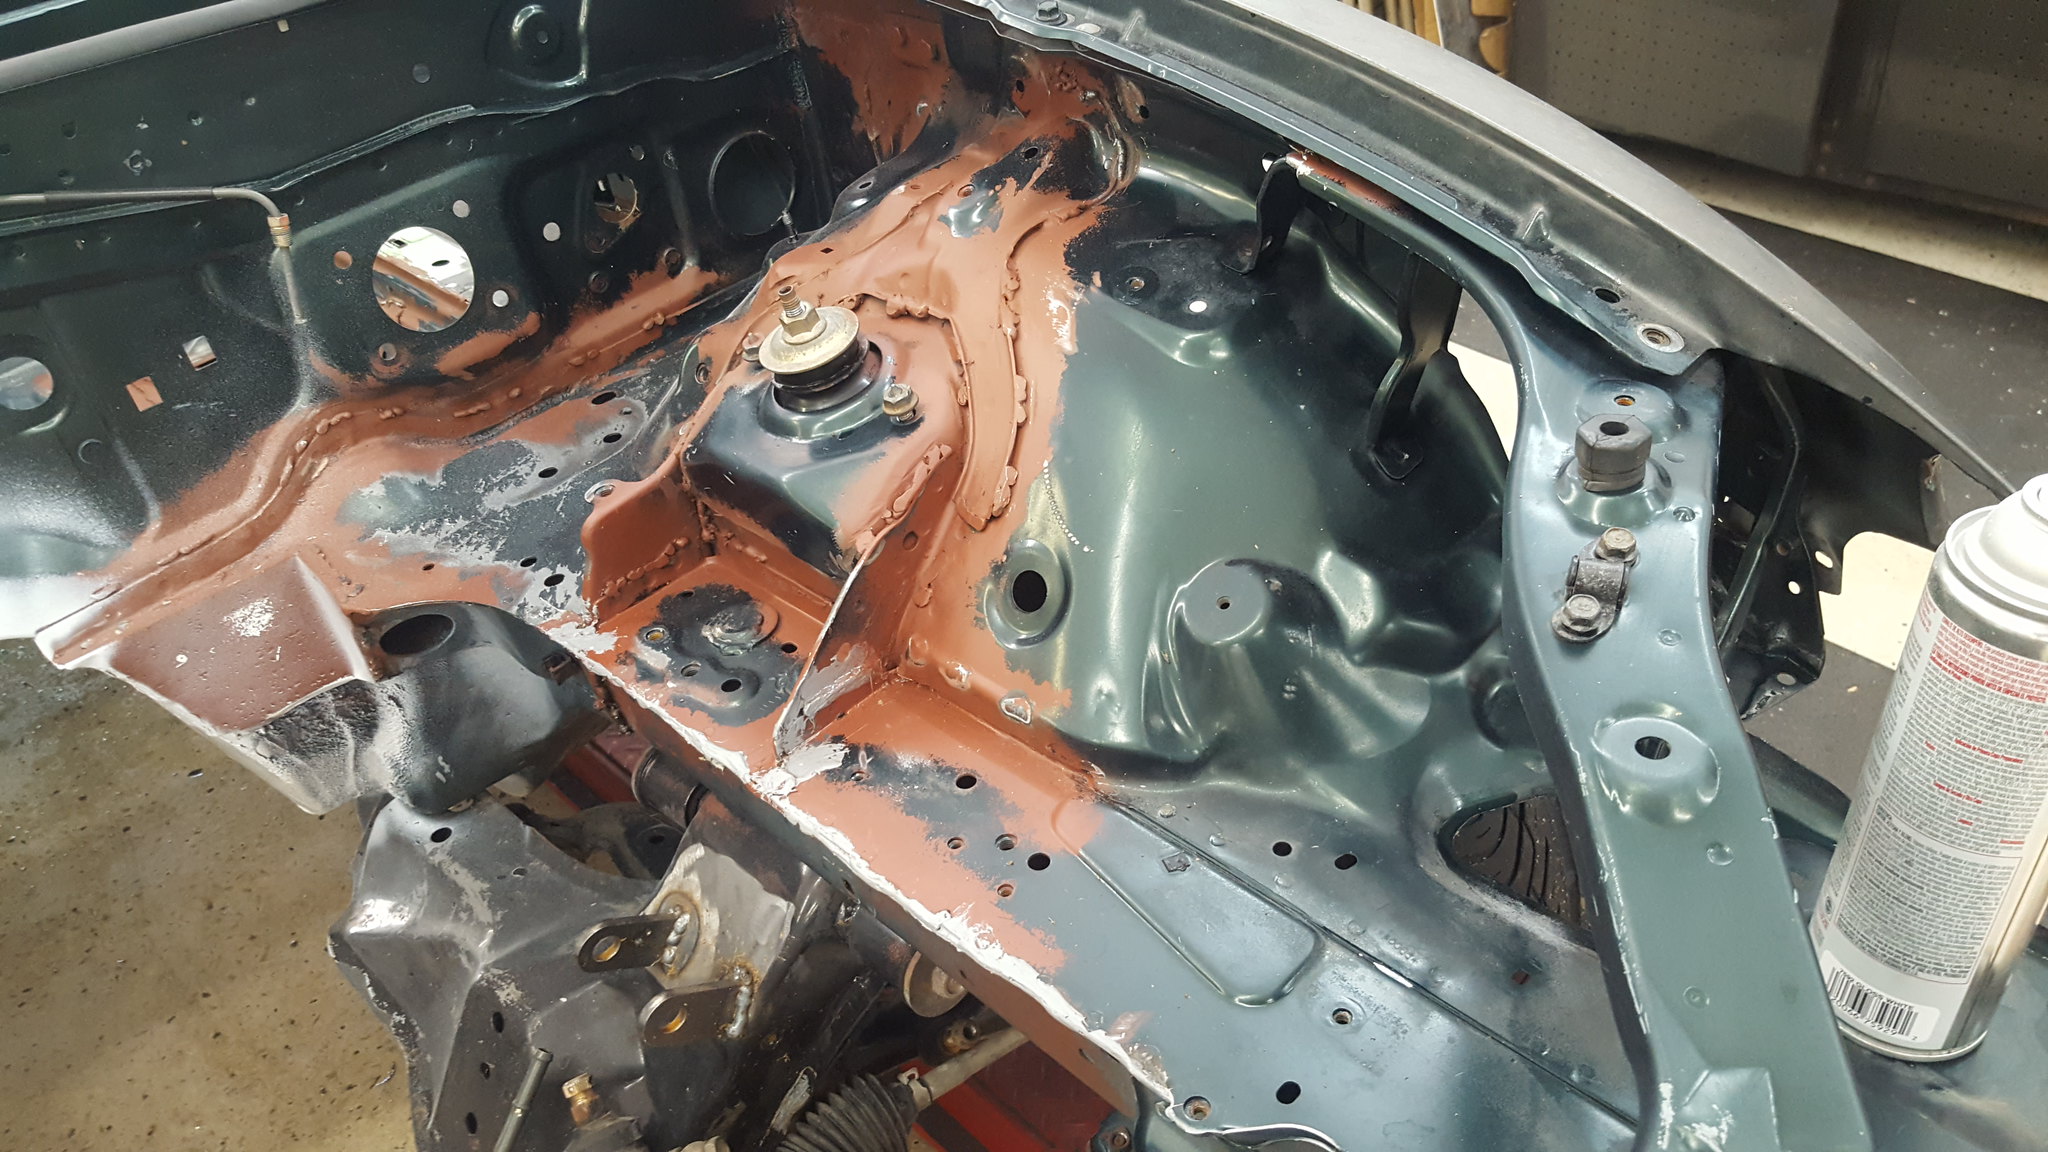
20180520_130552 by Michael Crawford, on Flickr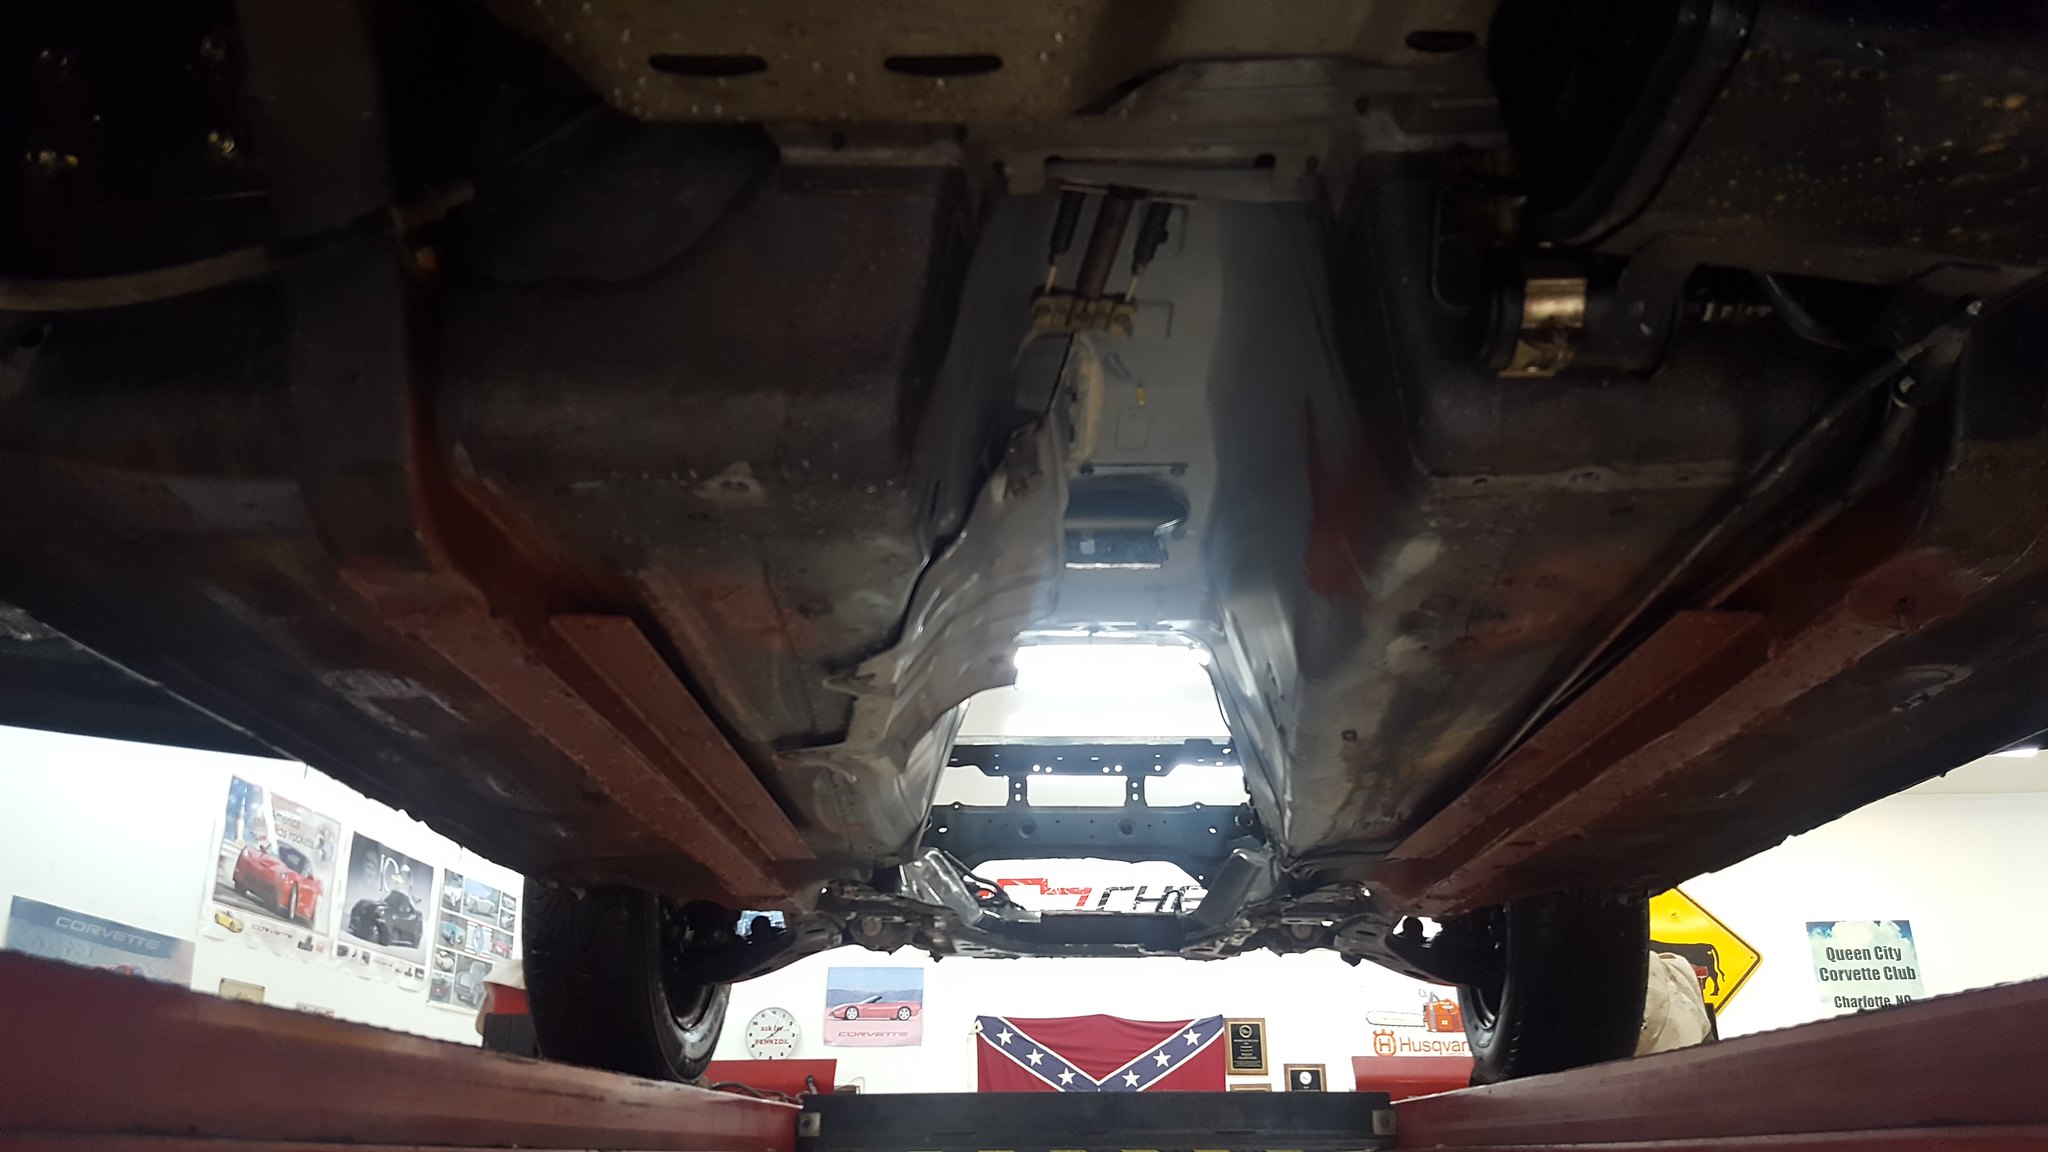
20180520_105825 by Michael Crawford, on Flickr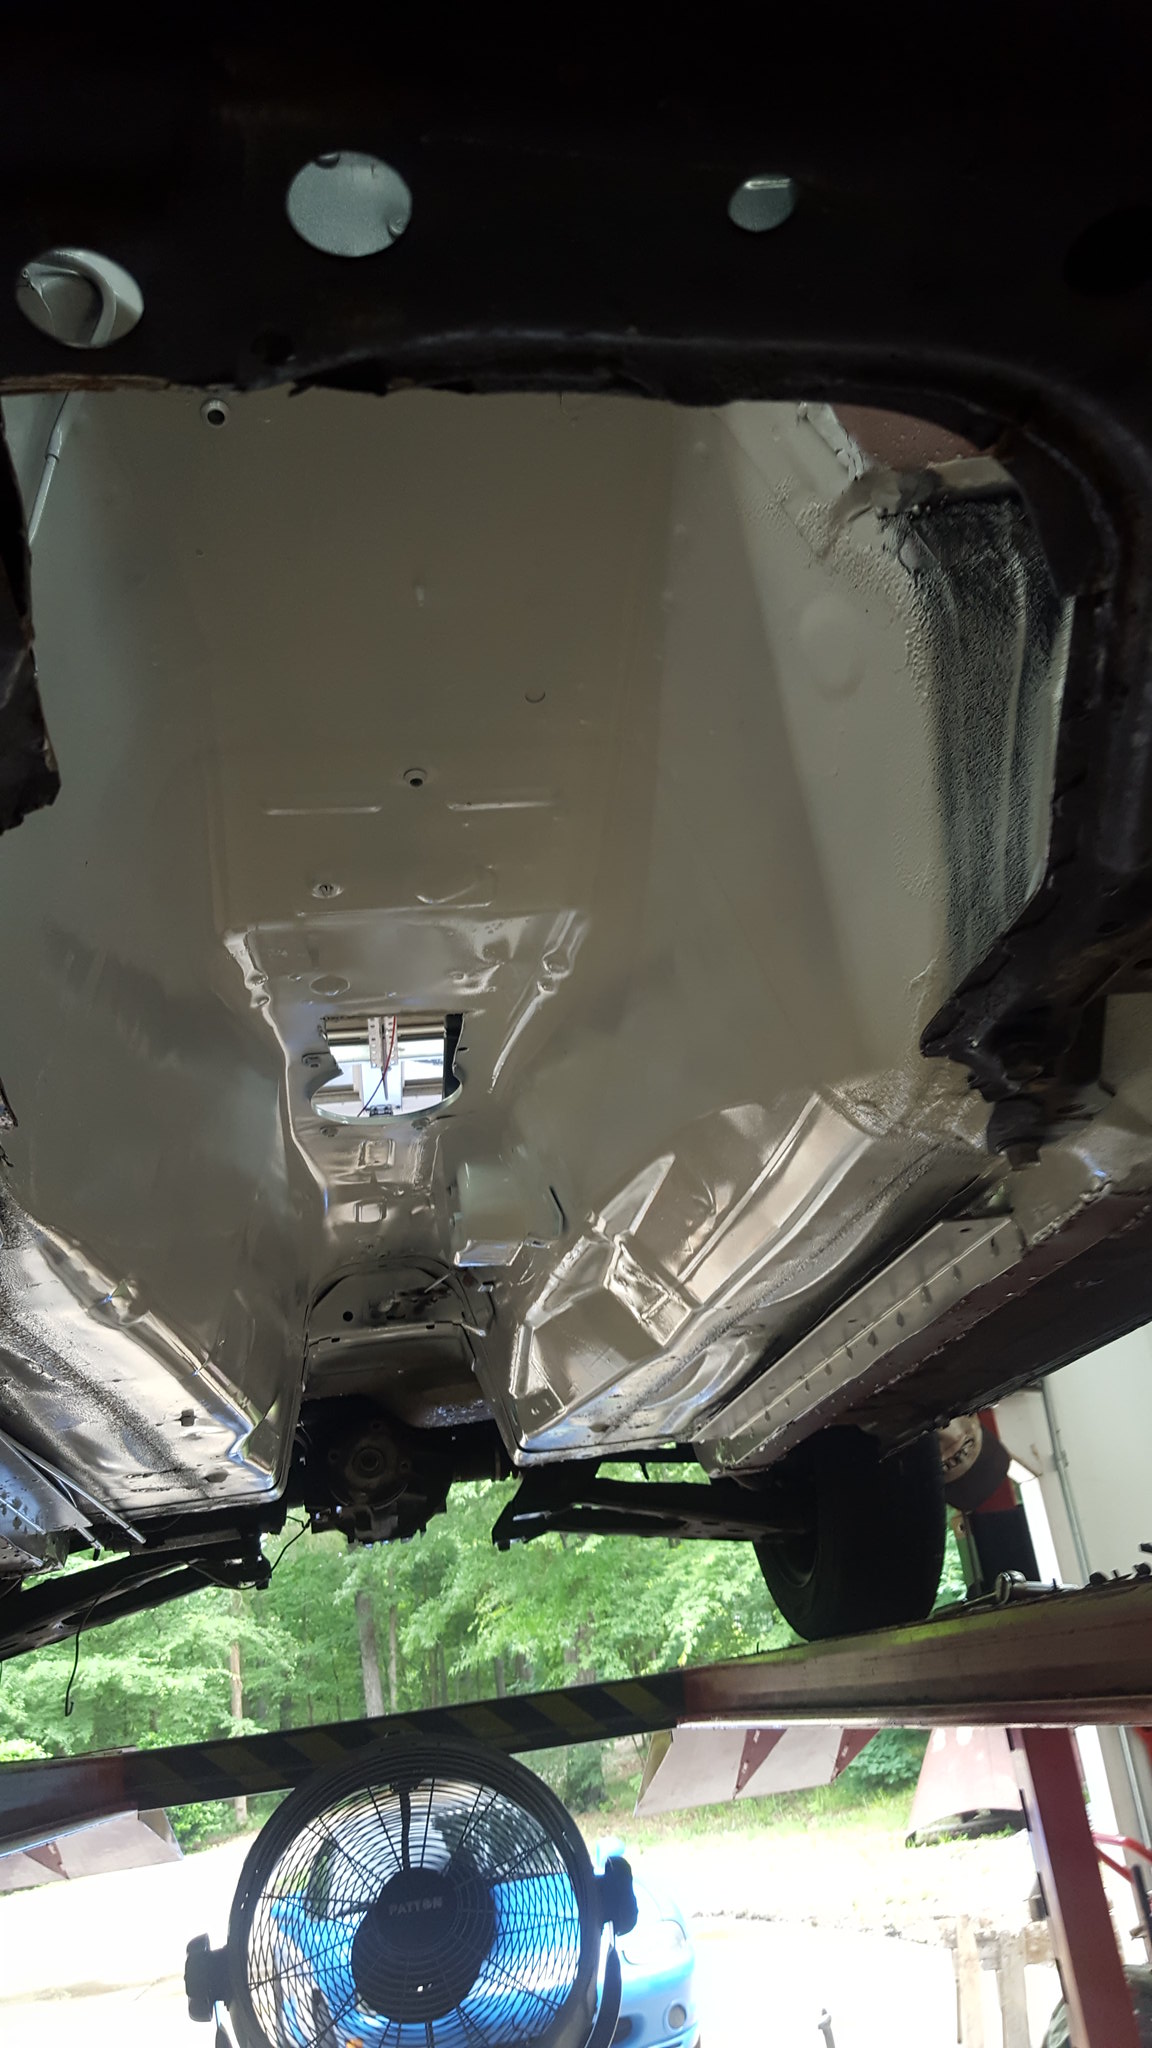
20180520_125241 by Michael Crawford, on Flickr
revious challenge budget: 1692.37 recoup total: 800new money: white rustoleum spray: 3.98also went through the budget sheet and pulled stuff that im not using to clean up the total to a more accurate numbersold the cruise/ac compressor/alt bracket from the 3400 for 20 new total: 1612.35recoup: 820lots of progress, but not photoworthy....Dallas and I spent part of yesterday grinding welds. And doing more grinding. And cleaning. And grinding. And.....we sprayed the last of the rusty metal primer on the cleaned and ground welds. Today, I pushed the car outside, and pressure washed every square inch. Except the underside at the rear end. LOTS of dirt came off. Lots. Then I went ahead and sprayed a can of white rustoleum on the underside of the trans tunnel. Im still debating weather or not to use the redneck lizard skin under there, but im leaning heavily towards yes. My stock miata gets blistering hot through the sides of the trans tunnel, and it has extra insulation. And carpet. And a much smaller engine, with more clearance. And.....anyway, heres where I got today. Tomorrow while the wife and daughter are at girl scouts, I hope to get the rest of the seam sealer done. Then on to painting!
20180520_130619 by Michael Crawford, on Flickr
20180520_130552 by Michael Crawford, on Flickr
20180520_105825 by Michael Crawford, on Flickr
20180520_125241 by Michael Crawford, on Flickr
Reply
0
0
05-30-2018, 08:26 PM
#55
Junior Member
Thread Starter
Join Date: Nov 2017
Posts: 112
Total Cats: 7
Challenge budget so farrevious challenge budget: 1612.35 recoup total: 820new money:bought reflectix insulation at lowes: 23:85bought dorman fittings for the fuel lines (5) for 12.997 ft steel fuel line at $1 foot.also went through the budget sheet and pulled stuff that im not using to clean up the total to a more accurate number. Stuff like pro-rating paint amounts, removing the 3500 stuff that im not using, etc. dropped a considerable amount there. Turbo and nitrous are still in the budget. However, were just running nitrous while sorting out the car. Turbo will be step 3. im leaving it in just to make sure that I can actually have the budget room to do it. new total: 1527.54
recoup: 820since last update, weve been getting steady progress made. I put a few more coats on the engine bay, and painted the interior. Not perfect, but good enough to photograph well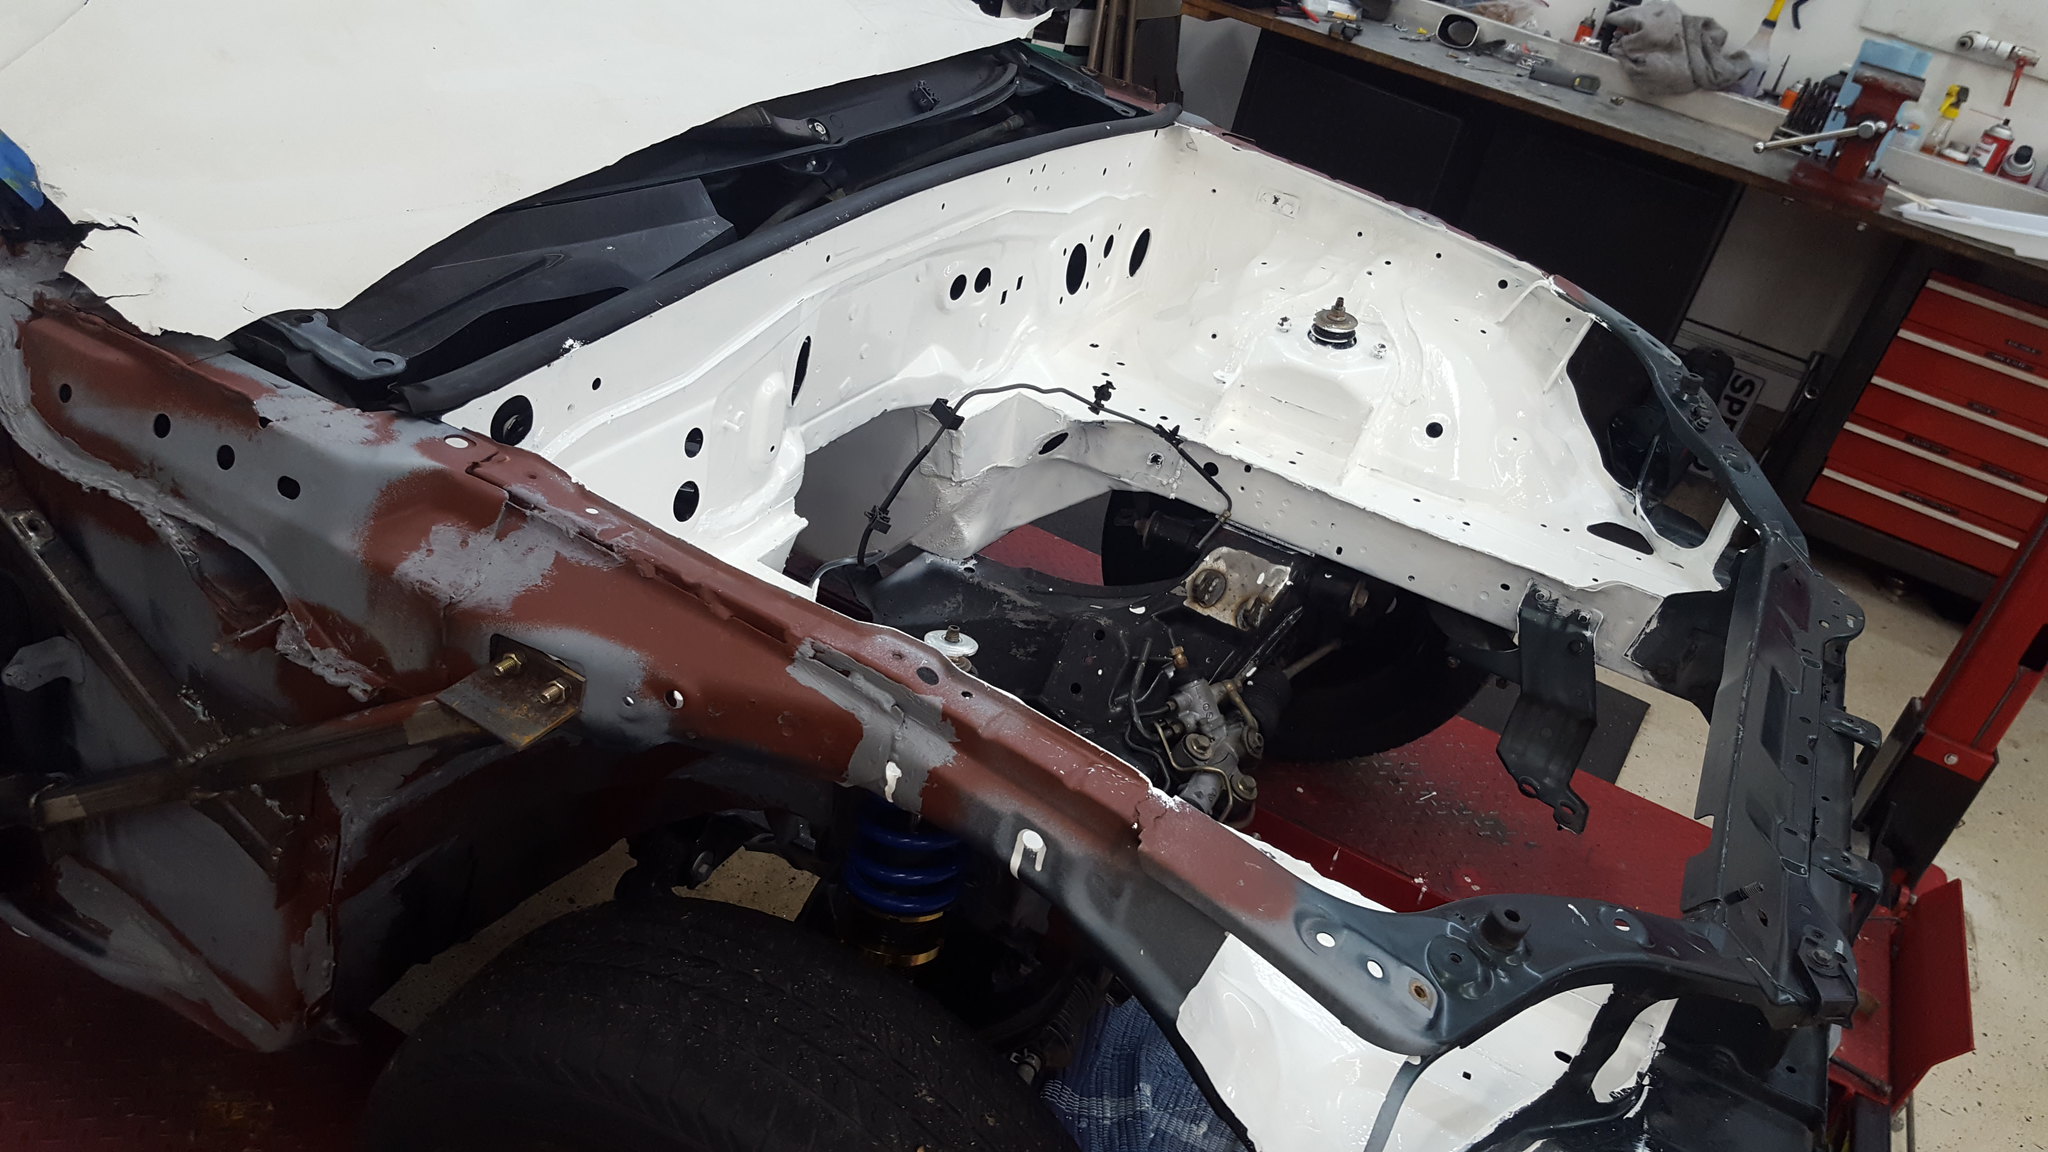
20180527_113437 by Michael Crawford, on Flickr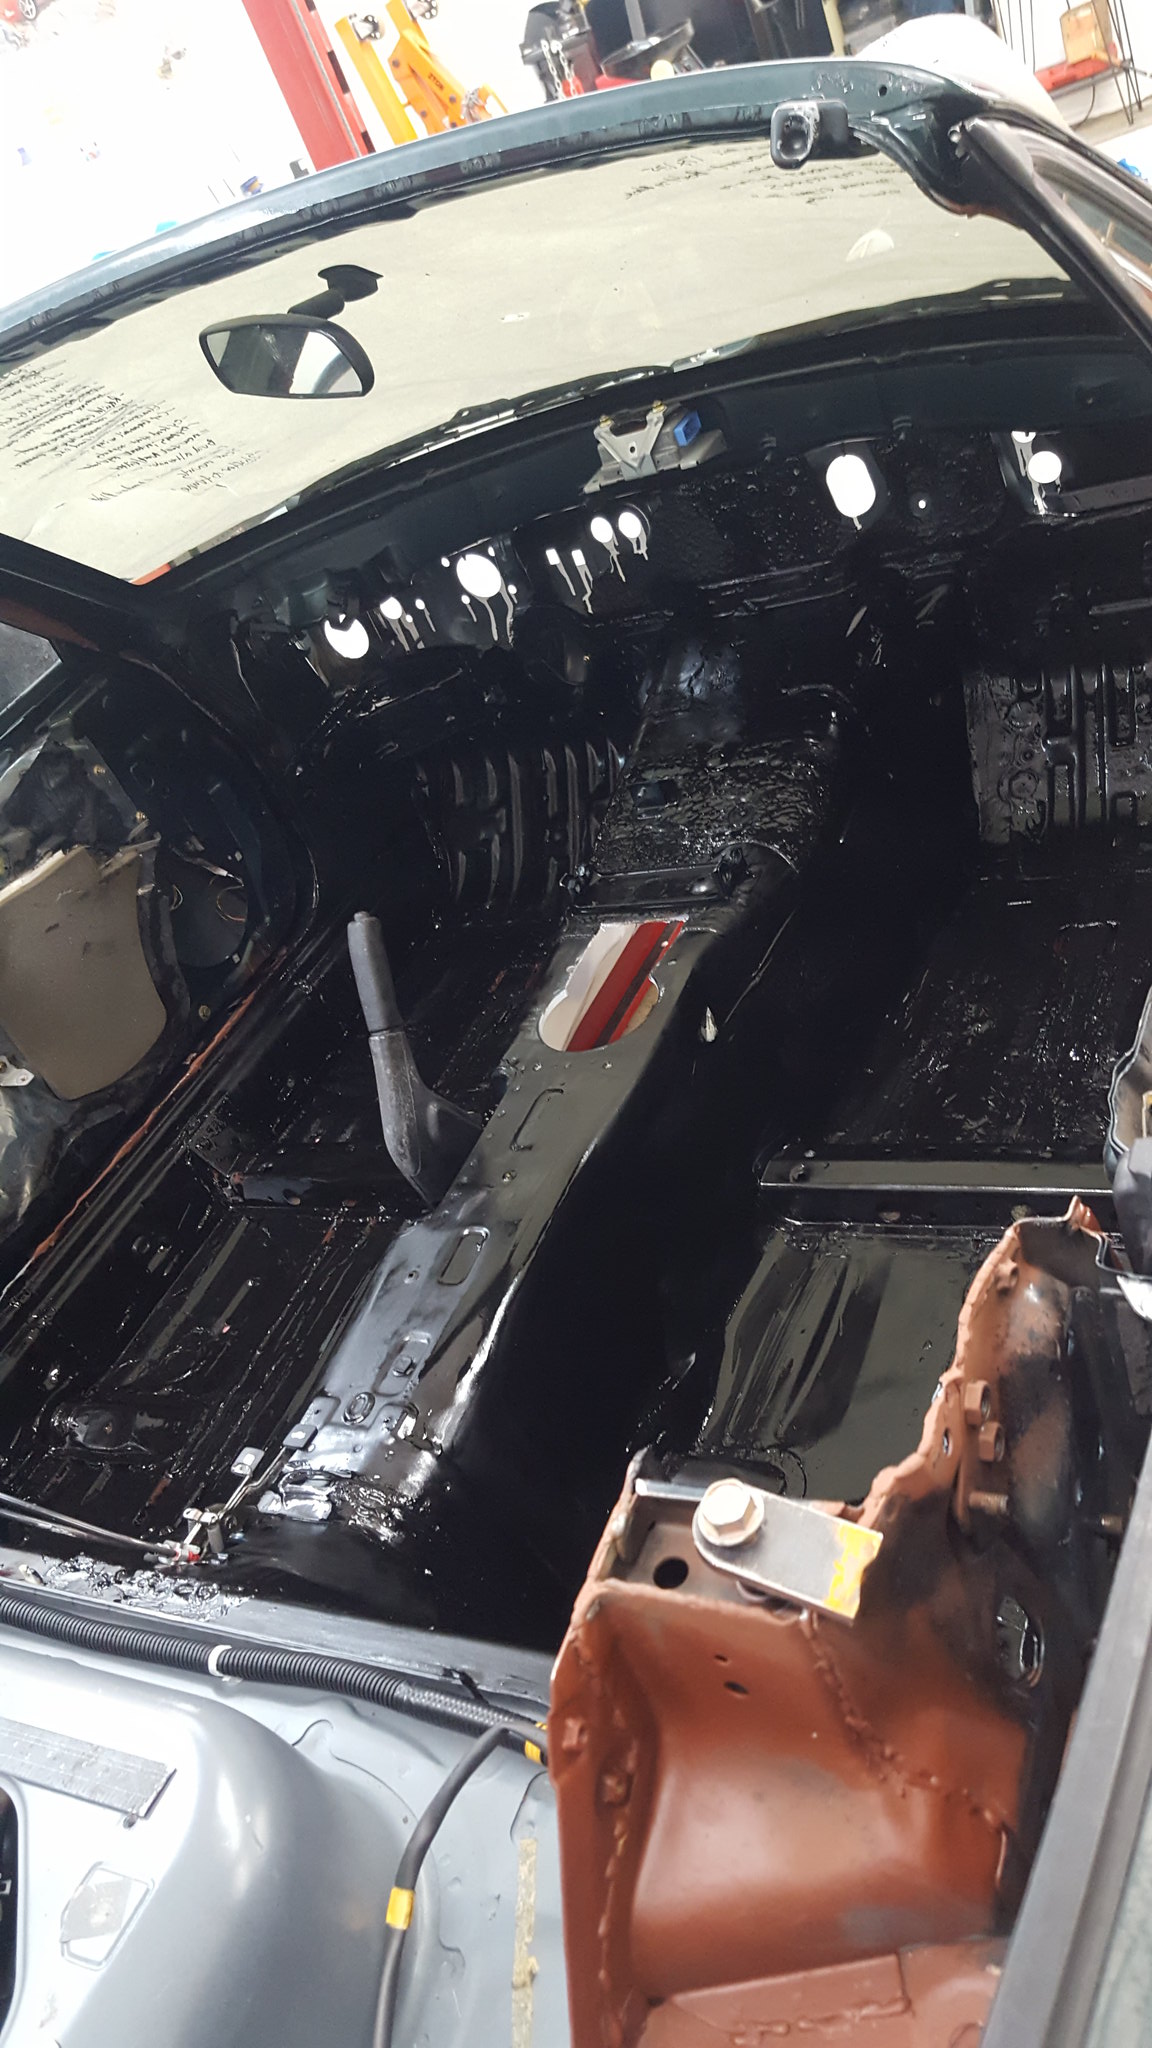
20180527_113431 by Michael Crawford, on FlickrI then spent a considerable amount of time with acetone and paper towels cleaning all the overspray off the 5/16 fuel line and all the brake lines. While I was doing that, my daughter painted the butterfly brace. Dad came home, and finished the calipers, frog arms, and a little touch up on the butterfly. Apparently I don't have the finished picture, so use your imagination for now....
20180522_181531 by Michael Crawford, on Flickrbrake lines installed, wiper motor cleaned and installed. Its really nice to finally start bolting stuff back ON the car for the last time. I also went ahead and built the 3/8 feed line. I had this on the shelf. Cheapest I could find a roll on ebay was 25 feet for 25 bucks, or a buck a foot. There's 7 feet. I put bubbles on the ends with my mastercool flaring tool, and double clamp each piece of rubber hose (pull-a-part doesn't charge me for small lengths of rubber hose or hose clamps. So I have plenty at a budget free price.) the gm v6 runs at 53 psi of pressure, and I have shown myself that the double clamp and bubble trick survives much higher pressure than this (120psi before the hose burst and it never slipped). I however would not recommend it if other options are available, as there's much less finicky methods that don't require nearly as much fiddle *******. Im doing it this way due to budget constraints) still need to redo the vent and hook up the return side of things to the tank, and the plumbing is done at this stage. Still need to figure out how to run the nitrous off the same supply as the efi. Never ran an efi system. Ever.Anyway, plumbing pictures.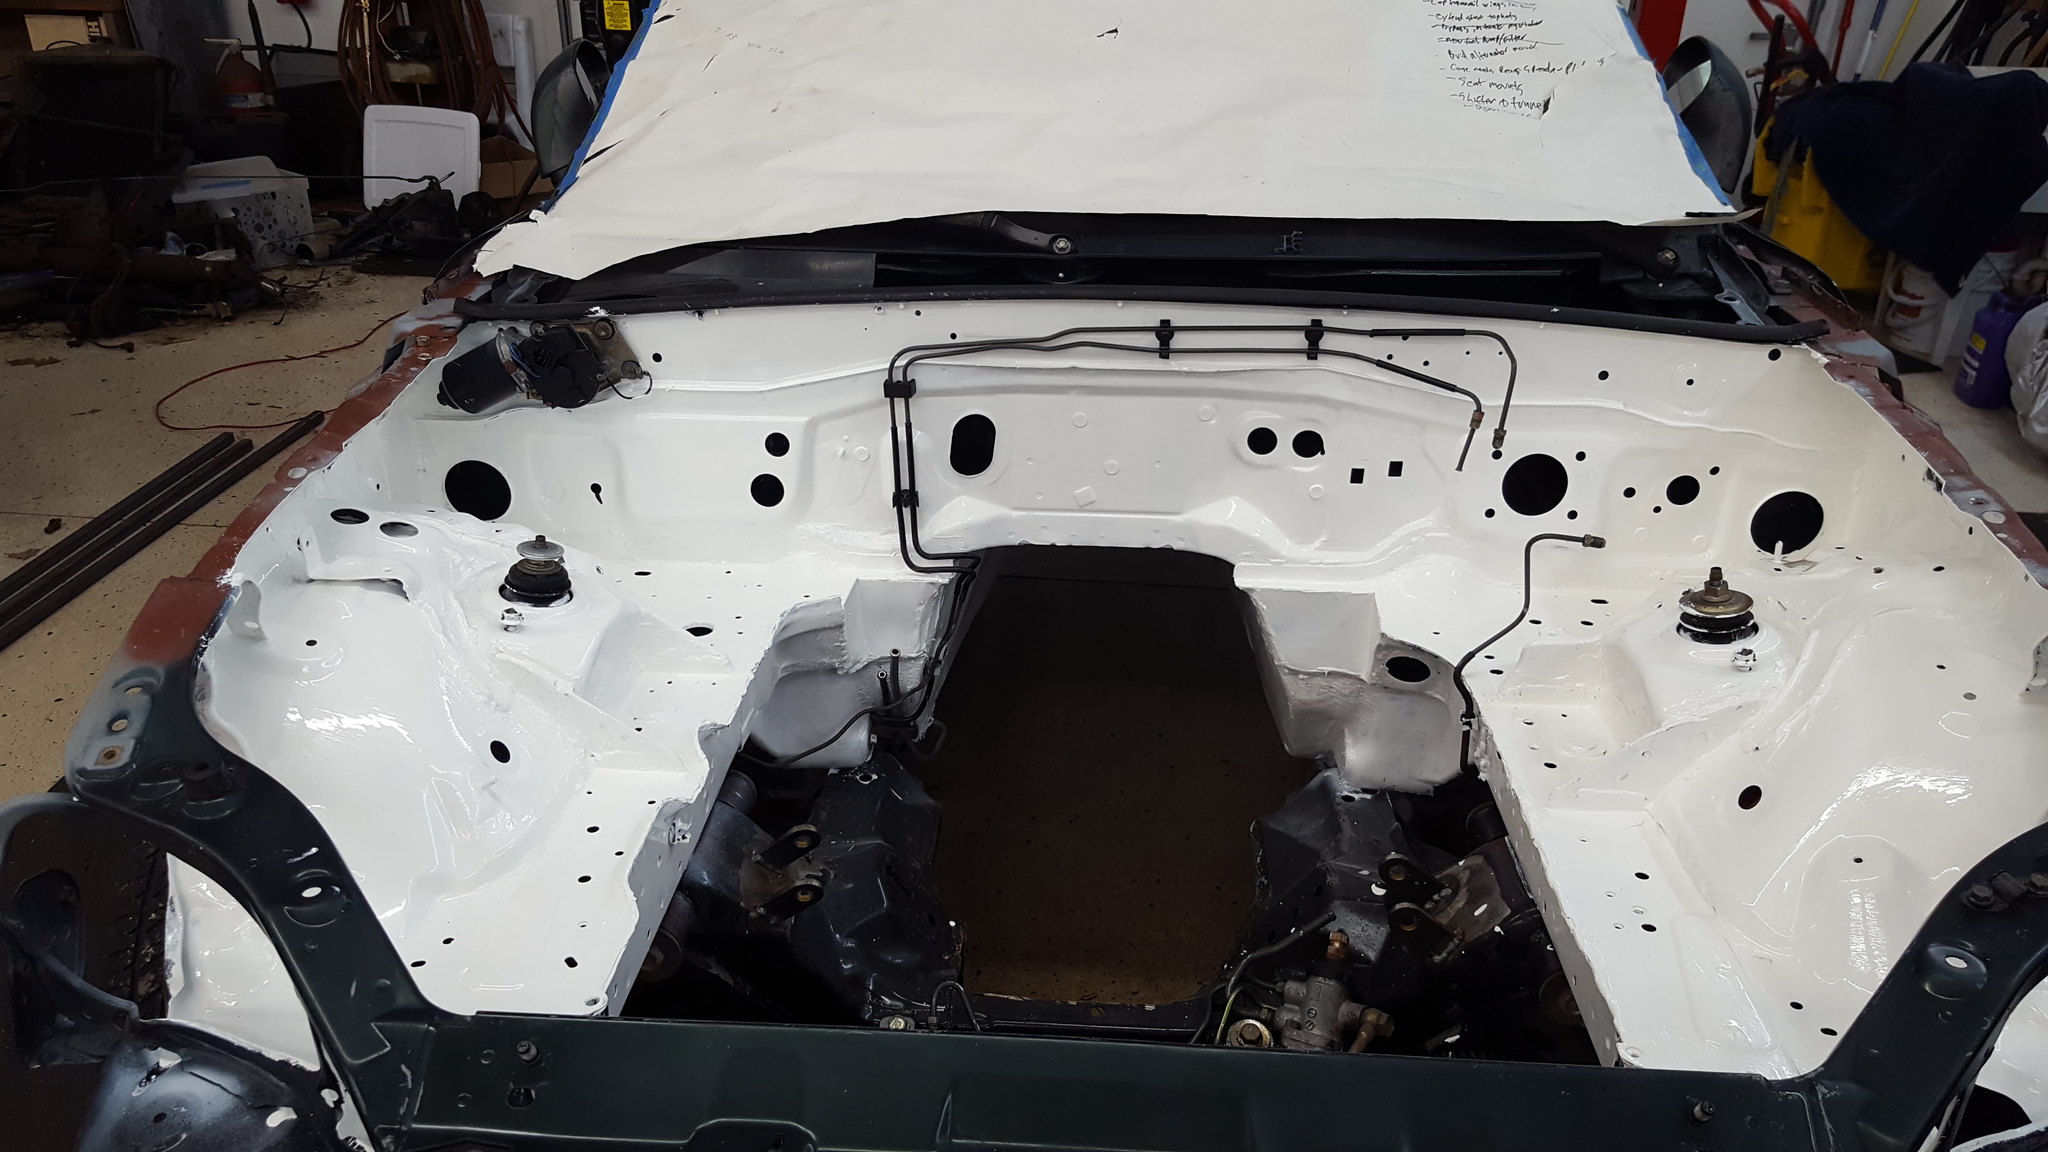
20180528_144132 by Michael Crawford, on Flickr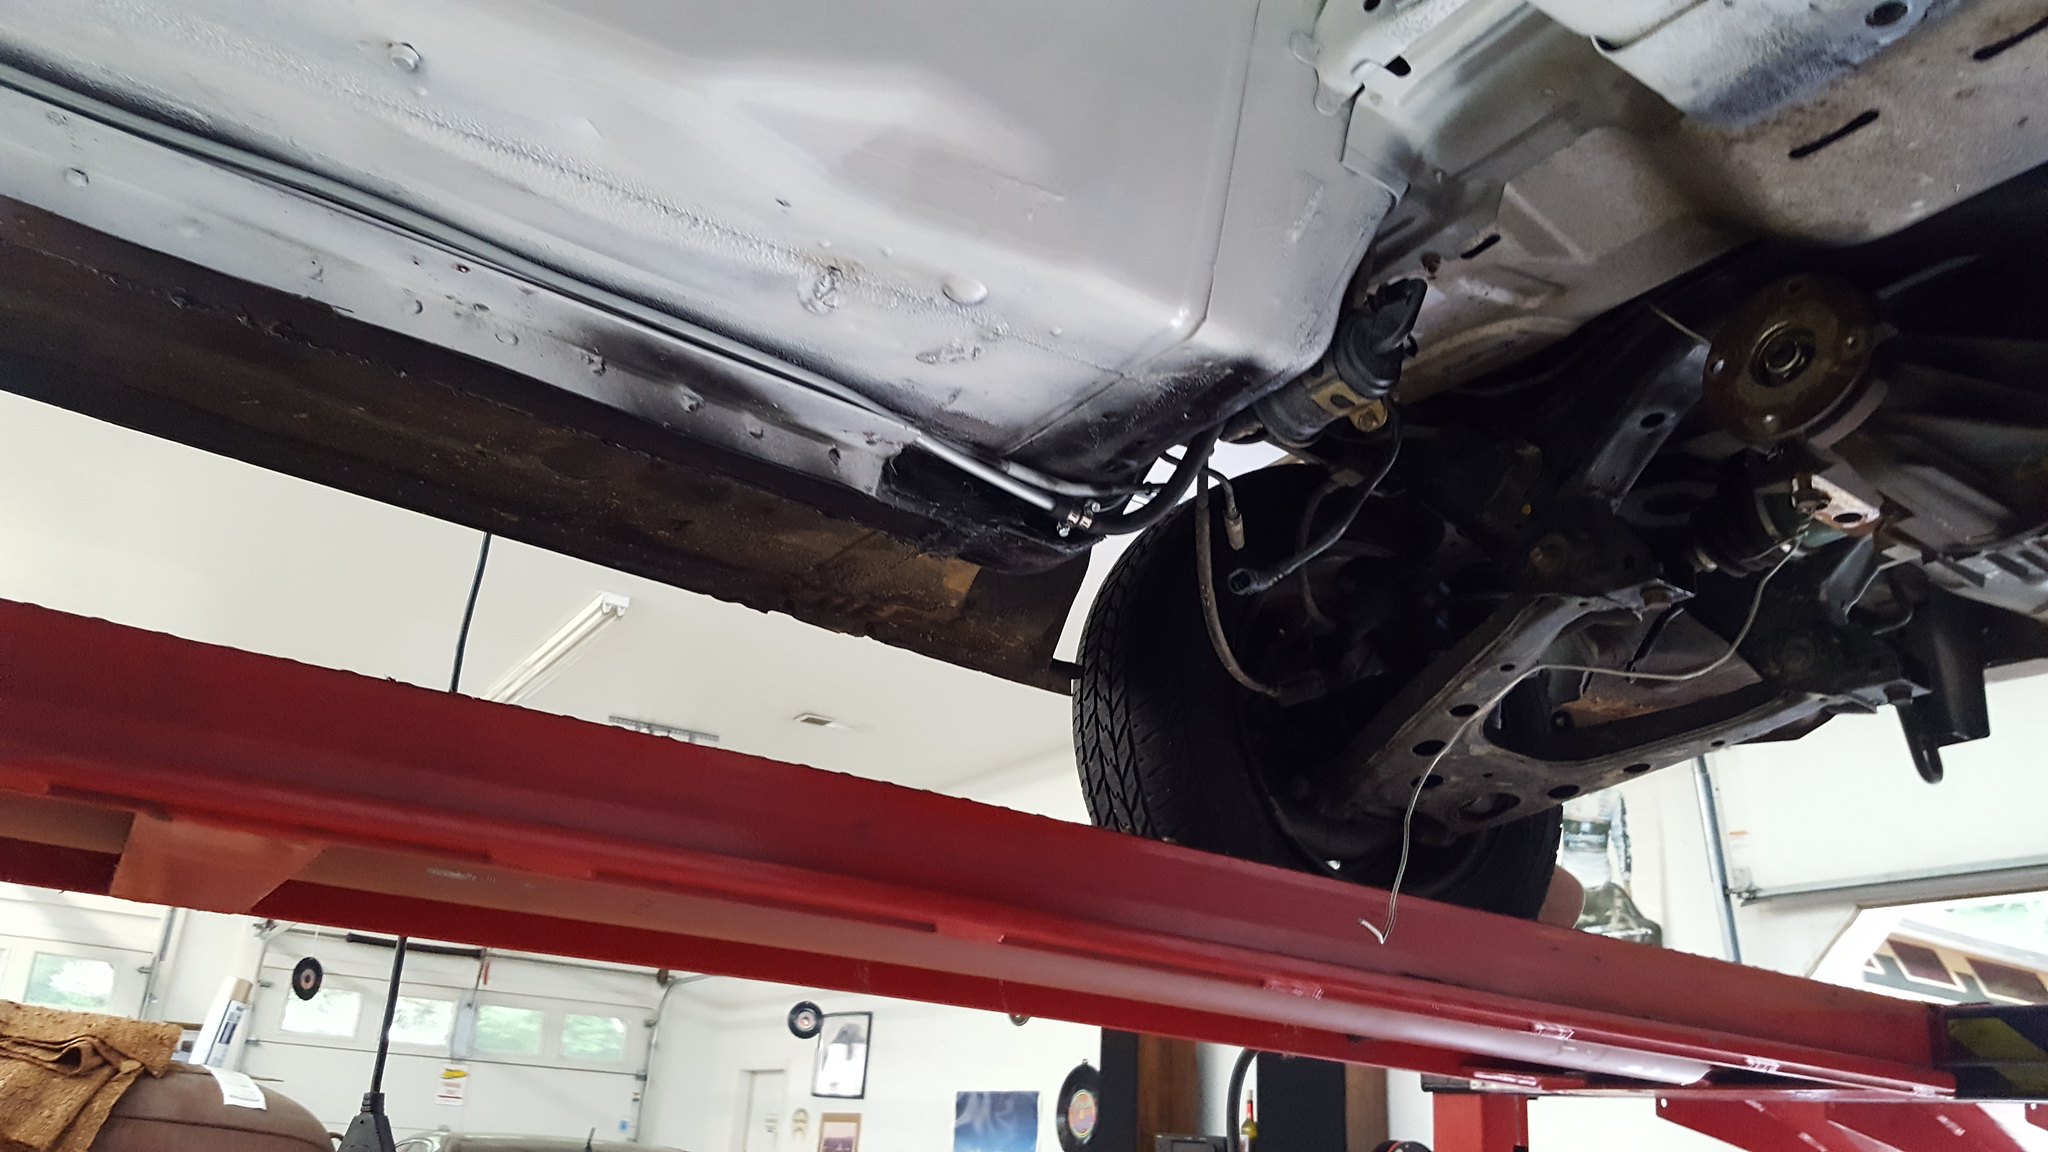
20180528_142509 by Michael Crawford, on Flickr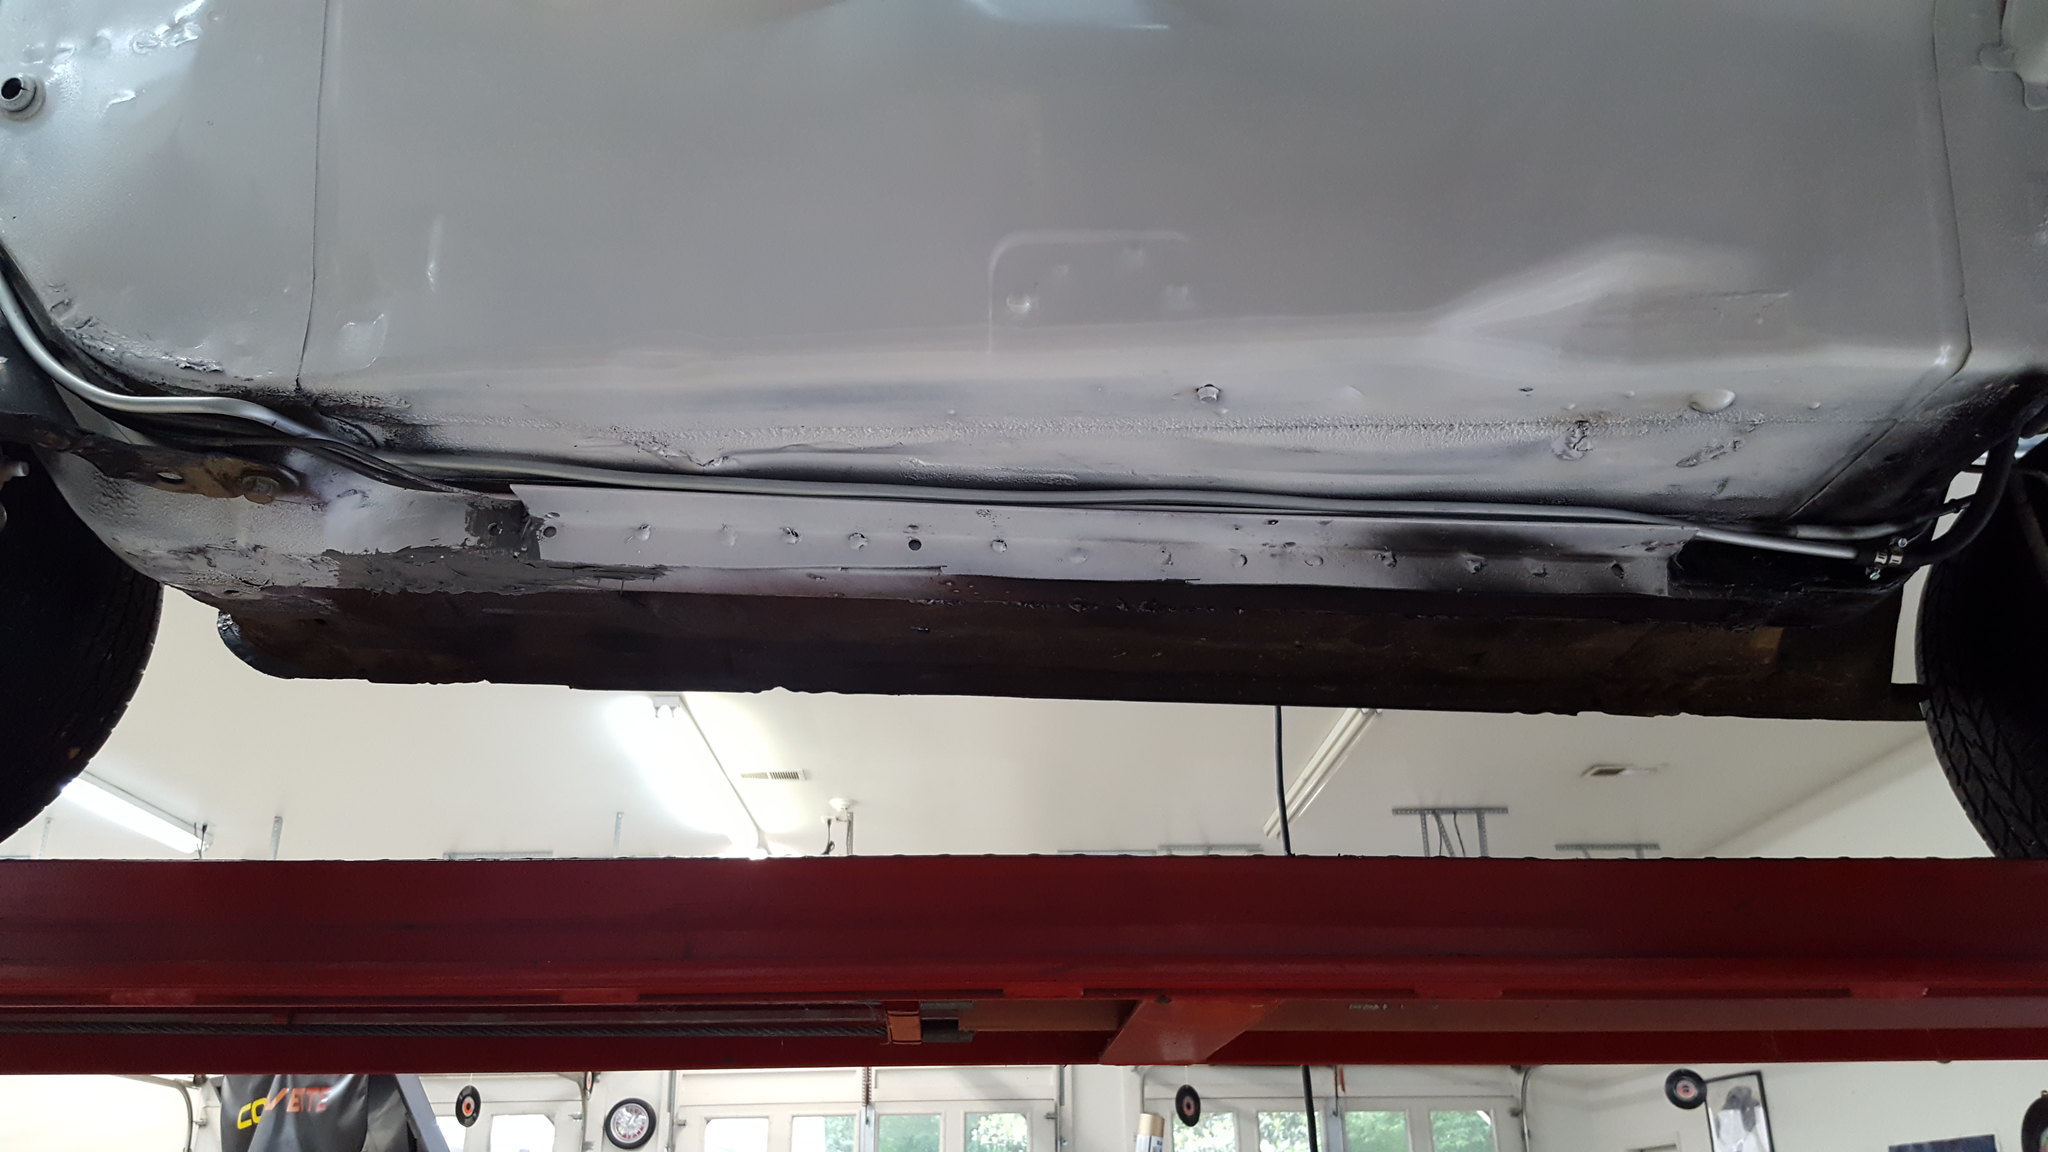
20180528_142506 by Michael Crawford, on FlickrI started insulating the firewall tonight, but didn't get very far, and didn't take any pictures. Suffice to say, the nest update will have a bit of that and more reassembly.Lastly, steve stafford helped do the last of the welding needed for the engine swap. We welded a water neck to the lower intake to be able to actually get water in and out of the engine. (no thermostat in there, and plan to make my own inline thermostat and housing setup). We also welded up the EGR port in the intake after I cut it off. This was required to clear the FWD timing chain cover with the upper manifold flipped. We decided not to run the 3500 upper and big throttle body at this time, as the jury is still out on its effectiveness vs the large port 3400 that this engine is. It may be good for some power in this application, but not enough for one twentieth of the budget.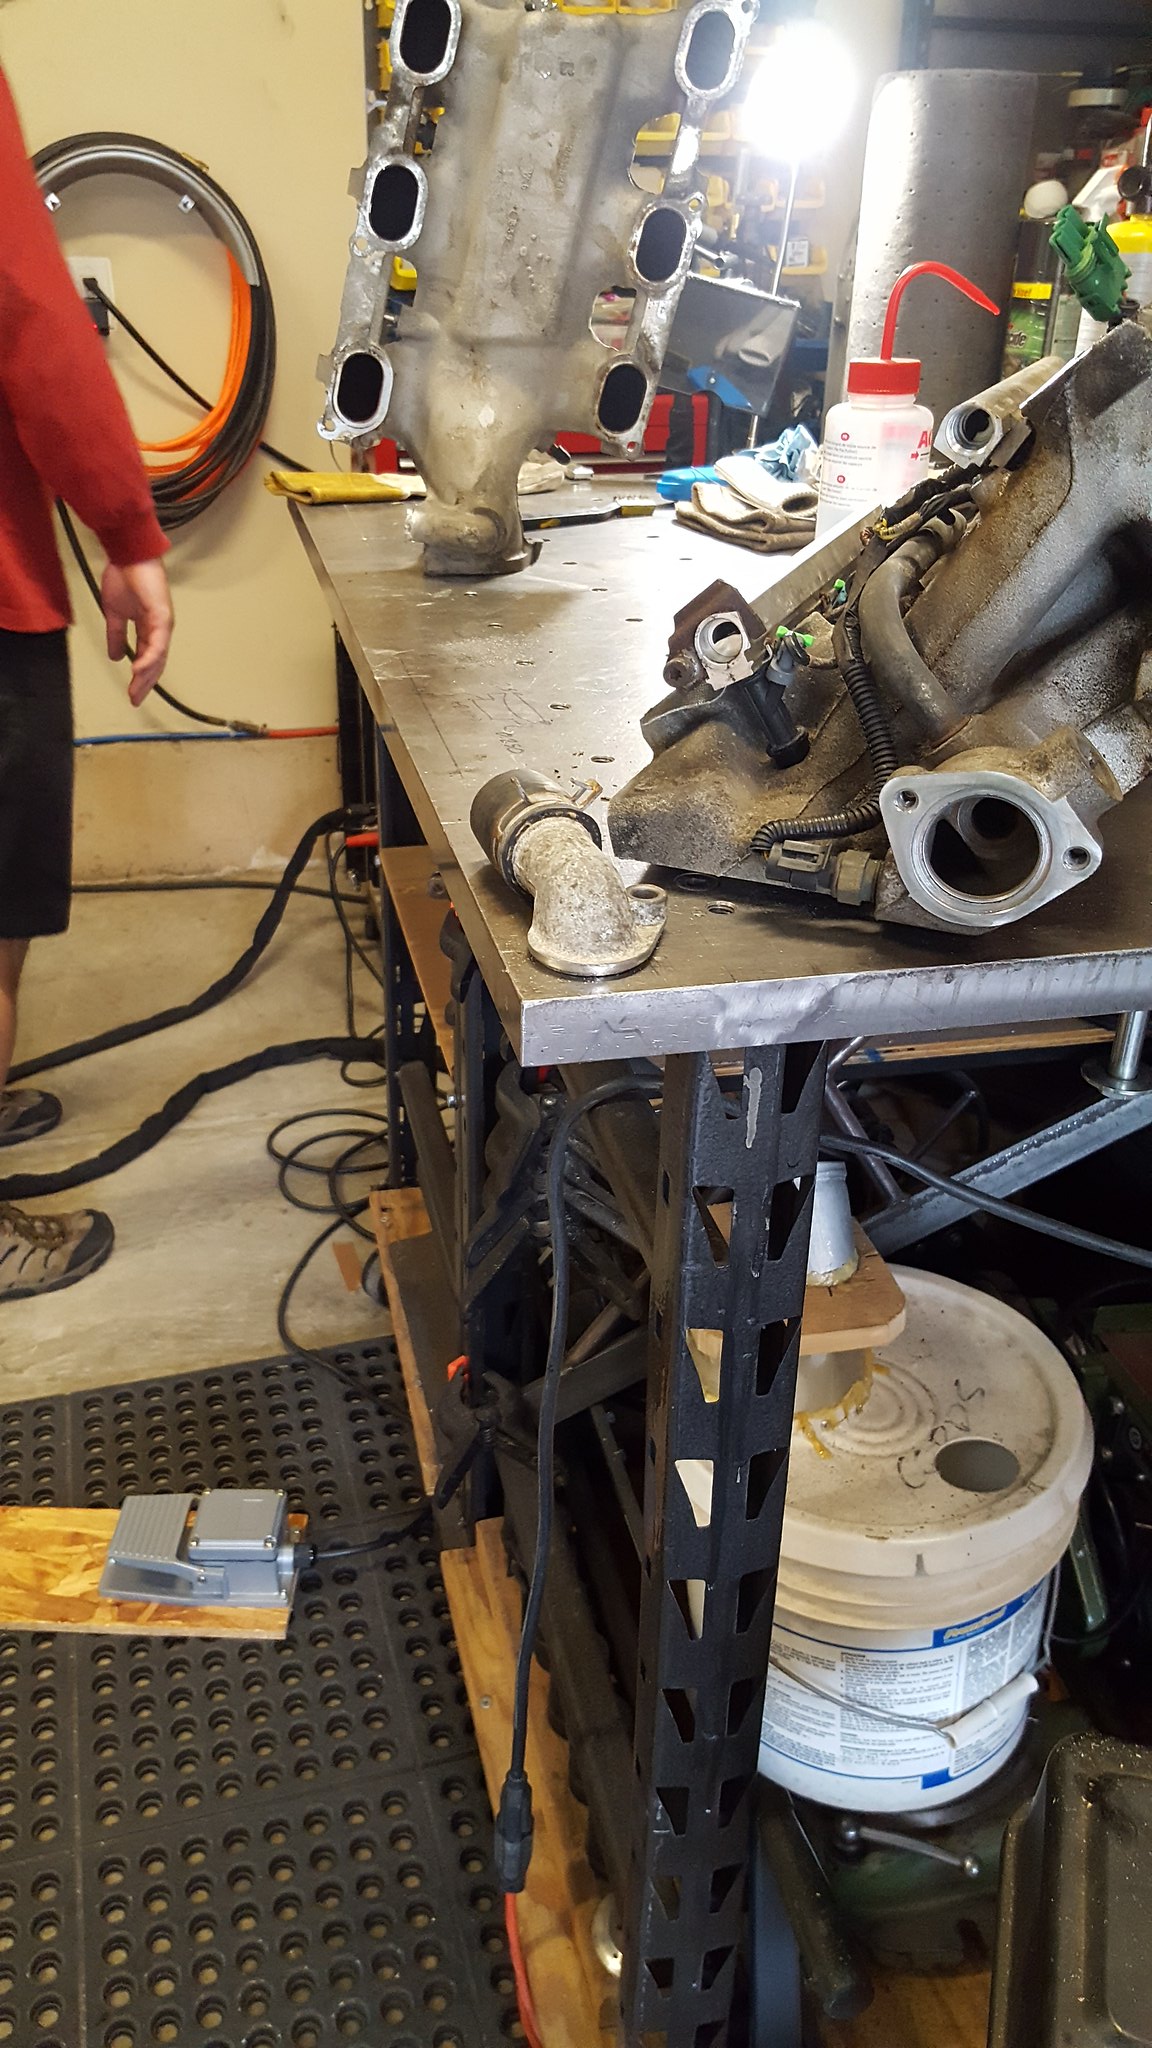
20180526_084916 by Michael Crawford, on Flickr
20180527_113454 by Michael Crawford, on Flickr
20180527_113450 by Michael Crawford, on Flickrdon't forget to tell your family you love them.
revious challenge budget: 1612.35 recoup total: 820new money:bought reflectix insulation at lowes: 23:85bought dorman fittings for the fuel lines (5) for 12.997 ft steel fuel line at $1 foot.also went through the budget sheet and pulled stuff that im not using to clean up the total to a more accurate number. Stuff like pro-rating paint amounts, removing the 3500 stuff that im not using, etc. dropped a considerable amount there. Turbo and nitrous are still in the budget. However, were just running nitrous while sorting out the car. Turbo will be step 3. im leaving it in just to make sure that I can actually have the budget room to do it. new total: 1527.54recoup: 820since last update, weve been getting steady progress made. I put a few more coats on the engine bay, and painted the interior. Not perfect, but good enough to photograph well
20180527_113437 by Michael Crawford, on Flickr
20180527_113431 by Michael Crawford, on FlickrI then spent a considerable amount of time with acetone and paper towels cleaning all the overspray off the 5/16 fuel line and all the brake lines. While I was doing that, my daughter painted the butterfly brace. Dad came home, and finished the calipers, frog arms, and a little touch up on the butterfly. Apparently I don't have the finished picture, so use your imagination for now....
20180522_181531 by Michael Crawford, on Flickrbrake lines installed, wiper motor cleaned and installed. Its really nice to finally start bolting stuff back ON the car for the last time. I also went ahead and built the 3/8 feed line. I had this on the shelf. Cheapest I could find a roll on ebay was 25 feet for 25 bucks, or a buck a foot. There's 7 feet. I put bubbles on the ends with my mastercool flaring tool, and double clamp each piece of rubber hose (pull-a-part doesn't charge me for small lengths of rubber hose or hose clamps. So I have plenty at a budget free price.) the gm v6 runs at 53 psi of pressure, and I have shown myself that the double clamp and bubble trick survives much higher pressure than this (120psi before the hose burst and it never slipped). I however would not recommend it if other options are available, as there's much less finicky methods that don't require nearly as much fiddle *******. Im doing it this way due to budget constraints) still need to redo the vent and hook up the return side of things to the tank, and the plumbing is done at this stage. Still need to figure out how to run the nitrous off the same supply as the efi. Never ran an efi system. Ever.Anyway, plumbing pictures.
20180528_144132 by Michael Crawford, on Flickr
20180528_142509 by Michael Crawford, on Flickr
20180528_142506 by Michael Crawford, on FlickrI started insulating the firewall tonight, but didn't get very far, and didn't take any pictures. Suffice to say, the nest update will have a bit of that and more reassembly.Lastly, steve stafford helped do the last of the welding needed for the engine swap. We welded a water neck to the lower intake to be able to actually get water in and out of the engine. (no thermostat in there, and plan to make my own inline thermostat and housing setup). We also welded up the EGR port in the intake after I cut it off. This was required to clear the FWD timing chain cover with the upper manifold flipped. We decided not to run the 3500 upper and big throttle body at this time, as the jury is still out on its effectiveness vs the large port 3400 that this engine is. It may be good for some power in this application, but not enough for one twentieth of the budget.
20180526_084916 by Michael Crawford, on Flickr
20180527_113454 by Michael Crawford, on Flickr
20180527_113450 by Michael Crawford, on Flickrdon't forget to tell your family you love them.
Reply
0
0
06-10-2018, 08:32 PM
#56
Junior Member
Thread Starter
Join Date: Nov 2017
Posts: 112
Total Cats: 7
Challenge budget so farrevious challenge budget: 1527.54 recoup total: 820new money: torsen: 200
quick release wheel: 20
aluminum paint: 6.99satin black spray paint: dustin was throwing out a box of aerosol cans, I took what I wanted and he put the rest by the road to make them go away. They lasted about 9 minutes.further budget clean up (took out leftover steel and other supplies were pro-rated. Also, since wvtumbler gave me the box of leftovers from his project, I dont need the gasket kit. Or the hydraulic clutch fittings, as there was one in there!) new total: 1686.08
recoup: 820 progress!!!!finished off my rattle can of rustoleum in the trunk. We found last year that theres a lot of wrenching in the dark at the challenge. White makes things easier to see by flashlight. Since the nitrous and battery go back in the trunk, I brightened it. Badly, but the can was running out. I have a bit of white left yet from the valspar, and im thinking about putting a solid coat of that on. However, its not a priority. At all.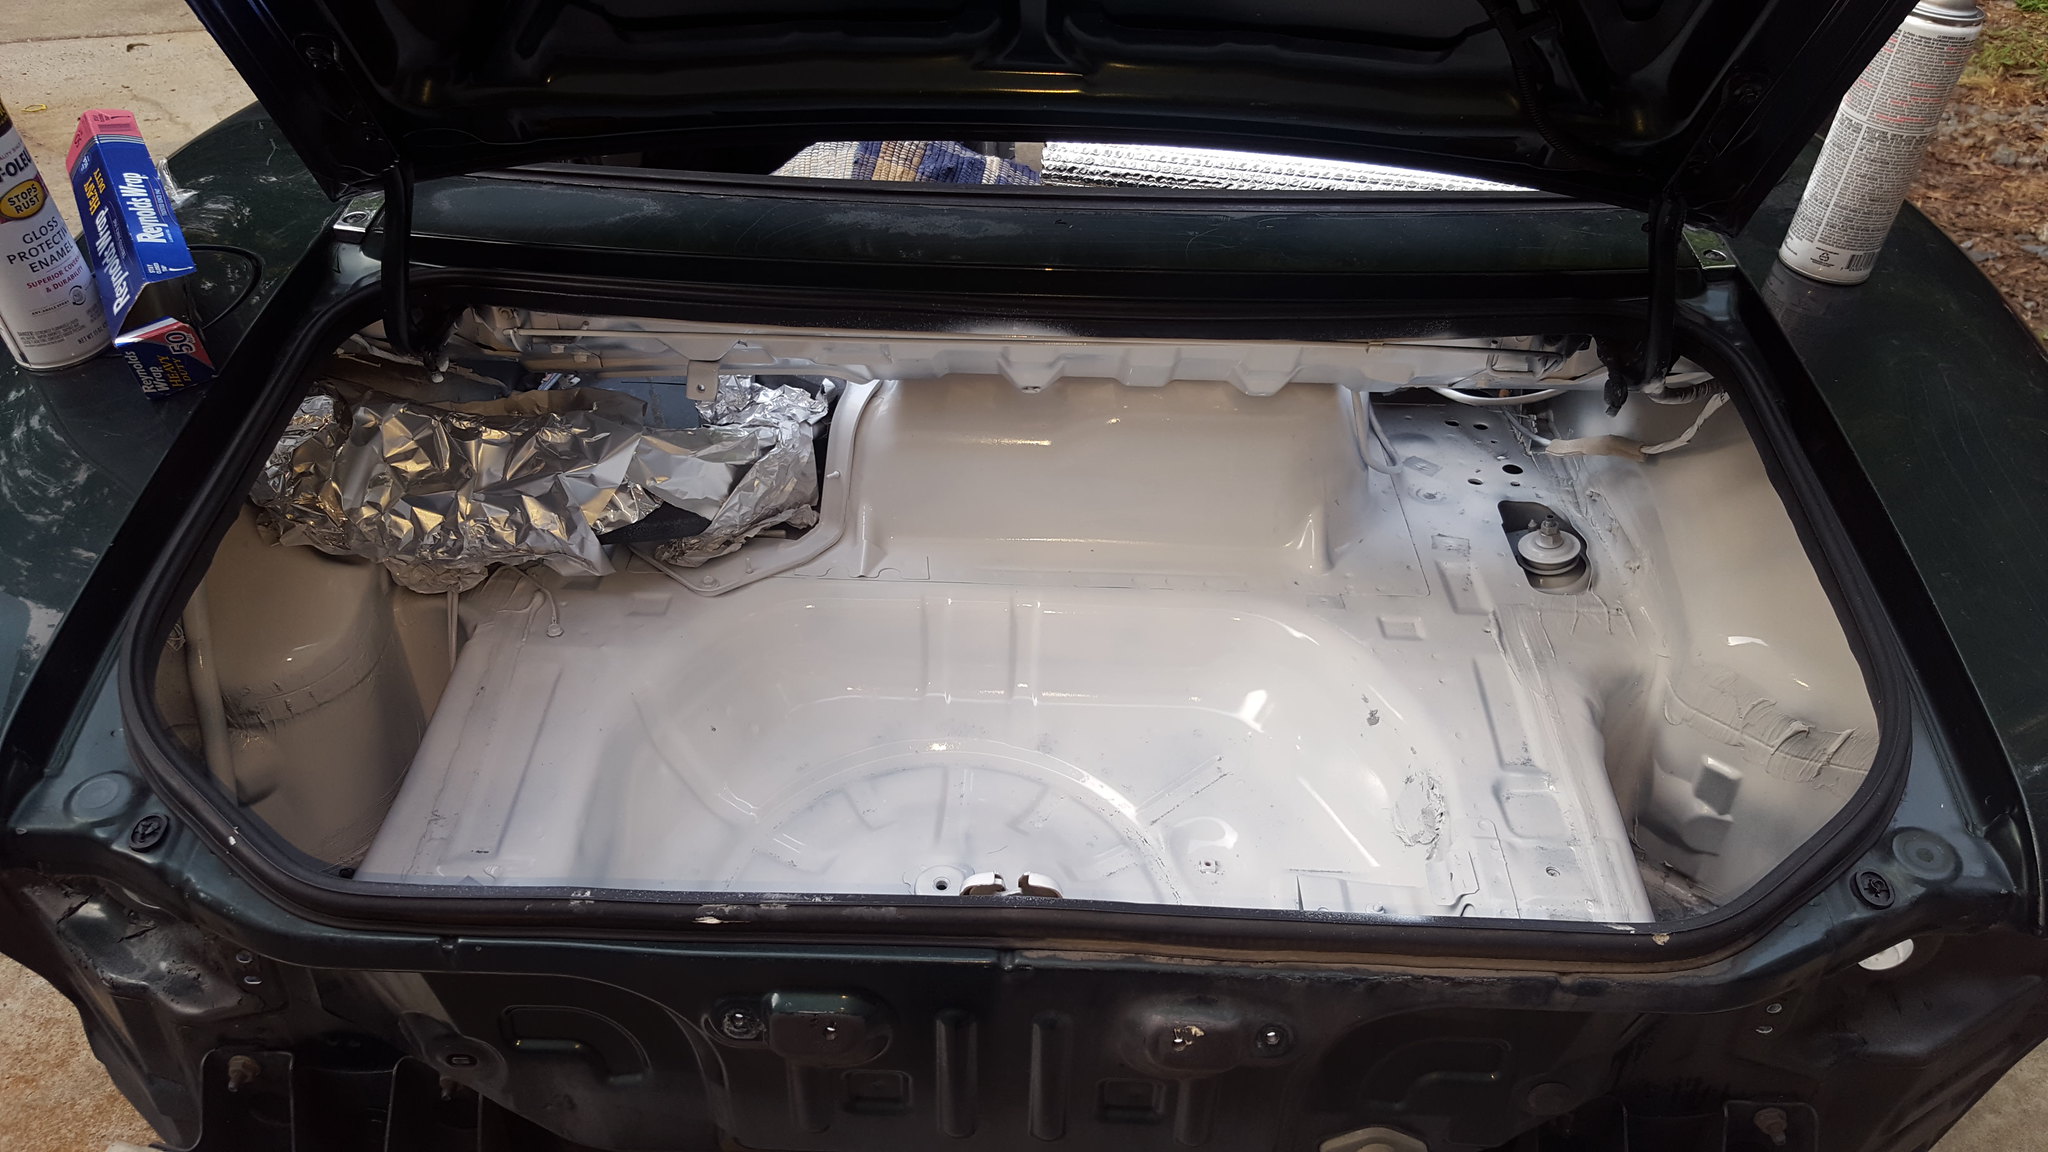
20180608_192603 by Michael Crawford, on FlickrI also spent a few minutes with a can of sating black. Blacked out the core support and fenderwells. Some off brand of paint ive never heard of, but the price was right....two days later its soft as hell and easily damaged. Theres a reason he was throwing it out.....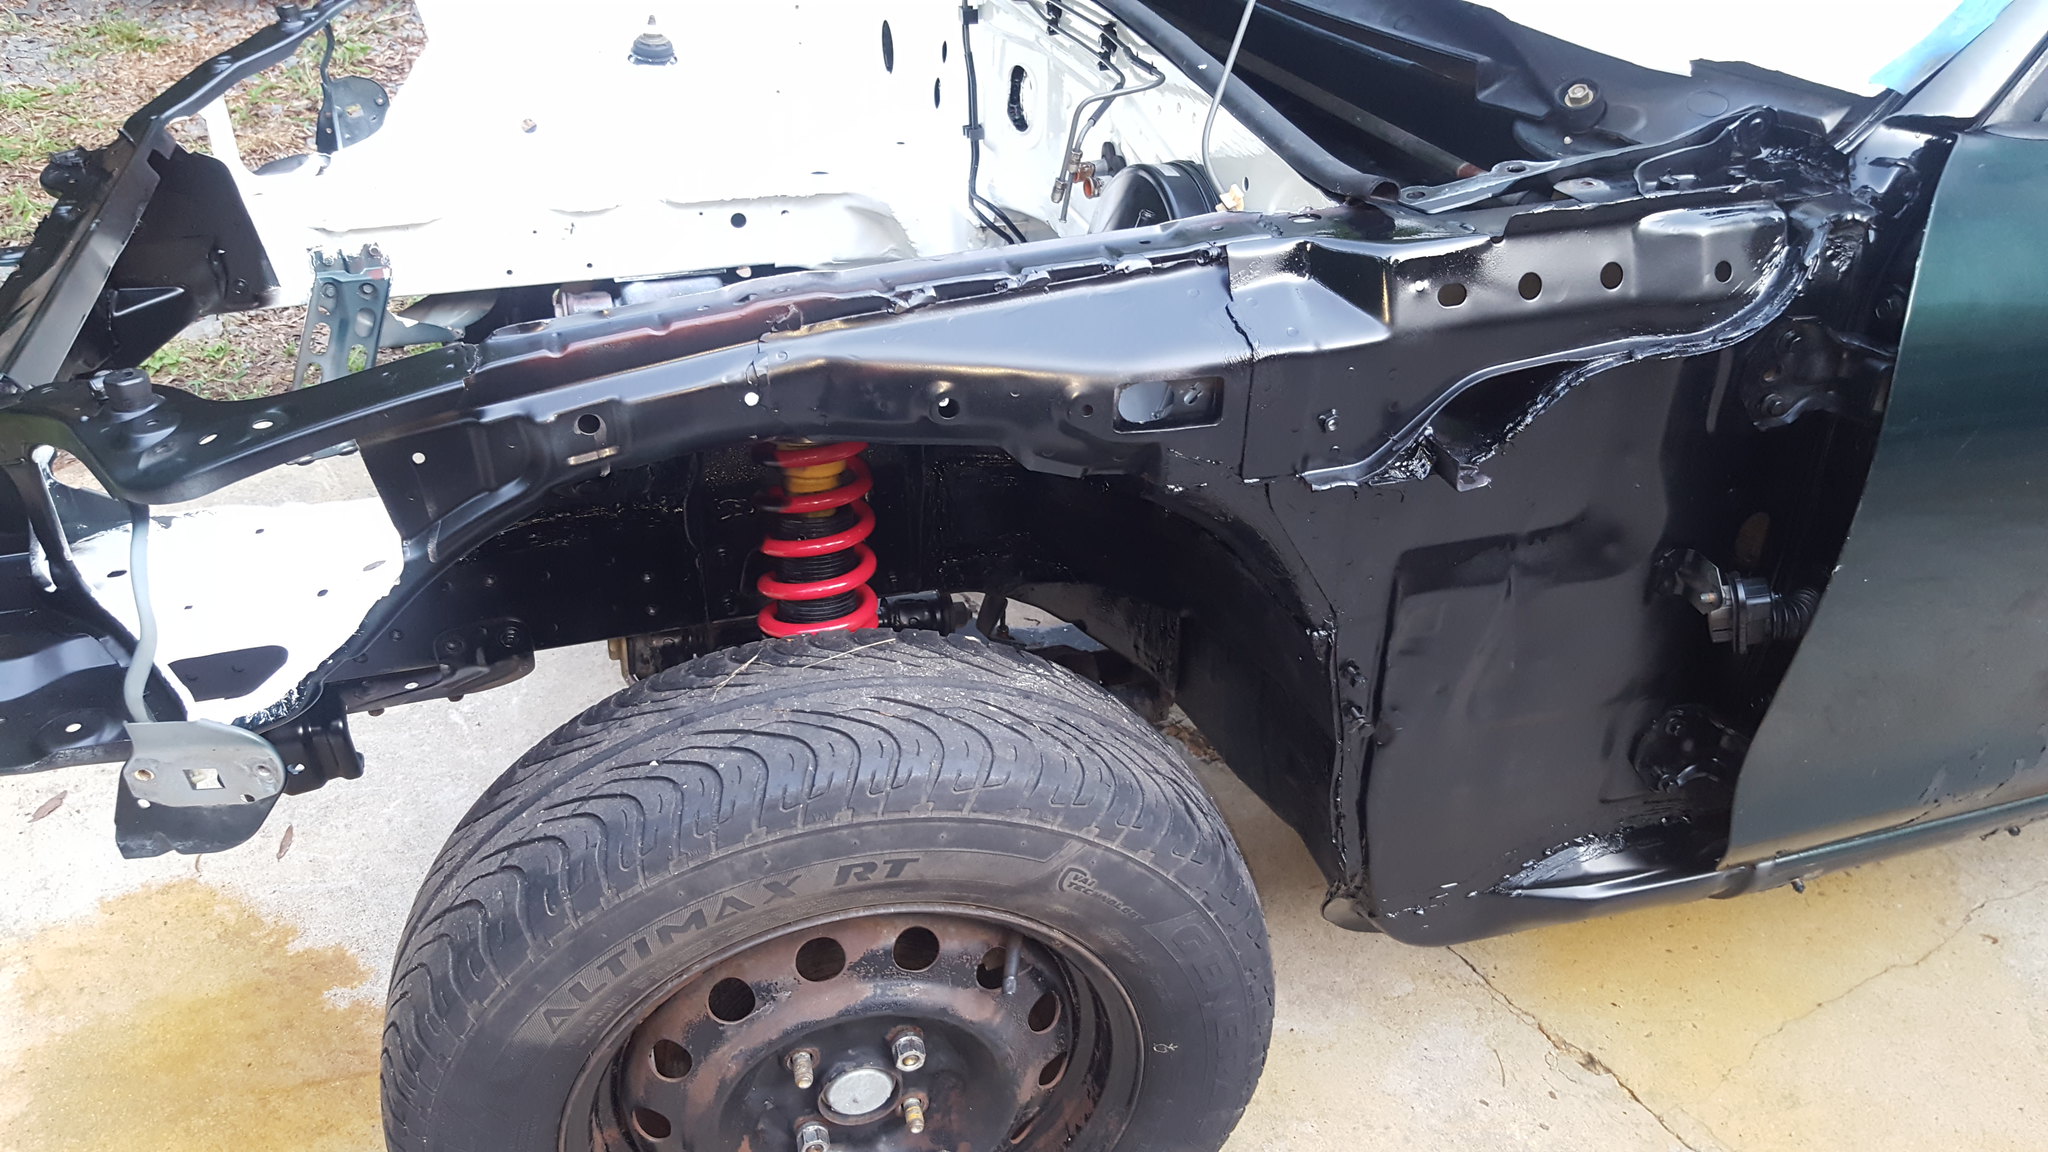
20180608_192545 by Michael Crawford, on Flickr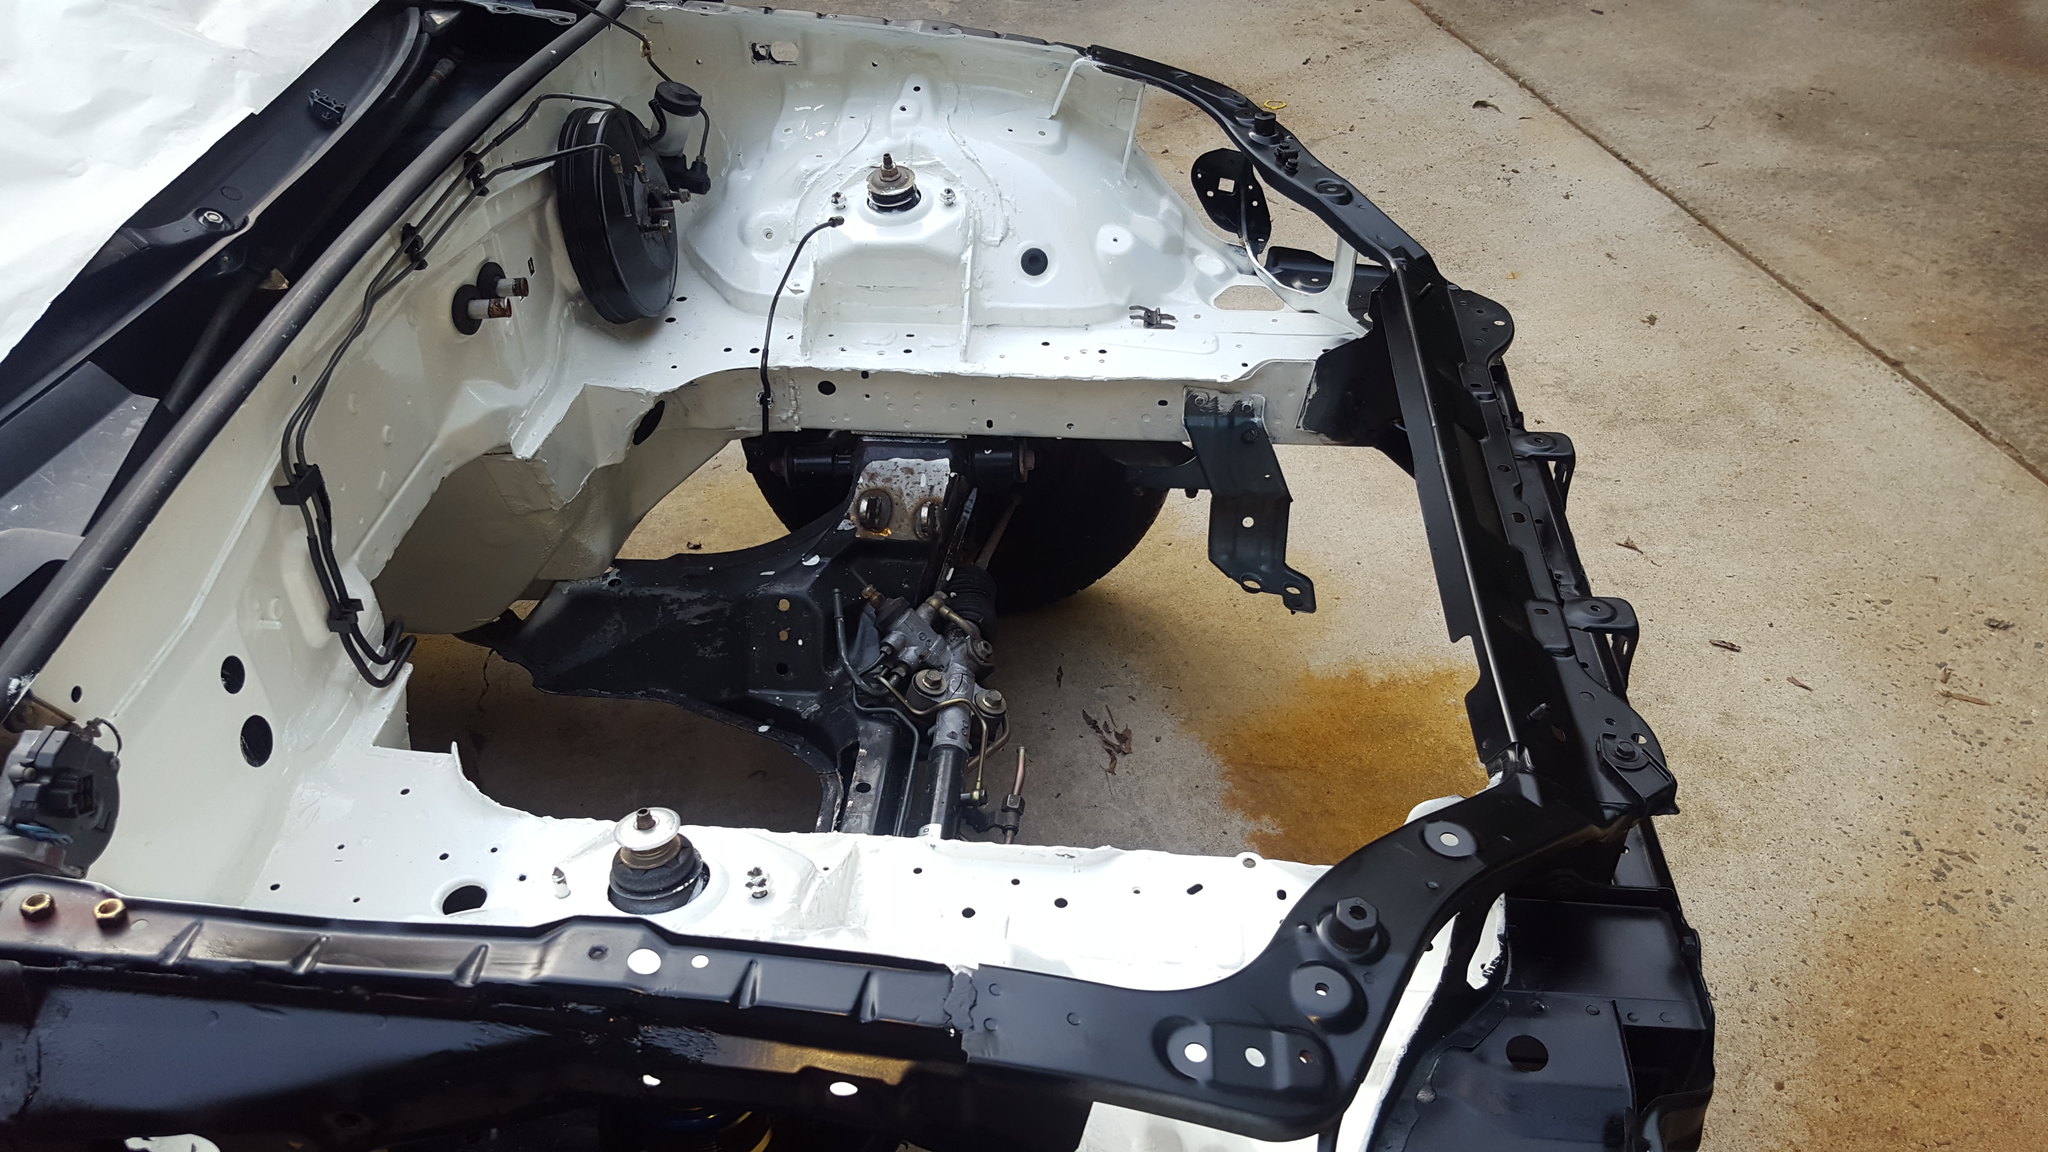
20180608_192530 by Michael Crawford, on FlickrI also scored a torsen with 4.11 gears for $200 from a failed challenge car project (also lemons racers. Cool, cool guys.) along with a miata steering column with quick release and wheel. I need to figure out if I can swap my ignition switch and other parts from the stock column with the quick release welded on. Hopefully. If someone can answer before I spend the time, that would be great!
20180601_200319 by Michael Crawford, on Flickr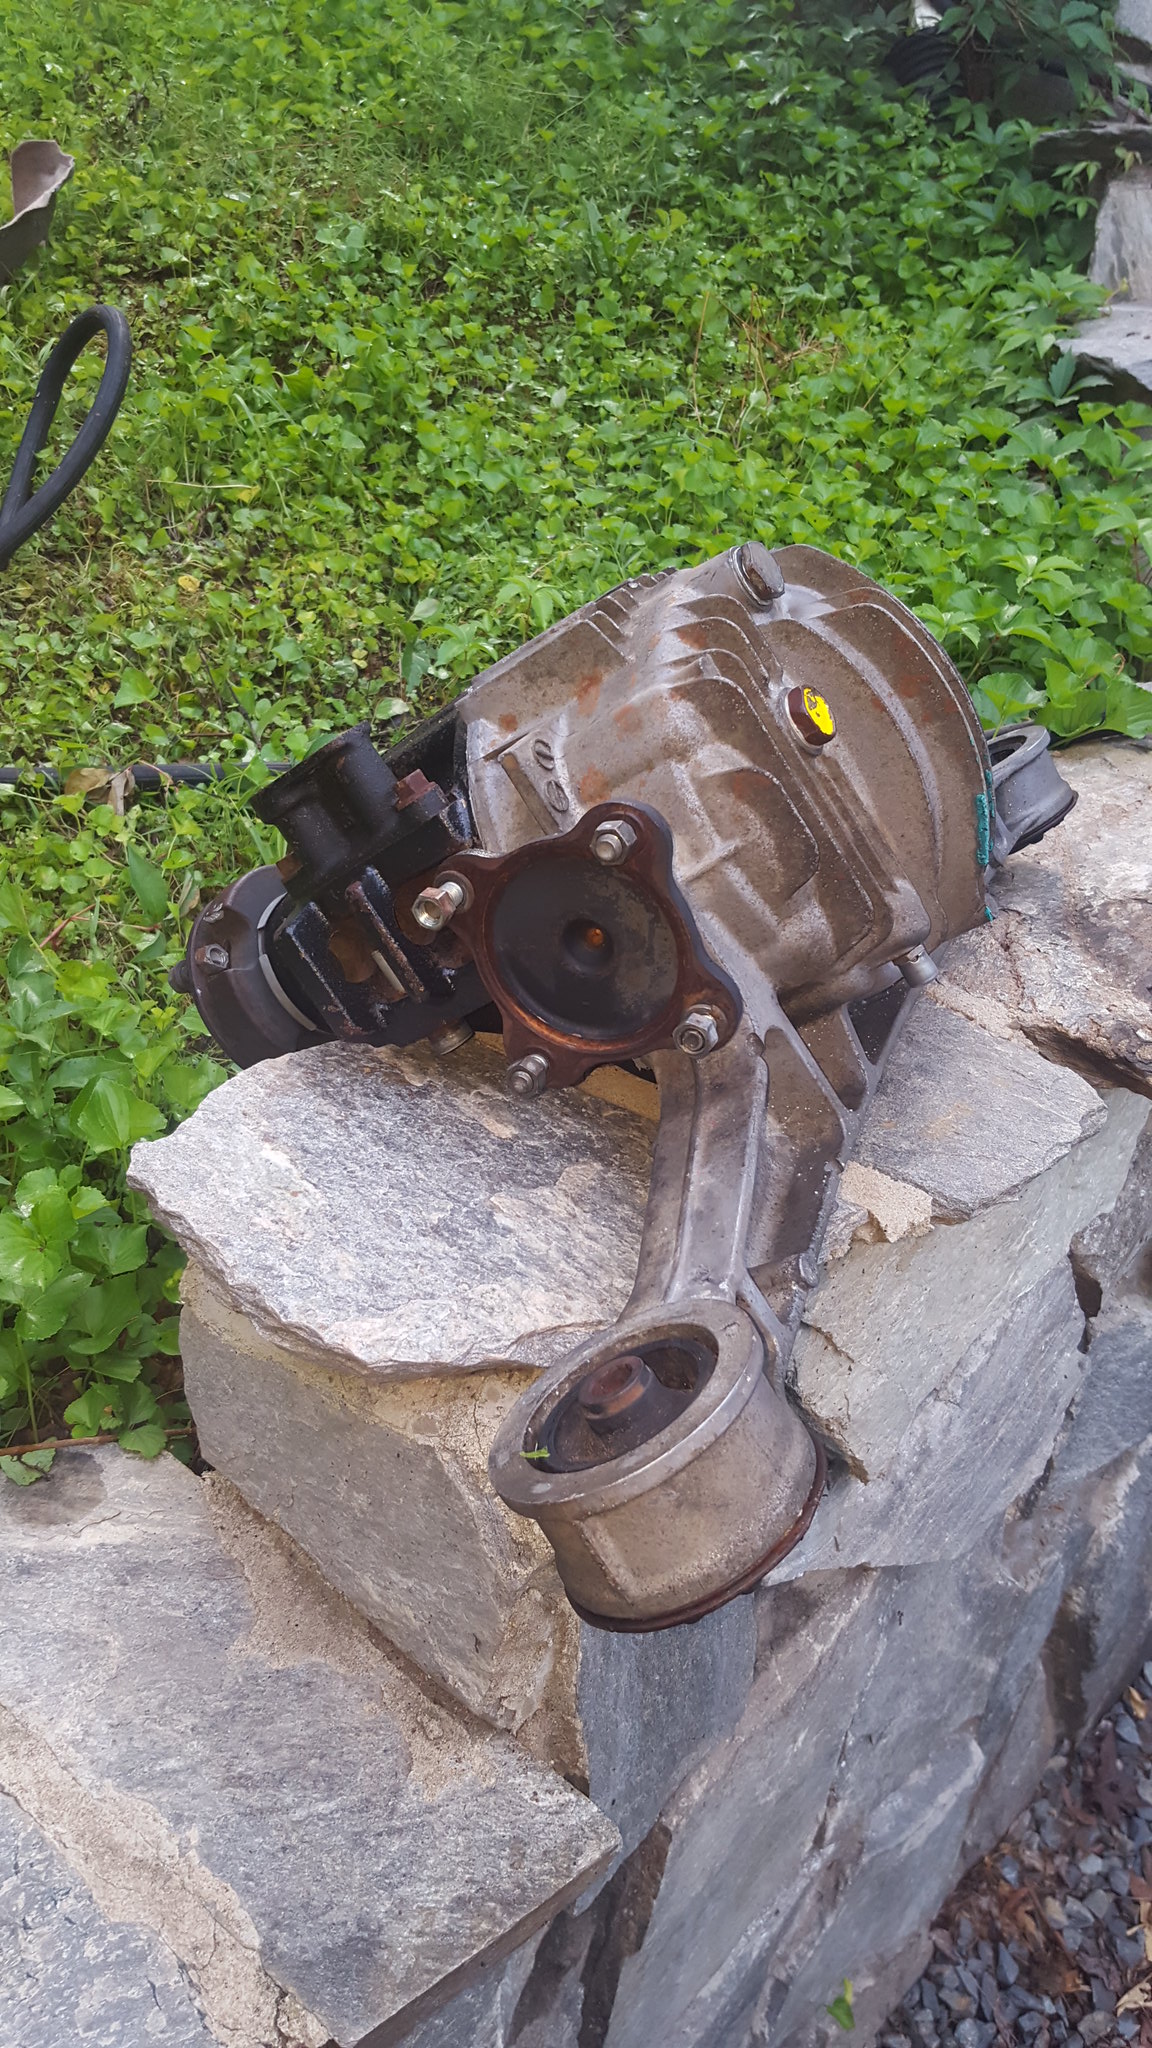
20180608_071040 by Michael Crawford, on Flickr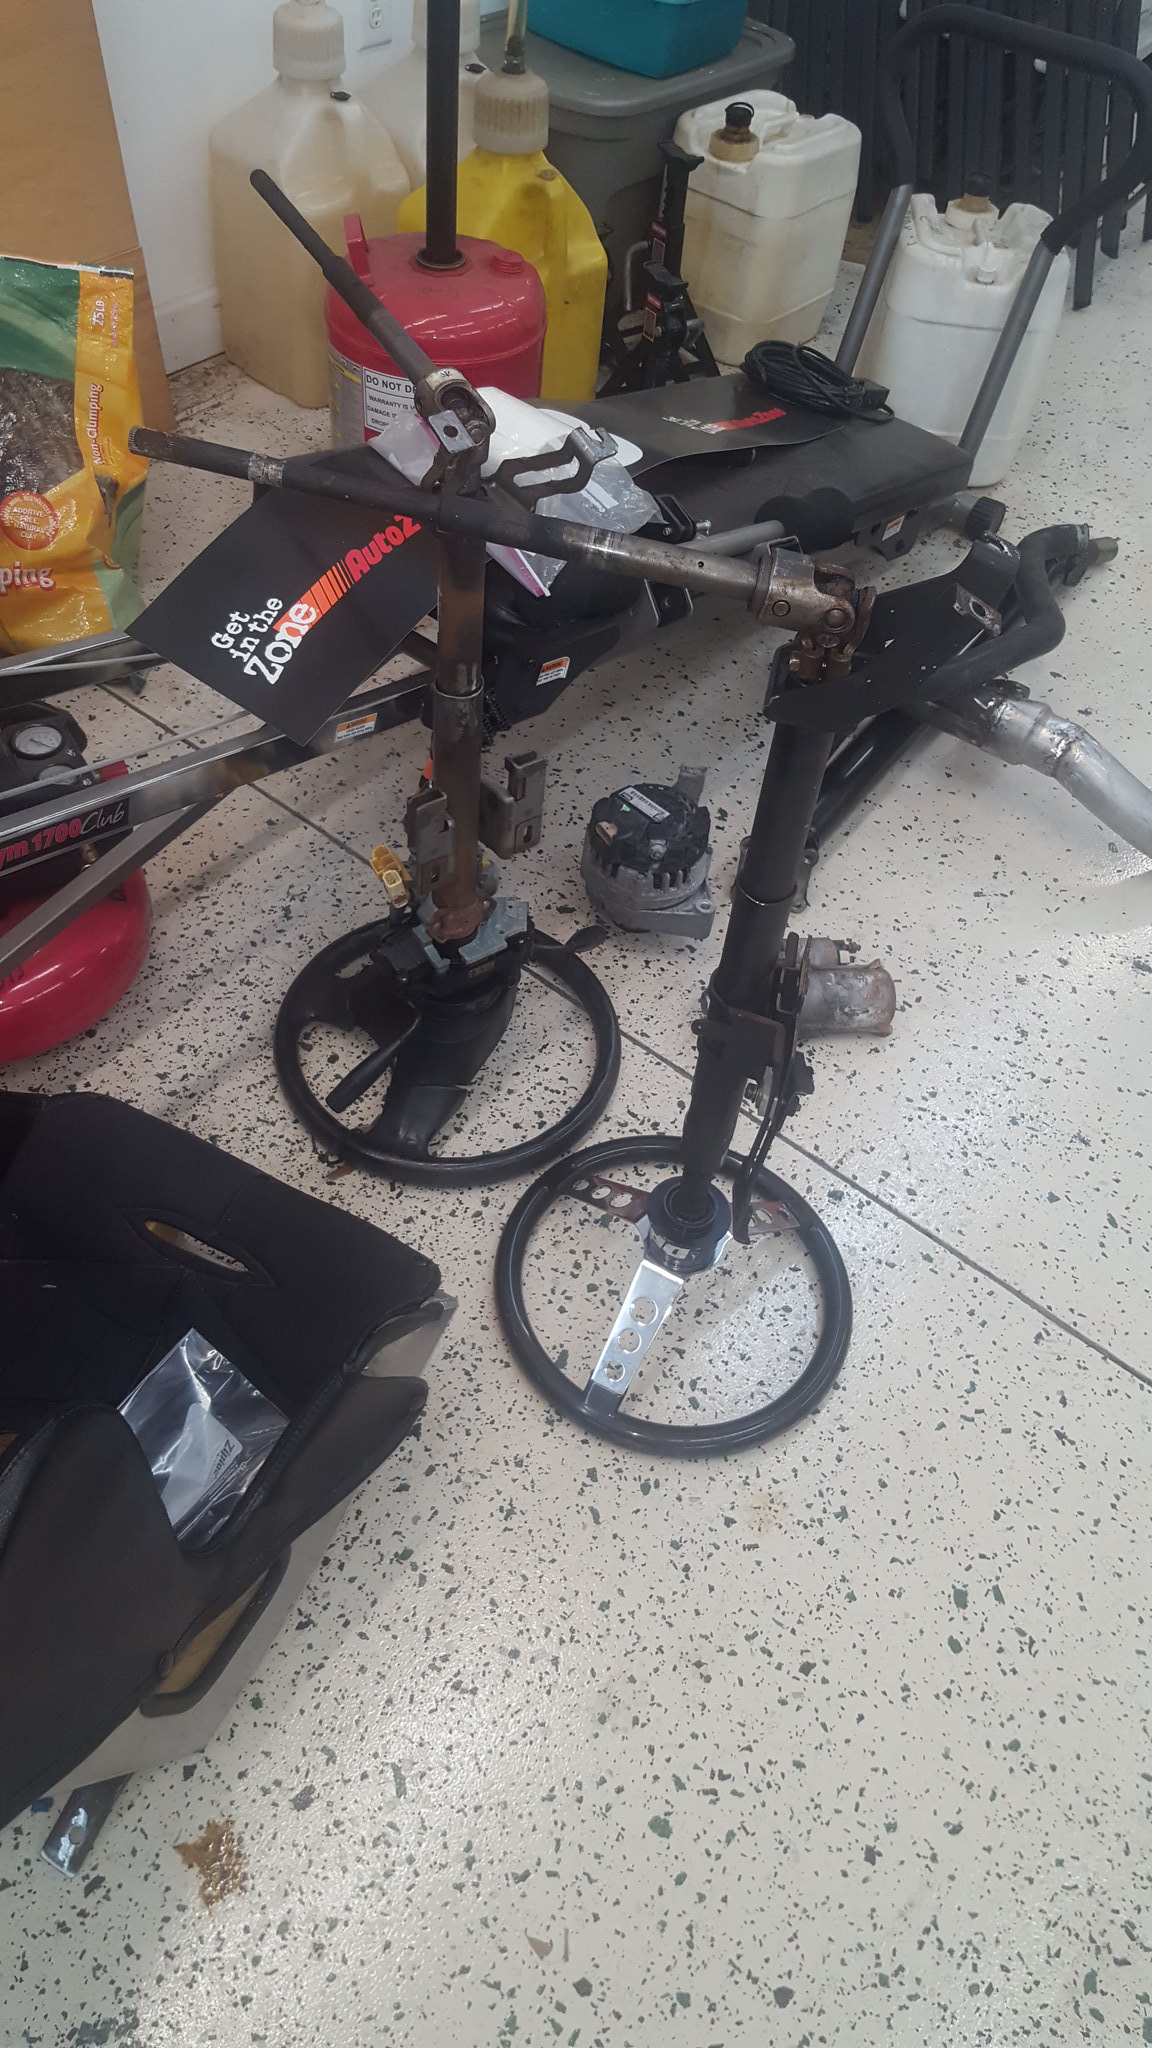
20180610_112435 by Michael Crawford, on Flickrcleaned and painted the upper and lower manifolds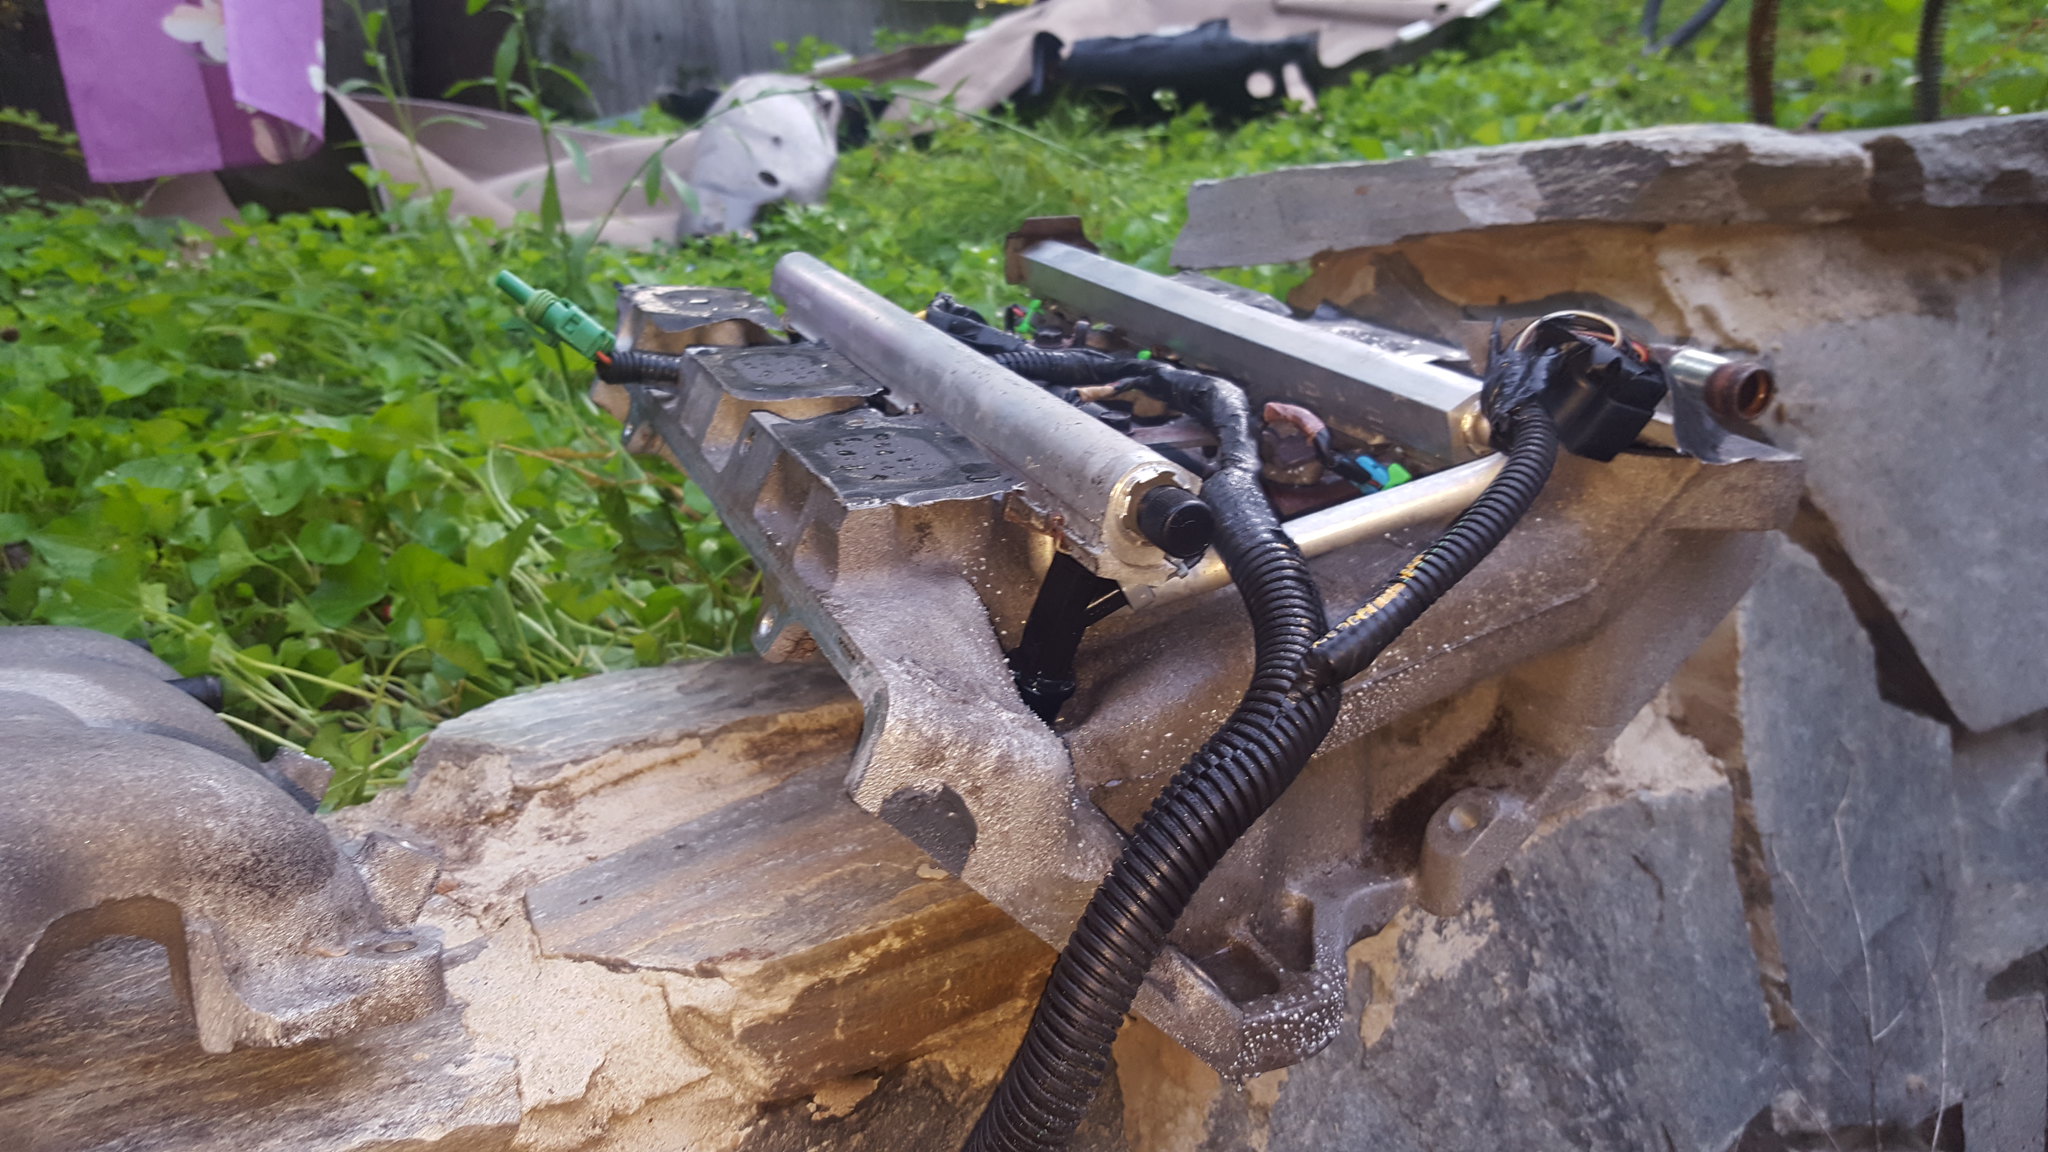
20180608_071019 by Michael Crawford, on Flickr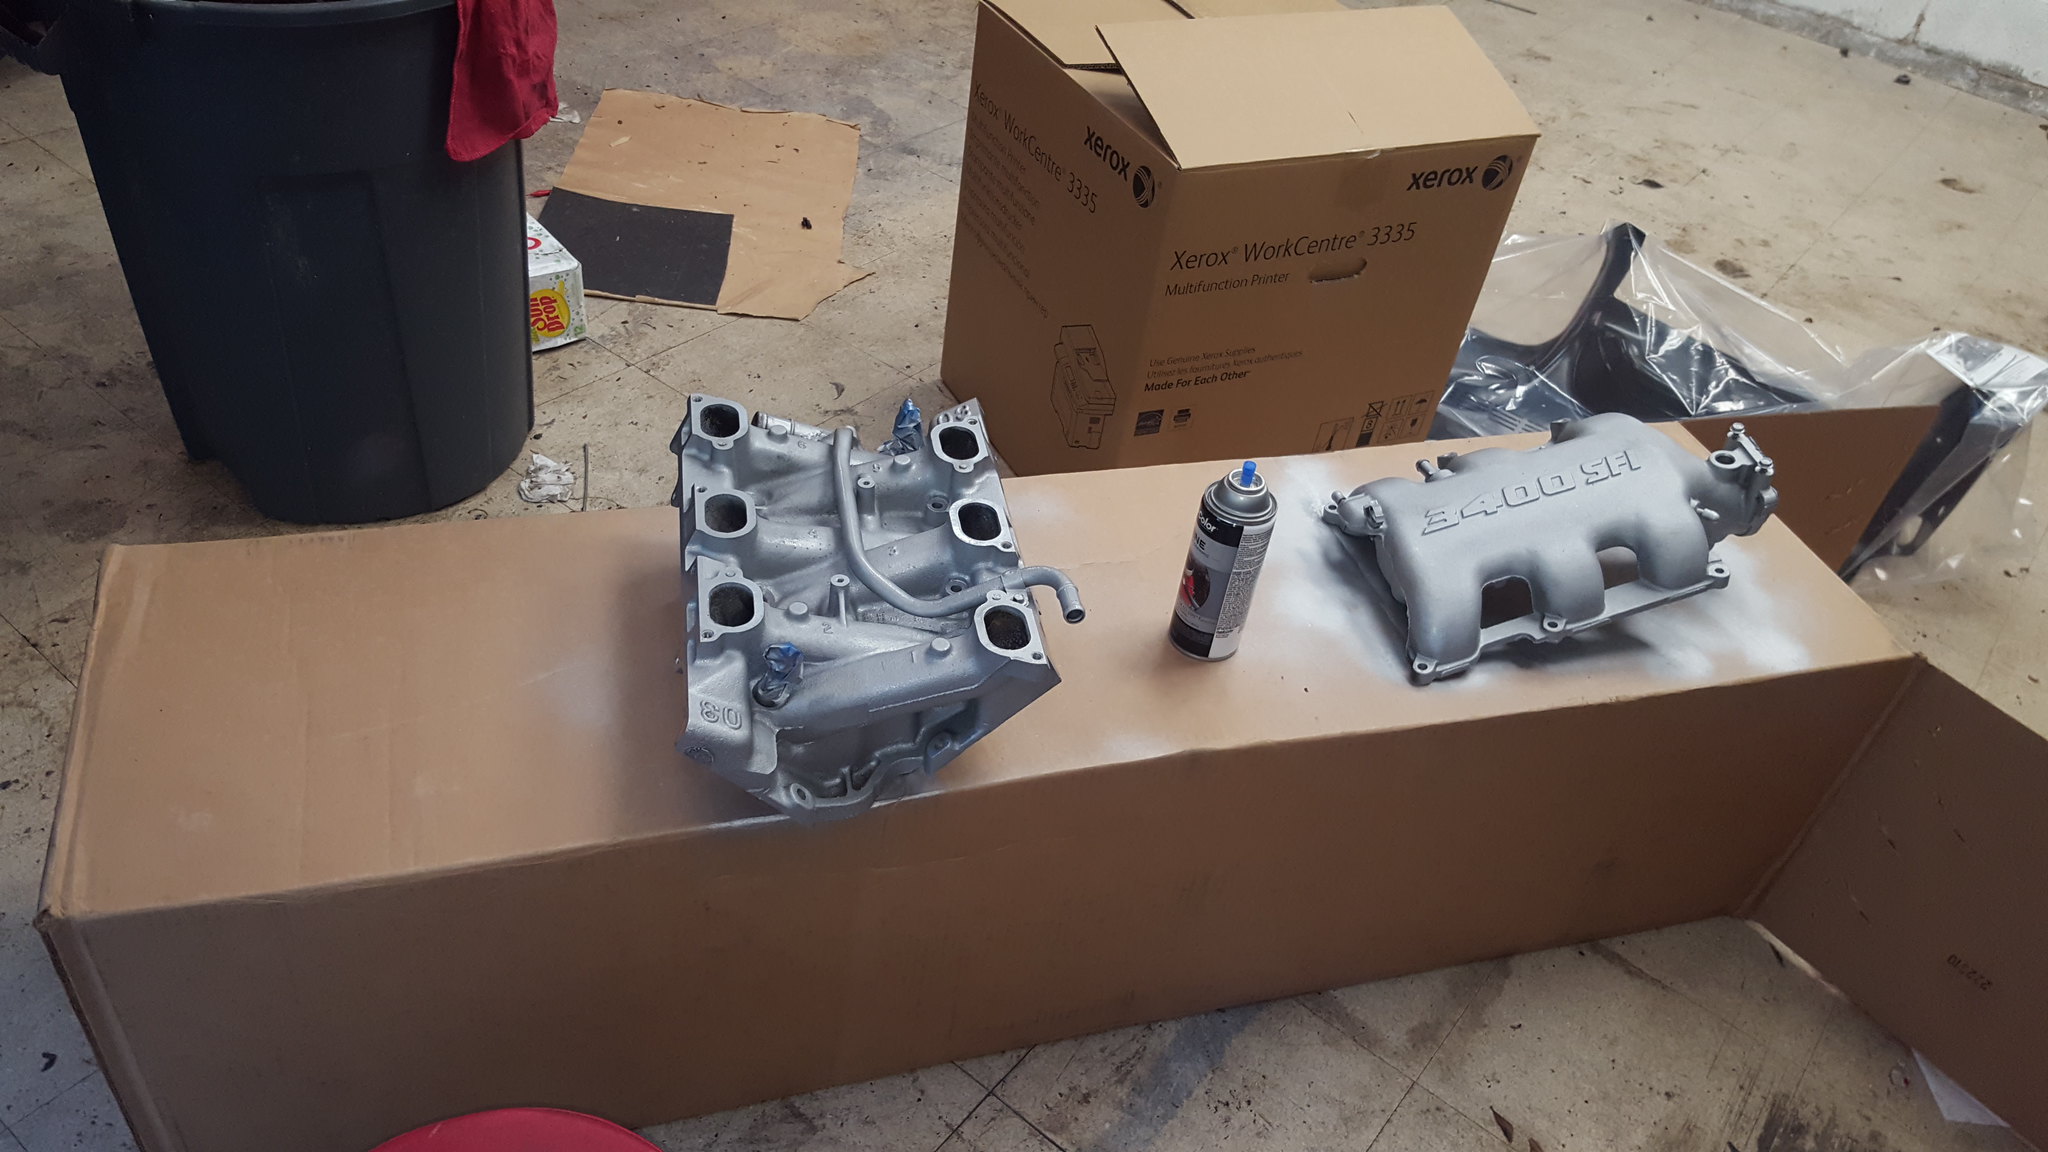
20180609_071506 by Michael Crawford, on Flickrfinished insulating the trans tunnel and drivers floor pans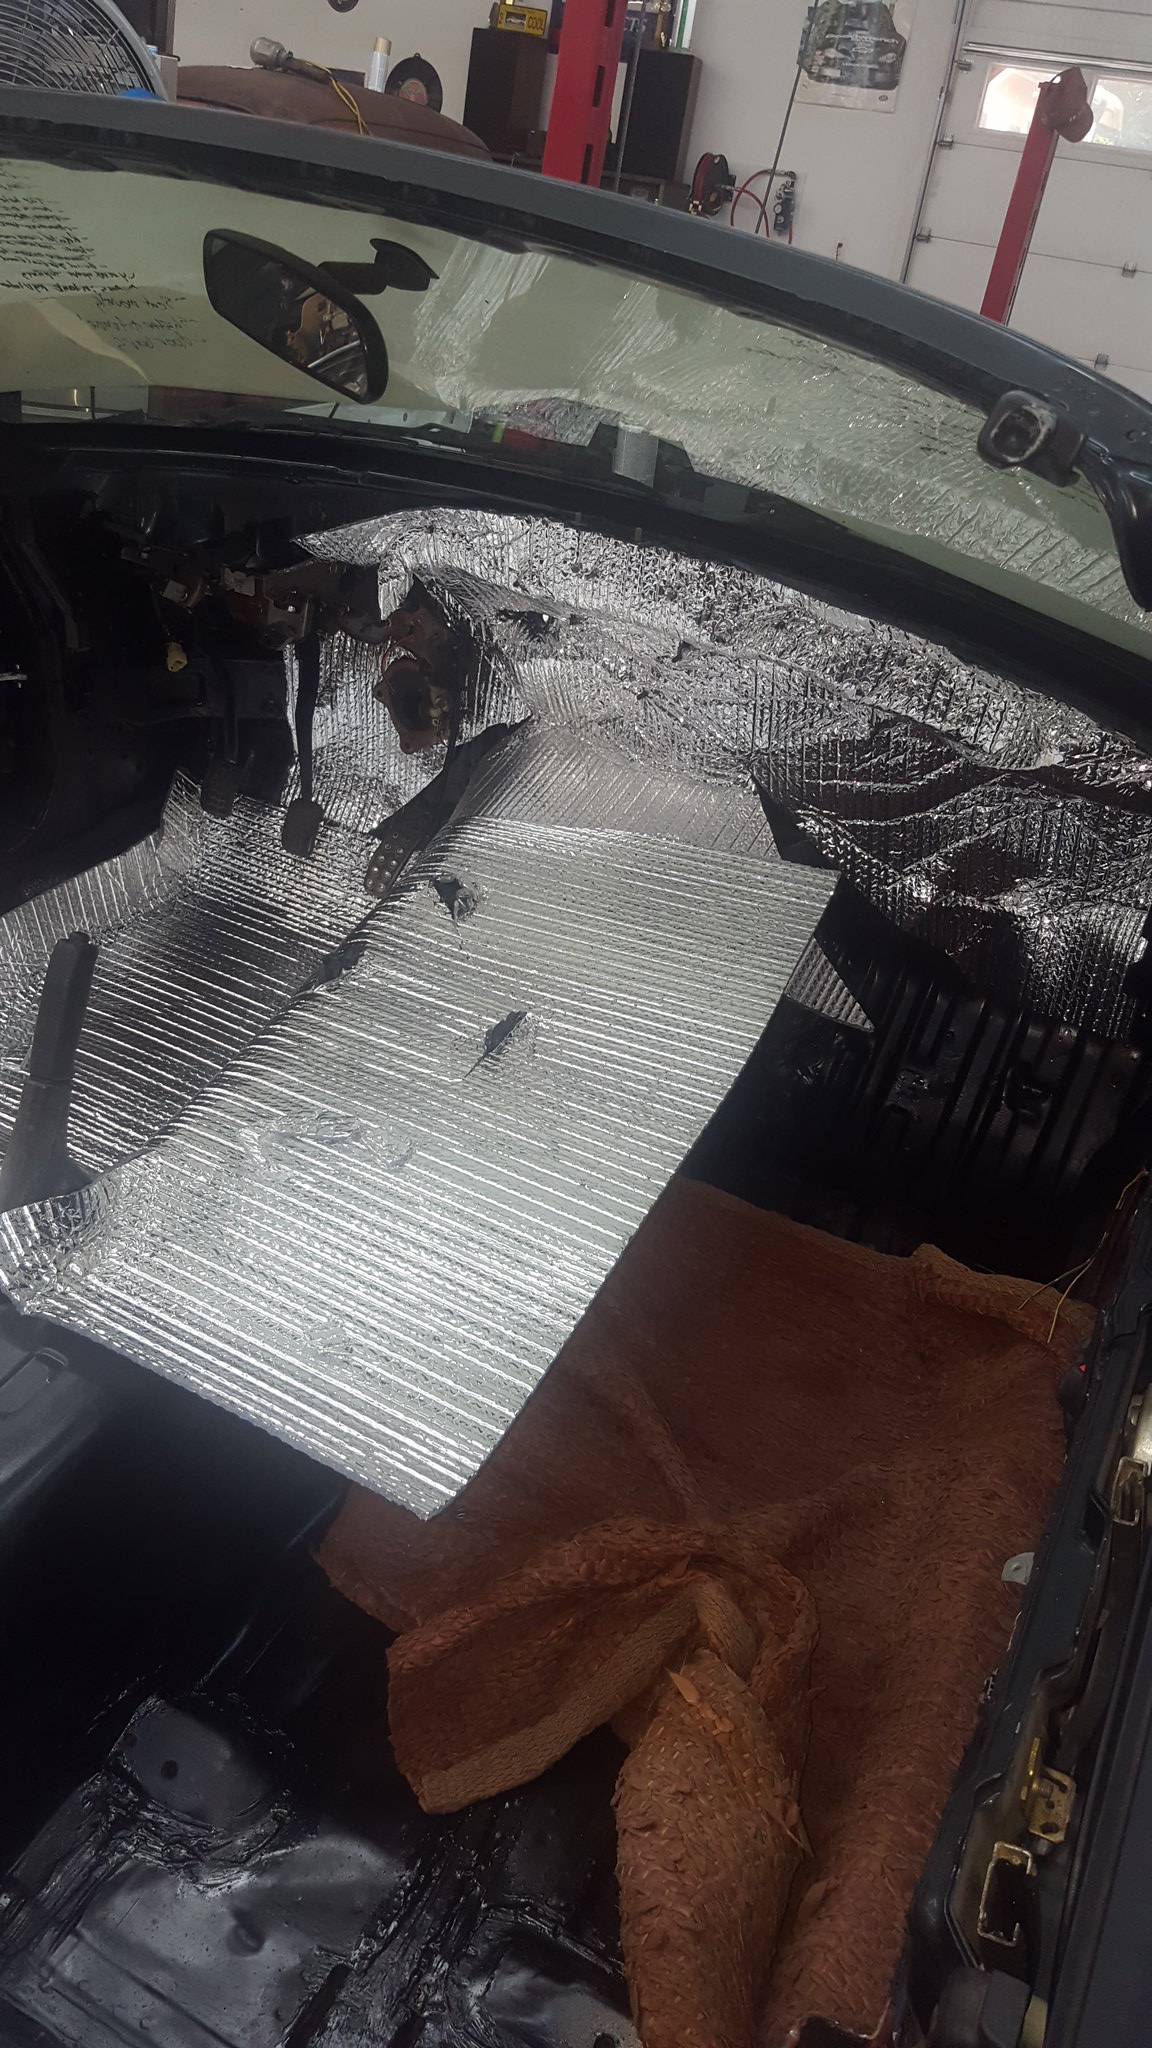
20180610_103149 by Michael Crawford, on Flickrpulled the carpet out of storage. This I will so a little more explanation on.These were the most disgusting carpets I have ever encountered. Honestly, the interior was the primary reason I parted this car out. It was that bad.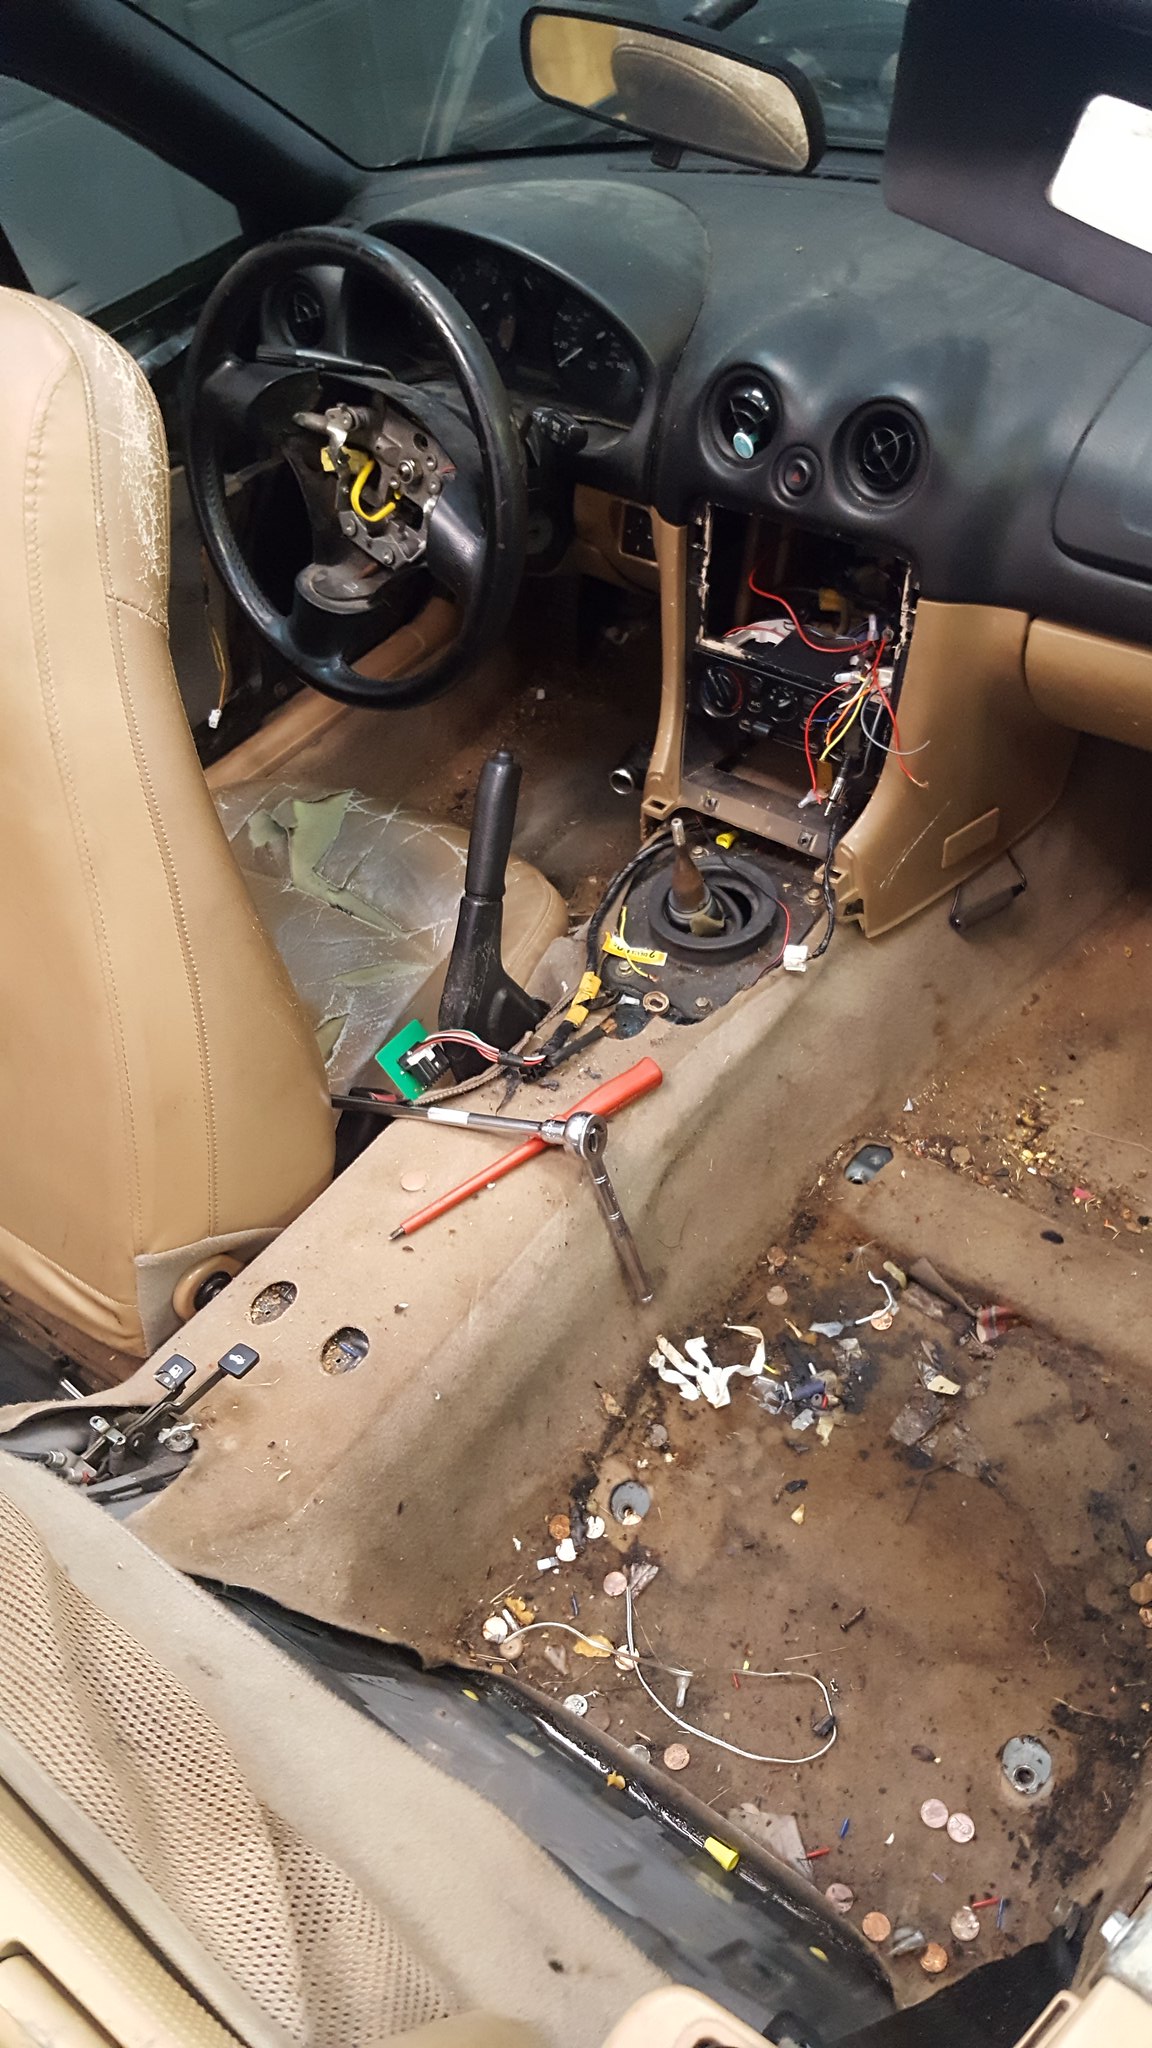
20171007_163818 by Michael Crawford, on FlickrI had used a vacuum, castrol superclean and a garden hose on them to see if I could get them better during the parts car phase of this project. Some improvements were made, but they were garbage. Dont know why I put them in storage instead of throwing them out as I had planned, to be honest. But when I pulled them out of storage, this is what they looked like.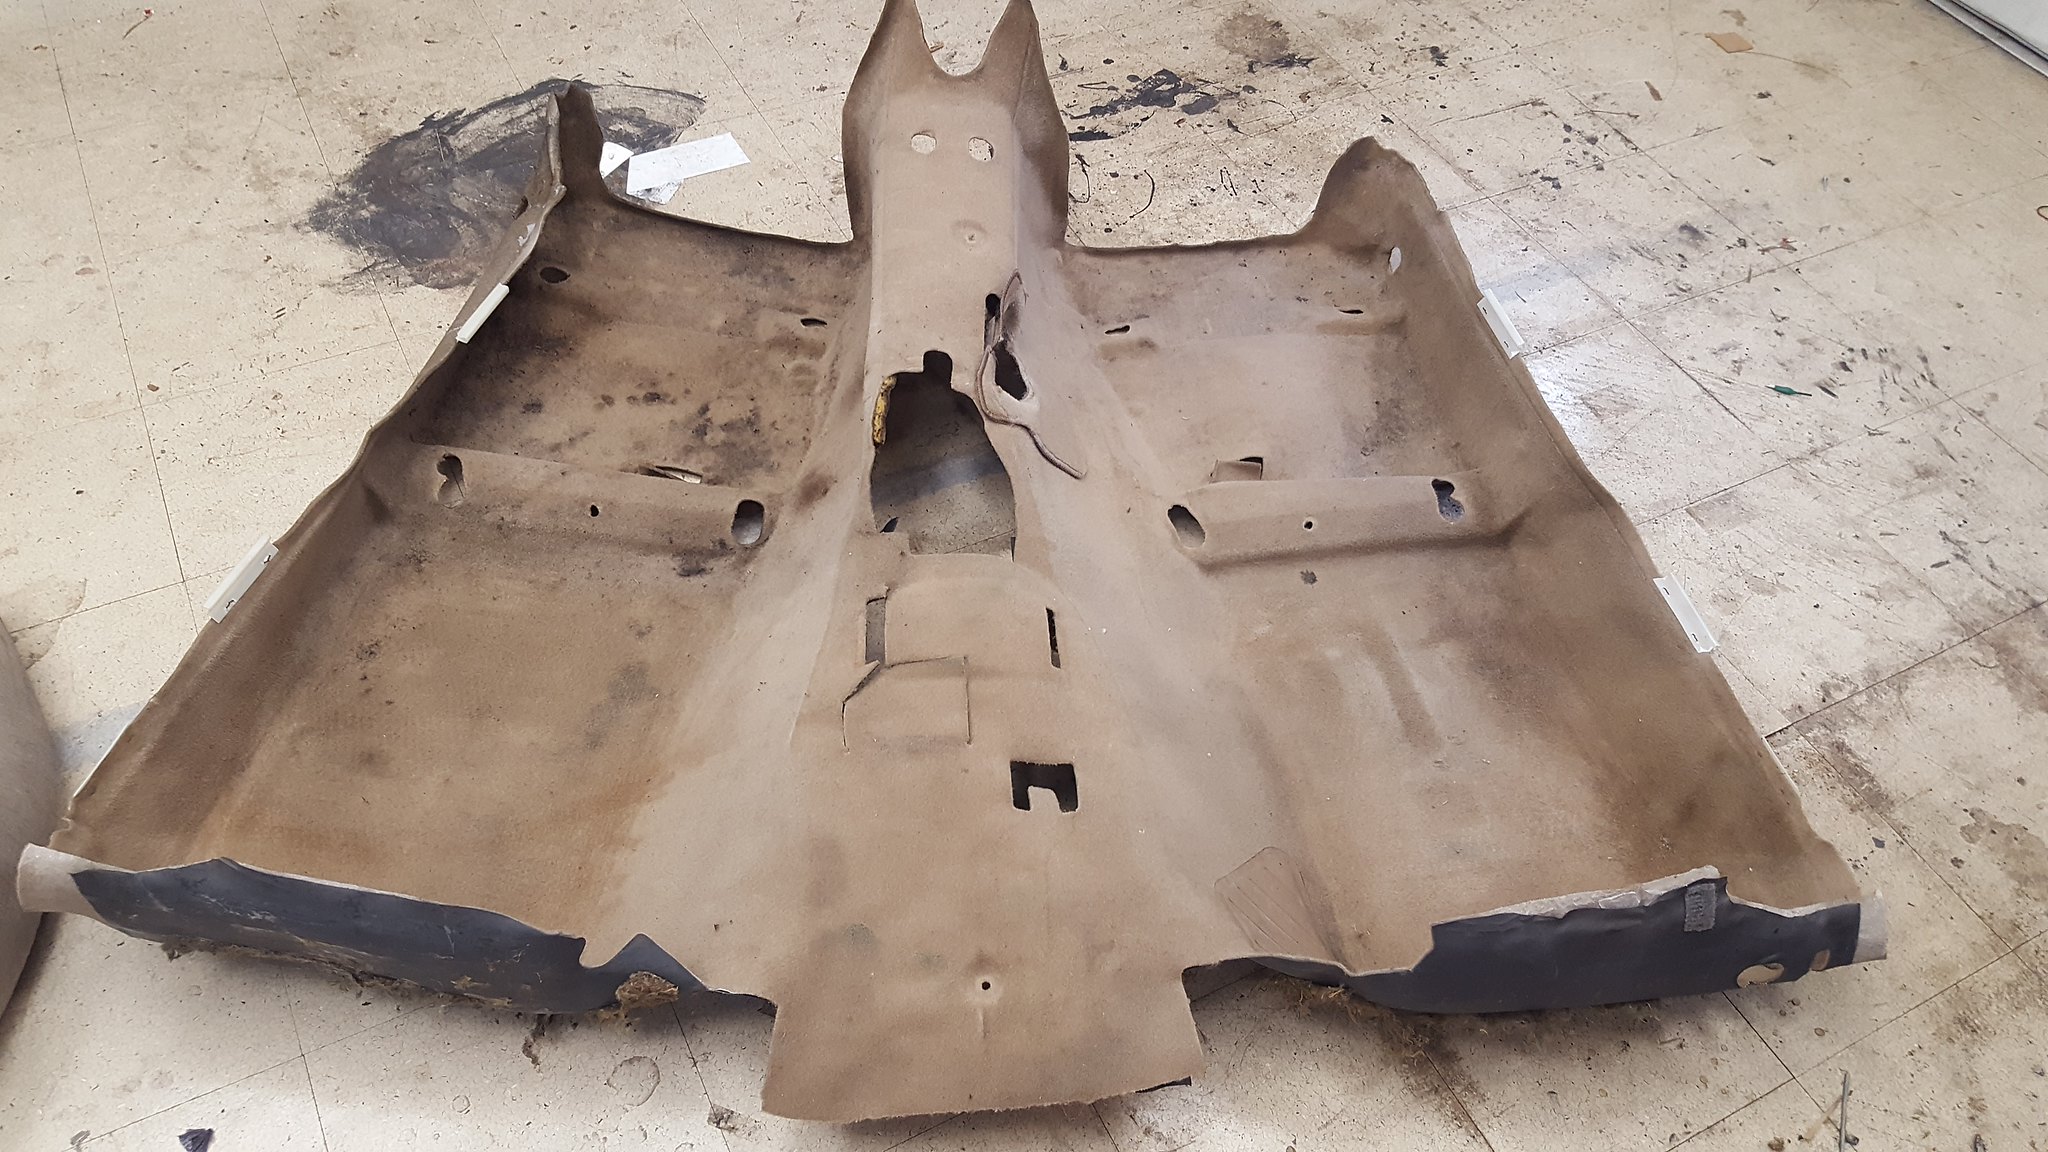
20180606_161423 by Michael Crawford, on Flickrthey were heavier than I was anticipating. As im trying to find a thousand places to save an ounce, I had to do something. Also, the jute and carpets were still dripping some unknown sticky substance. This would not do, and the were still too bad to use in a race car cosmetically. So I fixed them.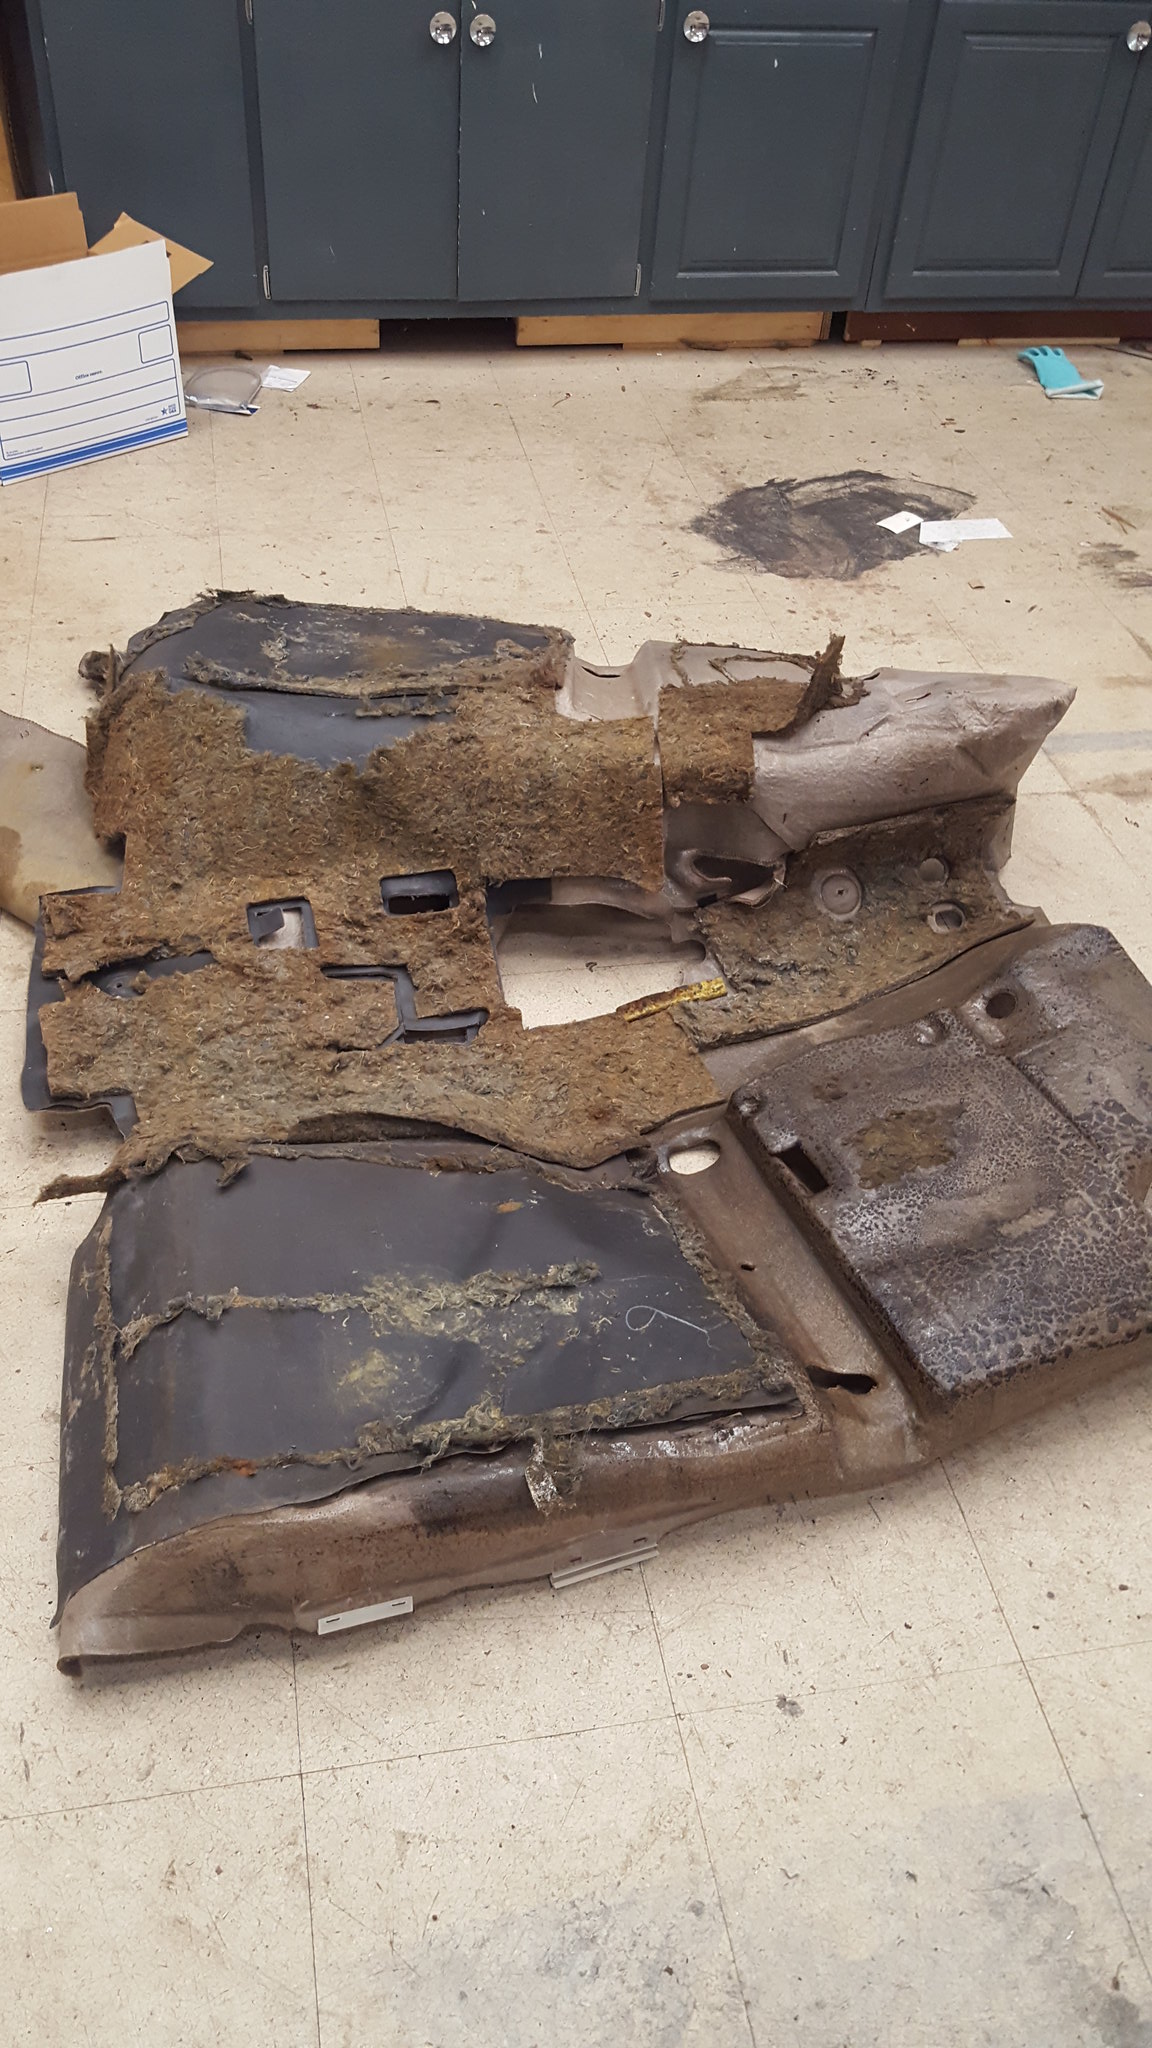
20180606_161204 by Michael Crawford, on Flickr
20180606_161511 by Michael Crawford, on Flickrand then we got midevil on it. Superclean and a 10 degree nozzle on the pressure washer.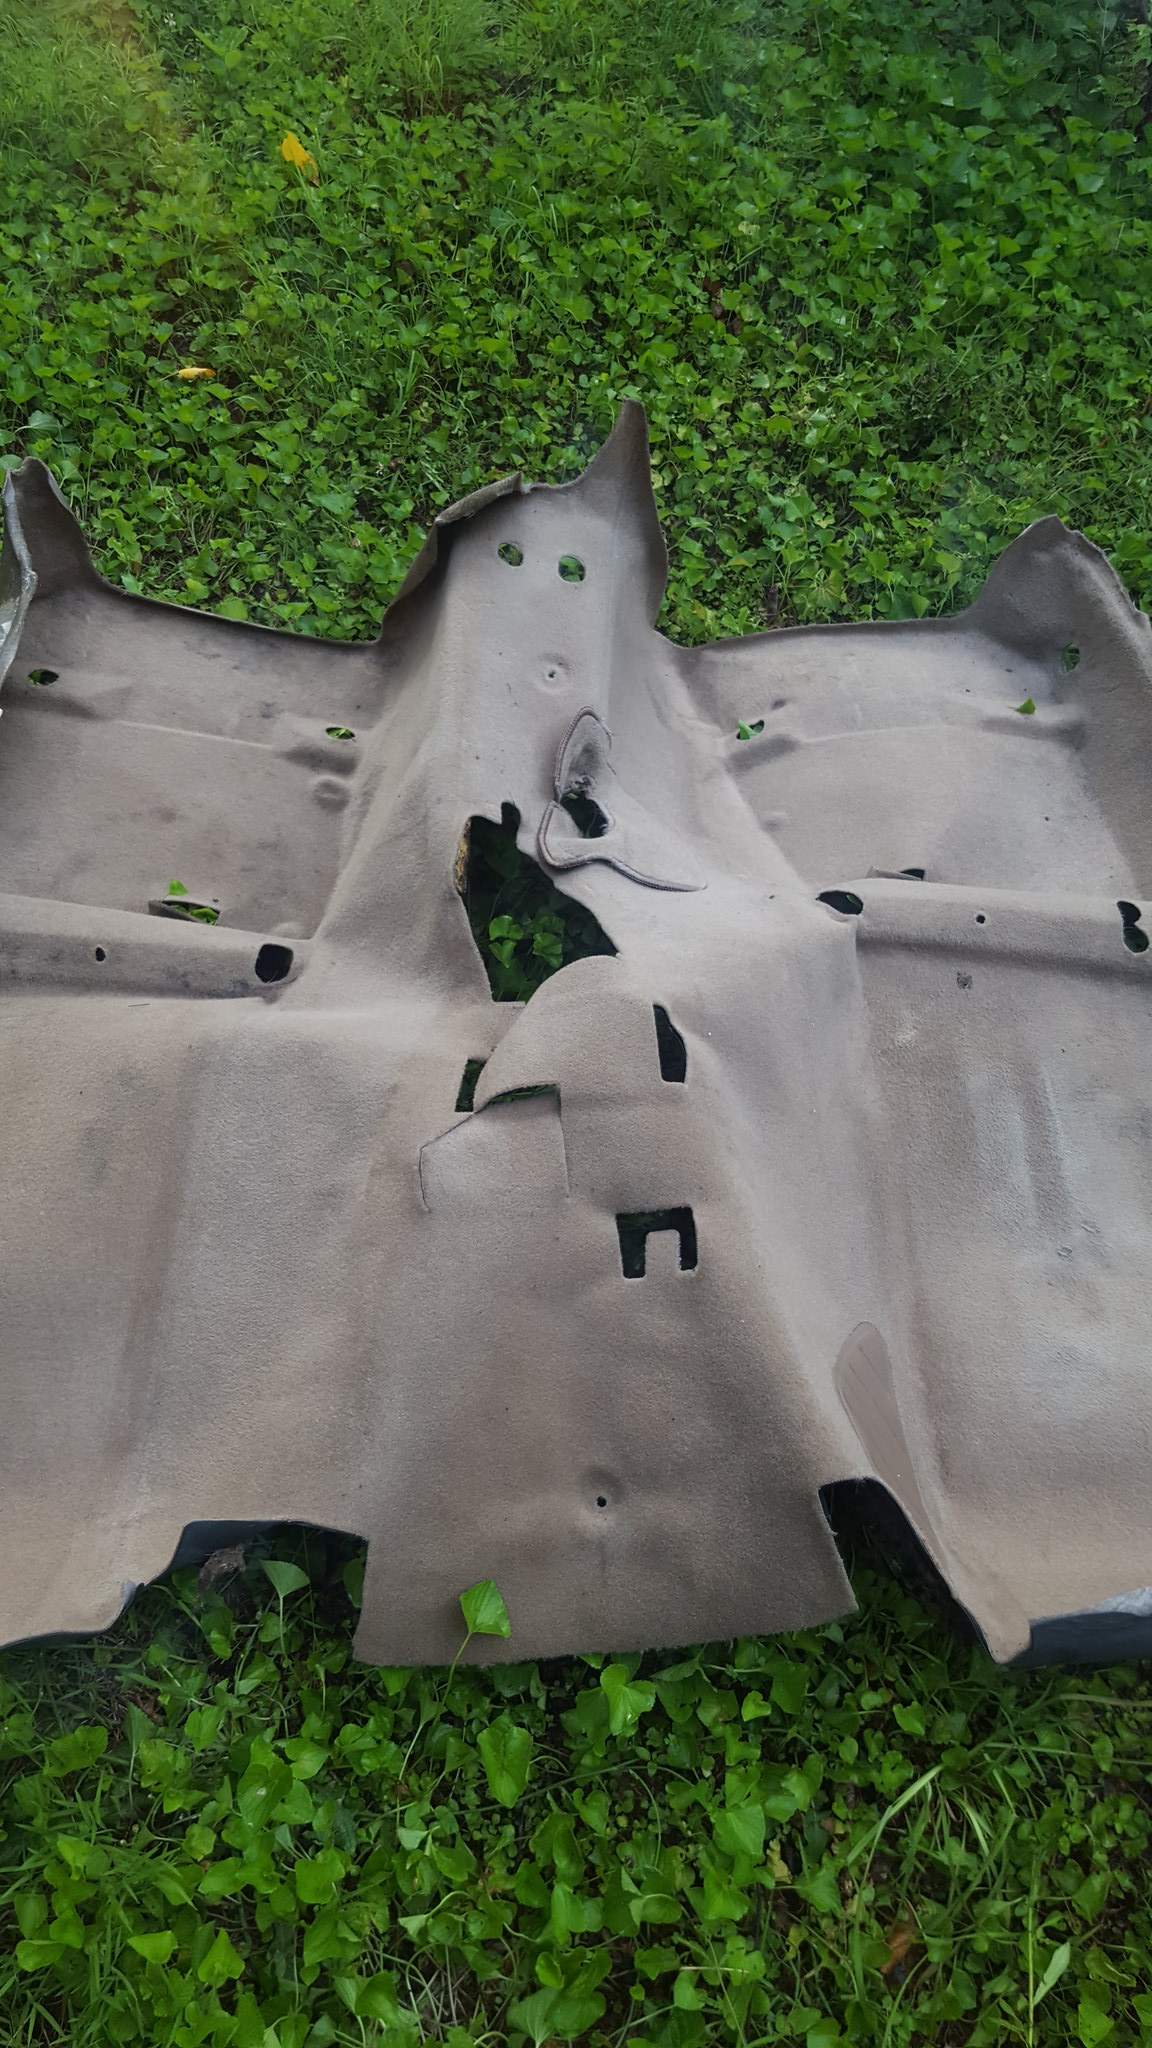
20180608_070931 by Michael Crawford, on Flickrdamn things are still sticky to the touch. But, race care pretty if you dont touche them...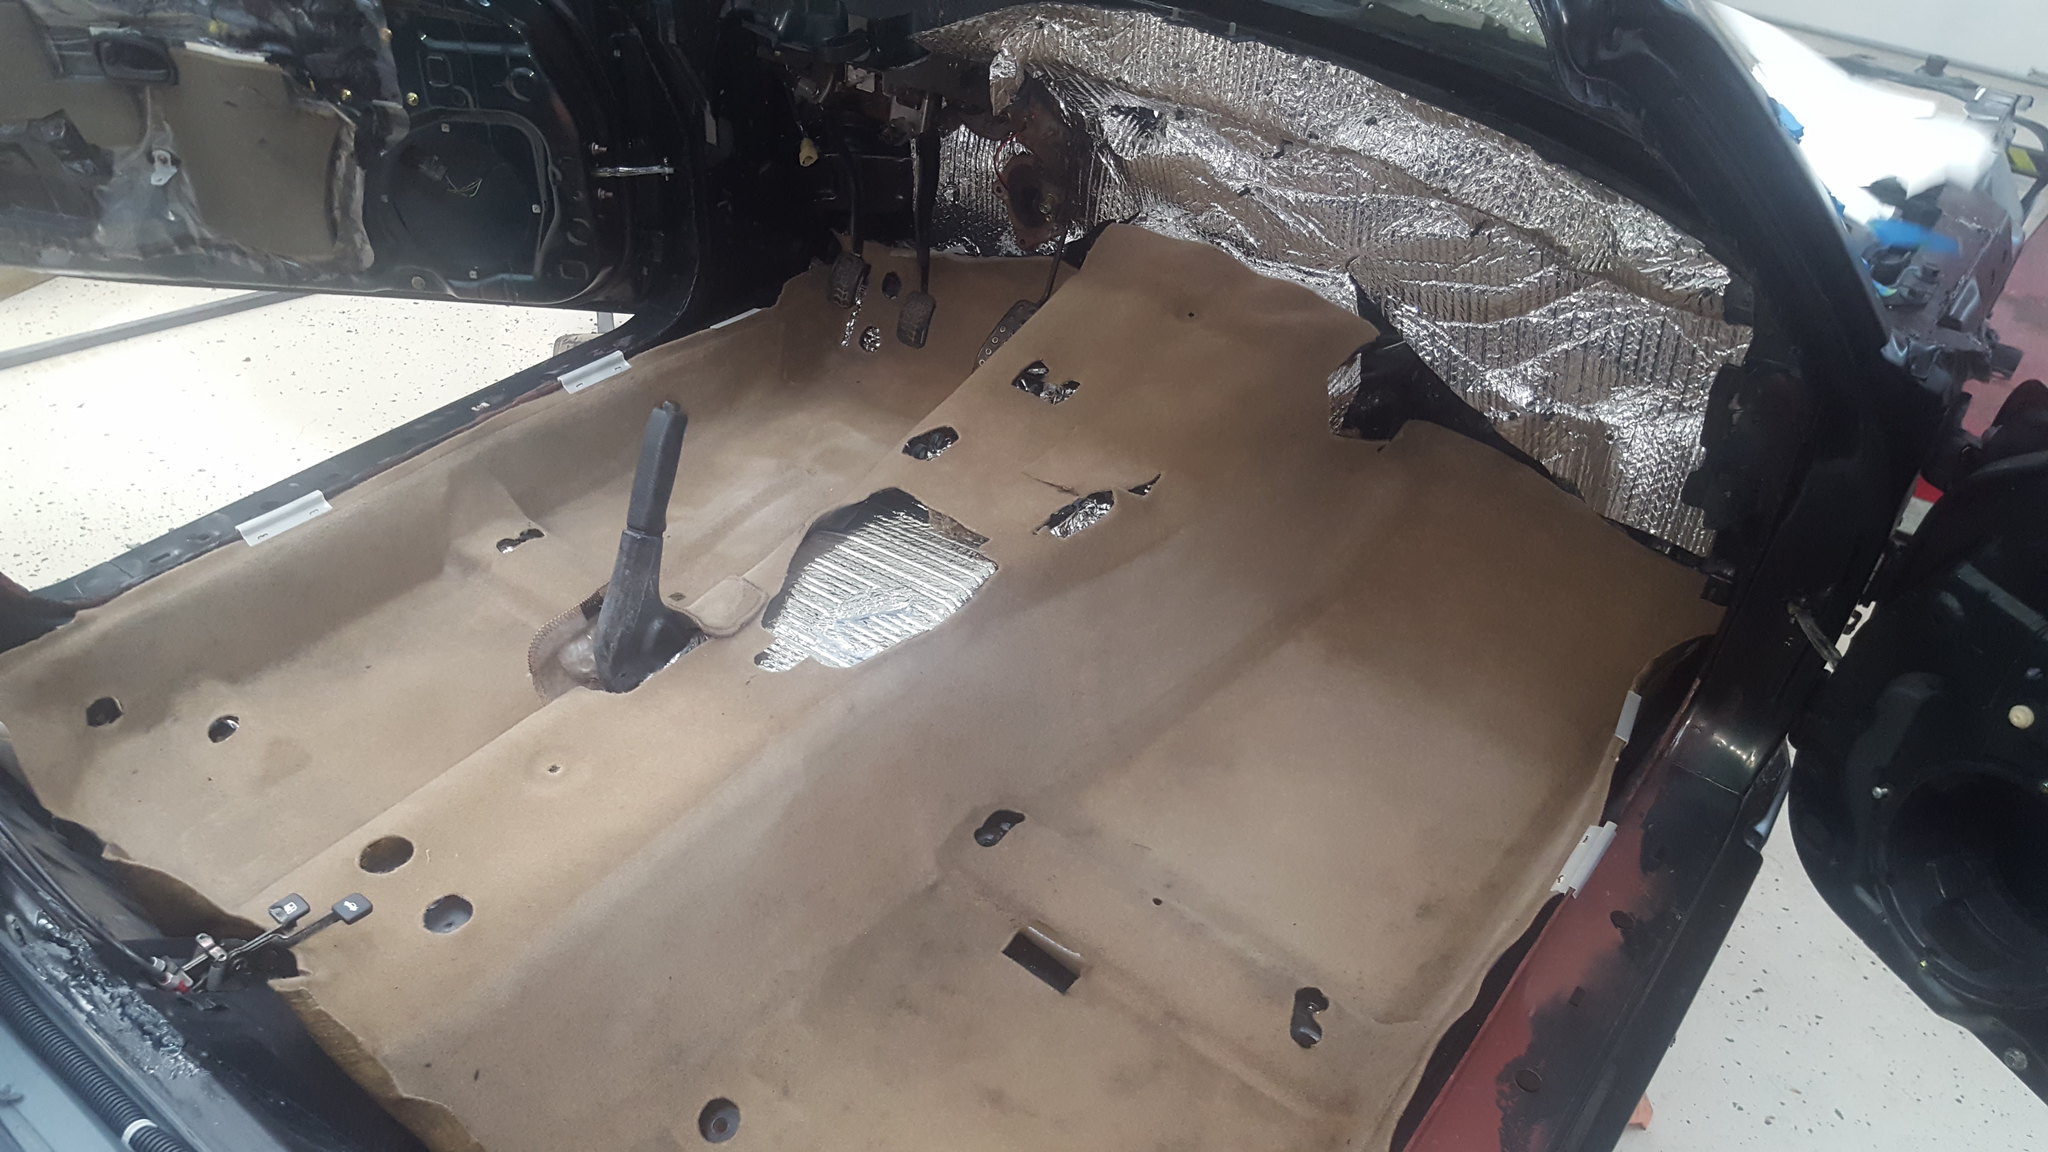
20180610_103555 by Michael Crawford, on Flickrwent ahead and gutted the ac evaporator, cleaned the center stack and blower motor, and rehung them. In the excitement of rehanging stuff, pictures happened less. But, I pulled the bose stuff out of the dash. About 2lbs. Then passengers airbag. Roughly 10. but I pulled the cover and reinstalled it for cosmetic purposes. Theres more weight to come out of the dash, but thats going to wait for now.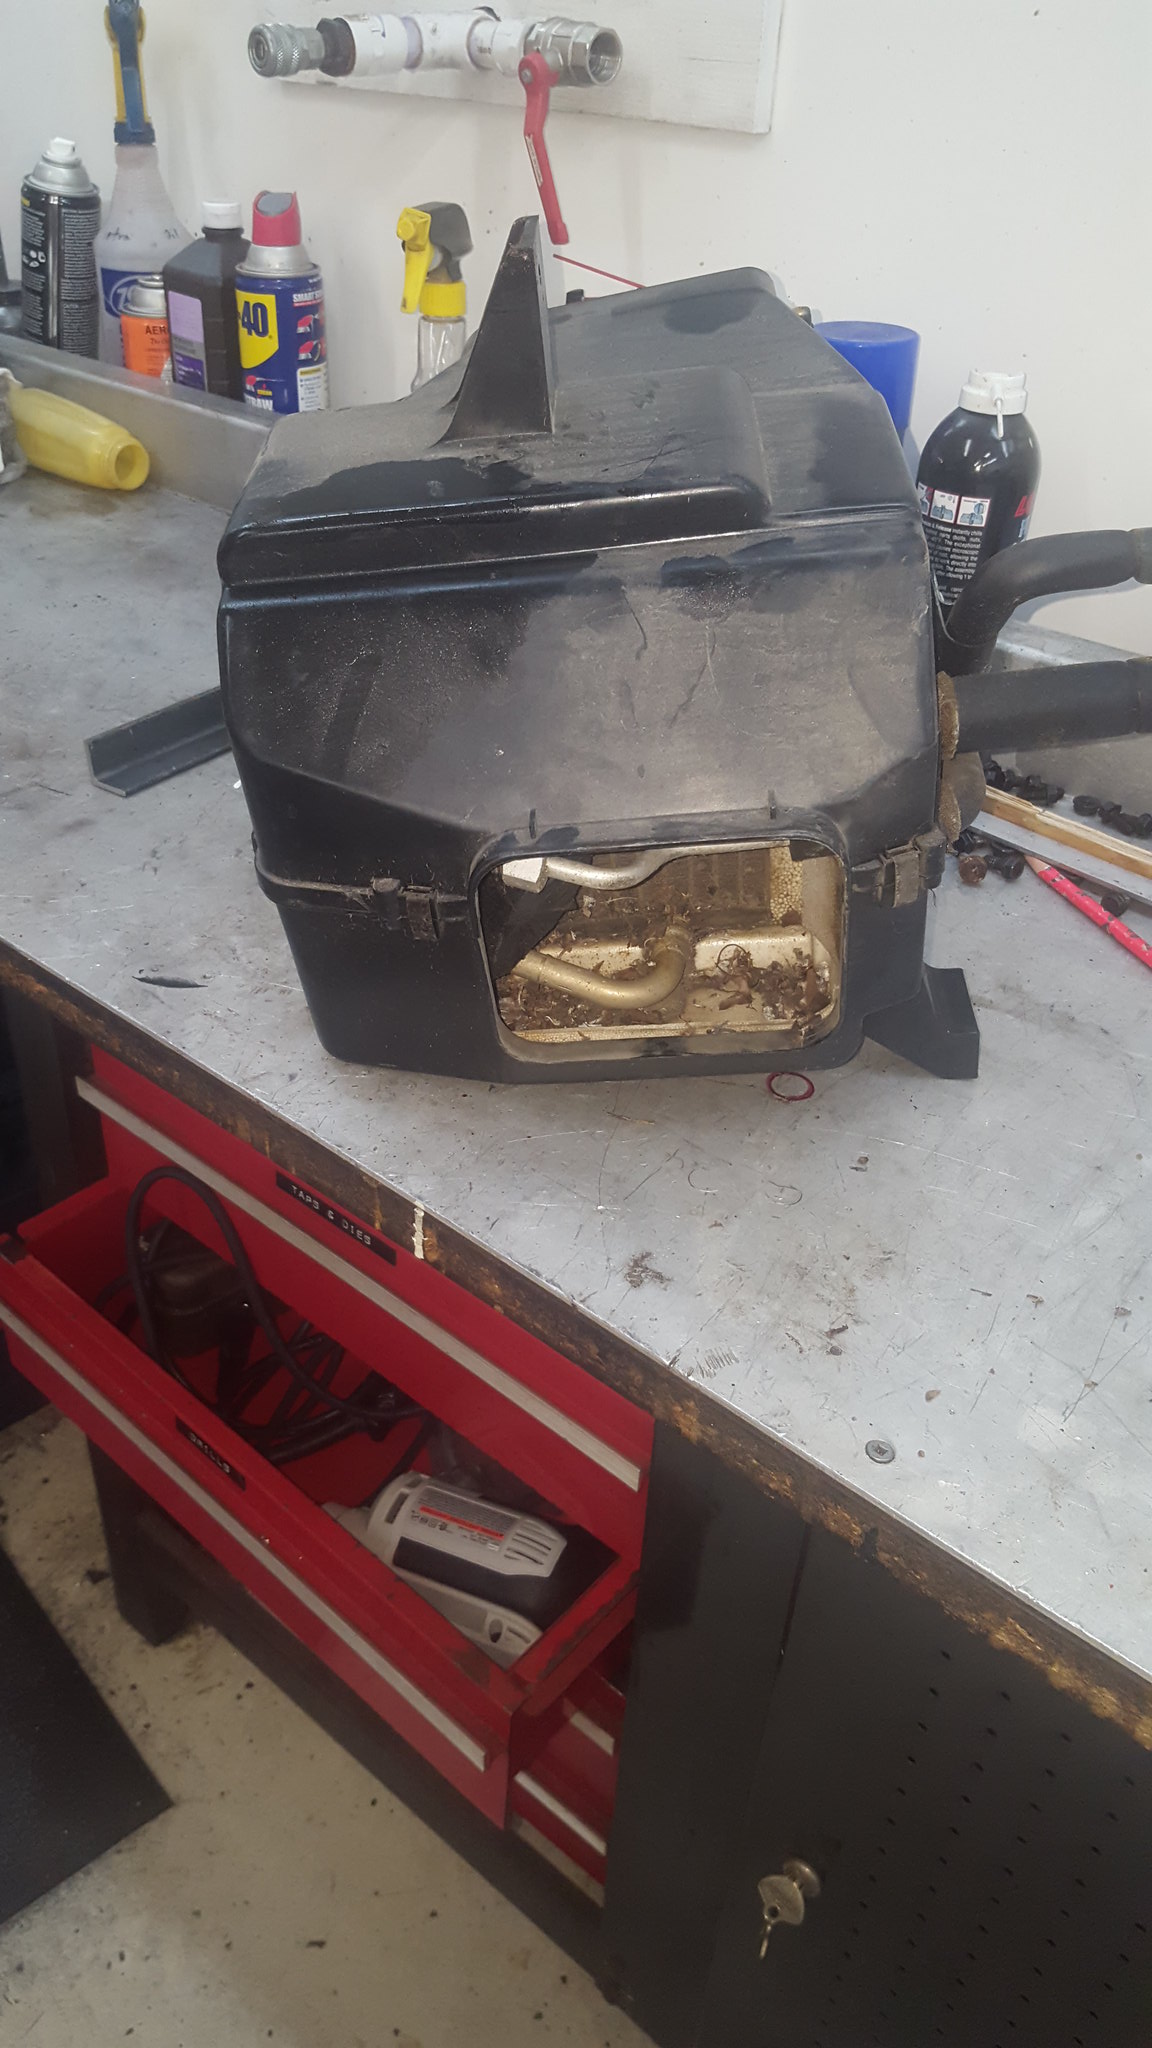
20180610_101015 by Michael Crawford, on Flickr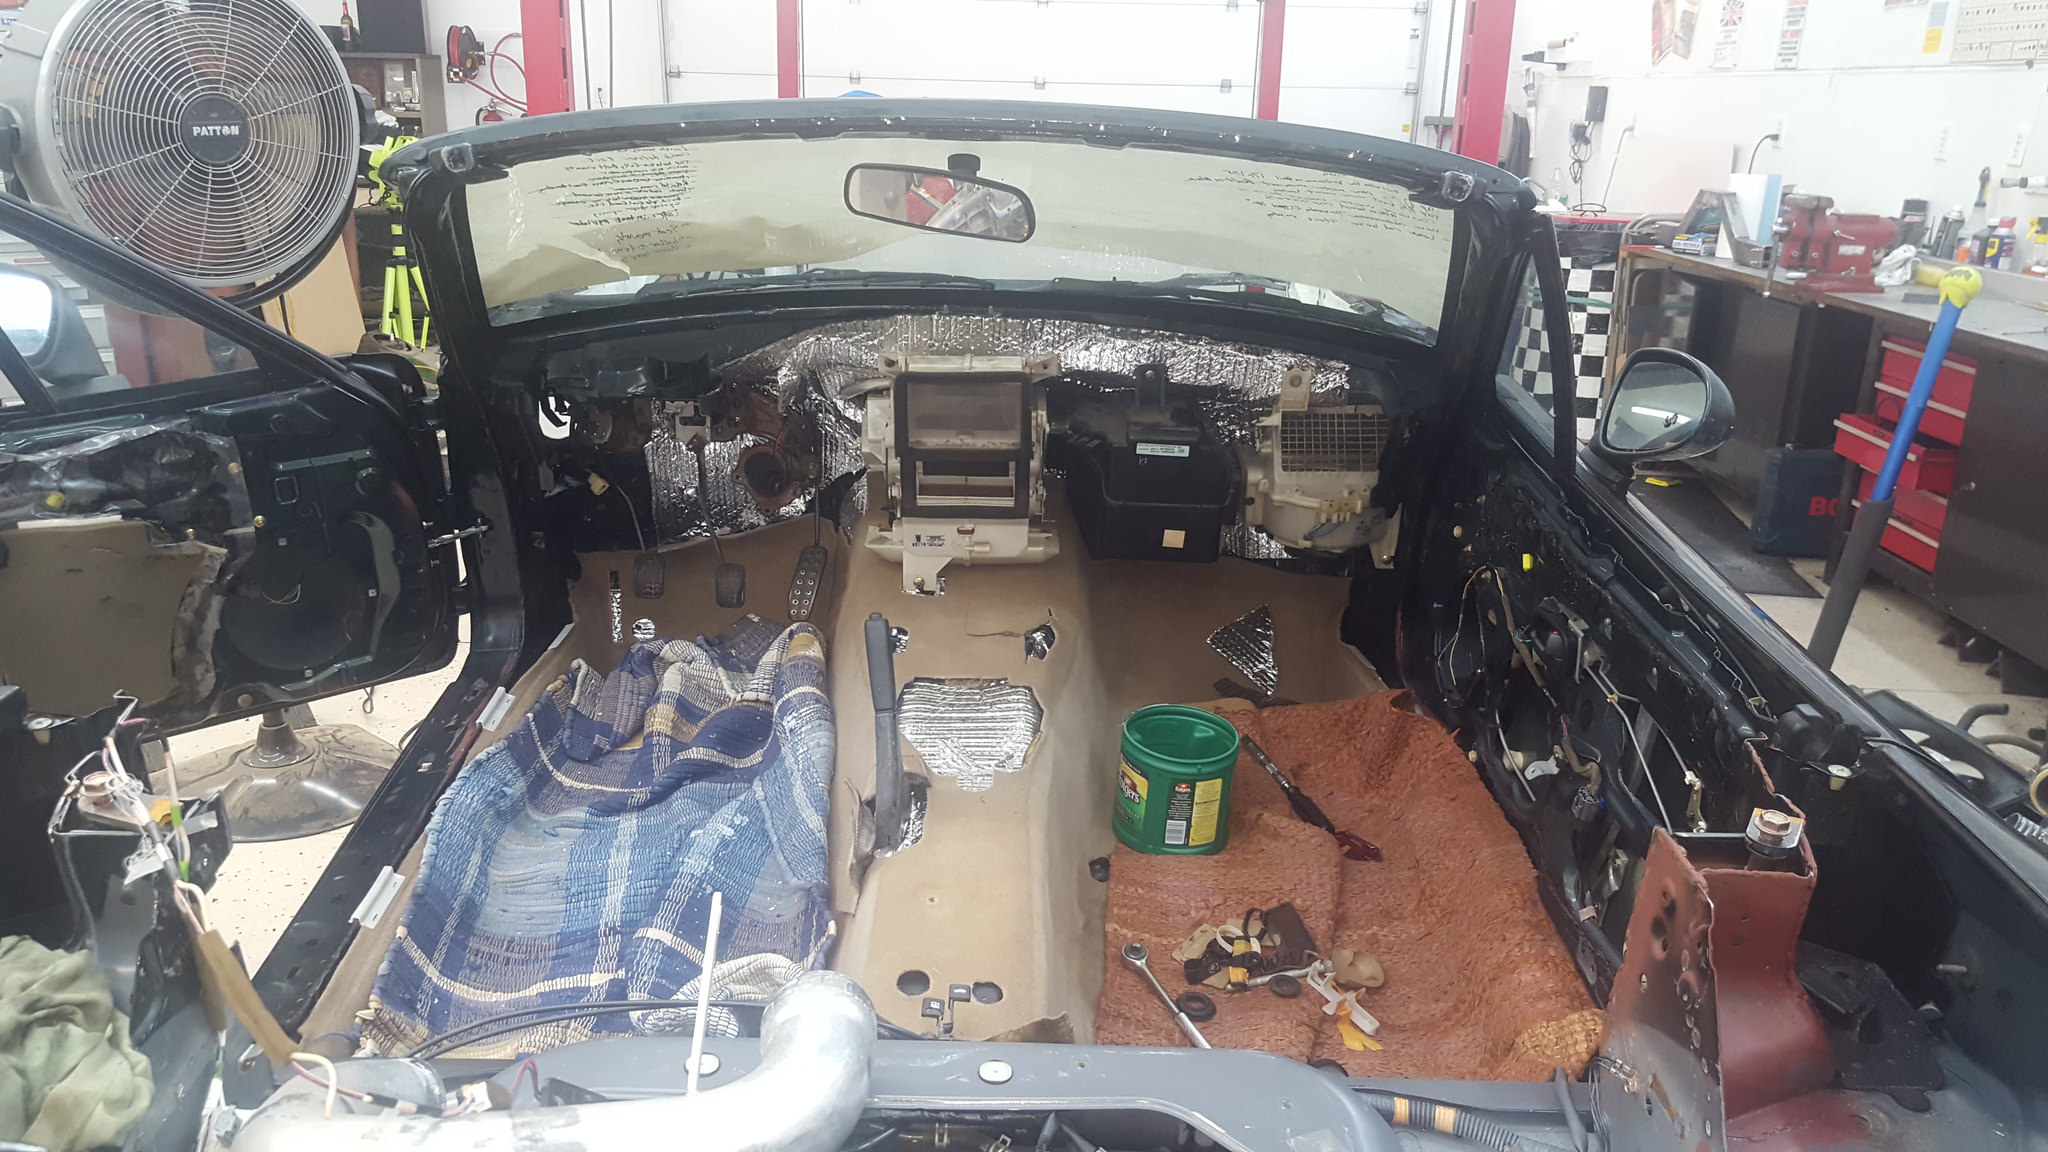
20180610_104612 by Michael Crawford, on Flickr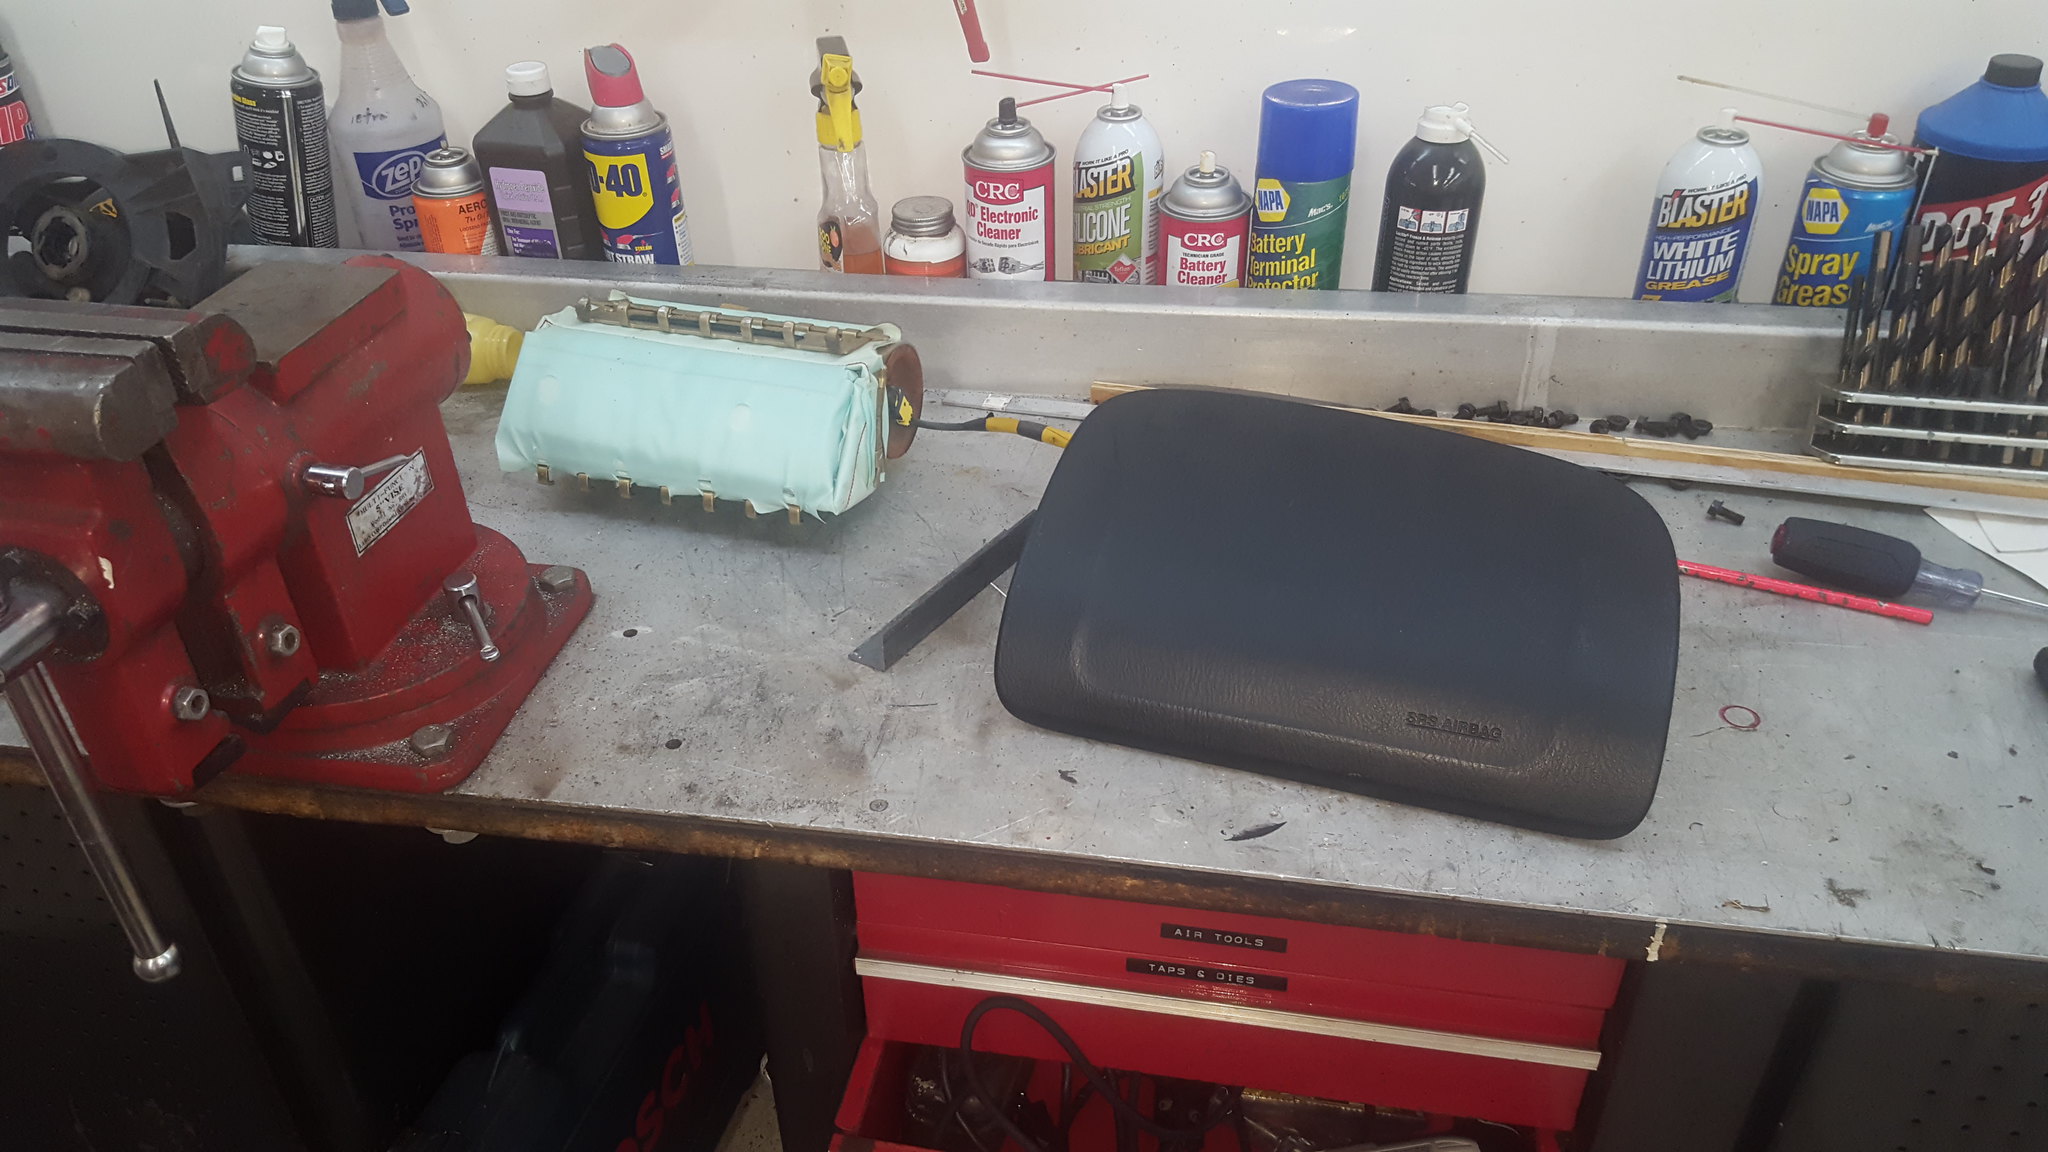
20180610_111807 by Michael Crawford, on Flickrran the dash home, and tossed the seat in. nice to have parts being consolidated.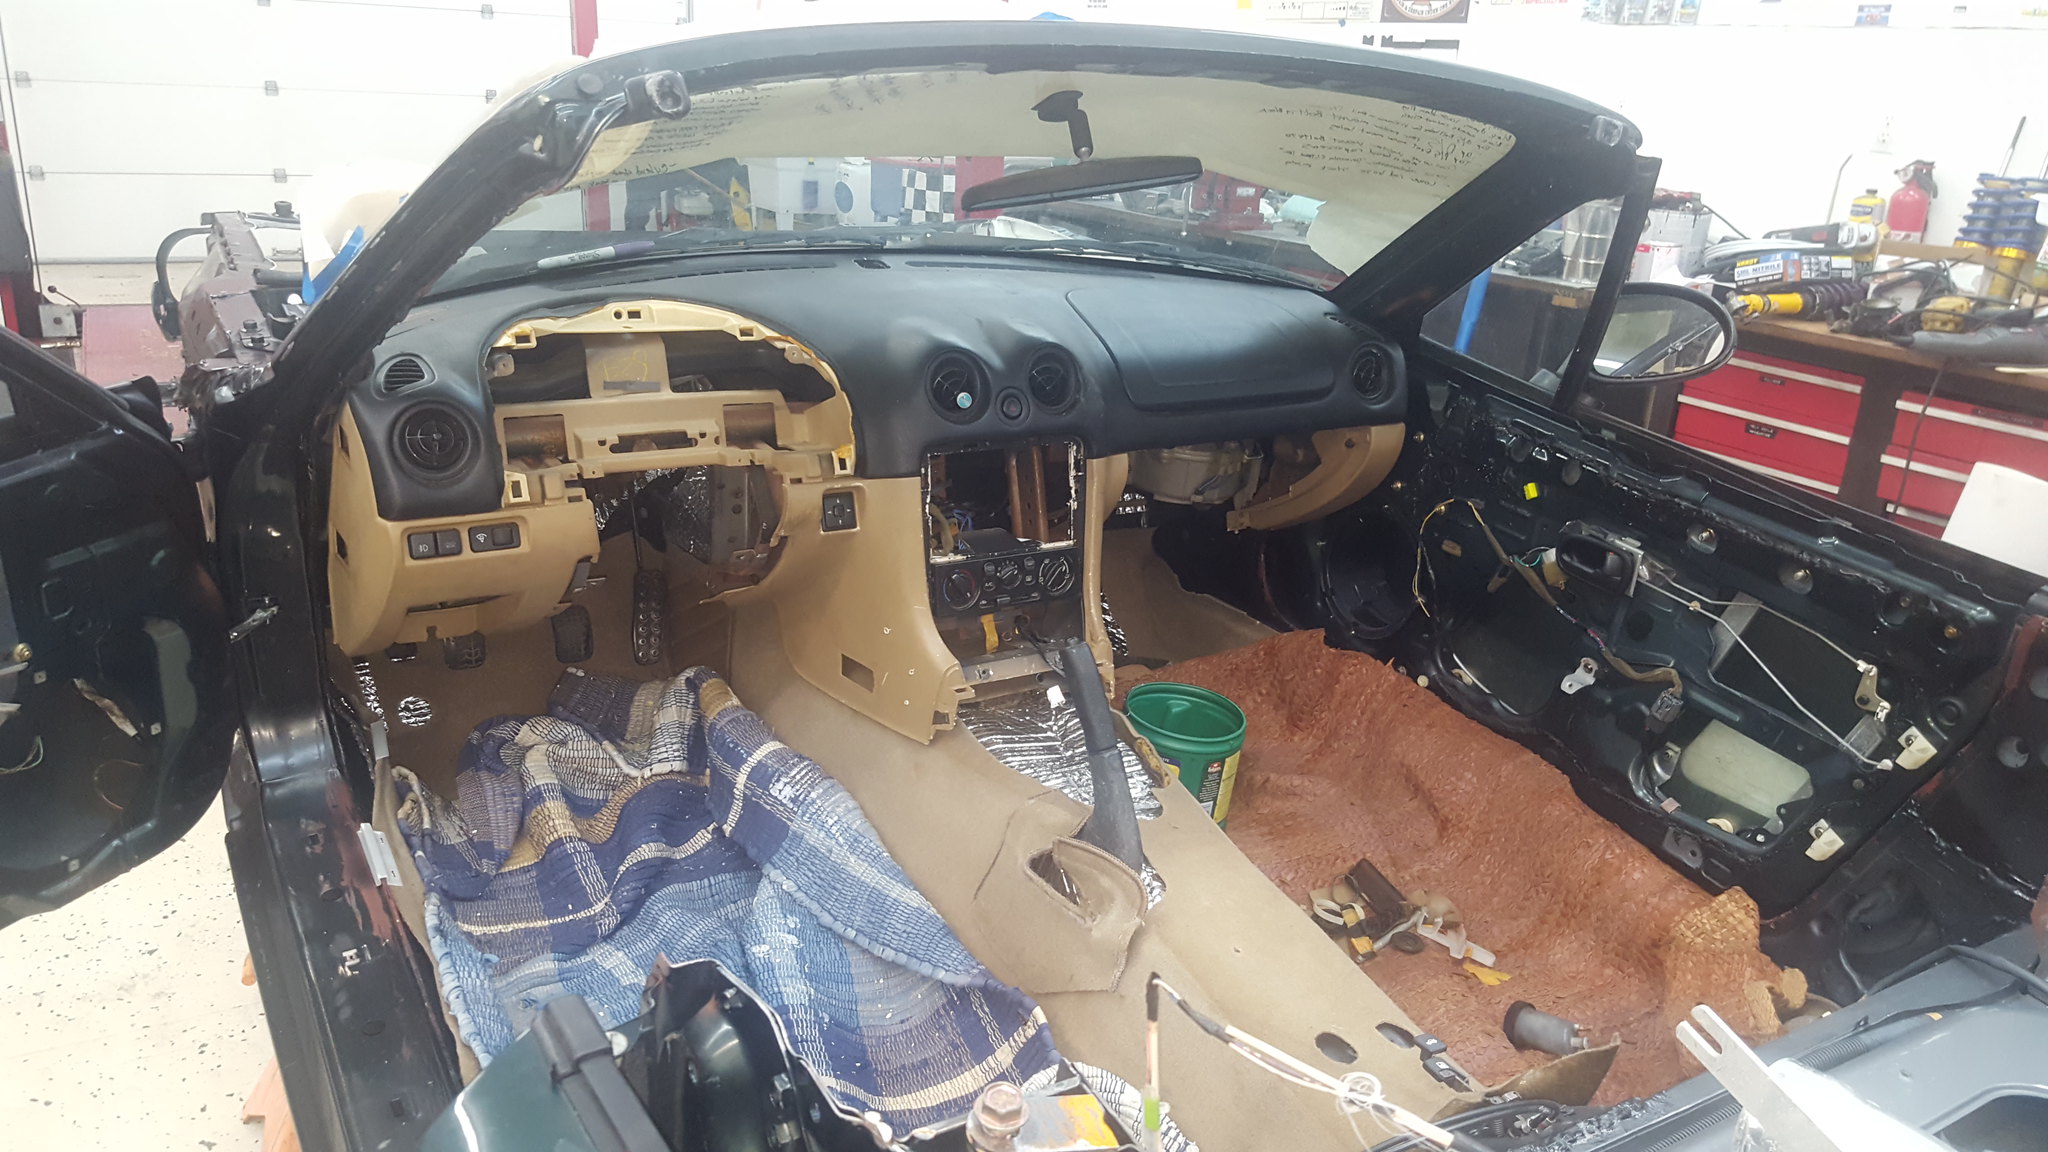
20180610_112224 by Michael Crawford, on Flickr
20180610_143649 by Michael Crawford, on Flickrthe big project this week was the front crossmember. I needed to do a little more clearance just for service room. I also needed to do something about the fact that I cut the thing up radically, and it had lost all strength it ever had. After some brief thought, I came up with a plan. First, some 1x1 tube welded to the horiszontal surfaces. These were both seam welded and plug welded, includeing as far as I could get inside the crossmember.
20180609_100532 by Michael Crawford, on Flickr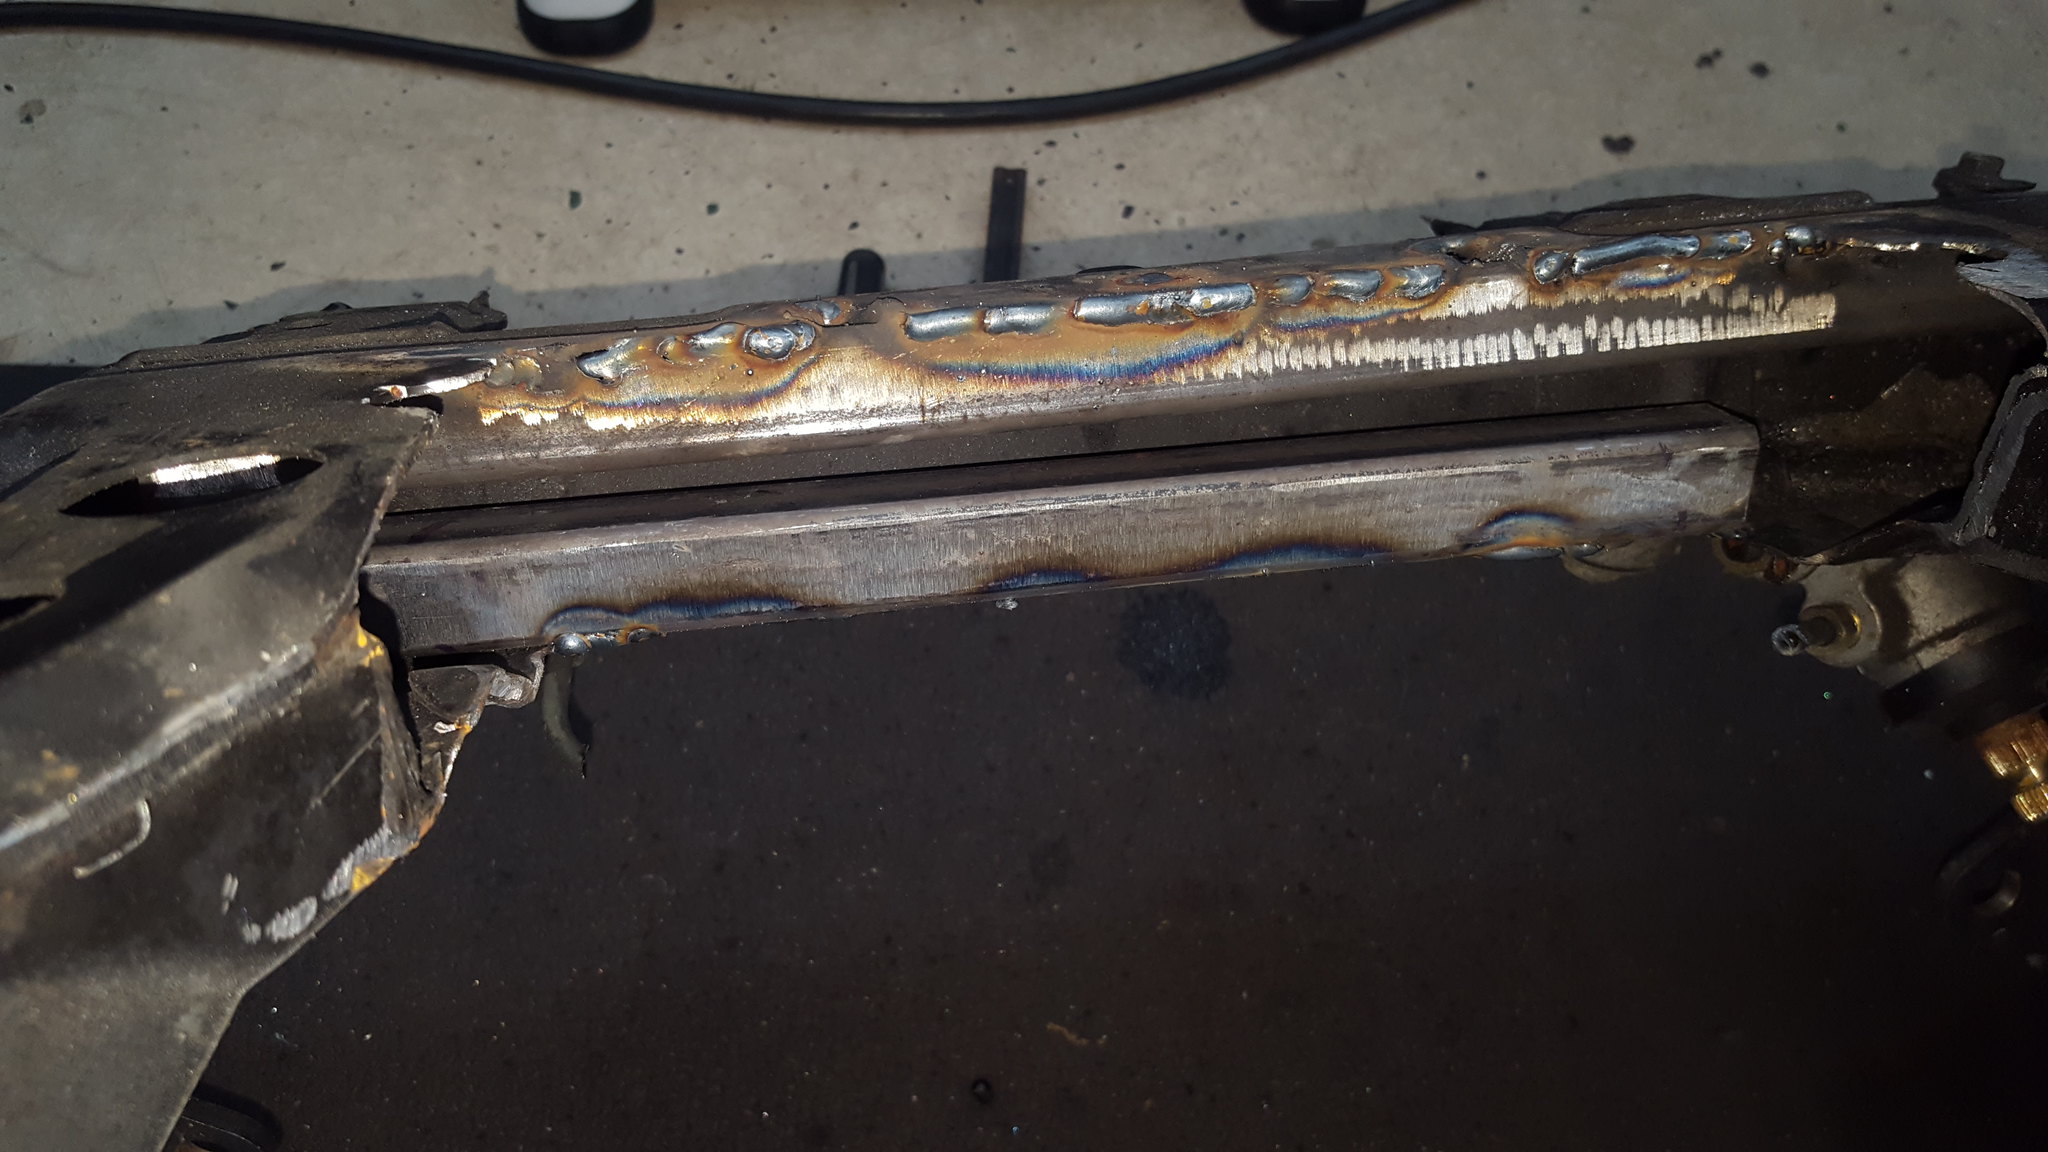
20180609_105307 by Michael Crawford, on Flickrafter I welded those, I took a leftover piece of lintel from some foundation repair when we bought our house. Ground it down, drilled some holes, did some trimming, and burned it in.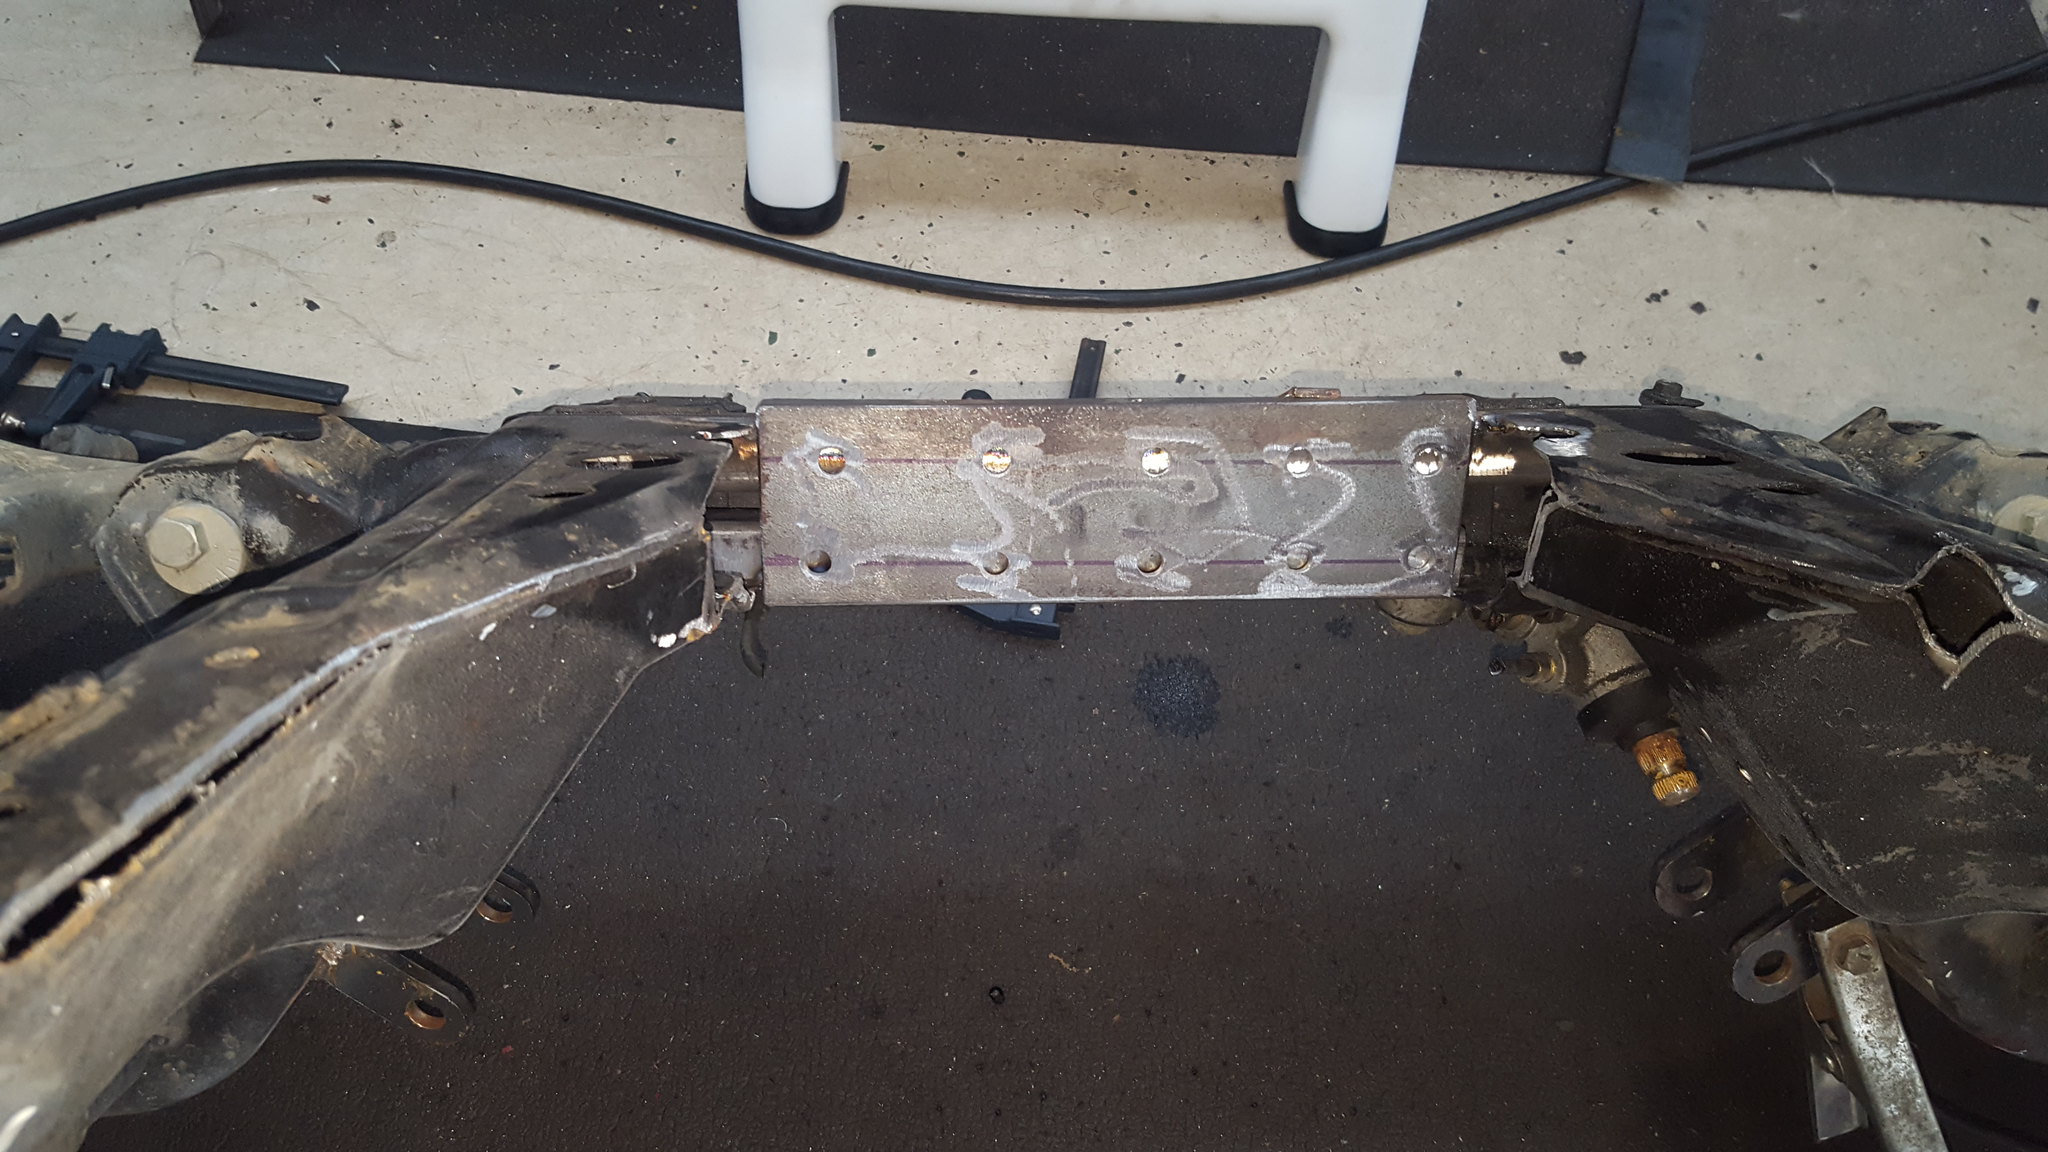
20180609_105319 by Michael Crawford, on Flickrmade some block offs for the wings, and a piece of angle reinforced the motor mounts. Went ahead and welded the entire thing where the two halves meet, as well as all the parts that were just partially welded or tack welded. Lots and lots of welding. And then a lot of grinding. But its DONE.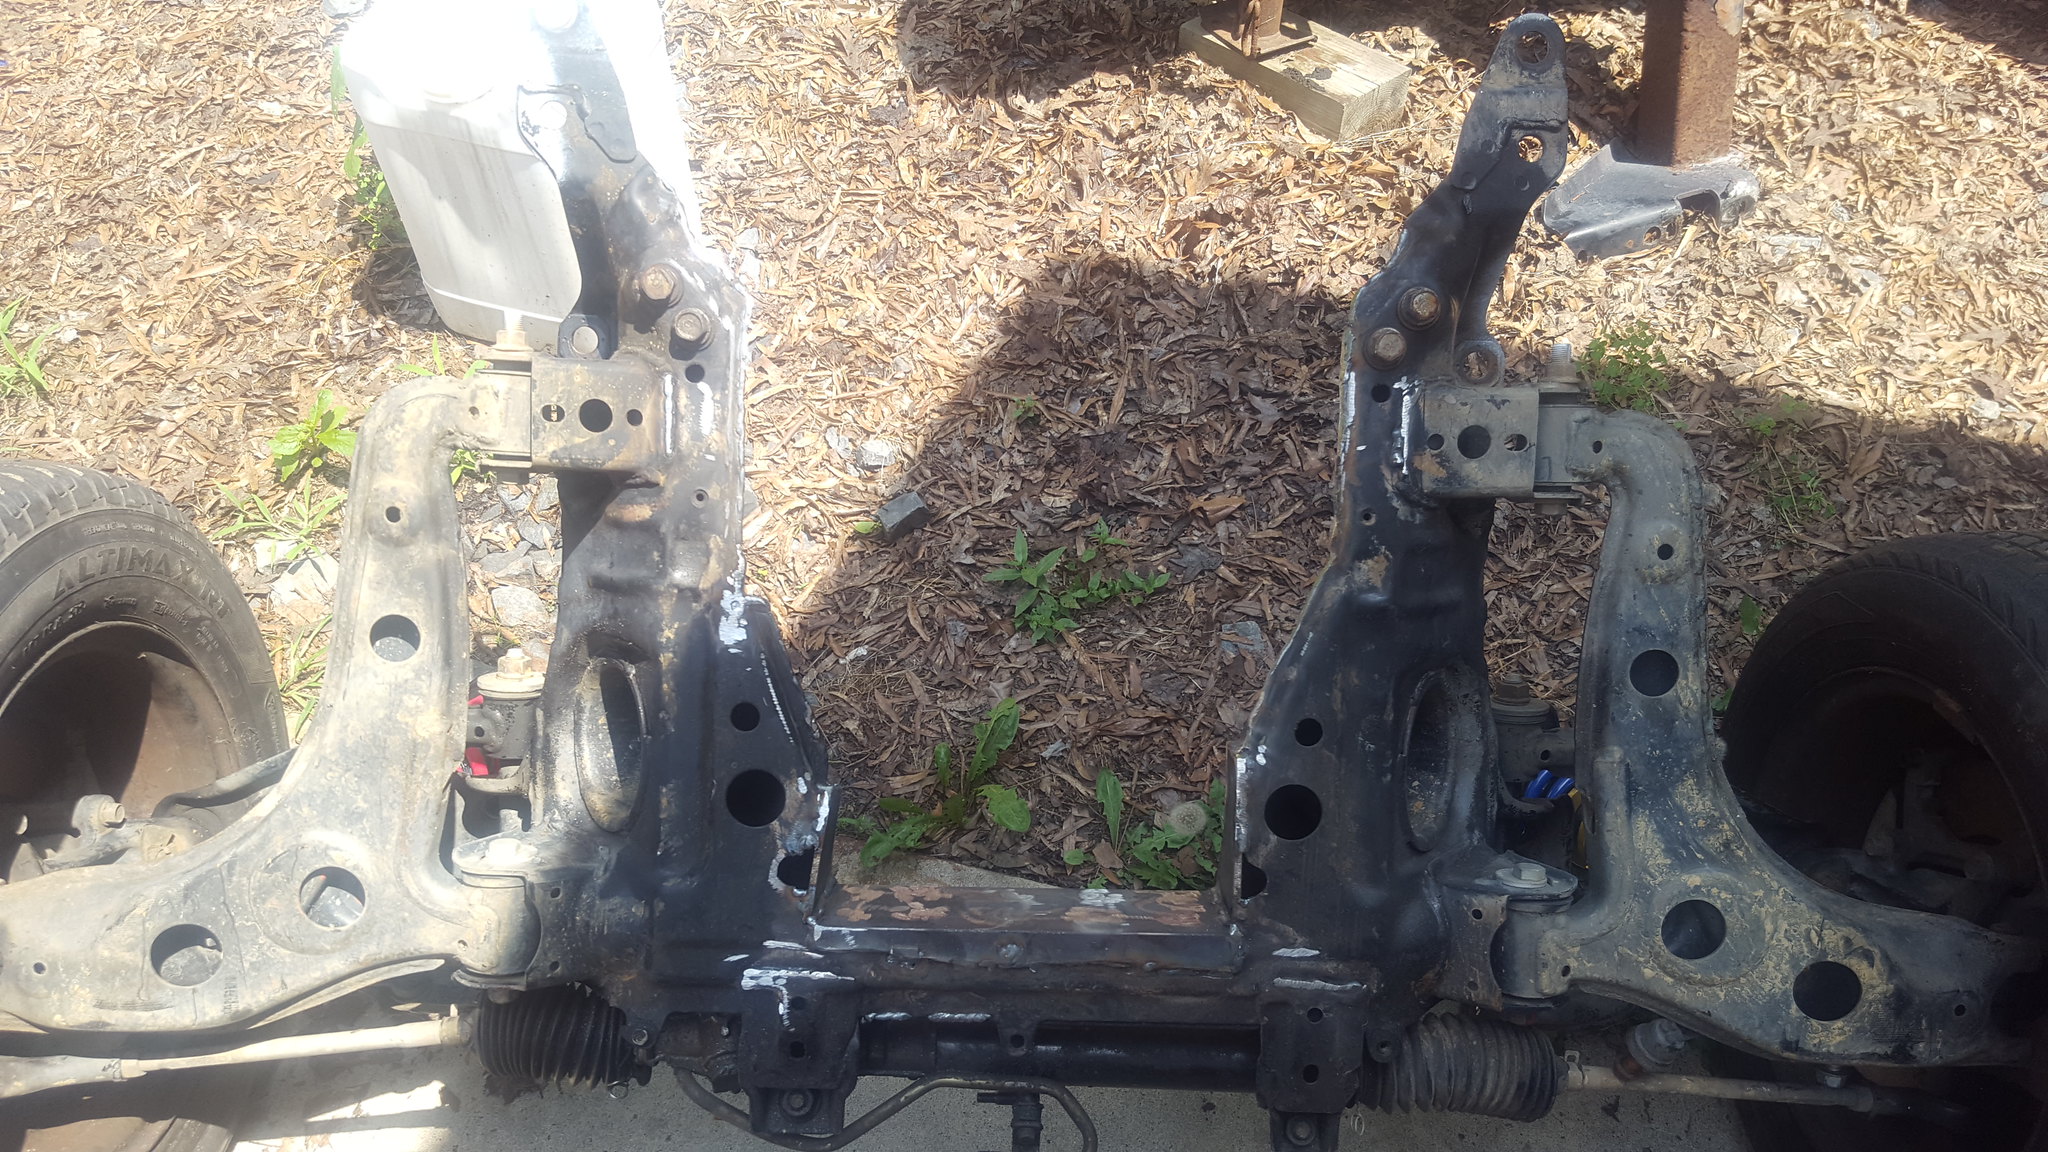
20180610_143516 by Michael Crawford, on Flickr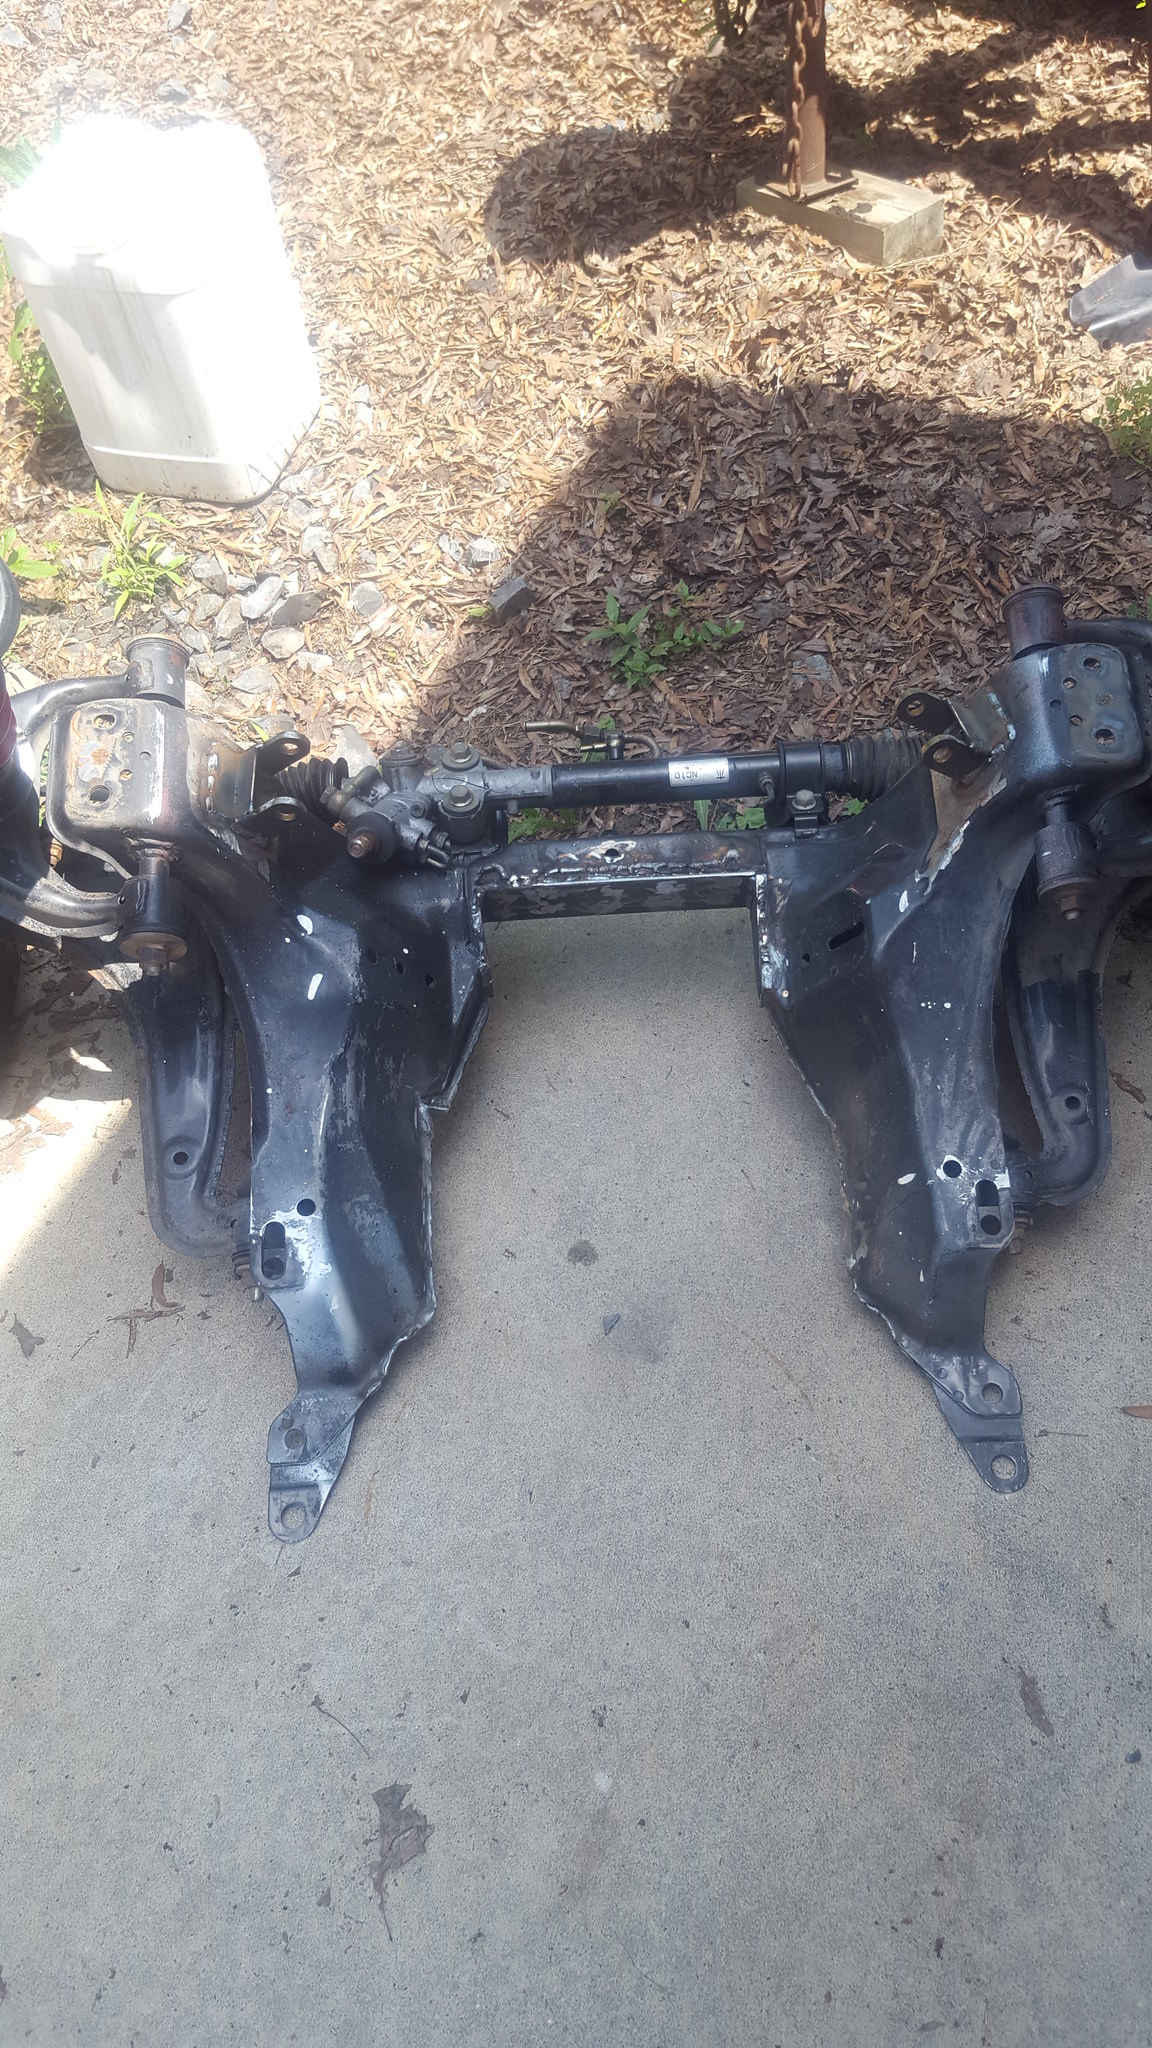
20180610_143502 by Michael Crawford, on Flickrhave a good week, y'all. And remember to be grateful for your blessings.
revious challenge budget: 1527.54 recoup total: 820new money: torsen: 200quick release wheel: 20
aluminum paint: 6.99satin black spray paint: dustin was throwing out a box of aerosol cans, I took what I wanted and he put the rest by the road to make them go away. They lasted about 9 minutes.further budget clean up (took out leftover steel and other supplies were pro-rated. Also, since wvtumbler gave me the box of leftovers from his project, I dont need the gasket kit. Or the hydraulic clutch fittings, as there was one in there!) new total: 1686.08
recoup: 820 progress!!!!finished off my rattle can of rustoleum in the trunk. We found last year that theres a lot of wrenching in the dark at the challenge. White makes things easier to see by flashlight. Since the nitrous and battery go back in the trunk, I brightened it. Badly, but the can was running out. I have a bit of white left yet from the valspar, and im thinking about putting a solid coat of that on. However, its not a priority. At all.
20180608_192603 by Michael Crawford, on FlickrI also spent a few minutes with a can of sating black. Blacked out the core support and fenderwells. Some off brand of paint ive never heard of, but the price was right....two days later its soft as hell and easily damaged. Theres a reason he was throwing it out.....
20180608_192545 by Michael Crawford, on Flickr
20180608_192530 by Michael Crawford, on FlickrI also scored a torsen with 4.11 gears for $200 from a failed challenge car project (also lemons racers. Cool, cool guys.) along with a miata steering column with quick release and wheel. I need to figure out if I can swap my ignition switch and other parts from the stock column with the quick release welded on. Hopefully. If someone can answer before I spend the time, that would be great!
20180601_200319 by Michael Crawford, on Flickr
20180608_071040 by Michael Crawford, on Flickr
20180610_112435 by Michael Crawford, on Flickrcleaned and painted the upper and lower manifolds
20180608_071019 by Michael Crawford, on Flickr
20180609_071506 by Michael Crawford, on Flickrfinished insulating the trans tunnel and drivers floor pans
20180610_103149 by Michael Crawford, on Flickrpulled the carpet out of storage. This I will so a little more explanation on.These were the most disgusting carpets I have ever encountered. Honestly, the interior was the primary reason I parted this car out. It was that bad.
20171007_163818 by Michael Crawford, on FlickrI had used a vacuum, castrol superclean and a garden hose on them to see if I could get them better during the parts car phase of this project. Some improvements were made, but they were garbage. Dont know why I put them in storage instead of throwing them out as I had planned, to be honest. But when I pulled them out of storage, this is what they looked like.
20180606_161423 by Michael Crawford, on Flickrthey were heavier than I was anticipating. As im trying to find a thousand places to save an ounce, I had to do something. Also, the jute and carpets were still dripping some unknown sticky substance. This would not do, and the were still too bad to use in a race car cosmetically. So I fixed them.
20180606_161204 by Michael Crawford, on Flickr
20180606_161511 by Michael Crawford, on Flickrand then we got midevil on it. Superclean and a 10 degree nozzle on the pressure washer.
20180608_070931 by Michael Crawford, on Flickrdamn things are still sticky to the touch. But, race care pretty if you dont touche them...
20180610_103555 by Michael Crawford, on Flickrwent ahead and gutted the ac evaporator, cleaned the center stack and blower motor, and rehung them. In the excitement of rehanging stuff, pictures happened less. But, I pulled the bose stuff out of the dash. About 2lbs. Then passengers airbag. Roughly 10. but I pulled the cover and reinstalled it for cosmetic purposes. Theres more weight to come out of the dash, but thats going to wait for now.
20180610_101015 by Michael Crawford, on Flickr
20180610_104612 by Michael Crawford, on Flickr
20180610_111807 by Michael Crawford, on Flickrran the dash home, and tossed the seat in. nice to have parts being consolidated.
20180610_112224 by Michael Crawford, on Flickr
20180610_143649 by Michael Crawford, on Flickrthe big project this week was the front crossmember. I needed to do a little more clearance just for service room. I also needed to do something about the fact that I cut the thing up radically, and it had lost all strength it ever had. After some brief thought, I came up with a plan. First, some 1x1 tube welded to the horiszontal surfaces. These were both seam welded and plug welded, includeing as far as I could get inside the crossmember.
20180609_100532 by Michael Crawford, on Flickr
20180609_105307 by Michael Crawford, on Flickrafter I welded those, I took a leftover piece of lintel from some foundation repair when we bought our house. Ground it down, drilled some holes, did some trimming, and burned it in.
20180609_105319 by Michael Crawford, on Flickrmade some block offs for the wings, and a piece of angle reinforced the motor mounts. Went ahead and welded the entire thing where the two halves meet, as well as all the parts that were just partially welded or tack welded. Lots and lots of welding. And then a lot of grinding. But its DONE.
20180610_143516 by Michael Crawford, on Flickr
20180610_143502 by Michael Crawford, on Flickrhave a good week, y'all. And remember to be grateful for your blessings.
Reply
0
0
06-17-2018, 04:56 PM
#57
Junior Member
Thread Starter
Join Date: Nov 2017
Posts: 112
Total Cats: 7
Challenge budget so farrevious challenge budget: 1686.08 recoup total: 820new money:2 thermostat housings from pull-a-part: 11.00traded the autometer ultralight gauges to myself for some REALLY scuzzy sunpro (oil/water/volts/tach) oil pan gasket: 12.60 new total: 1709.68
recoup: 820kicking *** and taking names.First, dad painted the crossmember.He made my mediocre fabrication look GOOD.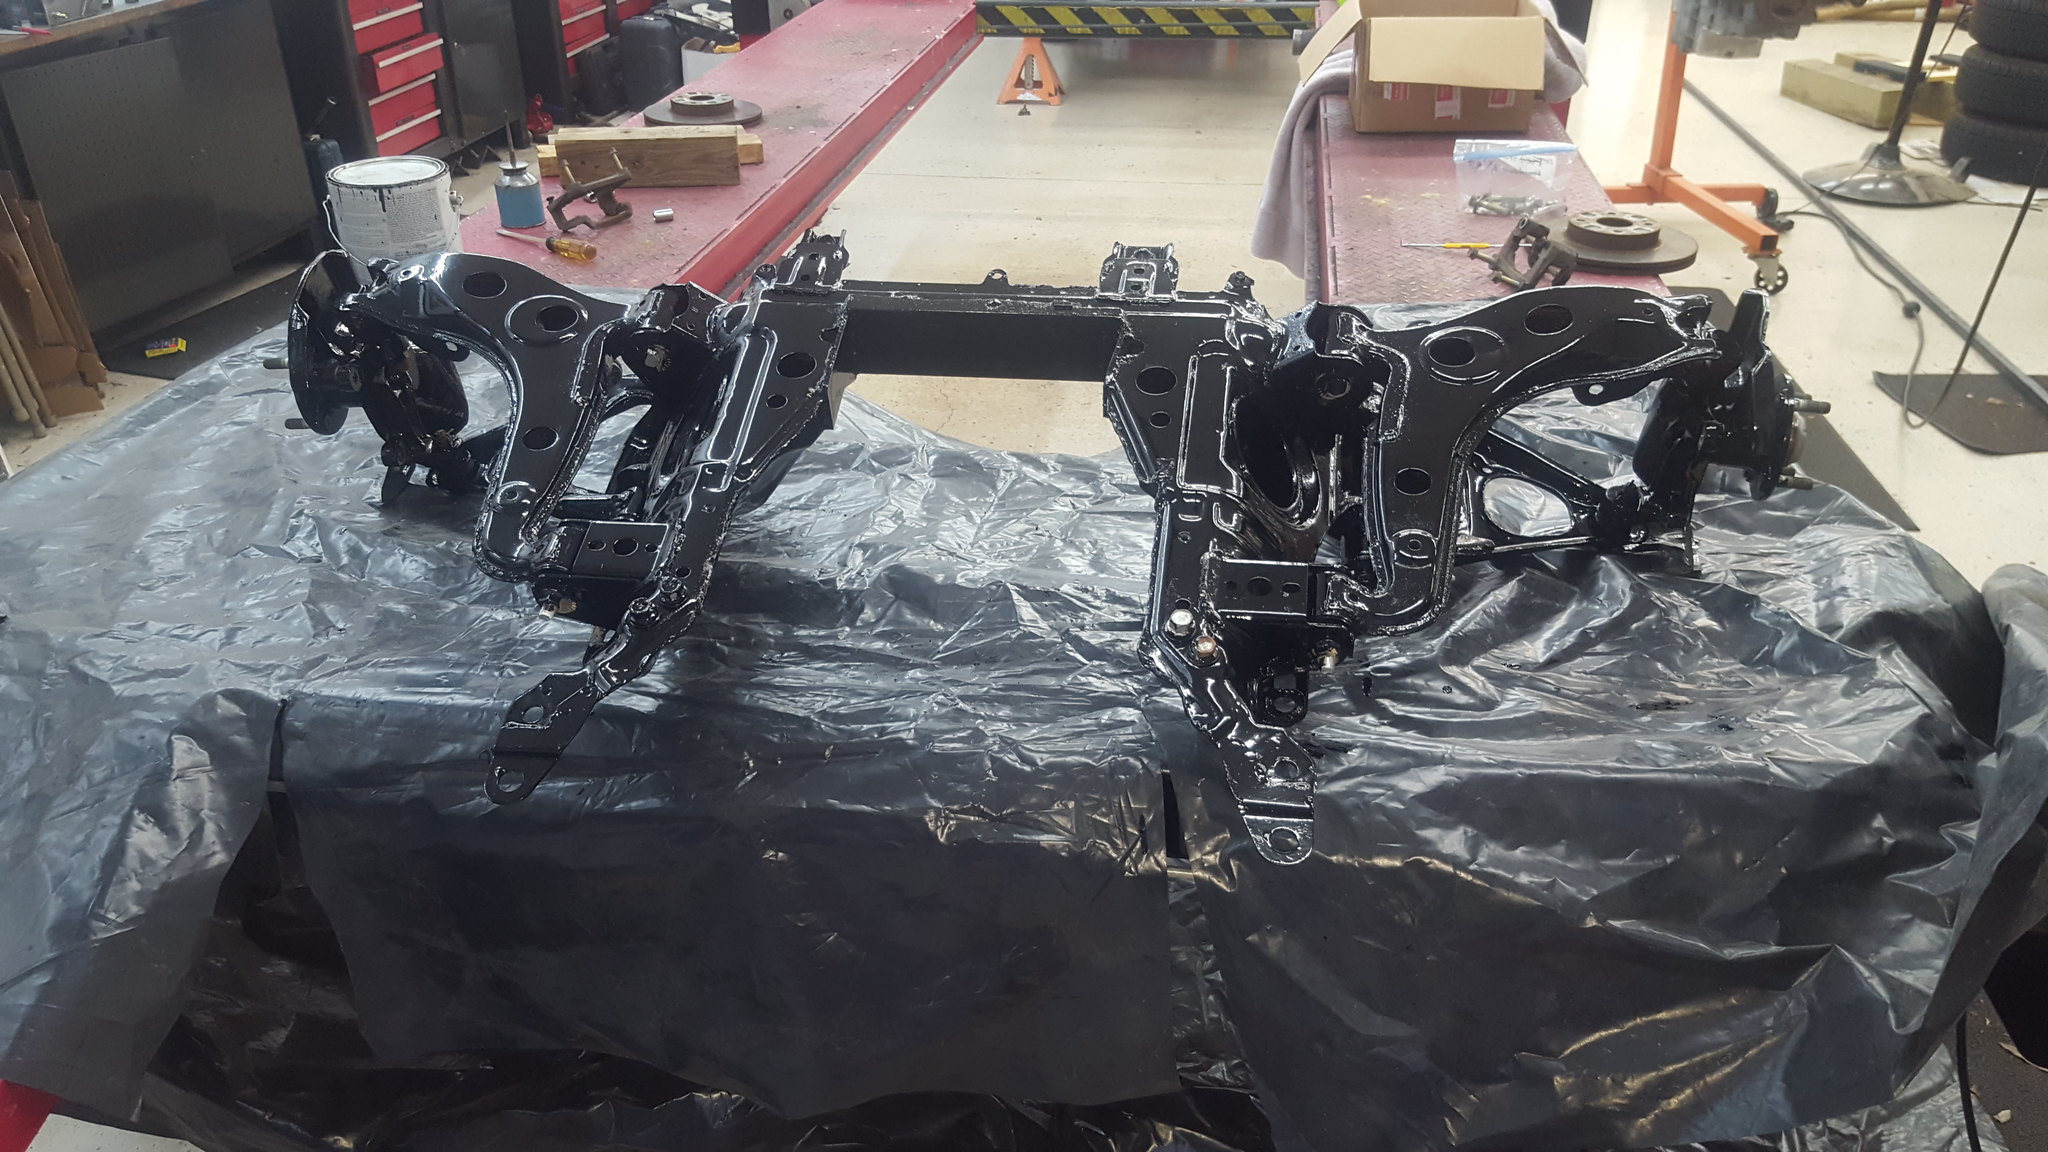
20180612_195646 by Michael Crawford, on Flickrthen we assembled the engine. WVTumbler had sent a care package mentioned earlier in the thread. A,azingly, it contained EVERY gasket I needed except oil pan and exhaust manifold gaskets. He even had new intake bolts in the box. Amazing guy. I bought the pan gasket, but am debating using a real gasket or high temp RTV for the exhaust. We then loaded it up in the back of dads truck, and he took it to a friend of his for broken exhaust stud removal. Neither of us have ever been any good at that, and these heads dont need to get damaged by my hamfistedness. Were supposed to be able to go pick it up this week sometime, but as kenny is a HVAC guy with a sick wife, were not holding our breath. Its over 100 degrees here today....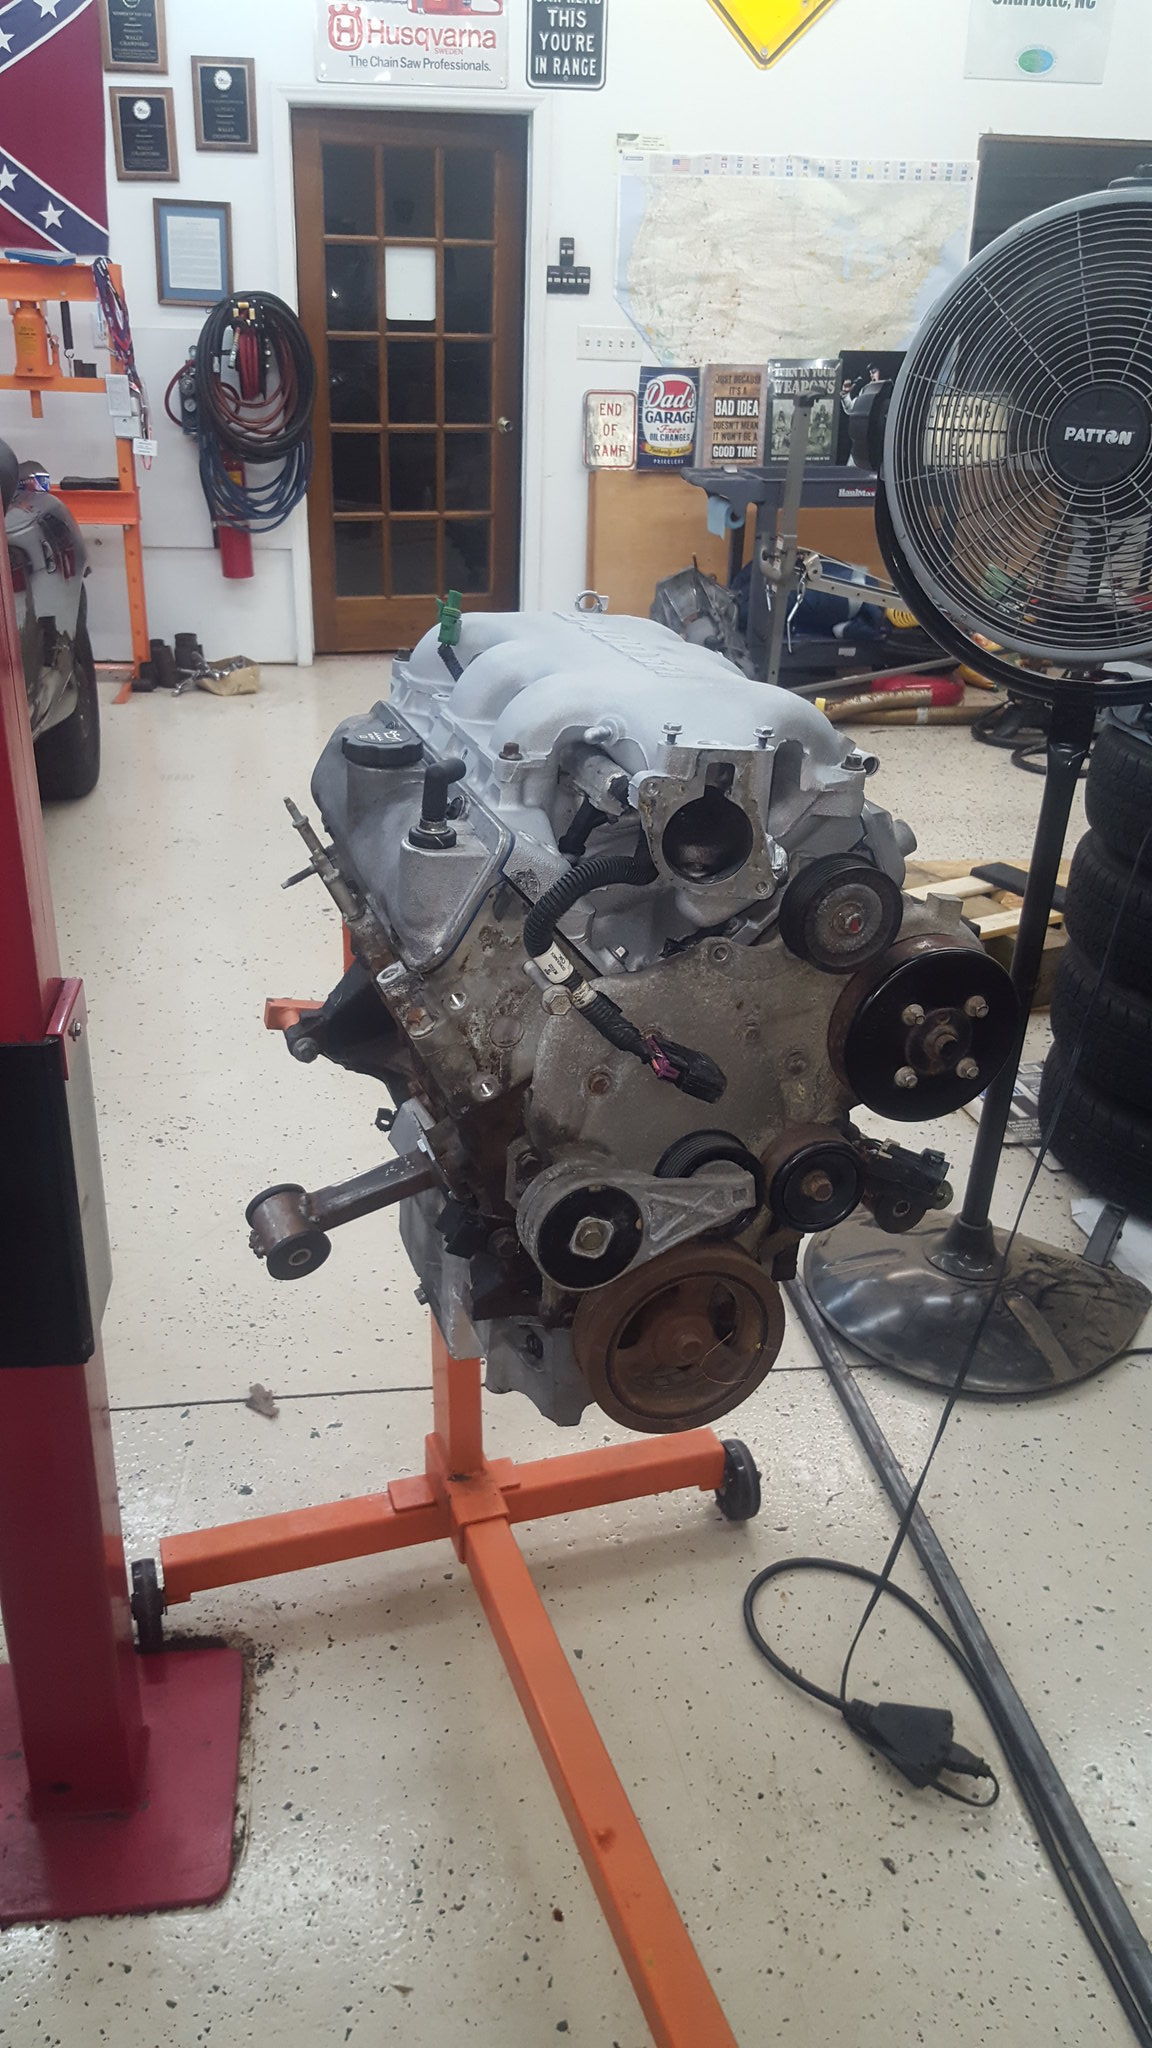
20180612_195557 by Michael Crawford, on Flickr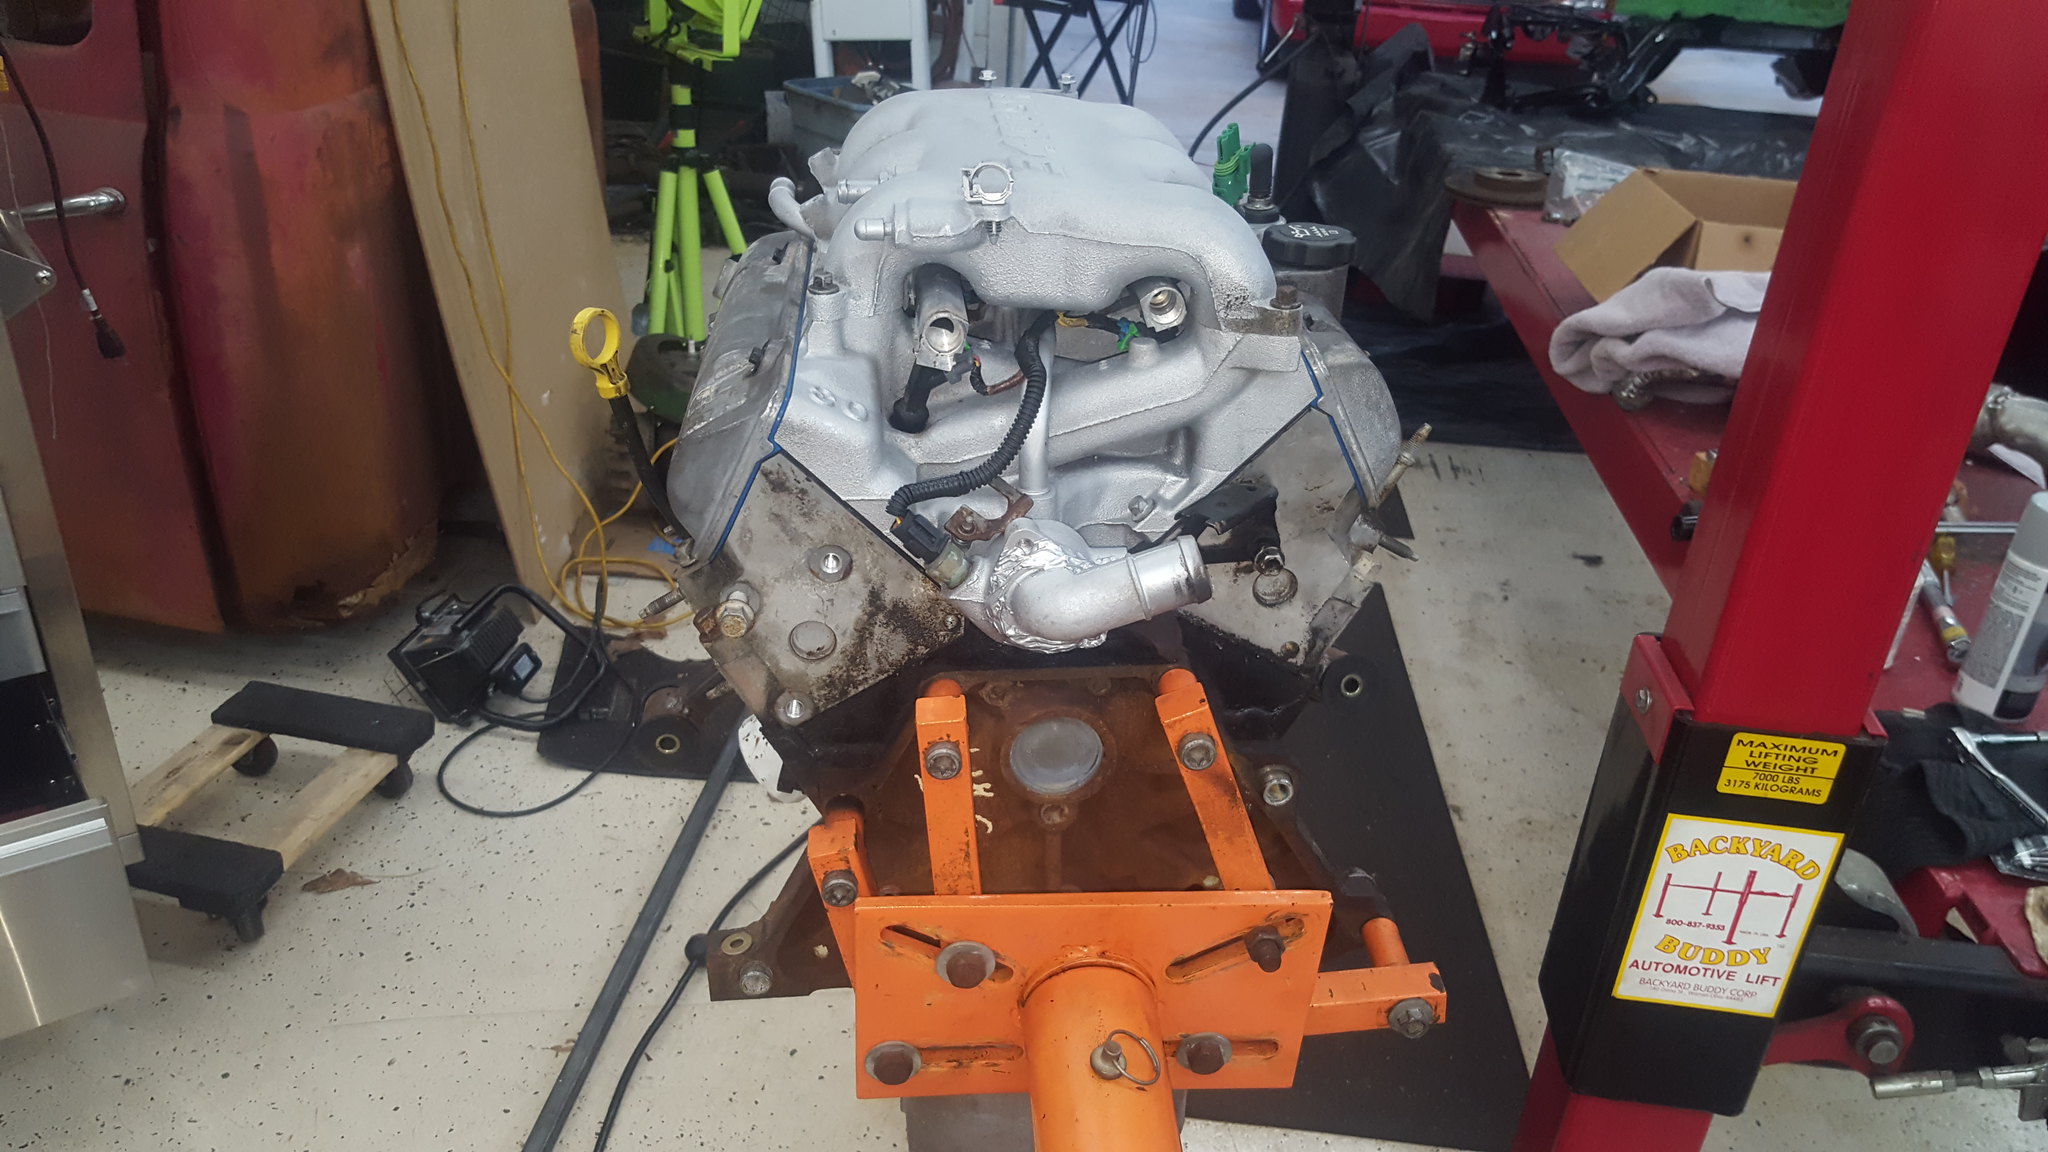
20180612_195611 by Michael Crawford, on Flickrwhen we get the engine back, well clean and paint it, as well as finish the alternator mount.In preparation for engine reinstall, I went ahead and finished the crossmember. To do so, I first depowered my replacement rack. That wasn't a fun job, but its done.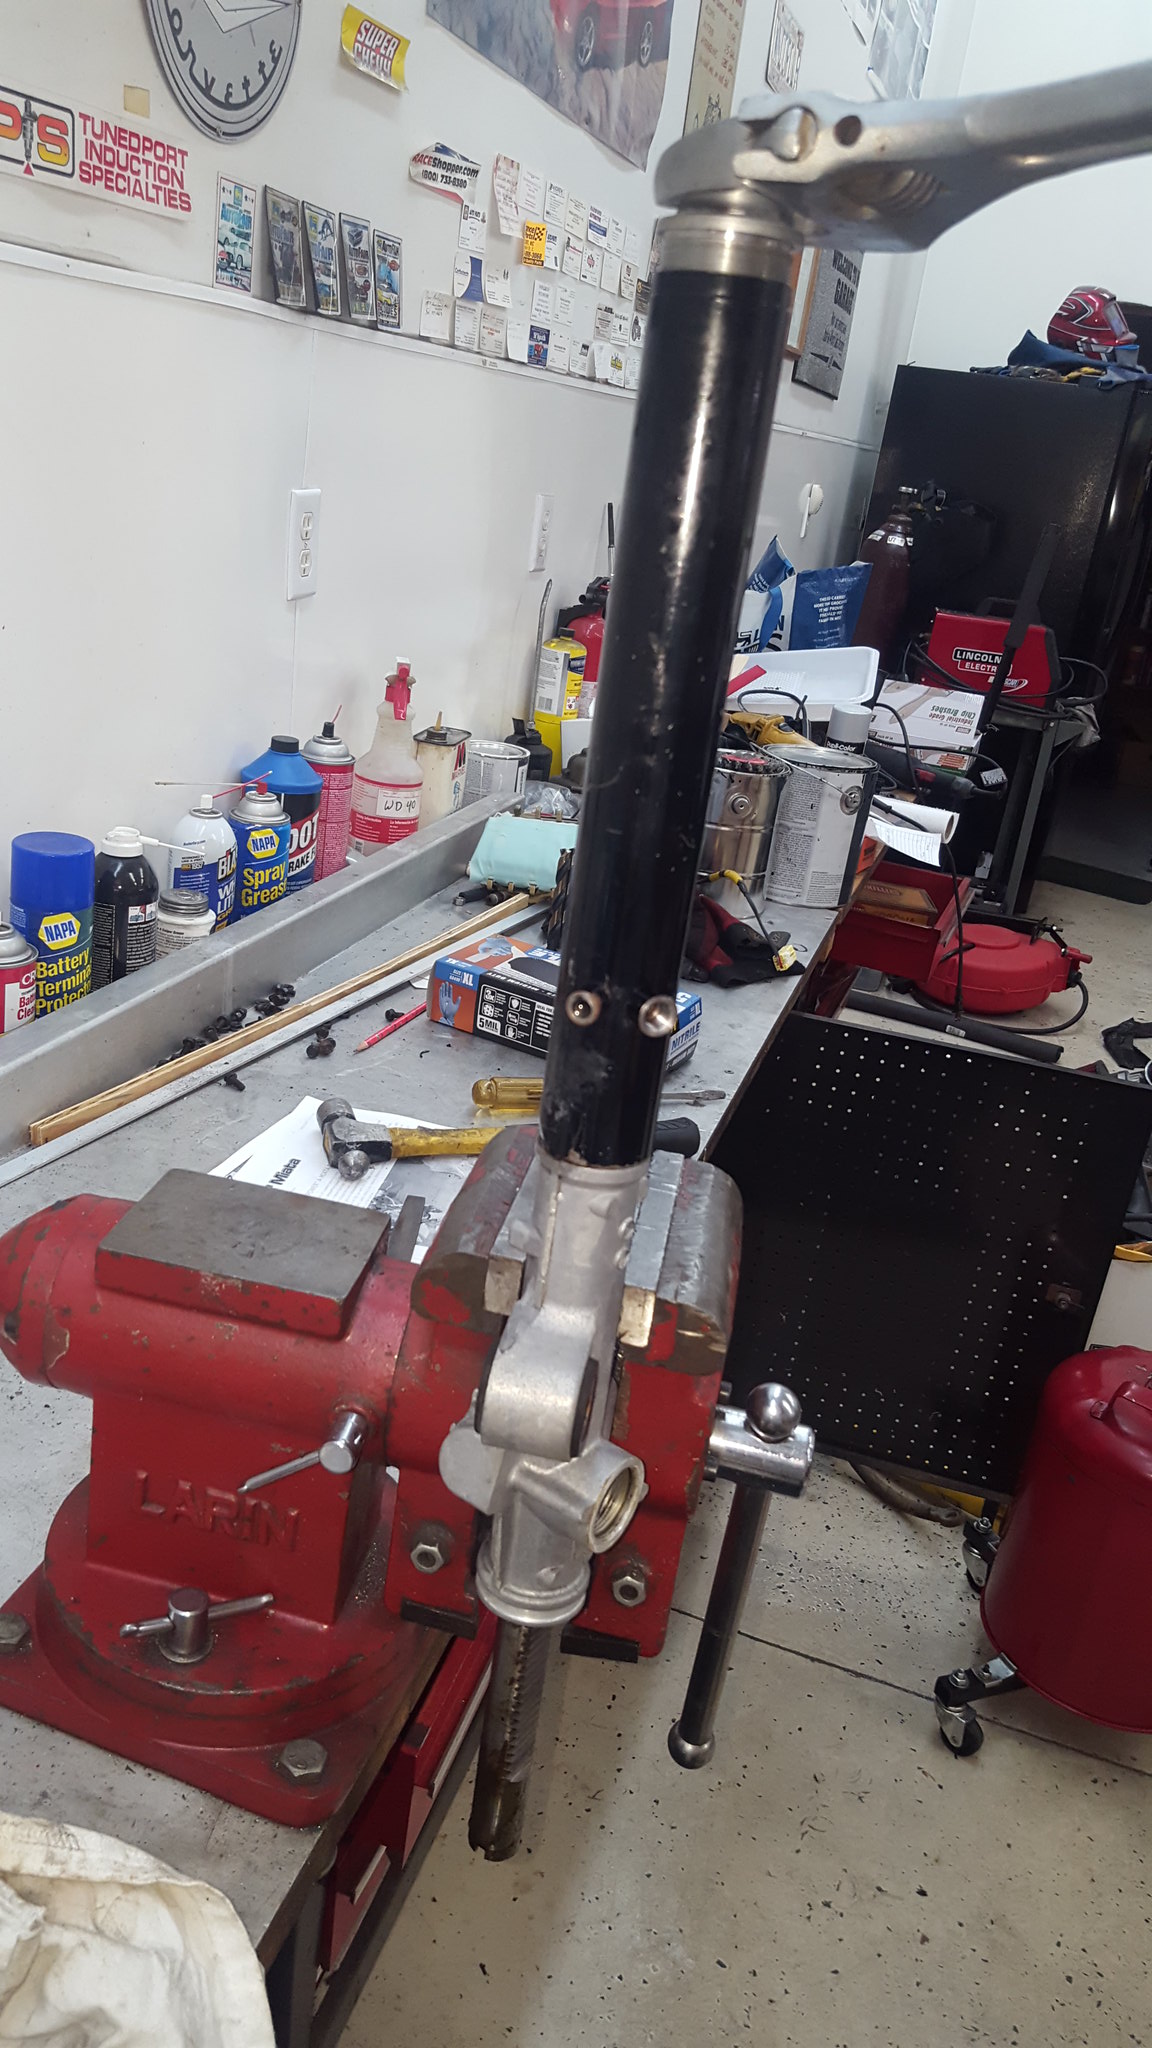
20180616_121228 by Michael Crawford, on Flickrreassembled it all with the bilsteins, brakes, rack, etc. and rolled it out of the way under the car.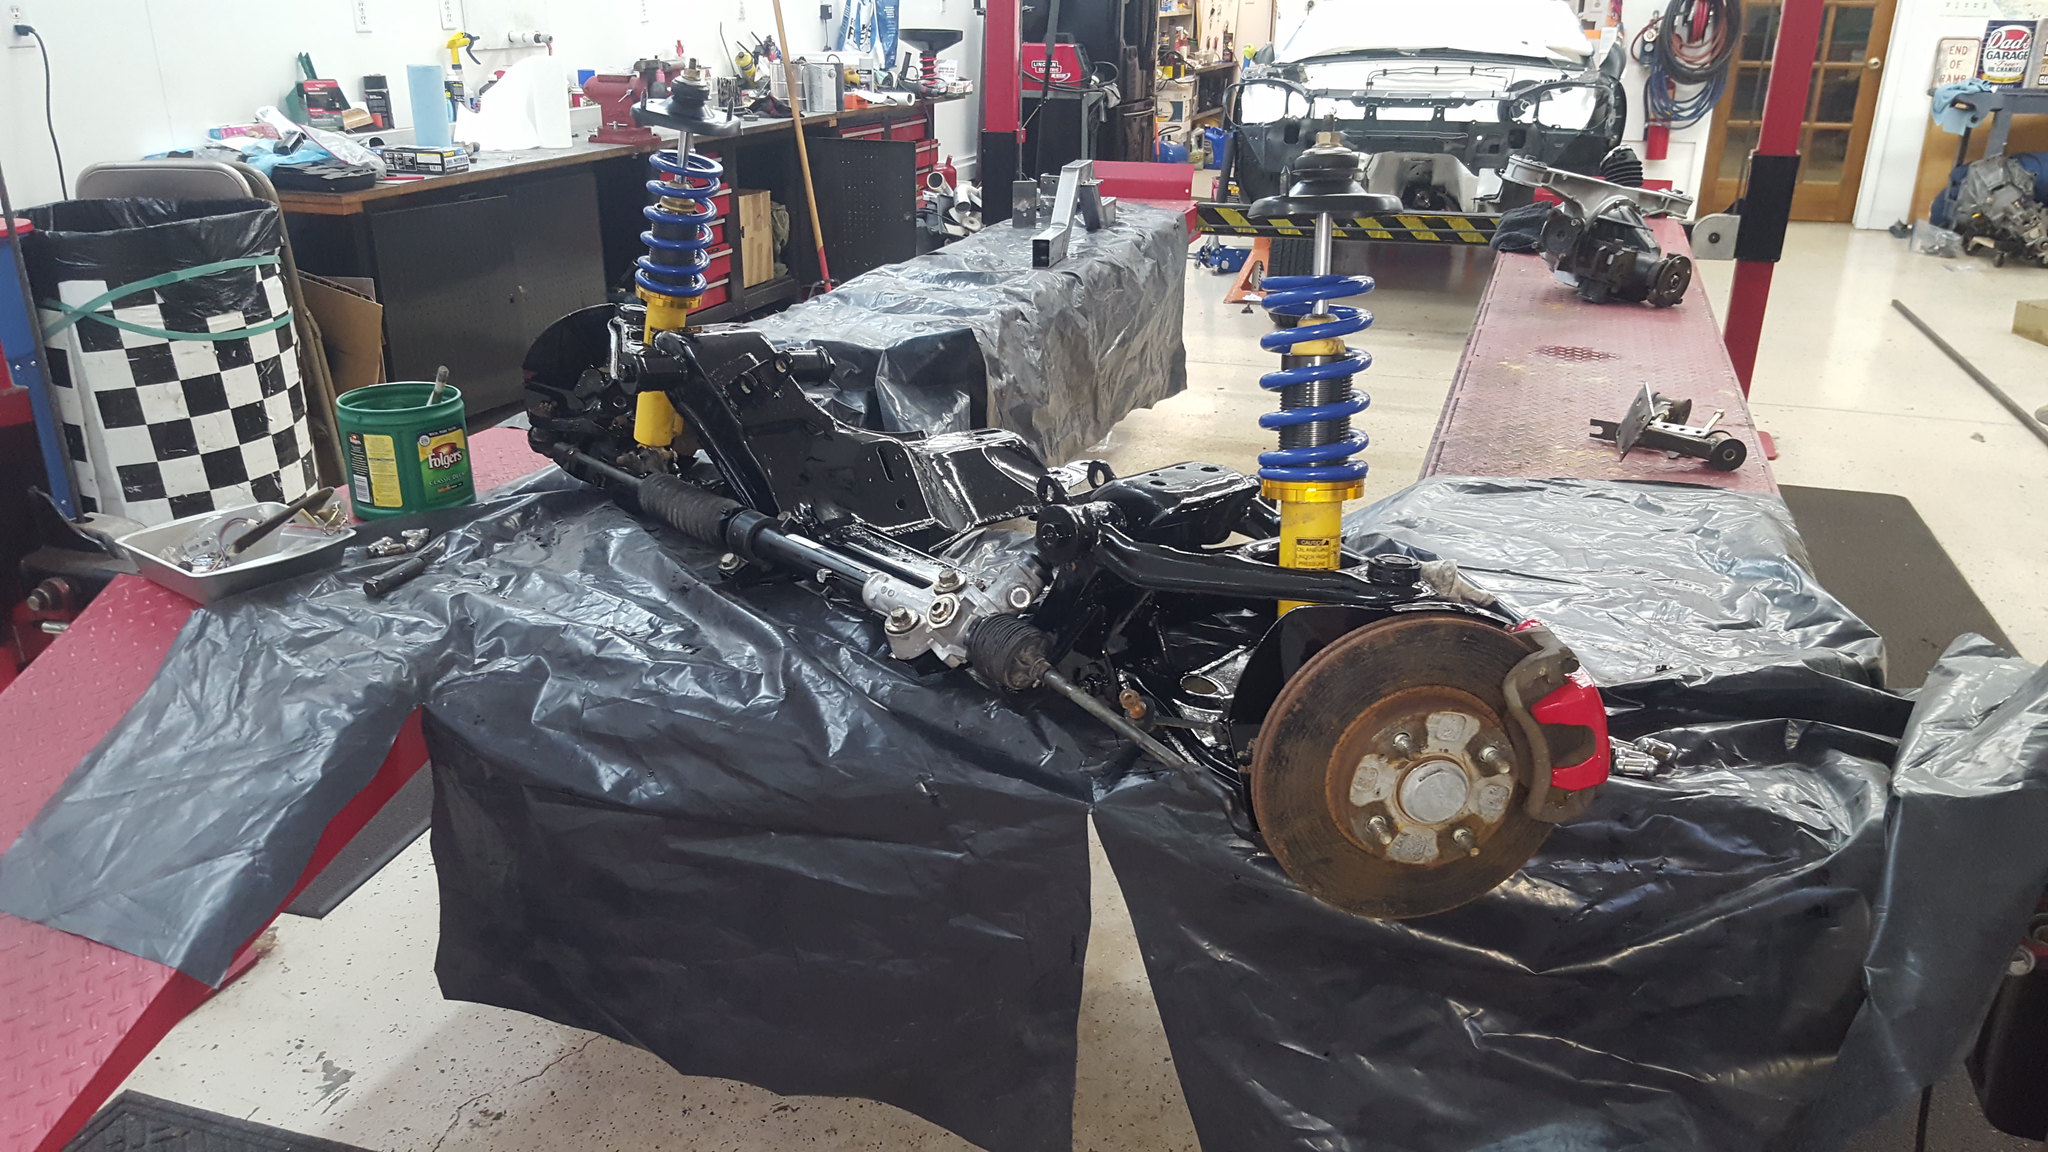
20180616_143746 by Michael Crawford, on Flickr
20180616_151039 by Michael Crawford, on Flickralso, I need to note my bumpstops. Wound up with a buch of NB front bump stops. Cut them all down to 1.5 inches and put them in.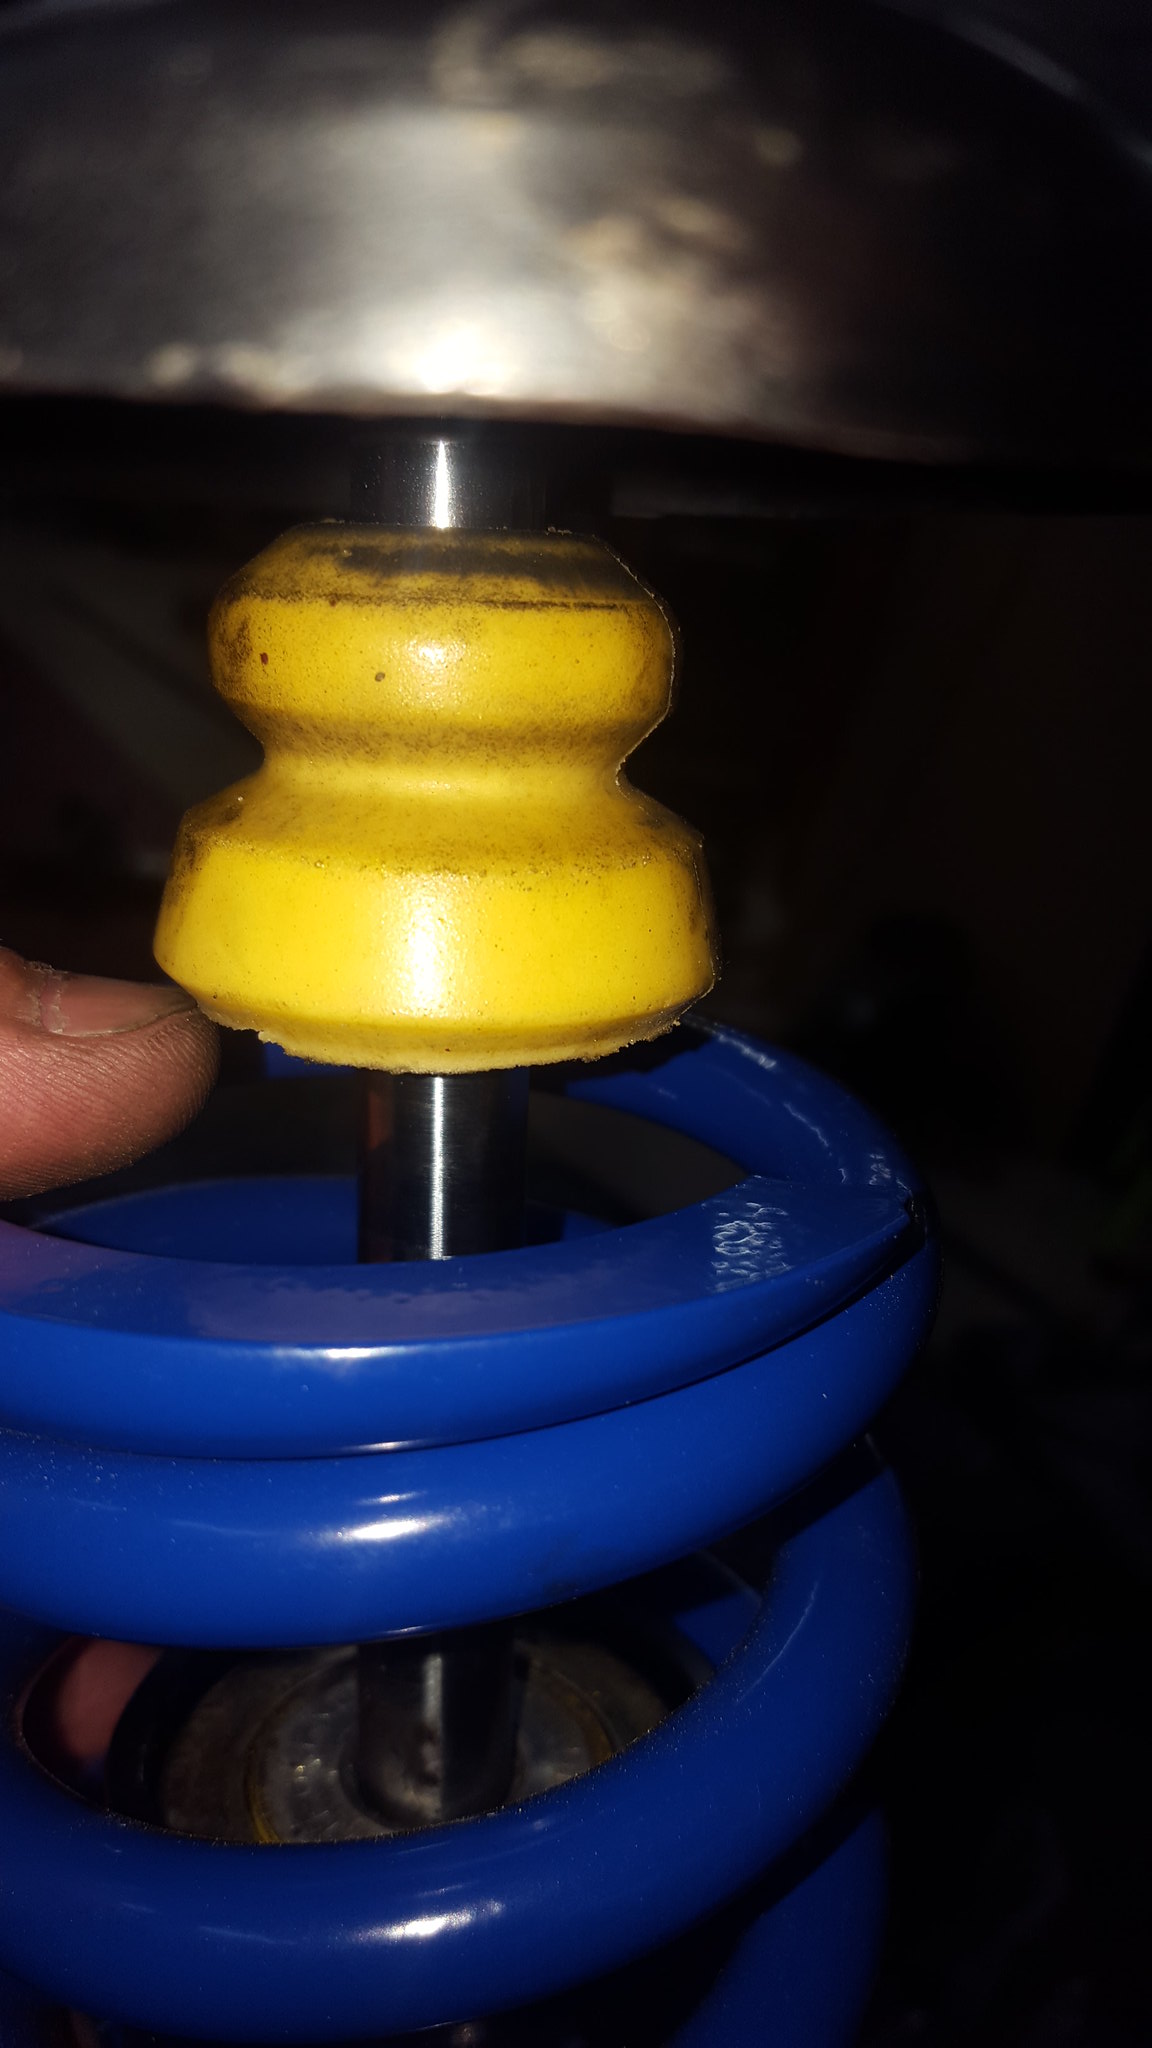
20180616_143832 by Michael Crawford, on Flickrive also begun the task of wiring and gauges. Nothing to report on wiring yet, but I built the cluster. To do so, I first spent far too much time researching how to make the stock tach work with a v6. Never could figure it out. This opened up the cluster to slight modification. By slight modification I mean I stripped it completely, cut the **** out of it, gutted some other gauges and cut them, and put it all back together.The tach was primary concern. I traded myself the ultralights I bought for some really rough sunpro gauges. Tach, oil, water, and volts. Somebody had painted the bezels blue with nailpolish, glass cracked, the tach had been apart multiple times and the housing was falling apart, etc. pretty much garbage. I had actually offered them for free, and had no takers. So I don't feel bad about trading myself. If I had traded someone else, I would have called myself a sucker.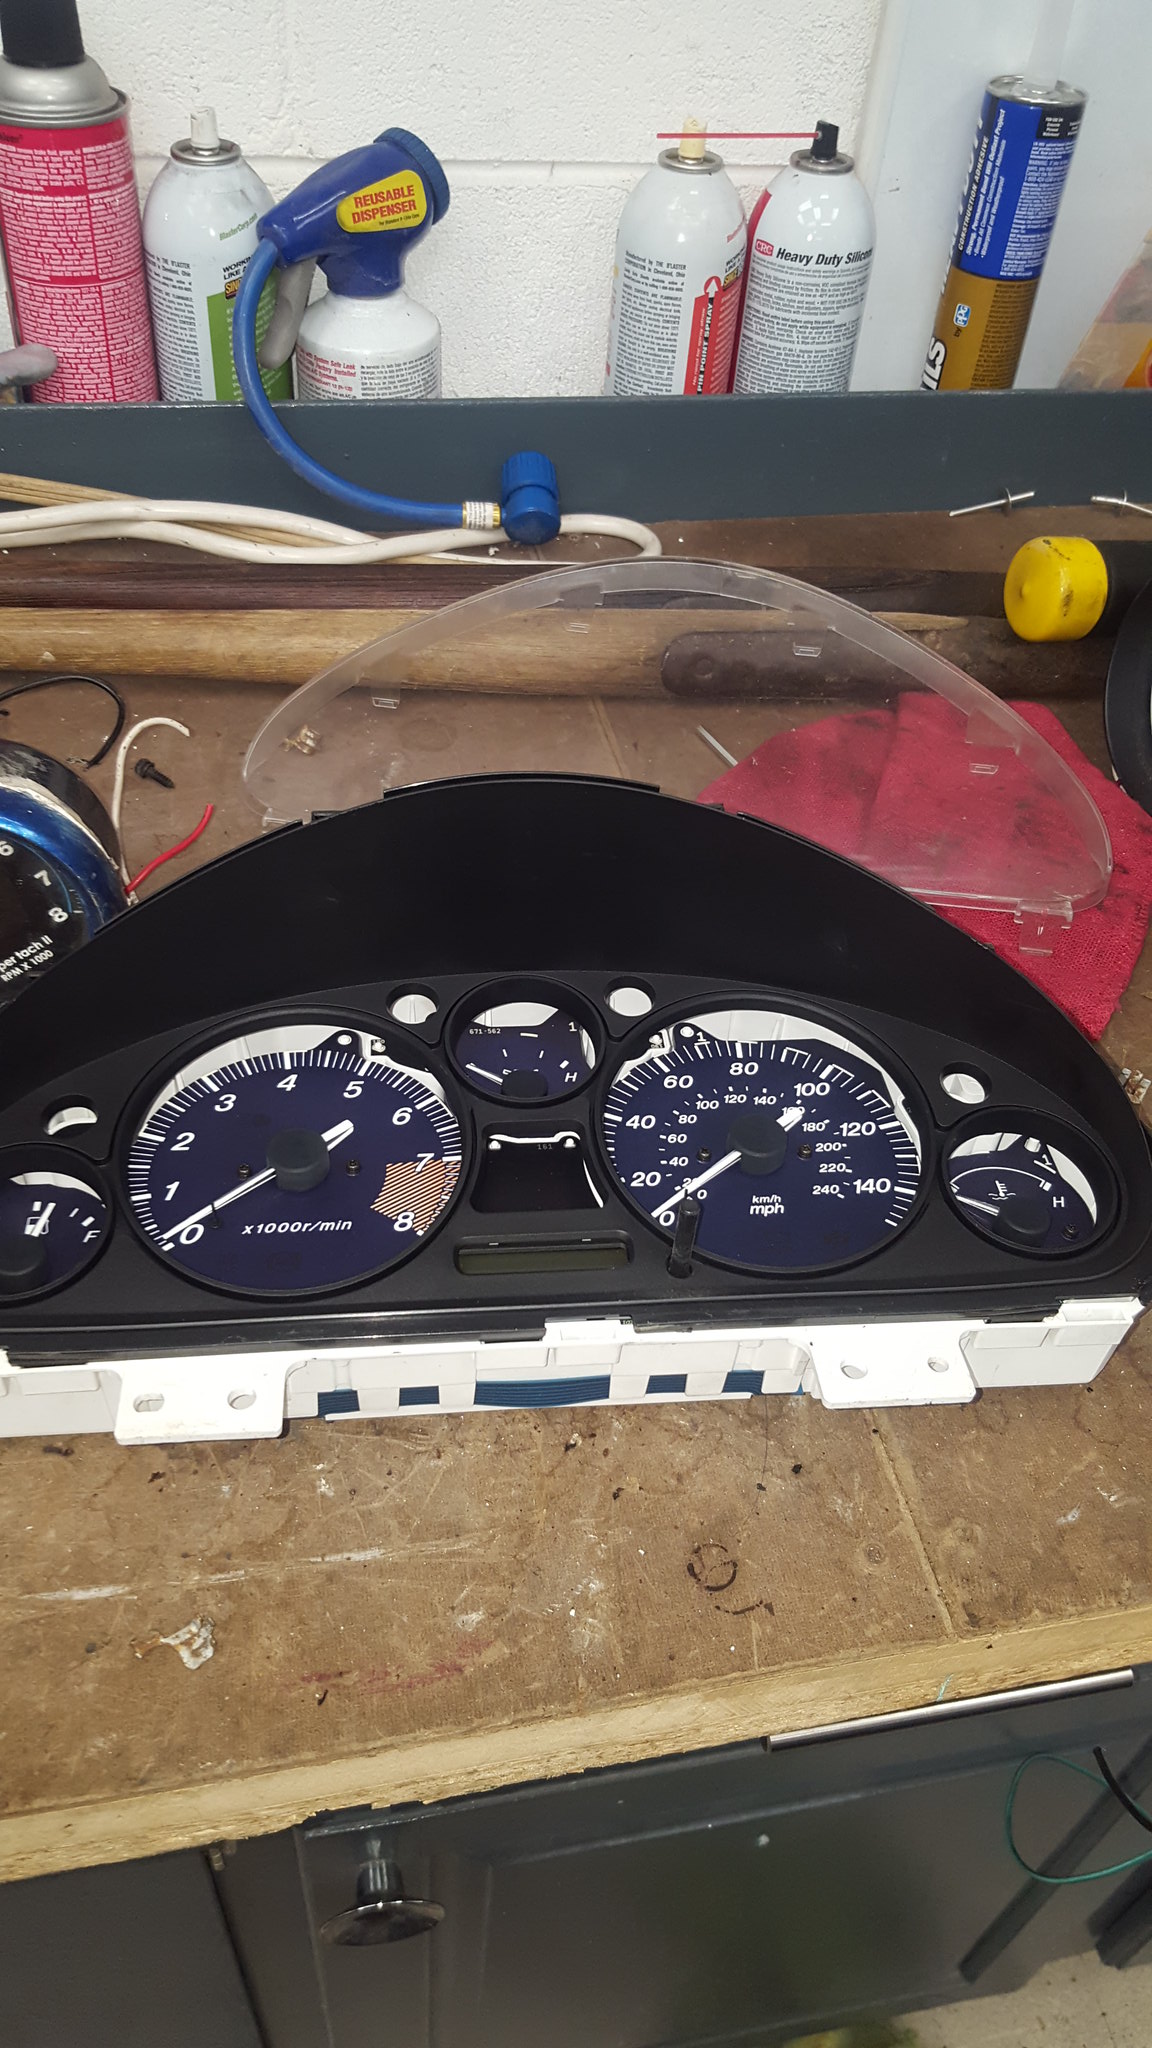
20180613_113240 by Michael Crawford, on Flickr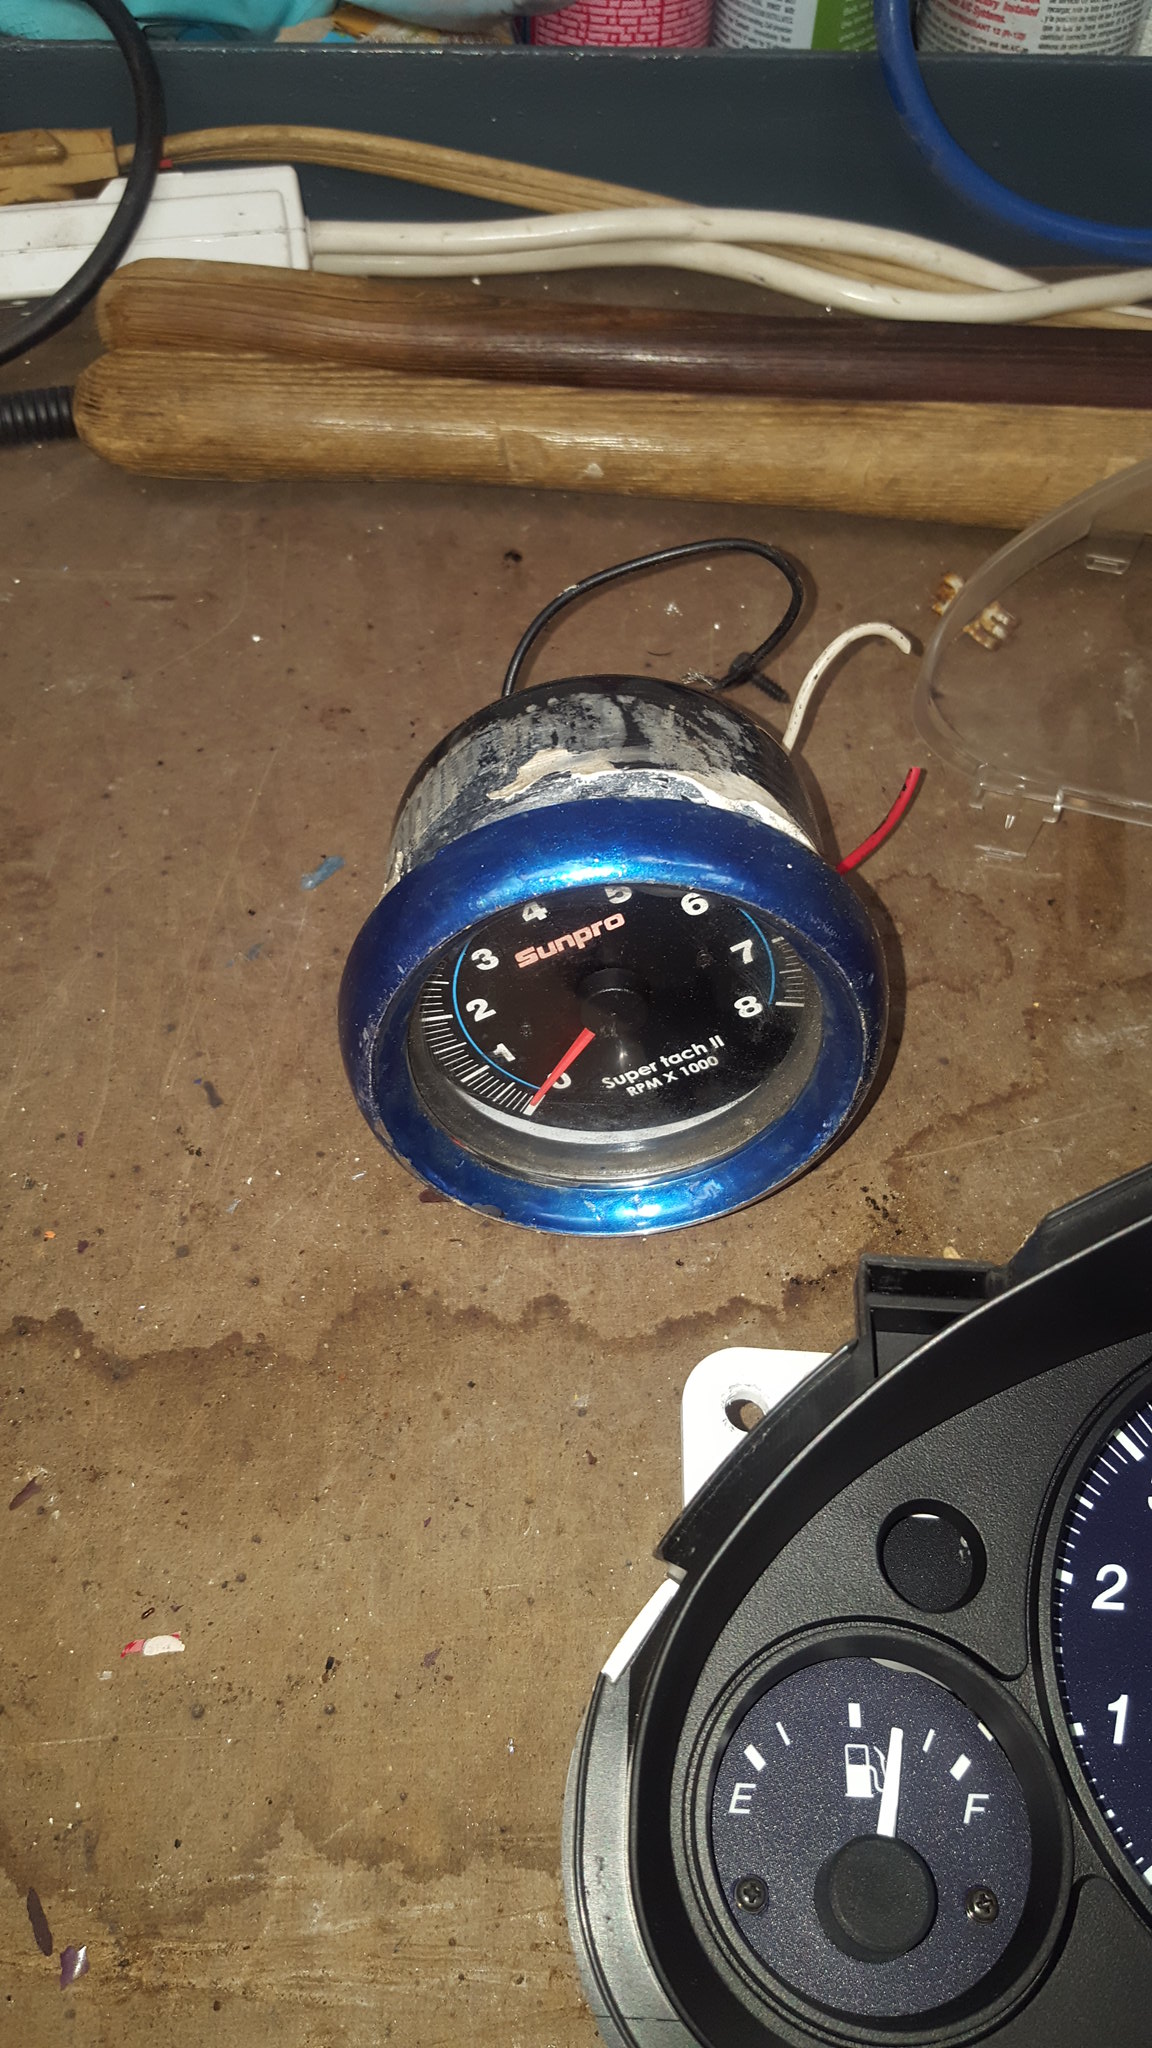
20180613_113244 by Michael Crawford, on Flickr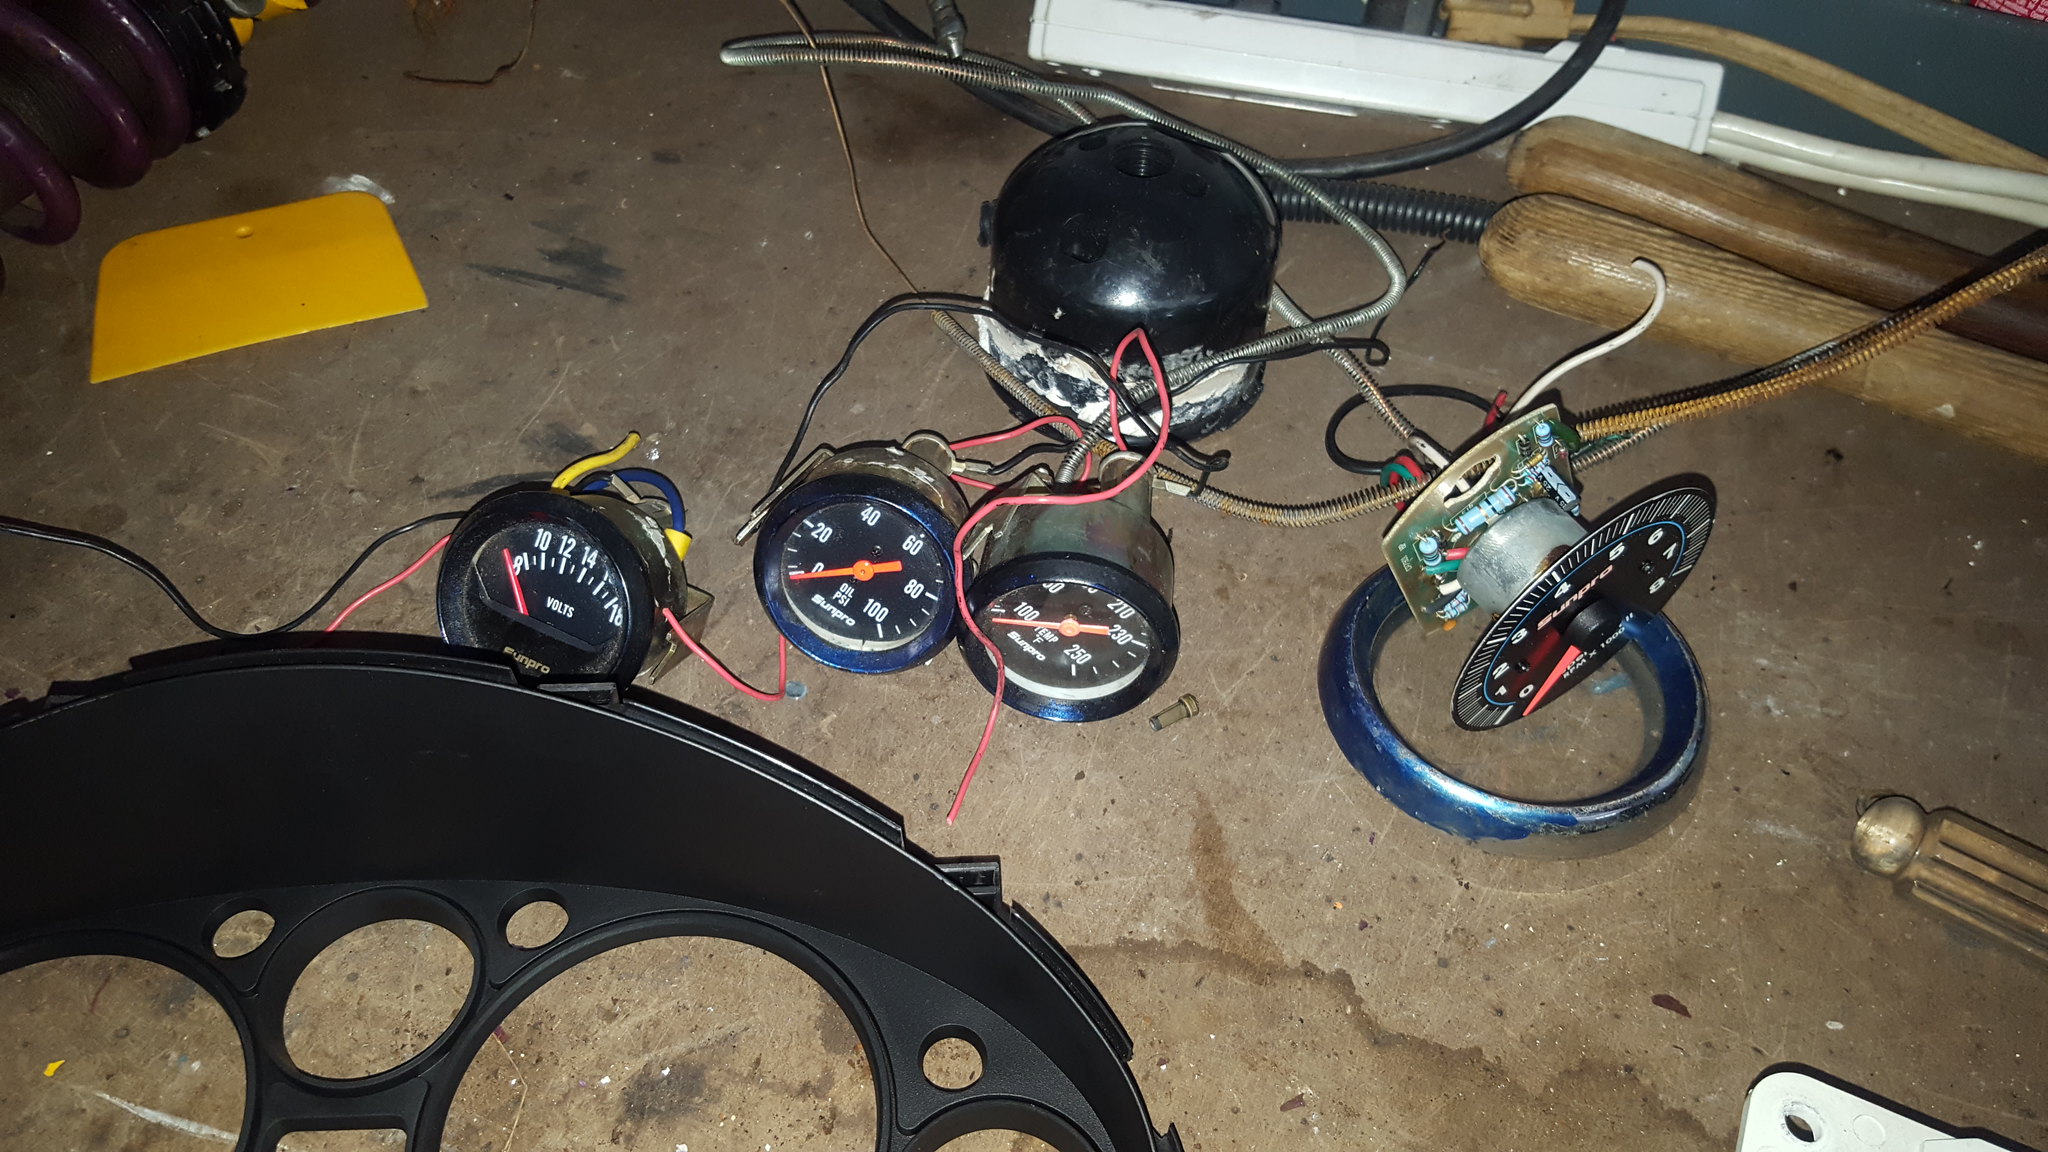
20180613_143223 by Michael Crawford, on Flickryou can see in the second picture I ripped the guts out of the tach. I then proceeded to re-gut the factory tach with the sunpro parts. Do so so, I used the factory face, redrilled for the sunpro pattern. Used the sunpro face to mark the pattern. I wound up needing the clear plastic backer as well, but its not in pictures. The face itself proved to be too flimsy to stand alone.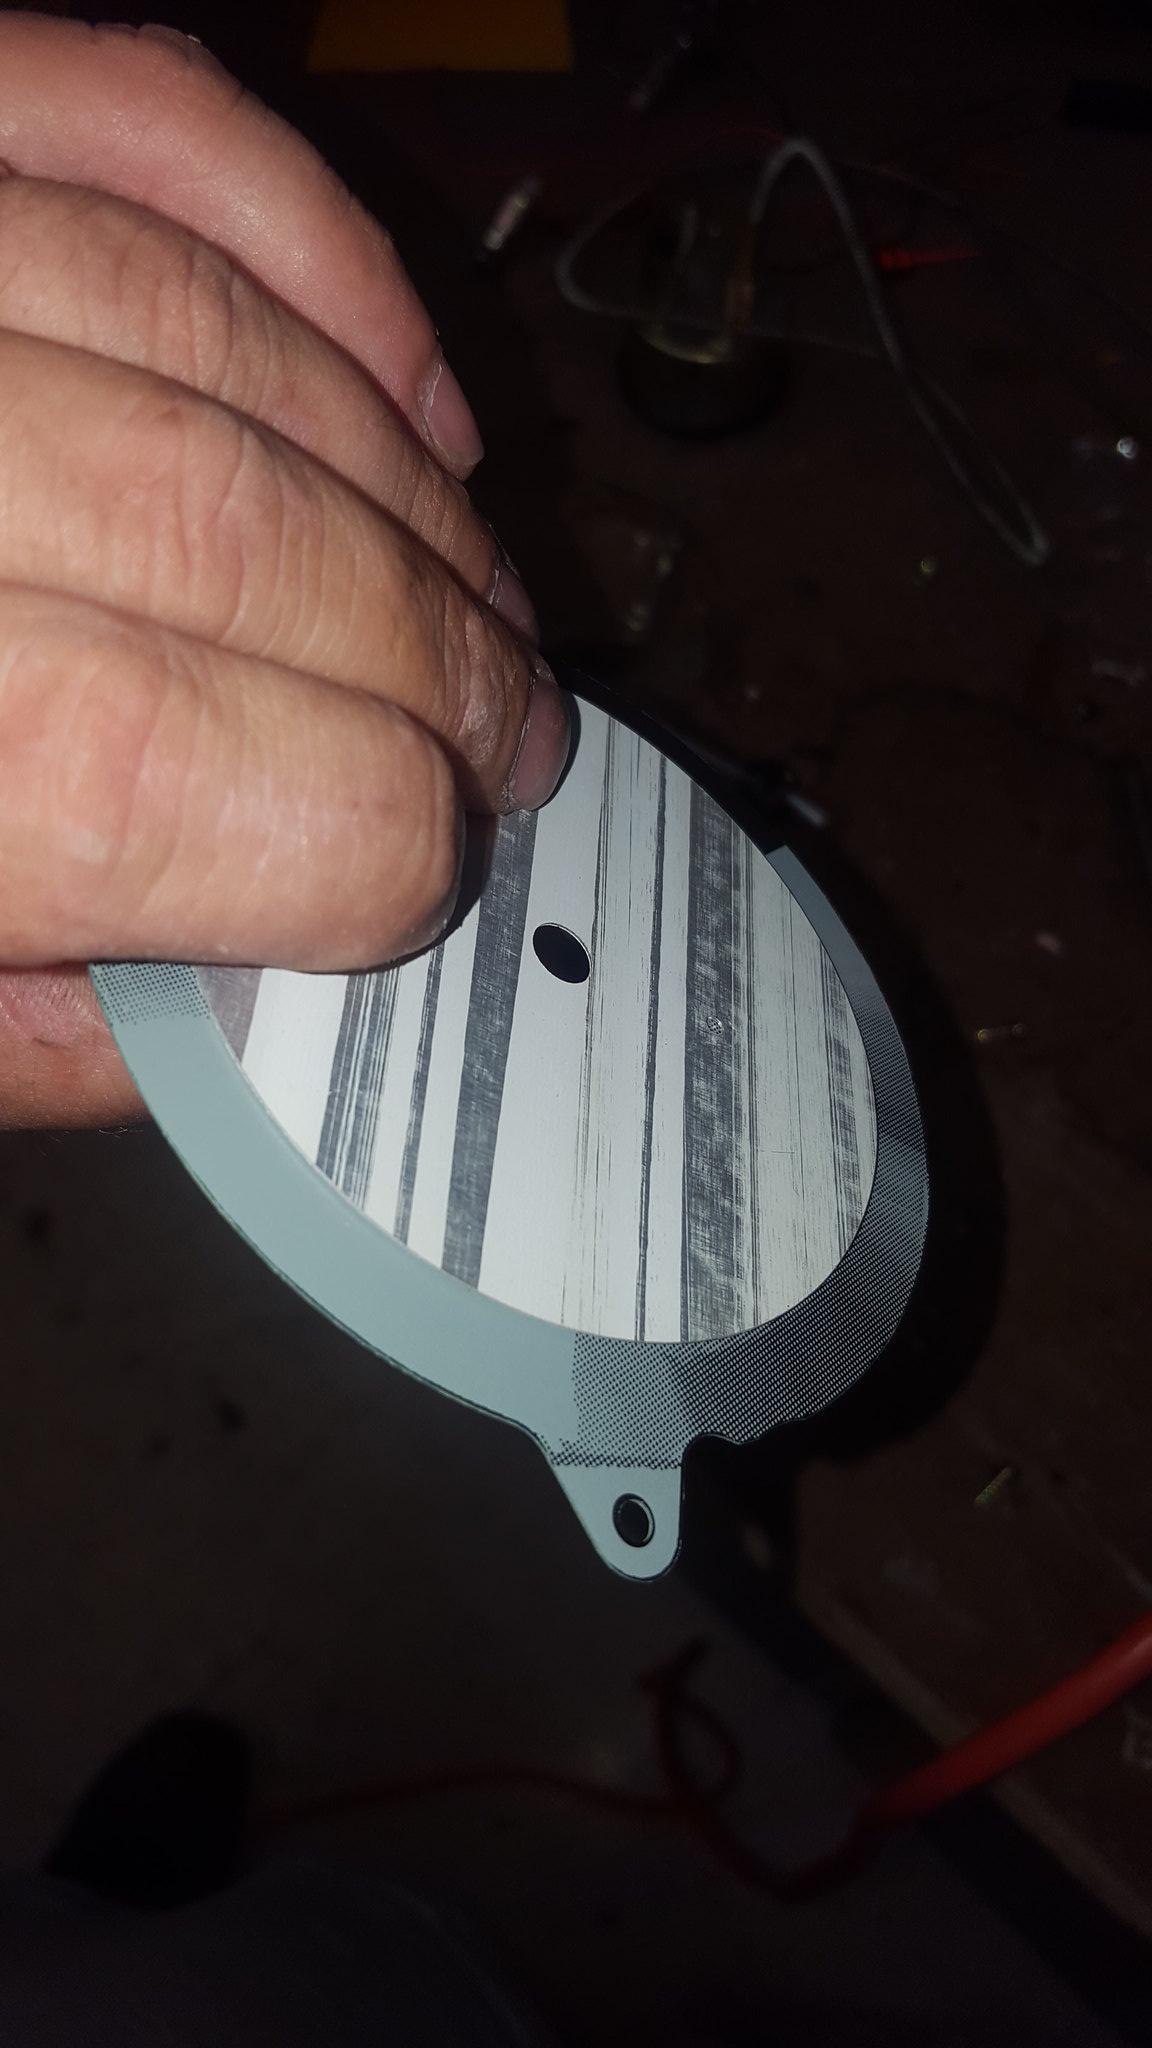
20180615_183322 by Michael Crawford, on Flickr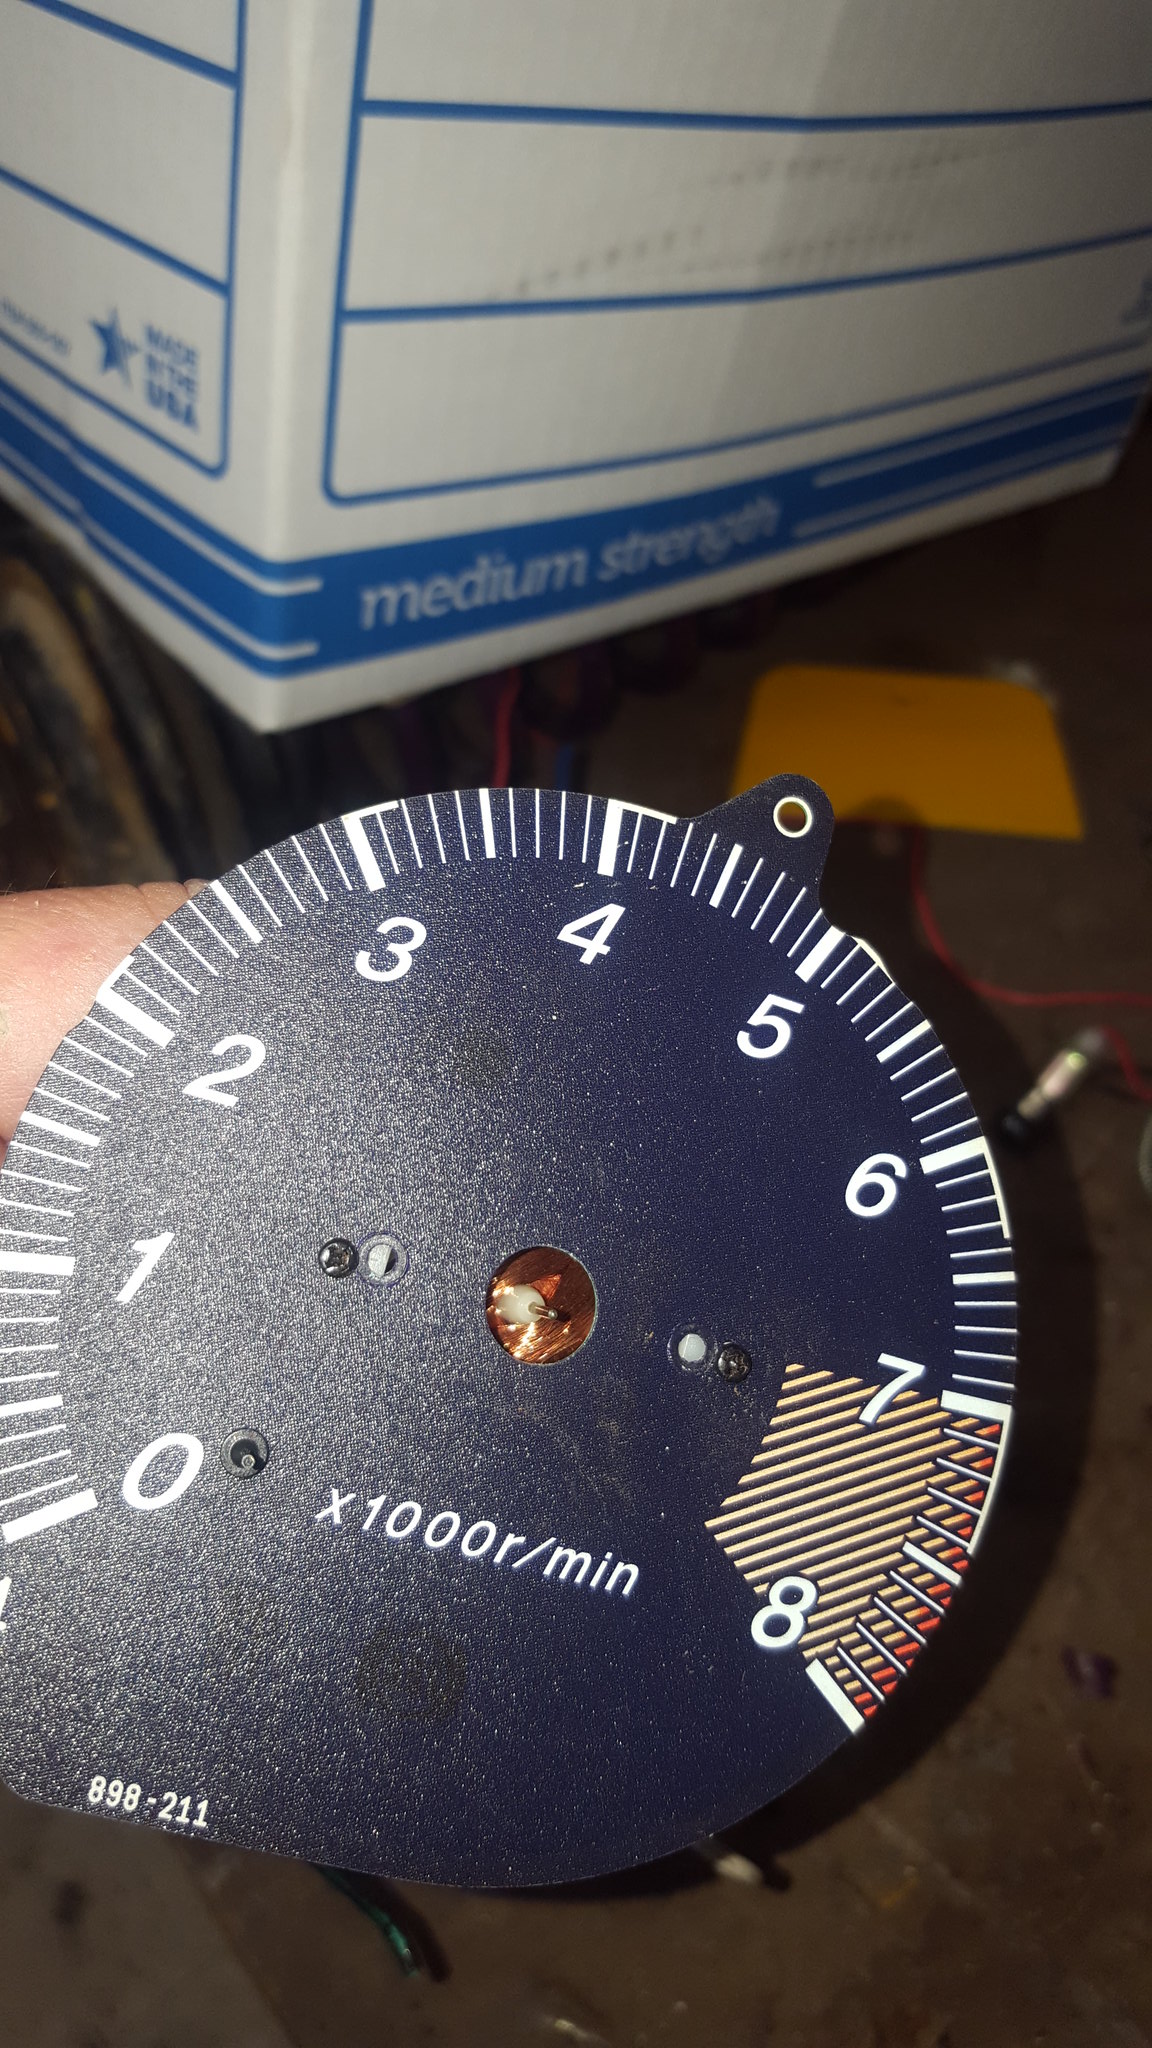
20180615_183830 by Michael Crawford, on FlickrI then put the miata needle on. Proved to be too tall....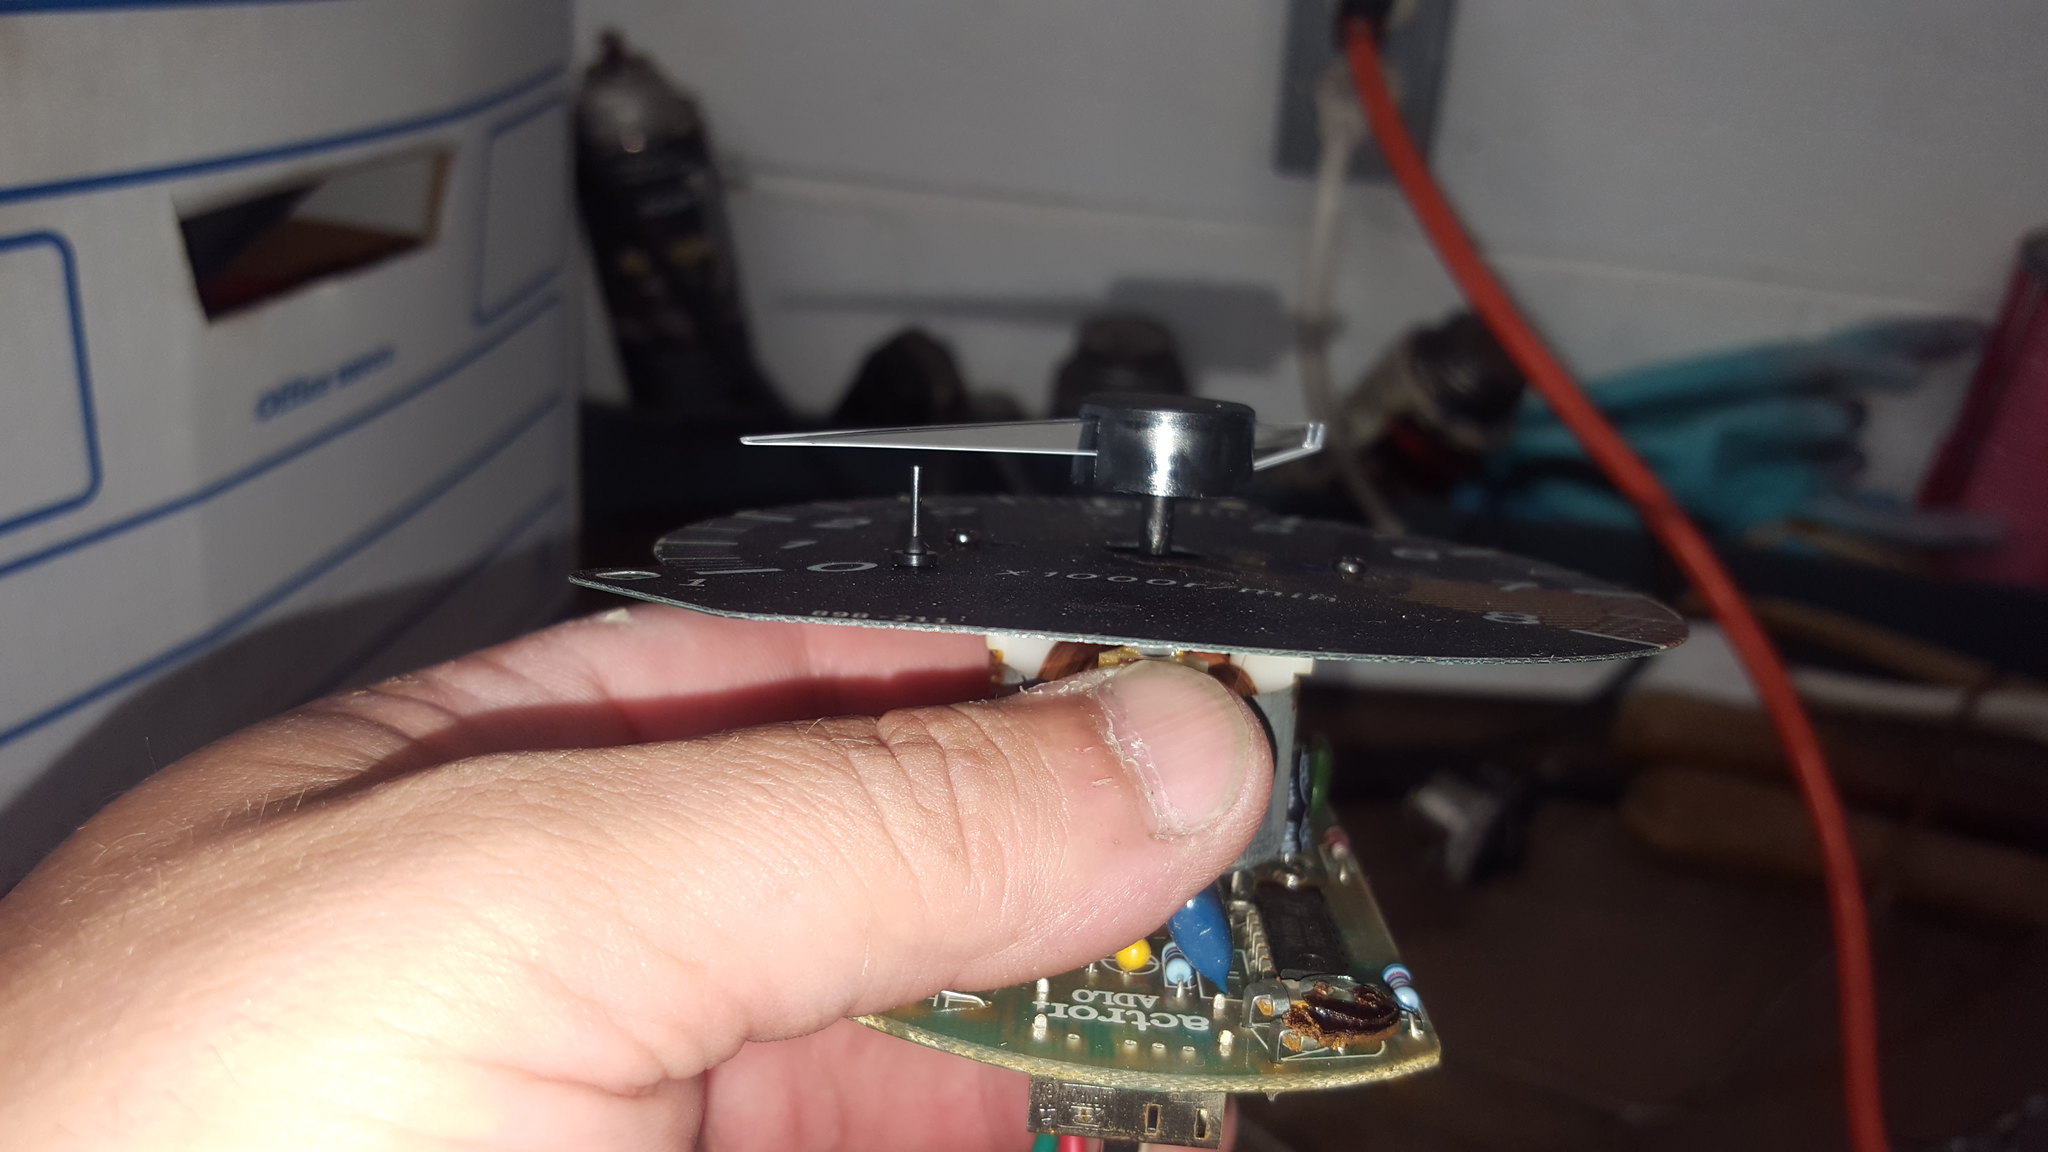
20180615_183843 by Michael Crawford, on Flickrcut down, and redrilled the shaft hole with my pin drill.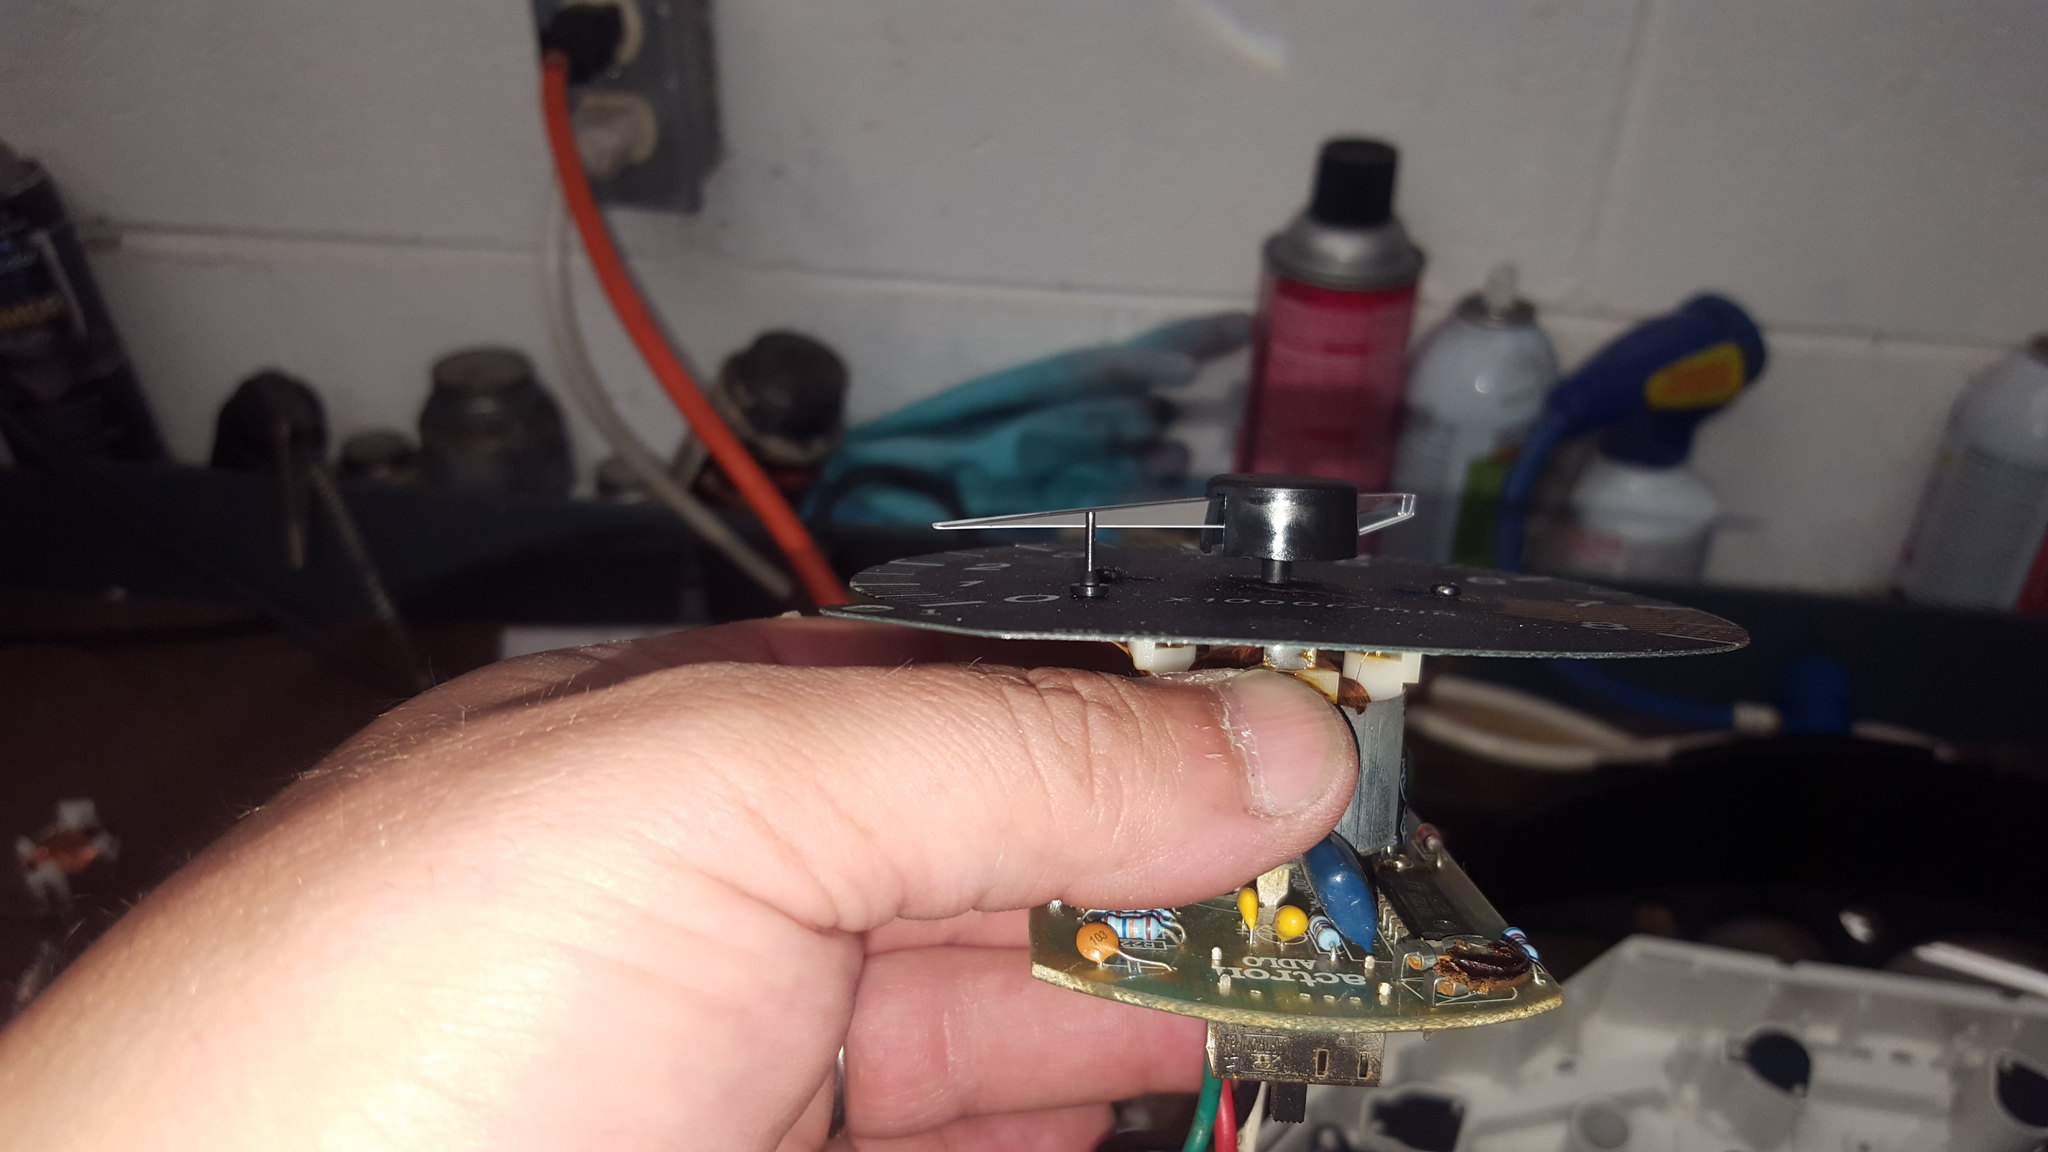
20180615_183955 by Michael Crawford, on Flickrall the tools used minus the phillips screwdriver for the tach conversion.
20180615_184010 by Michael Crawford, on FlickrI got into the zone on the next part and stopped taking pictures. Suffice to say, I pulled the bezels form the water and oil gauges, and cut the white plastic until everything fit properly. Used my dremel for that. Then used hot glue to hold it all in place. The fuel gauge will be relocated to where the stereo used to be. I also need to put some lights in.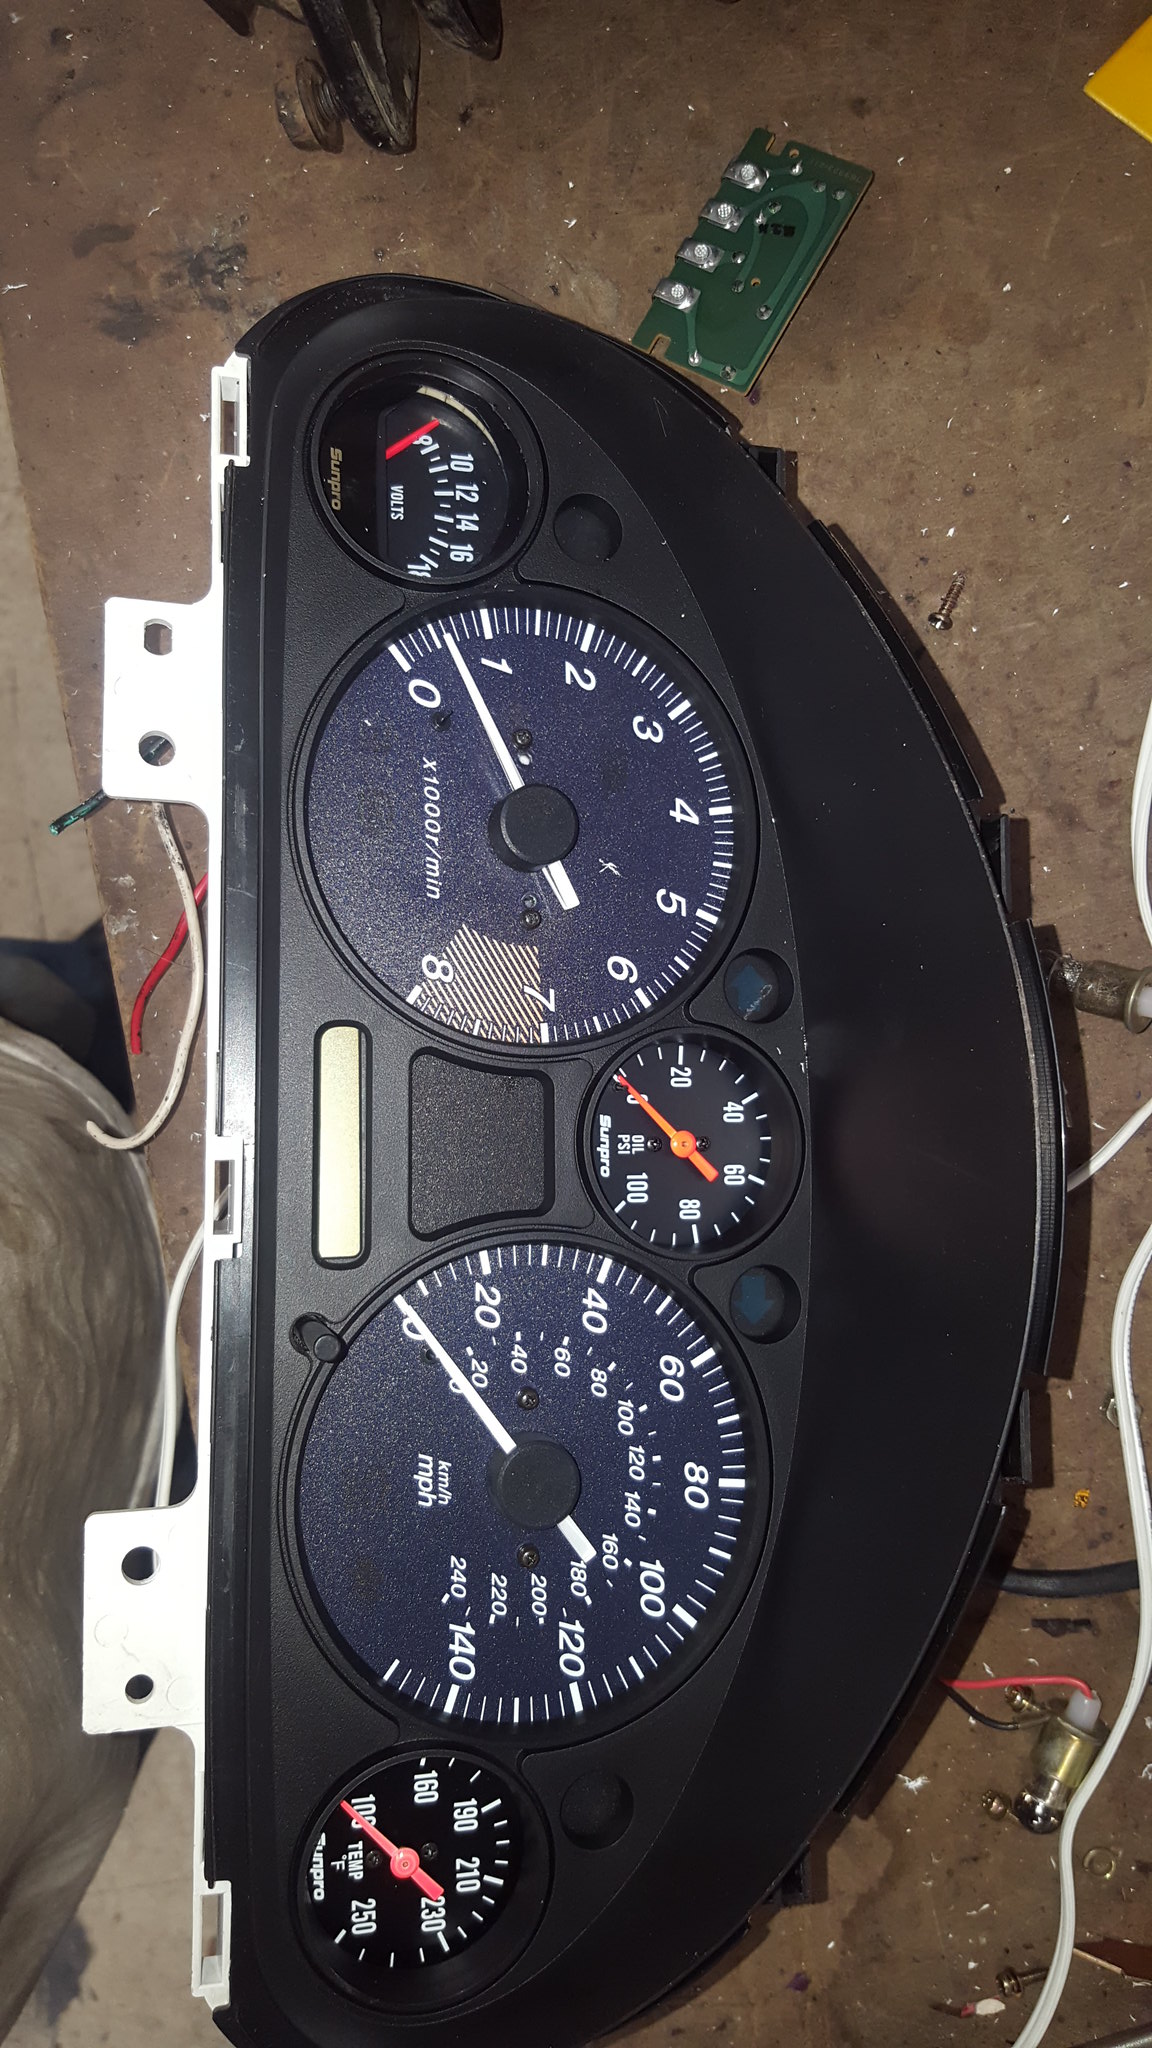
20180616_180001 by Michael Crawford, on Flickr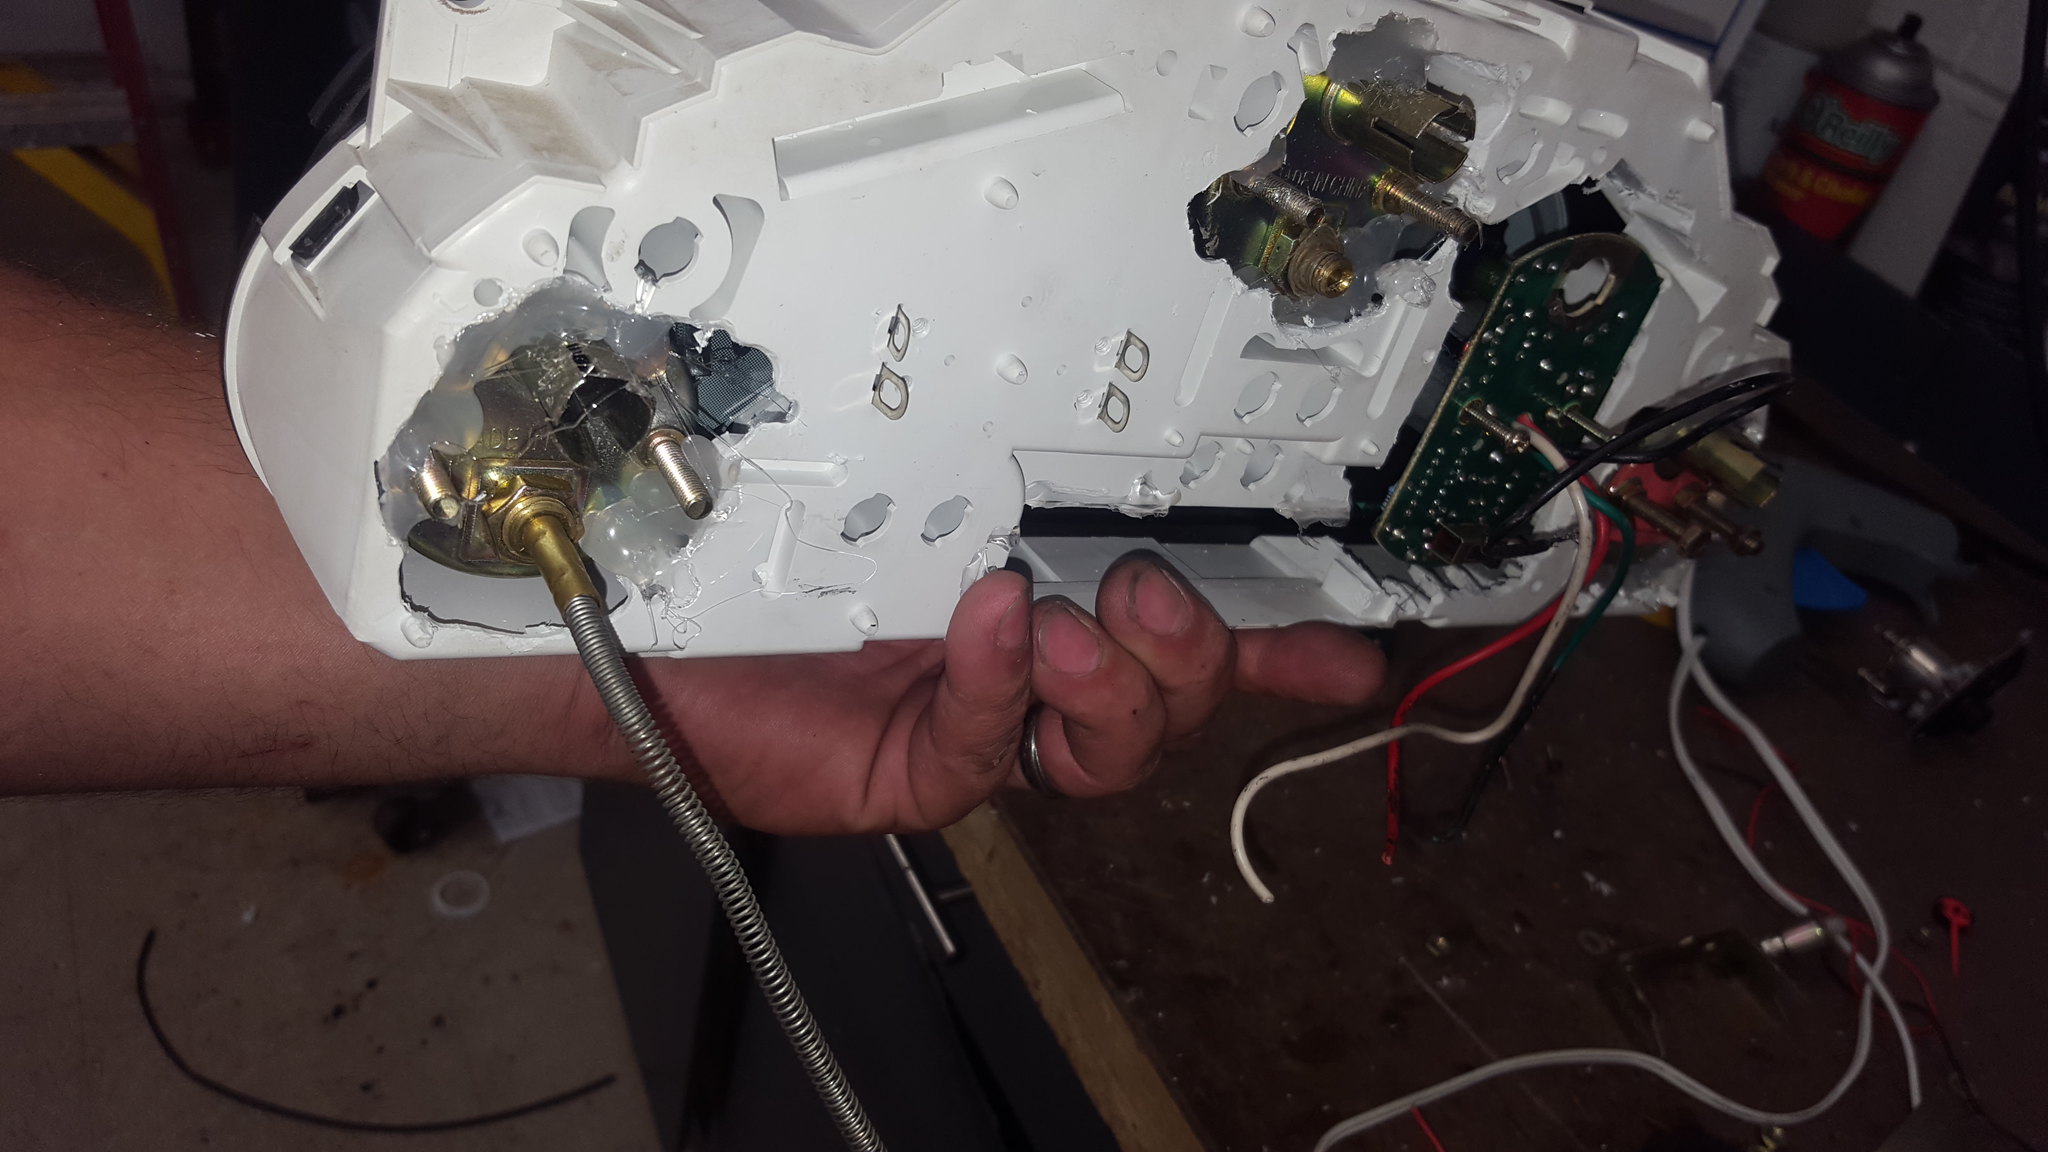
20180616_175637 by Michael Crawford, on Flickrthis cluster is only for the challenge. I actually have a full set of autometer pro-comp gauges that will be added after the challenge. But they were budget breakers. I had bought them for my elky before it was totaled.....also, I figured out my thermostat solution. With the welded neck at the back of the intake, there's no way to put the factory thermostat in. so I grabbed two housings from magnum v8 mopars in the junkyard, and the corresponding thermostat. As im leaving the heater core in, that will act as the bypass. Then these will be bolted and RTV'd together with a thermostat in the middle. With them being steel, I can weld a tab on to bolt it down for support, as its not light....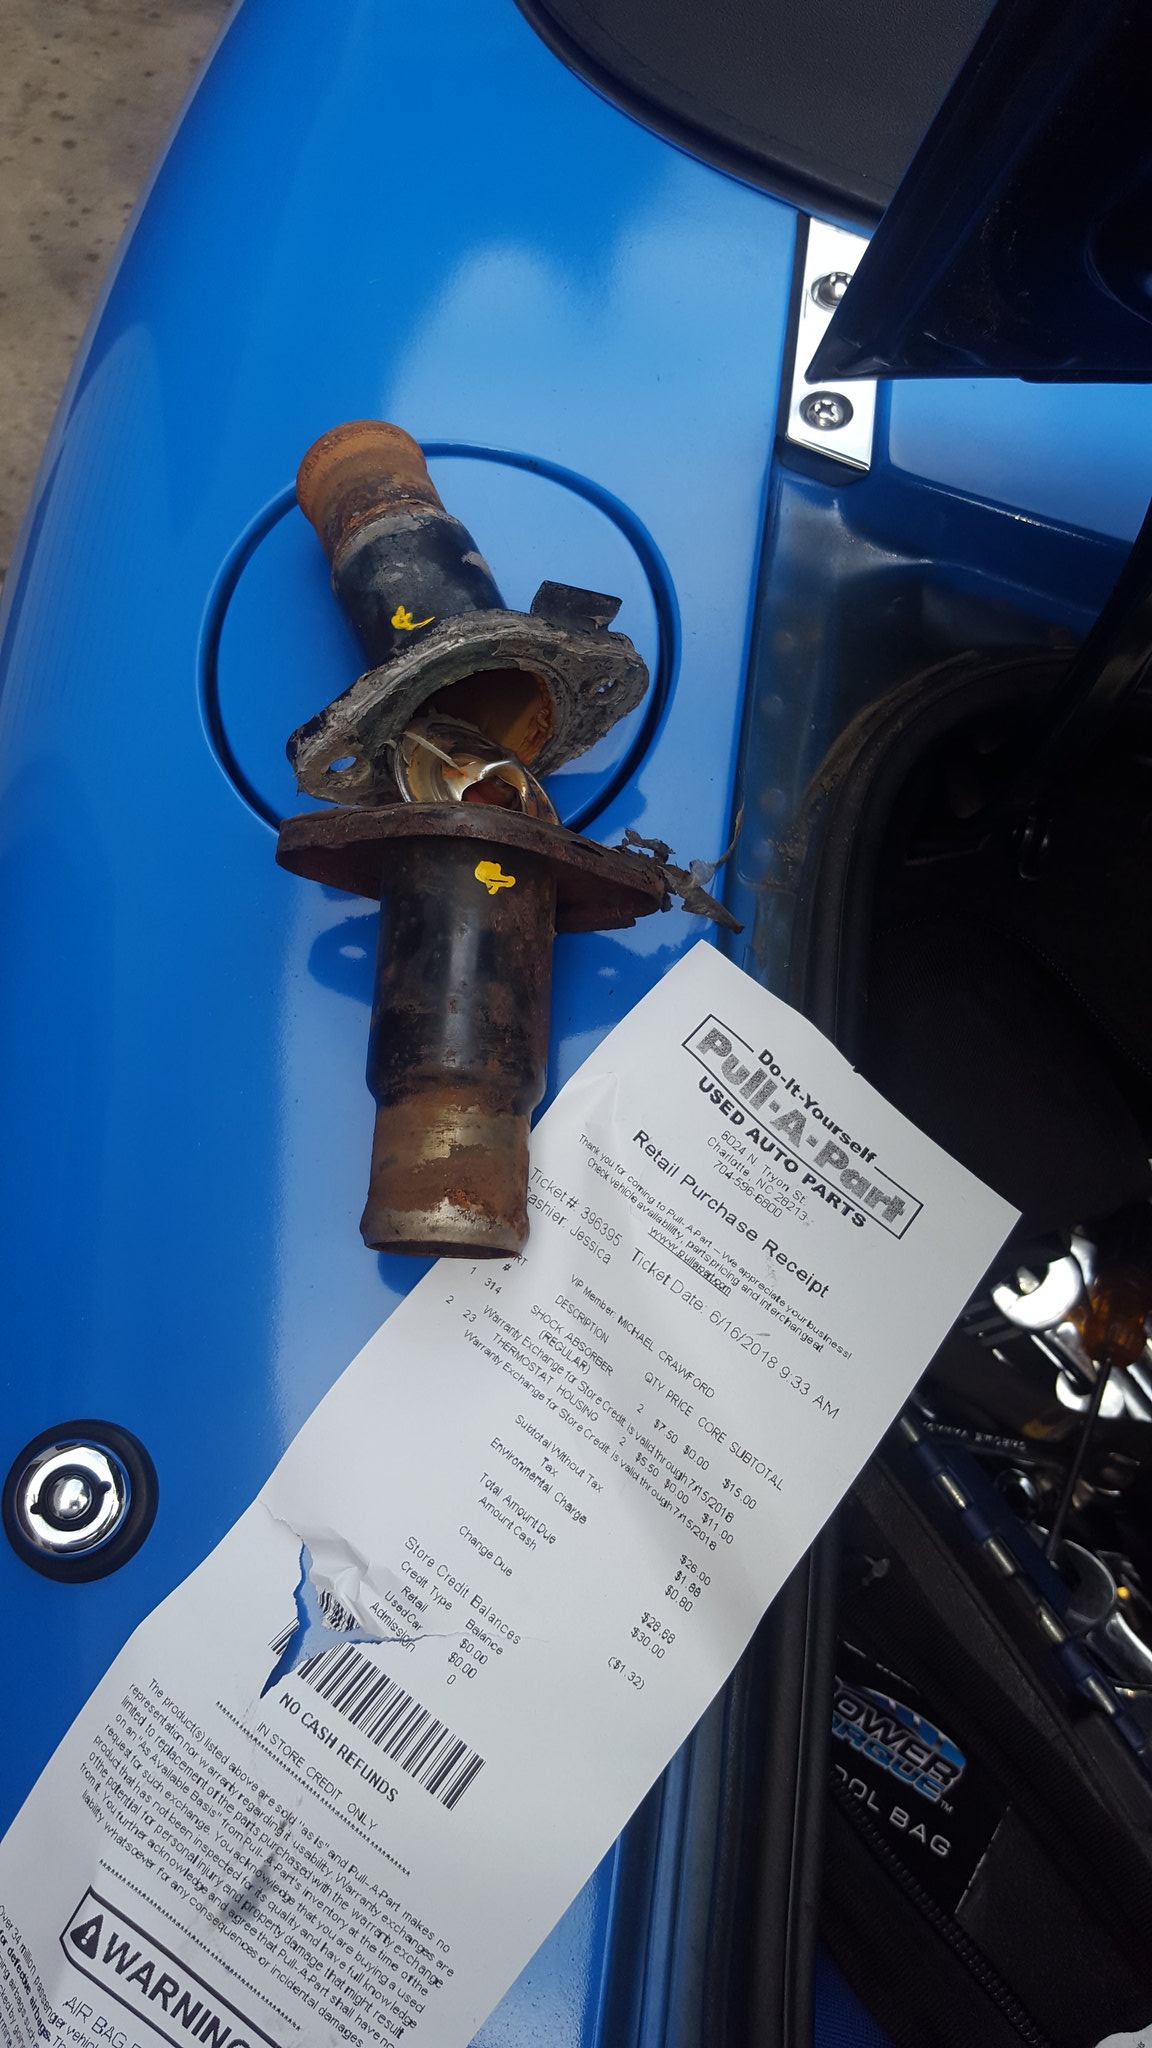
20180616_102618 by Michael Crawford, on Flickr
revious challenge budget: 1686.08 recoup total: 820new money:2 thermostat housings from pull-a-part: 11.00traded the autometer ultralight gauges to myself for some REALLY scuzzy sunpro (oil/water/volts/tach) oil pan gasket: 12.60 new total: 1709.68recoup: 820kicking *** and taking names.First, dad painted the crossmember.He made my mediocre fabrication look GOOD.
20180612_195646 by Michael Crawford, on Flickrthen we assembled the engine. WVTumbler had sent a care package mentioned earlier in the thread. A,azingly, it contained EVERY gasket I needed except oil pan and exhaust manifold gaskets. He even had new intake bolts in the box. Amazing guy. I bought the pan gasket, but am debating using a real gasket or high temp RTV for the exhaust. We then loaded it up in the back of dads truck, and he took it to a friend of his for broken exhaust stud removal. Neither of us have ever been any good at that, and these heads dont need to get damaged by my hamfistedness. Were supposed to be able to go pick it up this week sometime, but as kenny is a HVAC guy with a sick wife, were not holding our breath. Its over 100 degrees here today....
20180612_195557 by Michael Crawford, on Flickr
20180612_195611 by Michael Crawford, on Flickrwhen we get the engine back, well clean and paint it, as well as finish the alternator mount.In preparation for engine reinstall, I went ahead and finished the crossmember. To do so, I first depowered my replacement rack. That wasn't a fun job, but its done.
20180616_121228 by Michael Crawford, on Flickrreassembled it all with the bilsteins, brakes, rack, etc. and rolled it out of the way under the car.
20180616_143746 by Michael Crawford, on Flickr
20180616_151039 by Michael Crawford, on Flickralso, I need to note my bumpstops. Wound up with a buch of NB front bump stops. Cut them all down to 1.5 inches and put them in.
20180616_143832 by Michael Crawford, on Flickrive also begun the task of wiring and gauges. Nothing to report on wiring yet, but I built the cluster. To do so, I first spent far too much time researching how to make the stock tach work with a v6. Never could figure it out. This opened up the cluster to slight modification. By slight modification I mean I stripped it completely, cut the **** out of it, gutted some other gauges and cut them, and put it all back together.The tach was primary concern. I traded myself the ultralights I bought for some really rough sunpro gauges. Tach, oil, water, and volts. Somebody had painted the bezels blue with nailpolish, glass cracked, the tach had been apart multiple times and the housing was falling apart, etc. pretty much garbage. I had actually offered them for free, and had no takers. So I don't feel bad about trading myself. If I had traded someone else, I would have called myself a sucker.
20180613_113240 by Michael Crawford, on Flickr
20180613_113244 by Michael Crawford, on Flickr
20180613_143223 by Michael Crawford, on Flickryou can see in the second picture I ripped the guts out of the tach. I then proceeded to re-gut the factory tach with the sunpro parts. Do so so, I used the factory face, redrilled for the sunpro pattern. Used the sunpro face to mark the pattern. I wound up needing the clear plastic backer as well, but its not in pictures. The face itself proved to be too flimsy to stand alone.
20180615_183322 by Michael Crawford, on Flickr
20180615_183830 by Michael Crawford, on FlickrI then put the miata needle on. Proved to be too tall....
20180615_183843 by Michael Crawford, on Flickrcut down, and redrilled the shaft hole with my pin drill.
20180615_183955 by Michael Crawford, on Flickrall the tools used minus the phillips screwdriver for the tach conversion.
20180615_184010 by Michael Crawford, on FlickrI got into the zone on the next part and stopped taking pictures. Suffice to say, I pulled the bezels form the water and oil gauges, and cut the white plastic until everything fit properly. Used my dremel for that. Then used hot glue to hold it all in place. The fuel gauge will be relocated to where the stereo used to be. I also need to put some lights in.
20180616_180001 by Michael Crawford, on Flickr
20180616_175637 by Michael Crawford, on Flickrthis cluster is only for the challenge. I actually have a full set of autometer pro-comp gauges that will be added after the challenge. But they were budget breakers. I had bought them for my elky before it was totaled.....also, I figured out my thermostat solution. With the welded neck at the back of the intake, there's no way to put the factory thermostat in. so I grabbed two housings from magnum v8 mopars in the junkyard, and the corresponding thermostat. As im leaving the heater core in, that will act as the bypass. Then these will be bolted and RTV'd together with a thermostat in the middle. With them being steel, I can weld a tab on to bolt it down for support, as its not light....
20180616_102618 by Michael Crawford, on Flickr
Reply
0
0
06-17-2018, 05:11 PM
#58
You'll want to check shock travel with the springs off once you assemble the car. Basically checking for tire to metal interference with the car sitting on the bump stops. I betcha you'll find the rear bumps need to be closer to an inch long if not shorter without extended top hats. This matters, you could be giving up over an inch of wheel travel and cause the car to snap oversteer when you get into the stops mid corner.
Reply
0
0
06-24-2018, 05:13 PM
#60
Junior Member
Thread Starter
Join Date: Nov 2017
Posts: 112
Total Cats: 7
not much this week, to be honest. Been busy playing with trucks....spent a lot of the week rebuilding the dash and HVAC in my truck. Still have the rest of the interior to do.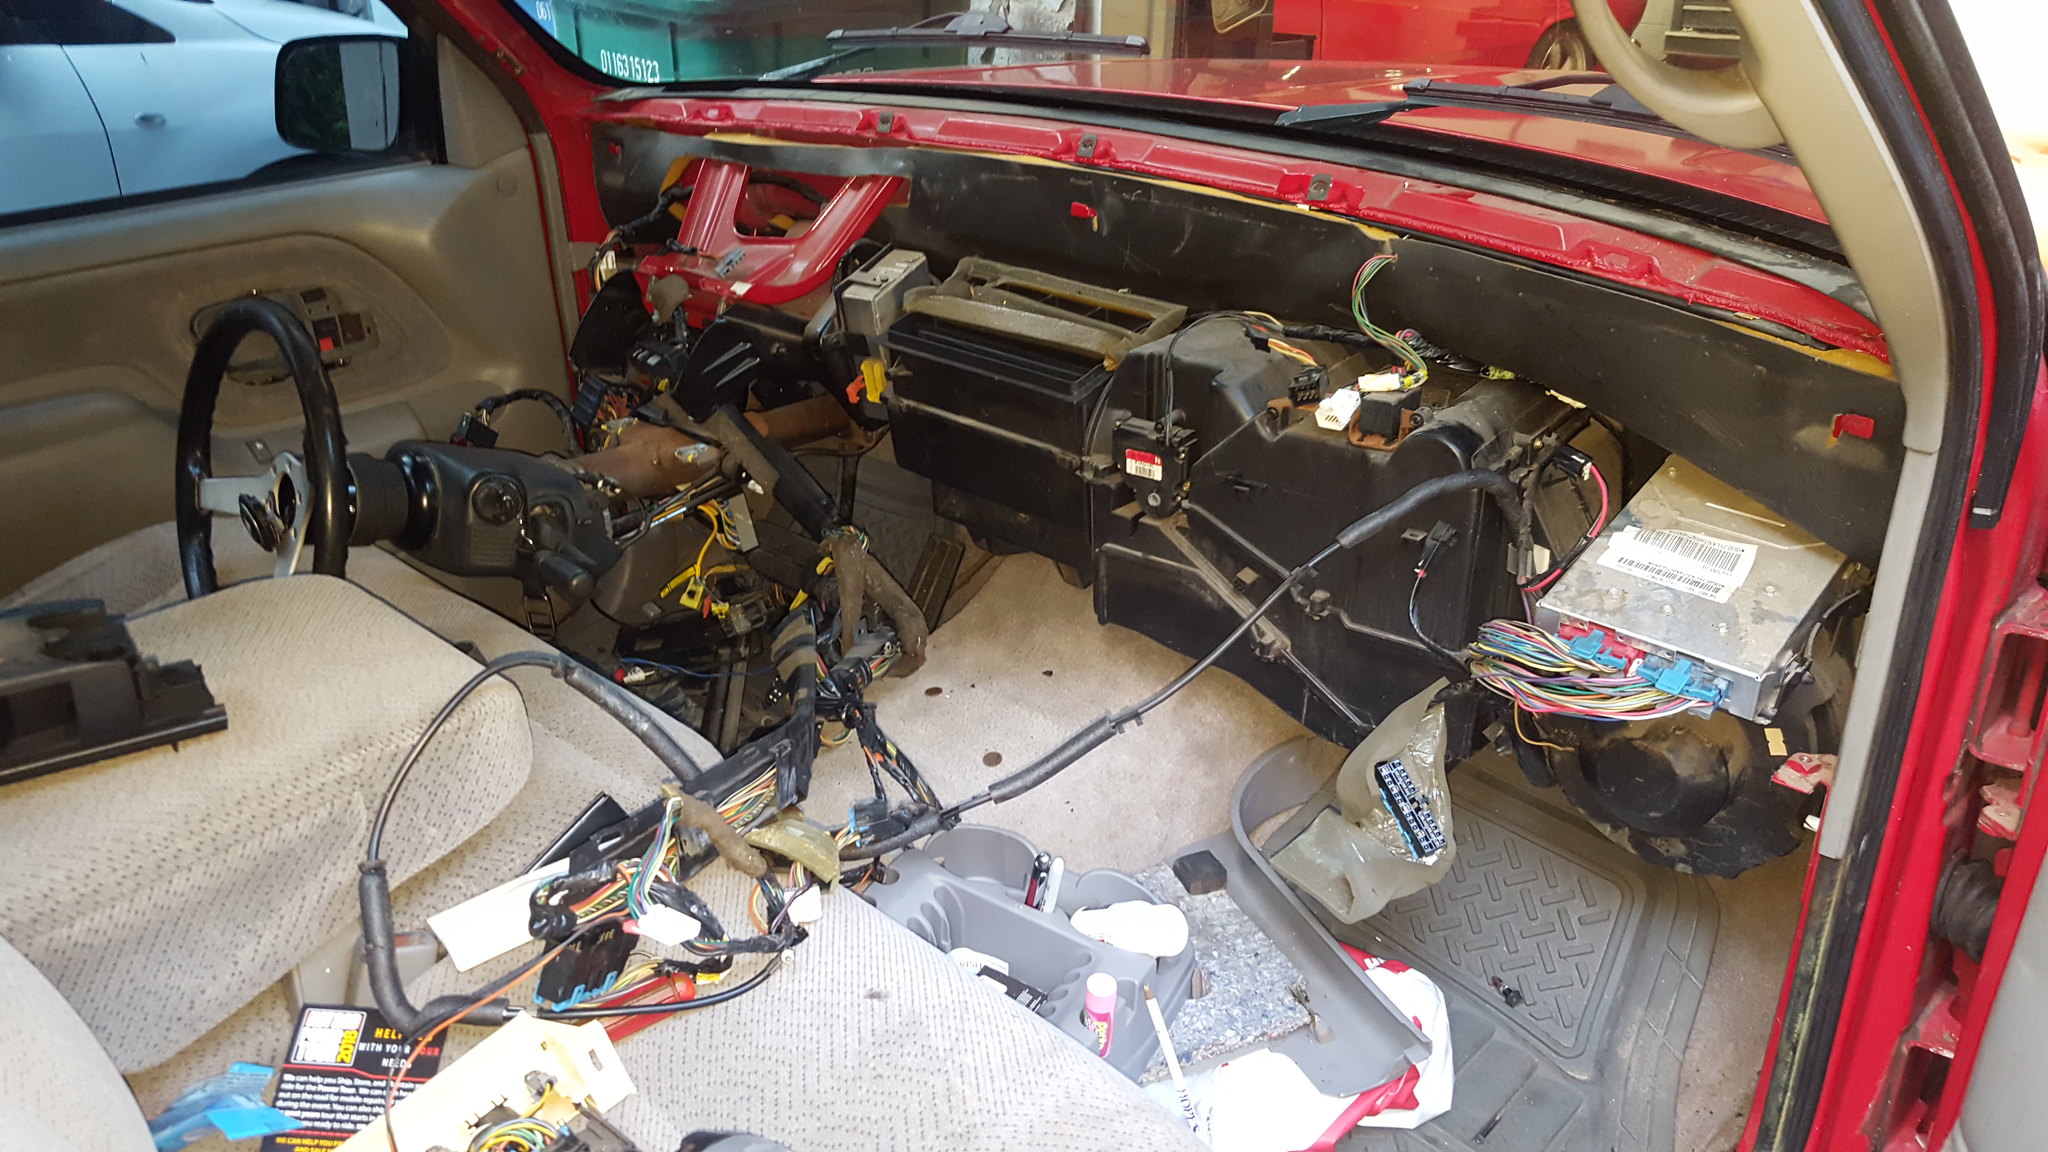
20180618_195121 by Michael Crawford, on Flickrrewired a 65 mustang for s customer (no pictures)was the puppet and storyteller for VBS at churchhelped dad get the trans sorted in his truck and plumbed it for him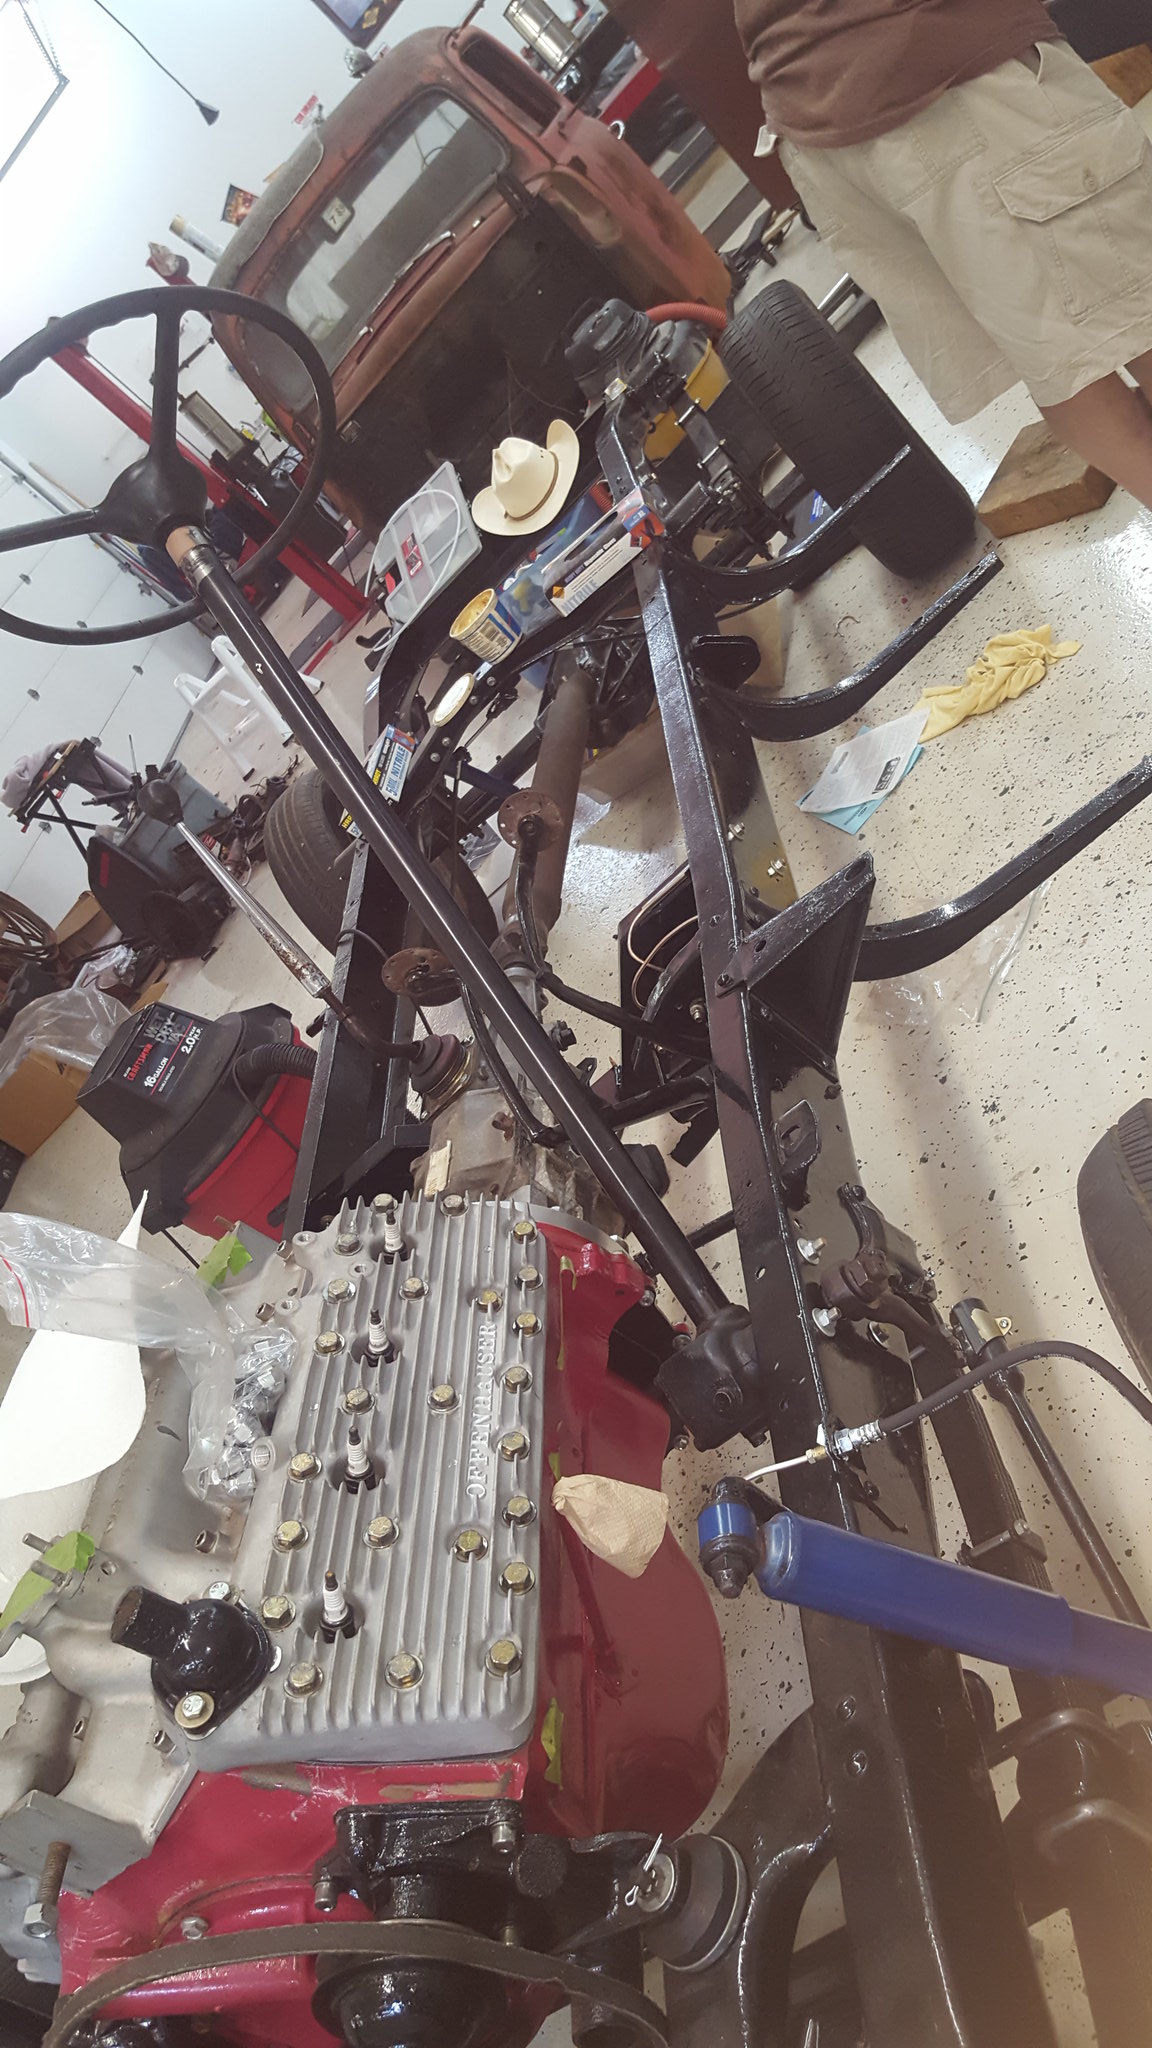
20180624_125412 by Michael Crawford, on Flickrbut on the challenge car front: I finished the alternator mount and motor mounts. Added gussets, fully welded, and drilled and tapped the one ear of the alternator for a triangulation tab.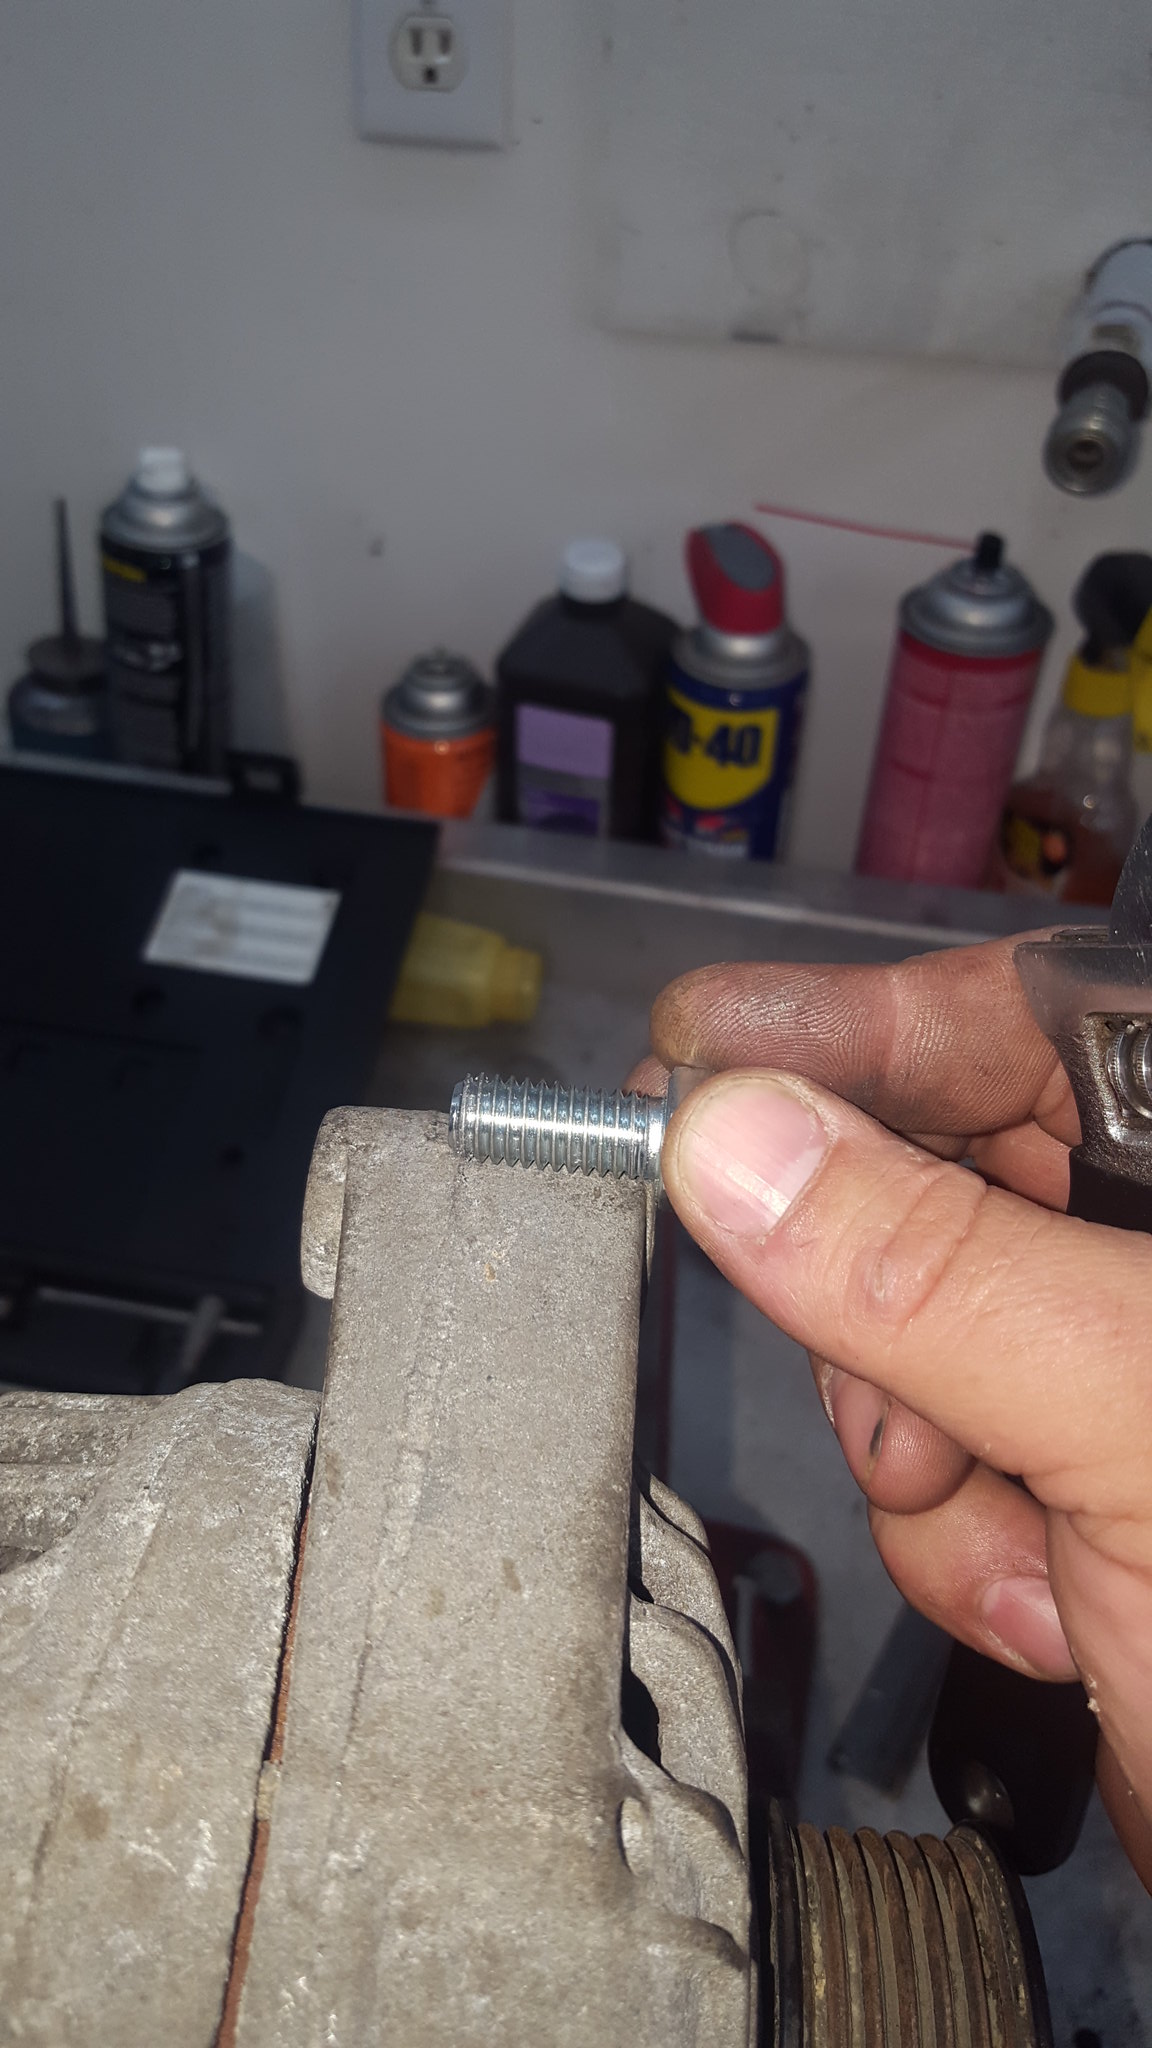
20180624_084526 by Michael Crawford, on Flickr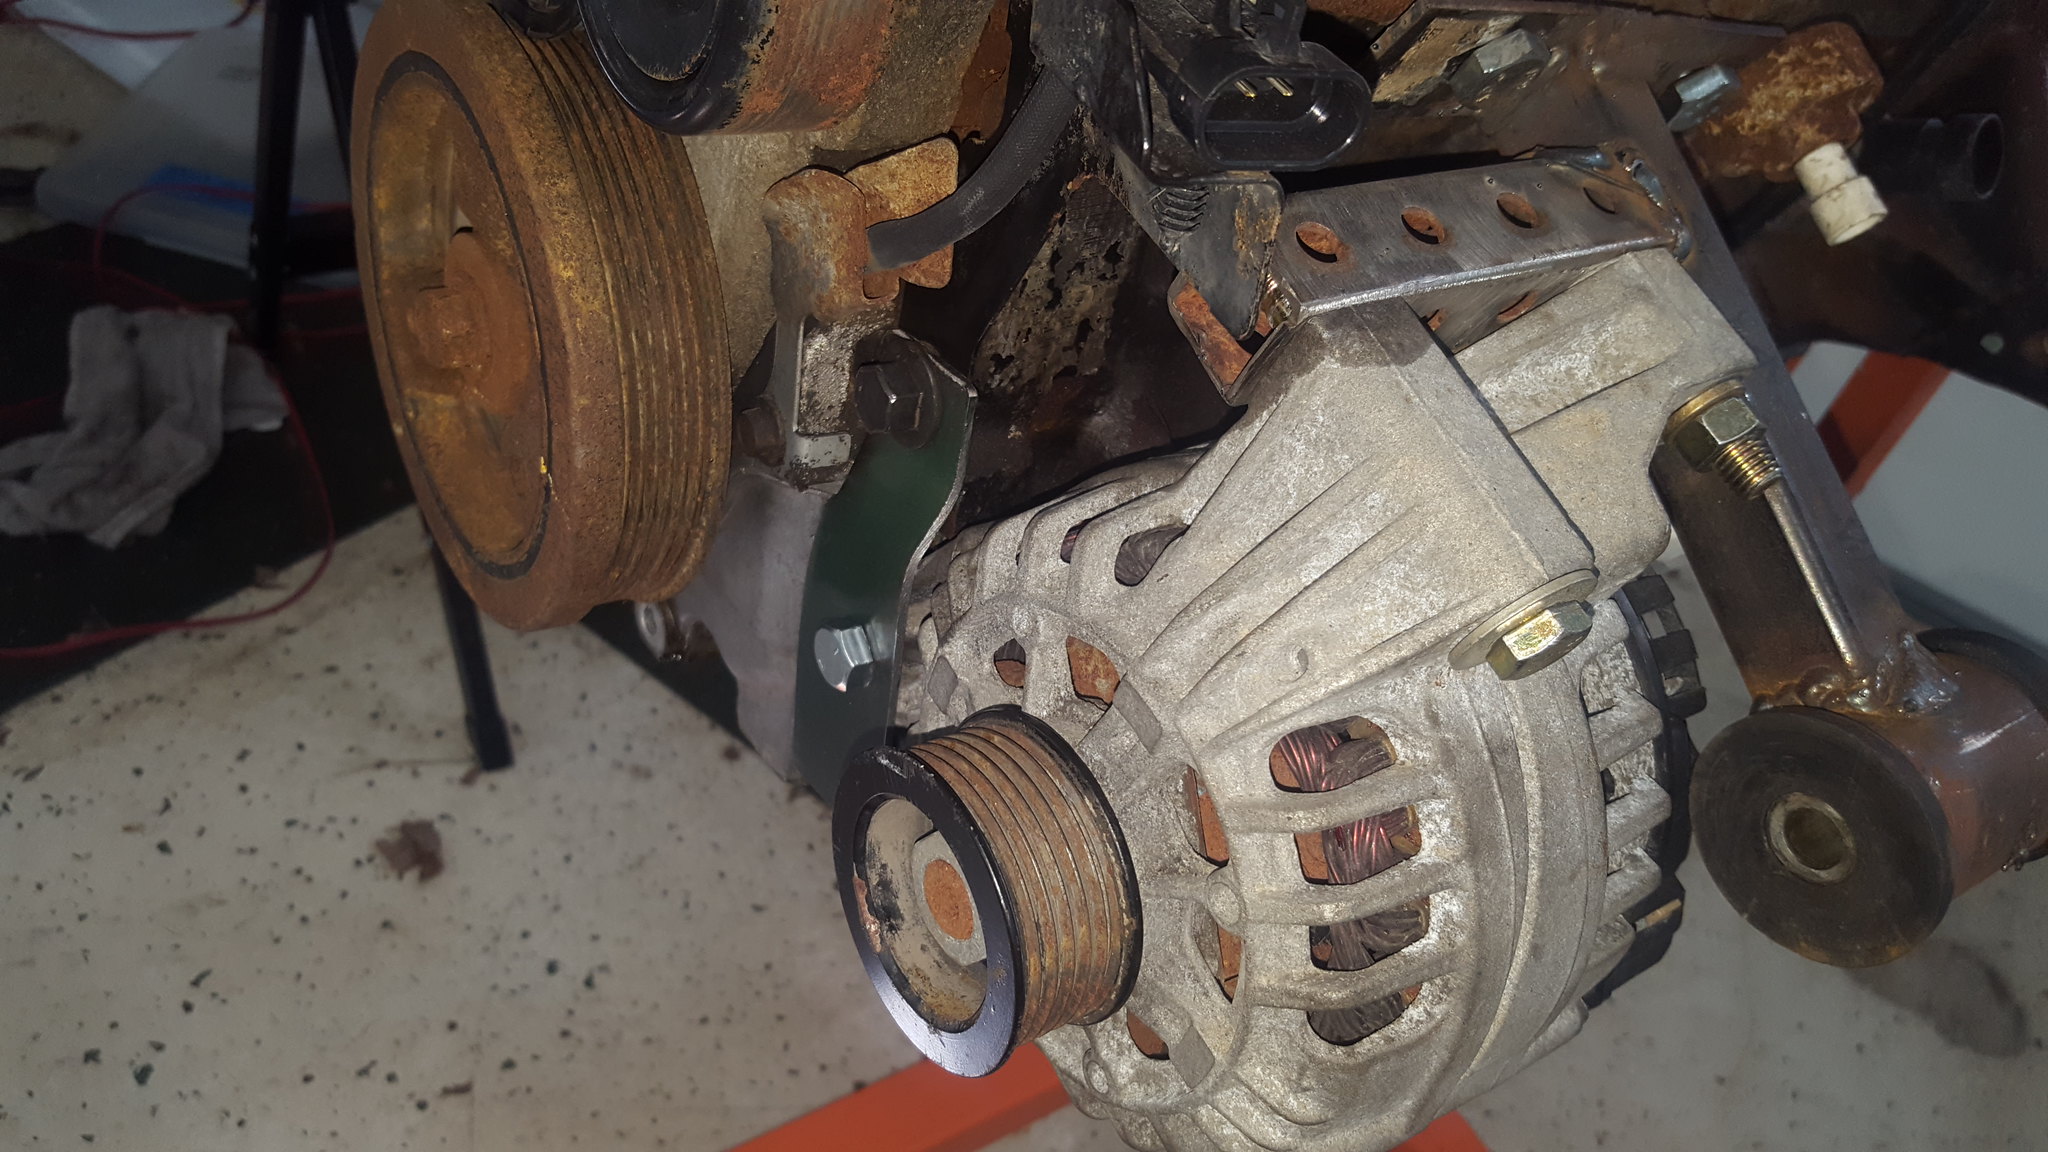
20180624_092305 by Michael Crawford, on Flickrno finished pictures, as I cut a finger pretty badly shortly after that picture. Called it a day....
Reply
0
0


