$2018 GRM challenge turbo miata build. with added insanity.
 07-01-2018, 08:40 PM
#61
Junior Member
Thread Starter

Join Date: Nov 2017
Posts: 112
Total Cats: 7
Challenge budget so far revious challenge budget: 1709.68 recoup total: 820new money: header wrap: 17.10
misc supplies: 50and fittings: 21.98 (4.99 male coupler, 10x tube nuts for 16.99) race car paint: 14.98 new total: 1813.74
recoup: 820kicking *** and taking names. This weekend was spent helping dad on the 49 ford truck, and getting ready to get the motor back in. the motor started here: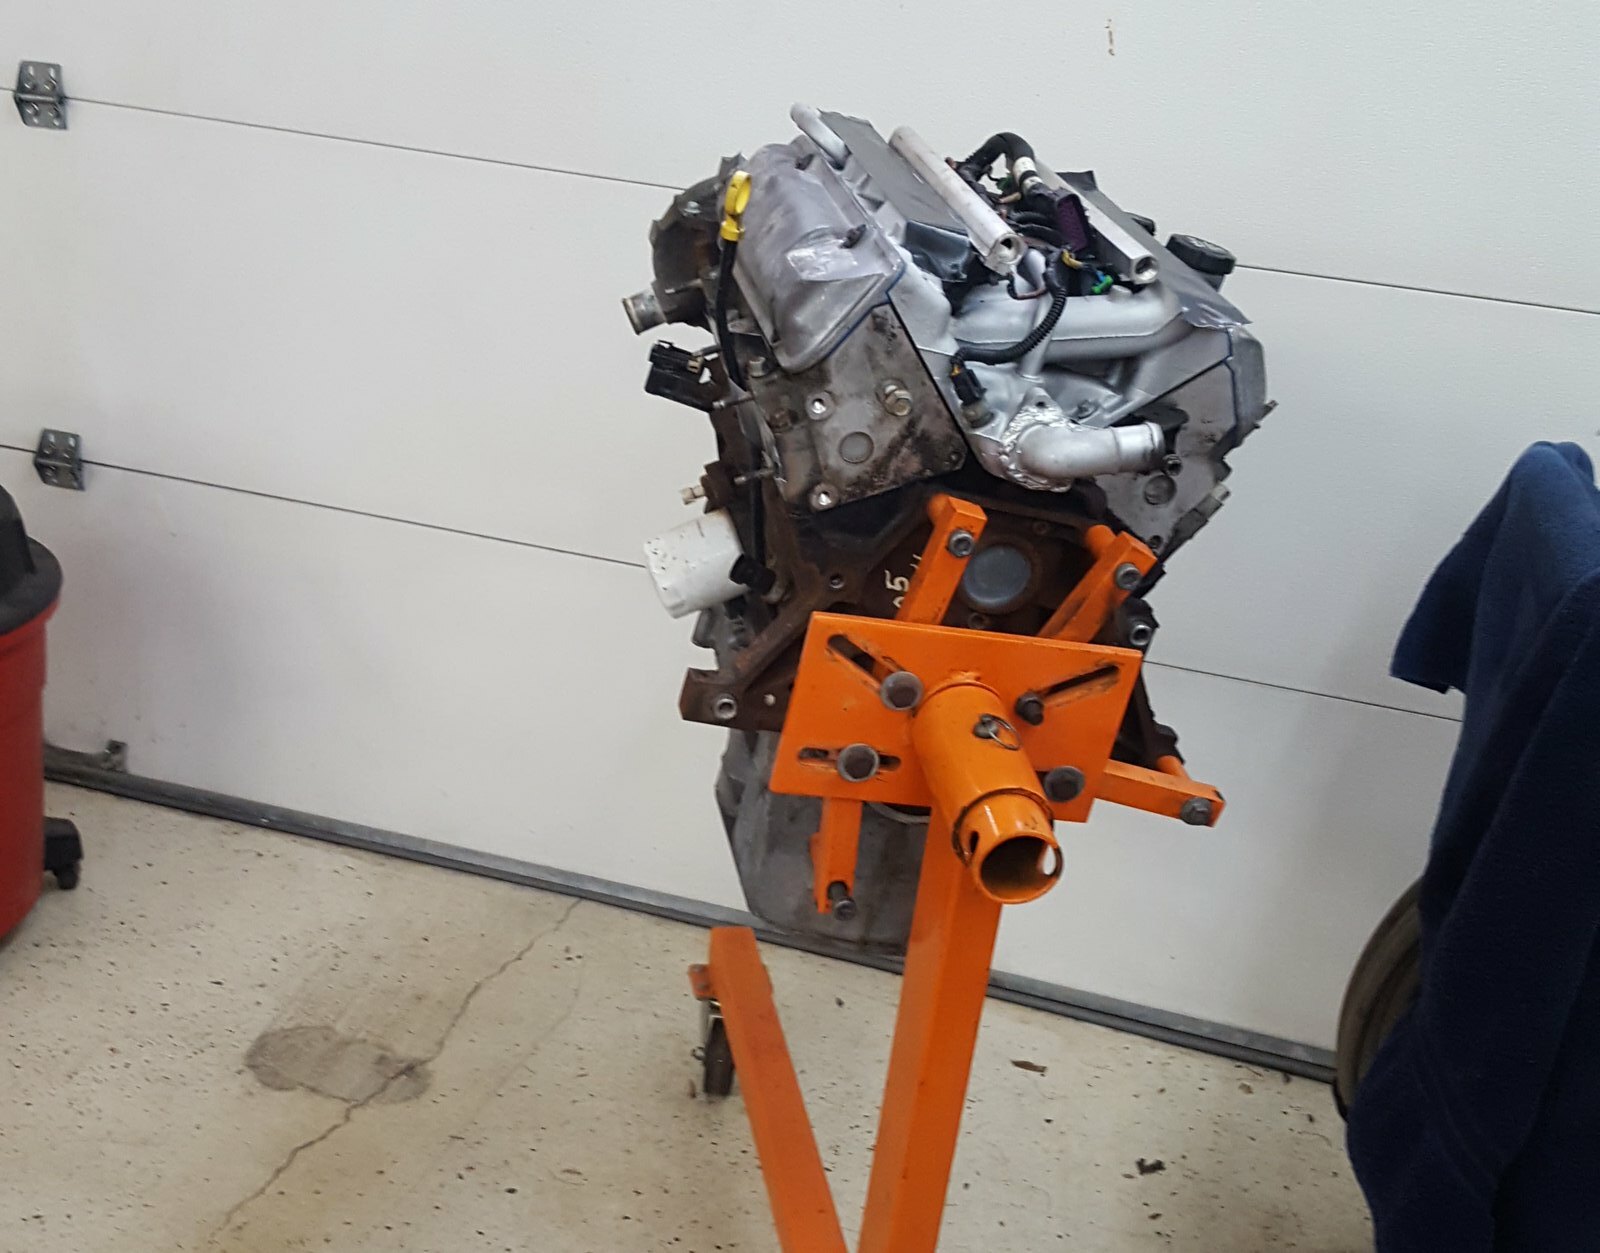
20180630_110948 by Michael Crawford, on Flickrstep one was to make the headers actually fit and flow again. Somehow, when I finished welding them, I screwed up and made all the tubes move. Not sure how I did that, other than stupidity and heat. So I cut them apart a bit, and re-welded them bolted to the engine. They still fit after cooling, so im calling that a win. They really don't look any different in ways that you can tell, other than having all the bolt holes line up. So use your imagination.I then tackled the other bit of stupid I did. When we cut the flanges, we cut them exactly to exhaust gasket size. When I put them together, I shoved the tubes into the holes in the flanges and welded. Obviously, now the headers are smaller than exhaust port size. So I put dykem on the gaskets, dykem on the header, and ran it all together. A bit of creative scribing and jigging, and we had some marks to port to.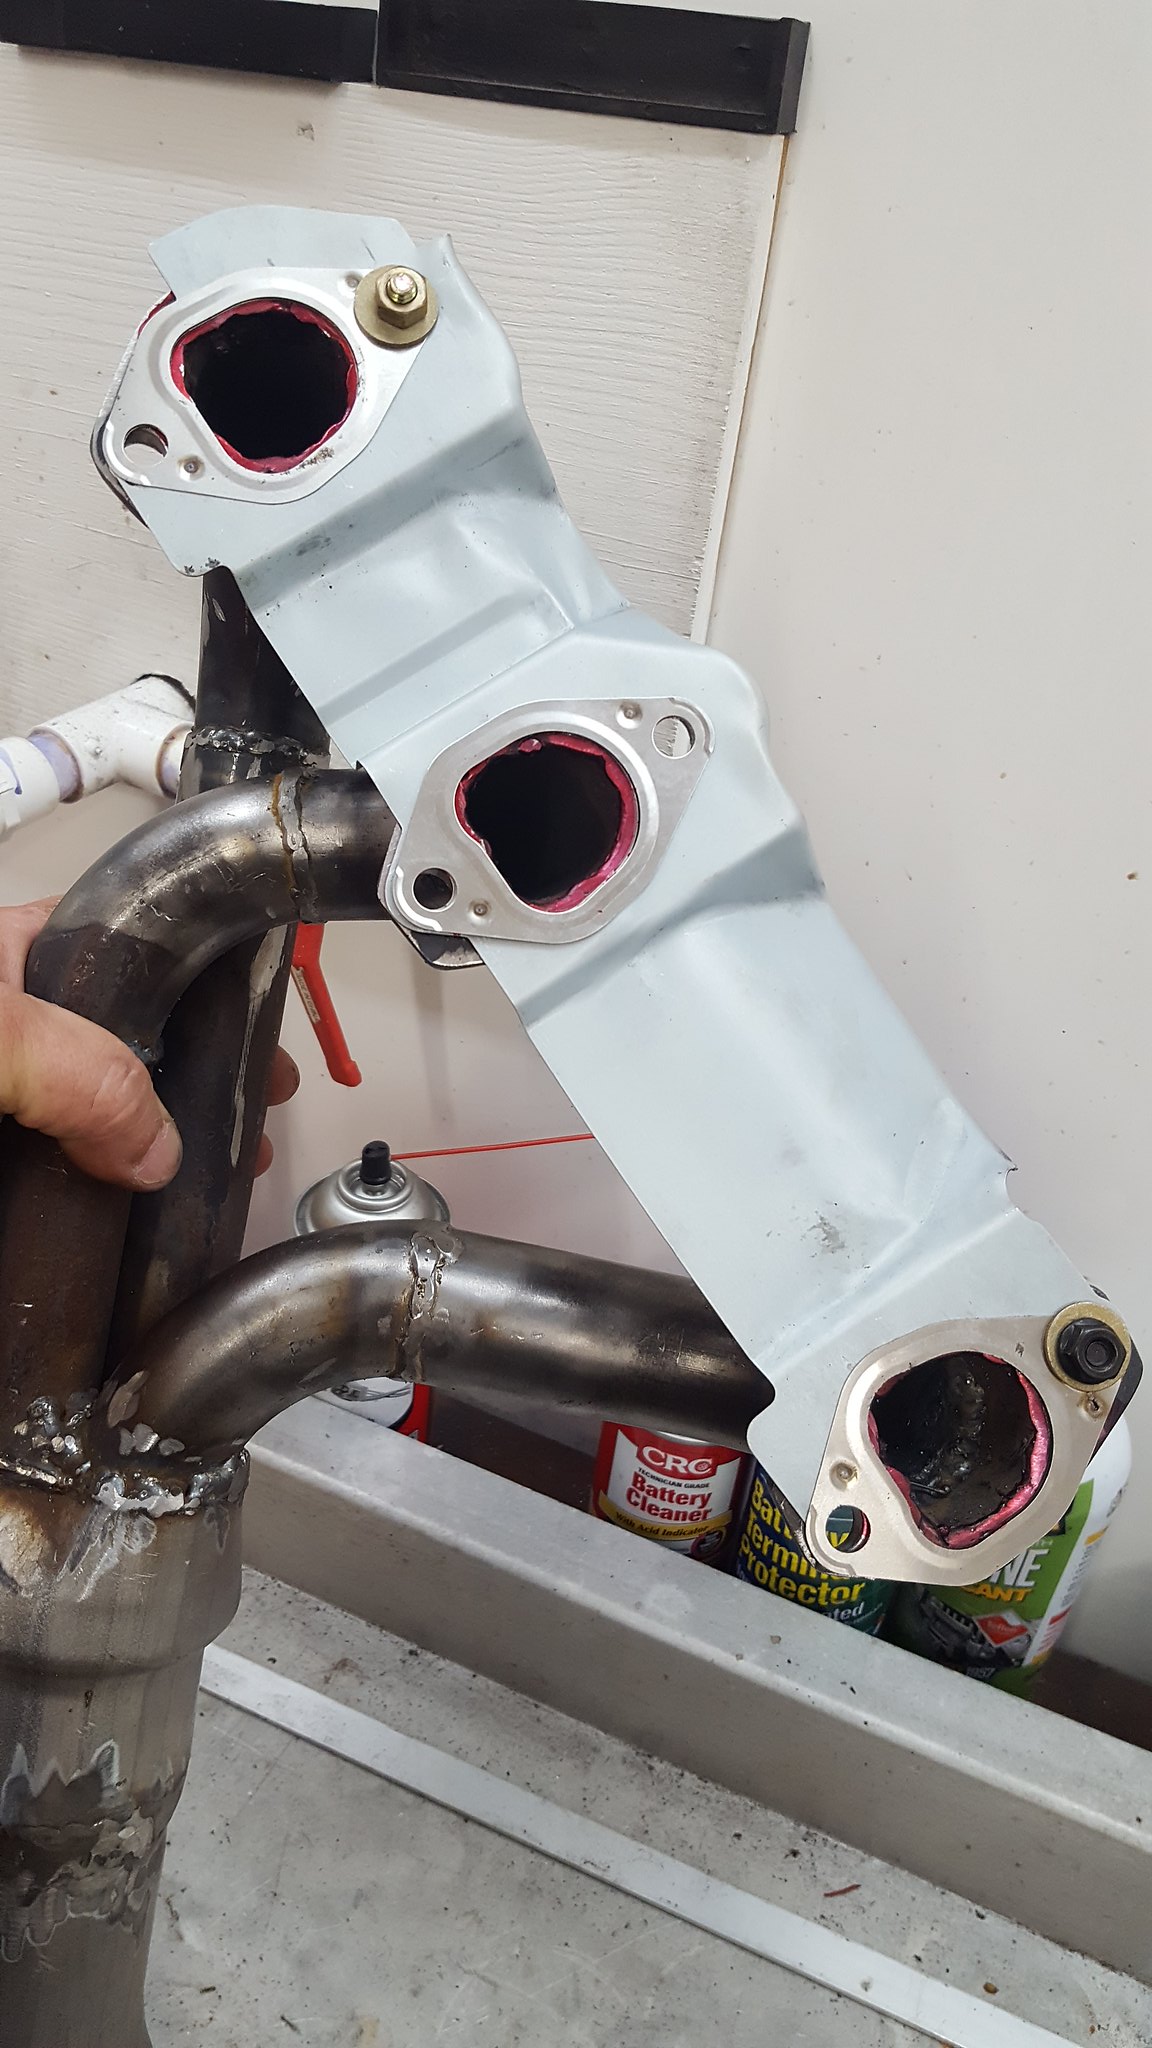
20180630_125209 by Michael Crawford, on FlickrI then broke out a new carbide burr on my die grinder.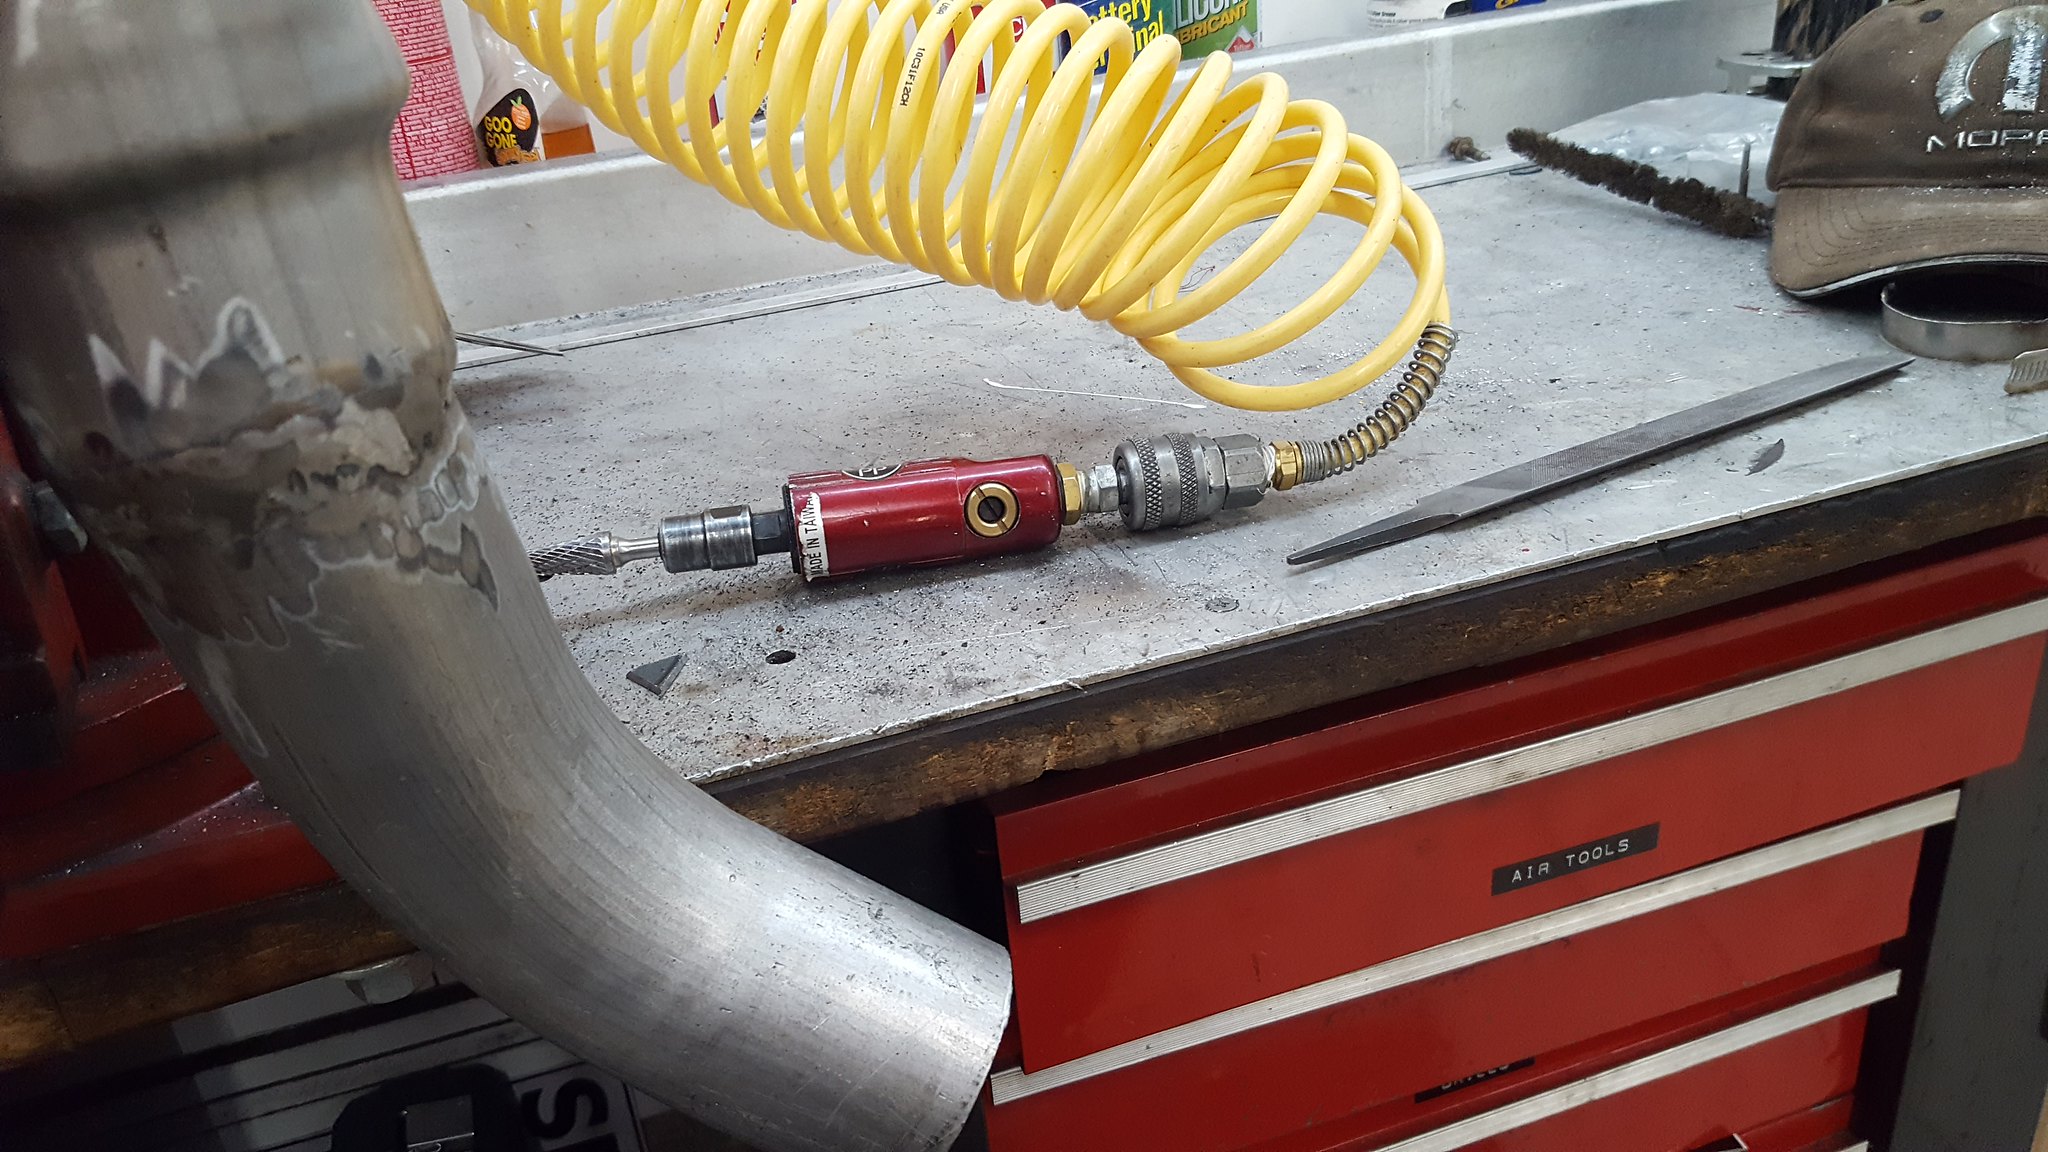
20180630_131050 by Michael Crawford, on Flickrcouple hours later, and one completely wore out burr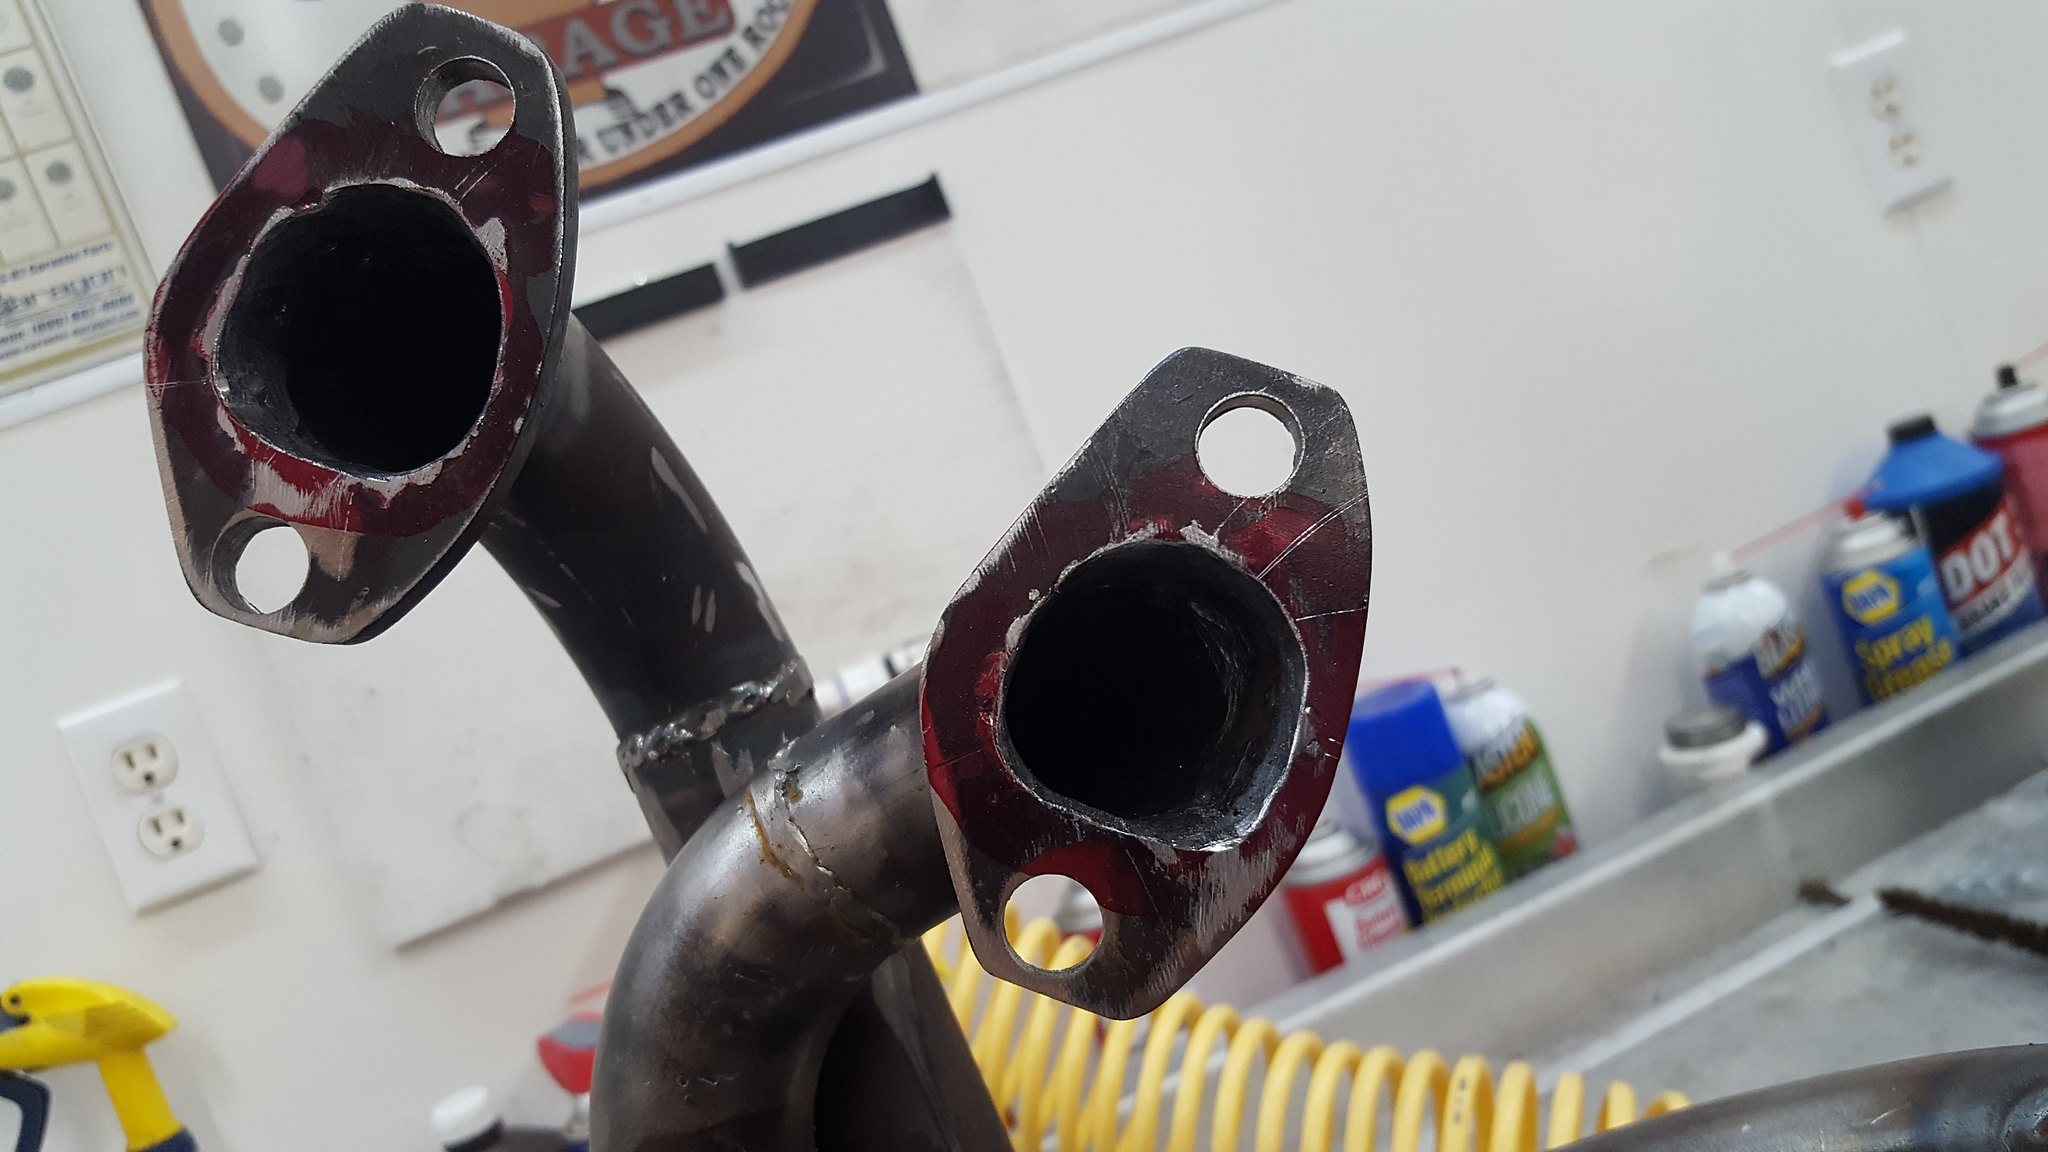
20180630_131049 by Michael Crawford, on Flickr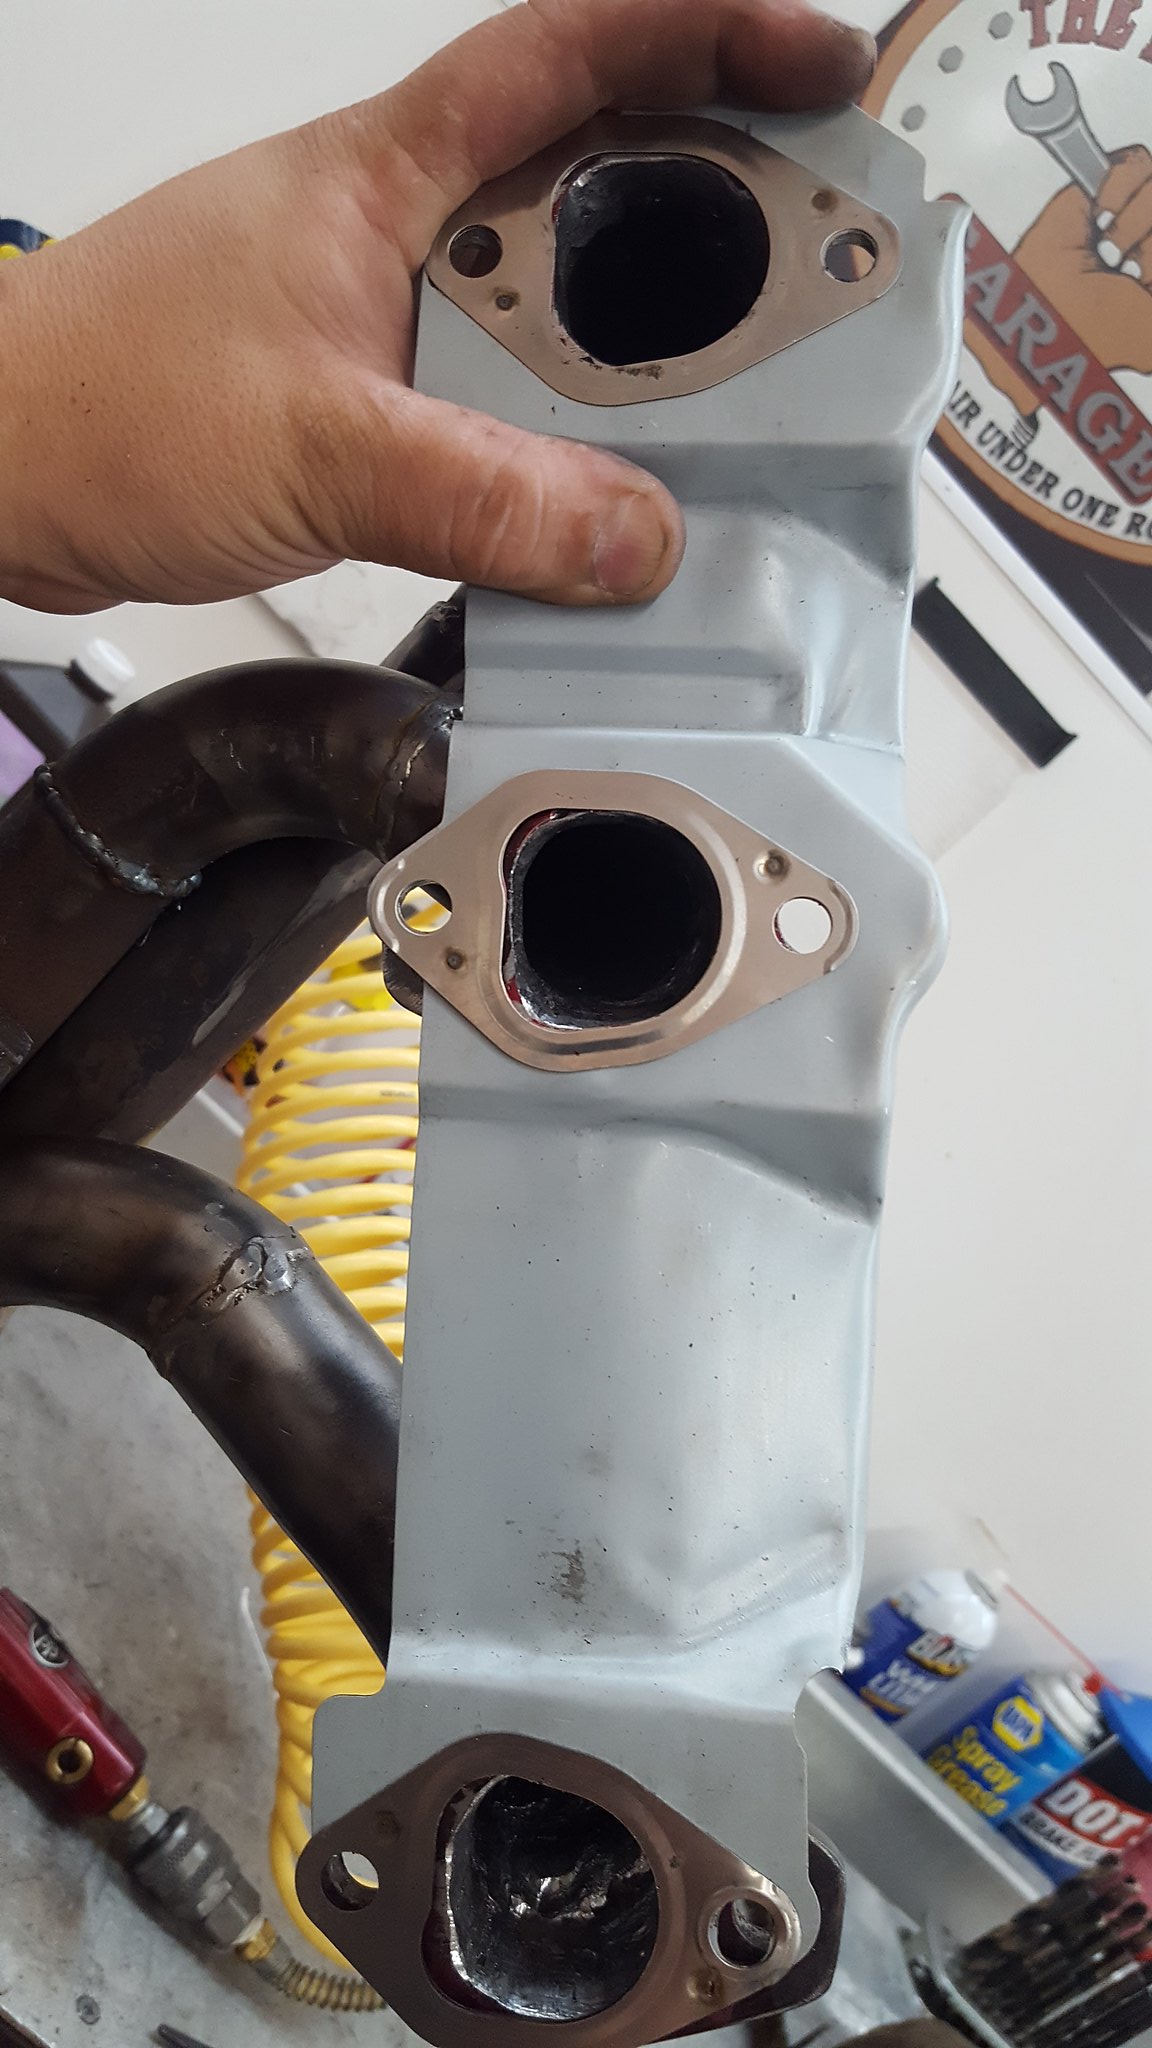
20180630_131044 by Michael Crawford, on Flickrwhen I came back to the shop this morning, dad gave me the headers mostly completed. He took one of the pictures (he used some muffler paste on the flanges. That muffler paste has been on the shelf since he found it under the seat of the tracker when he bought it. Im throwing it in the misc category for budget), and I took the picture of paint. Paint is another of the misc (neither of us remember buying it, and the can is so old that its starting to rust out on the bottom. Dad wanted to use it up.)
20180701_111931 by Michael Crawford, on Flickr
20180701_160440 by Michael Crawford, on Flickr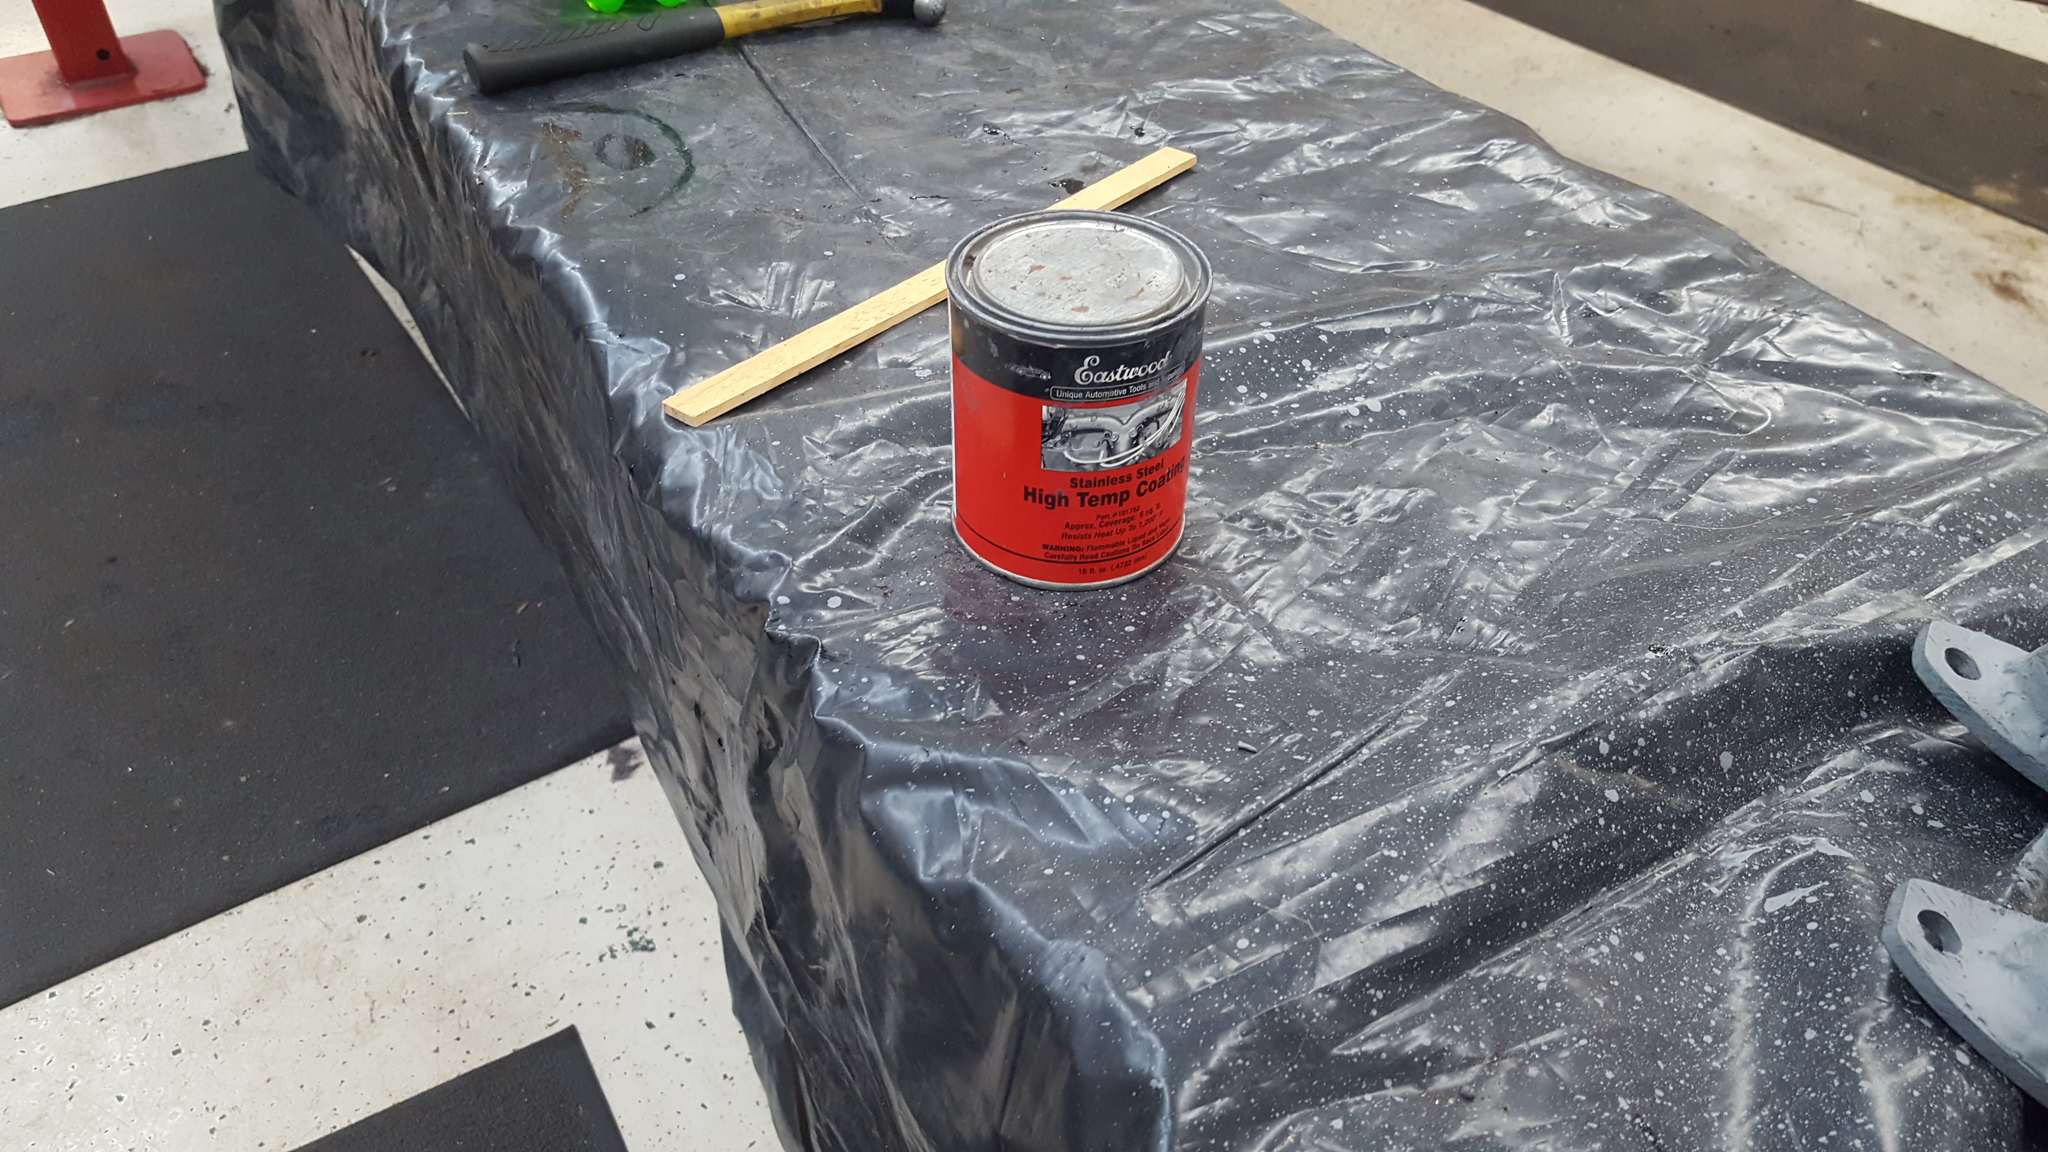
20180701_160442 by Michael Crawford, on Flickrthey're still uglier than some of the women I woke up next to after a week long bender, but some header wrap and no one will see them. And the header wrap should help underhood temps.
20180701_184256 by Michael Crawford, on Flickrthe next step was getting the engine cleaned, taped, and painted. I finally was convinced to take the easy route of painting the whole engine silver. With black accents. So, super clean, wire brush, brake clean, scrapers, etc. then some painters tape.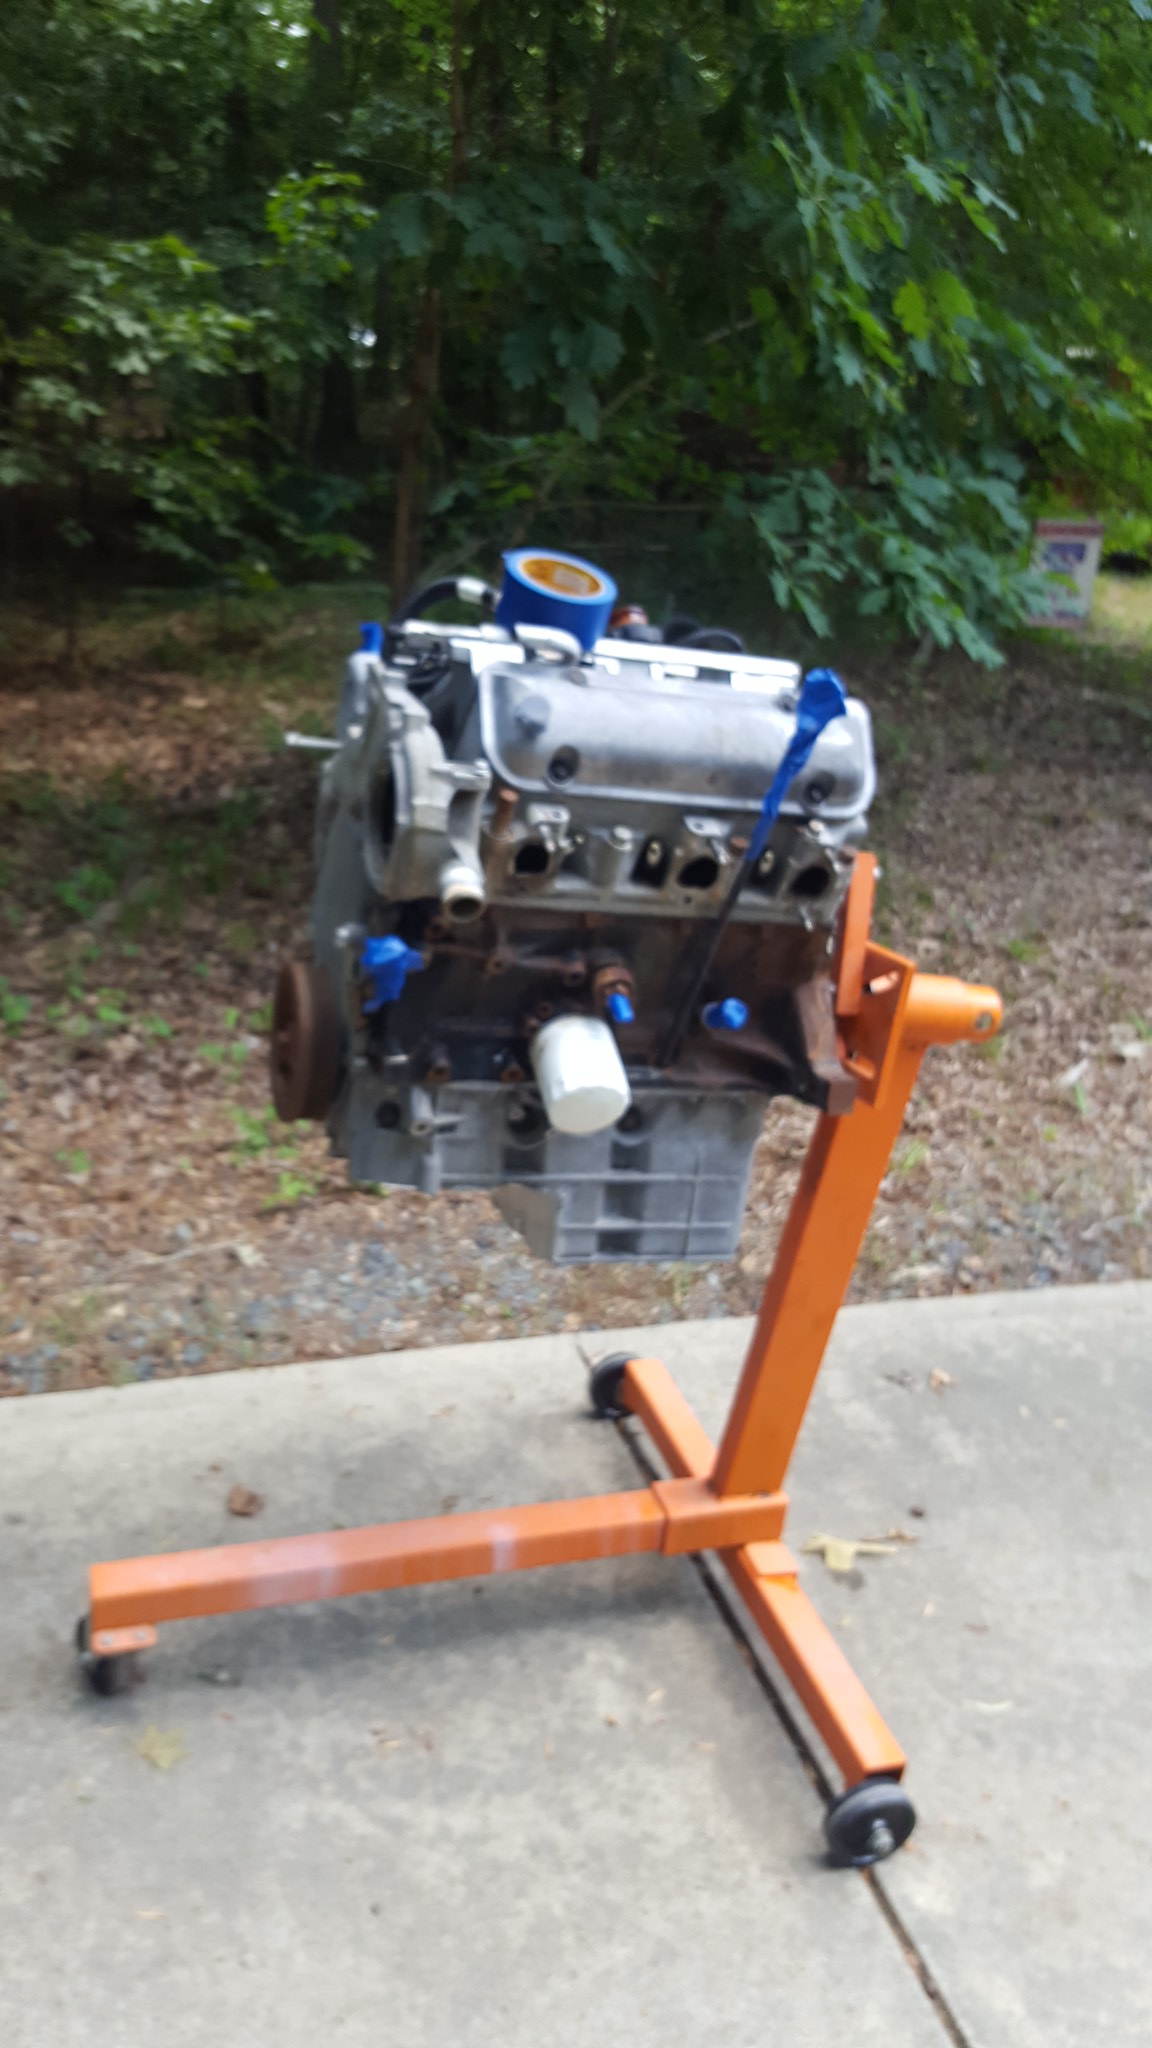
20180630_141244 by Michael Crawford, on FlickrI also used some black valspar on the brackets and lines and such. Pulies as well. The hard lines for the cooling system were all modified to work with the new setup, fuel lines modified, and everything bolted back together. (upper intake not bolted on. But sat there to give you the idea. And so I can see it. Turned out GOOD. I was really nervous about it looking like chrome spray paint at first....)
20180701_111934 by Michael Crawford, on Flickr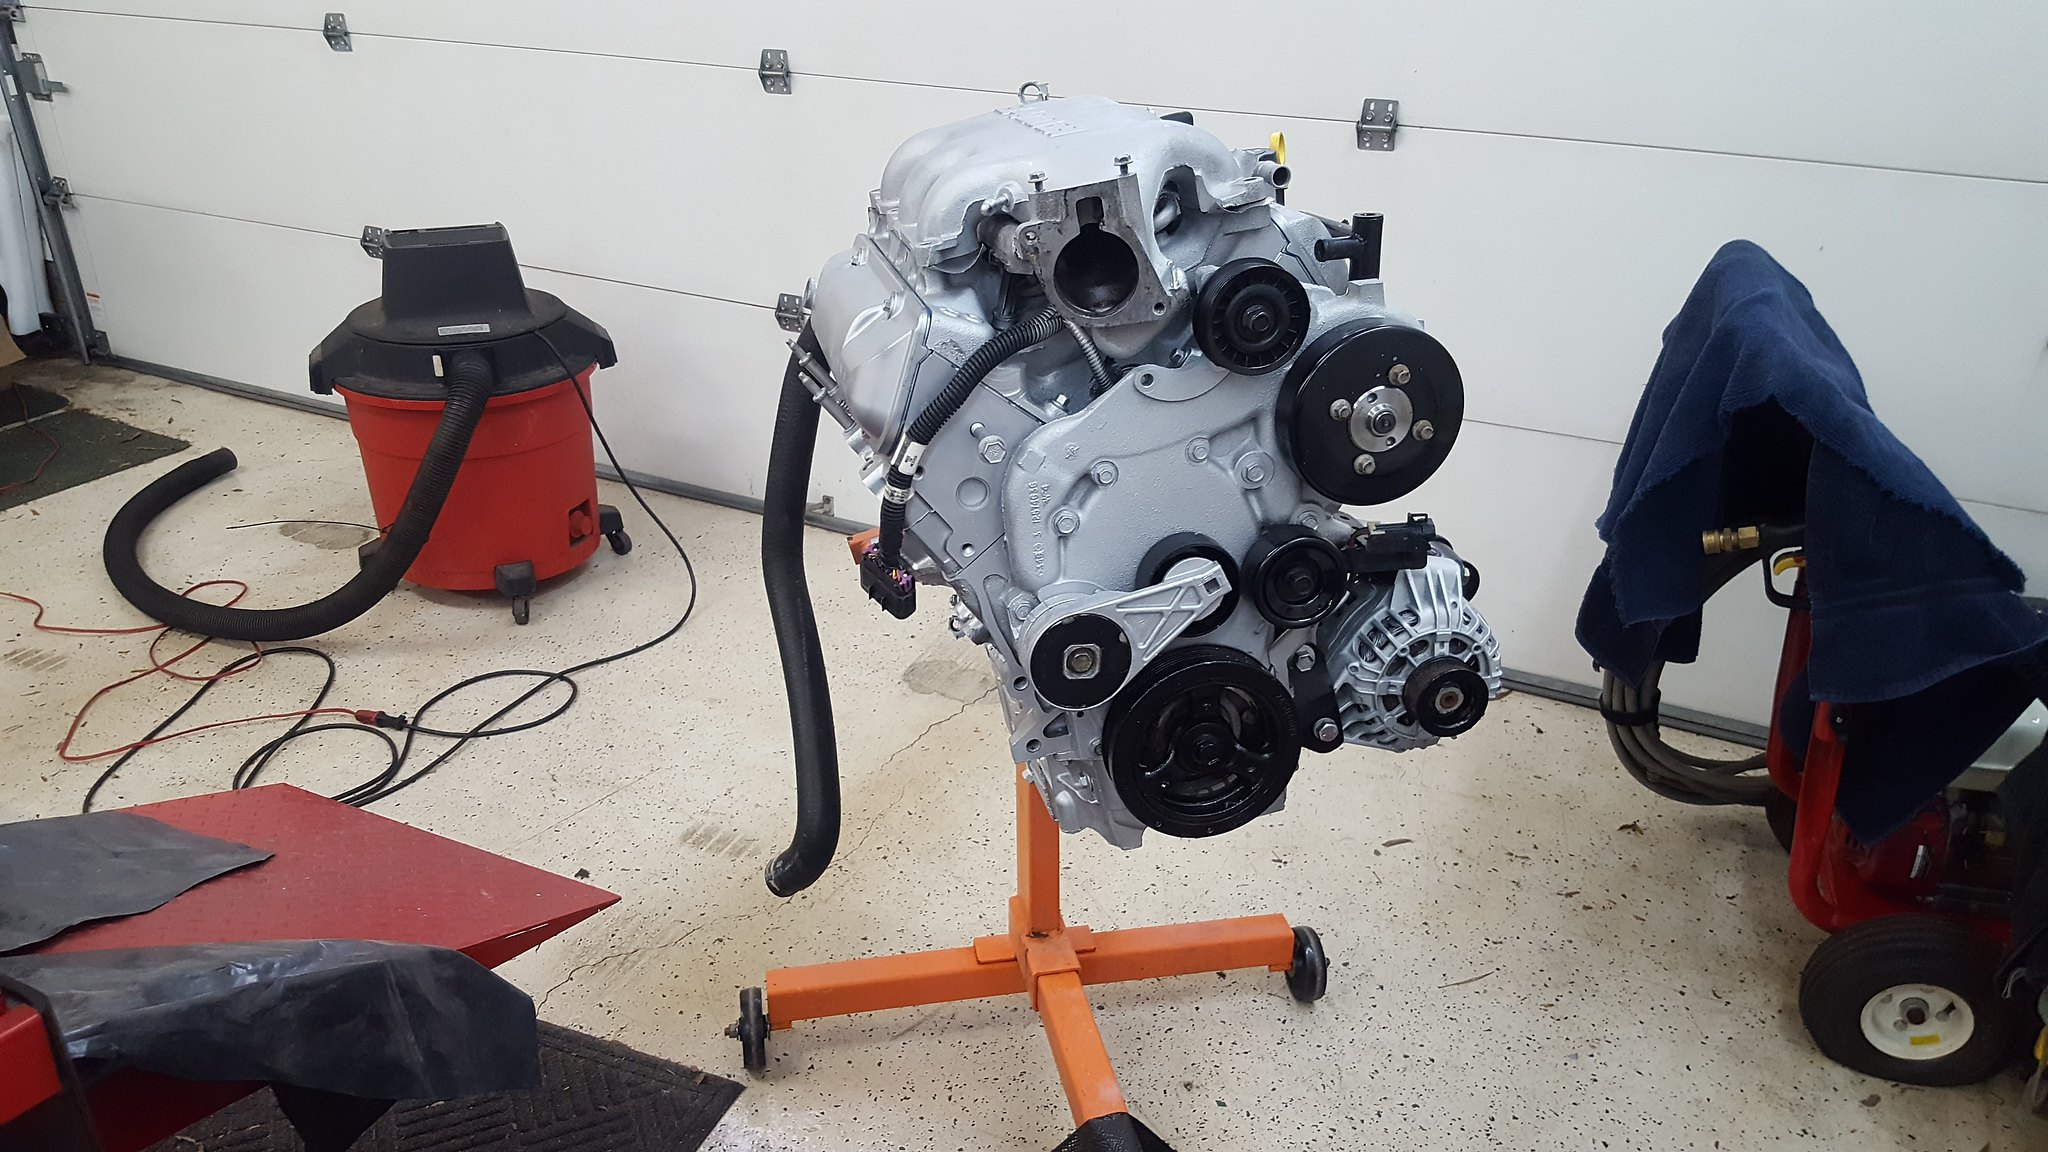
20180701_153220 by Michael Crawford, on Flickr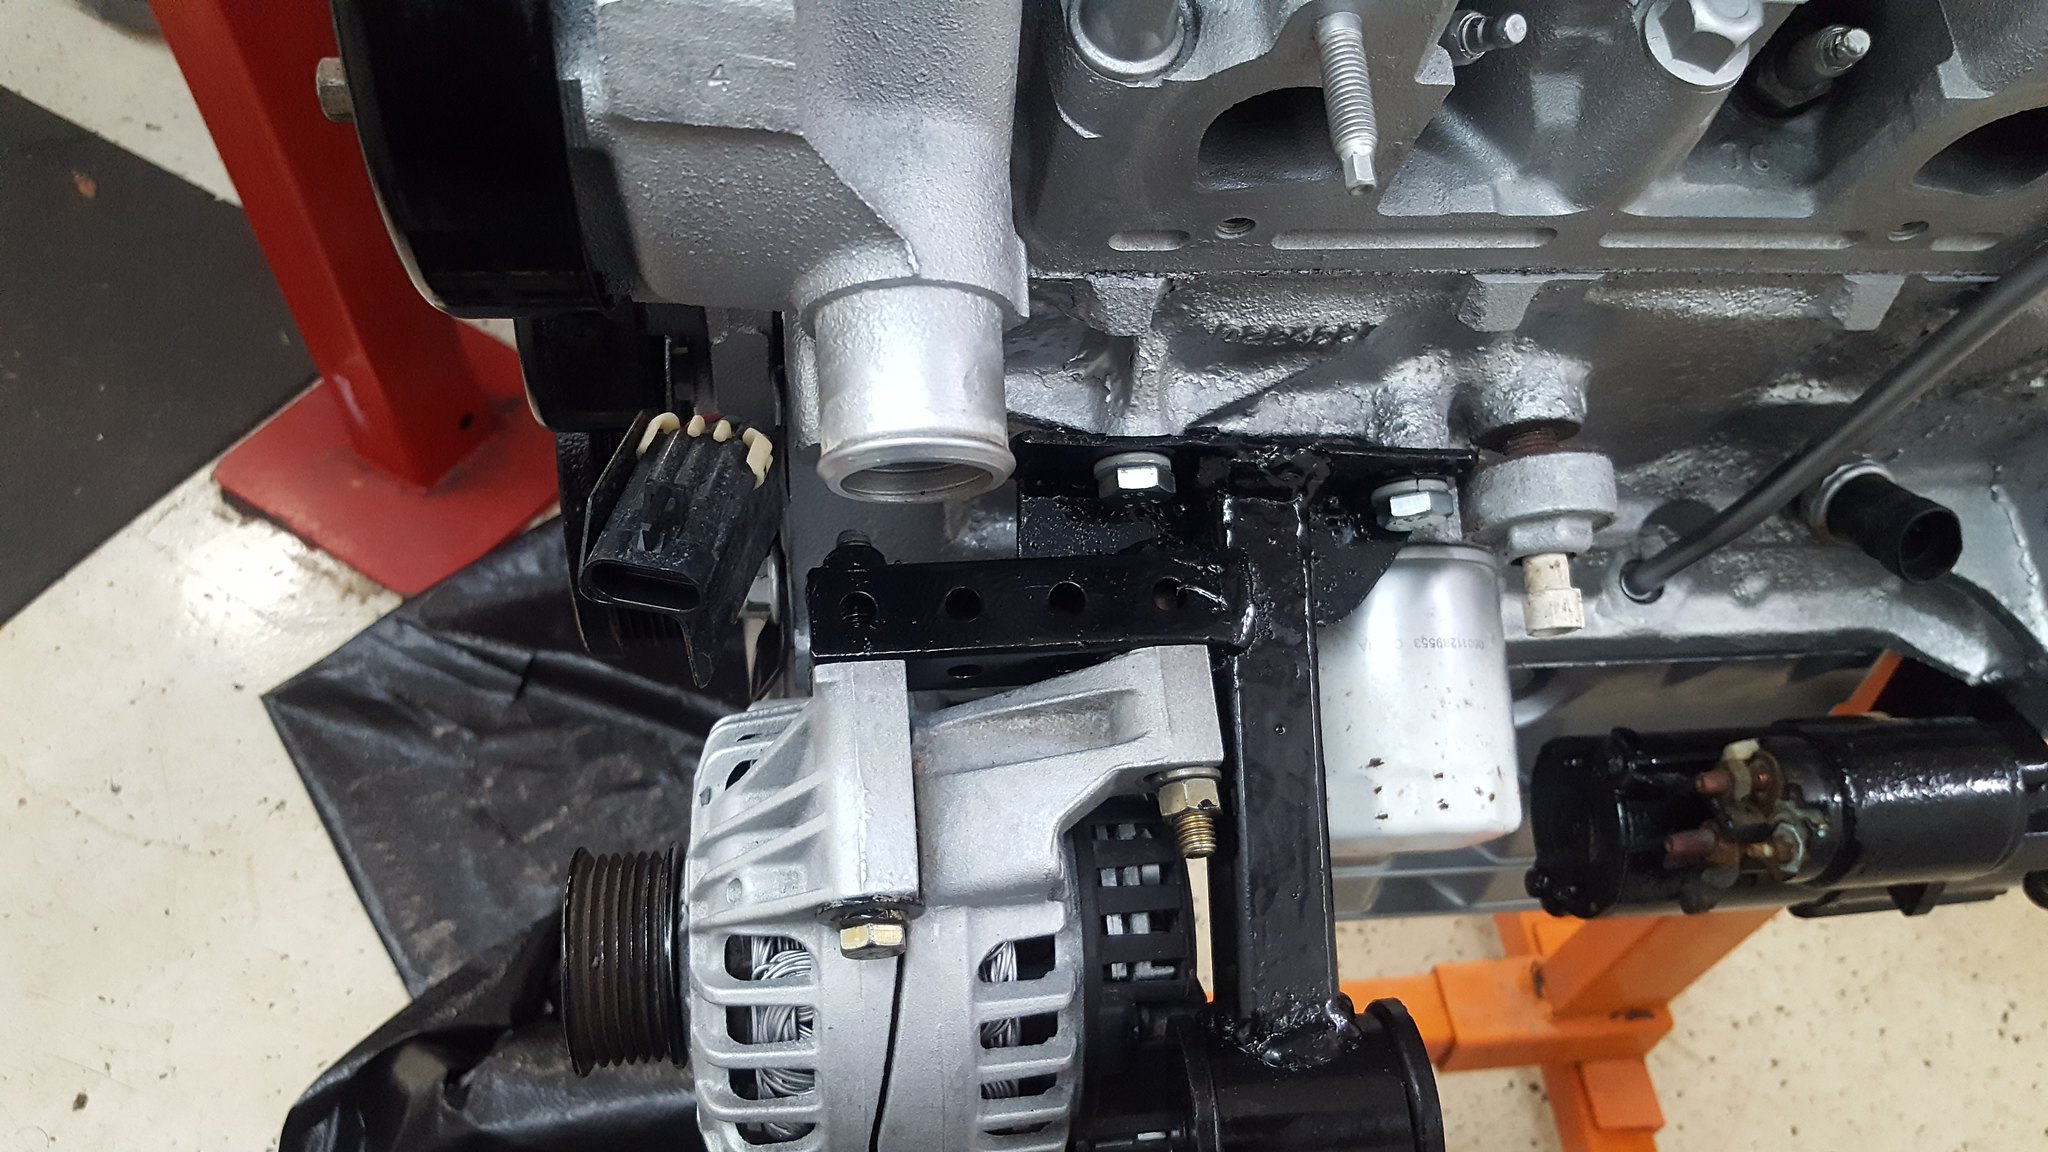
20180701_153228 by Michael Crawford, on Flickr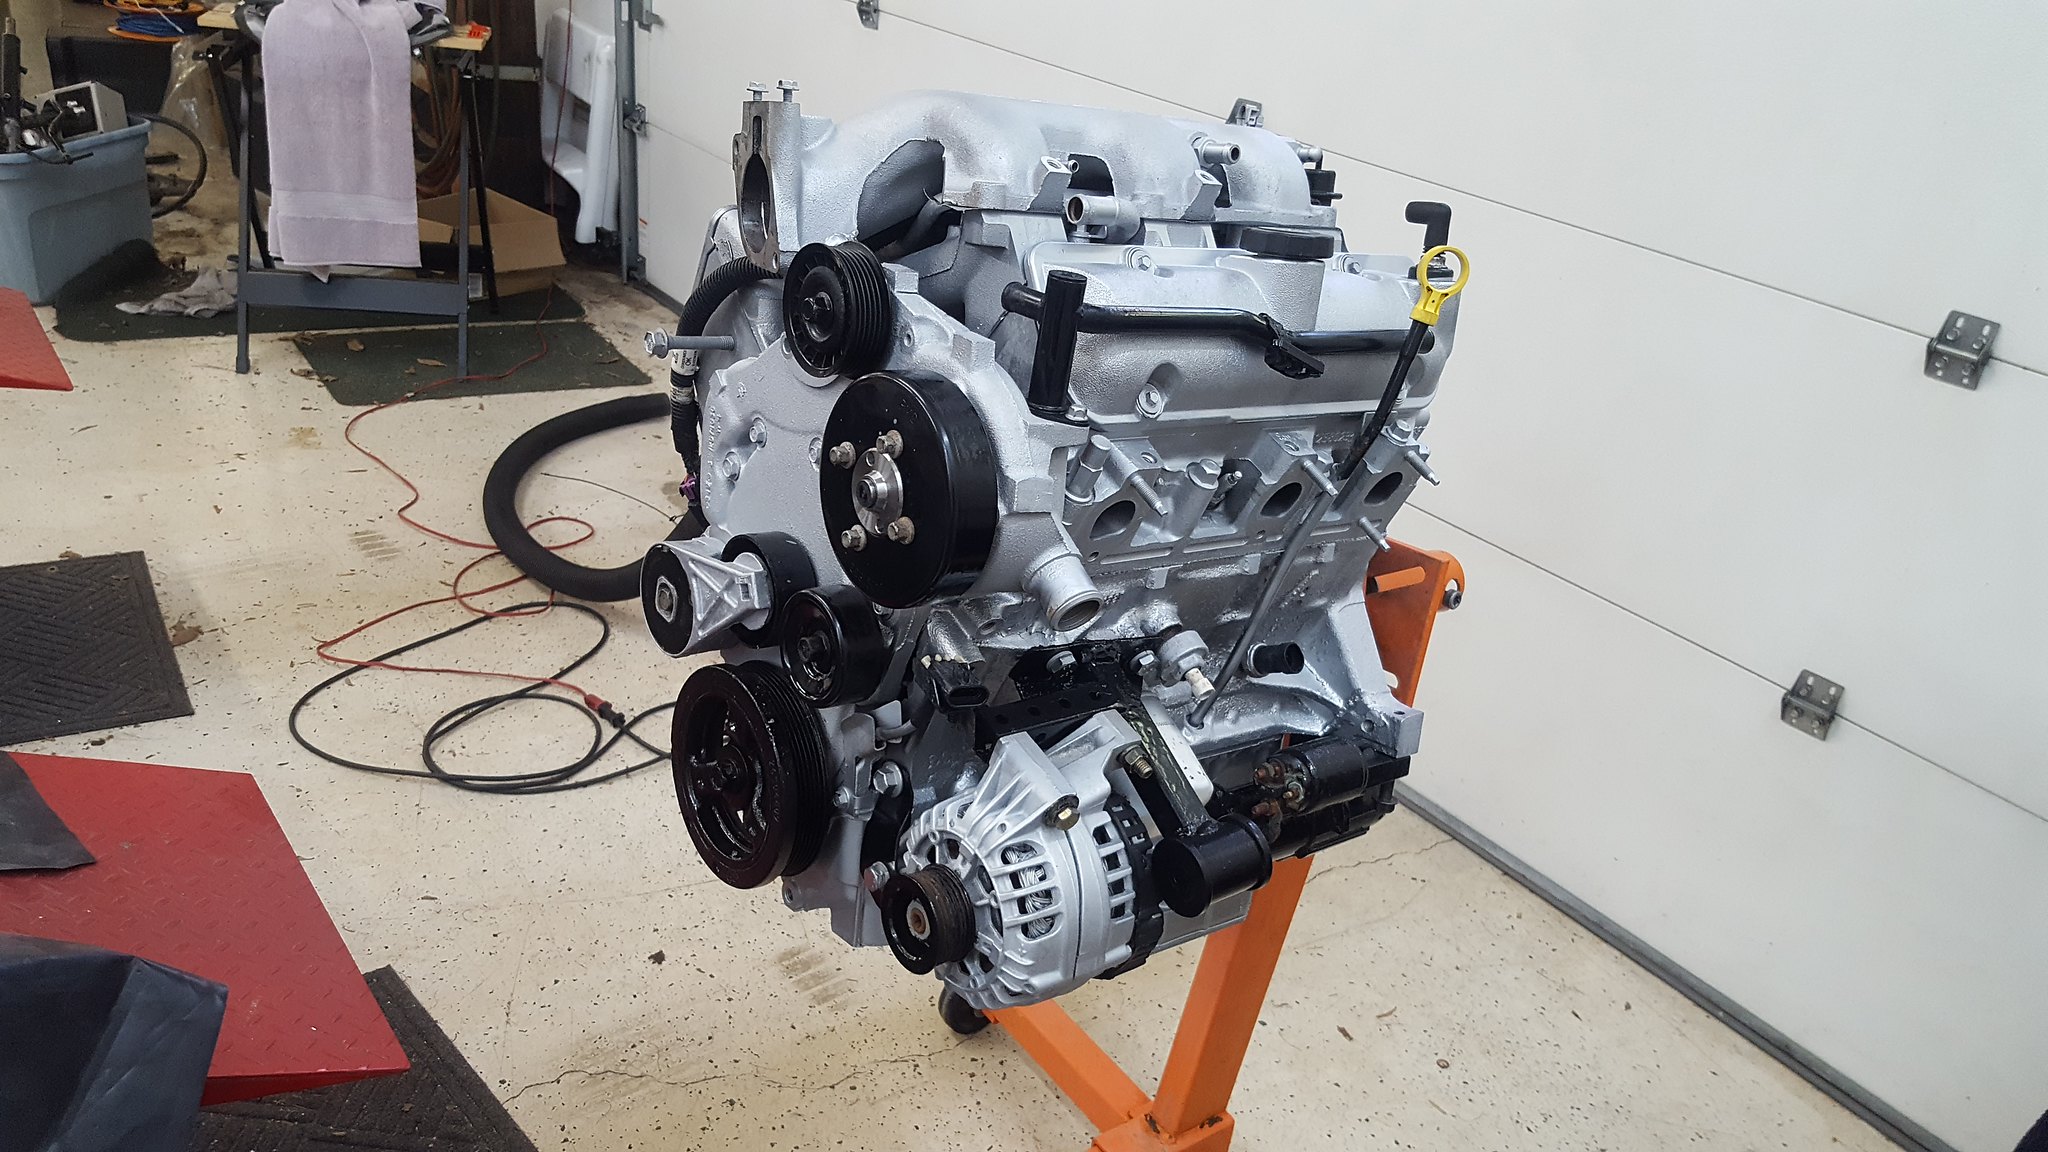
20180701_160407 by Michael Crawford, on Flickr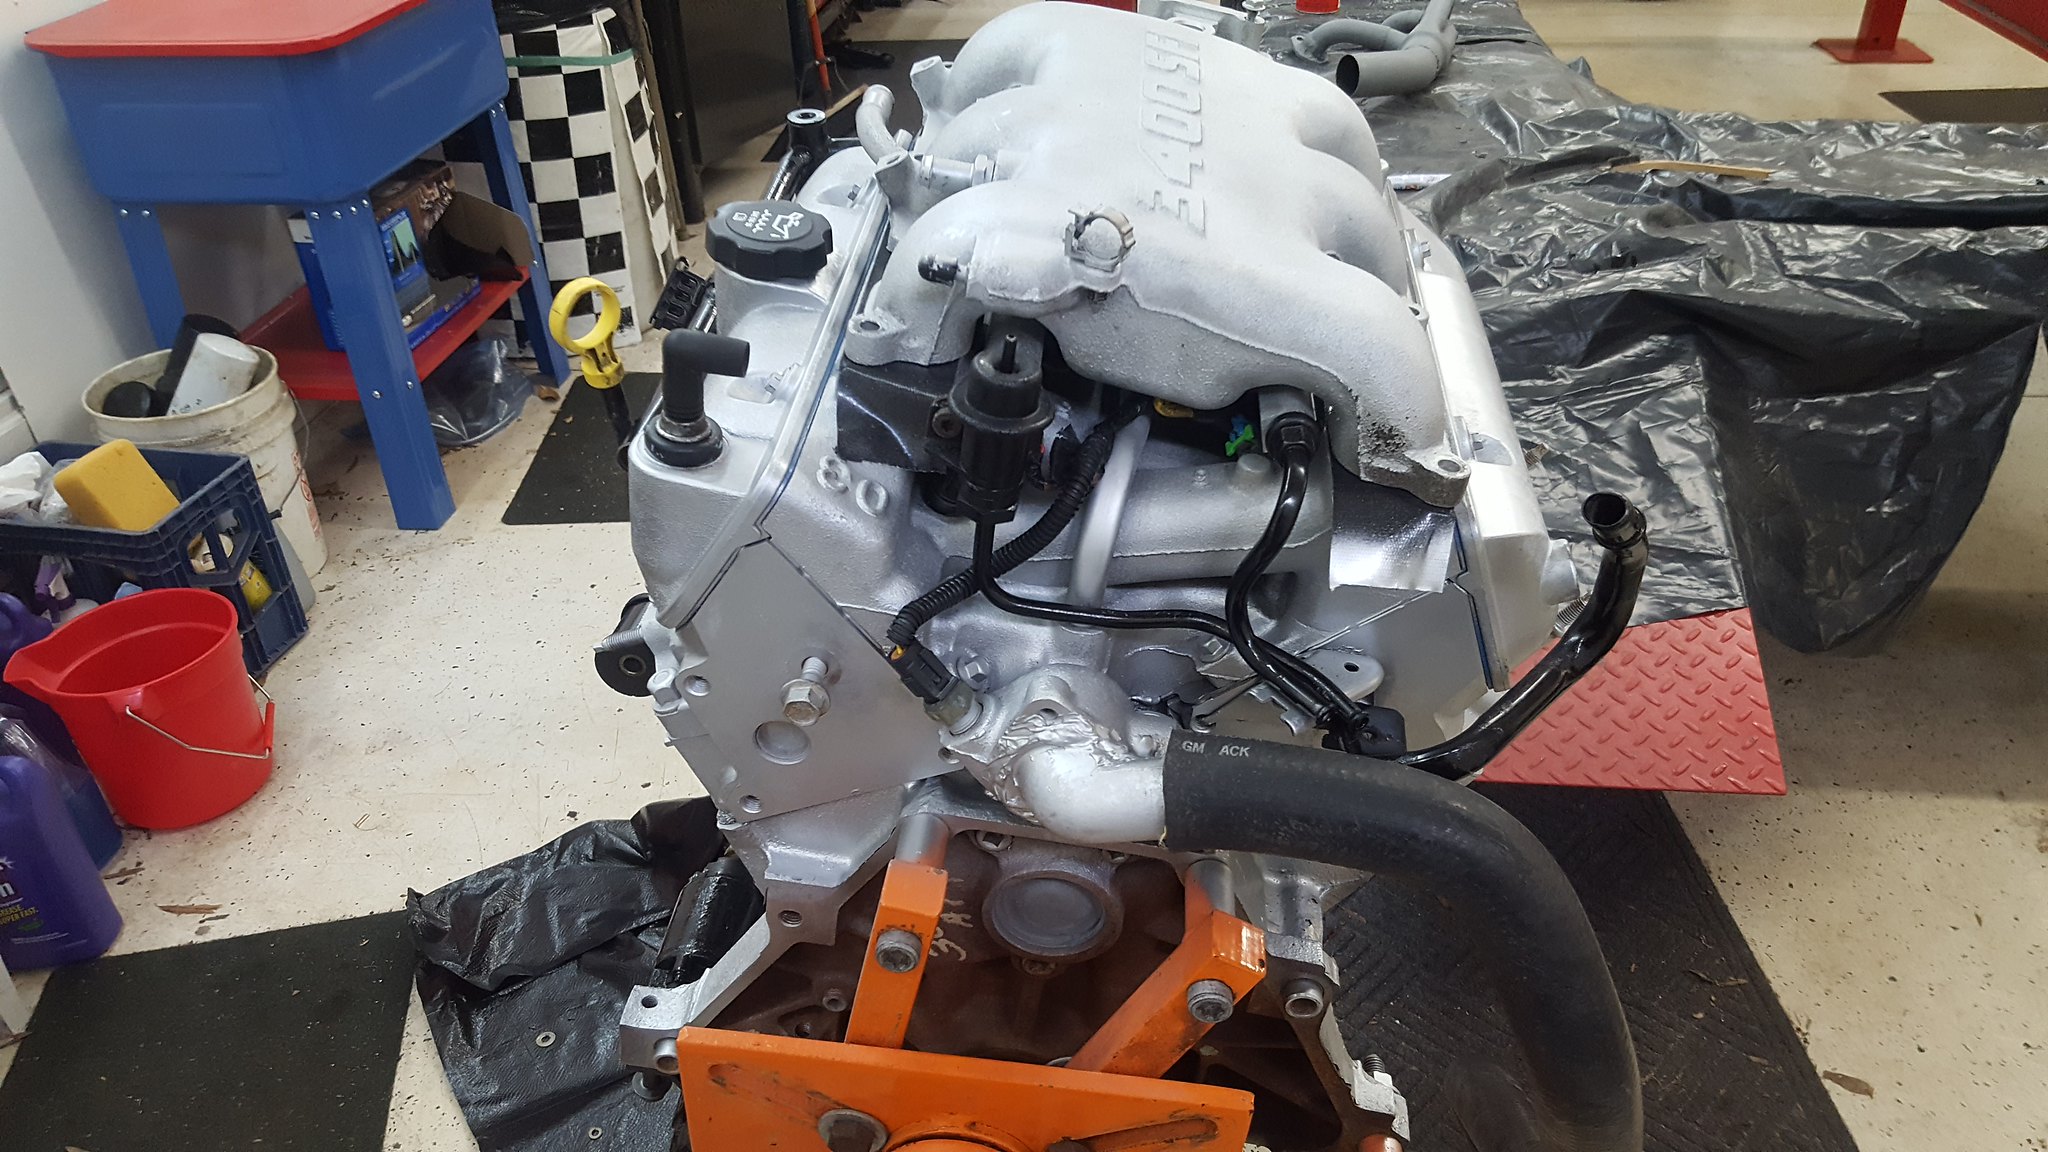
20180701_160412 by Michael Crawford, on Flickr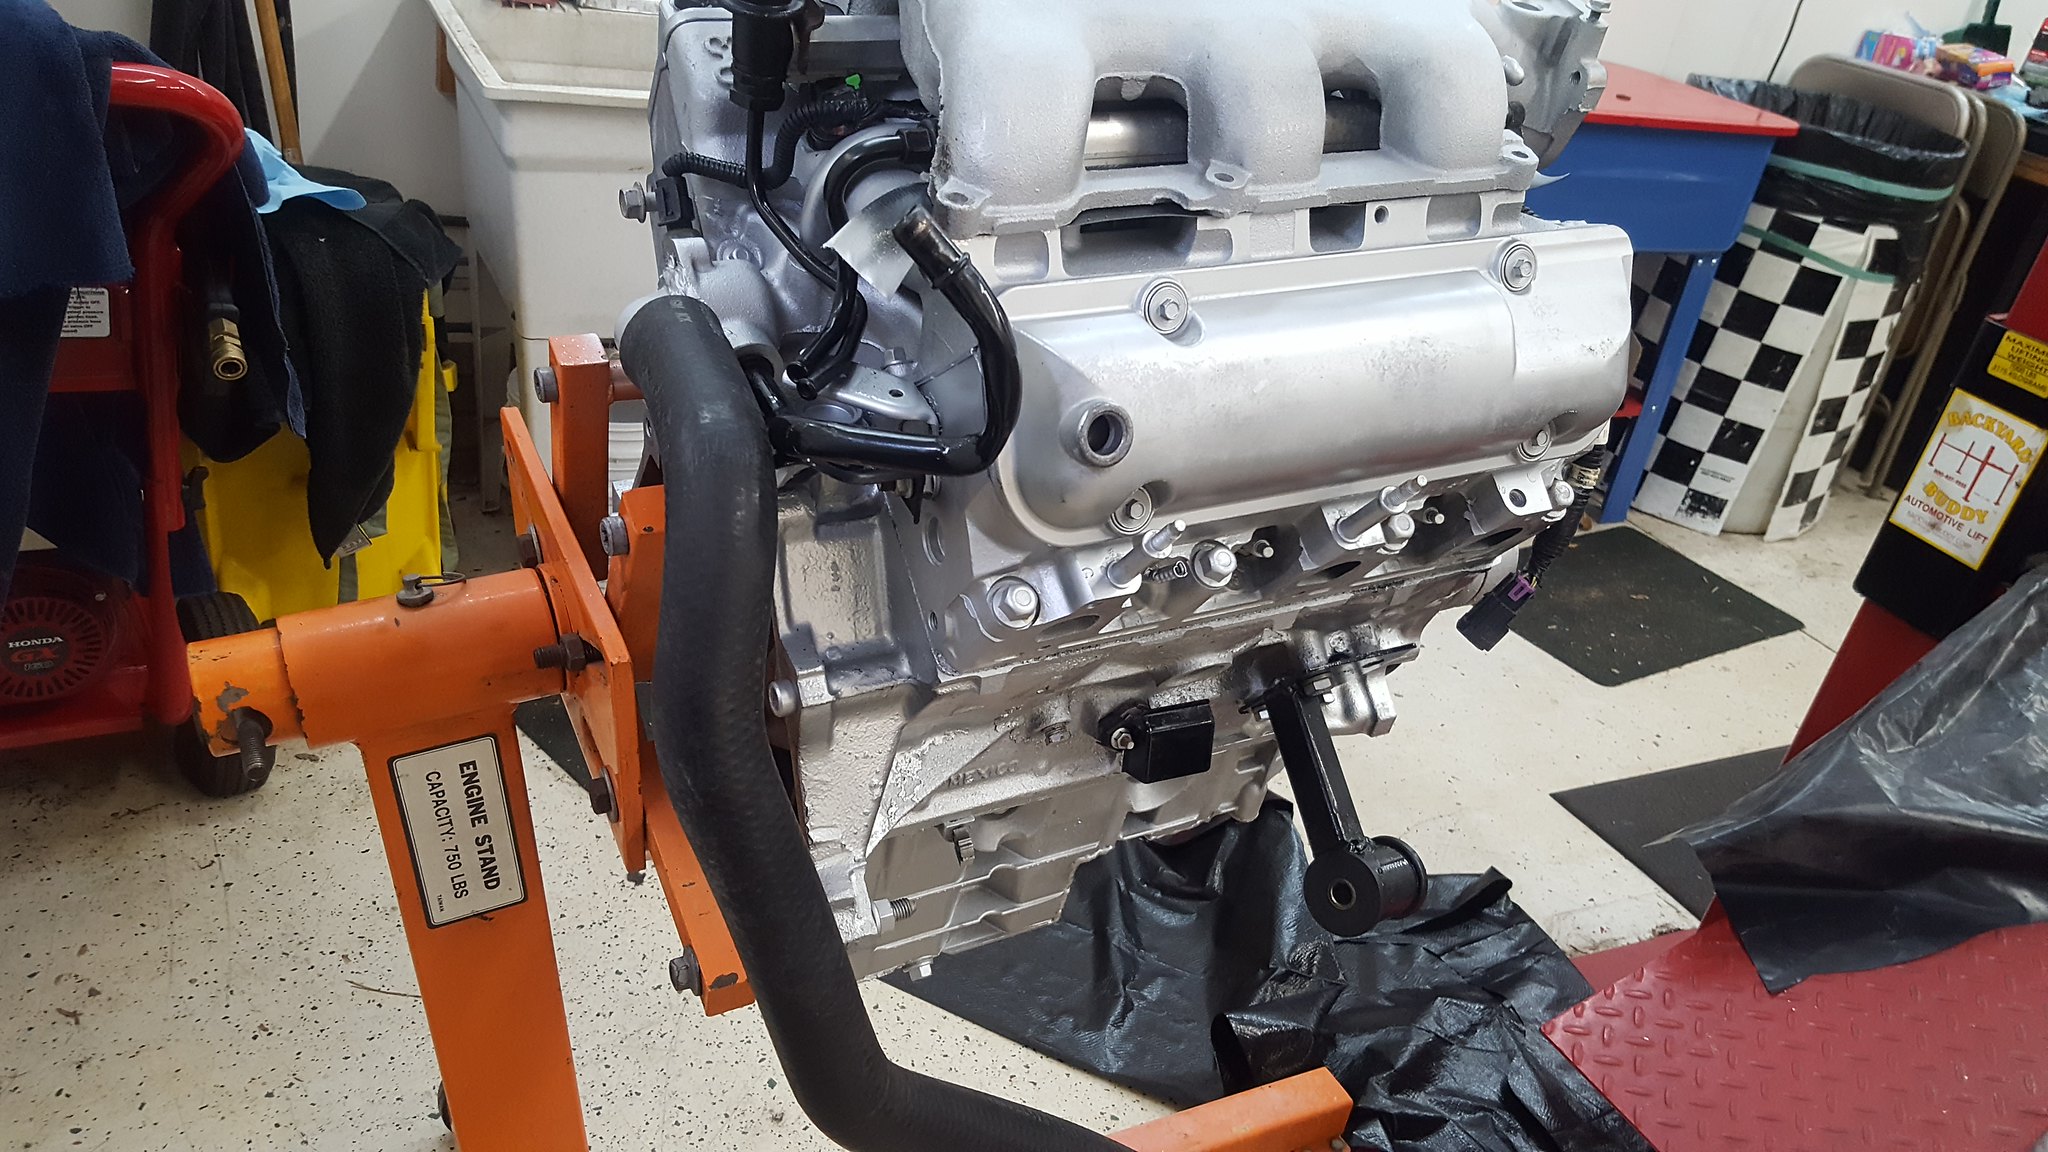
20180701_160418 by Michael Crawford, on FlickrI pulled the used clutch and flywheel out of their box to get ready to assemble that when I realized I don't have a pilot bearing. I'm ashamed to say that this clutch will have to do. Its pretty well worn out, but its what I have, and its paid for. These parts are off a 2.2 s10, which is what the 3400 fiero guys use, and wvtumbler recommended for this swap. Hopefully it doesn't slip. I'm going to dress the pressure plate and flywheel with the zizz wheel and a brown pad and hope for the best.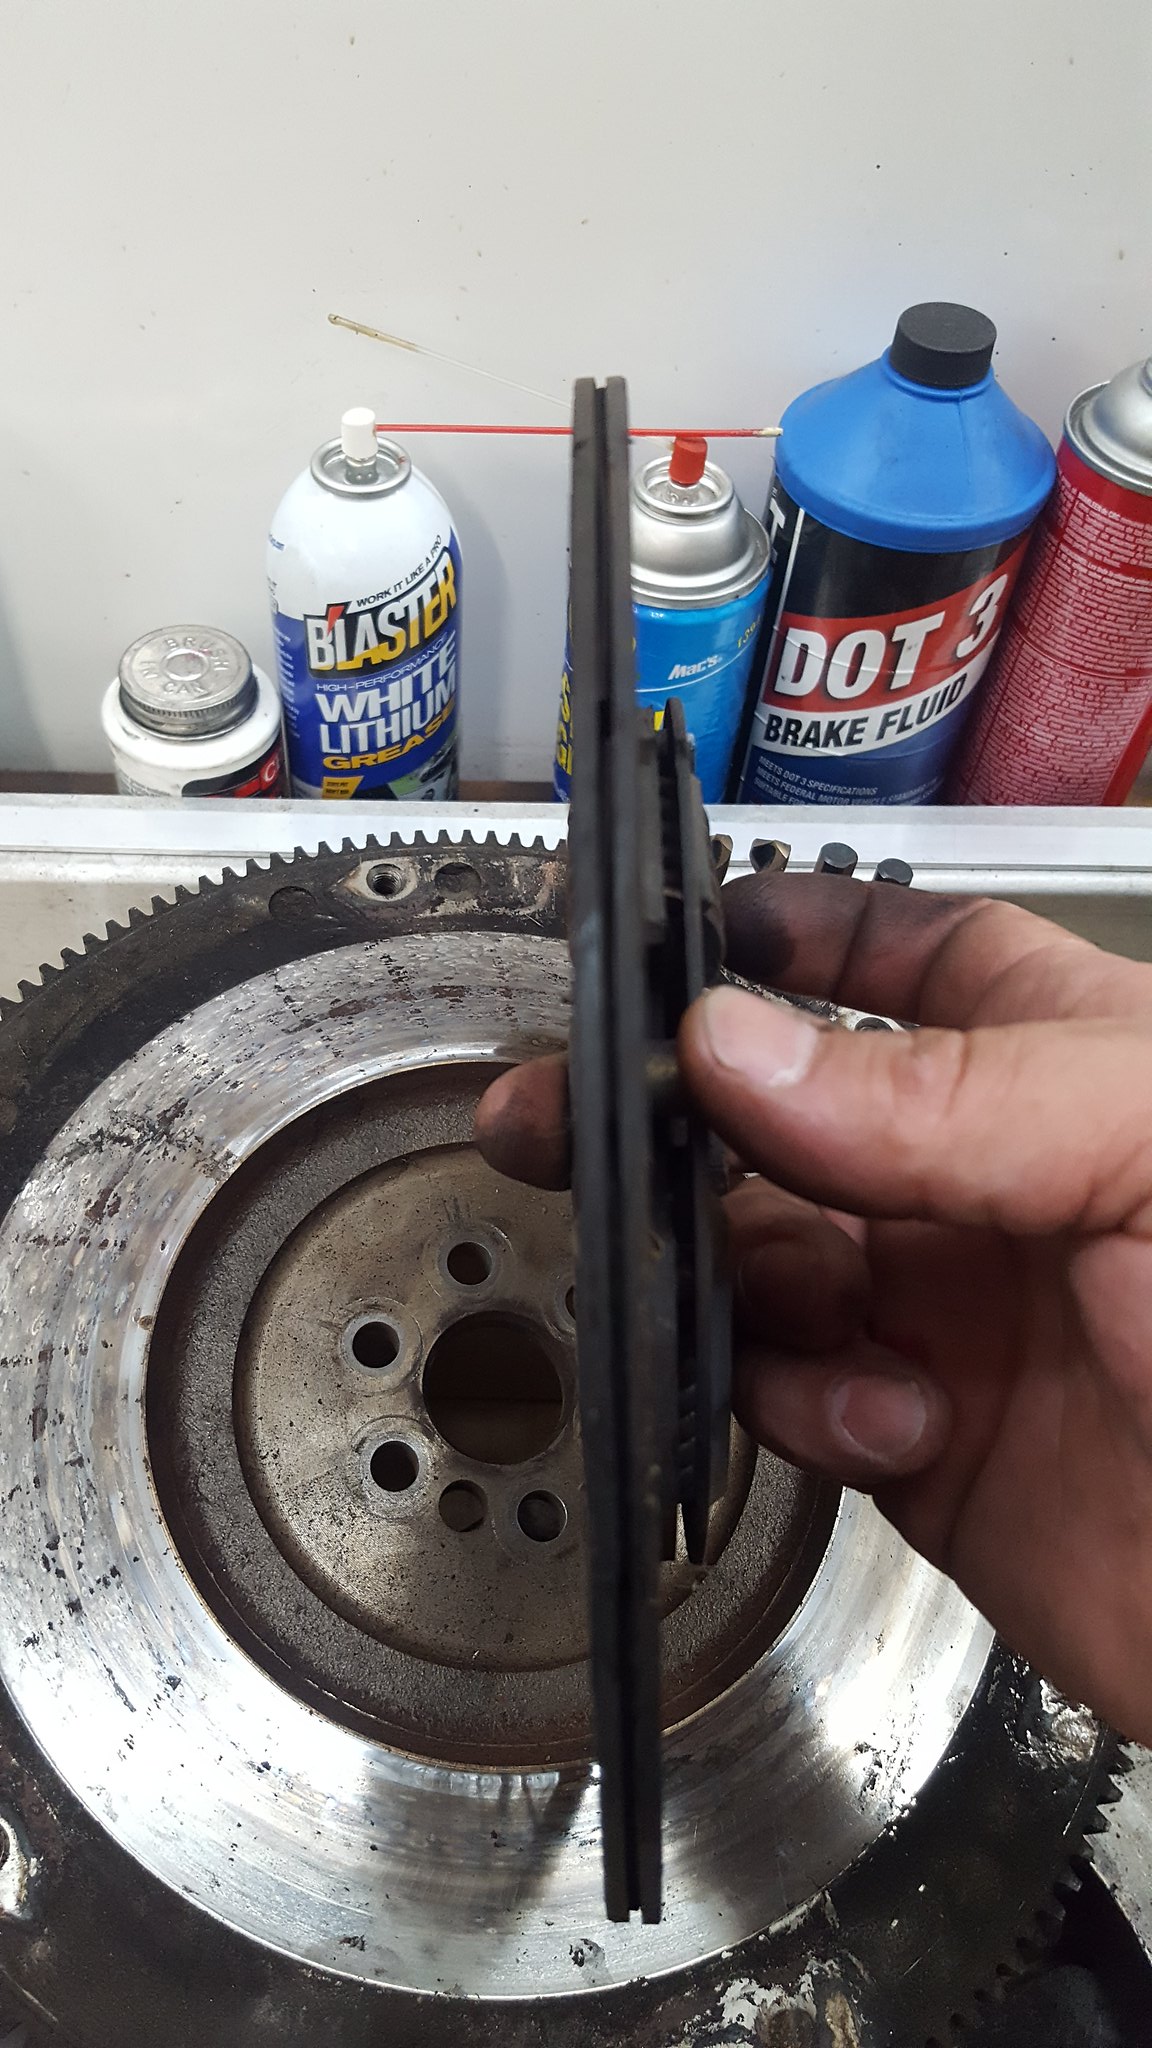
20180701_160234 by Michael Crawford, on Flickr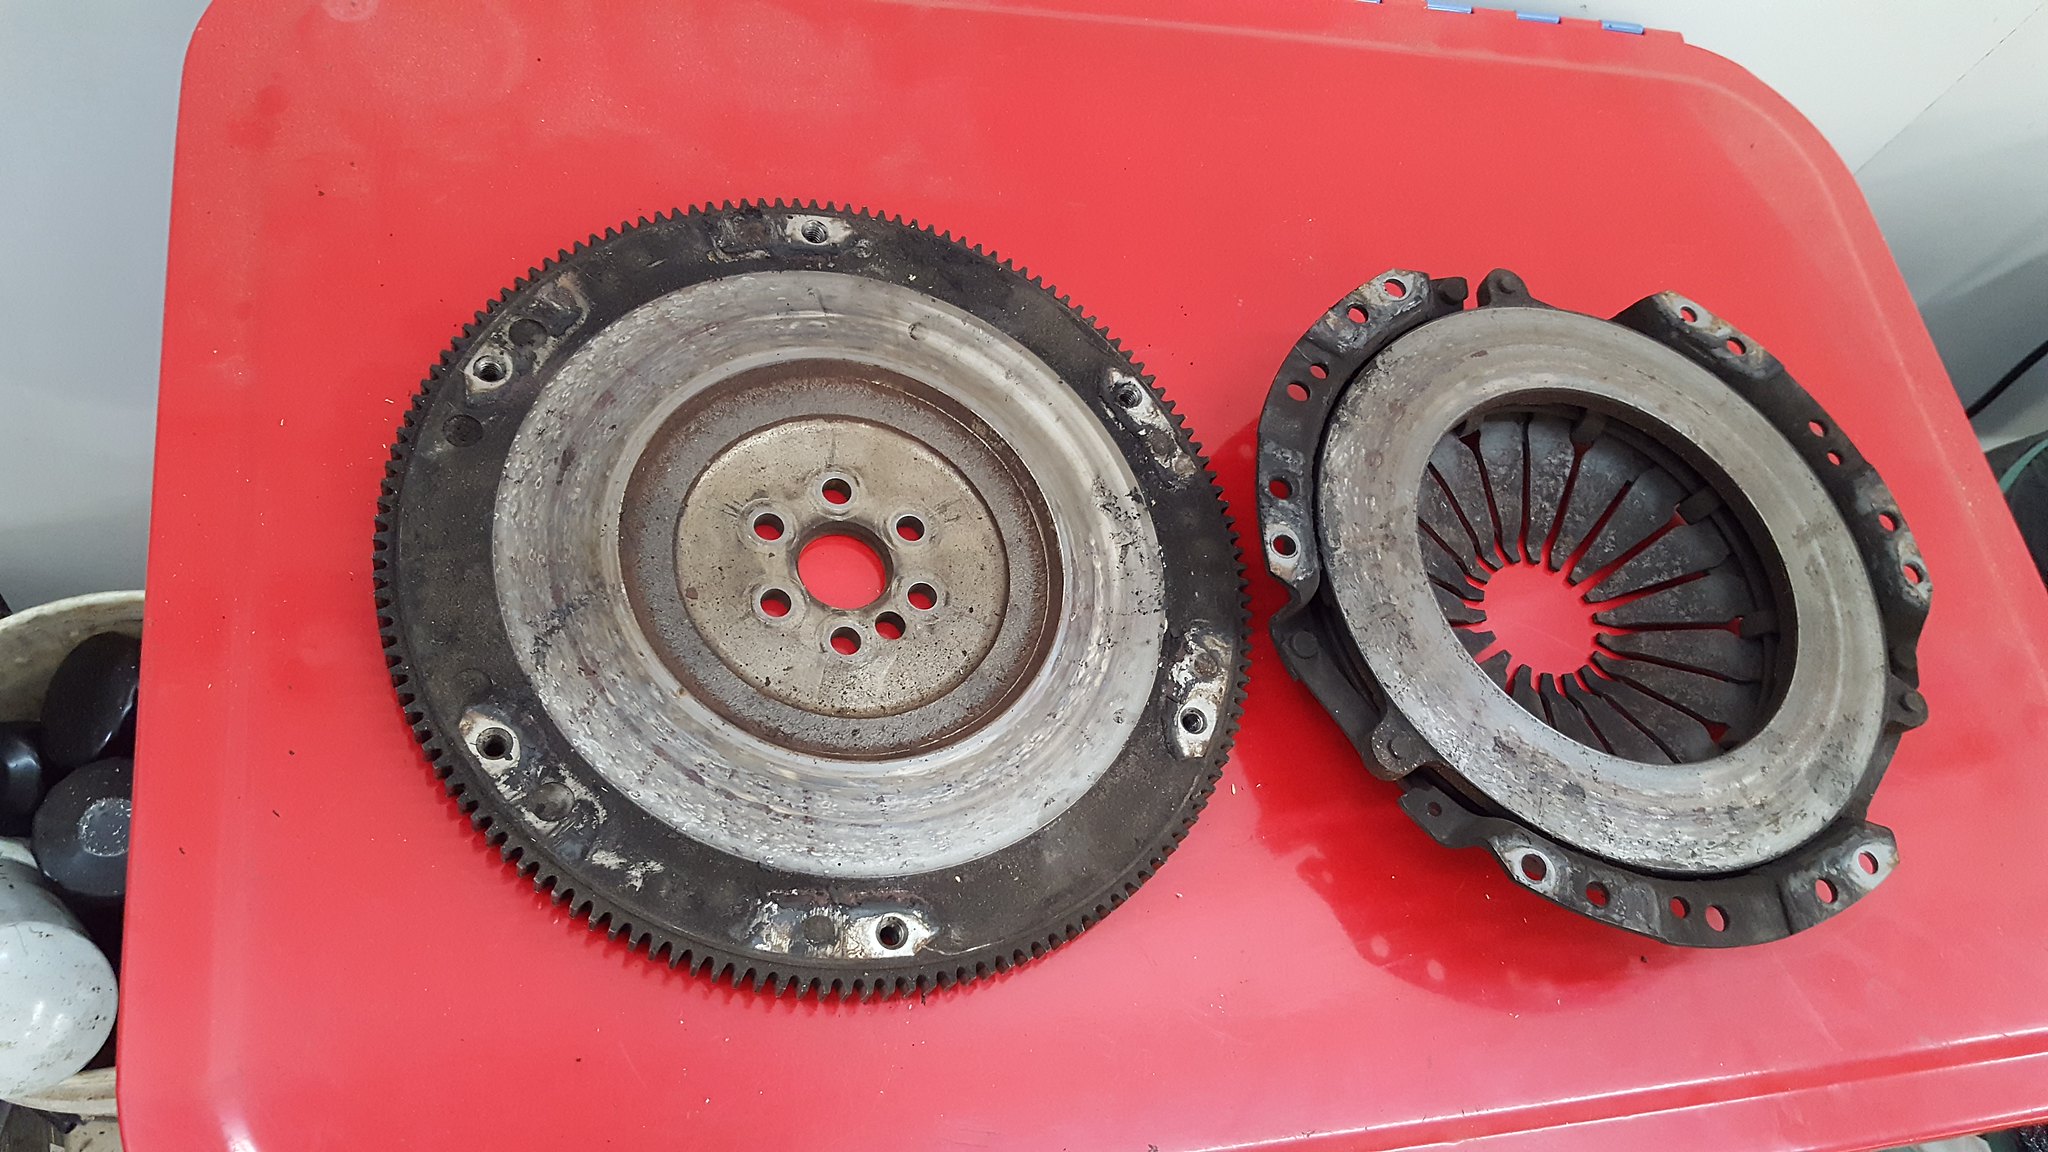
20180701_111928 by Michael Crawford, on Flickrhopefully the next post will see the engine in the bay, and all but hooked up!Happy 4 th y'all. And remember to thank our servicemen (armed forces, police, and firefighters) for the freedoms we all enjoy in this great country.
revious challenge budget: 1709.68 recoup total: 820new money: header wrap: 17.10misc supplies: 50and fittings: 21.98 (4.99 male coupler, 10x tube nuts for 16.99) race car paint: 14.98 new total: 1813.74
recoup: 820kicking *** and taking names. This weekend was spent helping dad on the 49 ford truck, and getting ready to get the motor back in. the motor started here:
20180630_110948 by Michael Crawford, on Flickrstep one was to make the headers actually fit and flow again. Somehow, when I finished welding them, I screwed up and made all the tubes move. Not sure how I did that, other than stupidity and heat. So I cut them apart a bit, and re-welded them bolted to the engine. They still fit after cooling, so im calling that a win. They really don't look any different in ways that you can tell, other than having all the bolt holes line up. So use your imagination.I then tackled the other bit of stupid I did. When we cut the flanges, we cut them exactly to exhaust gasket size. When I put them together, I shoved the tubes into the holes in the flanges and welded. Obviously, now the headers are smaller than exhaust port size. So I put dykem on the gaskets, dykem on the header, and ran it all together. A bit of creative scribing and jigging, and we had some marks to port to.
20180630_125209 by Michael Crawford, on FlickrI then broke out a new carbide burr on my die grinder.
20180630_131050 by Michael Crawford, on Flickrcouple hours later, and one completely wore out burr
20180630_131049 by Michael Crawford, on Flickr
20180630_131044 by Michael Crawford, on Flickrwhen I came back to the shop this morning, dad gave me the headers mostly completed. He took one of the pictures (he used some muffler paste on the flanges. That muffler paste has been on the shelf since he found it under the seat of the tracker when he bought it. Im throwing it in the misc category for budget), and I took the picture of paint. Paint is another of the misc (neither of us remember buying it, and the can is so old that its starting to rust out on the bottom. Dad wanted to use it up.)
20180701_111931 by Michael Crawford, on Flickr
20180701_160440 by Michael Crawford, on Flickr
20180701_160442 by Michael Crawford, on Flickrthey're still uglier than some of the women I woke up next to after a week long bender, but some header wrap and no one will see them. And the header wrap should help underhood temps.
20180701_184256 by Michael Crawford, on Flickrthe next step was getting the engine cleaned, taped, and painted. I finally was convinced to take the easy route of painting the whole engine silver. With black accents. So, super clean, wire brush, brake clean, scrapers, etc. then some painters tape.
20180630_141244 by Michael Crawford, on FlickrI also used some black valspar on the brackets and lines and such. Pulies as well. The hard lines for the cooling system were all modified to work with the new setup, fuel lines modified, and everything bolted back together. (upper intake not bolted on. But sat there to give you the idea. And so I can see it. Turned out GOOD. I was really nervous about it looking like chrome spray paint at first....)
20180701_111934 by Michael Crawford, on Flickr
20180701_153220 by Michael Crawford, on Flickr
20180701_153228 by Michael Crawford, on Flickr
20180701_160407 by Michael Crawford, on Flickr
20180701_160412 by Michael Crawford, on Flickr
20180701_160418 by Michael Crawford, on FlickrI pulled the used clutch and flywheel out of their box to get ready to assemble that when I realized I don't have a pilot bearing. I'm ashamed to say that this clutch will have to do. Its pretty well worn out, but its what I have, and its paid for. These parts are off a 2.2 s10, which is what the 3400 fiero guys use, and wvtumbler recommended for this swap. Hopefully it doesn't slip. I'm going to dress the pressure plate and flywheel with the zizz wheel and a brown pad and hope for the best.
20180701_160234 by Michael Crawford, on Flickr
20180701_111928 by Michael Crawford, on Flickrhopefully the next post will see the engine in the bay, and all but hooked up!Happy 4 th y'all. And remember to thank our servicemen (armed forces, police, and firefighters) for the freedoms we all enjoy in this great country.

Reply
 0
0

0
07-01-2018, 09:07 PM
#62

I kinda feel like you're not putting enough smoky Yunik into the build. Meaning if another slightly better shape clutch disk was found who's to say it wasn't the one that came with your original purchase? Claiming every little fitting and can of paint? Who's to say they didn't all come from the clearance section?
I'm not suggesting you out right cheat and fudge the true cost of things......but that's exactly what your competition is doing. It's really a race to see who can put together a build sheet that is barely believable.
I'm not suggesting you out right cheat and fudge the true cost of things......but that's exactly what your competition is doing. It's really a race to see who can put together a build sheet that is barely believable.
Reply
0
0
07-01-2018, 09:34 PM
#63
Junior Member
Thread Starter
Join Date: Nov 2017
Posts: 112
Total Cats: 7
I'm a man of rigorous honesty. I did pretty well with the amc, and actually got protested. However, because of the build thread and counting EVERYTHING , they wouldn't even accept the protest fee. We also pulled 9th. Being completely honest.
if i fail, I'll fail honestly.
if i win, I'll win honestly.
i do, however, channel my inner yunick, chapman, and frieberger every step of the way that i can. Some parts i just channel them better.
if i fail, I'll fail honestly.
if i win, I'll win honestly.
i do, however, channel my inner yunick, chapman, and frieberger every step of the way that i can. Some parts i just channel them better.
Reply
0
0
07-08-2018, 07:17 PM
#64
Junior Member
Thread Starter
Join Date: Nov 2017
Posts: 112
Total Cats: 7
Challenge budget so farrevious challenge budget: 1709.68 recoup total: 820new money: plug wires: 10FMV
clutch kit: 52.99
plugs: 14.94
fuel injection hose: 2.98
exhaust manifold gaskets: 13.57 FMV new total: 1908.22
recoup: 820so, some ups and downs this week.Got the headers wrapped (first time ever wrapping headers). The stainless zip tie things that came with the header wrap sucked. So dad did safety wire at all the ends. Aint going nowhere now!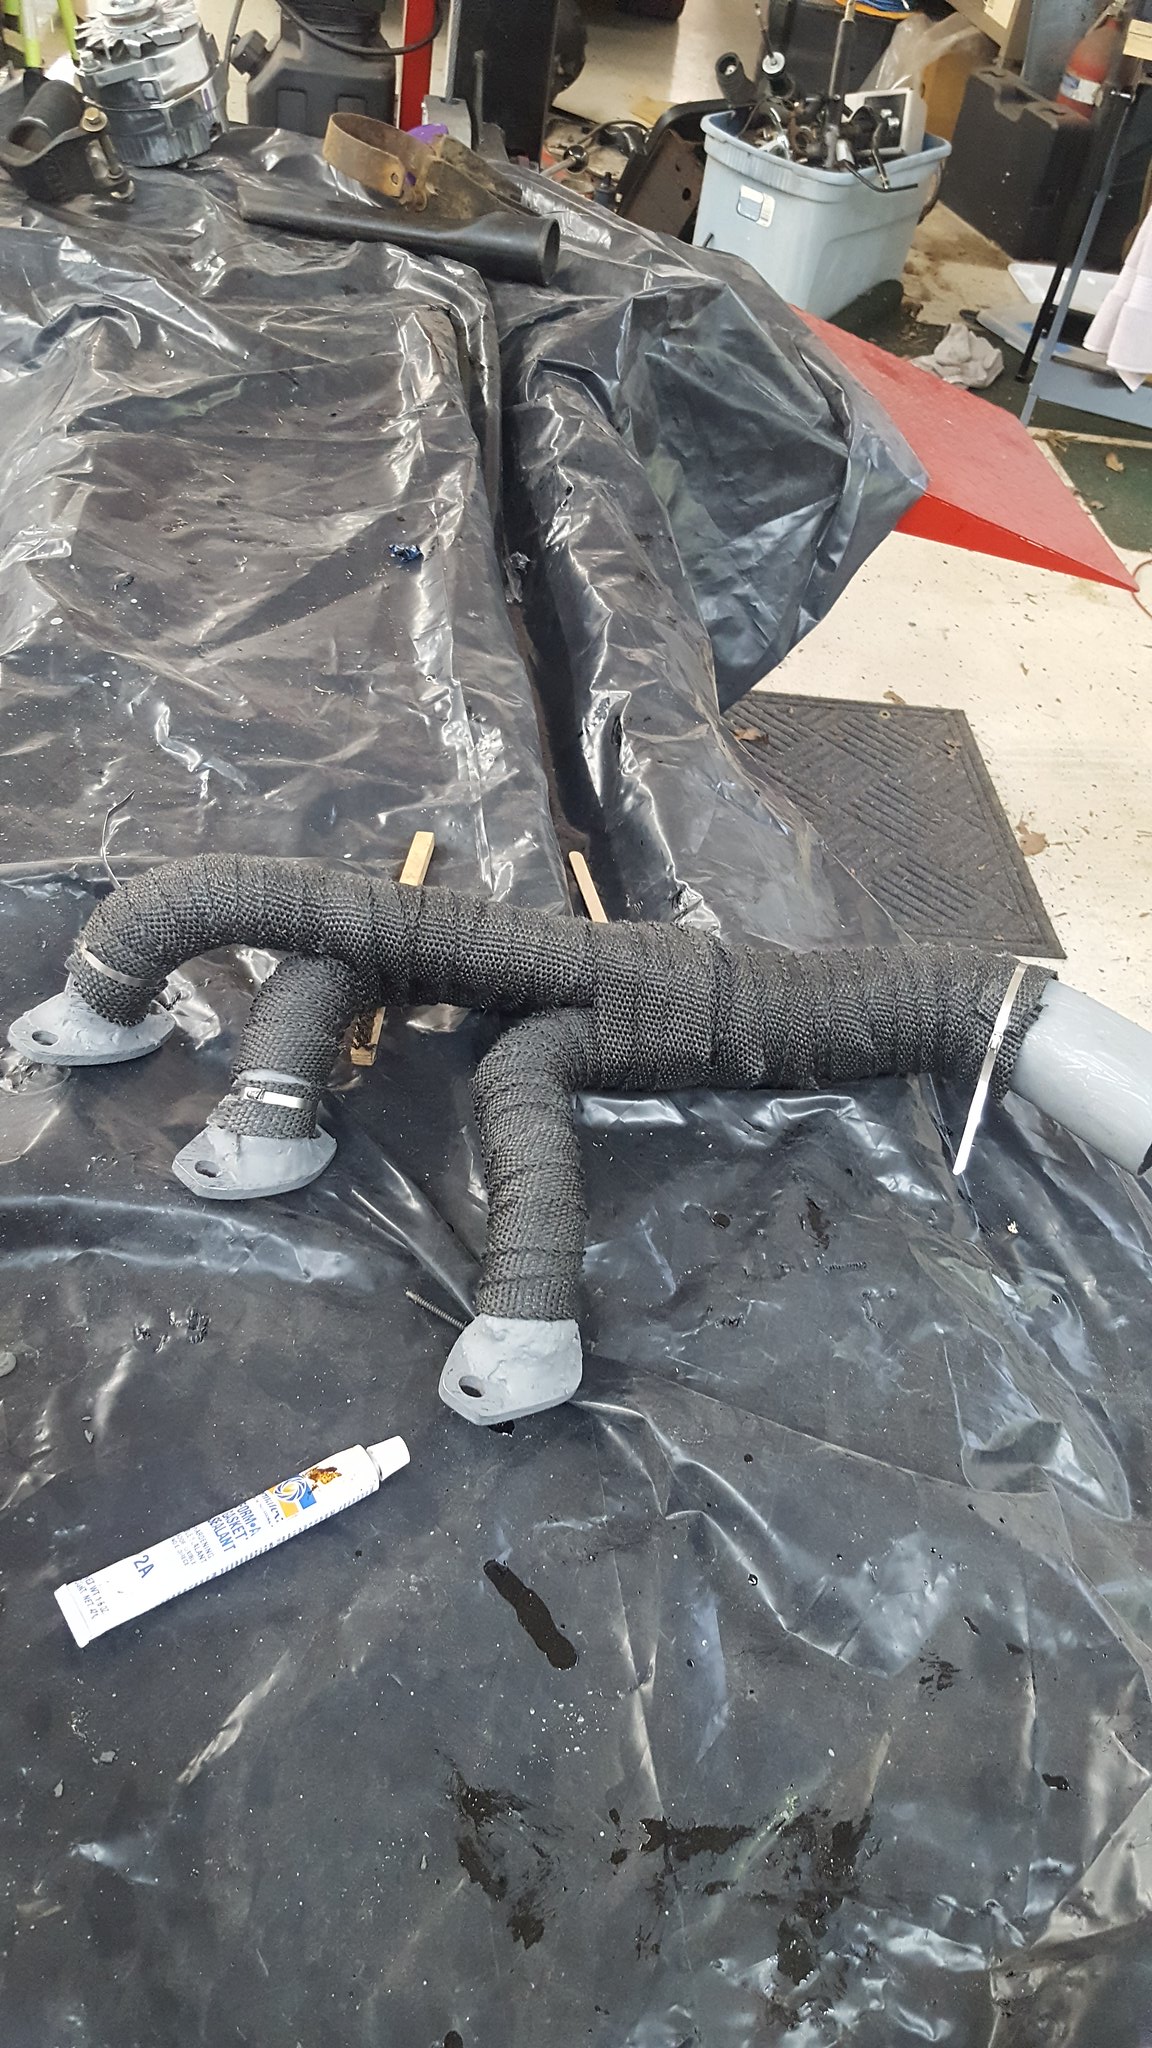
20180703_174436 by Michael Crawford, on Flickr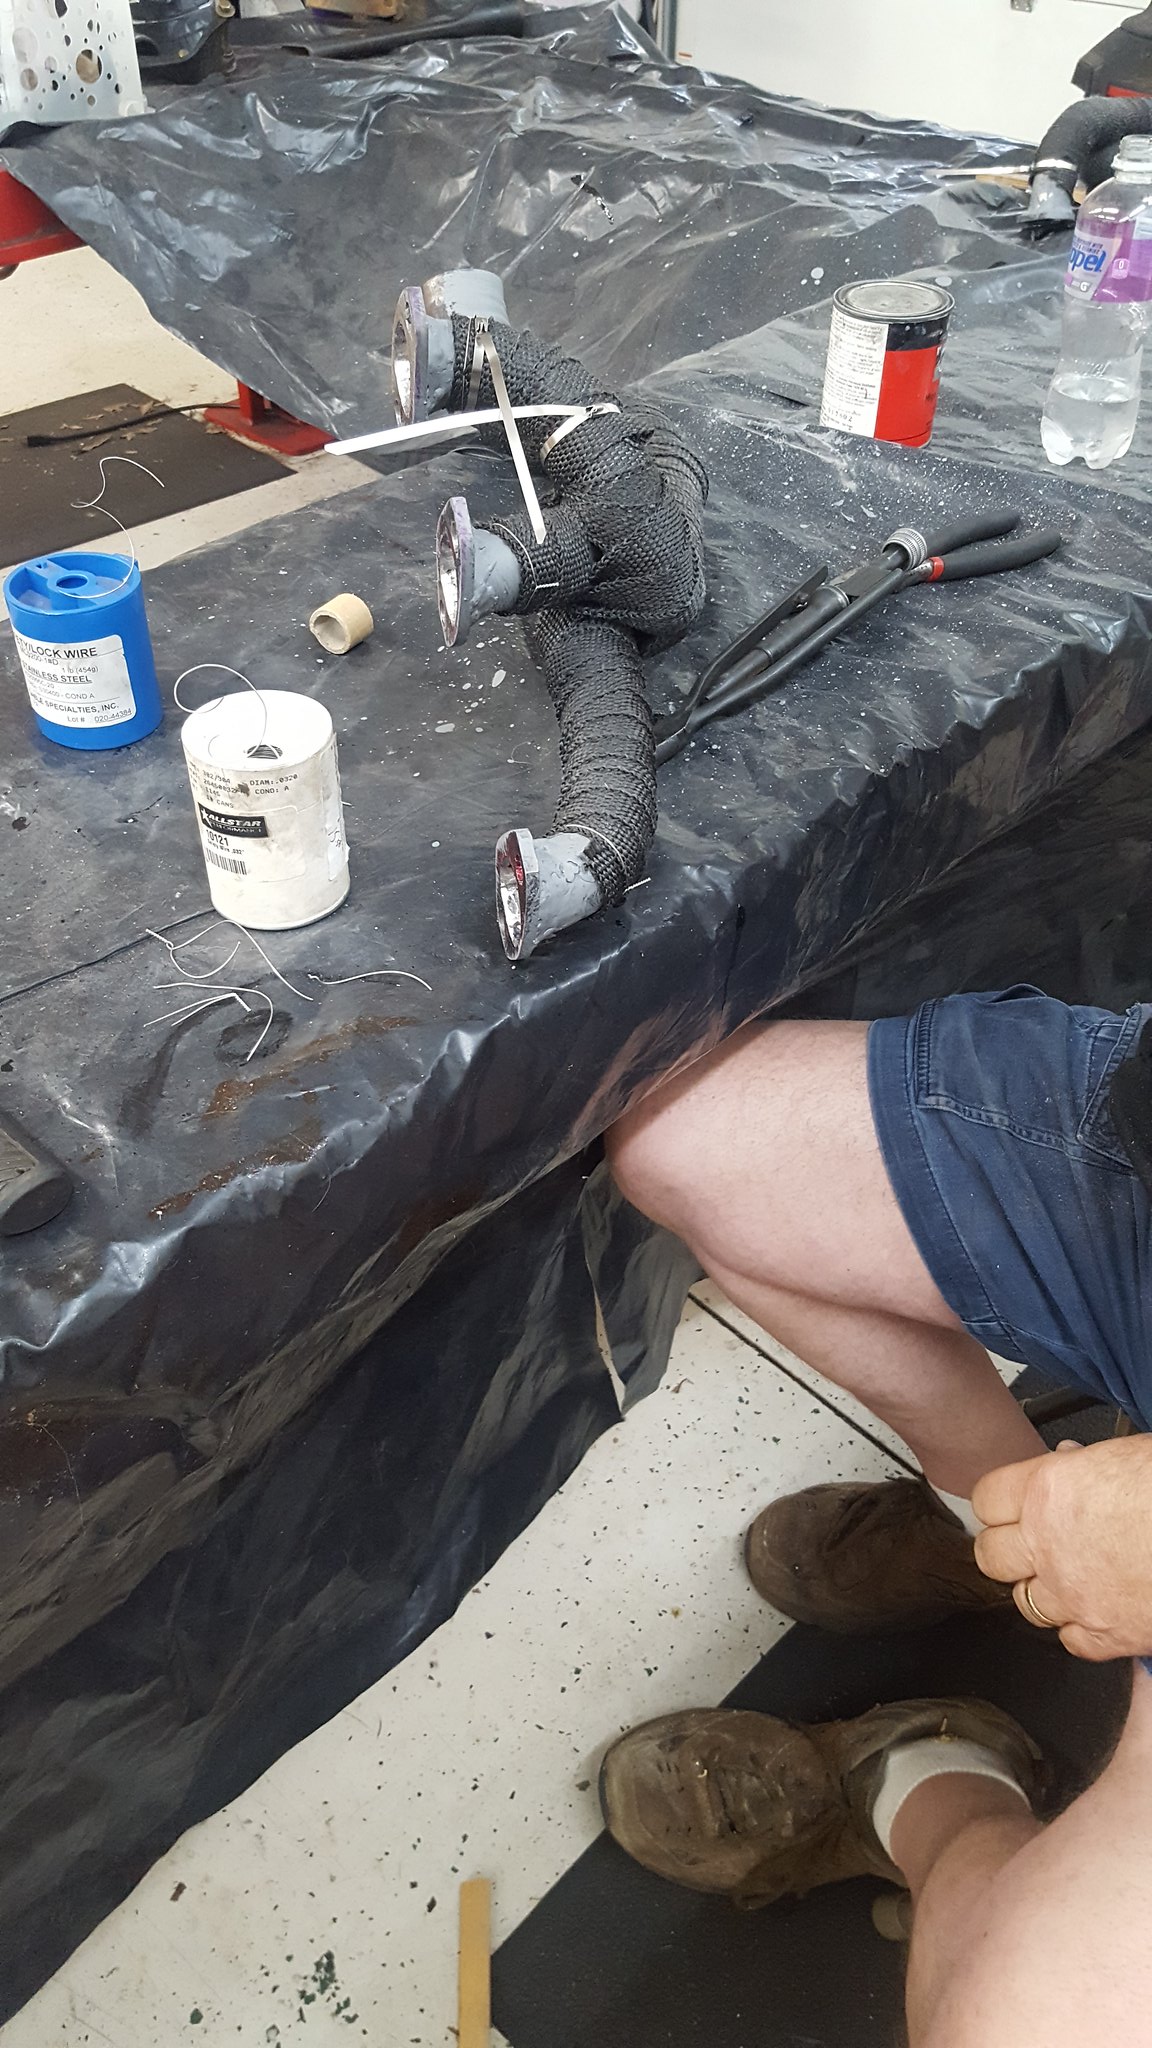
20180703_182229 by Michael Crawford, on FlickrI turned my flywheel on a brake lathe in preparation for putting a new clutch in. it was a hard decision, but I feel the right one. This may mean I forego turbo parts under challenge budget, but I would hate to end my race due to a failed worn out clutch. Much happier twisting an axle or breaking a trans or something.
20180702_165318 by Michael Crawford, on Flickrmy free, but put in the budget at FMV plug wires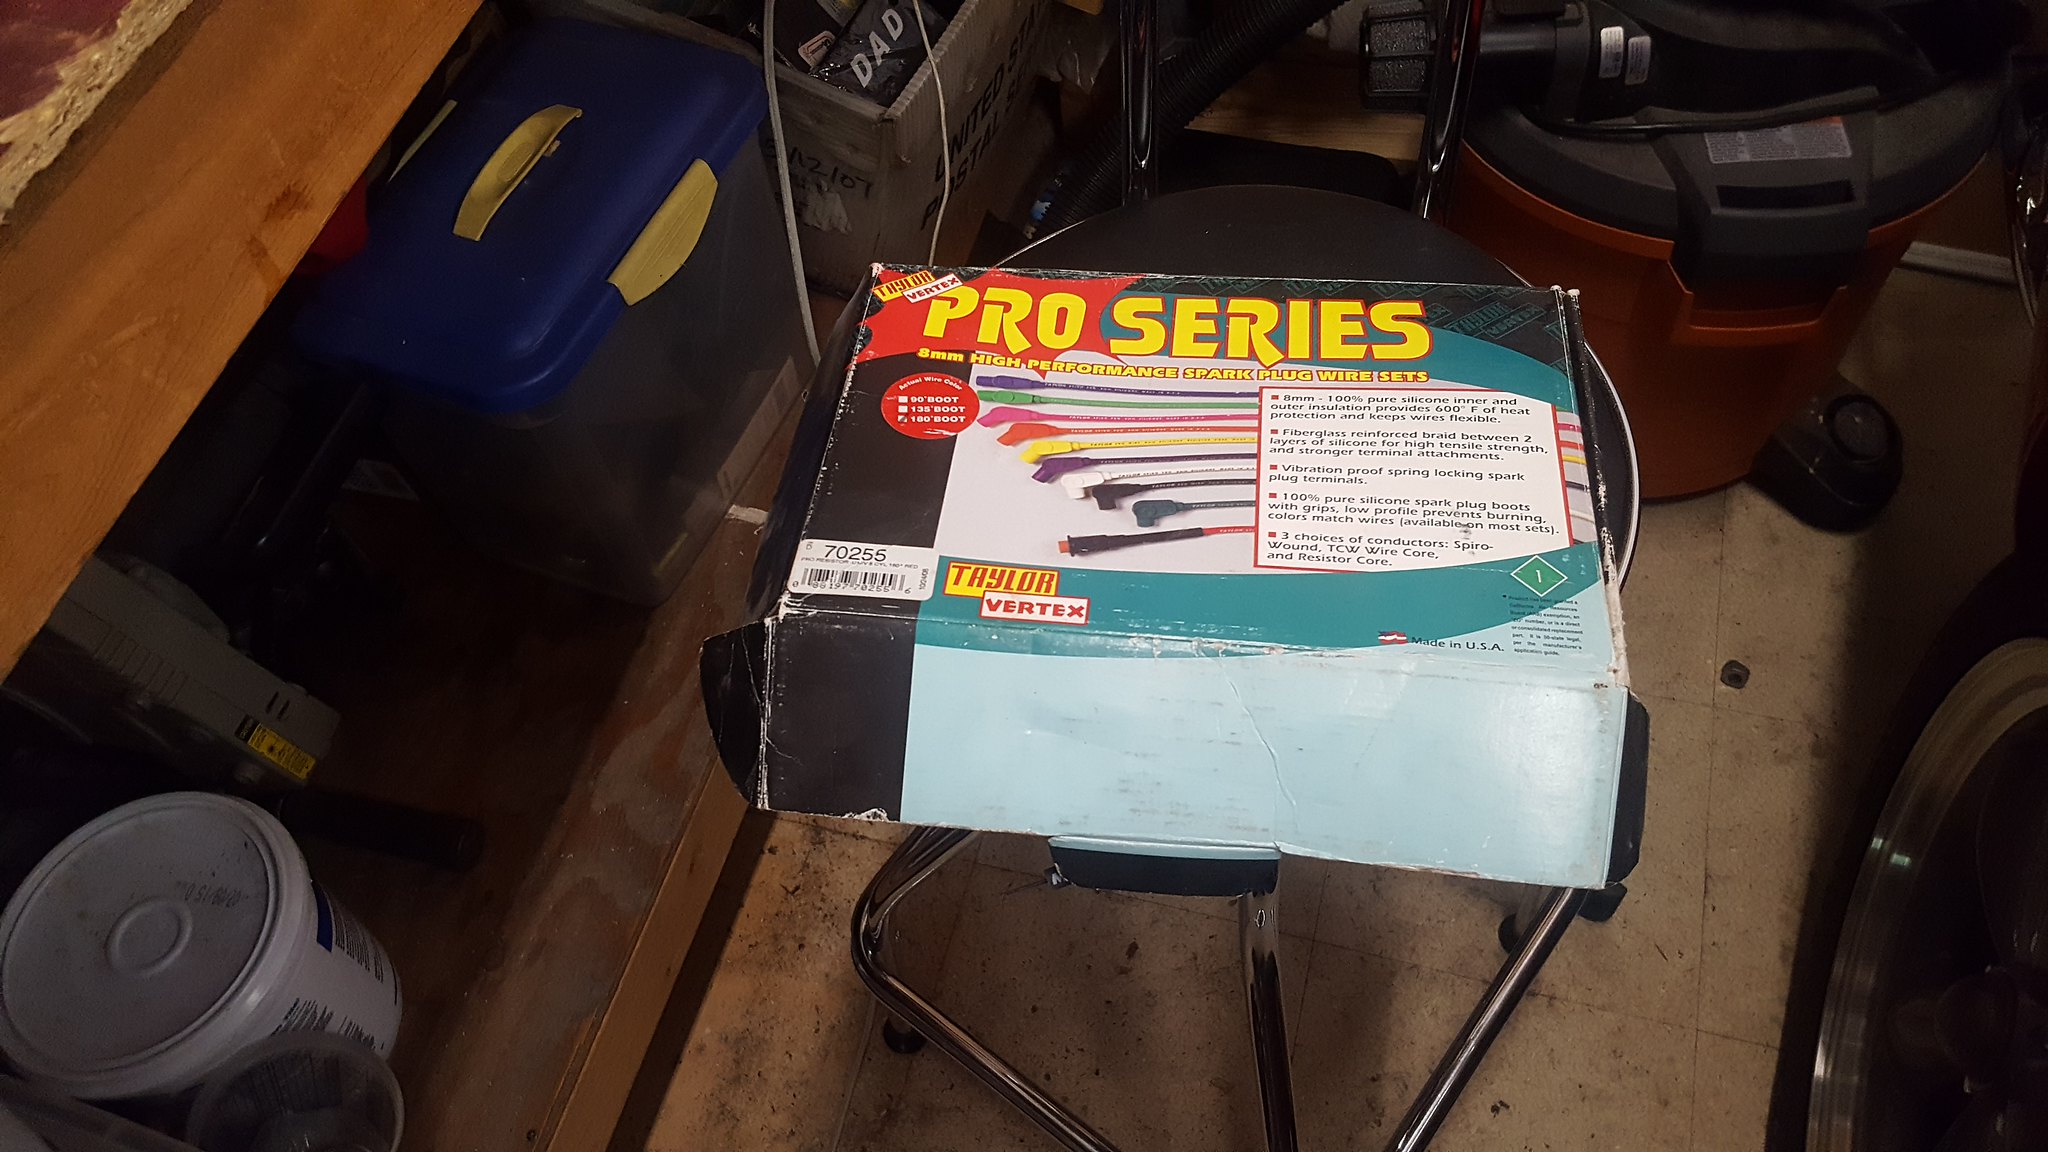
20180702_131327 by Michael Crawford, on Flickr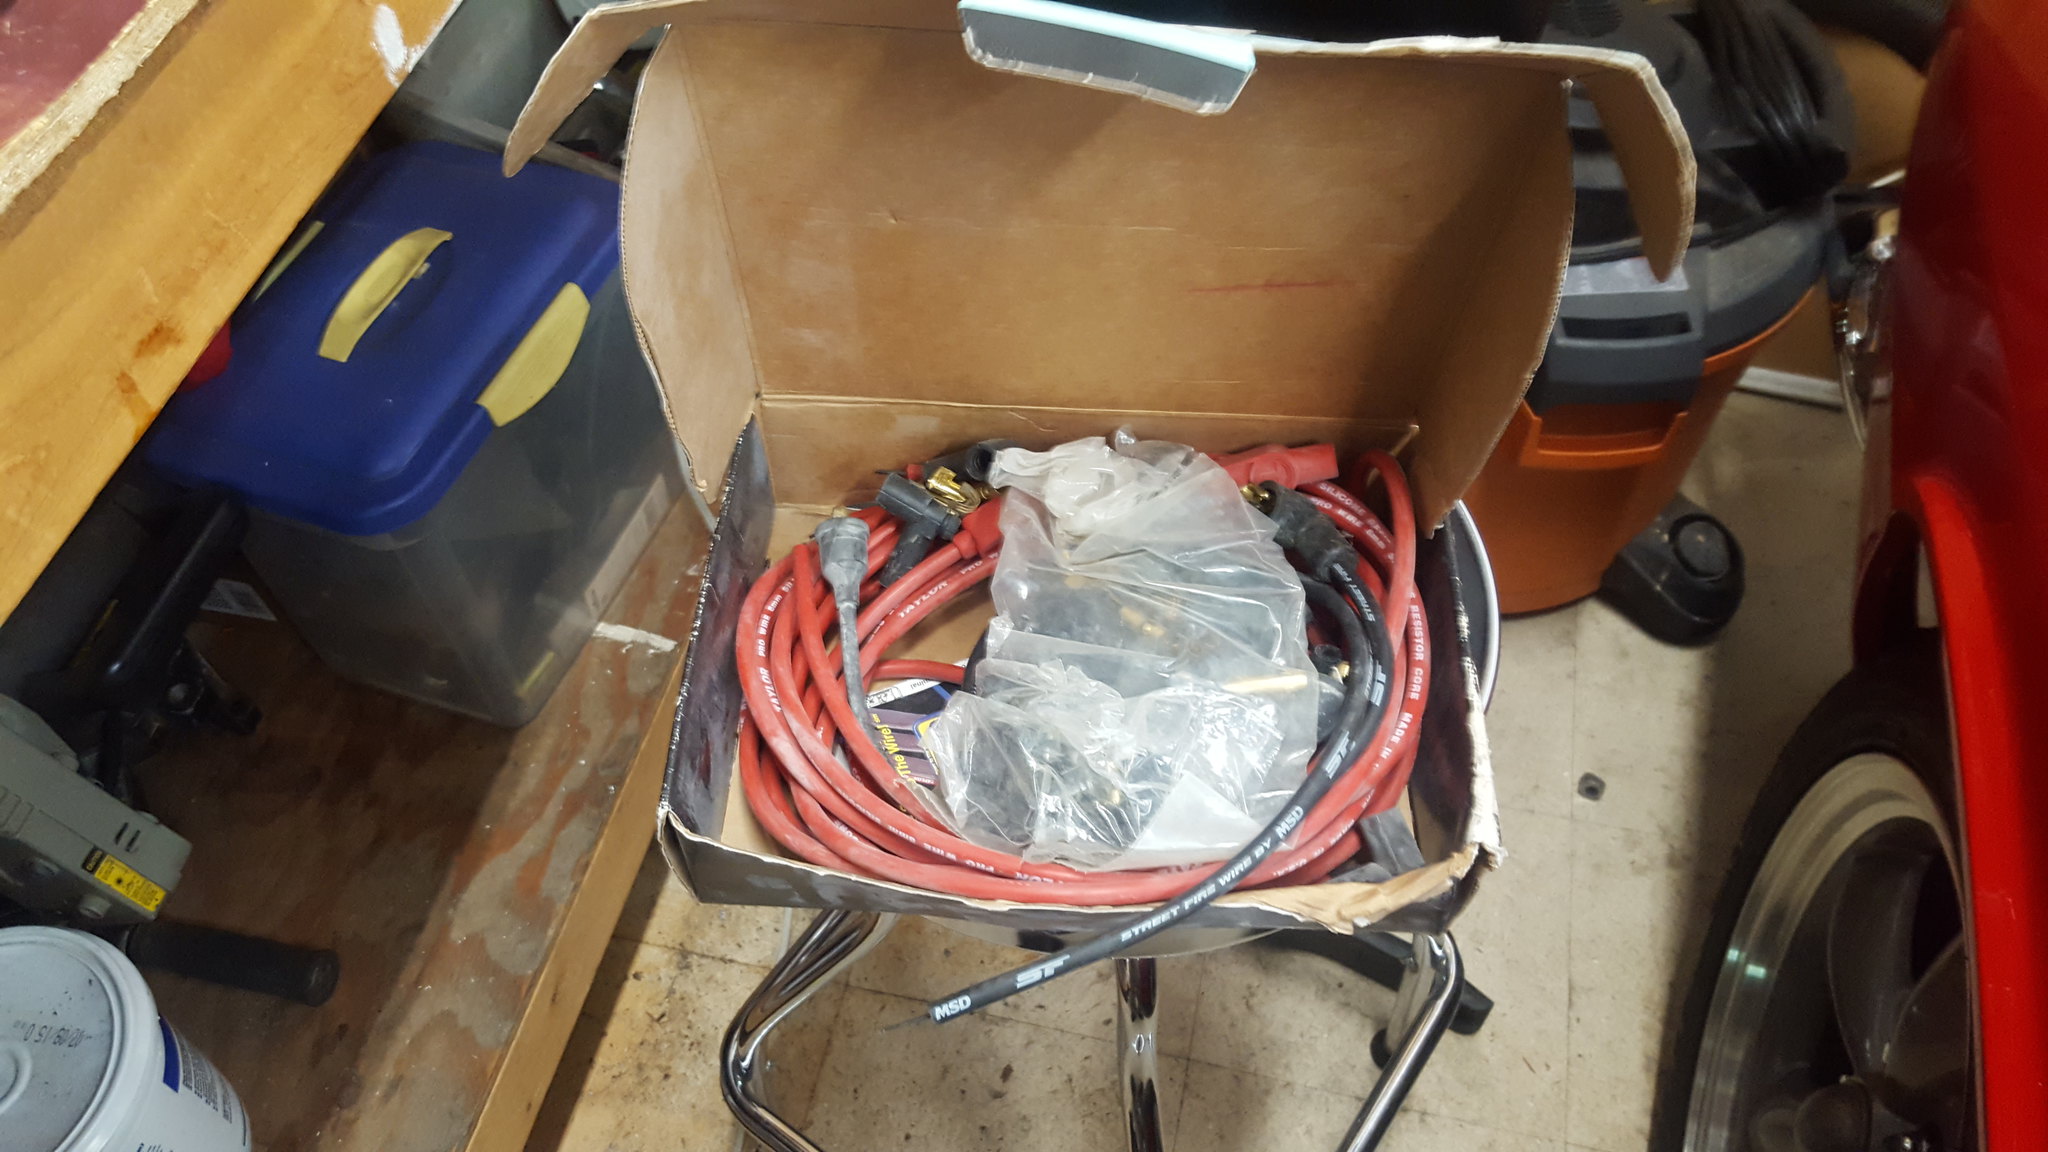
20180702_131323 by Michael Crawford, on FlickrI got everything assembled on the stand except the upper intake, and started prepping the engine harness.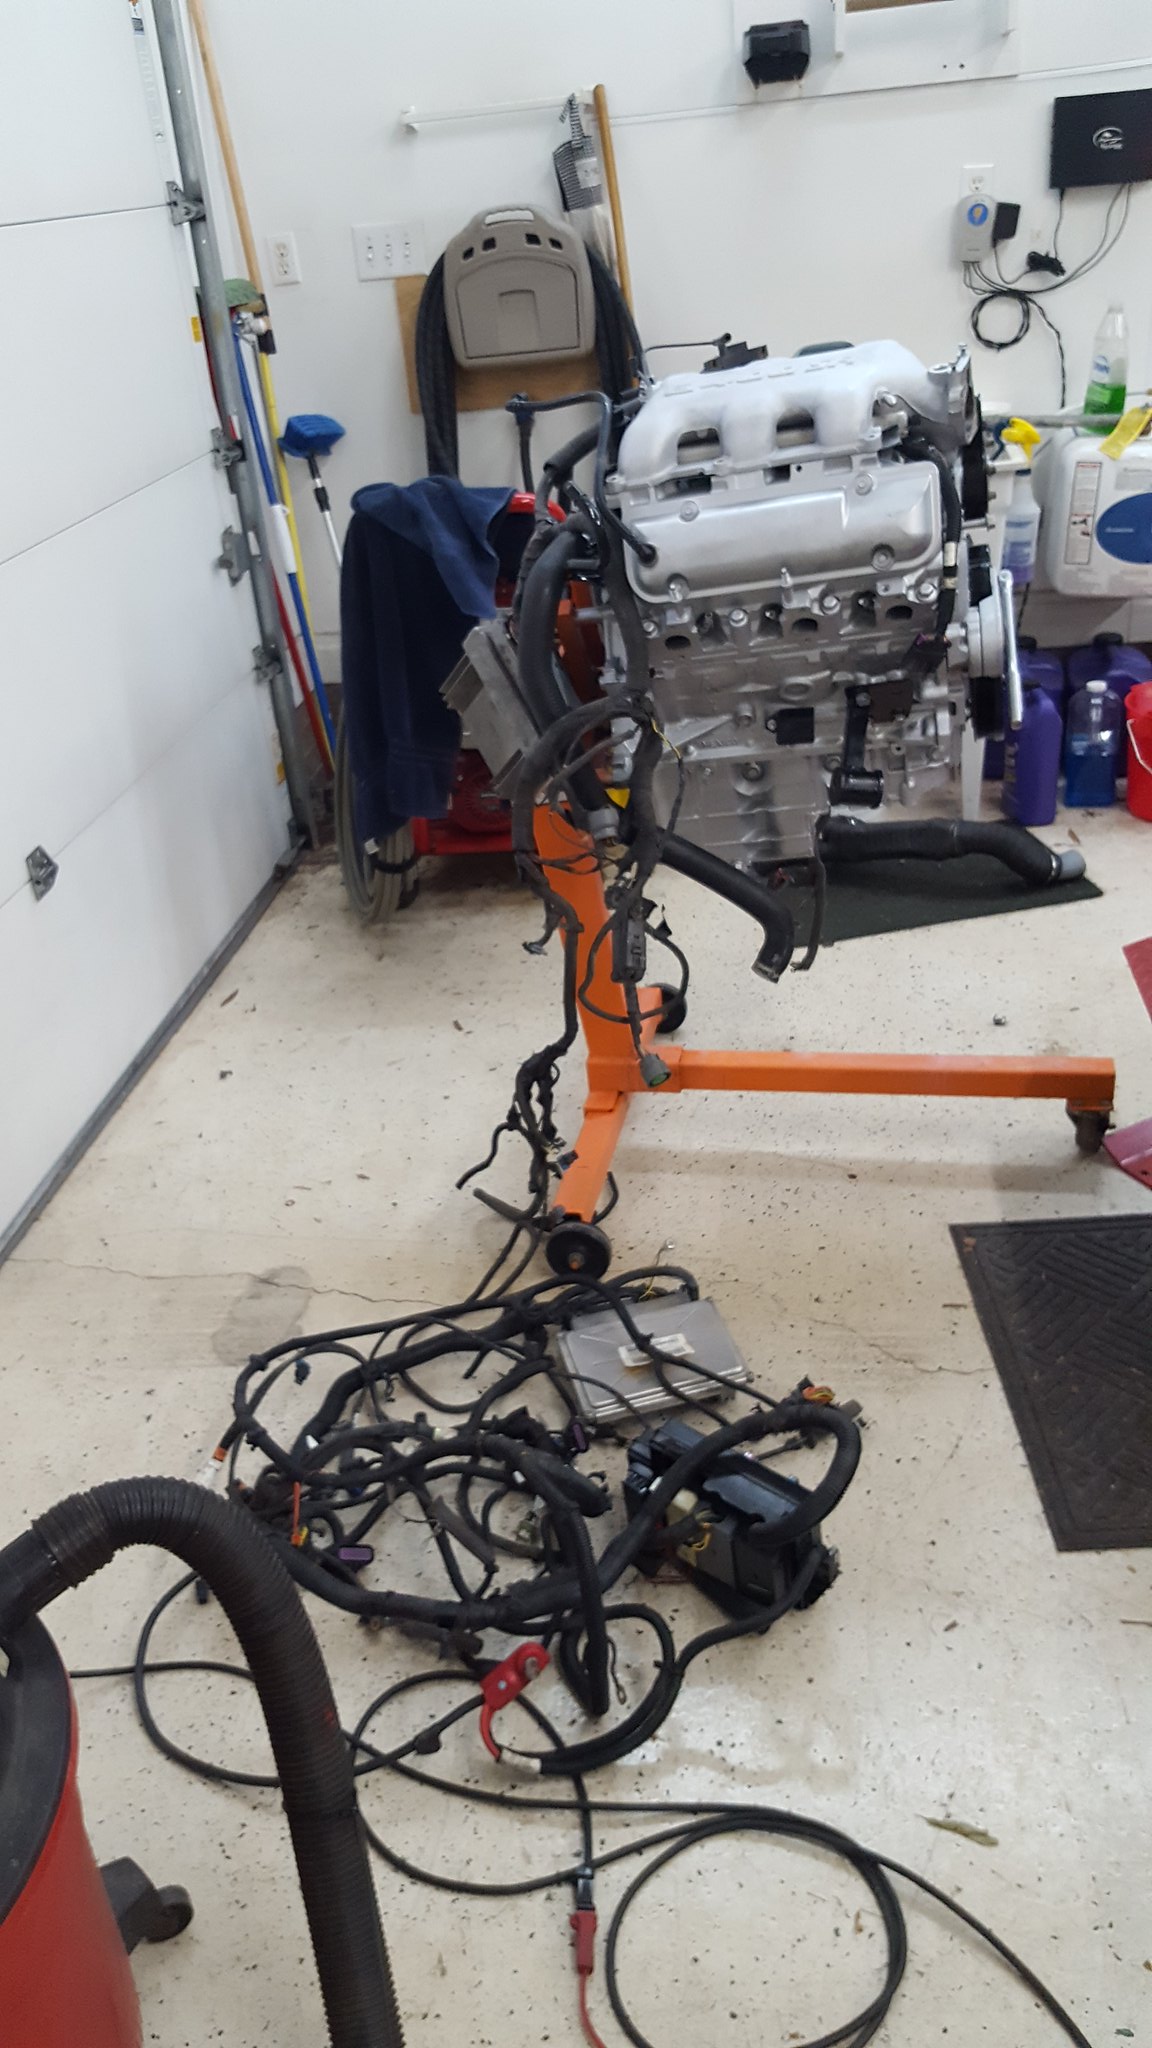
20180706_170509 by Michael Crawford, on Flickr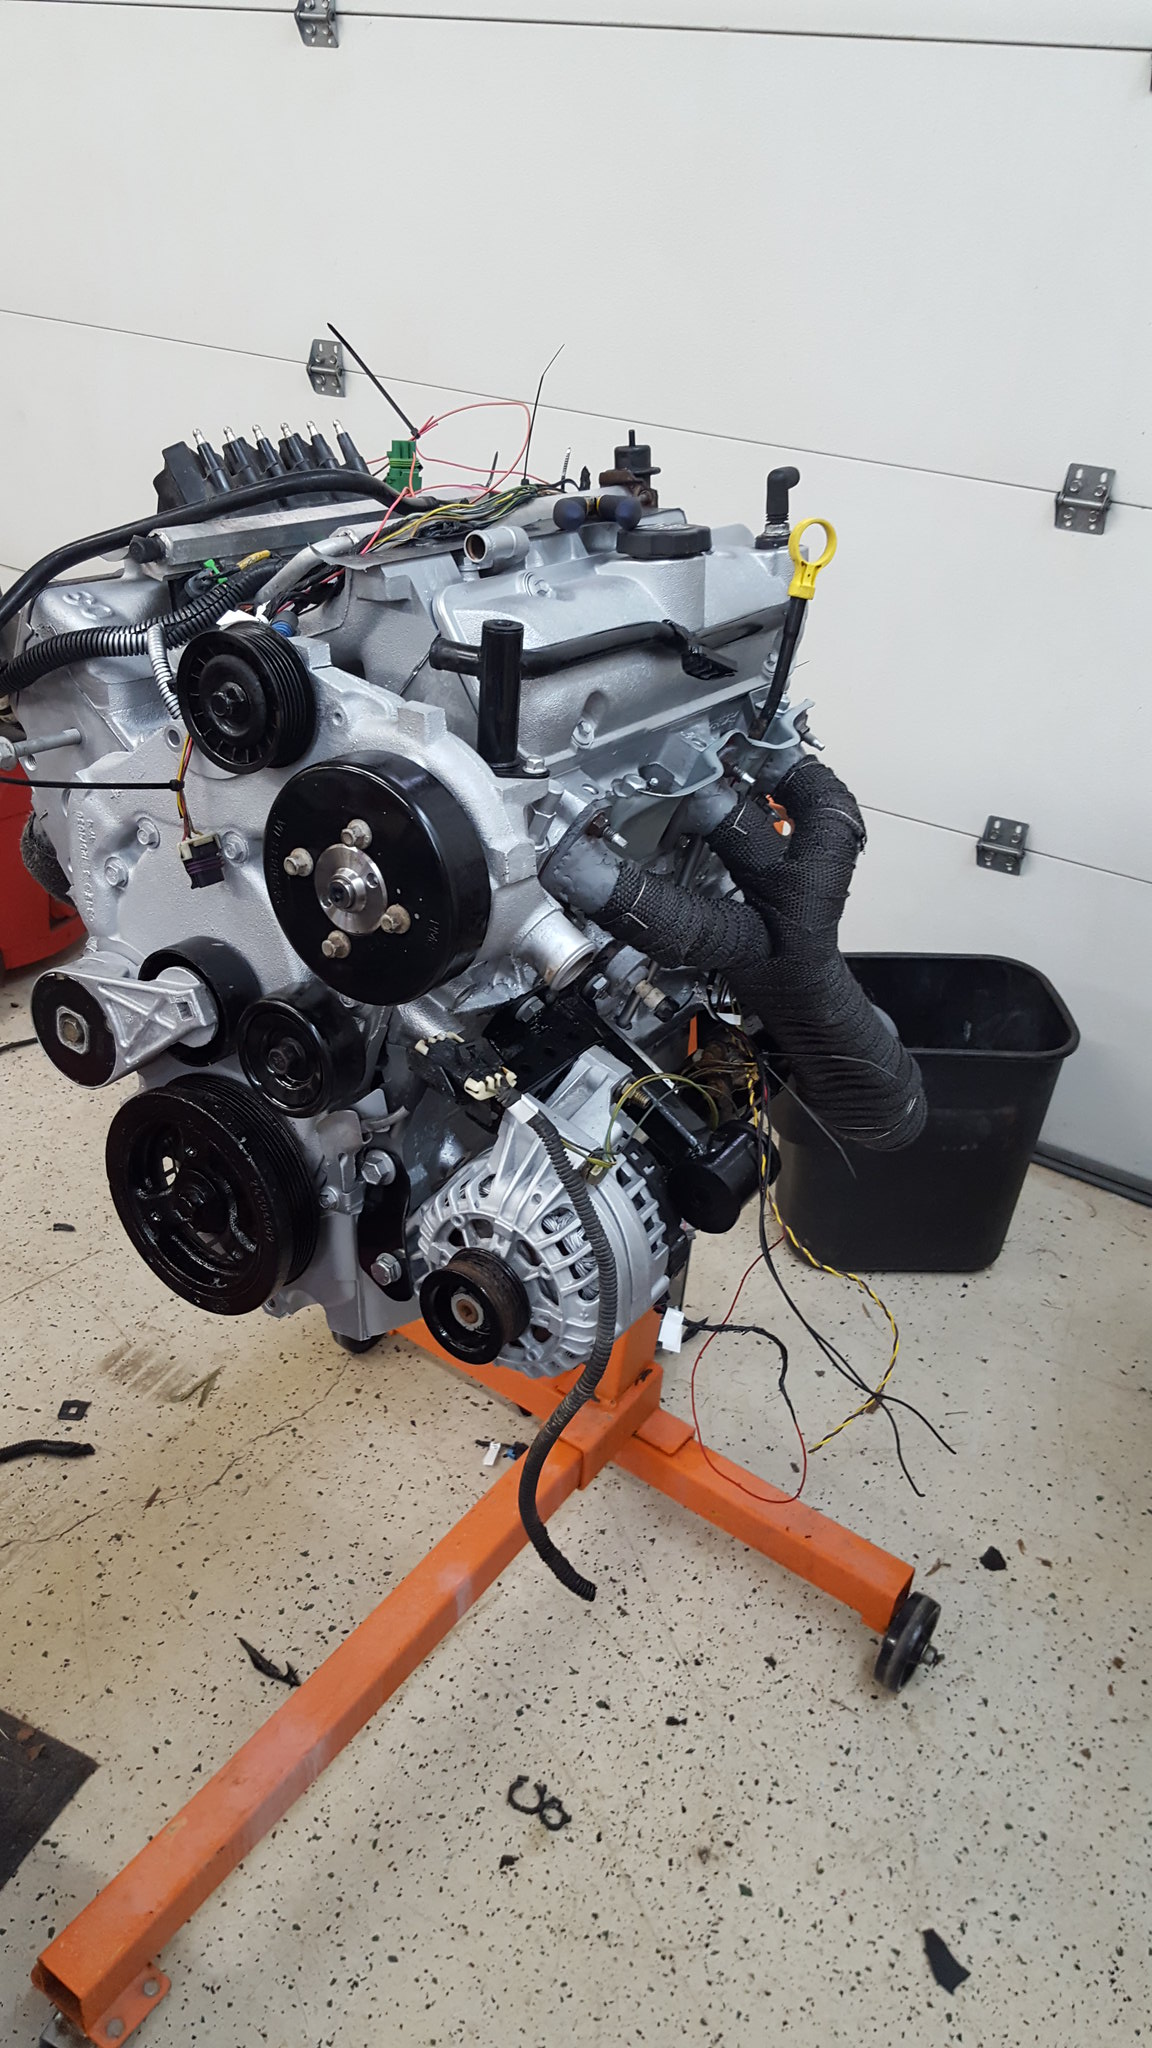
20180706_193250 by Michael Crawford, on Flickr then got it mated to the k frame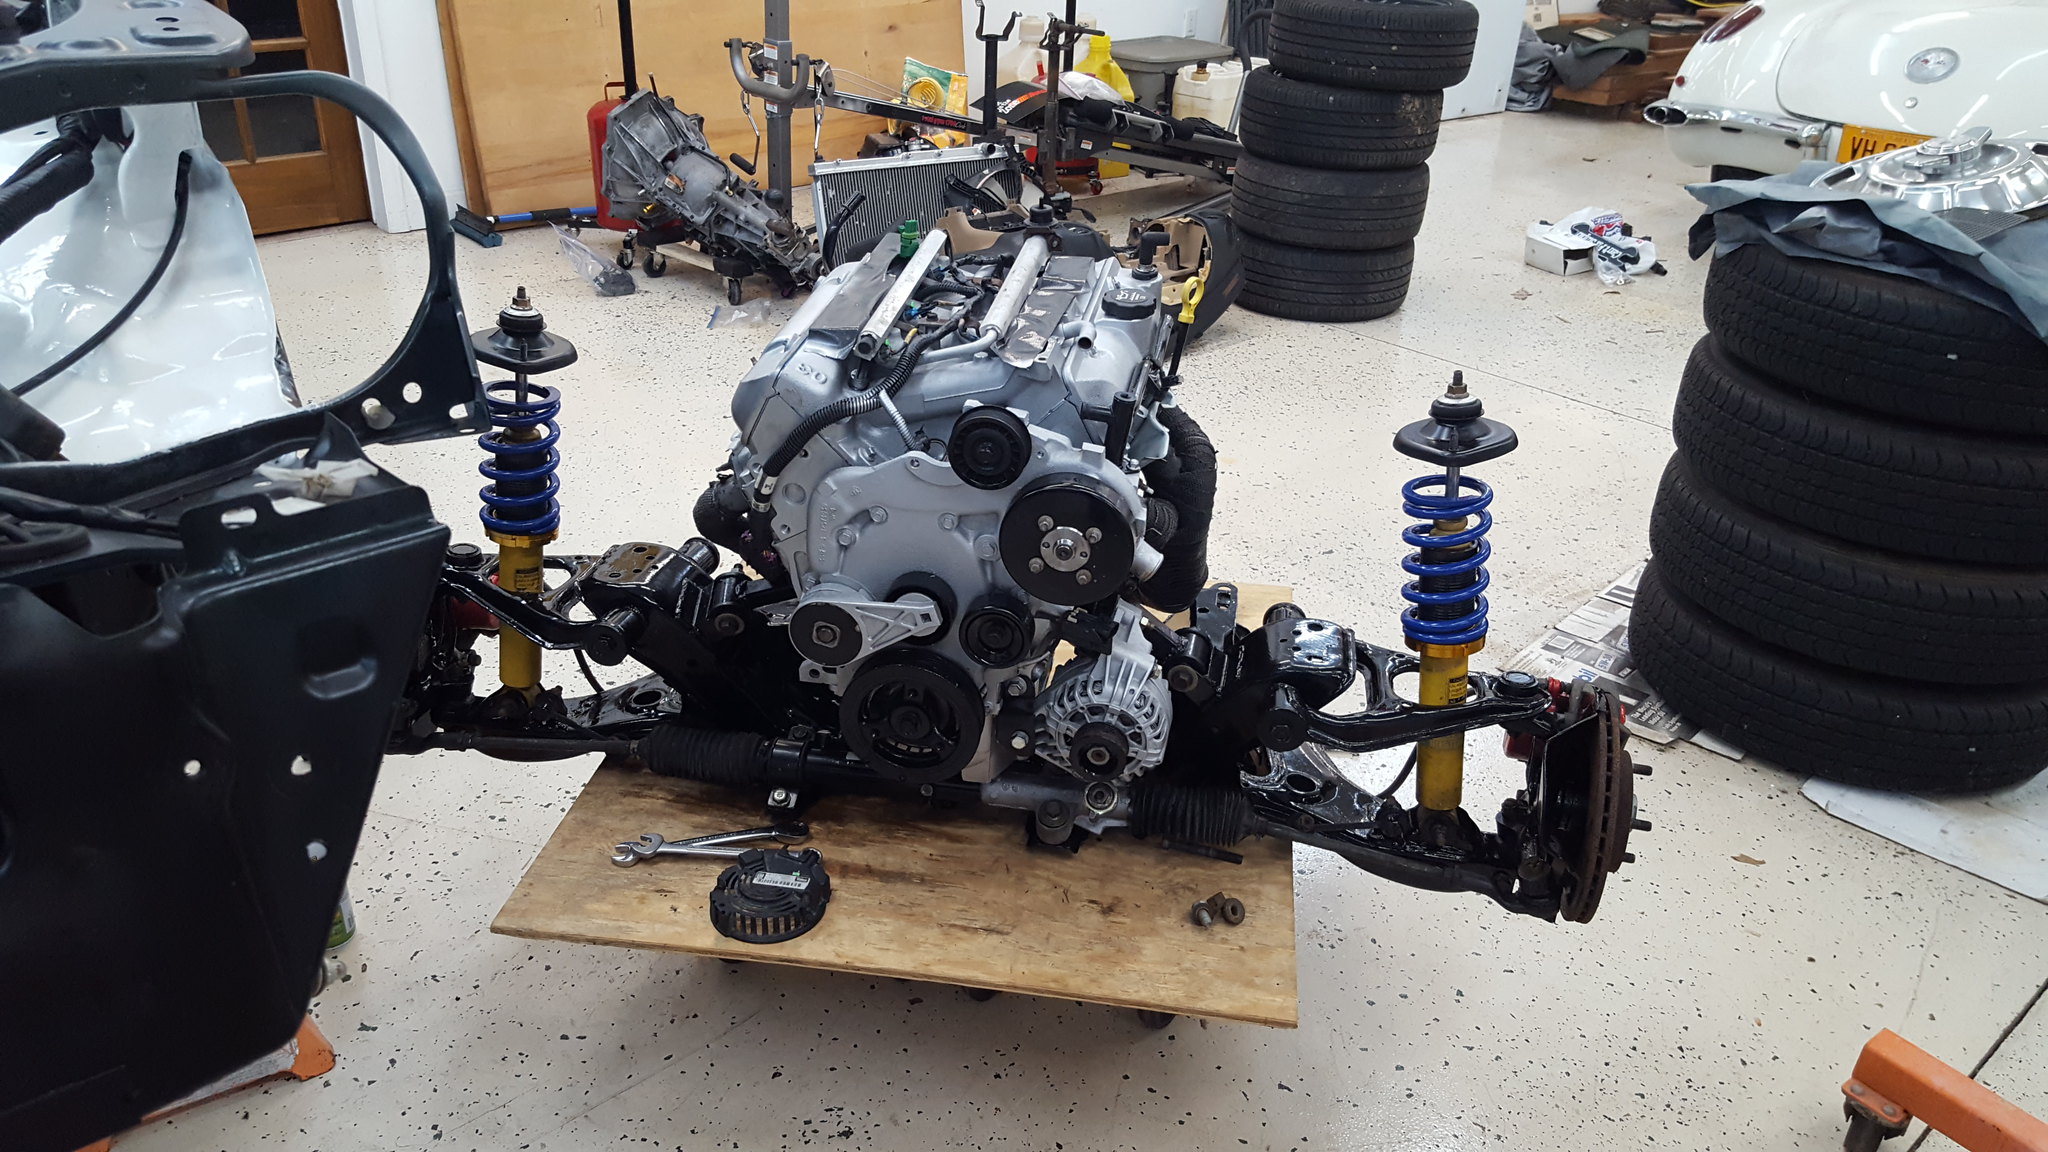
20180707_113131 by Michael Crawford, on Flickr and run home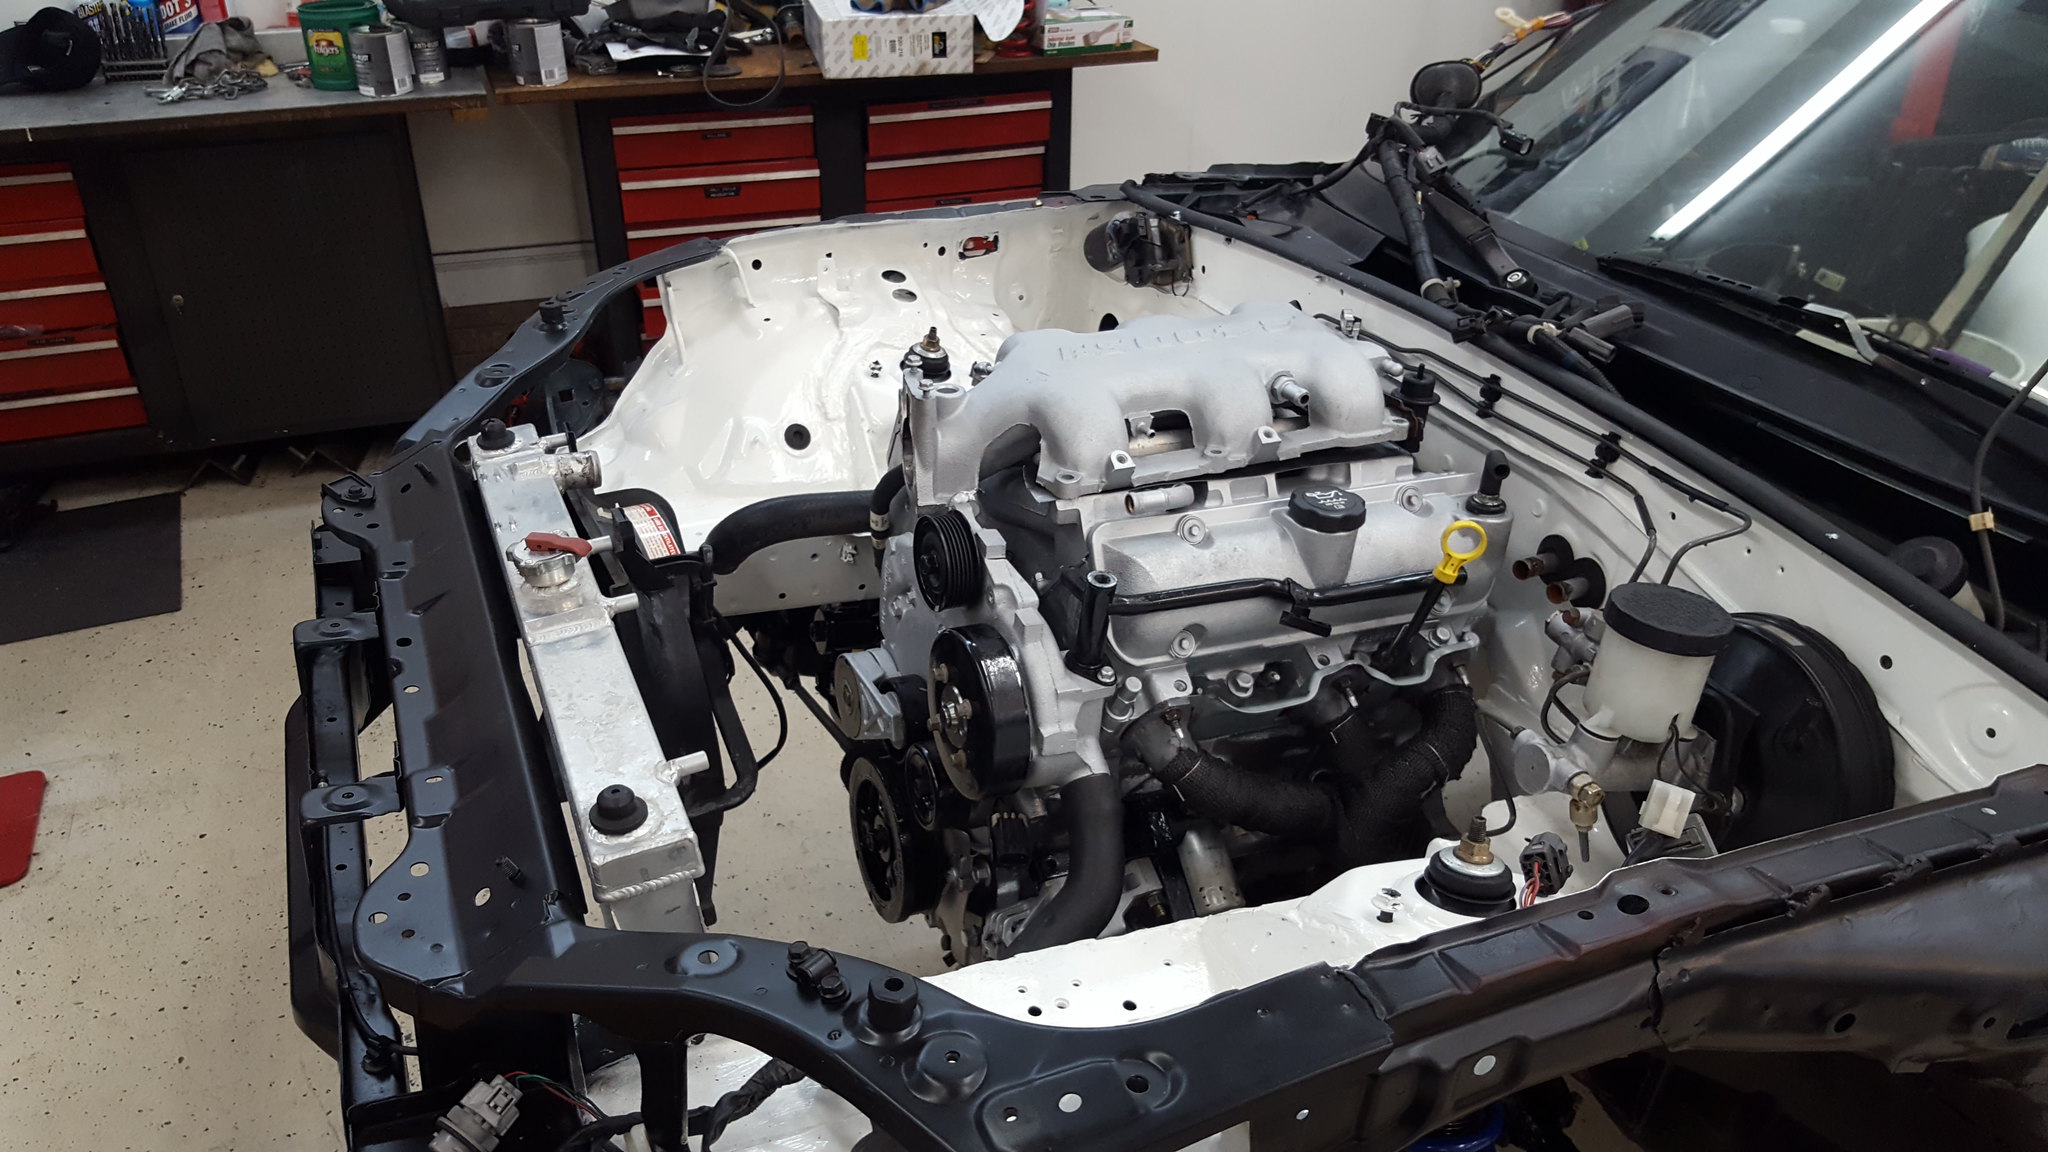
20180707_121624 by Michael Crawford, on Flickrmy joy stopped there. Apparently when welding the k frame, I warped the crap out of it. The rear 4 bolts didn't come close to fitting. So I quit for the night.
20180707_140651 by Michael Crawford, on FlickrToday I tackled it again. Using some creative jack placement, a scissors jack, some ingenuity and leverage, we spread the ears of the k frame that were warped. Its all bolted down. All the coilovers are found to be bottomed out at the moment (on the bumpstops). But by god, its on all 4!!!!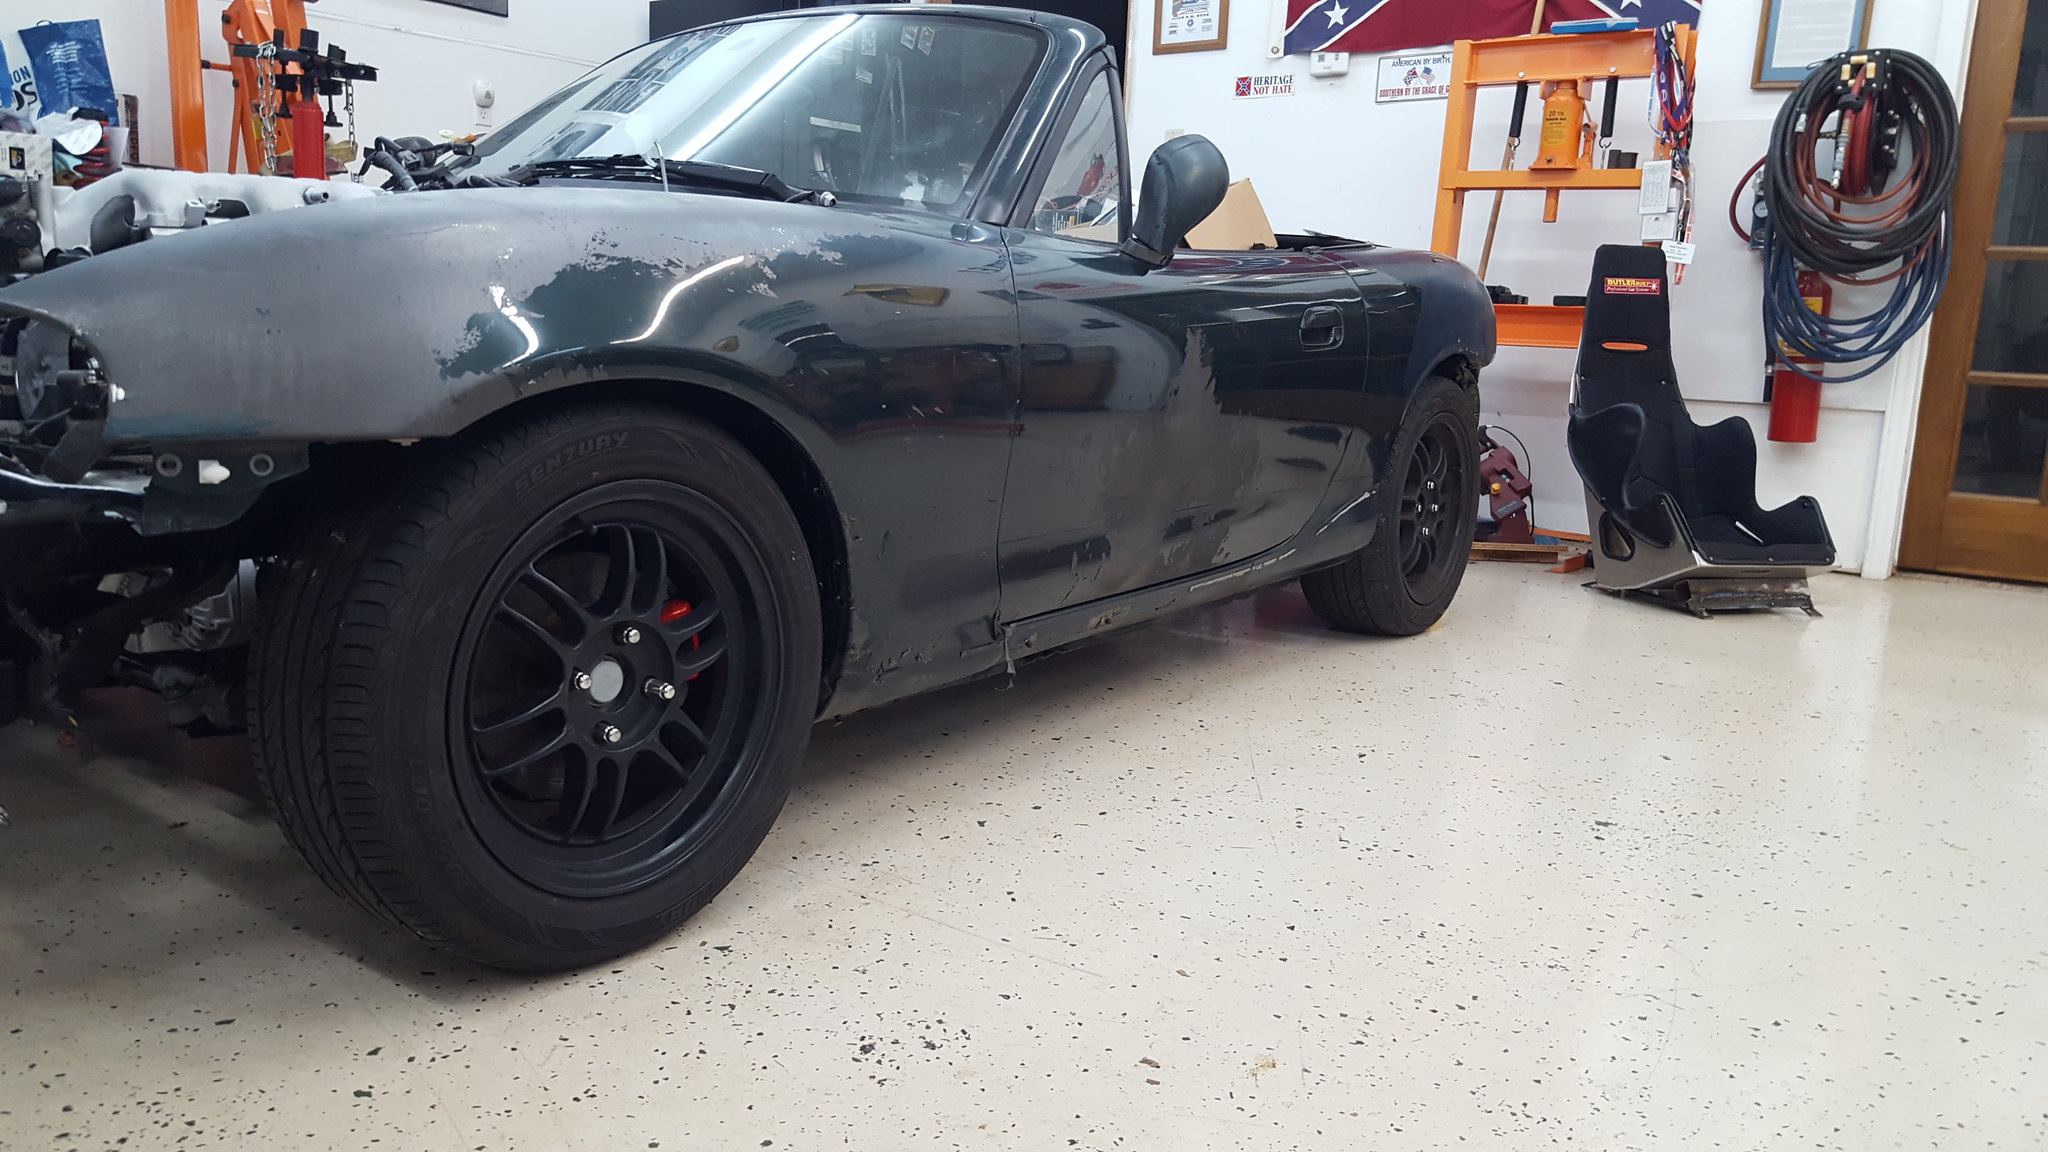
20180707_141856 by Michael Crawford, on Flickr
20180708_082055 by Michael Crawford, on FlickrI went ahead and started laying out the chassis side wiring. Near as I can tell, the chassis is just about standalone ready from the factory in 99. everything will work without the ECU except possibly some gauges and indicators (which I don't have anymore!). I will need to extend the starter and alternator charge wires to reach their new locations, and then find some convenient switched is start and run circuits for the GM engine. Not a whole lot of overlap of GM and Mazda as far as wiring goes, at least as far as I can tell at the moment.The biggest change to the harness is the battery leads and rear wiring. Factory they ran down the trans tunnel on the torque arm. Since that doesn't exist anymore, I ran it through the AC evaporator line hole, under the dash, down the passengers side rocker, and into the trunk.
20180708_090315 by Michael Crawford, on Flickr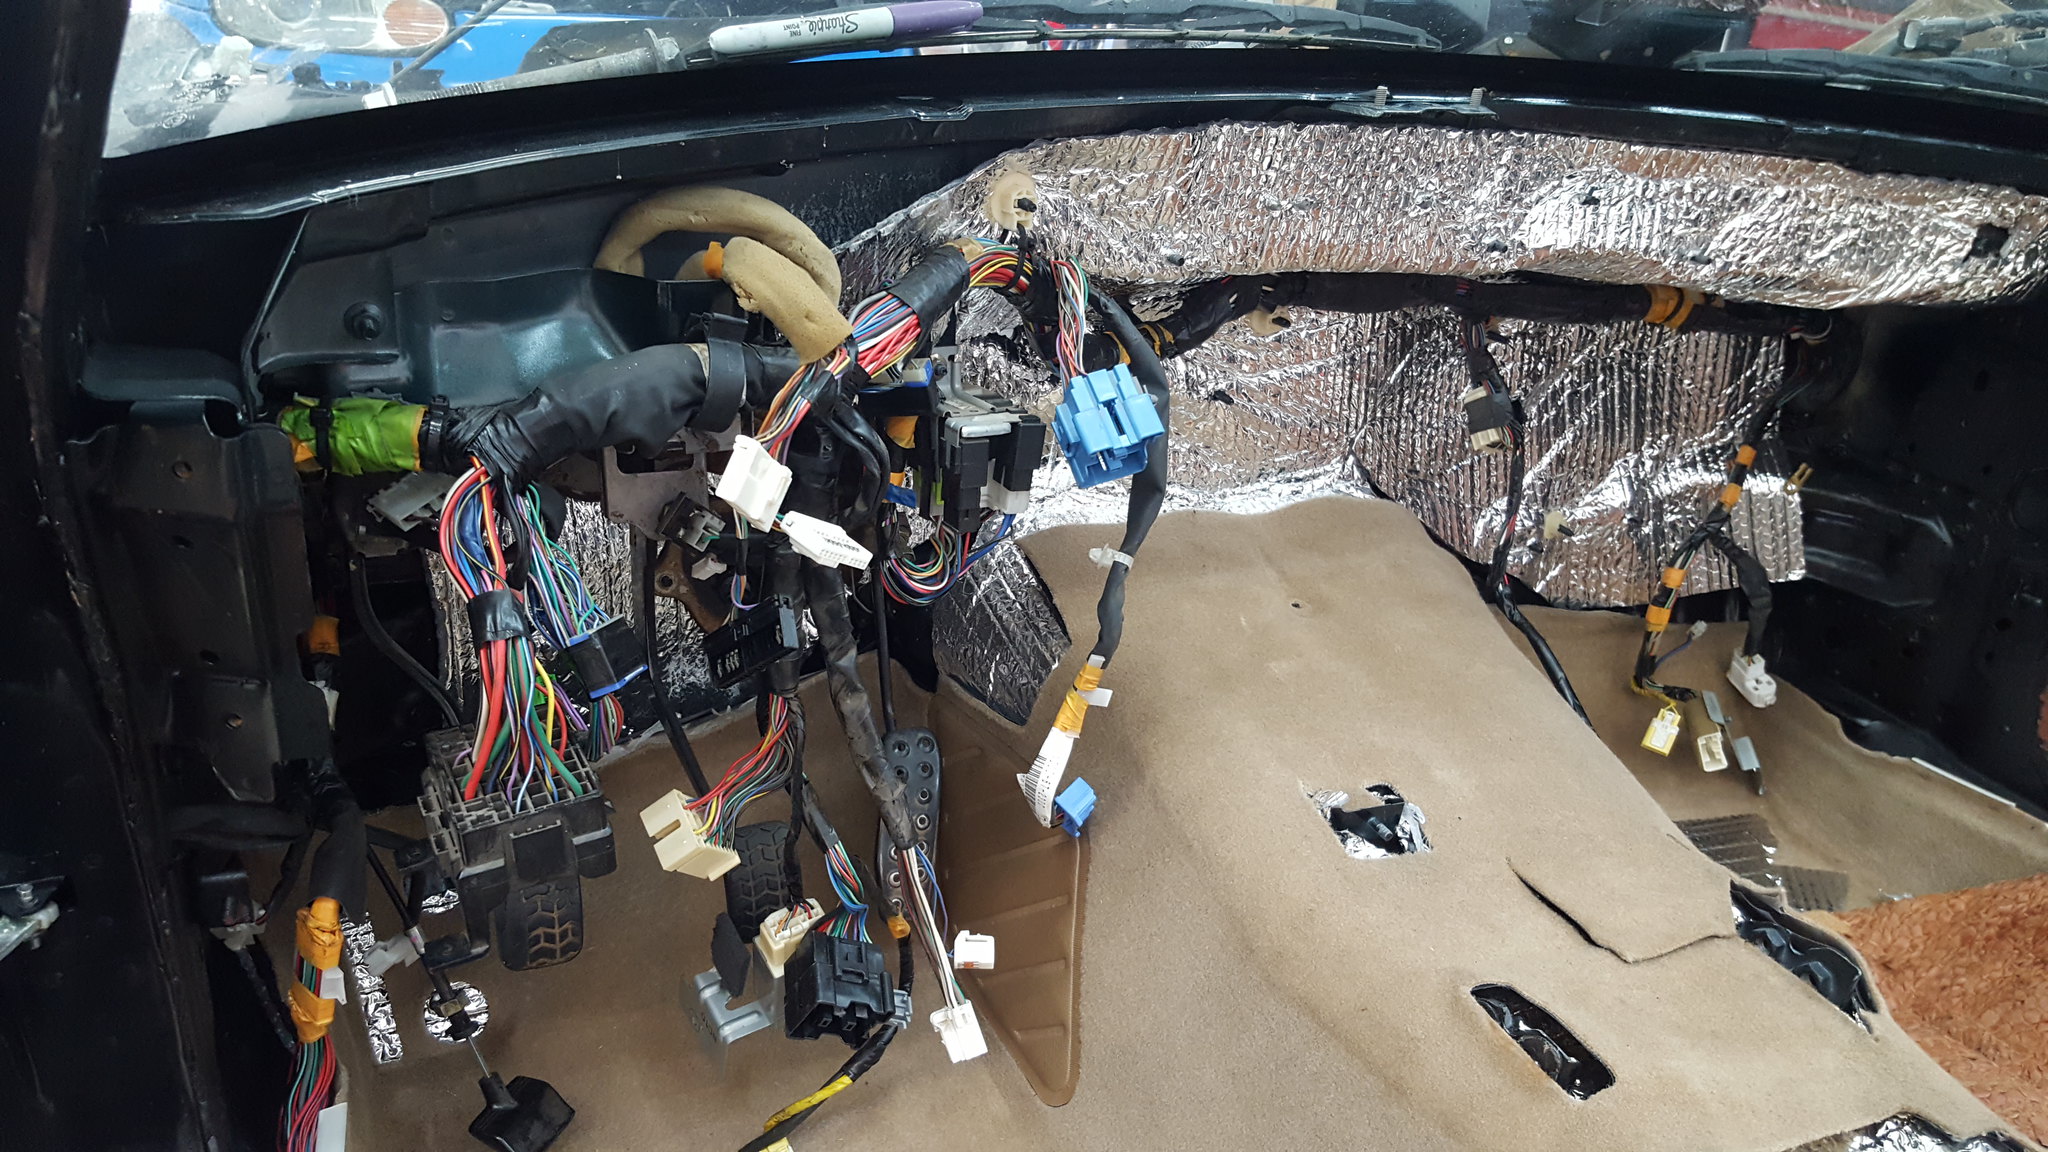
20180708_095331 by Michael Crawford, on Flickr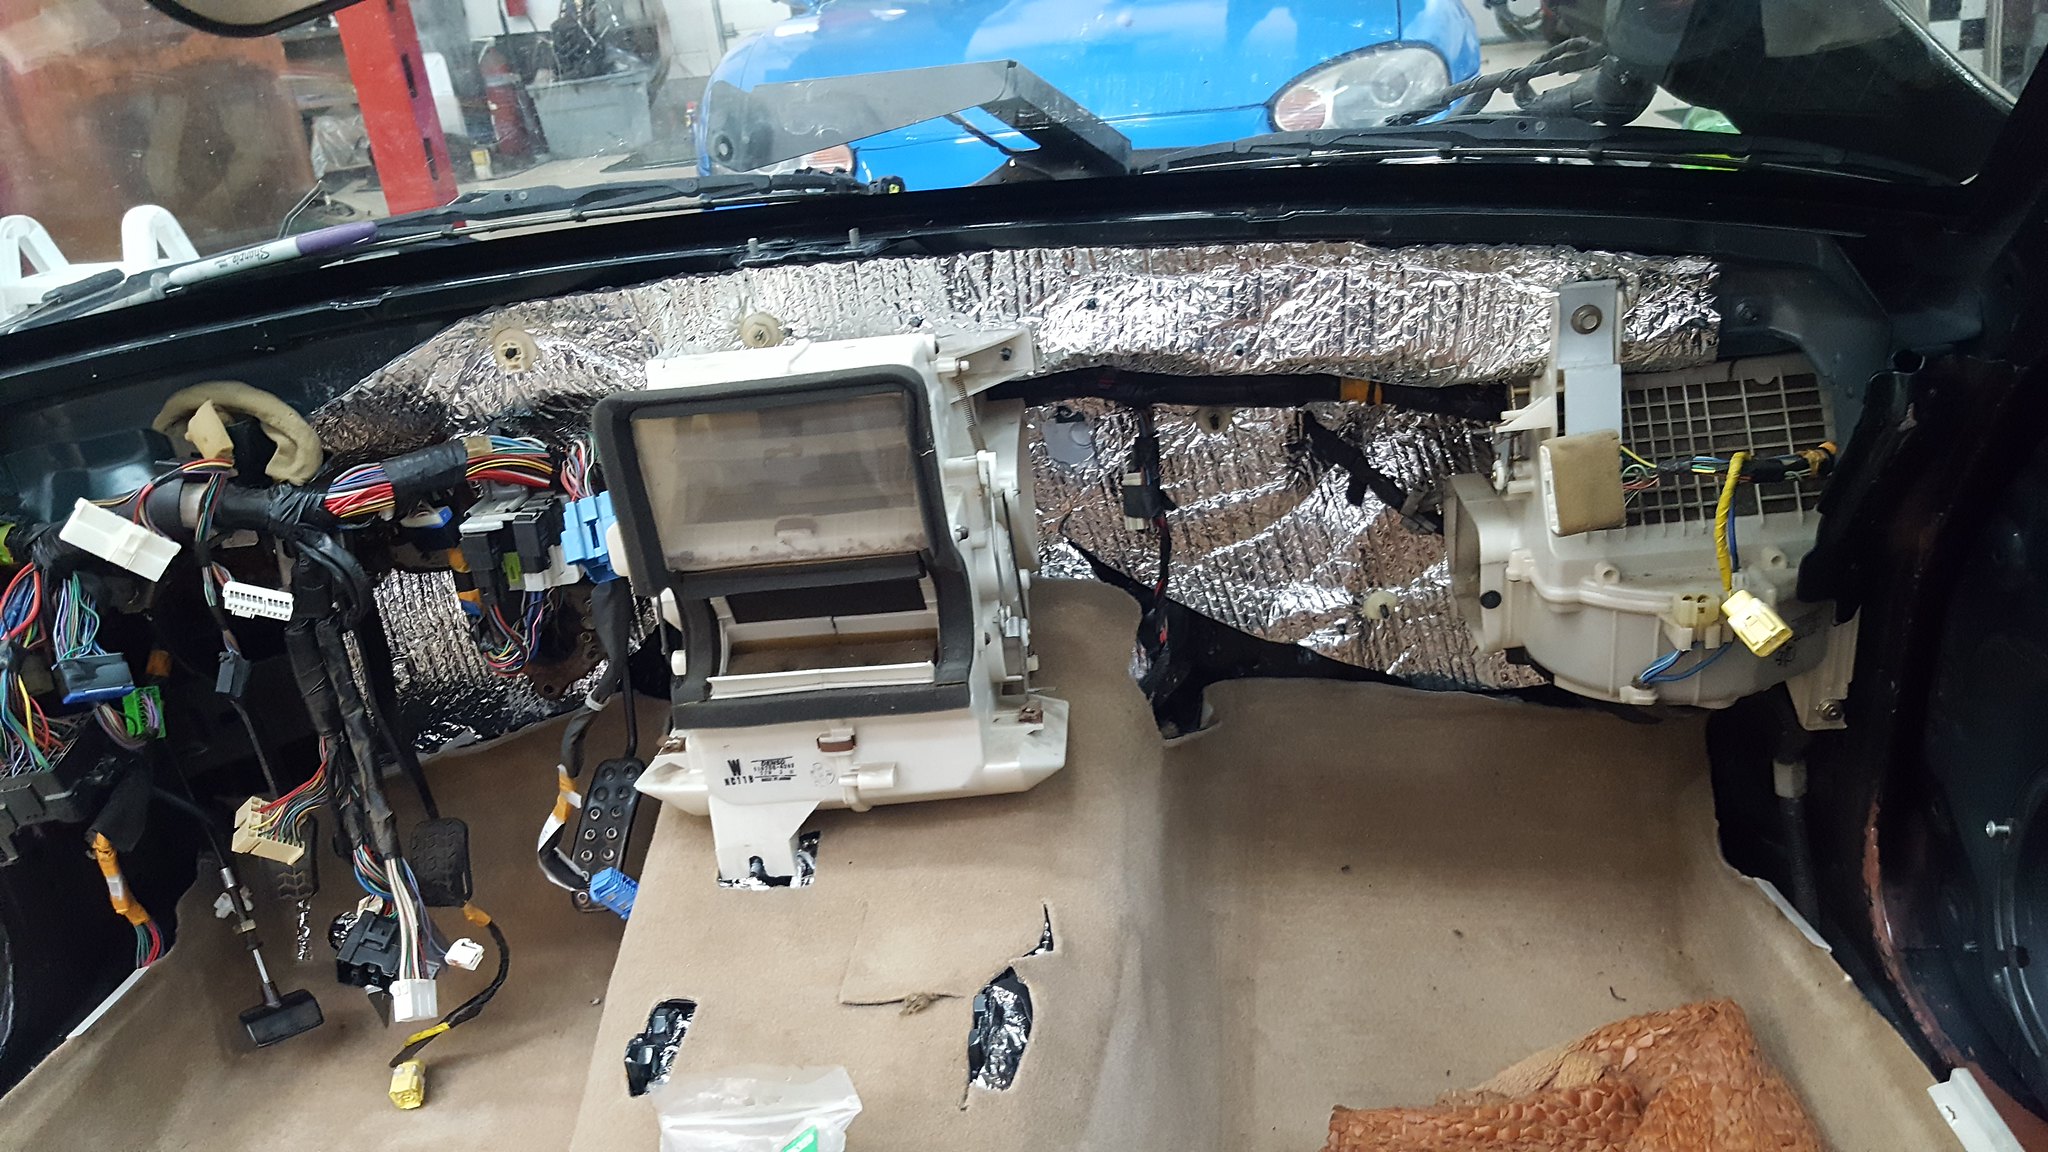
20180708_113712 by Michael Crawford, on Flickr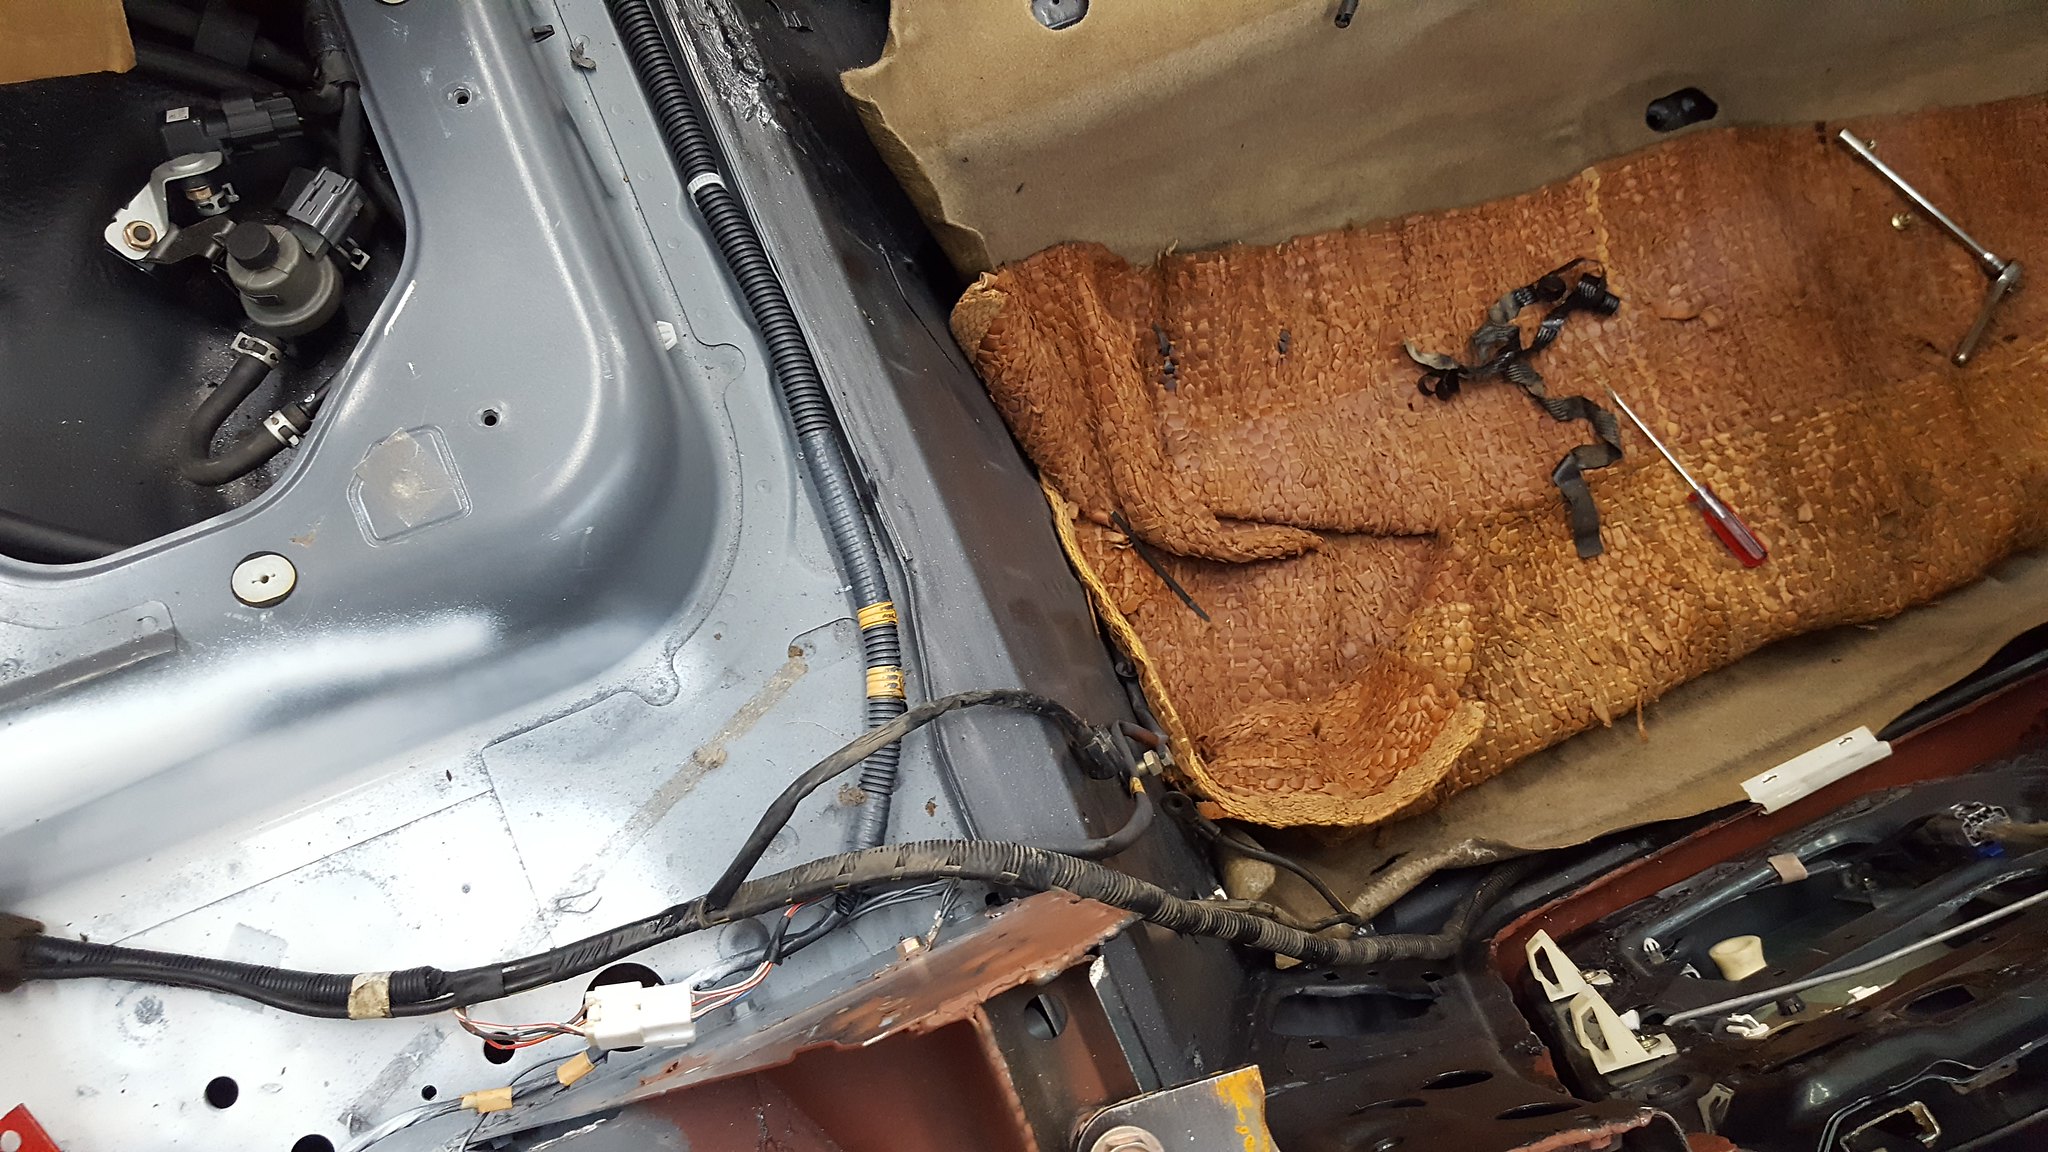
20180708_113715 by Michael Crawford, on Flickr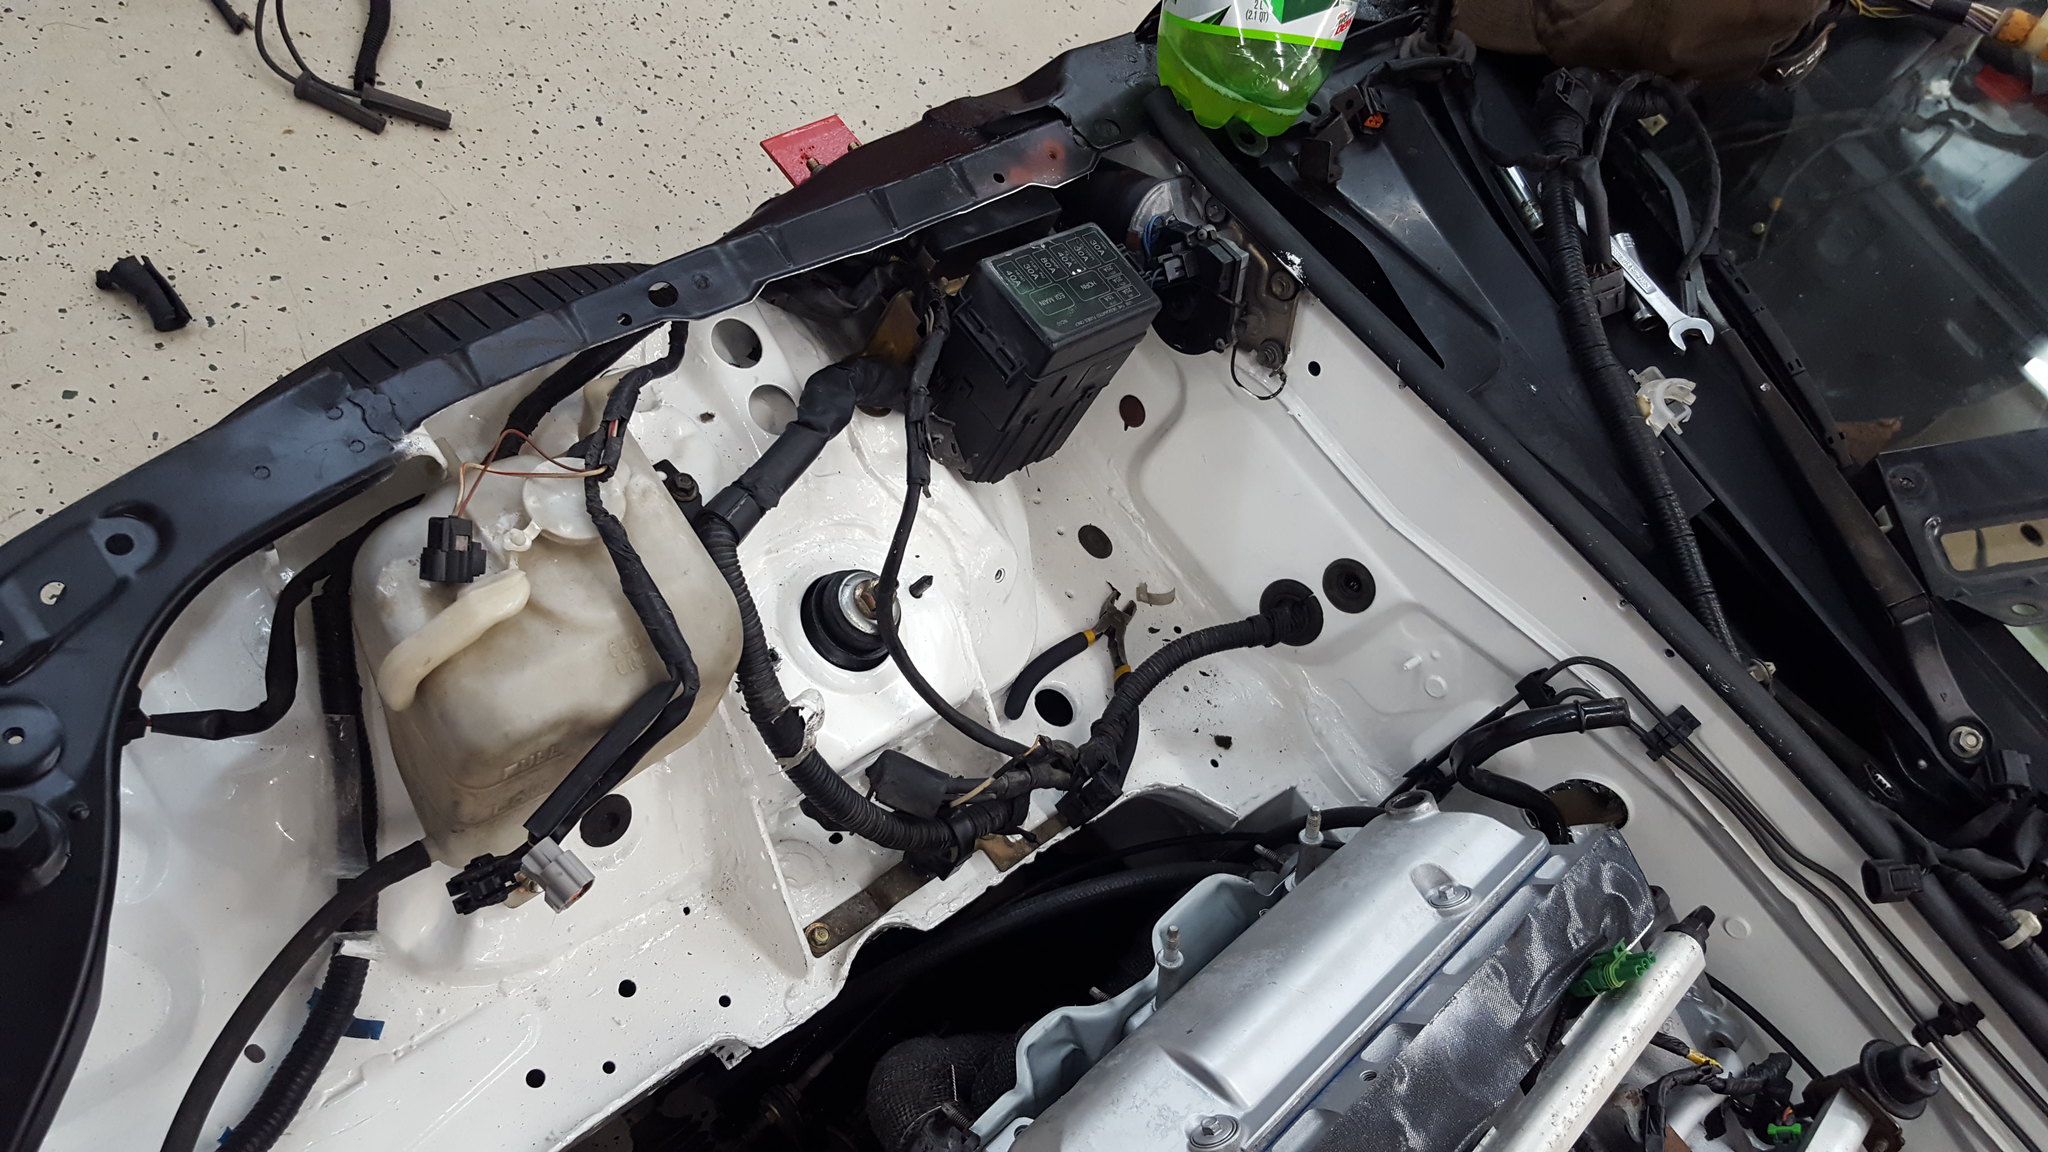
20180708_113736 by Michael Crawford, on Flickr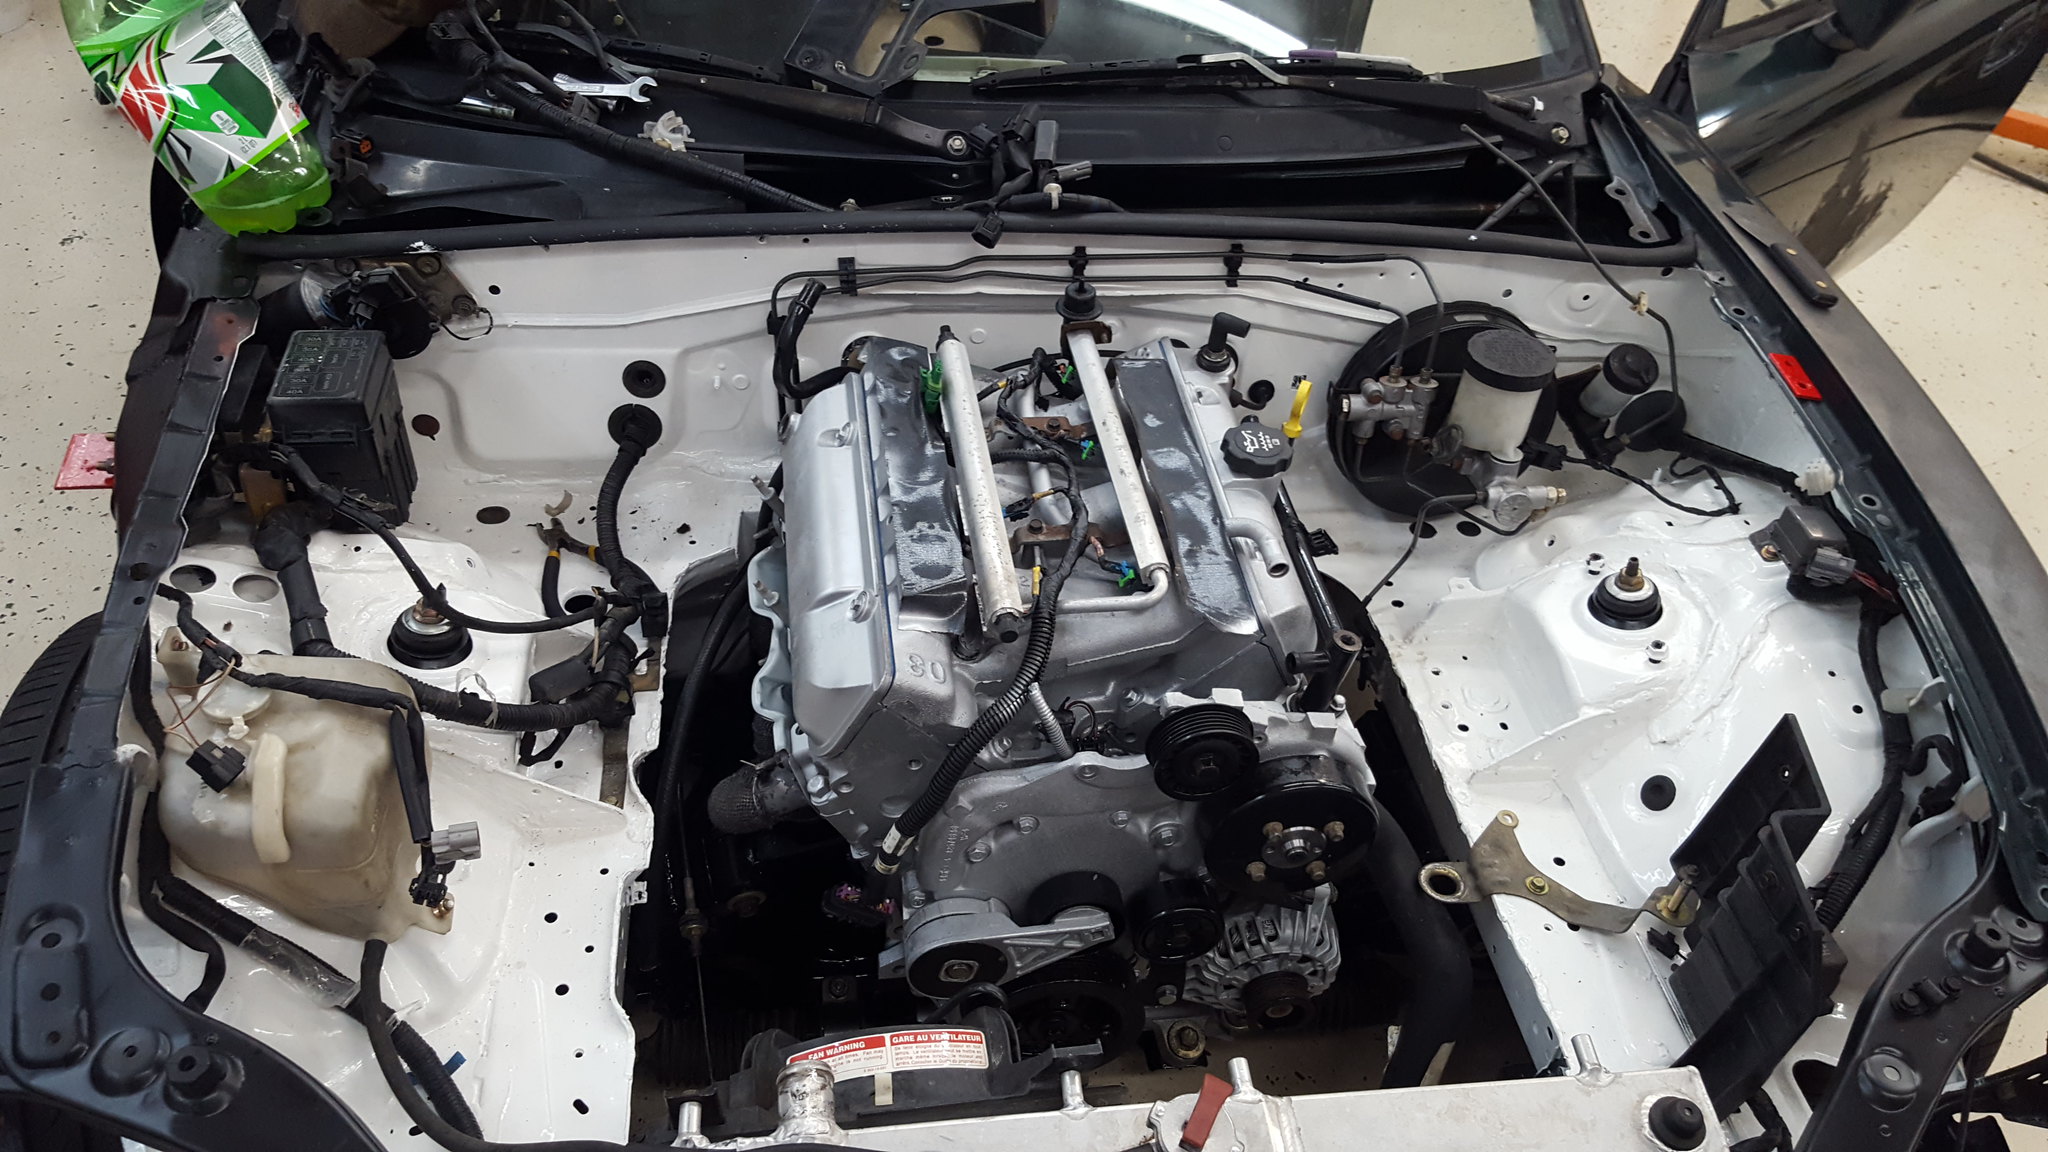
20180708_113730 by Michael Crawford, on Flickr got the frog arms back in
20180708_113722 by Michael Crawford, on Flickrsometimes, you ****** defeat from the jaws of victory. Other times its vice versa!
revious challenge budget: 1709.68 recoup total: 820new money: plug wires: 10FMVclutch kit: 52.99
plugs: 14.94
fuel injection hose: 2.98
exhaust manifold gaskets: 13.57 FMV new total: 1908.22
recoup: 820so, some ups and downs this week.Got the headers wrapped (first time ever wrapping headers). The stainless zip tie things that came with the header wrap sucked. So dad did safety wire at all the ends. Aint going nowhere now!
20180703_174436 by Michael Crawford, on Flickr
20180703_182229 by Michael Crawford, on FlickrI turned my flywheel on a brake lathe in preparation for putting a new clutch in. it was a hard decision, but I feel the right one. This may mean I forego turbo parts under challenge budget, but I would hate to end my race due to a failed worn out clutch. Much happier twisting an axle or breaking a trans or something.
20180702_165318 by Michael Crawford, on Flickrmy free, but put in the budget at FMV plug wires
20180702_131327 by Michael Crawford, on Flickr
20180702_131323 by Michael Crawford, on FlickrI got everything assembled on the stand except the upper intake, and started prepping the engine harness.
20180706_170509 by Michael Crawford, on Flickr
20180706_193250 by Michael Crawford, on Flickr then got it mated to the k frame
20180707_113131 by Michael Crawford, on Flickr and run home
20180707_121624 by Michael Crawford, on Flickrmy joy stopped there. Apparently when welding the k frame, I warped the crap out of it. The rear 4 bolts didn't come close to fitting. So I quit for the night.
20180707_140651 by Michael Crawford, on FlickrToday I tackled it again. Using some creative jack placement, a scissors jack, some ingenuity and leverage, we spread the ears of the k frame that were warped. Its all bolted down. All the coilovers are found to be bottomed out at the moment (on the bumpstops). But by god, its on all 4!!!!
20180707_141856 by Michael Crawford, on Flickr
20180708_082055 by Michael Crawford, on FlickrI went ahead and started laying out the chassis side wiring. Near as I can tell, the chassis is just about standalone ready from the factory in 99. everything will work without the ECU except possibly some gauges and indicators (which I don't have anymore!). I will need to extend the starter and alternator charge wires to reach their new locations, and then find some convenient switched is start and run circuits for the GM engine. Not a whole lot of overlap of GM and Mazda as far as wiring goes, at least as far as I can tell at the moment.The biggest change to the harness is the battery leads and rear wiring. Factory they ran down the trans tunnel on the torque arm. Since that doesn't exist anymore, I ran it through the AC evaporator line hole, under the dash, down the passengers side rocker, and into the trunk.
20180708_090315 by Michael Crawford, on Flickr
20180708_095331 by Michael Crawford, on Flickr
20180708_113712 by Michael Crawford, on Flickr
20180708_113715 by Michael Crawford, on Flickr
20180708_113736 by Michael Crawford, on Flickr
20180708_113730 by Michael Crawford, on Flickr got the frog arms back in
20180708_113722 by Michael Crawford, on Flickrsometimes, you ****** defeat from the jaws of victory. Other times its vice versa!
Reply
1
1
08-12-2018, 05:18 PM
#65
Junior Member
Thread Starter
Join Date: Nov 2017
Posts: 112
Total Cats: 7
Challenge budget so farrevious challenge budget: 1709.68 recoup total: 820new moneyulled some fittings I couldn't use from the budget, and added some I scrounged from boxes in the shop.Used 3 of the 5 dorman fittings, so I pulled that as well.So pretty much I just did budget cleanup for this. Recoup: 820
new total: 1882.05after the last update, we spent a LOT of time measuring the clutch, hydraulics, etc and doing math. Wanted to make sure wed have enough movement for disengagement. According to the measuring and math, we do! So I put the new clutch in, loctite on the flywheel and pressure plate bolts, etc.
20180702_165318 by Michael Crawford, on Flickr
20180714_105744 by Michael Crawford, on Flickr
20180714_110041 by Michael Crawford, on Flickrthen I put the trans in.nope.First the trans fouled the passengers side header. So I pulled it out.Found out that with the thermostat housing welded to the lower intake, the engine cant pivot far enough down to have the bellhousing clear. So I walked away and did other things for a while. It had stopped being fun.So, were back on it now. The reason? A clutch explosion in the duster. Stopped me cold on that project. And I was going through withdrawals of blank sheet hot rodding.Friday, dad and I dropped the engine and cross member out the bottom, and bolted the trans to the engine on the cradle. Took the opportunity to shorten the bump stops, reinstall the headers, install the fuel lines, etc.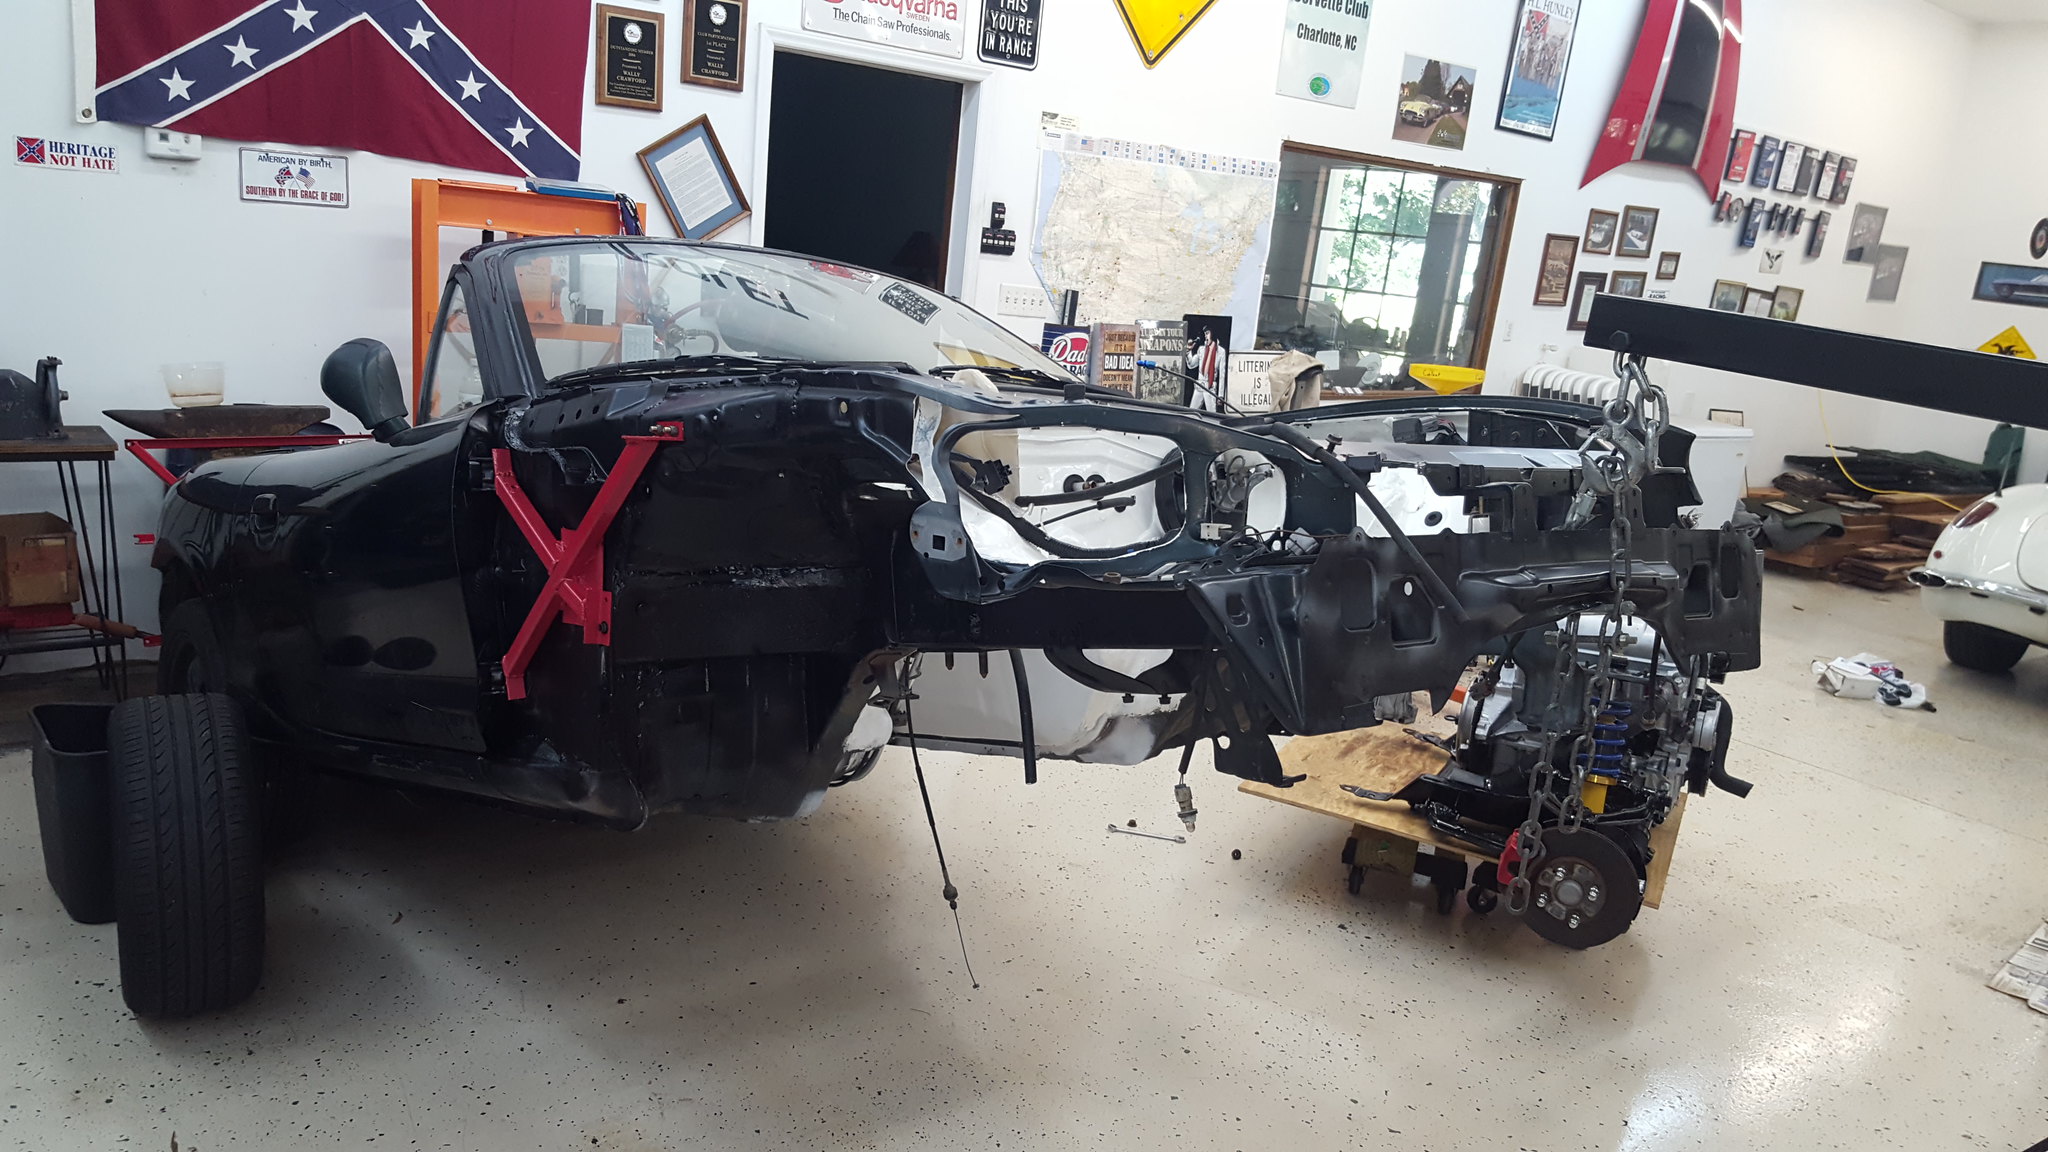
20180810_101203 by Michael Crawford, on Flickrshifter coming through the insulation reminded me of the scene from aliens....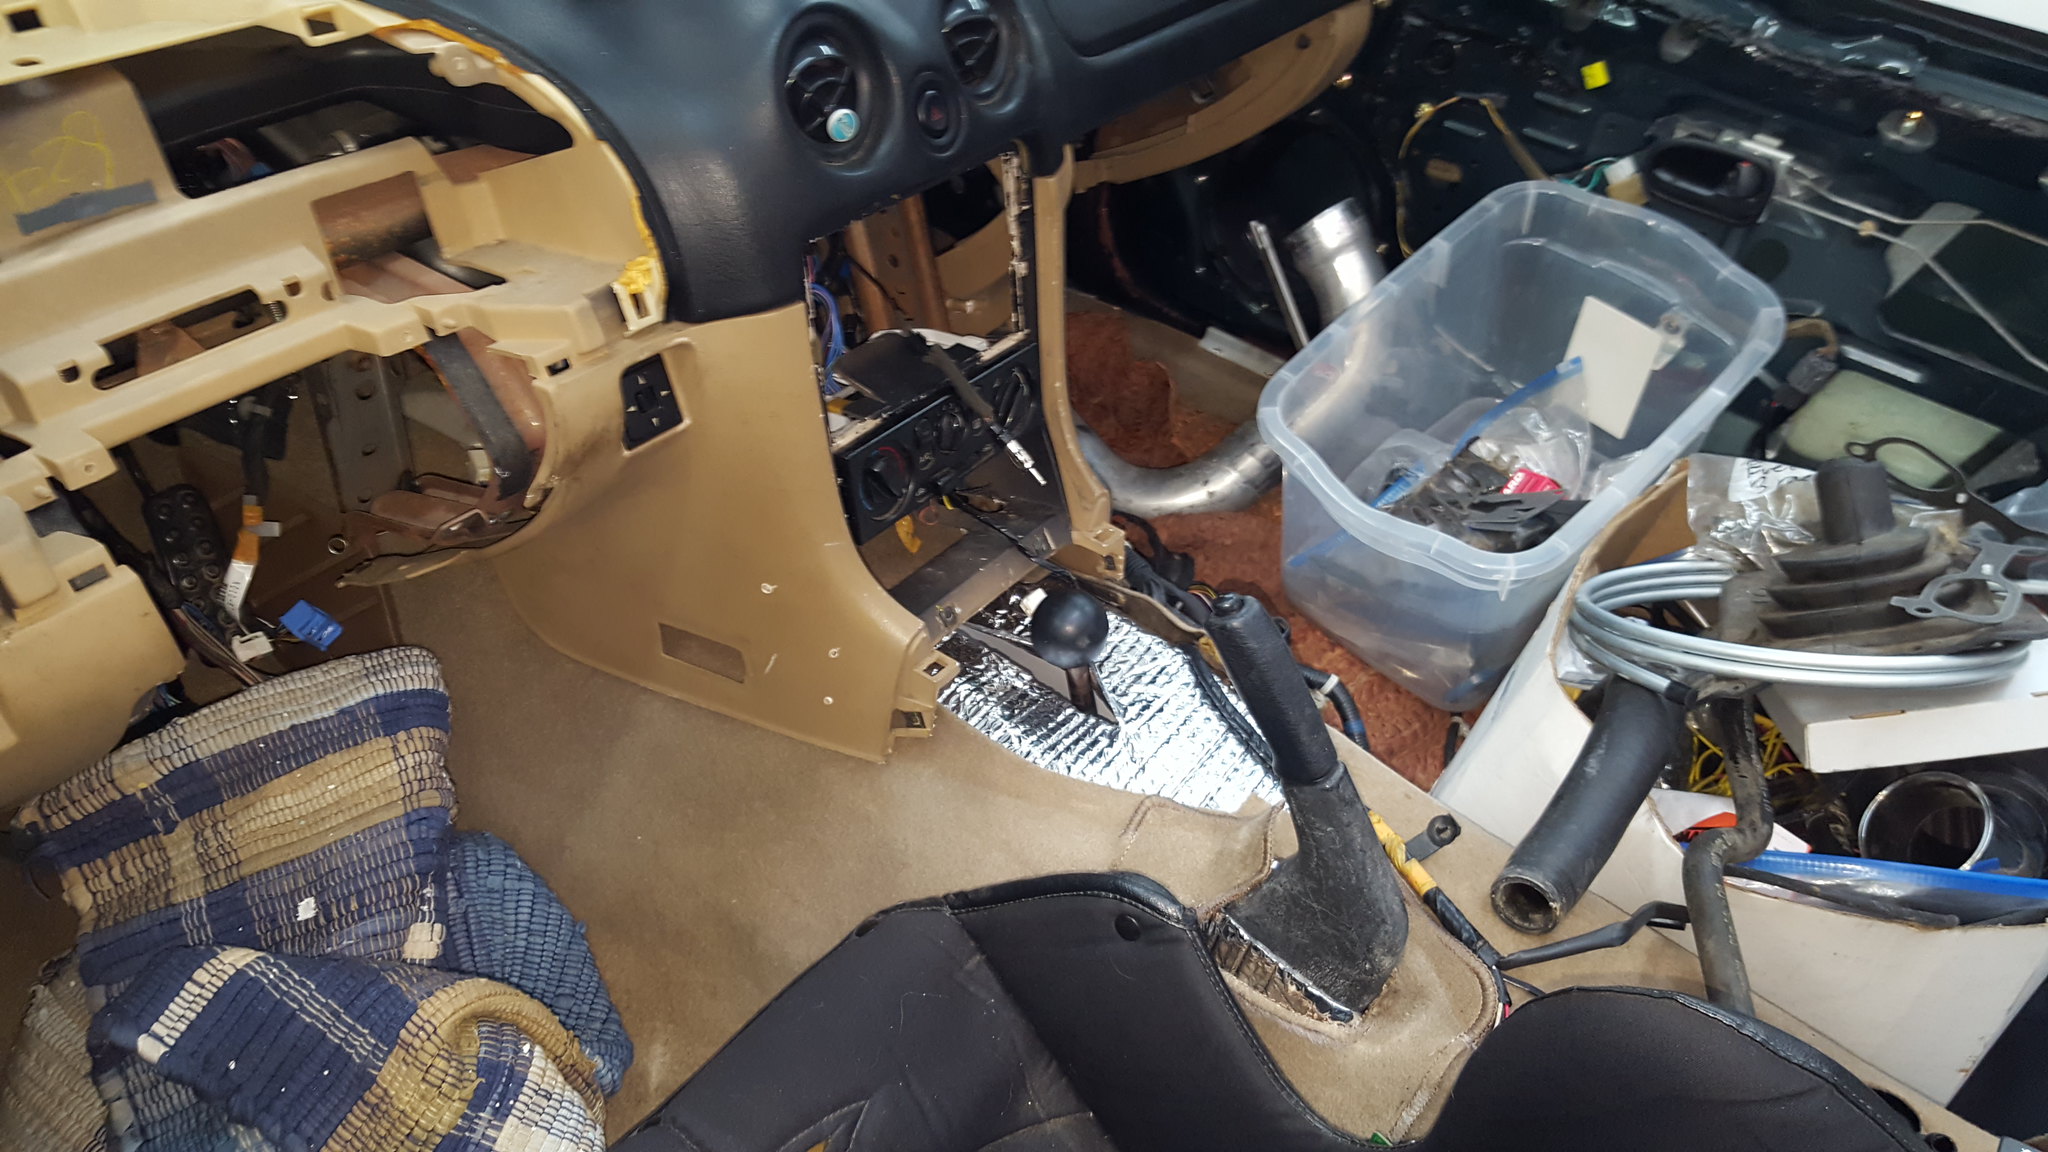
20180810_120931 by Michael Crawford, on Flickrbut, we got it all run home and butterfly brace installed to boot.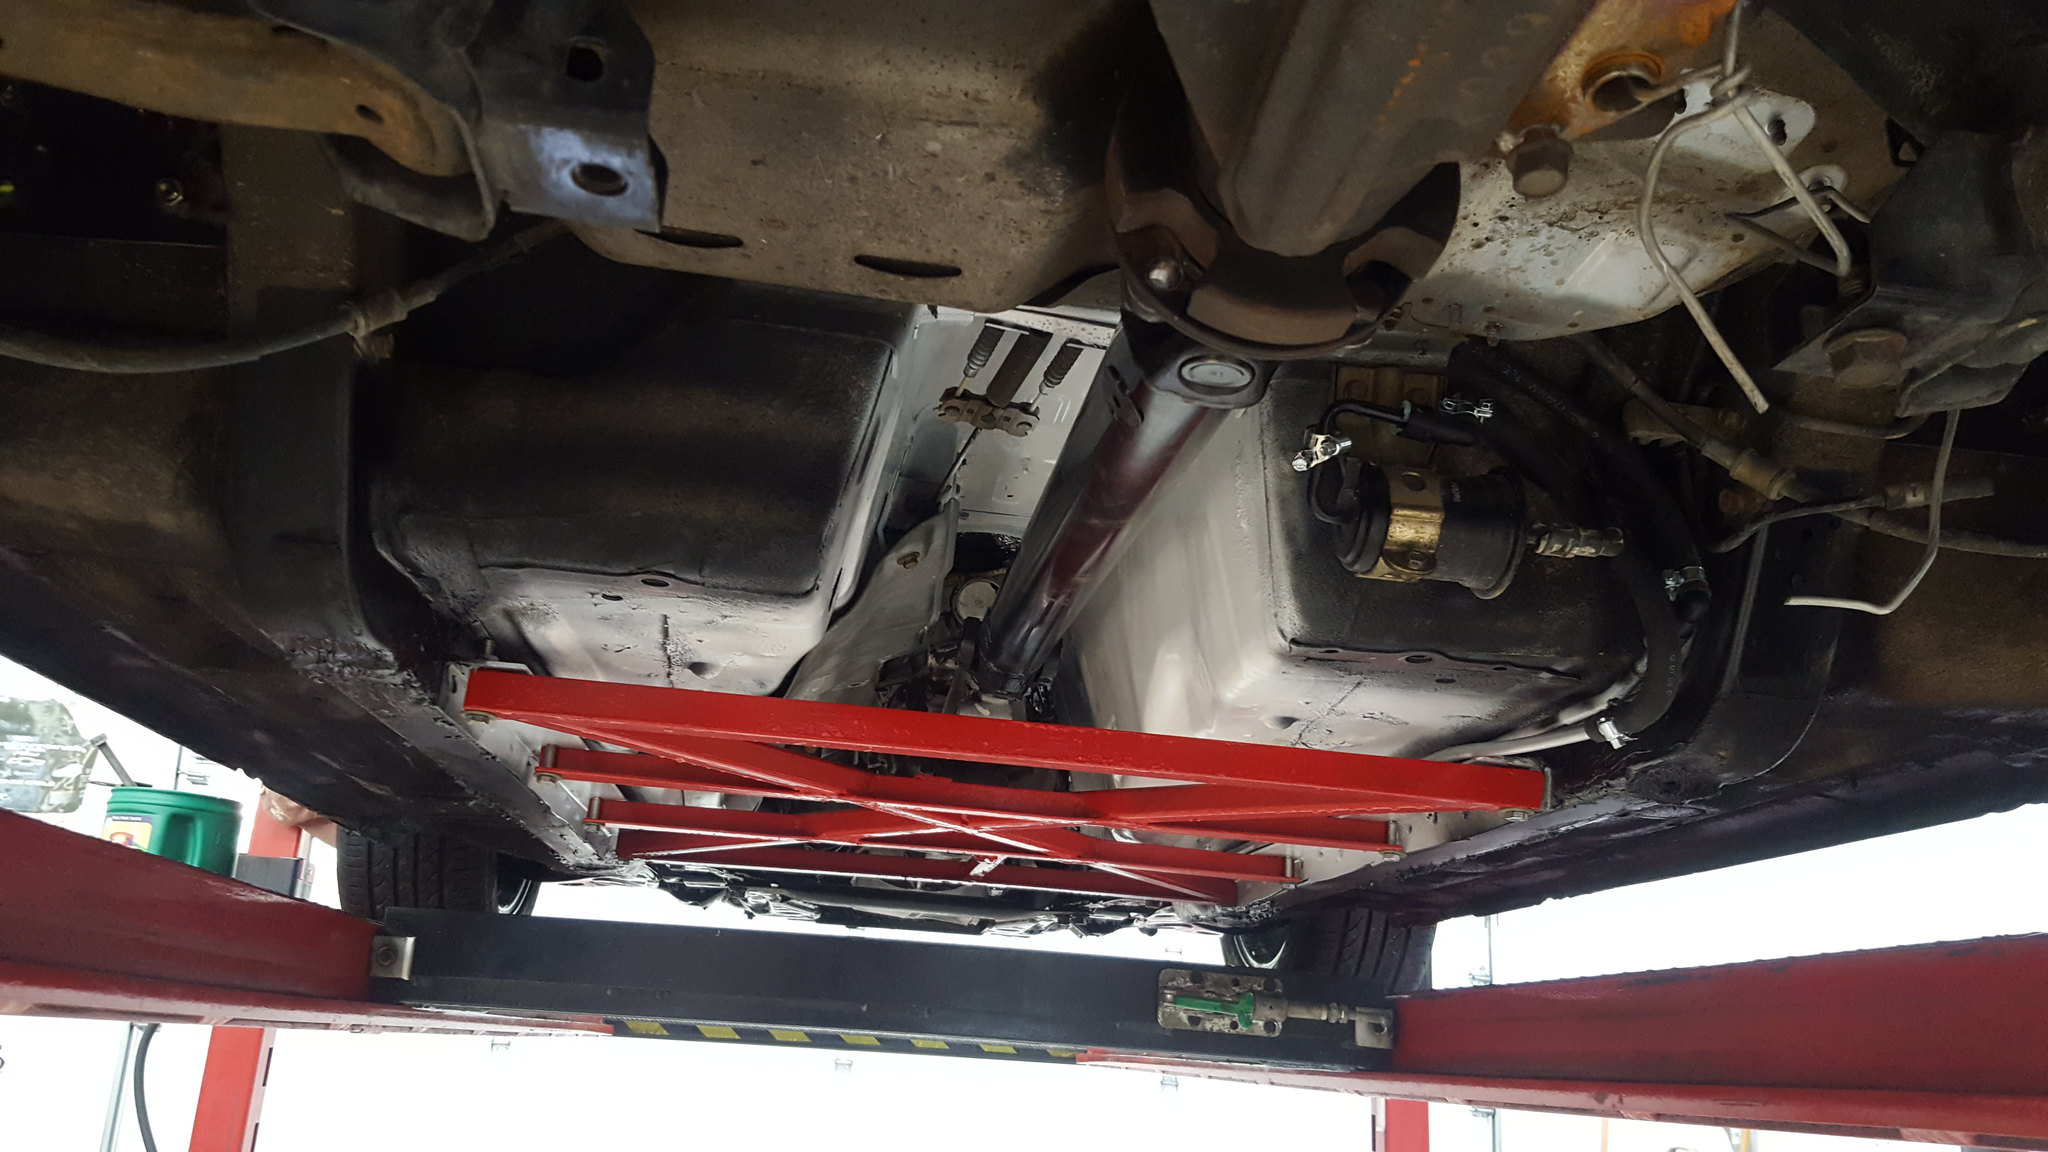
20180812_120458 by Michael Crawford, on Flickrtoday I worked on plumbing. Got all the brake lines tightened down, heater hoses and fuel lines run, lower radiator hose, and mocked up the upper hose.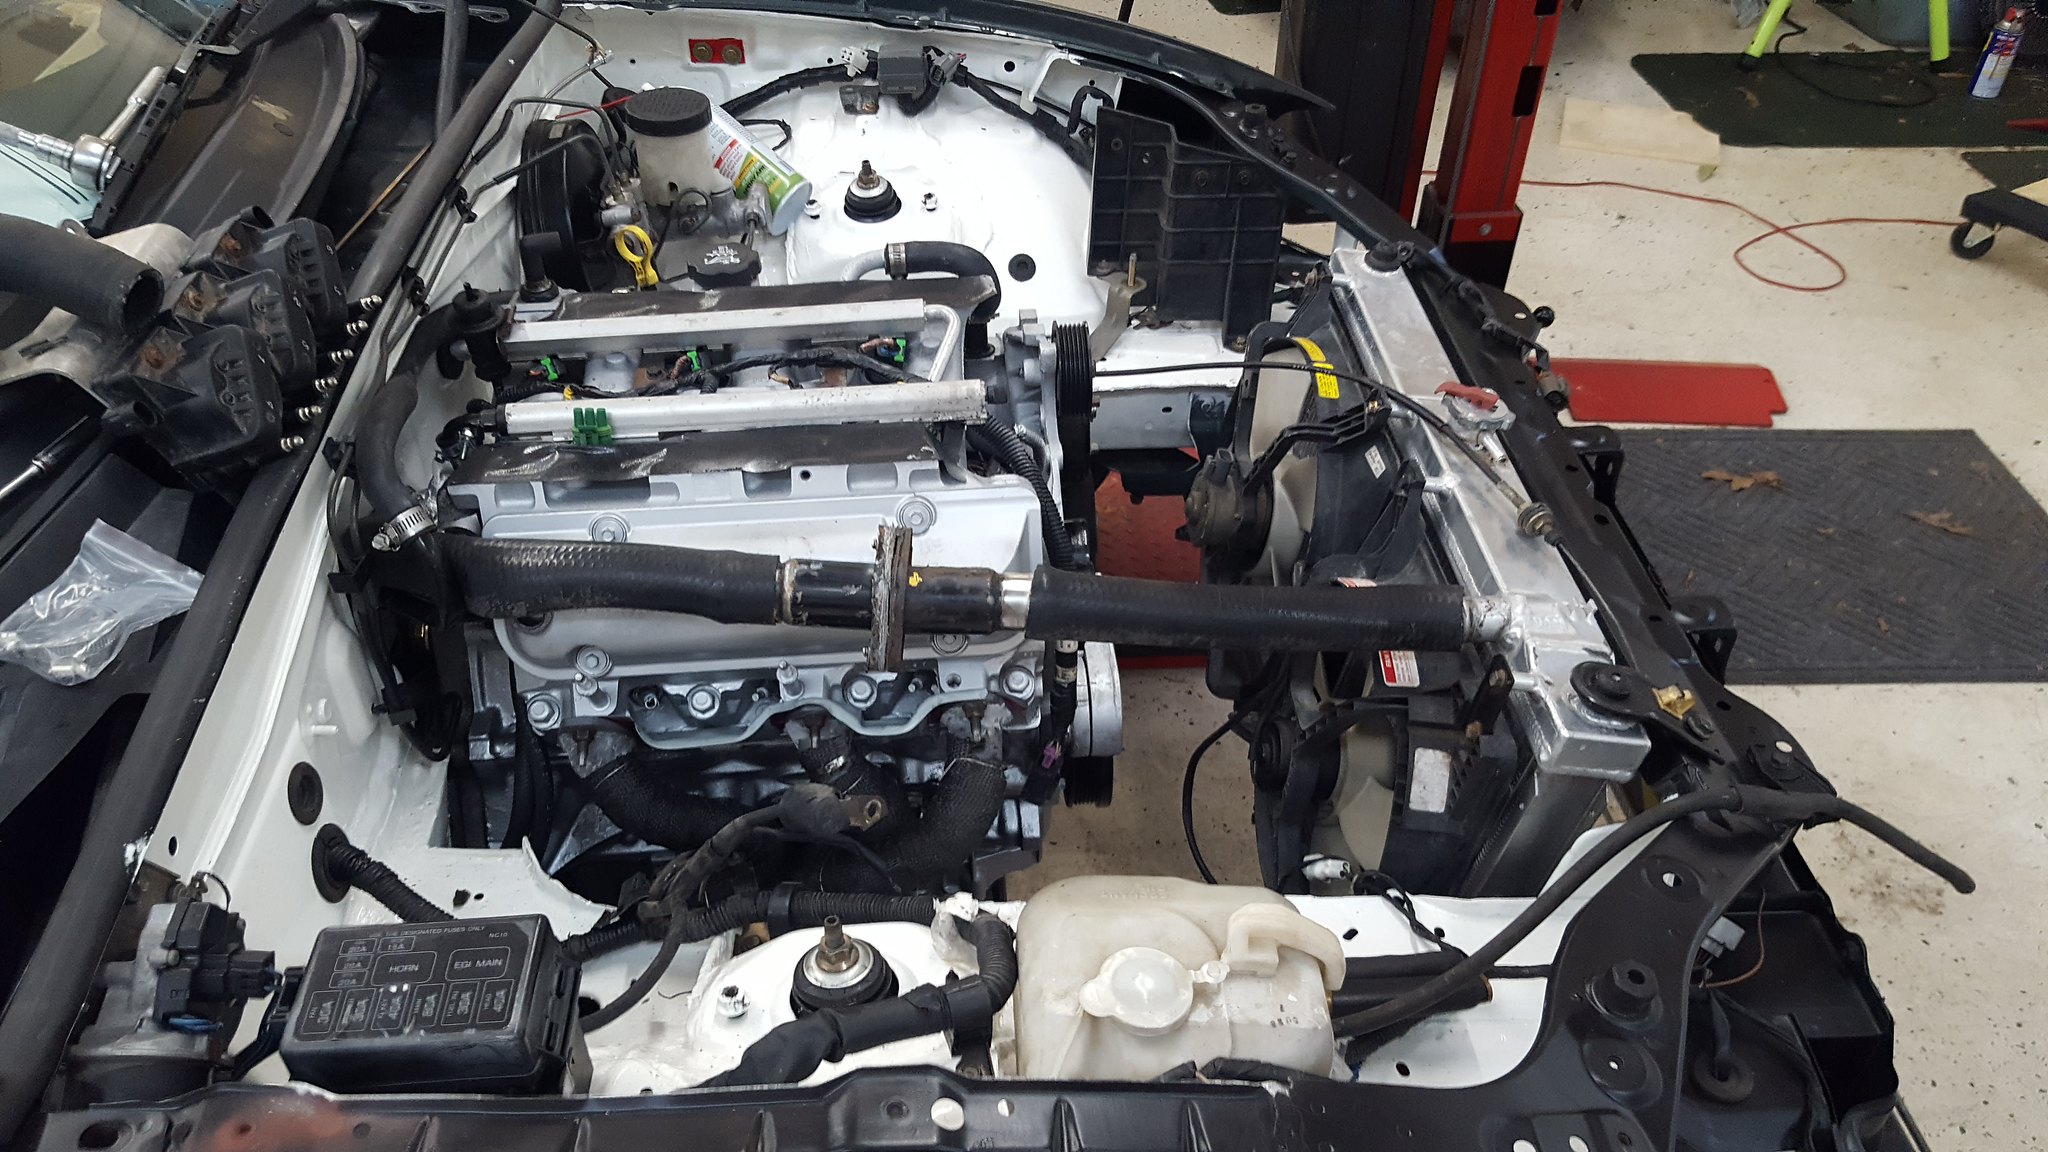
20180812_100908 by Michael Crawford, on Flickrstarting to get excited now. Next stop is wiring, and yanking the rear suspension for bent parts replacement, torsen install, painting, etc.
revious challenge budget: 1709.68 recoup total: 820new moneyulled some fittings I couldn't use from the budget, and added some I scrounged from boxes in the shop.Used 3 of the 5 dorman fittings, so I pulled that as well.So pretty much I just did budget cleanup for this. Recoup: 820new total: 1882.05after the last update, we spent a LOT of time measuring the clutch, hydraulics, etc and doing math. Wanted to make sure wed have enough movement for disengagement. According to the measuring and math, we do! So I put the new clutch in, loctite on the flywheel and pressure plate bolts, etc.
20180702_165318 by Michael Crawford, on Flickr
20180714_105744 by Michael Crawford, on Flickr
20180714_110041 by Michael Crawford, on Flickrthen I put the trans in.nope.First the trans fouled the passengers side header. So I pulled it out.Found out that with the thermostat housing welded to the lower intake, the engine cant pivot far enough down to have the bellhousing clear. So I walked away and did other things for a while. It had stopped being fun.So, were back on it now. The reason? A clutch explosion in the duster. Stopped me cold on that project. And I was going through withdrawals of blank sheet hot rodding.Friday, dad and I dropped the engine and cross member out the bottom, and bolted the trans to the engine on the cradle. Took the opportunity to shorten the bump stops, reinstall the headers, install the fuel lines, etc.
20180810_101203 by Michael Crawford, on Flickrshifter coming through the insulation reminded me of the scene from aliens....
20180810_120931 by Michael Crawford, on Flickrbut, we got it all run home and butterfly brace installed to boot.
20180812_120458 by Michael Crawford, on Flickrtoday I worked on plumbing. Got all the brake lines tightened down, heater hoses and fuel lines run, lower radiator hose, and mocked up the upper hose.
20180812_100908 by Michael Crawford, on Flickrstarting to get excited now. Next stop is wiring, and yanking the rear suspension for bent parts replacement, torsen install, painting, etc.
Reply
0
0
10-07-2018, 07:31 PM
#66
Junior Member
Thread Starter
Join Date: Nov 2017
Posts: 112
Total Cats: 7
Challenge budget so farrevious challenge budget: 1882.05 recoup total: 820new money: oil filter sandwich plate: 17.99
water temp sender block: 4.52
radiator hose: 10.95 advance
shift light: 10.69
tuned ecm: 120, sinister performancebattery cable splice: lowes. 4.99 pack of 2, needed 1: 2.50removed turbo stuff from the budget. That sucked. Recoup: 820
new total: 1932.70well, its been a minute since a legitimate update. Between working, the duster, the bmw, the truck, and family stuff, not a lot of time on this until recently (waiting on parts for the duster). So when we left off.....hell if I remember. Honestly. Its been a wild ride lately. So im just gonna throw it all out there is some way that makes sense to my pea brain.First up in my brain is wiring and such. Its really what ive been spending a lot of time and brain power on, so...I needed an ecm that had all the security measures removed. A friend on the GRM forum has HP tuners, and can do it for me. However, hes in Ohio. I'm not. And at the time, I was in a hurry thinking it was still possible to make $2018 (which is this week). So I spent the money to have it done by sinister performance. Well go back and reflash with HP tuners and fine tune it with a consummate reduction in budget after I actually prove this whole shitshow works.Anyway, we used the 01 impala ecm and harness as GM apparently really upped the security stuff by 04. so, I started de-building and rebuilding the mangled 01 harness. Used large sections of the rondevous harness. I also made the decision to take the easy way out. Almost completely separate harnesses. One for the chassis, one for the engine. The starter is all run off the mazda parts, and the only crossover will be at the battery, fuel pump and fan relays, and gauge cluster. I could have run relays and such, but free toggles, a crappy free fuse block, leftover LED bulbs, and lengths of assorted wires seemed quicker, easier, and cheaper (already had it all, most from pull-a-part and not charged for). The ECU fits beautifully in the cavity where the passengers airbag lived, and the switches/fuses/etc will live on a piece of plastic where the radio went. Anyway, some pictures that don't look like much, as wiring never does in pictures. But I can assure you, its a hell of a lot of work.... battery cable splice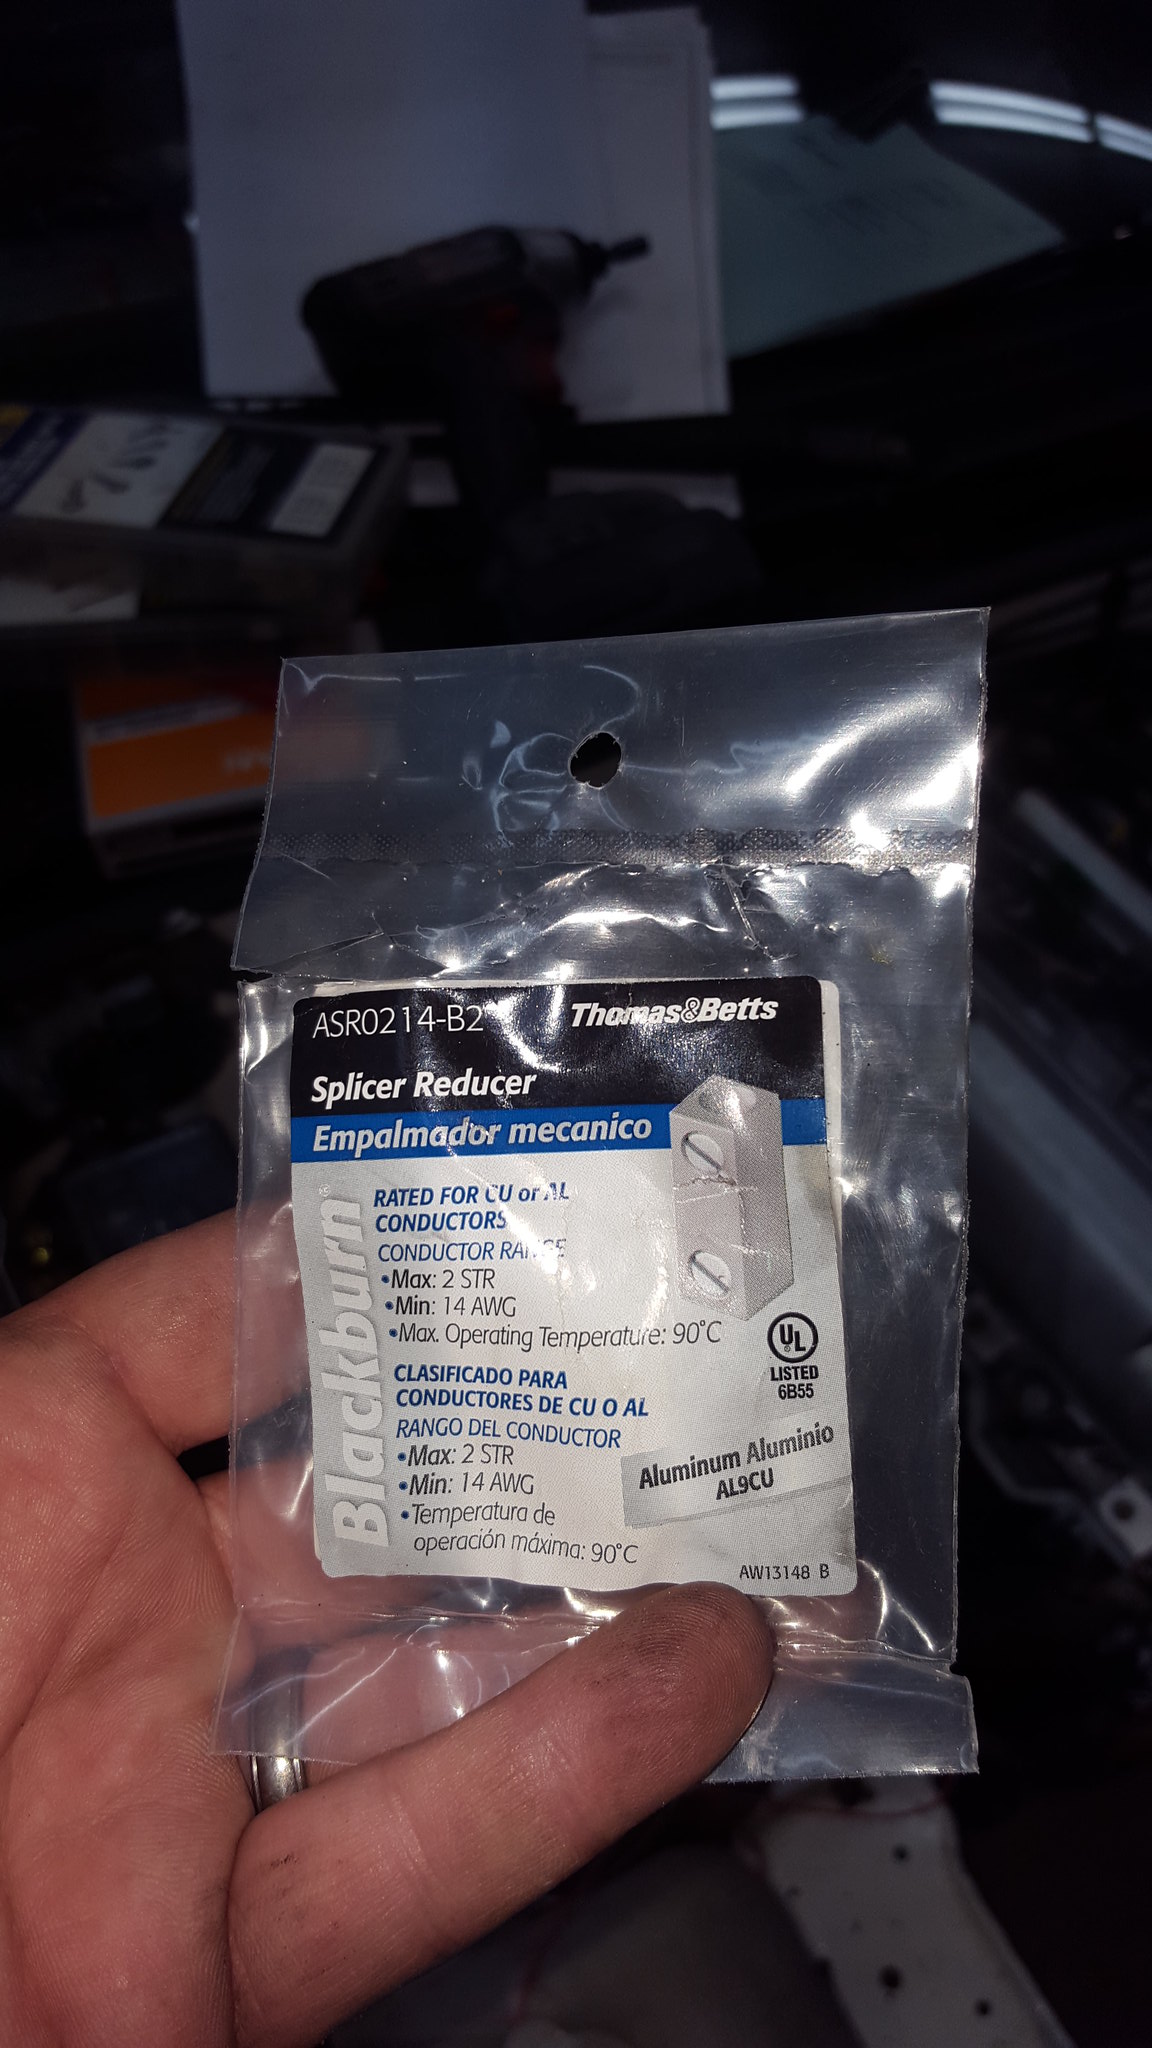 20181007_164659 by Michael Crawford, on Flickrand how the charge cables, starter cables, etc laid out. The gold box came from a car at pull-a-part with a horribly installed amp setup....
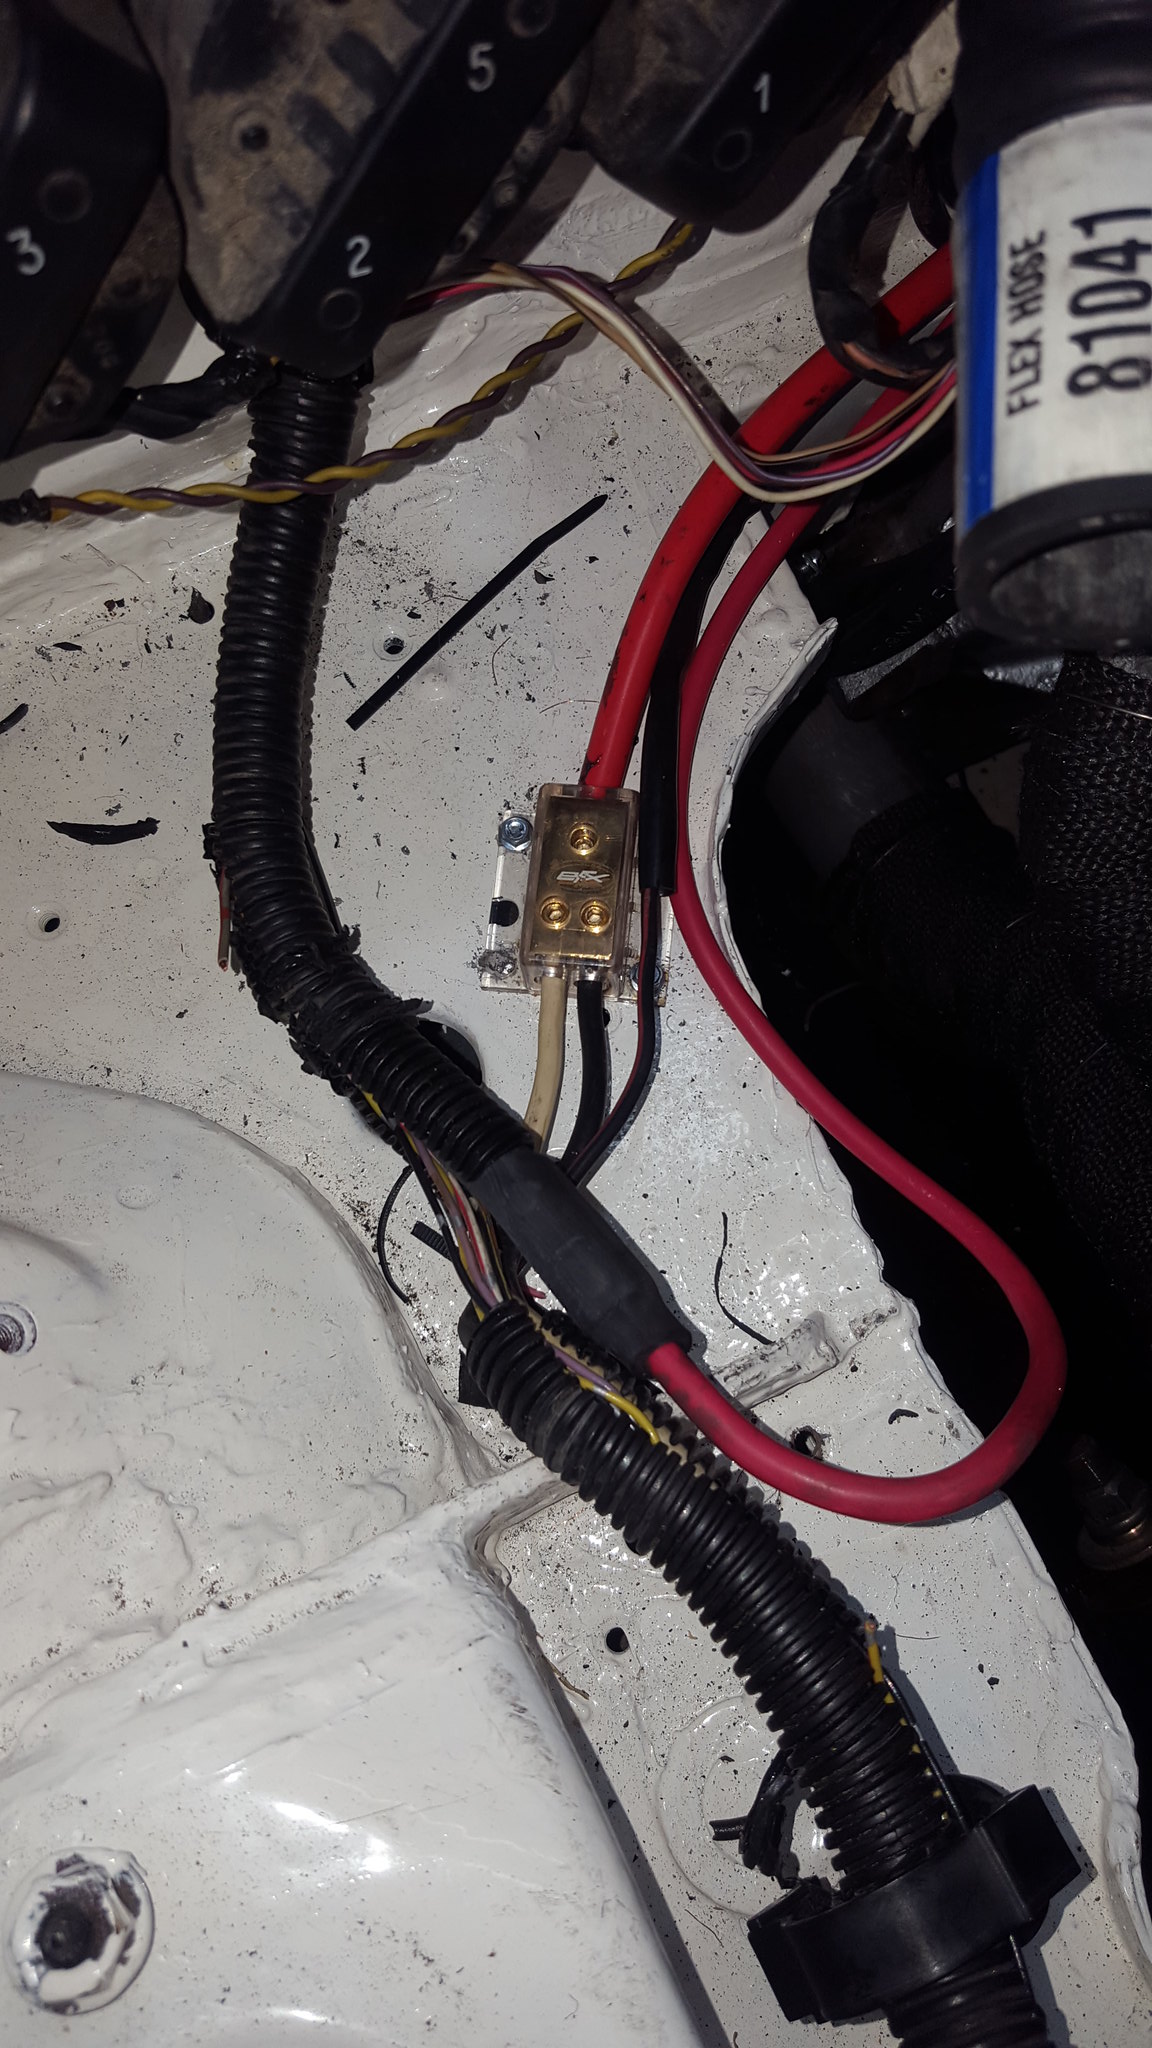 20181007_164653 by Michael Crawford, on Flickr then wiring. Lots and lots....
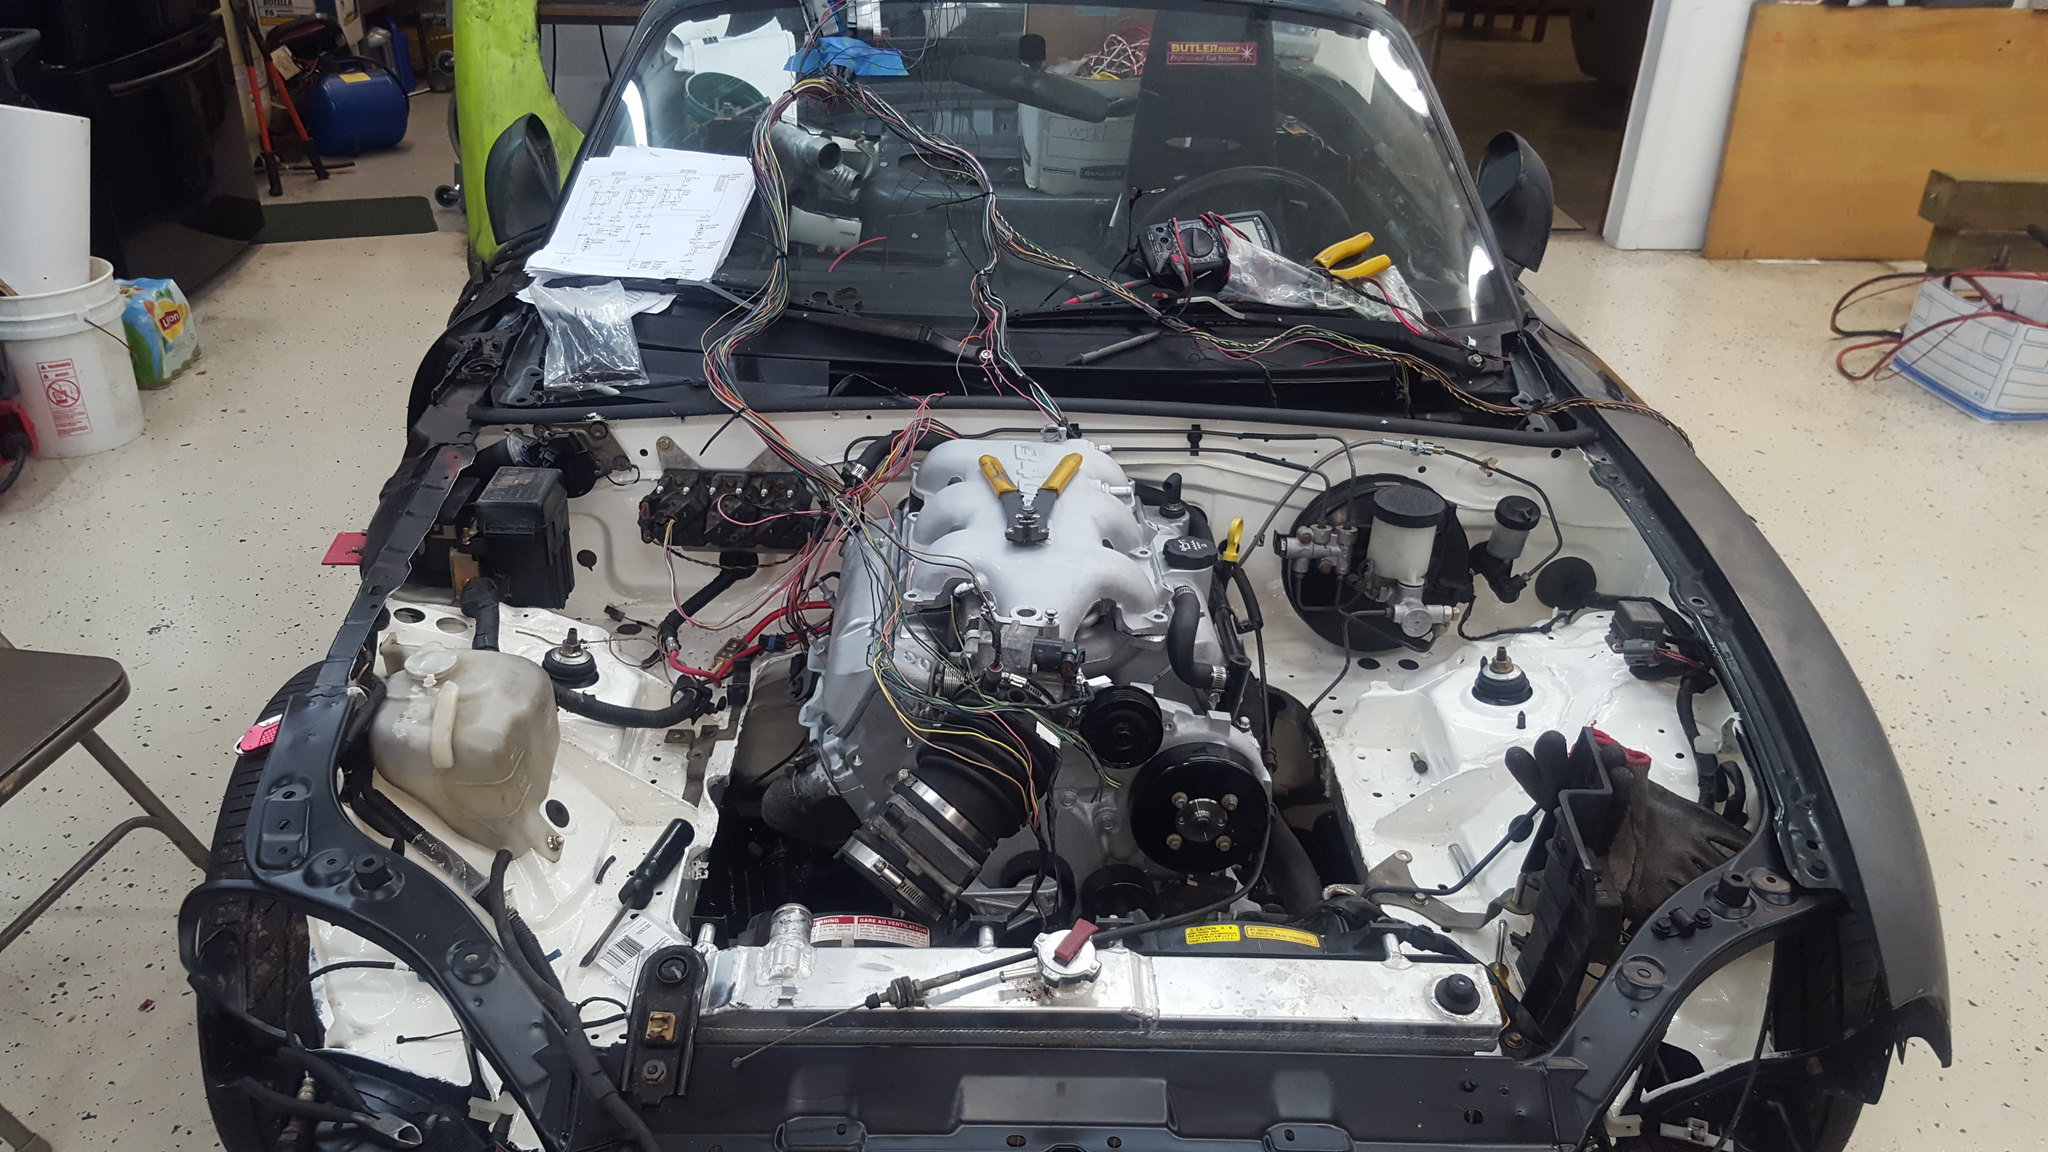 20180923_122037 by Michael Crawford, on Flickr
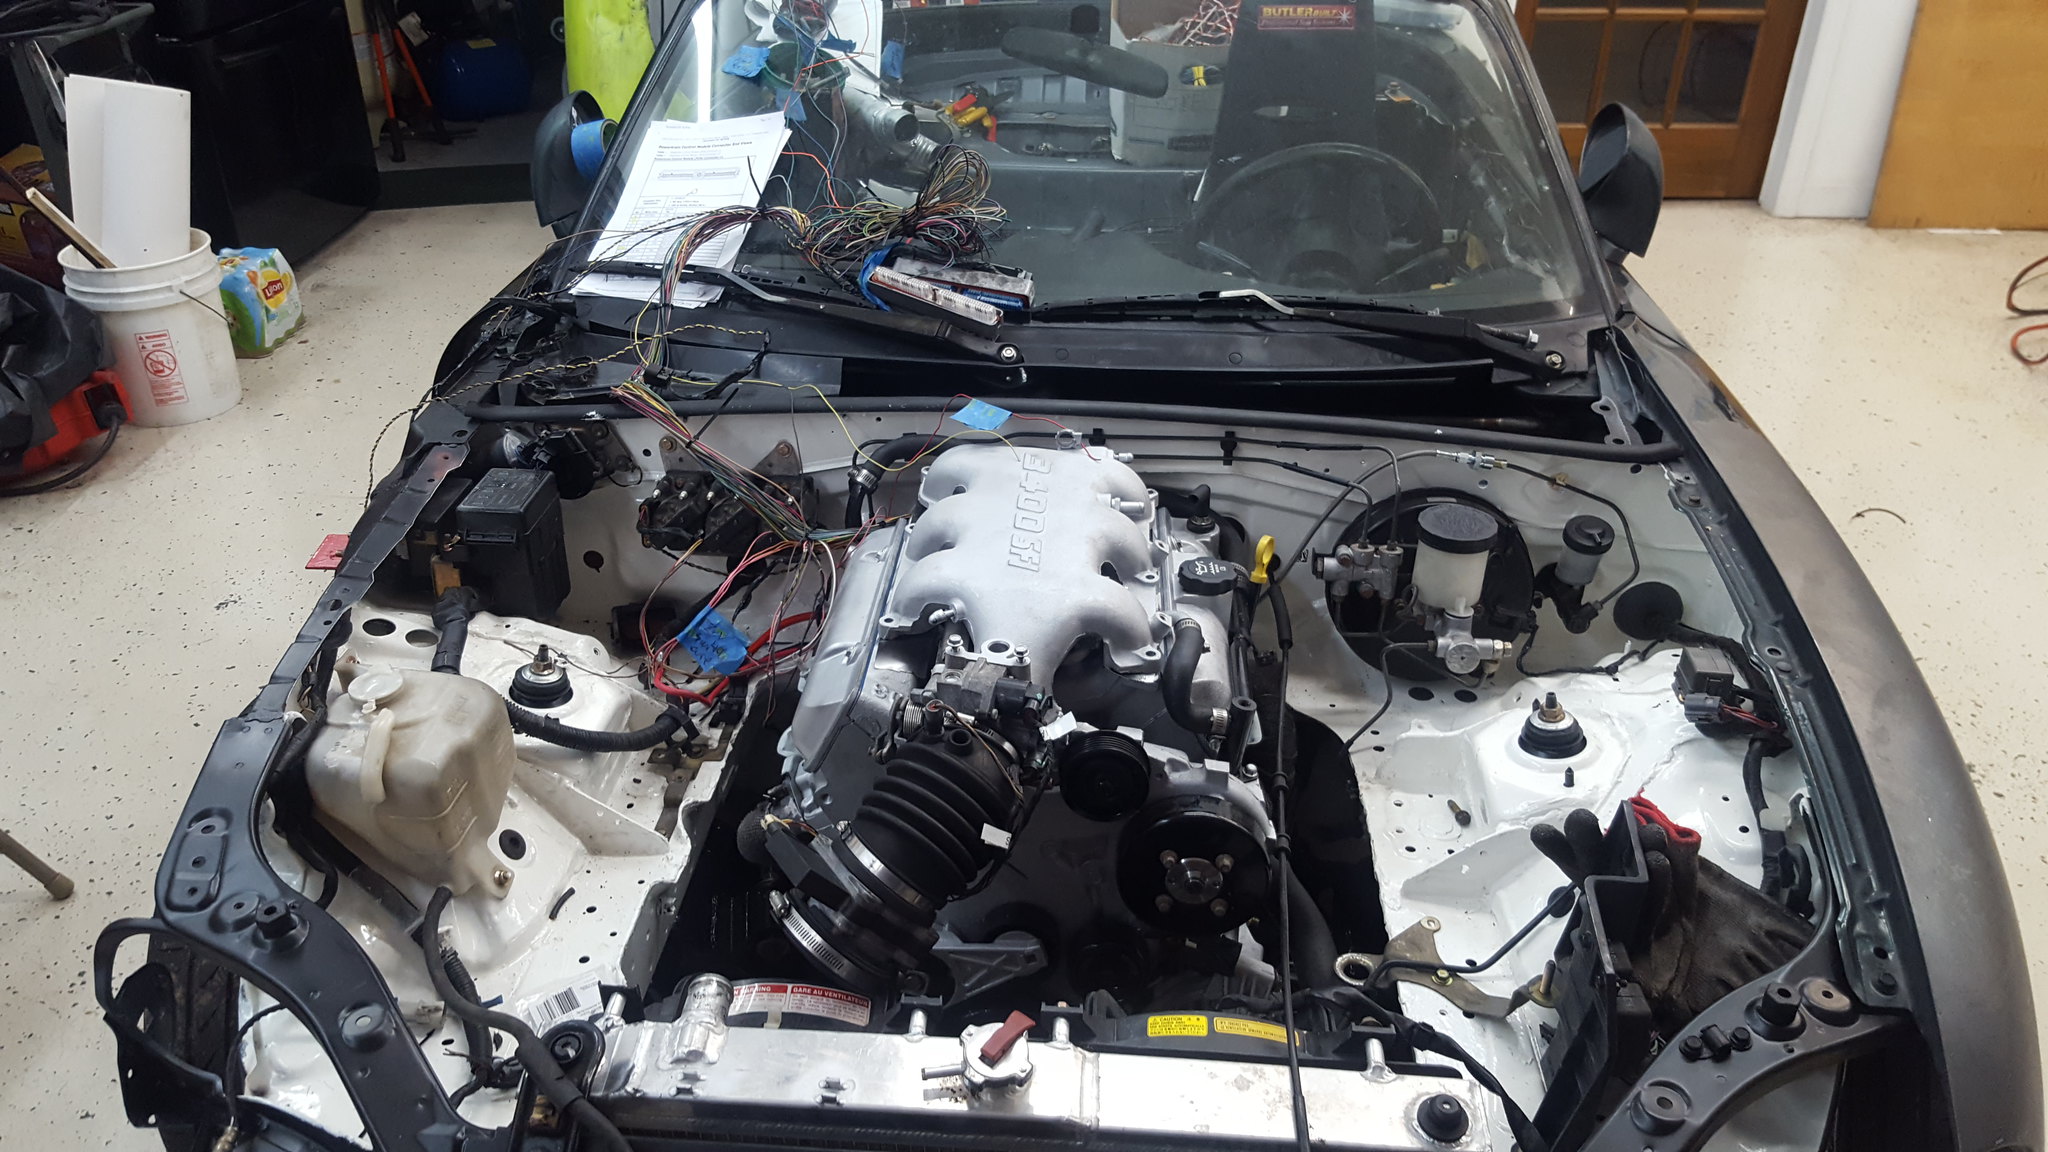 20180923_154807 by Michael Crawford, on Flickr
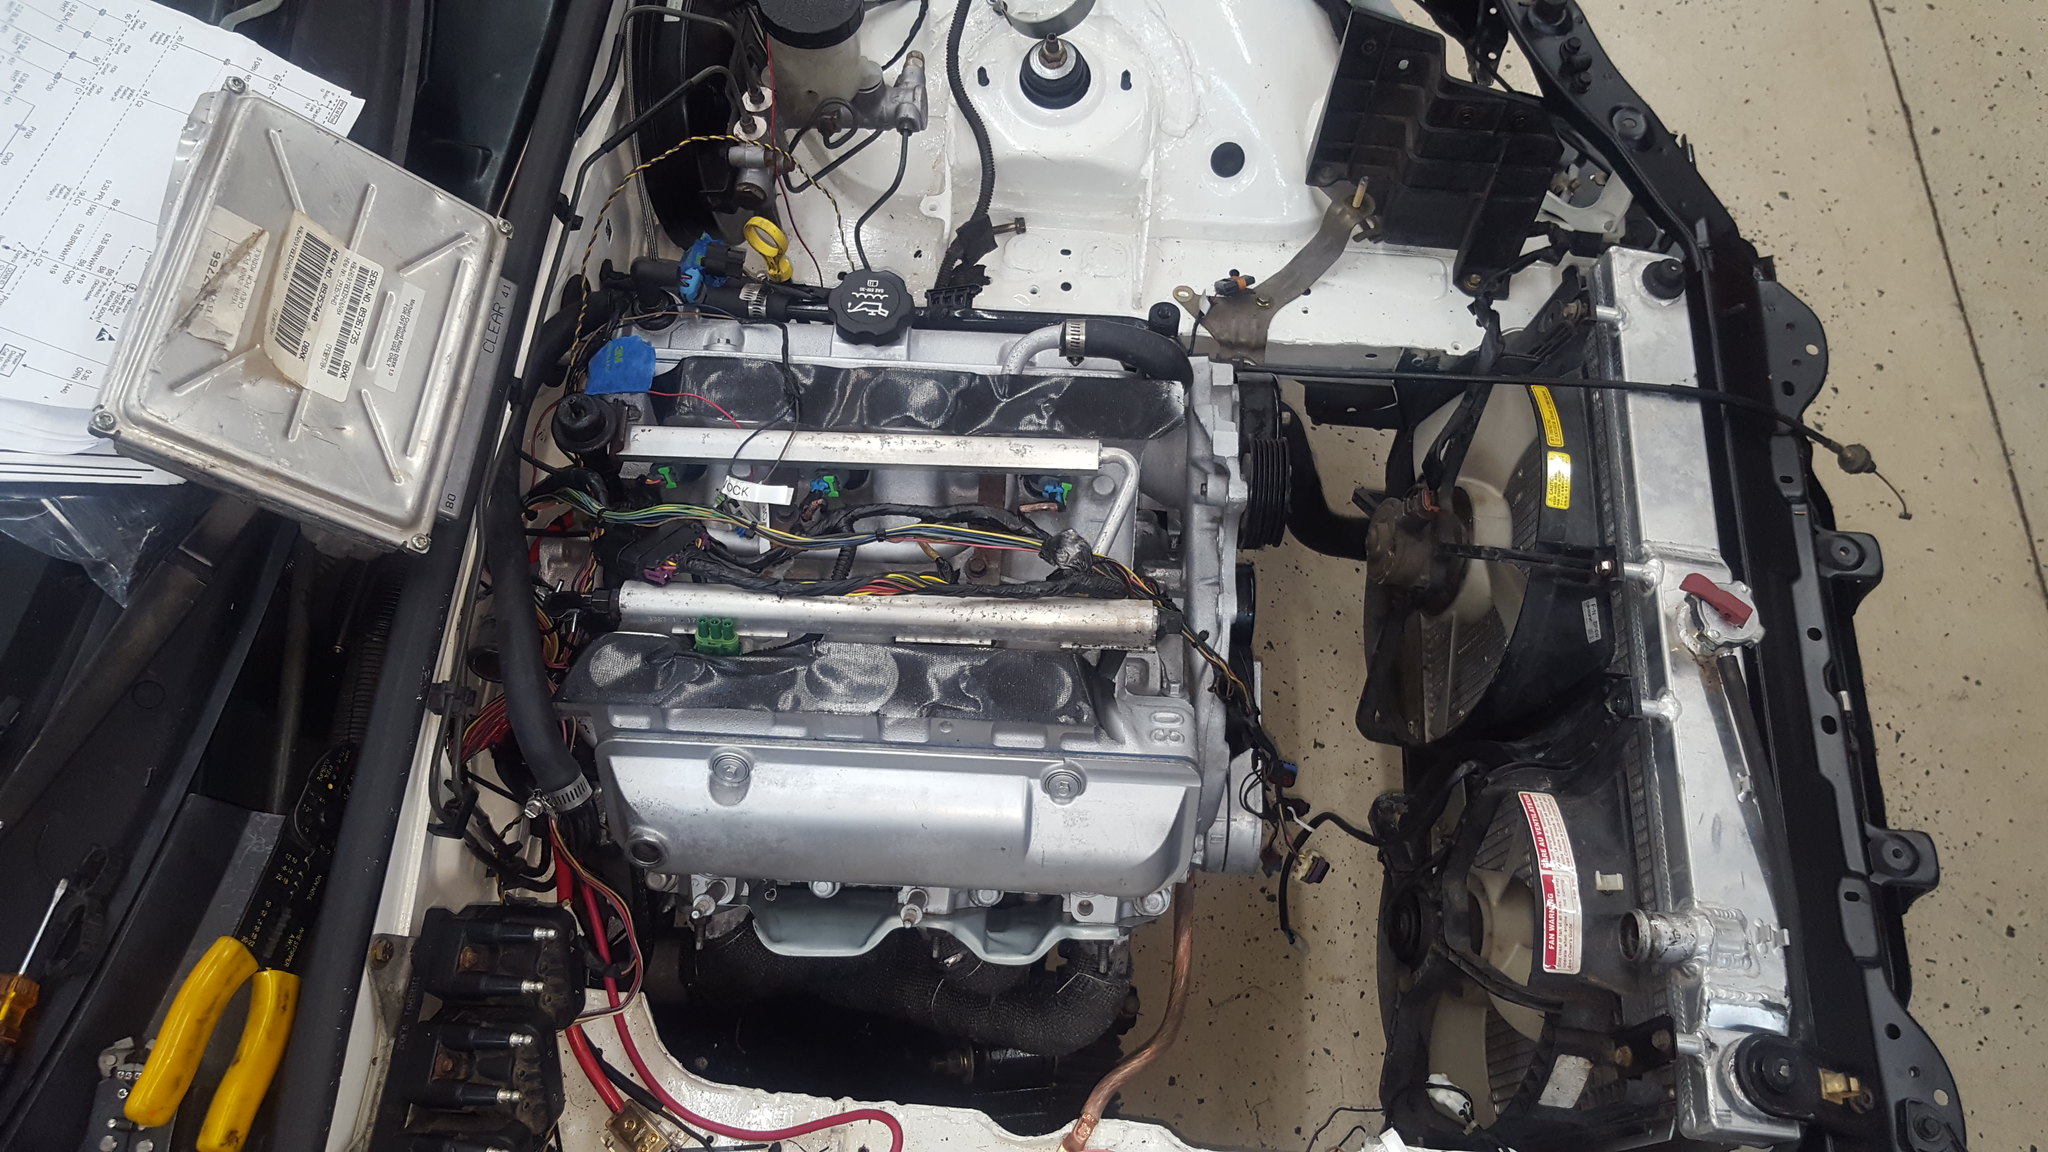 20181003_175712 by Michael Crawford, on Flickr
 20181007_163208 by Michael Crawford, on Flickrthe CAD (cardboard aided design) template for the switch panel where the fuel gauge, aux fuse panel, and switches will live. Probably the CEL as well if there's room.
 20181007_171044 by Michael Crawford, on Flickrdad found the by the road when he was mowing one day. We have no idea what the hell it is, but its plastic and big enough for what I need. Ill trace the template, cut it on the bandsaw, and then drill a ton of holes in it and mount it up like some sort of freak reject from a elementary school science fair.
 20181007_171107 by Michael Crawford, on Flickrreally, the only other things ive accomplished are plumbing things. The upper radiator hose has been a mother, but after 13 different attempts (no BS) we found a workable solution. The black block in between the two sections is a ryanstar inline water temp sender block. It came with an 1/8 hole in it. My mechanical gauge requires an NPT fitting that's freaking huge. Brother Dallas, being a plumber, has NPT taps. So ill modify it at his house. I don't own any and they're like 20 bucks.
 20181006_141426 by Michael Crawford, on Flickrthe other thing was I ordered an oil filter sandwich plate to have a place to hook up my mechanical gauge. I would really rather use a t-fitting and the port that goes to the ECMs oil pressure sender, but its rusted into the block so bad I cant get it out with the engine in place. I ain't pulling the engine again unless I have to. So, budget buggery it is!In other news, we got the fuel system pressure tested. Held full pressure with no leaks first time. No picture, because how the hell do you take a picture of fuel flowing through a hose without leaking?Until next time, y'all. Hug your family and say a prayer of thanks for your health. Never know how long you'll have both.
revious challenge budget: 1882.05 recoup total: 820new money: oil filter sandwich plate: 17.99water temp sender block: 4.52
radiator hose: 10.95 advance
shift light: 10.69
tuned ecm: 120, sinister performancebattery cable splice: lowes. 4.99 pack of 2, needed 1: 2.50removed turbo stuff from the budget. That sucked. Recoup: 820
new total: 1932.70well, its been a minute since a legitimate update. Between working, the duster, the bmw, the truck, and family stuff, not a lot of time on this until recently (waiting on parts for the duster). So when we left off.....hell if I remember. Honestly. Its been a wild ride lately. So im just gonna throw it all out there is some way that makes sense to my pea brain.First up in my brain is wiring and such. Its really what ive been spending a lot of time and brain power on, so...I needed an ecm that had all the security measures removed. A friend on the GRM forum has HP tuners, and can do it for me. However, hes in Ohio. I'm not. And at the time, I was in a hurry thinking it was still possible to make $2018 (which is this week). So I spent the money to have it done by sinister performance. Well go back and reflash with HP tuners and fine tune it with a consummate reduction in budget after I actually prove this whole shitshow works.Anyway, we used the 01 impala ecm and harness as GM apparently really upped the security stuff by 04. so, I started de-building and rebuilding the mangled 01 harness. Used large sections of the rondevous harness. I also made the decision to take the easy way out. Almost completely separate harnesses. One for the chassis, one for the engine. The starter is all run off the mazda parts, and the only crossover will be at the battery, fuel pump and fan relays, and gauge cluster. I could have run relays and such, but free toggles, a crappy free fuse block, leftover LED bulbs, and lengths of assorted wires seemed quicker, easier, and cheaper (already had it all, most from pull-a-part and not charged for). The ECU fits beautifully in the cavity where the passengers airbag lived, and the switches/fuses/etc will live on a piece of plastic where the radio went. Anyway, some pictures that don't look like much, as wiring never does in pictures. But I can assure you, its a hell of a lot of work.... battery cable splice
20181007_164659 by Michael Crawford, on Flickrand how the charge cables, starter cables, etc laid out. The gold box came from a car at pull-a-part with a horribly installed amp setup....20181007_164653 by Michael Crawford, on Flickr then wiring. Lots and lots....20180923_122037 by Michael Crawford, on Flickr20180923_154807 by Michael Crawford, on Flickr20181003_175712 by Michael Crawford, on Flickr20181007_163208 by Michael Crawford, on Flickrthe CAD (cardboard aided design) template for the switch panel where the fuel gauge, aux fuse panel, and switches will live. Probably the CEL as well if there's room.20181007_171044 by Michael Crawford, on Flickrdad found the by the road when he was mowing one day. We have no idea what the hell it is, but its plastic and big enough for what I need. Ill trace the template, cut it on the bandsaw, and then drill a ton of holes in it and mount it up like some sort of freak reject from a elementary school science fair.20181007_171107 by Michael Crawford, on Flickrreally, the only other things ive accomplished are plumbing things. The upper radiator hose has been a mother, but after 13 different attempts (no BS) we found a workable solution. The black block in between the two sections is a ryanstar inline water temp sender block. It came with an 1/8 hole in it. My mechanical gauge requires an NPT fitting that's freaking huge. Brother Dallas, being a plumber, has NPT taps. So ill modify it at his house. I don't own any and they're like 20 bucks.20181006_141426 by Michael Crawford, on Flickrthe other thing was I ordered an oil filter sandwich plate to have a place to hook up my mechanical gauge. I would really rather use a t-fitting and the port that goes to the ECMs oil pressure sender, but its rusted into the block so bad I cant get it out with the engine in place. I ain't pulling the engine again unless I have to. So, budget buggery it is!In other news, we got the fuel system pressure tested. Held full pressure with no leaks first time. No picture, because how the hell do you take a picture of fuel flowing through a hose without leaking?Until next time, y'all. Hug your family and say a prayer of thanks for your health. Never know how long you'll have both.
Reply
0
0
11-04-2018, 06:56 PM
#67
Junior Member
Thread Starter
Join Date: Nov 2017
Posts: 112
Total Cats: 7
Challenge budget so farrevious challenge budget: 1932.70 recoup total: 820new money: oil filter sandwich plate: 5
oil pressure gauge fitting: .97
belt: 21.99removed purchased oil filter sandwich plate: -17.99removed quart of holy freaking green: -14.98removed oil pan gasket and plugs per new rules (I deleted them from my spreadsheet and dont feel like looking at the moment. Additionally, I found the other oil pan gasket....) Recoup: 820
new total: 1877.19I've been like a ping pong ball in a blender lately. Doing way too much on way too many things. So this update will be a little scattered. Between going with my family to all sorts of fall events, working WAY too much, fixing the duster, etc, ive been having a hard time keeping track of what im doing with this.So, to start:the plastidip that was done to this car has turned to goo over much of it. Ive been working on peeling/scraping it from the plastics. I tried aircraft stripper, and luckily it didn't damage the plastic. But it wasn't my best idea. Ive found mineral spirits and lacquer thinner with an sos pad, as well as a razor blade to be the most effective means so far. And child labor. (she likes peeling the stuff that will peel) we've got the front bumper done, rear most of the way, and lots more to go everywhere else.
1540468889_15404688612351221519150_mmthumb by Michael Crawford, on Flickr
20181025_141225 by Michael Crawford, on Flickr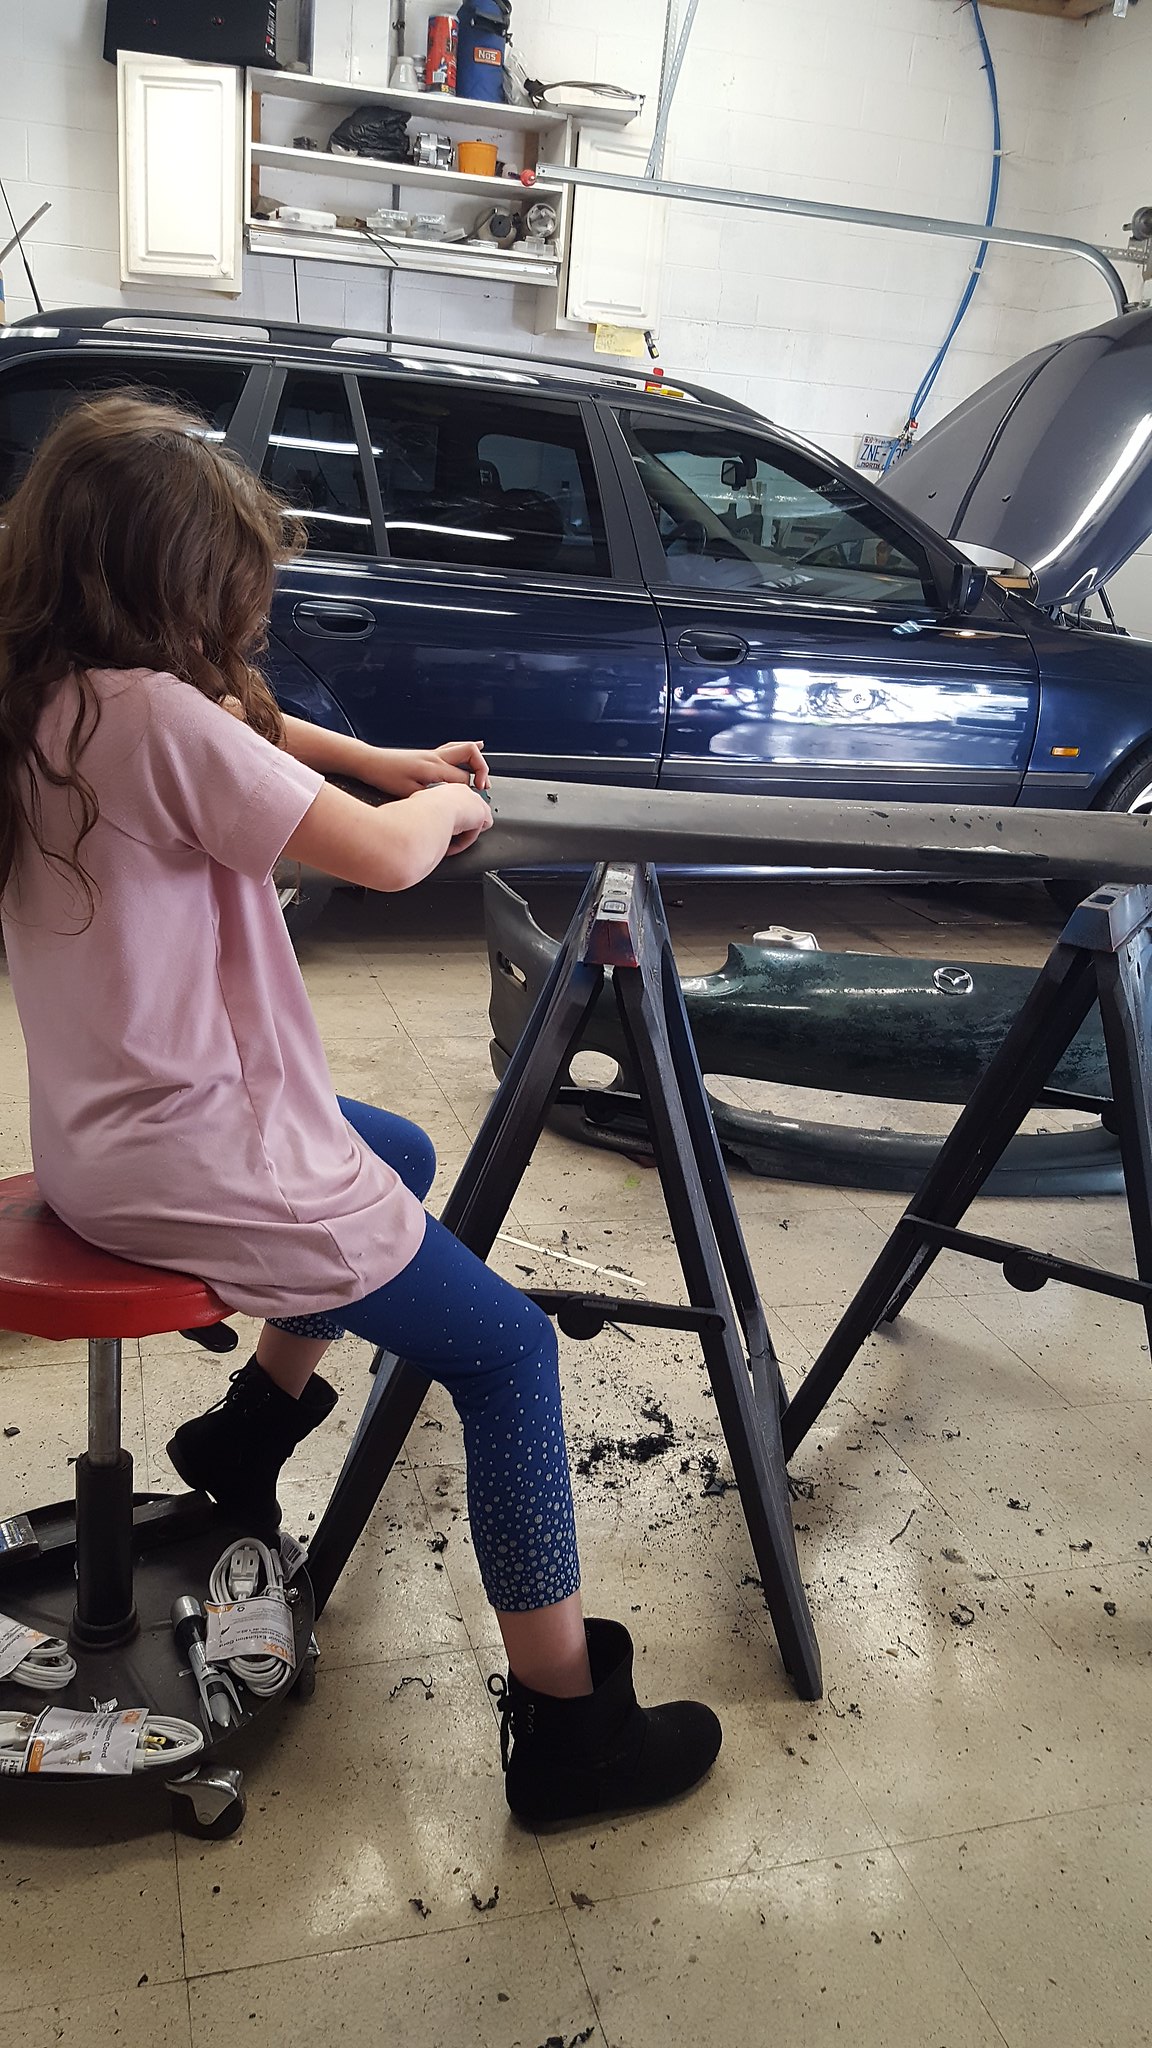
20181029_144150 by Michael Crawford, on Flickrnext up is belt routing. I finally figured out what size belt fits. Spent way too much on a belt, but have learned that the original application is a dodge intrepid. Ill snag a used belt next time at the junkyard. That'll cut $19 from the budget. And it'll make me happy to have mopar parts on this.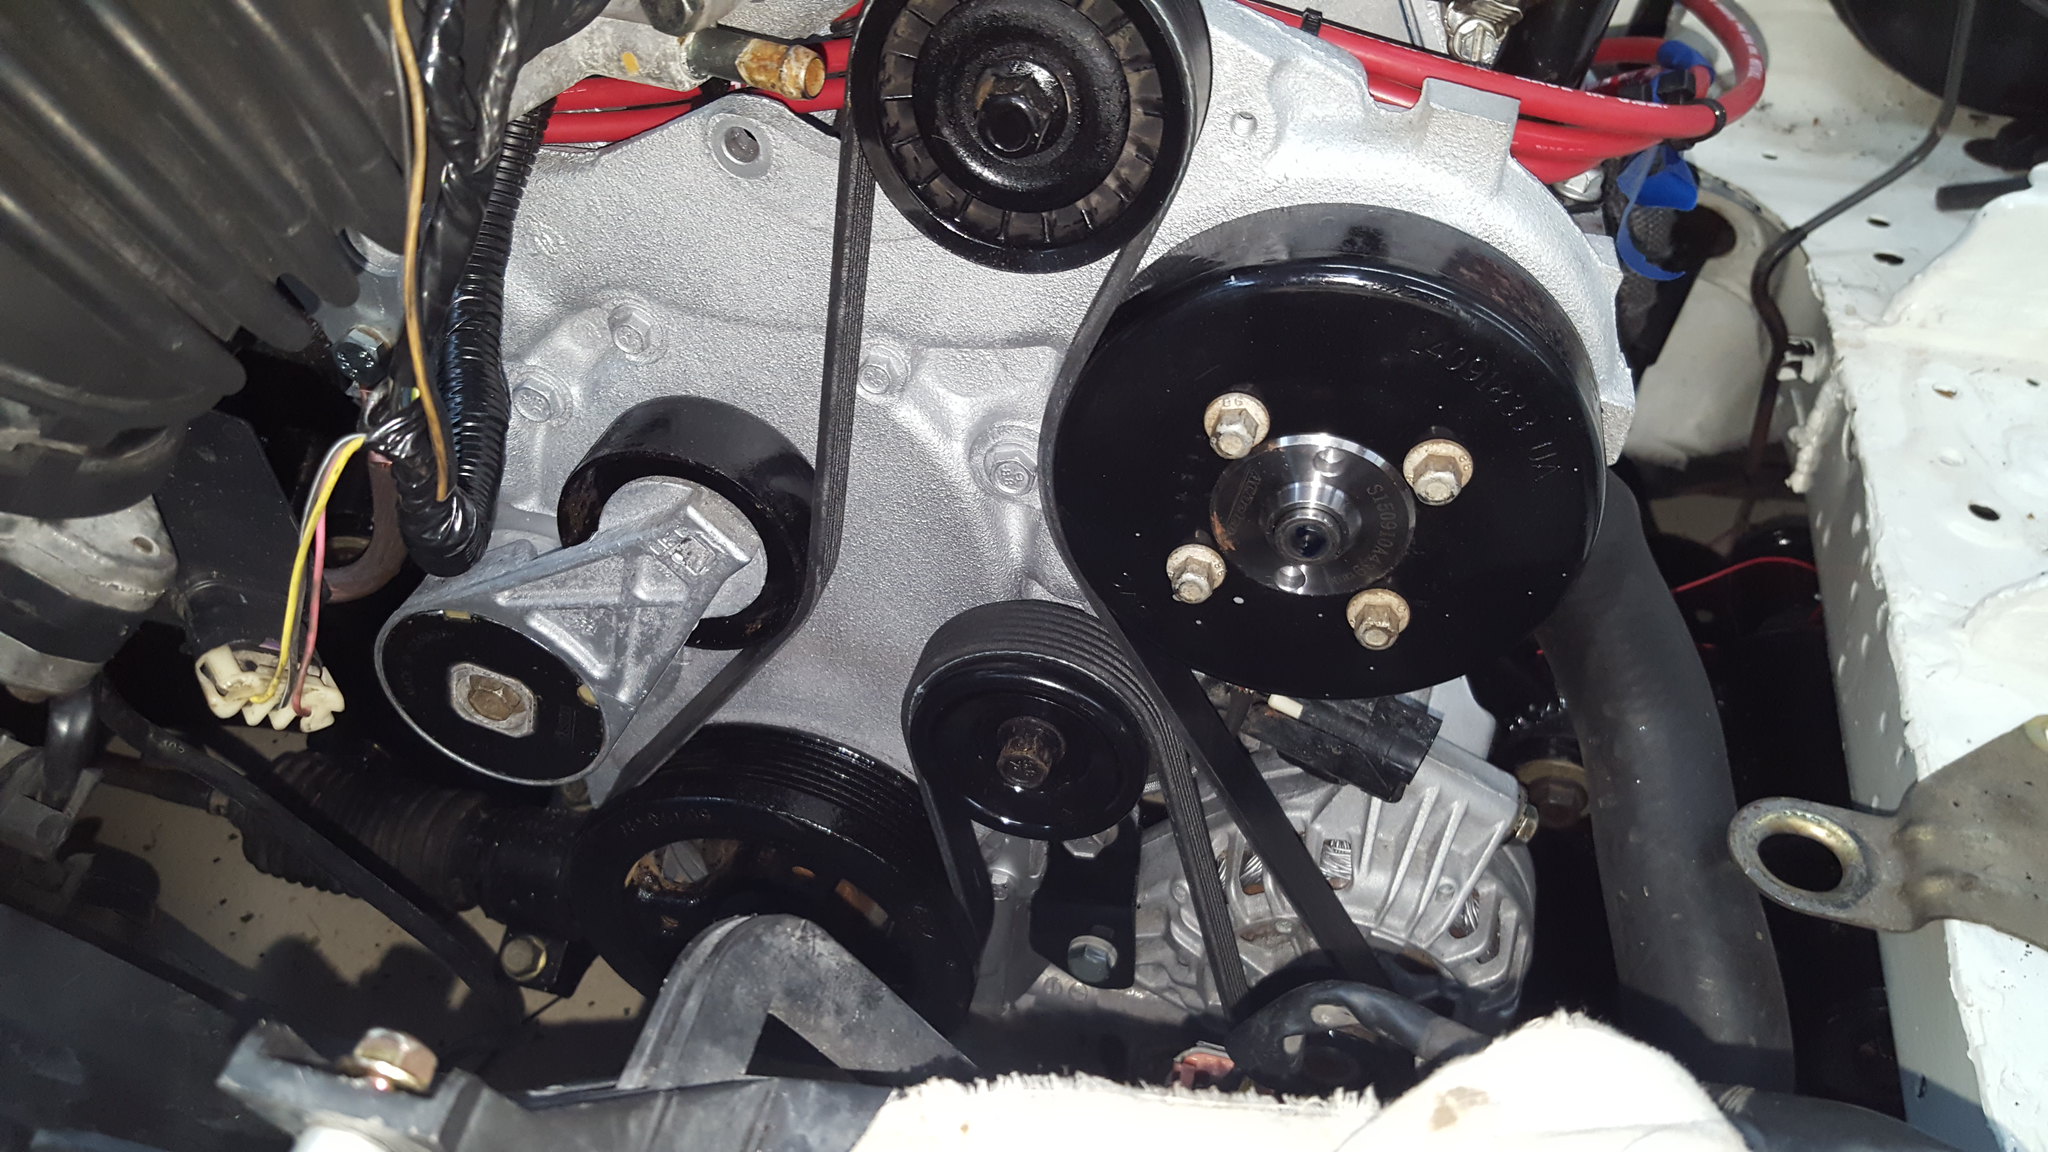
20181026_185835 by Michael Crawford, on Flickr
20181026_185904 by Michael Crawford, on FlickrI also picked up some free slicks for the 14s. 21X7x14 avon medium compound. Should cut $140 from the budget if they prove as fast at the SM7 on 15x6 in testing. Im sure as hell going to try! Very nice guy with some awesome garage hardware. And a really nice day and drive with my wife.
Screenshot_20181027-205009 by Michael Crawford, on Flickrthe kinked oil pressure line was really bothering me. The ultra-lites I bought, and then self traded for came with a braided line and a couple of fittings. The engine side fit my oil pressure sandwich plate fine, however the gauge end wouldn't fit. It was 1/8 female NPT, and the sunpro wasn't. So I bought a brass block off plug with a hex head for $.97, drilled, and tapped to make an o-ring sealing bushing (the threads were I think, 5/16 fine. Don't quote me)
20181019_202159 by Michael Crawford, on Flickr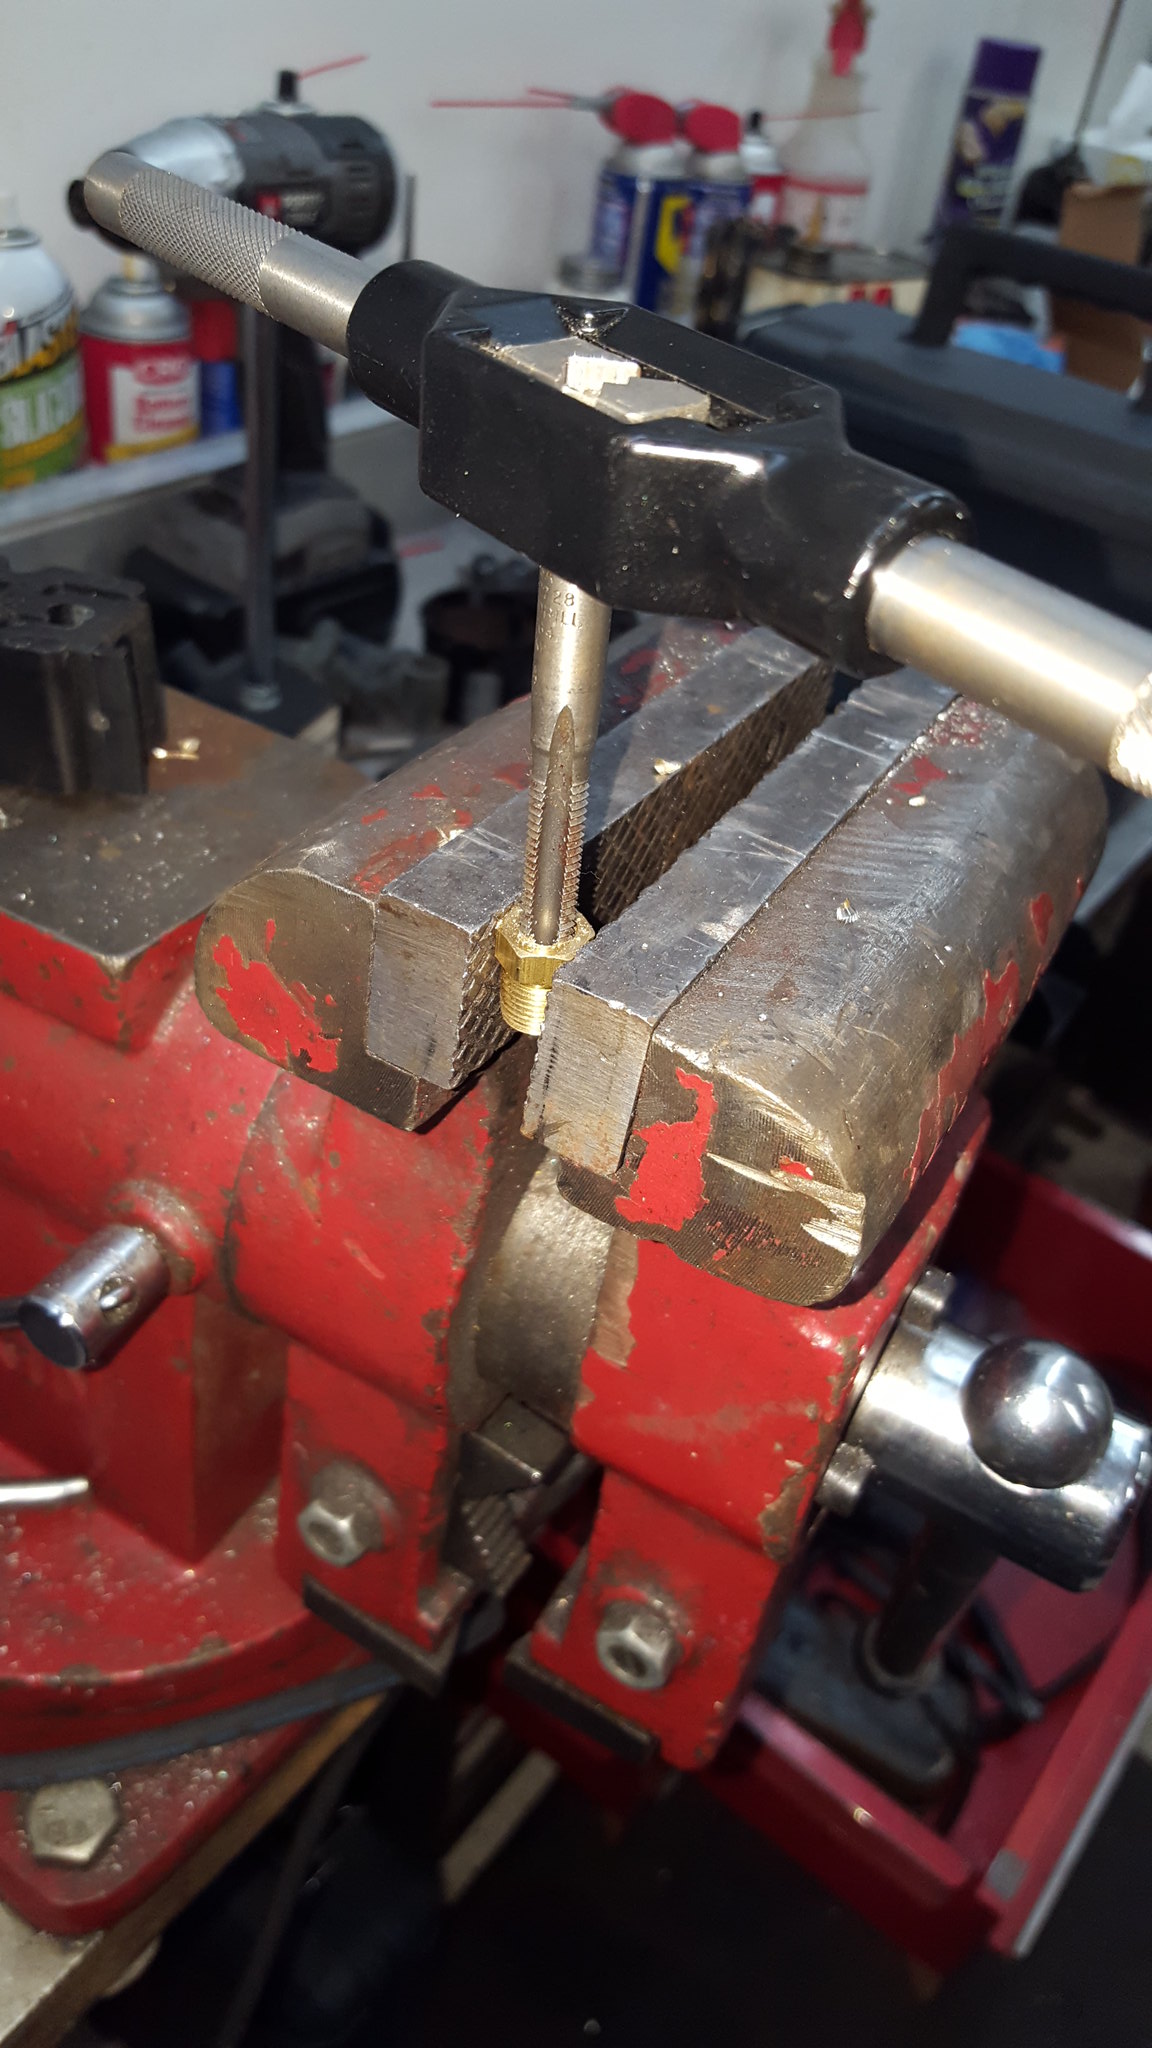
20181026_194239 by Michael Crawford, on Flickr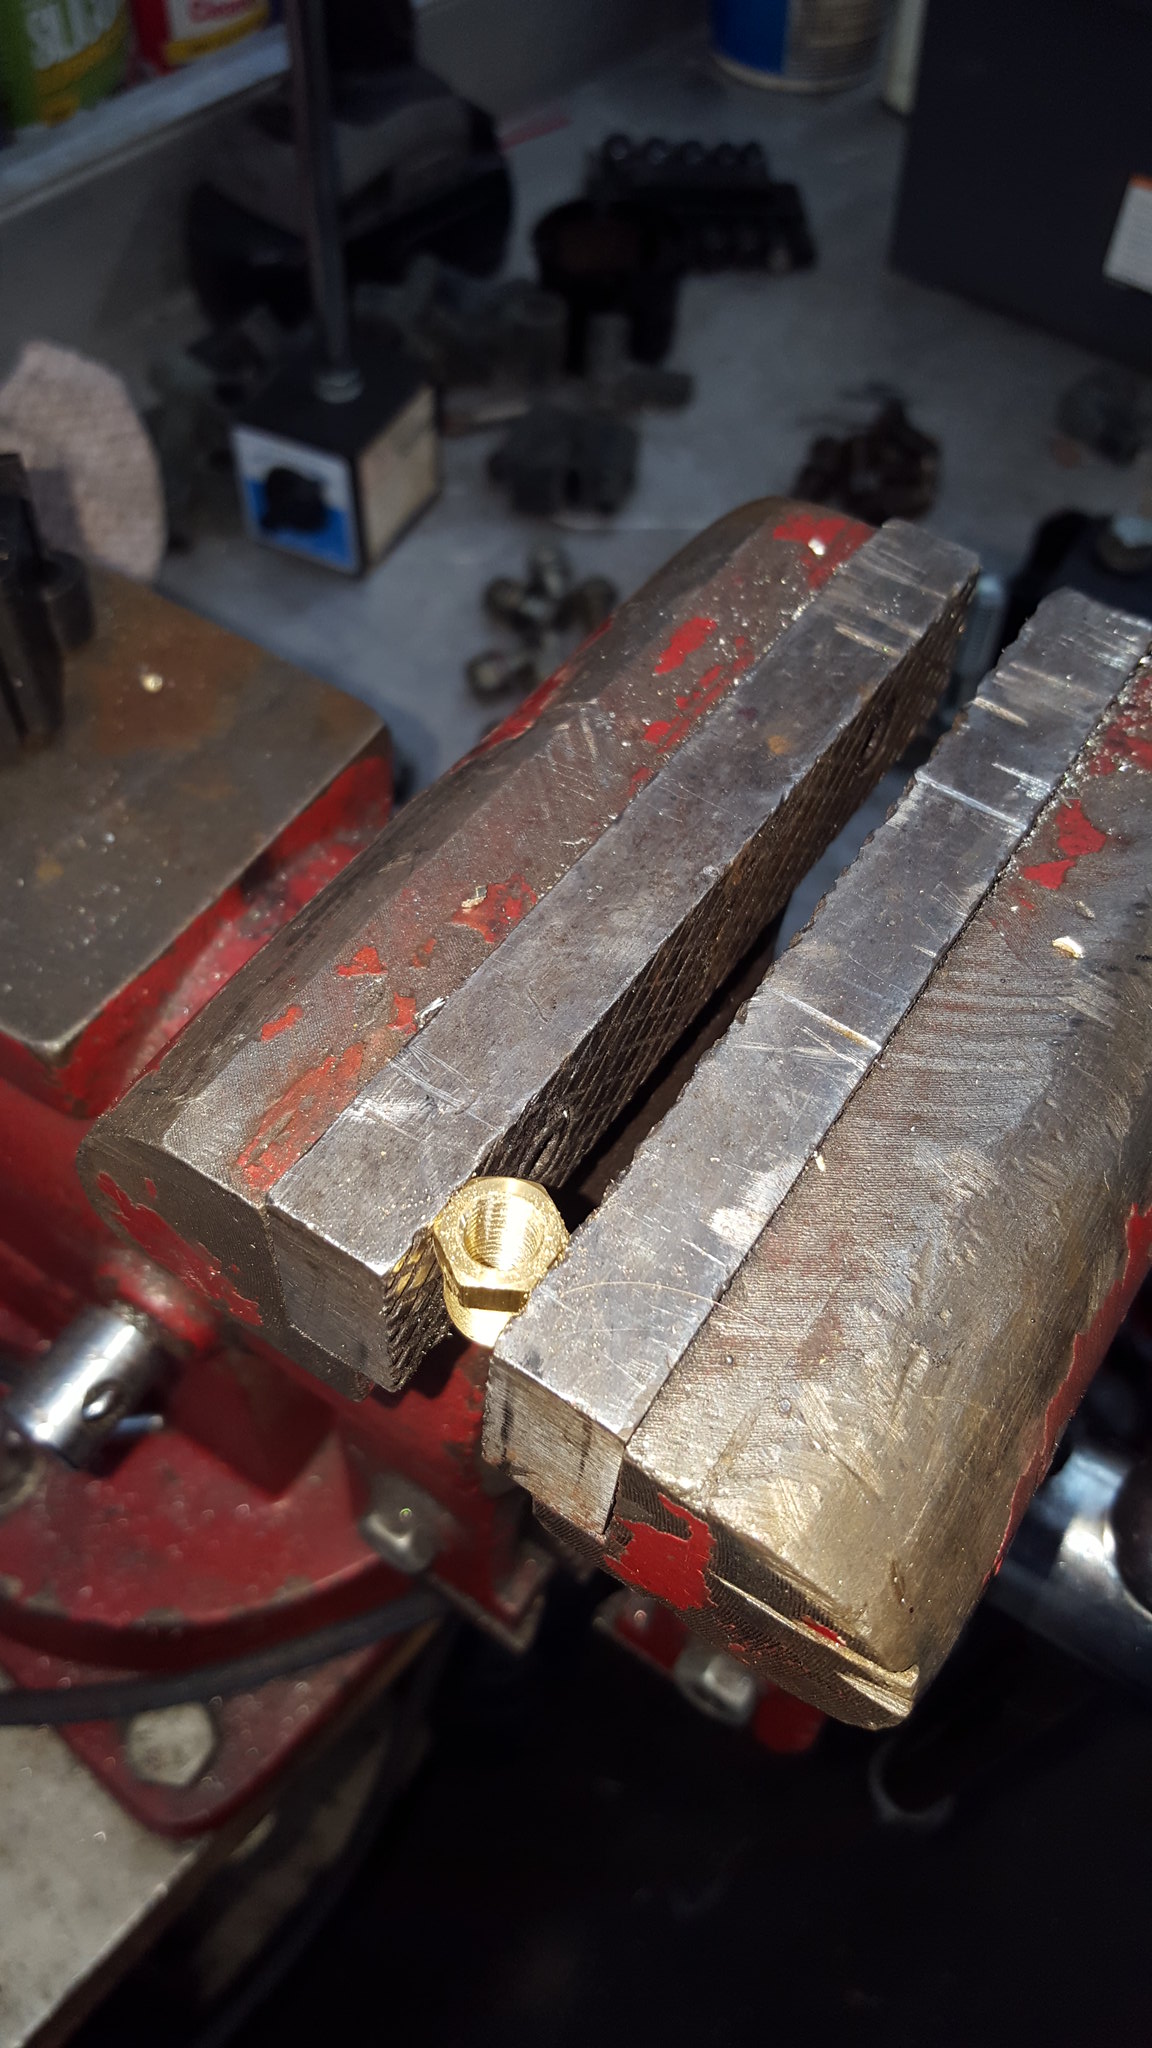
20181026_194626 by Michael Crawford, on Flickr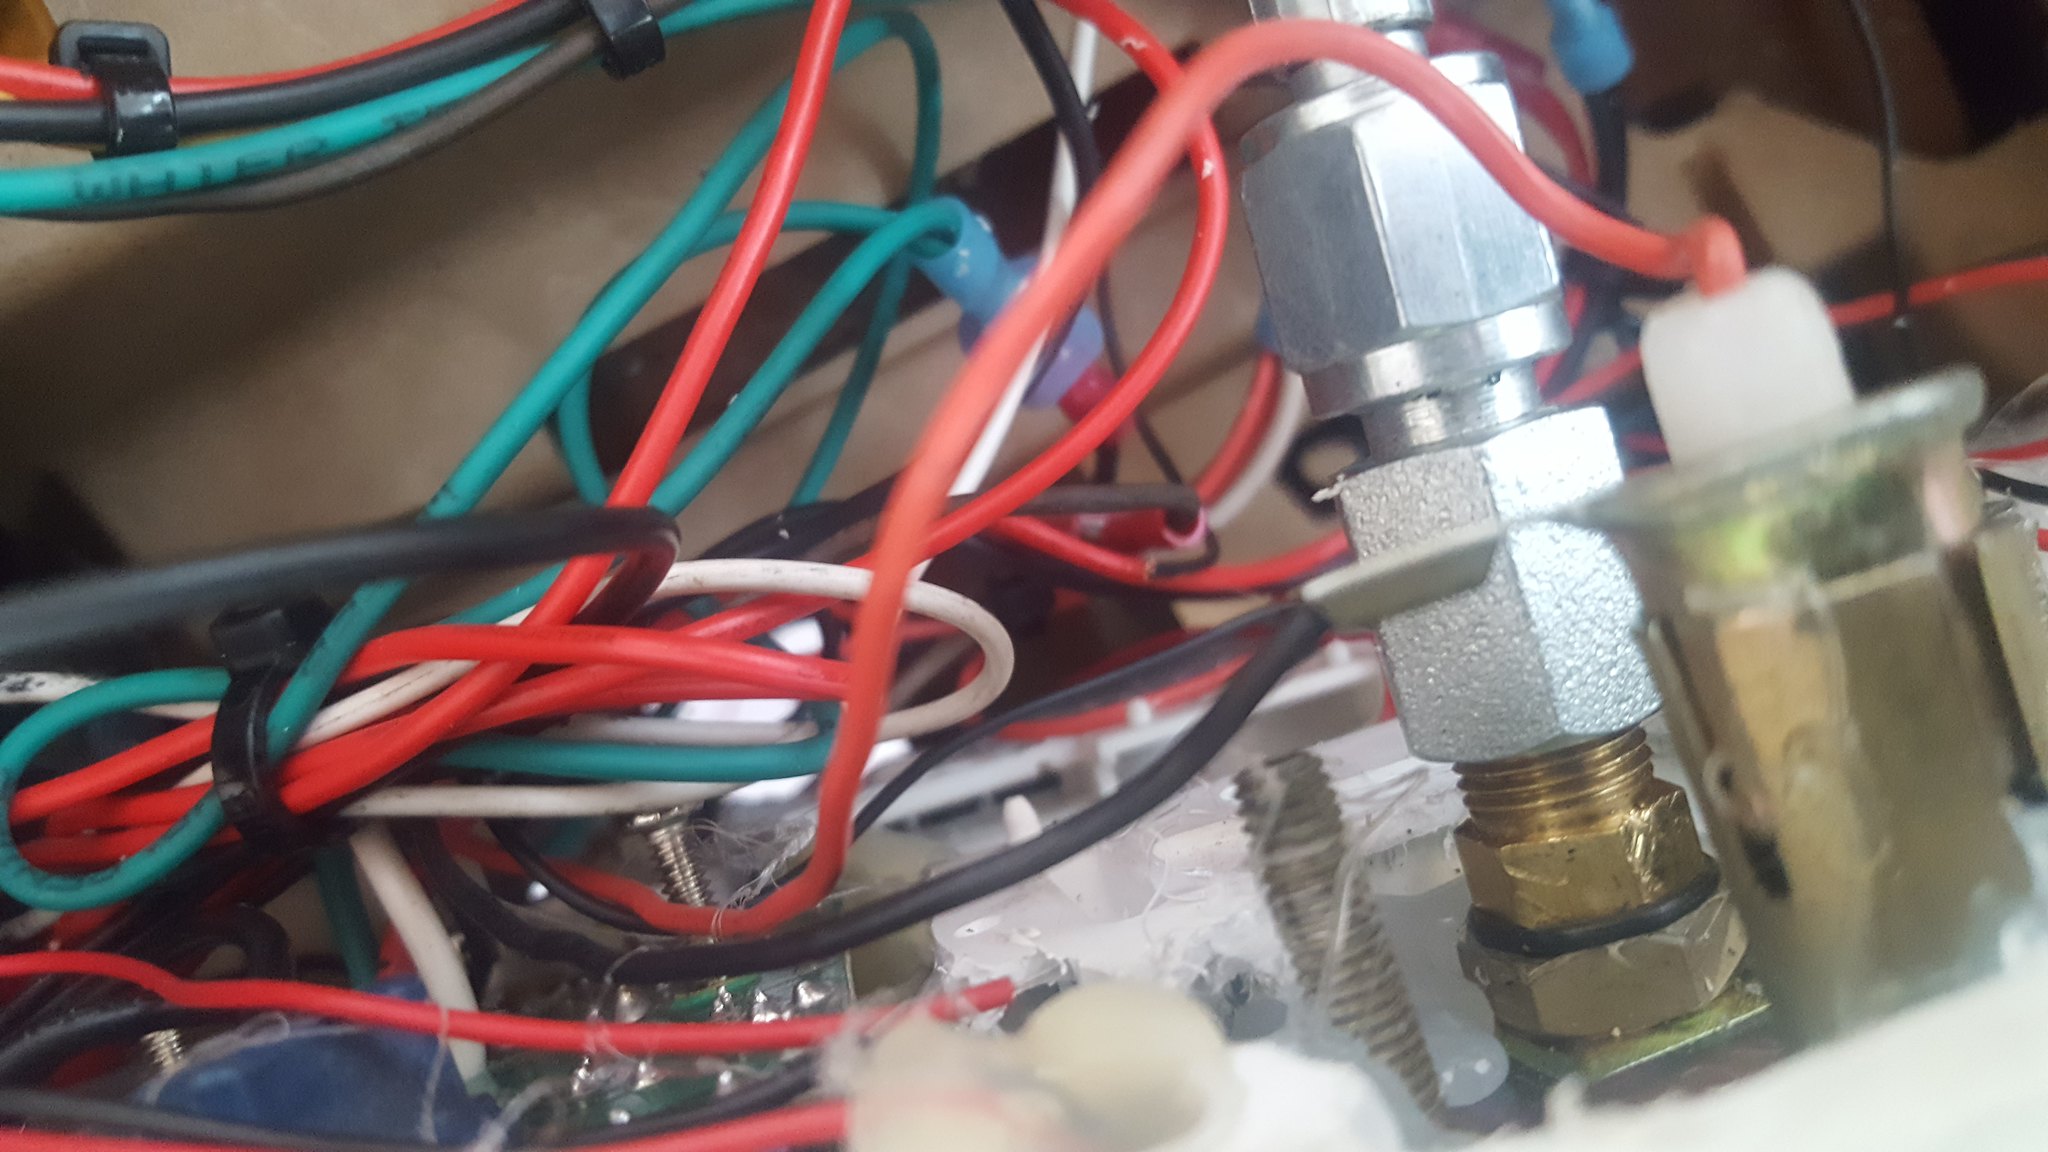
20181104_105634 by Michael Crawford, on Flickrhad to make some clearance for it behind the instrument panel.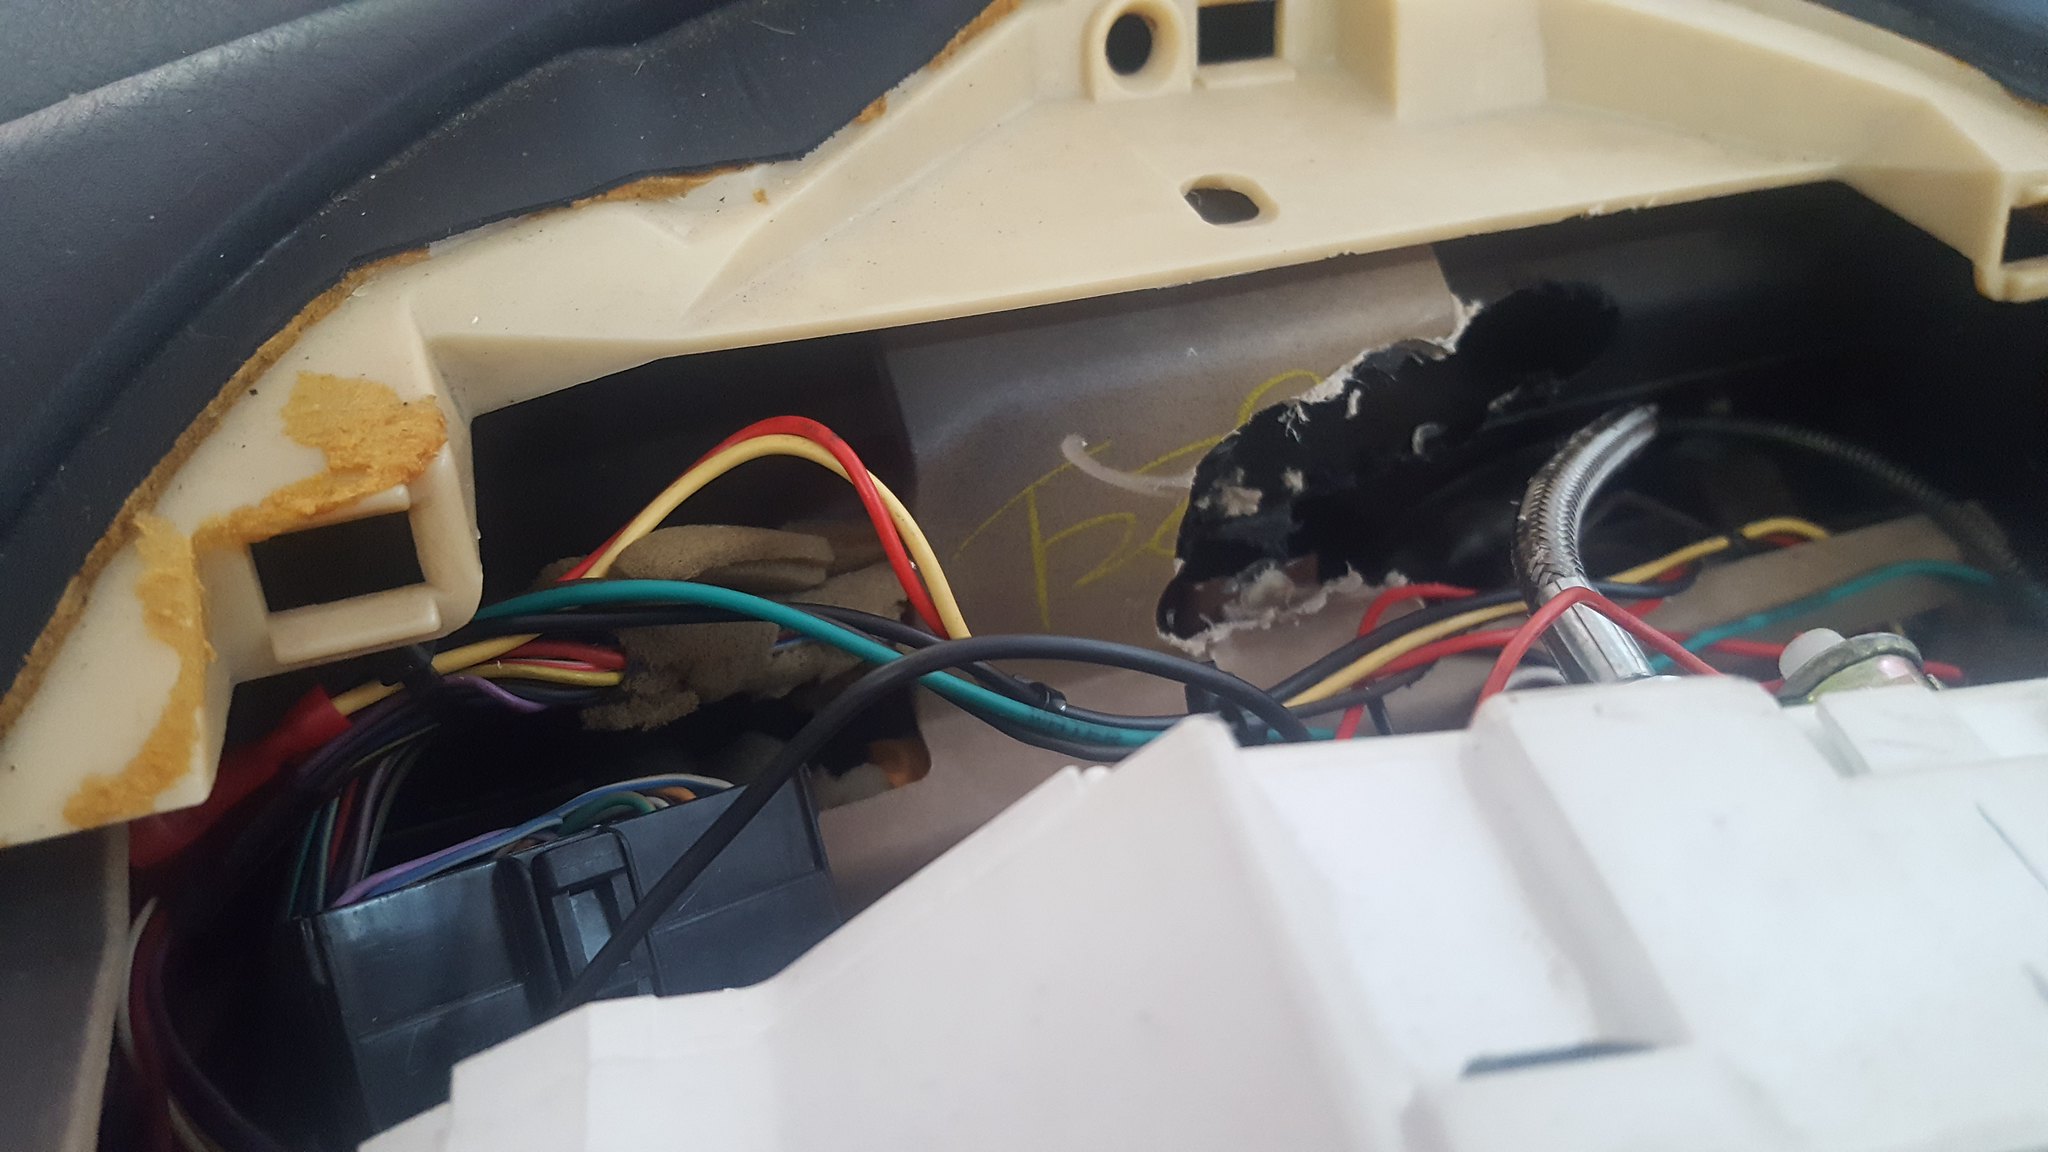
20181104_105627 by Michael Crawford, on Flickrnext, wiring and engine bay stuff.Obviosly, youve seen that the engine is together and wired. But here's some details.The ECM is run almost completely independent from the chassis. Only crossover points are the fan relays, fuel pump relay, OBD2 port, and instrument panel. I built a switch panel from scrap plastic, a free pull-a-part fuse block, some leftover LEDs, and used toggles. It has only now dawned on me that I could have relayed the fuse block, and made life much simpler. Thats revision 2 coming soon. Anyway, I did my best to make the whole engine bay side of things clean, neat, and mostly hidden. Routed the plug wires with zip tie looms, and trying my best to make the hoses neat and tidy (haven't done the fuel pressure regulator/MAP/crankcase vent yet). I'm happy with how its coming out for the most part.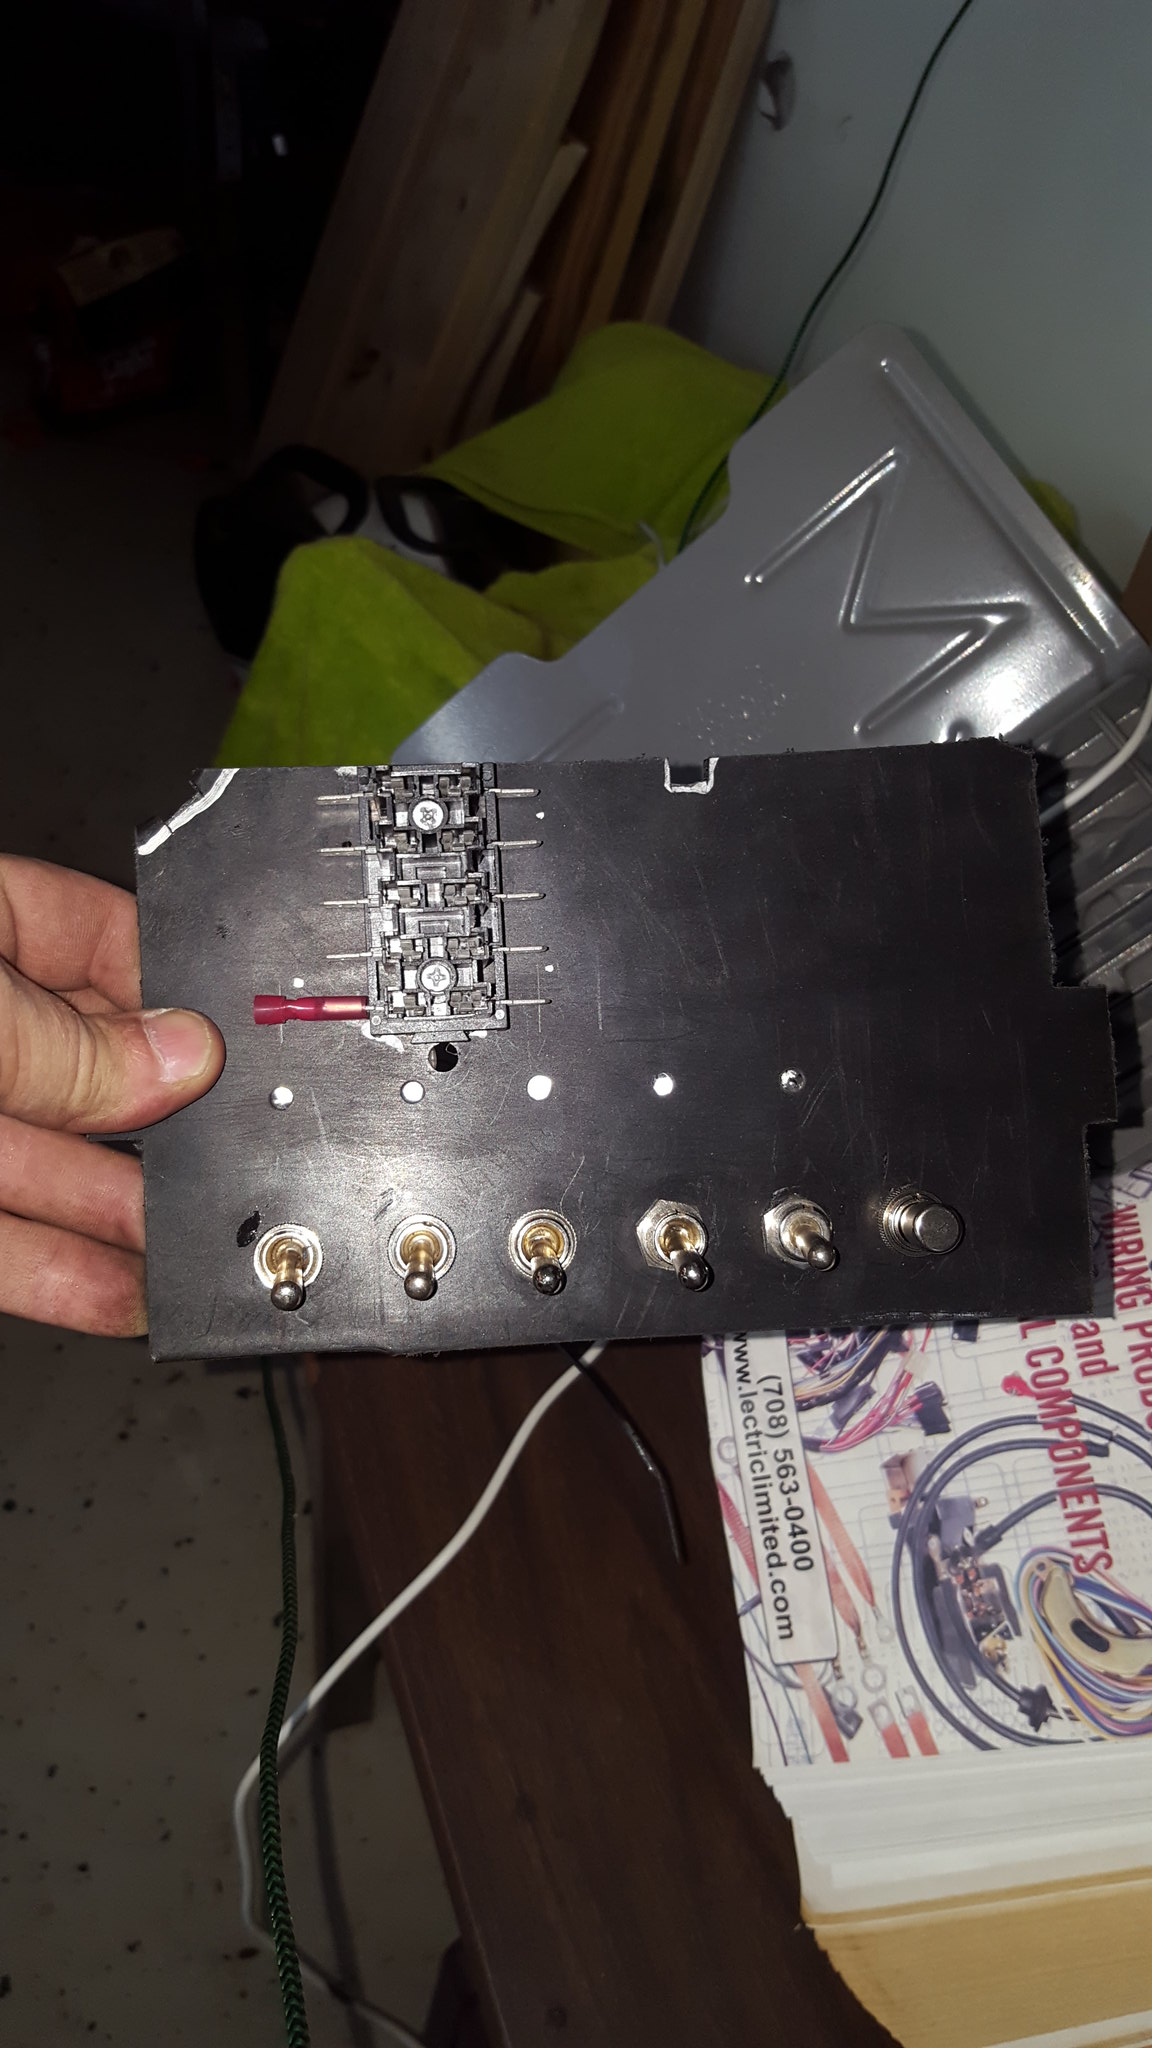
20181019_190432 by Michael Crawford, on Flickr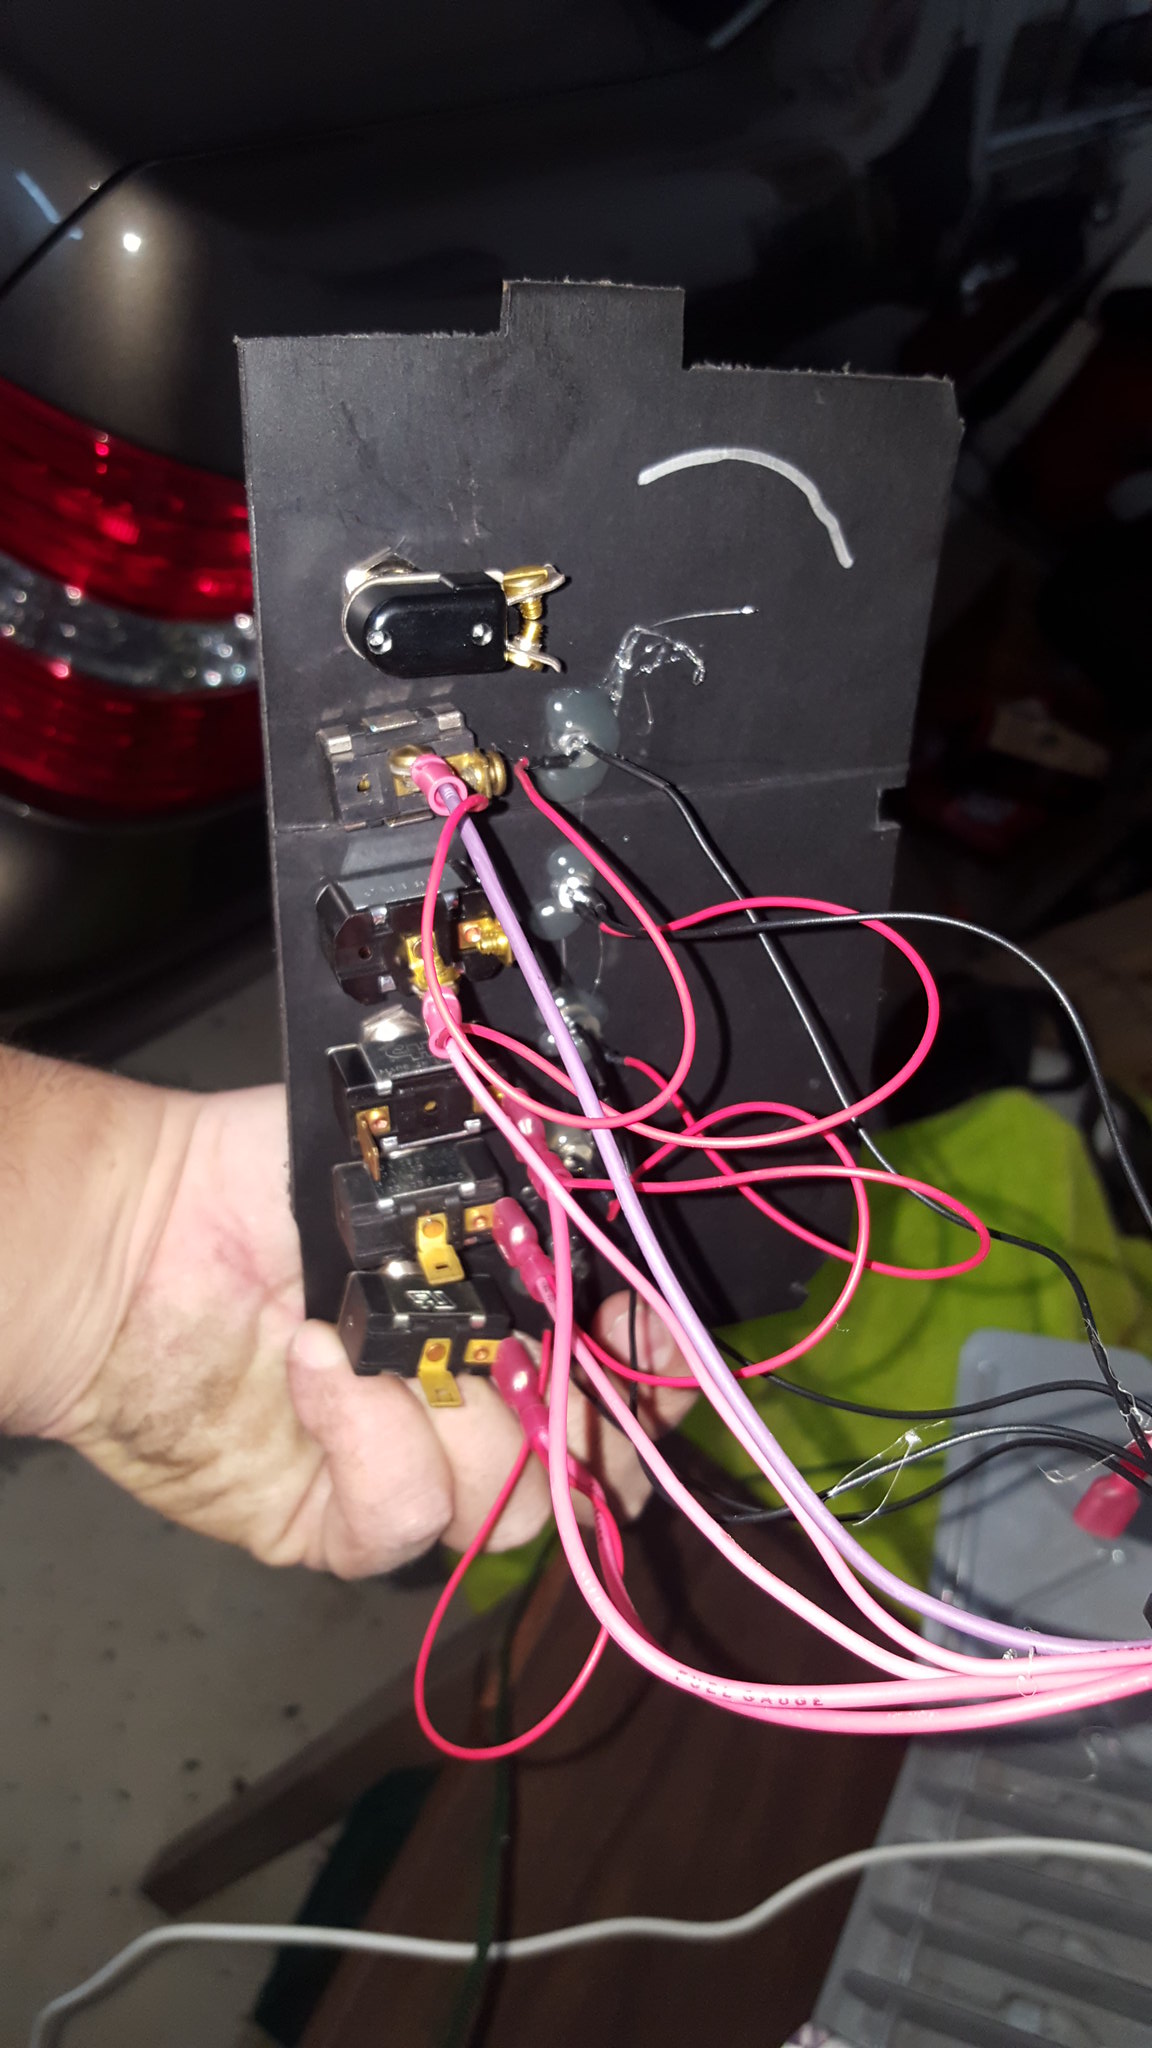
20181019_190437 by Michael Crawford, on Flickr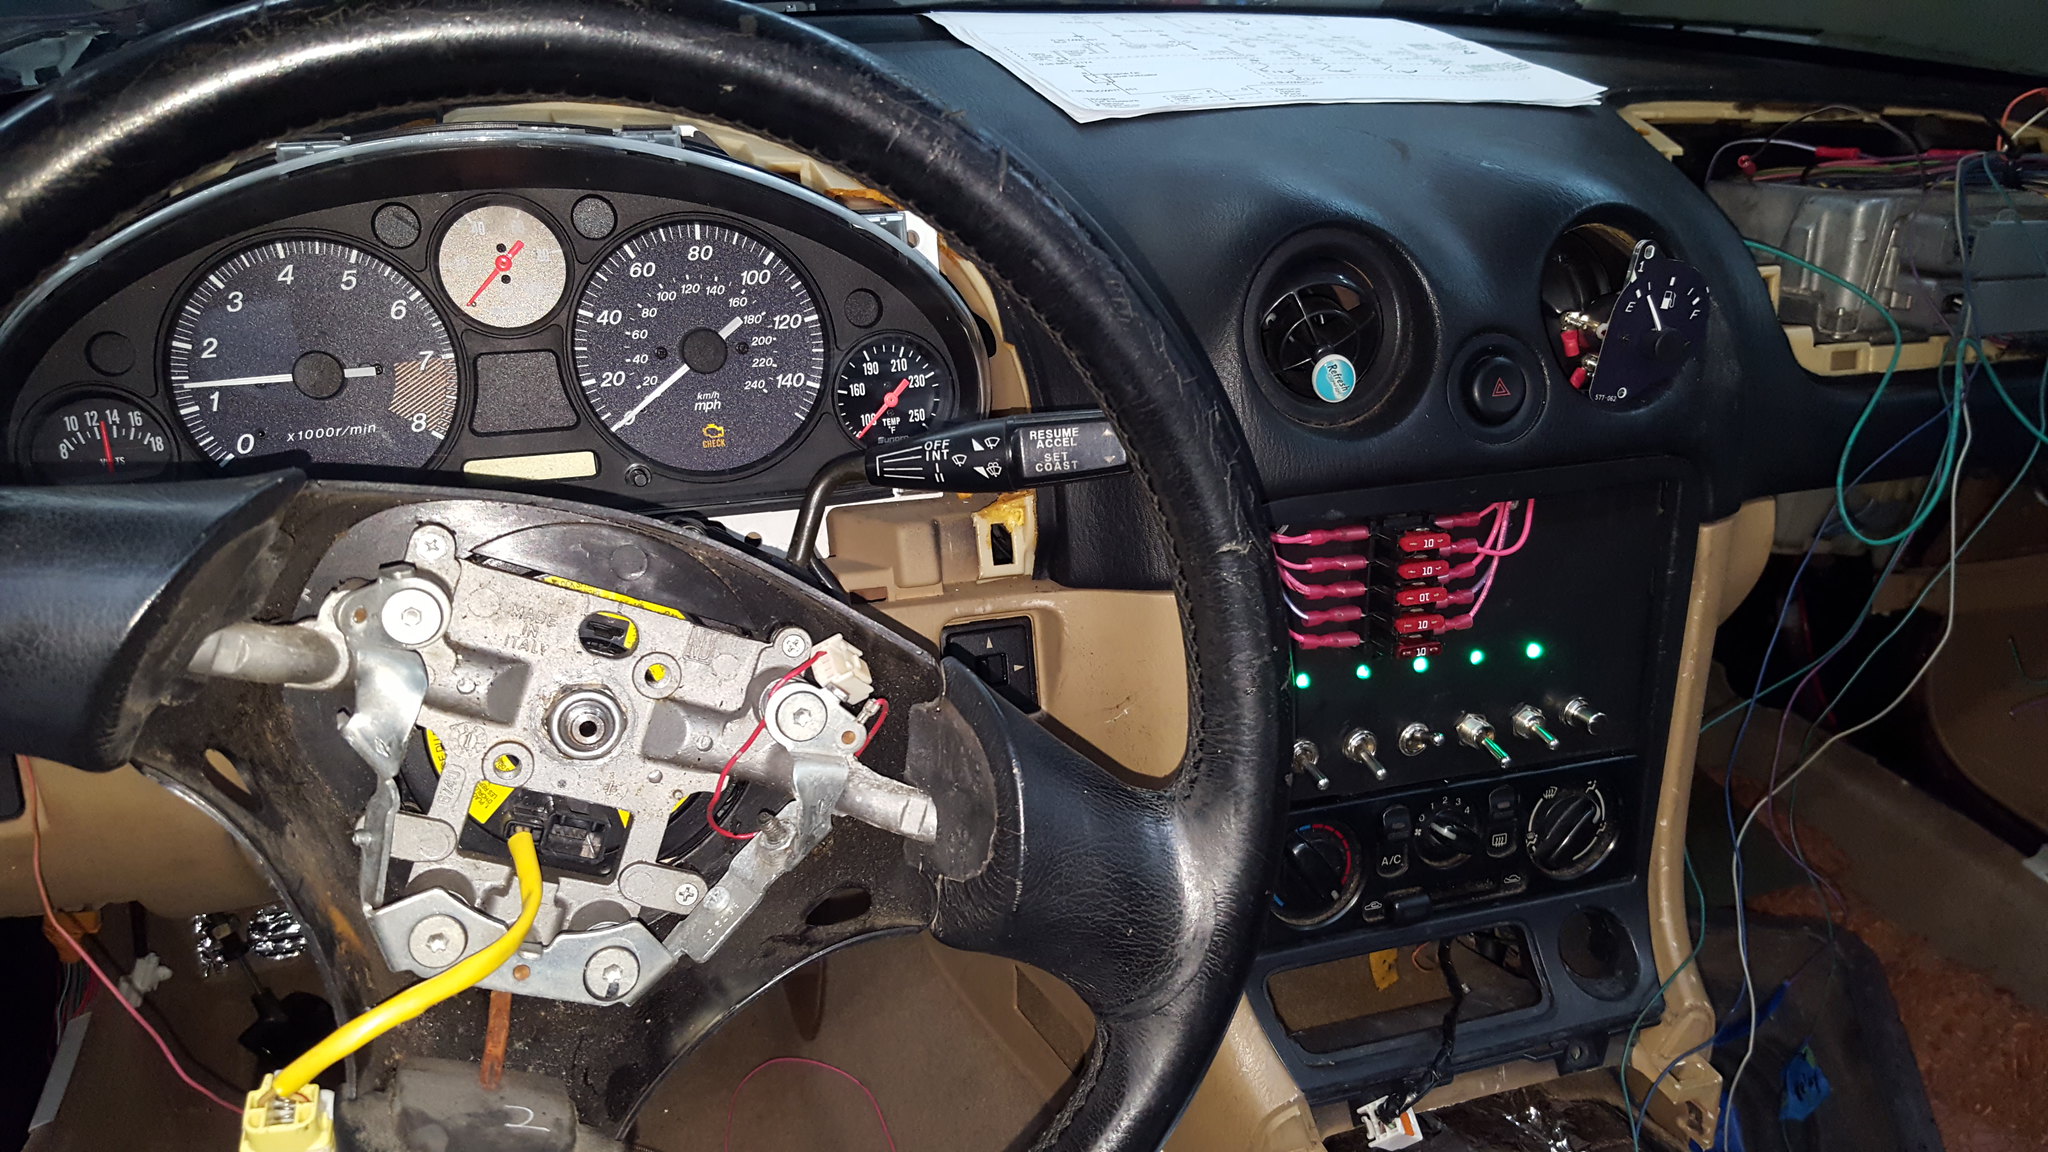
20181019_202227 by Michael Crawford, on Flickr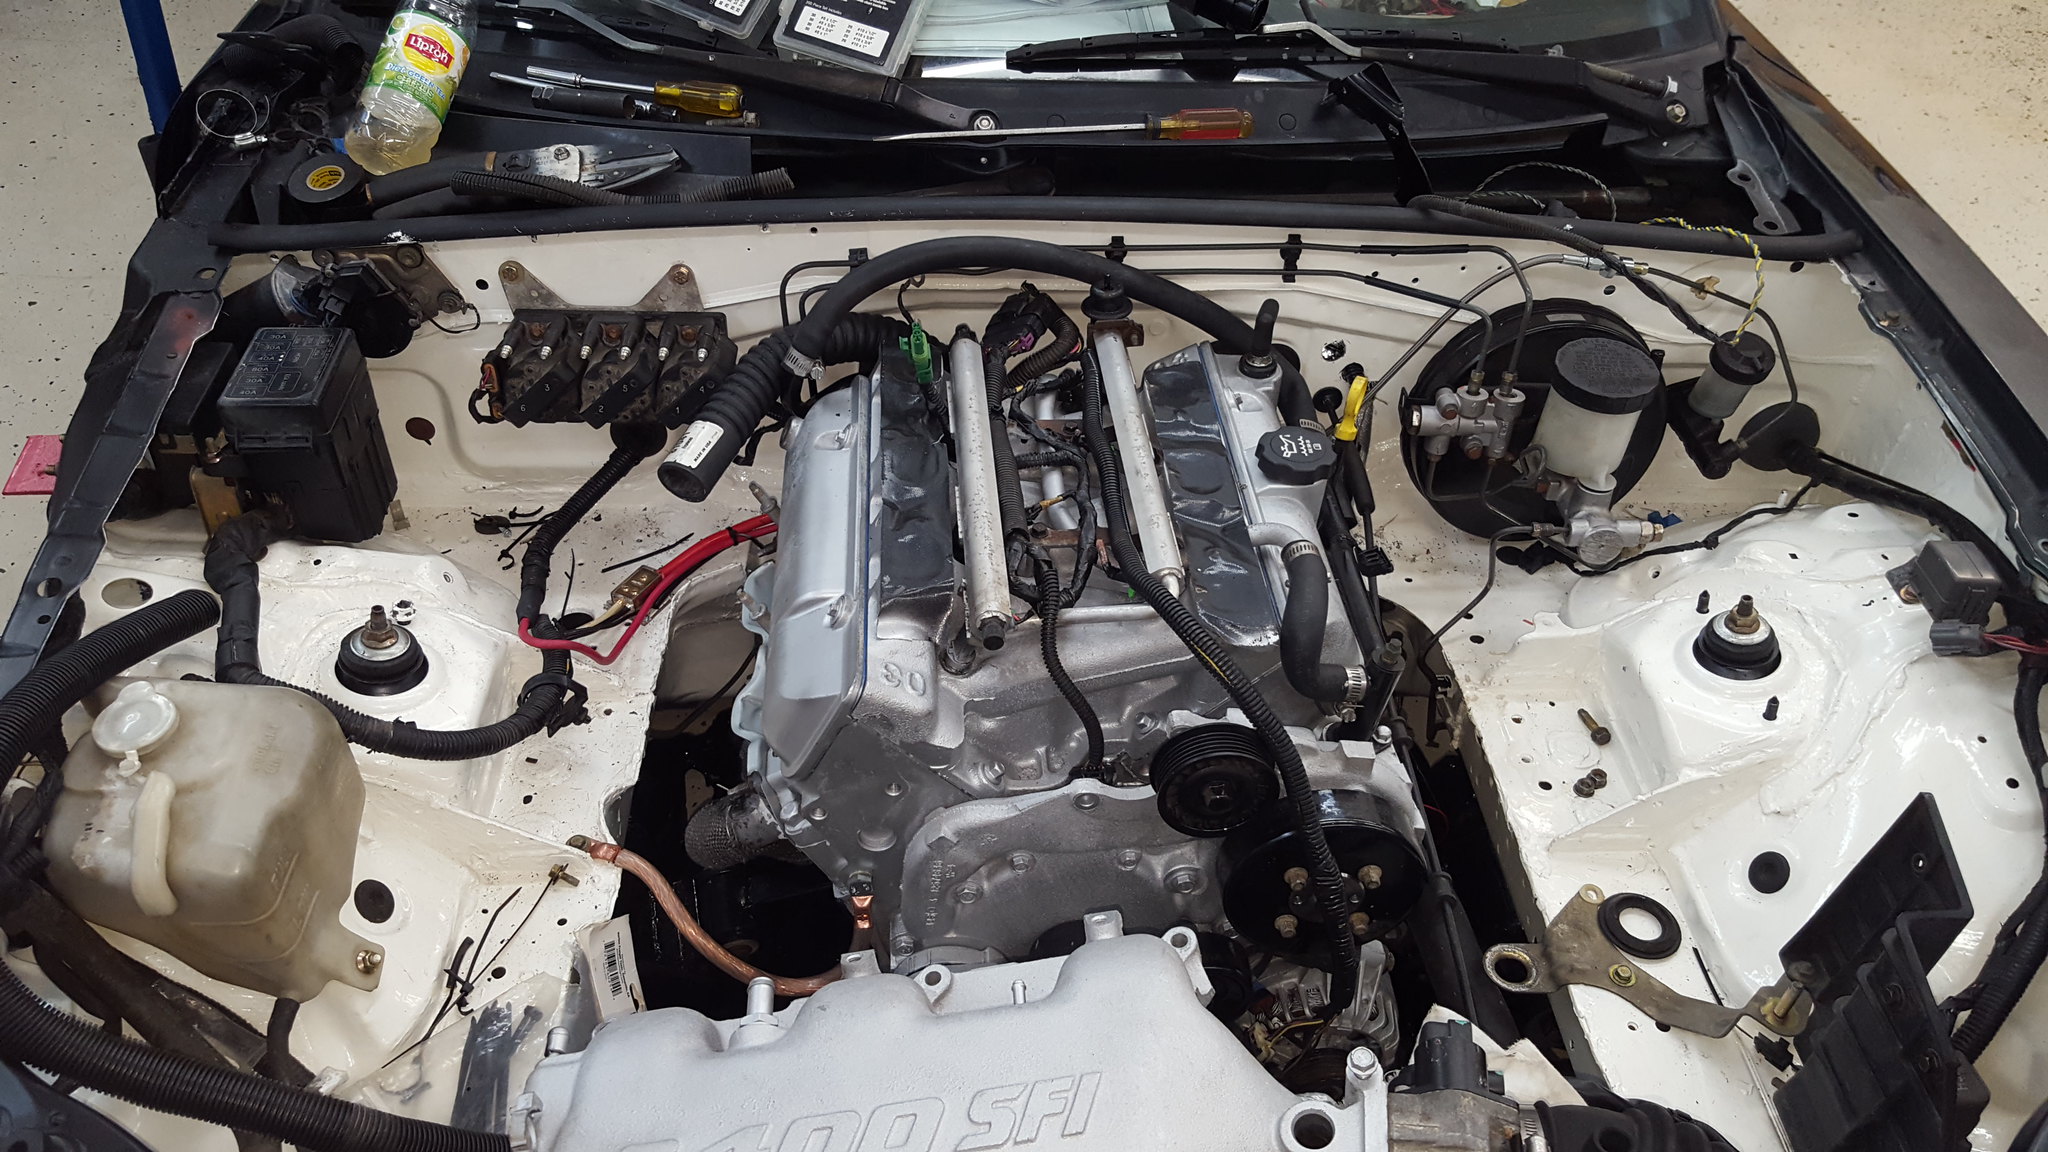
20181021_102253 by Michael Crawford, on Flickr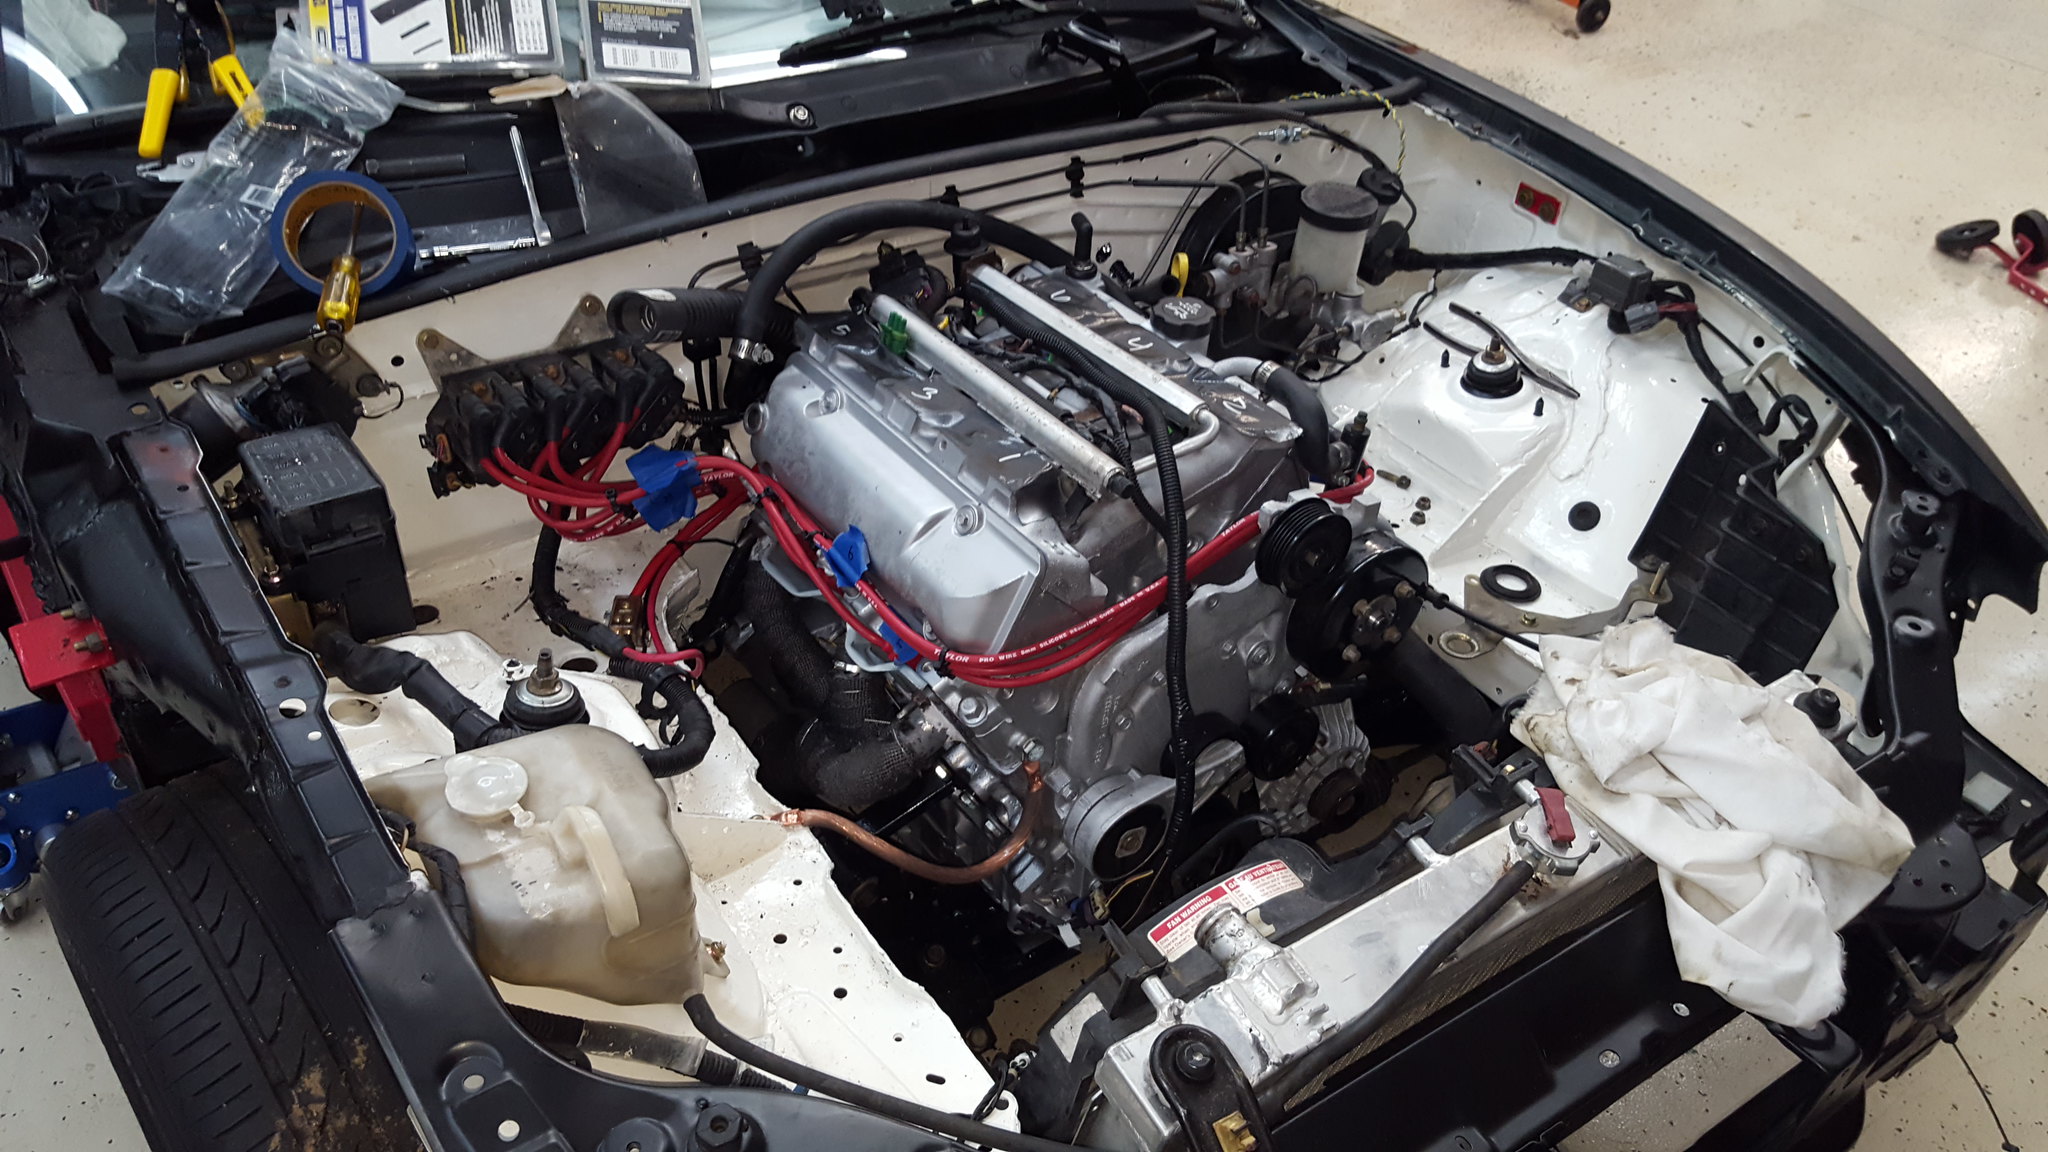
20181023_170526 by Michael Crawford, on Flickr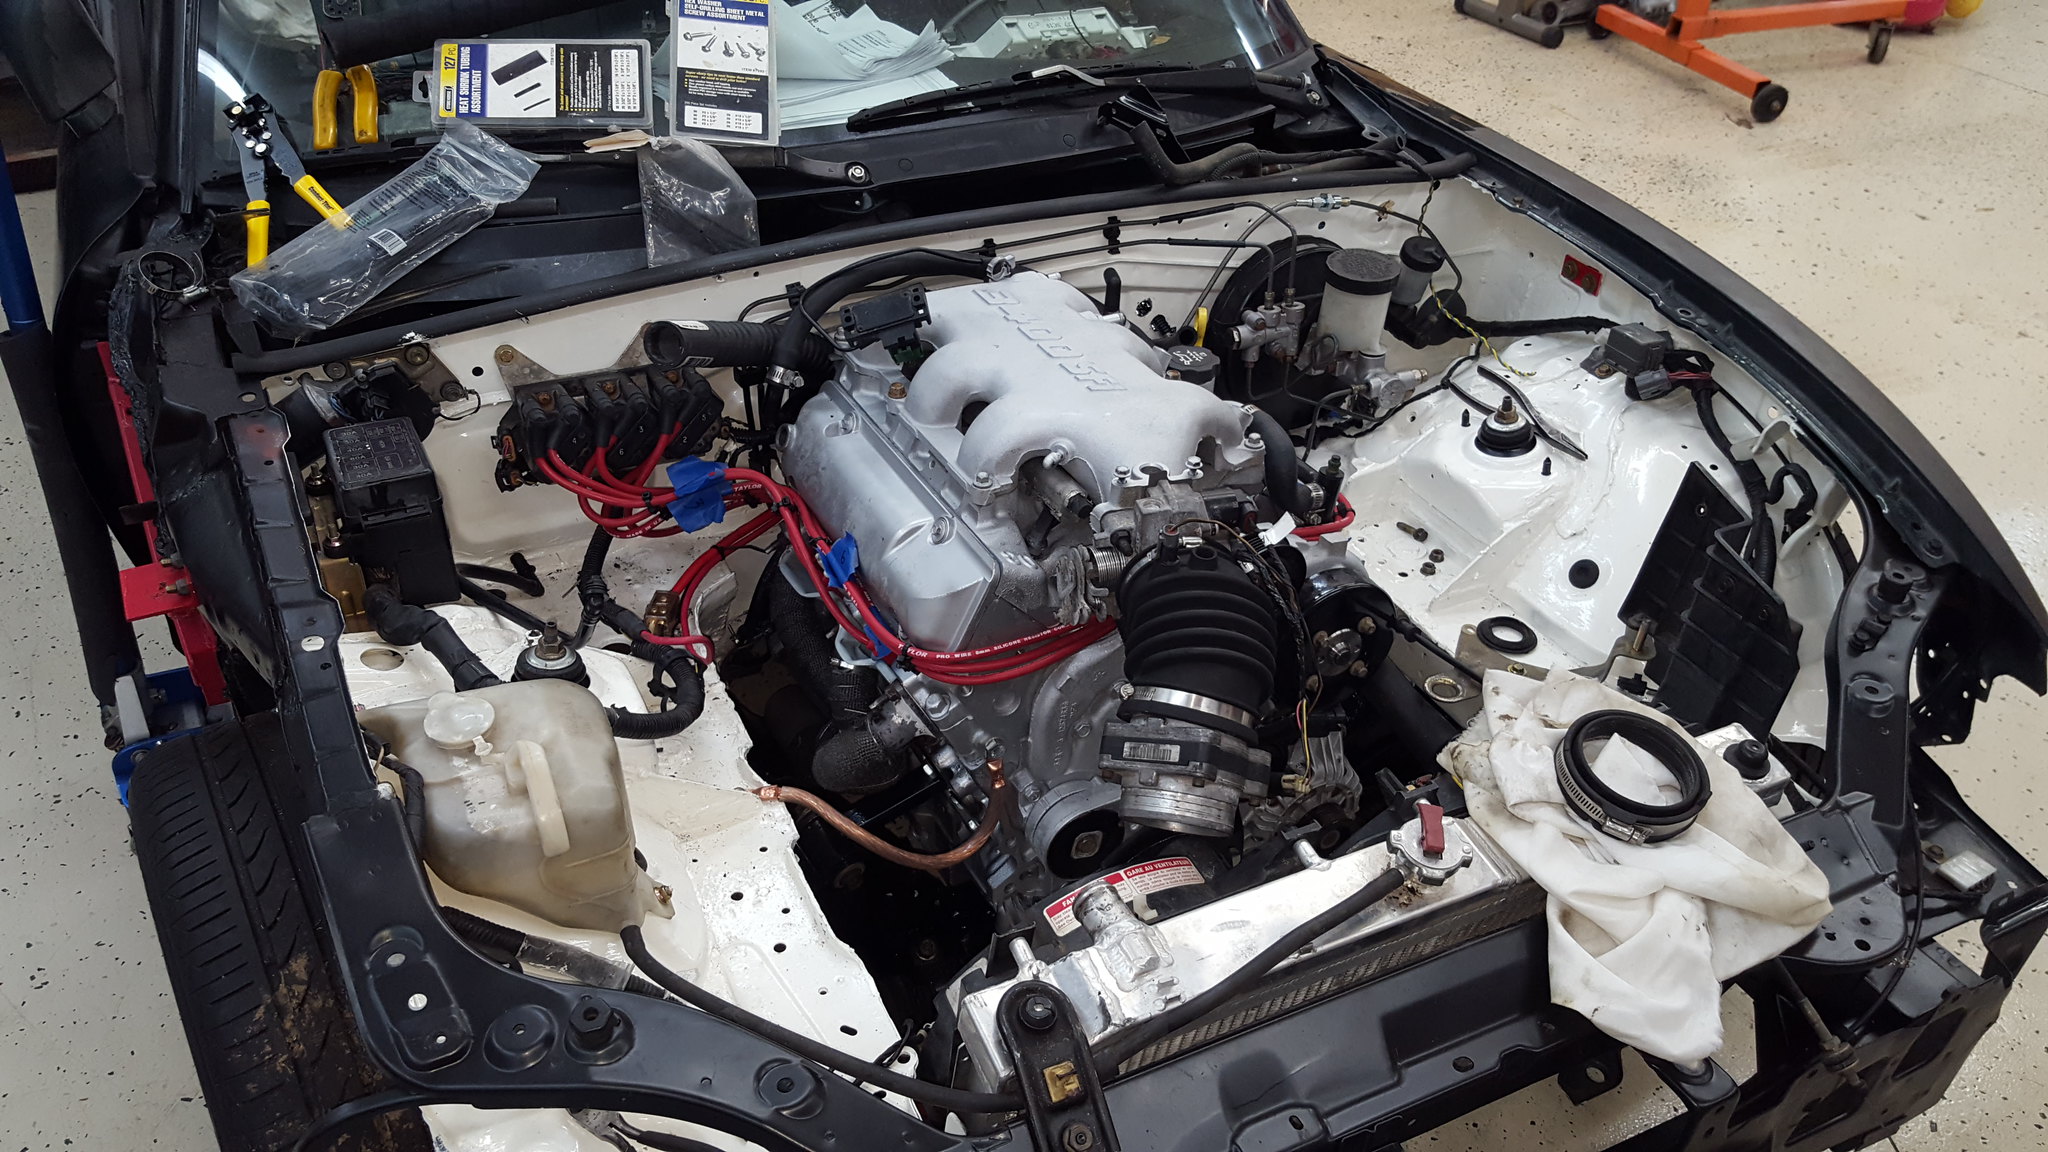
20181023_180020 by Michael Crawford, on Flickr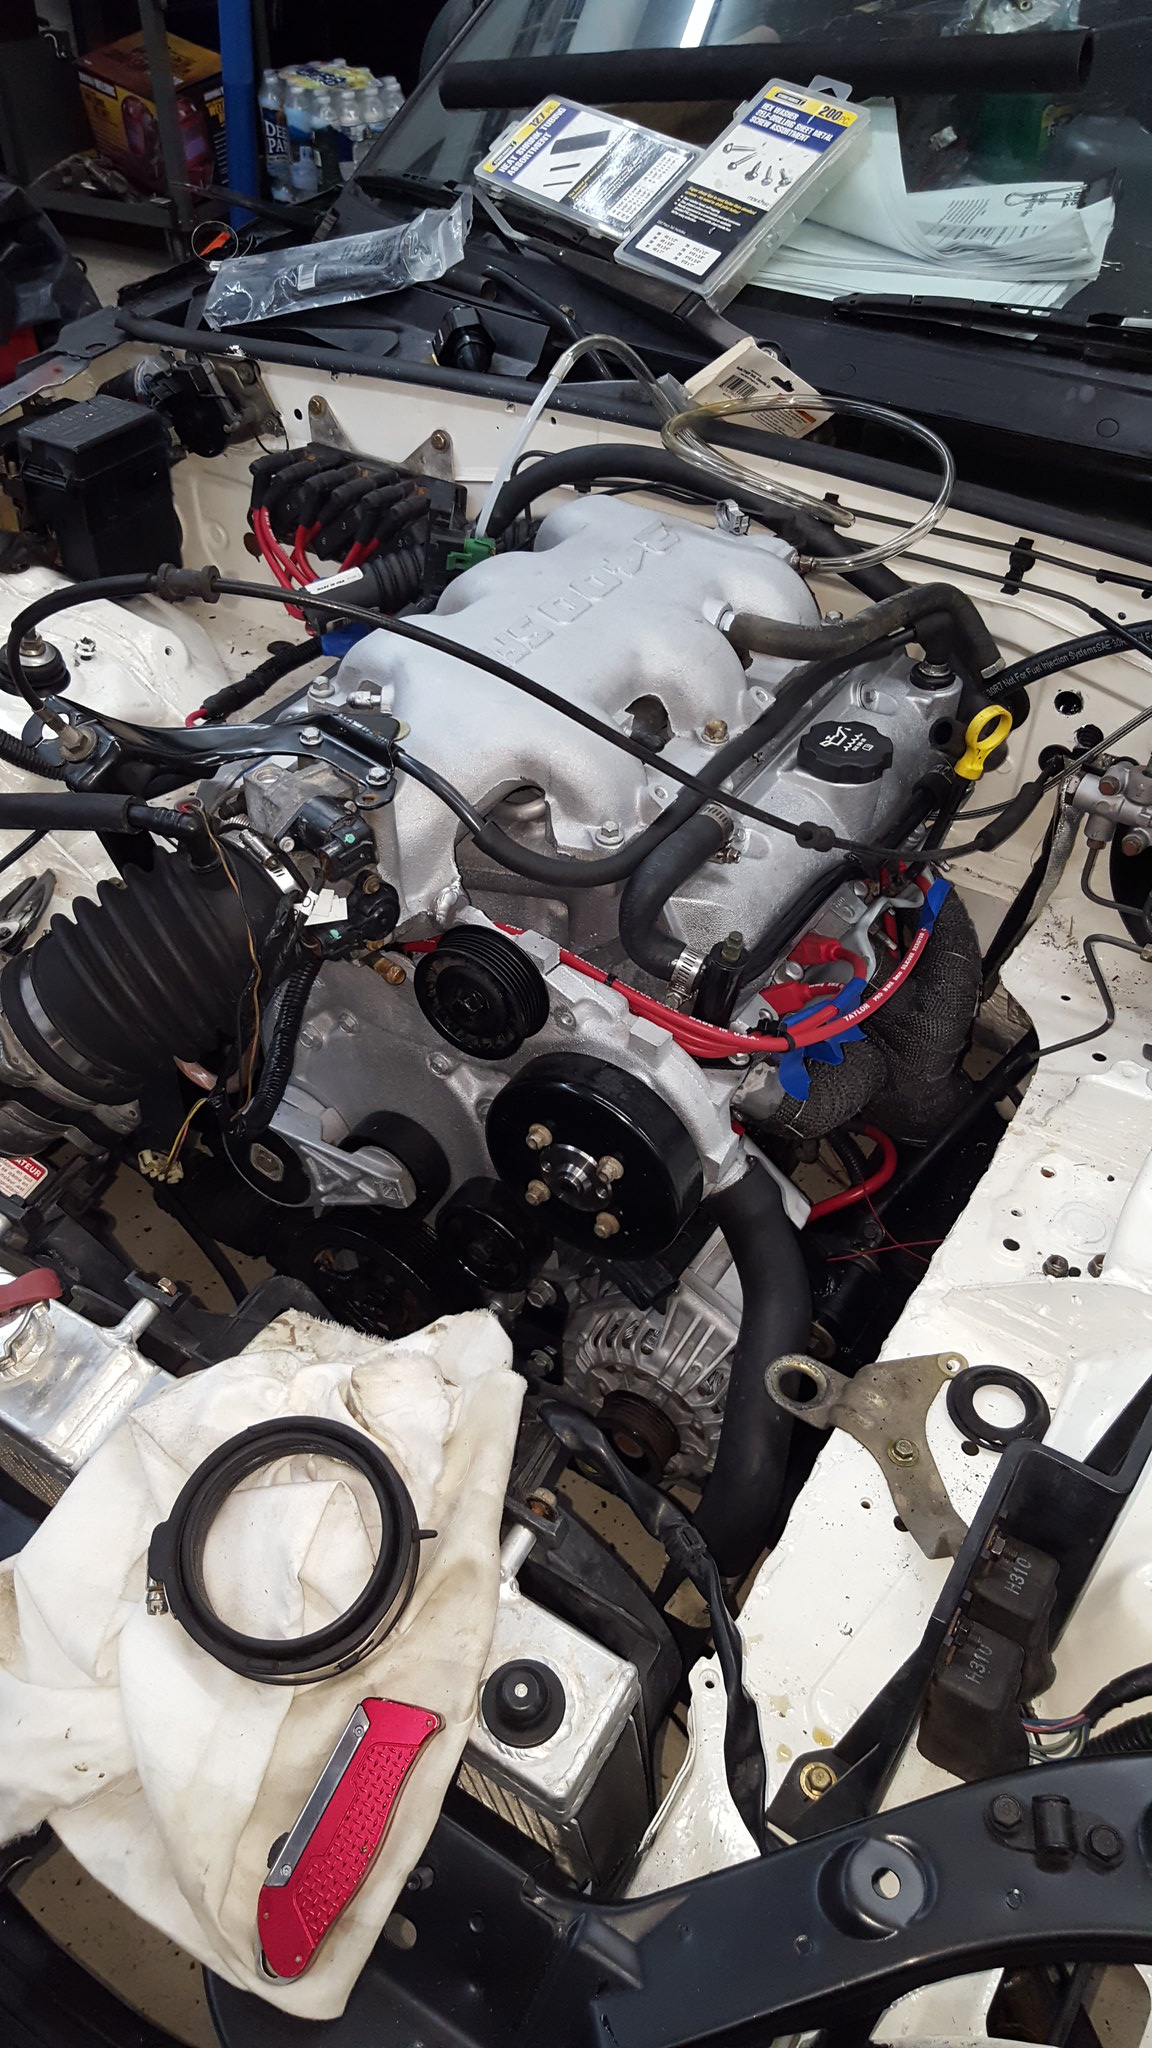
20181025_191007 by Michael Crawford, on Flickrthis brings us up to exhaust. At the end of the post will be a few YouTube links. Needless to say, exhaust on this was NOT optional. We were shooting fireballs from the open headers. But it RUNS now, and actually sounds good. I had to tweak the exhaust upon re-installation for no obvious reason, except the one where I forgot an oxygen sensor bung. But for no good reason the midpipes were now too short, so I had to extend the legs of my merge collector. And I also cut the mushroom heads off the hangars to make install and removal of the rear section easier. I also had to move the collector down towards the butterfly brace so it would stop hitting the driveshaft.But its done now, and sounds GOOD. to me it sounds a lot like an indy car.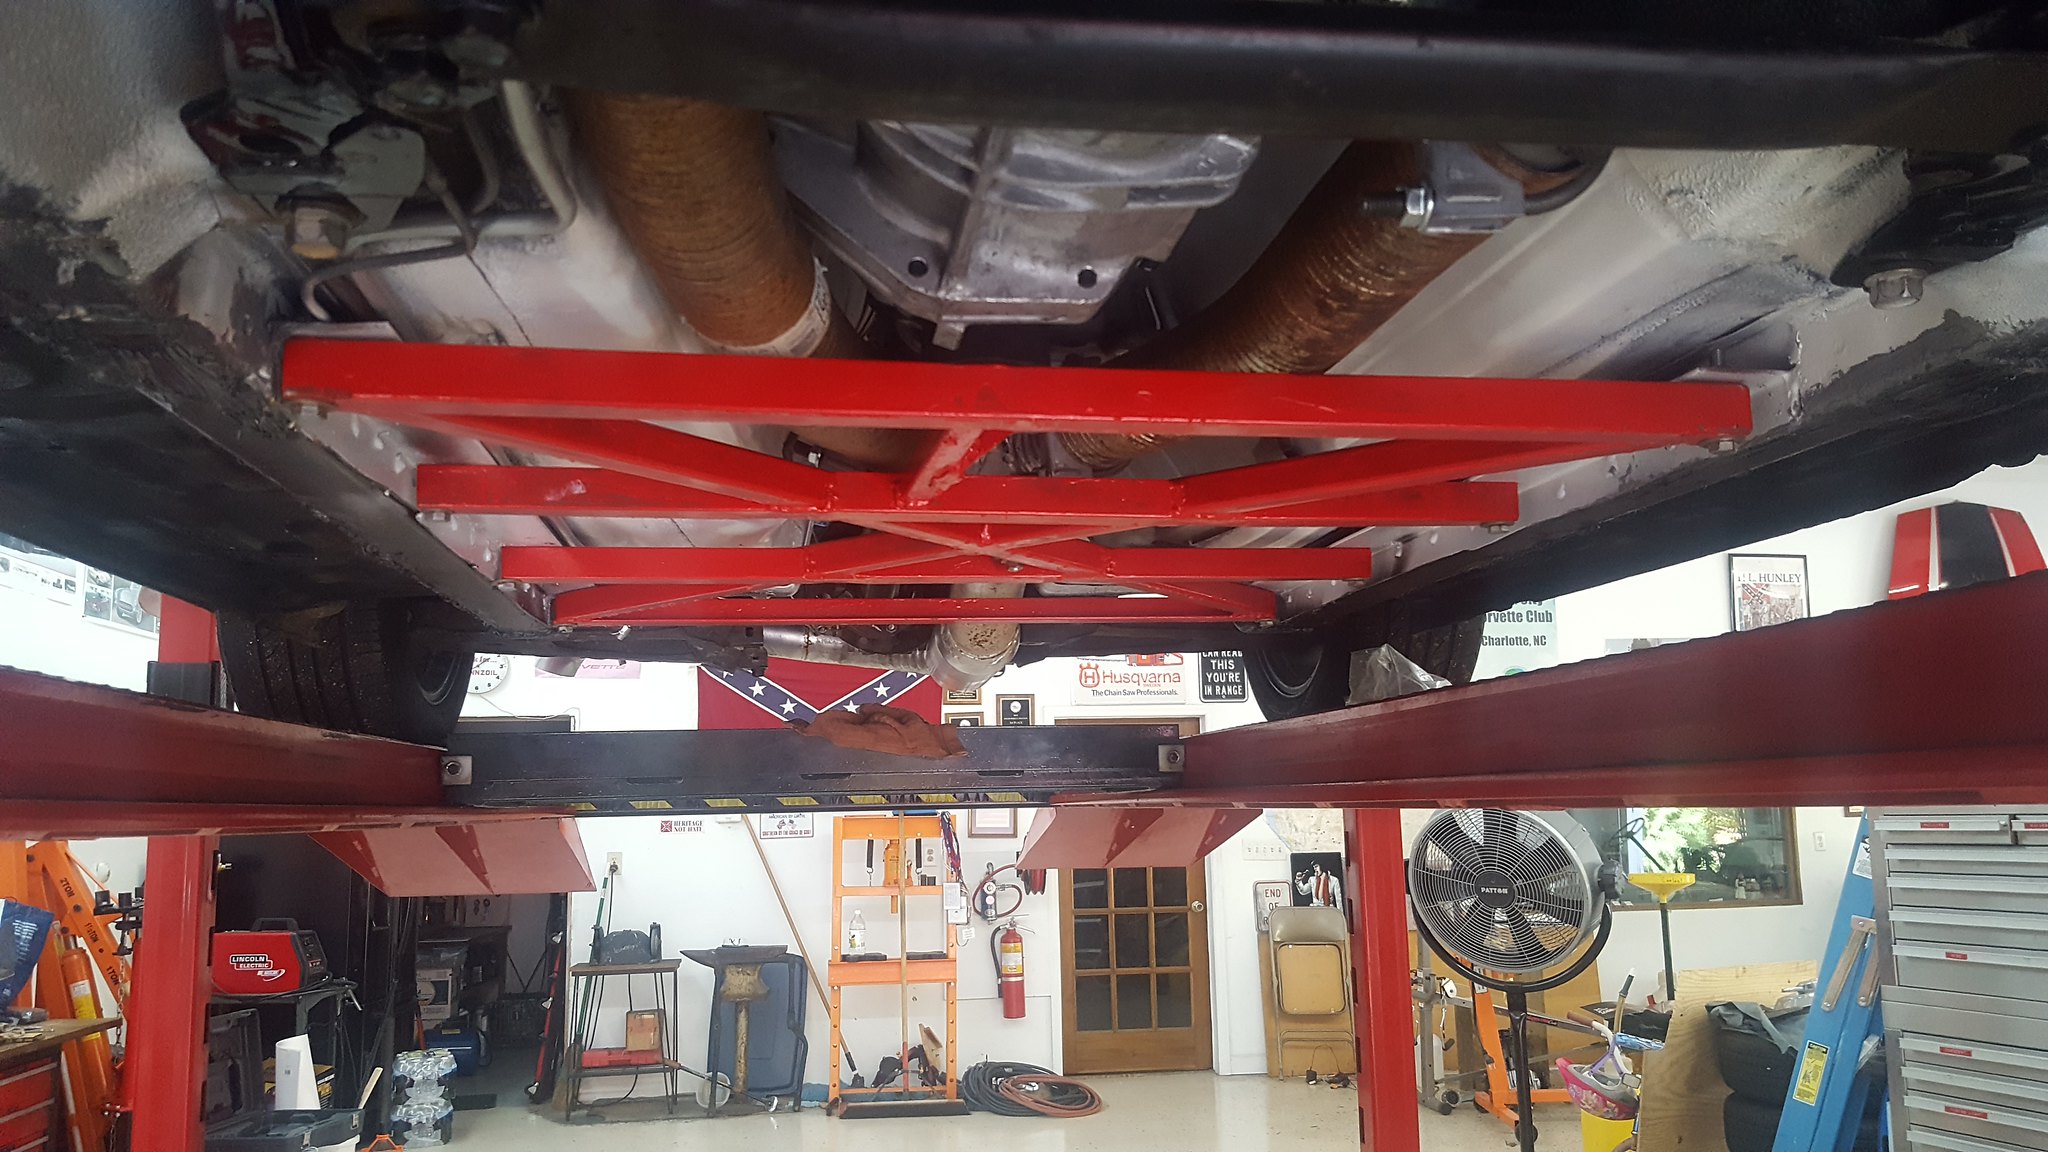
20181104_105836 by Michael Crawford, on Flickr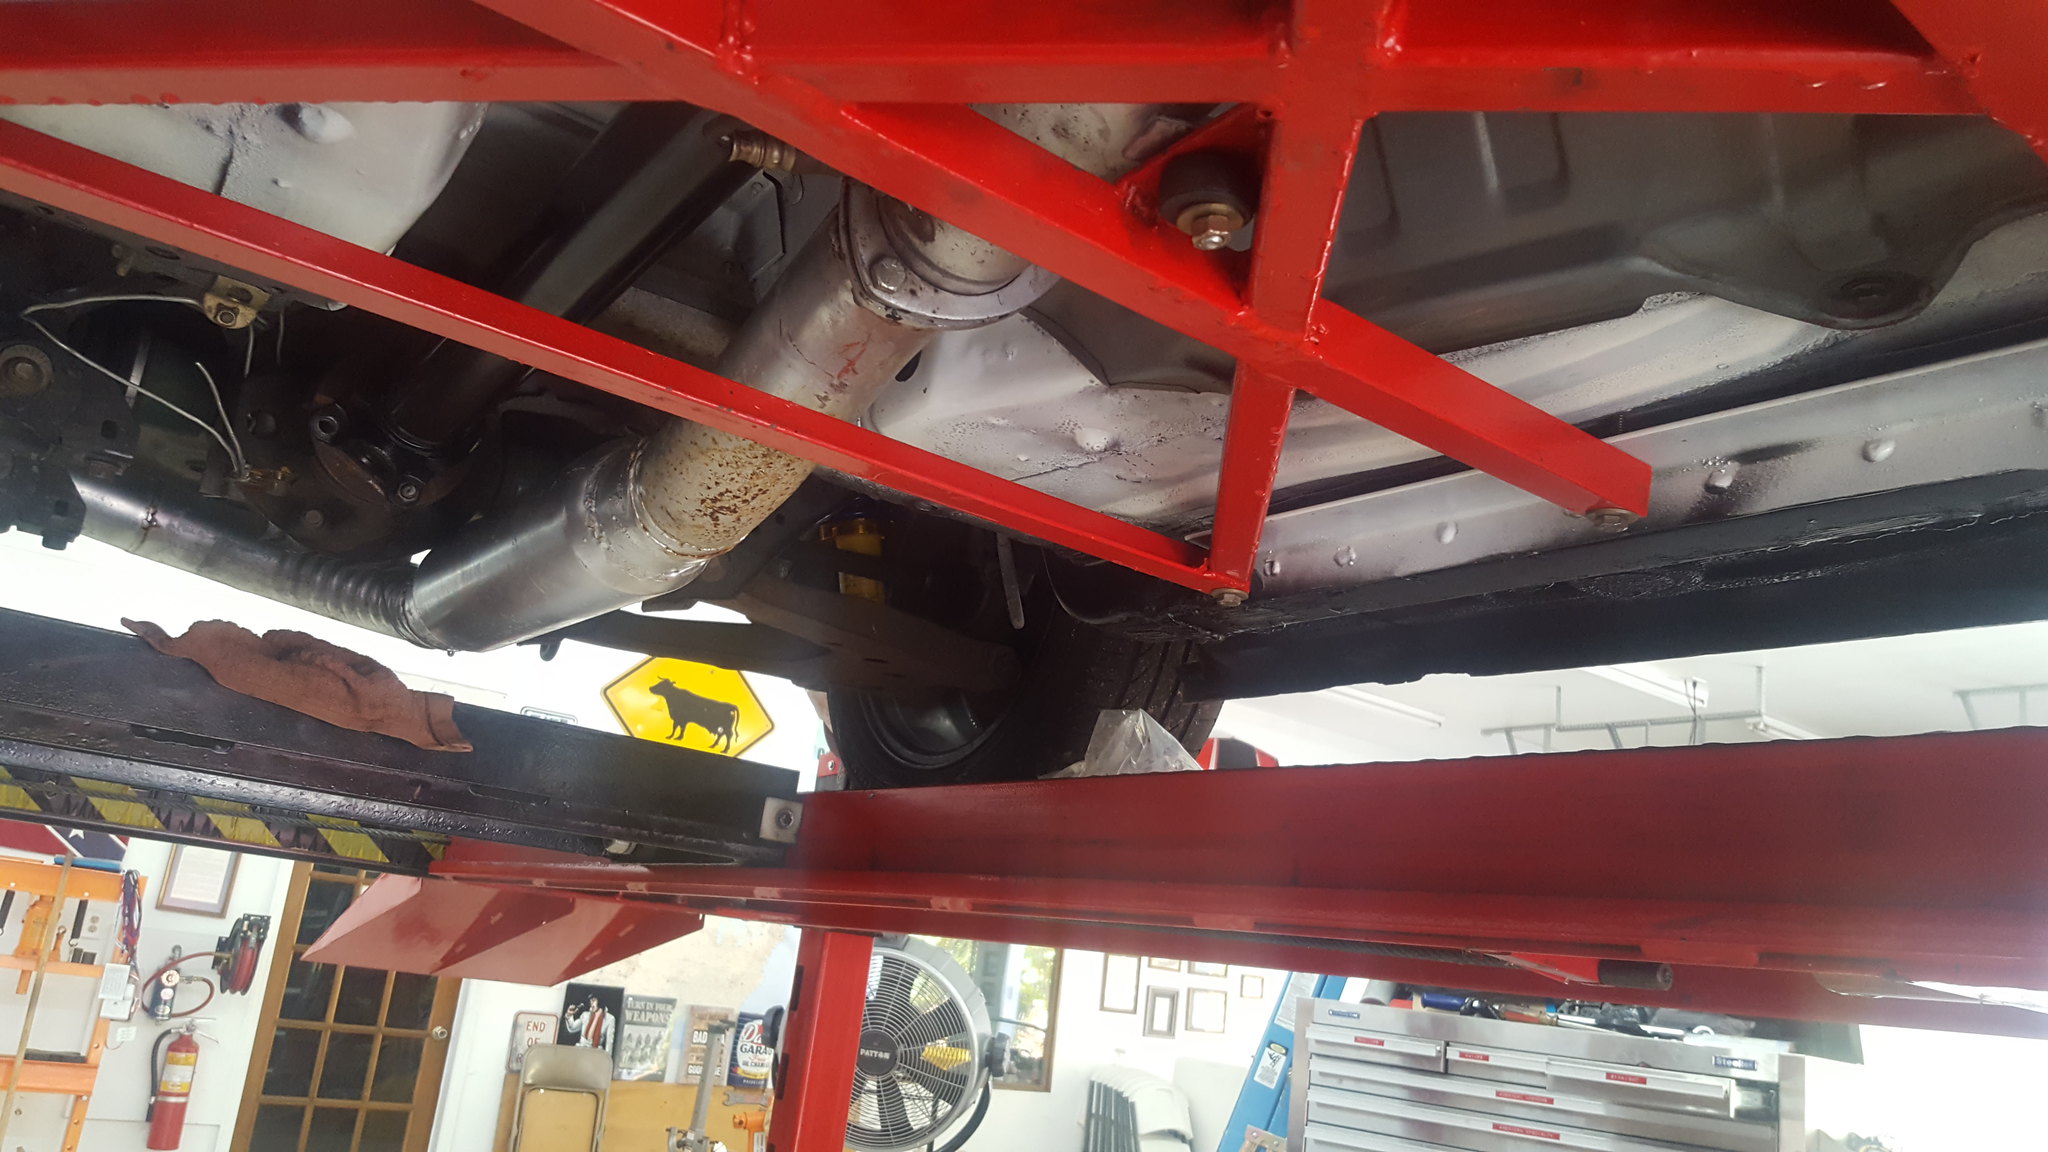
20181104_105844 by Michael Crawford, on Flickr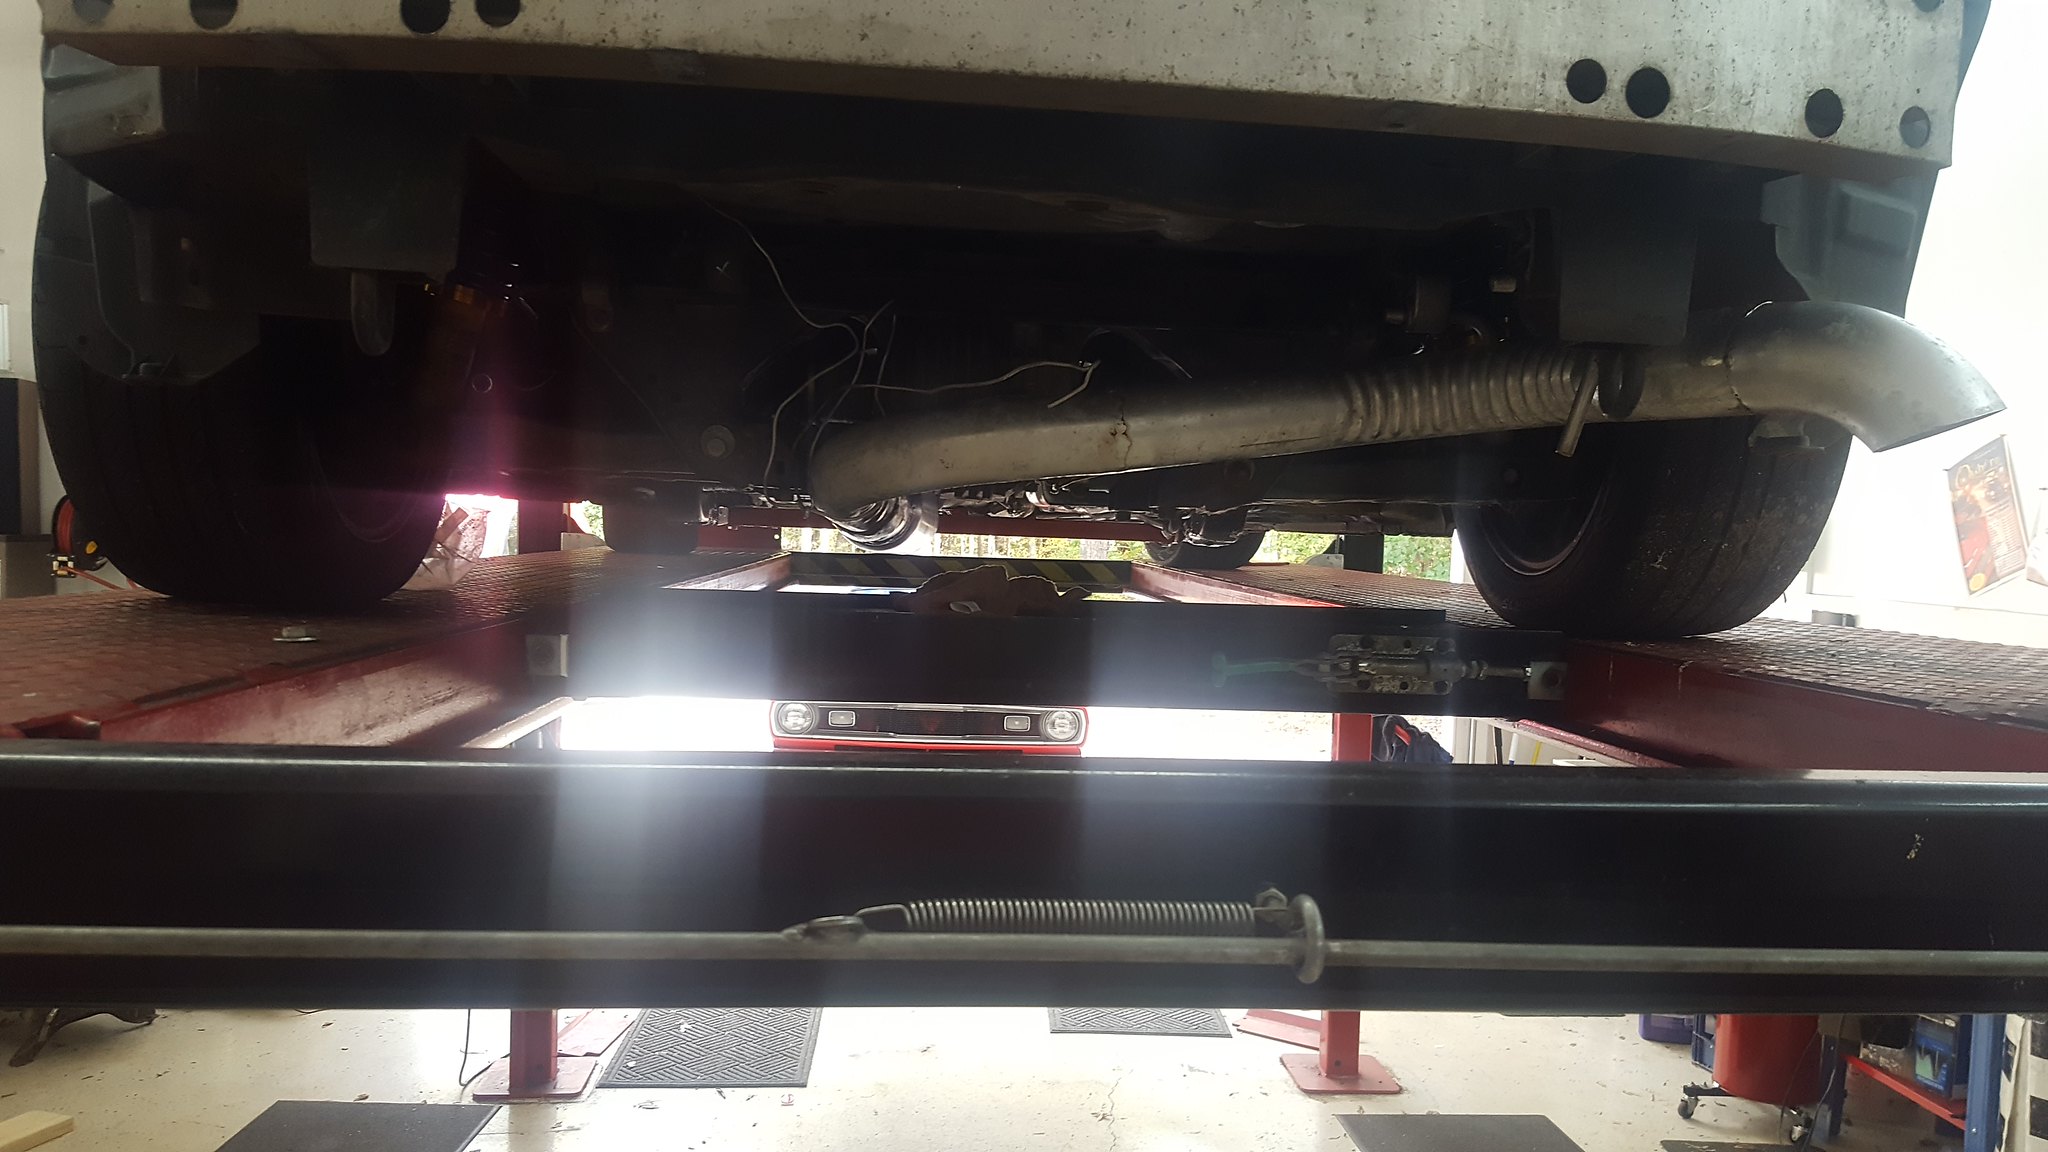
20181104_105827 by Michael Crawford, on FlickrI backed it out in the driveway to wash the engine bay (it was FILTHY. Pure white looks great when its clean though) and settle the suspension. Its really, really low. The coilovers are and full drop, so it has plenty of room to go up.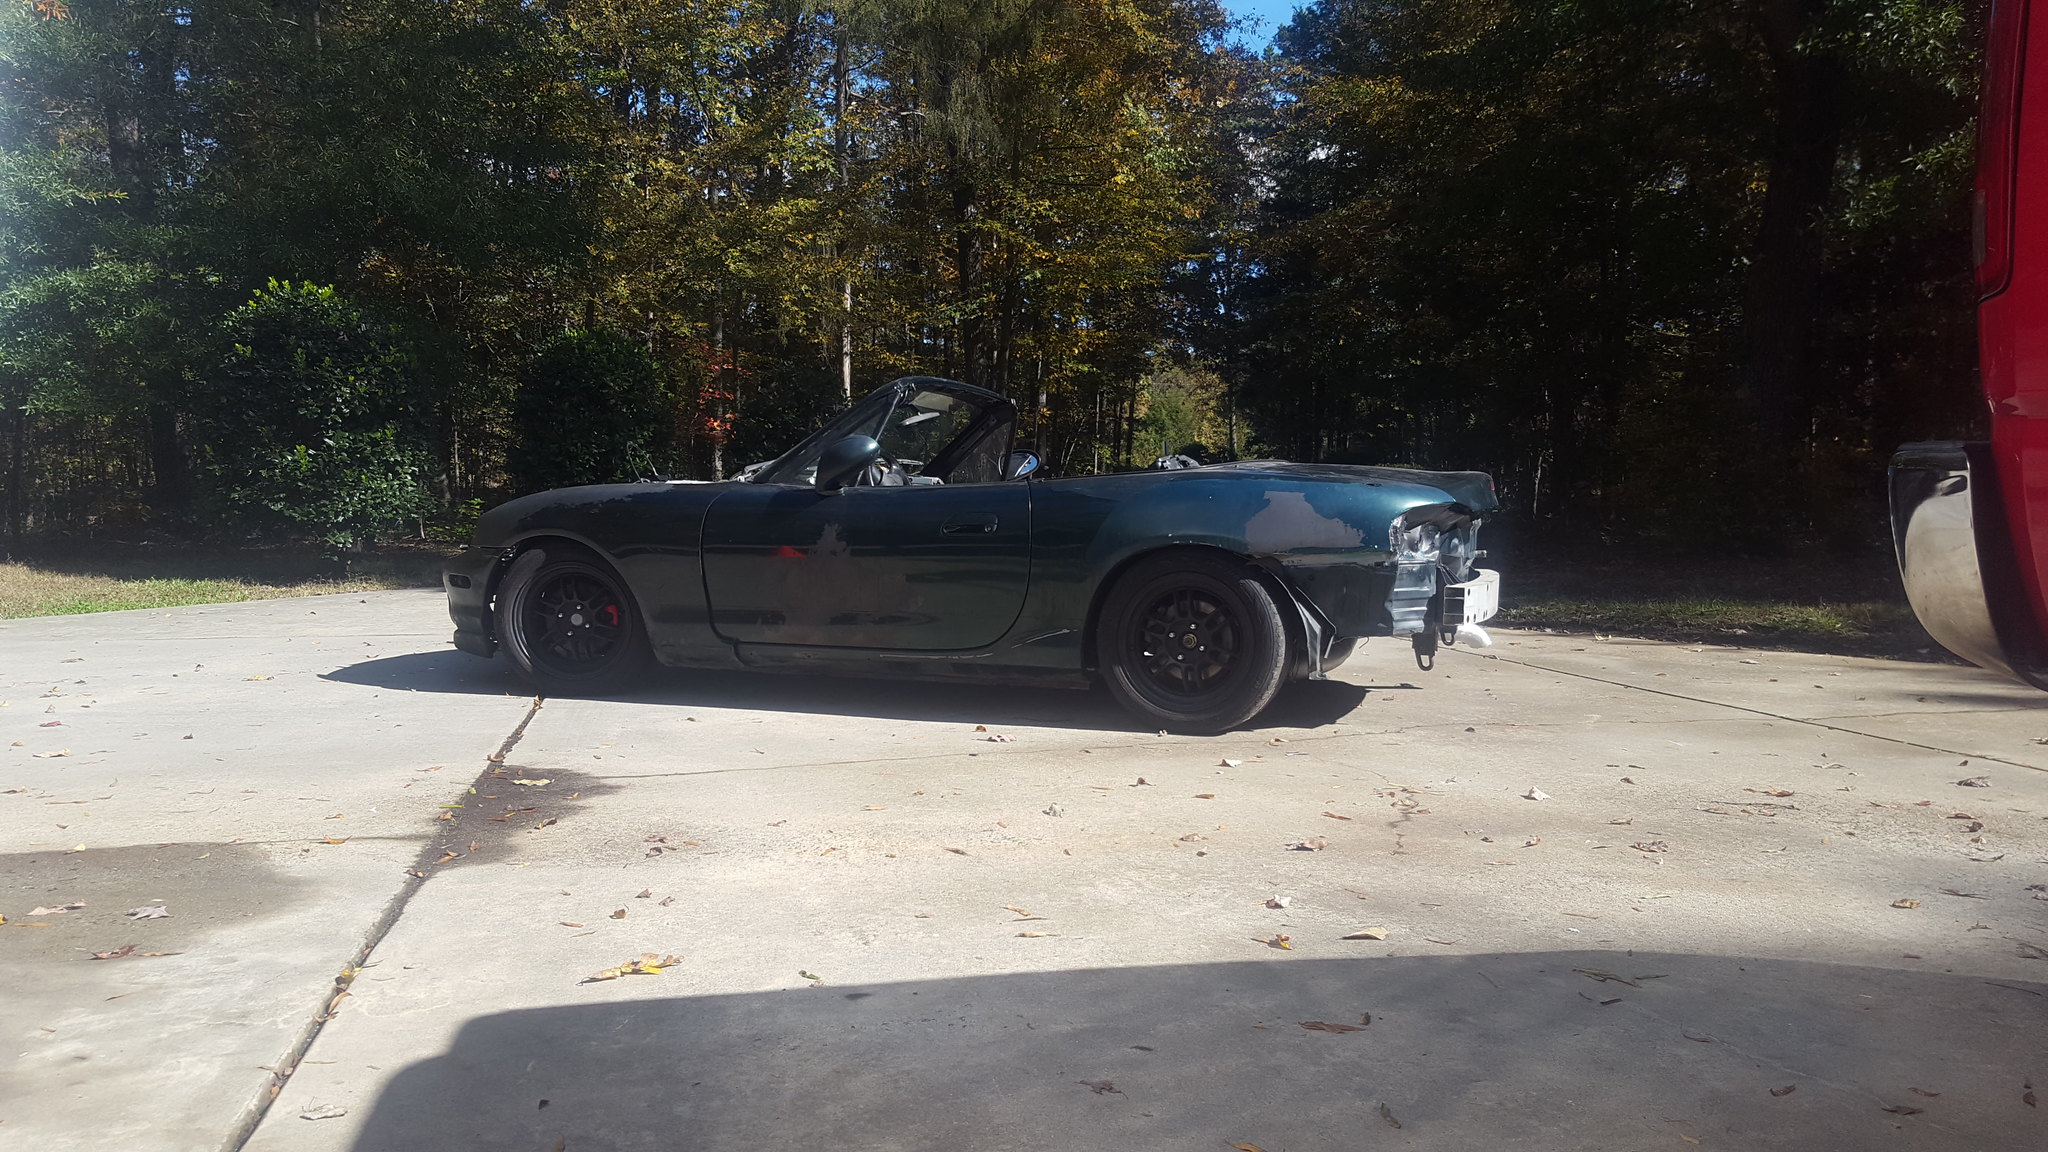
20181104_111727 by Michael Crawford, on Flickr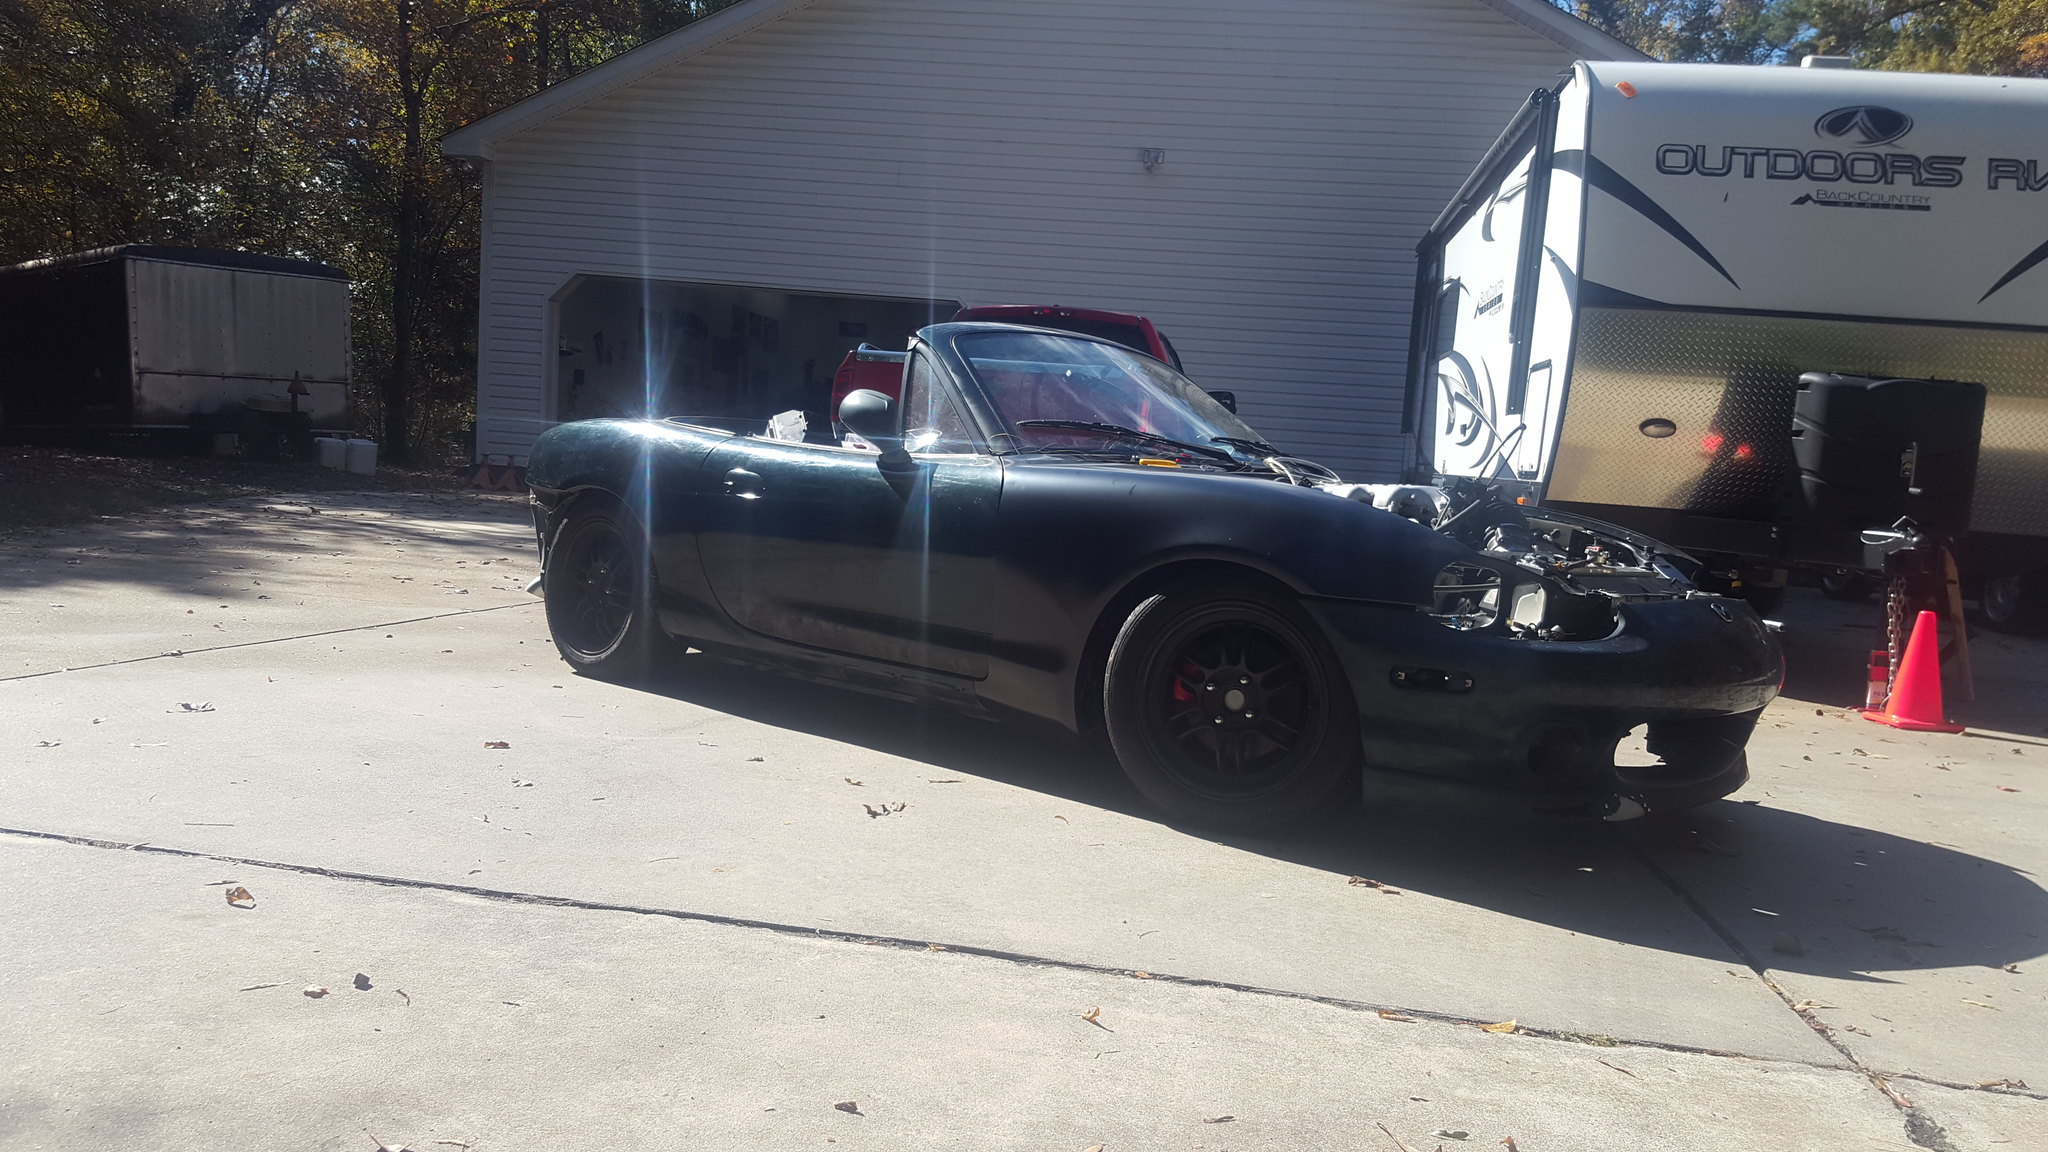
20181104_111747 by Michael Crawford, on Flickr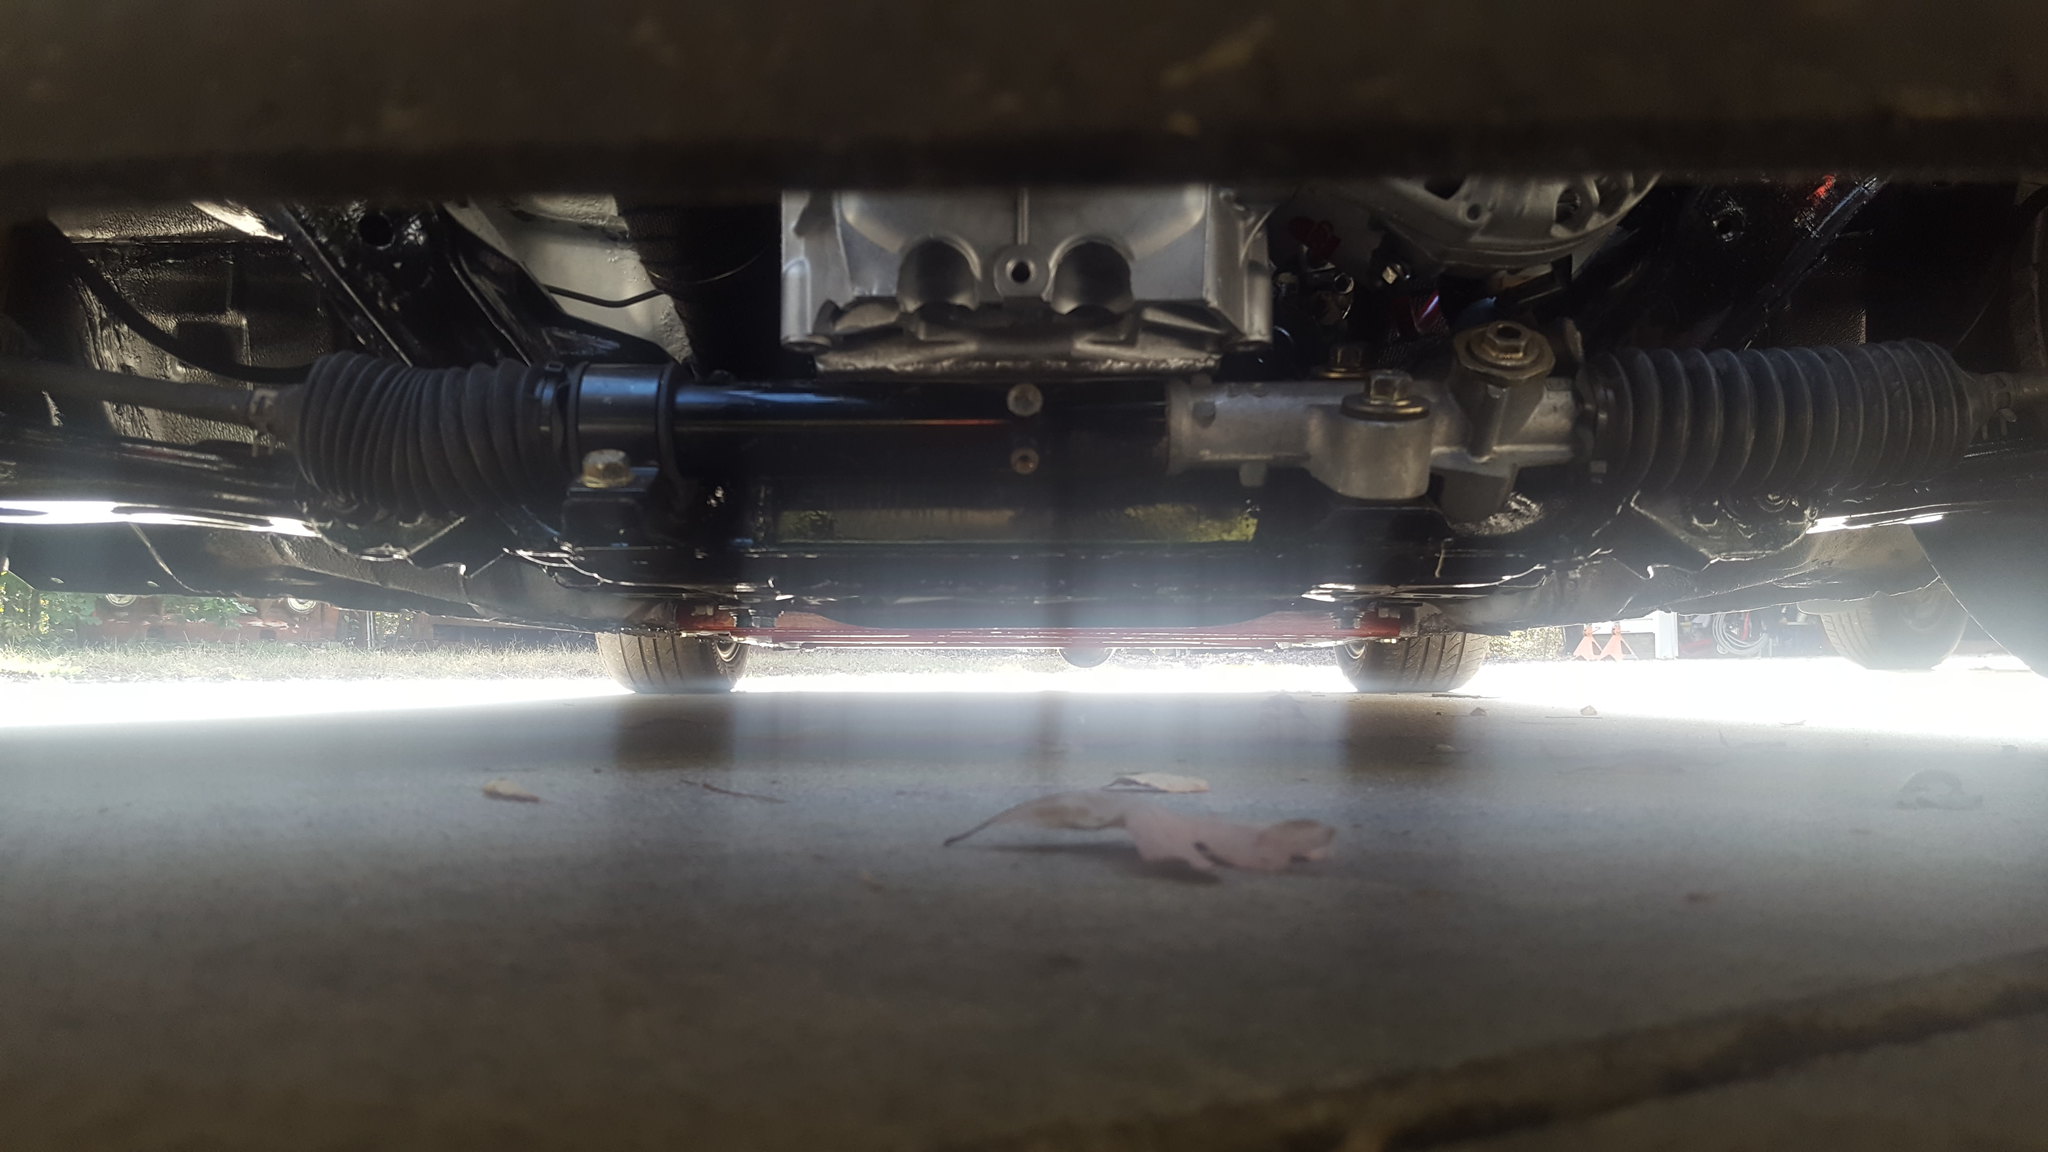
20181104_111826_001 by Michael Crawford, on Flickr
20181104_112225 by Michael Crawford, on Flickr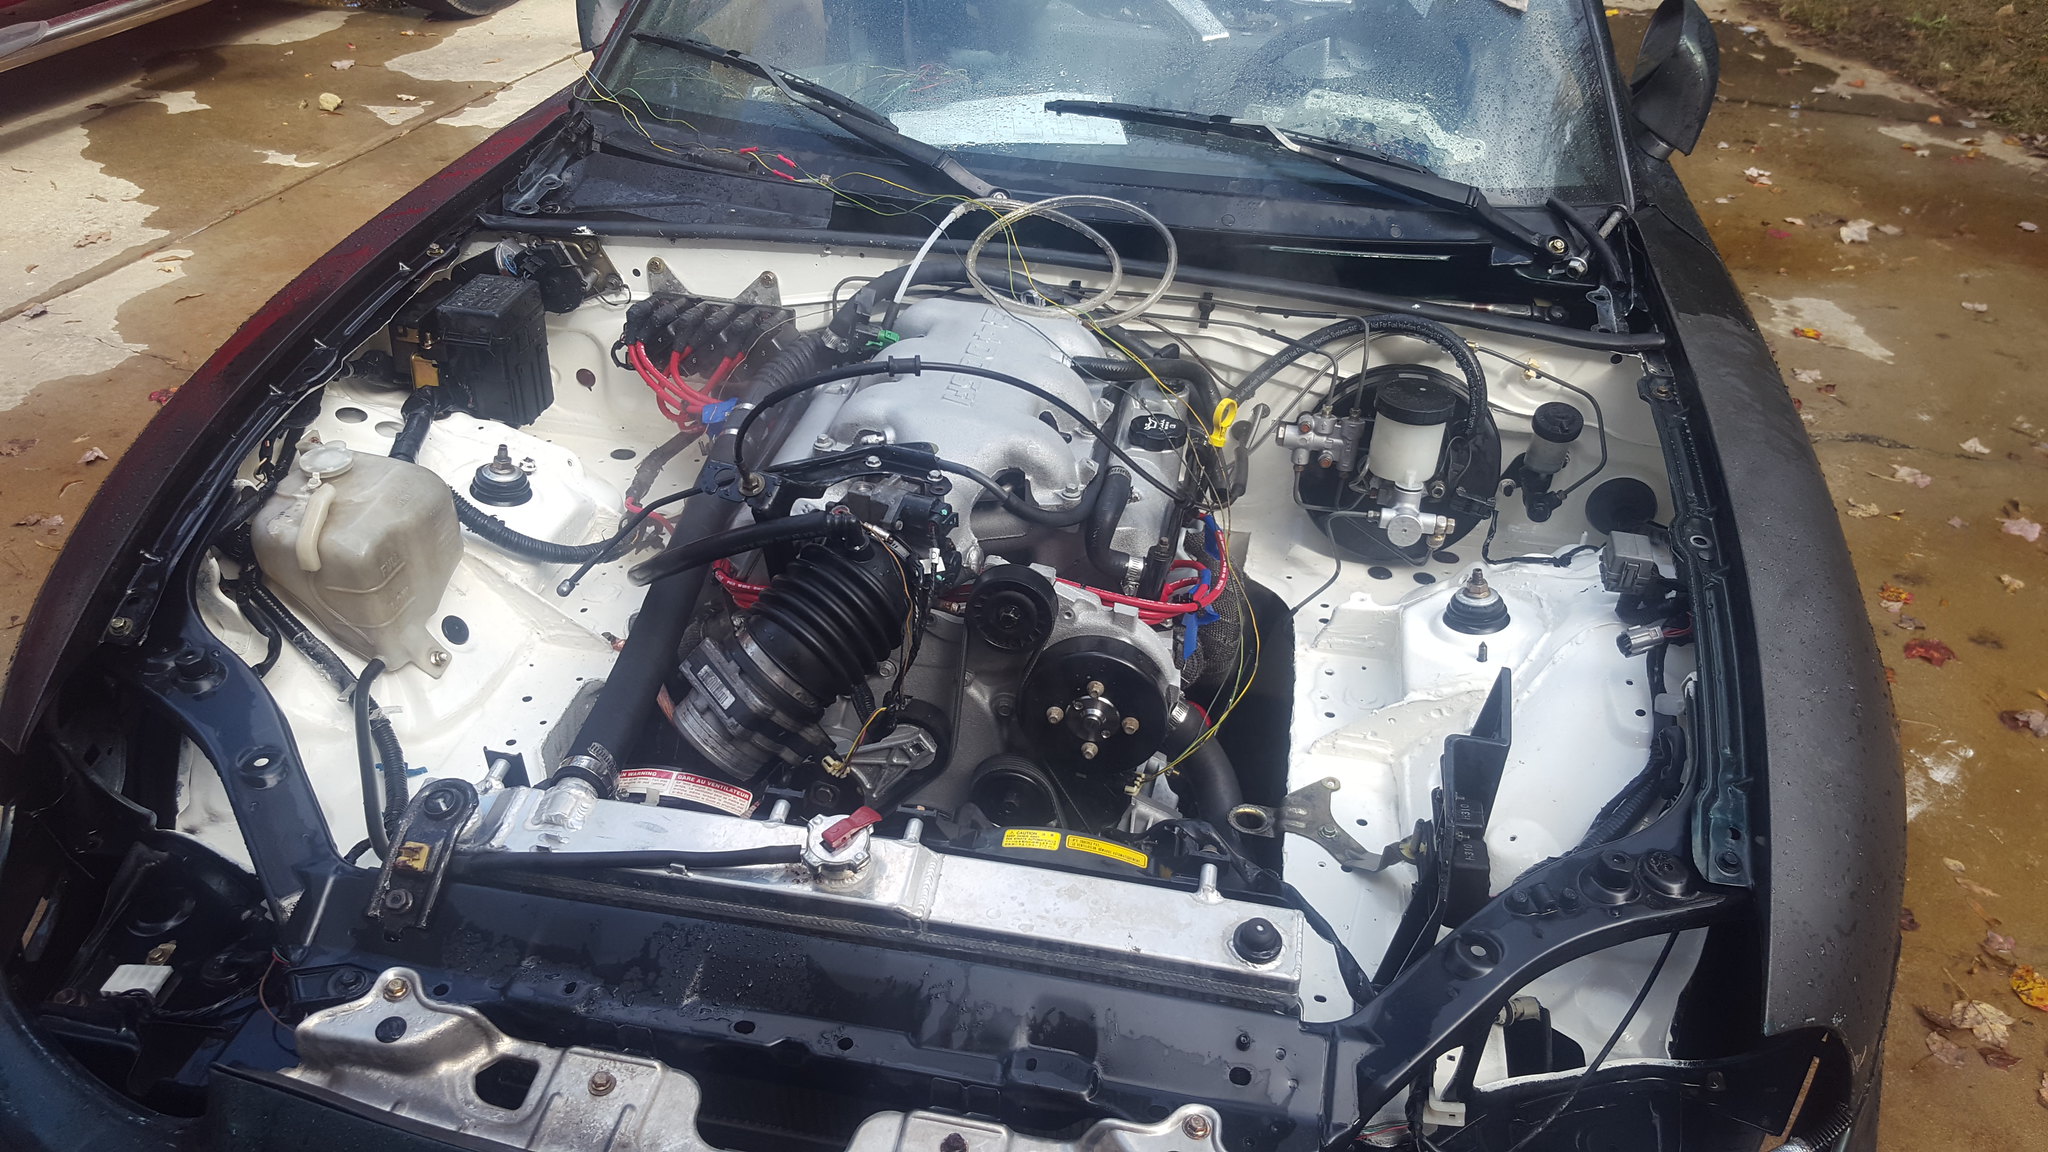
20181104_113433 by Michael Crawford, on Flickrso, videos. Because everyone likes video. And these are monumental achievements for me. Near as I can tell, this is the first FWD 60*v6 in a miata that has ever been done. This is also proof that you don't have to spend thousands to do an engine swap. Or be a genius (cause im sure not!). First fire:
legit first run time. It ran long enough to make us sick with the fumes from the header wrap and paint, and the fans to kick on.
shooting fireballs
and with exhaust
next steps are:Figuring out why it has such nasty hesitation.Figuring out how to get the OBD2 port functionalFiguring out how to support the differential without the PPF existing. Sold mount up front maybe?Pulling and painting the rear suspension, as well as brakesmaking a hood fit, and air cleaner assembly.
revious challenge budget: 1932.70 recoup total: 820new money: oil filter sandwich plate: 5oil pressure gauge fitting: .97
belt: 21.99removed purchased oil filter sandwich plate: -17.99removed quart of holy freaking green: -14.98removed oil pan gasket and plugs per new rules (I deleted them from my spreadsheet and dont feel like looking at the moment. Additionally, I found the other oil pan gasket....) Recoup: 820
new total: 1877.19I've been like a ping pong ball in a blender lately. Doing way too much on way too many things. So this update will be a little scattered. Between going with my family to all sorts of fall events, working WAY too much, fixing the duster, etc, ive been having a hard time keeping track of what im doing with this.So, to start:the plastidip that was done to this car has turned to goo over much of it. Ive been working on peeling/scraping it from the plastics. I tried aircraft stripper, and luckily it didn't damage the plastic. But it wasn't my best idea. Ive found mineral spirits and lacquer thinner with an sos pad, as well as a razor blade to be the most effective means so far. And child labor. (she likes peeling the stuff that will peel) we've got the front bumper done, rear most of the way, and lots more to go everywhere else.
1540468889_15404688612351221519150_mmthumb by Michael Crawford, on Flickr
20181025_141225 by Michael Crawford, on Flickr
20181029_144150 by Michael Crawford, on Flickrnext up is belt routing. I finally figured out what size belt fits. Spent way too much on a belt, but have learned that the original application is a dodge intrepid. Ill snag a used belt next time at the junkyard. That'll cut $19 from the budget. And it'll make me happy to have mopar parts on this.
20181026_185835 by Michael Crawford, on Flickr
20181026_185904 by Michael Crawford, on FlickrI also picked up some free slicks for the 14s. 21X7x14 avon medium compound. Should cut $140 from the budget if they prove as fast at the SM7 on 15x6 in testing. Im sure as hell going to try! Very nice guy with some awesome garage hardware. And a really nice day and drive with my wife.
Screenshot_20181027-205009 by Michael Crawford, on Flickrthe kinked oil pressure line was really bothering me. The ultra-lites I bought, and then self traded for came with a braided line and a couple of fittings. The engine side fit my oil pressure sandwich plate fine, however the gauge end wouldn't fit. It was 1/8 female NPT, and the sunpro wasn't. So I bought a brass block off plug with a hex head for $.97, drilled, and tapped to make an o-ring sealing bushing (the threads were I think, 5/16 fine. Don't quote me)
20181019_202159 by Michael Crawford, on Flickr
20181026_194239 by Michael Crawford, on Flickr
20181026_194626 by Michael Crawford, on Flickr
20181104_105634 by Michael Crawford, on Flickrhad to make some clearance for it behind the instrument panel.
20181104_105627 by Michael Crawford, on Flickrnext, wiring and engine bay stuff.Obviosly, youve seen that the engine is together and wired. But here's some details.The ECM is run almost completely independent from the chassis. Only crossover points are the fan relays, fuel pump relay, OBD2 port, and instrument panel. I built a switch panel from scrap plastic, a free pull-a-part fuse block, some leftover LEDs, and used toggles. It has only now dawned on me that I could have relayed the fuse block, and made life much simpler. Thats revision 2 coming soon. Anyway, I did my best to make the whole engine bay side of things clean, neat, and mostly hidden. Routed the plug wires with zip tie looms, and trying my best to make the hoses neat and tidy (haven't done the fuel pressure regulator/MAP/crankcase vent yet). I'm happy with how its coming out for the most part.
20181019_190432 by Michael Crawford, on Flickr
20181019_190437 by Michael Crawford, on Flickr
20181019_202227 by Michael Crawford, on Flickr
20181021_102253 by Michael Crawford, on Flickr
20181023_170526 by Michael Crawford, on Flickr
20181023_180020 by Michael Crawford, on Flickr
20181025_191007 by Michael Crawford, on Flickrthis brings us up to exhaust. At the end of the post will be a few YouTube links. Needless to say, exhaust on this was NOT optional. We were shooting fireballs from the open headers. But it RUNS now, and actually sounds good. I had to tweak the exhaust upon re-installation for no obvious reason, except the one where I forgot an oxygen sensor bung. But for no good reason the midpipes were now too short, so I had to extend the legs of my merge collector. And I also cut the mushroom heads off the hangars to make install and removal of the rear section easier. I also had to move the collector down towards the butterfly brace so it would stop hitting the driveshaft.But its done now, and sounds GOOD. to me it sounds a lot like an indy car.
20181104_105836 by Michael Crawford, on Flickr
20181104_105844 by Michael Crawford, on Flickr
20181104_105827 by Michael Crawford, on FlickrI backed it out in the driveway to wash the engine bay (it was FILTHY. Pure white looks great when its clean though) and settle the suspension. Its really, really low. The coilovers are and full drop, so it has plenty of room to go up.
20181104_111727 by Michael Crawford, on Flickr
20181104_111747 by Michael Crawford, on Flickr
20181104_111826_001 by Michael Crawford, on Flickr
20181104_112225 by Michael Crawford, on Flickr
20181104_113433 by Michael Crawford, on Flickrso, videos. Because everyone likes video. And these are monumental achievements for me. Near as I can tell, this is the first FWD 60*v6 in a miata that has ever been done. This is also proof that you don't have to spend thousands to do an engine swap. Or be a genius (cause im sure not!). First fire:
Reply
0
0
11-18-2018, 08:21 PM
#68
Junior Member
Thread Starter
Join Date: Nov 2017
Posts: 112
Total Cats: 7
this update brings no financial changes at this time. Really, the only part that I used was in my magic bits bucket (lives right next to my fab metal bucket full of odd pieces of metal) and I have yet to determine fair market value of the heim. Its pictured below, but came off a set of addco sway bars on a c5 corvette after they became horribly noisy. I had 4, but am down to just this one that I know of. Met be one more in the bucket at the bottom, but.....anyway, here it is. Whats it worth?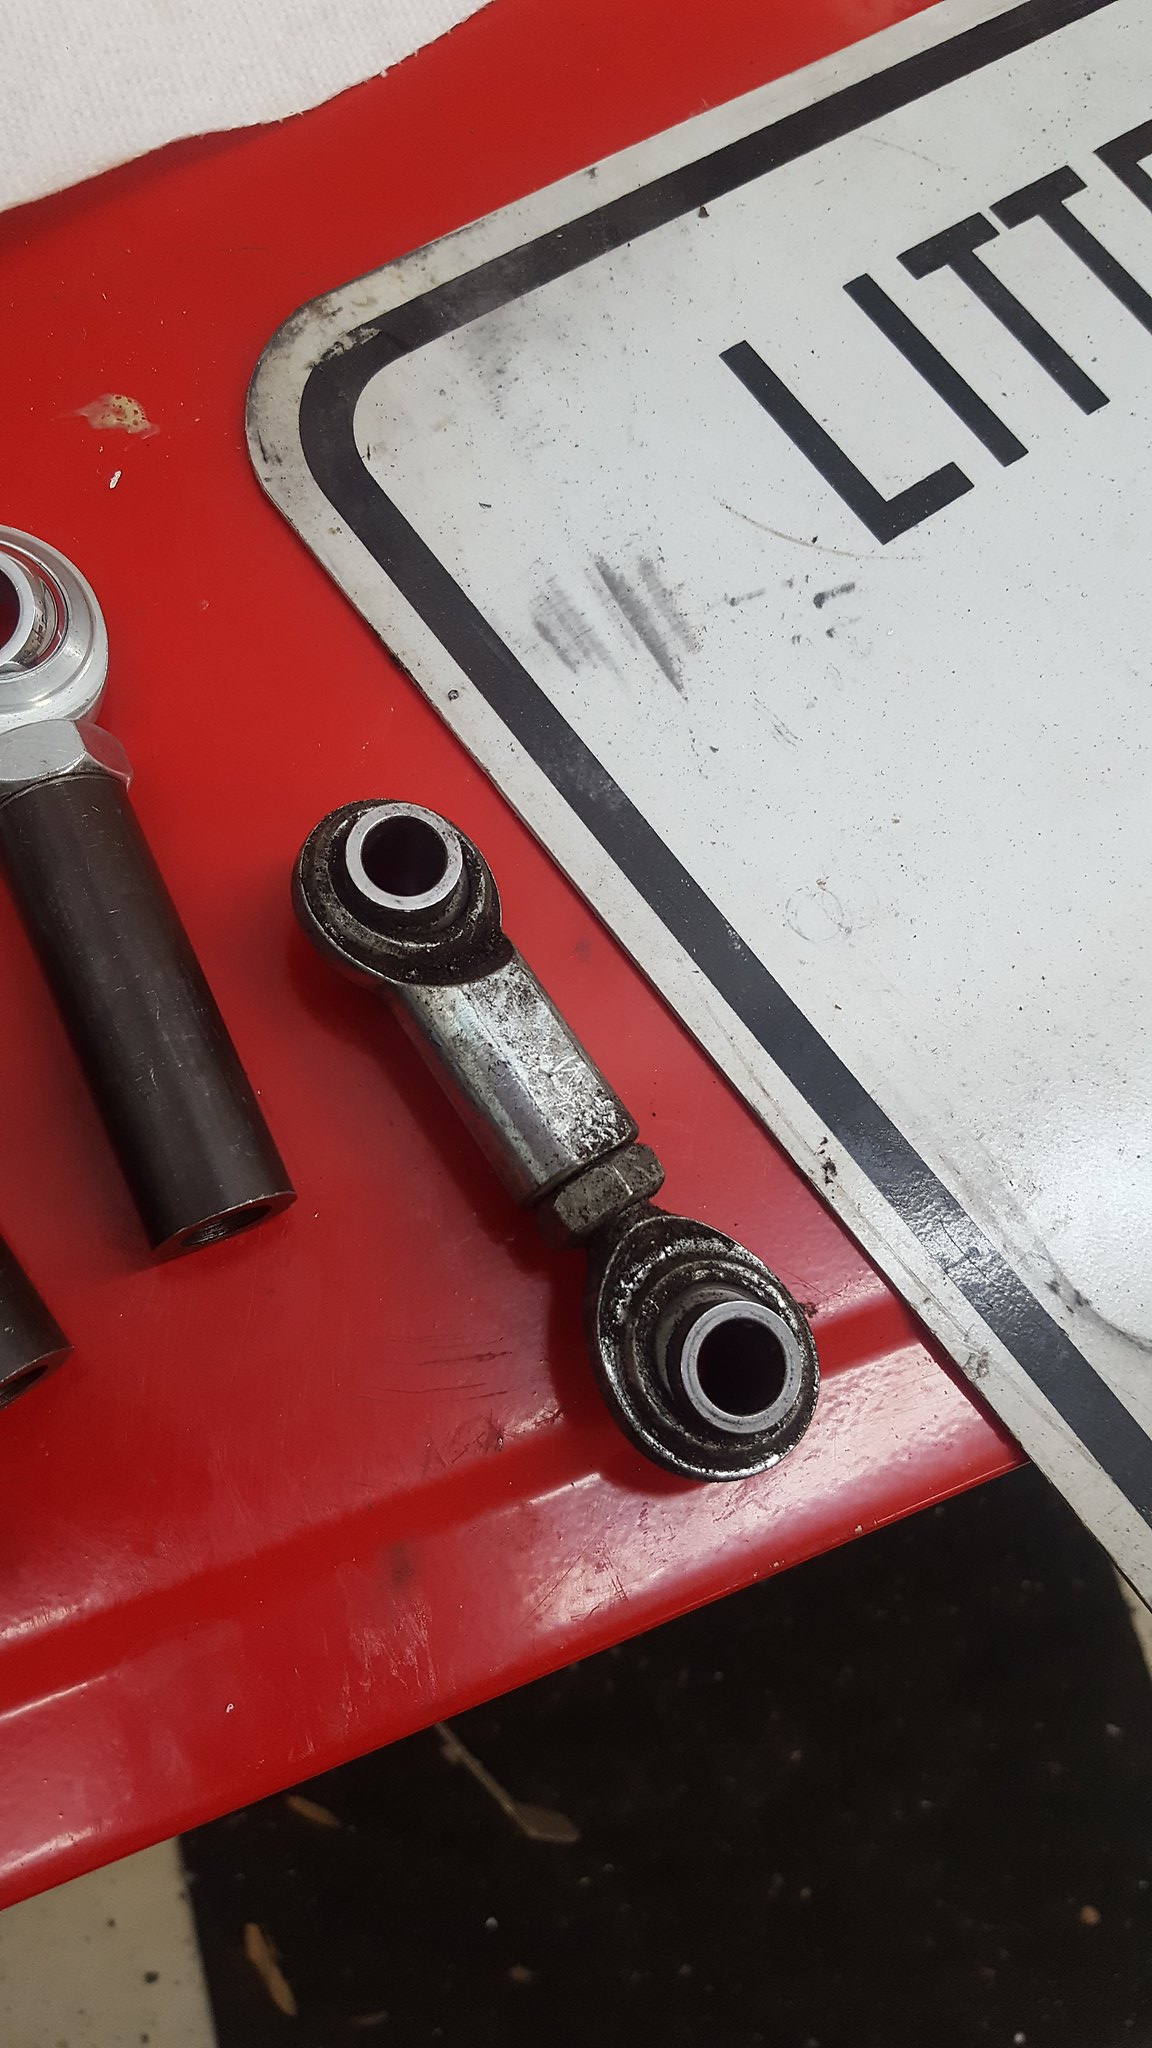
20181116_165748 by Michael Crawford, on Flickrregardless, its being used as part of my PPF delete. Ive been waffling back and forth for a month about how I want to do it, and finally, due to analysis paralysis, just made something simple and adjustable.
20181116_201858 by Michael Crawford, on Flickrthis gets welded to the rear crossmember on the passengers side directly to the outboard side of the original PPF that I cut down to make the lower mount. It will be fully boxed into the subframe, and should be welded in this week sometime when I remove the subframe. Then paint it, swap in the 4:11 torsen, and put it back under. Probably going to paint the underside of the car around the rear cradle white like I did the engine bay and tunnel.I've been chipping away at the dash a bit more. I re-clocked the tach needle to actually read properly, bolted the dash in, tided up all the gauge cluster wiring, mounted the ECU, etc. ECU is mounted behind the cover for the passengers air bag, and fit like GM and mazda planned this swap. I also went ahead and bolted in the gutted AC evaporator box to finish that as well.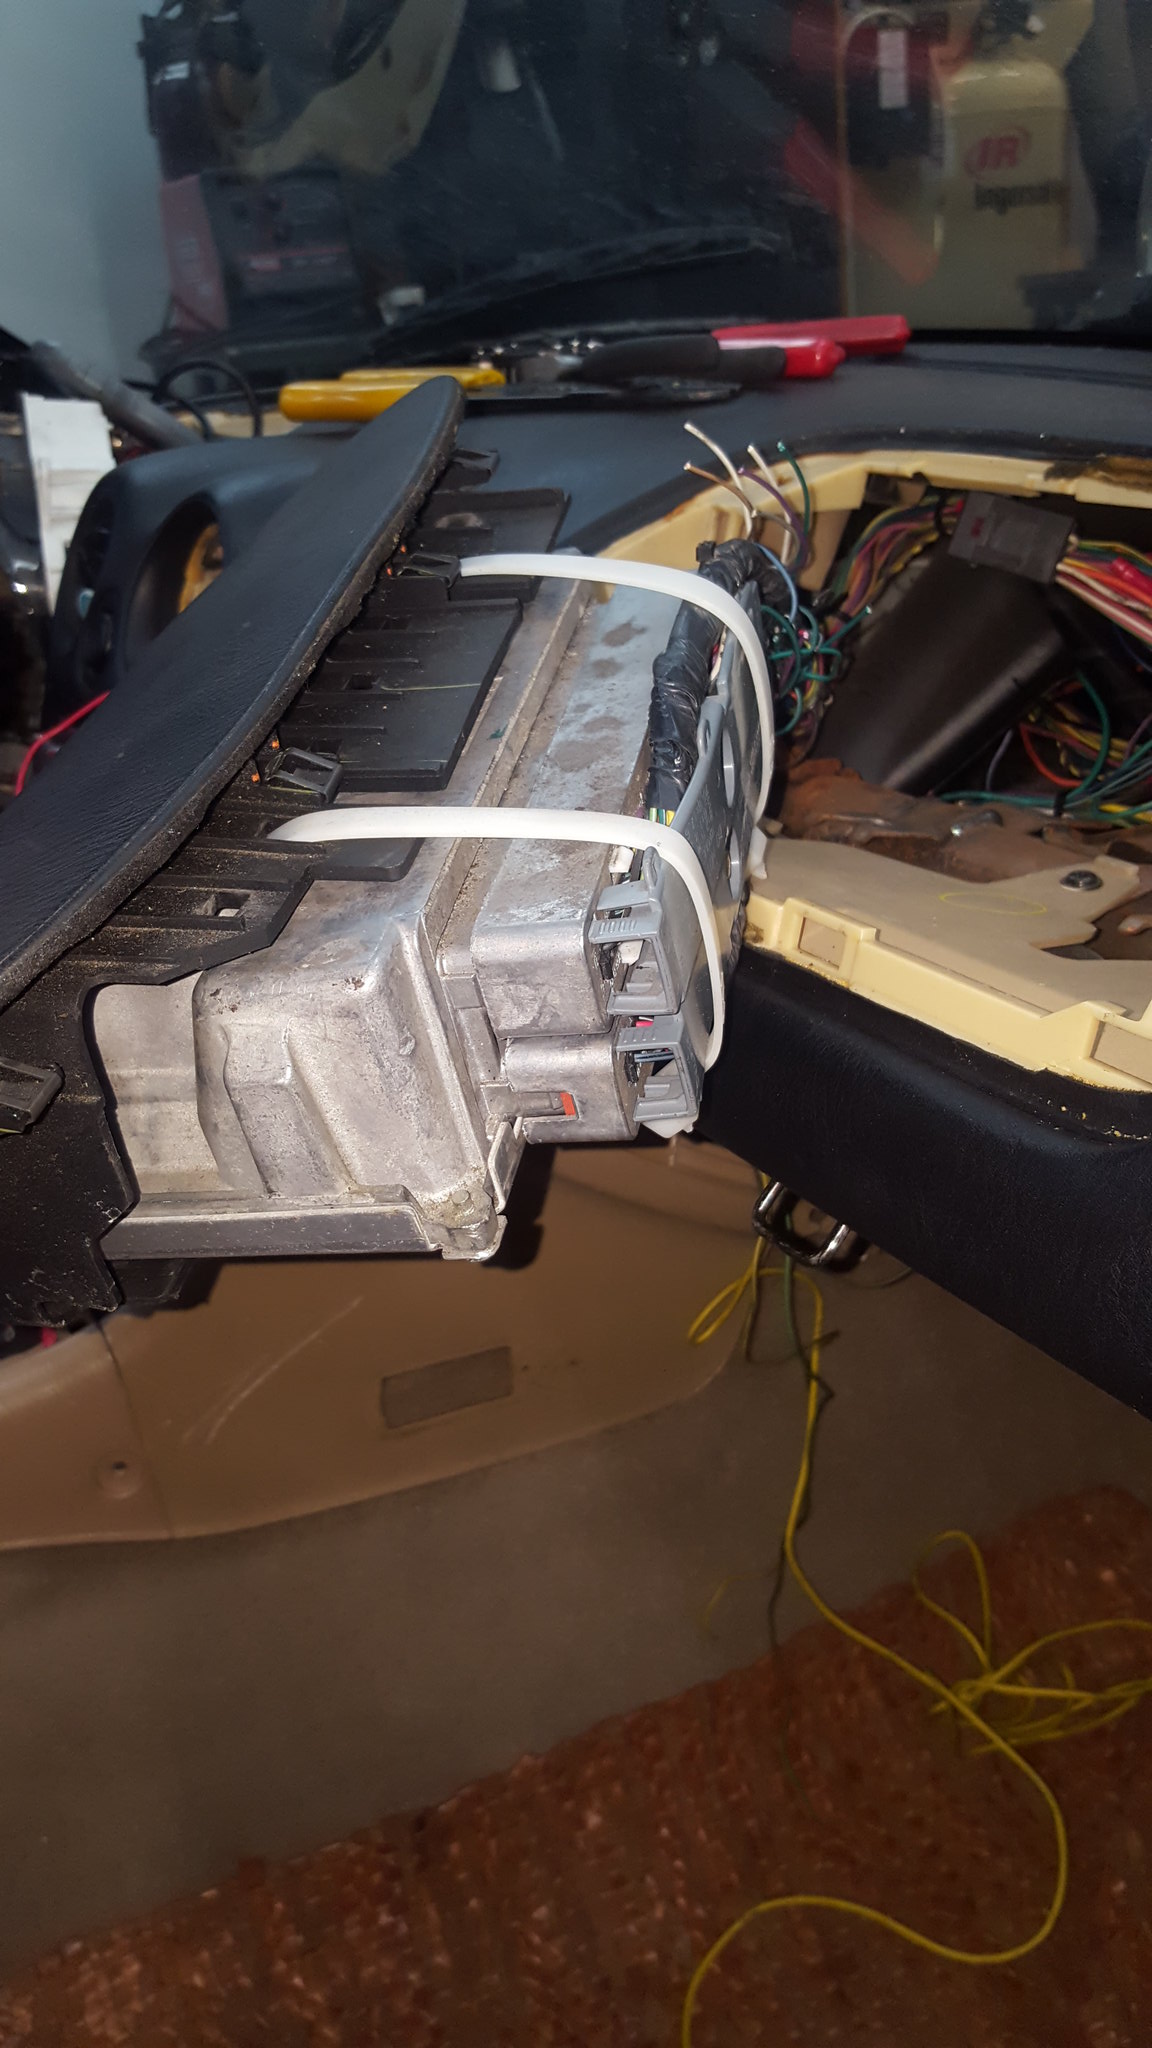
20181109_172101 by Michael Crawford, on Flickrin the process of this, I figured out why the OBD2 port wasn't working. Mazda and gm send the data on a different pin using a different protocol. The scanner is smart enough that it cant/wont use the wrong protocol on the wrong pin. Once I swapped the pin to the GM location, worked plain and easy. I also relayed the auxiliary switch panel and fused the line from the battery with a 50 amp maxifuse, but apparently didn't take any pictures of either, so you'll have to take my word for it.I needed to see another visual progress after all the wiring, so I went after some interior work. Pulled the kick panels, windshield trim, glove box, and knee panel out of storage. Became shocked at how much it all weighed. The pile from storage: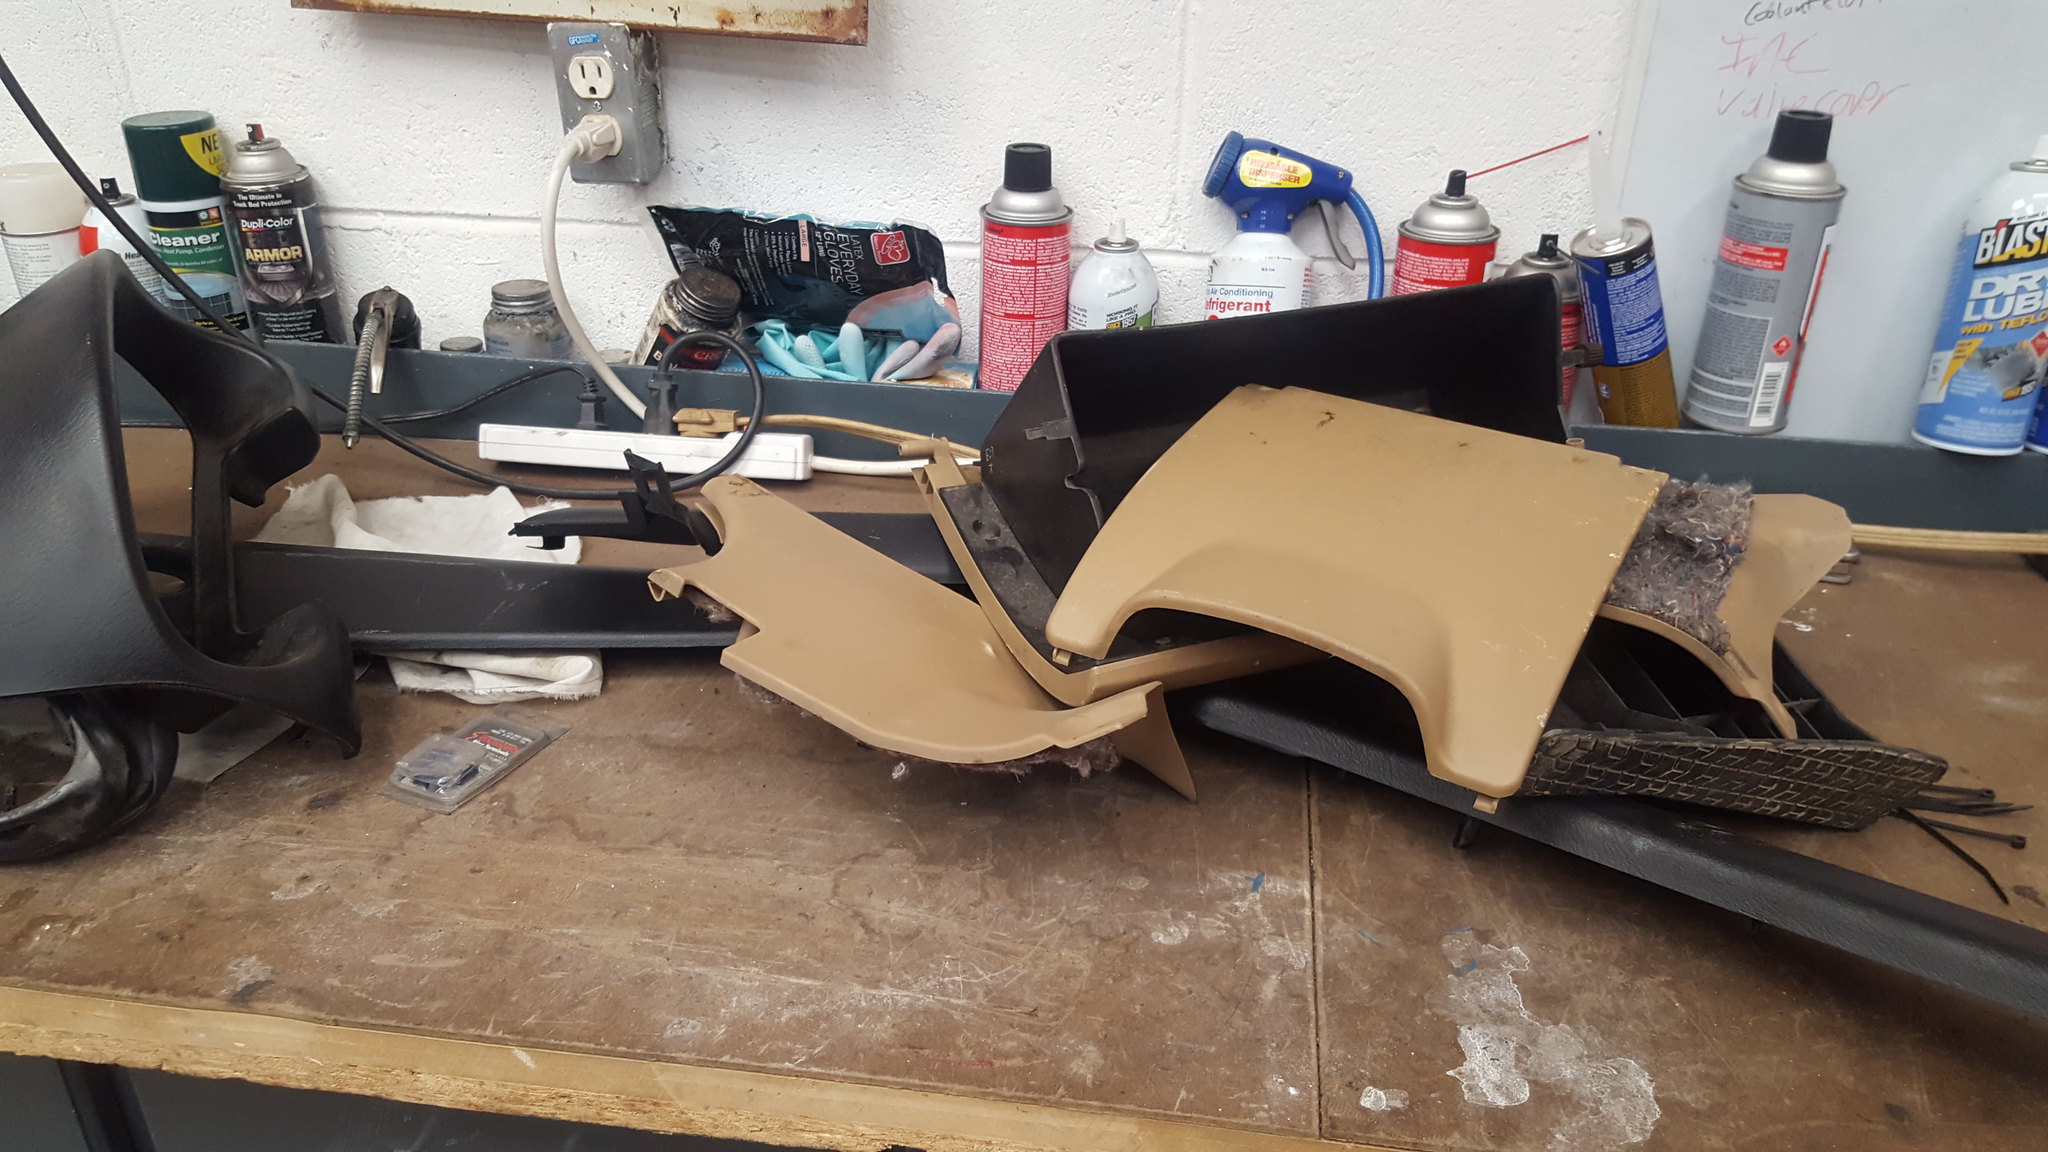
20181116_153644 by Michael Crawford, on FlickrI pulled the steel plate from the knee panel, and the inner structure from the glove box while keeping the hinges and latch. I also stripped all the jute and foam from the backs of the other panels. My highly calibrated left arm says that I reduced the weight by roughly 50% from stock, with no outward indication.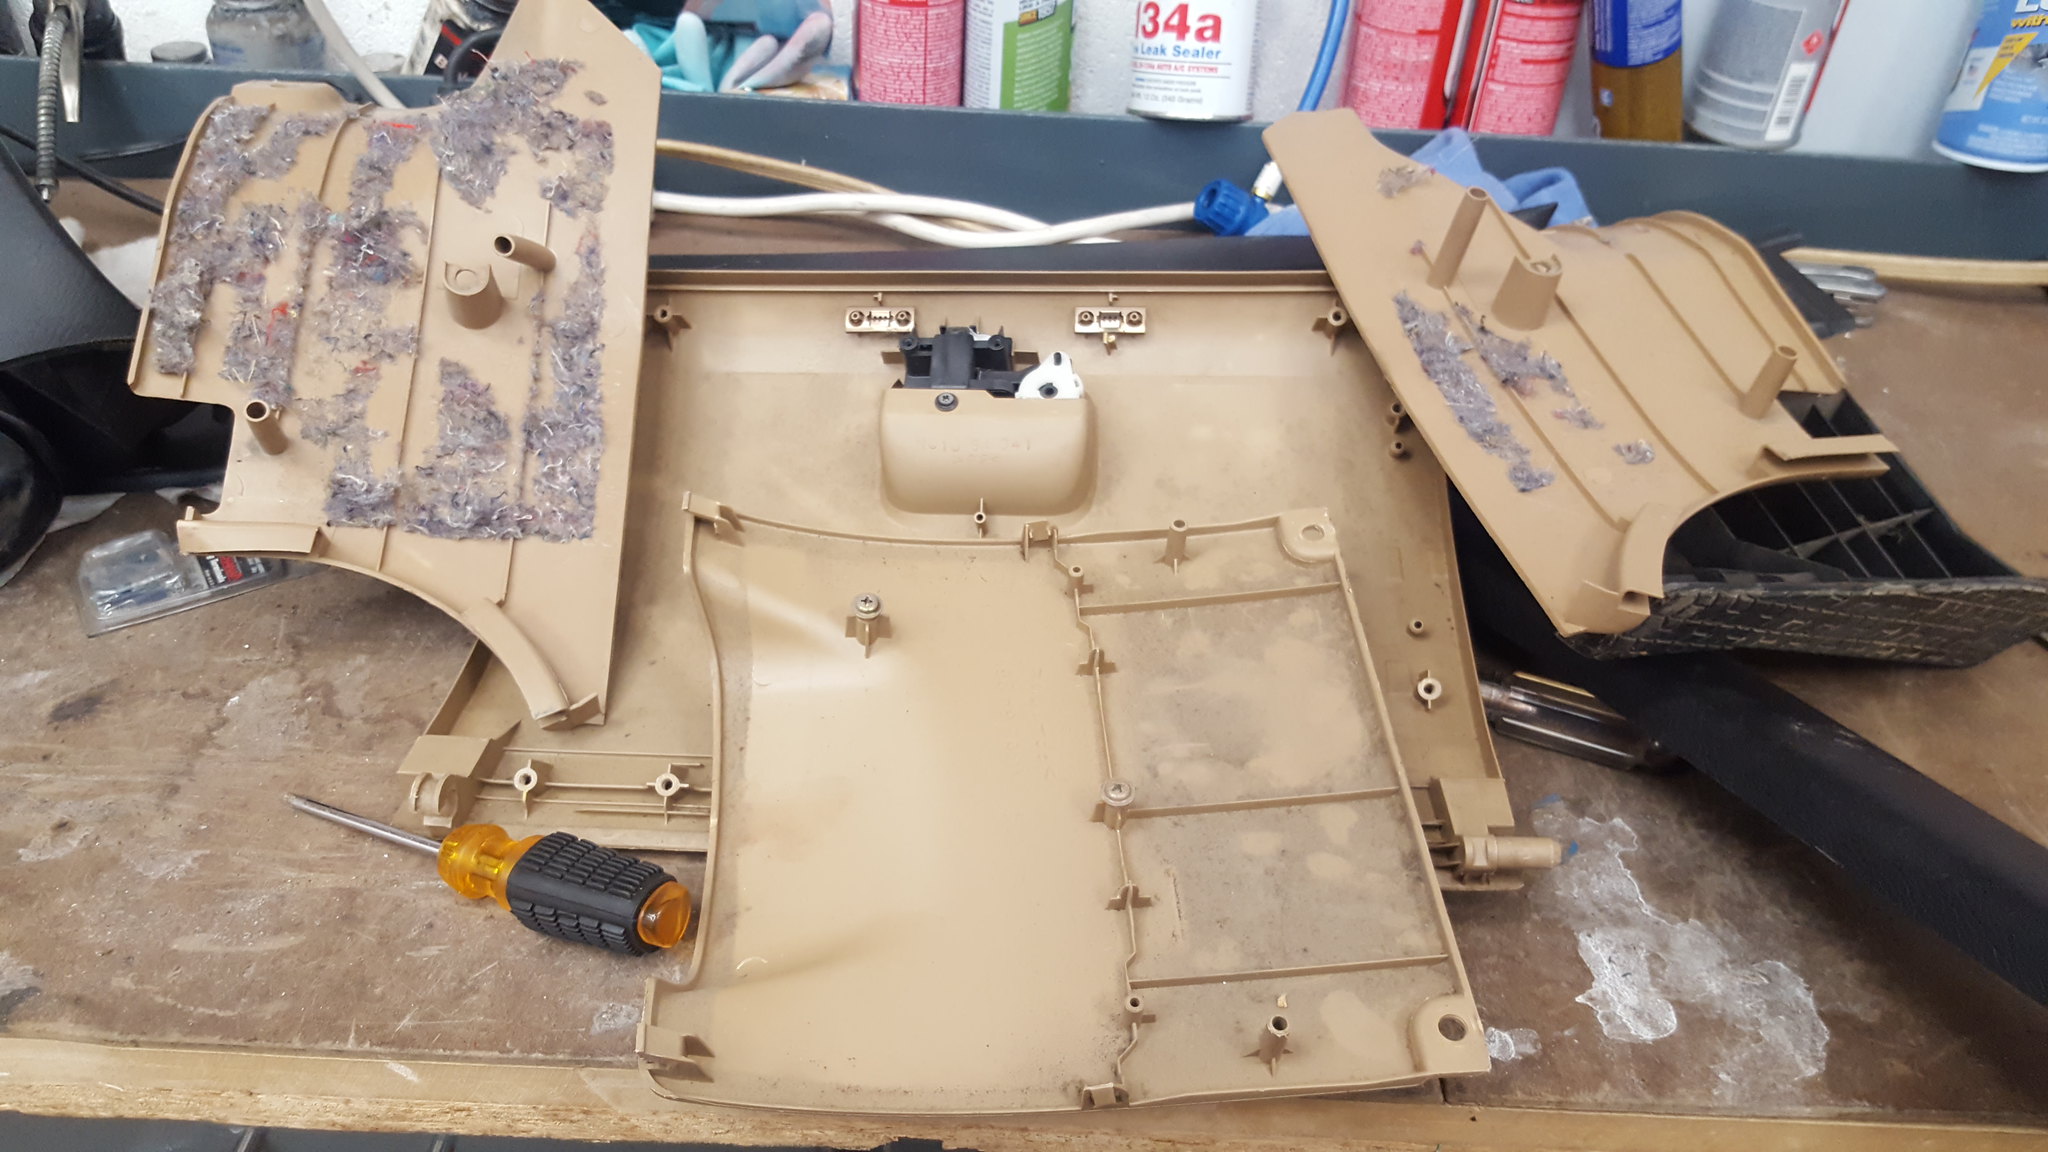
20181116_154757 by Michael Crawford, on Flickr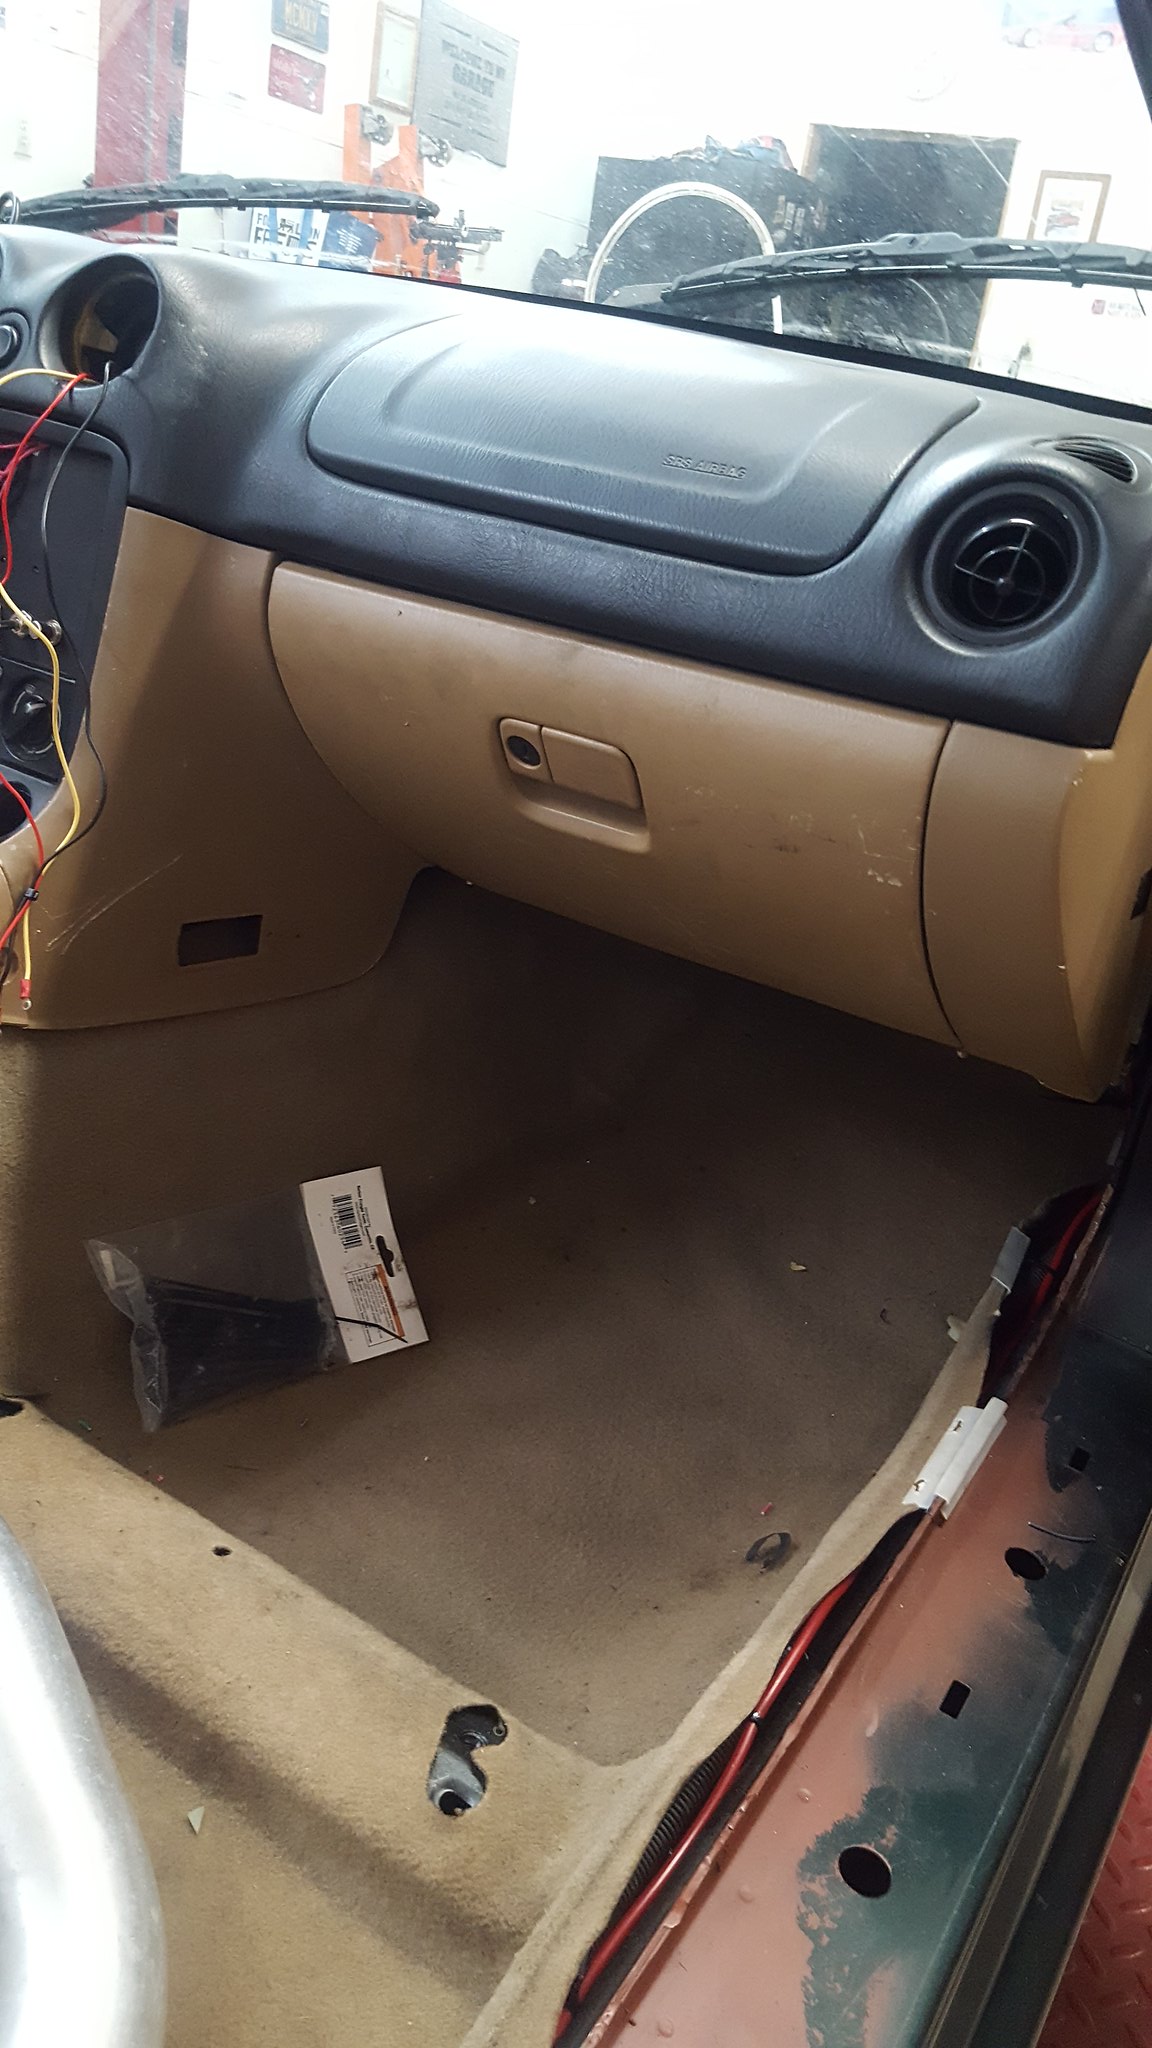
20181116_165646 by Michael Crawford, on Flickrand all put together looking like a car again. Still have to figure out how to gut the airbag assembly from the steering wheel while retaining the horn function and cover for appearance sake. And install the kick panels, steering column trim, dead pedal, etc. lots of interior to go back in.....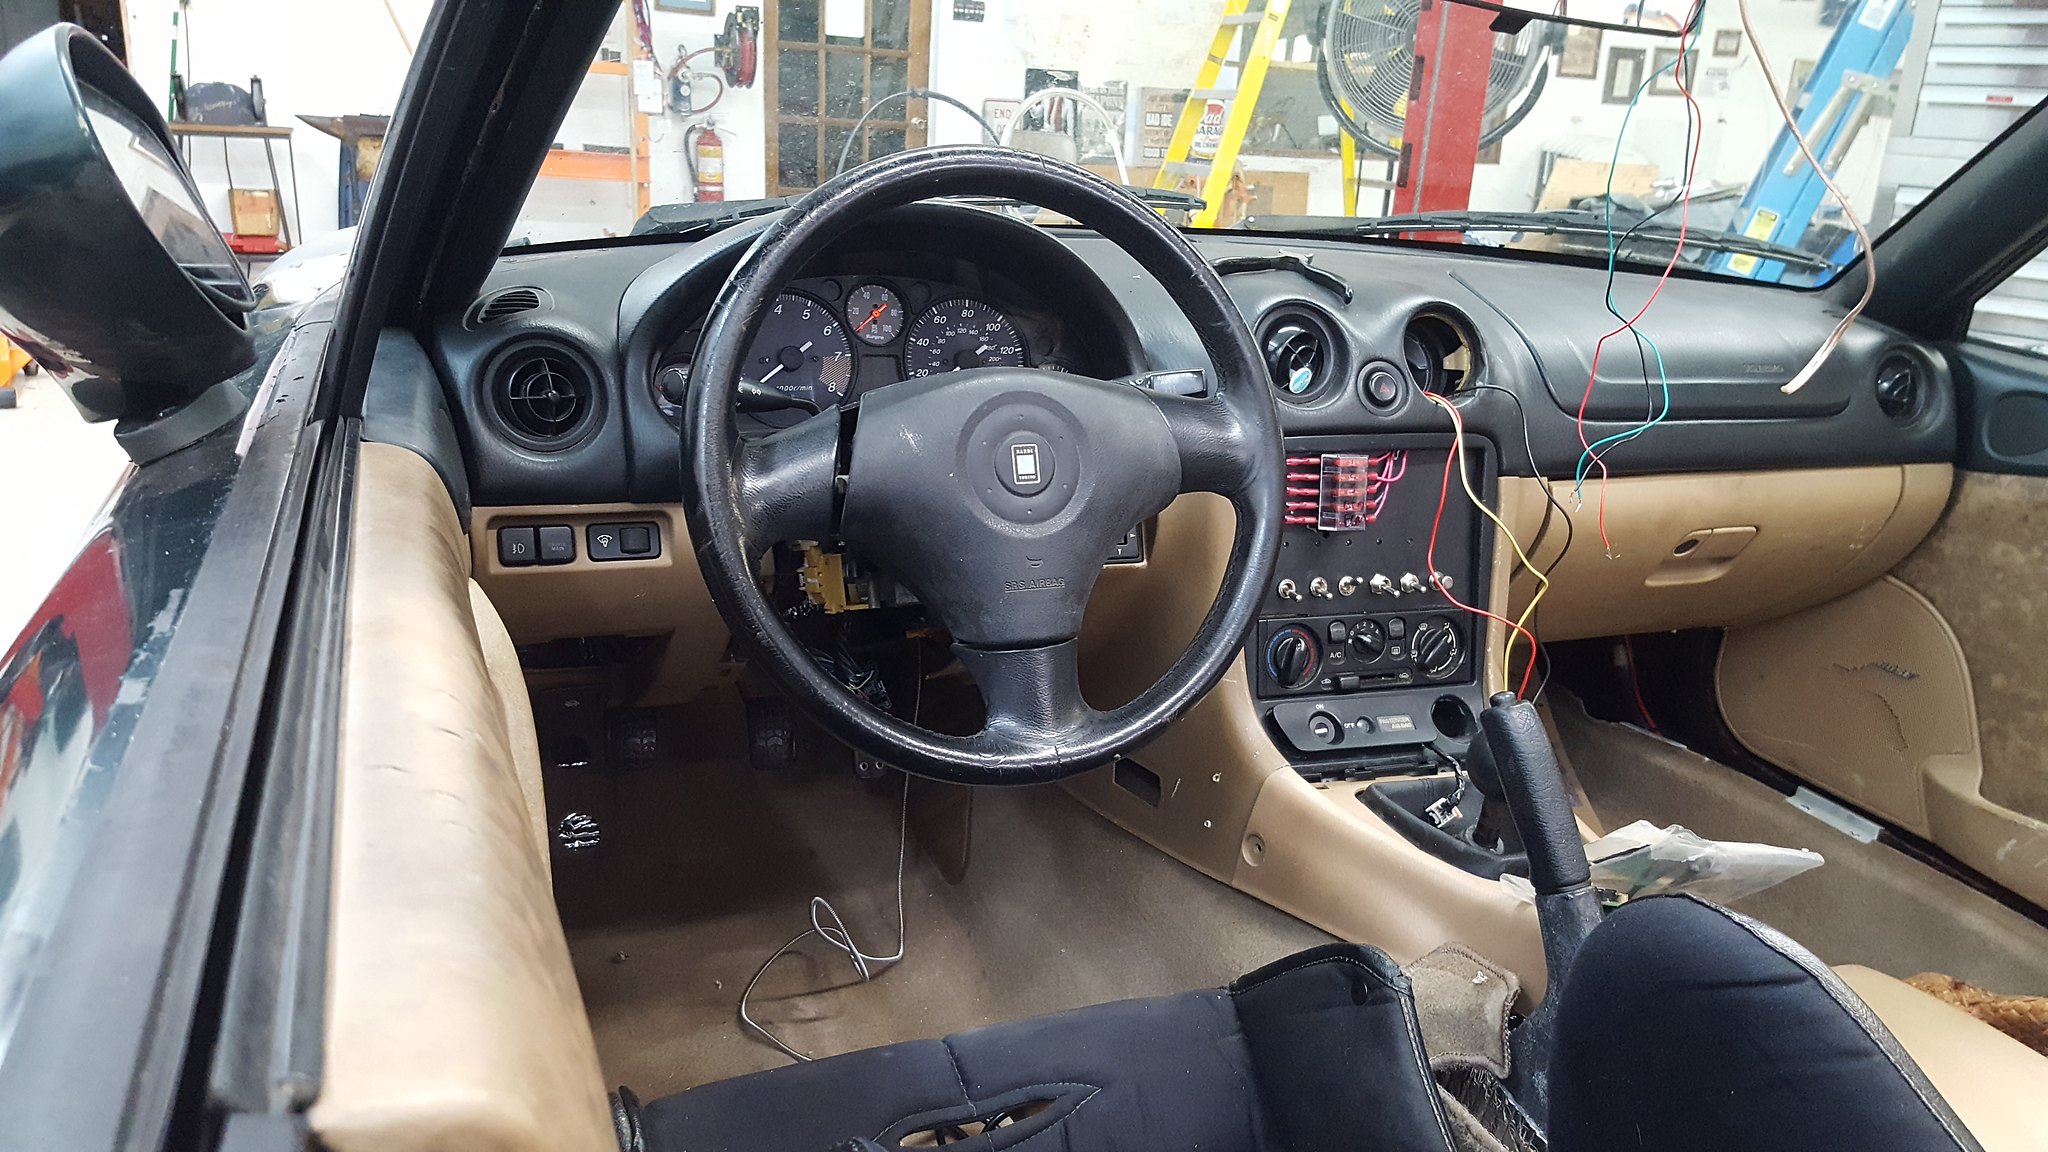
20181118_110952 by Michael Crawford, on Flickrthe shift light is going to be mounted where the dome light was above the rearview if I can make it fit in a way im happy with, may require cutting. You know, since NOTHING has been left untouched in this build. Except the gauge hood. I didn't mess with that at all. Yet.While ive been chipping away at electrical, dads been cleaning, painting, and prepping sub assemblies. Seat mounts were ground, cleaned, and painted, seat cover cleaned, hardware torqued, etc. ready to be bolted in after the roll bar.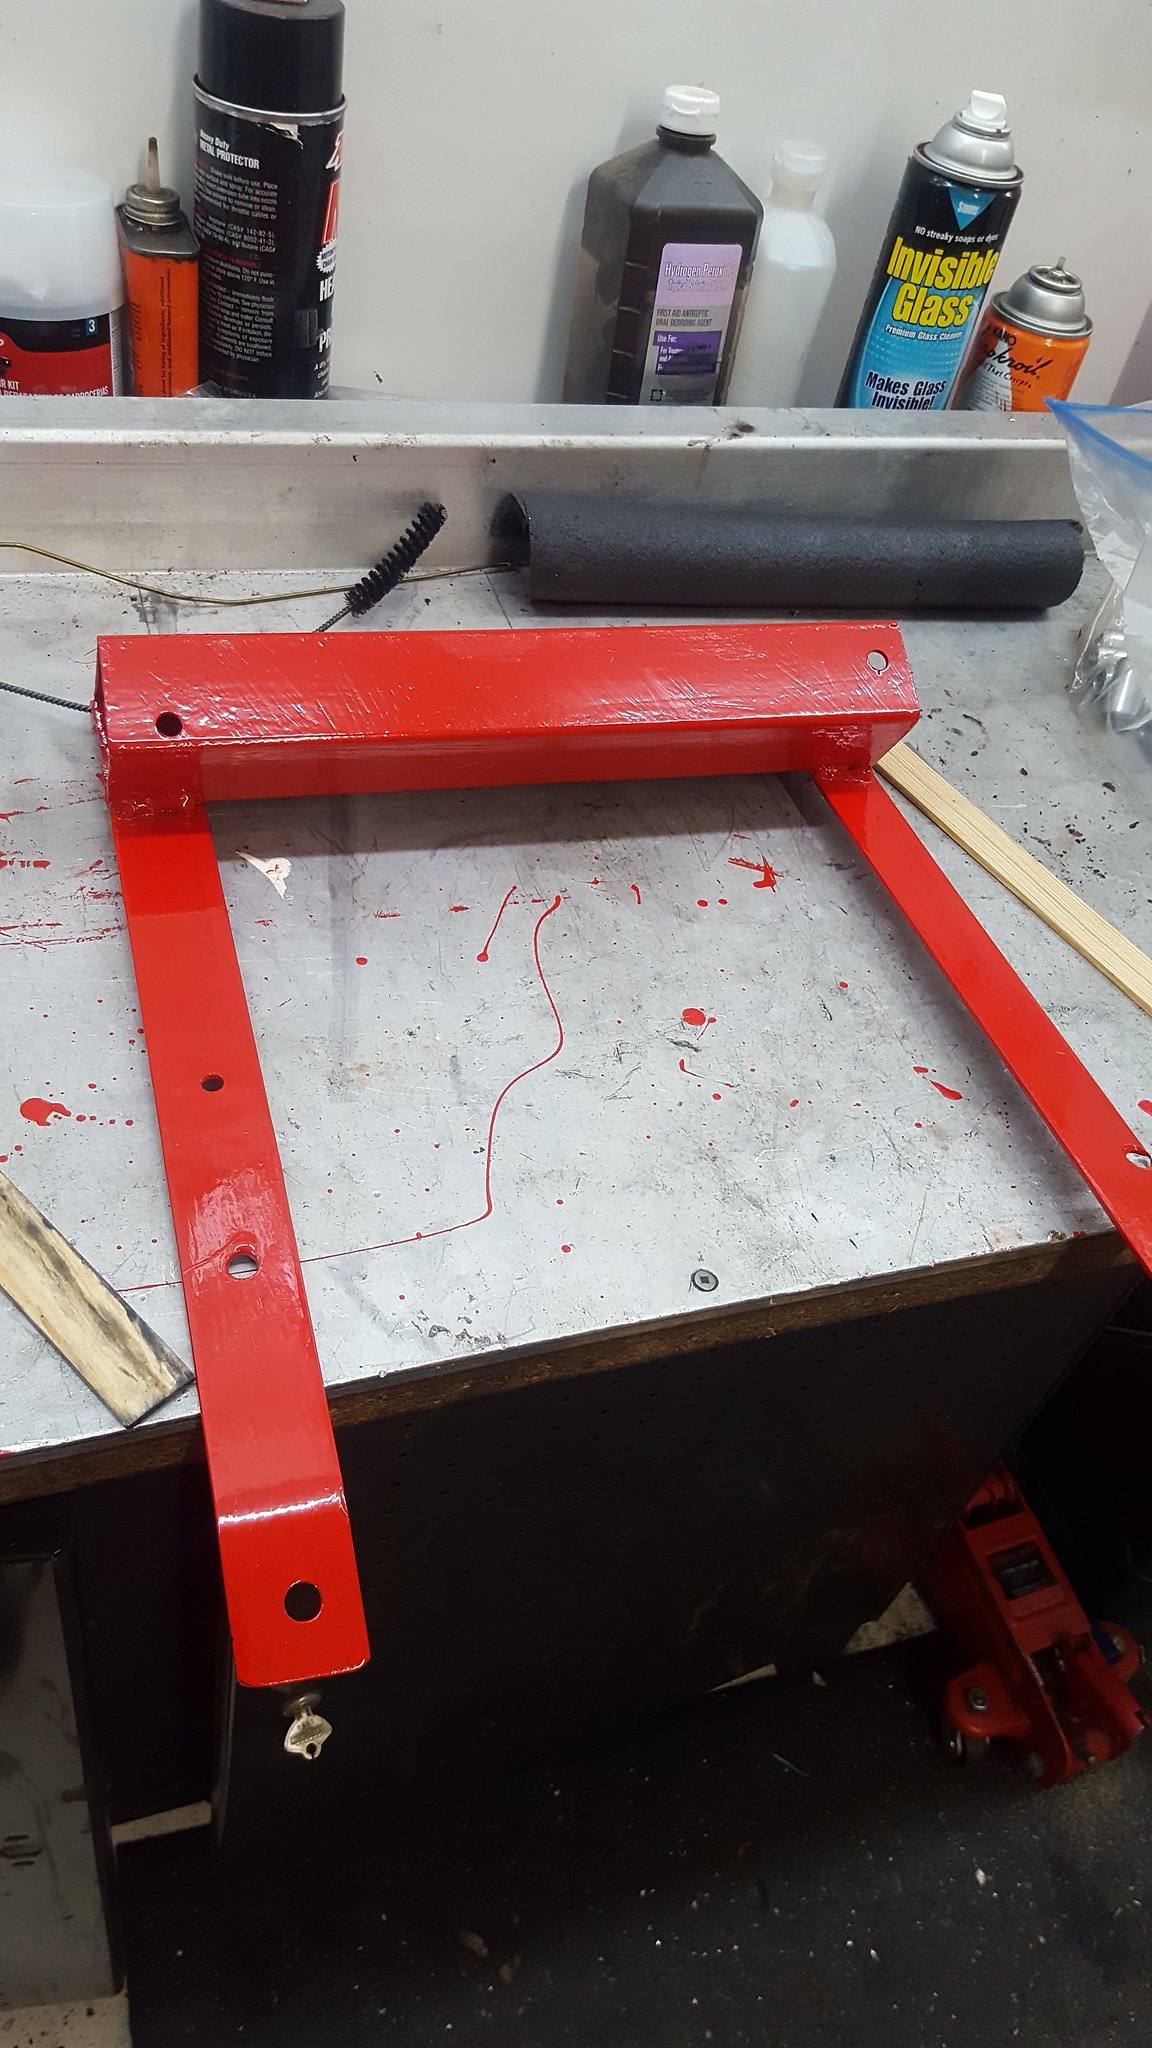
20181116_165754 by Michael Crawford, on Flickr
20181116_201749 by Michael Crawford, on FlickrI refit the roll bar to remind myself of what needed done. Two tabs to tack on, some finish welding on the floor backing plates, finish welding the roll bar (Stave of AMC fame volunteered to do that), clean and paint. Clean up the hackery on the body shell form where I cut for clearance, bolt it in, and make some close out panels.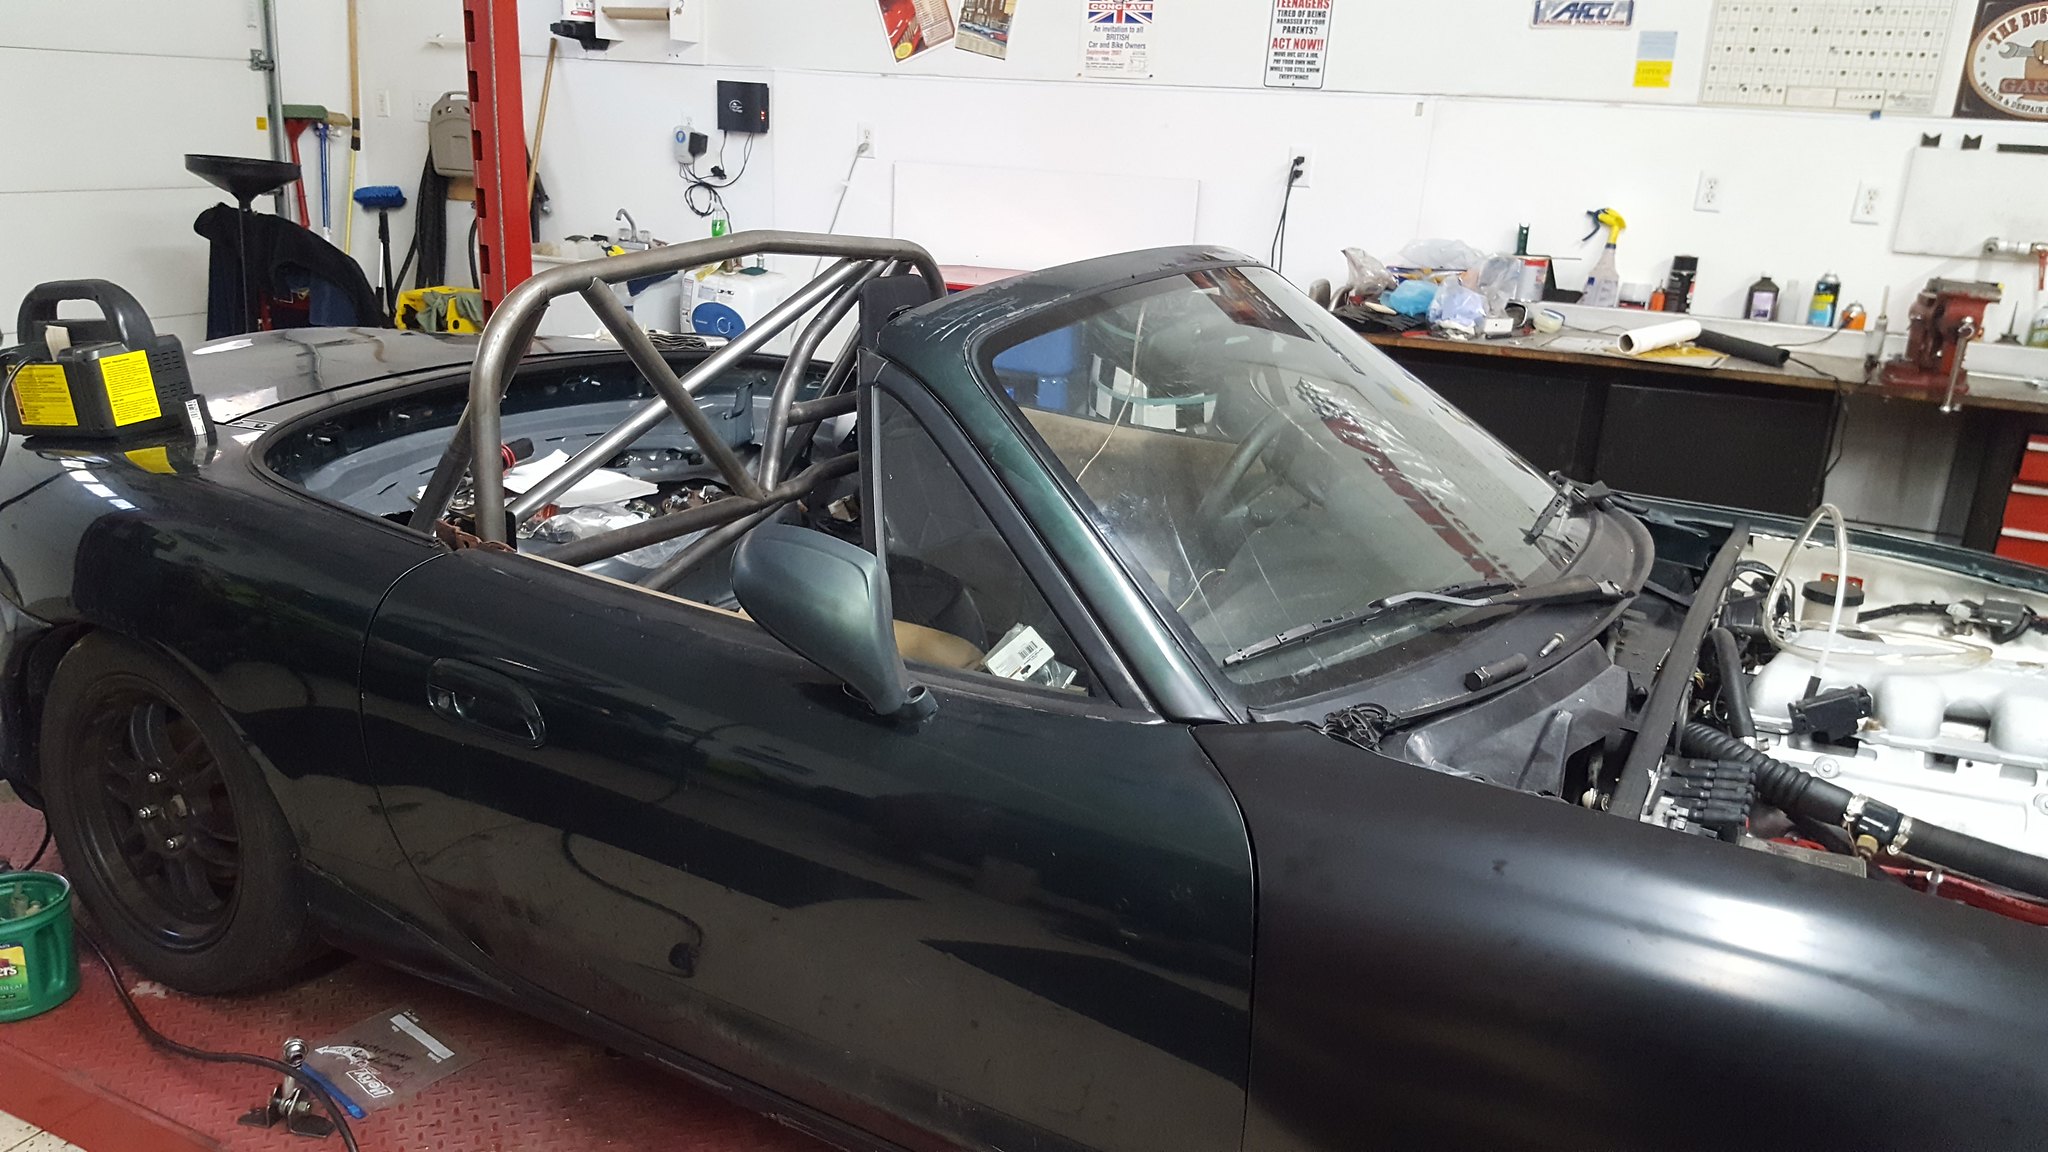
20181118_160602 by Michael Crawford, on FlickrI mounted up the rear bumper. Need to eradicate the structure from underneath it yet that should lighten the car a few more pounds as well.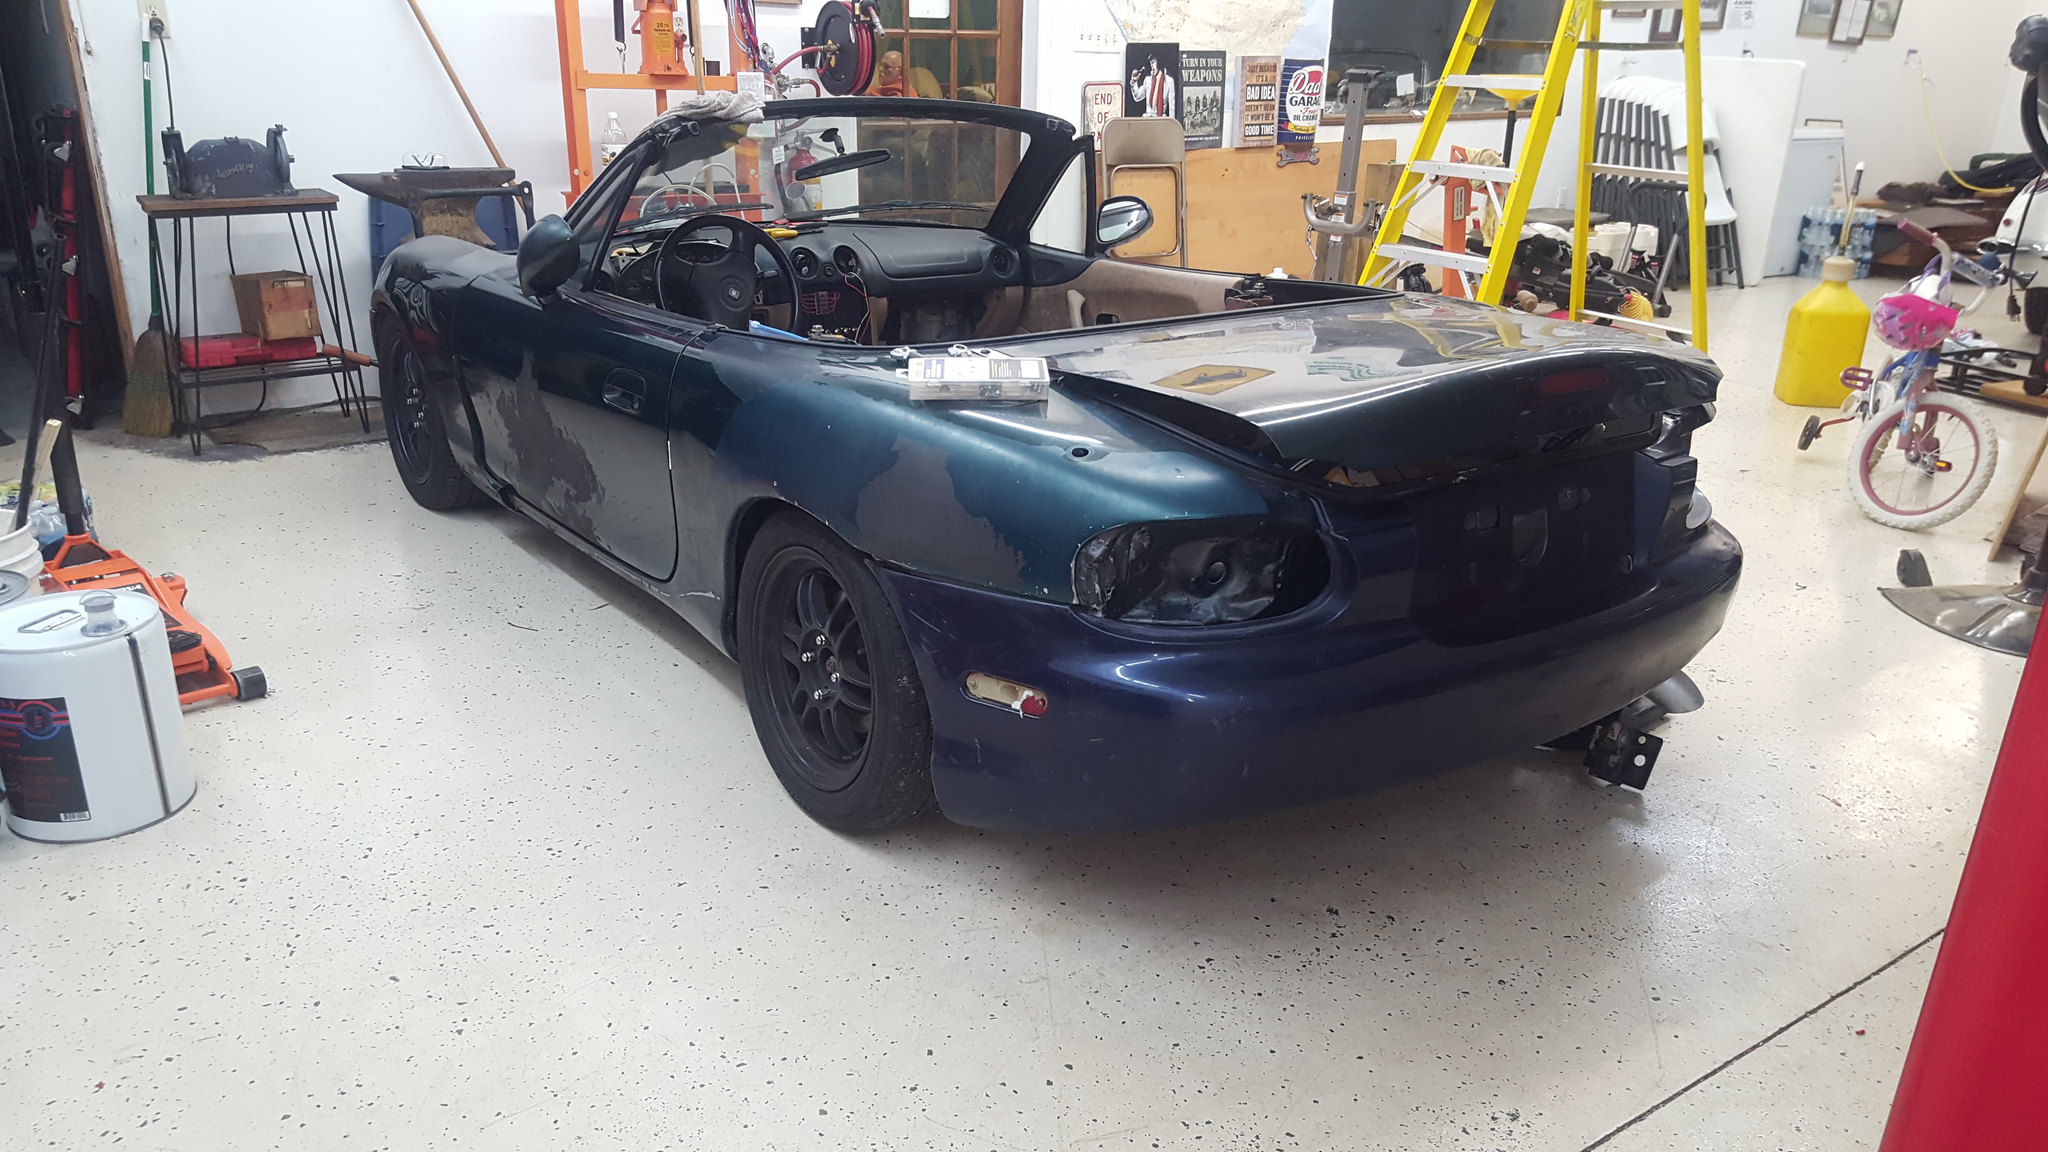
20181109_172637 by Michael Crawford, on Flickrlastly for this update is my puzzler. You see, I have to redo the throttle cable setup for ANY hope of a hood fitting. However, there's an issue there. I had thought it would be just as simple as moving the mount point towards the intake bu 90 degrees.Except it binds at anything over about 45 degrees from where it is now. Which really doesn't get me anything for hood clearance or cosmetics. Im open to ideas on how to lower the sleeved and fixed end without binding issues though. There has to be a way, and the only option I can come up with is to use a smooth stud to pivot the cable down like a pulley. That way the housing can come at a 90 to the angle of pull.Heres pictures. Help me brainstorm. Please.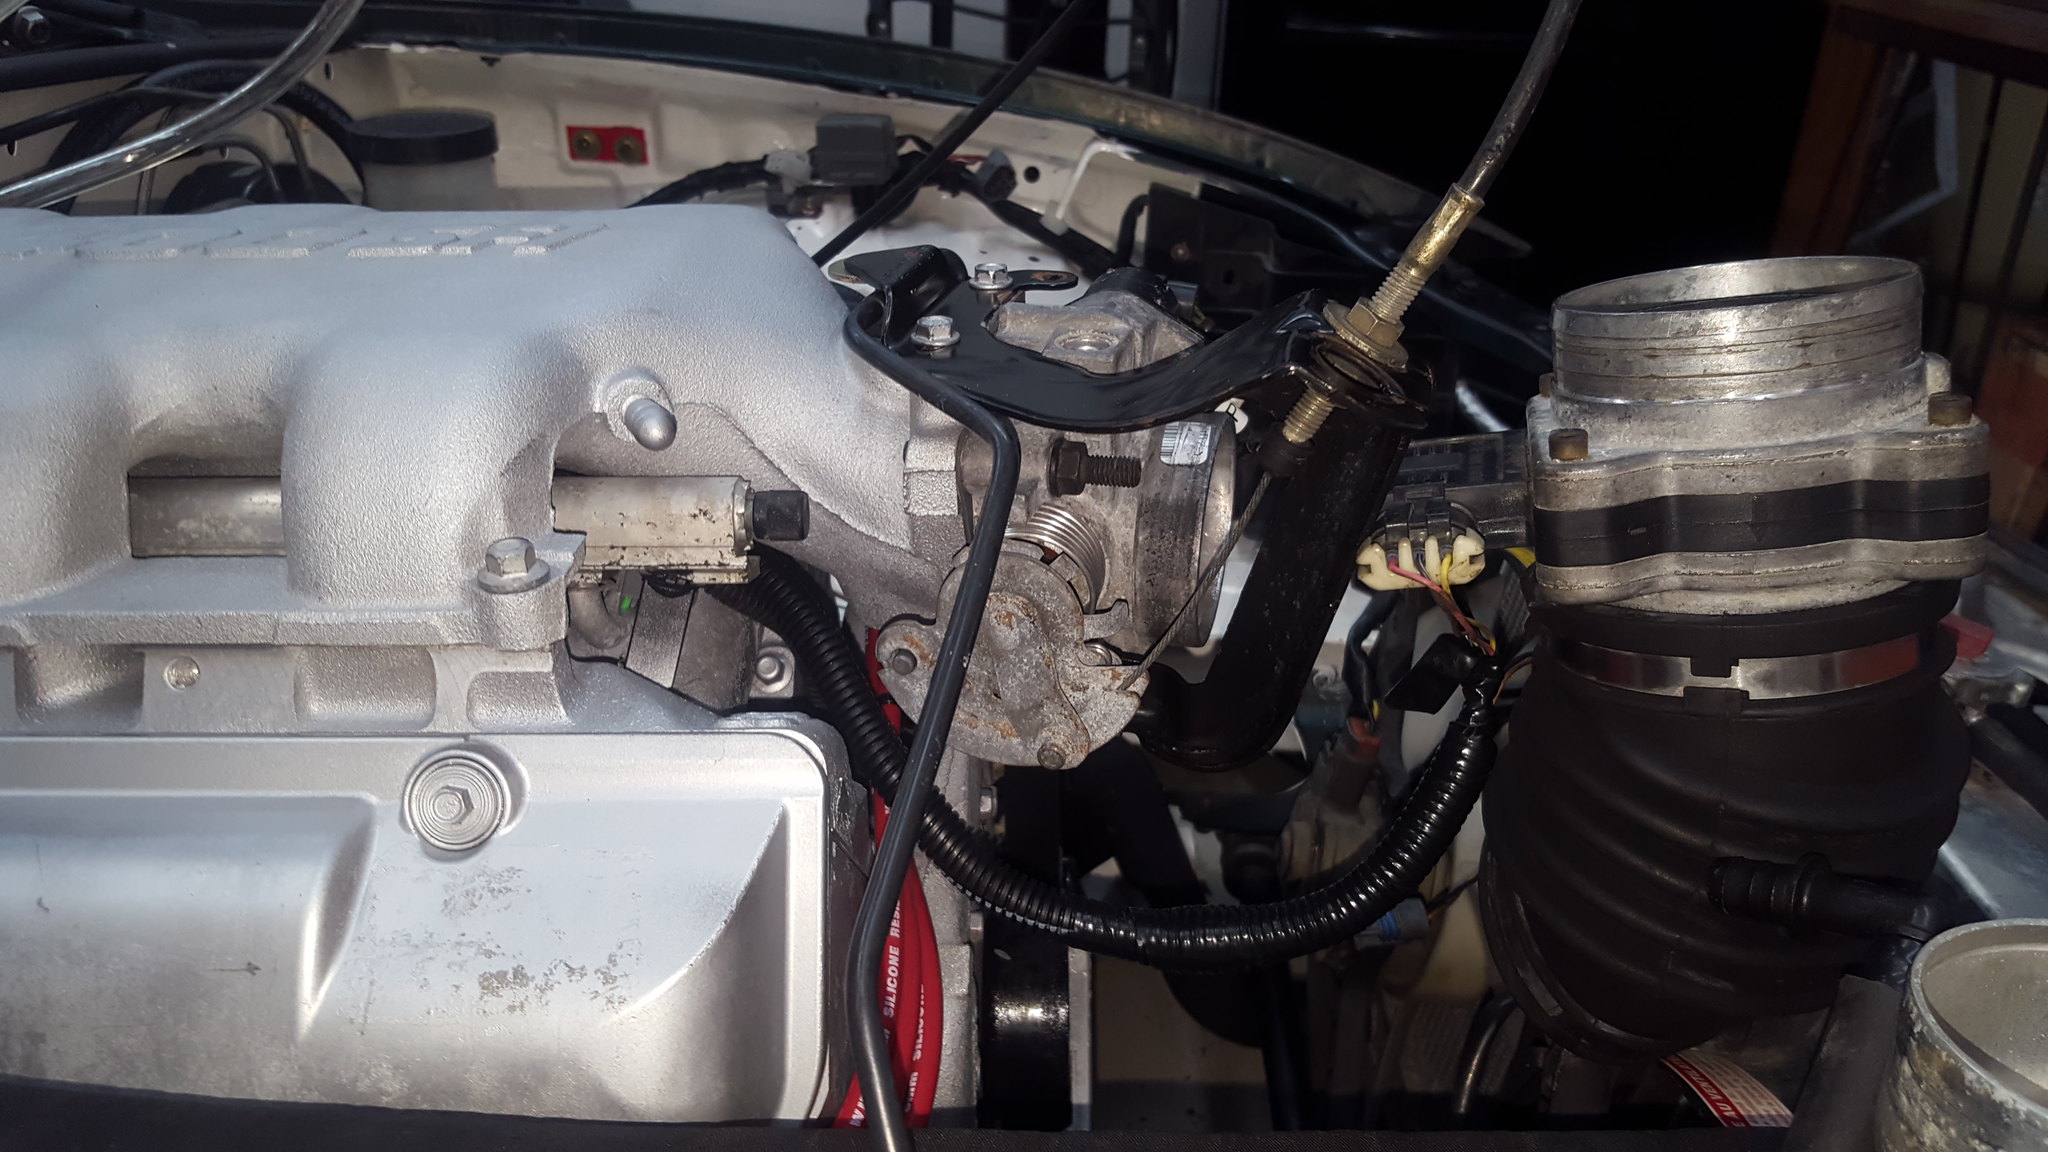
20181109_172707 by Michael Crawford, on Flickr
20181109_172703 by Michael Crawford, on Flickr
Reply
0
0
11-24-2018, 05:26 PM
#69
Junior Member
Thread Starter
Join Date: Nov 2017
Posts: 112
Total Cats: 7
Challenge budget so farrevious challenge budget: 1877.19 recoup total: 820new money: another can of white from lowes 3.98
heim: 1 from my magic bucketdriveshaft safety loops: 40 from J&t weldinggiant K&N air filter: 2.06 pull-a-part Recoup: 820
new total: 1902.29so, ive been chipping away over the holiday weekend. Tuesday on my lunch break, o swung by J&T welding I alblemarle to get the 2x1/4 plate I needed for the driveshaft and CV axle safetly loops, and have it bent. $40 later, and 30 minutes, I had this in the back of the car. We needed roughly 6 inches between the verticals on the legs. So thats what I asked for, and pretty much what we wound up with.
20181119_124615 by Michael Crawford, on FlickrTuesday, while waiting for an appointment, I made a to-do list.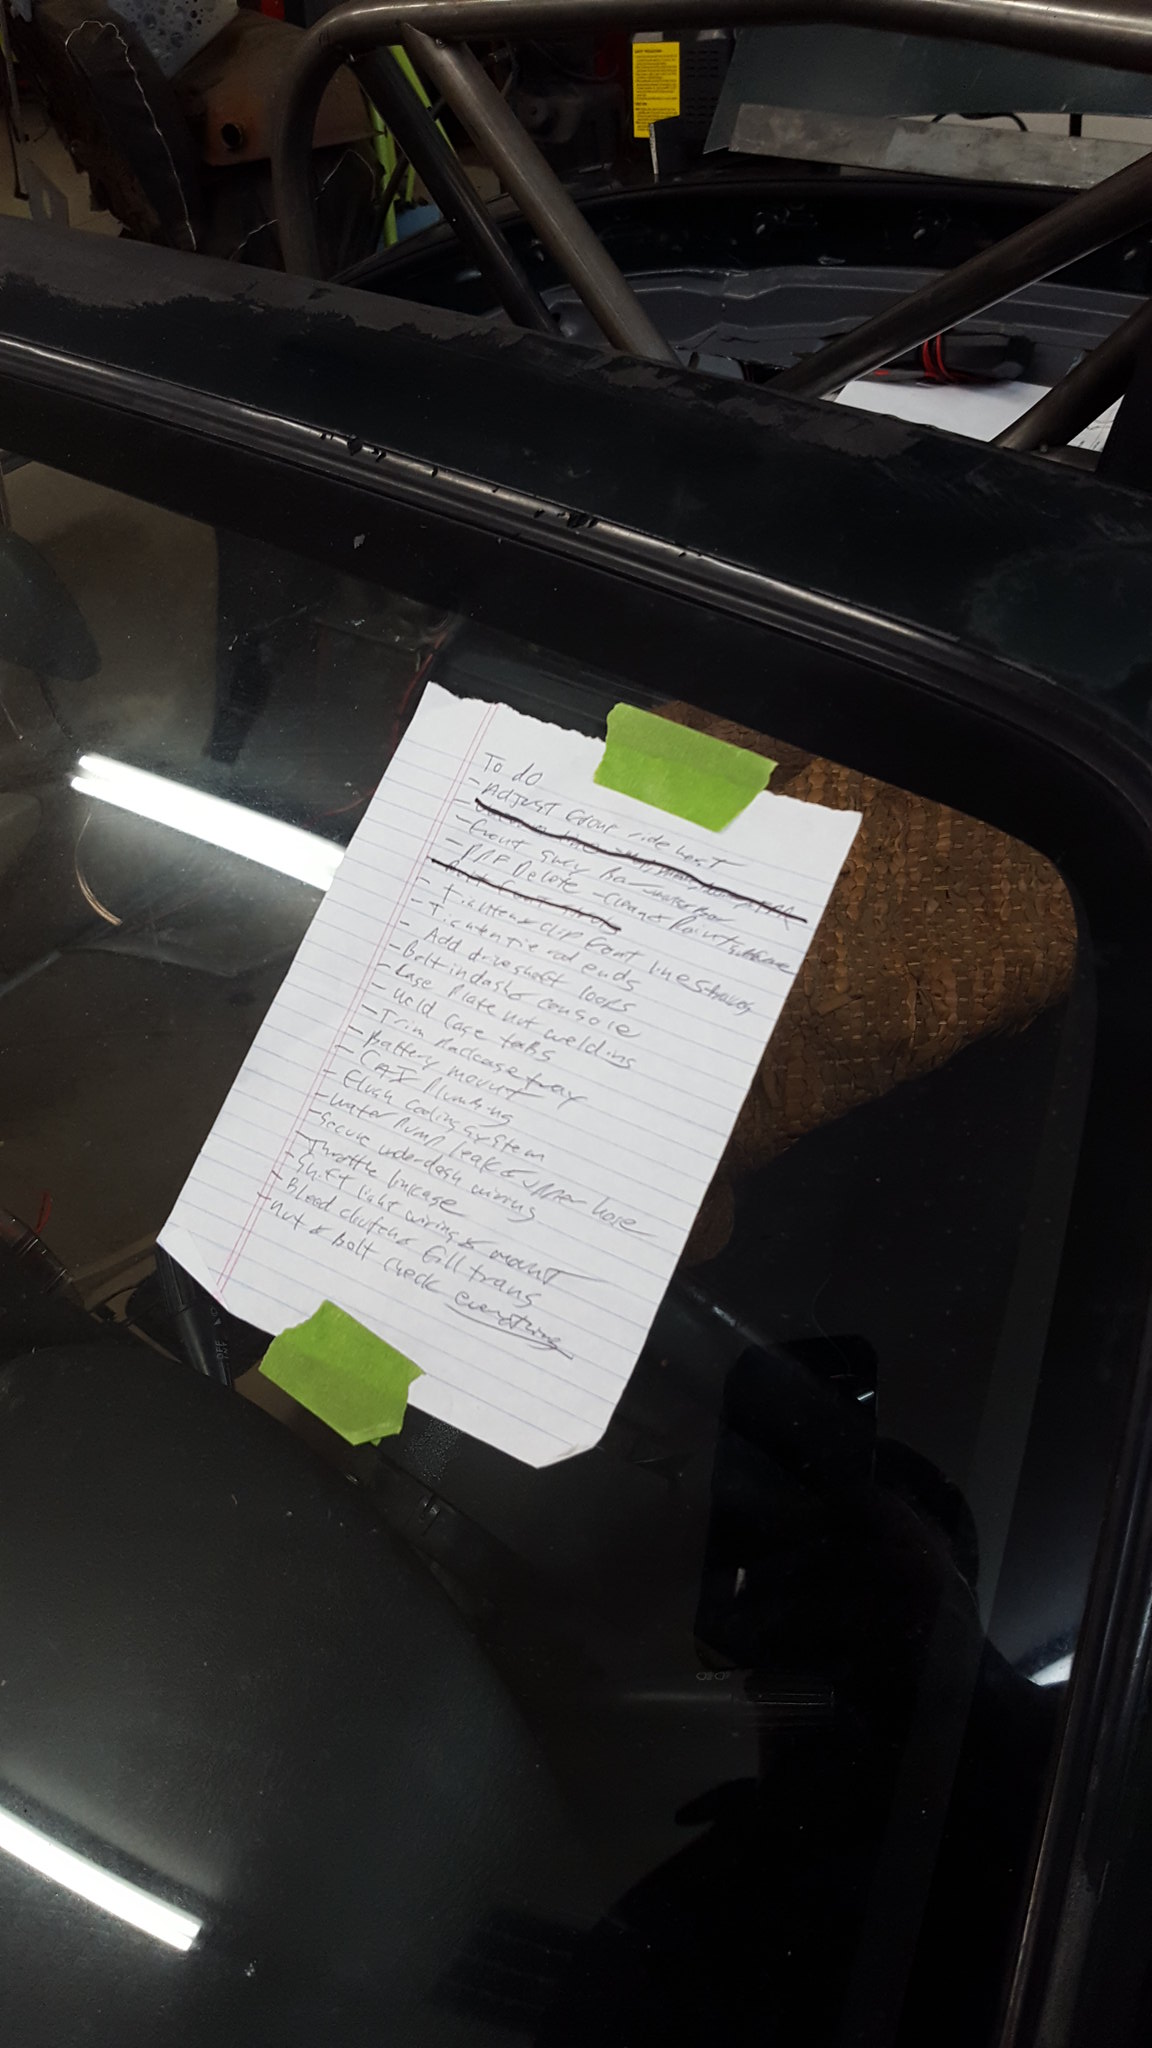
20181120_183625 by Michael Crawford, on Flickrstep one was Tuesday night, which was getting the CAI built, vacuum lines finished, and the throttle linkage sorted out. By the middle of the evening, I thought I had it all sorted out. I used one of my multiple aftermarket air filters, and the biggest I could fit. It happened to be a K&N. See, I buy them any time I see one at pull-a-part. For 2.06, I figure I cant lose. I have AEM, K&N, Spectre, ebay, and a greddy. Seriously, I have like 9 different aftermarket cone filters in storage. This one, If I remember right, was on a 3800 Buick. But don't quote me on that, its been in storage for probably 5 years. Maybe longer. I mounted the giant filter directly to the end of the MAF, tucked low behind the radiator. I dug it. Also, I cut and bent the stock throttle linkage bracket until it looked like it would clear, pretty much mimicking the car version of the GM bracket. (I bought a car version Wednesday morning, but it didn't wind up being the solution).I also finally did all the vacuum hoses and lines. Used scraps of hose ive scavenged from various cars over the years, as well as scraps of the factory nylon vacuum lines. Still need to get a factory style MAP sensor mount (didn't take the right tools with me to the yard for that) or make one, but its otherwise done!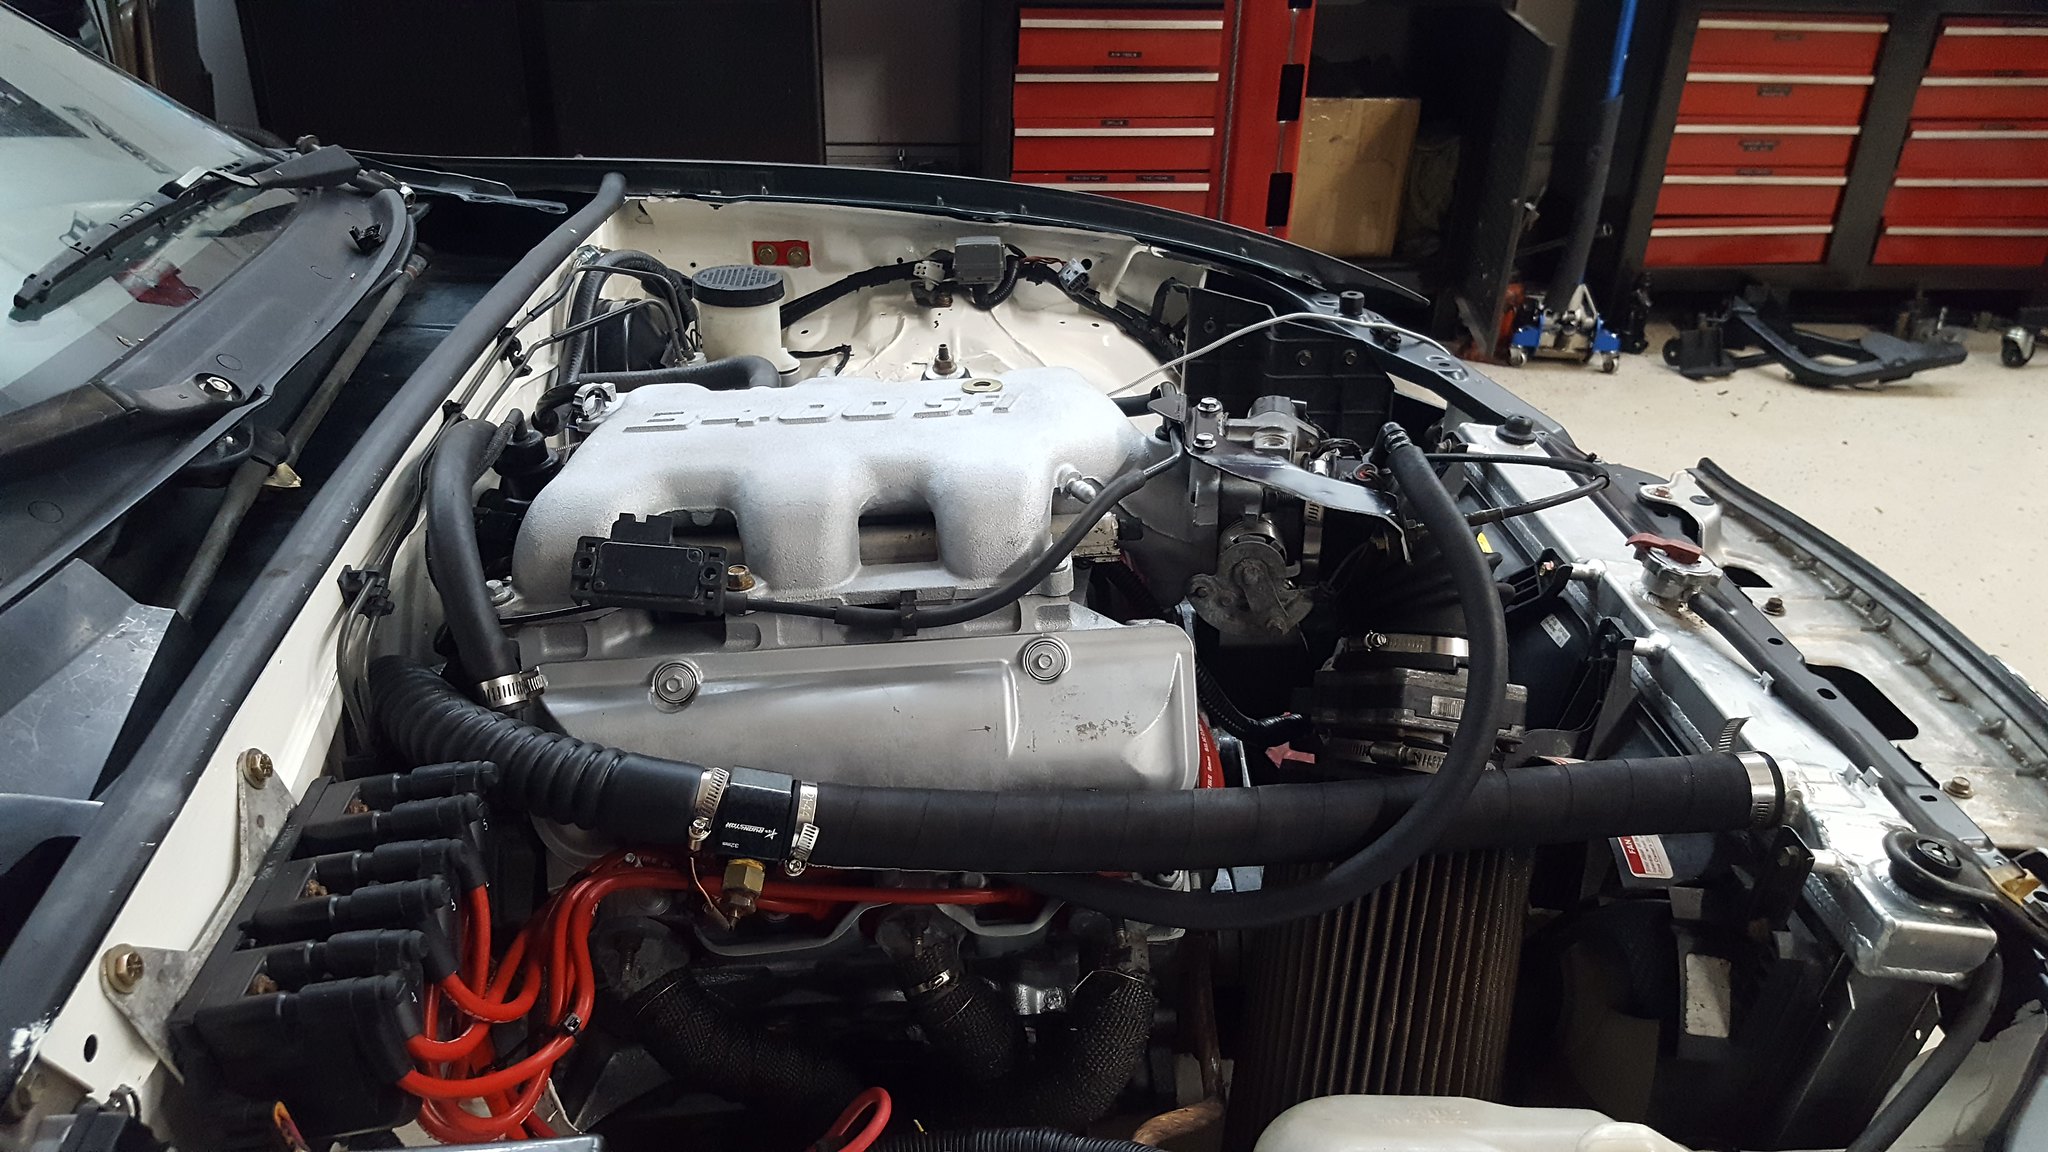
20181120_193804 by Michael Crawford, on Flickrhowever, I wasn't feeling like the hood was going to fit without a giant hole being cut.
20181120_193809 by Michael Crawford, on FlickrWednesday I ran by the junkyard real quick, had an eye-doctors appointment, and then spent the day helping my wife around the house.Thursday (thanksgiving), we had dinner at my folks place (where im building the car). I was specifically told I could NOT get dirty or stinky before dinner and family portraits. So I looked at the list, and decided to bolt the dash in (not picture worthy), secure under dash wiring (not picture worthy), and see how big a hole we would have to cut. Initially, it was looking REALLY BIG.But then, I pulled the entire CAI (hood was hitting breather hose fitting and IAT) and then the throttle bracket (again, hood hitting it). Without ANY cutting, we get here:
20181122_113126 by Michael Crawford, on Flickrvia horrible cell phone pictures and some guesstimation, we see that we only have to notch a 6 inch wide underhood brace to clear the intake manifold. Ill then need to build an underslung throttle cable bracket assembly, and a completely different CAI setup. But having an externally stock appearing hood was worth it!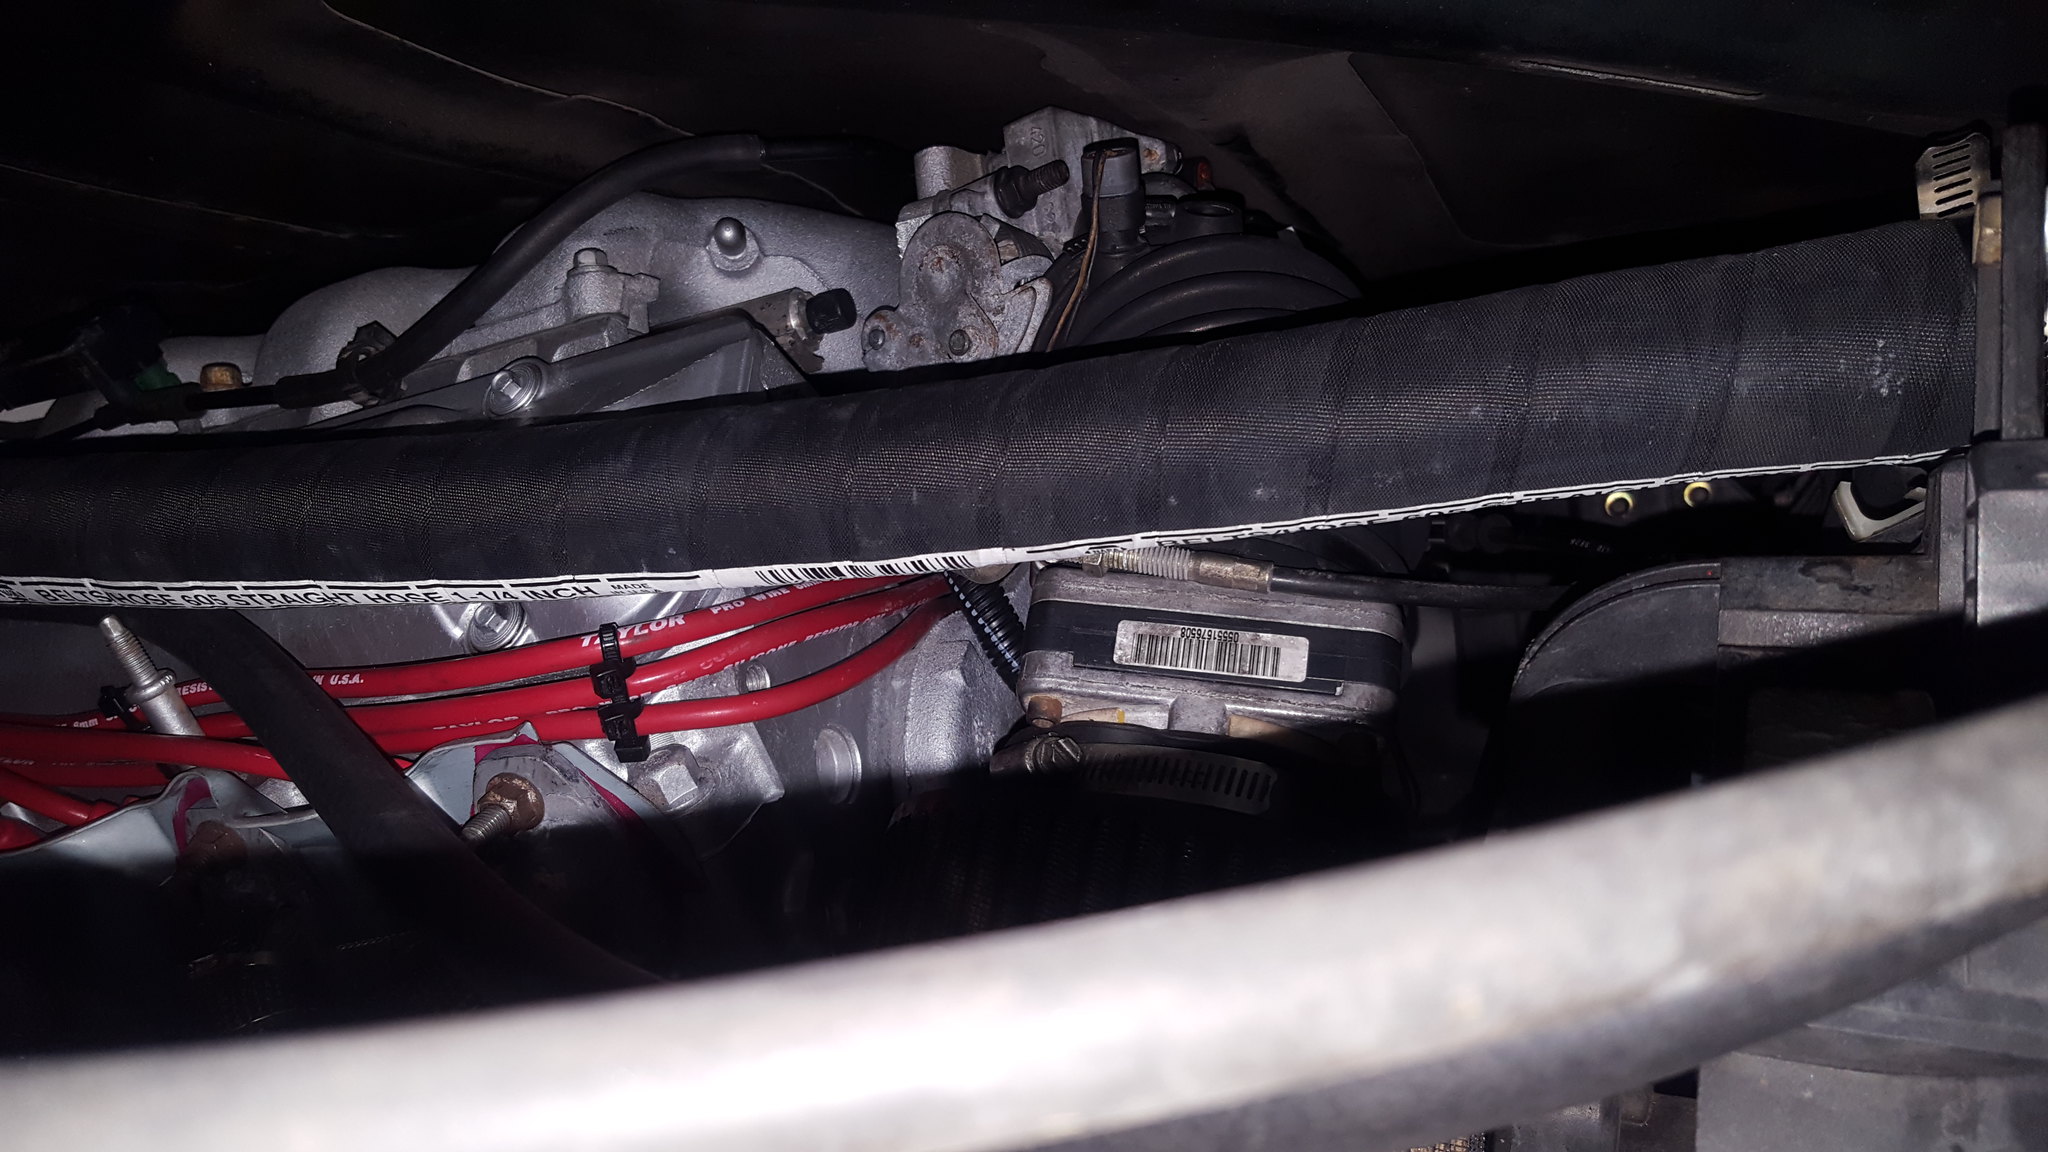
20181122_095559 by Michael Crawford, on FlickrThursday night after portraits, I finally made our fuel gauge. Used an old mudflap, some hole saws, my drill press, and a glue gun to turn the passengers side eyeball vent into a fuel gauge. I found that the gauge will read accurately when entirely divorced from the cluster, just like a GM gauge. That was a very nice thing to find out.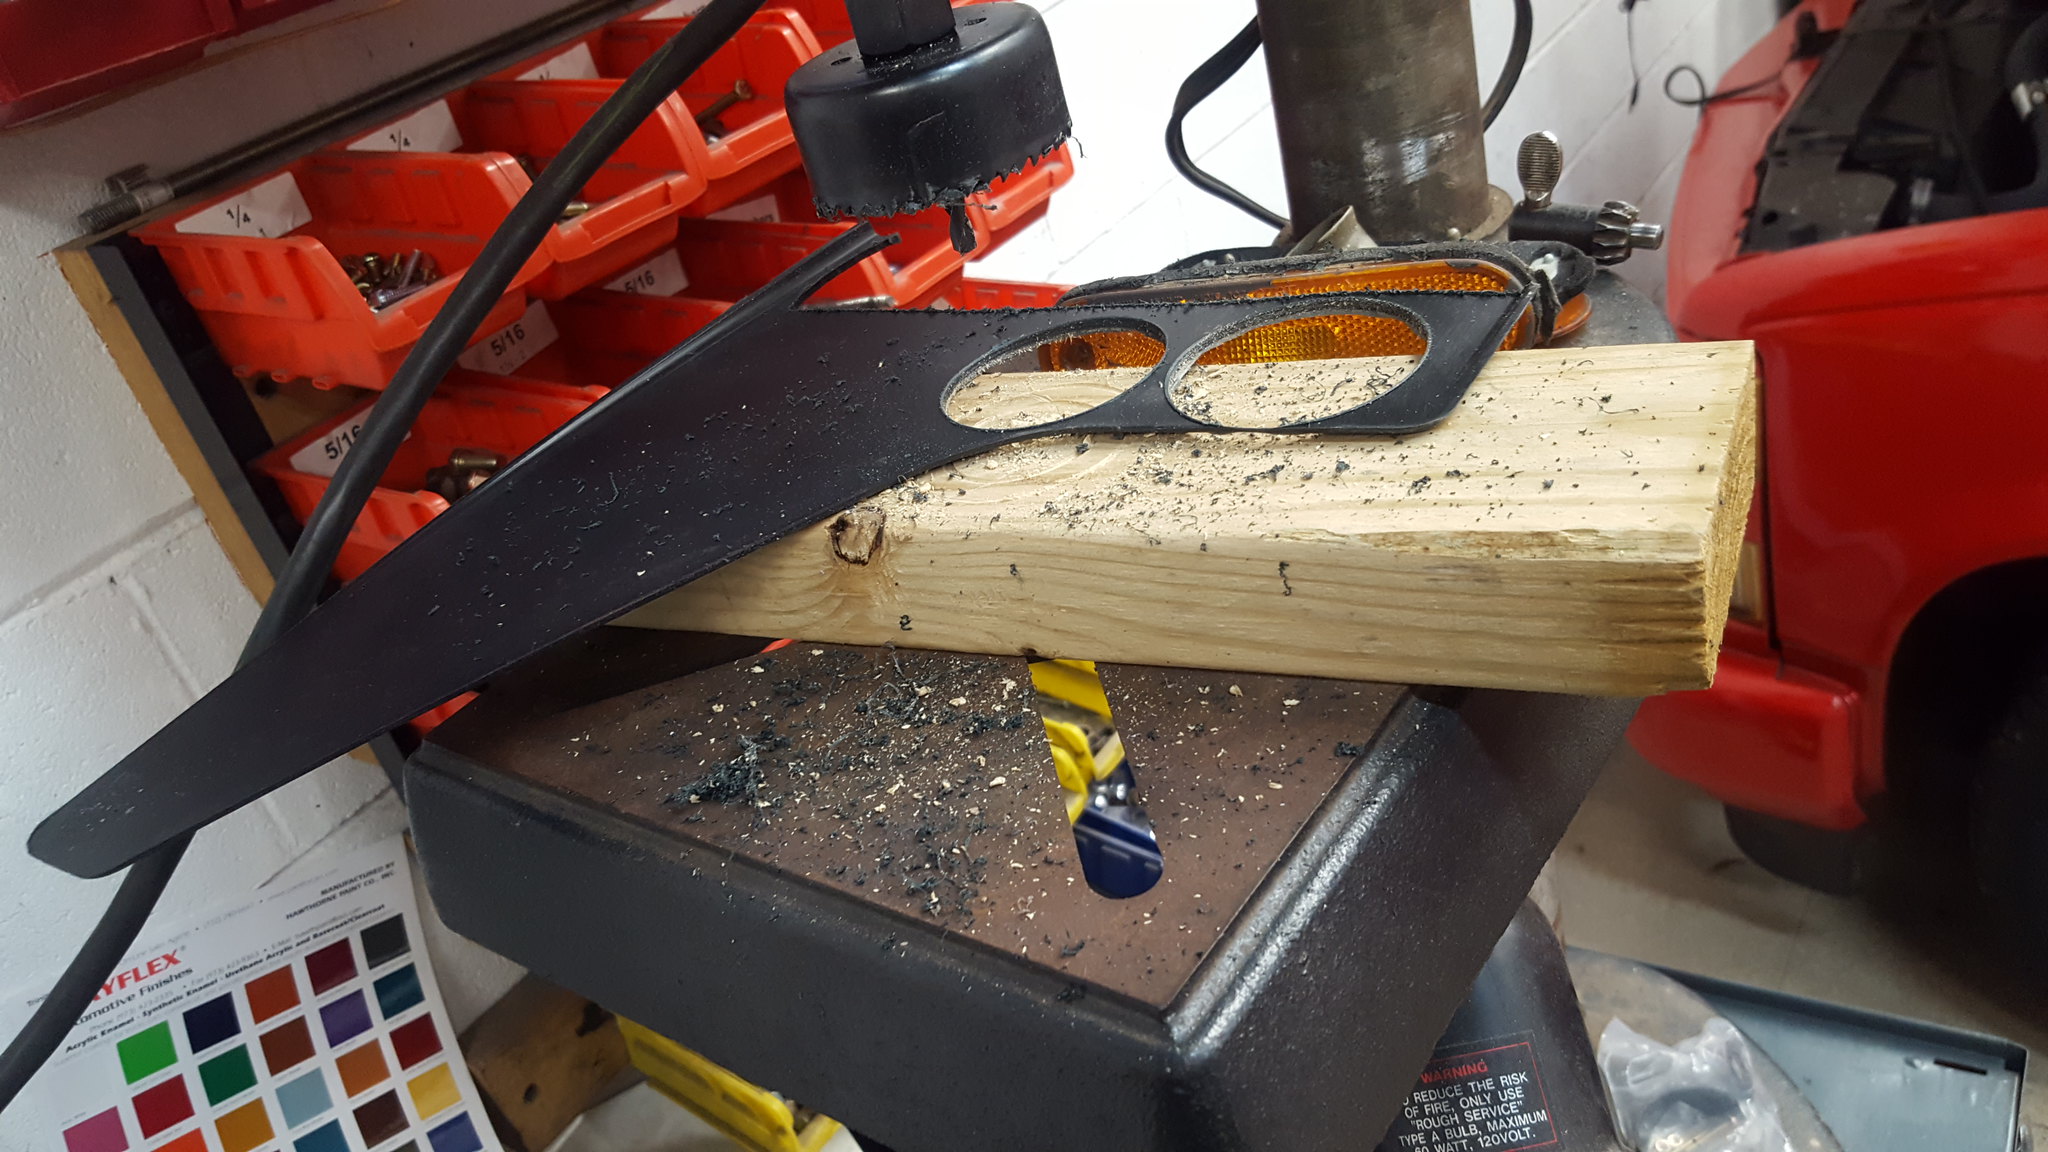
20181122_175346 by Michael Crawford, on Flickr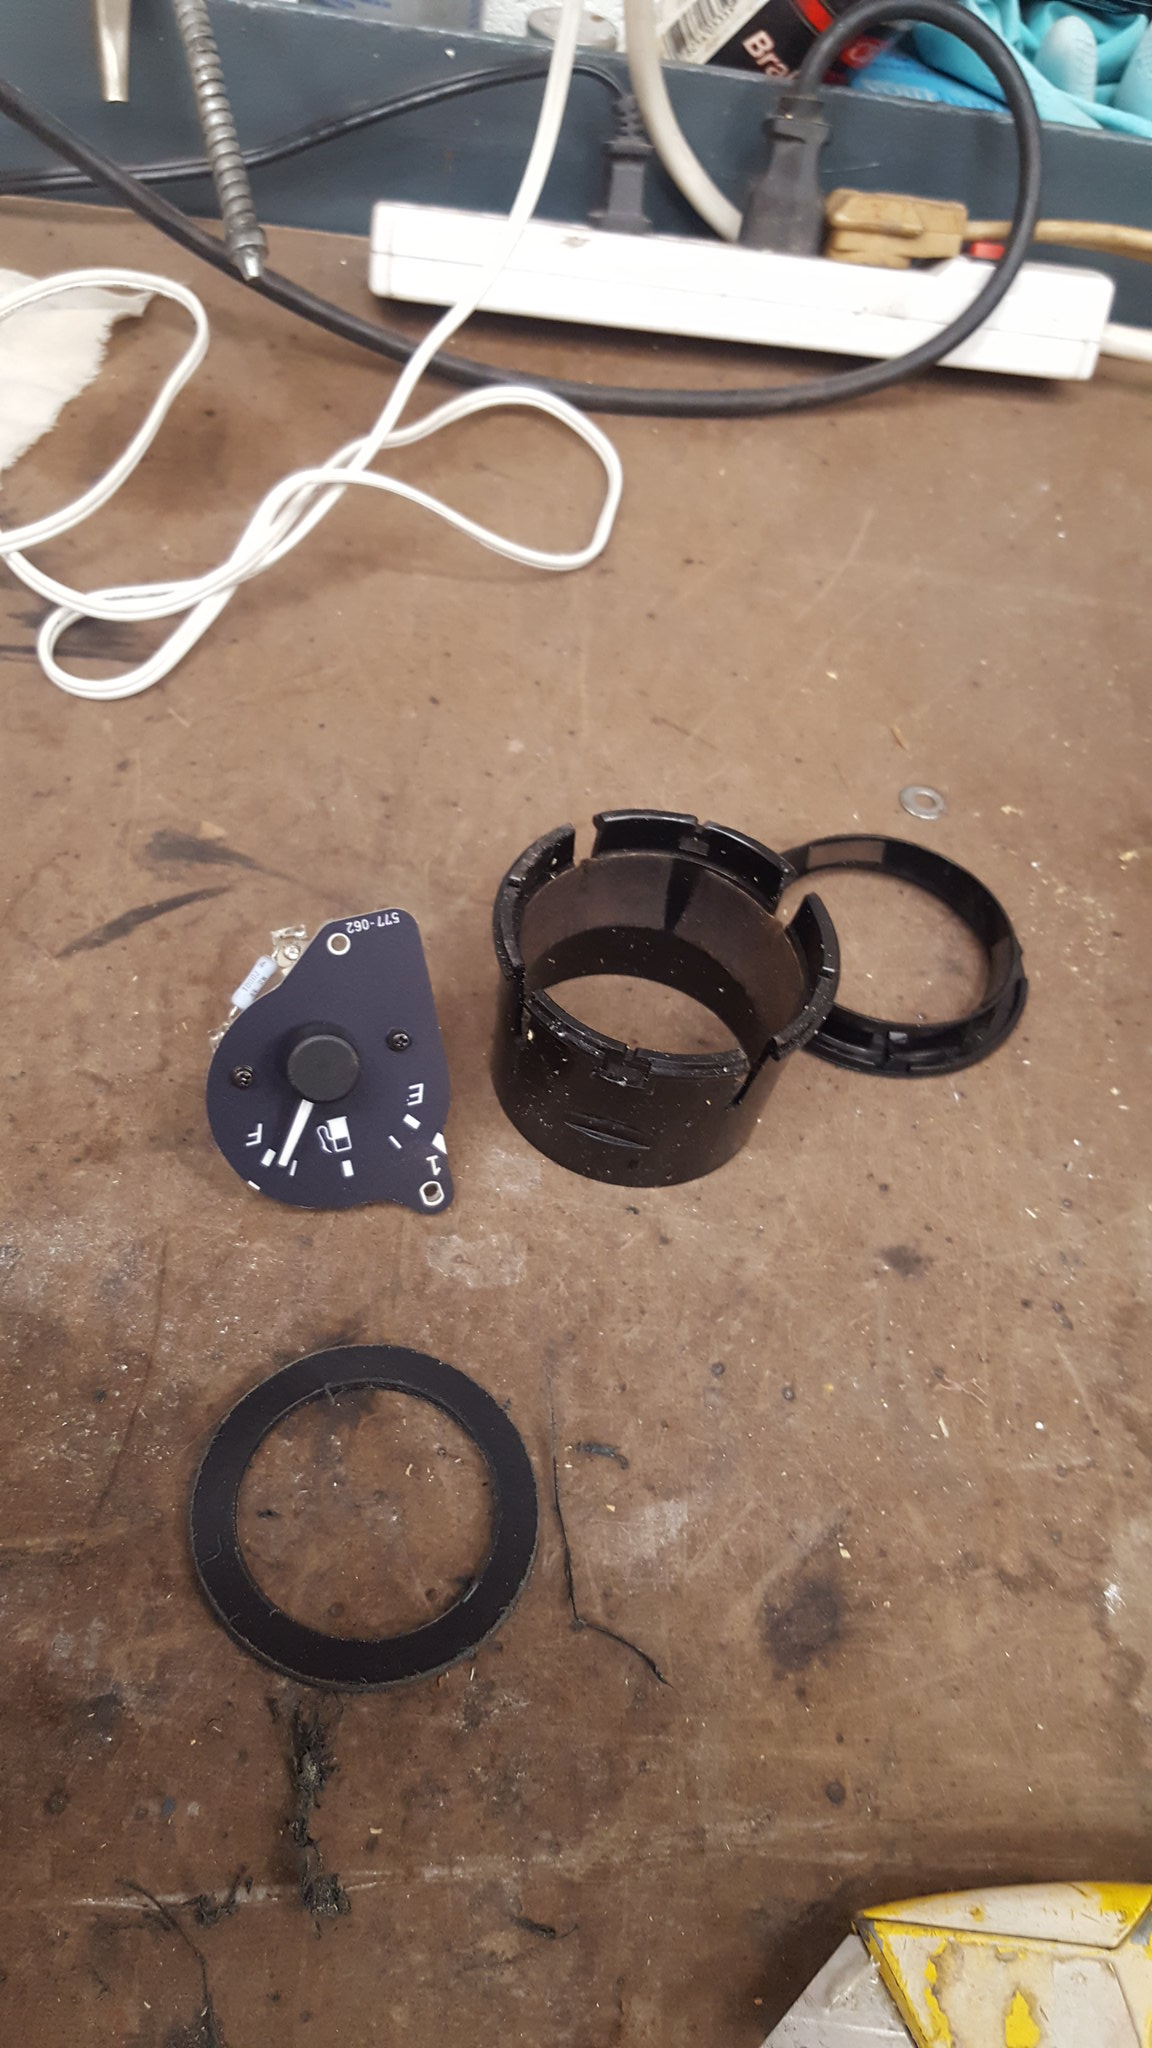
20181122_175711 by Michael Crawford, on Flickr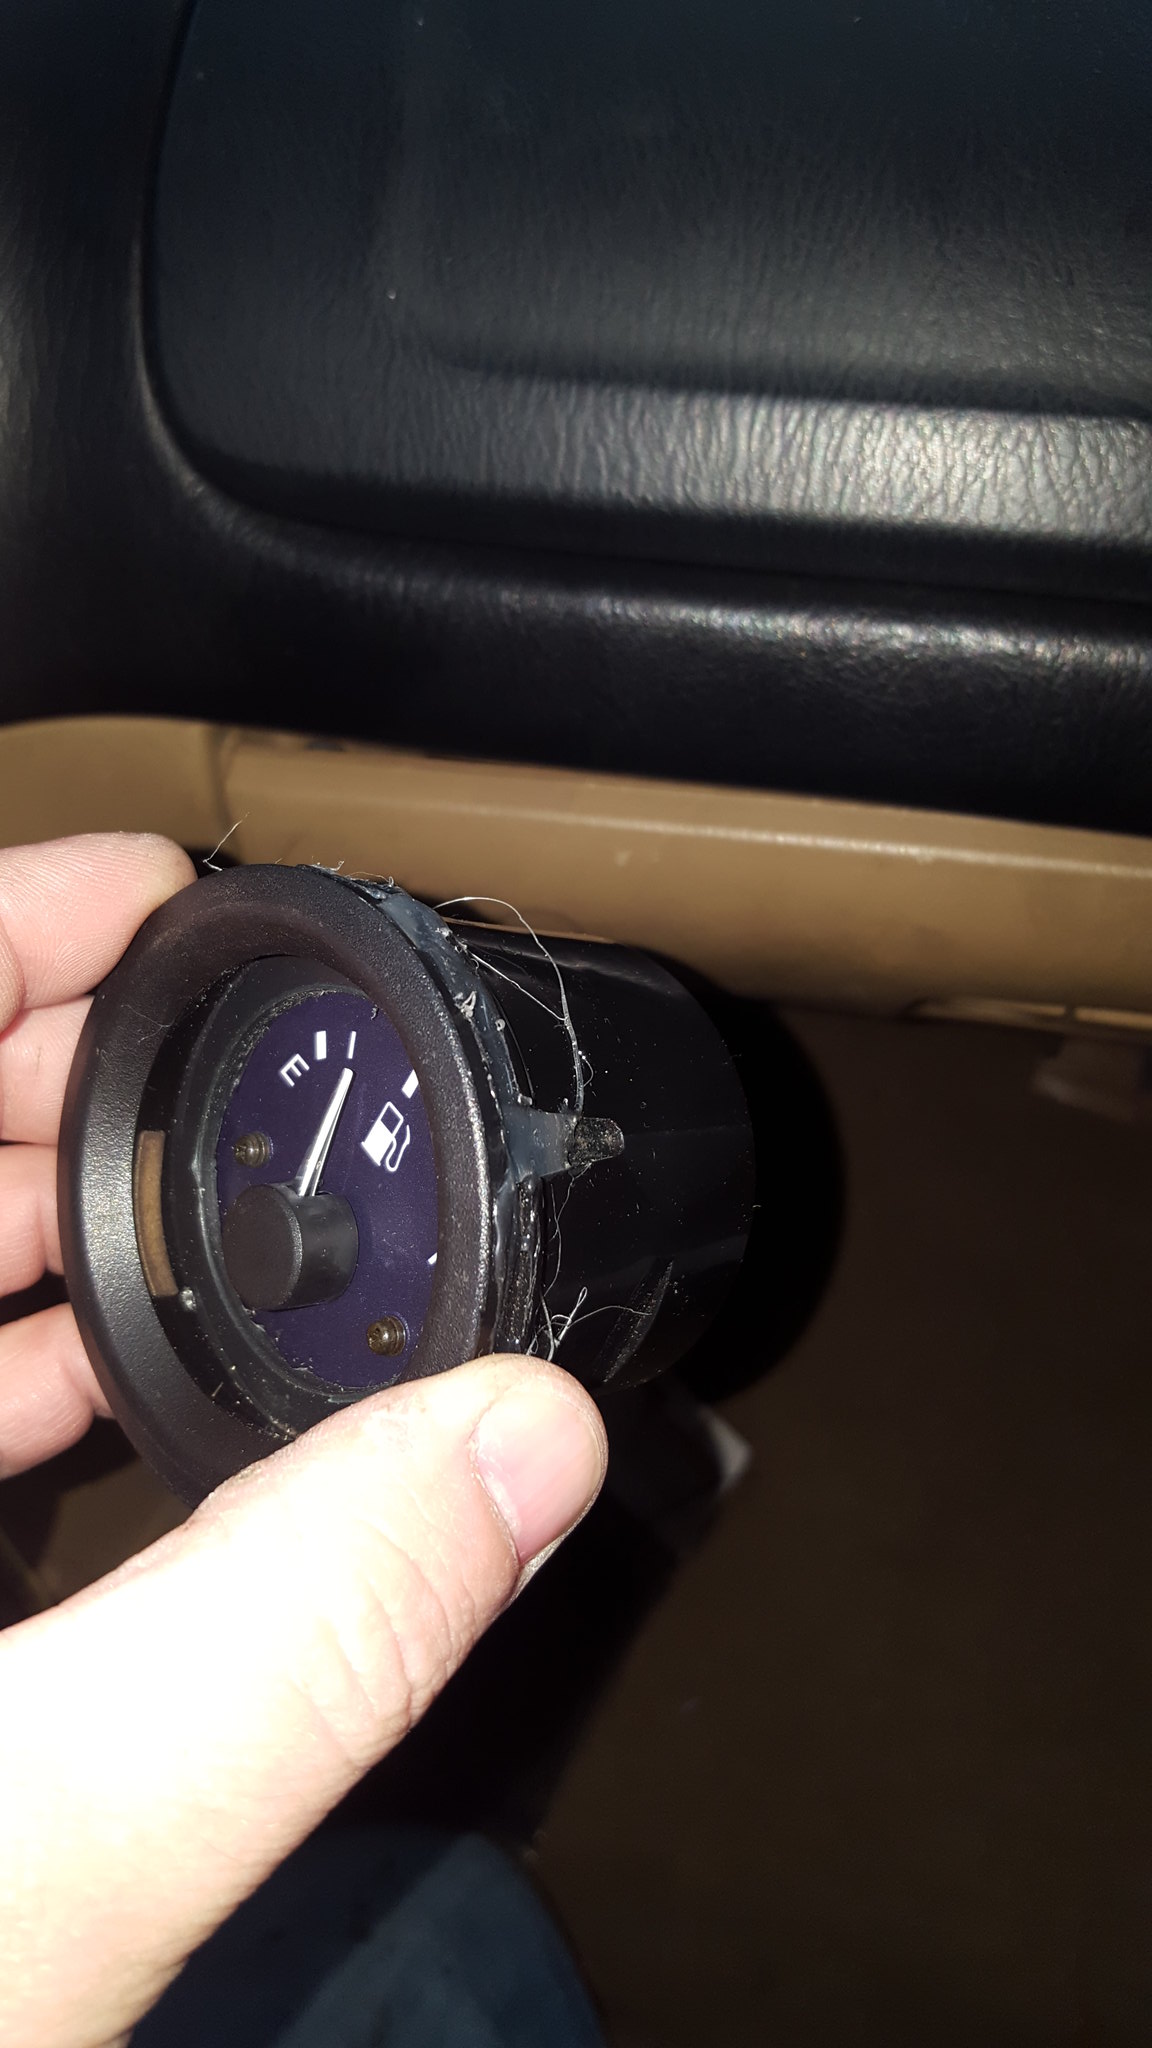
20181123_092810 by Michael Crawford, on Flickr
20181123_093202 by Michael Crawford, on Flickryesterday, I decided to finish tackling the PPF delete, as well as get the car ready to finish cleaning and painting parts, as well as replace the bent driver side rear suspension arms.To attach the upper joint, I had previously made this:
20181116_201858 by Michael Crawford, on Flickrto actually attach these brackets to the subframe, I pulled the subframe out, cut the spot welded flange down, welded the L brackets, then added a reinforcement/boxing strap up the subframe. Should be stronger than the metal its attached to, which is all I can ask for.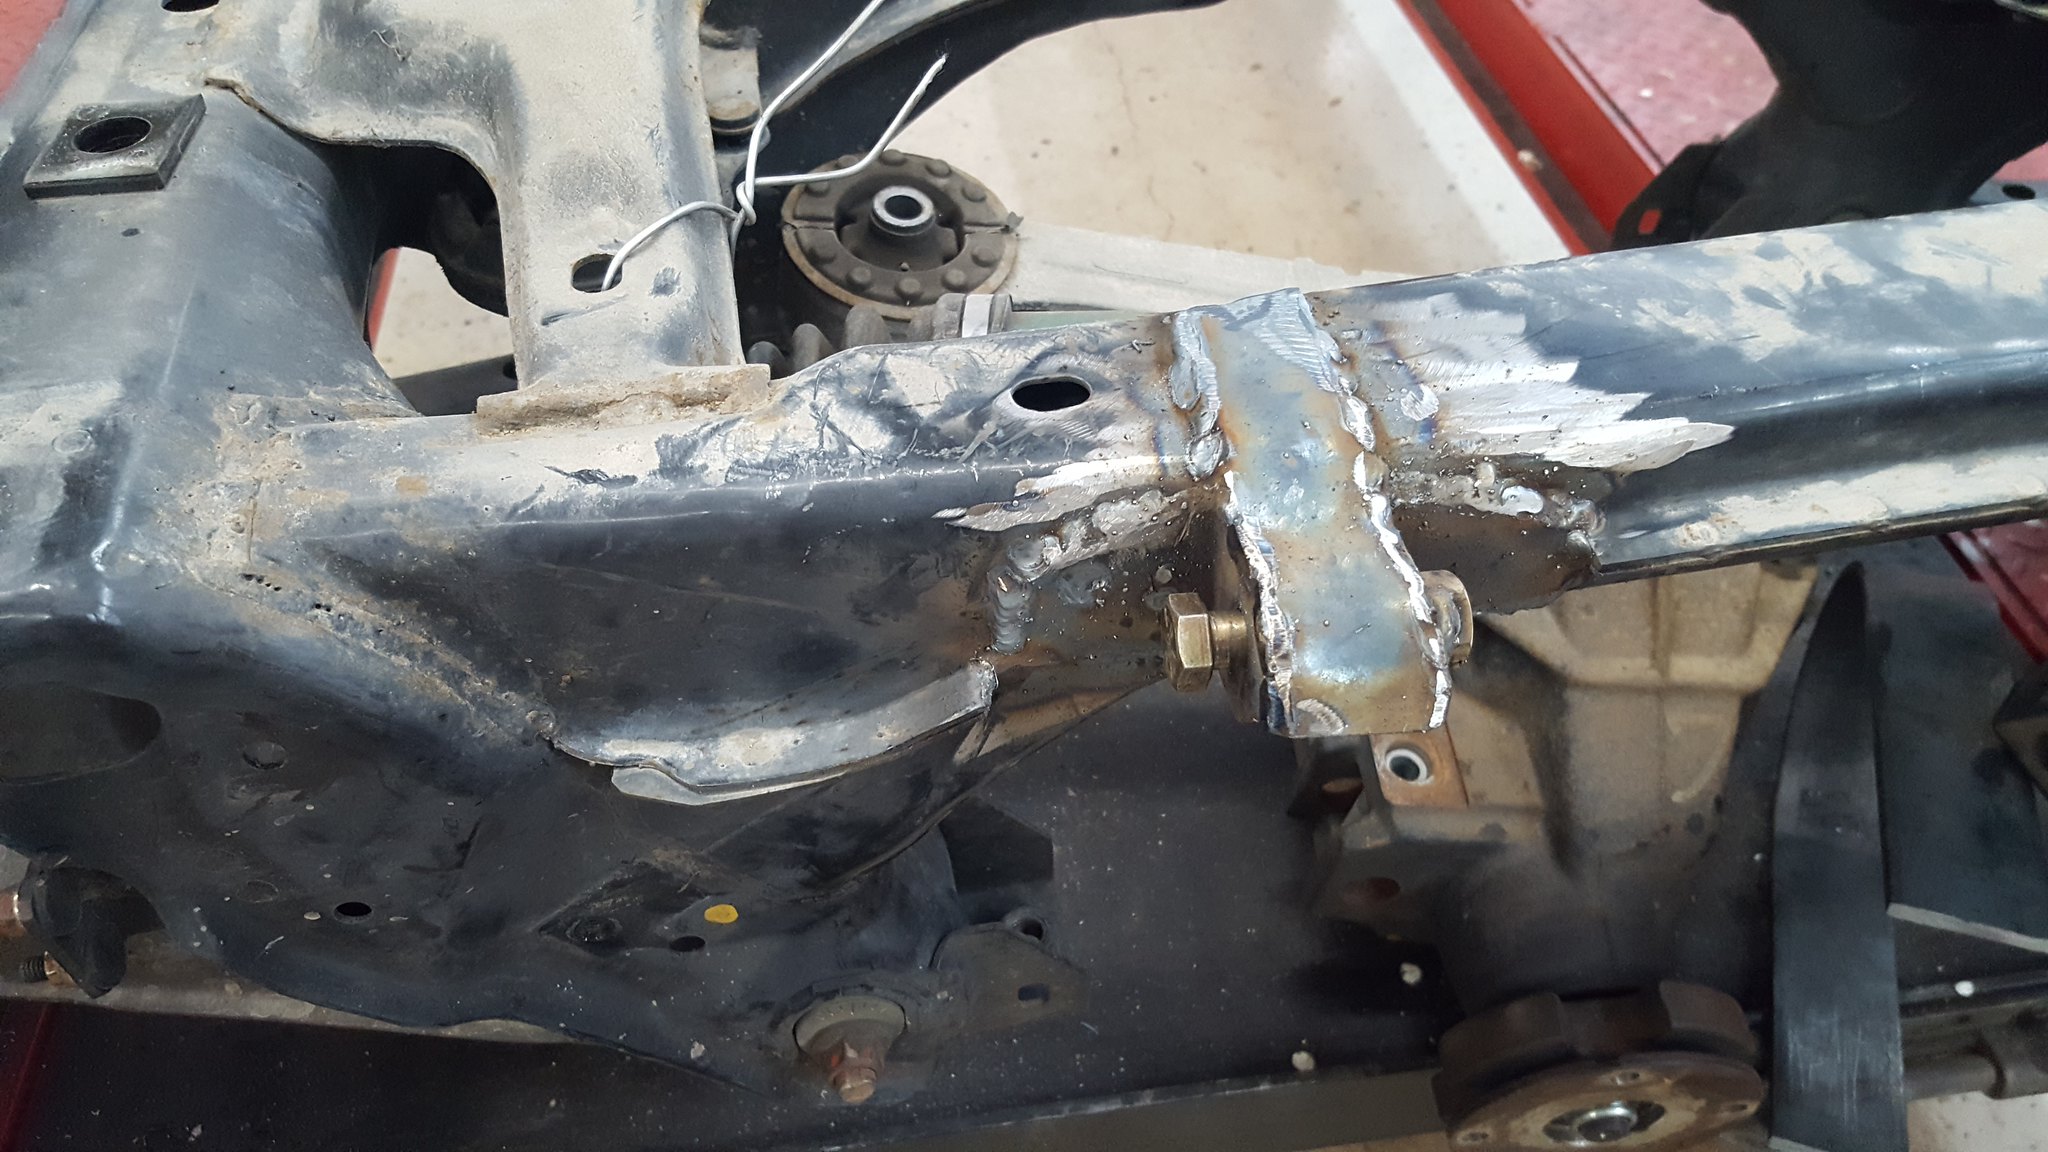
20181123_134620 by Michael Crawford, on Flickrwhile I had the subframe out, I figured it was a great time to make the CV axle loops. After all, I had the fab tools out already, right?My plan was to use the UCA mounting bolts to hold it in, thereby supporting the midpoint of the shaft in the event of failure. So, measure, mark, drill, weld, cut, repeat...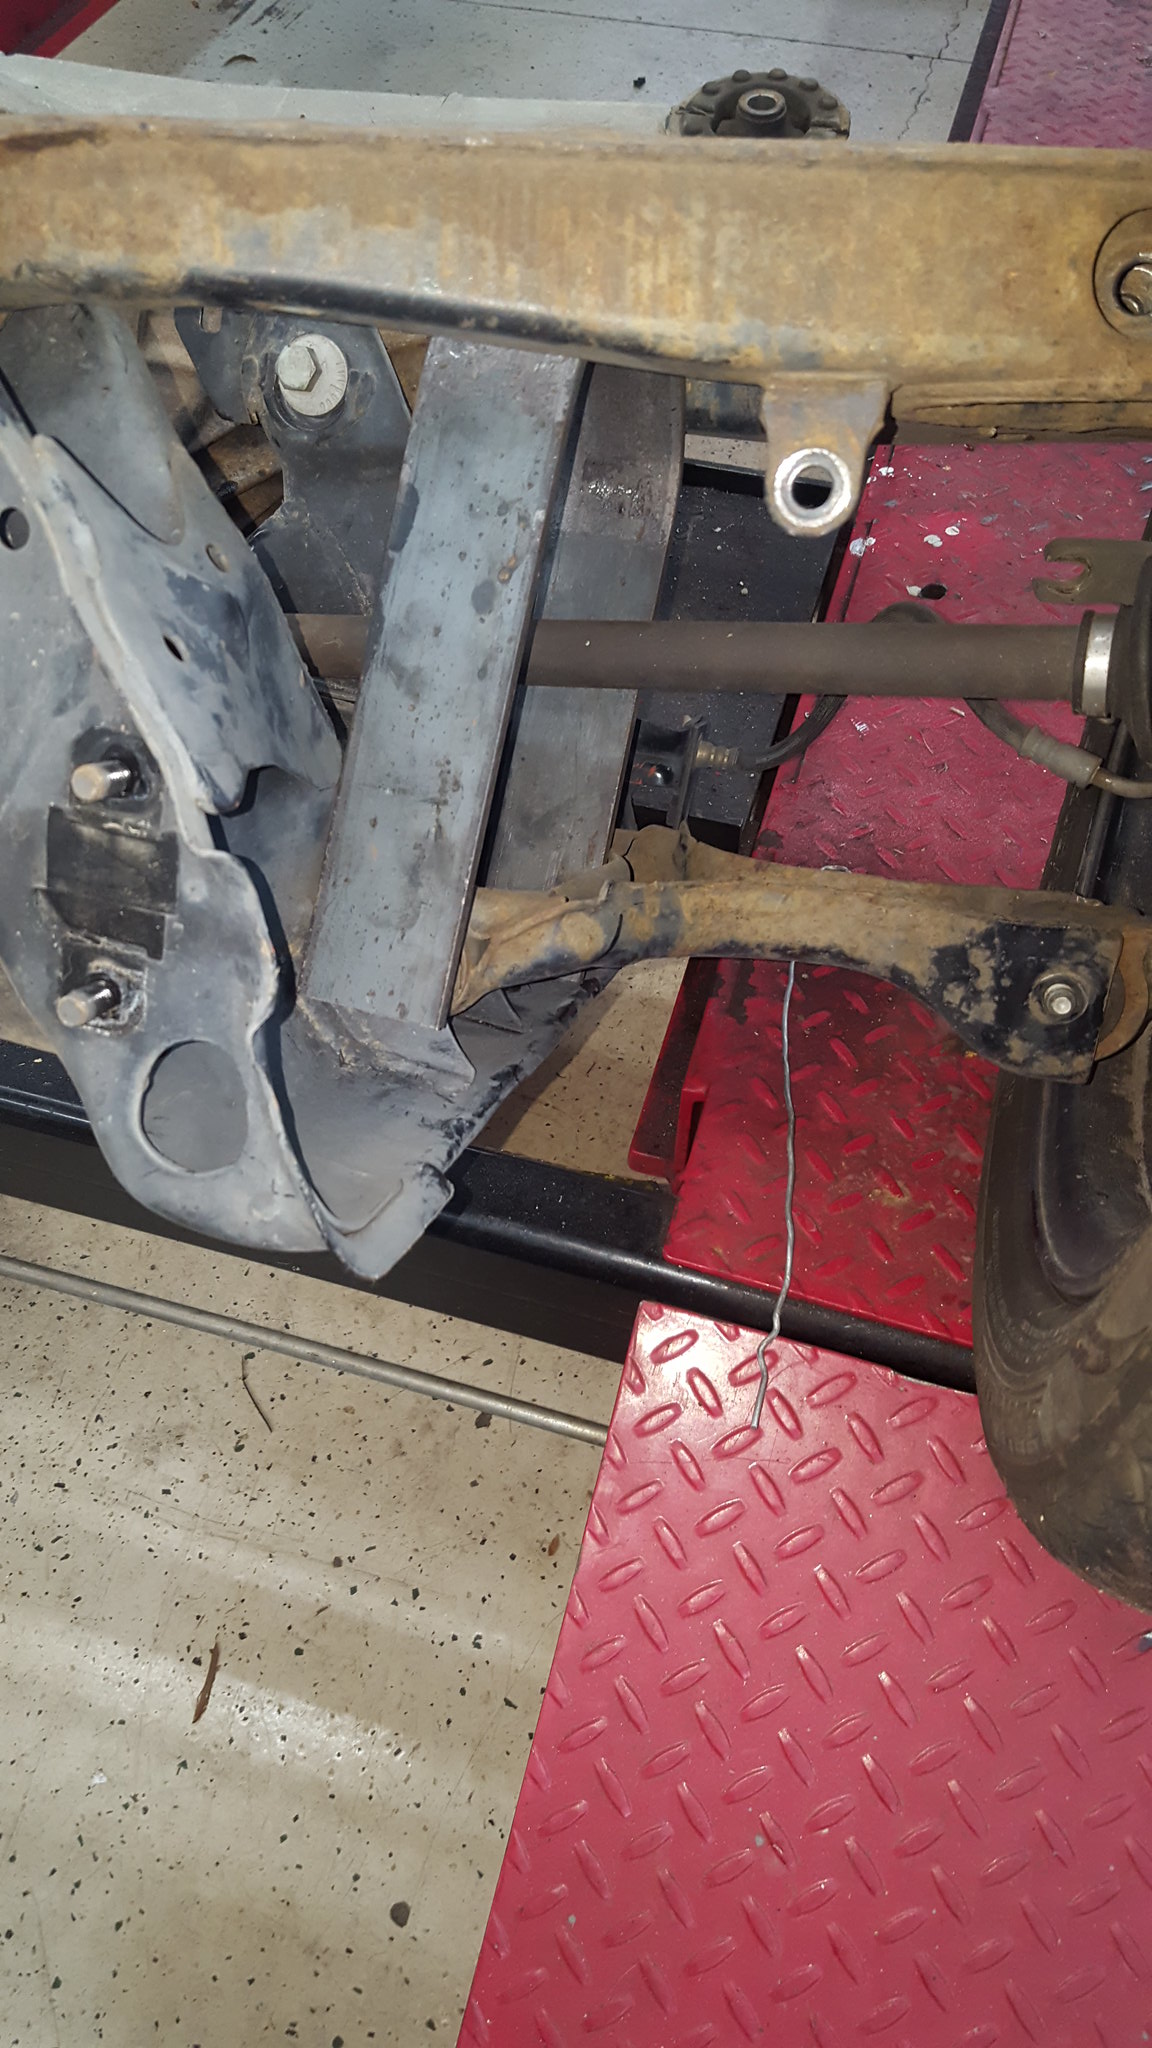
20181123_134518 by Michael Crawford, on Flickr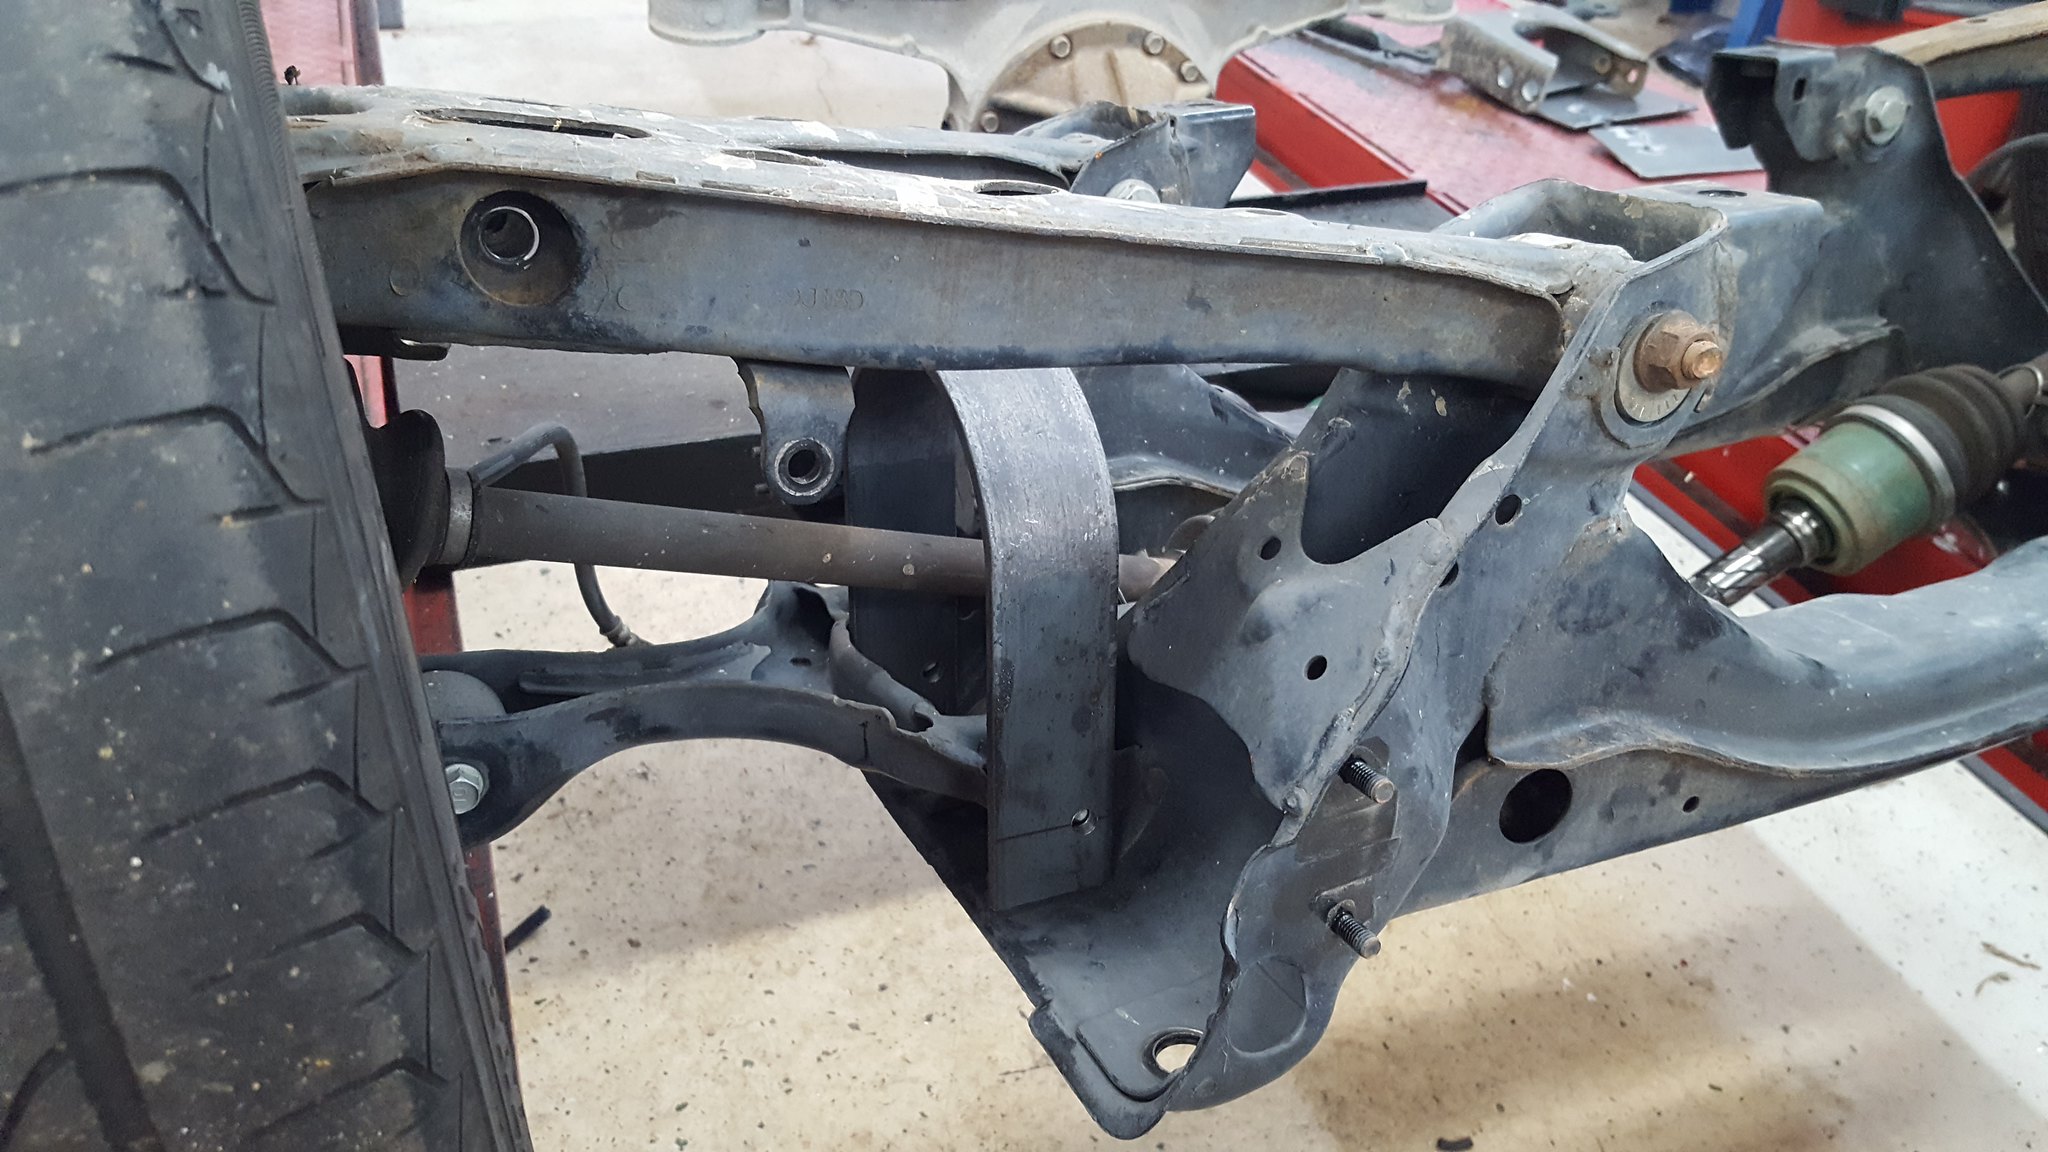
20181123_143618 by Michael Crawford, on Flickr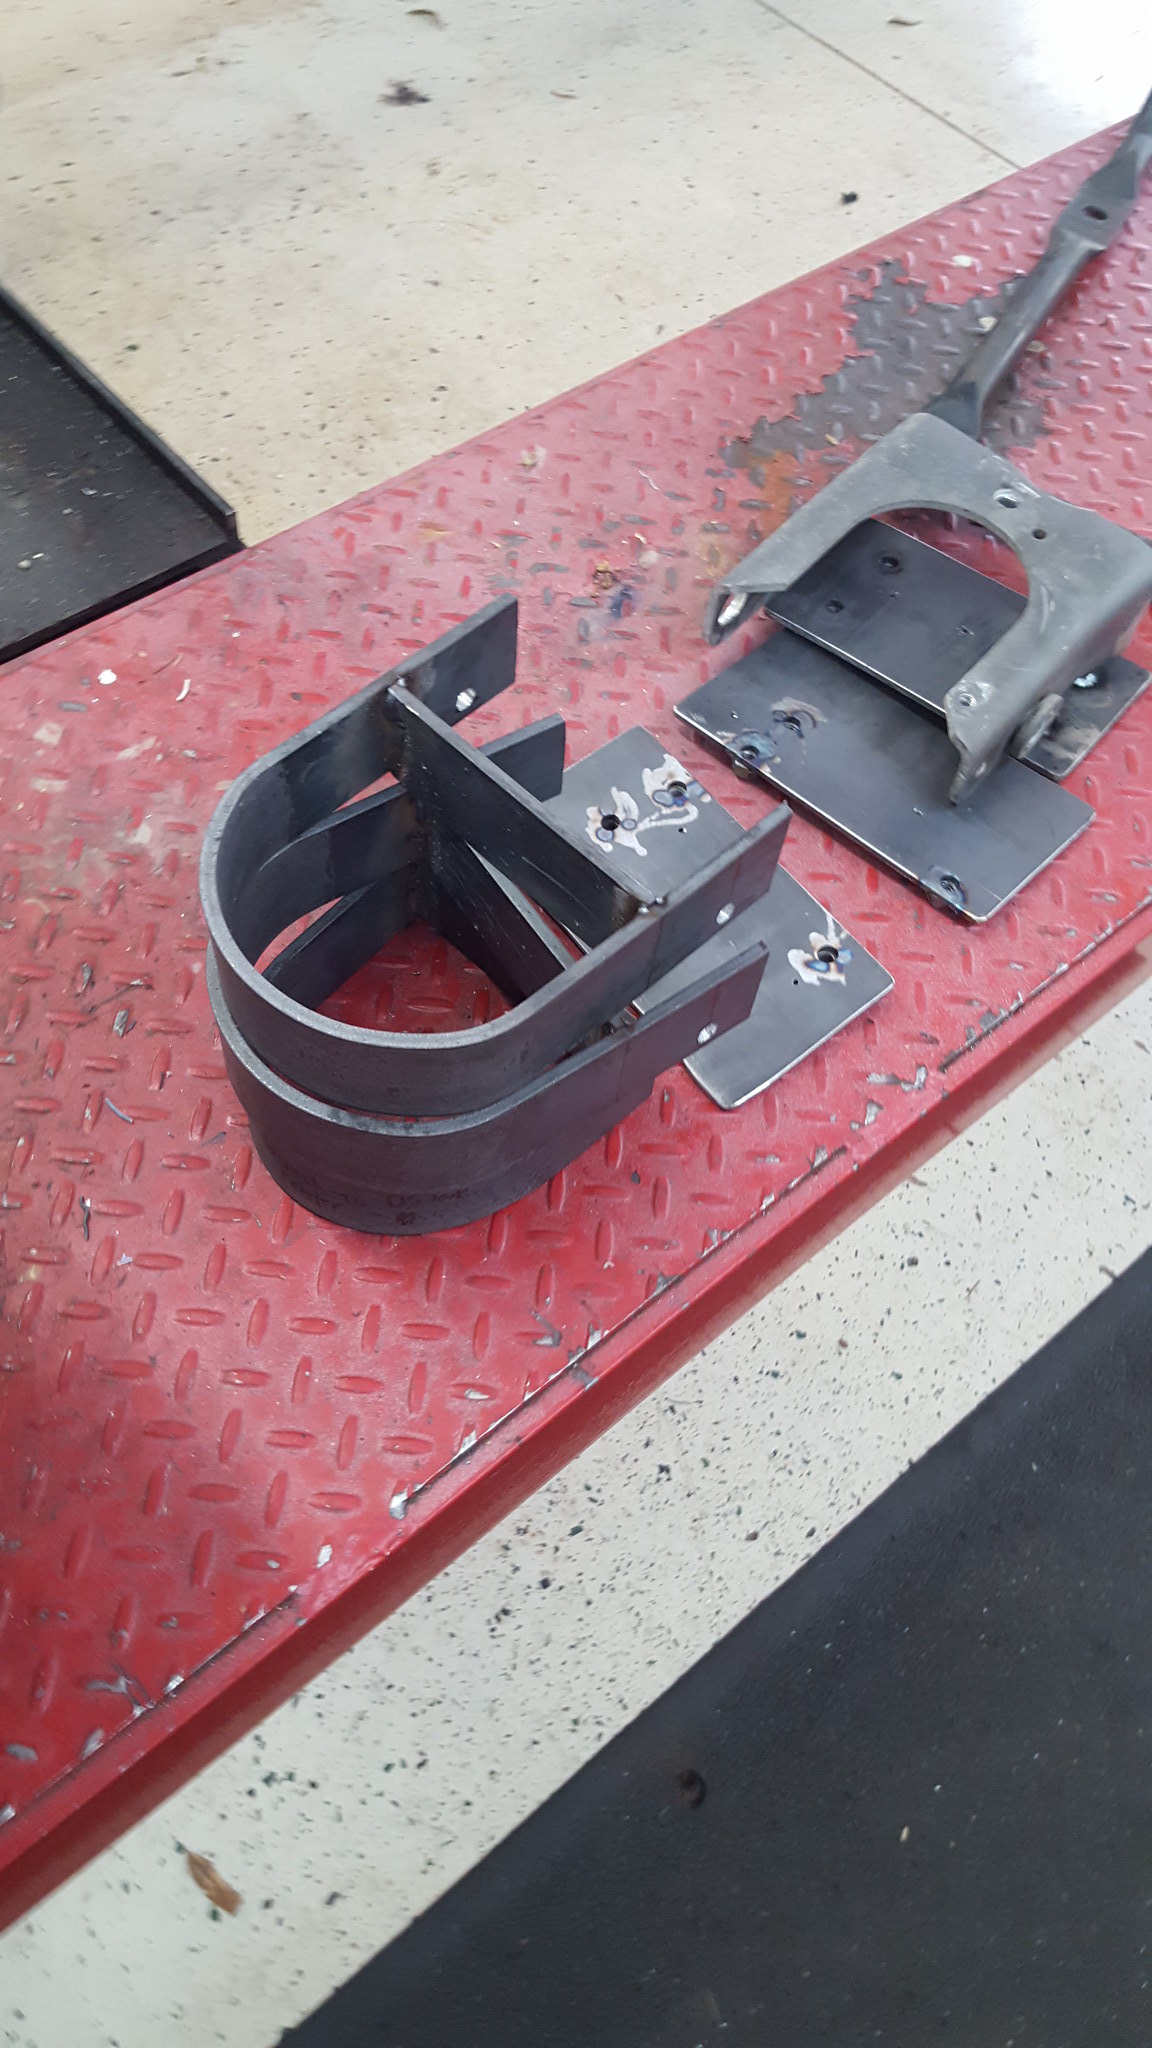
20181123_151618 by Michael Crawford, on Flickrthere was a little more trimming and profile work done after these pictures, but you get the idea. The D shaped one will bolt through the passengers side of the trans tunnel just above the merge for the exhaust. You know, in all the spare room I have here.
20181123_134653 by Michael Crawford, on FlickrI then switched gears for the last part of the day to cleaning and painting the underside of the car.I have to say that since I quit smoking, I have become much more susceptible to fumes. Spray paint never used to bother me. The following pictures gave me a hell of a headache. But the AMC proved to me just how nice working on a car with white engine bay and undercarriage can be. So I HAD to do it.
20181123_134645 by Michael Crawford, on Flickr
20181124_130927 by Michael Crawford, on FlickrToday, I finished cleaning all the suspension parts and loops and cage plates and such for painting. No pictures. I also spent the morning over at Steve's place, where he used his welding talent, 220 welder, and surface plate to finish weld my roll bar. Now I need to clean it, and paint it. Im debating between satin black, or color matched tan to match the interior. Both have their advantages and disadvantages. But cosmetically, with no top at all, dark green paint and tan interior, I don't know which would look better. I also didn't take a picture of the finished welded product, and for that I apologize. But heres one of Steve welding!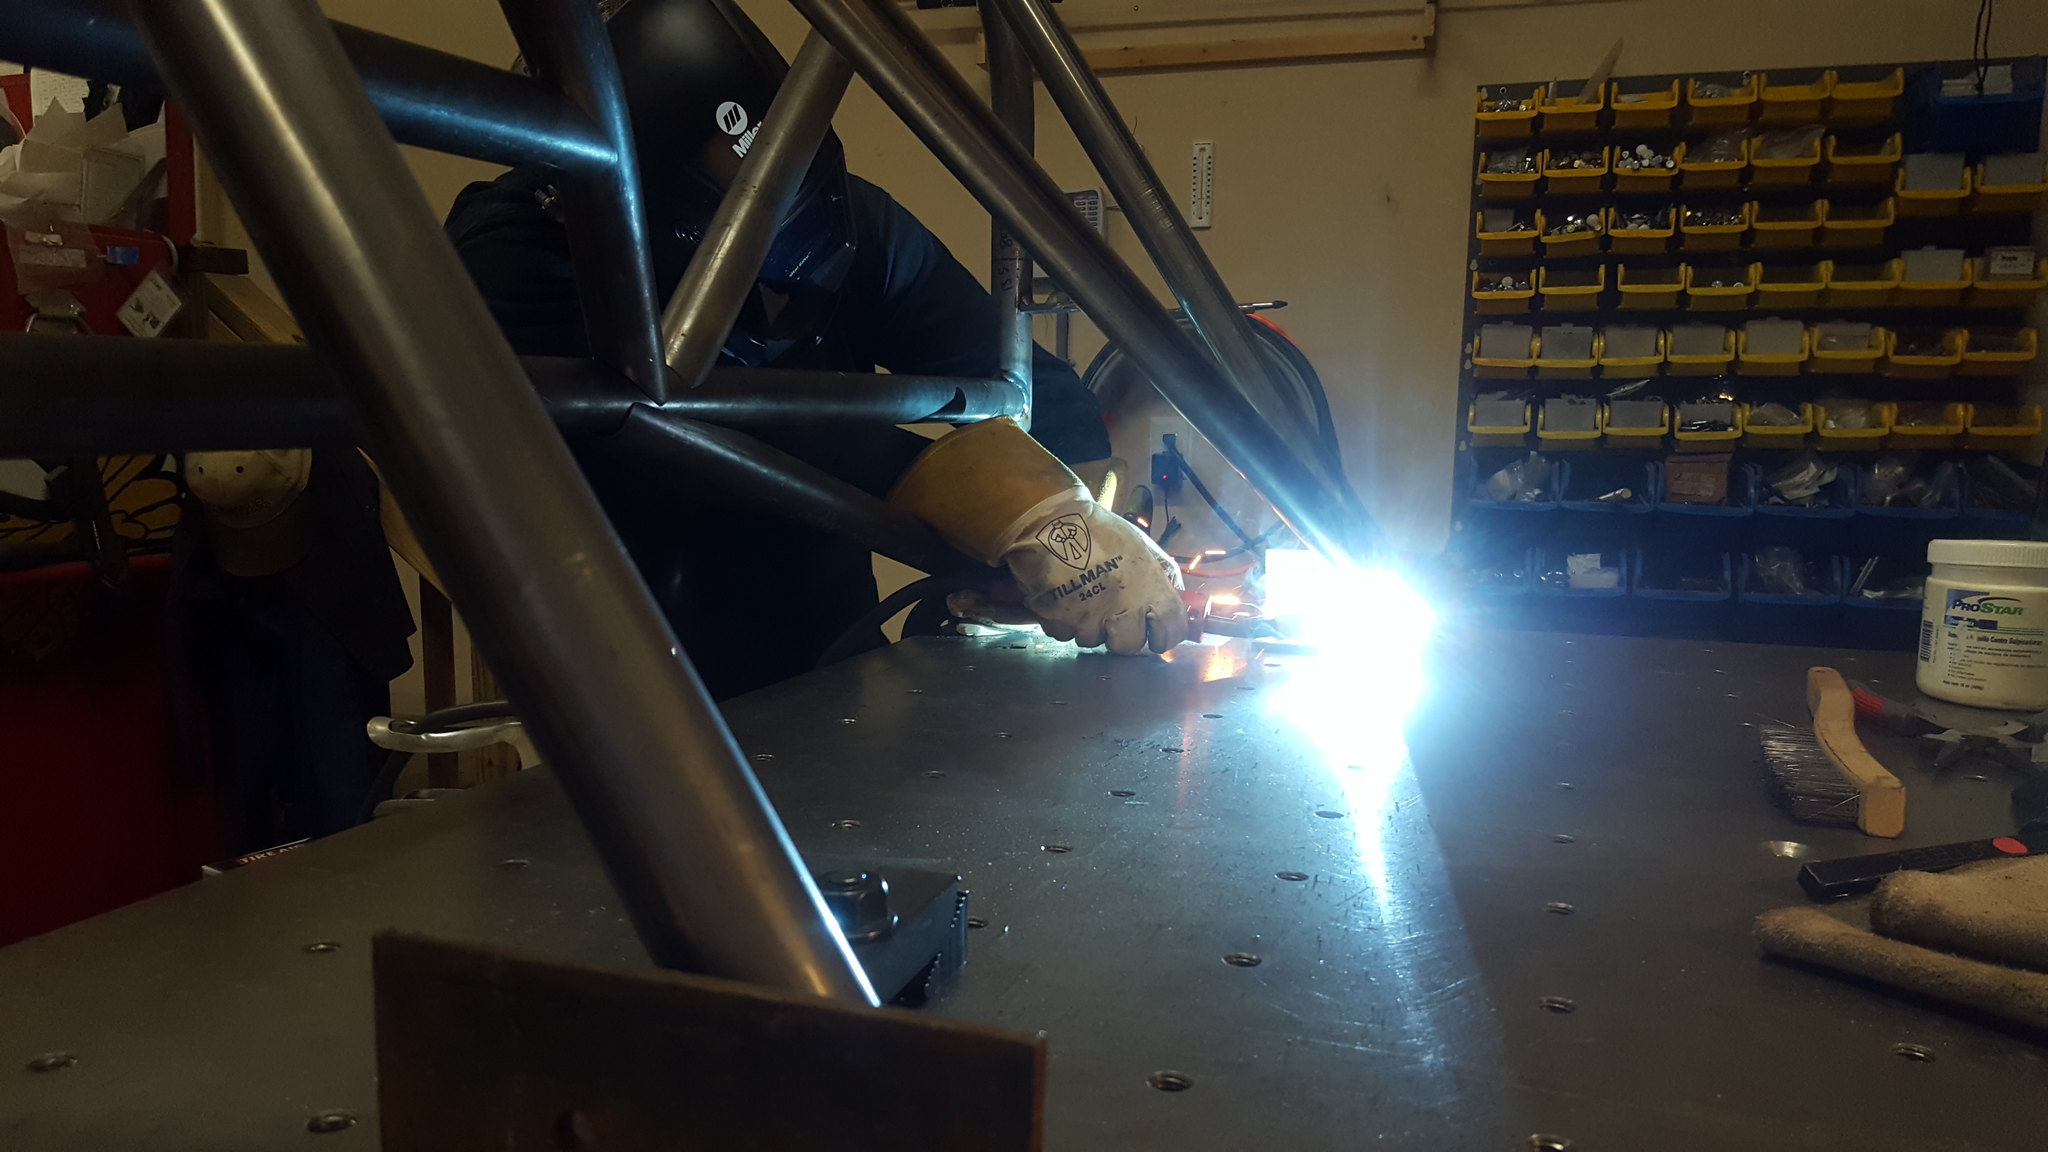
20181124_102538 by Michael Crawford, on Flickrtomorrow is thanksgiving with my in-laws (fried turkey and homemade collards. I ain't missing that!) so I don't know if I will be able to swing by the shop to lay some paint down or not. Hopefully I can, but no promises. Im really pushing to have test drive by Christmas. If I can do that, ill be really happy. And were awfully close!
revious challenge budget: 1877.19 recoup total: 820new money: another can of white from lowes 3.98heim: 1 from my magic bucketdriveshaft safety loops: 40 from J&t weldinggiant K&N air filter: 2.06 pull-a-part Recoup: 820
new total: 1902.29so, ive been chipping away over the holiday weekend. Tuesday on my lunch break, o swung by J&T welding I alblemarle to get the 2x1/4 plate I needed for the driveshaft and CV axle safetly loops, and have it bent. $40 later, and 30 minutes, I had this in the back of the car. We needed roughly 6 inches between the verticals on the legs. So thats what I asked for, and pretty much what we wound up with.
20181119_124615 by Michael Crawford, on FlickrTuesday, while waiting for an appointment, I made a to-do list.
20181120_183625 by Michael Crawford, on Flickrstep one was Tuesday night, which was getting the CAI built, vacuum lines finished, and the throttle linkage sorted out. By the middle of the evening, I thought I had it all sorted out. I used one of my multiple aftermarket air filters, and the biggest I could fit. It happened to be a K&N. See, I buy them any time I see one at pull-a-part. For 2.06, I figure I cant lose. I have AEM, K&N, Spectre, ebay, and a greddy. Seriously, I have like 9 different aftermarket cone filters in storage. This one, If I remember right, was on a 3800 Buick. But don't quote me on that, its been in storage for probably 5 years. Maybe longer. I mounted the giant filter directly to the end of the MAF, tucked low behind the radiator. I dug it. Also, I cut and bent the stock throttle linkage bracket until it looked like it would clear, pretty much mimicking the car version of the GM bracket. (I bought a car version Wednesday morning, but it didn't wind up being the solution).I also finally did all the vacuum hoses and lines. Used scraps of hose ive scavenged from various cars over the years, as well as scraps of the factory nylon vacuum lines. Still need to get a factory style MAP sensor mount (didn't take the right tools with me to the yard for that) or make one, but its otherwise done!
20181120_193804 by Michael Crawford, on Flickrhowever, I wasn't feeling like the hood was going to fit without a giant hole being cut.
20181120_193809 by Michael Crawford, on FlickrWednesday I ran by the junkyard real quick, had an eye-doctors appointment, and then spent the day helping my wife around the house.Thursday (thanksgiving), we had dinner at my folks place (where im building the car). I was specifically told I could NOT get dirty or stinky before dinner and family portraits. So I looked at the list, and decided to bolt the dash in (not picture worthy), secure under dash wiring (not picture worthy), and see how big a hole we would have to cut. Initially, it was looking REALLY BIG.But then, I pulled the entire CAI (hood was hitting breather hose fitting and IAT) and then the throttle bracket (again, hood hitting it). Without ANY cutting, we get here:
20181122_113126 by Michael Crawford, on Flickrvia horrible cell phone pictures and some guesstimation, we see that we only have to notch a 6 inch wide underhood brace to clear the intake manifold. Ill then need to build an underslung throttle cable bracket assembly, and a completely different CAI setup. But having an externally stock appearing hood was worth it!
20181122_095559 by Michael Crawford, on FlickrThursday night after portraits, I finally made our fuel gauge. Used an old mudflap, some hole saws, my drill press, and a glue gun to turn the passengers side eyeball vent into a fuel gauge. I found that the gauge will read accurately when entirely divorced from the cluster, just like a GM gauge. That was a very nice thing to find out.
20181122_175346 by Michael Crawford, on Flickr
20181122_175711 by Michael Crawford, on Flickr
20181123_092810 by Michael Crawford, on Flickr
20181123_093202 by Michael Crawford, on Flickryesterday, I decided to finish tackling the PPF delete, as well as get the car ready to finish cleaning and painting parts, as well as replace the bent driver side rear suspension arms.To attach the upper joint, I had previously made this:
20181116_201858 by Michael Crawford, on Flickrto actually attach these brackets to the subframe, I pulled the subframe out, cut the spot welded flange down, welded the L brackets, then added a reinforcement/boxing strap up the subframe. Should be stronger than the metal its attached to, which is all I can ask for.
20181123_134620 by Michael Crawford, on Flickrwhile I had the subframe out, I figured it was a great time to make the CV axle loops. After all, I had the fab tools out already, right?My plan was to use the UCA mounting bolts to hold it in, thereby supporting the midpoint of the shaft in the event of failure. So, measure, mark, drill, weld, cut, repeat...
20181123_134518 by Michael Crawford, on Flickr
20181123_143618 by Michael Crawford, on Flickr
20181123_151618 by Michael Crawford, on Flickrthere was a little more trimming and profile work done after these pictures, but you get the idea. The D shaped one will bolt through the passengers side of the trans tunnel just above the merge for the exhaust. You know, in all the spare room I have here.
20181123_134653 by Michael Crawford, on FlickrI then switched gears for the last part of the day to cleaning and painting the underside of the car.I have to say that since I quit smoking, I have become much more susceptible to fumes. Spray paint never used to bother me. The following pictures gave me a hell of a headache. But the AMC proved to me just how nice working on a car with white engine bay and undercarriage can be. So I HAD to do it.
20181123_134645 by Michael Crawford, on Flickr
20181124_130927 by Michael Crawford, on FlickrToday, I finished cleaning all the suspension parts and loops and cage plates and such for painting. No pictures. I also spent the morning over at Steve's place, where he used his welding talent, 220 welder, and surface plate to finish weld my roll bar. Now I need to clean it, and paint it. Im debating between satin black, or color matched tan to match the interior. Both have their advantages and disadvantages. But cosmetically, with no top at all, dark green paint and tan interior, I don't know which would look better. I also didn't take a picture of the finished welded product, and for that I apologize. But heres one of Steve welding!
20181124_102538 by Michael Crawford, on Flickrtomorrow is thanksgiving with my in-laws (fried turkey and homemade collards. I ain't missing that!) so I don't know if I will be able to swing by the shop to lay some paint down or not. Hopefully I can, but no promises. Im really pushing to have test drive by Christmas. If I can do that, ill be really happy. And were awfully close!
Reply
0
0
12-02-2018, 07:51 PM
#70
Junior Member
Thread Starter
Join Date: Nov 2017
Posts: 112
Total Cats: 7
Challenge budget so farrevious challenge budget: 1902.29 recoup total: 820new money:used serpentine belt from pull-a-part: 4.95roll bar paint: 3.99 (was 8.99 at oriellys, but used the $5 coupon I got in the mail) Recoup: 820
new total: 1911.23so, ive been in thrash mode. Lots of caffeine and heavy metal music. I NEED to see this thing moving under its own power soon. Ive been working on it for well over a year now.....Thursday night I started with a pile of parts and hardware that dad had cleaned and painted for me (he did all the really nice final coats on this stuff, as im not that great a brush painter). The only issues I ran into was that the upper control arm bolts were too short for proper engagement when the CV shaft safety loops were added. So a couple grade 8 bolts and nylock nuts from the bins were used. And, since I redesigned the upper PPF delete mount on the fly, I had to change the mounting hole in the chunk of the stock PPF.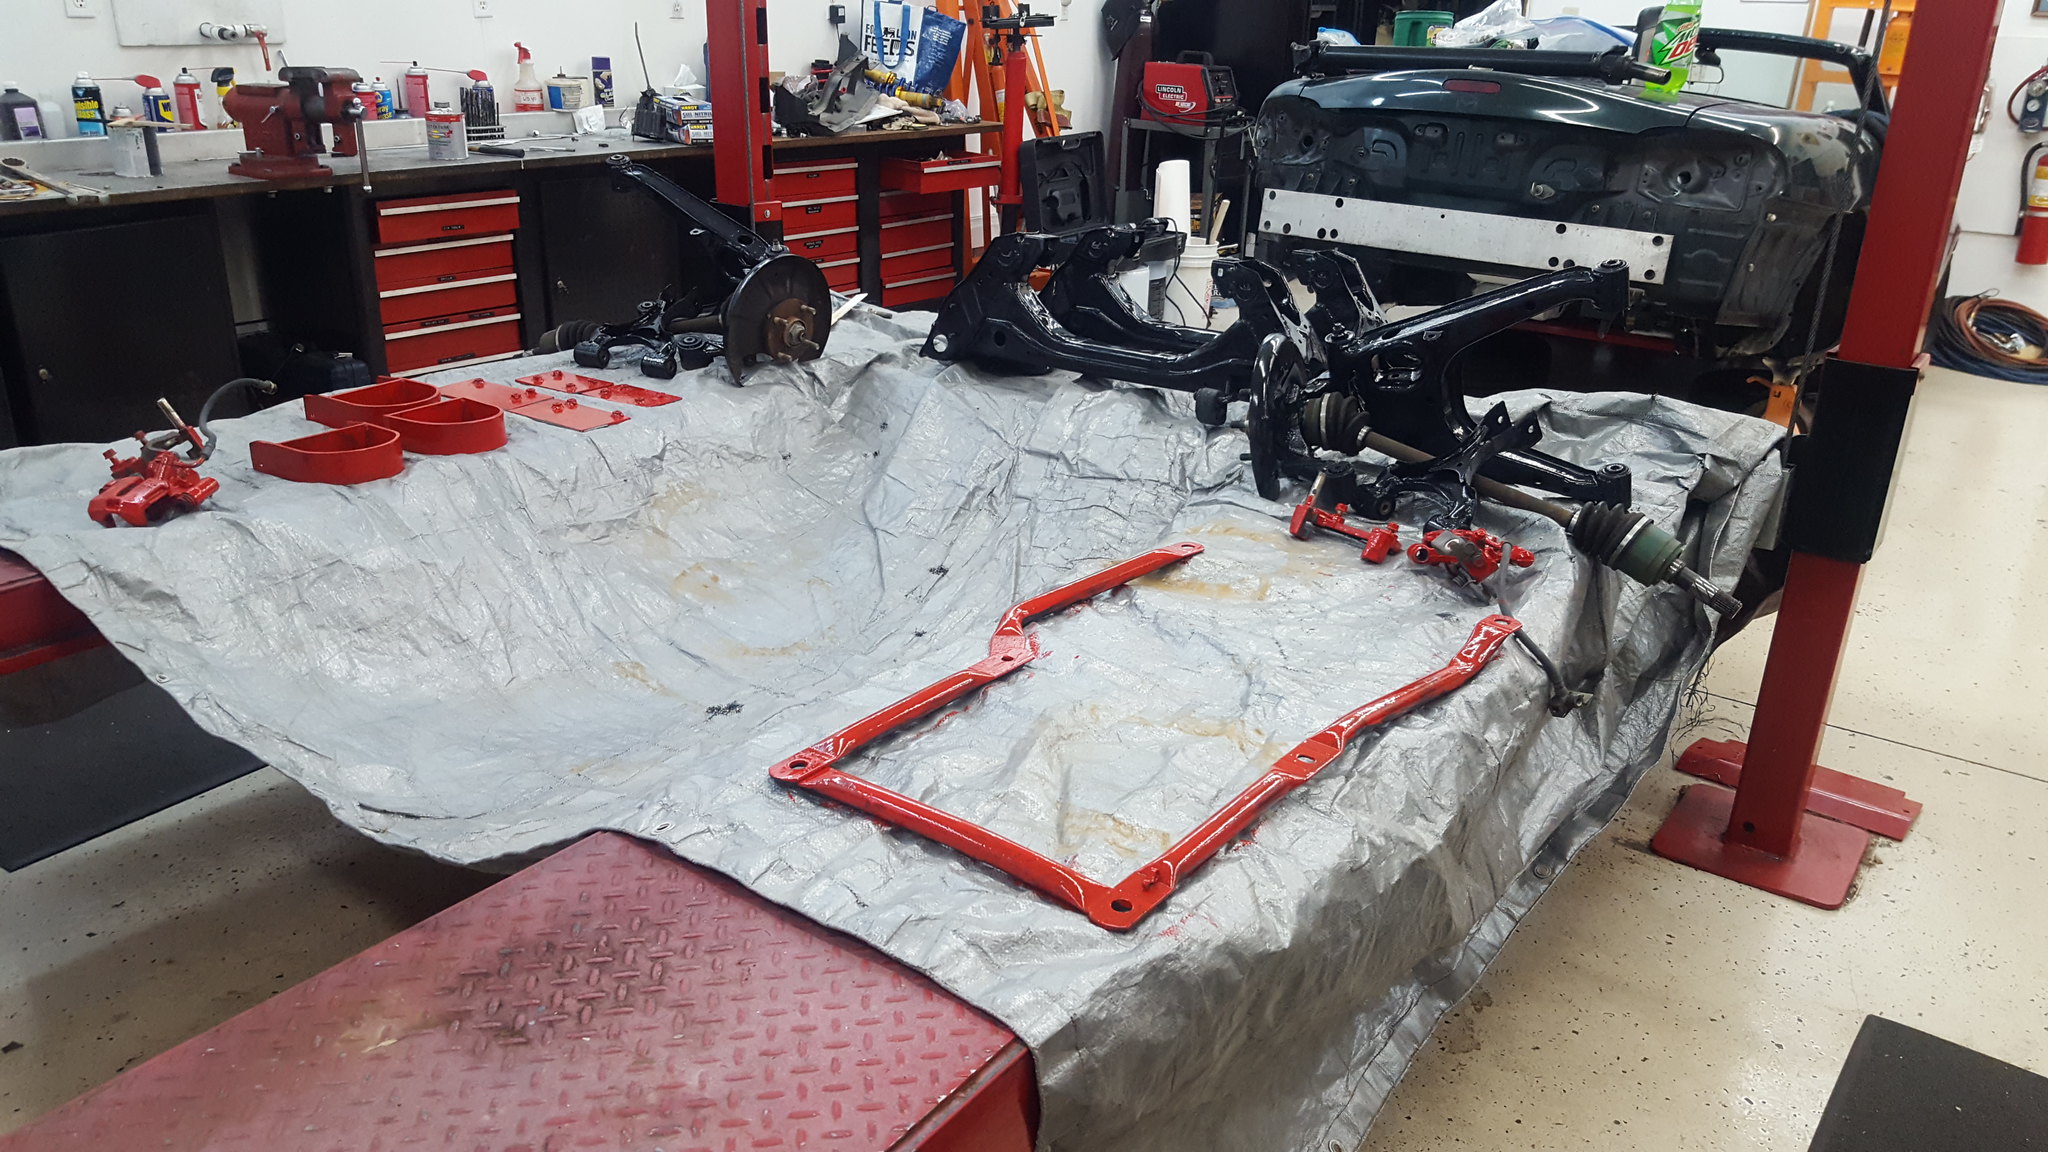 20181125_091438 by Michael Crawford, on Flickr
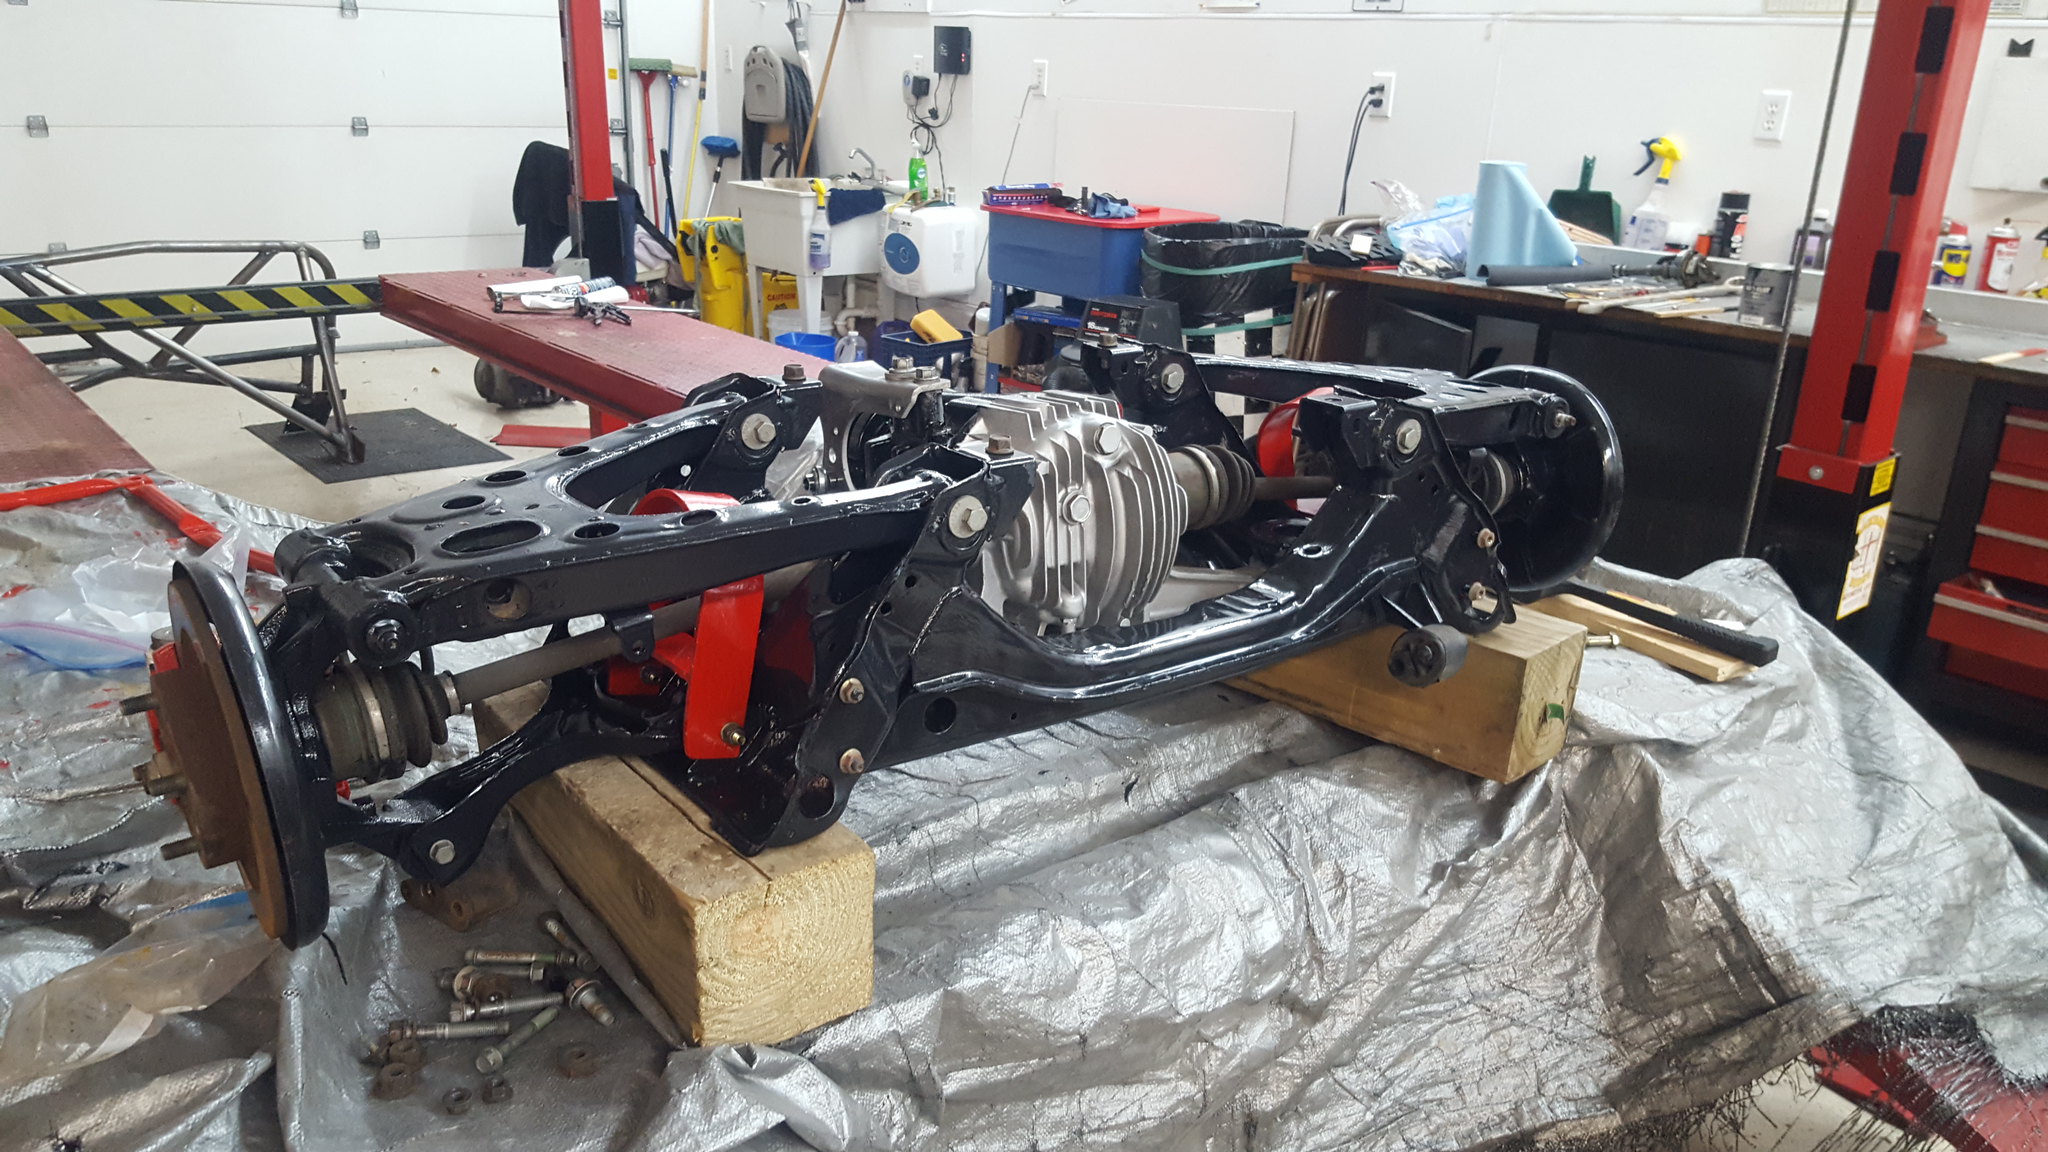 20181128_174550 by Michael Crawford, on Flickr
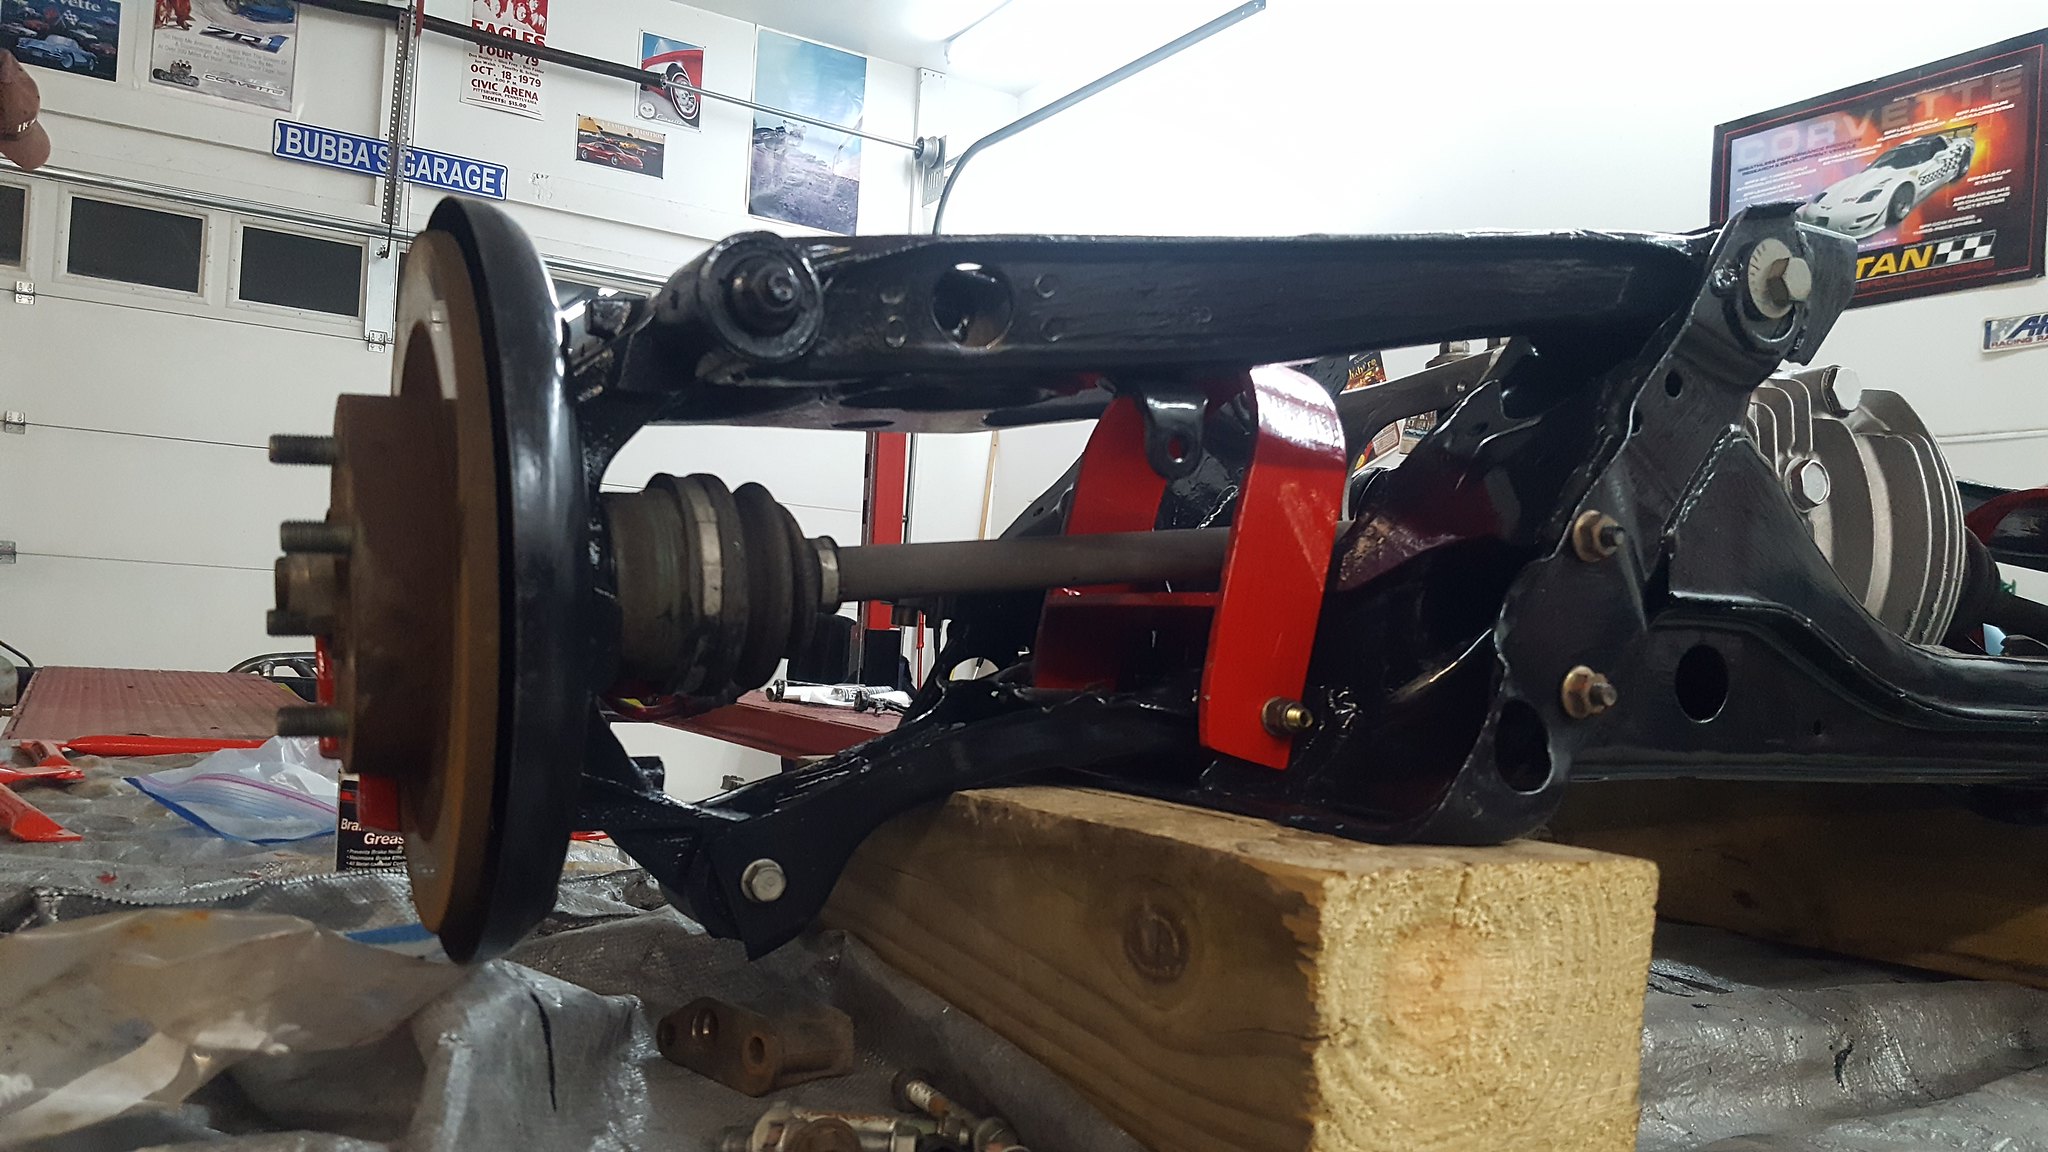 20181128_174557 by Michael Crawford, on FlickrBut got it all assembled with the �new� 4.11 torsen, and slid under the car.
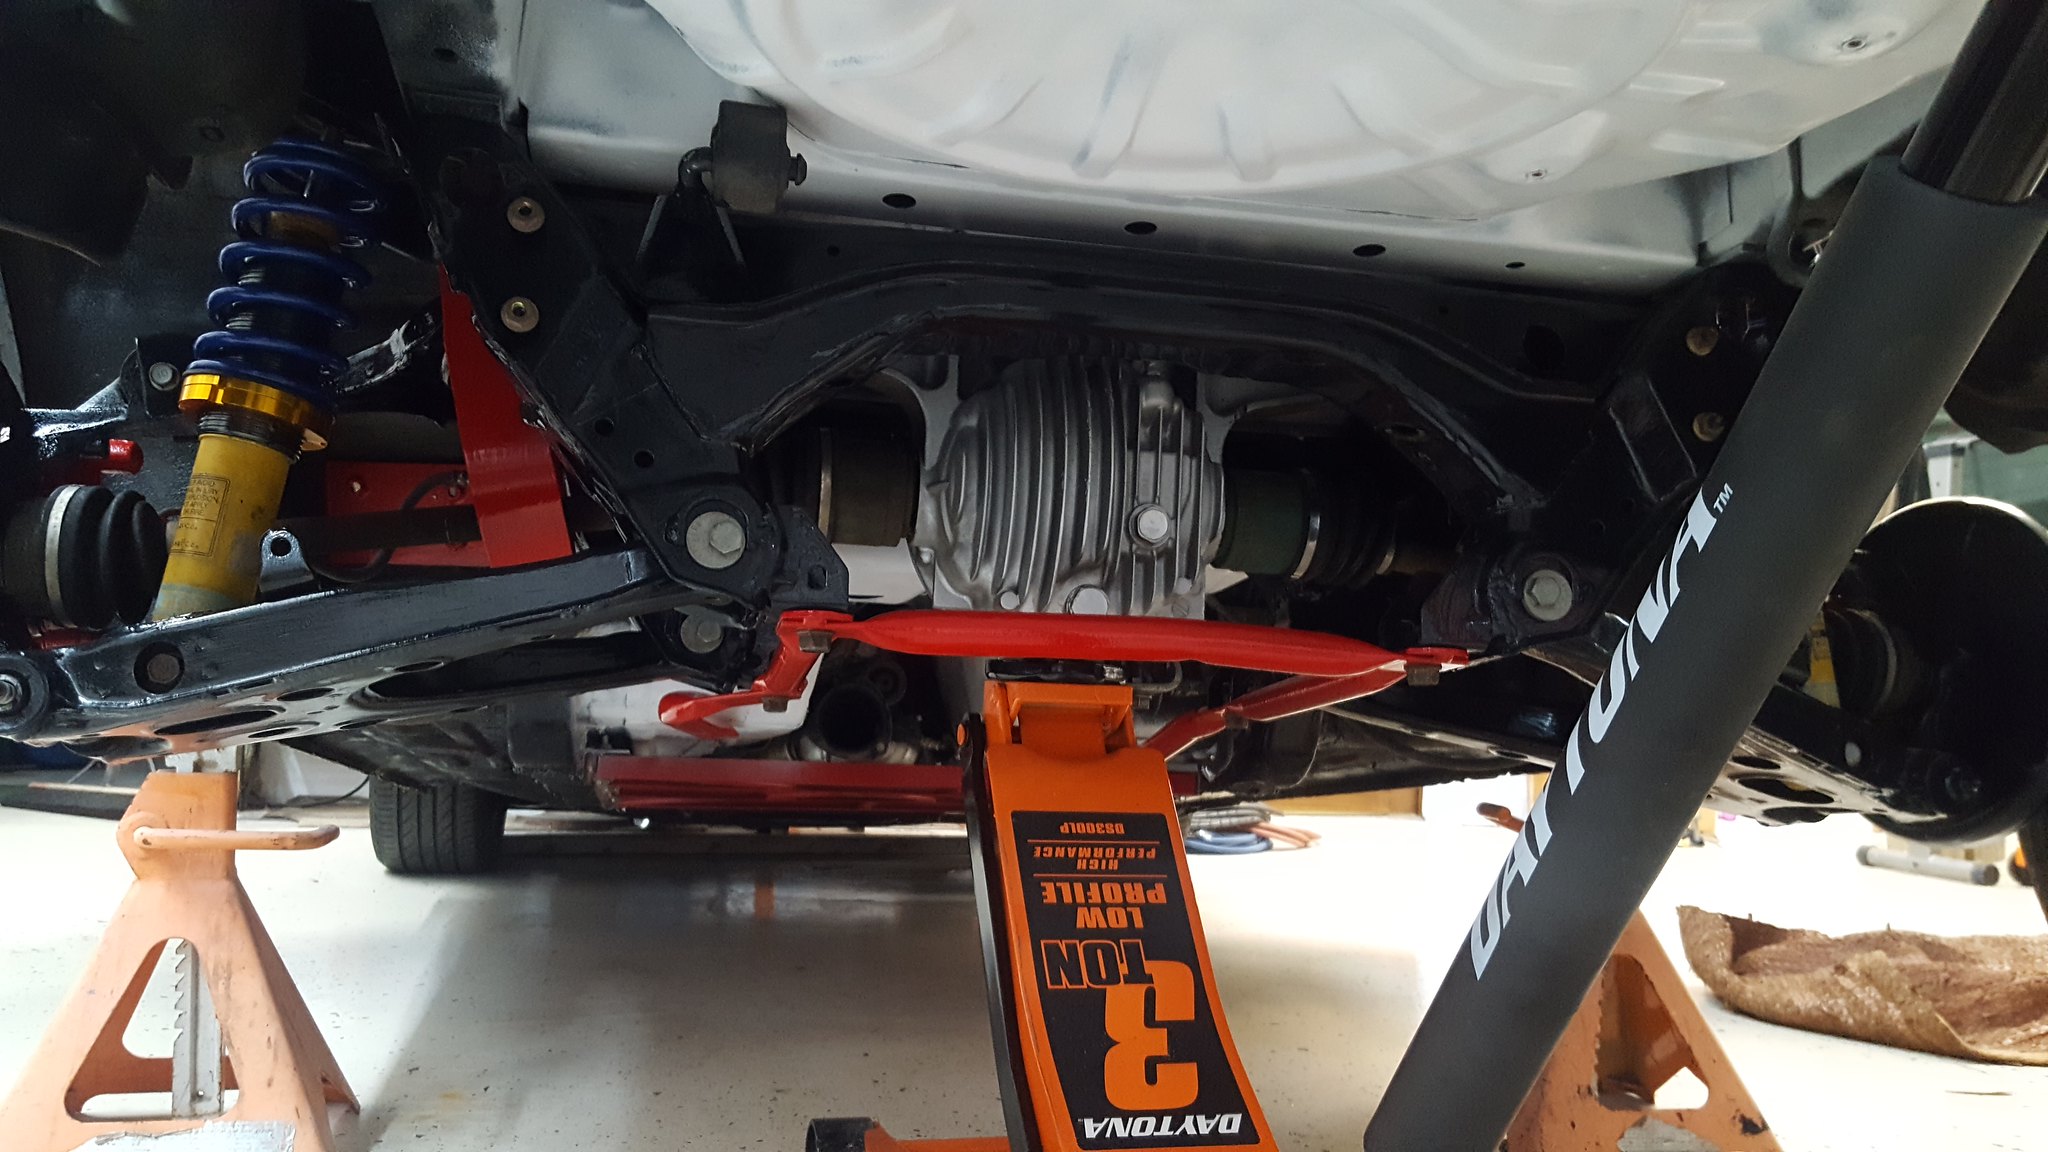 20181130_181025 by Michael Crawford, on FlickrFriday I raised it all up, drilled another hole, torqued everything, and went to install the factory rear brace.
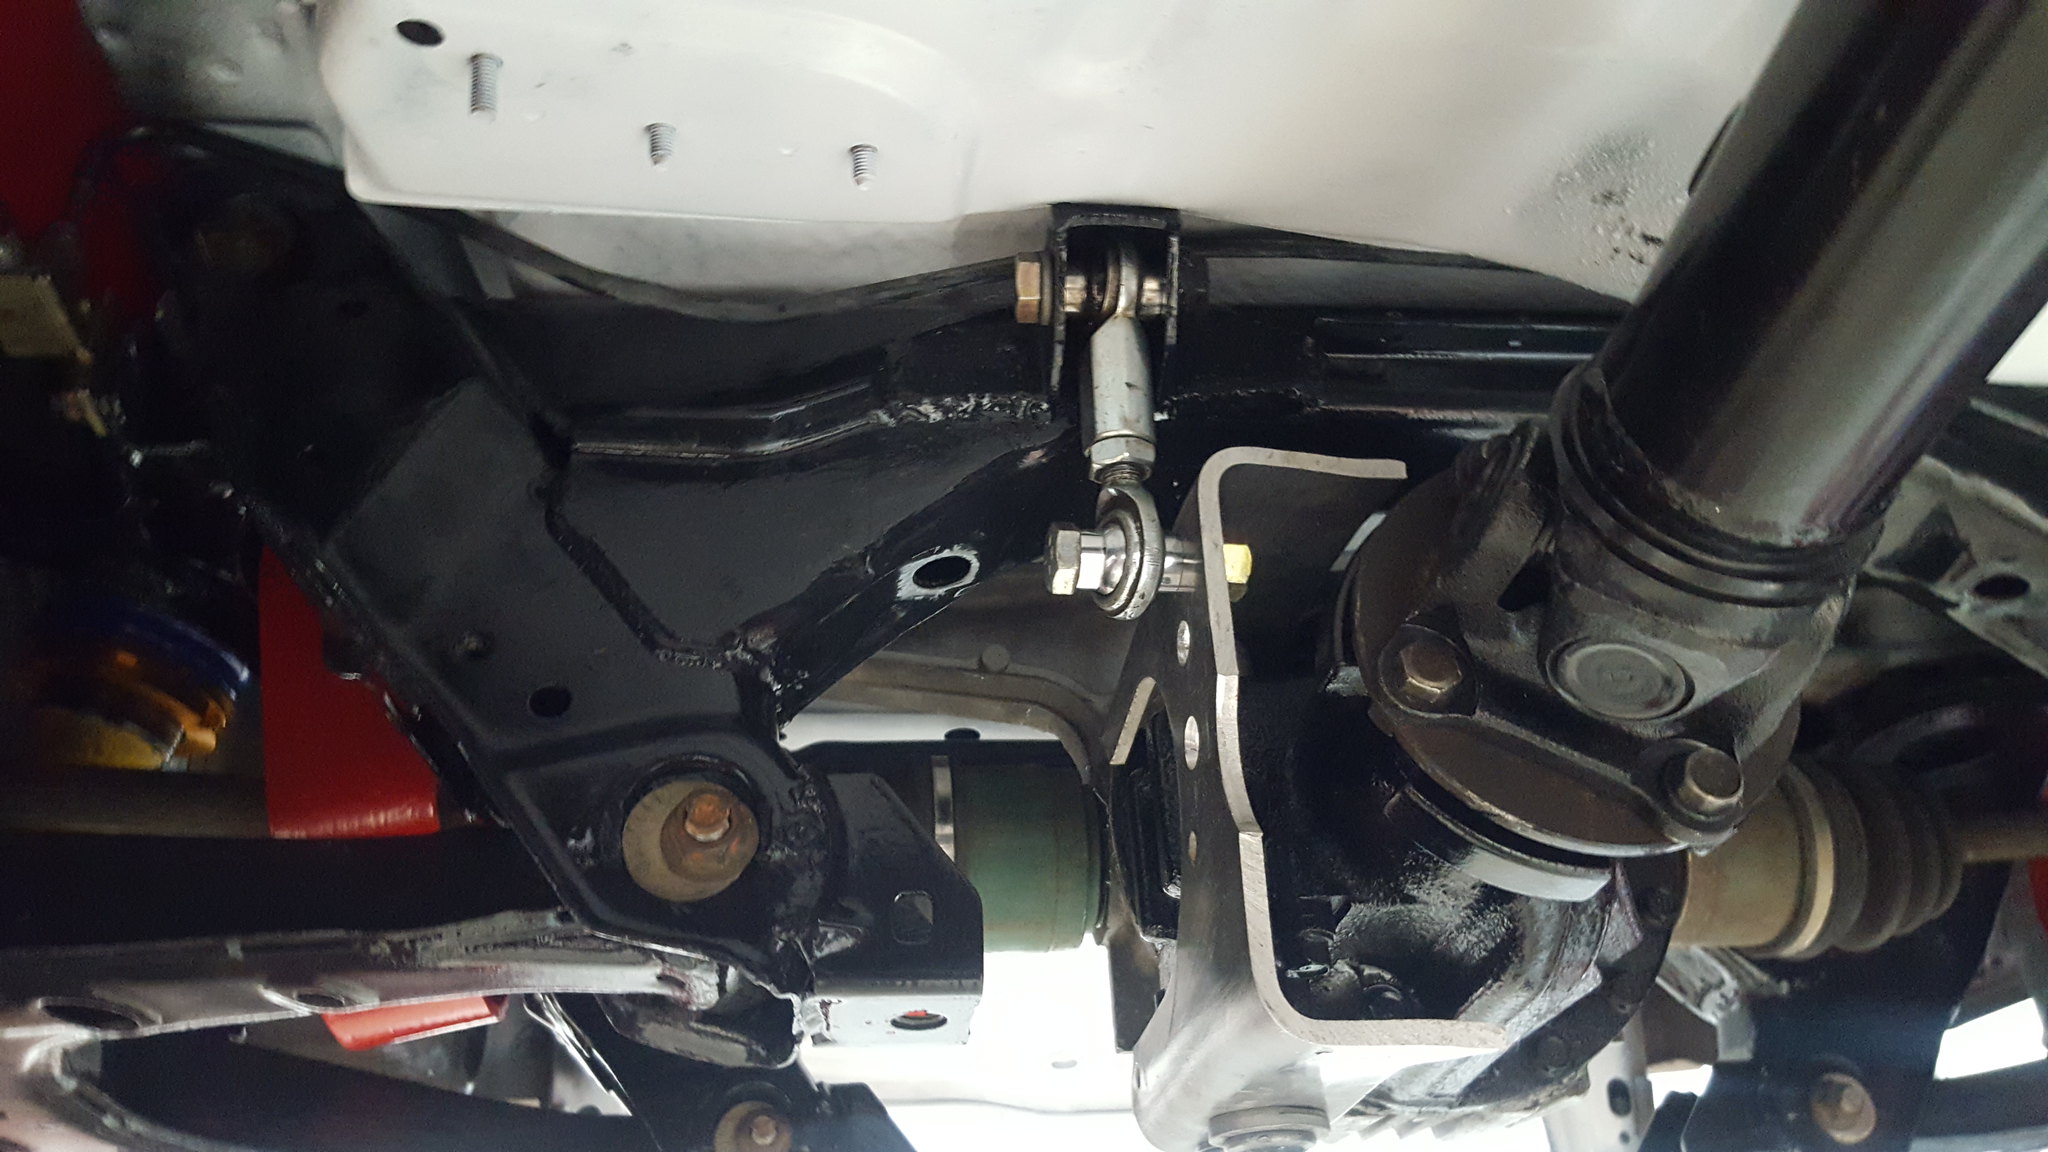 20181130_195146 by Michael Crawford, on FlickrIt wouldn't fit. Hit the exhaust. I got to looking, and realized there was a piece of the differential aluminum casting hanging the exhaust up from going up further. So I got out the sawzall.
 20181130_201001 by Michael Crawford, on FlickrGot it all bolted up, tightened down, drilled the holes for the driveshaft safety loop with a freaking DREMEL and carbide burr because I couldn't fit the drill in there, and called it a night. Well, after getting the drivers rear quarter beat somewhat into shape to fit the rear bumper cover, and mounted the shift light above the rear-view with a bit of tripled up plumbers hanging strap (scrap from a job site)
 20181130_195136 by Michael Crawford, on Flickr
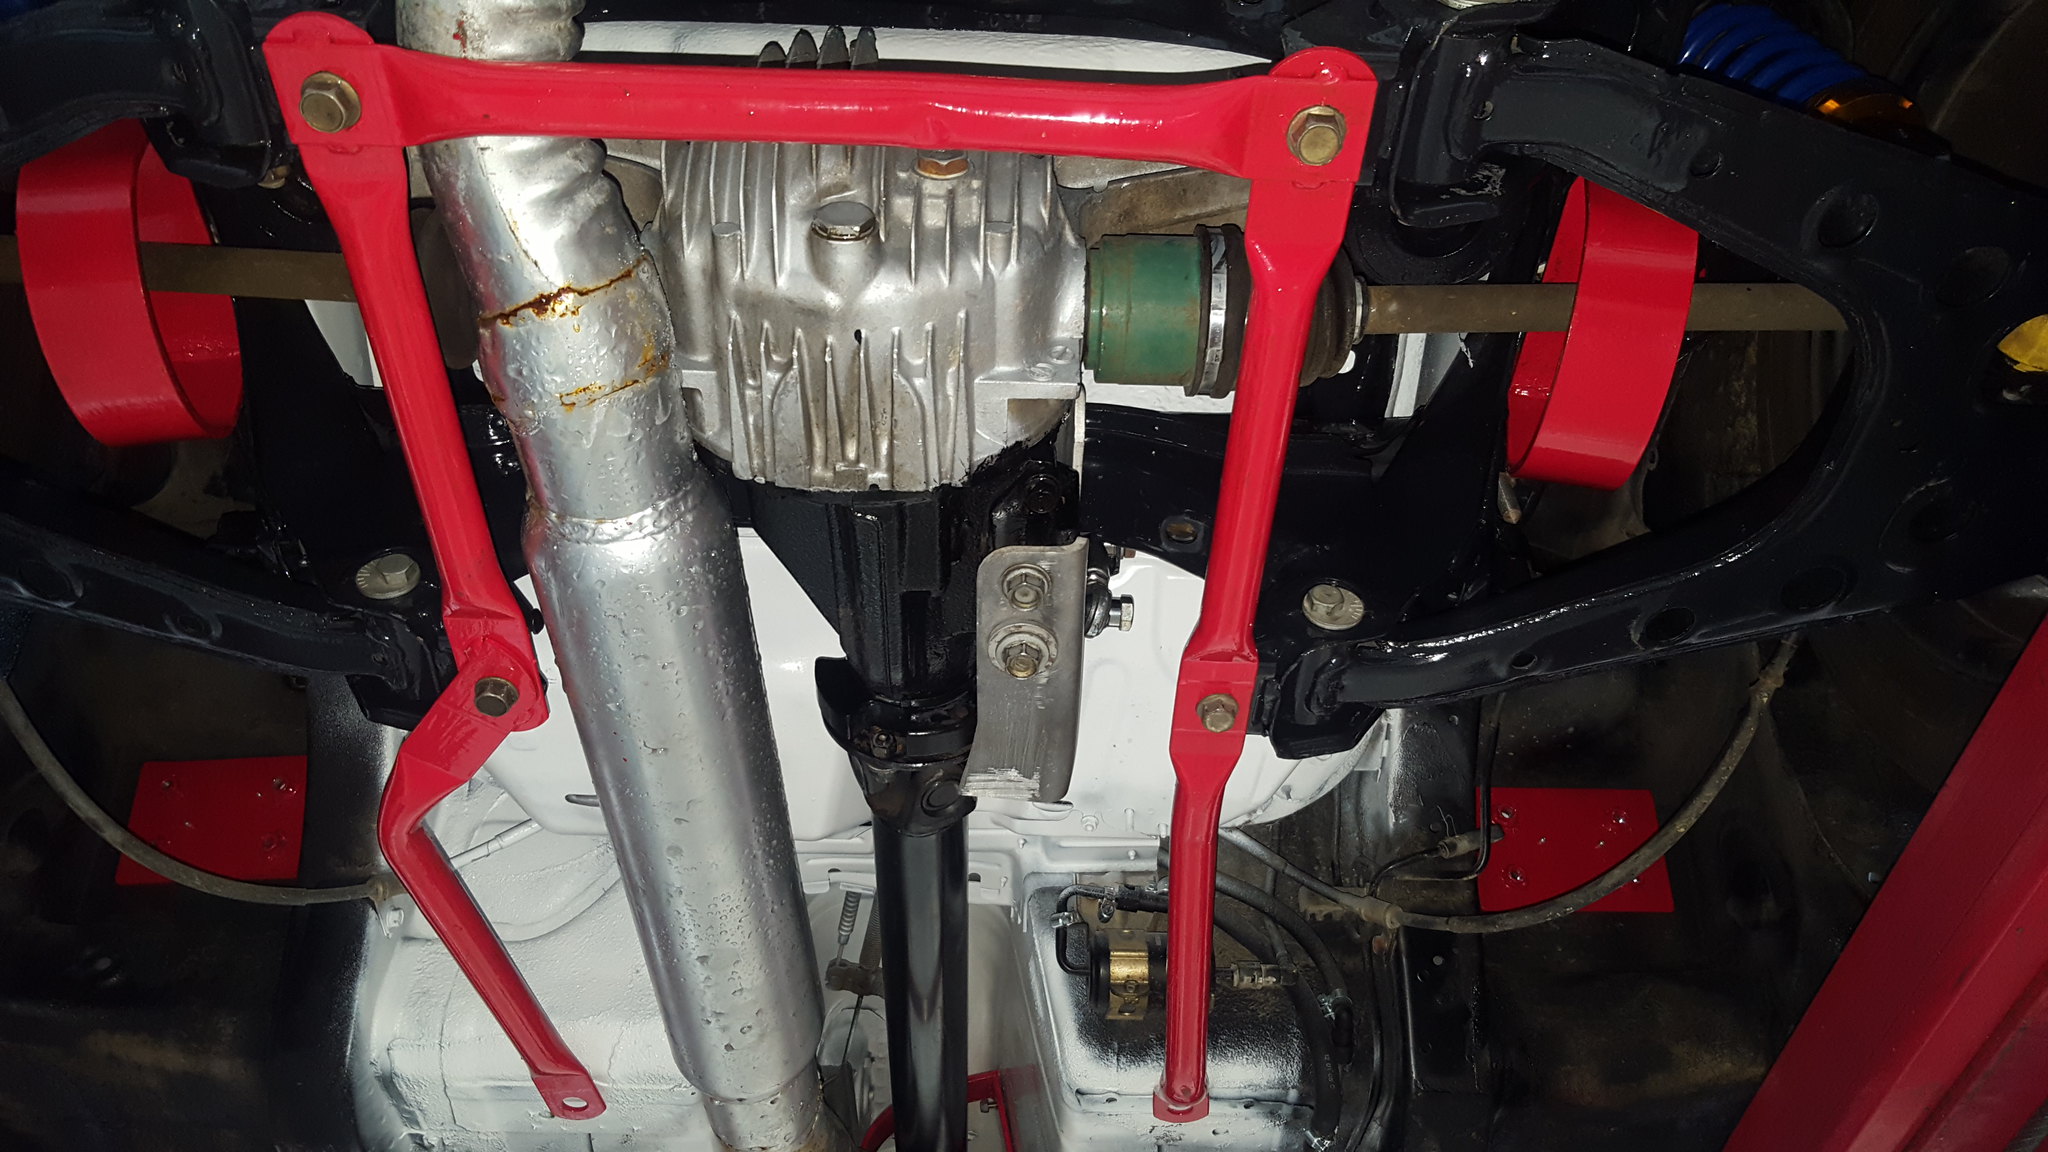 20181130_201444 by Michael Crawford, on Flickr
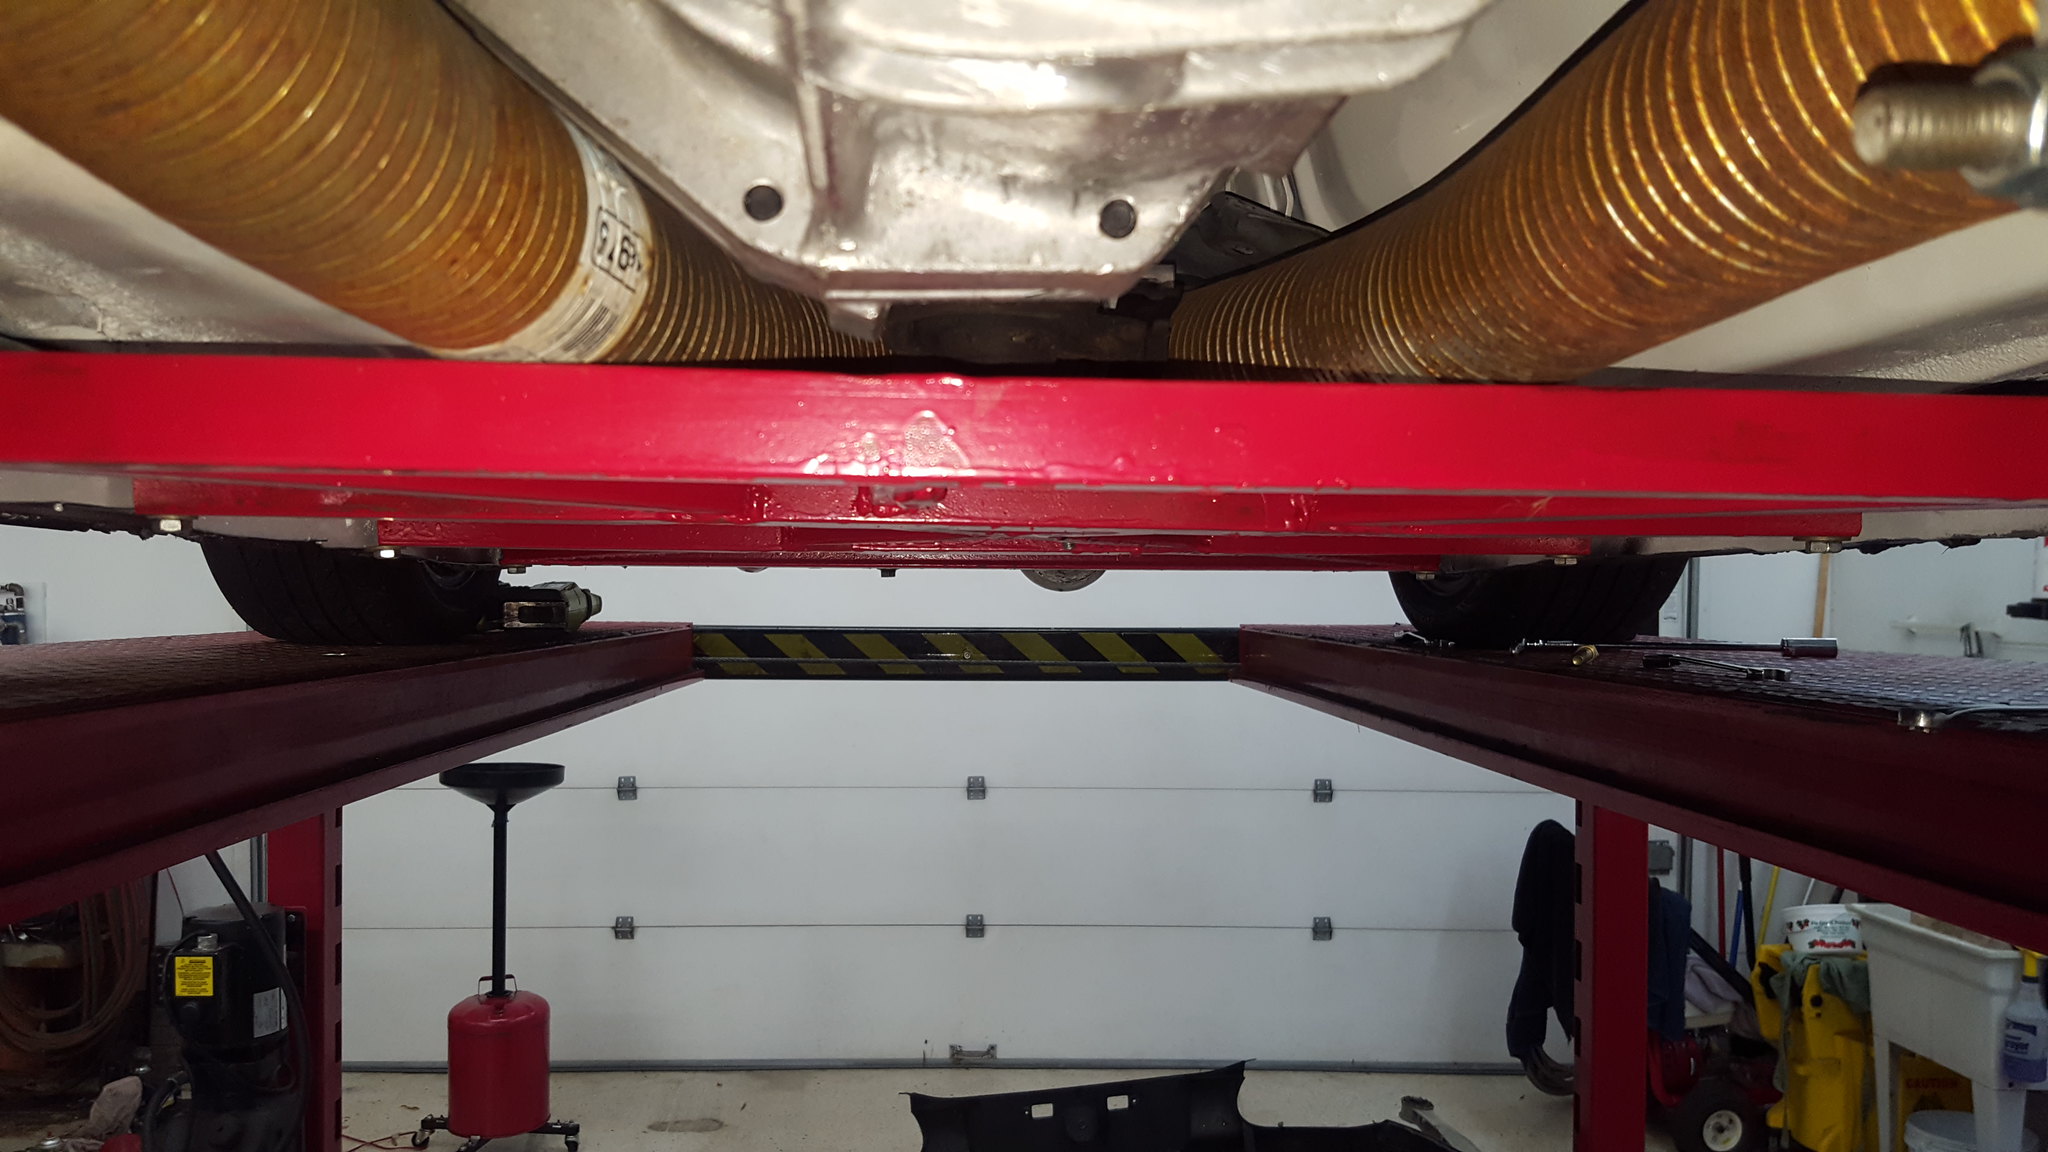 20181130_201429 by Michael Crawford, on Flickr
 20181130_190233 by Michael Crawford, on Flickr
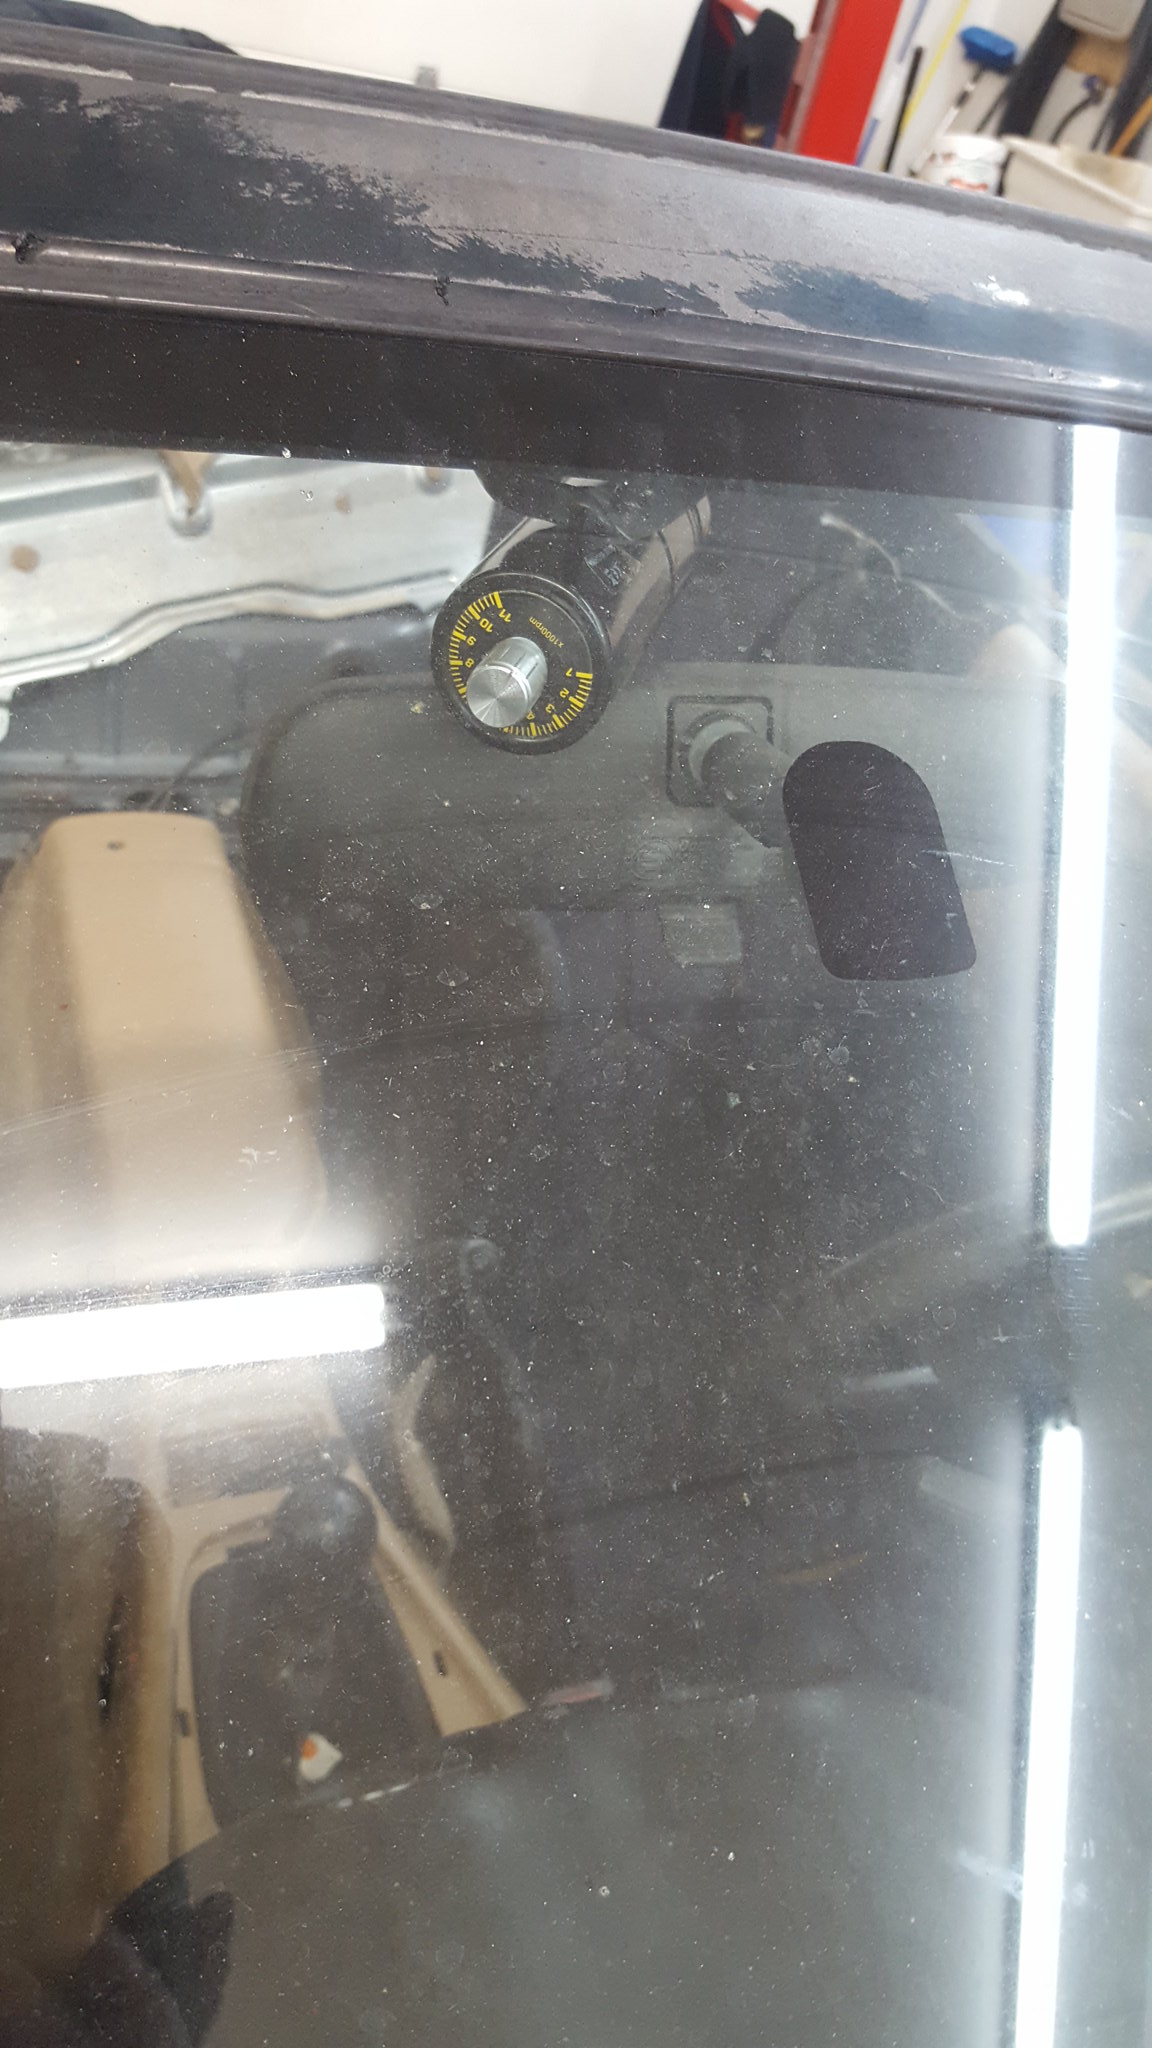 20181130_190223 by Michael Crawford, on Flickr
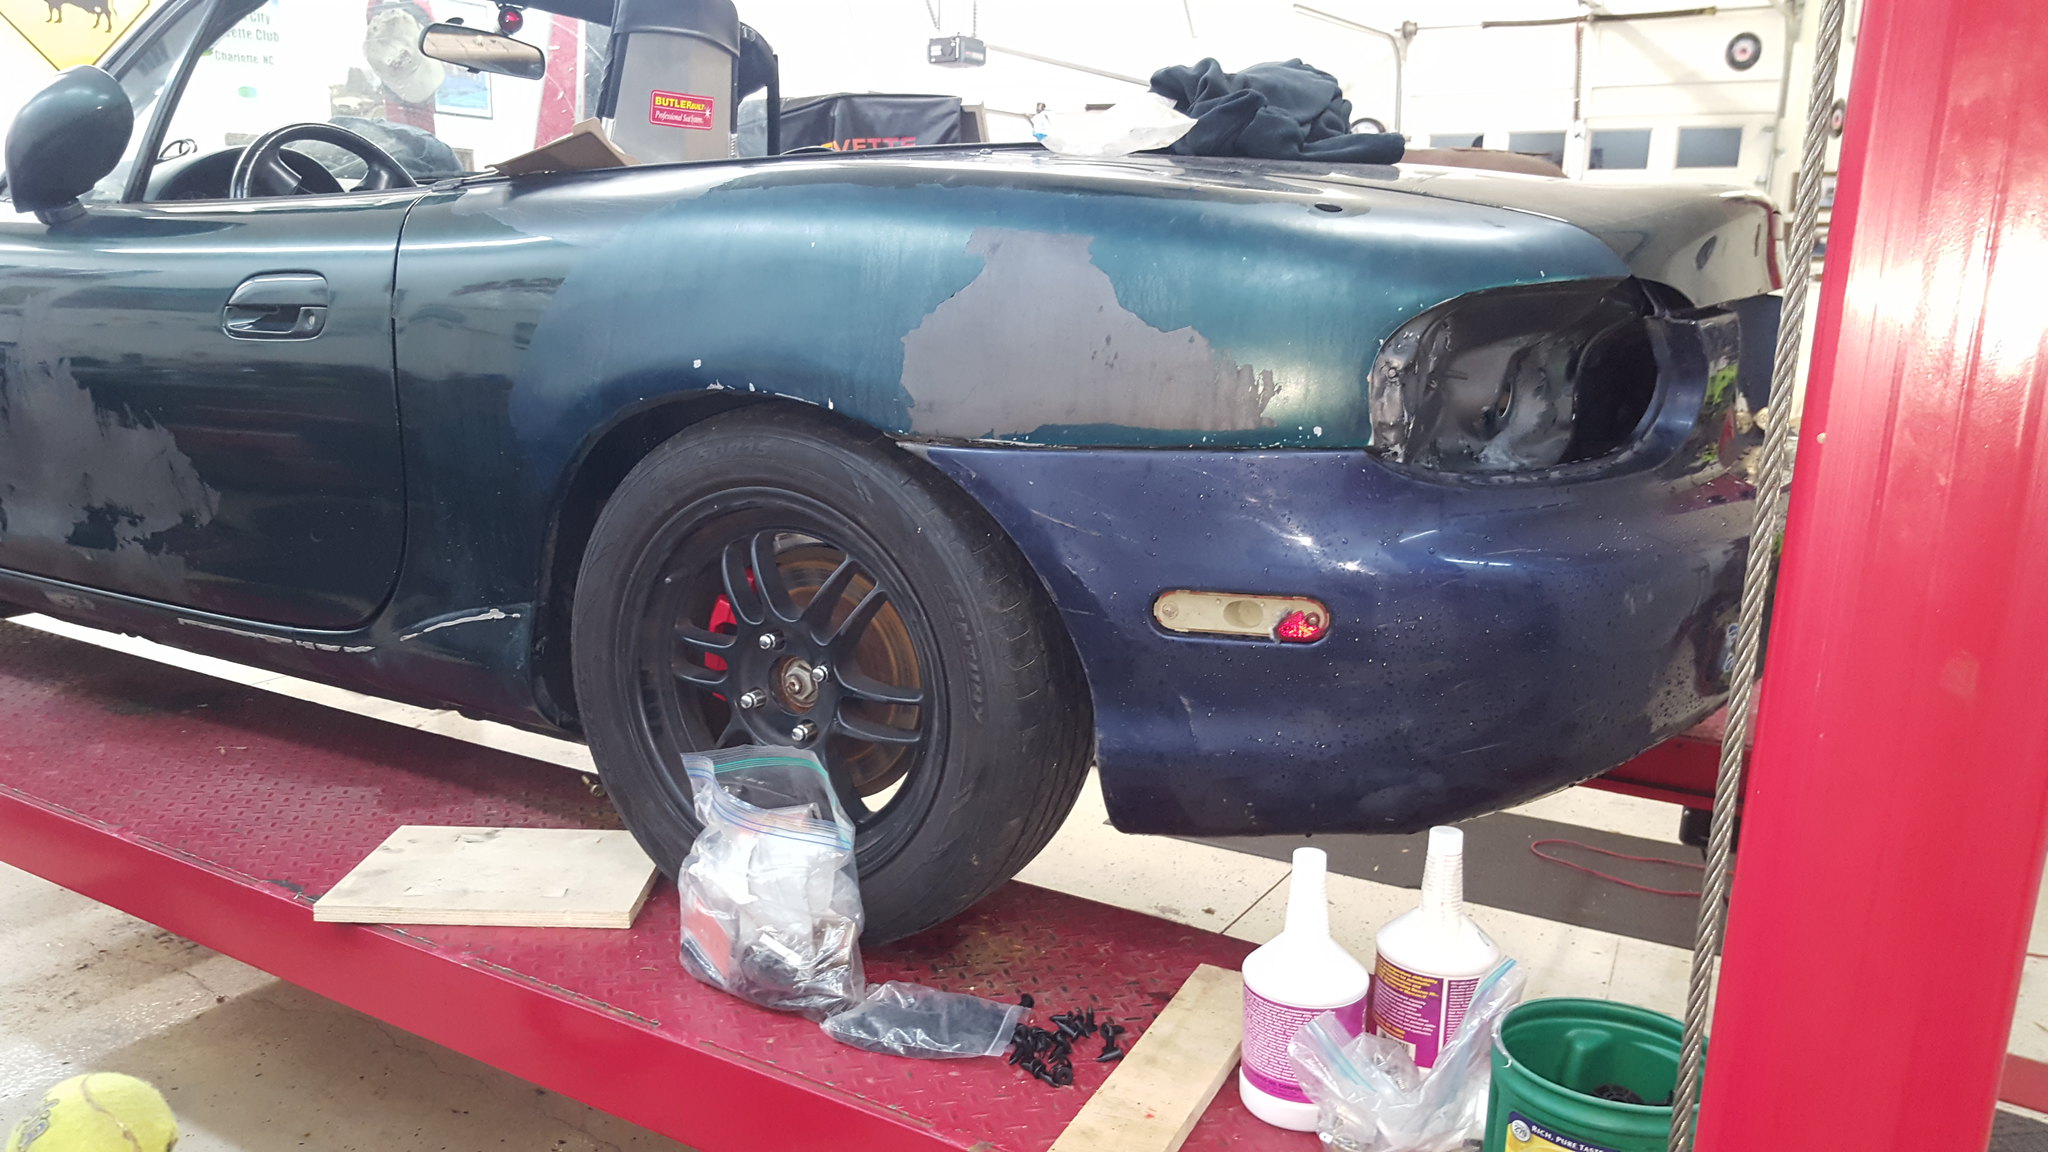 20181130_202912 by Michael Crawford, on FlickrSaturday morning started with flushing the cooling system of my vinegar and water flush. I didn't take pictures, but y'all should've seen the crap we knocked out. To facilitate this, and fixing the water pump leak, I pulled the few bolts and zipties holding the front clip and fans in, and cleaned everything else out of the car from stem to stern. While it was outside, I cut the package tray shelf to the scribe d lines, dressed the edges, vacuumed everything out, etc. generally made it a much nicer work environment. I also went ahead and put in the kick panels, dead pedal, sill plates, etc. got tired of cutting myself and laying on the sharp edges of the pinch around the door frame. Why I didn't do this a month ago, I don't know. Guess im a slow learner or something. I also reinstalled the windshield plastics and weatherstripping somewhere in the last week as well.
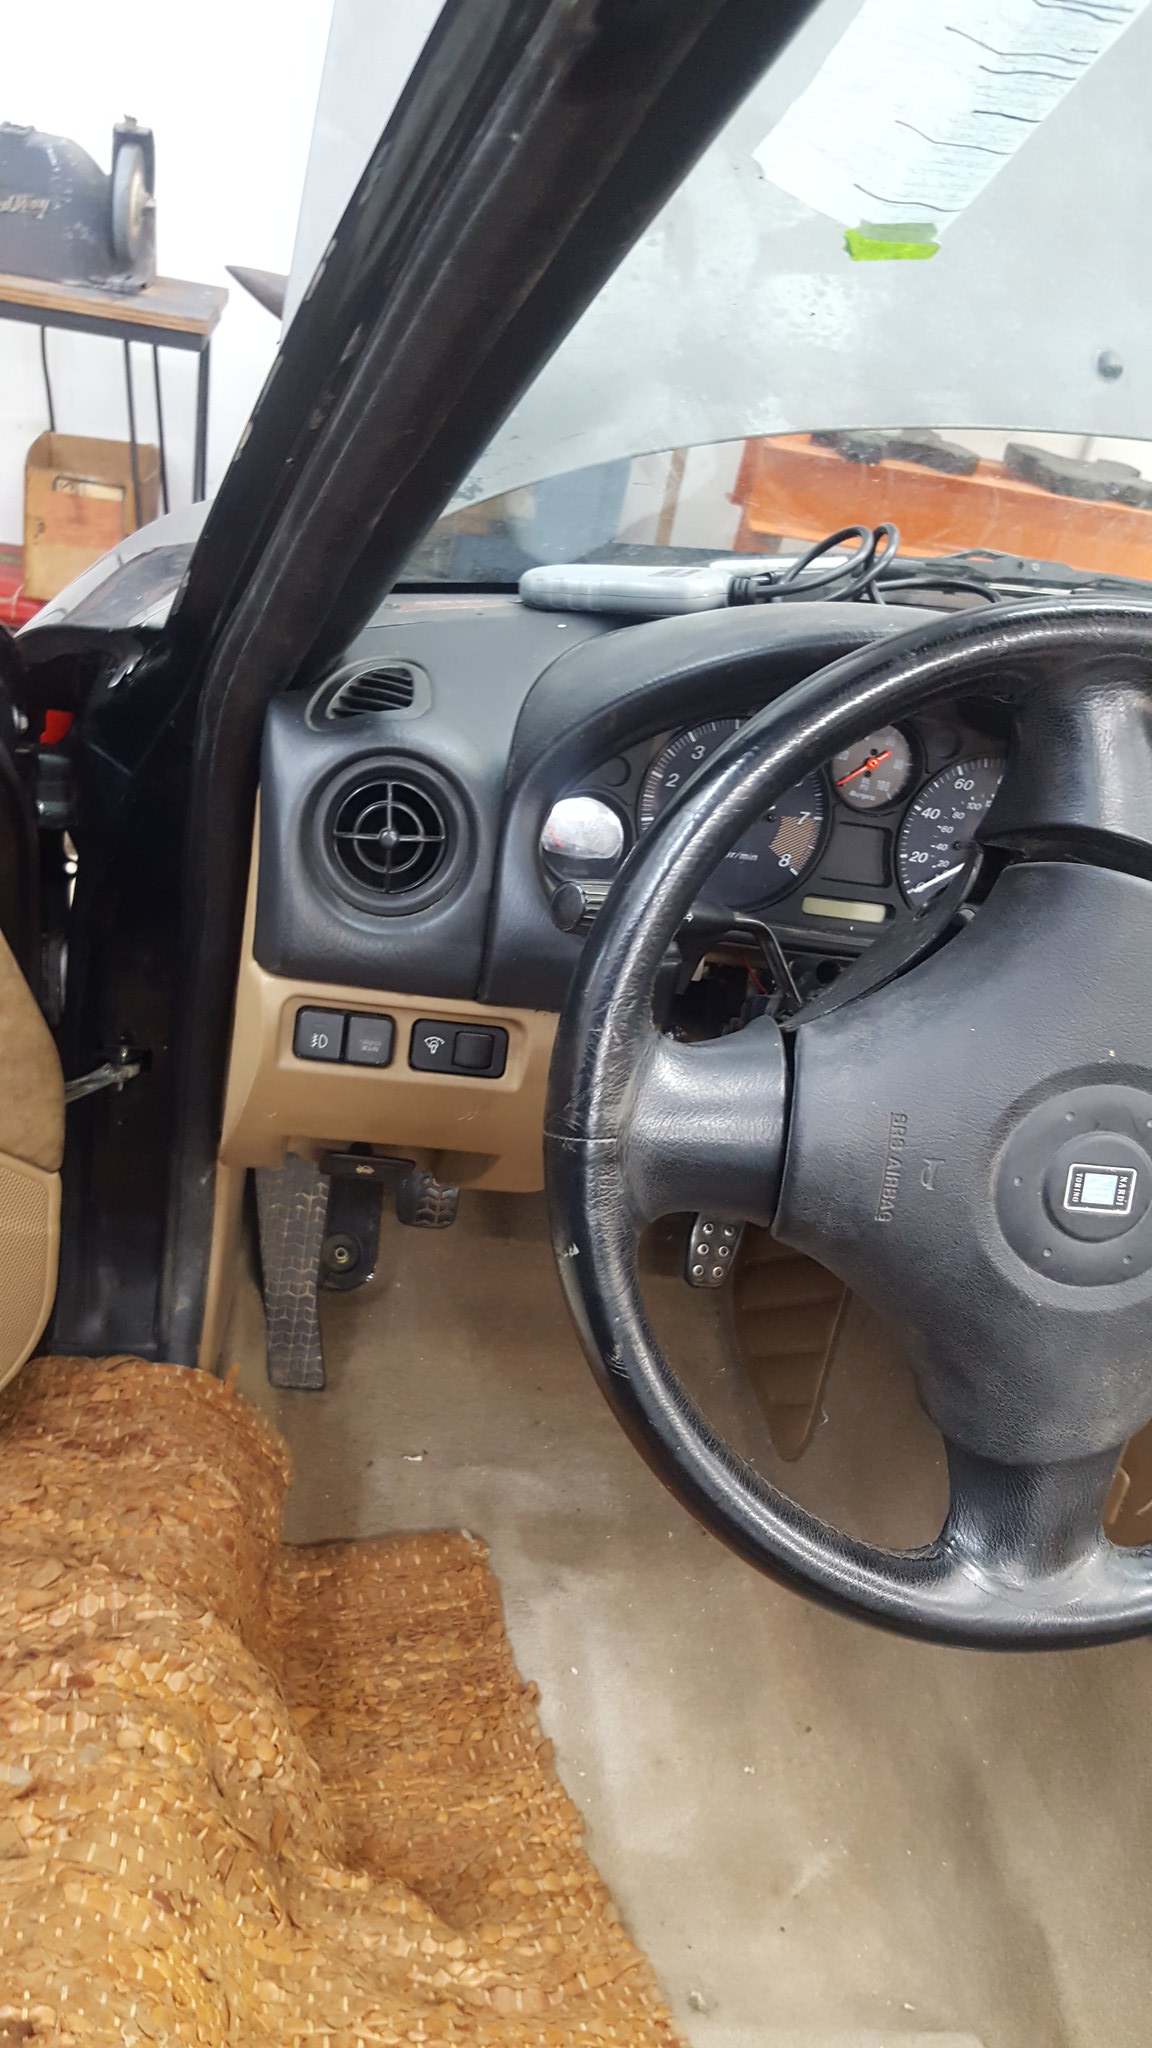 20181125_101709 by Michael Crawford, on Flickr
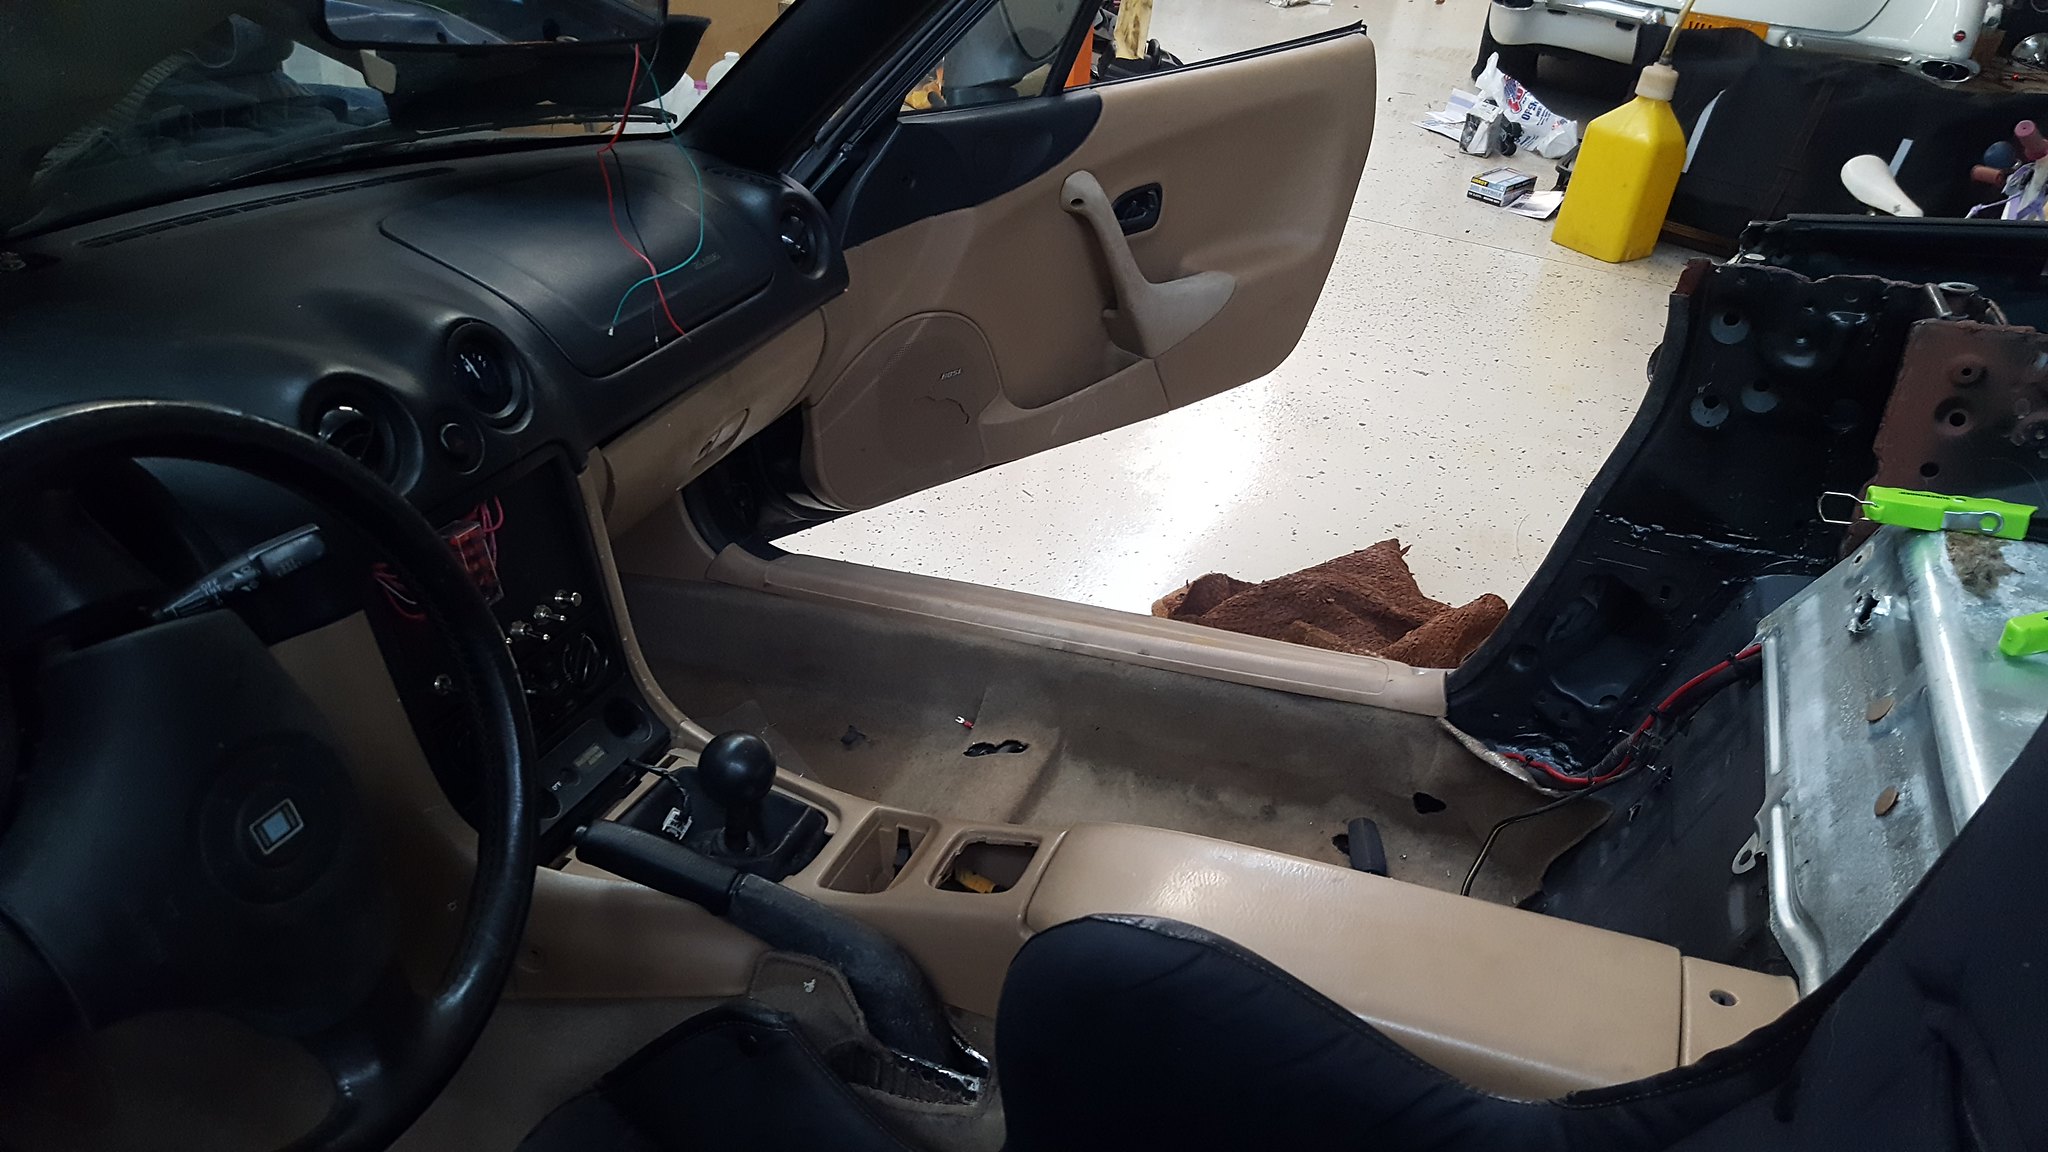 20181130_181039 by Michael Crawford, on FlickrI pushed the car inside, spread out a tarp, and dad cleaned/painted the rollbar with VHT rollbar and chassis paint. While it was drying, dad and I pop riveted the nut plates to the body, got the hardware lined up, loctite out, etc. when the rollbar was dry enough, we sat it in place and bolted it down with lock washers and blue loctite gel. Thankfully it didn't move too much when Steve welded it, so only the drivers rear leg needed a prybar to line the holes back up. But its got every fastener I designed it to have, and damn sure ain't going anywhere.
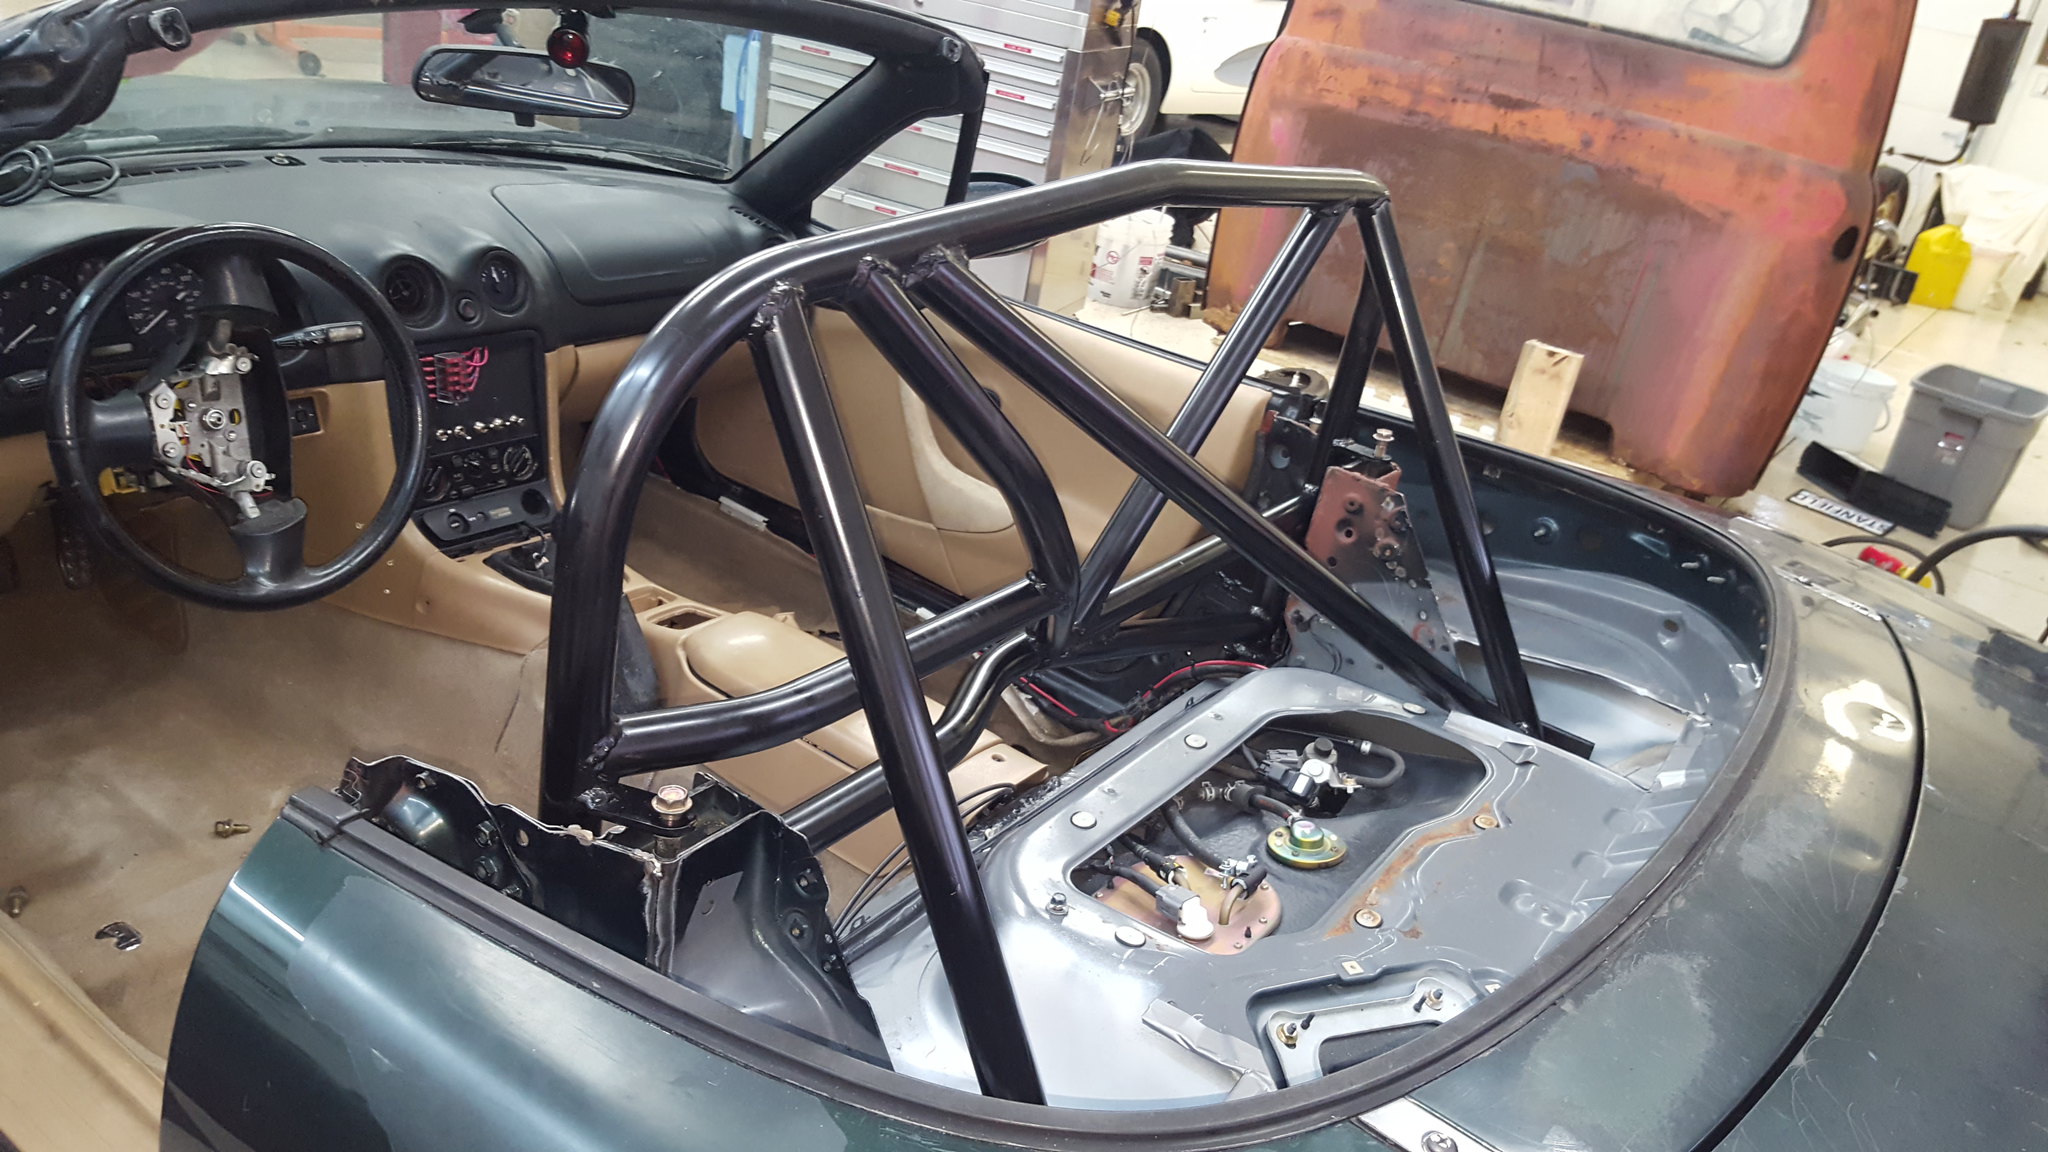 20181201_140155 by Michael Crawford, on Flickr
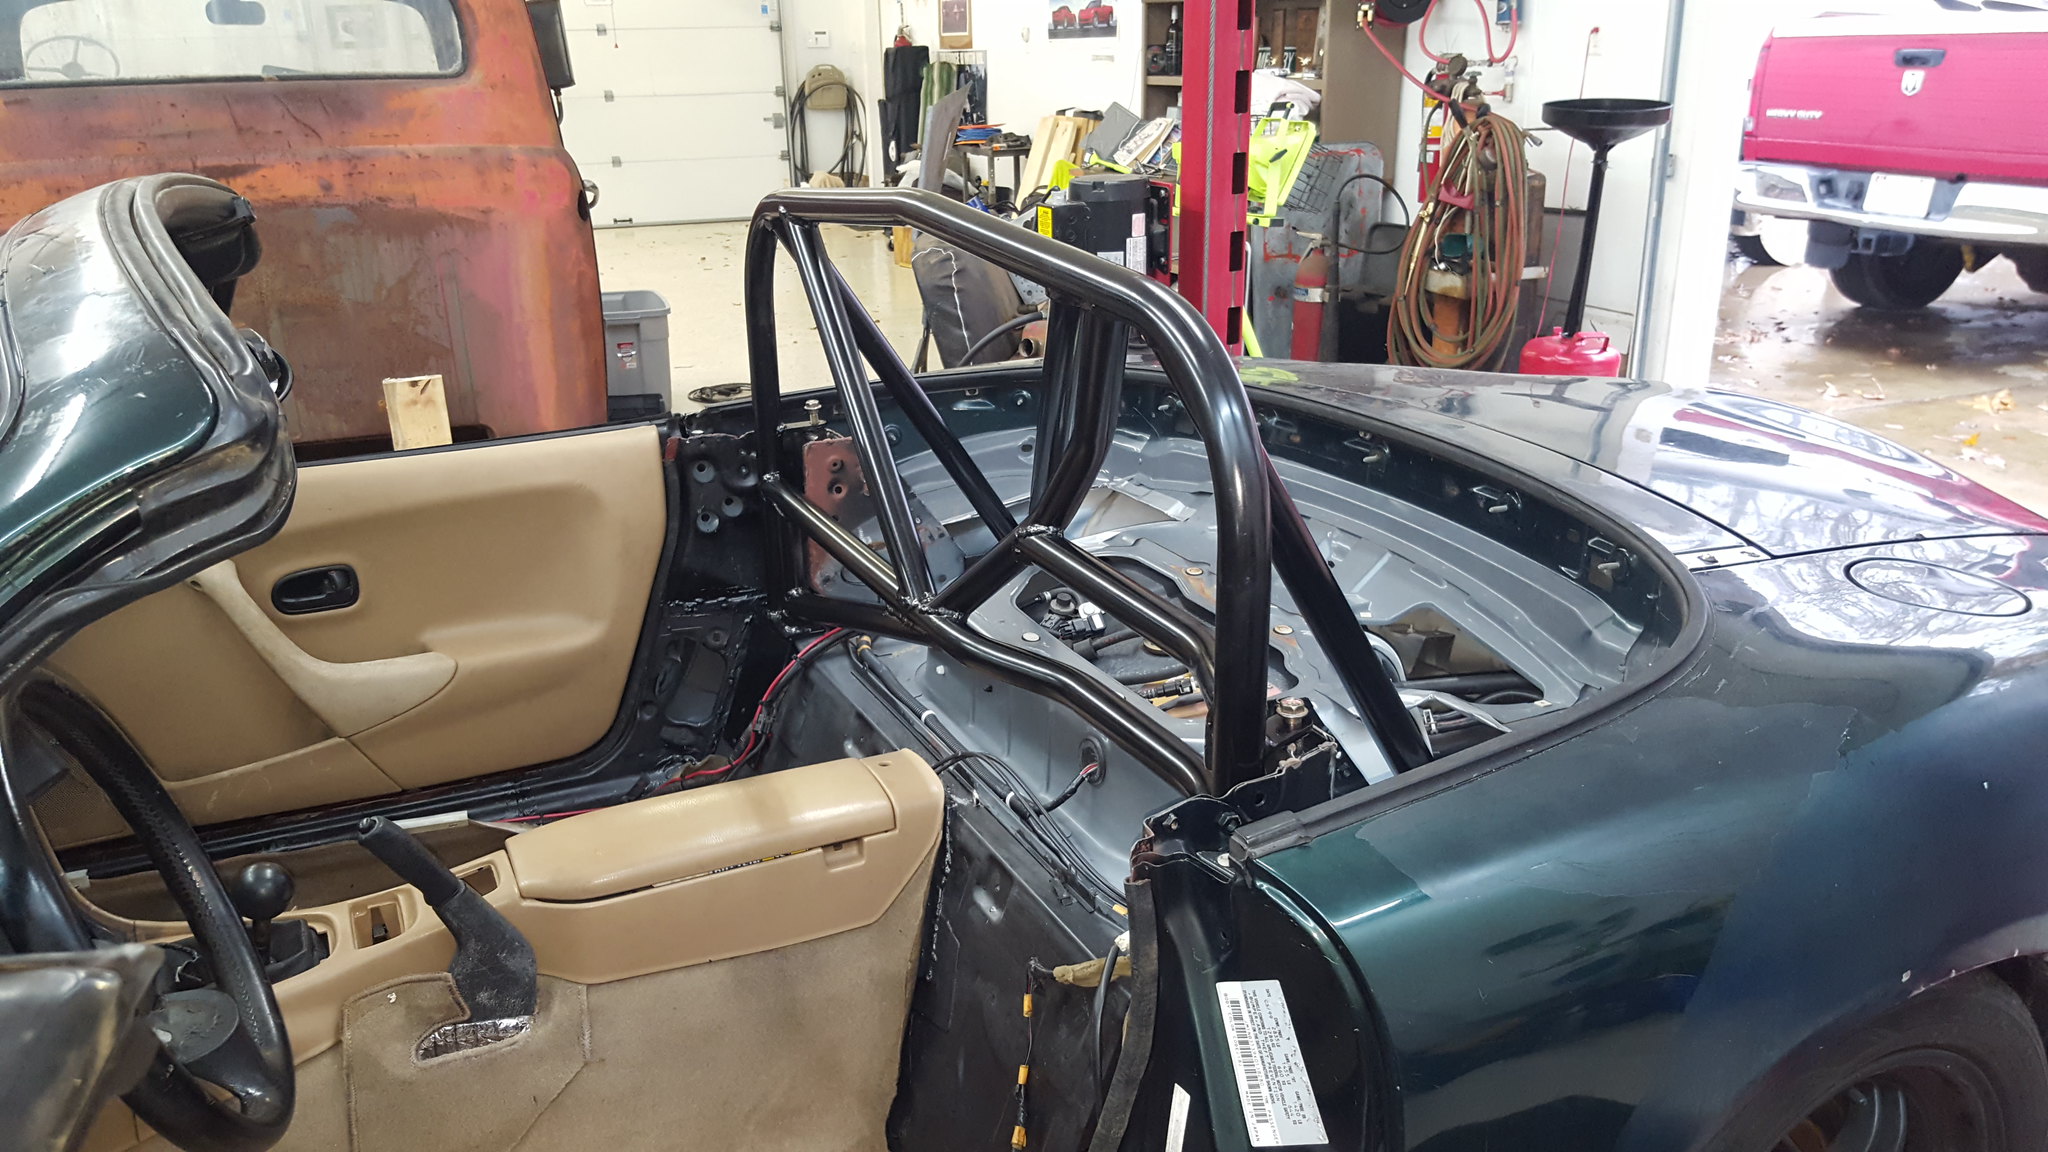 20181201_140148 by Michael Crawford, on FlickrWhen dallas and I welded up the seat frame, it moved a little as well, so I opened the holes up with a burr on the die grinder, and bolted the seat in.
 20181201_172813 by Michael Crawford, on Flickrwhile I was in there, now that it was difficult to access, I got the fuel tank vent sorted and the covers back on.
 20181201_172832 by Michael Crawford, on FlickrWe also sorted the front sway bar and mounts. This is a 1 1/8 front from an s10 blazer second gen. I had to move the bushing mounts rearward and inward by an inch each. To do so, I cut up some scrap angle iron, drilled some holes, and made adapter plates. Corners were cut from the plates to clear factory stuff. The bar itself had the original ends cut off, then new holes drilled to mate up with the miata end links. We then cut it down to a normal sway bar end with the portaband. All this (except the plates) was done by eyeball, so I don't really have a how to. But, at the end, I have a front 1 1/8 sway bar for $6.66
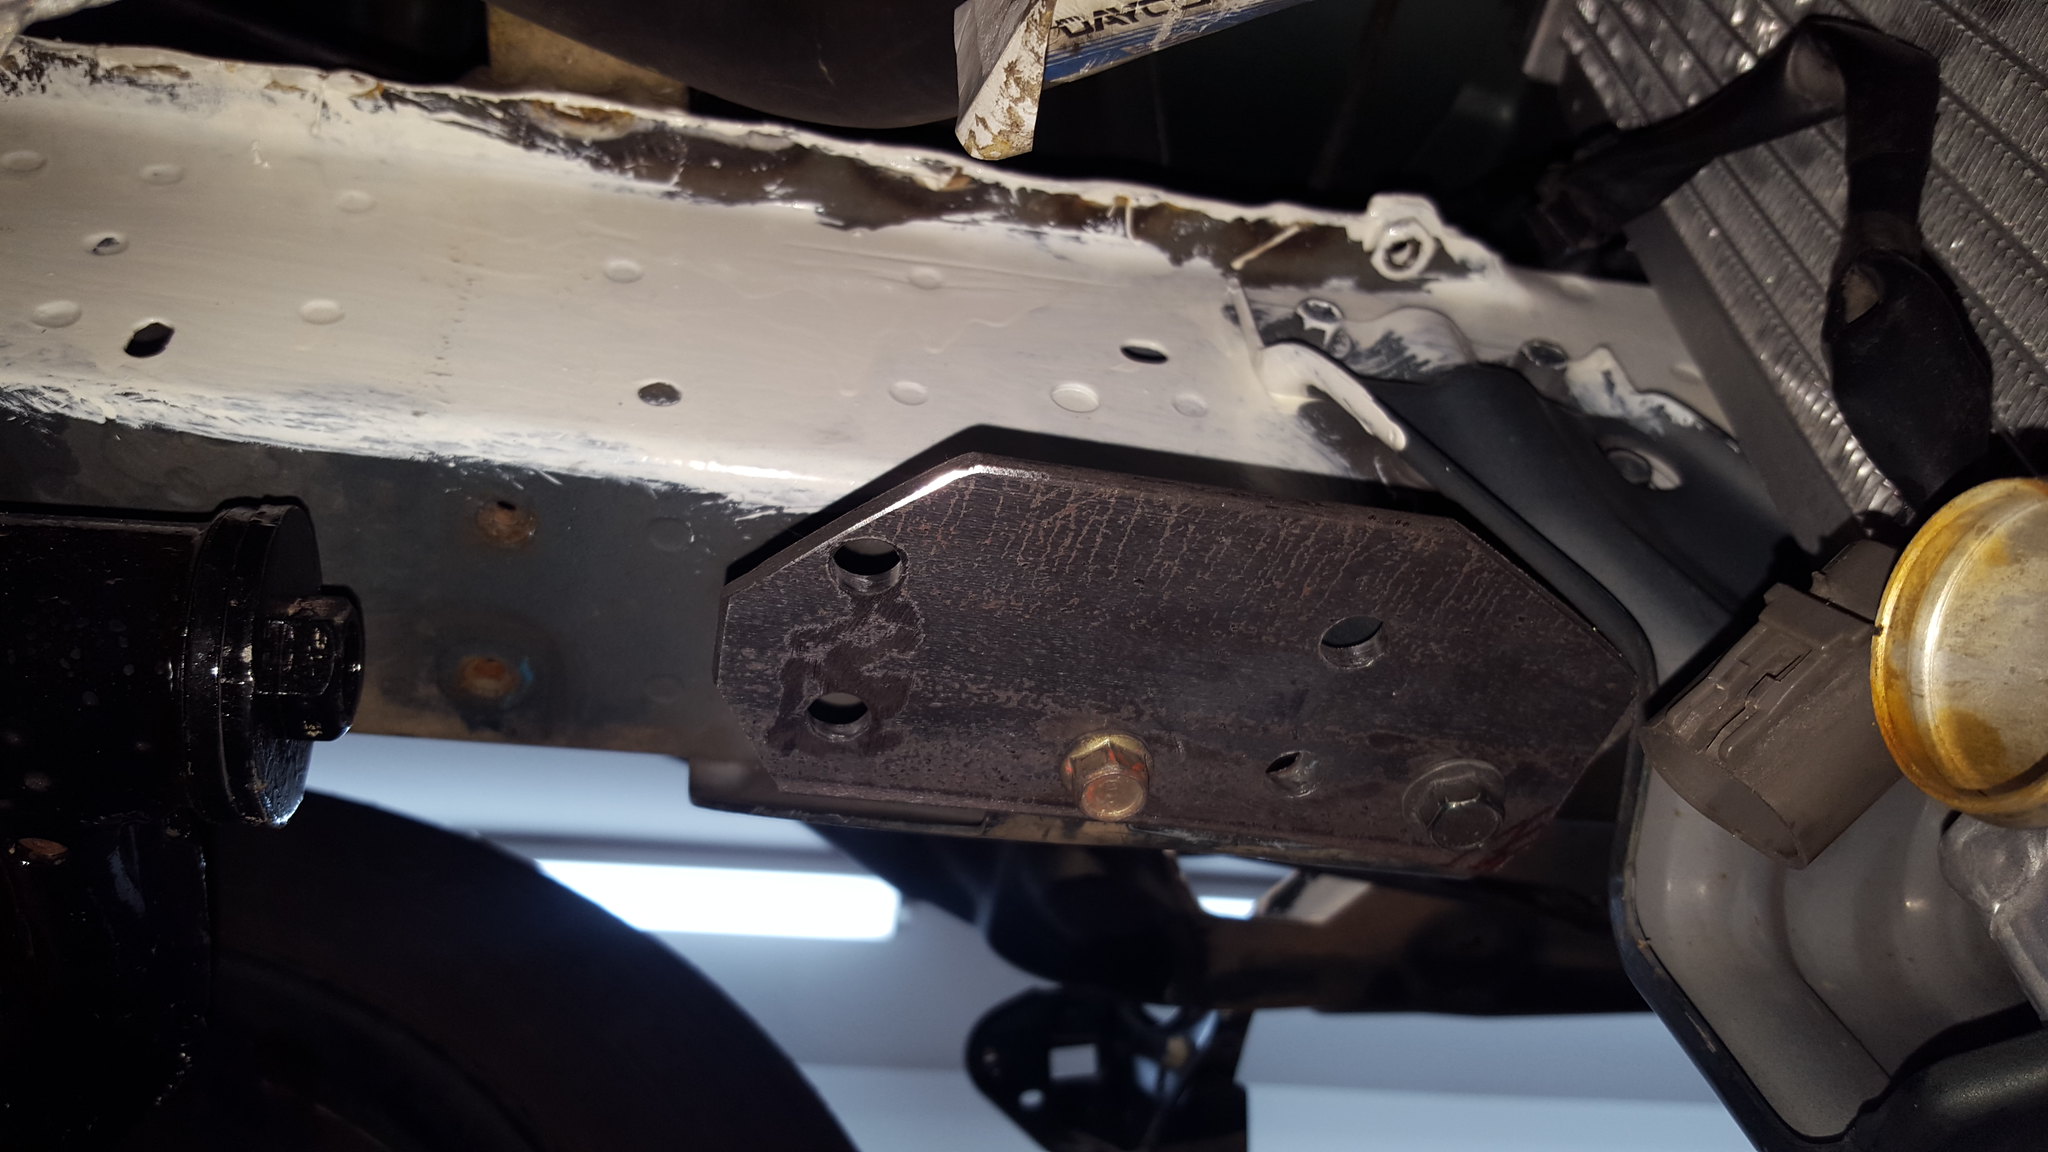 20181201_123136 by Michael Crawford, on Flickr
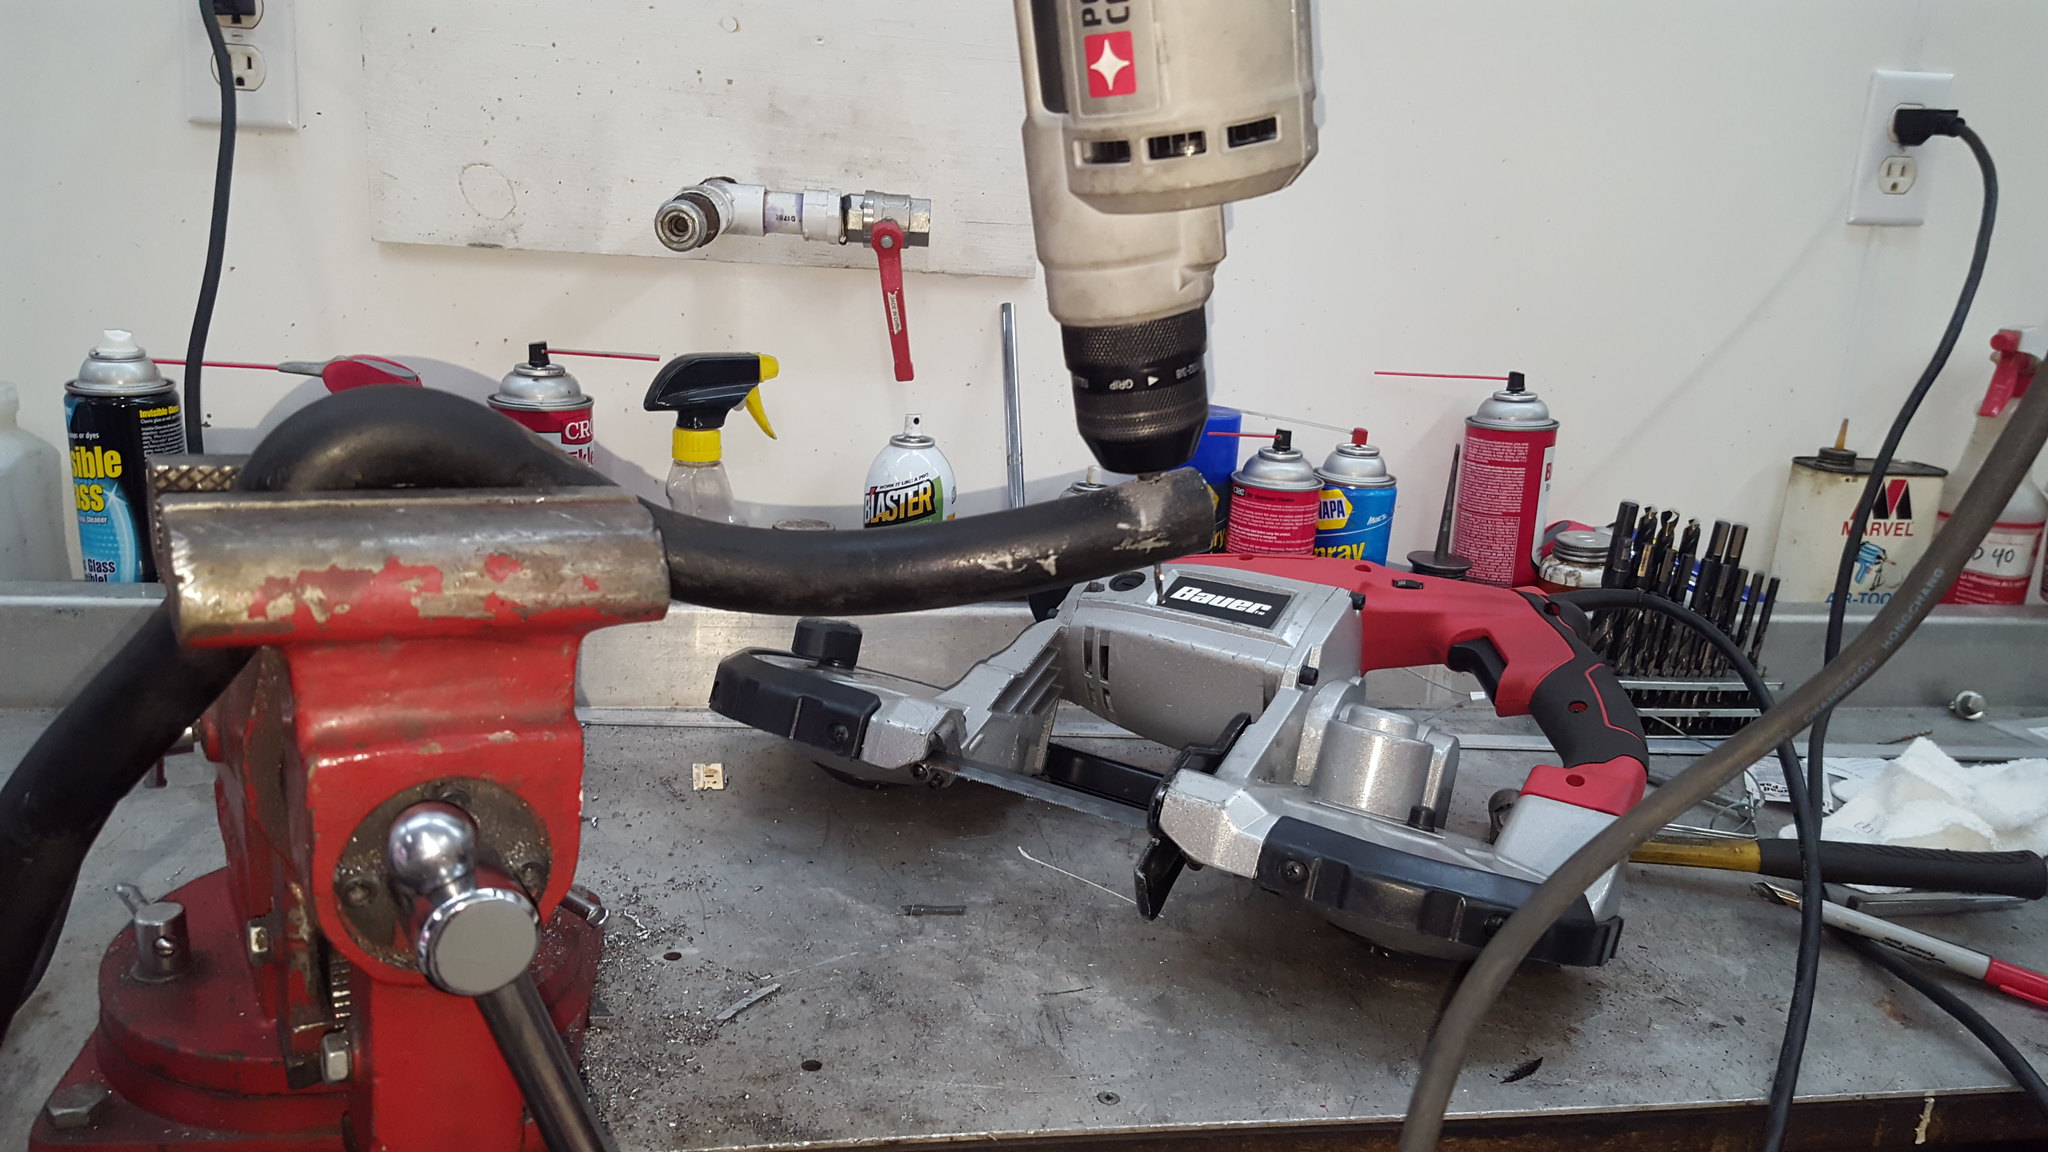 20181201_123142 by Michael Crawford, on Flickr
 20181201_131206 by Michael Crawford, on Flickr
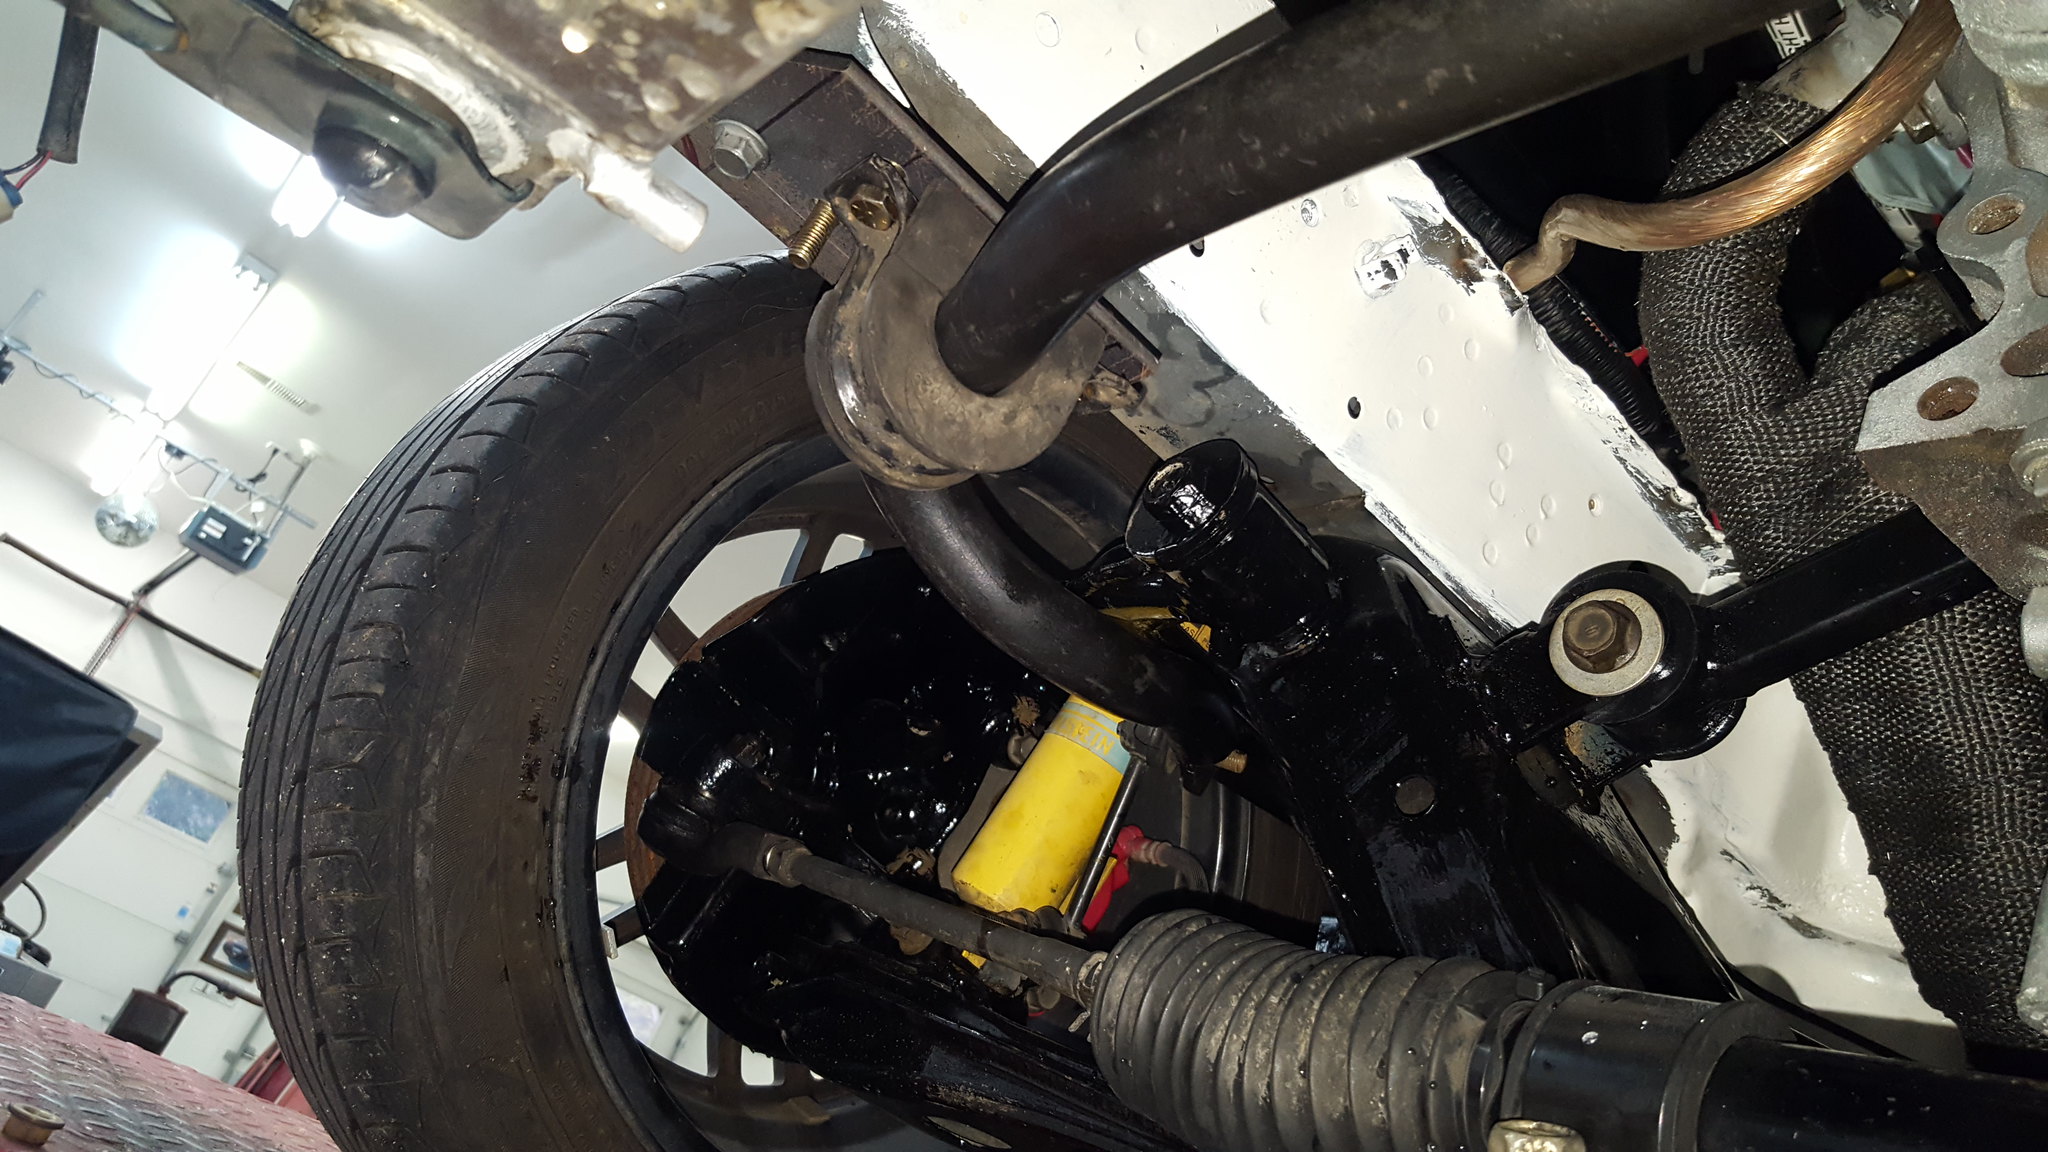 20181201_134406 by Michael Crawford, on FlickrTo finish the night, I installed the taillights (passengers brake and running lights (LED) don't work, but turn does, and its getting signal from the chassis) which may be the ugliest taillights on any car I have ever seen anywhere. The pictures do not do their hideousness justice. I'm going to tint them red with the VHT red nightshades I have on the shelf, but I don't think that's gonna help much. Maybe ill get lucky and talented and have time to build fiberglass versions of taillights and french in a set of 5 inch round trailer lights or something. Dunno, but these are that damned ugly.
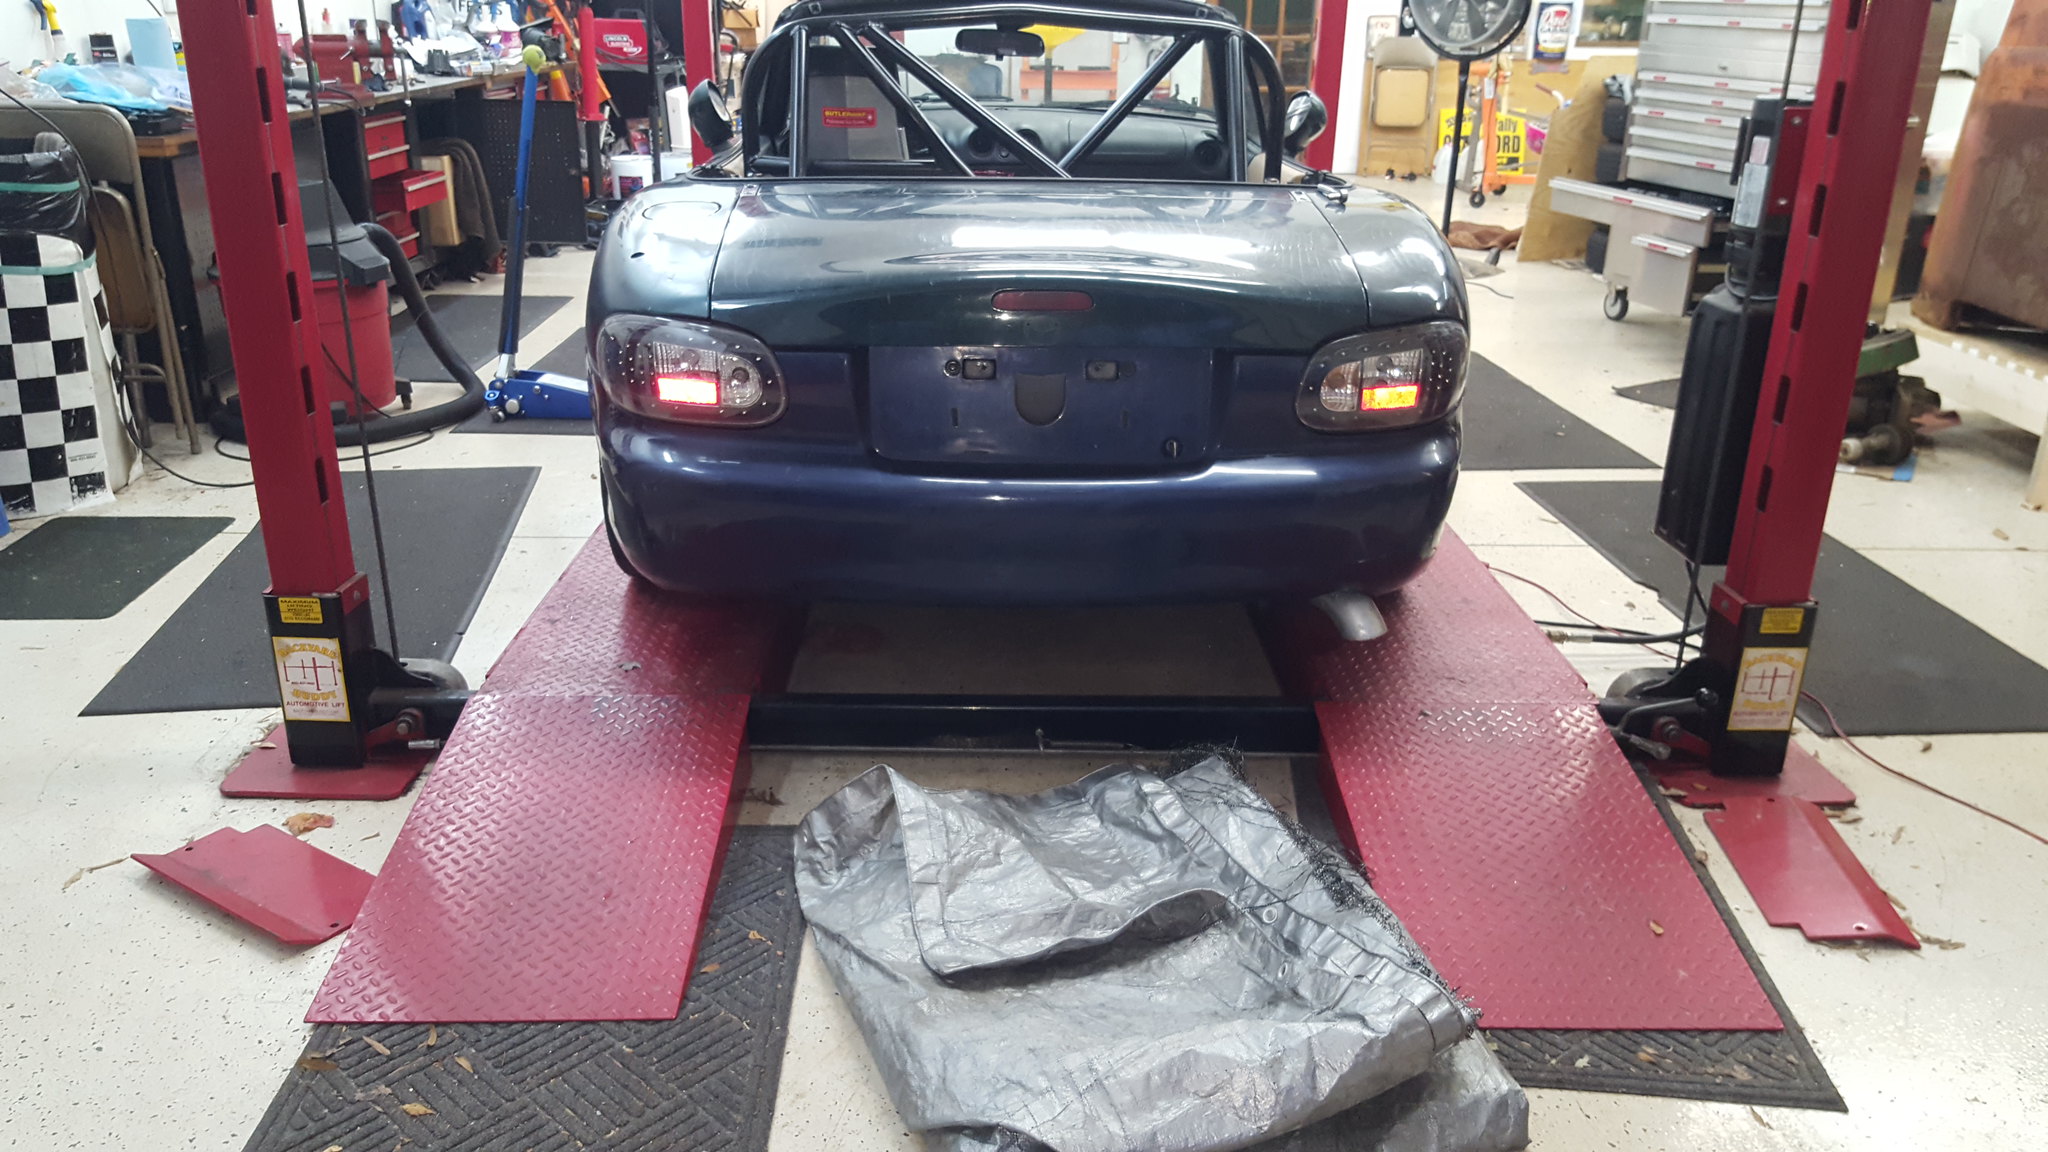 20181201_165829 by Michael Crawford, on FlickrOh, and I pulled the water pump, cleaned off all remnants of gasket, and reinstalled with a heavy bead of RTV.
 20181201_172804 by Michael Crawford, on FlickrToday, dad and I started after church to bleed the clutch and brakes, as well as set ride height. I have the front coilovers set at 1 inch up from bottom, and rear 1.5 right now. Little too high at both ends (13 rear, 14 front), but gaining on it. Did a full nut and bolt check of front and rear suspensions except the alignment eccentrics and tie rod jamb nuts. We started on the clutch, and really didn't have much success, were starting to get some pedal, but not a lot. I'm thinking that the air is trapped in the line where it goes above the clutch master before going down to the slave. So I may reroute it before we try to bleed it again. Then, we moved onto the brakes. We didn't seem to have a lot of pedal travel, with a very hard stop at the end. But we soldiered on, right up until the fronts wouldn't bleed at all. After much diagnosing, we decided we had a bad master cylinder. (I later found that I hadn't actually hooked the pedal to the booster rod through the hole in the pedal, so it was bottoming out after very little travel. Its been fixed now, but brakes still aren't bled.)
revious challenge budget: 1902.29 recoup total: 820new money:used serpentine belt from pull-a-part: 4.95roll bar paint: 3.99 (was 8.99 at oriellys, but used the $5 coupon I got in the mail) Recoup: 820new total: 1911.23so, ive been in thrash mode. Lots of caffeine and heavy metal music. I NEED to see this thing moving under its own power soon. Ive been working on it for well over a year now.....Thursday night I started with a pile of parts and hardware that dad had cleaned and painted for me (he did all the really nice final coats on this stuff, as im not that great a brush painter). The only issues I ran into was that the upper control arm bolts were too short for proper engagement when the CV shaft safety loops were added. So a couple grade 8 bolts and nylock nuts from the bins were used. And, since I redesigned the upper PPF delete mount on the fly, I had to change the mounting hole in the chunk of the stock PPF.
20181125_091438 by Michael Crawford, on Flickr20181128_174550 by Michael Crawford, on Flickr20181128_174557 by Michael Crawford, on FlickrBut got it all assembled with the �new� 4.11 torsen, and slid under the car.20181130_181025 by Michael Crawford, on FlickrFriday I raised it all up, drilled another hole, torqued everything, and went to install the factory rear brace.20181130_195146 by Michael Crawford, on FlickrIt wouldn't fit. Hit the exhaust. I got to looking, and realized there was a piece of the differential aluminum casting hanging the exhaust up from going up further. So I got out the sawzall.20181130_201001 by Michael Crawford, on FlickrGot it all bolted up, tightened down, drilled the holes for the driveshaft safety loop with a freaking DREMEL and carbide burr because I couldn't fit the drill in there, and called it a night. Well, after getting the drivers rear quarter beat somewhat into shape to fit the rear bumper cover, and mounted the shift light above the rear-view with a bit of tripled up plumbers hanging strap (scrap from a job site)20181130_195136 by Michael Crawford, on Flickr20181130_201444 by Michael Crawford, on Flickr20181130_201429 by Michael Crawford, on Flickr20181130_190233 by Michael Crawford, on Flickr20181130_190223 by Michael Crawford, on Flickr20181130_202912 by Michael Crawford, on FlickrSaturday morning started with flushing the cooling system of my vinegar and water flush. I didn't take pictures, but y'all should've seen the crap we knocked out. To facilitate this, and fixing the water pump leak, I pulled the few bolts and zipties holding the front clip and fans in, and cleaned everything else out of the car from stem to stern. While it was outside, I cut the package tray shelf to the scribe d lines, dressed the edges, vacuumed everything out, etc. generally made it a much nicer work environment. I also went ahead and put in the kick panels, dead pedal, sill plates, etc. got tired of cutting myself and laying on the sharp edges of the pinch around the door frame. Why I didn't do this a month ago, I don't know. Guess im a slow learner or something. I also reinstalled the windshield plastics and weatherstripping somewhere in the last week as well.20181125_101709 by Michael Crawford, on Flickr20181130_181039 by Michael Crawford, on FlickrI pushed the car inside, spread out a tarp, and dad cleaned/painted the rollbar with VHT rollbar and chassis paint. While it was drying, dad and I pop riveted the nut plates to the body, got the hardware lined up, loctite out, etc. when the rollbar was dry enough, we sat it in place and bolted it down with lock washers and blue loctite gel. Thankfully it didn't move too much when Steve welded it, so only the drivers rear leg needed a prybar to line the holes back up. But its got every fastener I designed it to have, and damn sure ain't going anywhere.20181201_140155 by Michael Crawford, on Flickr20181201_140148 by Michael Crawford, on FlickrWhen dallas and I welded up the seat frame, it moved a little as well, so I opened the holes up with a burr on the die grinder, and bolted the seat in.20181201_172813 by Michael Crawford, on Flickrwhile I was in there, now that it was difficult to access, I got the fuel tank vent sorted and the covers back on.20181201_172832 by Michael Crawford, on FlickrWe also sorted the front sway bar and mounts. This is a 1 1/8 front from an s10 blazer second gen. I had to move the bushing mounts rearward and inward by an inch each. To do so, I cut up some scrap angle iron, drilled some holes, and made adapter plates. Corners were cut from the plates to clear factory stuff. The bar itself had the original ends cut off, then new holes drilled to mate up with the miata end links. We then cut it down to a normal sway bar end with the portaband. All this (except the plates) was done by eyeball, so I don't really have a how to. But, at the end, I have a front 1 1/8 sway bar for $6.6620181201_123136 by Michael Crawford, on Flickr20181201_123142 by Michael Crawford, on Flickr20181201_131206 by Michael Crawford, on Flickr20181201_134406 by Michael Crawford, on FlickrTo finish the night, I installed the taillights (passengers brake and running lights (LED) don't work, but turn does, and its getting signal from the chassis) which may be the ugliest taillights on any car I have ever seen anywhere. The pictures do not do their hideousness justice. I'm going to tint them red with the VHT red nightshades I have on the shelf, but I don't think that's gonna help much. Maybe ill get lucky and talented and have time to build fiberglass versions of taillights and french in a set of 5 inch round trailer lights or something. Dunno, but these are that damned ugly.20181201_165829 by Michael Crawford, on FlickrOh, and I pulled the water pump, cleaned off all remnants of gasket, and reinstalled with a heavy bead of RTV.20181201_172804 by Michael Crawford, on FlickrToday, dad and I started after church to bleed the clutch and brakes, as well as set ride height. I have the front coilovers set at 1 inch up from bottom, and rear 1.5 right now. Little too high at both ends (13 rear, 14 front), but gaining on it. Did a full nut and bolt check of front and rear suspensions except the alignment eccentrics and tie rod jamb nuts. We started on the clutch, and really didn't have much success, were starting to get some pedal, but not a lot. I'm thinking that the air is trapped in the line where it goes above the clutch master before going down to the slave. So I may reroute it before we try to bleed it again. Then, we moved onto the brakes. We didn't seem to have a lot of pedal travel, with a very hard stop at the end. But we soldiered on, right up until the fronts wouldn't bleed at all. After much diagnosing, we decided we had a bad master cylinder. (I later found that I hadn't actually hooked the pedal to the booster rod through the hole in the pedal, so it was bottoming out after very little travel. Its been fixed now, but brakes still aren't bled.)
Reply
0
0
12-02-2018, 07:53 PM
#71
Junior Member
Thread Starter
Join Date: Nov 2017
Posts: 112
Total Cats: 7
I went ahead and finished the water pump, installed the fans, tightened all the hose claps, filled and bled the cooling system, and went on to the front clip instead. Part of the front clip was sorting the throttle cable brackets, and making the hood fit. Spoiler alert: the factory air intake elbow wont fit with a hood no matter what I do. I have a plan, but don't know that it will solve the issues.Anyway, mark and cut: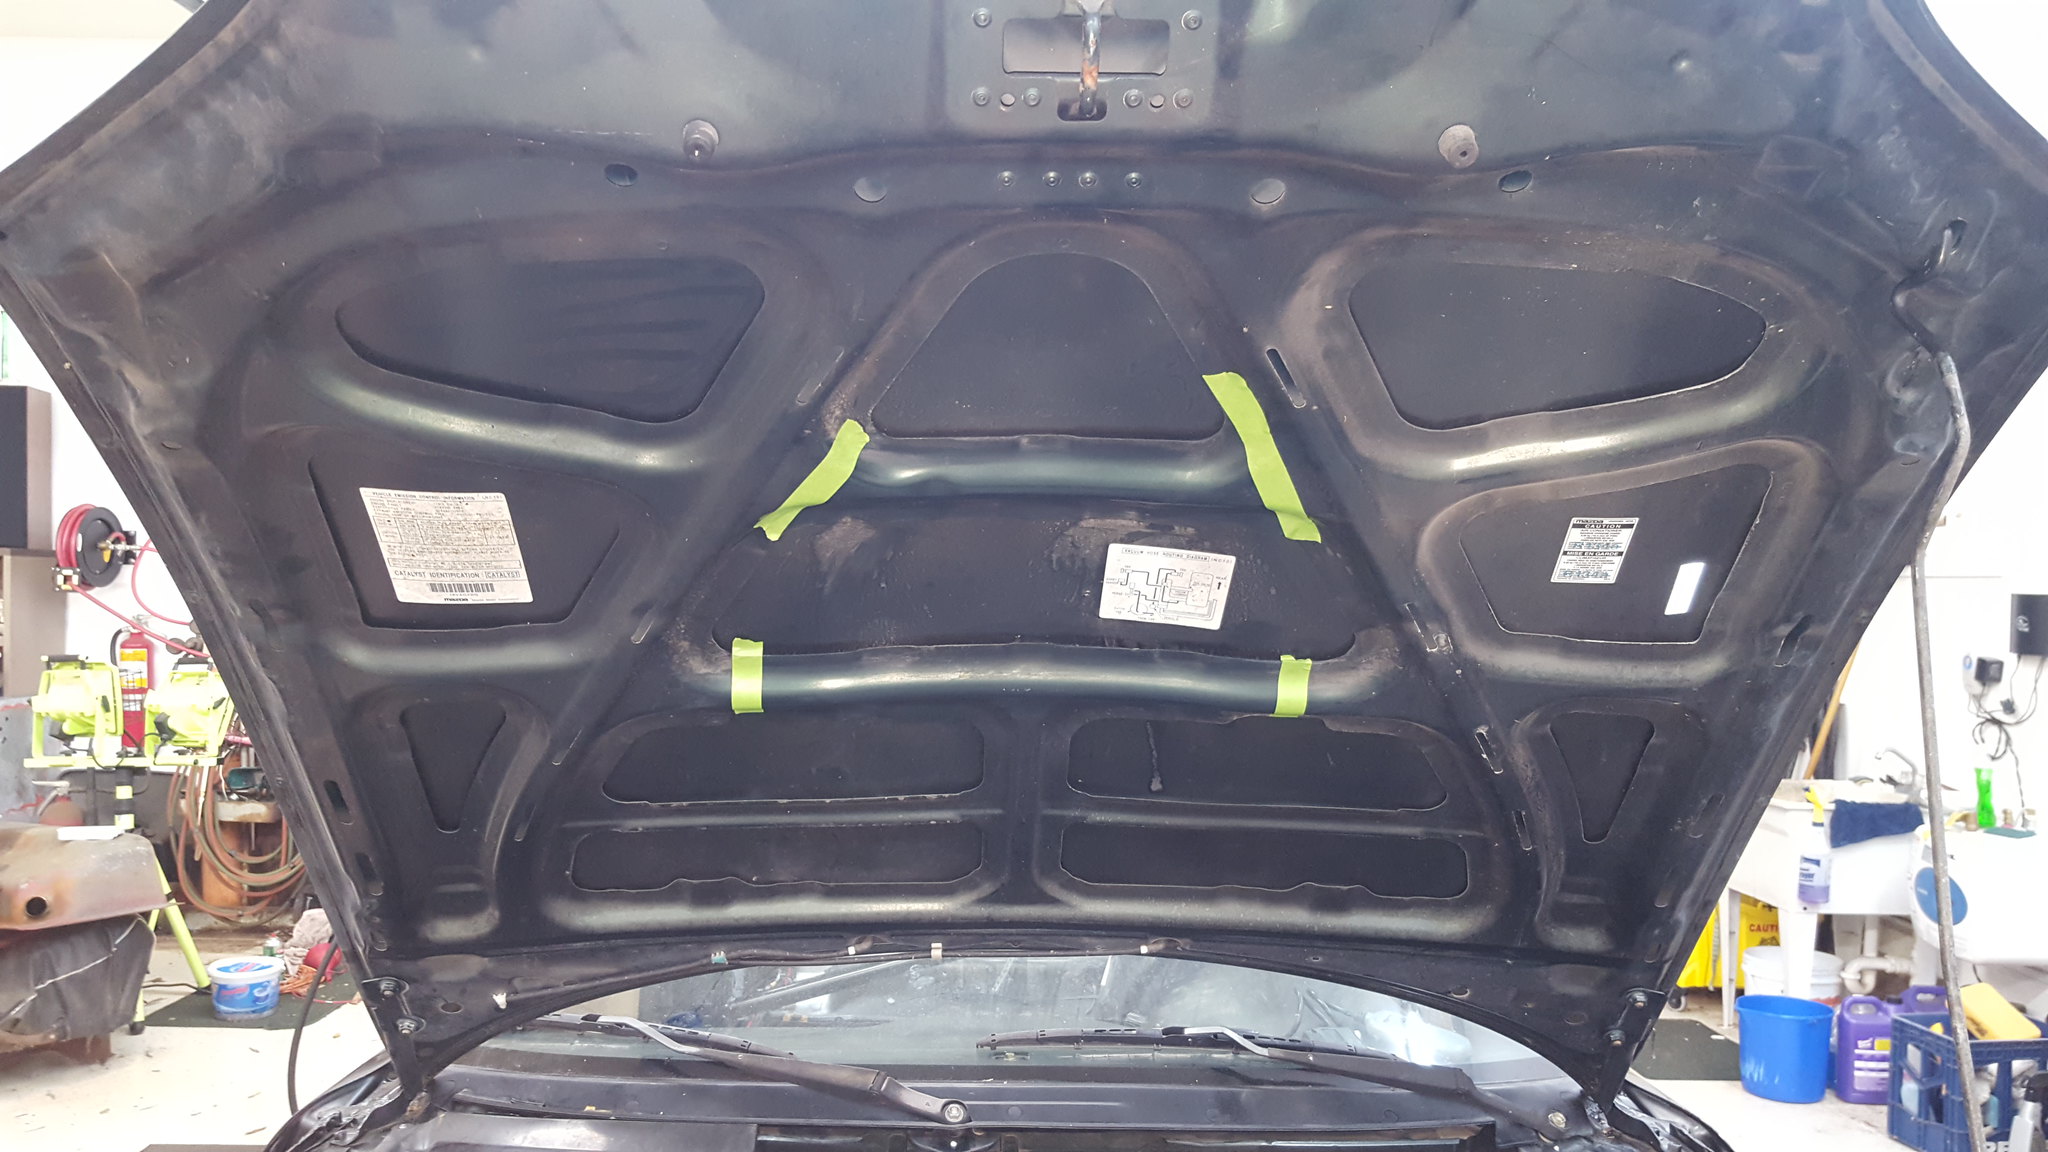
20181201_172729 by Michael Crawford, on Flickr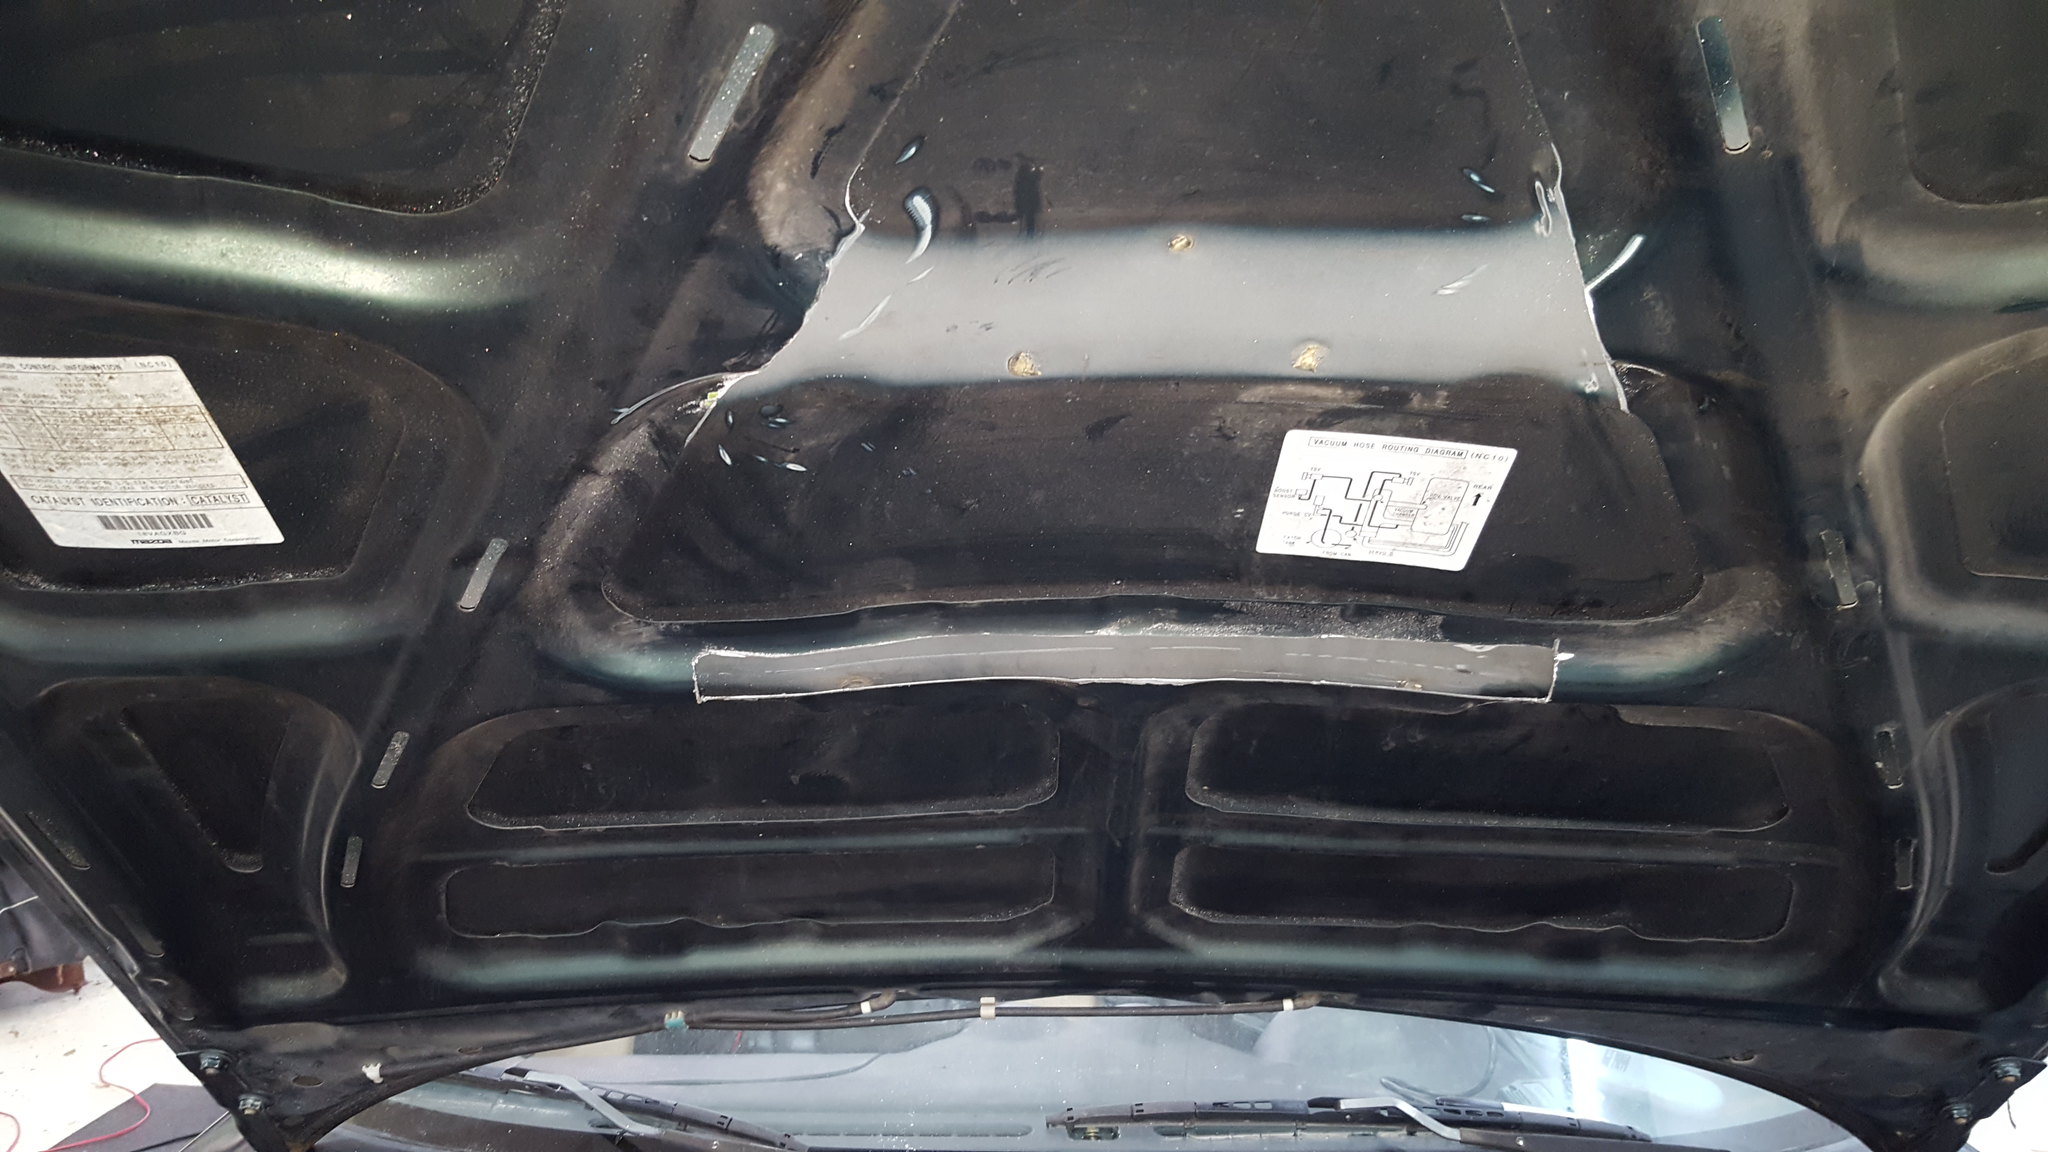
20181202_161657 by Michael Crawford, on Flickrthis is the final form of throttle bracket. Needs triangulation. but that has to wait until the intake is done so it all clears.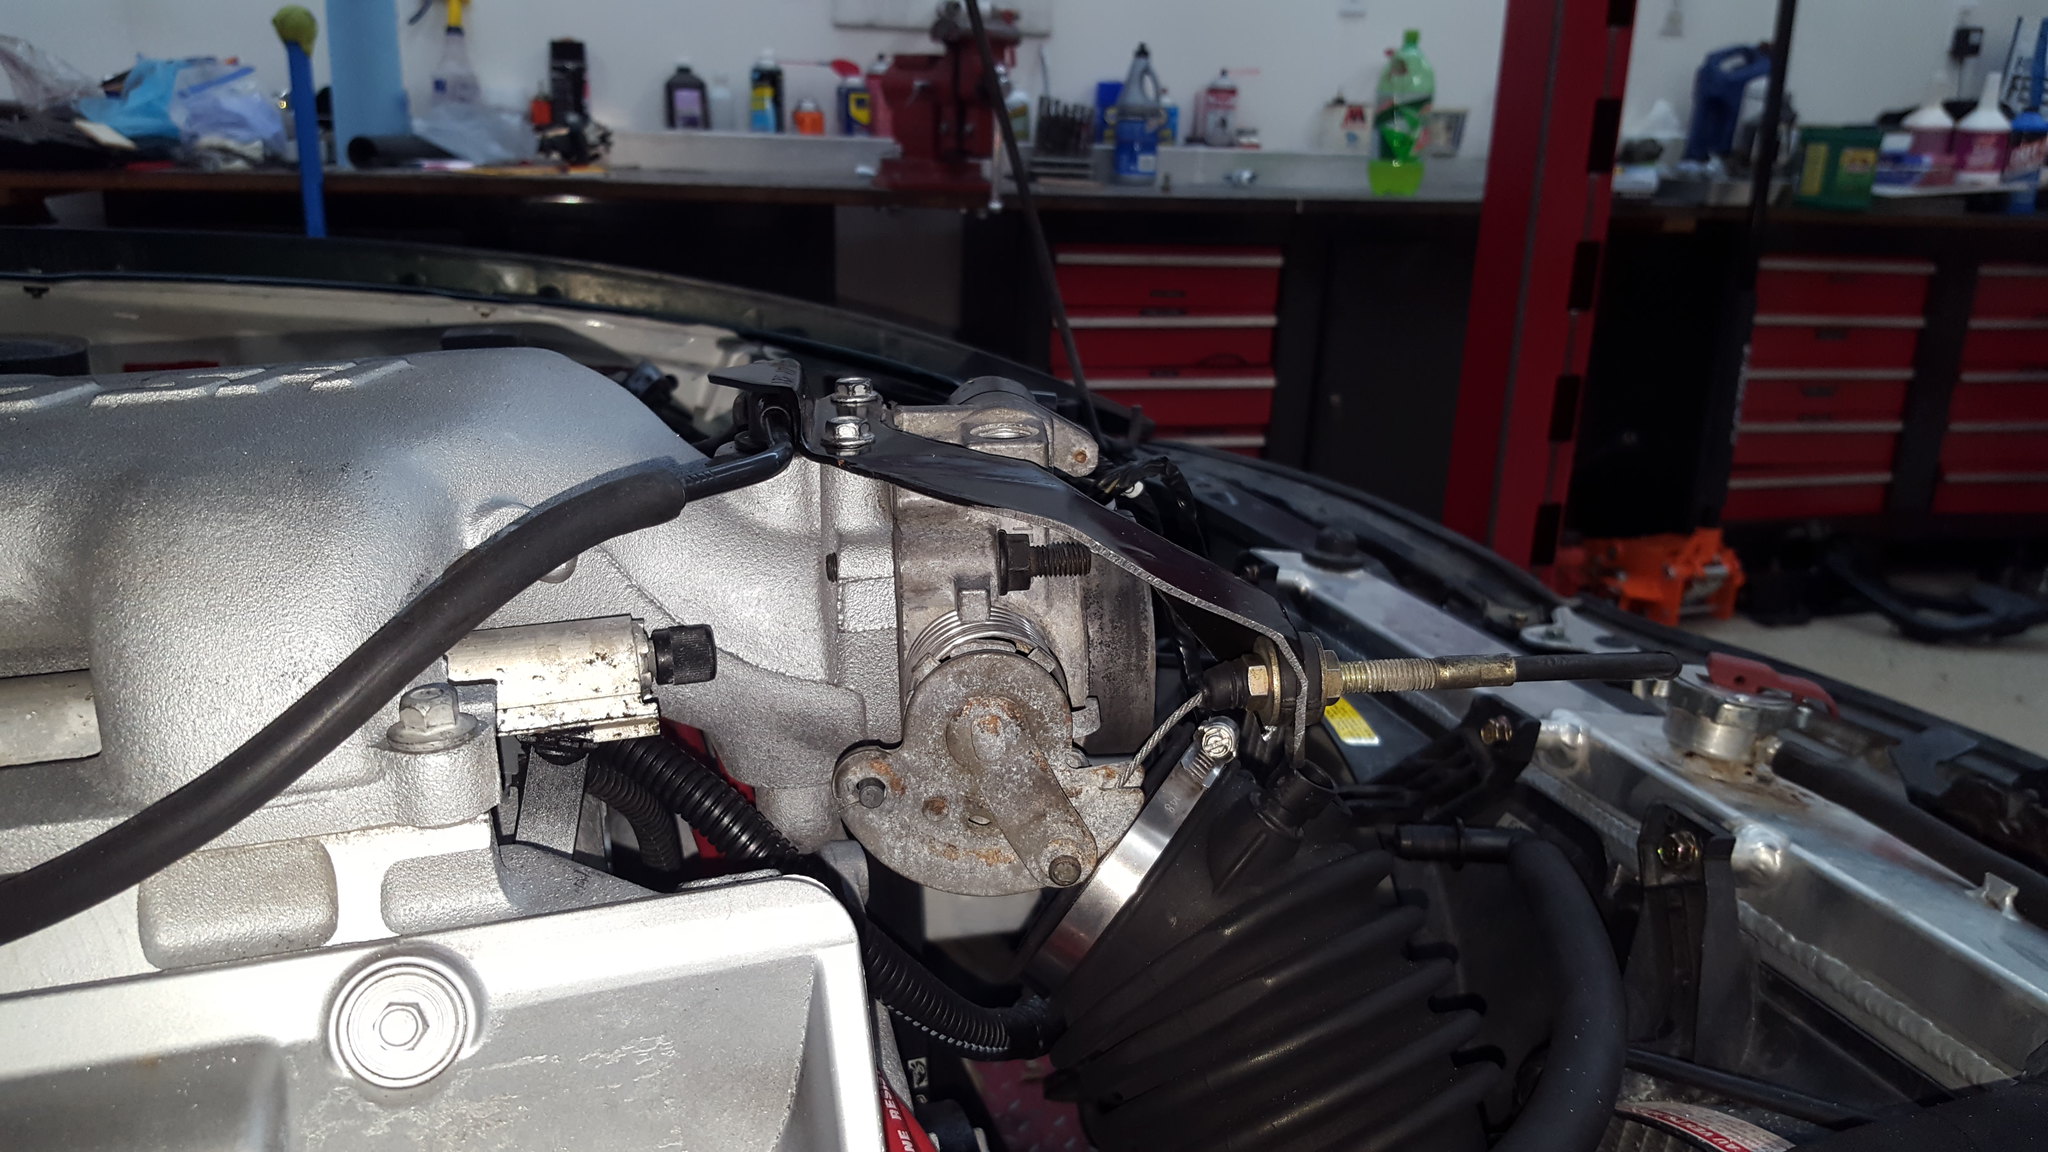
20181202_161714 by Michael Crawford, on Flickr
20181202_161702 by Michael Crawford, on FlickrThis snowballed into bolting down the fenders, bumper cover, figuring out that BOTH headlights are busted far more than I thought, and cleaning up the shop.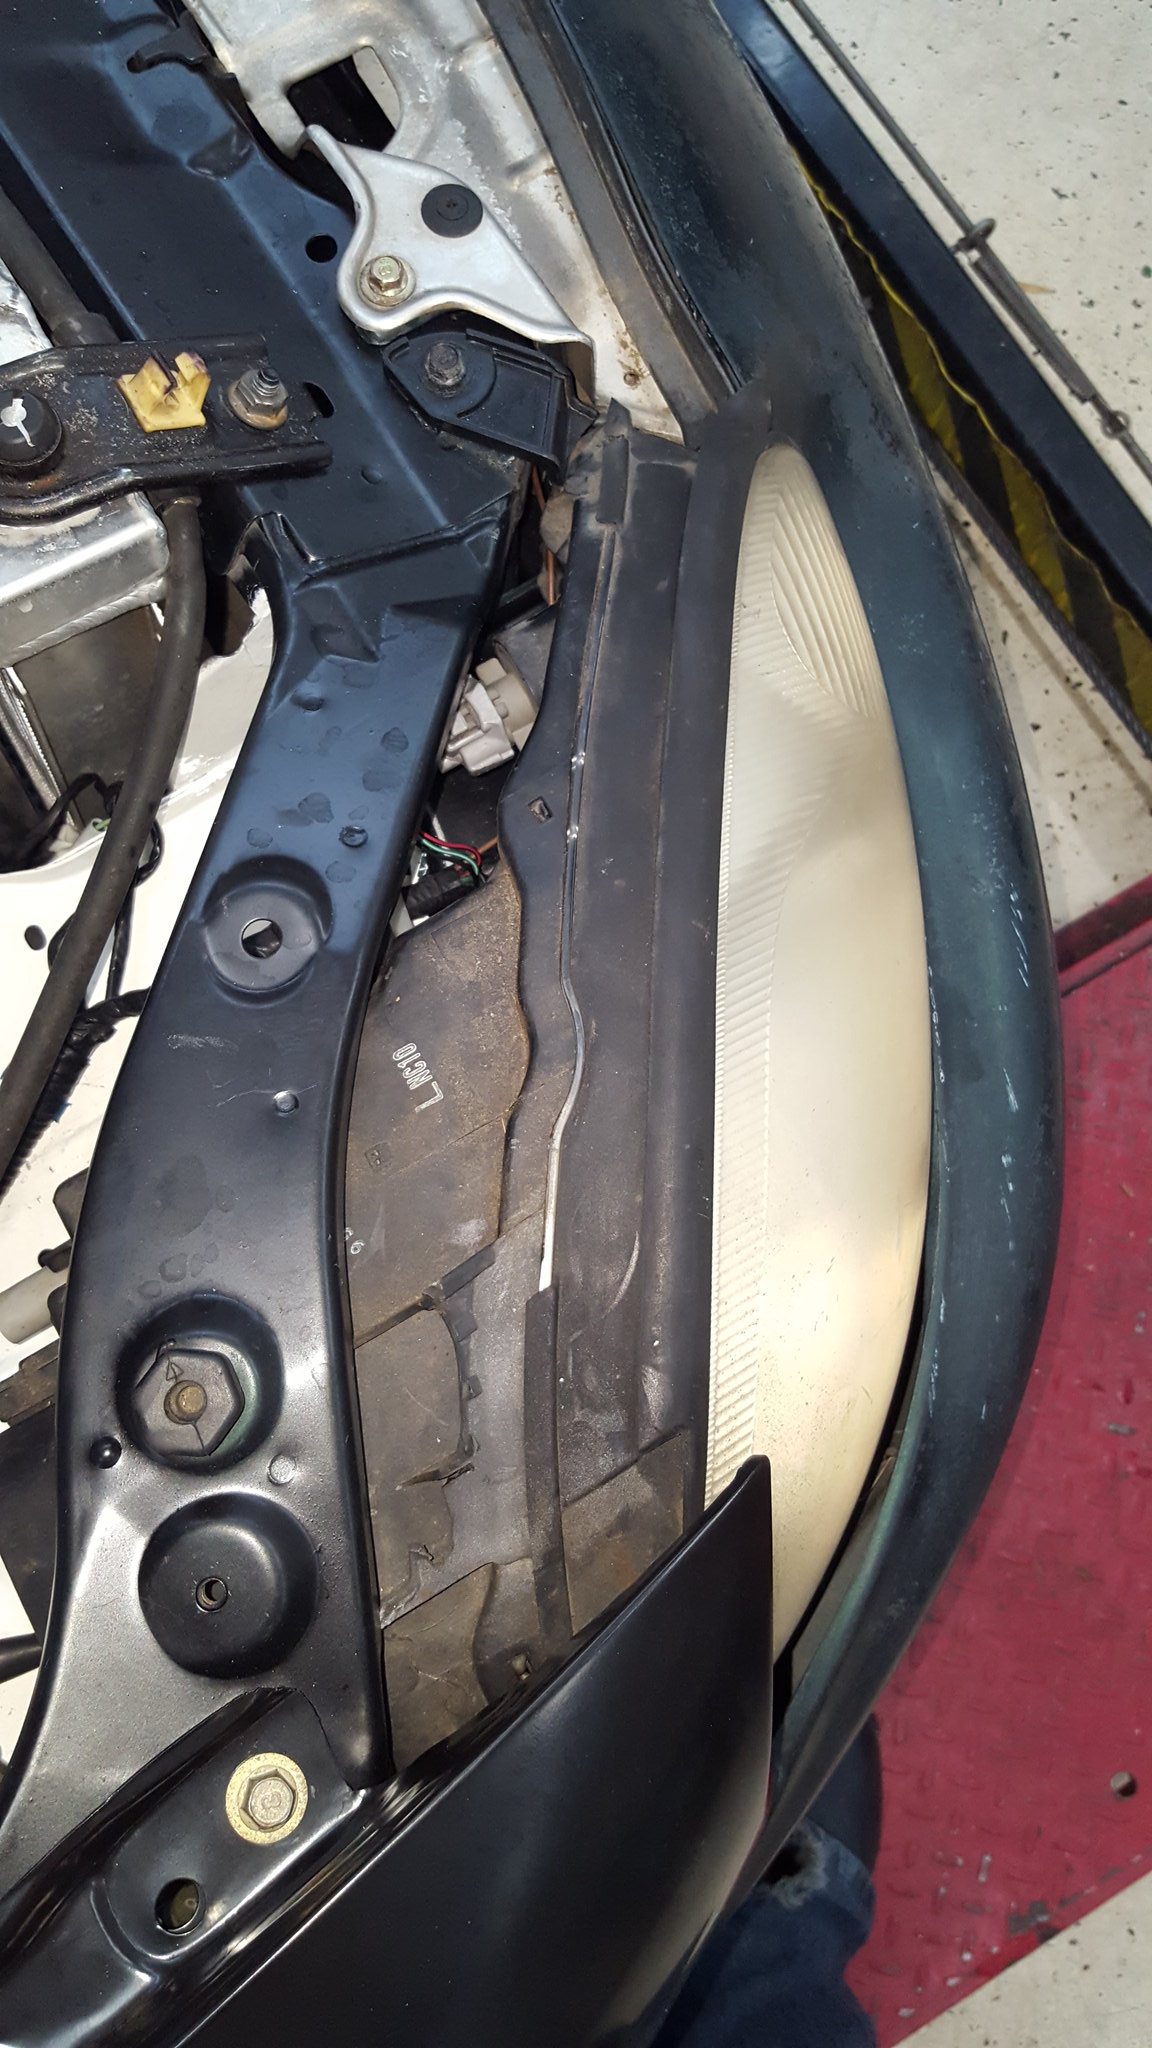
20181202_161735 by Michael Crawford, on Flickr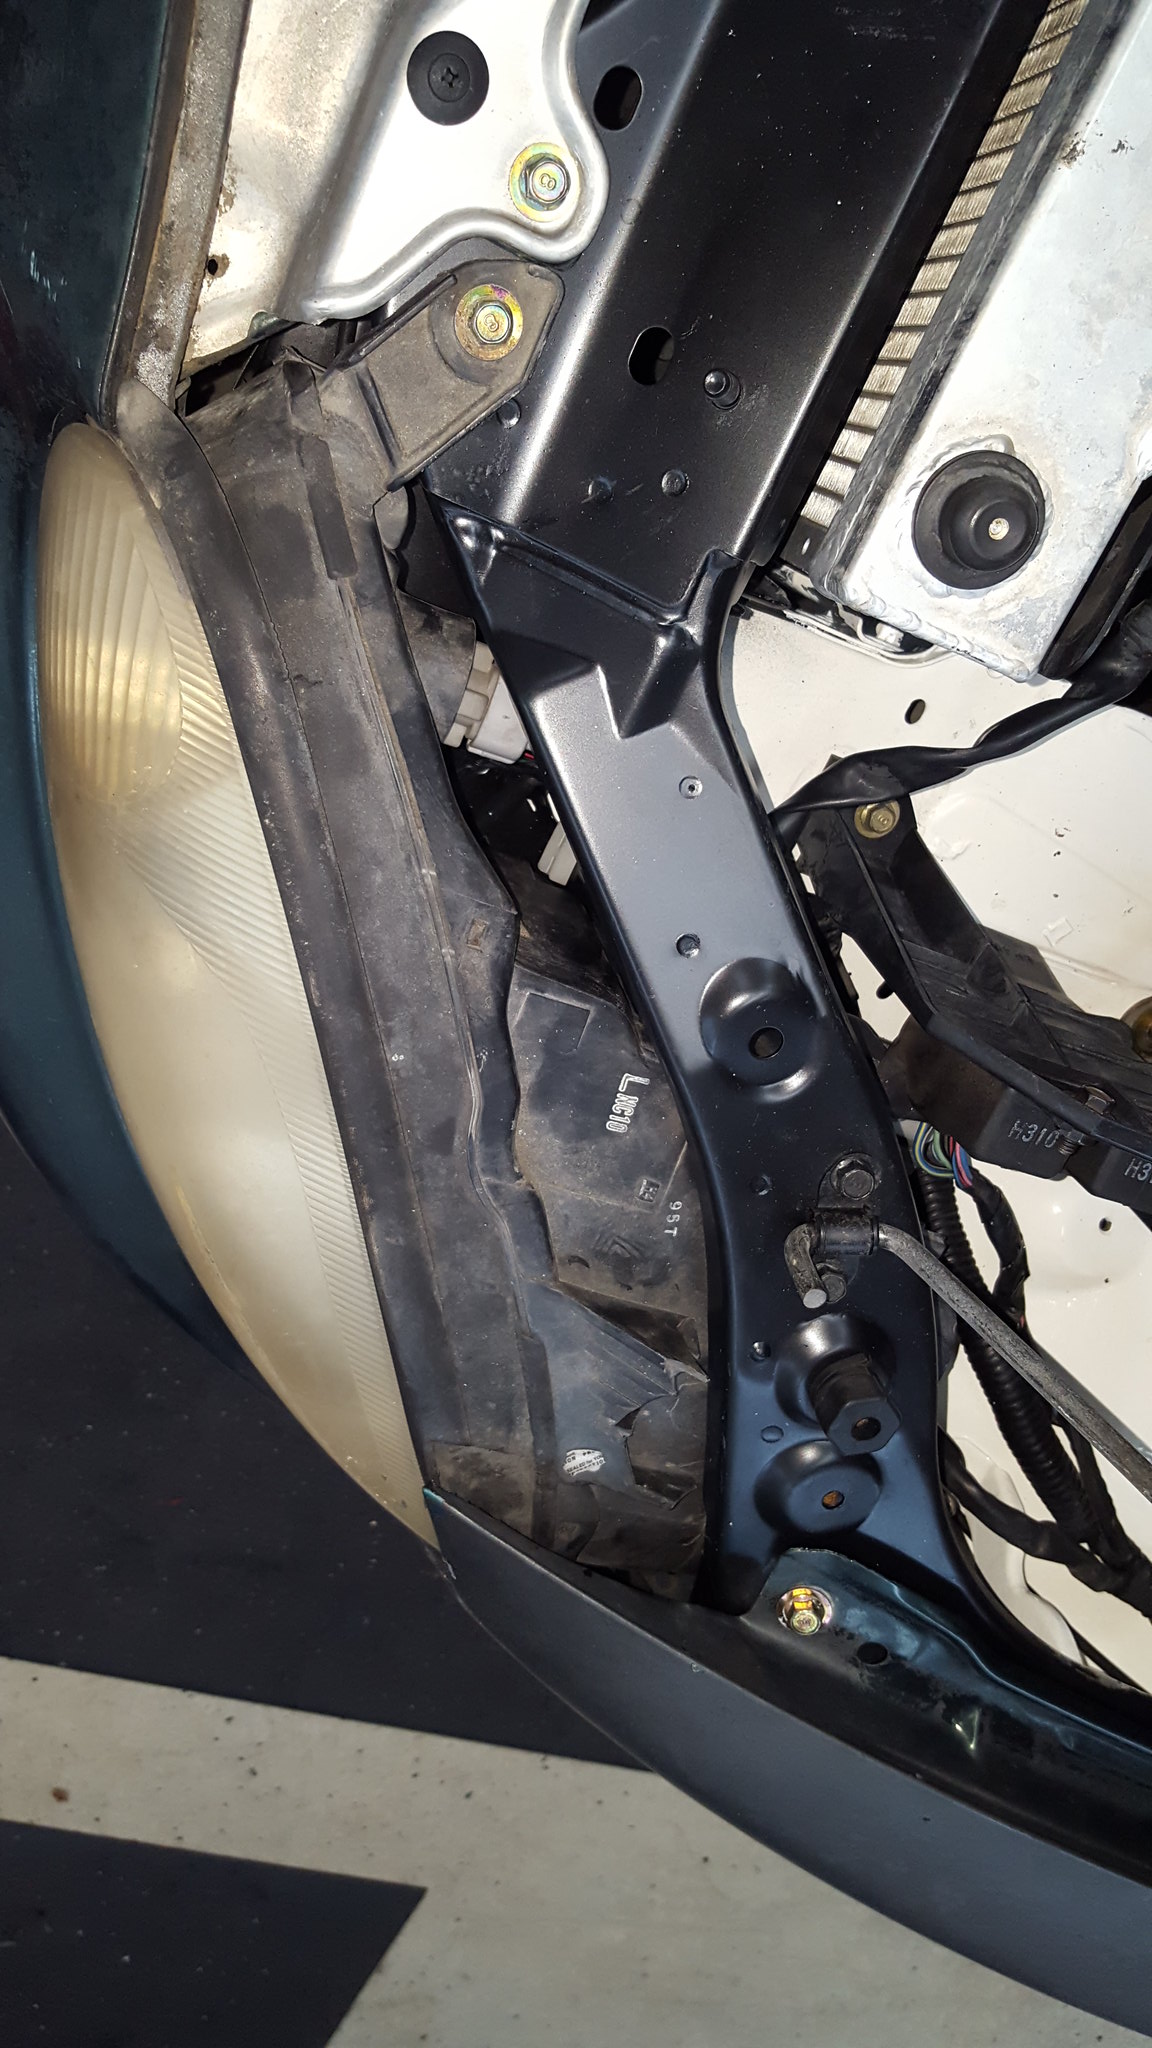
20181202_161742 by Michael Crawford, on Flickr
20181202_161754 by Michael Crawford, on Flickr
20181202_152829 by Michael Crawford, on Flickr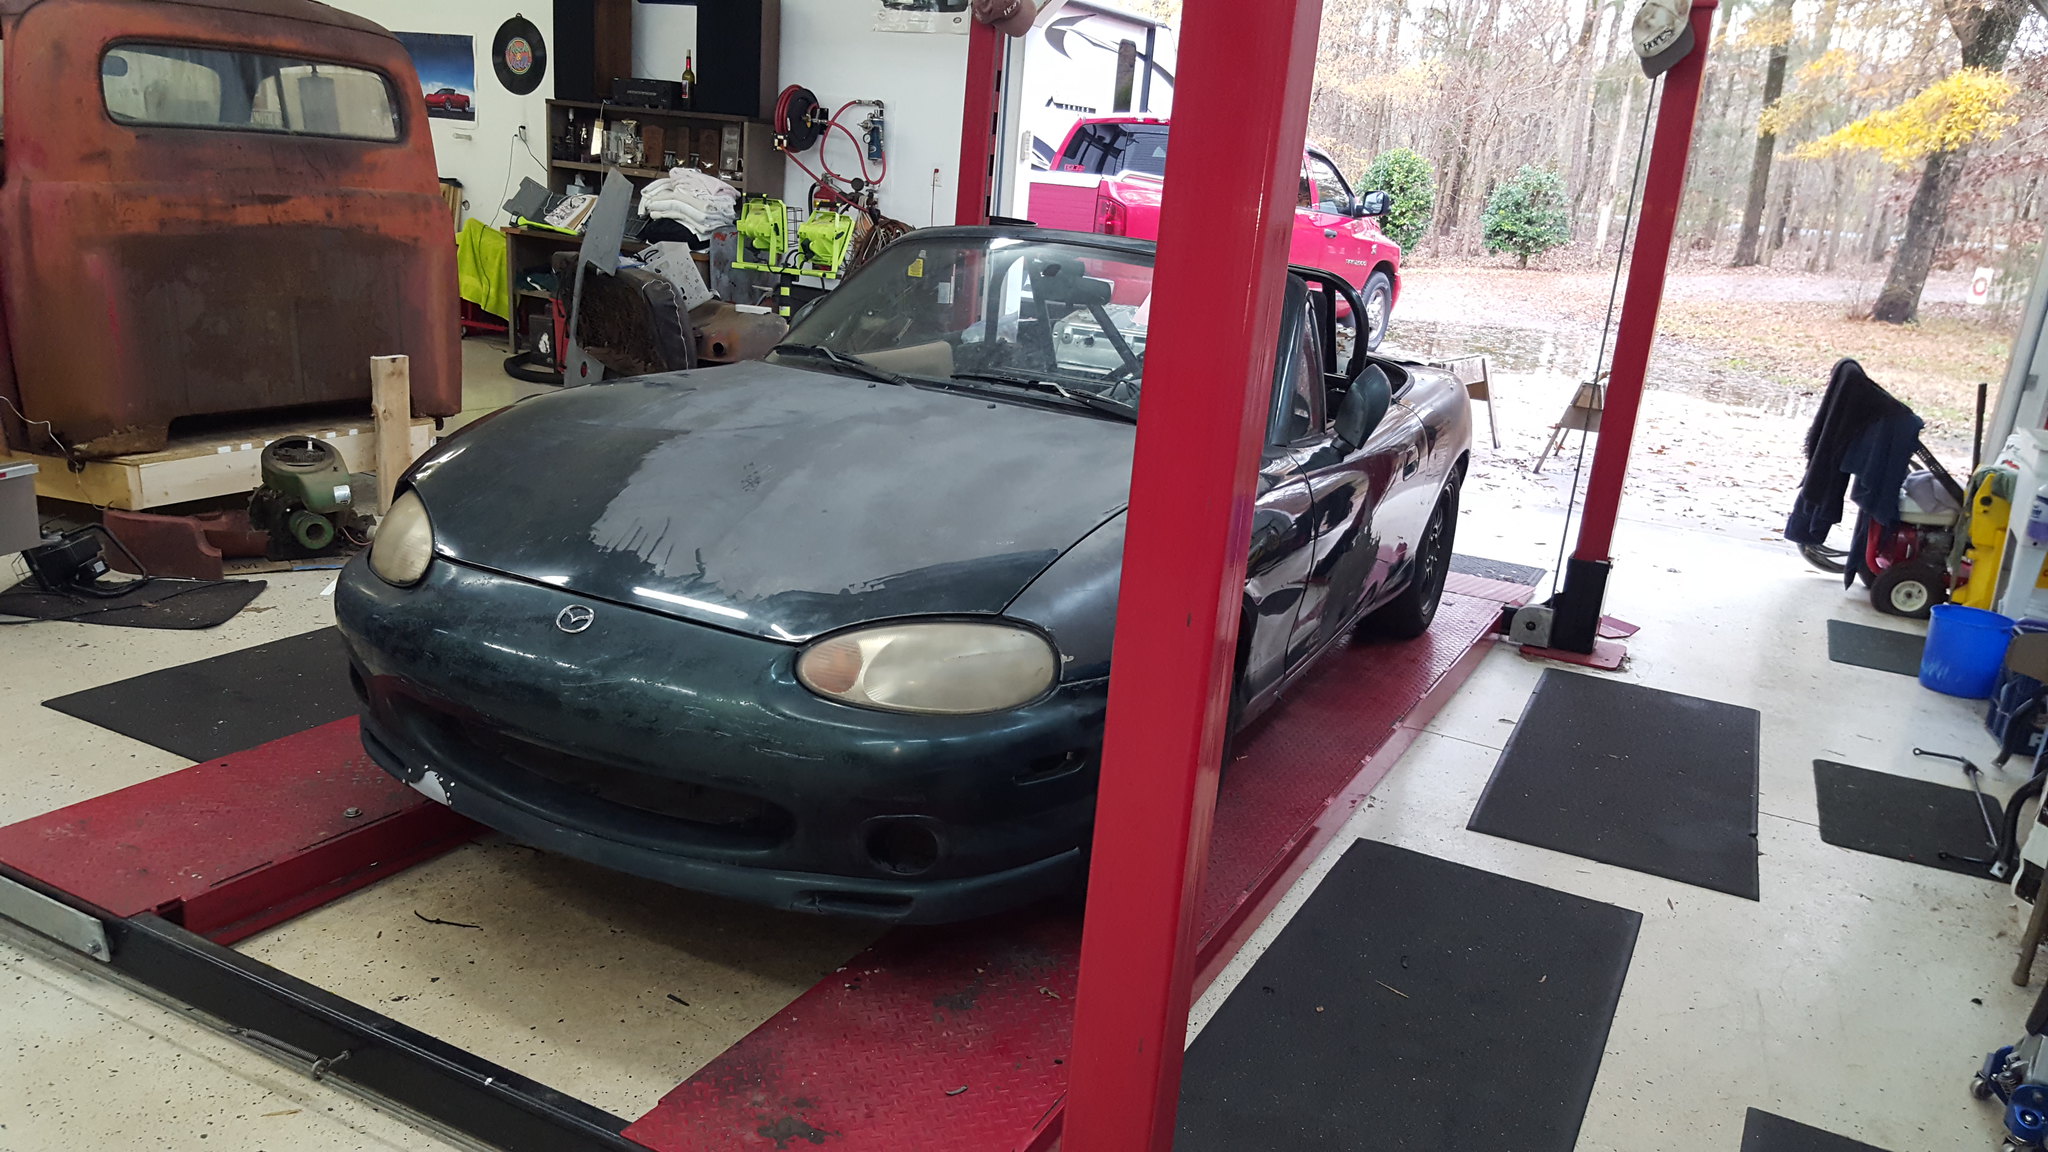
20181202_161617 by Michael Crawford, on Flickr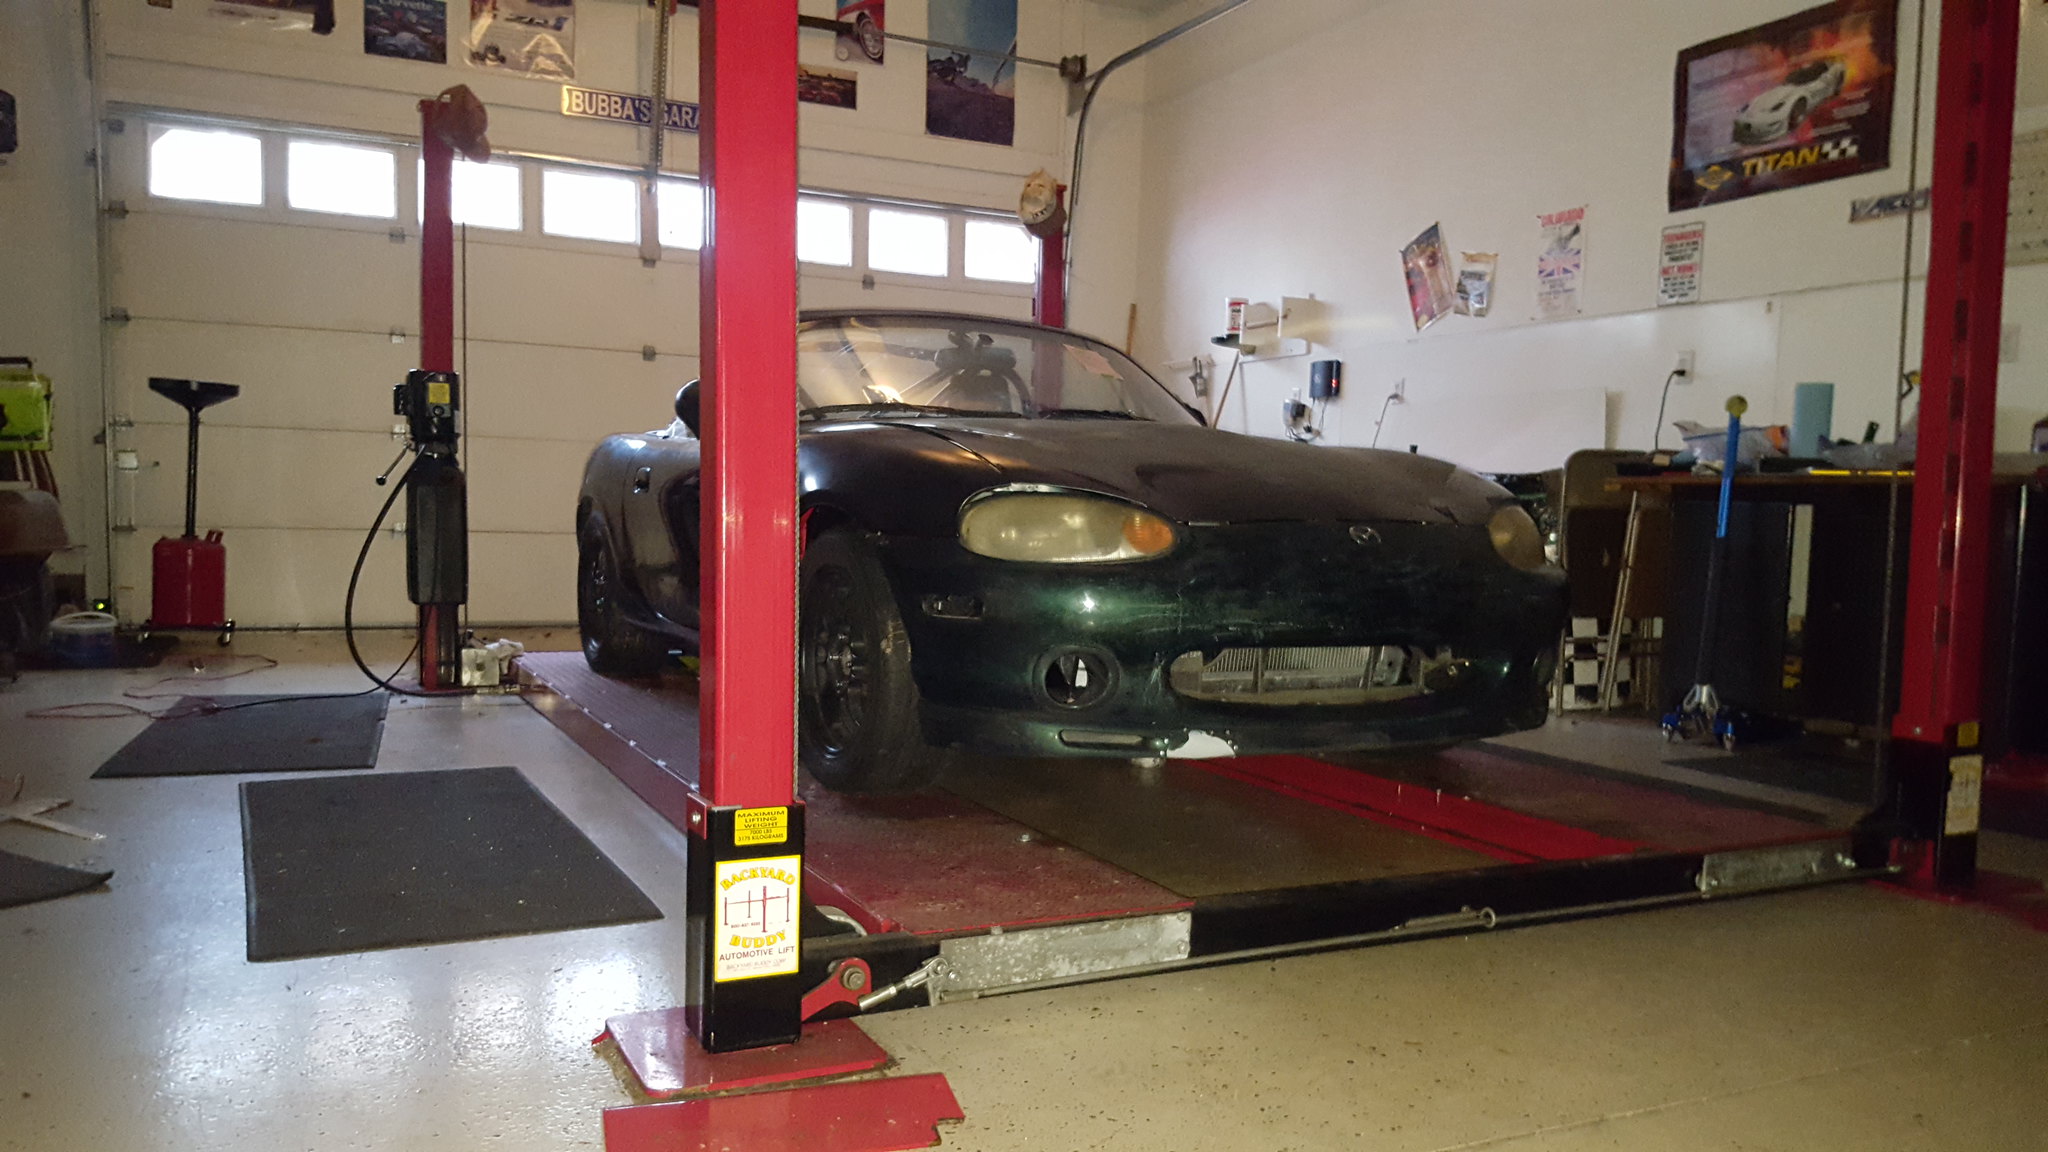
20181202_162040 by Michael Crawford, on Flickr But, were definitely getting close!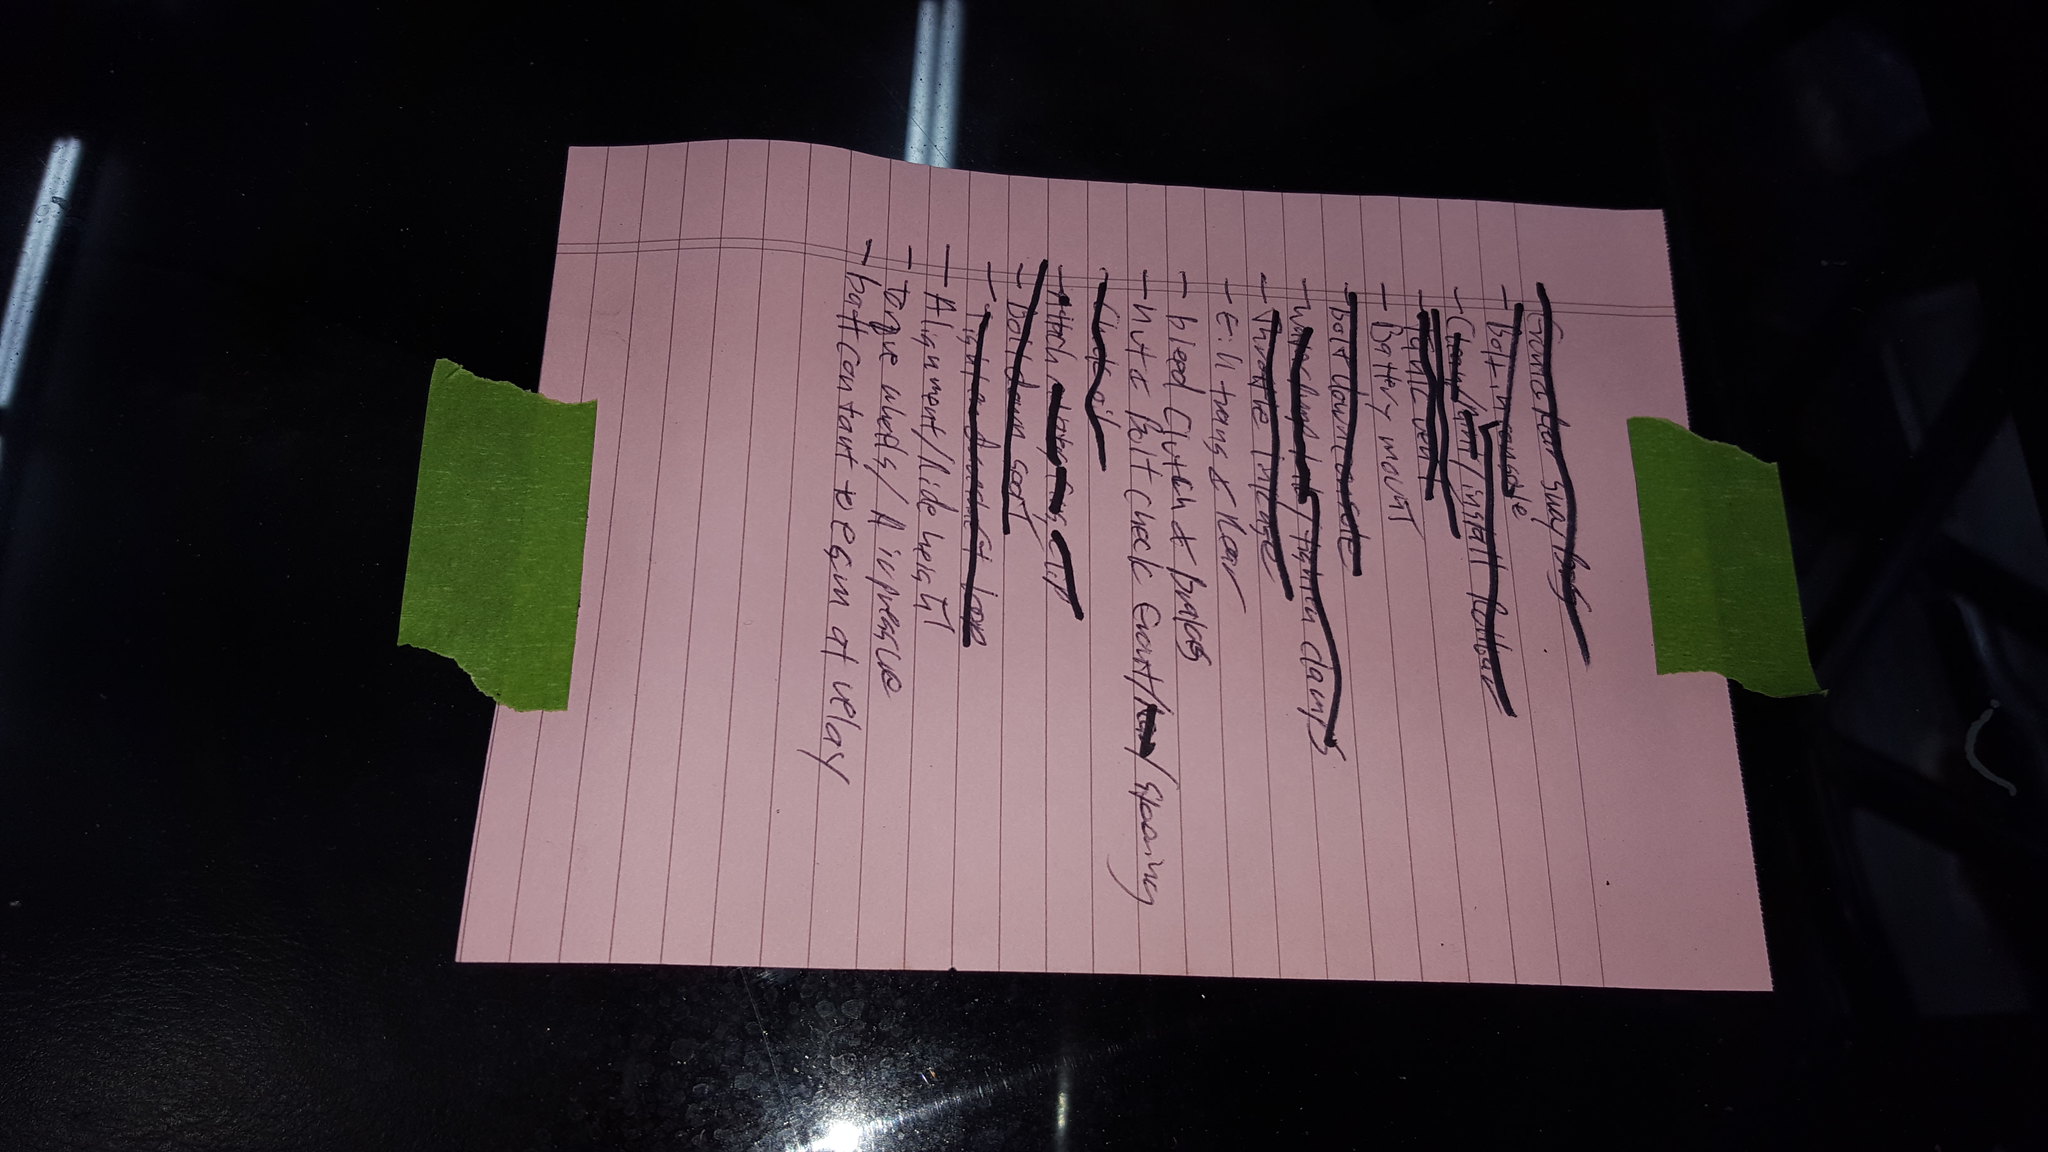
20181202_161637 by Michael Crawford, on Flickr
Reply
0
0
12-16-2018, 06:01 PM
#72
Junior Member
Thread Starter
Join Date: Nov 2017
Posts: 112
Total Cats: 7
Challenge budget so farrevious challenge budget: 1911.23 recoup total: 820new money:silicone 90 degree intake elbow, ebay: 8.90pair of tilton master cylenders from facebook marketplace (2x for 60, used 1) 30 Recoup: 820
new total: 1950.13alright, when we left off I had finished making sway bars. Dad painted, and I reinstalled.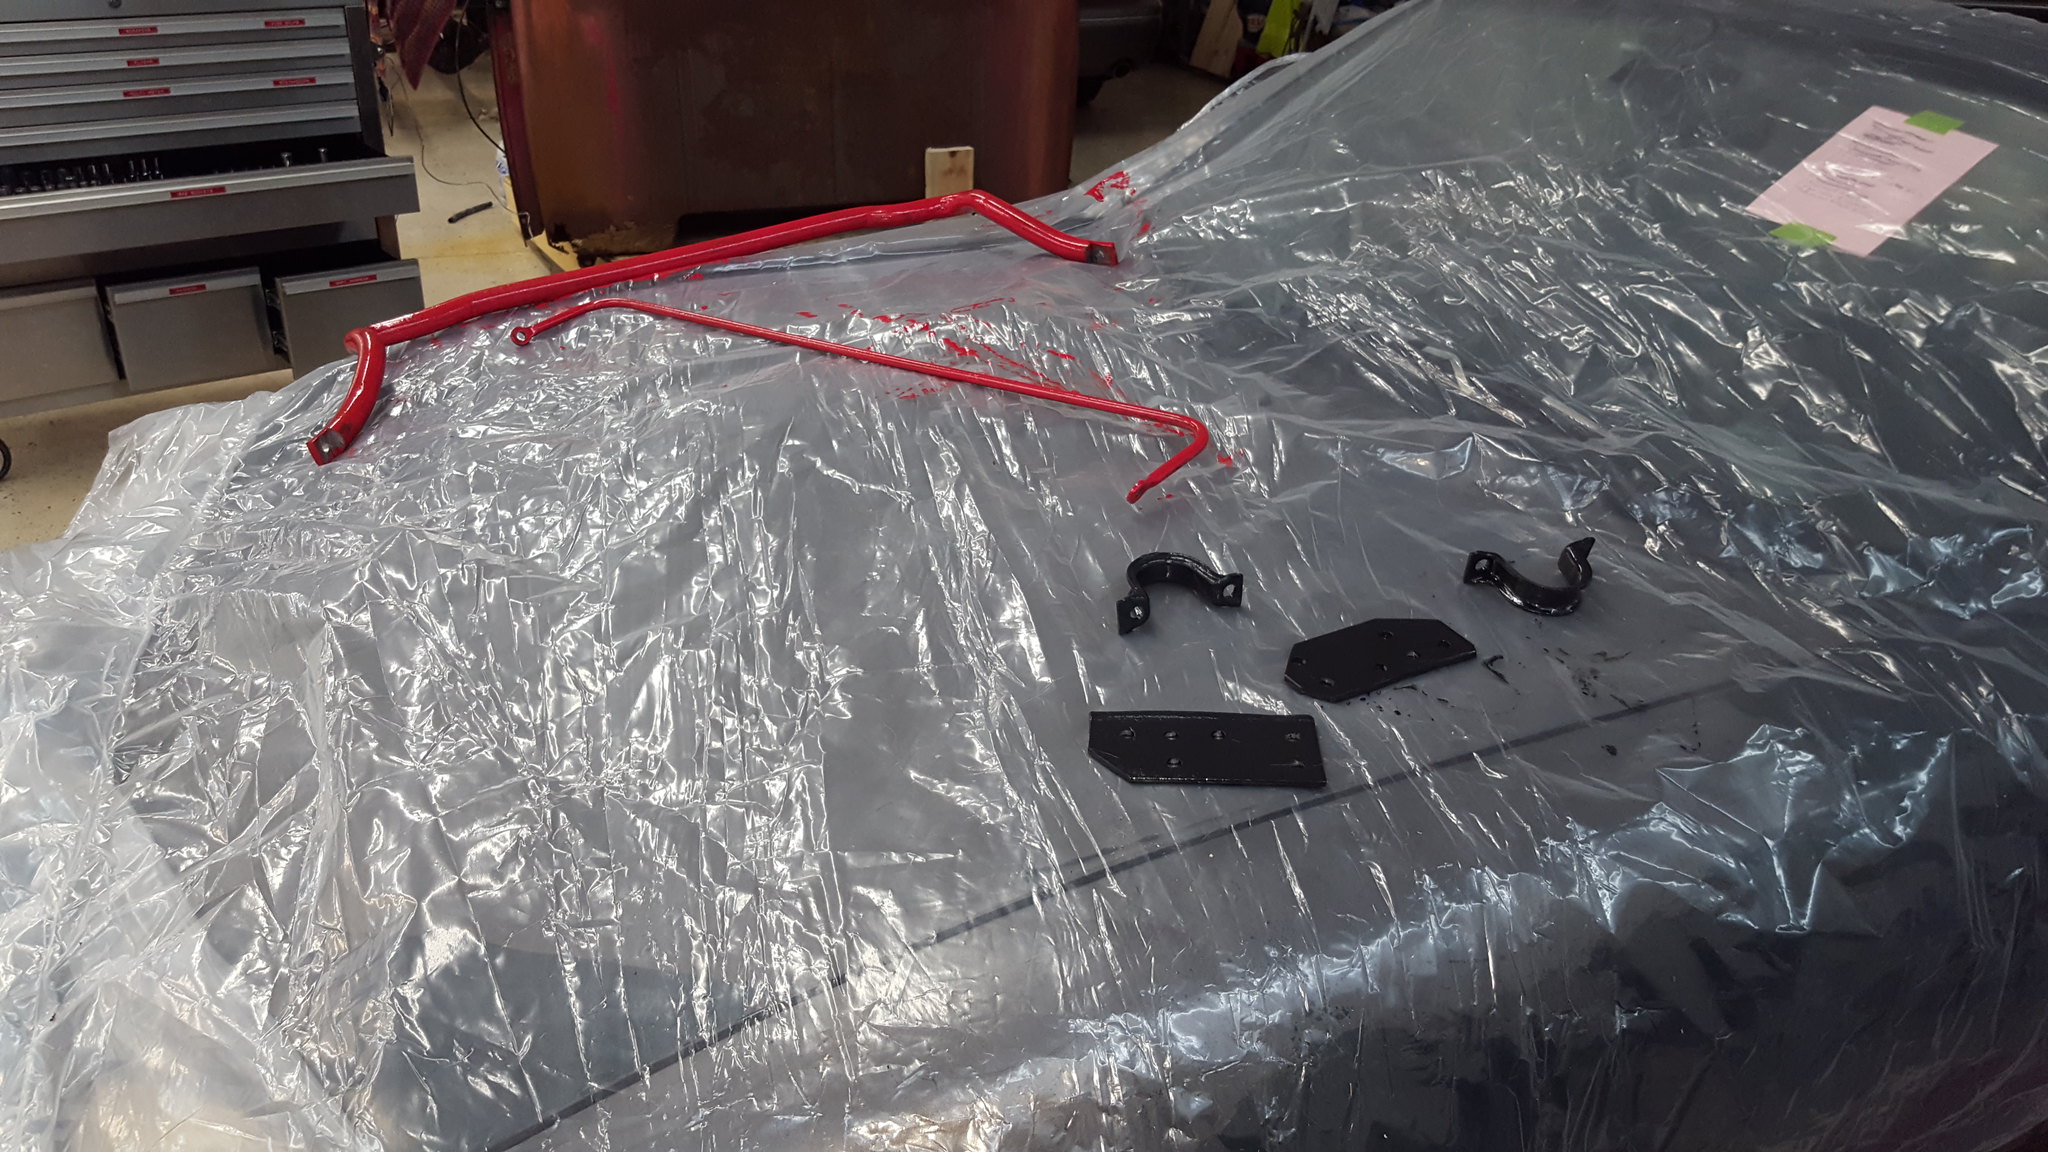
20181207_174036 by Michael Crawford, on Flickr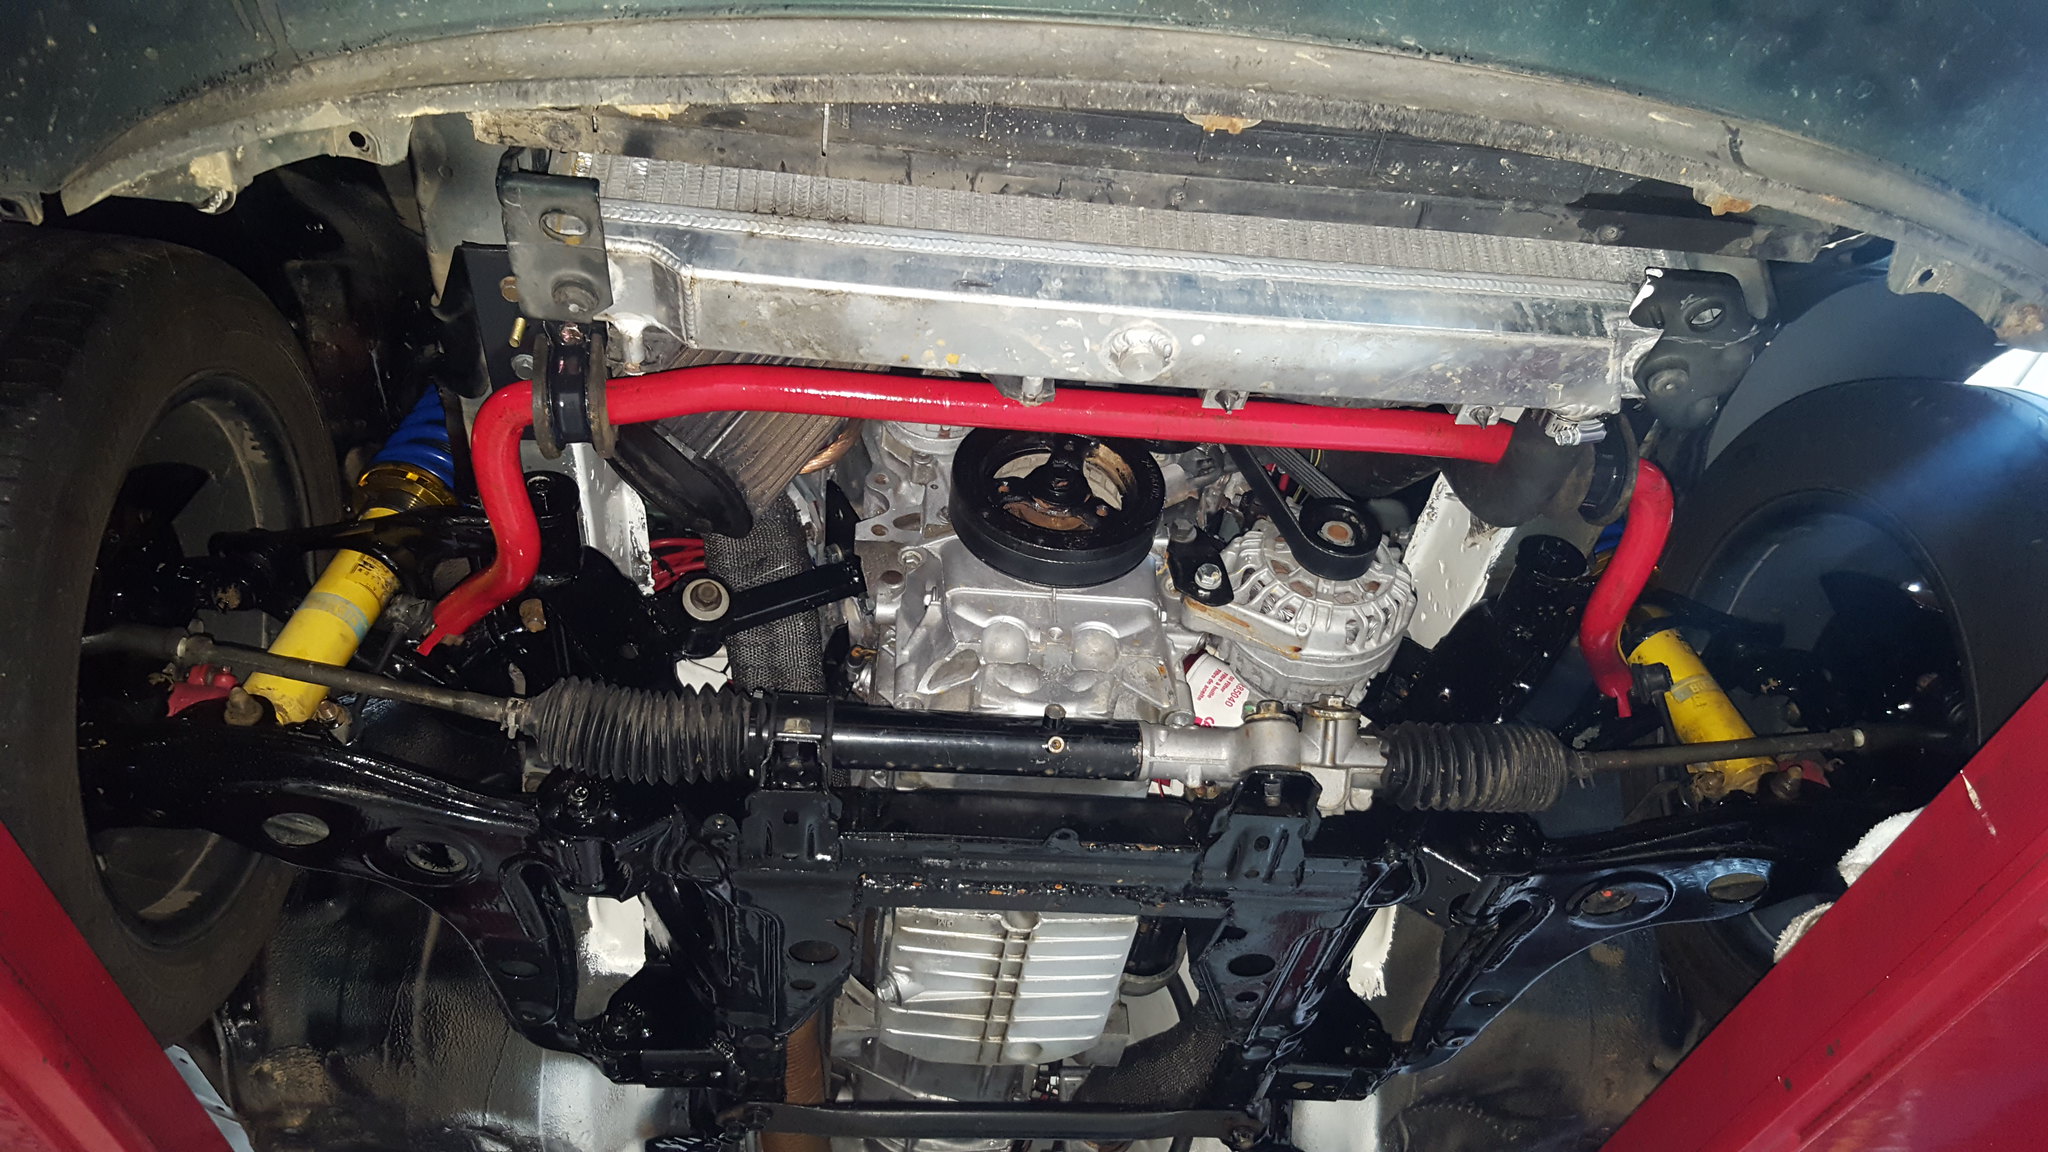
20181207_203557 by Michael Crawford, on Flickrred, because we all know red is faster than other colors.We also were having clutch issues. No matter what we did, we could not get the clutch to disengage. We reverse bled, gravit bled, pressure bled, two man....it boiled down to the fact that the miata clutch master just wasnt big enough. Seems that 7/8 is what is needed. So I spent far too much time trying t0 find a cheap and readily availible one. Finally came across a facebook marketplace ad for a pair of tilton masters for $60.
Screenshot_20181212-195551 by Michael Crawford, on Flickrbought them in a ymca parking lot at way too late at night, in the snow, 2 hours from home. Should've actually inspected them, as they were both seized up. So I blew them apart after soaking, and the bores and rubber were pretty much spotless inside. I think water and crap got inside and created just enough corrosion to cause problems.7/8 is the one I used initially, fully expecting to need the 1 inch. I removed the cruise and upward travel limiters while I had the clutch pedal out for a little more stroke, slotted the holes on the body of the master to fit the miata stud pattern, used the stock clutch master reservoir and a chunk of 3/8 fuel line as well as a couple of washers for install. The hole in the firewall needed opened up a little, and I did that with an air file. The masters came without the fittings, and tilton told me they were an AN style fitting. I don't have any of those, but I had a tube nut and some scrap nicopp line from plumbing the 49 ford in the background of the whole build thread. A bubble flare was made, and it seals well enough for what it is. I still need to make a bracket for the reservoir, and I re-tapped the miata clevis to fit the tilton master. But by god, it worked, and hasn't even been bled yet!!!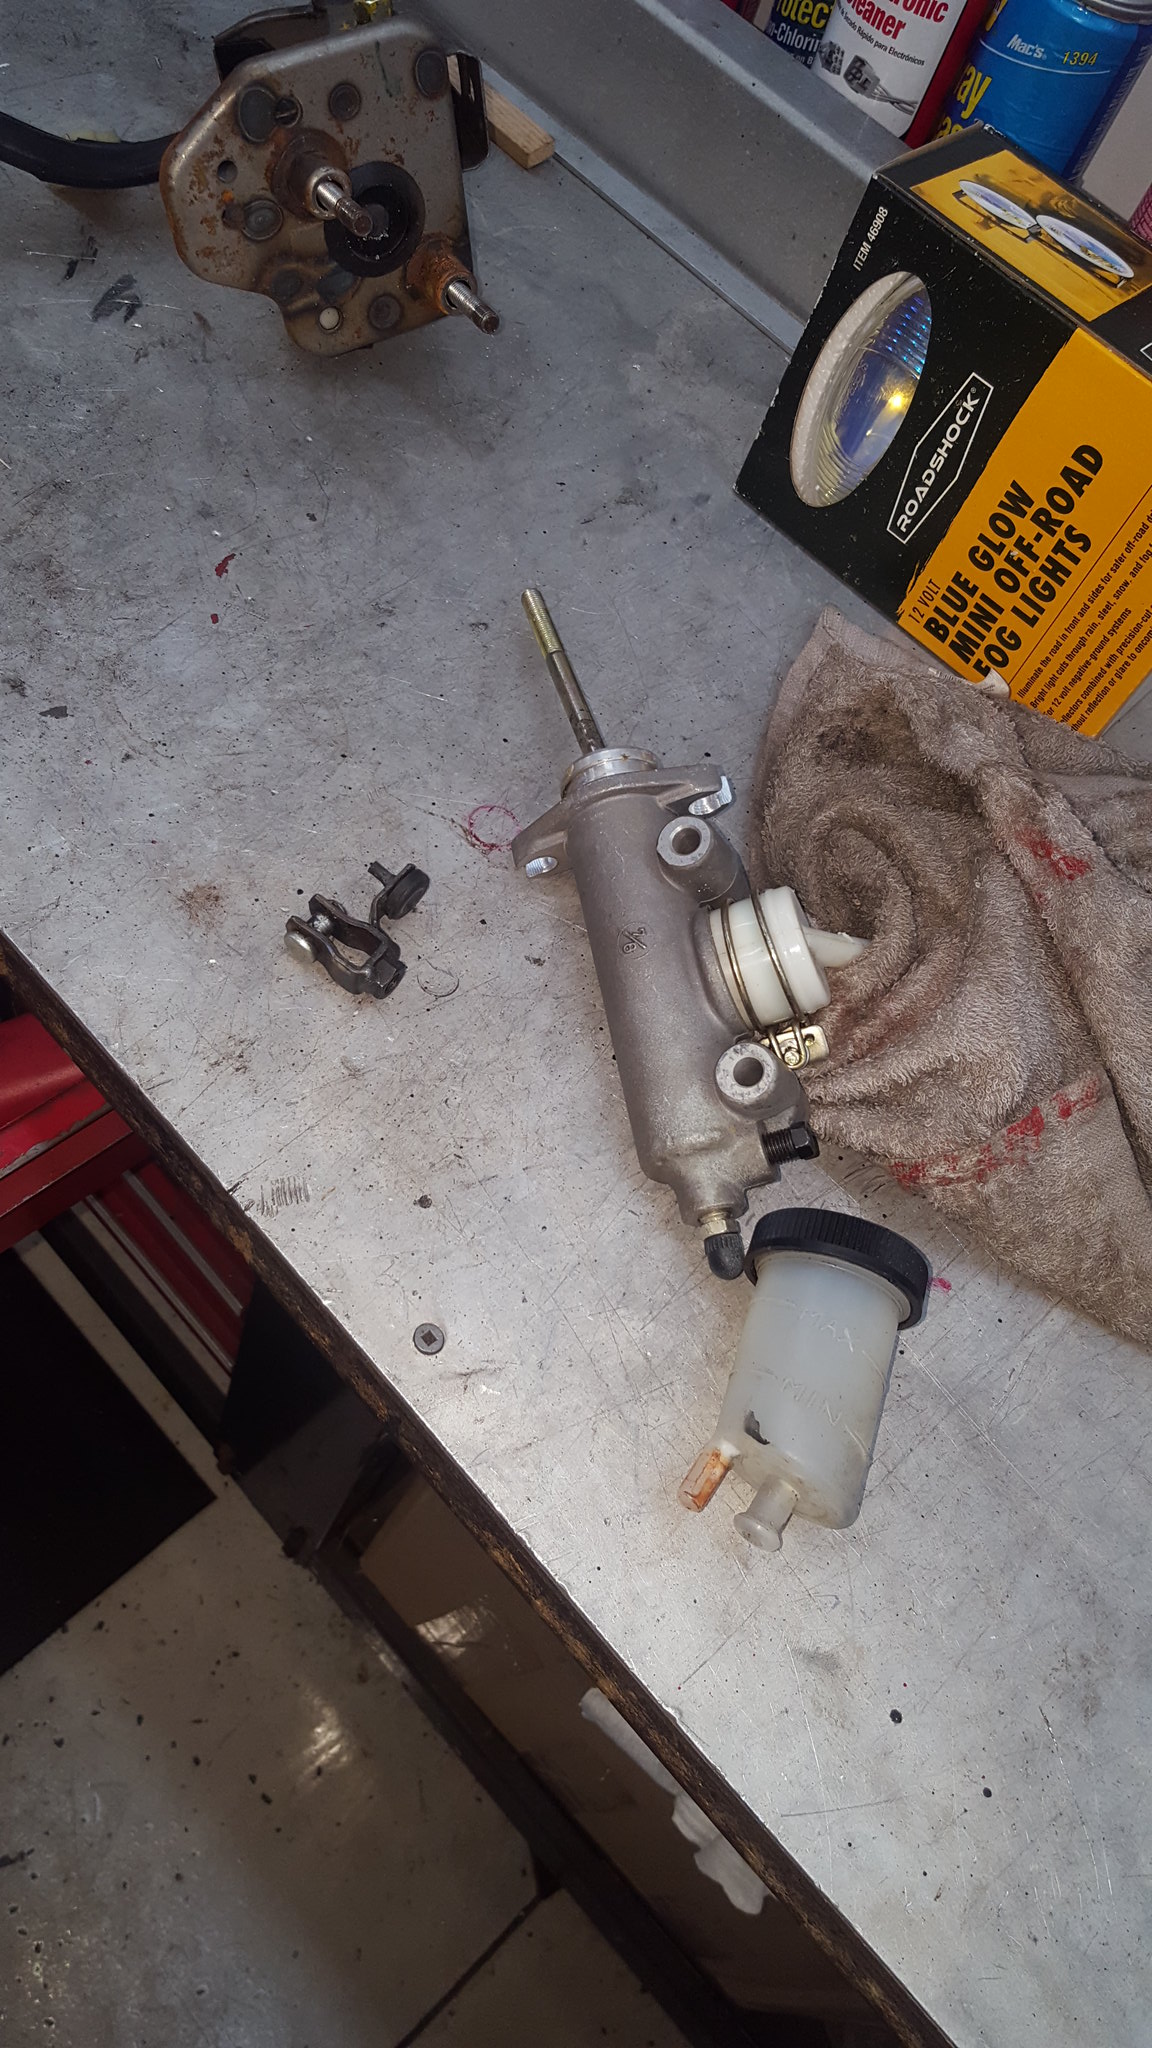
20181216_140702 by Michael Crawford, on Flickr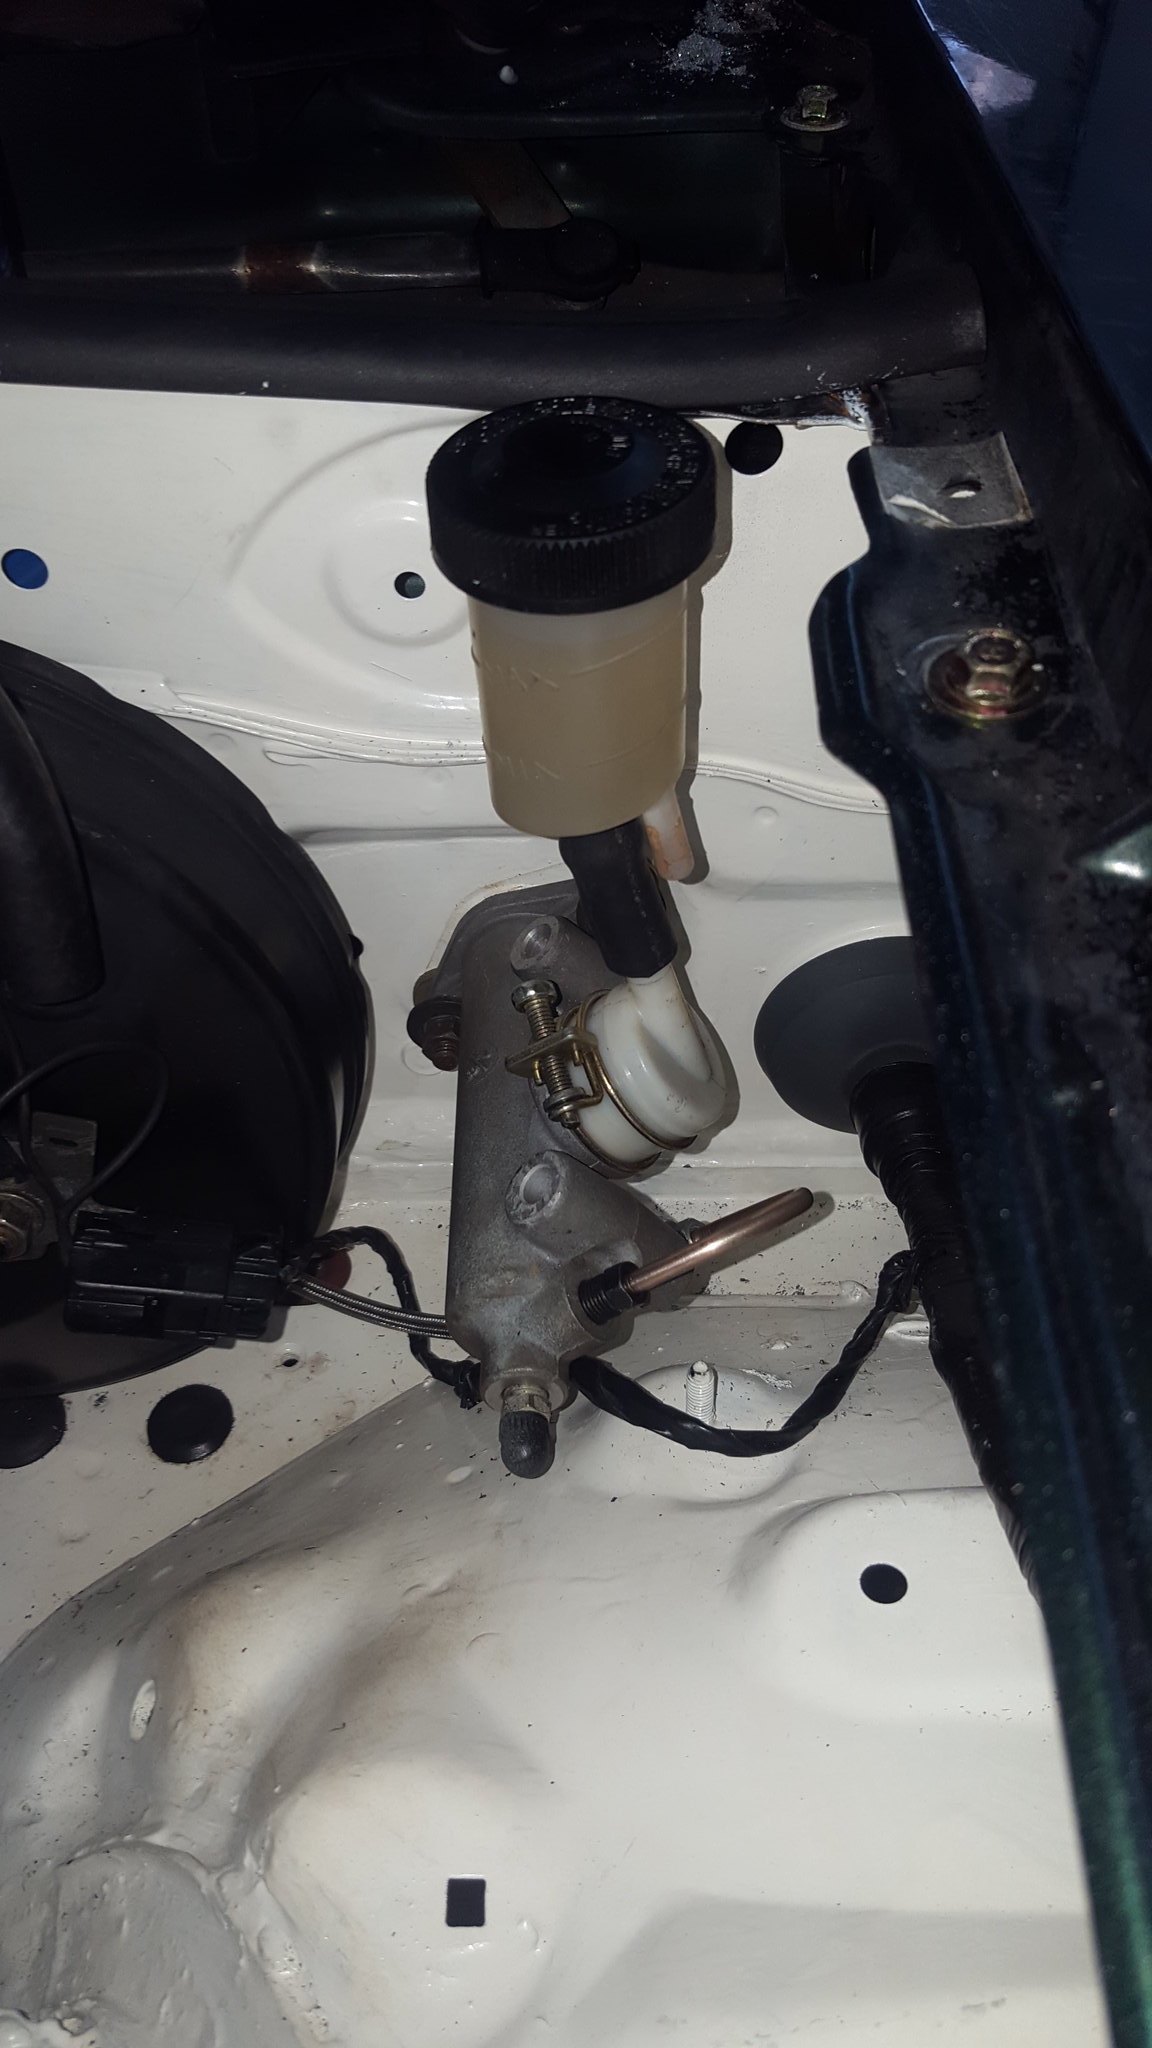
20181216_152629 by Michael Crawford, on FlickrI went ahead and filled the trans now that I know everything works. I cannot get to the proper fill/drain plugs on the passengers side, because im a dumbass and didn't give myself any way to get to them. So I used the reverse light switch hole on the drivers side. Hopefully it works right....I also filled the rear diff.Finished today with making the CAI clear the hood, and everything else. Ordered the cheapest coupler in 3 inch 90 degree I could find on ebay (black was more, red and blue were the cheapest). Used a piece of 3 inch exhaust tube to mate the silicone to the buick parts, and ran the filter behind the drivers side headlight. Just no good way to go on the passengers side, and the drivers side made everything fall into place. Its tight, and needs some mounts to keep it from moving around, but it clears everything I need it to. And the hood shuts easily.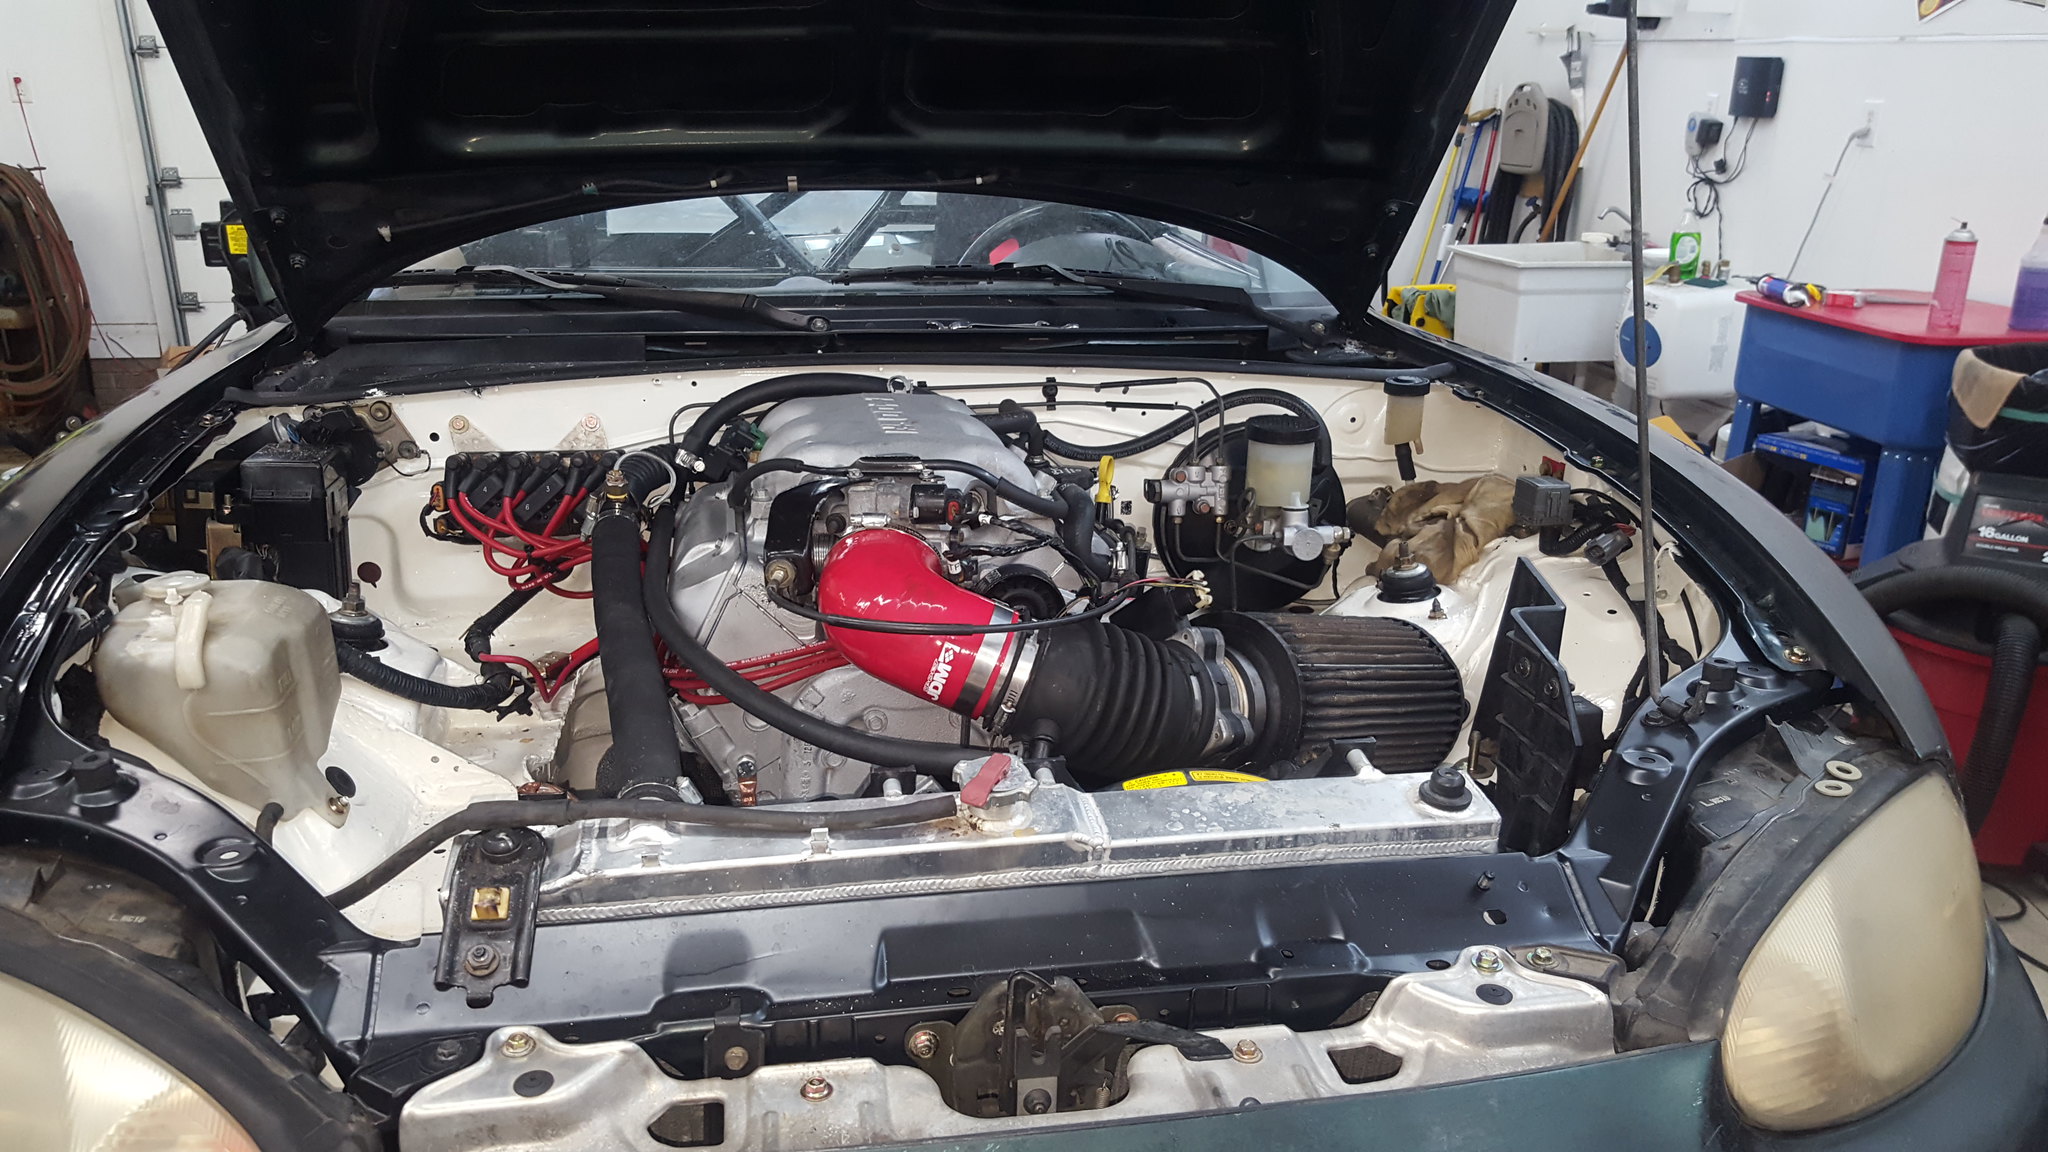
20181216_155157 by Michael Crawford, on Flickr
20181216_155220 by Michael Crawford, on Flickrdad and I do a nut and bolt check, rough alignment, bleed the clutch, and try to test drive before Christmas this week. My family and I leave Friday morning at holy crap its early, and I have to work all week. So its going to be tight. But I proved today that it moves a foot in either direction under its own power! So its possible....
revious challenge budget: 1911.23 recoup total: 820new money:silicone 90 degree intake elbow, ebay: 8.90pair of tilton master cylenders from facebook marketplace (2x for 60, used 1) 30 Recoup: 820new total: 1950.13alright, when we left off I had finished making sway bars. Dad painted, and I reinstalled.
20181207_174036 by Michael Crawford, on Flickr
20181207_203557 by Michael Crawford, on Flickrred, because we all know red is faster than other colors.We also were having clutch issues. No matter what we did, we could not get the clutch to disengage. We reverse bled, gravit bled, pressure bled, two man....it boiled down to the fact that the miata clutch master just wasnt big enough. Seems that 7/8 is what is needed. So I spent far too much time trying t0 find a cheap and readily availible one. Finally came across a facebook marketplace ad for a pair of tilton masters for $60.
Screenshot_20181212-195551 by Michael Crawford, on Flickrbought them in a ymca parking lot at way too late at night, in the snow, 2 hours from home. Should've actually inspected them, as they were both seized up. So I blew them apart after soaking, and the bores and rubber were pretty much spotless inside. I think water and crap got inside and created just enough corrosion to cause problems.7/8 is the one I used initially, fully expecting to need the 1 inch. I removed the cruise and upward travel limiters while I had the clutch pedal out for a little more stroke, slotted the holes on the body of the master to fit the miata stud pattern, used the stock clutch master reservoir and a chunk of 3/8 fuel line as well as a couple of washers for install. The hole in the firewall needed opened up a little, and I did that with an air file. The masters came without the fittings, and tilton told me they were an AN style fitting. I don't have any of those, but I had a tube nut and some scrap nicopp line from plumbing the 49 ford in the background of the whole build thread. A bubble flare was made, and it seals well enough for what it is. I still need to make a bracket for the reservoir, and I re-tapped the miata clevis to fit the tilton master. But by god, it worked, and hasn't even been bled yet!!!
20181216_140702 by Michael Crawford, on Flickr
20181216_152629 by Michael Crawford, on FlickrI went ahead and filled the trans now that I know everything works. I cannot get to the proper fill/drain plugs on the passengers side, because im a dumbass and didn't give myself any way to get to them. So I used the reverse light switch hole on the drivers side. Hopefully it works right....I also filled the rear diff.Finished today with making the CAI clear the hood, and everything else. Ordered the cheapest coupler in 3 inch 90 degree I could find on ebay (black was more, red and blue were the cheapest). Used a piece of 3 inch exhaust tube to mate the silicone to the buick parts, and ran the filter behind the drivers side headlight. Just no good way to go on the passengers side, and the drivers side made everything fall into place. Its tight, and needs some mounts to keep it from moving around, but it clears everything I need it to. And the hood shuts easily.
20181216_155157 by Michael Crawford, on Flickr
20181216_155220 by Michael Crawford, on Flickrdad and I do a nut and bolt check, rough alignment, bleed the clutch, and try to test drive before Christmas this week. My family and I leave Friday morning at holy crap its early, and I have to work all week. So its going to be tight. But I proved today that it moves a foot in either direction under its own power! So its possible....
Reply
0
0
12-26-2018, 08:07 PM
#73
Junior Member
Thread Starter
Join Date: Nov 2017
Posts: 112
Total Cats: 7
Challenge budget so farrevious challenge budget: 1950.13 recoup total: 820new money: 1 sheet .030 aluminum: .505 point harnesses (challenge budget exempt, but $54 on amazon) Recoup: 820
new total: 1950.53the last ten percent of work takes the other 90 percent of the time.So today doesn't look like 8 hours worth of work and thinking....first, I re-purposed some random engine bay bracket for a clutch master mount. Little cutting, little grinding, a pop rivet, and a couple of zip ties makes for a nice install that's hard to photograph because its hidden.
20181226_121347 by Michael Crawford, on Flickr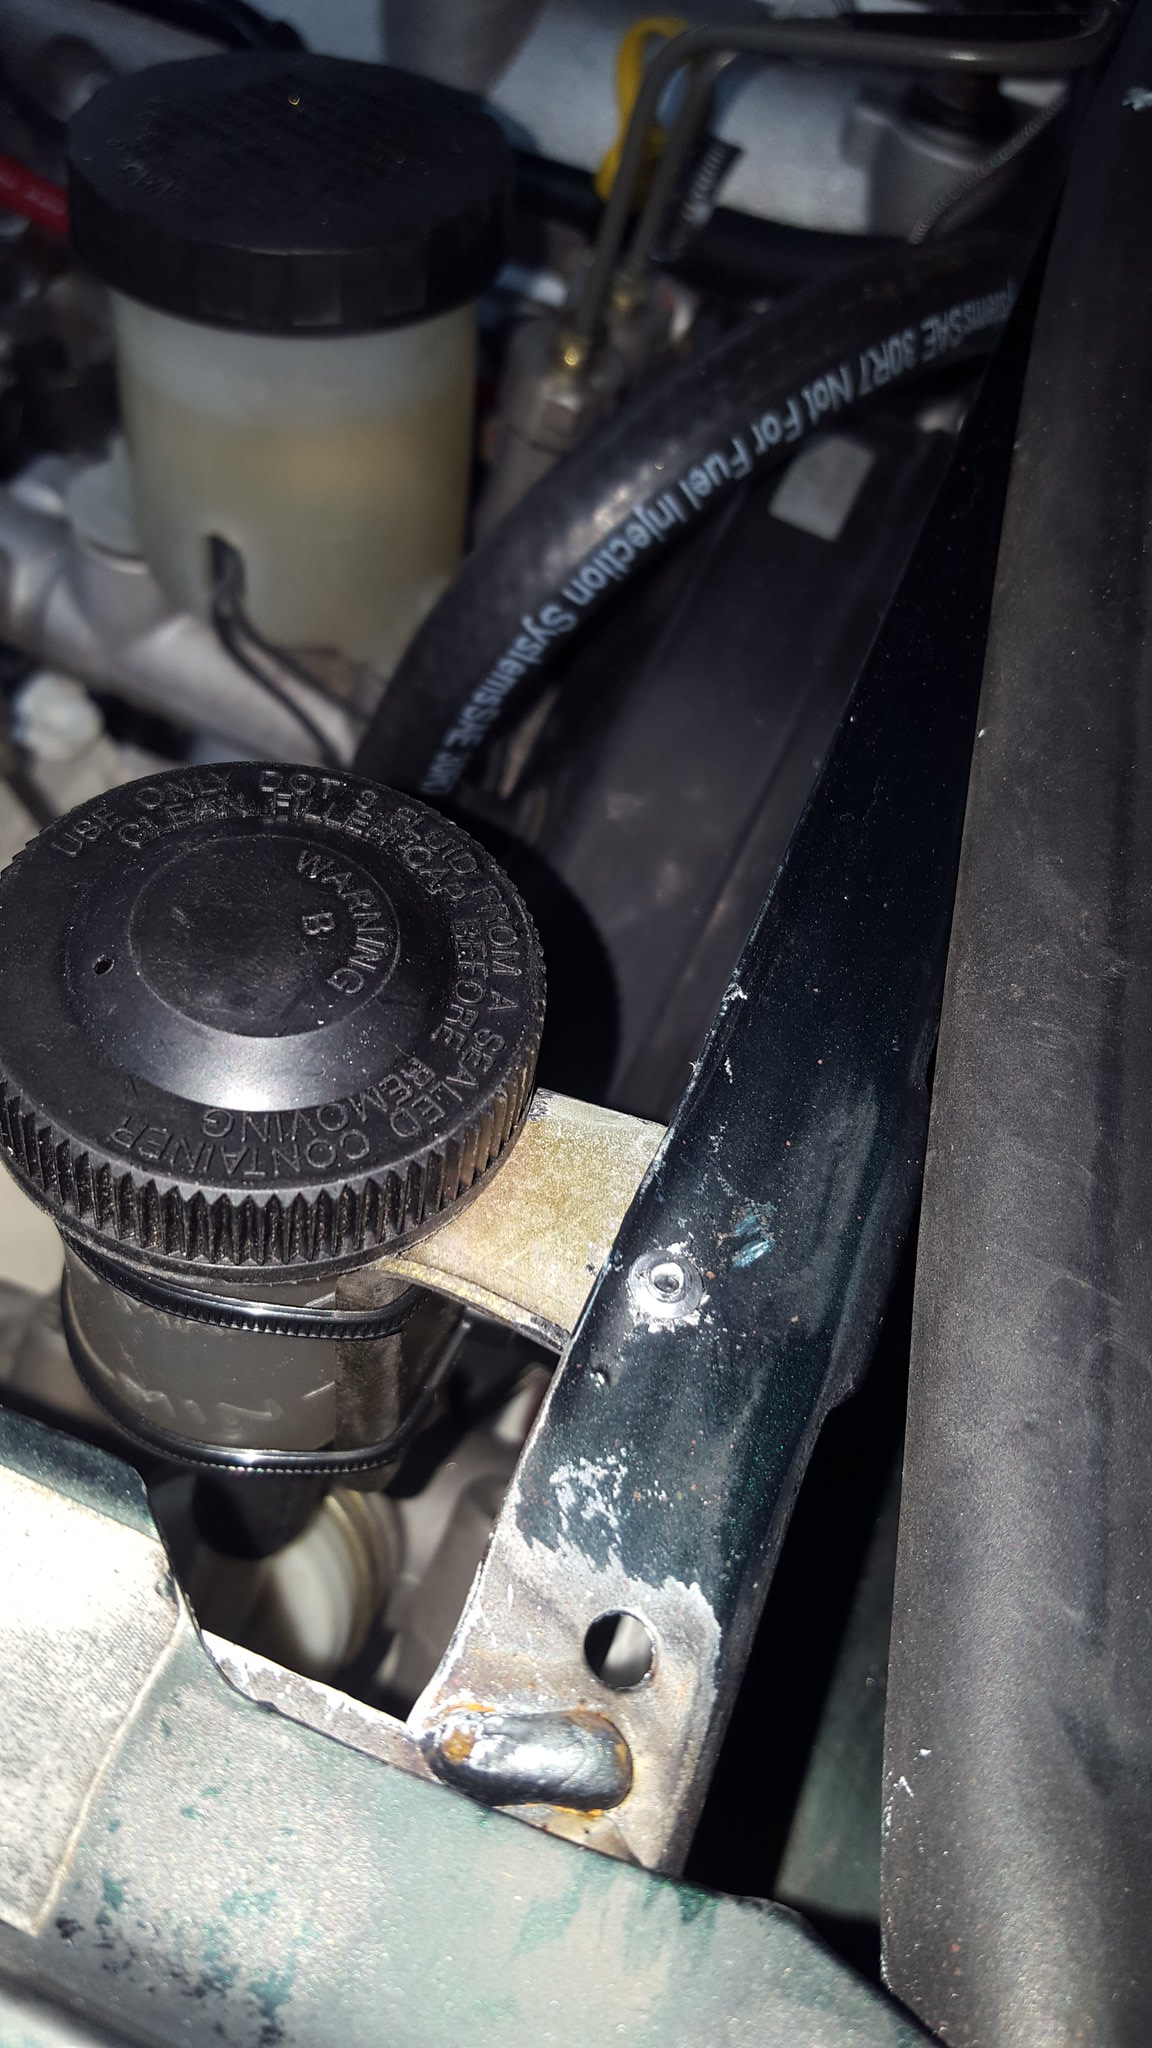
20181226_131250 by Michael Crawford, on Flickr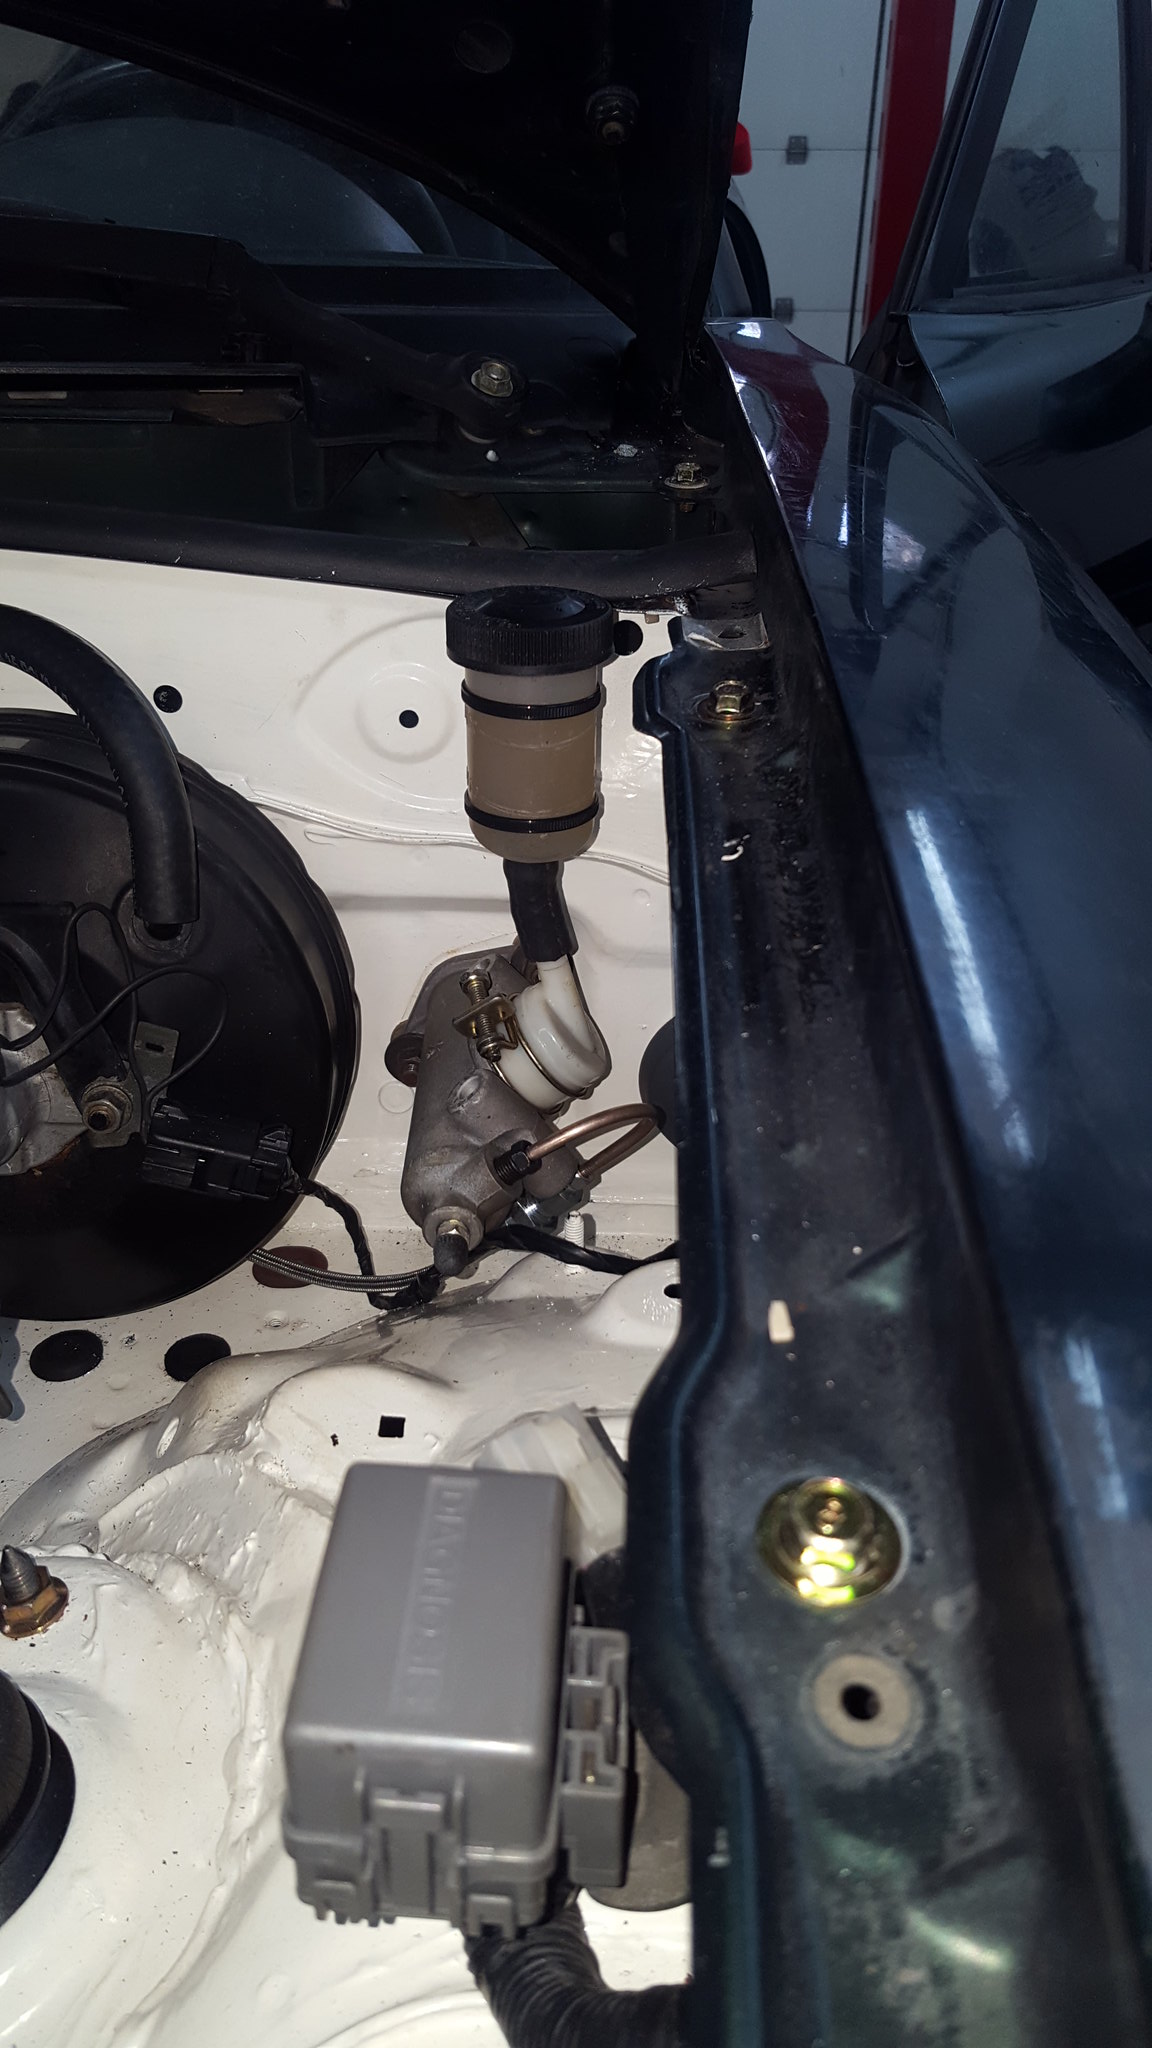
20181226_131257 by Michael Crawford, on Flickrnext, I finally made a mount for the upper radiator hose. Well, made is a little too strong a word. More like found a random sheet metal bracket in the 5 gallon bucket of random crap that lives in the corner. Worked perfect. The goal here was support, and to make the temp sending unit the highest point in the system. No matter what, the upper hose was going to trap air in the cooling system due to basic design issues, so I figured I may as well as use it to my benefit. Bolted it down to one of the original coil mounting studs, couple of zipties, and good to go!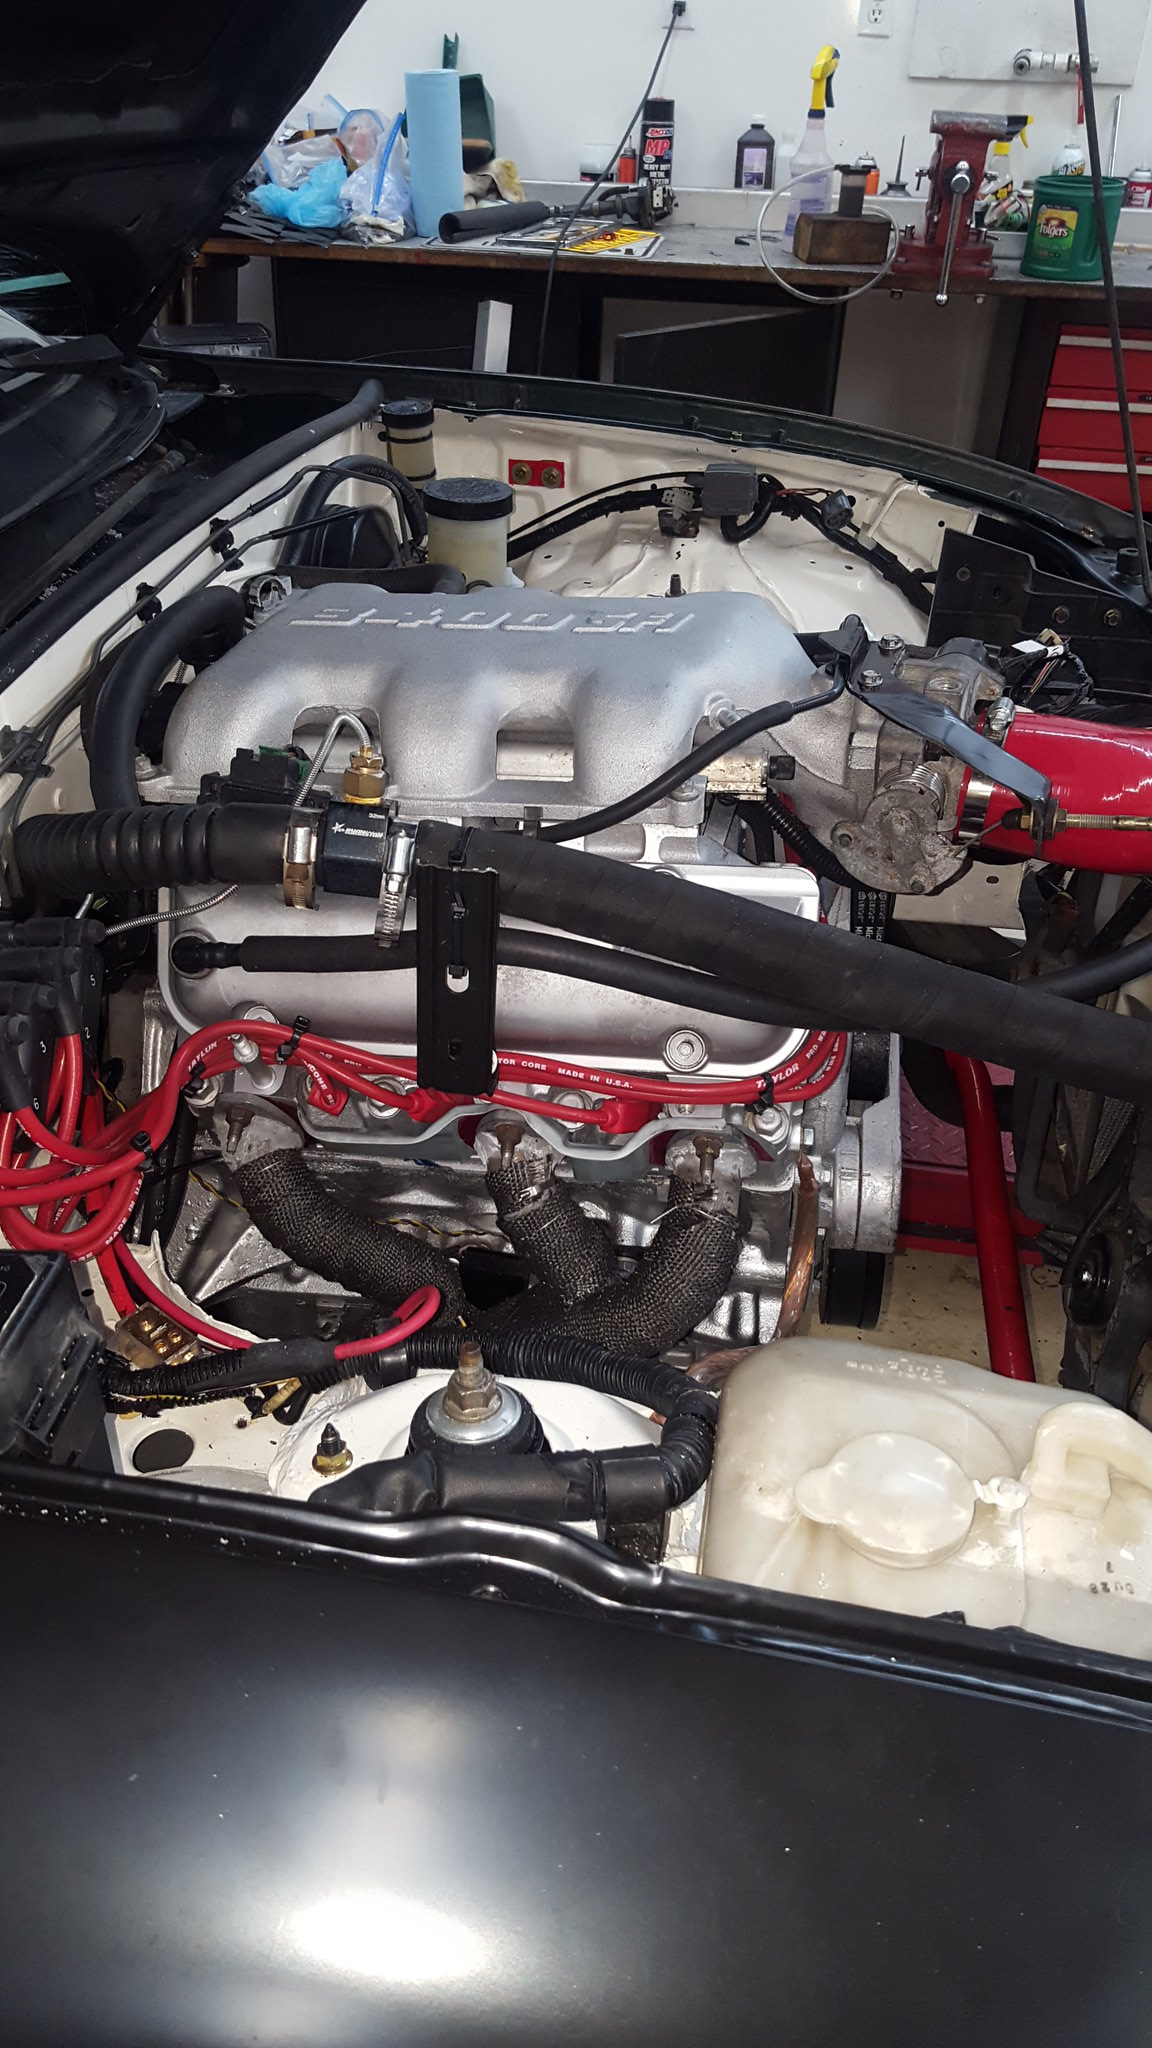
20181226_173411 by Michael Crawford, on Flickrnext, seat belts. My wife got these for me for Christmas. Not a brand I've ever heard of, but the stitching is good, they're SFI rated, and cam lock. Cant ask for much more than that!To install, I had to add a hole and backer plate through the trans tunnel for the inboard lap belt, wrap the shoulder harnesses around the roll bar, and the antisubmarine strap around the seat mounts. Really, nothing unusual. Roll the excess strap up, ziptie to keep contained. Done.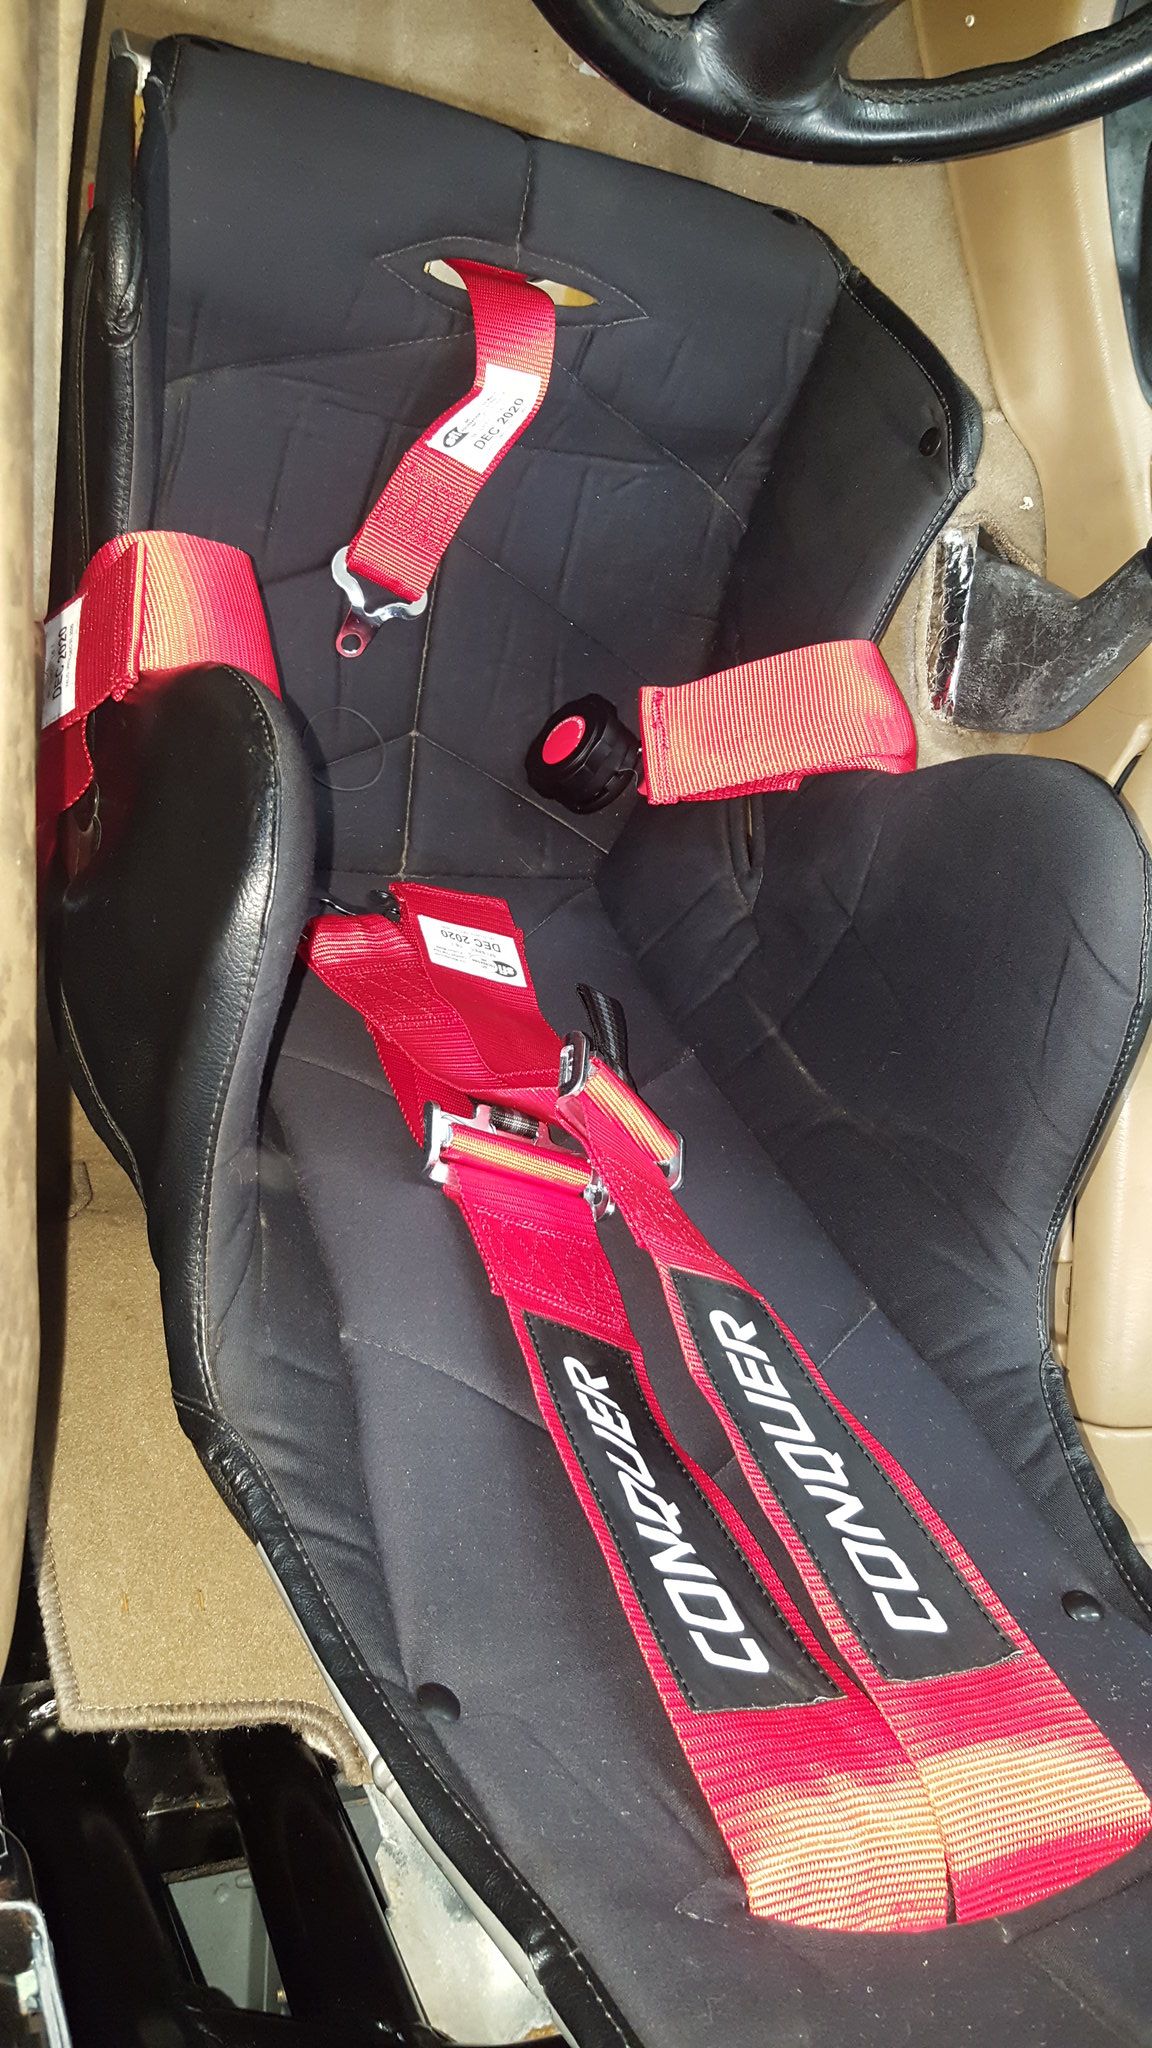
20181226_163525 by Michael Crawford, on FlickrI went ahead and did my interior nut and bolt checks. Every fastener between the firewall and trunklid. That's a lot of bolts and nuts, by the way. Oh, and screws. Don't forget the screws. I also installed the rear bulkhead carpet, and used a ex-printing press sheet of ,030 aluminum (I bought and inch thick stack from stampie at .50 a sheet a couple of years ago. Sheets are roughly 3.5 feet by 2.5, but I should really measure them.) to close out the rear package shelf where I cut it for the rollbar so the package tray carpet would lay nice. Went ahead and finished installing the steering column plastics as well.
20181226_163536 by Michael Crawford, on Flickr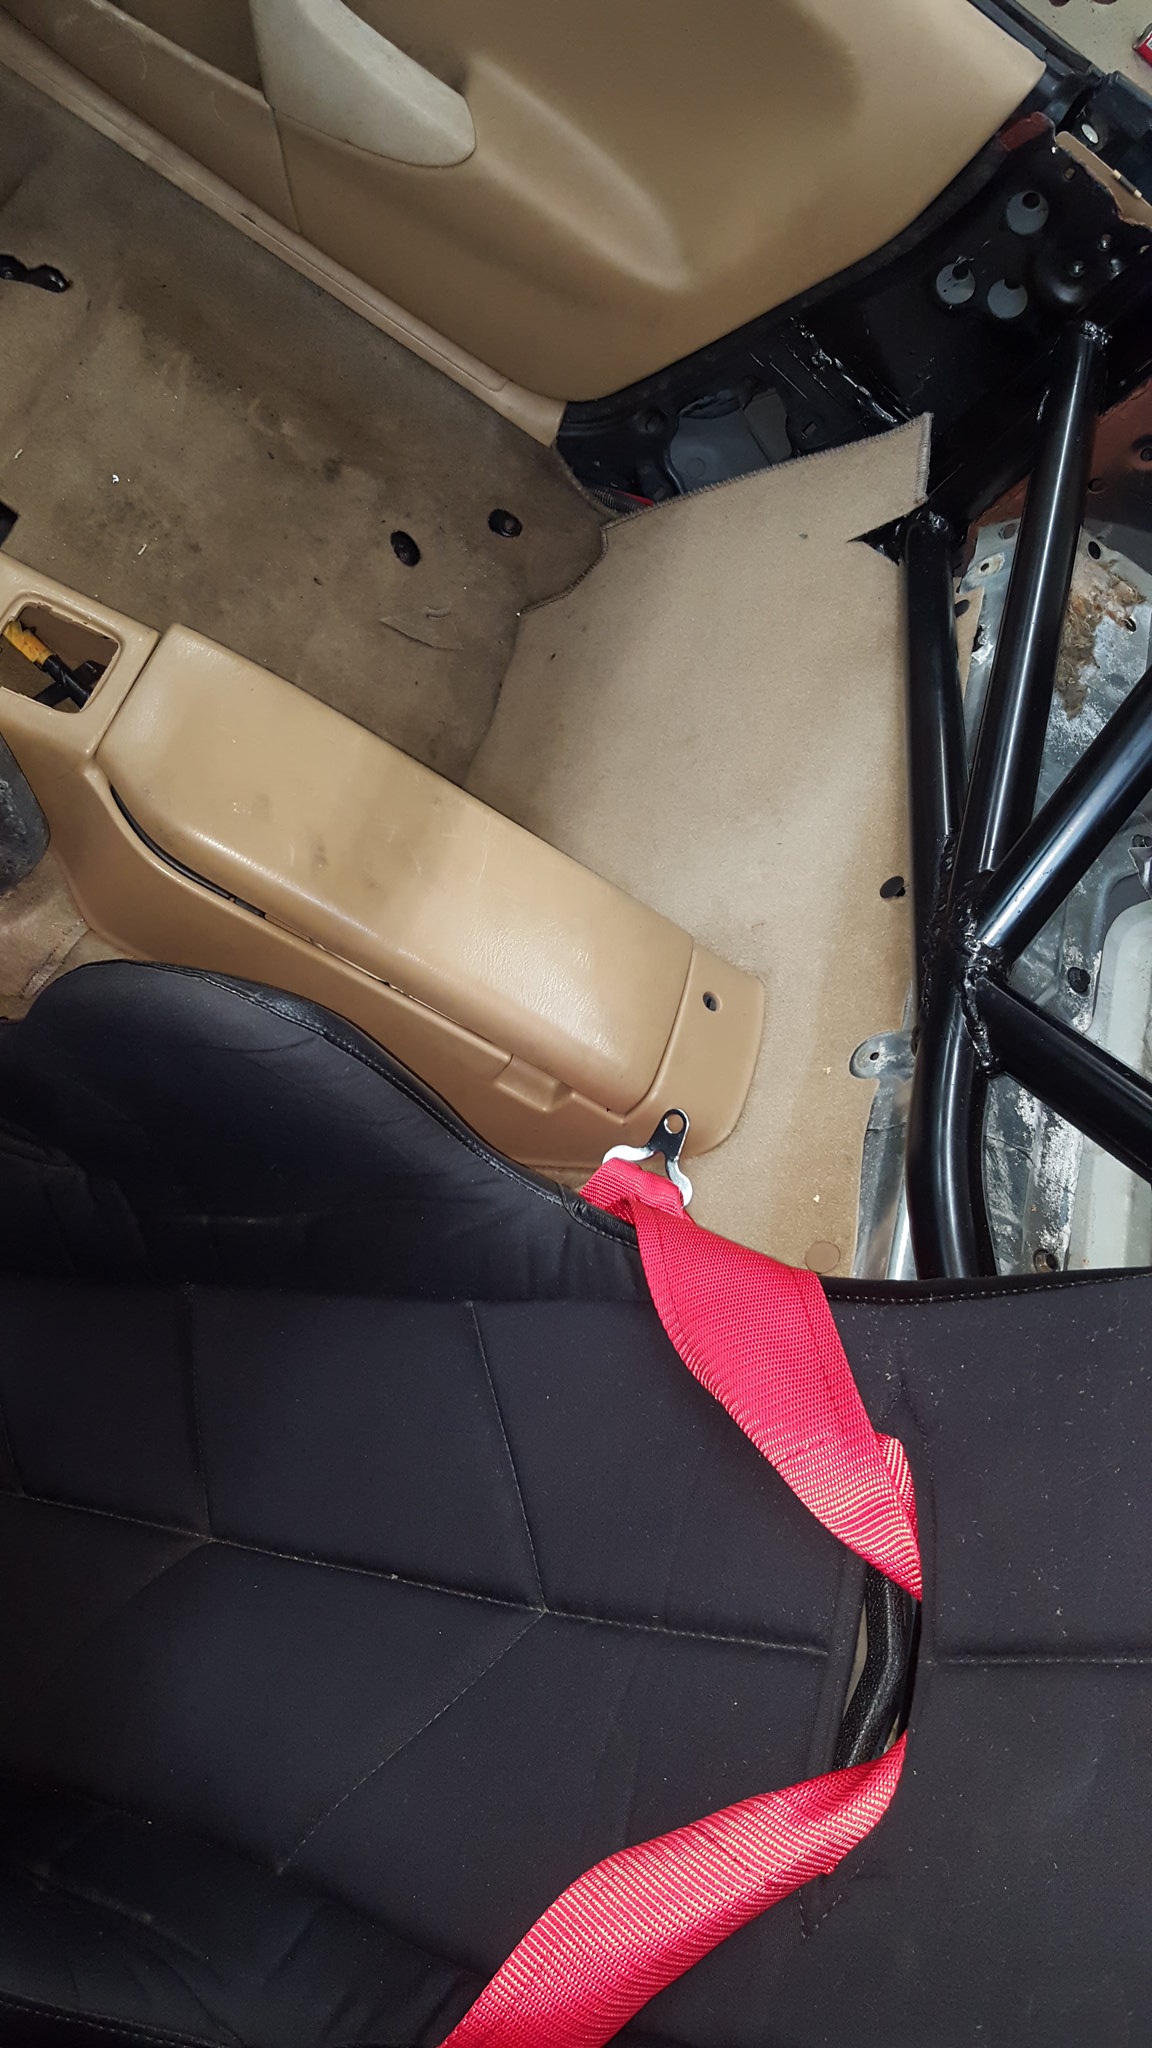
20181226_163506 by Michael Crawford, on Flickr
20181226_163456 by Michael Crawford, on Flickrthe last thing we did was solve the sway bar interference (helps if you center the damn thing before tightening the bolts), bleed the clutch and brakes again, nut and bolt check the exhaust, butterfly brace, and transmission fasteners, added a couple of missing bolts undercar as well. You know, stuff you cant really photograph.
revious challenge budget: 1950.13 recoup total: 820new money: 1 sheet .030 aluminum: .505 point harnesses (challenge budget exempt, but $54 on amazon) Recoup: 820new total: 1950.53the last ten percent of work takes the other 90 percent of the time.So today doesn't look like 8 hours worth of work and thinking....first, I re-purposed some random engine bay bracket for a clutch master mount. Little cutting, little grinding, a pop rivet, and a couple of zip ties makes for a nice install that's hard to photograph because its hidden.
20181226_121347 by Michael Crawford, on Flickr
20181226_131250 by Michael Crawford, on Flickr
20181226_131257 by Michael Crawford, on Flickrnext, I finally made a mount for the upper radiator hose. Well, made is a little too strong a word. More like found a random sheet metal bracket in the 5 gallon bucket of random crap that lives in the corner. Worked perfect. The goal here was support, and to make the temp sending unit the highest point in the system. No matter what, the upper hose was going to trap air in the cooling system due to basic design issues, so I figured I may as well as use it to my benefit. Bolted it down to one of the original coil mounting studs, couple of zipties, and good to go!
20181226_173411 by Michael Crawford, on Flickrnext, seat belts. My wife got these for me for Christmas. Not a brand I've ever heard of, but the stitching is good, they're SFI rated, and cam lock. Cant ask for much more than that!To install, I had to add a hole and backer plate through the trans tunnel for the inboard lap belt, wrap the shoulder harnesses around the roll bar, and the antisubmarine strap around the seat mounts. Really, nothing unusual. Roll the excess strap up, ziptie to keep contained. Done.
20181226_163525 by Michael Crawford, on FlickrI went ahead and did my interior nut and bolt checks. Every fastener between the firewall and trunklid. That's a lot of bolts and nuts, by the way. Oh, and screws. Don't forget the screws. I also installed the rear bulkhead carpet, and used a ex-printing press sheet of ,030 aluminum (I bought and inch thick stack from stampie at .50 a sheet a couple of years ago. Sheets are roughly 3.5 feet by 2.5, but I should really measure them.) to close out the rear package shelf where I cut it for the rollbar so the package tray carpet would lay nice. Went ahead and finished installing the steering column plastics as well.
20181226_163536 by Michael Crawford, on Flickr
20181226_163506 by Michael Crawford, on Flickr
20181226_163456 by Michael Crawford, on Flickrthe last thing we did was solve the sway bar interference (helps if you center the damn thing before tightening the bolts), bleed the clutch and brakes again, nut and bolt check the exhaust, butterfly brace, and transmission fasteners, added a couple of missing bolts undercar as well. You know, stuff you cant really photograph.
Reply
0
0
02-16-2019, 07:11 PM
#74
Junior Member
Thread Starter
Join Date: Nov 2017
Posts: 112
Total Cats: 7
so, its been a minute since update. Lots of testing, tweaking, tightening, cleaning plastidip, etc. and still nowhere near done on any of that.
However, its done enough for a test and tune next weekend!!!!!
so, on y way towards that, ive been busy. I added a passengers seat for navigator/instructor, installed the package tray carpet, scrapped the inner fenders in exchange for the quick release wheel, got rid of the toggles and exposed fuses, added a feta cheese container painted black to cover the clockspring, tinted the hideous taillights, installed rollbar padding, the list goes on....
but, were ready to rock for next weekend! Im going to drag it back to dads tomorrow if its not raining so I can pull a neon parts car in for total gutting. I need a daily that gets better than 14mpg.....
 20190207_164512 by Michael Crawford, on Flickr
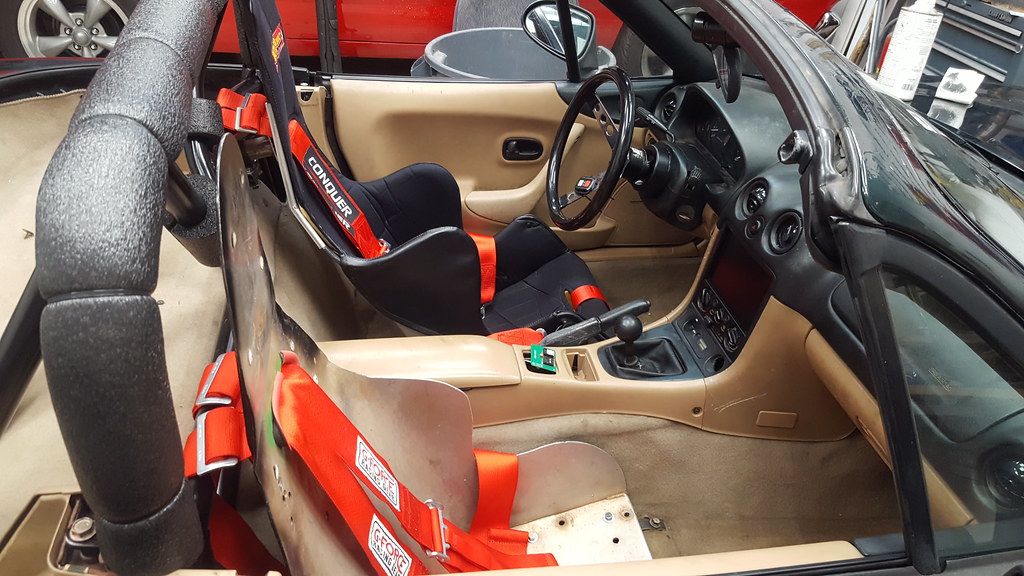 20190216_175038 by Michael Crawford, on Flickr
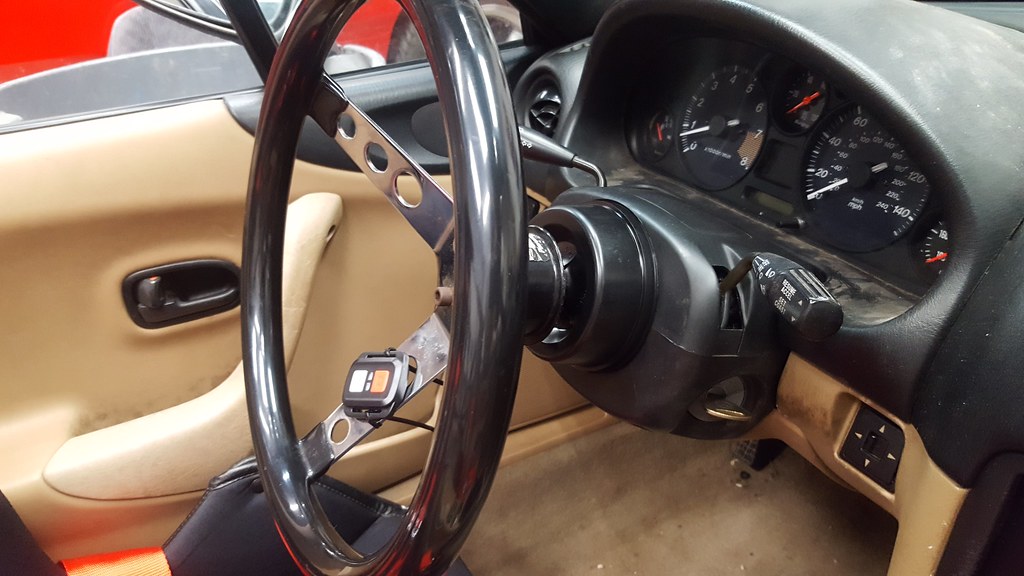 20190216_175043 by Michael Crawford, on Flickr
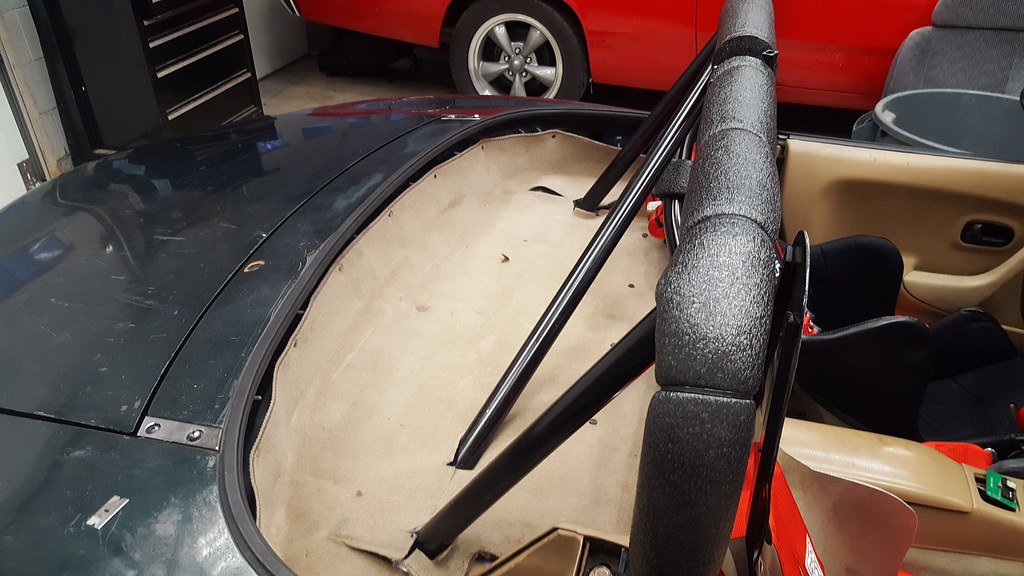 20190216_175048 by Michael Crawford, on Flickr
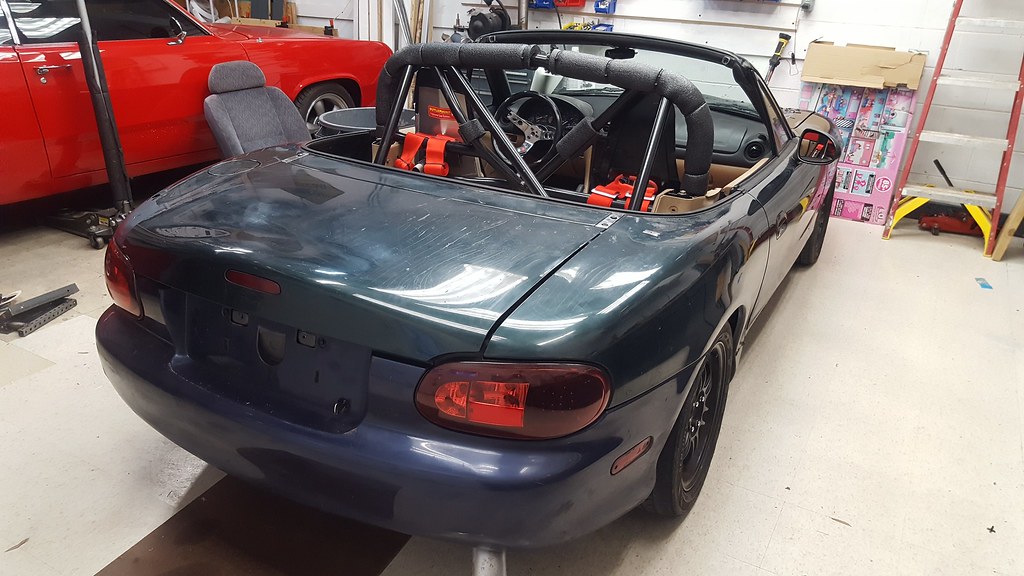 20190216_175032 by Michael Crawford, on Flickr
However, its done enough for a test and tune next weekend!!!!!
so, on y way towards that, ive been busy. I added a passengers seat for navigator/instructor, installed the package tray carpet, scrapped the inner fenders in exchange for the quick release wheel, got rid of the toggles and exposed fuses, added a feta cheese container painted black to cover the clockspring, tinted the hideous taillights, installed rollbar padding, the list goes on....
but, were ready to rock for next weekend! Im going to drag it back to dads tomorrow if its not raining so I can pull a neon parts car in for total gutting. I need a daily that gets better than 14mpg.....
20190207_164512 by Michael Crawford, on Flickr20190216_175038 by Michael Crawford, on Flickr20190216_175043 by Michael Crawford, on Flickr20190216_175048 by Michael Crawford, on Flickr20190216_175032 by Michael Crawford, on Flickr
Reply
0
0
 05-26-2019, 08:00 PM
#76
Junior Member
Thread Starter
Join Date: Nov 2017
Posts: 112
Total Cats: 7
new money:
valspar hunter green paint 4.99 ollies
bondo and spot putty from a yardsale 5.00
rattle can high build primer, oriellys 7.99
honda wheels 4.37
drag slicks (exempt from budget, 4x tires free) 0.00 (actual cost, 165)
removed 2x sm7 slicks and mounting from budget for -30 reduction for the other two exempt tires
used known good maf replaced under maintenance rule (was actually free to me from a trunked impala)
Recoup: 820
new total: 1926.53
so, this is the first real post in a long time. Some of this is recap, some is new, some is drivel. You know, normal stuff. Life got busy, and my documentation has fallen behind real life. Its currently too damn hot to be outside, so im updating.
Anyway, I took the car for its initial autocross on march second. I only got one picture, but did do a post about it over on GRM. So heres the picture, with a copy of my post below.

20190302_090621 by Michael Crawford, on Flickr
So, we have ignition/breakup issues with the maf connected, but wont idle with it disconnected.
Very, very loose. Much faster and more controllable in third.
Looks like hammered *** crack
Cant get heat in tires yet
Gauges are useless unless in grid
Needs a top/shade/etc
Holy berkeley its a lot more car than i can handle.
So, after the autocross, I got distracted with building a daily for work. And a broken truck in west virginia. And....
dad and I started hunting the issues with the car. We found a bad MAF, replaced that, and cured 90% of the drivability evils. Cleaning grounds and fixing loose connections cured the rest. The car tows beautifully with the flat tow setup, and runs fantastically now. Still have no operable oxygen sensor, and im not sure im going to bother sorting it at this time. The shift light is all but useless, as the car revs so quickly that its in the limiter before the light is noticed. Its also incredibly loud inside, but passes SCCA noise regs, so im happy there.
Anyway, my county passed new inspection laws, negating the need for emission inspections. Which means, since this car retains all other necessary street features, that this happened.

20190518_123420 by Michael Crawford, on Flickr
with the addition of legality to be on public streets, dad drove it for the first time. For about 20 miles. And loved it. It has gotten his seal of approval, which is all the awards the car needs in my mind. Its been a great journey with him.
Him and mom leave in the next couple of weeks for the summer Rv-ing in the southwest. He will be going to the challenge with me, but its my game to get the car finished. So I drove it to my house (30 miles away) and found out that it really isn't a bad street car! Which means it could probably use a lot more spring rate. And more power. And aero. And....
anyway, step one was to get it cleaned up, and take it to the local cruise night (last night) which is essentially a late model camaro/challenger/mustang meet, with some neat trucks and other older muscle cars. All domestics. No imports allowed. The miata was a hit, and I worked on my presentation for the concourse. As well as watched what people looked at funny to give me an idea of how to clean up the car for better scores and mire curb appeal. Majority of this will be fit/finish of the interior, under hood tidy up, and paint/body.
First, washed before the cruise night pictures (these are also intended to highlight the bodywork issues ahead of me, as well as I good representation of where im starting for concourse preparation):

20190519_102142 by Michael Crawford, on Flickr

20190519_102153 by Michael Crawford, on Flickr

20190519_102158 by Michael Crawford, on Flickr

20190519_102204 by Michael Crawford, on Flickr

20190519_102216 by Michael Crawford, on Flickr

20190519_102228 by Michael Crawford, on Flickr

20190519_102234 by Michael Crawford, on Flickr

20190519_102243 by Michael Crawford, on Flickr

20190519_102309 by Michael Crawford, on Flickr

20190519_102314 by Michael Crawford, on Flickr

20190519_102318 by Michael Crawford, on Flickr
so, ill let you know what I think, and hoped to show in the pictures. Every panel except the passengers door has damage of some form. There is an incredible amount of paint damage due to the methods used in plastidip removal, and some of that may have been the reasons for the plastidip in the first place. The worst is the bulge in the hood. Its seriously mangled. Im not a bodyman. I never have been, and ive never been good at doing filler and panel straightening. Im and OK painter, but not good at that either, really. But, I have no fear of failure! And its be hard to make it worse, to be honest. In addition, the interior is scruffy. The door panels arent actually attached, the tans are filthy and discolored, etc. needs a bunch of cleaning and detailing and adjusting. In addition, I know there's more weight I can take out inside while making it look better. I will attempt to do so. Underhood, im not happy with how I have the air intake routed, the wiring looks like ***, there's way too many holes glaring out from the white, there's still sharp weld edges that need dressed, the overflow bottle is ugly, air is coming around the radiator instead of through, the upper radiator hose looks sketchy, etc. I personally think the whole think looks like a flaming hackjob, and quite frankly, im thoroughly unhappy with it visually. Its mechanically what I want it to be (in theory, still need to see what kind of drag times I can grab)
step one, honestly, is paint and body. To fix lots of this, I need to pull body panels to get them out of my way. I also need to see the final color and livery on the car to be able to work the rest of the package around to it to match.
Step one of bodywork is gather your materials. In a recent run to ollies, I came across a 4.99 quart of green. I bought it.

20190505_095933 by Michael Crawford, on Flickr
the next material was body filler. Neighborhood yardsale got me this assortment of supploes for 5 bucks. All were open and partially used (guy said to fix a boat)

20190519_104007 by Michael Crawford, on Flickr
I then walked around the car with a silver sharpie, circling every dent, ding, and issue I could find. Lots of sharpie....

20190526_150038 by Michael Crawford, on Flickr
I then scuffed the first fer dents with 80 grit, leaving the very small stuff and hood bulge for last. Trying to get my bodywork groove going....

20190526_151230 by Michael Crawford, on Flickr
and then mixed and spread the first round of bondo

20190526_154933 by Michael Crawford, on Flickr

20190526_154955 by Michael Crawford, on Flickr

20190526_155137 by Michael Crawford, on Flickr
sanding is done outside to keep the mess down. And its 95 degrees with 142% humidity. So that's waiting till morning. Or after dark.
As a parting gift, im leaving you with pictures of my honda wheels (AFTER lots of cleaning) and slicks (no cleaning, just laying on the floor). The slicks are budget exempt, though the wheels aren't. Still truong to figure out how to de-ugly the wheels.....

20190508_092519 by Michael Crawford, on Flickr

20190523_145929 by Michael Crawford, on Flickr
valspar hunter green paint 4.99 ollies
bondo and spot putty from a yardsale 5.00
rattle can high build primer, oriellys 7.99
honda wheels 4.37
drag slicks (exempt from budget, 4x tires free) 0.00 (actual cost, 165)
removed 2x sm7 slicks and mounting from budget for -30 reduction for the other two exempt tires
used known good maf replaced under maintenance rule (was actually free to me from a trunked impala)
Recoup: 820
new total: 1926.53
so, this is the first real post in a long time. Some of this is recap, some is new, some is drivel. You know, normal stuff. Life got busy, and my documentation has fallen behind real life. Its currently too damn hot to be outside, so im updating.
Anyway, I took the car for its initial autocross on march second. I only got one picture, but did do a post about it over on GRM. So heres the picture, with a copy of my post below.
20190302_090621 by Michael Crawford, on Flickr
So, we have ignition/breakup issues with the maf connected, but wont idle with it disconnected.
Very, very loose. Much faster and more controllable in third.
Looks like hammered *** crack
Cant get heat in tires yet
Gauges are useless unless in grid
Needs a top/shade/etc
Holy berkeley its a lot more car than i can handle.
So, after the autocross, I got distracted with building a daily for work. And a broken truck in west virginia. And....
dad and I started hunting the issues with the car. We found a bad MAF, replaced that, and cured 90% of the drivability evils. Cleaning grounds and fixing loose connections cured the rest. The car tows beautifully with the flat tow setup, and runs fantastically now. Still have no operable oxygen sensor, and im not sure im going to bother sorting it at this time. The shift light is all but useless, as the car revs so quickly that its in the limiter before the light is noticed. Its also incredibly loud inside, but passes SCCA noise regs, so im happy there.
Anyway, my county passed new inspection laws, negating the need for emission inspections. Which means, since this car retains all other necessary street features, that this happened.
20190518_123420 by Michael Crawford, on Flickr
with the addition of legality to be on public streets, dad drove it for the first time. For about 20 miles. And loved it. It has gotten his seal of approval, which is all the awards the car needs in my mind. Its been a great journey with him.
Him and mom leave in the next couple of weeks for the summer Rv-ing in the southwest. He will be going to the challenge with me, but its my game to get the car finished. So I drove it to my house (30 miles away) and found out that it really isn't a bad street car! Which means it could probably use a lot more spring rate. And more power. And aero. And....
anyway, step one was to get it cleaned up, and take it to the local cruise night (last night) which is essentially a late model camaro/challenger/mustang meet, with some neat trucks and other older muscle cars. All domestics. No imports allowed. The miata was a hit, and I worked on my presentation for the concourse. As well as watched what people looked at funny to give me an idea of how to clean up the car for better scores and mire curb appeal. Majority of this will be fit/finish of the interior, under hood tidy up, and paint/body.
First, washed before the cruise night pictures (these are also intended to highlight the bodywork issues ahead of me, as well as I good representation of where im starting for concourse preparation):
20190519_102142 by Michael Crawford, on Flickr
20190519_102153 by Michael Crawford, on Flickr
20190519_102158 by Michael Crawford, on Flickr
20190519_102204 by Michael Crawford, on Flickr
20190519_102216 by Michael Crawford, on Flickr
20190519_102228 by Michael Crawford, on Flickr
20190519_102234 by Michael Crawford, on Flickr
20190519_102243 by Michael Crawford, on Flickr
20190519_102309 by Michael Crawford, on Flickr
20190519_102314 by Michael Crawford, on Flickr
20190519_102318 by Michael Crawford, on Flickr
so, ill let you know what I think, and hoped to show in the pictures. Every panel except the passengers door has damage of some form. There is an incredible amount of paint damage due to the methods used in plastidip removal, and some of that may have been the reasons for the plastidip in the first place. The worst is the bulge in the hood. Its seriously mangled. Im not a bodyman. I never have been, and ive never been good at doing filler and panel straightening. Im and OK painter, but not good at that either, really. But, I have no fear of failure! And its be hard to make it worse, to be honest. In addition, the interior is scruffy. The door panels arent actually attached, the tans are filthy and discolored, etc. needs a bunch of cleaning and detailing and adjusting. In addition, I know there's more weight I can take out inside while making it look better. I will attempt to do so. Underhood, im not happy with how I have the air intake routed, the wiring looks like ***, there's way too many holes glaring out from the white, there's still sharp weld edges that need dressed, the overflow bottle is ugly, air is coming around the radiator instead of through, the upper radiator hose looks sketchy, etc. I personally think the whole think looks like a flaming hackjob, and quite frankly, im thoroughly unhappy with it visually. Its mechanically what I want it to be (in theory, still need to see what kind of drag times I can grab)
step one, honestly, is paint and body. To fix lots of this, I need to pull body panels to get them out of my way. I also need to see the final color and livery on the car to be able to work the rest of the package around to it to match.
Step one of bodywork is gather your materials. In a recent run to ollies, I came across a 4.99 quart of green. I bought it.
20190505_095933 by Michael Crawford, on Flickr
the next material was body filler. Neighborhood yardsale got me this assortment of supploes for 5 bucks. All were open and partially used (guy said to fix a boat)
20190519_104007 by Michael Crawford, on Flickr
I then walked around the car with a silver sharpie, circling every dent, ding, and issue I could find. Lots of sharpie....
20190526_150038 by Michael Crawford, on Flickr
I then scuffed the first fer dents with 80 grit, leaving the very small stuff and hood bulge for last. Trying to get my bodywork groove going....
20190526_151230 by Michael Crawford, on Flickr
and then mixed and spread the first round of bondo
20190526_154933 by Michael Crawford, on Flickr
20190526_154955 by Michael Crawford, on Flickr
20190526_155137 by Michael Crawford, on Flickr
sanding is done outside to keep the mess down. And its 95 degrees with 142% humidity. So that's waiting till morning. Or after dark.
As a parting gift, im leaving you with pictures of my honda wheels (AFTER lots of cleaning) and slicks (no cleaning, just laying on the floor). The slicks are budget exempt, though the wheels aren't. Still truong to figure out how to de-ugly the wheels.....
20190508_092519 by Michael Crawford, on Flickr
20190523_145929 by Michael Crawford, on Flickr
Reply
0
0
 05-29-2019, 01:29 PM
#79
Junior Member
Thread Starter
Join Date: Nov 2017
Posts: 112
Total Cats: 7
I'm hoping I did not offend anybody with the no homo comment. I'm also grateful that this project is appreciated here despite not currently being turbocharged or all that fast. Hopefully by the end of the weekend that I will be able to post a full update of the car in paint. Been kicking *** and taking names every night after work this week
Reply
0
0
06-01-2019, 07:34 PM
#80
Junior Member
Thread Starter
Join Date: Nov 2017
Posts: 112
Total Cats: 7
Old money: 1926.53
new money:
pint of magic brand hardener, tractor supply: 15.99
gallon paint thinner (used 1 quart) 8.99 gallon, 2.24
Recoup: 820
new total: 1945.53
ive been busier than a one legged man in an *** kicking contest this week.
I spent all week doing my impression of a bodyman, starting where we left off in my last post.
I started block sanding the bondo and previous repairs, and then shot it with the duplicolor high build primer when it felt and looked right. This picture is after its been washed the first time with dawn and an sos pad to knock the dust and crap off before bringing it in for the night.

20190527_103521 by Michael Crawford, on Flickr
we then grabbed the 220 and palm sander to work down the high build. Thiss is where things went wrong the first time. Near as I can tell, I either had a reaction with the random gloss spray paint I used for a guidecoat, or the duplicolor high build never cured, or something. When it was sanded with ANY grit of paper, it sort of melted and turned to pebbles. I fought it for a while trying t make it work. Dressed the whole car with 220 while I was at it, hoping for the best. Washed it again with the sos pad and dawn, and put it away for the night to think. No good picture of the pebble spots of the primer.

20190527_091835 by Michael Crawford, on Flickr

20190528_194405 by Michael Crawford, on Flickr

20190528_194419 by Michael Crawford, on Flickr
next day, I called my buddy art. See, art and I go back 15 years or so now. Hes the best $200 paint man in the county. Hes also turned into a good friend over the years. Lives across town from me now, but he taught earl scheib how to paint cars cheap. He knows what hes doing, and is my bodywork sherpa. Hes always given me tips, pointers, and a hand when asked. He helped paint the amc last year, and other cars as well. Anyway, he told me the duplicolr had to come off. He also told me to use rustoleum sandable primer, and final sand the car to 320. in addition, he asked to help spray the car, but was only available this morning to help. So, that moved my timetable up considerably.
Anyway, laquer thinner and paper towels took care of removing the duplicolor. While I was doing that, my daughter worked on peeling plastidip from the plastics and mirrors.

20190529_170221 by Michael Crawford, on Flickr
I then re-sanded the car with 220 outside, followed by another round of dawn and an sos pad after taking the bumpers, mirrors, lights, etc off to be able to work edges and such better. When it dried, I sprayed the rustoleum primer, and used a little bit of the leftover rusty metal primer as a guidecoat.

20190529_191244 by Michael Crawford, on Flickr

20190530_072447 by Michael Crawford, on Flickr
we then went after every facet with 320 and 400 grit paper. In between, I did more rounds of dawn and an sos pad. Did this a couple of times, and last night, it was READY.

20190531_074204 by Michael Crawford, on Flickr
I put the spare free top frame on as a structure to hold masking plastic, re-prepped the plastics, washed again, and tucked it away for the night. At midnight.

20190531_195909 by Michael Crawford, on Flickr
this morning at dawn, which came far too damn early, I pulled the car out to tape up. We had planned on using the carport, but with it being 60 degrees and no wind, I thought that the middle of the driveway would be better. And the acr isn't movable, and would be in the way the whole morning. This was a mistake ill explain later.

20190601_083248 by Michael Crawford, on Flickr
so, now a side note. This fits as well here as anywhere I guess. I grew up reading car magazines, and especially loved junkyard stuff and bodywork issues. Car craft had a series for a while about how to make cheap paint look great. They suggested many things like washing all the seams well to get rid of dust and dirt, removing parts so there weren't tape lines that look bad and chip, using light colors to hide bodywork sins, prepping around corners and edges to limit chipping, and masking tips. Ive kept all this crap in the back of my brain, and use it every time I paint a car/have one painted. My cheap, shitty jobs typically turn out better than most stuff costing 10x as much. Lots more effort on my part, though. But worth it in my wallet. Youve hopefully noticed these tips in all the [previous pictures. If you haven't, ill wait while you go back and look.
Now that you're back, its time for masking. I bought plastic sheeting and green painters tape at ollies, pulled out all my other plastic rolls/sheets, cardboard, sawhorses, painters tape, harbor freight spray gun, mineral spirits (paint thinner), air hose, etc.

20190601_083251 by Michael Crawford, on Flickr
step one was backing all the holes in the body with tape so overspray didn't turn the trunk/underhood/interior green. Then, used some plastic to block off the trunk

20190601_085128 by Michael Crawford, on Flickr
then, some trashbags over the wheels, tape the engine bay jambs, take plastic from the front bumper to the back of the interior, mask off the undercarriage with plastics from below the rocker molding down, tape a plastic skirt around the car, etc. essentially hermetically seal the previously painted and detailed parts of the car from the not yet painted and detailed parts. Only with painters tape and cheap plastic sheets and scraps of other crap. On the right is brother dustin, who wanted to learn how to paint for his upcoming datsun 280z resto, and on the left is art the sherpa.

20190601_100244 by Michael Crawford, on Flickr
now, a little more backstory here. A while back, I read about the $50 roll on paint job with rustoleum. So I tried it. The rolling part sucked, so art and I sprayed it instead. Rustoleum sail blue, valspar hardener, and mineral spirits. 1:1 ratio of rustoleum to thinner, and a splash of hardener to taste as the recipe. We used a pint of paint on the whole car, and it was a great 20 footer. It even went to the challenge last year with the new owner. Laid down pretty good, and sprayed in almost the exact same spot in my driveway.

20170716_192052 by Michael Crawford, on Flickr
so this time, I figured that we could do even better now that we had the secret sauce down! Only with ollies valspar instead of rustoleum. Both oil based enamel, so should be the same, right?

20190601_102026 by Michael Crawford, on Flickr
well, we went through the whole quart of green. It didn't lay down nearly as well, and didn't cover nearly as well. The blue car was done with a pint. This was done with a quart. The blue cars color came out exactly as it looked in the can. The valspar did not. But we pressed on, because challenge car!
There are no pictures of me running the gun, but all the runs in the paint are mine!

20190601_100949 by Michael Crawford, on Flickr

20190601_110037 by Michael Crawford, on Flickr

20190601_112151 by Michael Crawford, on Flickr
the only overall picture of the unwrapped car I have has art in the middle of it. He wont be coming to the challenge with me, nor will dustin, due to other obligations and barriers. However, they will be listed as team members because they are.

20190601_114031 by Michael Crawford, on Flickr
we pulled the car under the carport to see how it looked in the normal light spectrum instead of the blinding sun. the parts of the car that were not in direct sun, laid down reasonably smooth. The stuff that was in the sun orange peeled, textured, and popped. It will PROBABLY wetsand and buff out beautifully, but we wont know until we actually do it. Ive also never wetsanded or buffed a damn thing, so it'll be interesting to see what happens! I have a porter cable DA, rubbing compound, sandpaper, and no fear of failure!
Before you look at the next pictures, make sure you avert your eyes if you have a weak stomach, and maybe send the women and children from the room.....

20190601_145931 by Michael Crawford, on Flickr

20190601_145950 by Michael Crawford, on Flickr

20190601_150002 by Michael Crawford, on Flickr

20190601_145956 by Michael Crawford, on Flickr
well let it cure out a day or two under the carport before moving it back in the shop. Rustoleum has a ton of fumes, and as you can see, the shop is a basement. I don't want those fumes in my house, and my wife sure doesn't. When its back indoors, I can start reassembly and clean up of other cosmetic issues. Im interested to see the color fully assembled!
new money:
pint of magic brand hardener, tractor supply: 15.99
gallon paint thinner (used 1 quart) 8.99 gallon, 2.24
Recoup: 820
new total: 1945.53
ive been busier than a one legged man in an *** kicking contest this week.
I spent all week doing my impression of a bodyman, starting where we left off in my last post.
I started block sanding the bondo and previous repairs, and then shot it with the duplicolor high build primer when it felt and looked right. This picture is after its been washed the first time with dawn and an sos pad to knock the dust and crap off before bringing it in for the night.
20190527_103521 by Michael Crawford, on Flickr
we then grabbed the 220 and palm sander to work down the high build. Thiss is where things went wrong the first time. Near as I can tell, I either had a reaction with the random gloss spray paint I used for a guidecoat, or the duplicolor high build never cured, or something. When it was sanded with ANY grit of paper, it sort of melted and turned to pebbles. I fought it for a while trying t make it work. Dressed the whole car with 220 while I was at it, hoping for the best. Washed it again with the sos pad and dawn, and put it away for the night to think. No good picture of the pebble spots of the primer.
20190527_091835 by Michael Crawford, on Flickr
20190528_194405 by Michael Crawford, on Flickr
20190528_194419 by Michael Crawford, on Flickr
next day, I called my buddy art. See, art and I go back 15 years or so now. Hes the best $200 paint man in the county. Hes also turned into a good friend over the years. Lives across town from me now, but he taught earl scheib how to paint cars cheap. He knows what hes doing, and is my bodywork sherpa. Hes always given me tips, pointers, and a hand when asked. He helped paint the amc last year, and other cars as well. Anyway, he told me the duplicolr had to come off. He also told me to use rustoleum sandable primer, and final sand the car to 320. in addition, he asked to help spray the car, but was only available this morning to help. So, that moved my timetable up considerably.
Anyway, laquer thinner and paper towels took care of removing the duplicolor. While I was doing that, my daughter worked on peeling plastidip from the plastics and mirrors.
20190529_170221 by Michael Crawford, on Flickr
I then re-sanded the car with 220 outside, followed by another round of dawn and an sos pad after taking the bumpers, mirrors, lights, etc off to be able to work edges and such better. When it dried, I sprayed the rustoleum primer, and used a little bit of the leftover rusty metal primer as a guidecoat.
20190529_191244 by Michael Crawford, on Flickr
20190530_072447 by Michael Crawford, on Flickr
we then went after every facet with 320 and 400 grit paper. In between, I did more rounds of dawn and an sos pad. Did this a couple of times, and last night, it was READY.
20190531_074204 by Michael Crawford, on Flickr
I put the spare free top frame on as a structure to hold masking plastic, re-prepped the plastics, washed again, and tucked it away for the night. At midnight.
20190531_195909 by Michael Crawford, on Flickr
this morning at dawn, which came far too damn early, I pulled the car out to tape up. We had planned on using the carport, but with it being 60 degrees and no wind, I thought that the middle of the driveway would be better. And the acr isn't movable, and would be in the way the whole morning. This was a mistake ill explain later.
20190601_083248 by Michael Crawford, on Flickr
so, now a side note. This fits as well here as anywhere I guess. I grew up reading car magazines, and especially loved junkyard stuff and bodywork issues. Car craft had a series for a while about how to make cheap paint look great. They suggested many things like washing all the seams well to get rid of dust and dirt, removing parts so there weren't tape lines that look bad and chip, using light colors to hide bodywork sins, prepping around corners and edges to limit chipping, and masking tips. Ive kept all this crap in the back of my brain, and use it every time I paint a car/have one painted. My cheap, shitty jobs typically turn out better than most stuff costing 10x as much. Lots more effort on my part, though. But worth it in my wallet. Youve hopefully noticed these tips in all the [previous pictures. If you haven't, ill wait while you go back and look.
Now that you're back, its time for masking. I bought plastic sheeting and green painters tape at ollies, pulled out all my other plastic rolls/sheets, cardboard, sawhorses, painters tape, harbor freight spray gun, mineral spirits (paint thinner), air hose, etc.
20190601_083251 by Michael Crawford, on Flickr
step one was backing all the holes in the body with tape so overspray didn't turn the trunk/underhood/interior green. Then, used some plastic to block off the trunk
20190601_085128 by Michael Crawford, on Flickr
then, some trashbags over the wheels, tape the engine bay jambs, take plastic from the front bumper to the back of the interior, mask off the undercarriage with plastics from below the rocker molding down, tape a plastic skirt around the car, etc. essentially hermetically seal the previously painted and detailed parts of the car from the not yet painted and detailed parts. Only with painters tape and cheap plastic sheets and scraps of other crap. On the right is brother dustin, who wanted to learn how to paint for his upcoming datsun 280z resto, and on the left is art the sherpa.
20190601_100244 by Michael Crawford, on Flickr
now, a little more backstory here. A while back, I read about the $50 roll on paint job with rustoleum. So I tried it. The rolling part sucked, so art and I sprayed it instead. Rustoleum sail blue, valspar hardener, and mineral spirits. 1:1 ratio of rustoleum to thinner, and a splash of hardener to taste as the recipe. We used a pint of paint on the whole car, and it was a great 20 footer. It even went to the challenge last year with the new owner. Laid down pretty good, and sprayed in almost the exact same spot in my driveway.
20170716_192052 by Michael Crawford, on Flickr
so this time, I figured that we could do even better now that we had the secret sauce down! Only with ollies valspar instead of rustoleum. Both oil based enamel, so should be the same, right?
20190601_102026 by Michael Crawford, on Flickr
well, we went through the whole quart of green. It didn't lay down nearly as well, and didn't cover nearly as well. The blue car was done with a pint. This was done with a quart. The blue cars color came out exactly as it looked in the can. The valspar did not. But we pressed on, because challenge car!
There are no pictures of me running the gun, but all the runs in the paint are mine!
20190601_100949 by Michael Crawford, on Flickr
20190601_110037 by Michael Crawford, on Flickr
20190601_112151 by Michael Crawford, on Flickr
the only overall picture of the unwrapped car I have has art in the middle of it. He wont be coming to the challenge with me, nor will dustin, due to other obligations and barriers. However, they will be listed as team members because they are.
20190601_114031 by Michael Crawford, on Flickr
we pulled the car under the carport to see how it looked in the normal light spectrum instead of the blinding sun. the parts of the car that were not in direct sun, laid down reasonably smooth. The stuff that was in the sun orange peeled, textured, and popped. It will PROBABLY wetsand and buff out beautifully, but we wont know until we actually do it. Ive also never wetsanded or buffed a damn thing, so it'll be interesting to see what happens! I have a porter cable DA, rubbing compound, sandpaper, and no fear of failure!
Before you look at the next pictures, make sure you avert your eyes if you have a weak stomach, and maybe send the women and children from the room.....
20190601_145931 by Michael Crawford, on Flickr
20190601_145950 by Michael Crawford, on Flickr
20190601_150002 by Michael Crawford, on Flickr
20190601_145956 by Michael Crawford, on Flickr
well let it cure out a day or two under the carport before moving it back in the shop. Rustoleum has a ton of fumes, and as you can see, the shop is a basement. I don't want those fumes in my house, and my wife sure doesn't. When its back indoors, I can start reassembly and clean up of other cosmetic issues. Im interested to see the color fully assembled!
Reply
0
0


