93' Miata stolen and flipped build thread


Elite Member
Joined: Oct 2013
Posts: 2,764
Total Cats: 951
From: Cedar City, UT


Reply
 0
0

0

Joined: Sep 2010
Posts: 8,157
Total Cats: 1,094
From: Lake Forest, CA
I bet you drive your car before I drive mine.
Course I'll be sitting inside sipping hot cocoa while I wait for mine. You'll be building the best BP-powered Miata... Ever.
Course I'll be sitting inside sipping hot cocoa while I wait for mine. You'll be building the best BP-powered Miata... Ever.
Reply
1
1


Junior Member
Joined: Aug 2006
Posts: 239
Total Cats: 5
From: Cedar City, UT
I just don't want to replace the 2 dashboard vents. I'm a skinny bastard with no body fat. When it gets cold...I like my heat. Revlimiter gave me a link to the Zoom Tombstone which has three 3 gauge holes above the vents but A) It is pricy B) I don't like the lines of it much.
Saying that a thought dawned on me that when it gets cold enough I'll probably be driving the Jetta instead of the Miata....hmmm
Saying that a thought dawned on me that when it gets cold enough I'll probably be driving the Jetta instead of the Miata....hmmm
I am up in Cedar City with my miata w/ hardtop also with no body fat, and tbh to get heat the fastest I find to just use the defrost and floor setting, even with the snow and stuff we got last week the eyeball vents just get my eyes dried out too fast.
Ive just been using recirculate when water temps are below 160 to get heat asap, and then it gets to be just a furnace. I have had to set it halfway and then switch to outside air and its still baking in there.
Reply
0
0
Elite Member
Joined: Oct 2013
Posts: 2,764
Total Cats: 951
From: Cedar City, UT
Hope it warms up for yah man.


I am up in Cedar City with my miata w/ hardtop also with no body fat, and tbh to get heat the fastest I find to just use the defrost and floor setting, even with the snow and stuff we got last week the eyeball vents just get my eyes dried out too fast.
Ive just been using recirculate when water temps are below 160 to get heat asap, and then it gets to be just a furnace. I have had to set it halfway and then switch to outside air and its still baking in there.
Ive just been using recirculate when water temps are below 160 to get heat asap, and then it gets to be just a furnace. I have had to set it halfway and then switch to outside air and its still baking in there.
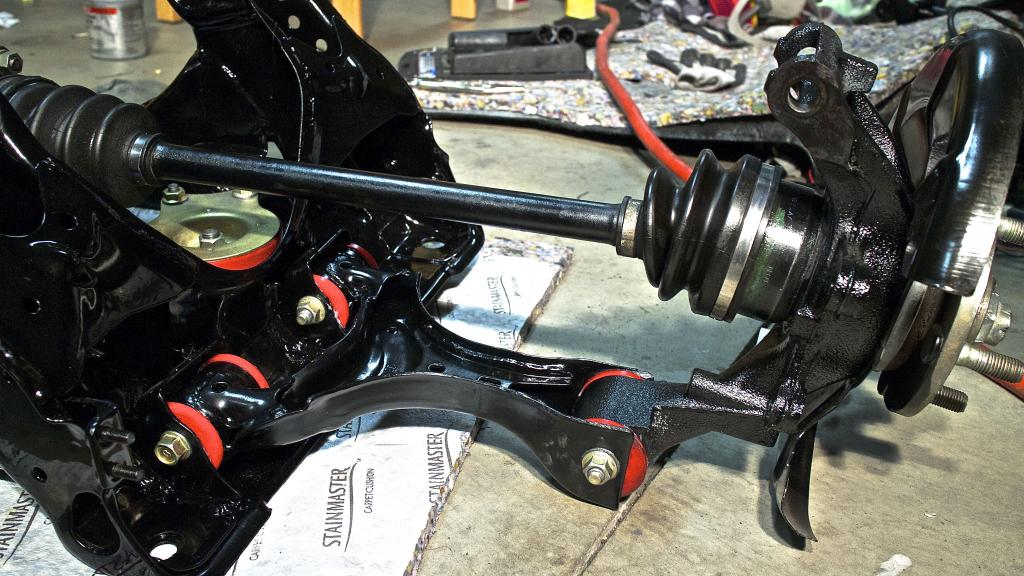
I've come to the conclusion there is no way to do your bushings without covering everything in grease.
I put all new zerk fittings in and redrilled the holes for the grease path. It was much easier this second time around mostly due to me actually organizing the bushings really well before I started.
[IMG]
 [/IMG]
Glad the hard/messy part is out of the way.
Reply
2
2
Elite Member
Joined: Oct 2013
Posts: 2,764
Total Cats: 951
From: Cedar City, UT
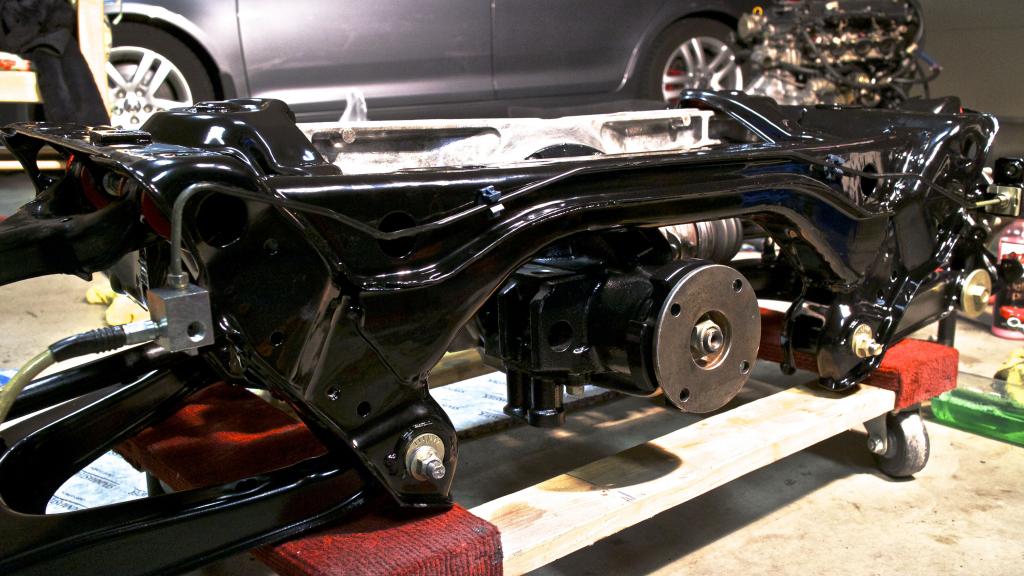
Slowly but surely, in the words of Gune, "making progress!"

Taking my sweet time so that I torque everything down properly and use all the right bolts/nuts/washers.
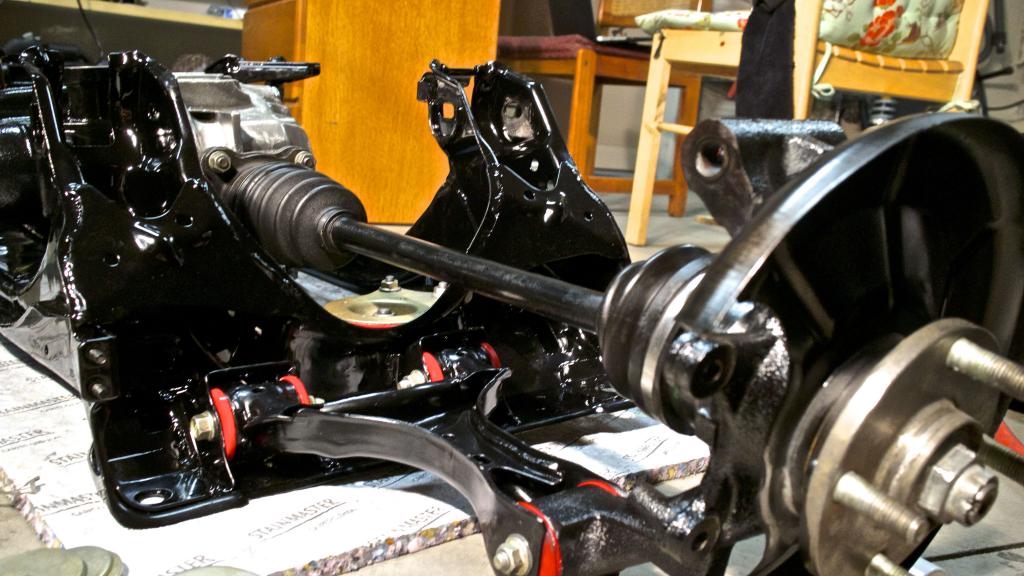
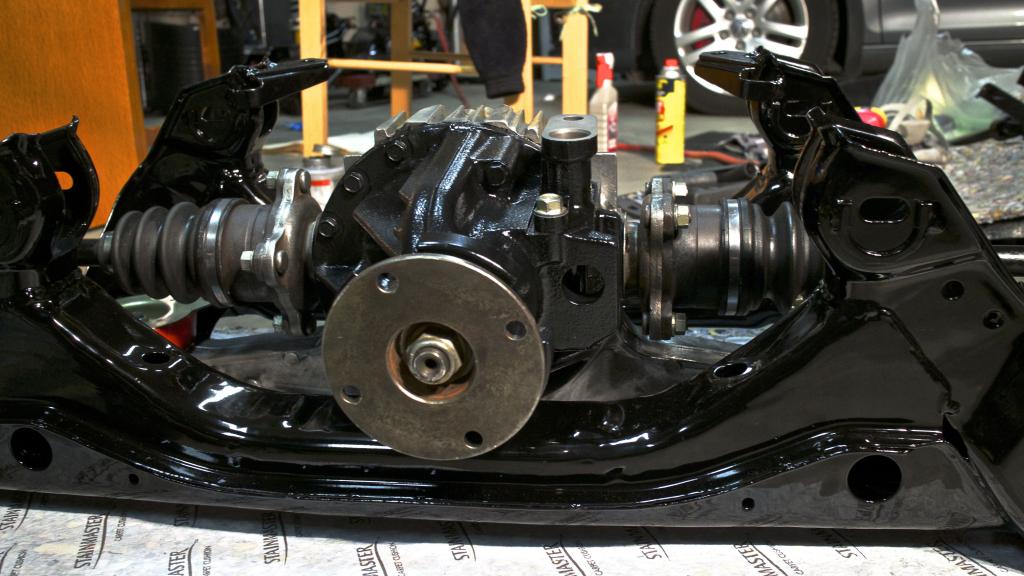
Just need the lowers put on and the brake assembly and I can bolt this sucker onto the car.
Taking my sweet time so that I torque everything down properly and use all the right bolts/nuts/washers.


Just need the lowers put on and the brake assembly and I can bolt this sucker onto the car.
Reply
2
2
Elite Member
Joined: Oct 2013
Posts: 2,764
Total Cats: 951
From: Cedar City, UT
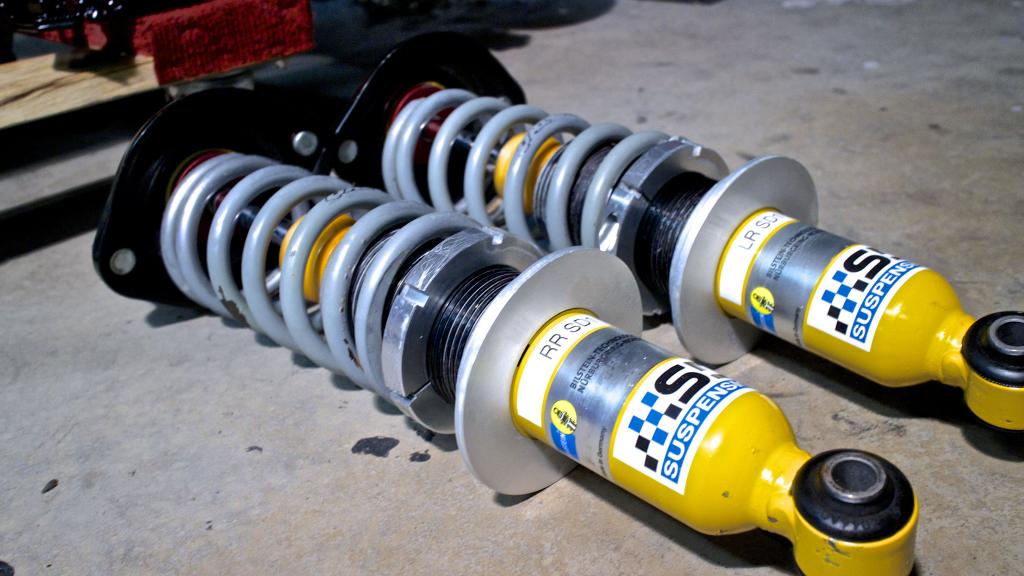
Bilstein's need some TLC before I put them on but it is a tidy little box if I must say so myself.
The gold bolts with red poly bushings is a perfect mix. Had to use a little metal polish to pull all the corrosion off the stainless lines.


Now it is time to grab some donuts and coffee and recharge the ol' battery a bit.
The gold bolts with red poly bushings is a perfect mix. Had to use a little metal polish to pull all the corrosion off the stainless lines.


Now it is time to grab some donuts and coffee and recharge the ol' battery a bit.
Reply
4
4

Newb
Joined: Jun 2013
Posts: 26
Total Cats: 8
From: Norway
Holy cow, Jeff! I have never seen anyone go to your level of restoring a car - it's absolutely beautiful, 100x better than new! This thread is the definite benchmark! 
And if you're ever thinking about selling this car, I'm already in line!
And if you're ever thinking about selling this car, I'm already in line!
Reply
0
0
Junior Member
Joined: Aug 2006
Posts: 239
Total Cats: 5
From: Cedar City, UT
Hmm why haven't I seen your Miata around. Is yours the white or blue Miata I've seen on occasion?
Ive seen a blue w/ stripes and a yellow one in town, not yet seen a white one personally.
Tried to acknowledge them, its not like I was doing this:
But they kinda just give dirty looks, it was like a nod in their direction. I don't think they care, they were using it as a point A to B car
Reply
0
0
Elite Member
Joined: Oct 2013
Posts: 2,764
Total Cats: 951
From: Cedar City, UT
I think the line has started a while a go. I've had a few PM's about that exact thing.
Reply
0
0
Elite Member
Joined: Oct 2013
Posts: 2,764
Total Cats: 951
From: Cedar City, UT
My body crashed hard core, so not much done today. Just restored a little life into the Bilsteins and going to work on the brake assemblies. I'll repaint the strut bodies at some other point.

Reply
2
2
Elite Member
Joined: Oct 2013
Posts: 2,764
Total Cats: 951
From: Cedar City, UT
Also while I'm waiting on a little paint to dry.
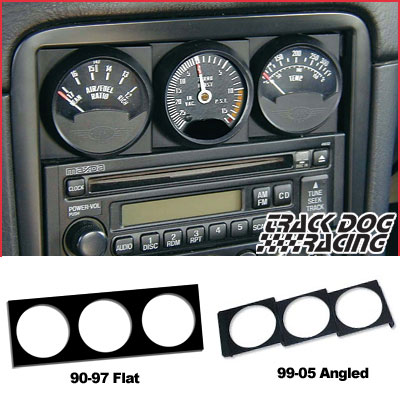
It says the version of this Track Dog Racing ANGLED gauge panel is only for 99+ but it doesn't have one available for the NA's.
Does anyone know if it will fit?
It says the version of this Track Dog Racing ANGLED gauge panel is only for 99+ but it doesn't have one available for the NA's.
Does anyone know if it will fit?
Reply
0
0

Reply
0
0

They do NOT fit the NA. It's been years since I attempted to install it, but it was not plug and play. On my NB, it pops right in. I ended up just making my own flat panel out of a piece of aluminum.
Reply
0
0
Elite Member
Joined: Oct 2013
Posts: 2,764
Total Cats: 951
From: Cedar City, UT

Reply
0
0
Elite Member
Joined: Oct 2013
Posts: 2,764
Total Cats: 951
From: Cedar City, UT
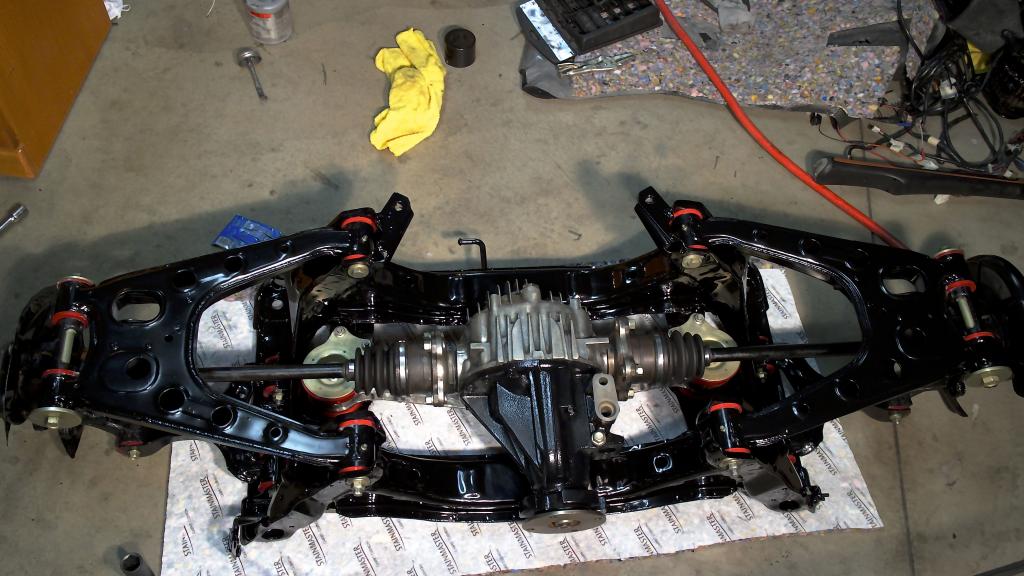
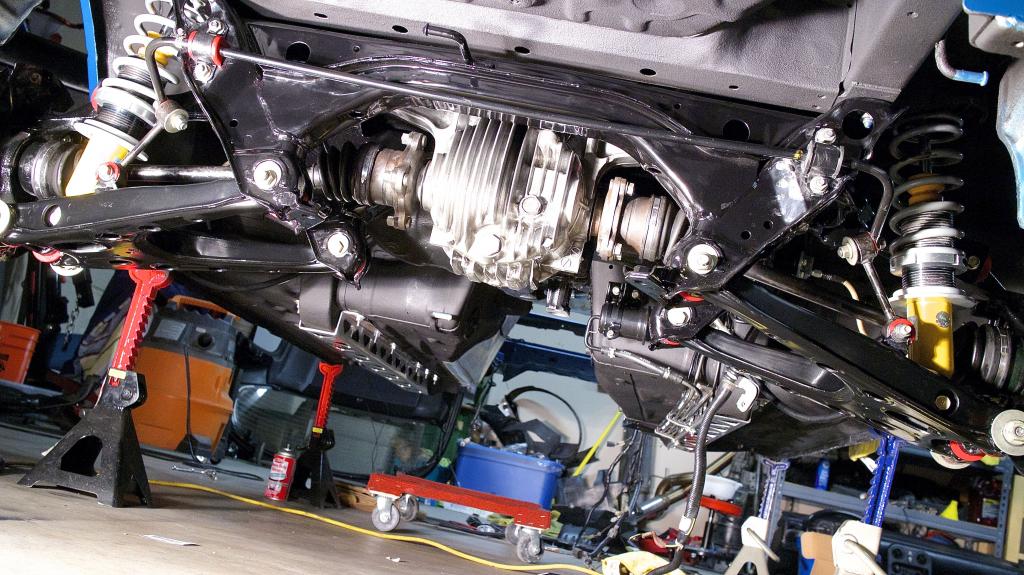
Joy of joys that is all done. That thing is a beast to align properly so all the holes slot in right. I had a jack stand under the diff and a jack under each control arm and would slowly left each side until I could get the strut hat bolts connected. Then again with the back and forth until I could get both subframe-chassis nuts/bolts on.
So many things to connect to the subframe! Everything is torqued to its proper spec and can be ignored for a while now. Going to start on the front subframe in a little bit and get that hooked up as well.
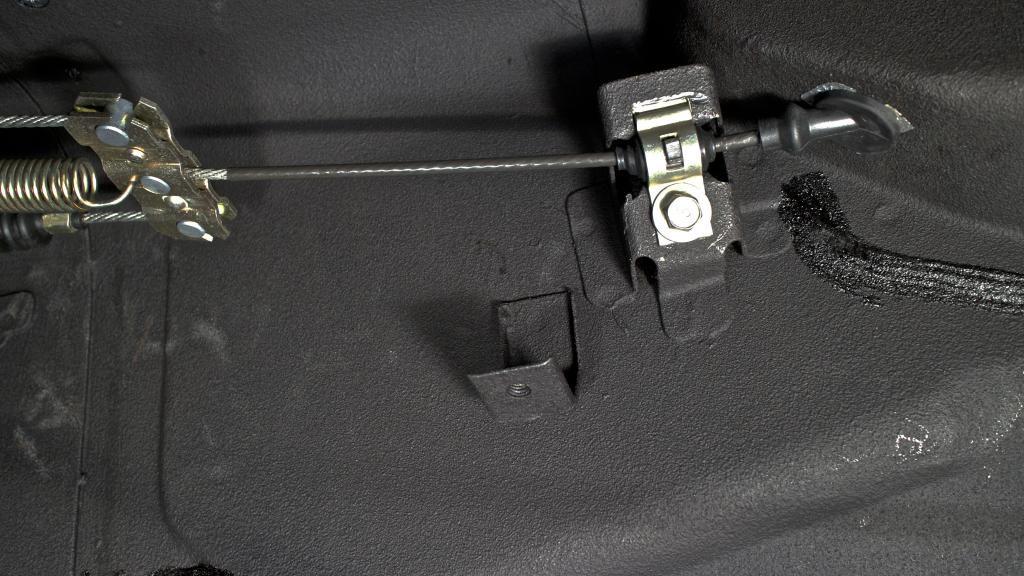
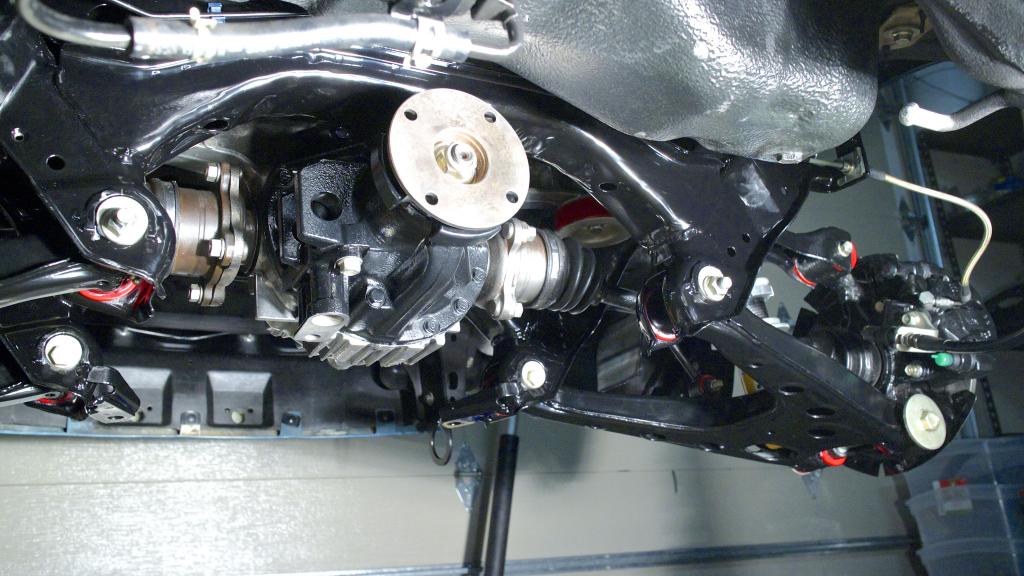
Found the proper grommet and bracket for the emergency brake cable.
Lines hooked up the the brakes and adjusted for 5-7 clicks; which is what the manual calls for.
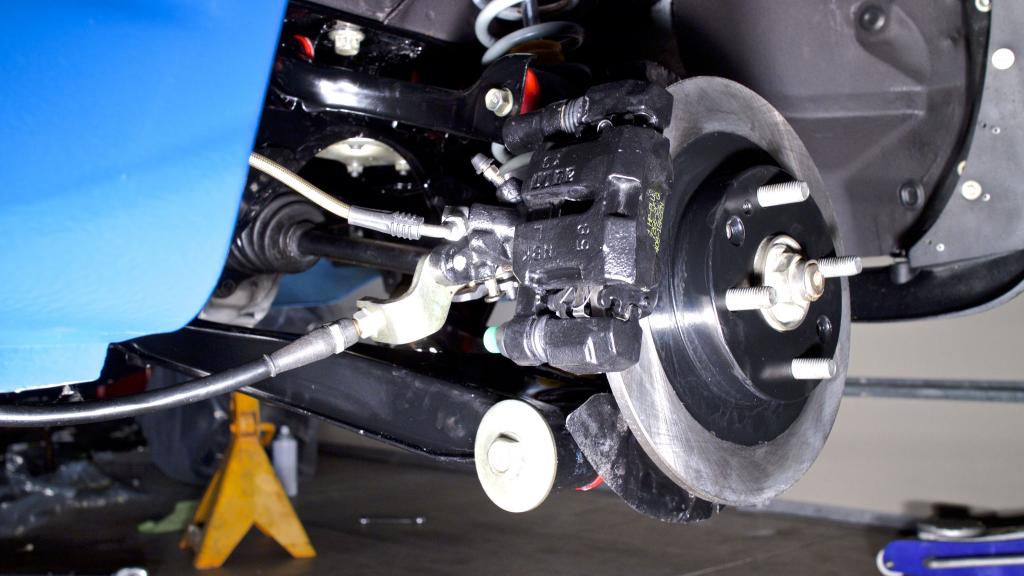
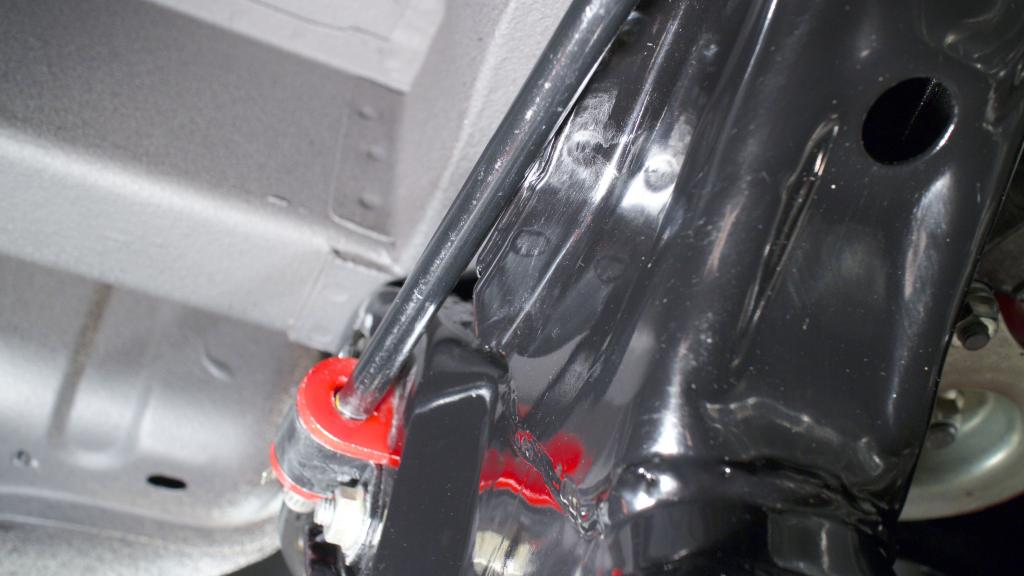
The sway bar oddly gave me a lot of trouble. I could find no information on the proper way to install it so I winged it and it didn't turn out great. the left side is only 1 mm off the body of the subframe and I know for sure it will rub. Ignore the grease, I had just gotten done.
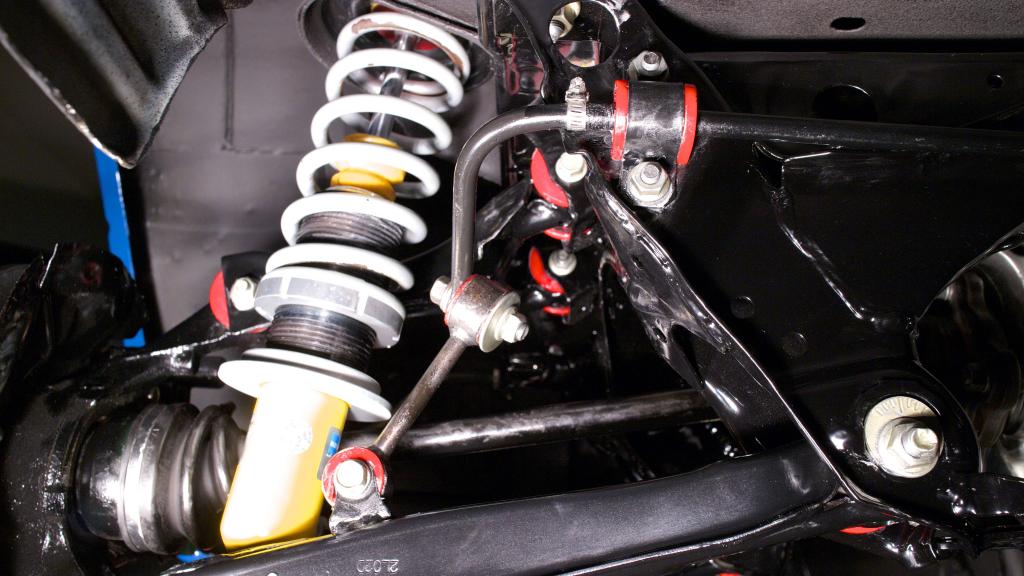
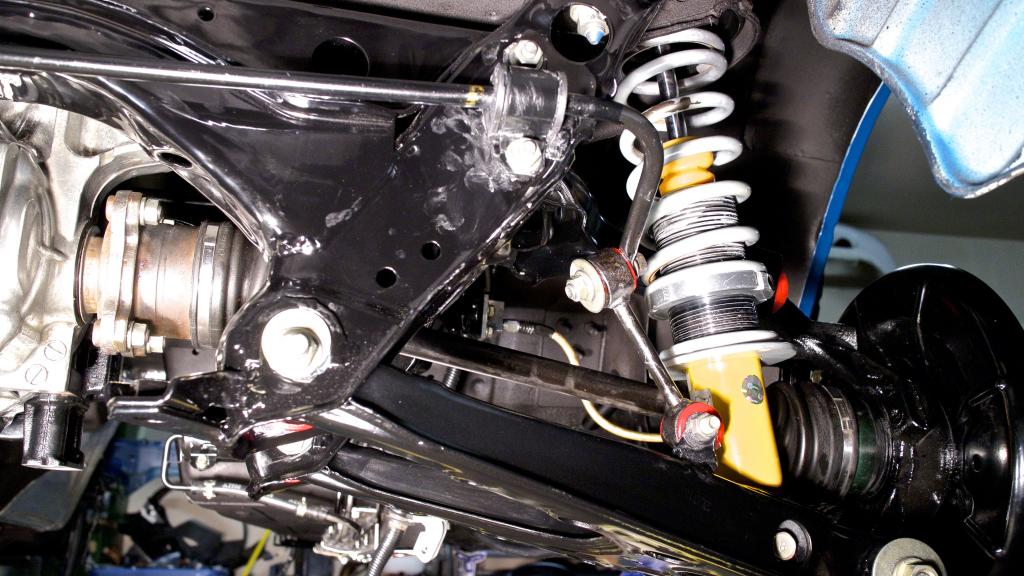
lookin' pretty
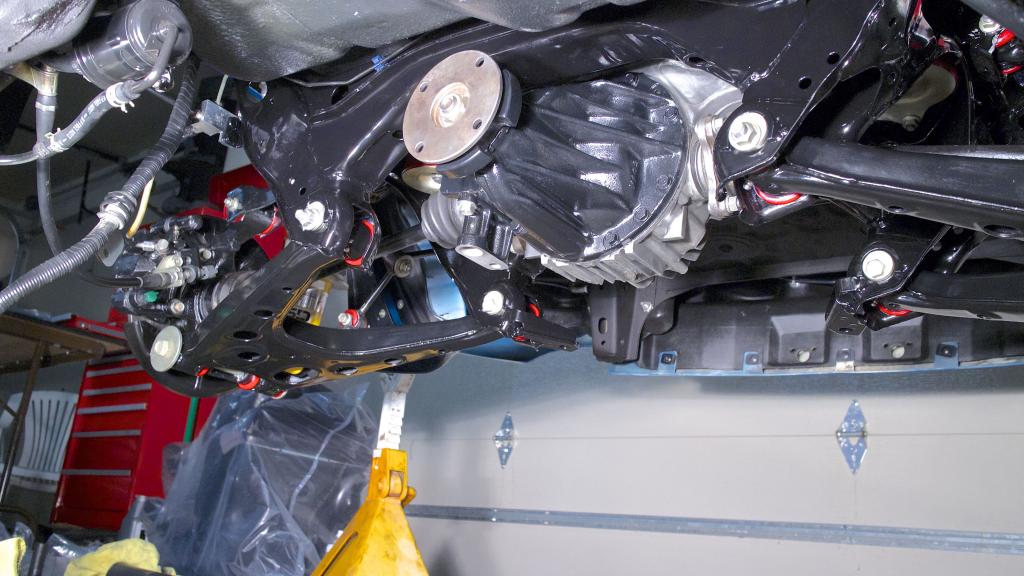
So many things to connect to the subframe! Everything is torqued to its proper spec and can be ignored for a while now. Going to start on the front subframe in a little bit and get that hooked up as well.
Found the proper grommet and bracket for the emergency brake cable.

Lines hooked up the the brakes and adjusted for 5-7 clicks; which is what the manual calls for.

The sway bar oddly gave me a lot of trouble. I could find no information on the proper way to install it so I winged it and it didn't turn out great. the left side is only 1 mm off the body of the subframe and I know for sure it will rub. Ignore the grease, I had just gotten done.


lookin' pretty


Reply
4
4