93' Miata stolen and flipped build thread


Junior Member
Joined: Jan 2014
Posts: 79
Total Cats: -9
From: Finland


Reply
 1
1

1


They are also color adjustable meaning I can color match my interior lighting, thus satisfying my OCD.
-Zach
Reply
0
0

Elite Member
Joined: Oct 2013
Posts: 2,764
Total Cats: 951
From: Cedar City, UT
Thanks for clarifying the cost and making my OCD want them more!
I guess if I really wanted to satiate my OCD I'd just replace the boost gauge and then get a black face plate for the AFR gauge.
As to mounting them? I'm not sure. Maybe mounting them both on the left edge and cutting the trim ring at an angle to have them face me more? Yet I still don't think it'd look too pretty. I like the idea of a tablet but know the inherent weakness it has especially with the Bluetooth manual connection you have to make with MS3 each time(source Soviet),,
I just don't want to replace the 2 dashboard vents. I'm a skinny bastard with no body fat. When it gets cold...I like my heat. Revlimiter gave me a link to the Zoom Tombstone which has three 3 gauge holes above the vents but A) It is pricy B) I don't like the lines of it much.
Saying that a thought dawned on me that when it gets cold enough I'll probably be driving the Jetta instead of the Miata....hmmm
I'm talking I'm circles here aren't I...
Reply
0
0
I love my Maxigauge, one of the best mods I've done to my car!
Actually the Maxigagues are better than analog for one reason. User-settable upper and lower limits for each parameter monitored. If it goes outside of those limits it sounds a very loud alarm that is easily heard on track. I never even look at them until it goes off and then see what is causing it. And before someone says "yeah but by then it is too late" you can set it wherever you want. Want it 20* below a self-imposed threshold? Set it. You can also change it anytime with the buttons on the front so different settings for track or DD is no problem.
Reply
0
0
Elite Member
Joined: Oct 2013
Posts: 2,764
Total Cats: 951
From: Cedar City, UT
Okay a little more progress tonight. Wasn't what I wanted to do, but hey, I'm an idiot so why not!
Wipers in. Need to align them but I just shot them in real quick to get it over with
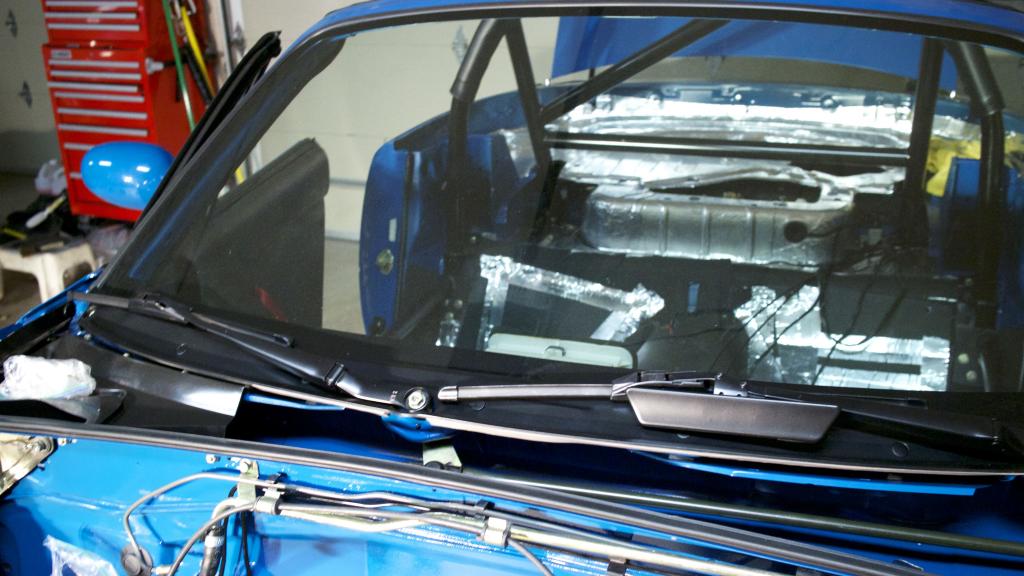
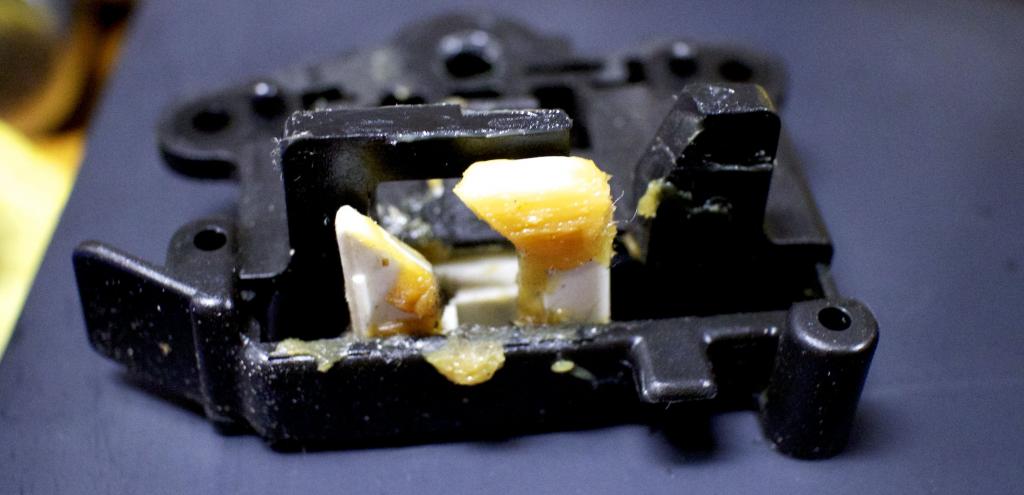
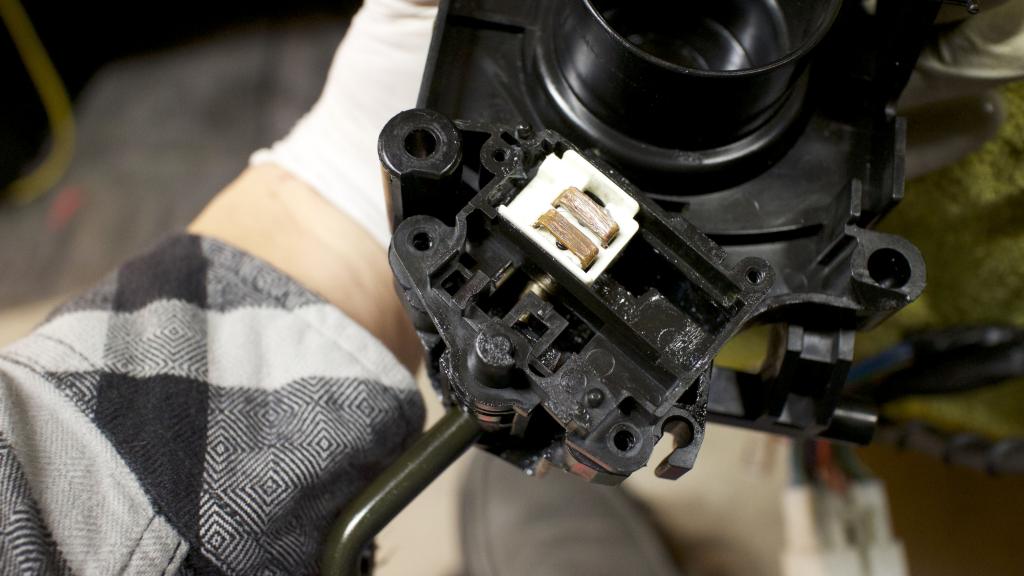
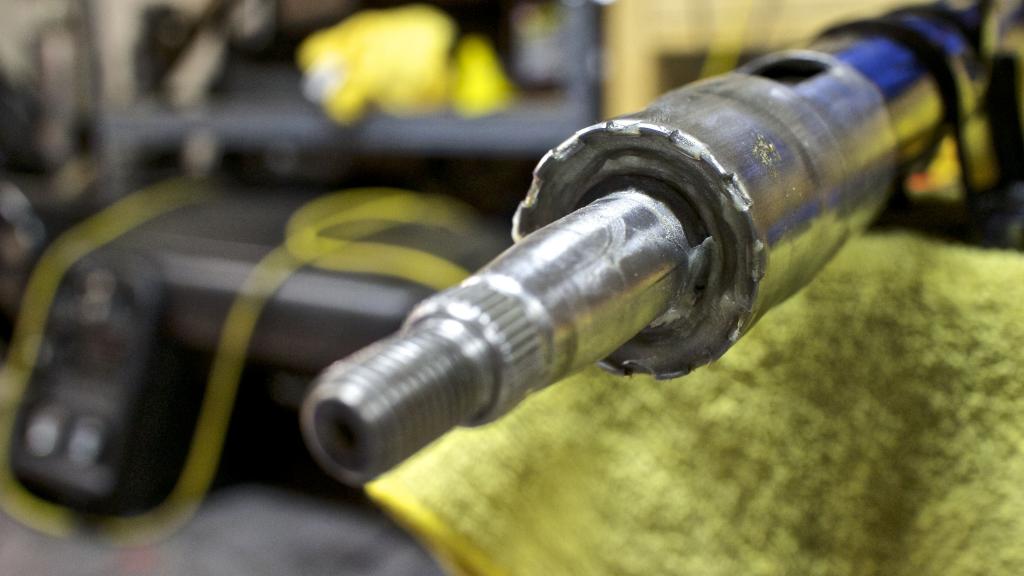
Regreased ignition switch. See the brass 1/2 circle not in? Take note of the tab, that one goes on top of the other.
Make sure your key is in the off position otherwise it won't align properly when you bolt the cover on top
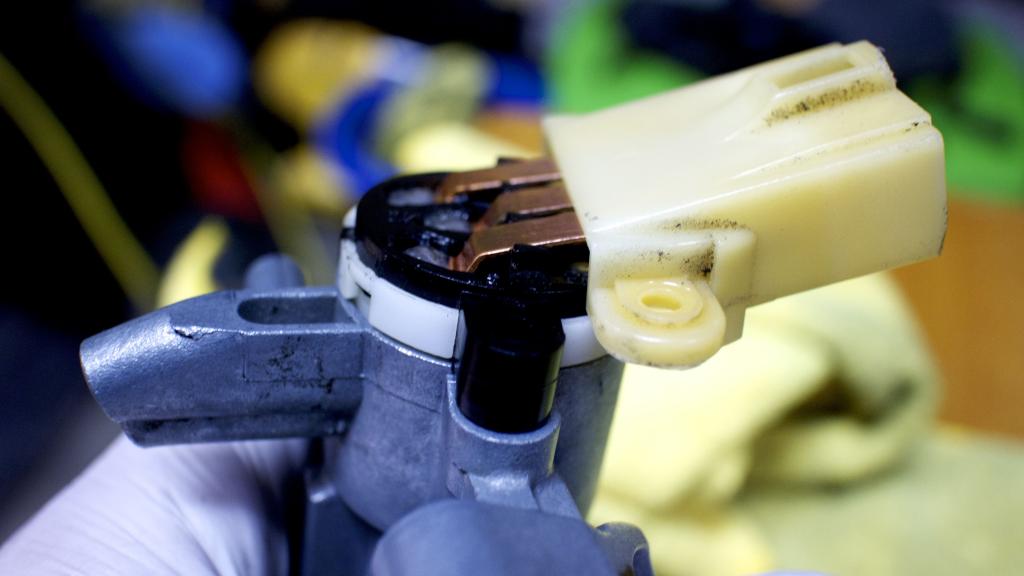
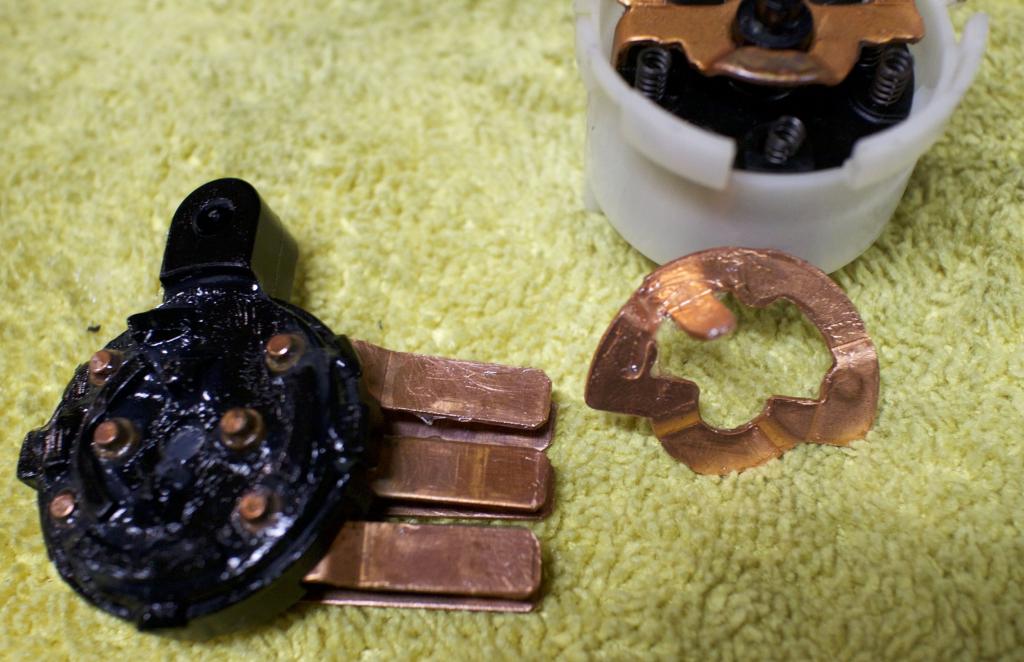
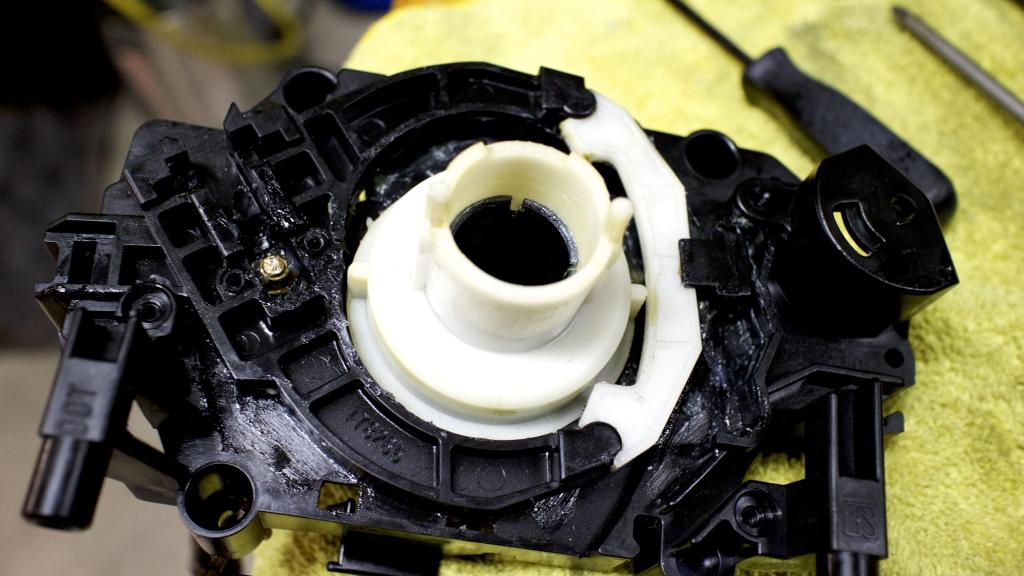
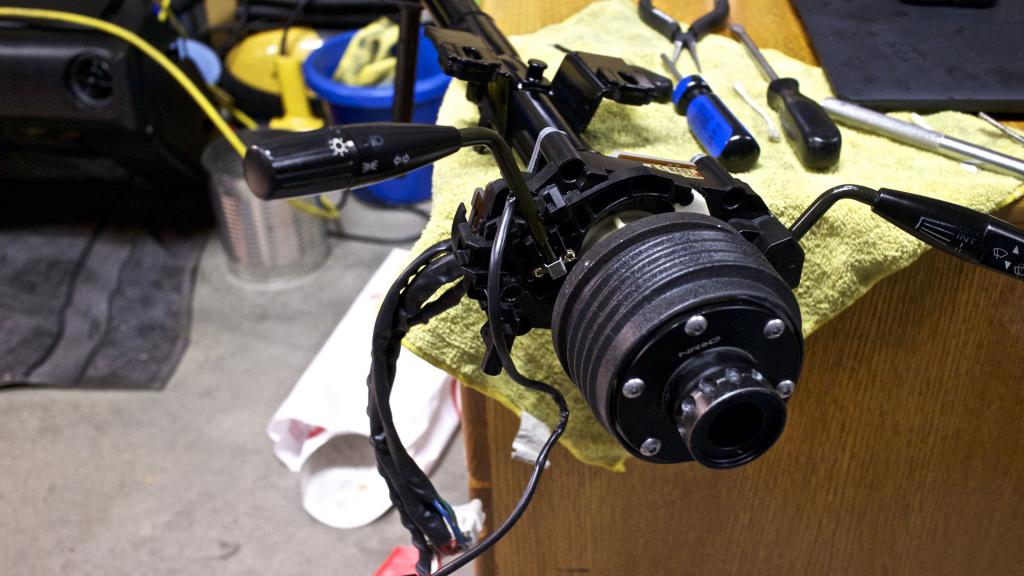
Then I just went full retard and somehow ended up cleaning the wiper/headlight controls...
old grease was again the consistency of wax with a lot of dirt build up on brass contacts.
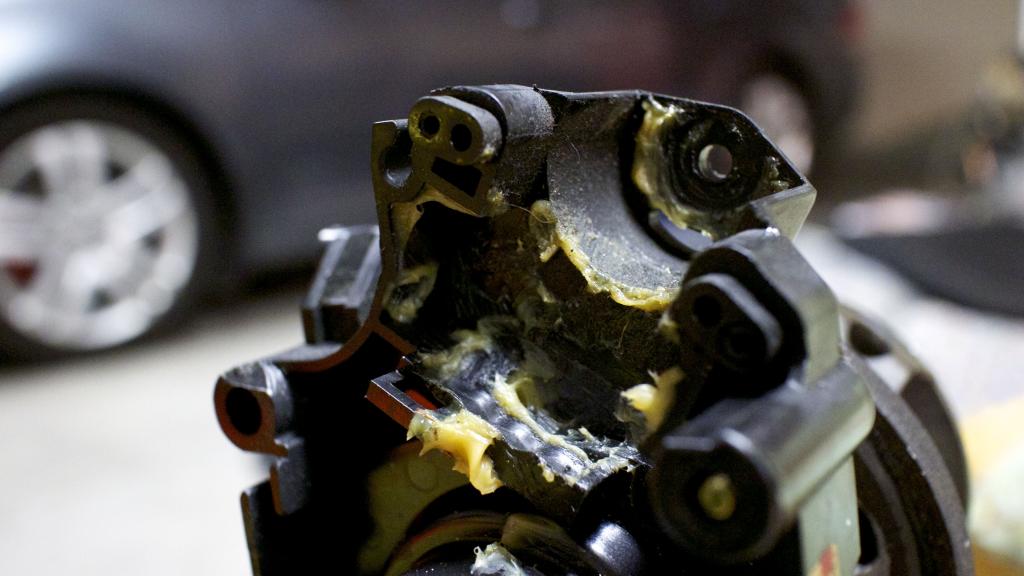
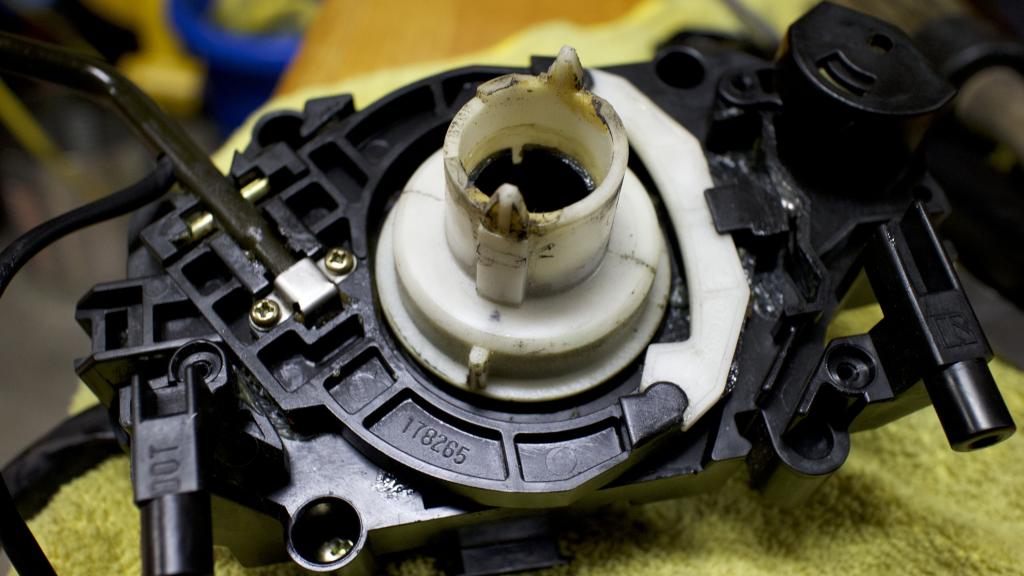
Again careful with this ball bearing
degreased and regreased
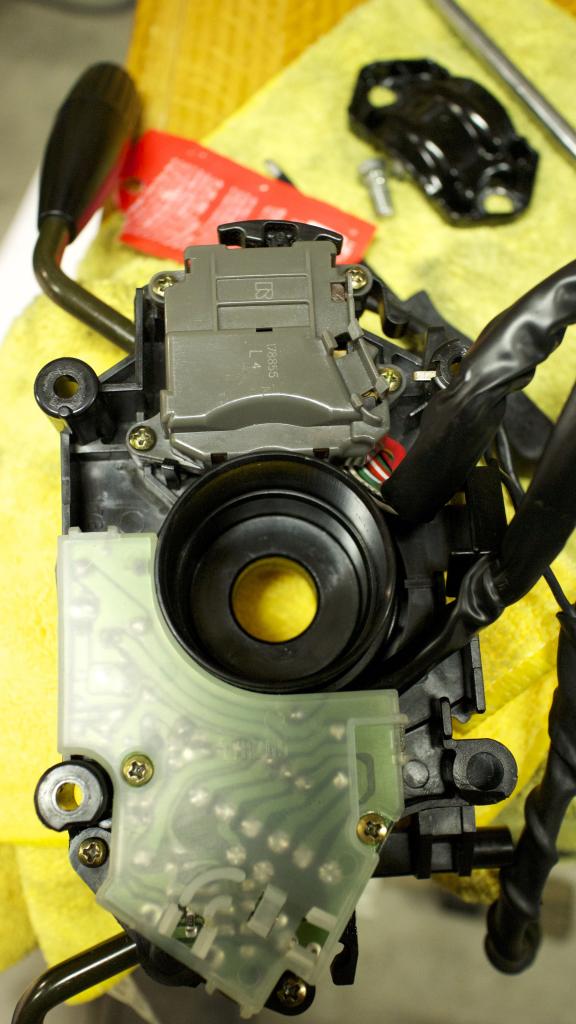
Ready to put in.
Next project
Wipers in. Need to align them but I just shot them in real quick to get it over with

Regreased ignition switch. See the brass 1/2 circle not in? Take note of the tab, that one goes on top of the other.

Make sure your key is in the off position otherwise it won't align properly when you bolt the cover on top

Then I just went full retard and somehow ended up cleaning the wiper/headlight controls...
old grease was again the consistency of wax with a lot of dirt build up on brass contacts.


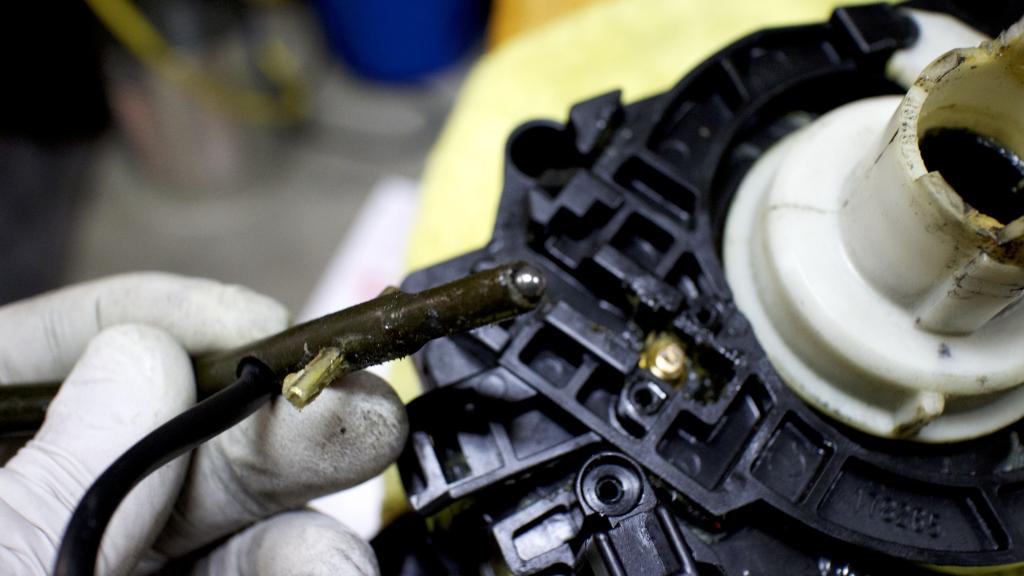
Again careful with this ball bearing

degreased and regreased


Ready to put in.

Next project

Reply
2
2

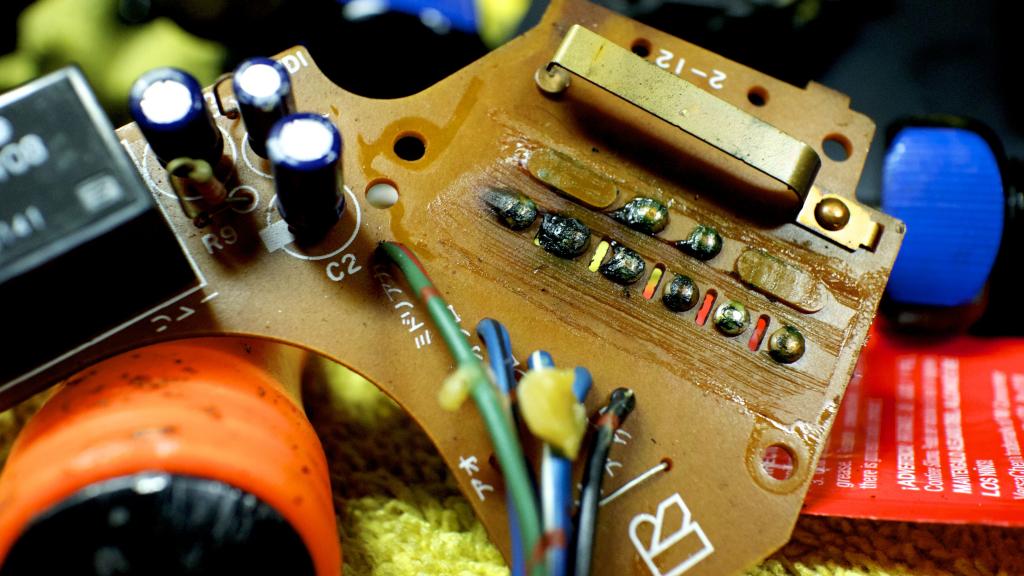
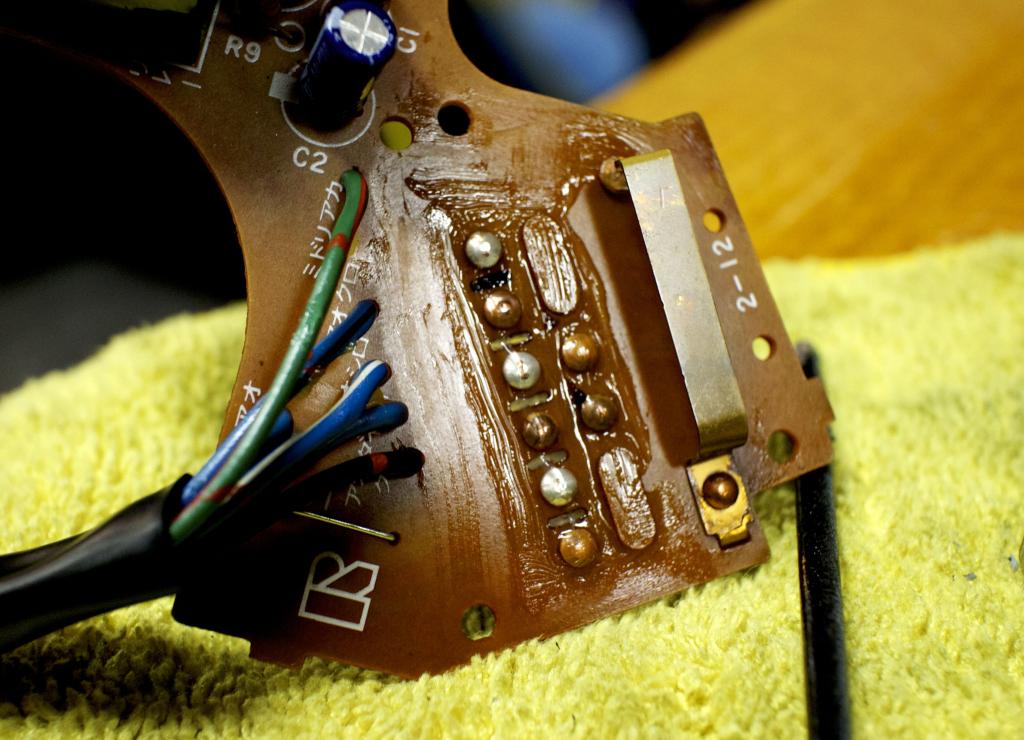
Jeff, since you have torn into the wiper controls, I'd suggest you do not button it up before doing the "intermittent control" mod.
Takes about 5 minutes with the board exposed like that, and you will thank me later.
I did that, and it IS one of the best mods you can do to a Miata.
Here's the link for instructions:
Miata Intermittent Wiper Control
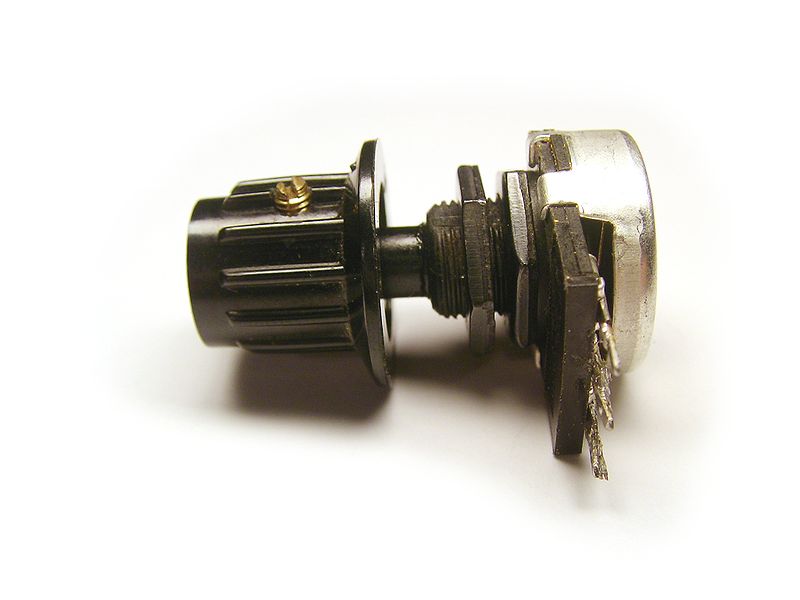
I used a rotary pot, like this one, and mounted it on the switch blank next to the cluster light dimmer:
Takes about 5 minutes with the board exposed like that, and you will thank me later.
I did that, and it IS one of the best mods you can do to a Miata.
Here's the link for instructions:
Miata Intermittent Wiper Control
I used a rotary pot, like this one, and mounted it on the switch blank next to the cluster light dimmer:
Reply
0
0
Elite Member
Joined: Oct 2013
Posts: 2,764
Total Cats: 951
From: Cedar City, UT
Jeff, since you have torn into the wiper controls, I'd suggest you do not button it up before doing the "intermittent control" mod.
Takes about 5 minutes with the board exposed like that, and you will thank me later.
I did that, and it IS one of the best mods you can do to a Miata.
Here's the link for instructions:
Miata Intermittent Wiper Control
I used a rotary pot, like this one, and mounted it on the switch blank next to the cluster light dimmer:
Reply
0
0
Elite Member
Joined: Oct 2013
Posts: 2,764
Total Cats: 951
From: Cedar City, UT
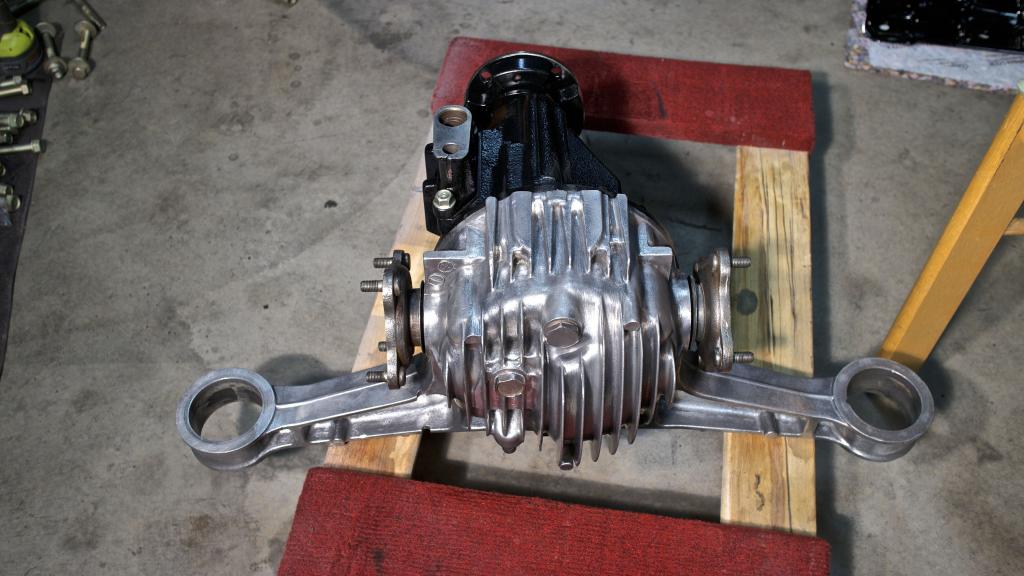
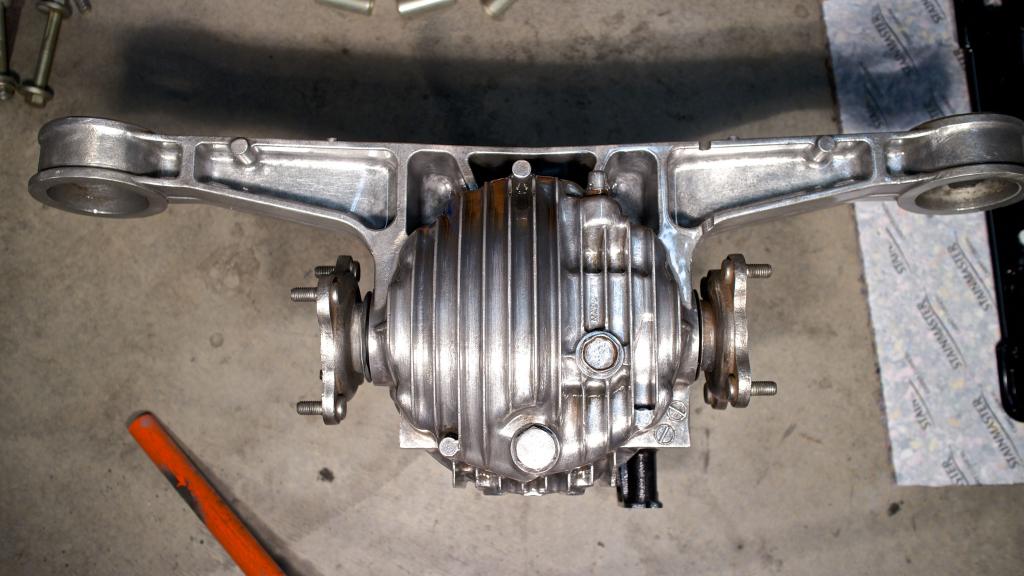
Title: How to break an OCD persons spirit.
Give them a Miata Diff and tell them to clean it.
I never...ever...ever want to do that again. It ain't perfect but...I simply just don't care anymore. I'm going to go buy some clear coat tomorrow and make sure I don't have to think about that again.
Also, wear a carbon filter air-mask. Aluminum oxide is no bueno.
Also, can you install zerk fittings for the diff bushings?
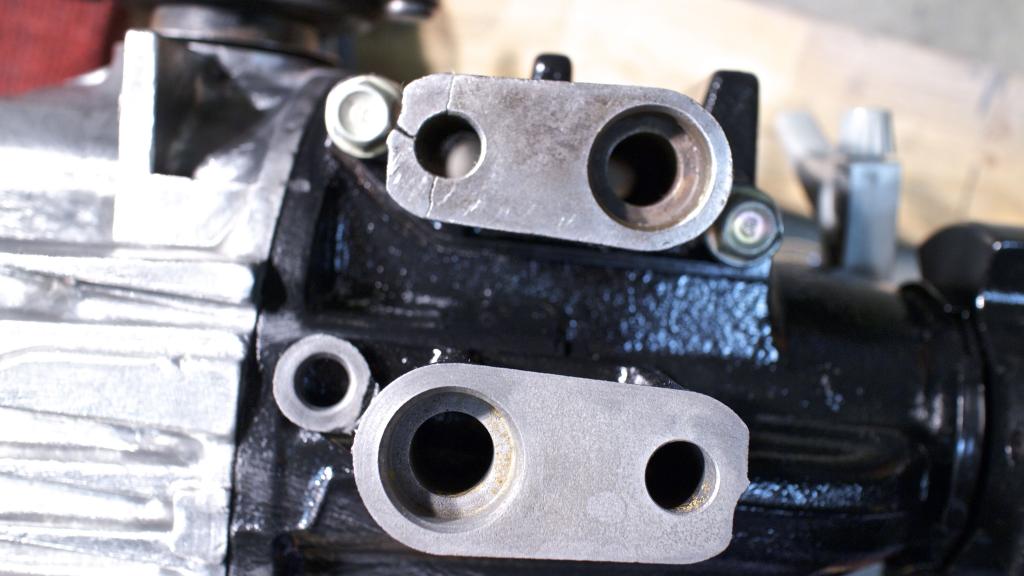
Question though. Torque gave me a spare diff spacer he had, the problem though is that the replacement spacer only has one bolt hole, while the old one has 2. I don't foresee this as an issue but I thought I'd pass that along to you gurus.
Give them a Miata Diff and tell them to clean it.
I never...ever...ever want to do that again. It ain't perfect but...I simply just don't care anymore. I'm going to go buy some clear coat tomorrow and make sure I don't have to think about that again.
Also, wear a carbon filter air-mask. Aluminum oxide is no bueno.
Also, can you install zerk fittings for the diff bushings?


Question though. Torque gave me a spare diff spacer he had, the problem though is that the replacement spacer only has one bolt hole, while the old one has 2. I don't foresee this as an issue but I thought I'd pass that along to you gurus.

Last edited by Jeffbucc; Feb 8, 2014 at 08:21 AM.
Reply
3
3

You mean the two holes that bolt it onto the diff housing? Mine torsen only has one too. It's really only a spacer, so the two big holes in the middle are really all that's necessary, the 1-2 tabs on the side are really only to hold it on during installation.
Don't grease the diff bushings though, they're not pivoting bushings, and if they're aftermarket polyurethane bushings, they won't be moving much at all.
Don't grease the diff bushings though, they're not pivoting bushings, and if they're aftermarket polyurethane bushings, they won't be moving much at all.
Reply
1
1

Reply
0
0
Elite Member
Joined: Oct 2013
Posts: 2,764
Total Cats: 951
From: Cedar City, UT
Reply
0
0

Joined: Sep 2010
Posts: 8,157
Total Cats: 1,094
From: Lake Forest, CA


Reply
0
0
You have provided more than enough proof in this one thread. I rest my case.
BTW, I am often the same way. Start some simple task, and end up spending way too much time and effort cleaning parts, tweaking things, etc. It's gotten so I don't start projects, because I make so much work out of everything.
I am a hobby machinist. I make "steam" engines (run on air) but tend to not get them ever to the finished stage, because I insist on polishing/painting the parts to perfection. Which is silly, because my machining skills aren't all that great, and I should concentrate more on making more complicated parts, and less on making things pretty.
Anyway, I really admire the attention to detail and sheer magnitude of the project you have undertaken. You're going to have one fine car at the end.
Reply
1
1
Elite Member
Joined: Oct 2013
Posts: 2,764
Total Cats: 951
From: Cedar City, UT
Ah so the truth comes out! I think to be a machinist you have to be on a different level of ocd. I don't have the patience for that. Sounds awesome though, I'd love to have that skill.
I keep thinking that if I didn't get distracted by some inane detail of the car I'd be done by now. It doesn't other me too much though since this is a "project car" and not my daily driver. I think that is the reason I have gone so far with it, it has no rush to be done so I can really dig into the nitty gritty of it.
I keep thinking that if I didn't get distracted by some inane detail of the car I'd be done by now. It doesn't other me too much though since this is a "project car" and not my daily driver. I think that is the reason I have gone so far with it, it has no rush to be done so I can really dig into the nitty gritty of it.
Reply
0
0
Elite Member
Joined: Oct 2013
Posts: 2,764
Total Cats: 951
From: Cedar City, UT
There is one thing I can recommend everyone does when painting. Tape off your rubber trim perfectly or remove it. Not worth the headache and damage it causes trying to carefully scrape the paint off.
Working on the rain rail, I think that is what it is at least. The rubber U shaped trim connected to metal that bolts down in 10 spots. It is covered in white paint. Using chemicals to strip it off damages the rubber too much so you have to be super meticulous.
Currently deciding if it is worth clear coating the aluminum on the diff. What do you guys think?
Last edited by Jeffbucc; Feb 8, 2014 at 08:50 PM.
Reply
0
0
Elite Member
Joined: Oct 2013
Posts: 2,764
Total Cats: 951
From: Cedar City, UT
OK talk was cheap and decided to do.
Bought some clear engine enamel, which is good for about 500 degrees F.
Since there are so many nooks and crannies and it would be impossible to get the surface nice and clean for paint I decided to spritz a little on the aluminum and the blast that off with the steam cleaner, to ensure no aluminum powder was left on the surface.
Unfortunately I started painting late so I had to make a little contraption to block the wind and get some heat on the diff so it would cure properly. It is warm in Southern Utah but it drops 30 degrees the instant the sun goes down.
Yes that is tinfoil, I was in a rush!
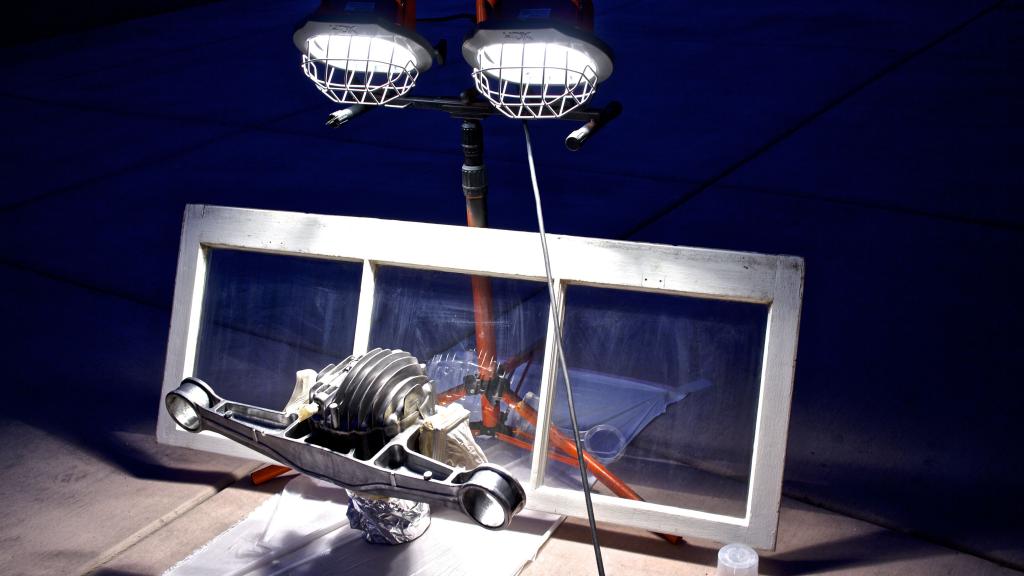
Obviously hard to see but it is nice and clear coated, I put about 4 layers on to ensure it would survive being under the car.
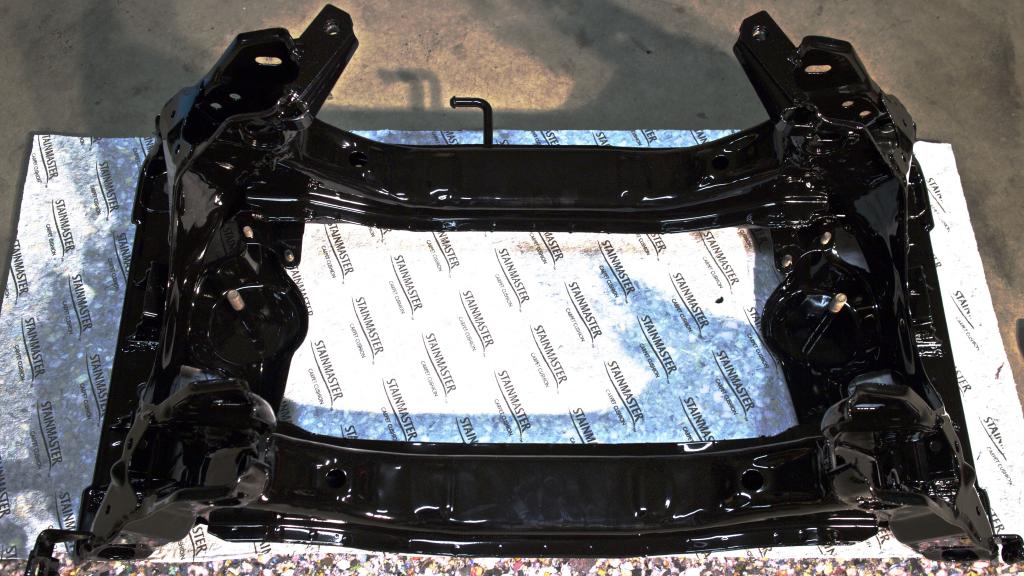
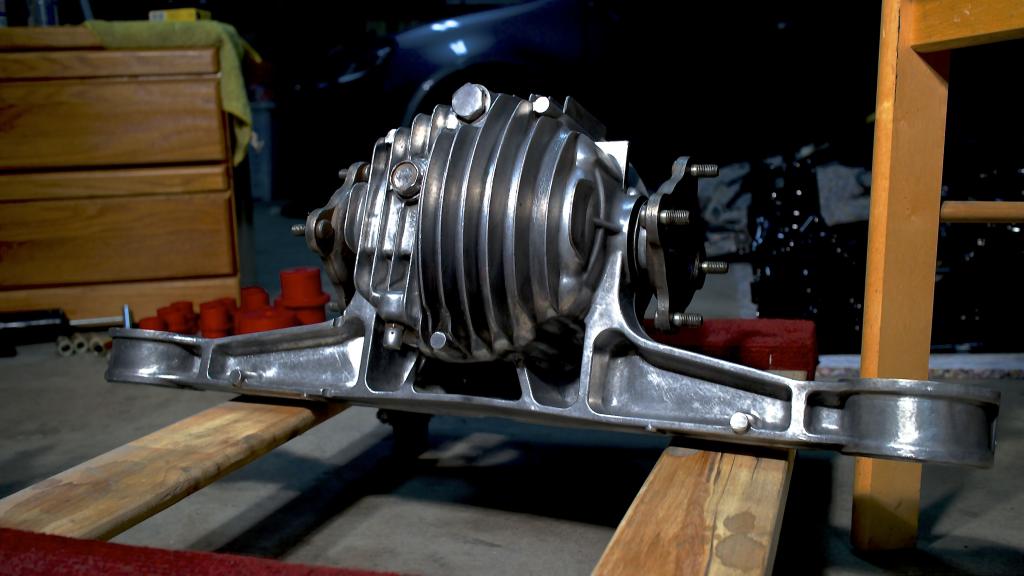
and mounted in the subframe and torqued to spec(~69 for the 17mm and ~19 for the 4 smaller 14mm)
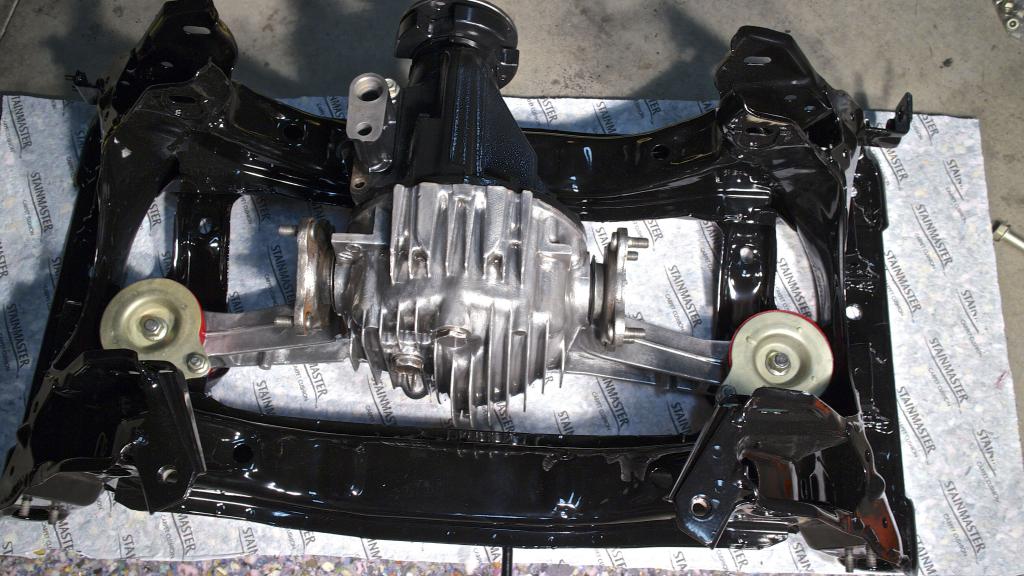
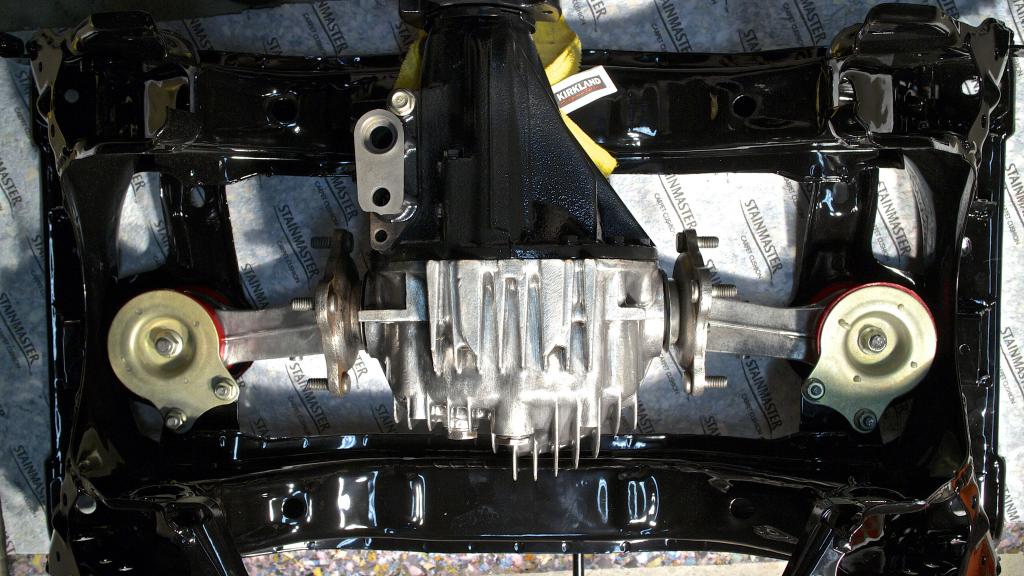
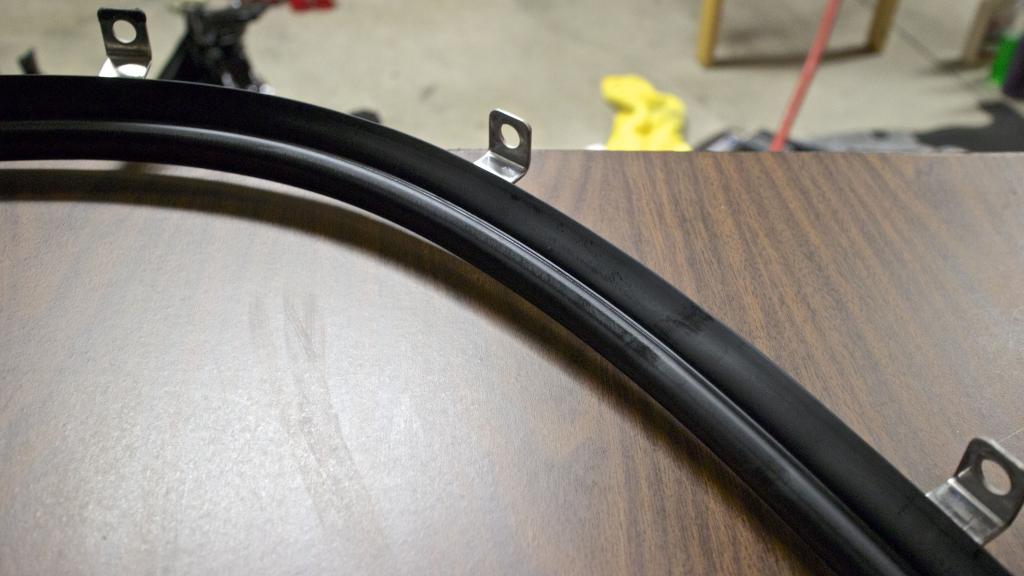
Also got the frame rail cleaned up and slotted in. Lots of overspray, so it took a TON of rubber restore to get it back to being nice and healthy again. It is still curing in this picture hence the splotches.
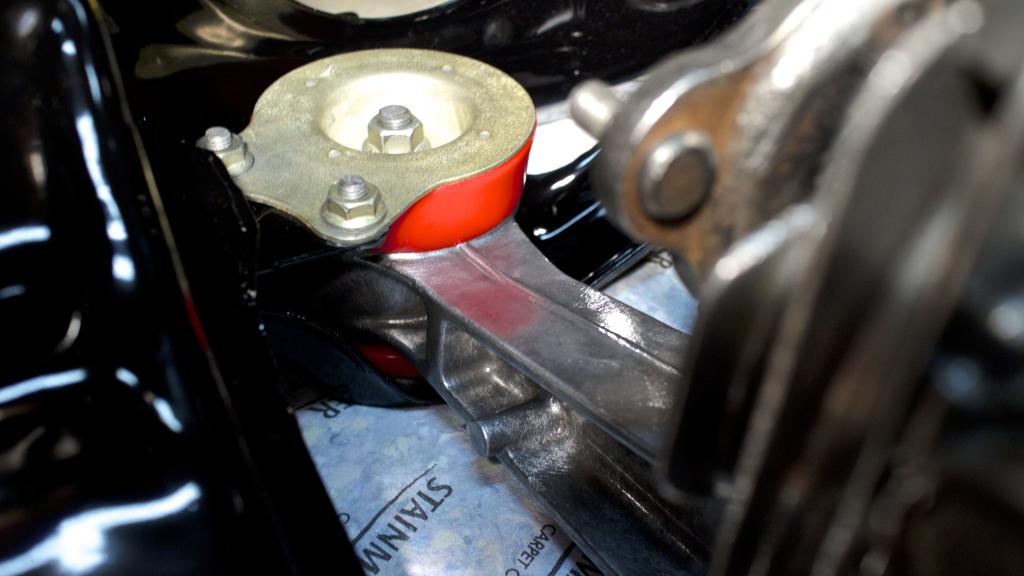
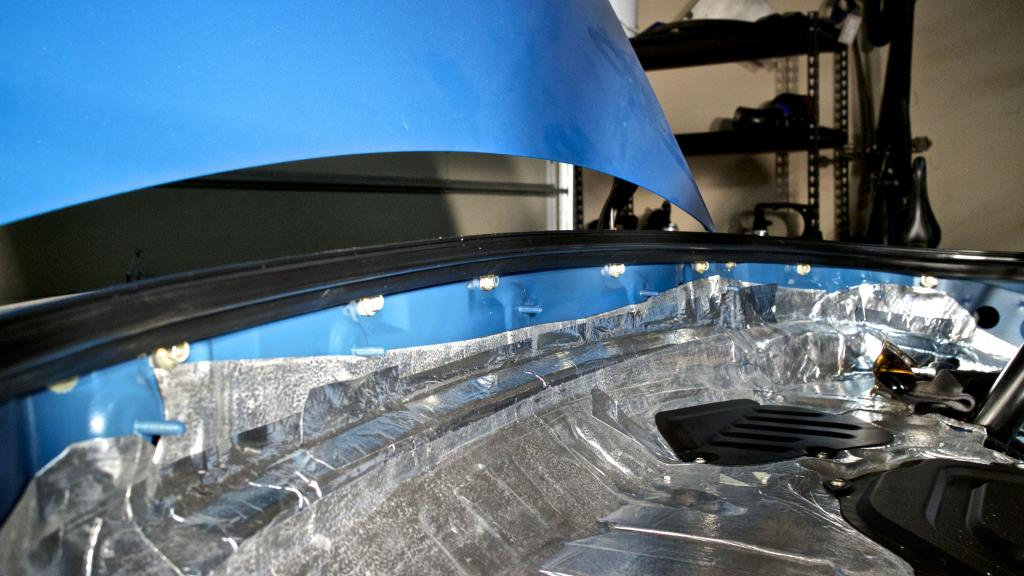
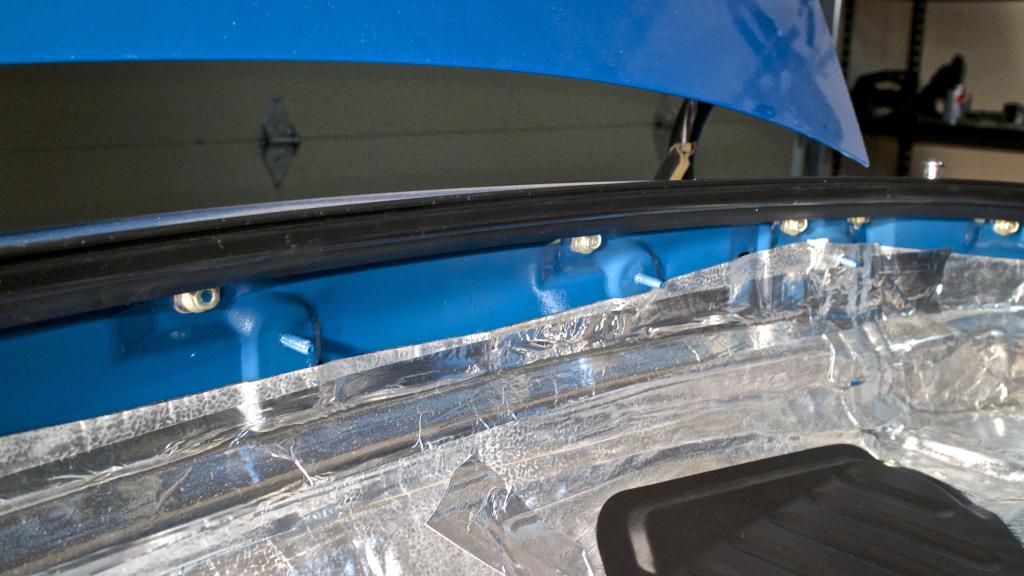
Installed. Thanks to whoever pointed out that it needs to be tightened in a certain order. I wouldn't have even thought to look without that! I cleaned out the old sealant and put a nice thick bead of clear waterproof sealant inside the gap before I pressed it on.
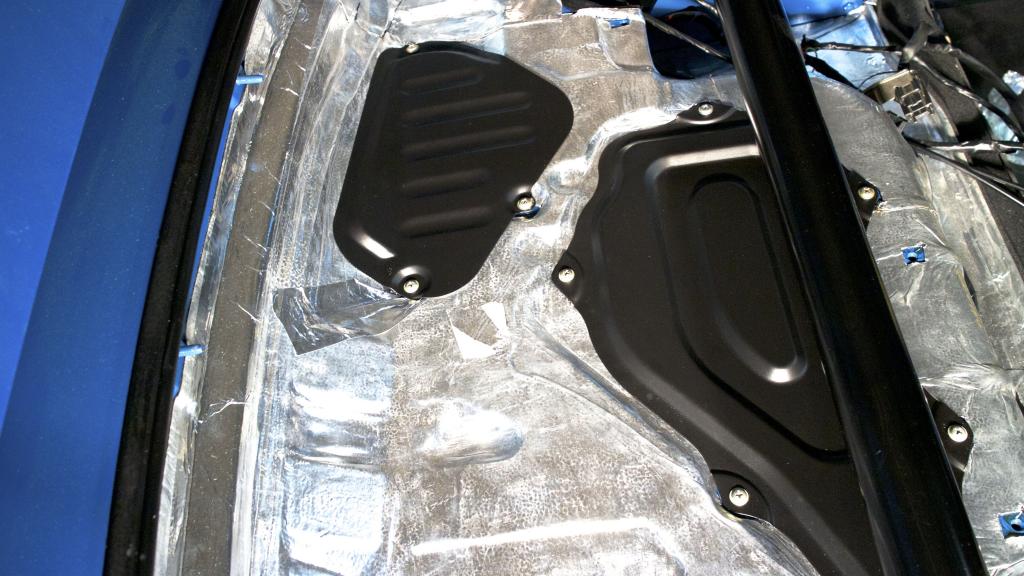
Also put the accessory trays on as well.
Now onto buttoning up the rest of it!
Bought some clear engine enamel, which is good for about 500 degrees F.
Since there are so many nooks and crannies and it would be impossible to get the surface nice and clean for paint I decided to spritz a little on the aluminum and the blast that off with the steam cleaner, to ensure no aluminum powder was left on the surface.
Unfortunately I started painting late so I had to make a little contraption to block the wind and get some heat on the diff so it would cure properly. It is warm in Southern Utah but it drops 30 degrees the instant the sun goes down.
Yes that is tinfoil, I was in a rush!

Obviously hard to see but it is nice and clear coated, I put about 4 layers on to ensure it would survive being under the car.

and mounted in the subframe and torqued to spec(~69 for the 17mm and ~19 for the 4 smaller 14mm)


Also got the frame rail cleaned up and slotted in. Lots of overspray, so it took a TON of rubber restore to get it back to being nice and healthy again. It is still curing in this picture hence the splotches.

Installed. Thanks to whoever pointed out that it needs to be tightened in a certain order. I wouldn't have even thought to look without that! I cleaned out the old sealant and put a nice thick bead of clear waterproof sealant inside the gap before I pressed it on.


Also put the accessory trays on as well.

Now onto buttoning up the rest of it!
Reply
3
3
Joined: Sep 2010
Posts: 8,157
Total Cats: 1,094
From: Lake Forest, CA
Reply
0
0