Build Thread (FE3, RX7 TII, EFR 6258, MS3)
 06-06-2014, 05:11 PM
#401

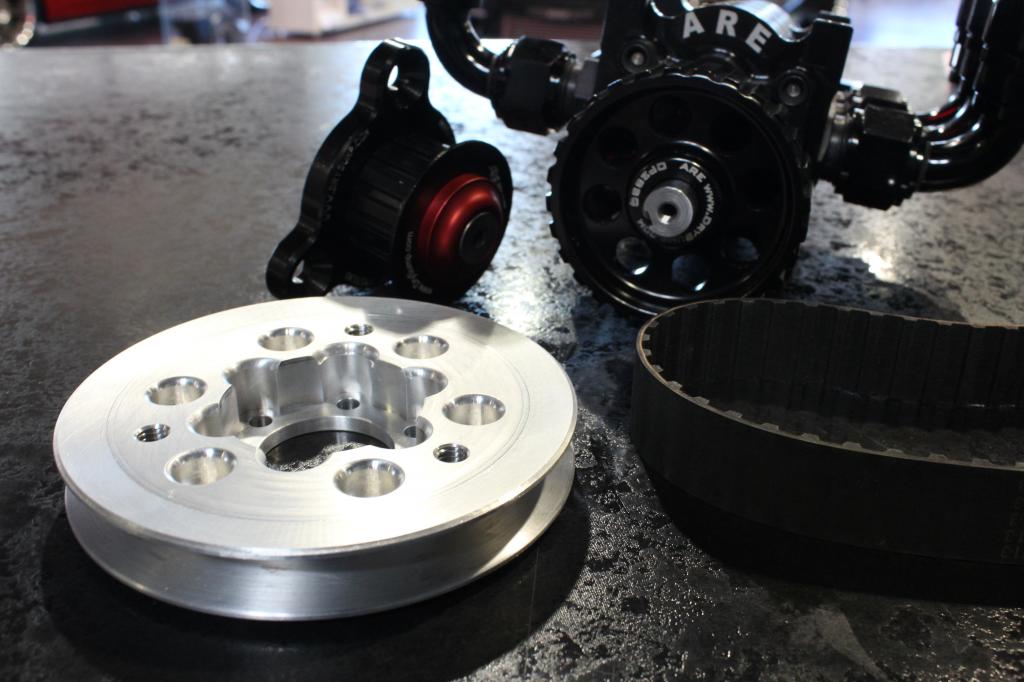
Finished deleting the A/C this past week and made a new TIG welded Stainless steel coolant reroute WITH MANDREL BENDS this time. Its nice to have resources and nice fab tools available. Received the custom crank pulley i designed in Solidworks today and my short block is at the machine shop and ready for pickup.
Tearing down the car tonight!

Tearing down the car tonight!

Reply
 0
0

0
06-06-2014, 05:18 PM
#402

Should.
I may or may not have an FE3 crank with some F2T rods attached to it sitting in an F2T block at this very moment.
Glad OP was able to get some custom 155mm rods done.... I should call them concerning some 165.5mm rods a la Mazda G6, but stronger.
[edit]
Can you explain the torque plate to me? Actually building engines is far from my forte, so that's a new thing to me.
Also: How do you like the RH fittings?
Reply
0
0
06-06-2014, 09:21 PM
#403
Redhorse fittings fit and finish are good. They had a batch of them where the threads didn't come all the way down to the bottom of the shoulder which were a PITA to assemble but i called them and he told me that they were not supposed to be shipped out. Ended up sending them back and they replaced with the updated models/paid shipping. Shouldn't be seeing the assembly issue again.
On my way out to the shop to pull the head. It'll be interesting to see the damage. My guess is spent valve seals.
Reply
0
0


 06-08-2014, 03:18 PM
#406
so much awesome
you know borg warner makes a v-band efr housing now, right? call up full race and ask them about it.
BorgWarner EFR 6258 Turbo - Full-Race.com
See option in dropdown.
you know borg warner makes a v-band efr housing now, right? call up full race and ask them about it.
BorgWarner EFR 6258 Turbo - Full-Race.com
See option in dropdown.
Reply
0
0
06-08-2014, 09:12 PM
#407

When the head is torqued to the block it actually pulls the cylinders slightly out of round by elastically deforming the block material itself (typically more pronounced with aluminum blocks but still exists in cast iron) Boring and honing with a torque plate helps keep the cylinders more concentric. Theories fly about how this is ineffective since thermal stresses are not considered which Google can produce for you but i thought i'd give it a shot. Made sense to me. Higher rev ring float comes to mind so i thought i'd be proactive..
Reply
0
0
 06-09-2014, 06:02 PM
#410
Thought of this also since i have a spent head laying around. Both Eastco and M & B suggested against it for reasons unknown. My guess is that after boring and decking the top portion of the head the cast aluminum would be so weak that it wouldn't distribute the load of the nut even enough. Just a guess from a mechanical engineer though..
Last edited by yank; 06-09-2014 at 06:36 PM.
Reply
1
1
06-11-2014, 03:24 PM
#412
Yes. Its always rolled smoke. It continued to get worse over its short life. I've pulled the pistons and the bearing in cylinder 1 had a deep groove cut all the way around directly under the oil port. The ring lands all looked okay on first glance but i haven't cleaned them up yet. I'll take pics of the damage when i get everything tore down. I haven't pulled the mains yet.
Reply
0
0

 06-13-2014, 02:39 AM
#415
Correct. Supercore's are everything except for the turbine housing.
Unfortunately. $$$
Modified the turbine housing tonight. Welded a GT30 V-band to it with some ER310 filler rod while back purging. From what I've read the ER310 filler is the best thing to use if welding HK40 cast Stainless. (which the EFR turbine housings are made of as per full-race email.)
Epic win / Fail. Time will tell.
Reply
0
0

 06-23-2014, 02:45 AM
#419

Motor mounts 3.0

Pen fits snug under the pan. Got lucky on this one. Took preliminary measurements and everything ended up clearing just fine.

Notched the steering rack the same as M2cupcar for extra AN fitting clearance. Planning on routing the scavenge lines between the upper and lower control arms and then over the sub frame and down to the sump.


functional birdshit welds. T-sat housing now pointing the correct direction instead of straight down.

New alternator bracket with more room for the oil pressure inlet AN fitting.
Waiting on the pressure plate and flywheel to get back from the machine shop and a new set of HLA's and i'll be able to get this thing bolted back together.
I ended up taking another almost 2mm out of the combustion chamber so the dome of the pistons would clear the head.
Piston to head clearance should be about .045" in the quench and piston to valve clearance at TDC at full lift should come in at .039"
Hoping to turn the key this time next weekend.
Crossing fingers for success.
Reply
0
0
06-23-2014, 08:52 AM
#420
What did you use for the new mounts v3? Jeep mounts? I believe those have both sides completely isolated with bushing material, but use a "capture" method IF the bushing material gives way.
I notched the aluminum collar on the rack first time around but this time I pulled the motor back out, pan off and made a concession in the pan to clear that collar. I was kicking myself as I completely forgot about when I fab'd the pan.
Free space is quickly diminishing with all the dry sump parts. Those AN 90s are giant.
Reply
0
0


