When you click on links to various merchants on this site and make a purchase, this can result in this site earning a commission. Affiliate programs and affiliations include, but are not limited to, the eBay Partner Network.
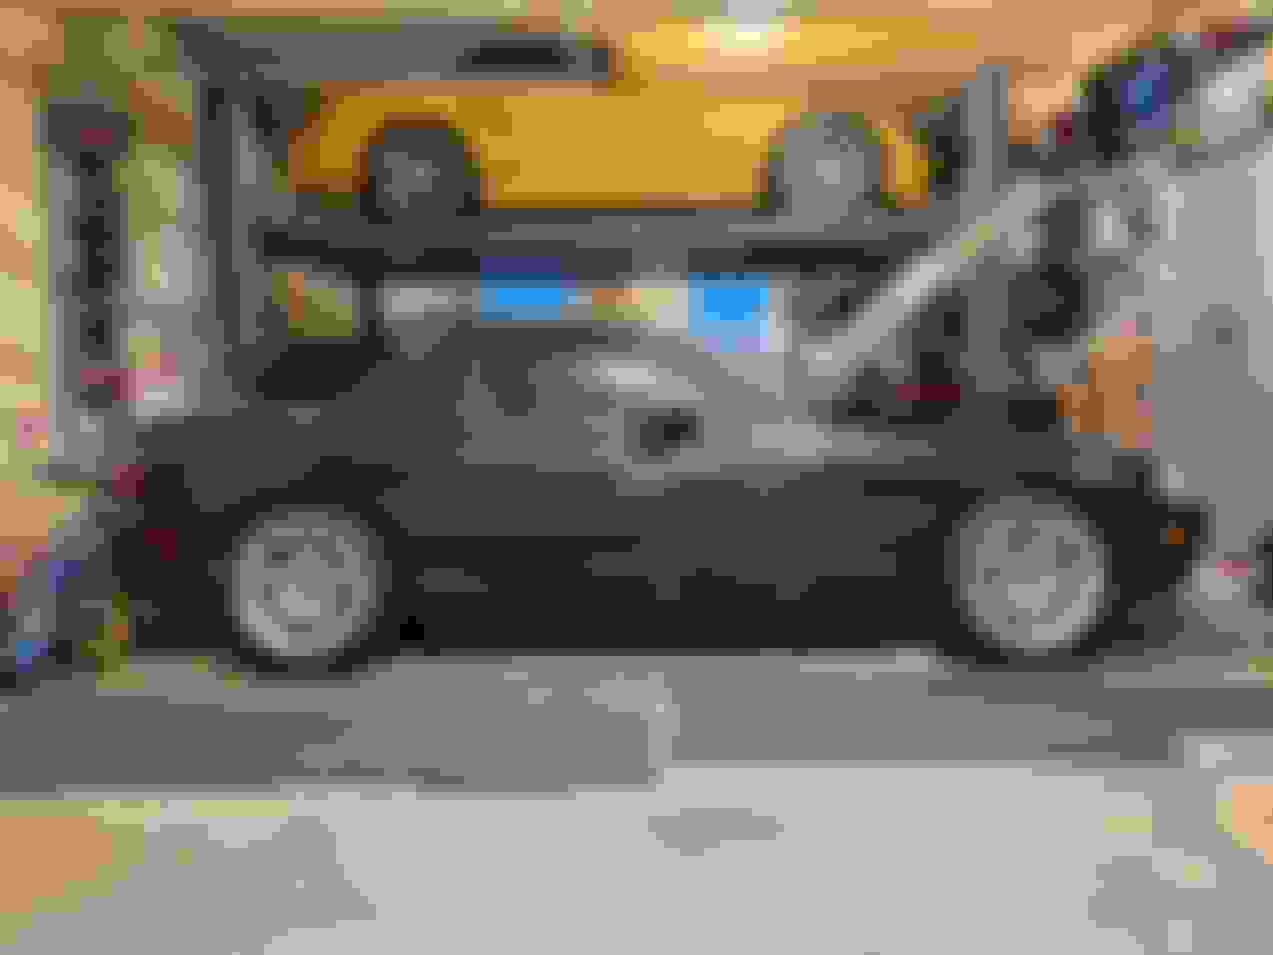
Well.. after a bunch of work, I've decided I'm taking a new direction with the car and foregoing building a track car. It will be a show car and I'm joining #stancelife. That's some serious tuckage.
Ok enough jokes.. it does look pretty badass though. So I got the rear fenders rolled. For the pictures above I removed the coilover to check the clearance of the wheel to the fender. I didn't measure the pinch weld height but that had to be ~3.5" I'd guess. There's about a good pinky gap right now between the tire and rear fender which should be good. Yes, I haven't gotten the car aligned yet but camber should be pretty close and I still should have enough clearance. Rolling the rear fenders wasn't too bad, just took my time with my heat gun and fender roller. It took about an hour to do each side. No damaged paint which is nice. I still need to roll the fronts.
I got the car back together and here is about 4.75" high all around. I set it a little higher to give it a little more ground clearance. Curious what do other folks run? A friend said he runs 4" pinch welds on his spec miata but I'd still like to drive it on the street. Welded pinion I should get back from miatasource tomorrow so I'll look to get the front fenders rolled, steering rack back in the car, and the car aligned and back on the road next week sometime. Brake pedal feels nice and stiff after bleeding the brakes. Looking forward to driving this car!
Car looks much better with 4.75" heights than it does in the first pic
I'm currently running 4.75" pinch weld heights all around on my car. Used to run 4.25" all around with 225s but I started getting really bad inner fender well rub when I upped to the 245s. I might be able to lower the car a bit now that it's on stiffer springs, but haven't had time to experiment with that yet.
I think I'm running around 105-110 mm (~4.25") on my car. Basically the heights recommended in the 949 Dual Duty alignment. I'm not too precise, and my pinch welds are largely destroyed so that doesn't help.
Quick question for you guys. I'm rolling the front fenders and was just wondering what you guys do with the front fender liners? Just tuck the fender liner behind the rolled attachment points or cut the fender liner in spots?
Also, I got the rack back in and the front swaybar on (I will backtrack and make a post about it), and noticed the instructions in the Racingbeat swaybar recommended reinforced end link mounts on the lower control arm for NBs. Is this necessary? I'm running the 1.125" thick with 188wall not the 1.25" thick racingbeat swaybar. I am running reinforcement plates for the actual swaybar chassis mount though.
I've not heard of anyone having an issue with the NB control arm mounts, assuming you have the end link mounted on properly. Racing Beat sells a bracket to convert the NB style L bracket to an NA style double shear mount, and that's what they're trying to get you to buy. The only failures I have seen were due to putting the end link on backwards, with the ball joint on the outside of the "L". It can be tempting do mount them backwards in the rear if you're using an adjustable sway bar at the stiffer adjustment settings. That did break my mounts, and I've seen it happen to one other person for the same reason.
I've not heard of anyone having an issue with the NB control arm mounts, assuming you have the end link mounted on properly. Racing Beat sells a bracket to convert the NB style L bracket to an NA style double shear mount, and that's what they're trying to get you to buy.
Awesome thanks! I wasn't sure and didn't see it mentioned elsewhere as a failure point but wasn't sure if it was just something I overlooked. I just saw how you reinforced your sway bar end link mount and it's definitely overkill. Very nice.
Appreciate your skunk2 TB thread as well. Found it very helpful!
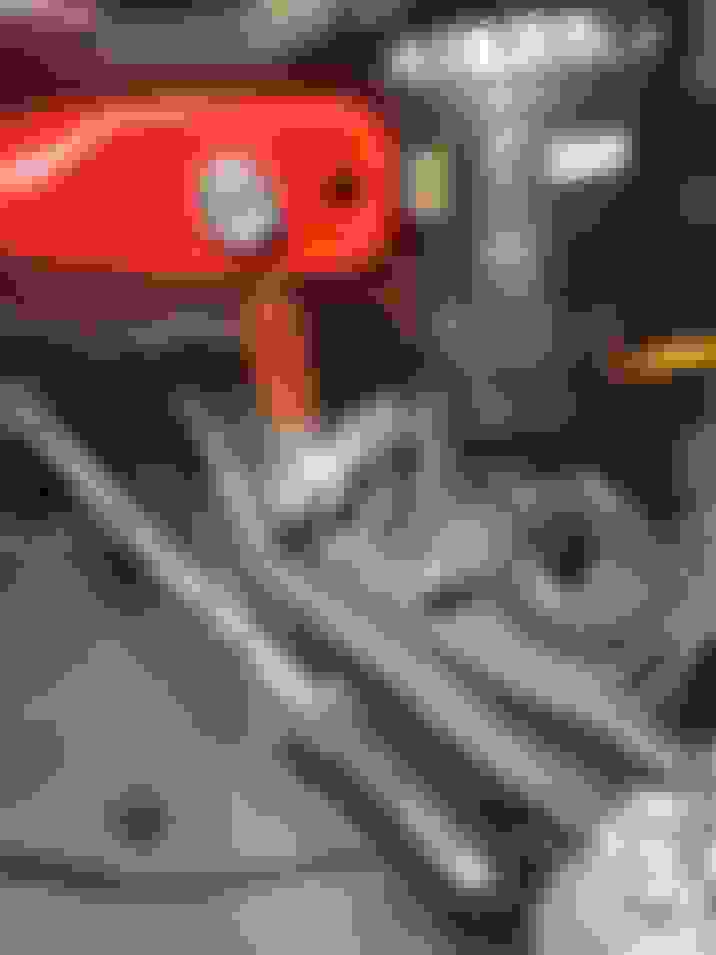
I opted to send the steering pinion to miatasource to weld. For $75 it made sense to just have someone do it that's familiar w/ it. I figured if I was going to depower the rack may as well do it "right" and remove any slop. I also got the allen plug set for the rack just to make it easy. Depowering the rack was pretty straightforward. There are a bunch of videos and flyinmiata has a guide so it makes it easy for a DIYer. I cut out the middle seal on the rack that separates the two sections. Here's the pinion after being welded. It's welded about 3/4 of the way around which should be plenty.
Here I got the rack all cleaned up and ready for assembly. My workbench is always a perpetual mess. I thought I could reuse my old steering boots (they weren't torn).
Unfortunately after assembling the rack I didn't like how the boots kept crumpling a lot and deformed so I opted to order some new ones. Unfortunately no one had them in stock locally that I could find so I just had to wait. Maybe they would've been fine but no sense rushing and regretting it later.
I really wanted to get the car back together and sitting around waiting for parts sucks. So, I said what the hell and started doing some other work that I thought I'd leave till after the first track event. I started porting the squaretop manifold for the skunk2 TB so why not get it installed. Big thanks to @OptionXIII 's install thread on the skunk2 TB. It's just nice to see what are "common" problems and hopefully I can save myself some time and headaches. The skunk2 TB has a small inset screw that attaches a spacer flange for the IACV. The screw is too long that bottoms out before getting tight and doesn't come with any washers. Fortunately I just used a small washer to make up the gap and it worked well.
I removed the throttle rotor and drilled a hole in about the same spot as OptionXIII.
Planning ahead, I also opted to add a couple vacuum ports on the IM for the turbo setup later. It's pretty easy and straightforward to tap some 1/8" npt threads in an Al intake manifold. I opted for 2. One on the top and one on the "back" by the firewall.
Finally, I attached the skunk2 TB. I just used some washers to keep the OEM studs. I used blue loctite on all fasteners. The skunk2 TB didn't come with any washers strangely so I added washers to all bolts. I also got a couple blockoff plates for the EGR ports. I just used RTV as gaskets.
The steering rack boots came in (Delphi TBR4132) so I could move forward and finish the rack. I'm not thrilled how these boots seem to crumple a bit also but is what it is. The OEM metal straps broke so I just used the zip ties. Centering the rack wasn't too bad. Just count the turns, mark where the rack stops, do some math, and I marked the Center of the rack so I could tell if it moved. It wasn't a problem but nice for peace of mind. I did opt to go with the flyin miata delrin rack mounts, supermiata inner tie rods, and extended lower ball joints as well from SM. In retrospect I'm not sure if I needed the ELBJ, and SM says it increases steering effort a bit, but it is what it is. I thought I'd need a little more camber for the ride height. Is anyone else running ELBJs?
With the rack back in the car I could finish rolling the front fenders. I tried rolling the front fenders w/o the steering rack connected and it's a big pita as the hub shifts too easily. Do it with the rack connected. The ELBJ clearance to the rotors is close but should be ok.
I'm now waiting for an intake manifold gasket (the old one was peeling, not worth taking the chance and reusing imo), I'm going to install the supermiata coolant reroute, pull the valve cover and tap the ports for -10an fittings for a catch can, replace all the coolant lines, and I got an ampefi Maxxspark ignition setup I'll install as well. Hopefully can get it all back together and running and get it aligned by next weekend. I replaced the brake booster soft hoses as the original ones were quite old and crusty/hard. I was able to cut out the check valve in the oem soft line by the brake booster and install it in the new brake booster line. Definitely a bit of a pain and didn't break it. Just lube it up and shove it in..
Question for anyone.. Can I run with the EGR unplugged and the car will run fine on the stock ecu? I know it'll have a check engine light but want to make sure the car won't run in "limp mode" or some other state.
I'm interested in seeing how the S2 TB works out for you. Like I wrote in the thread, I've had a issues with idle droop stalling during warm up in colder weather. I'm the only one I've seen with this complaint, but there aren't many people out there running the S2 TB with a stock ECU and driving in colder weather. My theory is that the stock ECU can't compensate for the greater restriction with the S2 unit. With a standalone ECU it shouldn't be an issue since you have direct control over the PID feedback loop for the IACV.
Once again, you're doing it RIGHT! Great progress, man. Option's S2 TB writeup was a lifesaver, thanks again for that. I put blue loctite on all the S2 fasteners but forgot to do so for the IACV adapter plate bolts. Two months in, they backed out causing a difficult to find vacuum leak lol.
Dunno if it's of any use to you, but at 4" front/4.25" rear ride height on my NA, I was only able to squeeze ~2.8* of camber out of the front suspension on the stock ball joints, and needed to install ELBJs to get myself up to the ~3.5* I run now. I suspect YMMV.
Are the SuperMiata tie rod ends the "R Package" style ones? I opted to go the other route and get steering rack spacers instead of the dropped tie rod ends in order to eliminate bump steer. Couldn't notice the difference with or without the spacers. Maybe (probably) I just suck haha.
Thanks Zak appreciate your input and build thread as always! I'm running 4.75" F/R right now so I bet I'll probably need the ELBJ's to get ~3* of negative camber up front. So to my understanding the SM tie rod ends are the same geometry as stock. In my last post I think I was mixing up the ELBJ's and tie rod ends in my head. To my understanding the NB miata suspension geometry changed such that it's less susceptible to bump steer when you lower the car. So, the NB doesn't need rack spacers..? I looked around and a bunch of folks said they weren't necessary so I didn't get any. I'm sure the lowered suspension on the NB has some effect on bumpsteer but I'm guessing it's just not as severe as the NA..? Not sure I'd notice it either but shouldn't hurt.
I don�t know how it compares to an NA, but when I lowered my NB without �R� tie rod ends the bump steer was bad. I also couldn�t get more than -2.1 front camber without extended lower ball joints. Now with XIDAs, �R� tie rods and ELBJs, there is no bump steer and I can get all the camber. I hadn�t heard about rack spacers before, don�t think you�ll need those in an NB.
I don�t know how it compares to an NA, but when I lowered my NB without �R� tie rod ends the bump steer was bad. I also couldn�t get more than -2.1 front camber without extended lower ball joints. Now with XIDAs, �R� tie rods and ELBJs, there is no bump steer and I can get all the camber. I hadn�t heard about rack spacers before, don�t think you�ll need those in an NB.
Thanks man I'll keep that in mind. For the time being I will just drive it. If the bumpsteer is bad I'll cross that bridge down the road but hopefully it won't be too bad. I thought I read that NBs fixed (or greatly reduced) the bumpsteer curve by changing the suspension geometry over the NA. For the NA, I thought I read there were two ways to fix the bumpsteer issue, different outer tie rods or steering rack spacers (to raise up the rack).
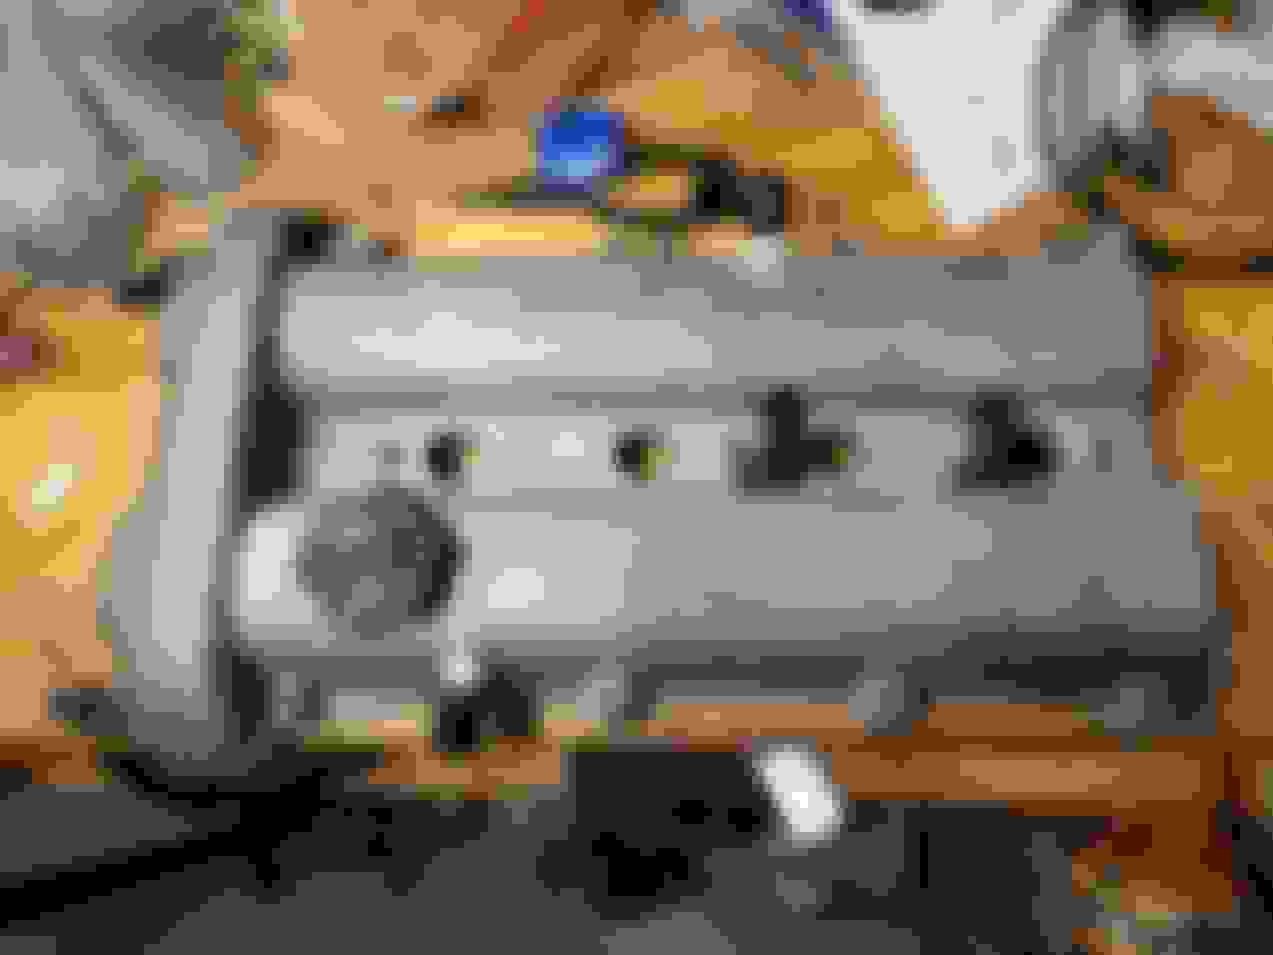
I didn't take many pictures but I finished rolling the front fenders. There are enough OEM attachment points for the fender liner that it's pretty secure. So the next thing on the list was the valve cover. The valve cover appears to have a small leak so I figured I might as well replace the valve cover gasket as well. Fortunately there are youtube videos on this which made it pretty straightforward and you know what to expect. The passenger side port I used a 1/2"-10an 90 degree fitting and the driver's side I used a 3/8"-10an fitting. I also removed the baffle cover plates on the underside of the valve cover to clean out the shavings and drill out the one port to 3/8" on the driver's side passage.I will say the driver's side 3/8" port made me a little nervous tapping it as the drilled opening gets a little thin and I didn't want to crack it when tapping the threads but it wasn't a problem. I'd def use a little loctite when reinstalling the philips screws for the baffle plates.
Next step was installing the coolant reroute. I was quasi dreading this just because I expected it to be a pita and it was. The space is obviously very tight and you can't directly see the back of the head. You absolutely should remove the brake booster hardline if you do this on the car. I assembled the water neck and sensors first. I purchased an allstar coolant pressure kit that has a dummy light. I installed the pressure sensor in the extra 1/8" npt port on the water neck. To make the led light less annoying on the street i will be sure to put a switch inline with the sensor (which acts as the ground).
Now the hard part.. After remove the OEM water neck I wasn't sure how I was going to access and see the surface. Fortunately I realized a simple mirror would do the trick. I found a simple makeup mirror and it fit perfectly. Unfortunately I was not lucky and the gasket was basically fully intact on the back of the head. I tried a few different things (like soaking it in some brake cleaner) but ultimately the only thing that worked well was a razor blade, and finally cleaning it up with some 100grit sandpaper and finished it up with some 150 and 200. This was a huge pita as you have to lean over the car, hold the mirror with one hand, and work with the other,
After over an hour of removing the gasket, maybe closer to 2 (I didn't wanna gouge the head and have a coolant leak) I got it done. This gasket was a big bitch.. stuck on and wouldn't come off in chunks or large pieces. I had to remove the stud to clean off the gasket materially properly.
Finally installing the water neck. Anytime I apply liquid gasket I like to get the surfaces as clean as possible. I clean the surface well and use a rag sprayed with brake cleaner to get it super clean and free of any contaminants. This usually provides a good bonding surface for liquid gaskets. As the instructions say. I'd practice and find the sockets you'll need to tighten down the water neck ahead of time. It's not easy maneuvering it in place, holding it carefully, and slowly tightening it down without messing up the liquid gasket. Anyway.. just take your time. Here it is in place.
Here's the last photo of the day. I retorqued the oil filter sandwich plate bolt/nut and replaced all the coolant hoses for the oil cooler and heater core. I put some fresh spark plugs in. I also installed an AmpEFI maxxspark kit. I purchased this one because they had a sale during BF and I wasn't aware of the R8 kit. I probably would've purchased the R8 kit over this one to save a few bucks but this one is nice and is an easy install, no complaints. Got a handful or so more things on the list to do but getting there..
Well, got the car back together. *Knock on wood* so far so good. Slipping the stock intake hose over the S2 TB wasn't as bad as I thought. It's super snug but I didn't even have to heat up the pipe. It would be nice if you didn't have to install everything piecemeal (lower intake manifold -> upper manifold -> TB) but is what it is.
Eyeballed the toe so it drives straight and adjusted the tie rods a bit but it needs an alignment. So far so good, seems to run/idle well just like stock to be honest. Can definitely feel the Mazda comp mounts NVH over stock. I haven't touched the idle screw on the TB although weather has been very mild (70 degrees). The SM clutch seems to chatter a bit which is a little surprising being a sprung full face disc but it's not too bad. Brakes felt weak until I remembered to adjust the prop valve. Started on 6 turns but I think 7 might be good. These street pads definitely don't have a lot of bite compared to track pads so I will swap the pads for a good set of track pads. Otherwise brakes feel pretty good and stiff. Still got a handful of little things to do but I have a week to get it done. Trying to decide on pads. Supermiata recommend gloc 16/12 for the turbo setup. Are gloc pads really that finicky with having a proper transfer layer? I've used Hawk/PFC and they didn't seem to care swapping pads for the street/track. A few good hard stops and they were properly bedded imo.
Gave her a quick wash after washing the salt/crap off my daily. Oh ya I forgot to comment on the depowered rack. It feels good, not too stiff. Definitely not easy to fling the wheel around but will definitely encourage smoother driving. The swaybars are currently disconnected and who knows what the alignment is at right now so I'll comment on steering feel after it gets aligned but so far so good. My passenger seat is still MIA. I'm starting to think it got lost in customs but all I can do is sit and wait.
Looking good man! That's a ton of work out of the way. You're gonna be stoked when you get it on track soon.
Mirror idea for the coolant reroute install is brilliant. Wish I had thought of that when I did mine. Sucks how the gaskets basically turn into sticky dust/powder and don't want to come off in one or a few clean pieces.
Did you speak to Supermiata specifically on brake pad compounds? I remember Emilio telling me R12/R10 was the way to go on a thread I made last year. Also, I might've misunderstood your transfer layer question earlier. No problems on my end swapping back and forth from GS-1 to R12/R10 for street and track.
Did you speak to Supermiata specifically on brake pad compounds? I remember Emilio telling me R12/R10 was the way to go on a thread I made last year. Also, I might've misunderstood your transfer layer question earlier. No problems on my end swapping back and forth from GS-1 to R12/R10 for street and track.
I did. I'm pretty sure I'm gonna run PFC 11/97 f/r pads at this point. I'm local to OG racing and they have them in stock. I don't like how the Carbotech/G-locs seem to be fussy about having a nice transfer layer and the PFC's I have for the Honda work well. That way I can swap pads as needed and don't have to worry about the transfer layer.
Been running these pads for years, 12/10 on the racecar, 10/8 on the dual duty cars. No problems with transfer layers. Withe the upgrades to the RGM, I may have to look at going back to 12s on the front, but ...
The12s require close attention to cleaning of wheels, I have ruined a pair using 12s and letting the dust set.
Man, this makes me really glad I installed that reroute when the engine was out of the car. That gasket was enough of a pain to clean up with the engine on a stand.
Looking good! I recently got a S2 throttle body that I'll be tinkering with soon, so I'm glad you pointed to Option's thread. I'll be reading through that for sure.
Any issues with the reroute hose pushing against the fuel lines and bracketry? I tried routing mine that way and the hose didn't seem to fit very well under/beside the manifold.
Any issues with the reroute hose pushing against the fuel lines and bracketry? I tried routing mine that way and the hose didn't seem to fit very well under/beside the manifold.
Ya it rests against some of the fuel lines and brackets as well as a bracket off the intake manifold or TB, I can't remember exactly. I used the extra bit of radiator hose from the reroute, slit it lengthwise, and wrapped it around the radiator hose and fixed it with zip ties. That got most of it. I still need to do another small section but I'd say save your old radiator hose and use it as a protective wrap for the new radiator hose.
That's hilarious. I did the exact same thing to pad my reroute hose. Cut up the old upper rad hose and zip tied it on in a few places where it could rub.
I'll probably try changing my routing next time the coolant is drained.
 02-26-2024, 05:50 PM


 So I got the rear fenders rolled. For the pictures above I removed the coilover to check the clearance of the wheel to the fender. I didn't measure the pinch weld height but that had to be ~3.5" I'd guess. There's about a good pinky gap right now between the tire and rear fender which should be good. Yes, I haven't gotten the car aligned yet but camber should be pretty close and I still should have enough clearance. Rolling the rear fenders wasn't too bad, just took my time with my heat gun and fender roller. It took about an hour to do each side. No damaged paint which is nice. I still need to roll the fronts.


 1
1