
Just Another F20C build... <Preview>


Thread Starter
Junior Member
Joined: Dec 2010
Posts: 375
Total Cats: 20
From: UK, in Cambridgeshire or wherever work takes me.
Went to the shop today, and can confirm that the rollcage is looking great. It's all starting to come together. The top of the front of each side bar structure has been attached to the trans tunnel with a bar that goes over the top of the pedals. It's pretty cool, and will be even cooler in a side impact. The bar in question is curved upwards in the middle, so if it's going to bend, it'll bend upwards, not downwards into my feet.
No pics I'm afraid. I'll get some next time I go.
Just so this update is not completely useless on the piktars front, here is a picture of a cute kitty:

No pics I'm afraid. I'll get some next time I go.
Just so this update is not completely useless on the piktars front, here is a picture of a cute kitty:
Reply
 0
0

0

Thread Starter
Junior Member
Joined: Dec 2010
Posts: 375
Total Cats: 20
From: UK, in Cambridgeshire or wherever work takes me.
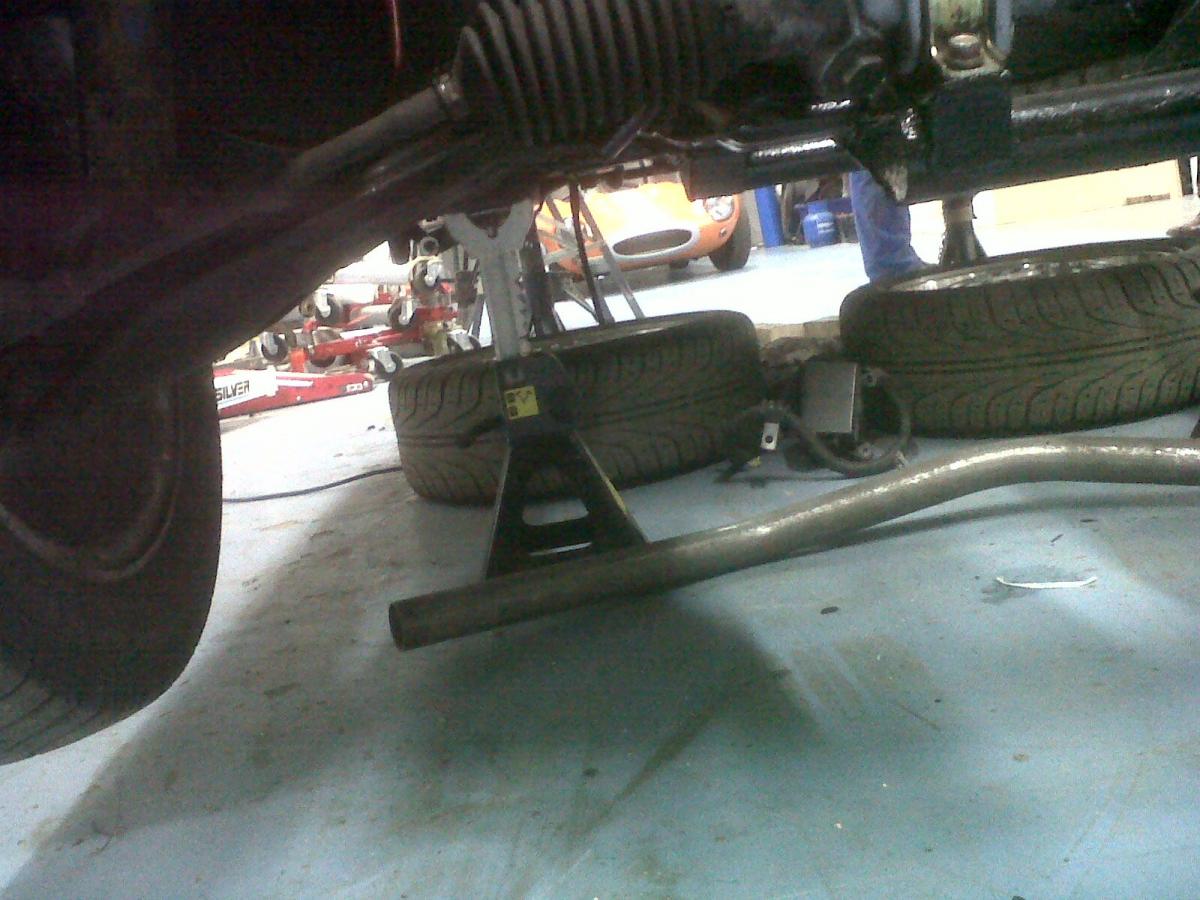
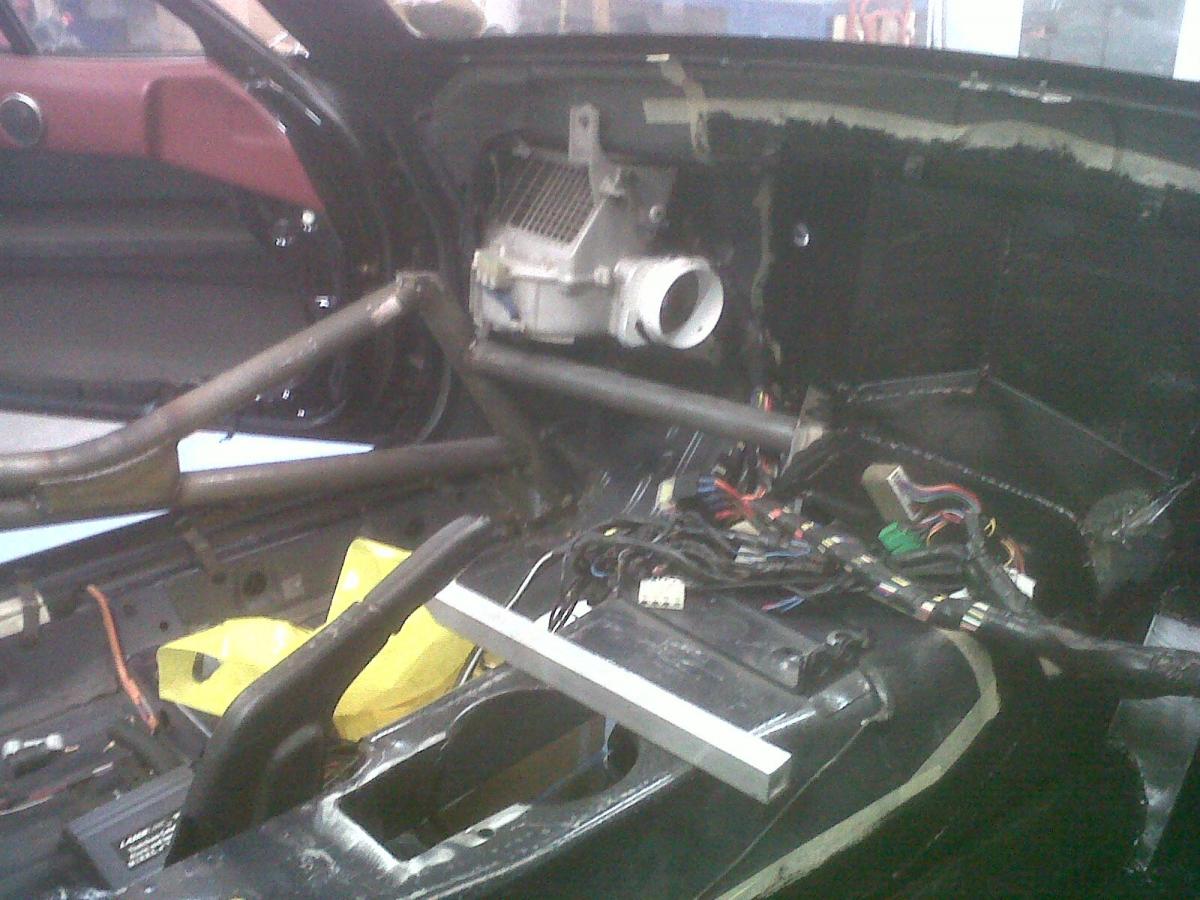
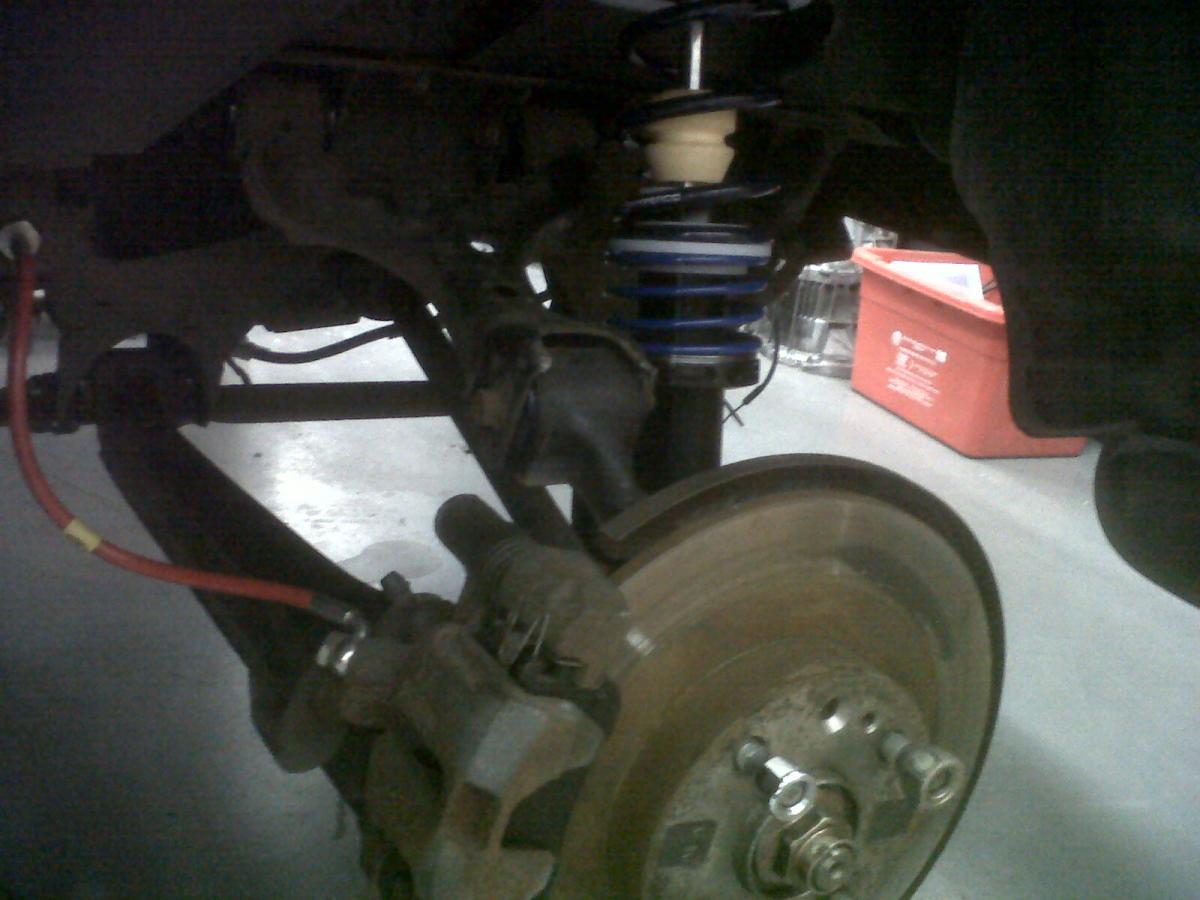
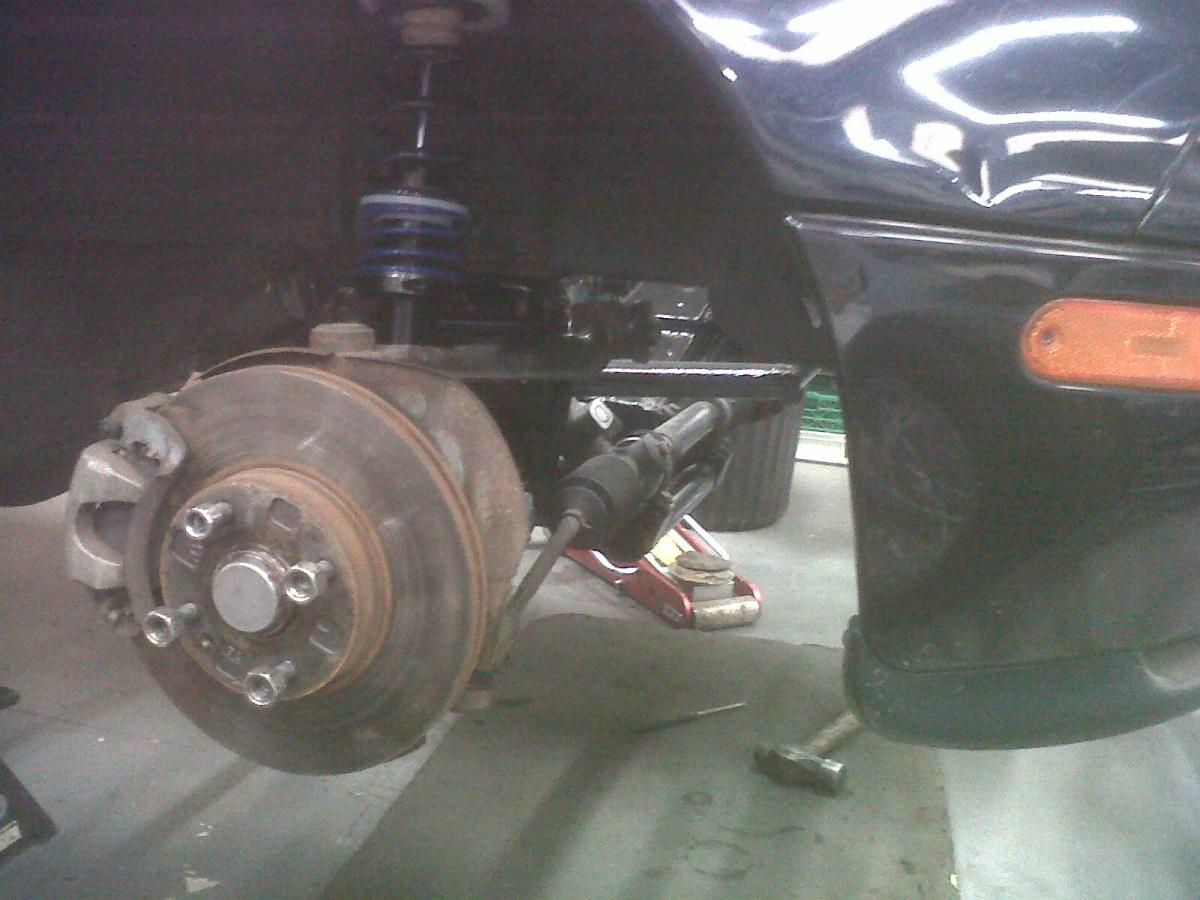
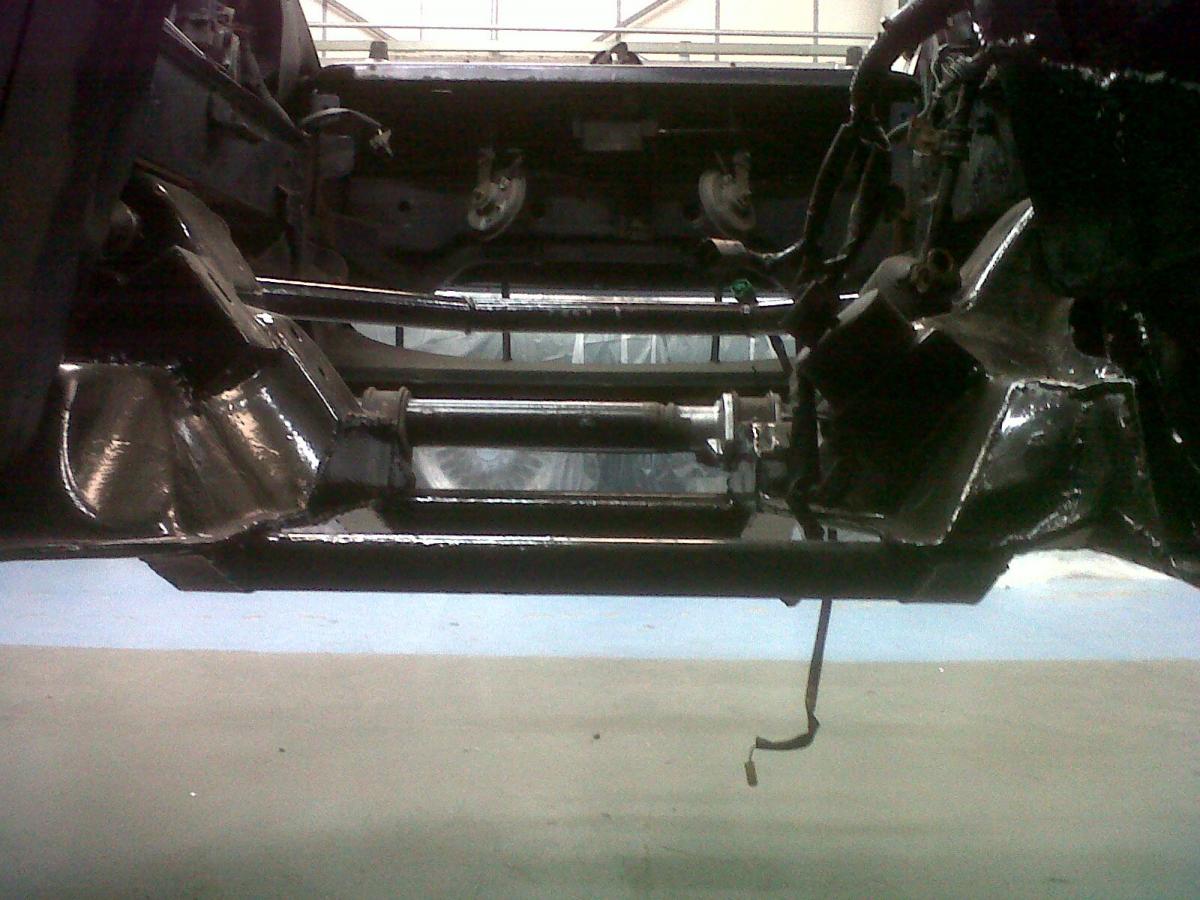
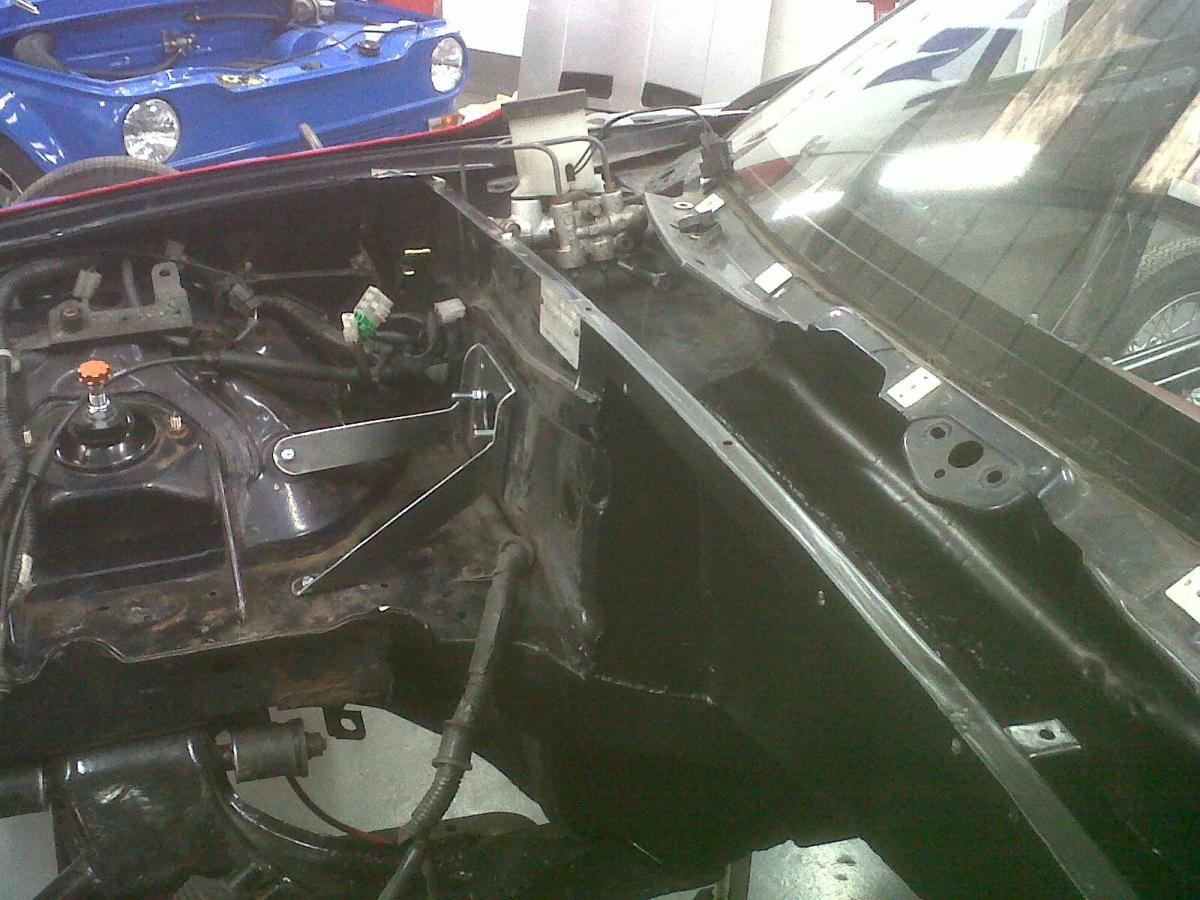
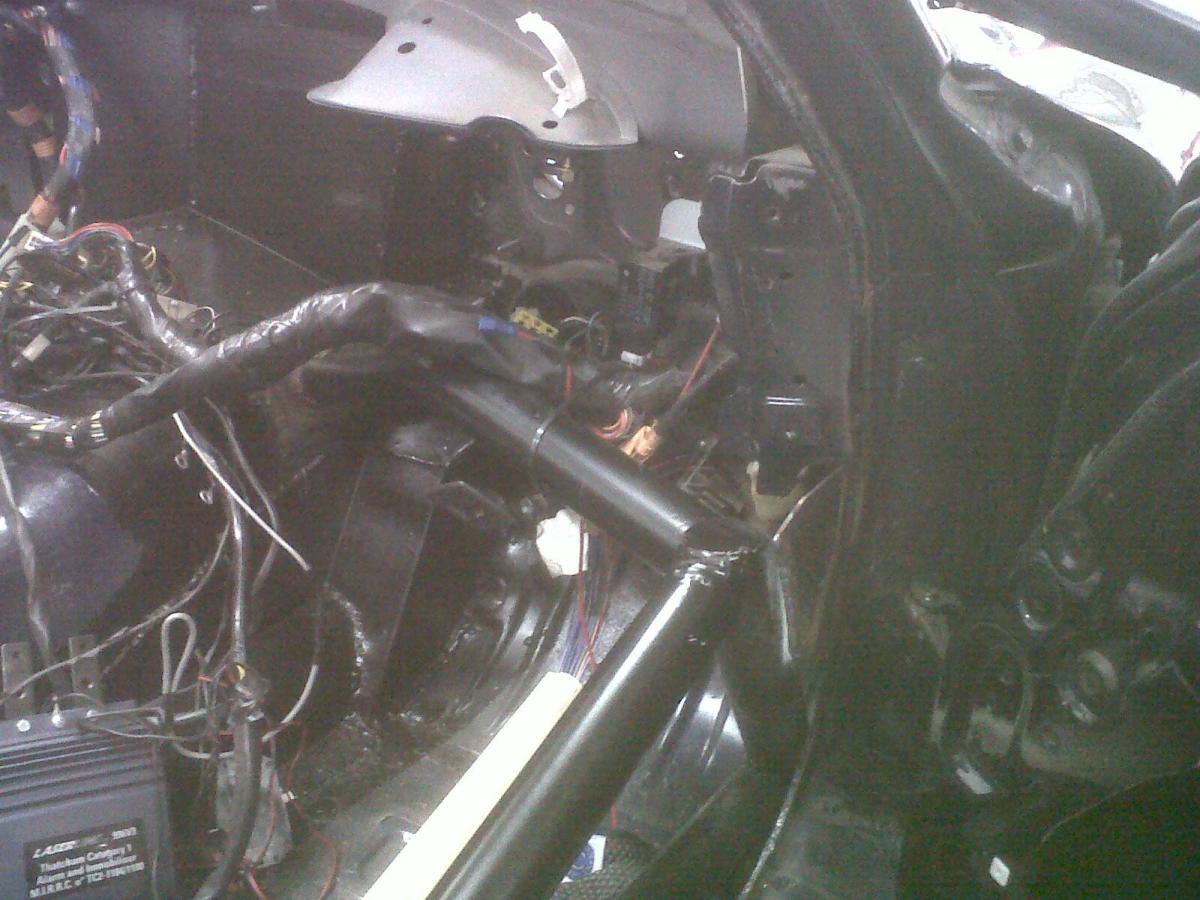
This photo was taken from in front of the car, looking directly along the line of the frame rail with the wheels dangling at full droop. The frame rail is sat on top of the silver Y-shape jack. This shows me that a flat undertray could be bolted to the frame rail, and extend *almost* straight forward to the front of the car without contacting the front lower wishbone when said wishbone is at full droop.
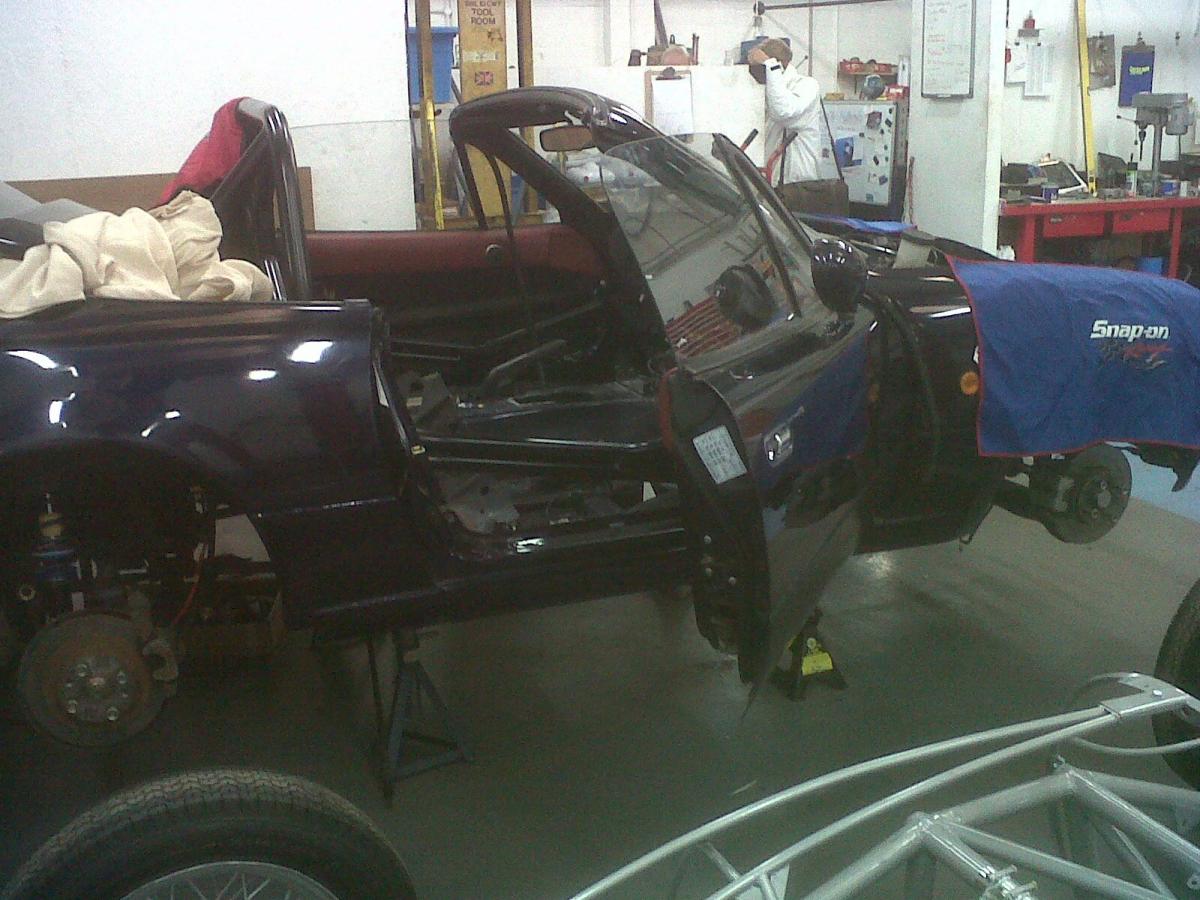
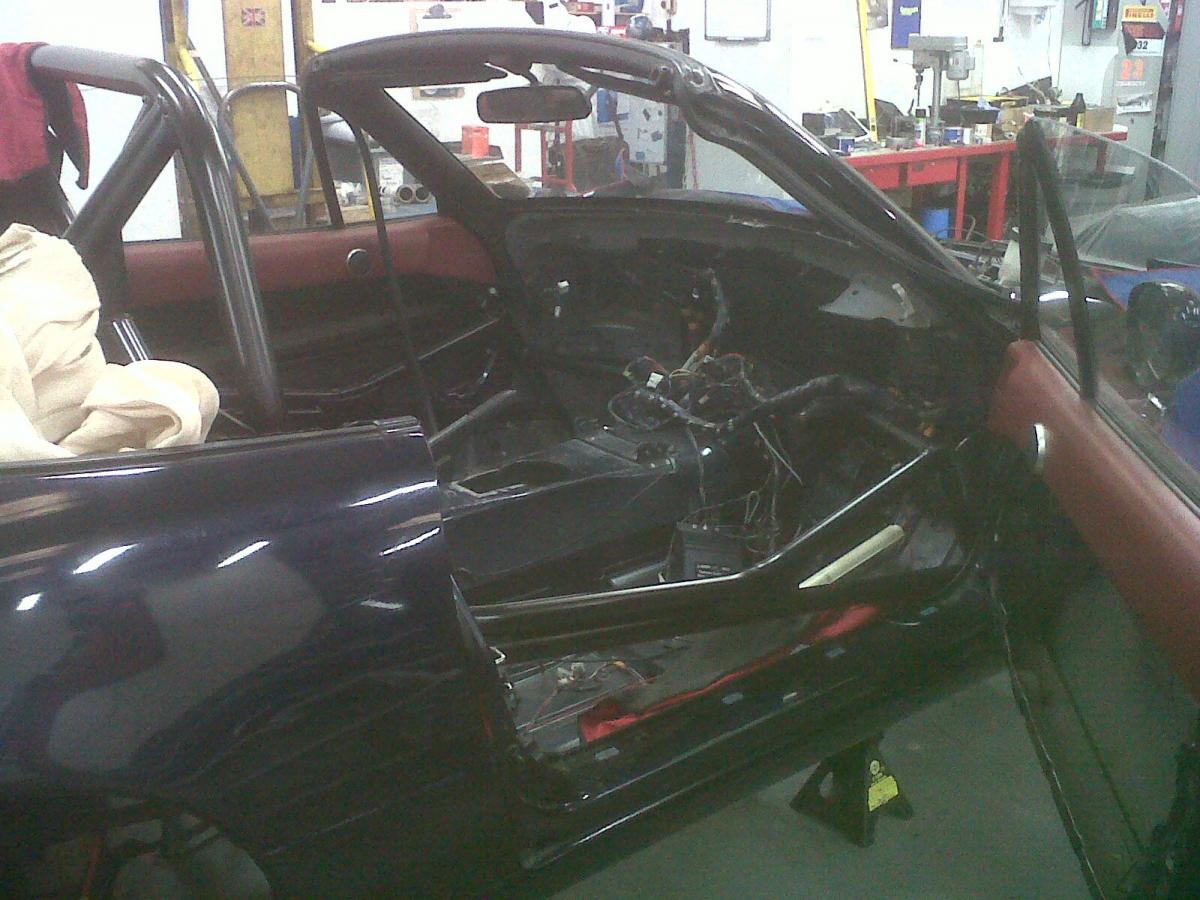
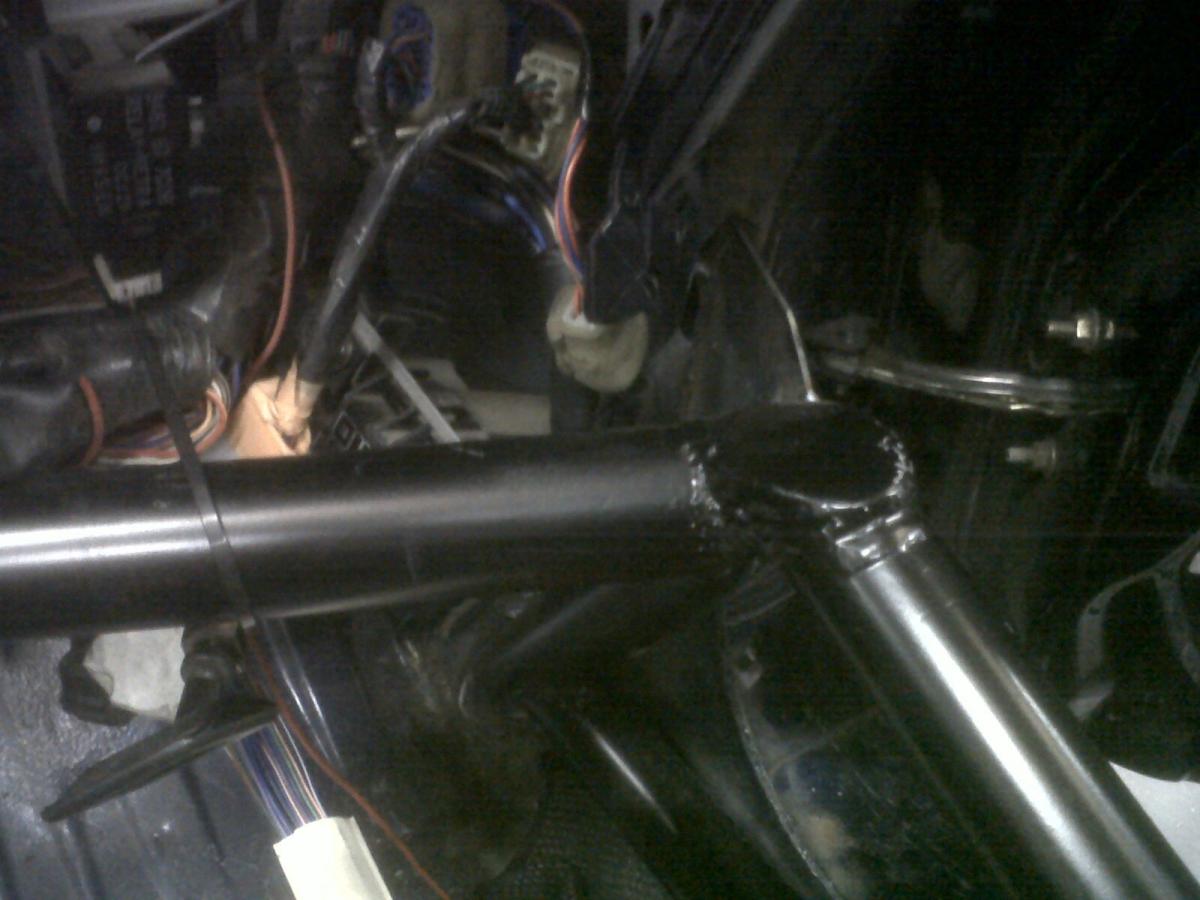
Next photo is of the door bar sat loosely in position. Note that the top bar will be tied in to the dash, so won't be left just floating there. I suggested to Quent today that a vertical flat plate is used to do this, which could be sandwiched between the door seal and the dash, and welded along approx. half the door bar upright and along all of the dash mount. Quent would rather not cut into the dash, not least because it would apparently make it a bitch to get the dash in and out, which is why I suggested a flat vertical plate.
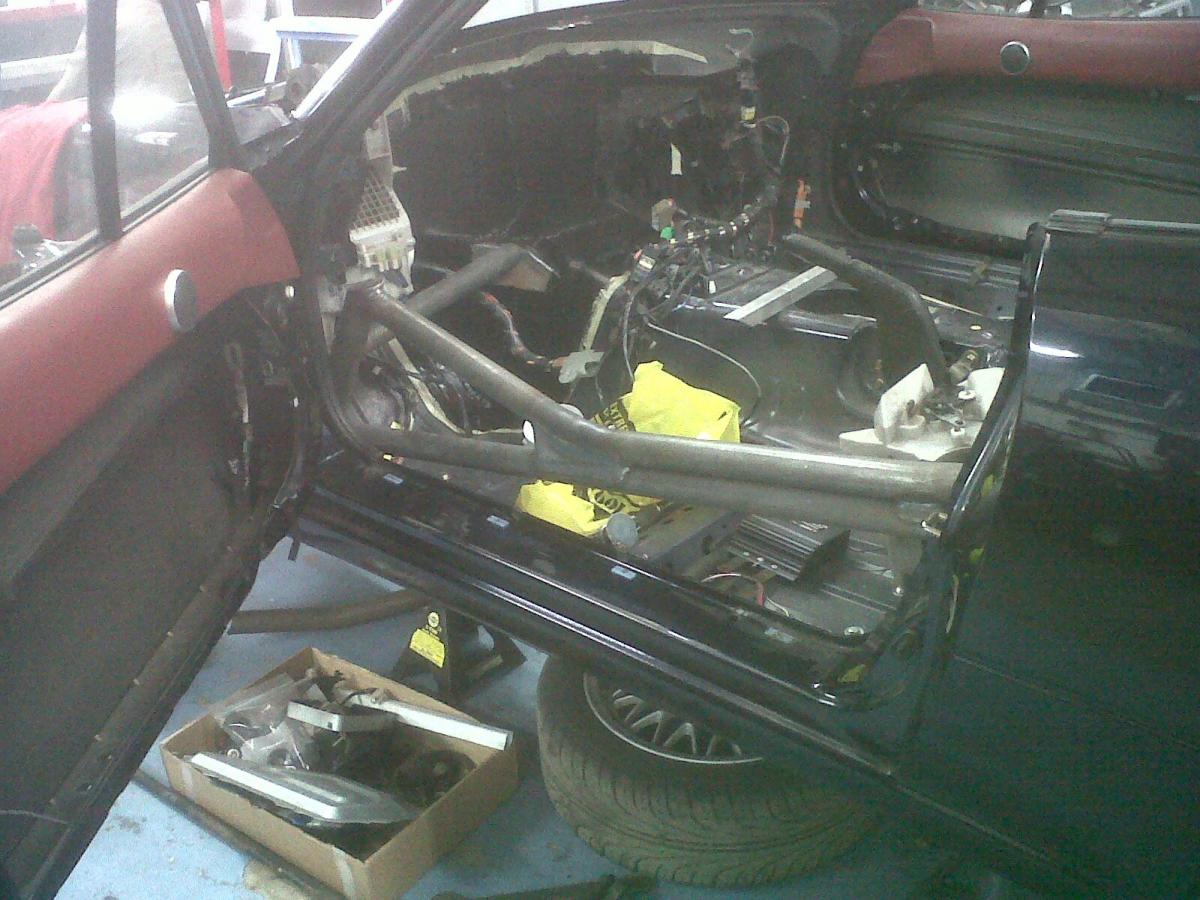

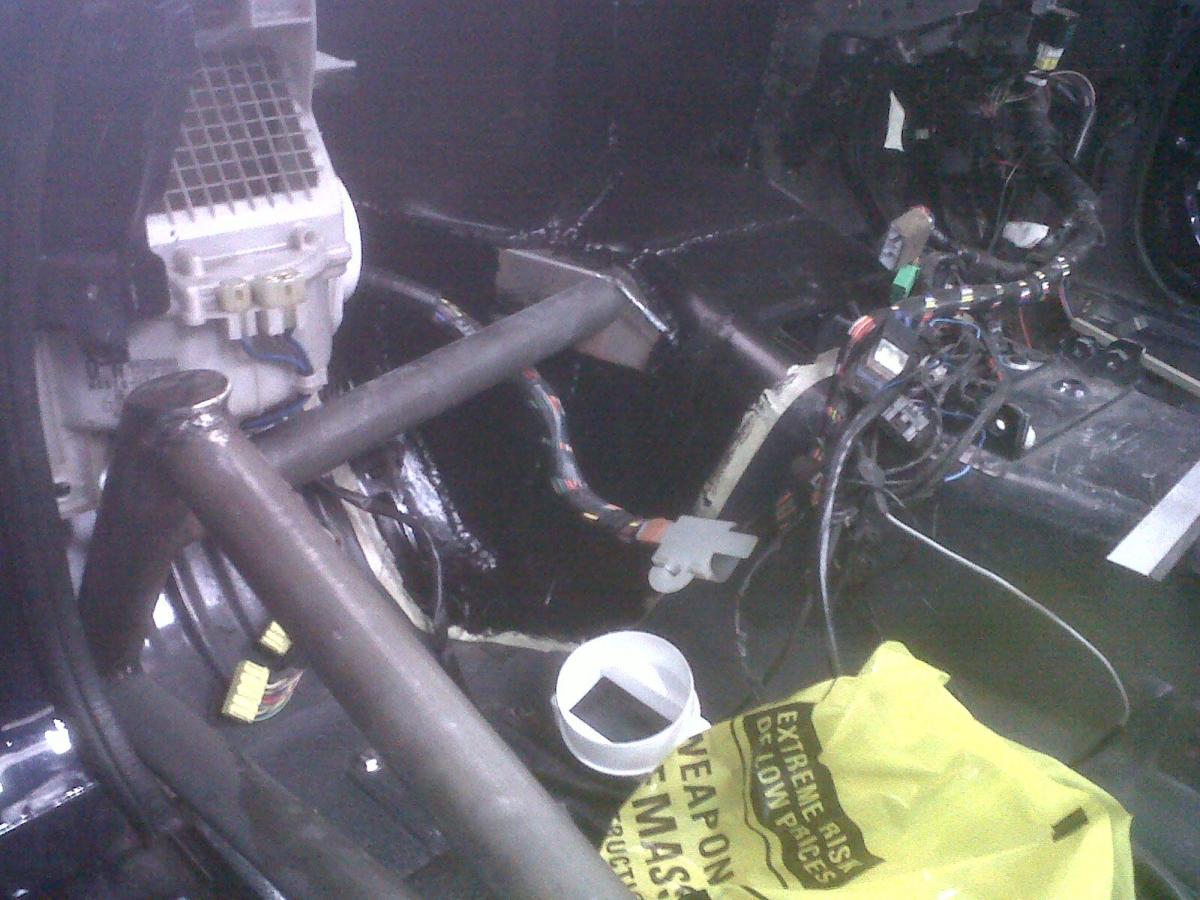
Gearstick position is exactly 100mm further back from standard. As I've said before, the seat will be mounted 100mm further back, the steering wheel has a 95mm dish, and the pedals will be brought back to suit.
Next photo is of the door bar sat loosely in position. Note that the top bar will be tied in to the dash, so won't be left just floating there. I suggested to Quent today that a vertical flat plate is used to do this, which could be sandwiched between the door seal and the dash, and welded along approx. half the door bar upright and along all of the dash mount. Quent would rather not cut into the dash, not least because it would apparently make it a bitch to get the dash in and out, which is why I suggested a flat vertical plate.
Gearstick position is exactly 100mm further back from standard. As I've said before, the seat will be mounted 100mm further back, the steering wheel has a 95mm dish, and the pedals will be brought back to suit.
Reply
0
0

Thread Starter
Junior Member
Joined: Dec 2010
Posts: 375
Total Cats: 20
From: UK, in Cambridgeshire or wherever work takes me.
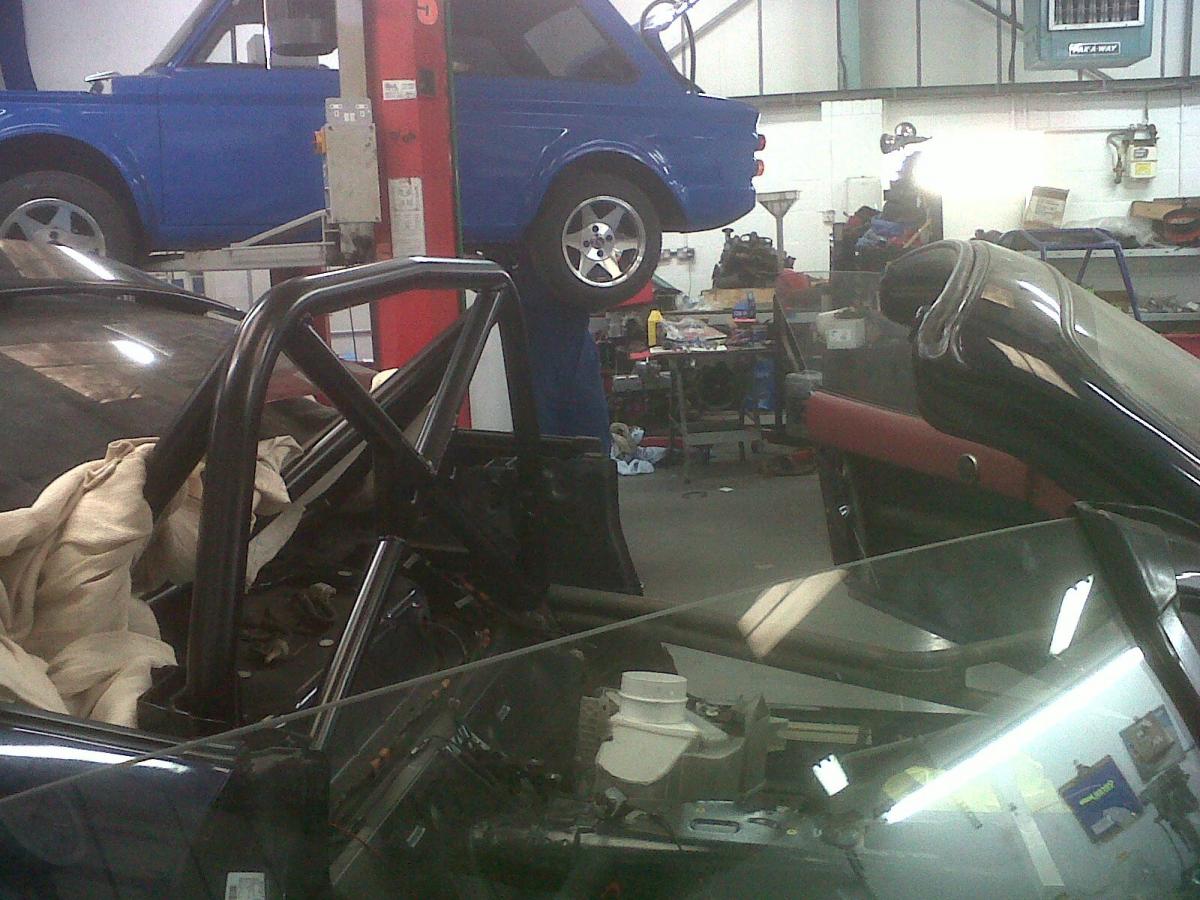
Thanks Sean. I was half expecting some criticism over either a) the door bars,or b) the generally messy state the car is currently in. I mean, if it was someone else's build, that's what would jump out at me from the photos. Then again, I am a bit of a picky little bastard.
Quick thoughts on the door bars, in handy list format:
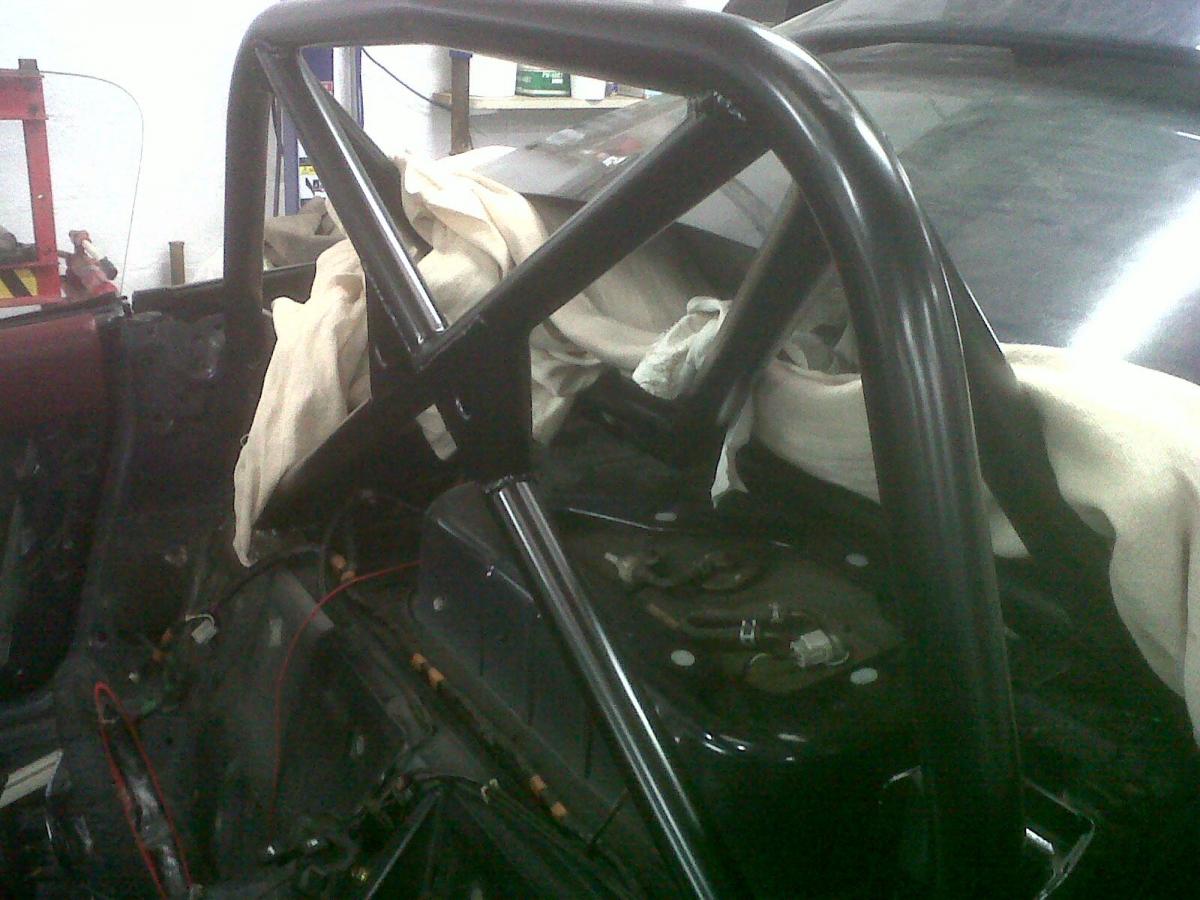
1. I don't like the way the two bars of each door bar section both tie into the rear uppermost point.
2. I don't like the slight outward bend of said bars.
3. Points 1 and 2 mean these door bars should be really bloody excellent at dissipating the energy from a front impact around me.
Of course, they won't work half as well as NASCAR-style door bars in a side impact scenario.
Quick thoughts on the door bars, in handy list format:
1. I don't like the way the two bars of each door bar section both tie into the rear uppermost point.
2. I don't like the slight outward bend of said bars.
3. Points 1 and 2 mean these door bars should be really bloody excellent at dissipating the energy from a front impact around me.
Of course, they won't work half as well as NASCAR-style door bars in a side impact scenario.
Reply
0
0
Thread Starter
Junior Member
Joined: Dec 2010
Posts: 375
Total Cats: 20
From: UK, in Cambridgeshire or wherever work takes me.
I've been weighing stuff again today.
'95 OEM Bilsteins:
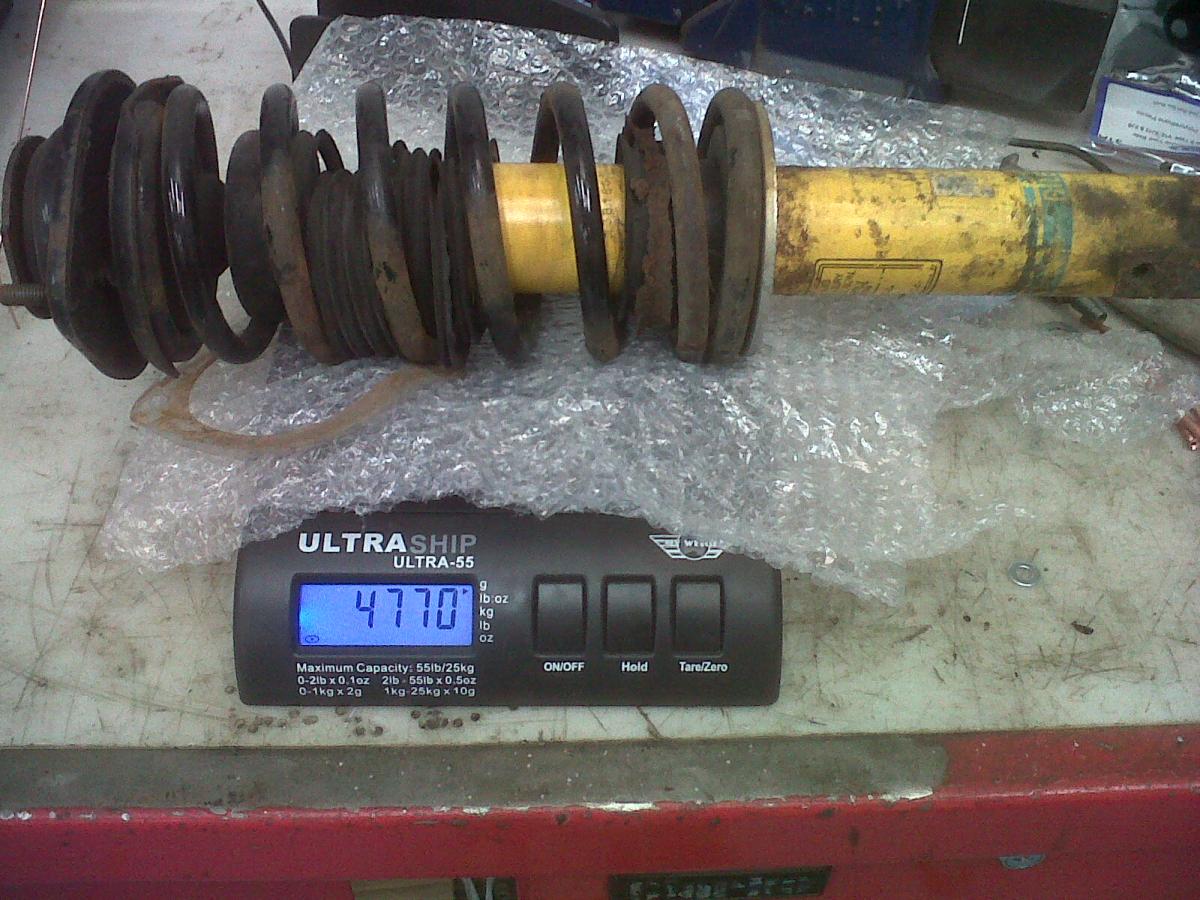
Front: 4.77kg/10.5lbs
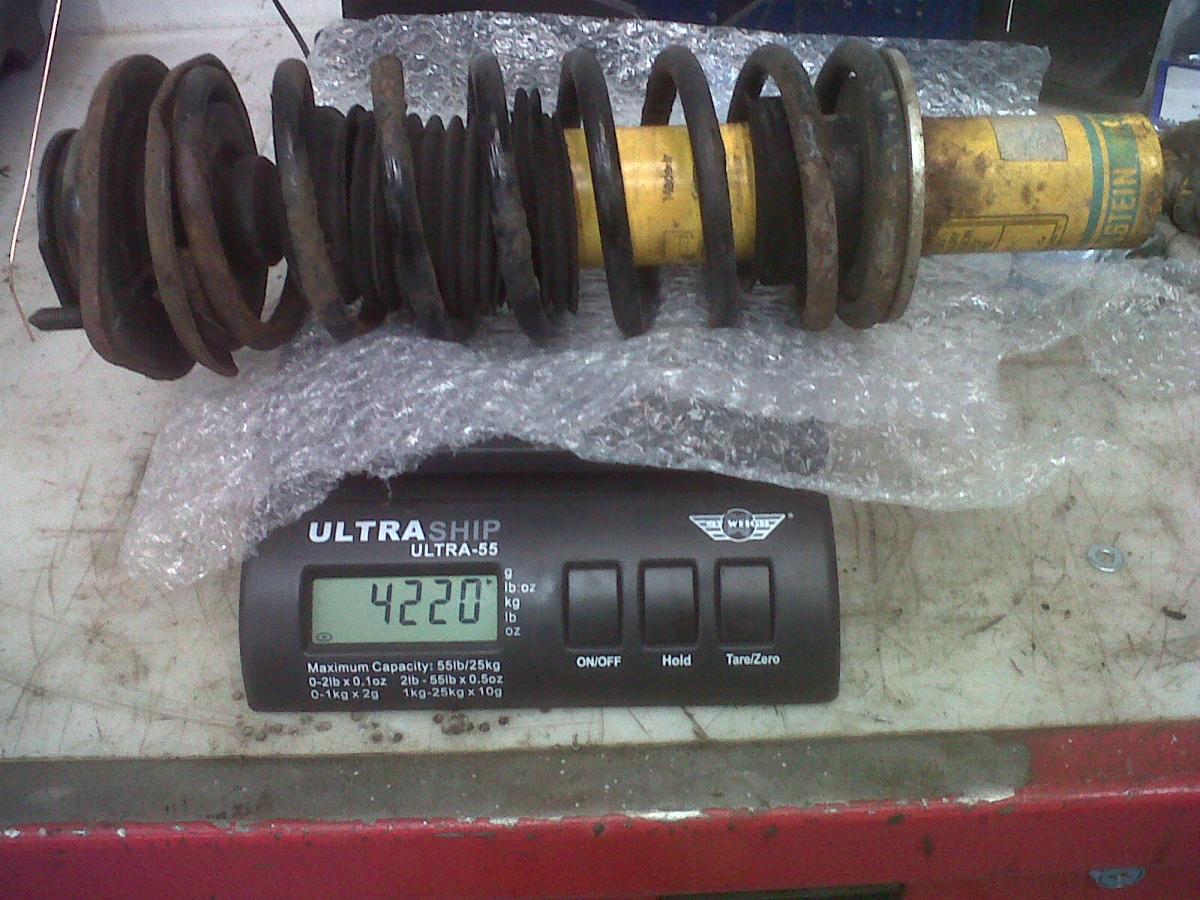
Rear: 4.22kg/9.3lbs
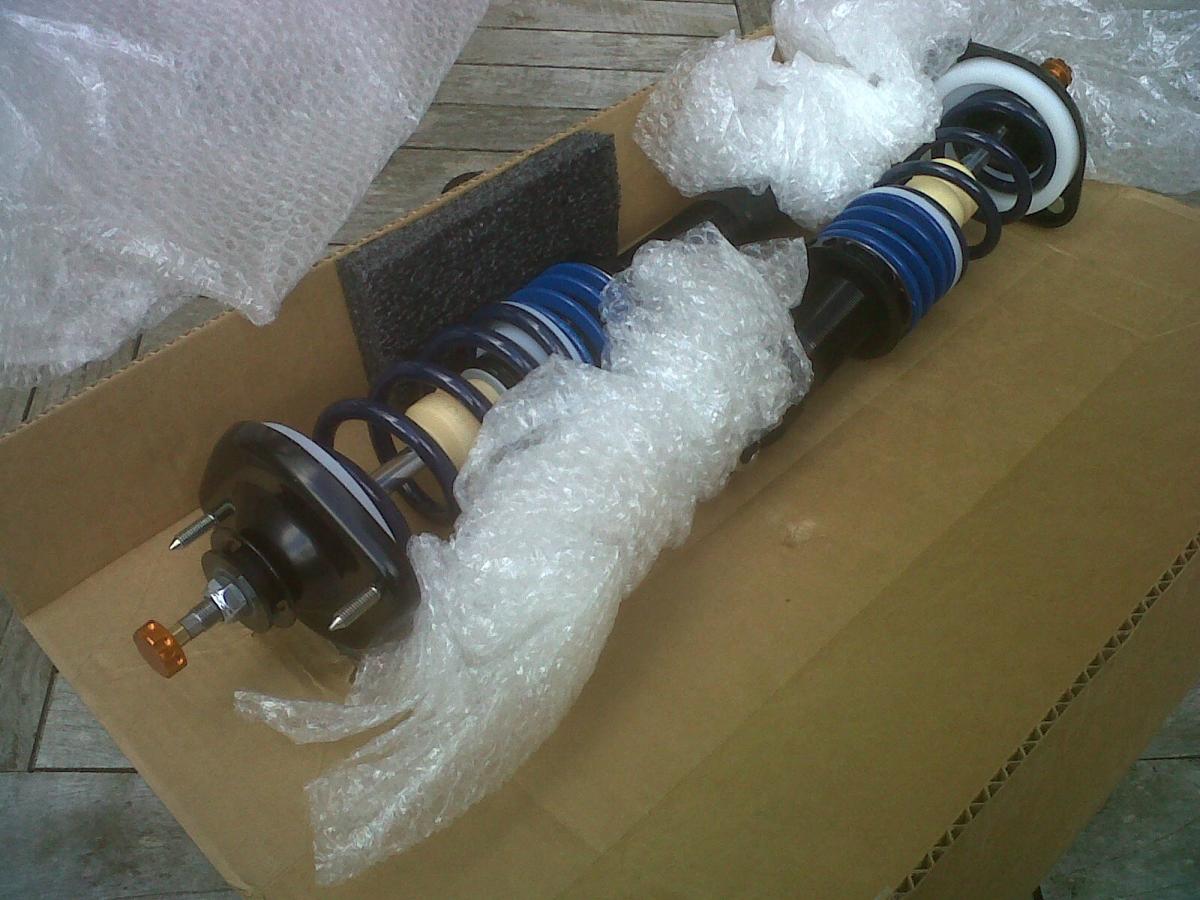
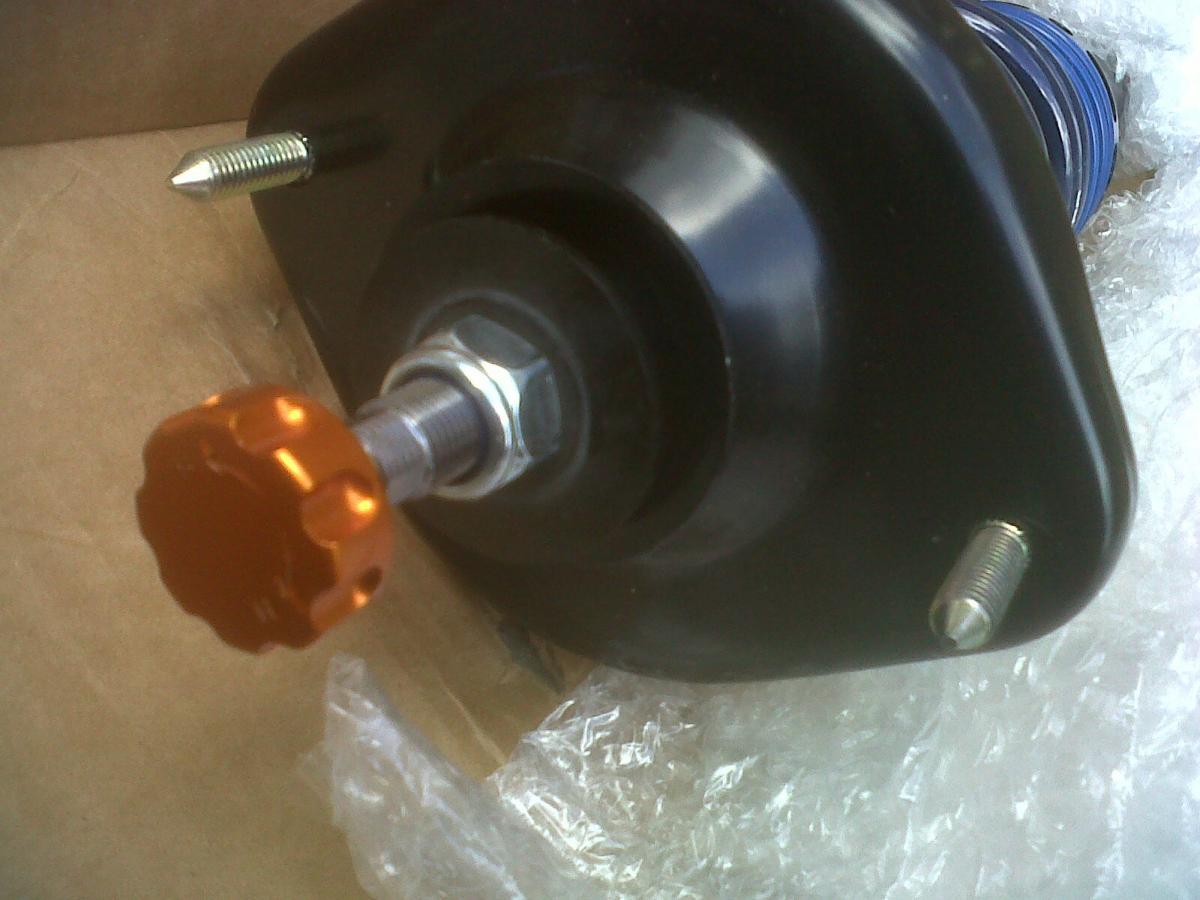
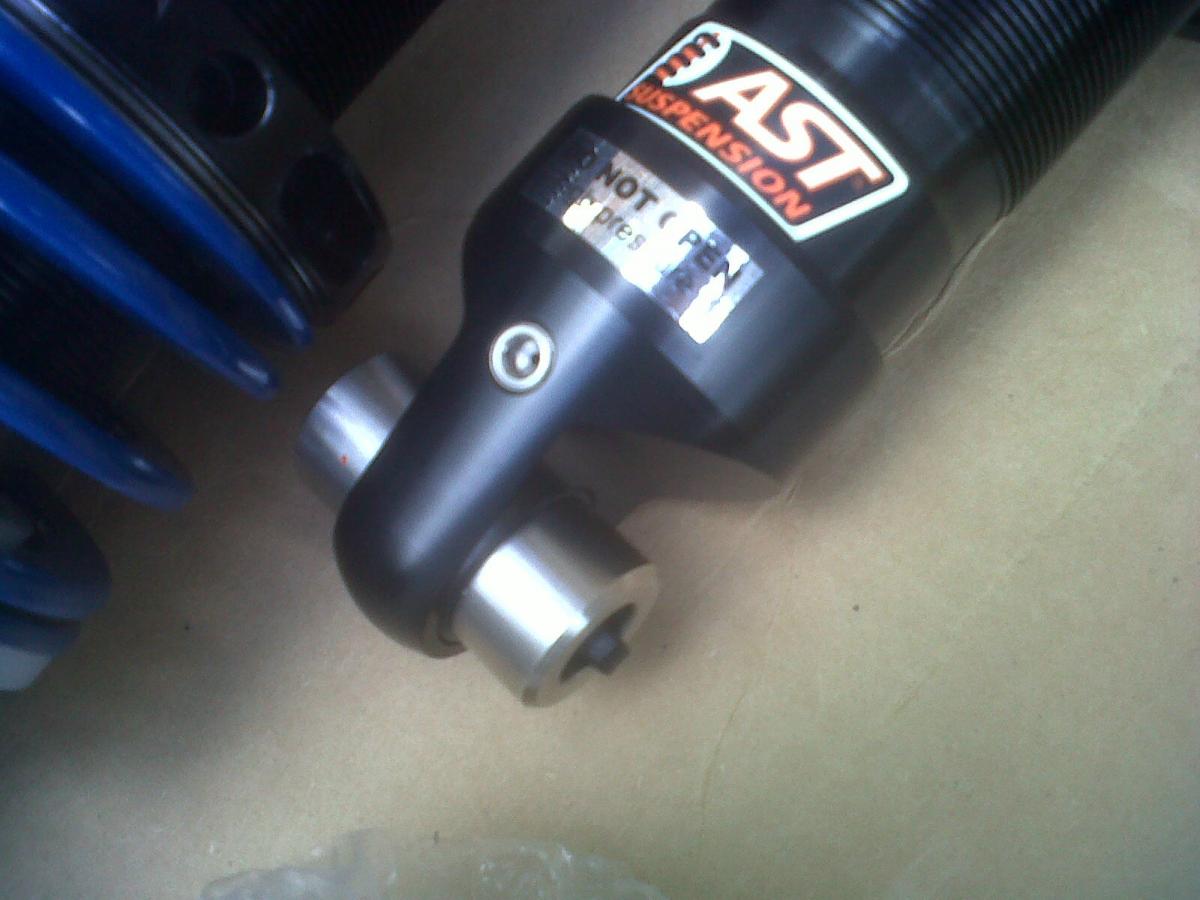
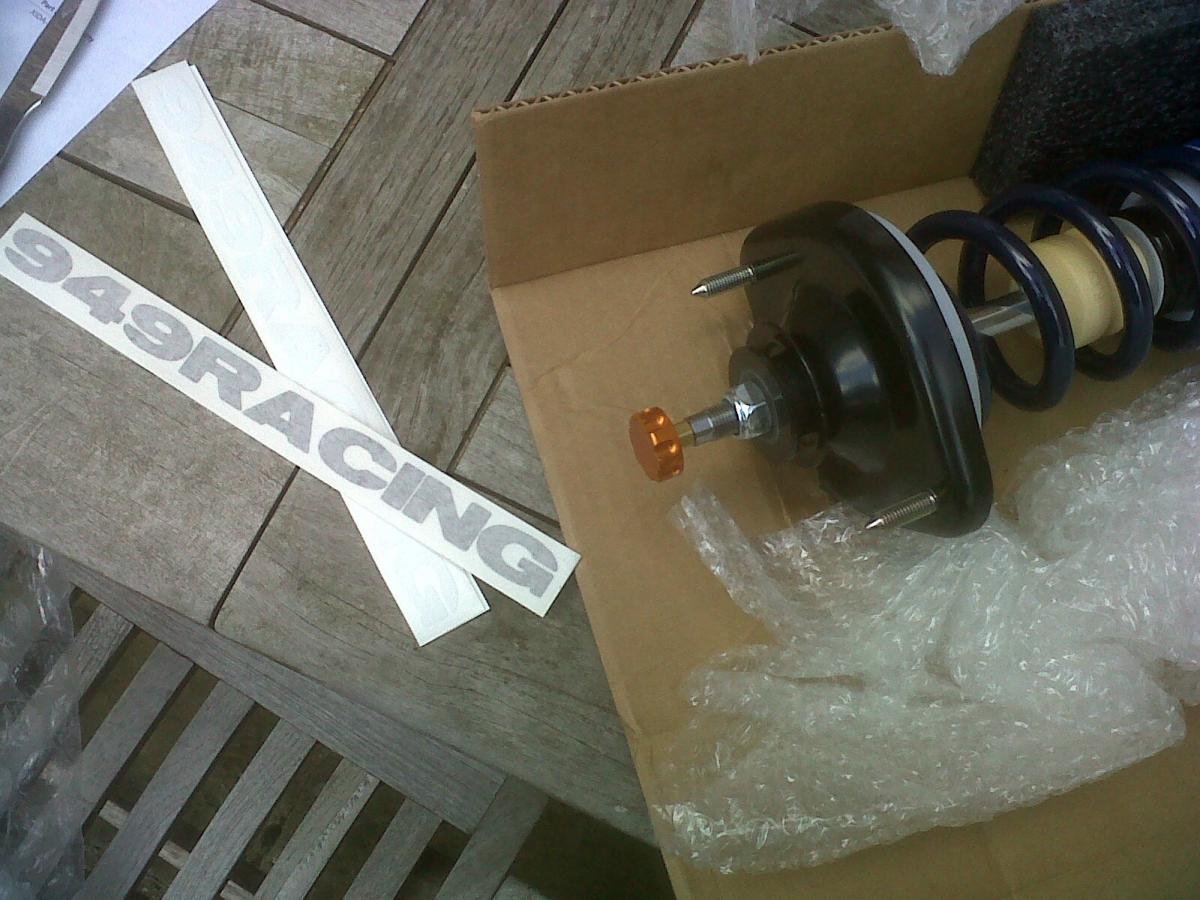
I have a feeling the quoted 3.2kg/7lbs front, 2.7kg/6lbs rear Xida weights include the aluminium top mounts. Mine use the Club Sport OEM steel mounts, so will be heavier. I didn't weigh them before they went on the car and I can't find a Xida-with-OEM-mounts weight, so I can't yet say how much lighter they will be. I reckon they'll save about 5kg/11lbs in total.
'95 OEM BBS wheels:
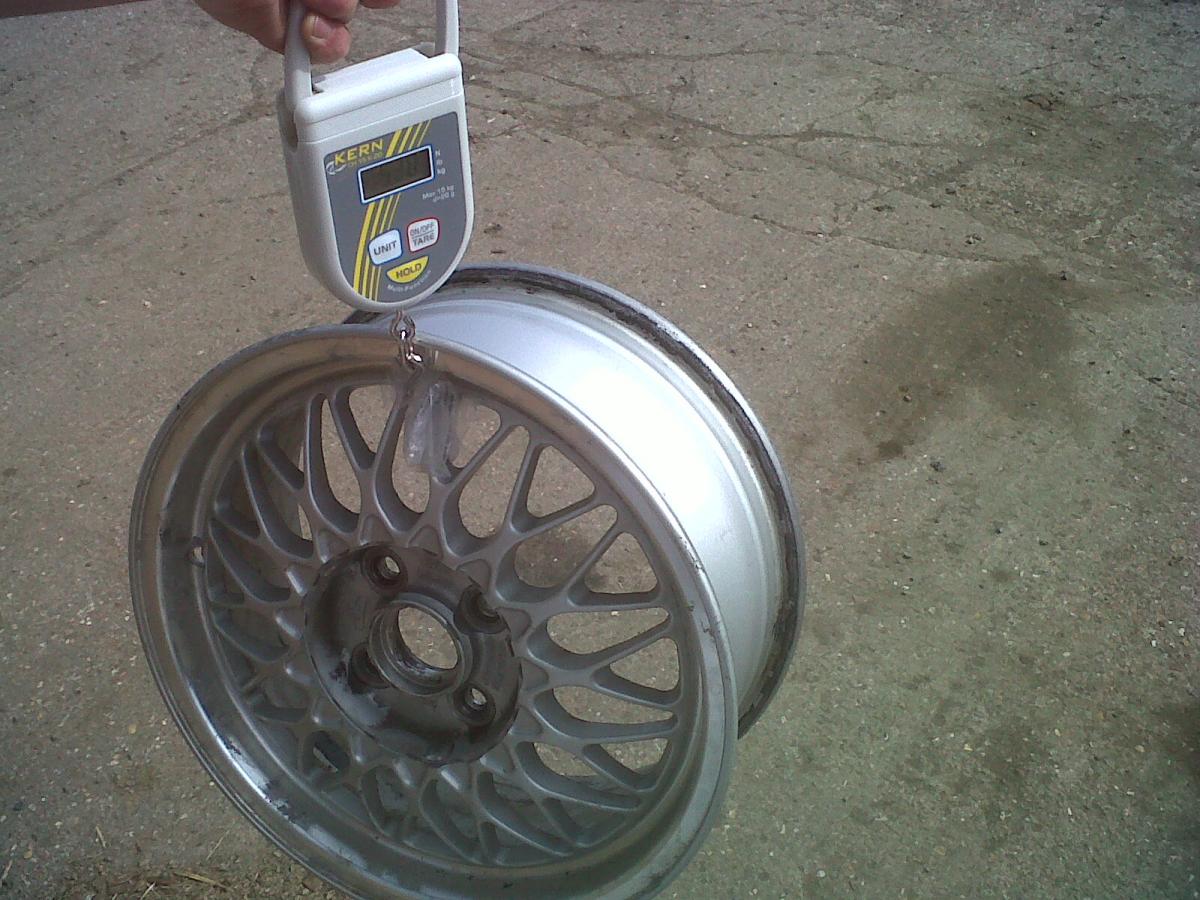
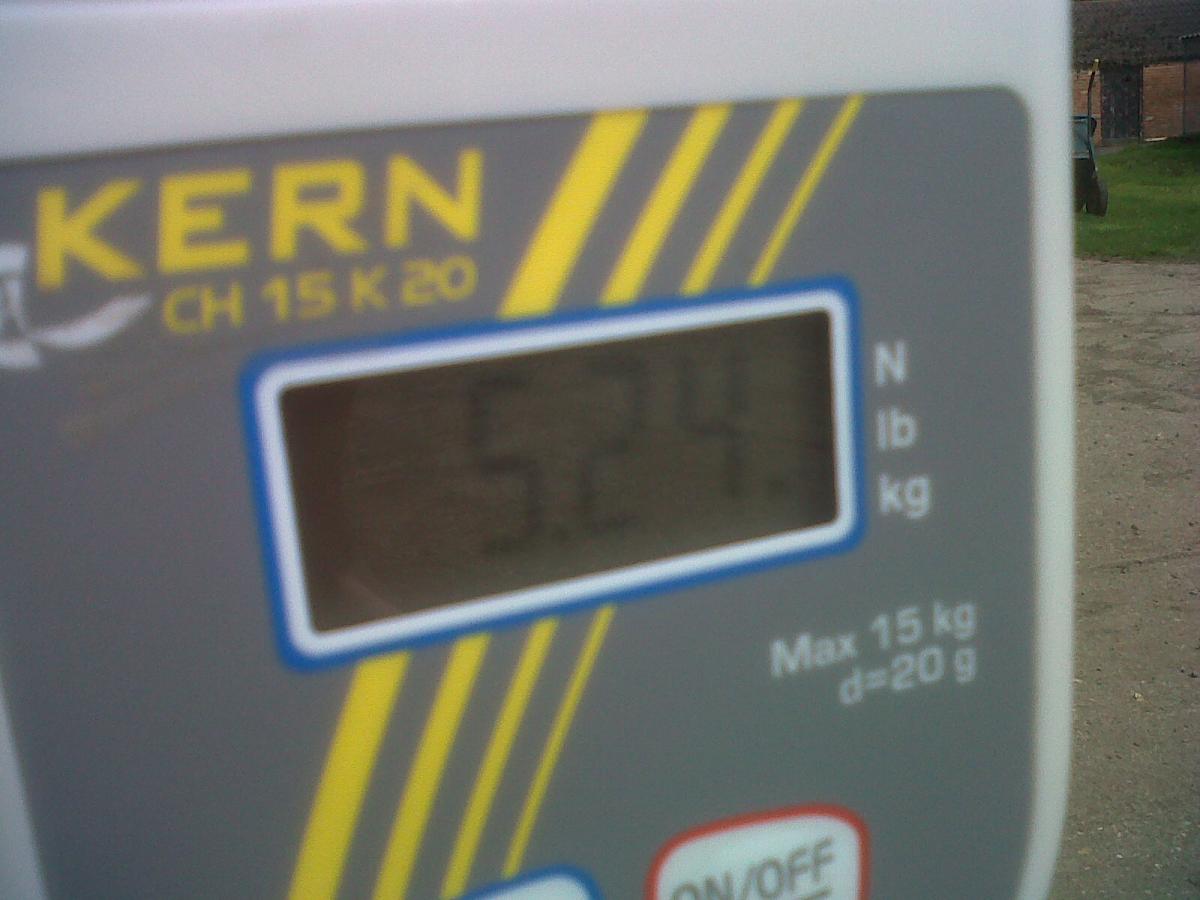
5.24kg/11.5lbs. That's roughly the same as 15x7 6ULs. Btw, the BBS centre caps are plastic and weigh next to nothing.
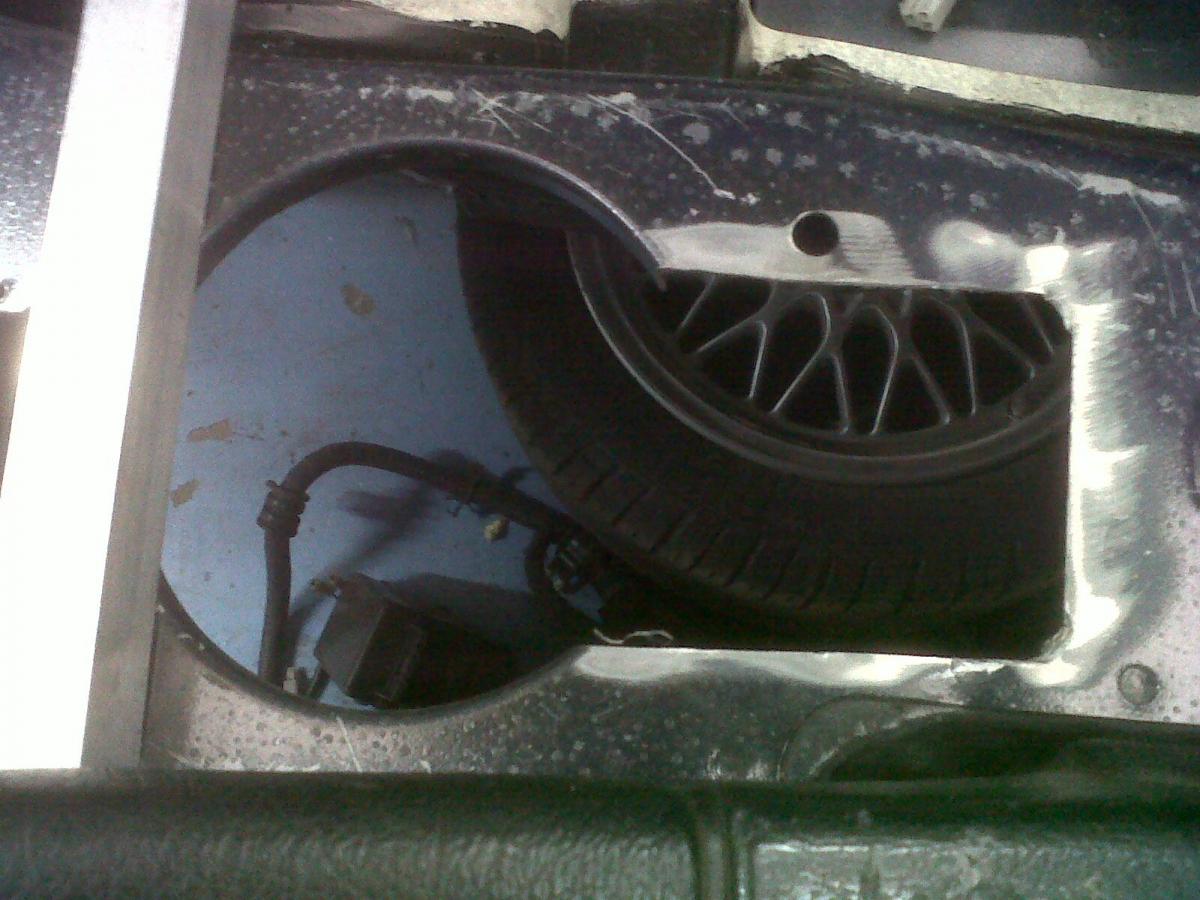
I don't think I'll be fitting a big brake kit any time soon though:
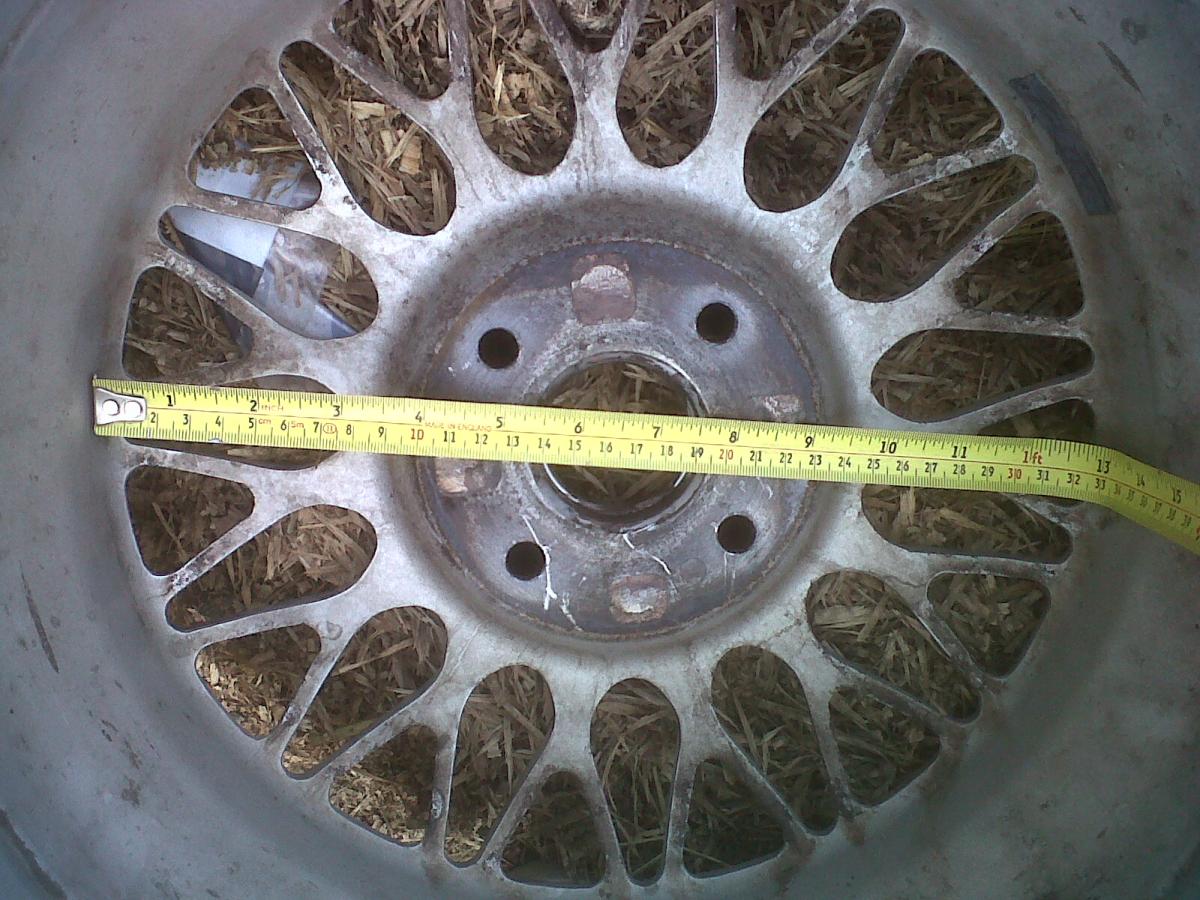
The narrowing of the rim toward the outermost edge, combined with spokes that curve in to produce the 'dished' look, mean these wheels would seem to be spectacularly unsuitable for big brakes. Hmm.
I also weighed my bootlid with OEM spoiler, and it came in at 8.76kg. Which is extremely heavy. I really don't want to change it though, as it's waterproof, doesn't look at all aftermarket, I like the LED brake light in the spoiler, and I think the spoiler shape is aesthetically well suited to the car. I'm under no illusion that it does the aero any good whatsoever, mind. All that said, knowing that I could shave 5kg from the weight sitting on my boot by going for an aftermarket GRP outer-skin-only kind of lid, means I'm really tempted to swap it out. If I could buy something painted and ready to go, I probably would.
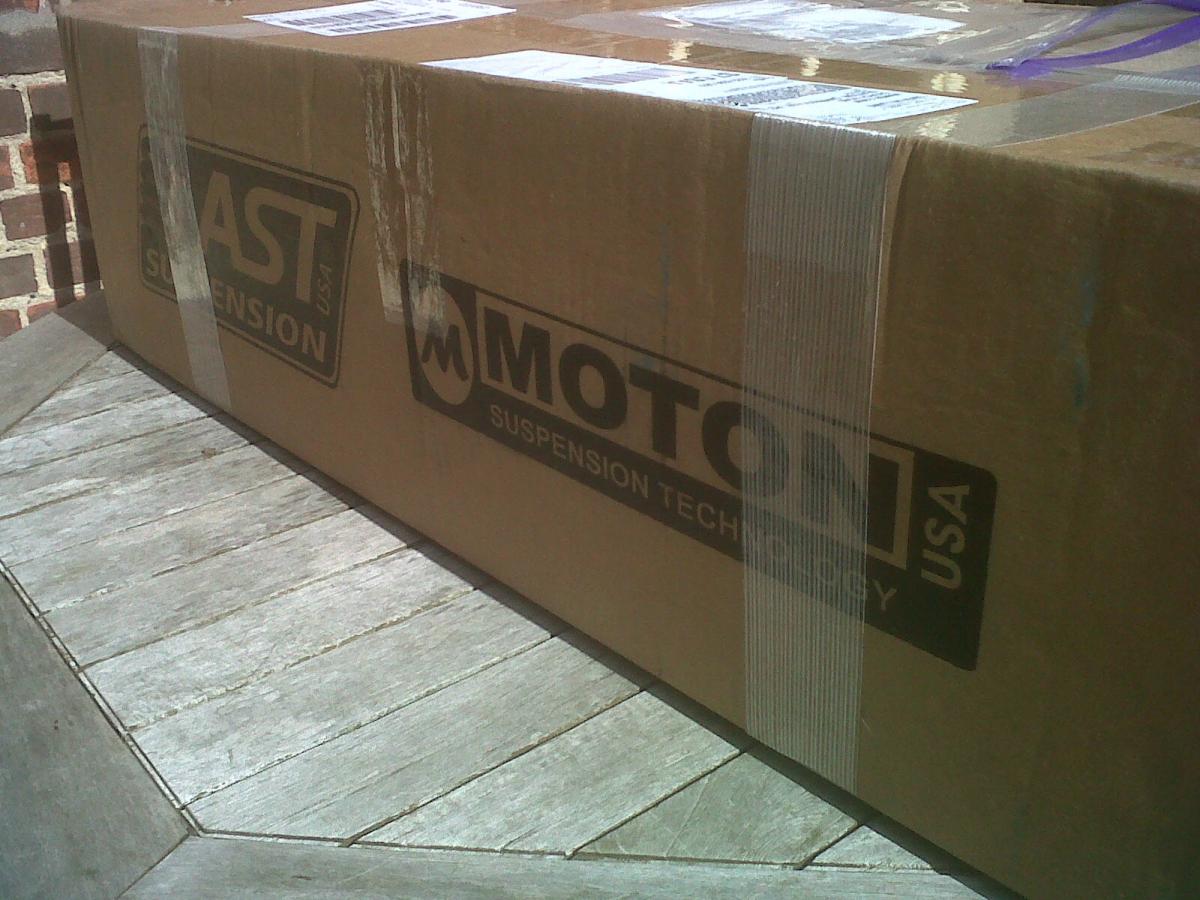
Also, Xida:
'95 OEM Bilsteins:
Front: 4.77kg/10.5lbs
Rear: 4.22kg/9.3lbs
I have a feeling the quoted 3.2kg/7lbs front, 2.7kg/6lbs rear Xida weights include the aluminium top mounts. Mine use the Club Sport OEM steel mounts, so will be heavier. I didn't weigh them before they went on the car and I can't find a Xida-with-OEM-mounts weight, so I can't yet say how much lighter they will be. I reckon they'll save about 5kg/11lbs in total.
'95 OEM BBS wheels:
5.24kg/11.5lbs. That's roughly the same as 15x7 6ULs. Btw, the BBS centre caps are plastic and weigh next to nothing.
I don't think I'll be fitting a big brake kit any time soon though:
The narrowing of the rim toward the outermost edge, combined with spokes that curve in to produce the 'dished' look, mean these wheels would seem to be spectacularly unsuitable for big brakes. Hmm.
I also weighed my bootlid with OEM spoiler, and it came in at 8.76kg. Which is extremely heavy. I really don't want to change it though, as it's waterproof, doesn't look at all aftermarket, I like the LED brake light in the spoiler, and I think the spoiler shape is aesthetically well suited to the car. I'm under no illusion that it does the aero any good whatsoever, mind. All that said, knowing that I could shave 5kg from the weight sitting on my boot by going for an aftermarket GRP outer-skin-only kind of lid, means I'm really tempted to swap it out. If I could buy something painted and ready to go, I probably would.
Also, Xida:
Reply
0
0
Thread Starter
Junior Member
Joined: Dec 2010
Posts: 375
Total Cats: 20
From: UK, in Cambridgeshire or wherever work takes me.
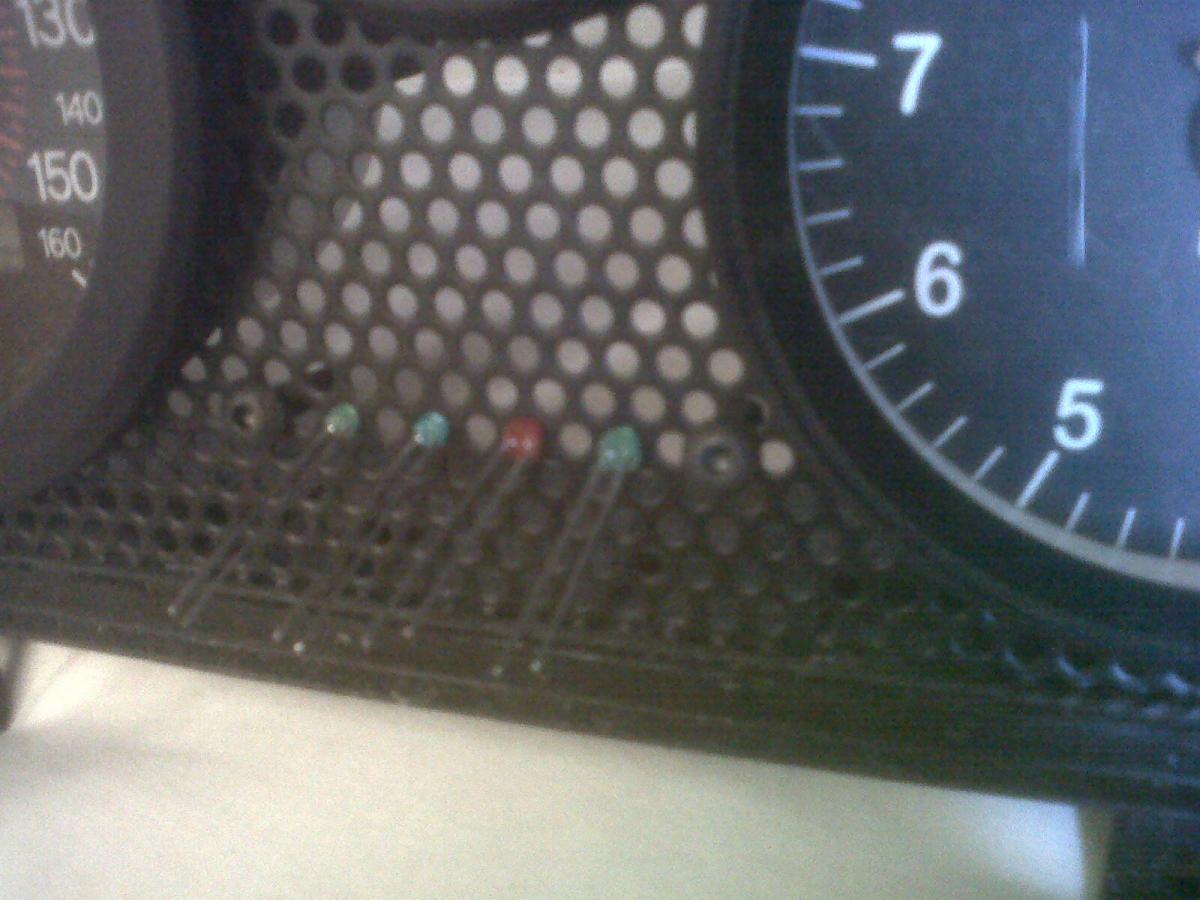
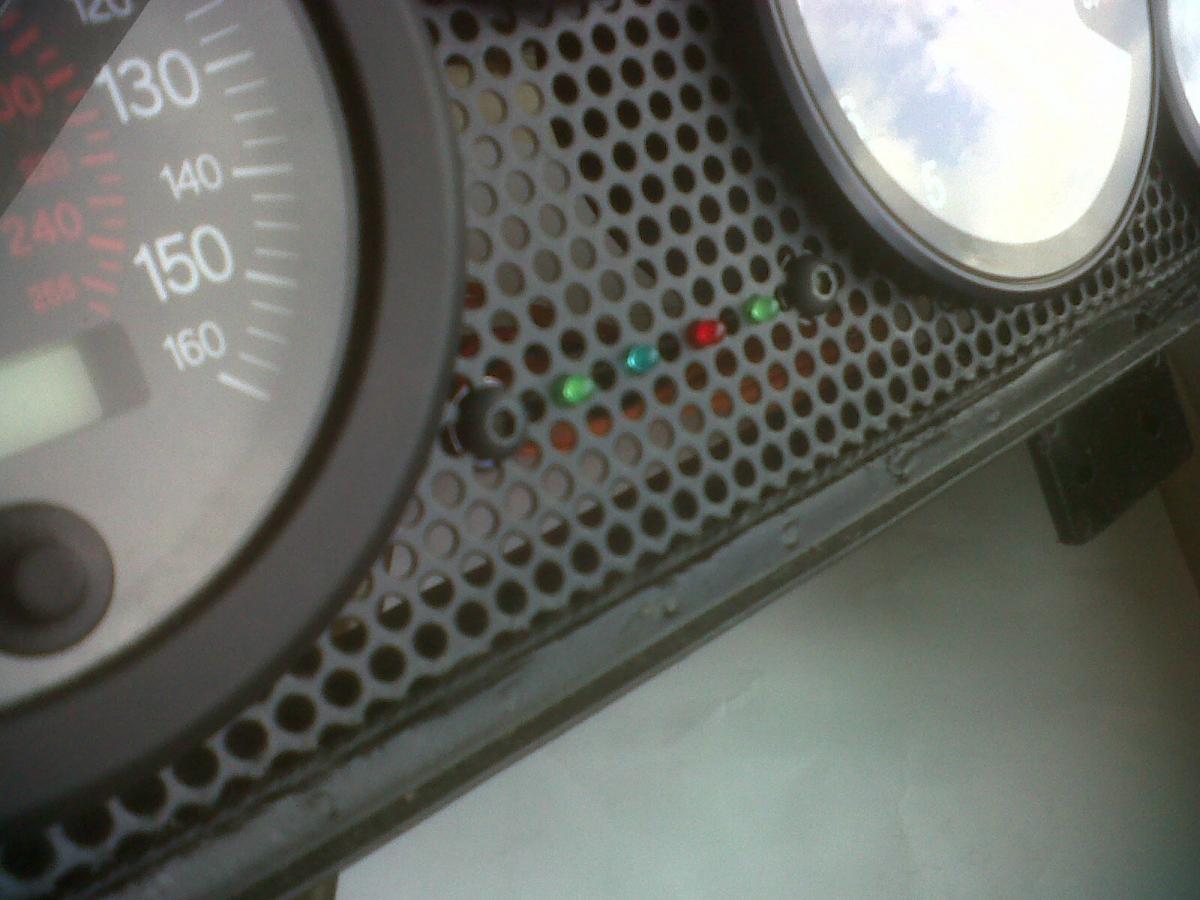
I added the necessary indication lights to the dash today.
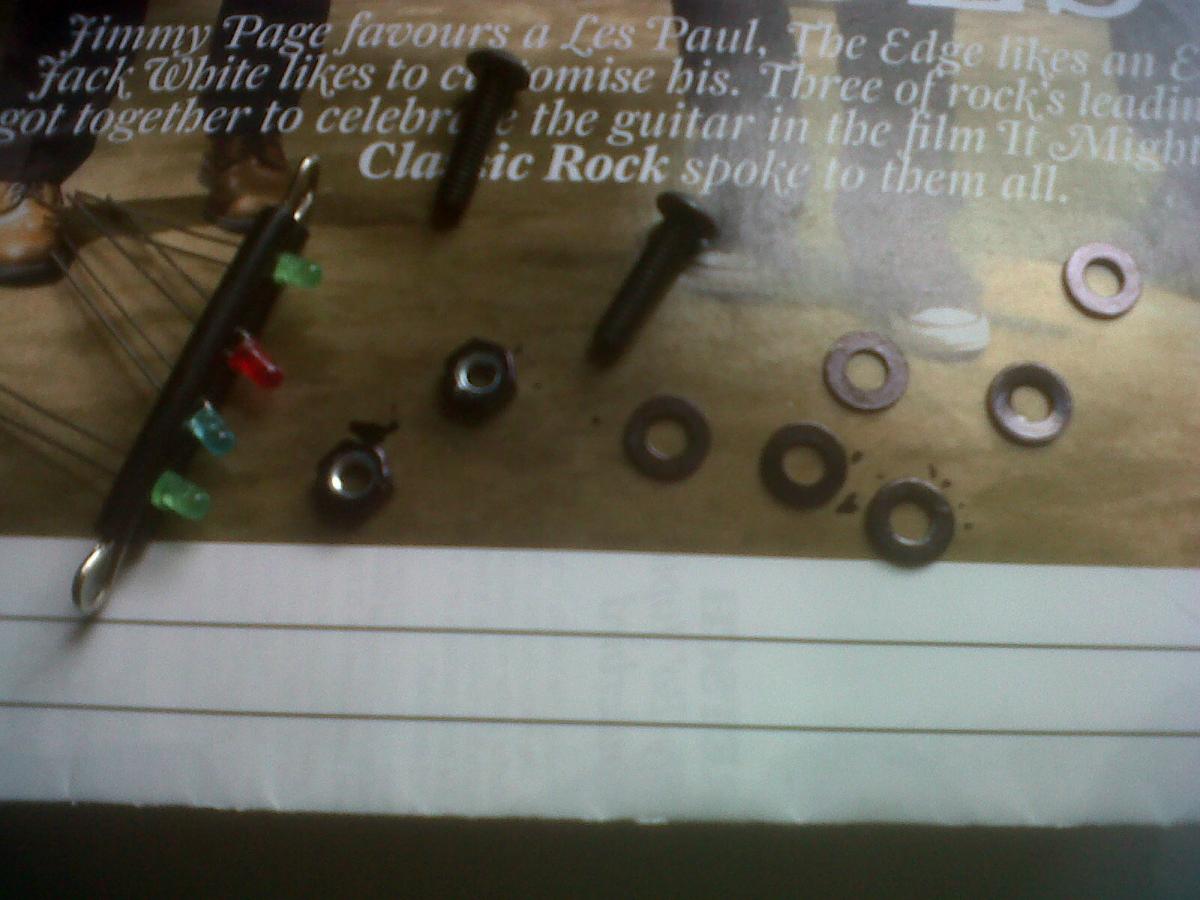
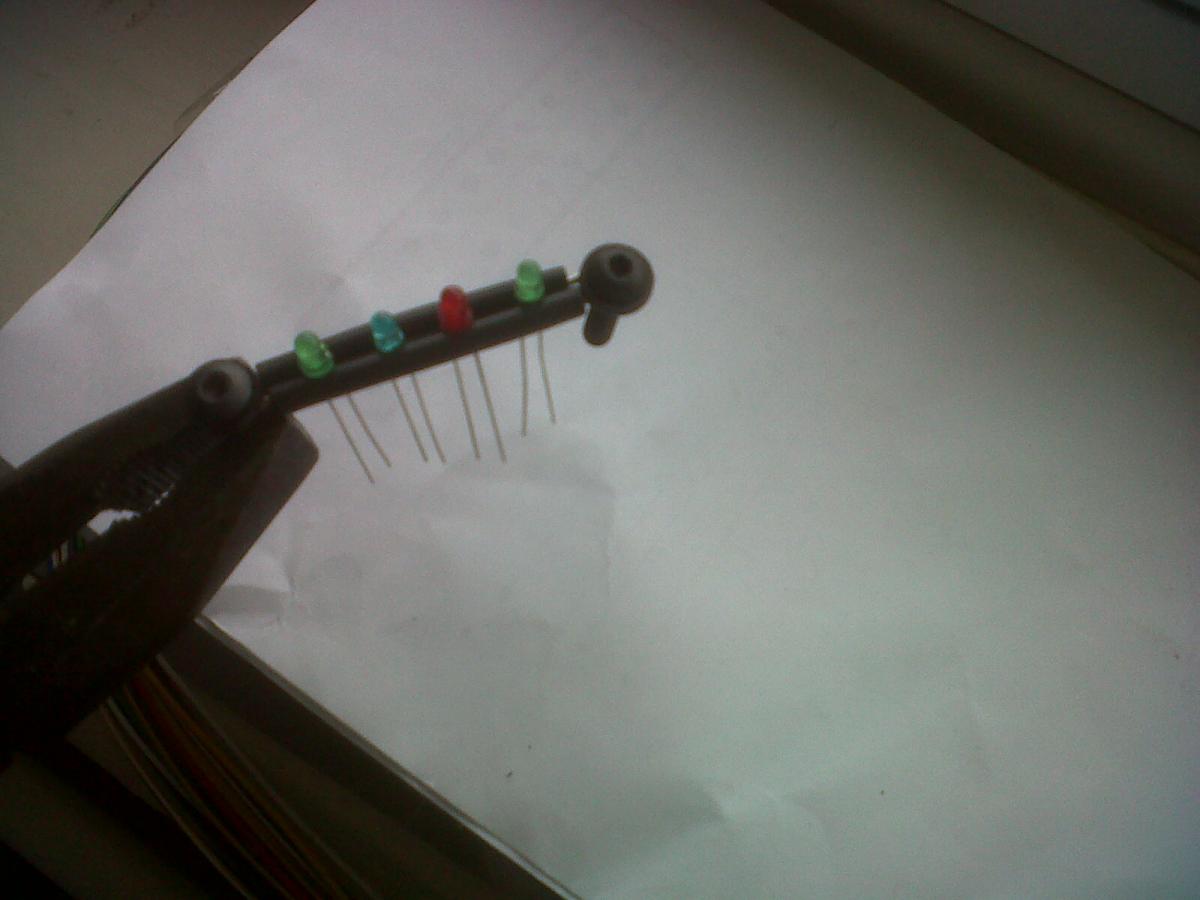
Below = LEDs of matched brightness/correct size etc, black M3 dome head fixings, and� er� some paperclips:

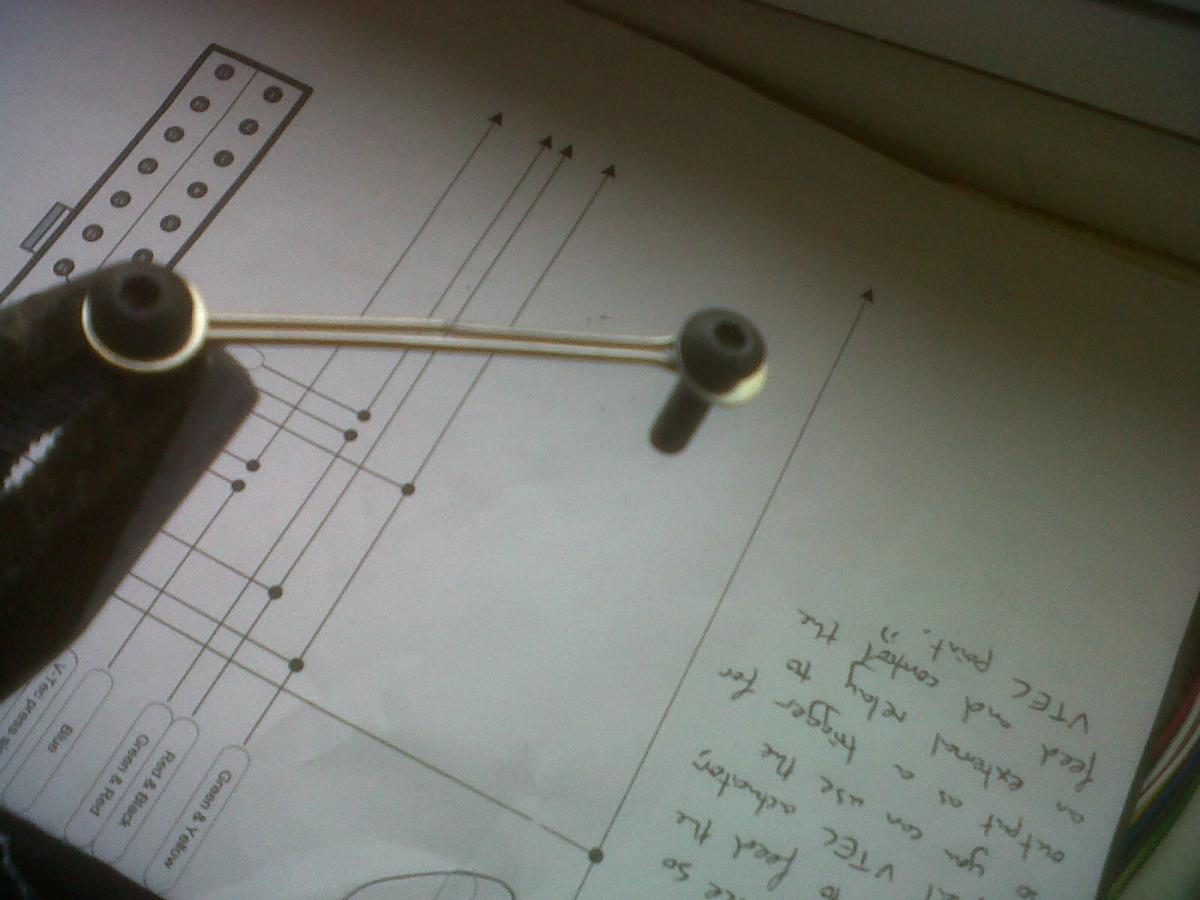
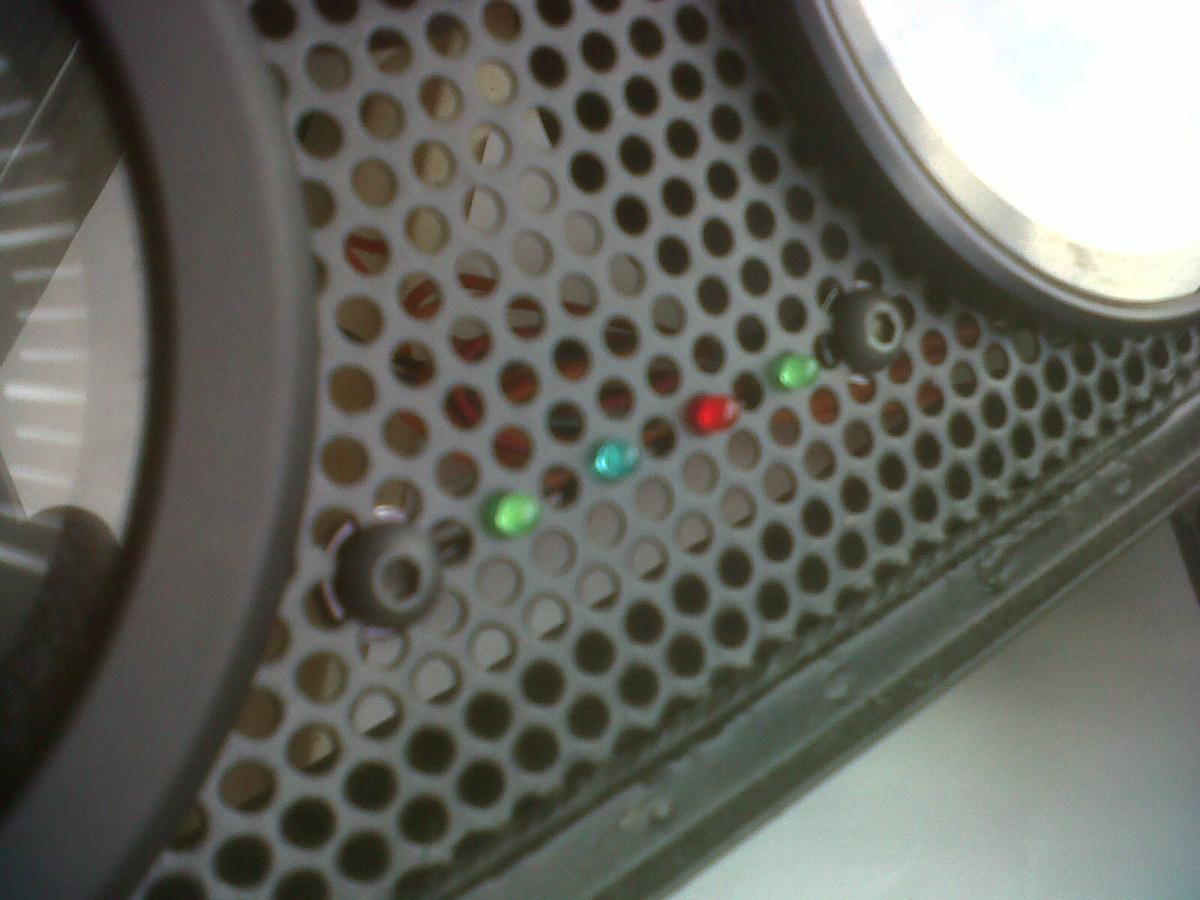
Test fit of general position:
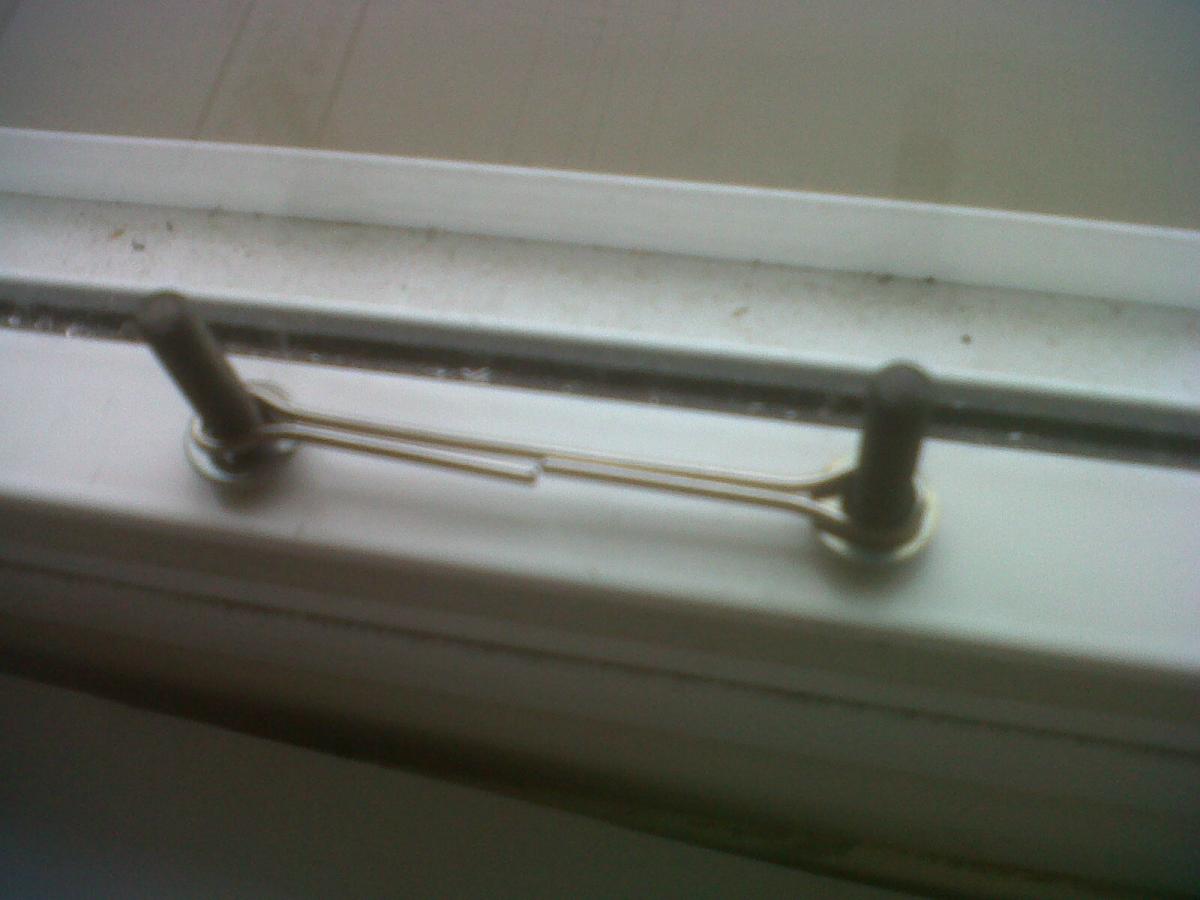
Paper clip bent into a shape that allows the fixings at each end to squeeze the LEDs into the dash. So, from front to back, you end up with bolt head, then the mesh dash surface, then a spacing washer, then the paper clip wire, then another washer and a nut:
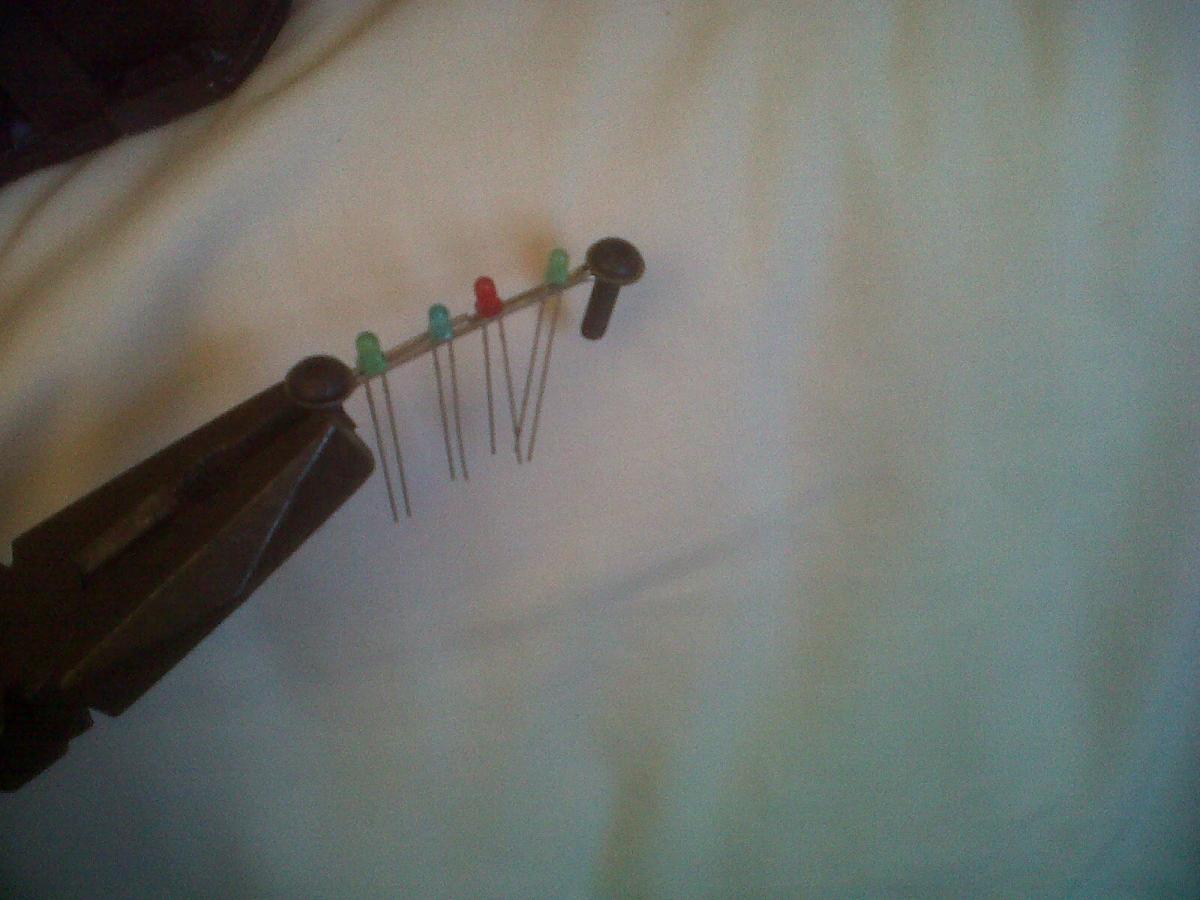
Initially used the rubber housing from an old mobile phone charger's mains lead to insulate the LEDs from each other:
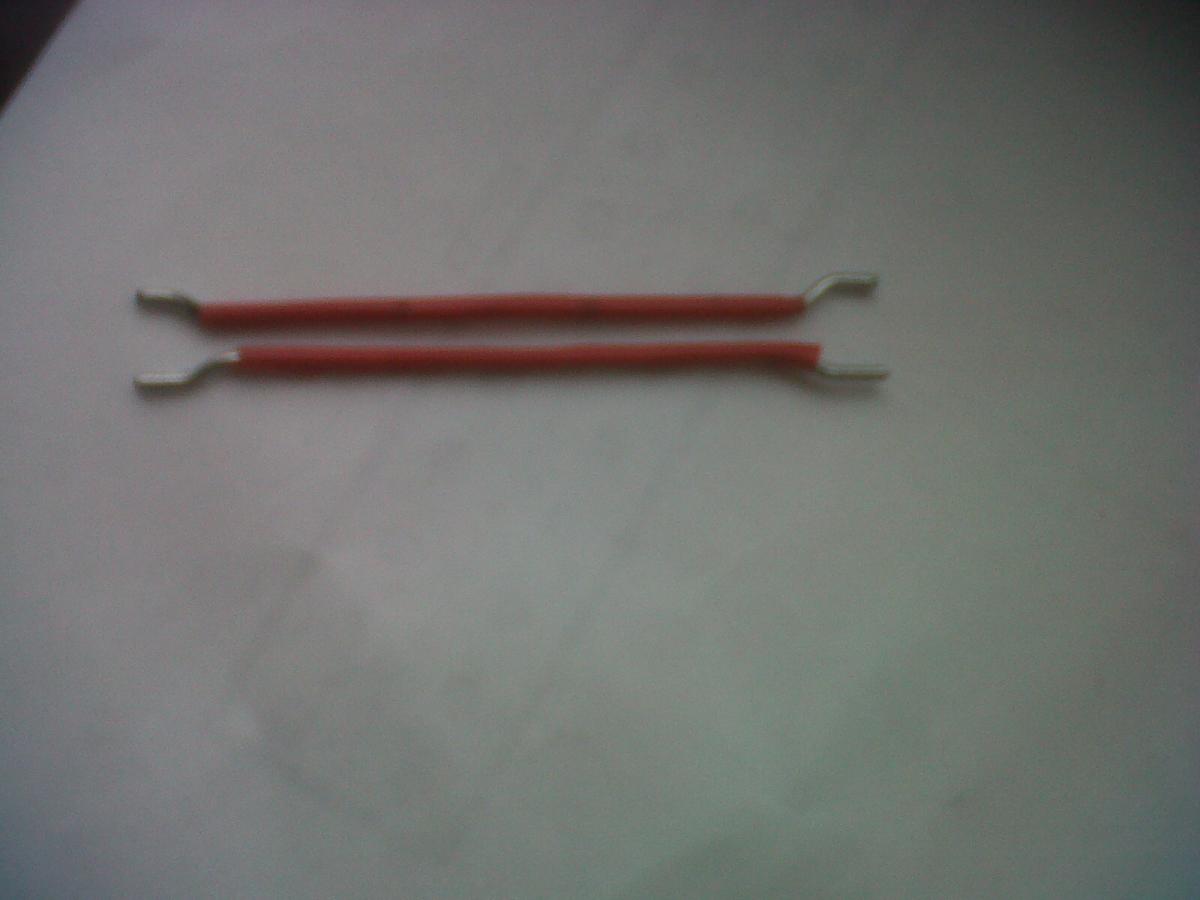
�but after a test fit, it became clear that this rubber insulator was too thick. You could see it through the holes in the dash mesh. So I made another version, using more paper clip wire, and thin electrical tape. I coloured the tape black with permanent marker. The open ends made the measurement of the wire not quite so critical:
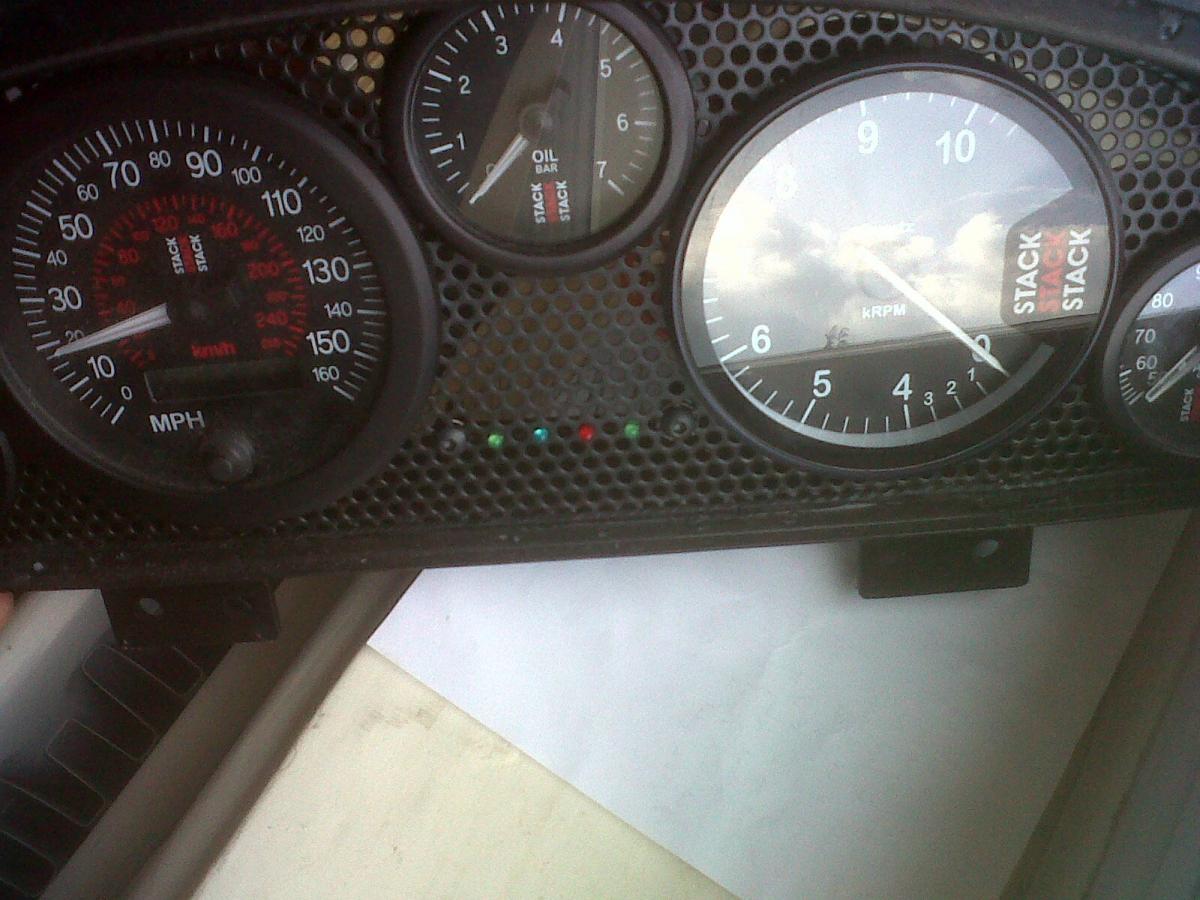
This worked a lot better. All LEDs are locked solid apart from the blue one, which you can wiggle slightly. I don't think this will be an issue, so I've left it. Now the only thing I'm not happy with is the crudely coloured-in washers behind the dash still being too reflective, so I will get hold of some matt black paint and a very thin paint brush and correct this some time.
I took a photo from under the car looking forward into the engine bay. Note the long cut out for the exhaust on the right:
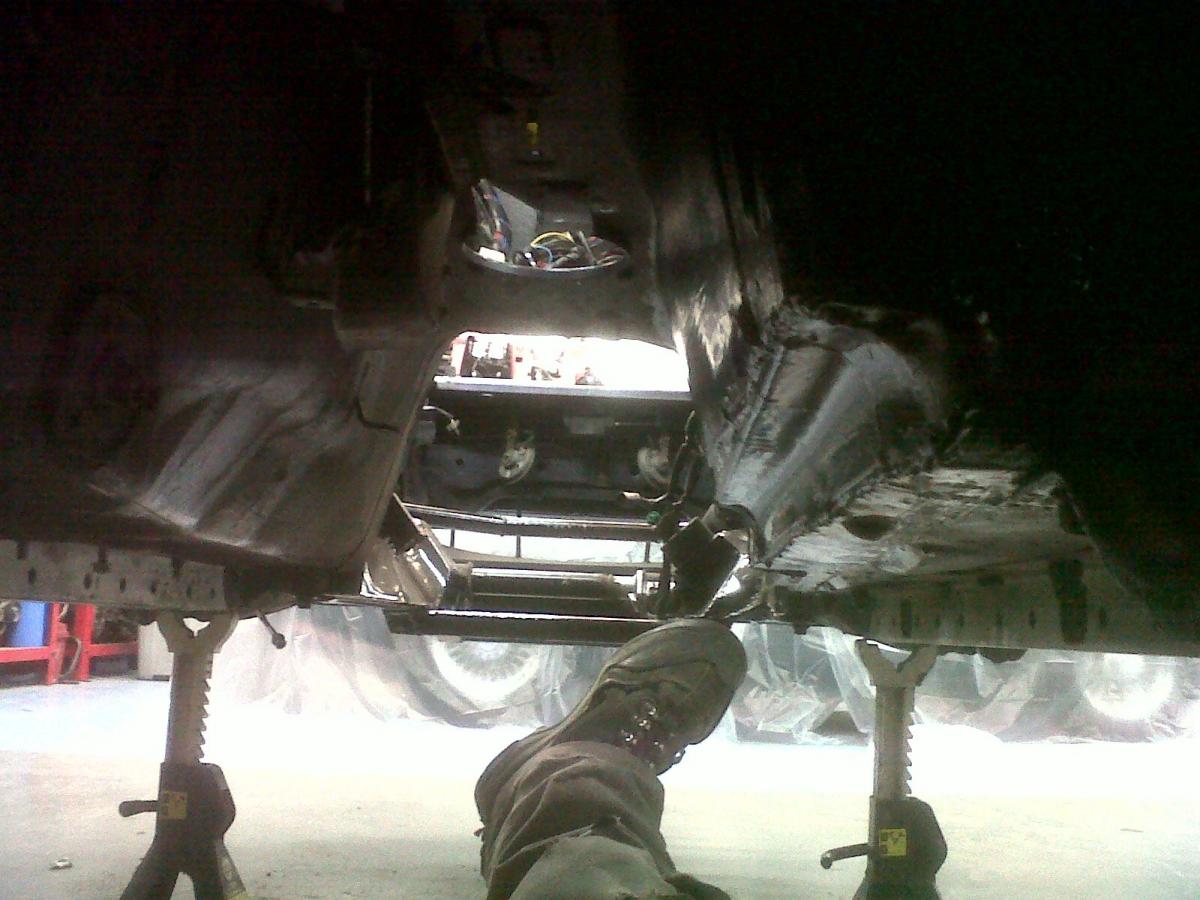
Lots of horizontal black things in this photo. From bottom to top: Rear subframe brace; front subframe brace; steering rack; bottom of the front bumper; front subframe brace/battery mounting shelf/crash structure:
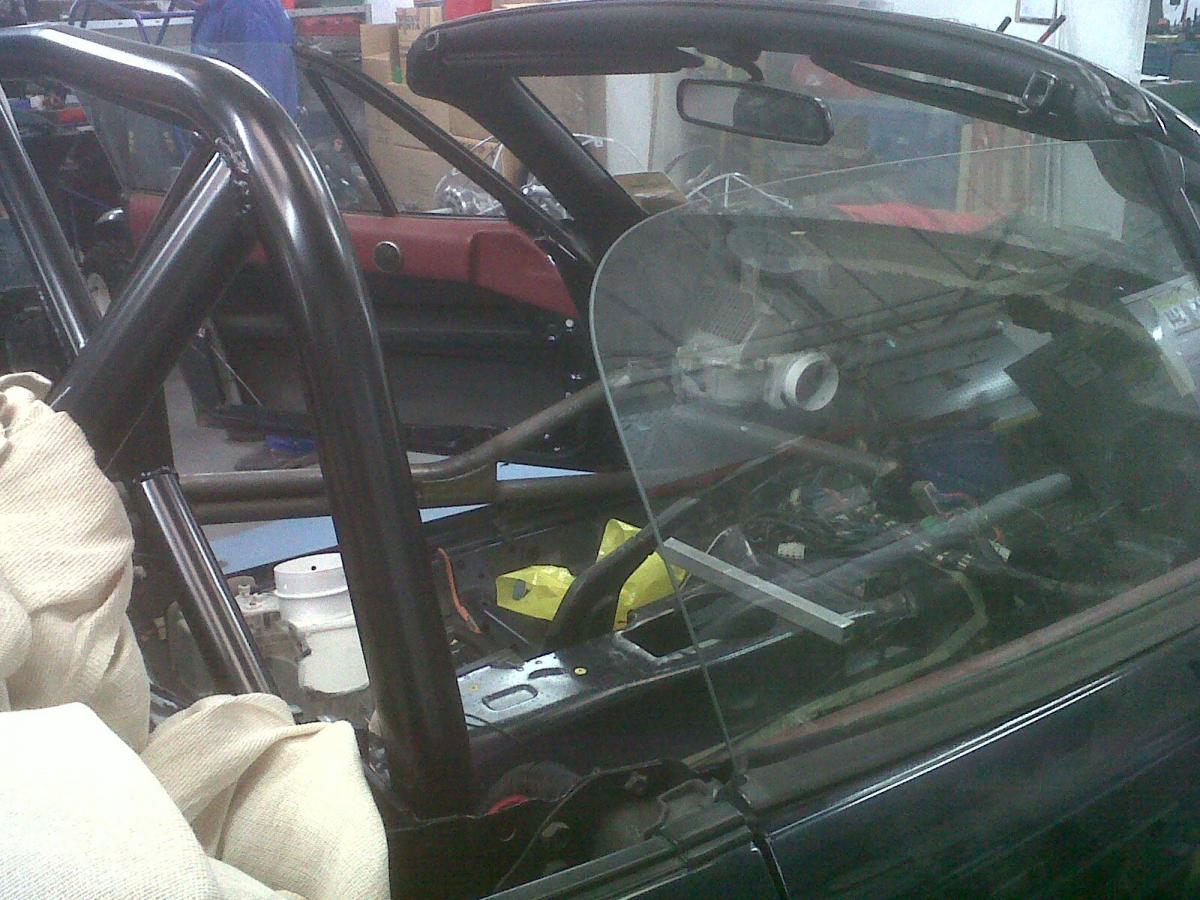
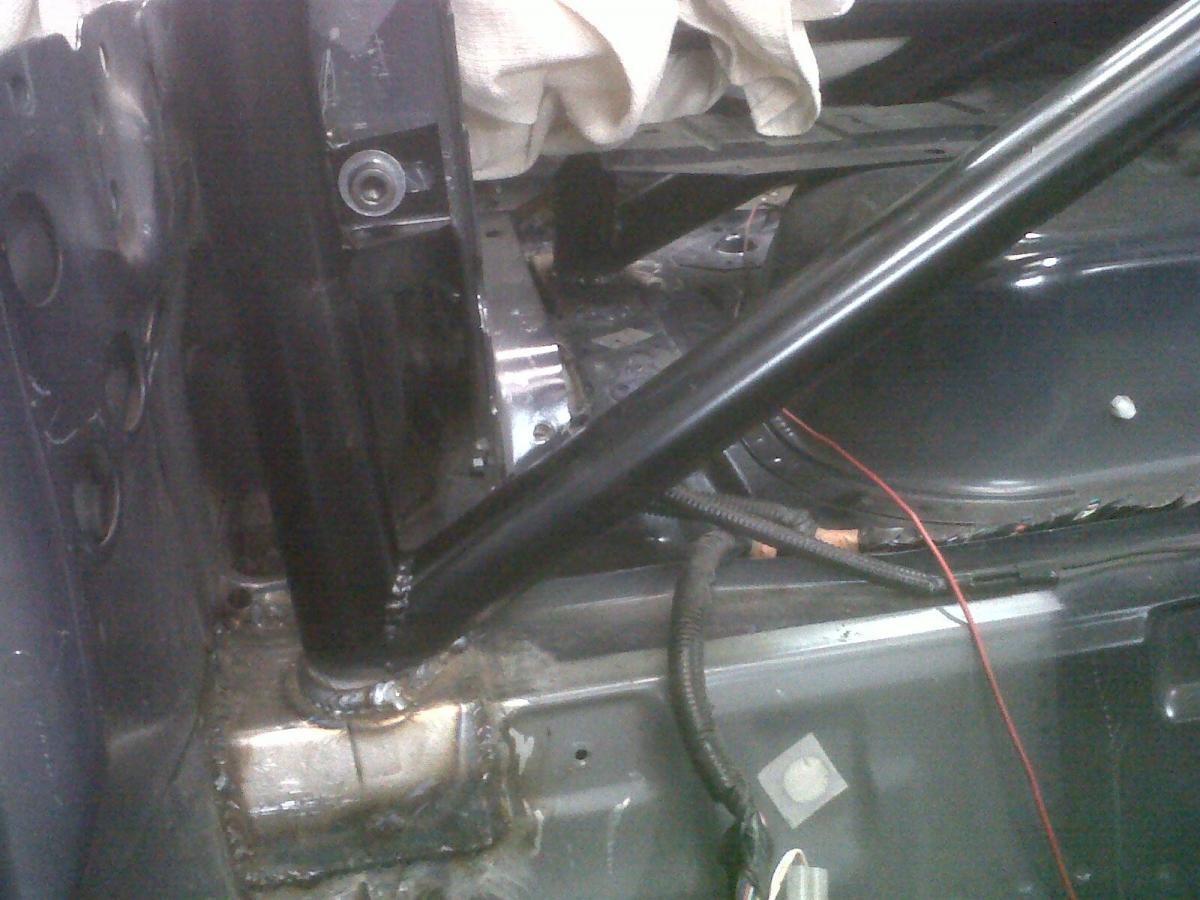
All the major fabrication is now complete, apart from the doors, which I'll do myself. Side bars are in and painted, with the vertical plate added that I mentioned in the last update. The plate isn't as long as I'd have liked, but it's fine. Should help torsional rigidity a tad. The door bars in general are still a compromise, although some of the compromise comes from packaging constraints - e.g., leaving enough space for the seats, not infringing on the dash, and allowing the heater box to be taken in and out on the passenger side.
New MOT regs mean that I can now have non-servo-assisted brakes
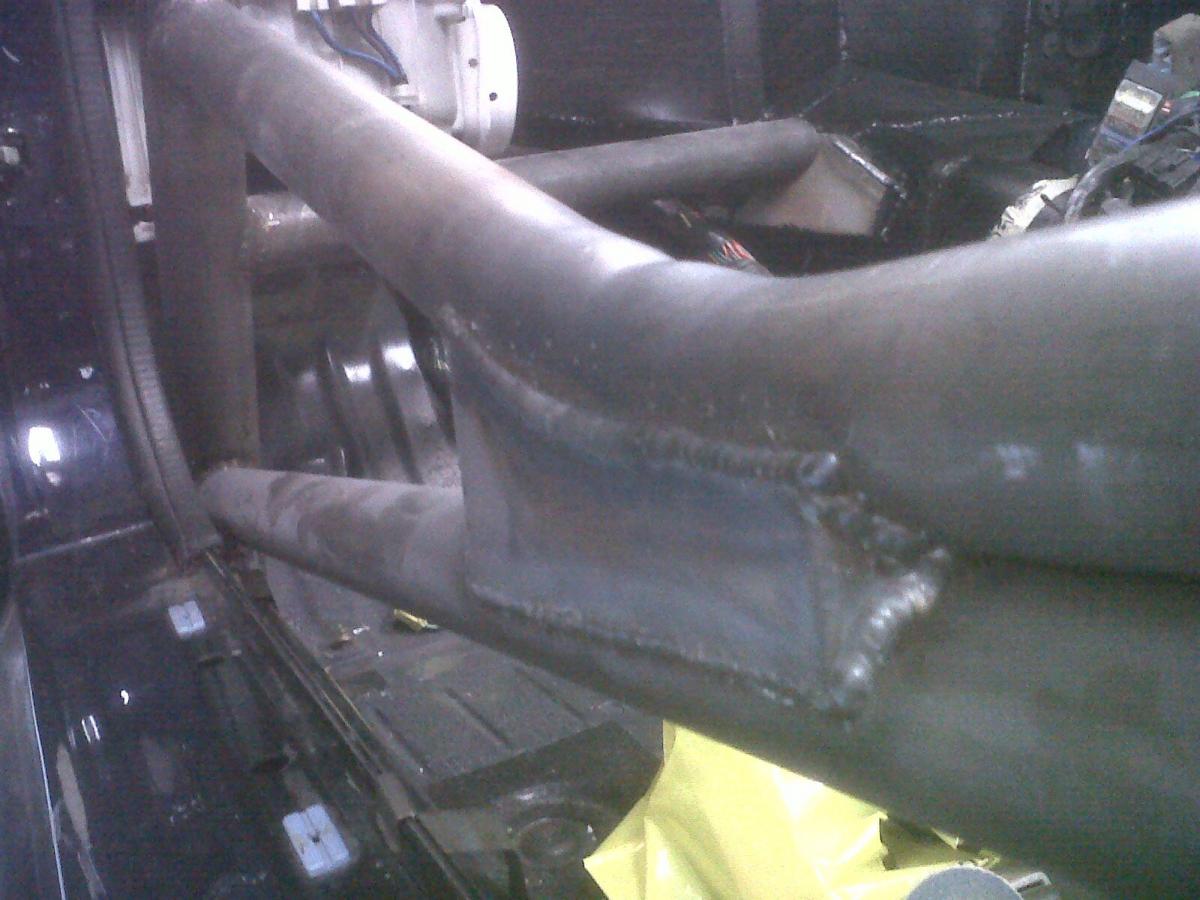
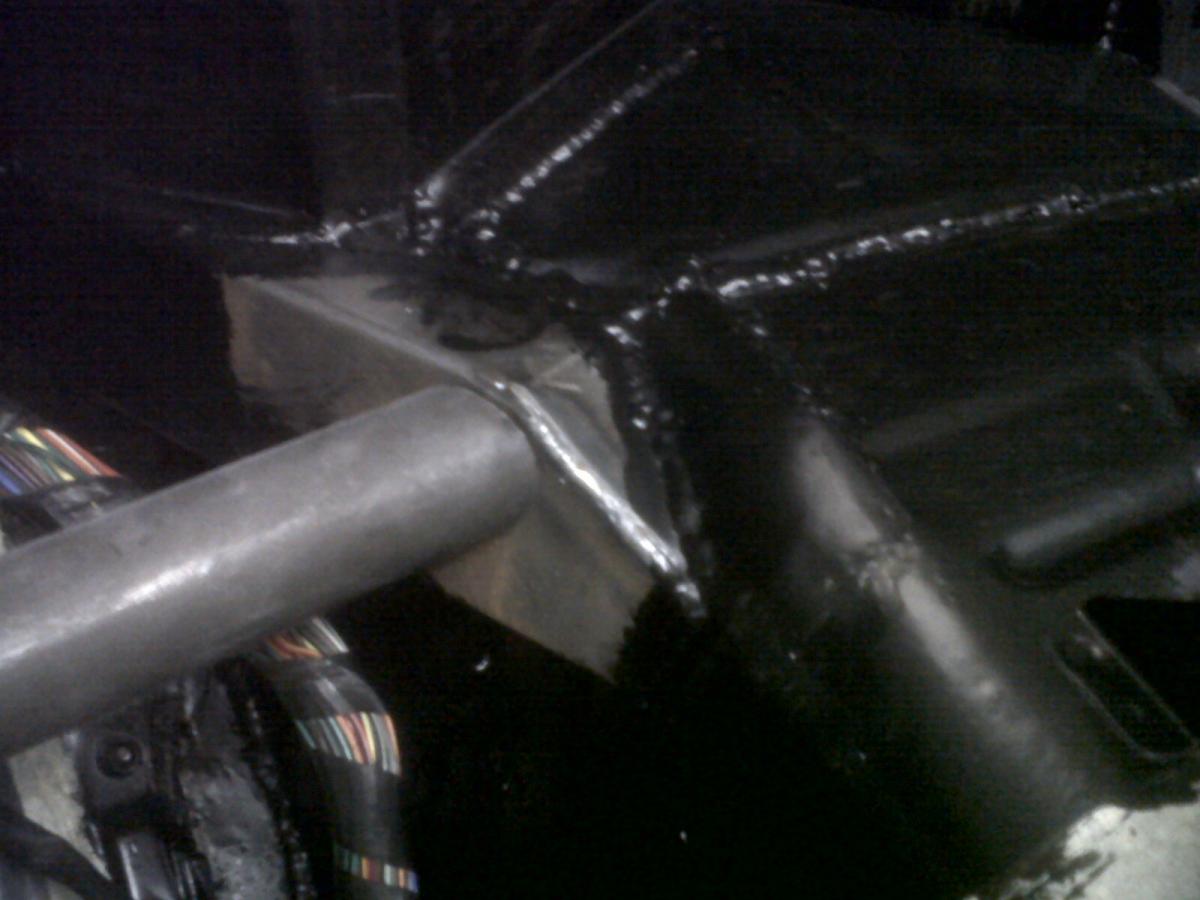
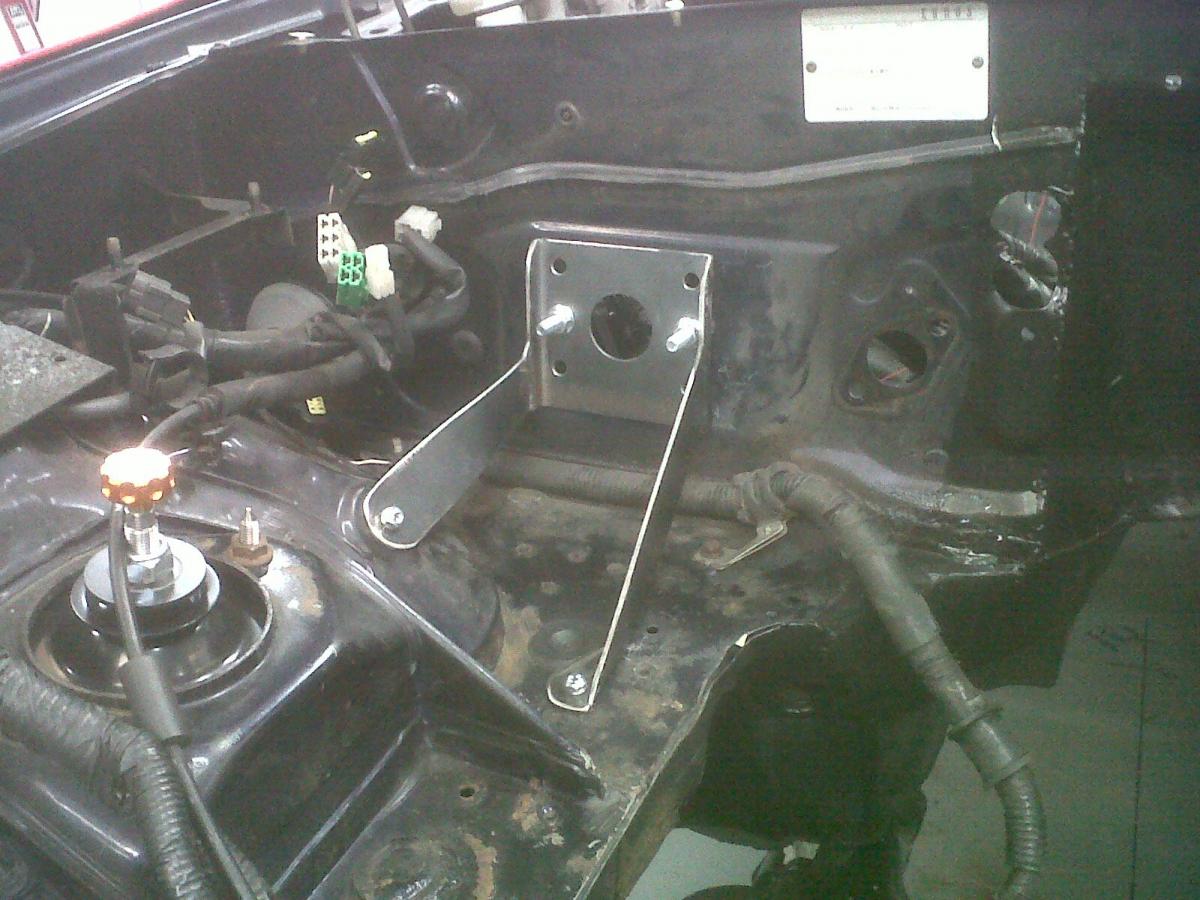
Firewall brace:
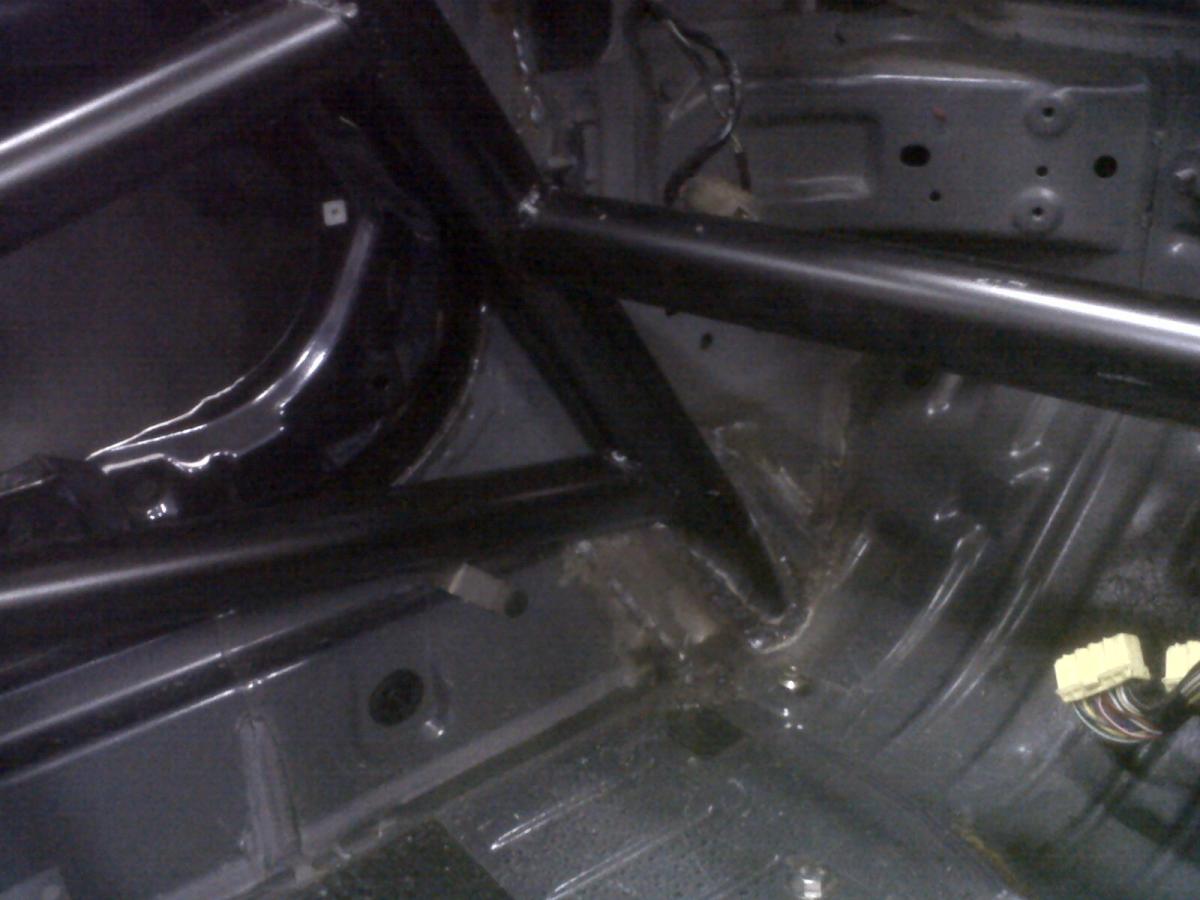
Front floor mount of door bars:

Below = LEDs of matched brightness/correct size etc, black M3 dome head fixings, and� er� some paperclips:
Test fit of general position:
Paper clip bent into a shape that allows the fixings at each end to squeeze the LEDs into the dash. So, from front to back, you end up with bolt head, then the mesh dash surface, then a spacing washer, then the paper clip wire, then another washer and a nut:
Initially used the rubber housing from an old mobile phone charger's mains lead to insulate the LEDs from each other:
�but after a test fit, it became clear that this rubber insulator was too thick. You could see it through the holes in the dash mesh. So I made another version, using more paper clip wire, and thin electrical tape. I coloured the tape black with permanent marker. The open ends made the measurement of the wire not quite so critical:
This worked a lot better. All LEDs are locked solid apart from the blue one, which you can wiggle slightly. I don't think this will be an issue, so I've left it. Now the only thing I'm not happy with is the crudely coloured-in washers behind the dash still being too reflective, so I will get hold of some matt black paint and a very thin paint brush and correct this some time.
I took a photo from under the car looking forward into the engine bay. Note the long cut out for the exhaust on the right:
Lots of horizontal black things in this photo. From bottom to top: Rear subframe brace; front subframe brace; steering rack; bottom of the front bumper; front subframe brace/battery mounting shelf/crash structure:
All the major fabrication is now complete, apart from the doors, which I'll do myself. Side bars are in and painted, with the vertical plate added that I mentioned in the last update. The plate isn't as long as I'd have liked, but it's fine. Should help torsional rigidity a tad. The door bars in general are still a compromise, although some of the compromise comes from packaging constraints - e.g., leaving enough space for the seats, not infringing on the dash, and allowing the heater box to be taken in and out on the passenger side.
New MOT regs mean that I can now have non-servo-assisted brakes
Firewall brace:
Front floor mount of door bars:
Reply
0
0

Like the transmission tunnel, still don't understand what you are trying to accomplish with the cage. The car is a driver, I just don't see the need for a cage, all it does is give your head a nice hard surface to hit while you are belted into the car. Over all a nice build.
Reply
0
0
Thread Starter
Junior Member
Joined: Dec 2010
Posts: 375
Total Cats: 20
From: UK, in Cambridgeshire or wherever work takes me.
Thanks. The cage is for stiffness and safety. The head-contacting-cage issue is the reason I didn't go for a full cage. As it stands, it would be next to impossible for me to hit my head on the rollbar.
Reply
0
0

Newb
Joined: Oct 2011
Posts: 2
Total Cats: 0
Glad to see this build progressing!
Have you tested the LED indicators in the dark? I wonder if they won't end up being much brighter and causing more glare than the original incandescent bulbs, especially as they're so directional.
Have you tested the LED indicators in the dark? I wonder if they won't end up being much brighter and causing more glare than the original incandescent bulbs, especially as they're so directional.
Reply
0
0
Thread Starter
Junior Member
Joined: Dec 2010
Posts: 375
Total Cats: 20
From: UK, in Cambridgeshire or wherever work takes me.
Not in the dark, but I did test all of them on a variable-current tester at Maplins when I bought them. I wrote down the voltage for each of the four LEDs that was required to make them all appear as bright as each other, and ran them all at a lower brightness level than normal to try and bring them roughly in to line with incandescents. I didn't even know you could adjust the brightness of LEDs before I started researching it (I am godawful with electronics…). The green was the least bright, then the red, then the blue. Turns out it's hard to find a blue LED that isn't retina-meltingly bright. The blue and red LEDs will be run with a resistor to bring them down to the same brightness as the two greens… and if they are all still too bright, I'll just drop the voltage again until they're right.
Reply
0
0
Thread Starter
Junior Member
Joined: Dec 2010
Posts: 375
Total Cats: 20
From: UK, in Cambridgeshire or wherever work takes me.
Regarding dash glare - I'm actually more concerned about the potential reflectiveness of the Stack gauges. You can see from the photos above that there doesn't appear to be any anti-glare coating on the lenses, and without the stock curved plastic over all of them that does such a good job on standard Miatas of reducing unwanted reflections, I'm a bit anxious to see whether the car "does a Lotus Evora" and reflects the entire sky directly at your face whilst driving. We'll see.
Reply
0
0

Reply
0
0
Thread Starter
Junior Member
Joined: Dec 2010
Posts: 375
Total Cats: 20
From: UK, in Cambridgeshire or wherever work takes me.
Six point will be ok. Not to everyone's taste I know (especially not Hingston's, who would probably prefer to be chauffered in his car if he could get away with it..... :P ). Mud on the door bars getting on my clothes will be more of an issue, to me. It'll still be more practical than a Caterham, which is probably what I'd have had if I wasn't building this.
Reply
0
0
Thread Starter
Junior Member
Joined: Dec 2010
Posts: 375
Total Cats: 20
From: UK, in Cambridgeshire or wherever work takes me.
That IS a ball ache. My total experience with a six point on the road amounts to one day, and as you say, over that short a period, it could have been the novelty value that made me think it would be ok in the long term.
Road cars such as the GT3RS et al make it work, so it's not unheard of. Although, in a ropey Miata, the ballacheyness might seem slightly less justified.
Road cars such as the GT3RS et al make it work, so it's not unheard of. Although, in a ropey Miata, the ballacheyness might seem slightly less justified.
Reply
0
0
Thread Starter
Junior Member
Joined: Dec 2010
Posts: 375
Total Cats: 20
From: UK, in Cambridgeshire or wherever work takes me.
Tyres came today:
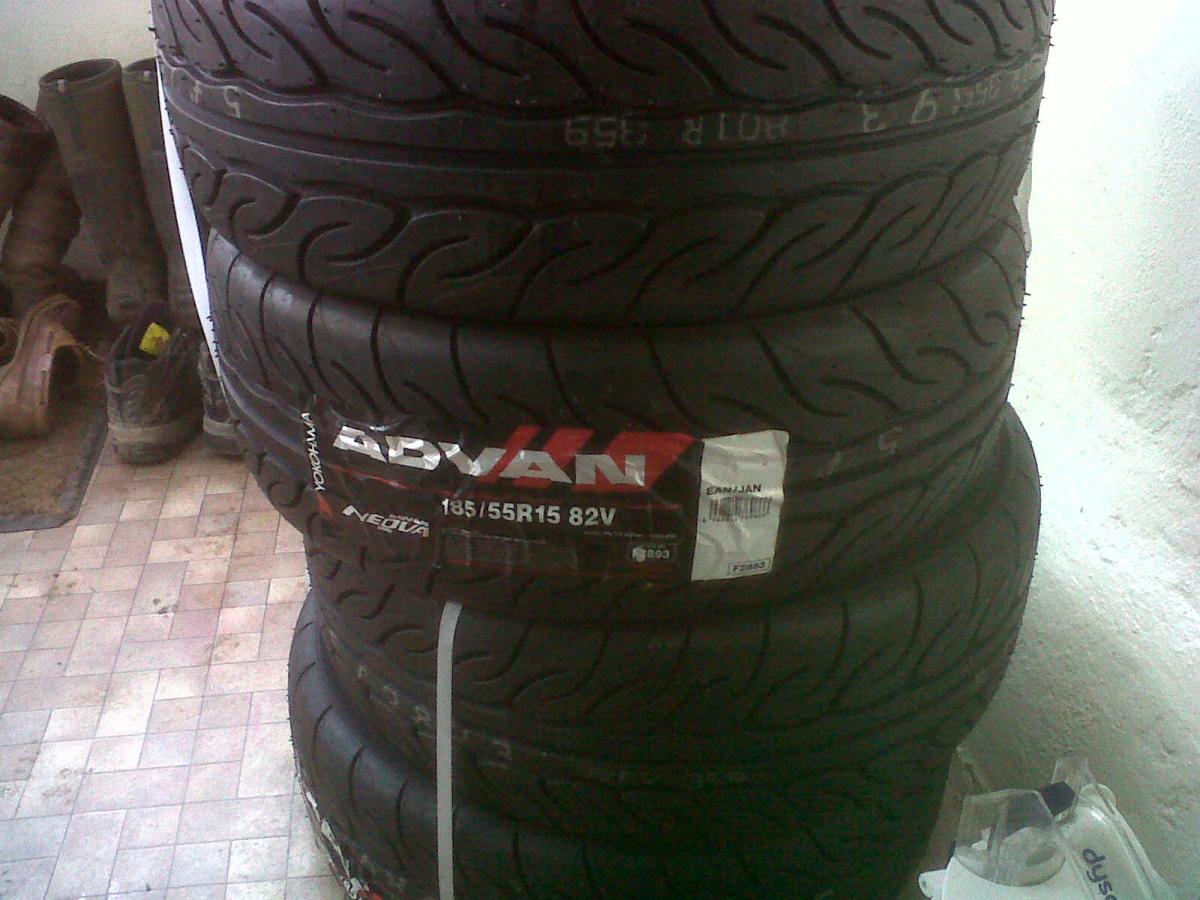
185/55 r15 Yokohama AD08s. They weigh 7.55kg/16.6lbs each, which gives a wheel + tyre weight of 12.8kg/28.2lbs.
The 149mph 'V' speed rating is almost exactly what the car is geared for (152mph @ 9000rpm in theory) and drag limited to (circa 150mph?).
185/55 r15 Yokohama AD08s. They weigh 7.55kg/16.6lbs each, which gives a wheel + tyre weight of 12.8kg/28.2lbs.
The 149mph 'V' speed rating is almost exactly what the car is geared for (152mph @ 9000rpm in theory) and drag limited to (circa 150mph?).
Reply
0
0


