
Ryan's build thread - Clean and Mean


Reply
 0
0

0

Thread Starter
Elite Member
iTrader: (8)
Joined: Jan 2012
Posts: 2,568
Total Cats: 217
From: Tampa, Florida
Heavy cleaning will happen today. I am going to remove the intercooler as well and clean that up. Tomorrow I want to get the ducting for the radiator done and the power steering delete finalized.
Reply
0
0

Ok, that makes me feel a bit better. They told me 2 weeks before I sent it in like 3 weeks ago. I assume Christmas and New Years are going to screw the deadline even further, so I won't worry about it until January.
I should have sent in my downpipe too, because that looks great. Though I am surprised the coated the backside of the V-bands?
I should have sent in my downpipe too, because that looks great. Though I am surprised the coated the backside of the V-bands?
Reply
0
0
Thread Starter
Elite Member
iTrader: (8)
Joined: Jan 2012
Posts: 2,568
Total Cats: 217
From: Tampa, Florida
I was worried about that as well. I did some research and found that many vbands still work with the coating. Tial vbands will not but I don't have any of those so we will see if mine work or if I have some cleanup to do.
Reply
0
0
When I called them they said they couldnt apply such a small amount of their masking agent. The efr vband for treadstone fits more or less. It does get ******* stuck like a bastard though and I do have some trouble getting it to seal even though both are flat.
Reply
0
0

Thread Starter
Elite Member
iTrader: (8)
Joined: Jan 2012
Posts: 2,568
Total Cats: 217
From: Tampa, Florida
Been making progress but it has been much slower than I would have liked. In the home stretch right now and I can hopefully get everything back together and running before this week is over like I had originally planned.
Modified the valve cover with two 3/8 NPT fittings for the catch can setup.
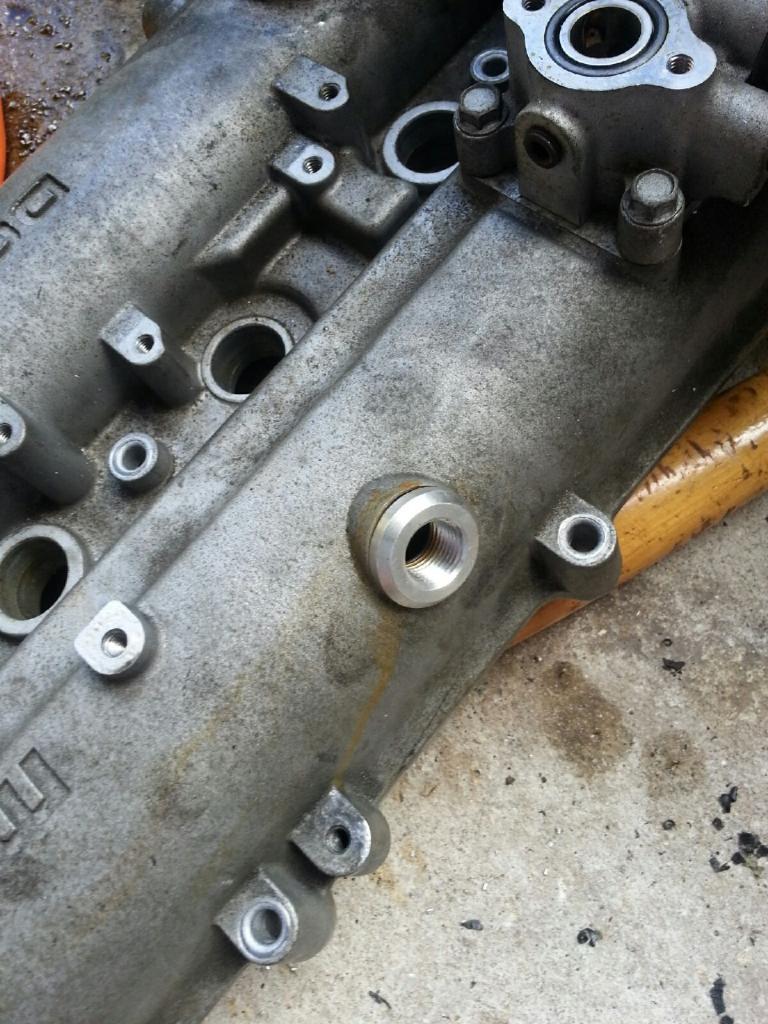
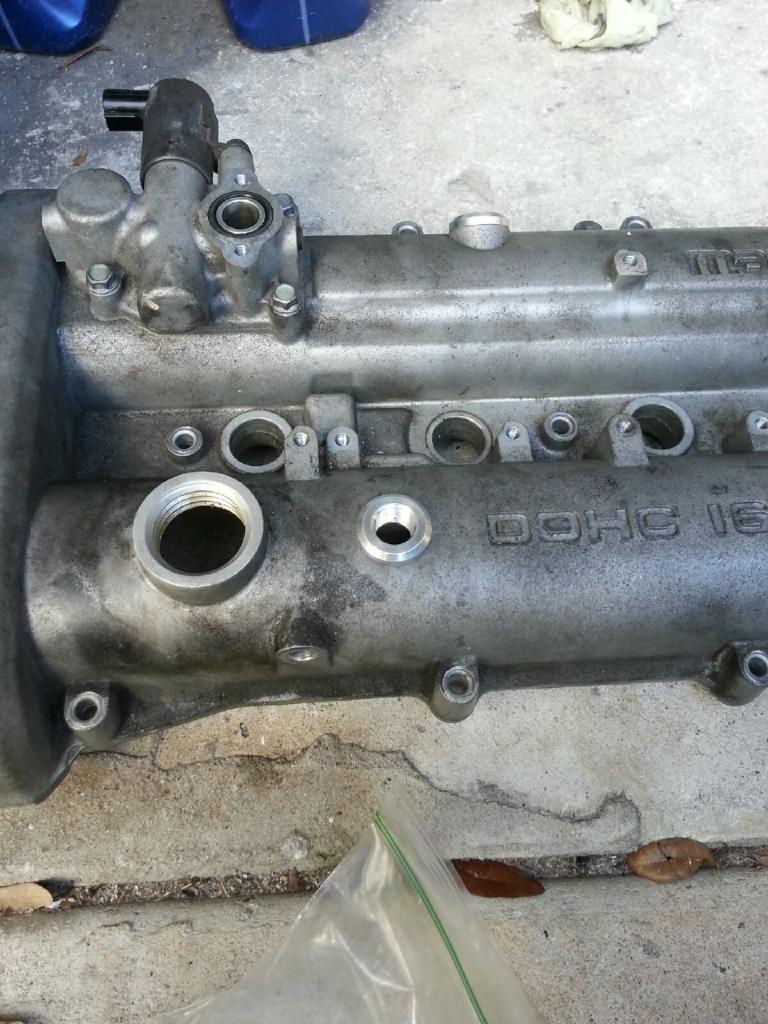
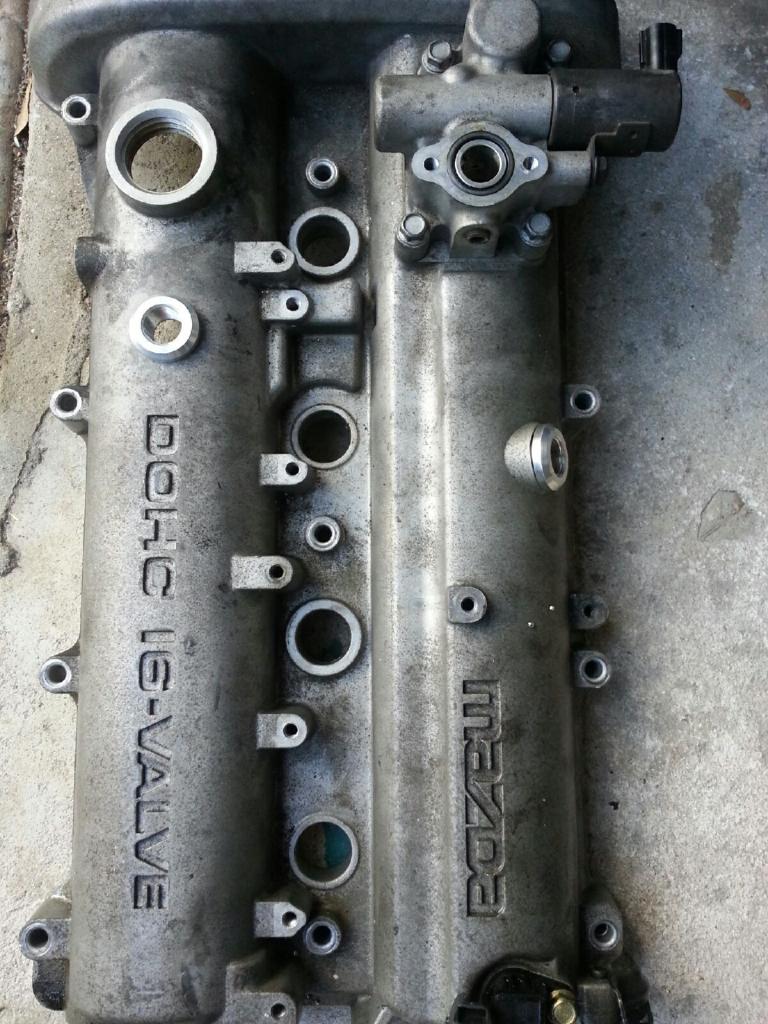
The bungs are currently being welded by a profressional.
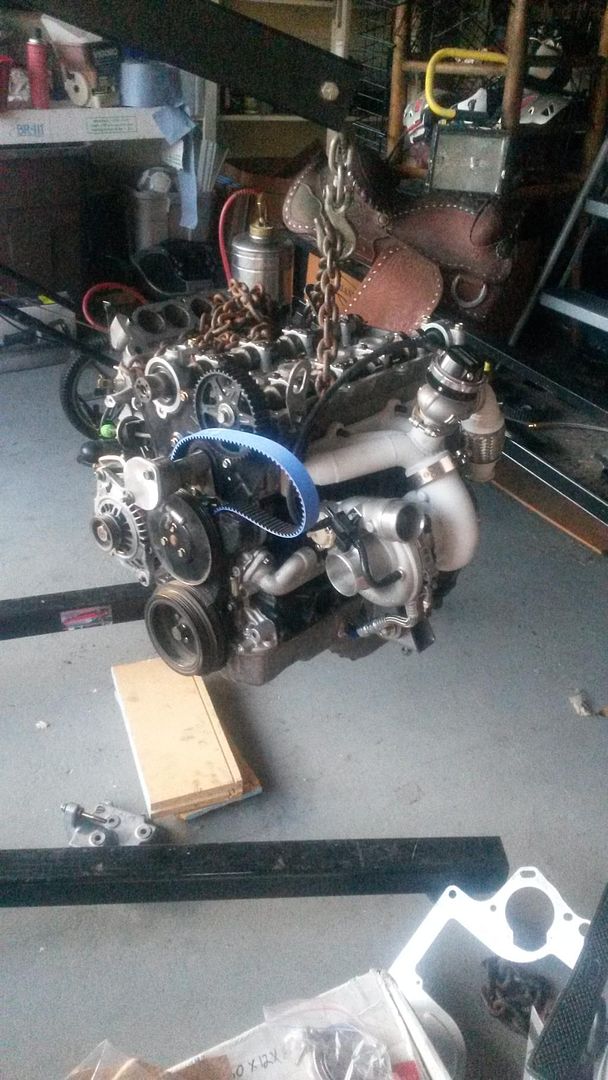
I have almost the entire engine back together but I ran into a few hitches. The first big one is this:
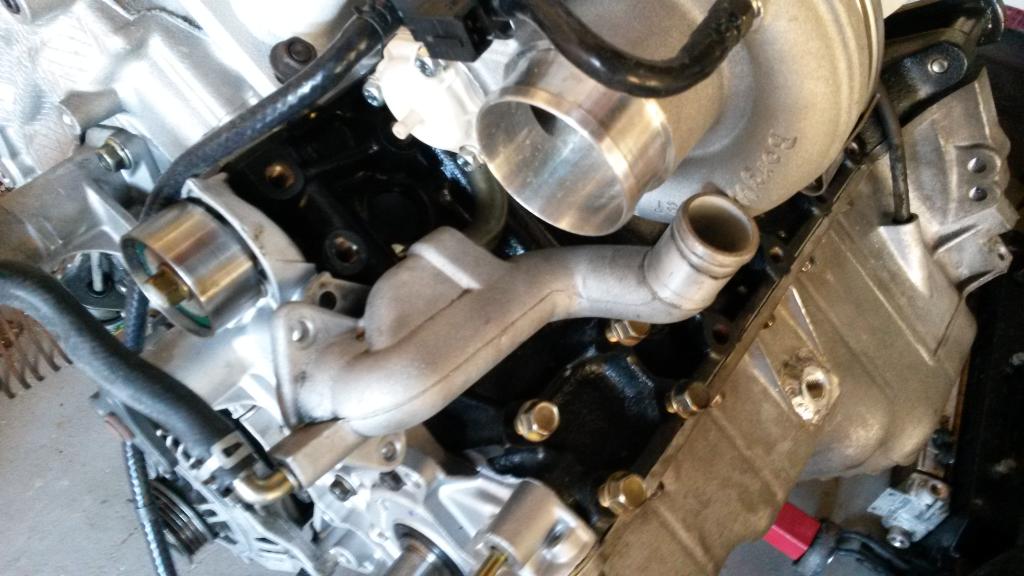
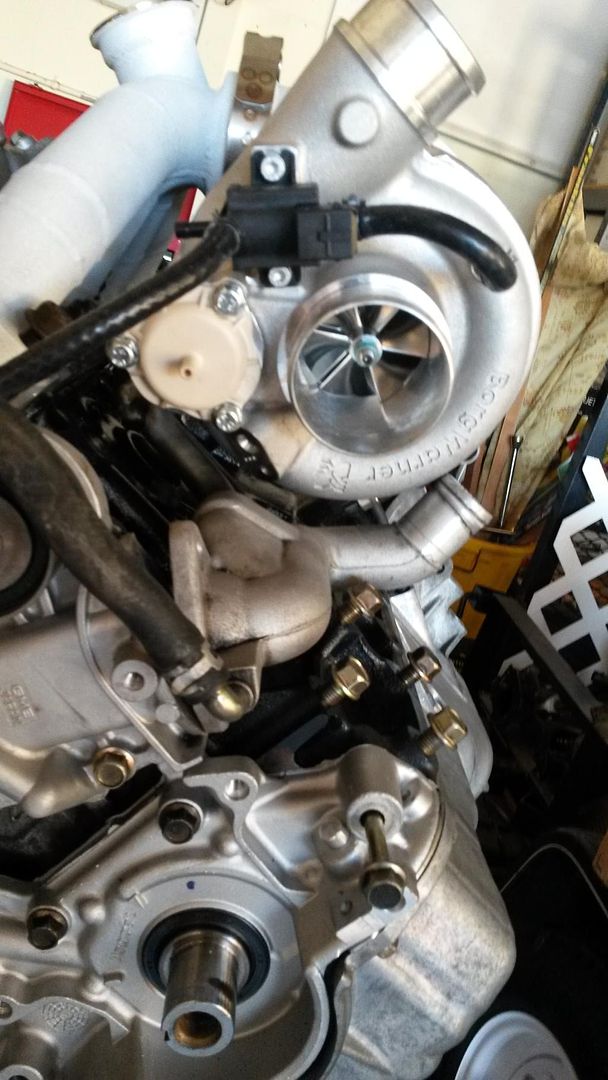
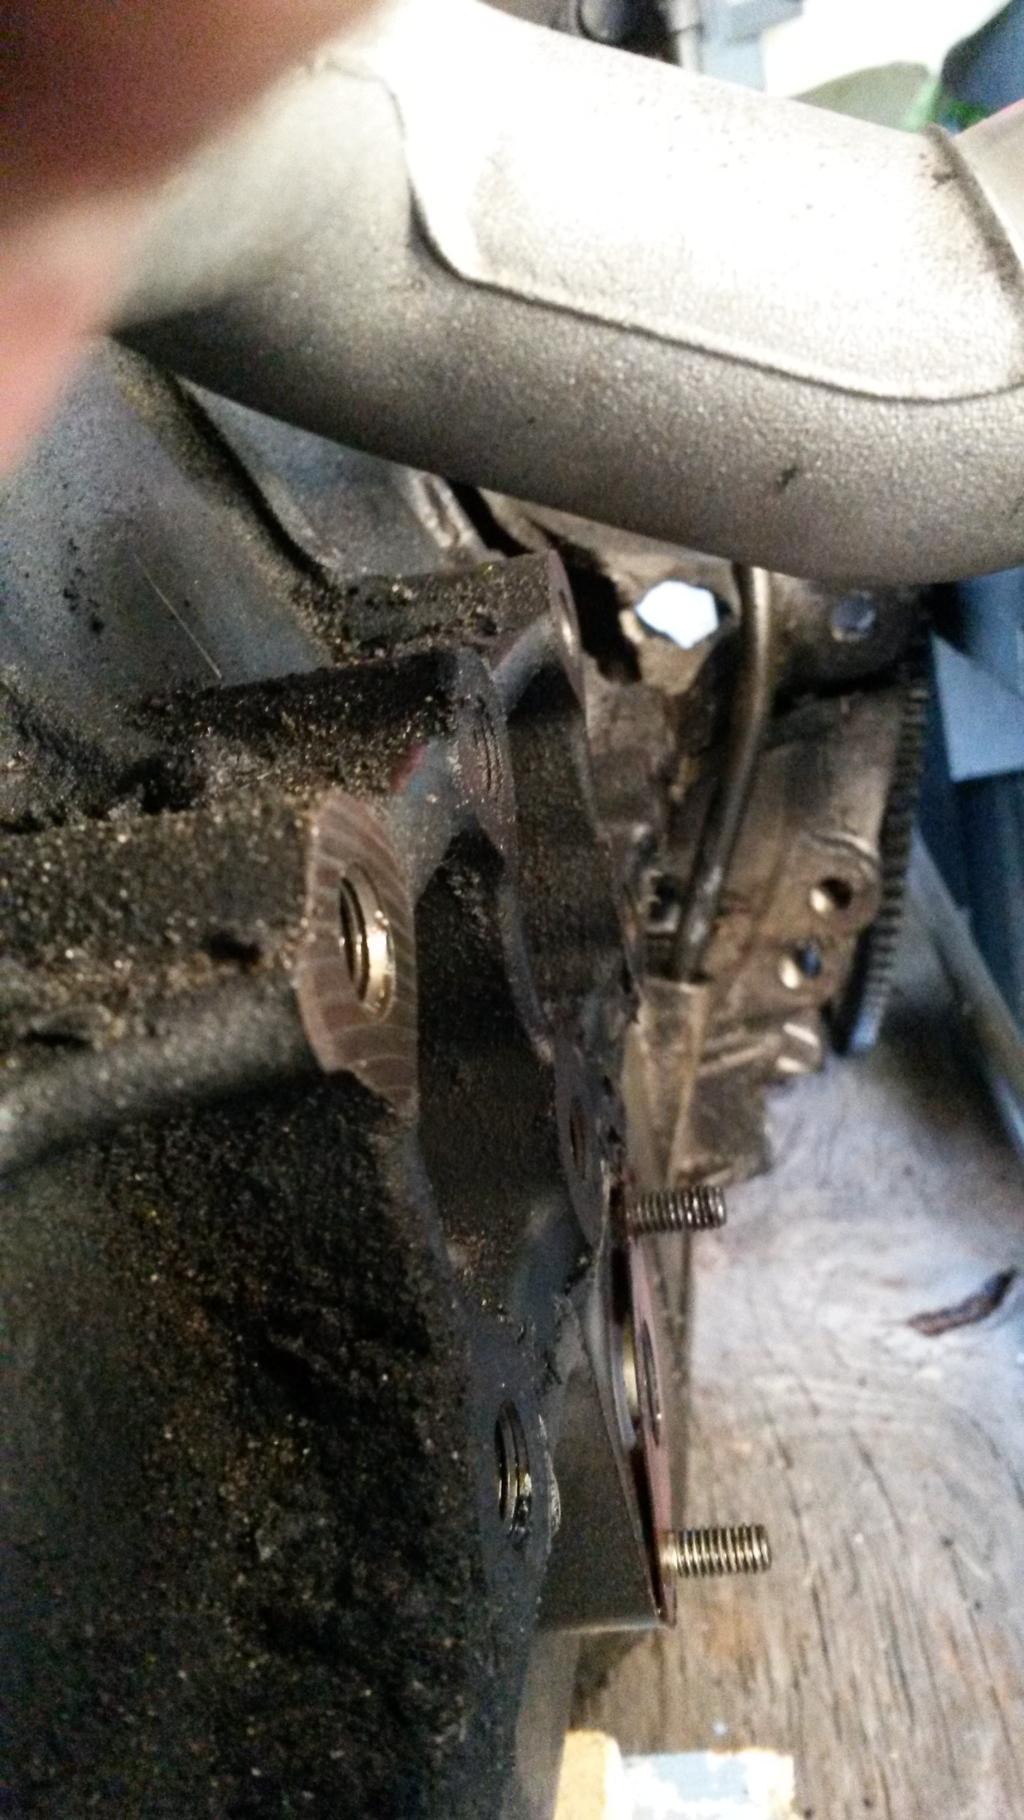
The MSM water inlet housing is contacting the compressor housing on the turbine. I also have a normal housing but that would be even worse as it does not point downward at all. I am thinking I might have the same guy that welded my oil pan and valve cover modify it a bit for me. I can either have a piece of the downward section removed and place the hose end at a downward angle to clear the housing or just cut and rotate the whole arm a little farther downward so that it clears. I am going to decide this tomorrow. Here is how much clearance on the block I have to work with.
Modified the valve cover with two 3/8 NPT fittings for the catch can setup.


The bungs are currently being welded by a profressional.

I have almost the entire engine back together but I ran into a few hitches. The first big one is this:


The MSM water inlet housing is contacting the compressor housing on the turbine. I also have a normal housing but that would be even worse as it does not point downward at all. I am thinking I might have the same guy that welded my oil pan and valve cover modify it a bit for me. I can either have a piece of the downward section removed and place the hose end at a downward angle to clear the housing or just cut and rotate the whole arm a little farther downward so that it clears. I am going to decide this tomorrow. Here is how much clearance on the block I have to work with.

Reply
0
0
Joined: Apr 2014
Posts: 18,643
Total Cats: 1,870
From: Beaverton, USA
Been making progress but it has been much slower than I would have liked. In the home stretch right now and I can hopefully get everything back together and running before this week is over like I had originally planned.
Modified the valve cover with two 3/8 NPT fittings for the catch can setup.
The bungs are currently being welded by a profressional.
I have almost the entire engine back together but I ran into a few hitches. The first big one is this:
The MSM water inlet housing is contacting the compressor housing on the turbine. I also have a normal housing but that would be even worse as it does not point downward at all. I am thinking I might have the same guy that welded my oil pan and valve cover modify it a bit for me. I can either have a piece of the downward section removed and place the hose end at a downward angle to clear the housing or just cut and rotate the whole arm a little farther downward so that it clears. I am going to decide this tomorrow. Here is how much clearance on the block I have to work with.
Reply
0
0
Mine is flipped too. Note, the flipped mixing manifold does not clear the stock fans. But there is a pre-bent radiator hose at advanced auto that fits after being trimmed. I think you could get by without welding by using an na6 thermostat cover and a plate. The plate is there because while the bolt patterns are the same between the thermostat covers and the water pump inlet the sealing areas dont mate fully.
Reply
0
0
Joined: Apr 2014
Posts: 18,643
Total Cats: 1,870
From: Beaverton, USA
Mine is flipped too. Note, the flipped mixing manifold does not clear the stock fans. But there is a pre-bent radiator hose at advanced auto that fits after being trimmed. I think you could get by without welding by using an na6 thermostat cover and a plate. The plate is there because while the bolt patterns are the same between the thermostat covers and the water pump inlet the sealing areas dont mate fully.

Reply
0
0
I'd happily trade you a "regular" mixing manifold or even buy the MSM one off you if you are not going to use it. It looks like it would fix my "mixing manifold hit primary" problem perfectly.
Also, I really like what you did with the weld bungs. I did the same thing on my pan. MUCH cleaner way to do it if you have things apart and access to a welder.
Also, I really like what you did with the weld bungs.
I did the same thing on my pan. MUCH cleaner way to do it if you have things apart and access to a welder.
Reply
0
0

Thread Starter
Elite Member
iTrader: (8)
Joined: Jan 2012
Posts: 2,568
Total Cats: 217
From: Tampa, Florida
I thought about turning the mixing manifold around but I am pretty sure it will make contact with the ac belt. Every one I have seen that retains accessories still had ps and the tube sits in the middle of the belt. I will only have a belt going from the crank pulley to the ac pulley so I don't think I will have the needed clearance.
Reply
0
0
Joined: Apr 2014
Posts: 18,643
Total Cats: 1,870
From: Beaverton, USA

Reply
0
0
Thread Starter
Elite Member
iTrader: (8)
Joined: Jan 2012
Posts: 2,568
Total Cats: 217
From: Tampa, Florida
So I solved the water inlet problem and it was really simple.

I am going to use a bendable radiator line that I already have to route around the turbo and then hook it into the stock line (which I will have to cut) with a metal pipe connection.
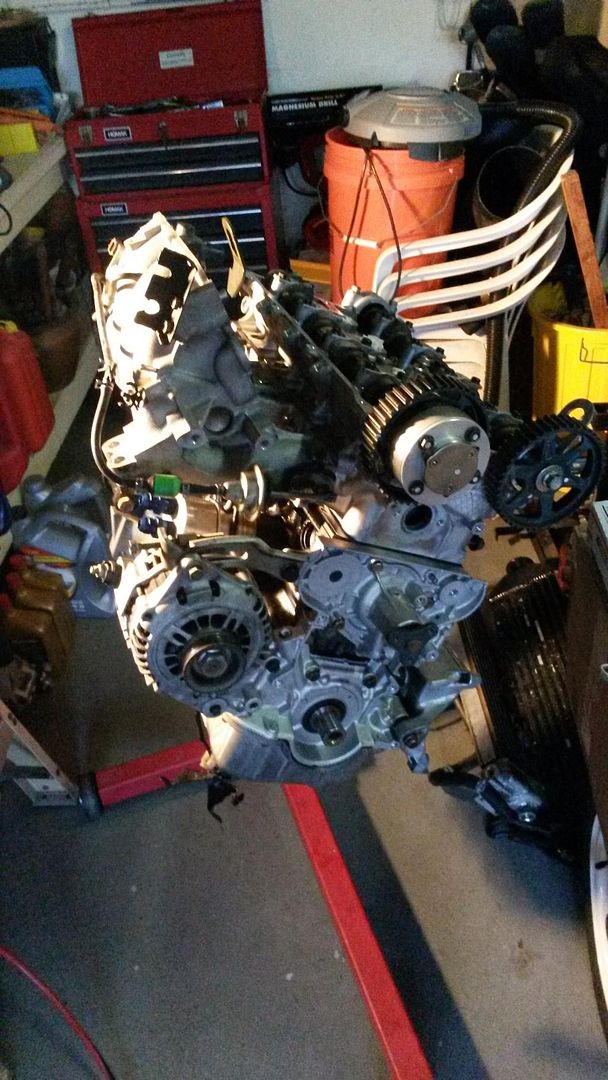
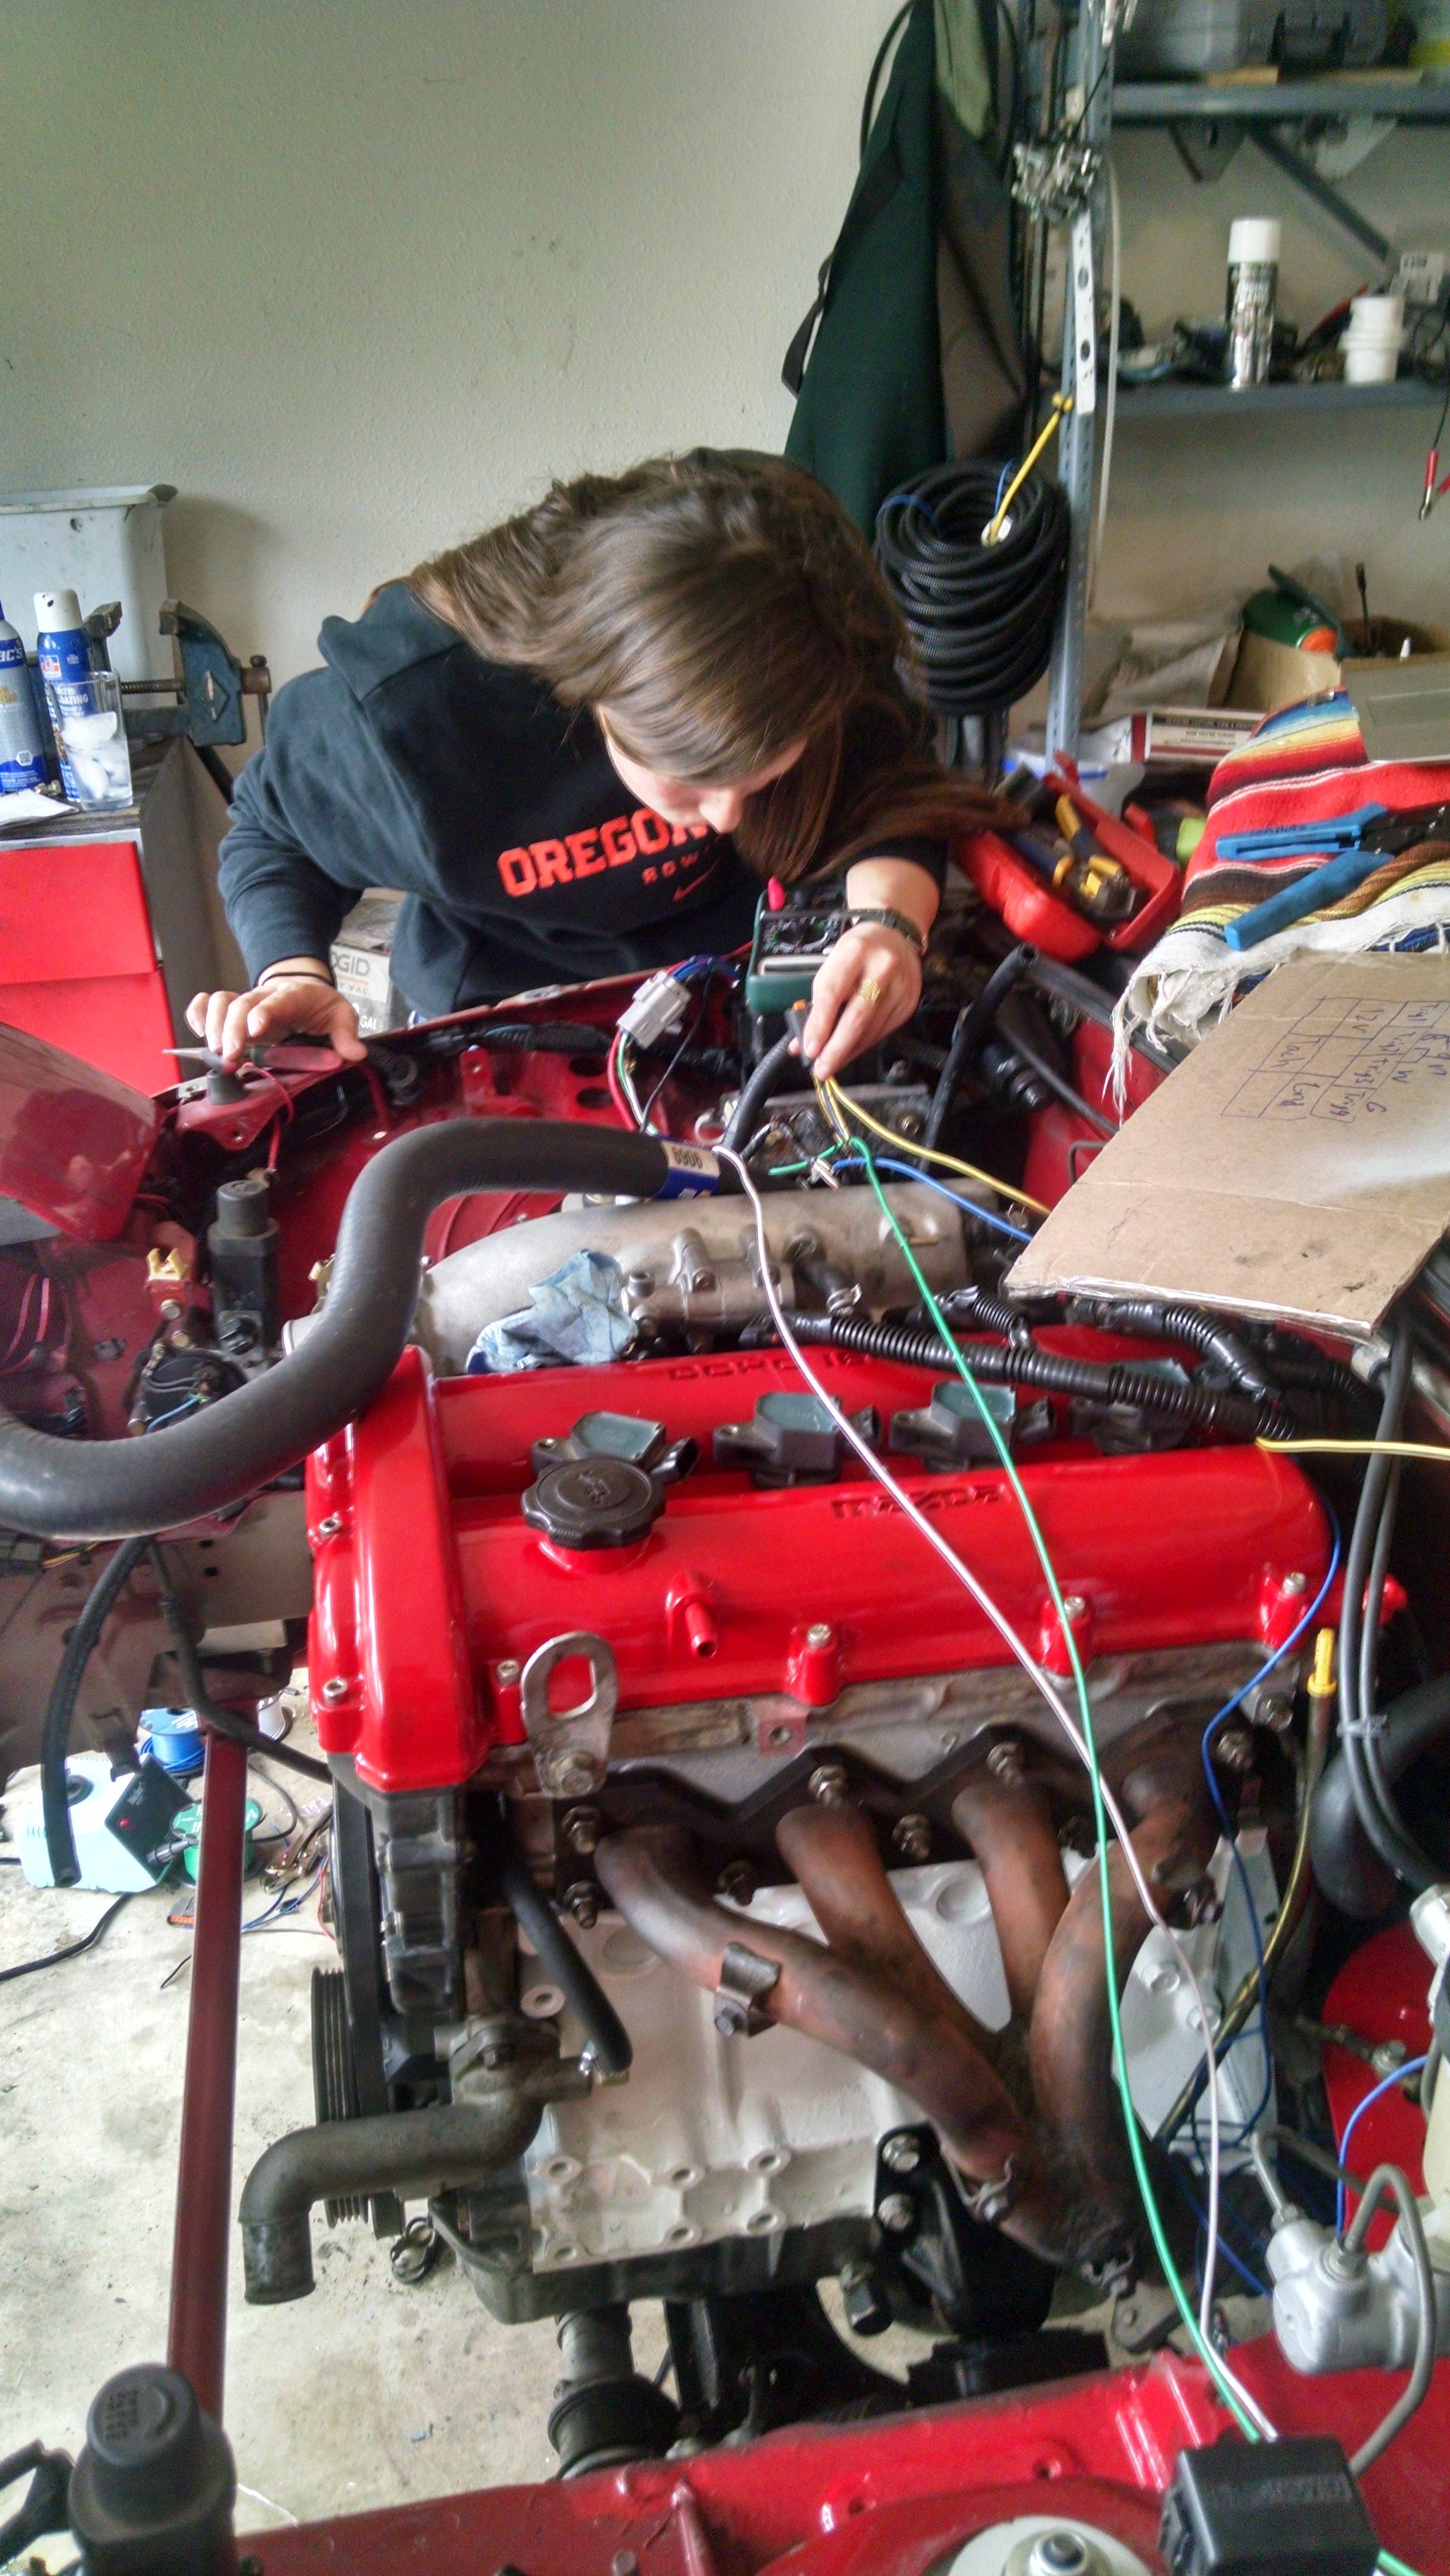
I made more progress today.
I was hoping to get the engine in the car by the end of the day but I ran into another ******* problem. You notice how the intake cam gear is not installed in the picture. The motherfucking torx bolts will not come out. I used pb blaster, hit the torx bit into them with a hammer, tried to tighten it and then loosen it, and in a fit of desperation put the cam gear between my feet and used a ******* drill and nothing would even budge that ****.
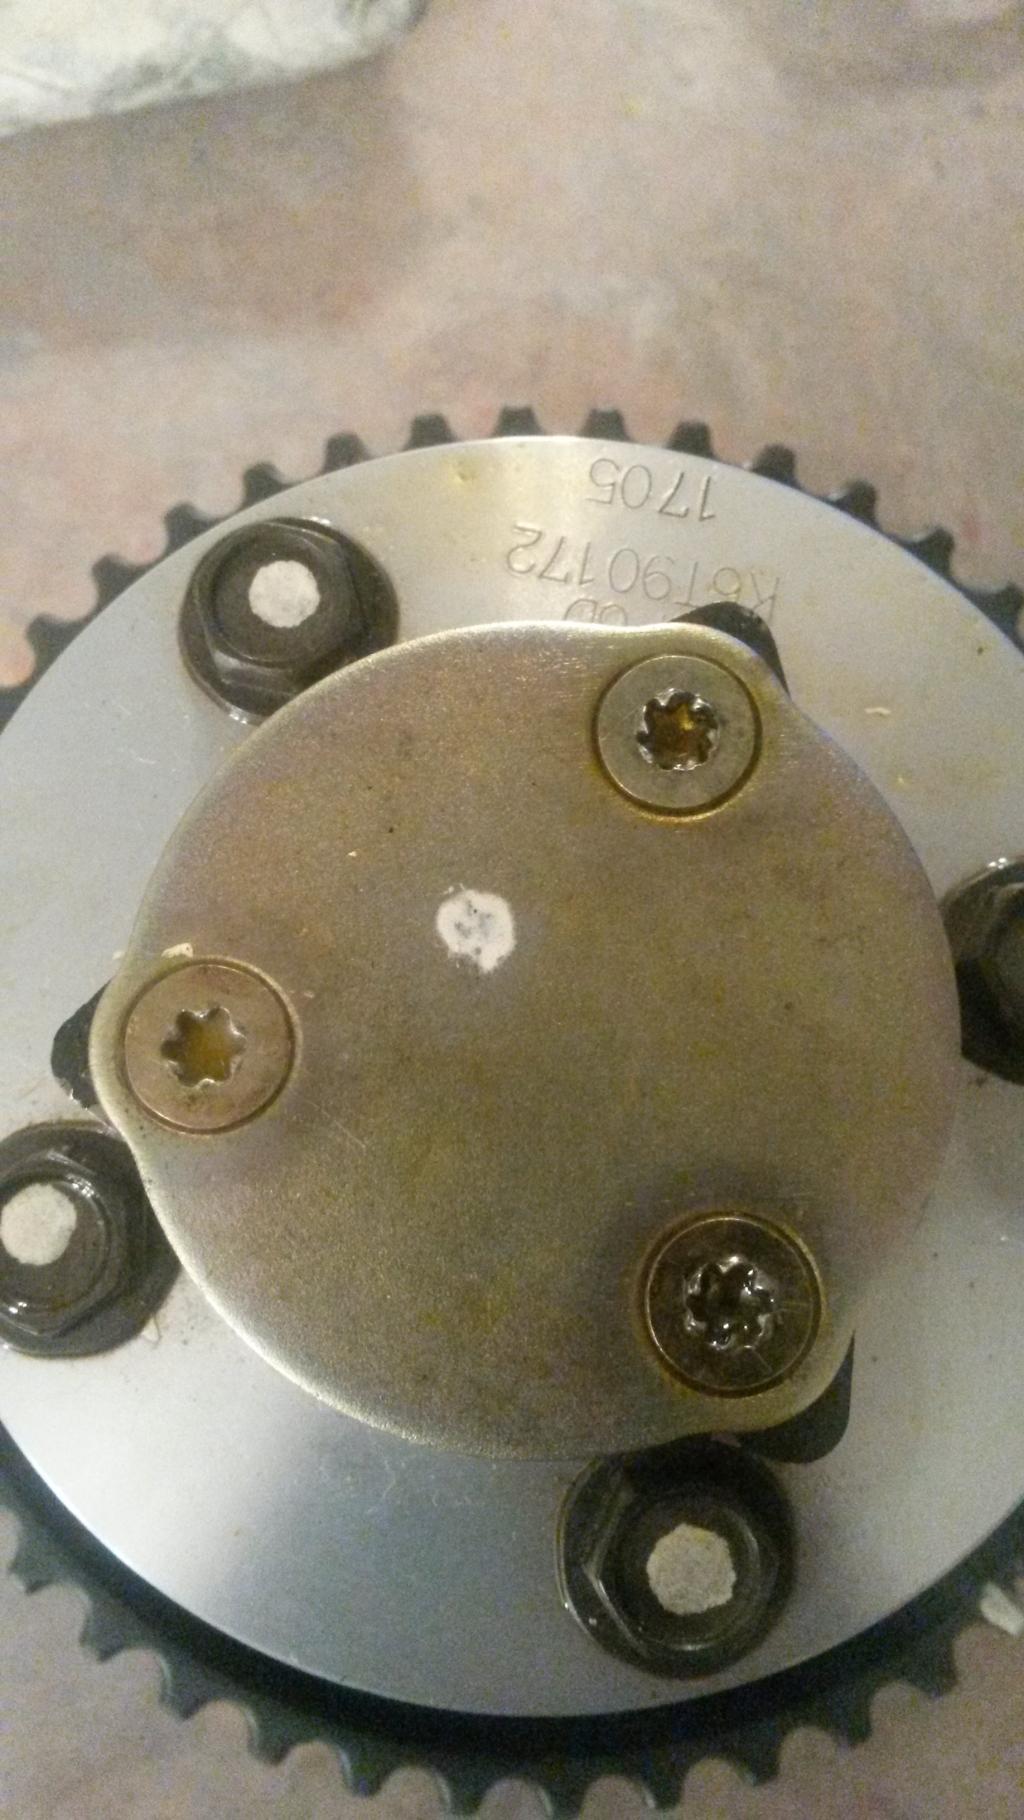
I am going to take it to a machine shop tomorrow to pull them out because I do not trust myself to drill them out without damaging something important. I got the call today that my valve cover is done. I will be picking that up tomorrow along with a few last fittings that I need.
You may also notice that the stock damper is in place instead of the fancy ati damper that I have in my garage. I was also unaware that the stock trigger wheel would not work with it and has to be modified. So that will go on later since right now I just want my car back on its feet.

I am going to use a bendable radiator line that I already have to route around the turbo and then hook it into the stock line (which I will have to cut) with a metal pipe connection.
I made more progress today.

I was hoping to get the engine in the car by the end of the day but I ran into another ******* problem. You notice how the intake cam gear is not installed in the picture. The motherfucking torx bolts will not come out. I used pb blaster, hit the torx bit into them with a hammer, tried to tighten it and then loosen it, and in a fit of desperation put the cam gear between my feet and used a ******* drill and nothing would even budge that ****.

I am going to take it to a machine shop tomorrow to pull them out because I do not trust myself to drill them out without damaging something important. I got the call today that my valve cover is done. I will be picking that up tomorrow along with a few last fittings that I need.
You may also notice that the stock damper is in place instead of the fancy ati damper that I have in my garage. I was also unaware that the stock trigger wheel would not work with it and has to be modified.
So that will go on later since right now I just want my car back on its feet.
Reply
0
0


