Turbo Smurfette - Build in progress (slow)
 03-12-2015, 10:58 AM
#221
Elite Member
Thread Starter
iTrader: (4)

Join Date: Mar 2012
Location: Northern VA
Posts: 4,648
Total Cats: 544
I'm waiting for a coolant bypass tube before I can make more headway on this.
Braineak has clarified a bunch of wiring stuff for me regarding spark and fuel.
I think VVT solenoid should be easy to connect too. Find power from injector harness, and ground to the MS3X vvt wire?
Knock stuff I still need to figure out. Does it also grab power from injector or spark and then ground at the MS3x?
Buh.
I'm second guessing whether or not I should tap the oil source on the driver side of the block since I'm using an early bottom end. Does anyone think this will cause oil pressure issues for lubricating the rear main bearing?

Reply
 0
0

0
03-12-2015, 12:09 PM
#222
Elite Member
iTrader: (37)

Join Date: Apr 2010
Location: Very NorCal
Posts: 10,441
Total Cats: 1,899
But that's just me, and i r not smrt. Perhaps more folks can chime in.
Reply
0
0
03-12-2015, 12:16 PM
#224
Elite Member
Thread Starter
iTrader: (4)
Join Date: Mar 2012
Location: Northern VA
Posts: 4,648
Total Cats: 544
Well, I suppose you're right. It's got 1 shim as well and is an extreme pump. Fluids are incompressible so whatever pressure drop would probably be more from the relief valve than local proportioning...maybe
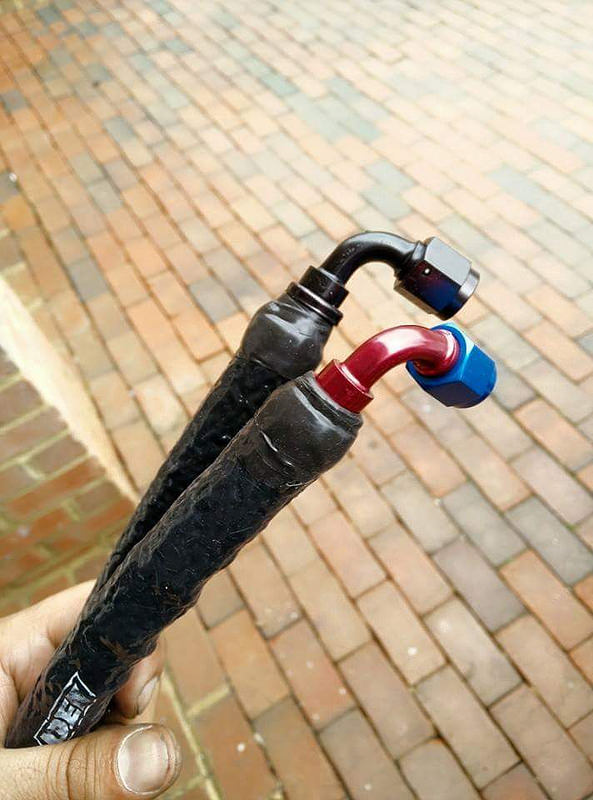
I am building a new oil and water line, you will probably have a pretty close to complete oil and water kit coming your way.
The water lines are braided, and the feed is the blue one as you've seen. I'm just converting to all Aeroquip/socketless except for coolant return
I am building a new oil and water line, you will probably have a pretty close to complete oil and water kit coming your way.
The water lines are braided, and the feed is the blue one as you've seen. I'm just converting to all Aeroquip/socketless except for coolant return
Reply
0
0
03-16-2015, 09:23 AM
#225
Elite Member
Thread Starter
iTrader: (4)
Join Date: Mar 2012
Location: Northern VA
Posts: 4,648
Total Cats: 544
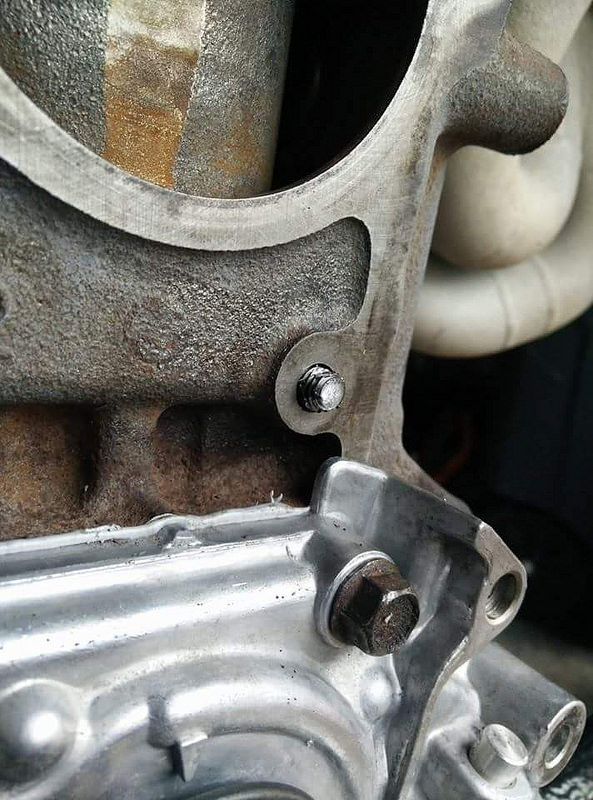
Saturday turned out to be hellish. I removed the water pump because I wasn't confident that the gasket had sealed properly and it was cocked a couple millimeters too high on the right side. I replace the gasket and started tightening the bolts. The head sheared with almost no resistance. I really don't think I hamfisted it because I was just going to snug them before I brought the torque wrench out. This was this first bolt, didn't even bother with the rest.
I used a center punch and drilled a pilot hole, then proceeded to carefully destroy an easy out as they always break and I don't even know why I bothered. I took a dremel to cut a slot to dry to use a screw driver, but I had taken a lot of material out, it started to flare. I refaced it, cut it flat and drilled another pilot hole. I thought about using another easy out, but since this was right at the block surface, I wasn't comfortable breaking another one in.
I decided to continue drilling, stepping up the size every so often. After a while, I could tell the hole was no longer concentric. After destroying four grinding bits and a carbide bit for a dremel, I started to step up to larger drill sizes. A broken drill bit later, I was able to fish out most of the parts driving a punch into the hole fracturing the bit further and picking it out. Finally, I used a tap drill bit for m8x1.25 and was able to loosen some material whilst drilling. I ran a tap through to chase the threads and recovered most of the hole.
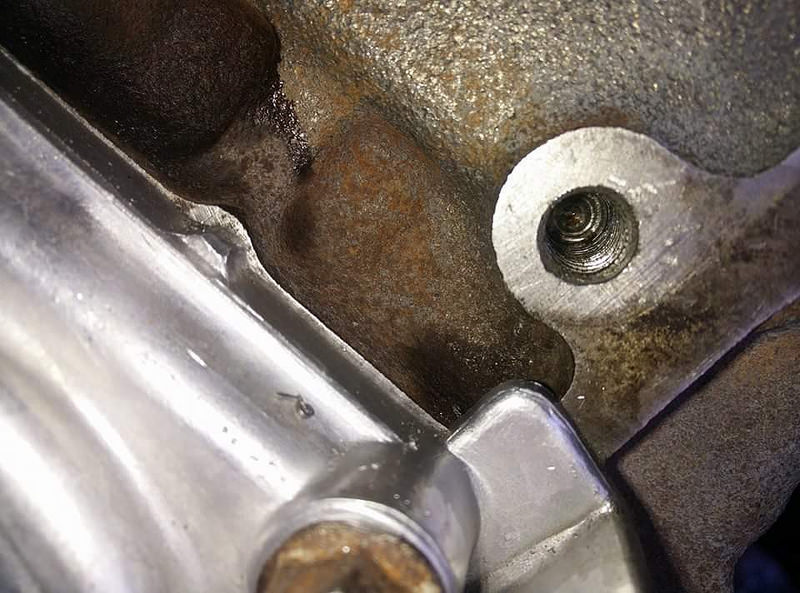
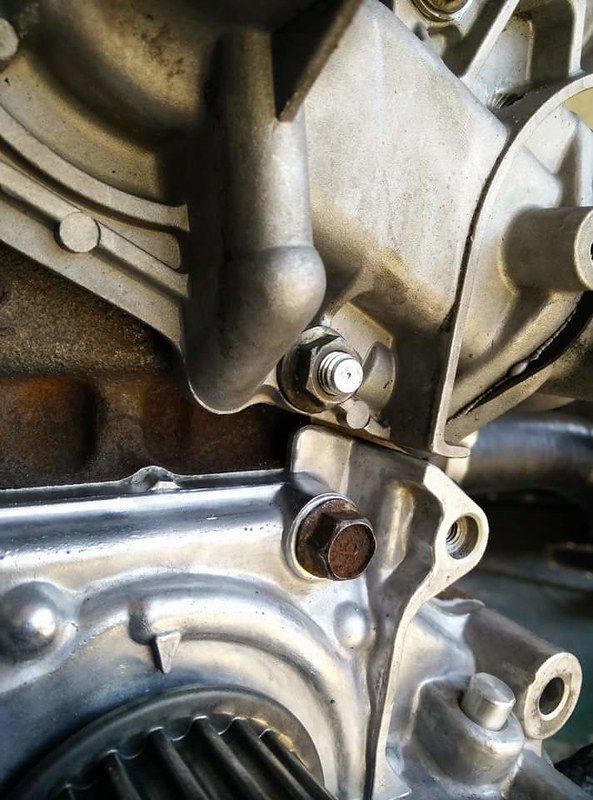
The threads are really tender; I was not comfortable driving another bolt in. I wasn't confident on how much material there was to try to helicoil it without breaking into the waterjacket so I decided with much reluctance to stud the hole. That way tension is applied by nut, but no torsion is wearing on the thread. Oh man, I hope I don't regret this decision later. Everything after all said and done torqued to spec.
Machine shop was closed, so I had to press hose ends into AQP socketless hose by hand. I hated life.
Assembled some bits.

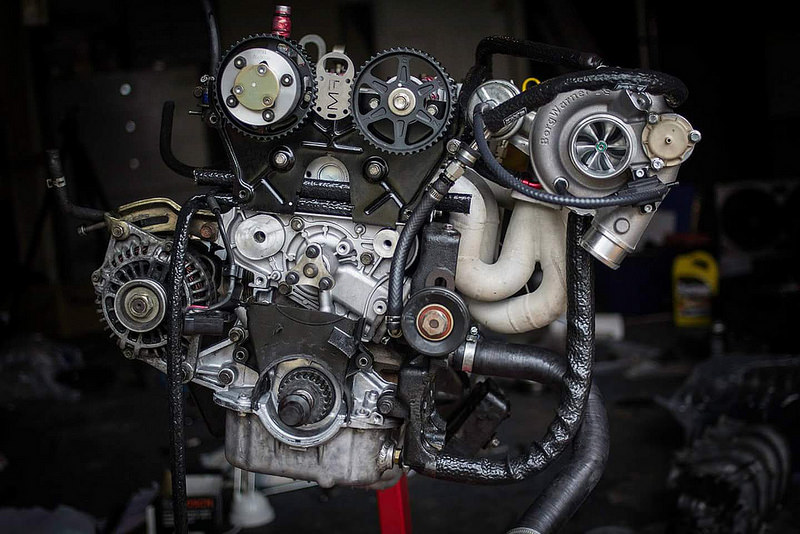
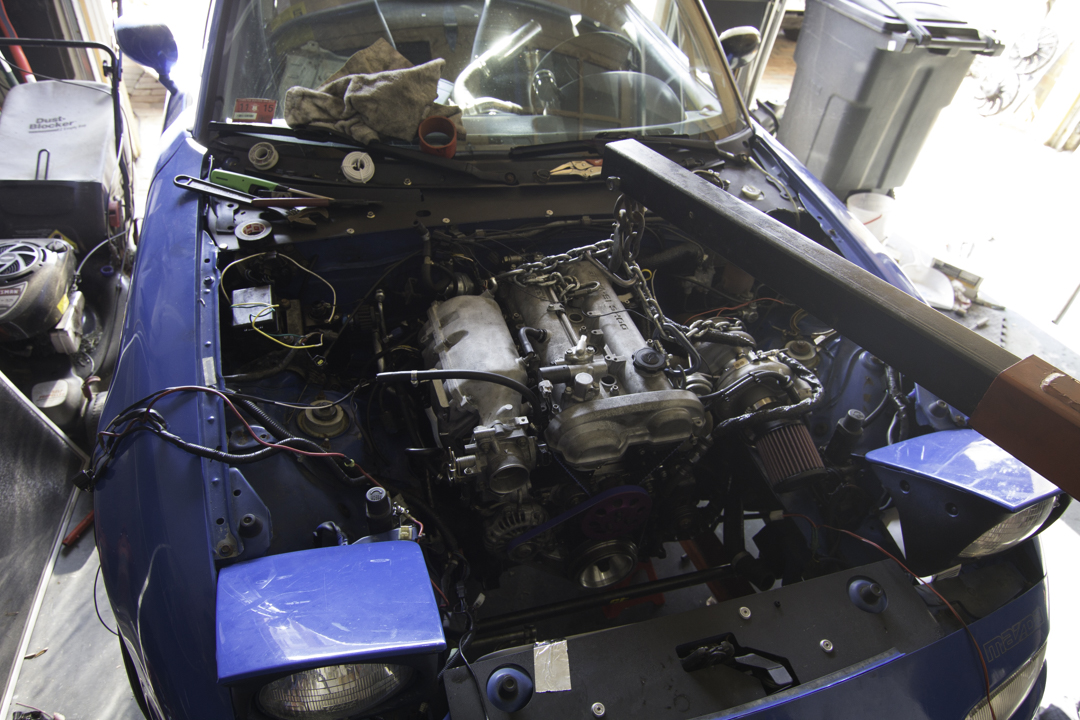
Exploring the idea of passing wires or vacuum source behind the black plate where the coolant neck would have been. Still deciding on A/C. I also need to figure out the air filter. I am still waiting on the coolant bypass hose before I can wrap the engine up and slap it to the transmission. Also waiting on a brandy new timing belt and pulley from Fab. I just realized all parts for this replacement build has been purchased through Fab9.
With Braineack's guidance, I flipped the fuel injector wires and separated cylinder 4 and 2 to wire into injector C and D respectively. Maybe this car will finally have sequential bits.
I reverted to the stock NB trigger system so if anyone wants a 36-1 trigger wheel for a superdamper, just pay shipping.
Intake manifold is installed. VVT solenoid is wired.
Is there polarity for the knock sensor? I wire to 12V, then the other wire is grounded at the megasquirt?
I'm tired. I feel like something is wrong but I cannot place it. I think I'm just getting used to the failure.
I used a center punch and drilled a pilot hole, then proceeded to carefully destroy an easy out as they always break and I don't even know why I bothered. I took a dremel to cut a slot to dry to use a screw driver, but I had taken a lot of material out, it started to flare. I refaced it, cut it flat and drilled another pilot hole. I thought about using another easy out, but since this was right at the block surface, I wasn't comfortable breaking another one in.
I decided to continue drilling, stepping up the size every so often. After a while, I could tell the hole was no longer concentric. After destroying four grinding bits and a carbide bit for a dremel, I started to step up to larger drill sizes. A broken drill bit later, I was able to fish out most of the parts driving a punch into the hole fracturing the bit further and picking it out. Finally, I used a tap drill bit for m8x1.25 and was able to loosen some material whilst drilling. I ran a tap through to chase the threads and recovered most of the hole.
The threads are really tender; I was not comfortable driving another bolt in. I wasn't confident on how much material there was to try to helicoil it without breaking into the waterjacket so I decided with much reluctance to stud the hole. That way tension is applied by nut, but no torsion is wearing on the thread. Oh man, I hope I don't regret this decision later. Everything after all said and done torqued to spec.
Machine shop was closed, so I had to press hose ends into AQP socketless hose by hand. I hated life.
Assembled some bits.
Exploring the idea of passing wires or vacuum source behind the black plate where the coolant neck would have been. Still deciding on A/C. I also need to figure out the air filter. I am still waiting on the coolant bypass hose before I can wrap the engine up and slap it to the transmission. Also waiting on a brandy new timing belt and pulley from Fab. I just realized all parts for this replacement build has been purchased through Fab9.
With Braineack's guidance, I flipped the fuel injector wires and separated cylinder 4 and 2 to wire into injector C and D respectively. Maybe this car will finally have sequential bits.
I reverted to the stock NB trigger system so if anyone wants a 36-1 trigger wheel for a superdamper, just pay shipping.
Intake manifold is installed. VVT solenoid is wired.
Is there polarity for the knock sensor? I wire to 12V, then the other wire is grounded at the megasquirt?
I'm tired. I feel like something is wrong but I cannot place it. I think I'm just getting used to the failure.
Reply
2
2
03-16-2015, 11:48 AM
#226
Elite Member
iTrader: (37)
Join Date: Apr 2010
Location: Very NorCal
Posts: 10,441
Total Cats: 1,899
 Carry on
Good progress though, that sheared bolts like that are the kinds of things I have nightmares about.
Reply
0
0
03-16-2015, 12:00 PM
#227
Retired Mech Design Engr

iTrader: (3)
Join Date: Jan 2013
Location: Seneca, SC
Posts: 5,009
Total Cats: 857
G: NB1 is definitely sequential from factory. Can't imagine NB2 would not be. Maybe he means at the MS?
P: By "flipped the fuel injector wires", do you mean bringing them straight in from the back of the engine instead of running them to the front, and then to the back? Pics would be great, unless obvious, as that is on my list.
P: By "flipped the fuel injector wires", do you mean bringing them straight in from the back of the engine instead of running them to the front, and then to the back? Pics would be great, unless obvious, as that is on my list.
Reply
0
0
03-16-2015, 12:05 PM
#228
Elite Member
Thread Starter
iTrader: (4)
Join Date: Mar 2012
Location: Northern VA
Posts: 4,648
Total Cats: 544
According to Scott, for an NA6, the fuel and spark wiring are as follows:
INJ A - 2 & 4
INJ B - 1 & 3
Spark A - 2 & 3
Spark B - 1 & 4
For fuel, I needed to split the wire pairs, leaving cylinder 2 and 4 as orphan wires, then swap the wires such that Injector A corresponded to cylinder 1.
I was confused at first, but if anything is messed up, I can always fiddle with the wires down at the ecu harness end.
For spark, I'll just run fresh wire in the arrangement as posted above.
Reply
0
0
03-16-2015, 01:30 PM
#229
Moderator

iTrader: (12)
Join Date: Nov 2008
Location: Tampa, Florida
Posts: 20,656
Total Cats: 3,011
Be careful if you are wiring up the knock sensor. Some things in the ECU use 5v and some use 12v. I'm not sure what the knock sensor uses but it would be prudent to check first.
Reply
0
0
 03-16-2015, 01:38 PM
#231
Elite Member
Thread Starter
iTrader: (4)
Join Date: Mar 2012
Location: Northern VA
Posts: 4,648
Total Cats: 544
Unless I should just switch to a Bosch unit that DIY recommends
Also, I have a set of FAB9 COPS, but am unsure if I should try them out, or just find a set of stock 01-05 coils. ideas?
Last edited by psyber_0ptix; 03-16-2015 at 03:46 PM.
Reply
0
0
03-21-2015, 05:06 PM
#232
Elite Member
Thread Starter
iTrader: (4)
Join Date: Mar 2012
Location: Northern VA
Posts: 4,648
Total Cats: 544
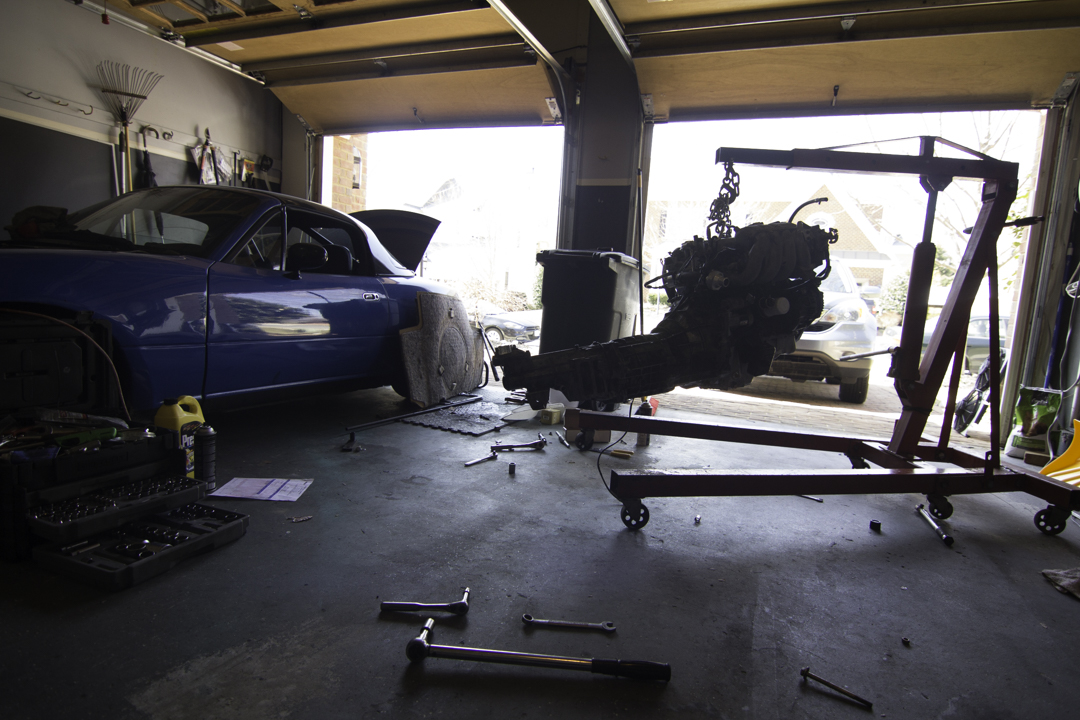
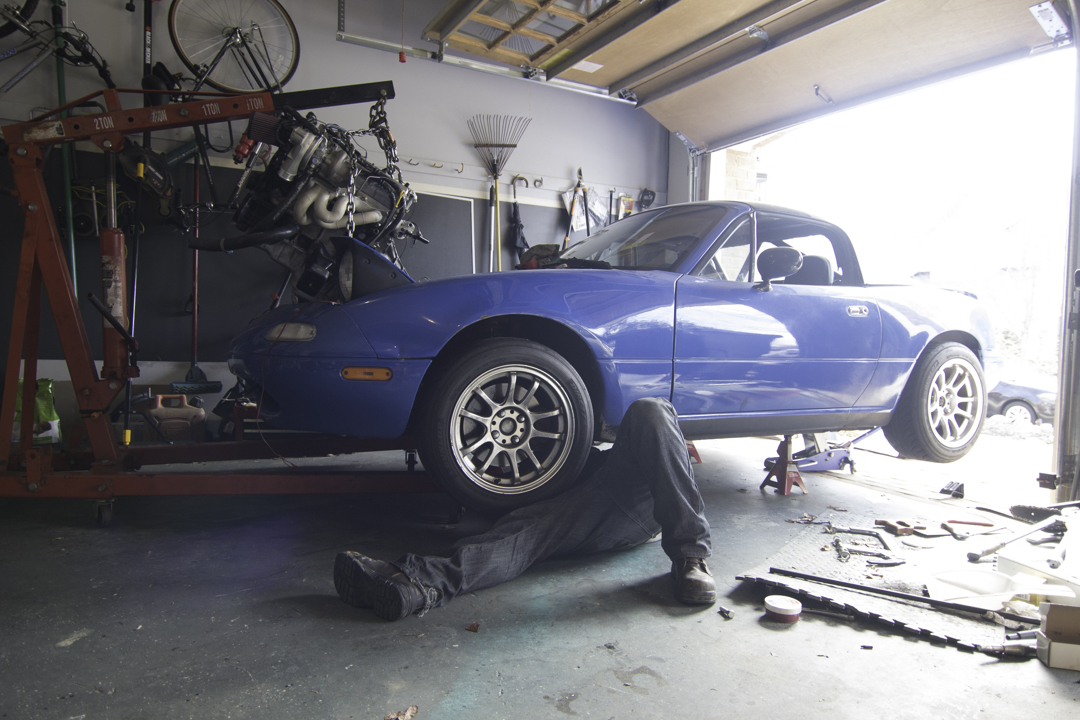
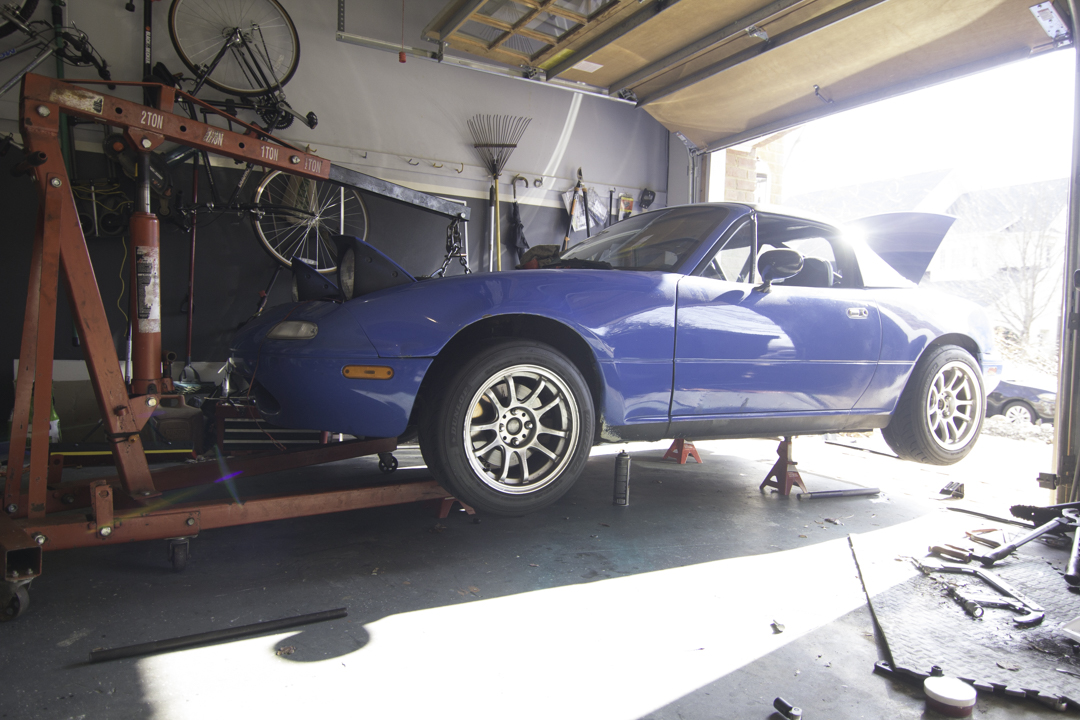
The two friends who offered to help out today flaked out.
I ended up doing it myself. Every single time, aligning those engine mounts and trying to get the PPF in place with urethane diff bushings is extremely difficult. It's even worse when you don't have a second set of hands. It took two hours to put the motor in.
I'll finish the wiring another time
I got a new filter, but it looks a bit small. But it fits really nicely. ****. I hope it's ok
Reply
0
0
03-23-2015, 07:24 AM
#233
Elite Member
Thread Starter
iTrader: (4)
Join Date: Mar 2012
Location: Northern VA
Posts: 4,648
Total Cats: 544
Yesterday I modified the FM fan shroud to fit the Supermiata radiator. Such a beautiful radiator, so light.
Plugged in all the electrics, but still need to get off my *** about the injectors/spark wiring. I was getting tired and jaded. I threw in two bottles of trans fluid and forgot that I didn't install the drive shaft yet.
2 bags of kitty litter and some grunting, drive shaft is in. I feel like I've bruised my tail bone from crawling out and under my car so many times.
I seriously hope this things works. I'll have to tow it to a shop if anything weird happens. I can't do it another time (won't have the facility/space/motivation)
Reply
0
0
03-31-2015, 02:21 PM
#234
Elite Member
Thread Starter
iTrader: (4)
Join Date: Mar 2012
Location: Northern VA
Posts: 4,648
Total Cats: 544
The MSM coolant bypass hose I purchased never came in so I just reused the old cut up stock bit.
I just have to add trans fluid again, solder some wires for the ignition/spark, put the interior back and maybe tidy up some sensor wires.
Hopefully it starts this week, weathers been a real motivator, and a lot of stuff has been completed with the house renovation.
I just have to add trans fluid again, solder some wires for the ignition/spark, put the interior back and maybe tidy up some sensor wires.
Hopefully it starts this week, weathers been a real motivator, and a lot of stuff has been completed with the house renovation.
Reply
0
0
05-13-2015, 09:37 AM
#235
Elite Member
Thread Starter
iTrader: (4)
Join Date: Mar 2012
Location: Northern VA
Posts: 4,648
Total Cats: 544
I've been remodeling a house so that's taken quite a bit of time. Tiled the kitchen and bathroom, got new cabinets, painted the walls, fixed the trim, replaced the windows, removed 1.5tons of cracked cast iron radiators, contractors came in and replaced all the wiring and plumbing in the house, and finally cleared the floors so the 95 year old hardwood can get resurfaced and stained.
That means, I have time to touch Smurfette in all the right ways. I already wired the injectors, knock, and vvt stuff thanks for Scott's guidance and help with megasquirt. I just have to join a couple wires for the tach, and essentially wire in the FAB9cops and clean up. I'd like to see this running this weekend.
That means, I have time to touch Smurfette in all the right ways. I already wired the injectors, knock, and vvt stuff thanks for Scott's guidance and help with megasquirt. I just have to join a couple wires for the tach, and essentially wire in the FAB9cops and clean up. I'd like to see this running this weekend.
Reply
0
0
05-16-2015, 01:07 PM
#236
Elite Member
Thread Starter
iTrader: (4)
Join Date: Mar 2012
Location: Northern VA
Posts: 4,648
Total Cats: 544
So I got everything wired in and am having difficulty building pressure. I don't remember if I packed the oil pump before install. It's been so long and it's been apart so many times. Any easy way to get the oil pressure up before starting?
I was really hoping to start it up this weekend.
I was really hoping to start it up this weekend.
Reply
0
0
05-16-2015, 01:21 PM
#237
Elite Member
iTrader: (37)
Join Date: Apr 2010
Location: Very NorCal
Posts: 10,441
Total Cats: 1,899
Do you have a mity-vac or similar tool? Put it on the turbo oil feed or hook it up to the block via the oil sensor hole and pump away.
Also, check dis: TwinTurbo.NET: Nissan 300ZX forum - Simple rig to prime your oil pump
Also, check dis: TwinTurbo.NET: Nissan 300ZX forum - Simple rig to prime your oil pump
Reply
0
0
05-16-2015, 01:52 PM
#238
Elite Member
Thread Starter
iTrader: (4)
Join Date: Mar 2012
Location: Northern VA
Posts: 4,648
Total Cats: 544
Oh man after a lot of finagling, I was able to break that allan plug free on the oil pump to pour some oil in. Now to reassemble all the bits and see if it holds pressure.
I hope I hadn't turned the motor over too many times without it drawing oil. I really don't want to ruin the bearings this early in the game
I hope I hadn't turned the motor over too many times without it drawing oil. I really don't want to ruin the bearings this early in the game
Reply
0
0
05-16-2015, 01:53 PM
#239
Elite Member
Thread Starter
iTrader: (4)
Join Date: Mar 2012
Location: Northern VA
Posts: 4,648
Total Cats: 544
Do you have a mity-vac or similar tool? Put it on the turbo oil feed or hook it up to the block via the oil sensor hole and pump away.
Also, check dis: TwinTurbo.NET: Nissan 300ZX forum - Simple rig to prime your oil pump
Also, check dis: TwinTurbo.NET: Nissan 300ZX forum - Simple rig to prime your oil pump
Reply
0
0
05-16-2015, 03:16 PM
#240
Elite Member
Thread Starter
iTrader: (4)
Join Date: Mar 2012
Location: Northern VA
Posts: 4,648
Total Cats: 544
So I think I have oil pressure, when cranking, the oem gauge pops up to the 15 psi mark.
The motor isn't turning over though. I have the fuel lines hooked up properly. When running the test mode for spark, the Fab9 coils work, but if I'm touching the top of the coil, it grounds out to my finger through the heat shrink wrap. Injectors are working.
Test outputs confirmed
Spark A B C D = 1342
Inj A B C D = 1342
edit: I got the car running, but it's really lumpy and it's super pig rich. I can't set base timing very easily as it jumps around as it's sputtering.
Edit edit: cam timing is off on both cams. No clue why, I thought I was careful. Will correct and fix idle. Then try to get it not running piggy rich to break in
Last edited by psyber_0ptix; 05-16-2015 at 05:57 PM.
Reply
0
0


