
DIYPNP install: inital tuning


Thread Starter
Junior Member
Joined: Jun 2007
Posts: 411
Total Cats: 0
Holy Smoke! So fast @_@
Will test in the morning. Will also be rewiring the outputs as previously described, so I can control the AC engagement from TS.
Will test in the morning. Will also be rewiring the outputs as previously described, so I can control the AC engagement from TS.
Last edited by Greg G; Oct 14, 2011 at 10:15 AM.
Reply
 0
0

0


Thread Starter
Junior Member
Joined: Jun 2007
Posts: 411
Total Cats: 0
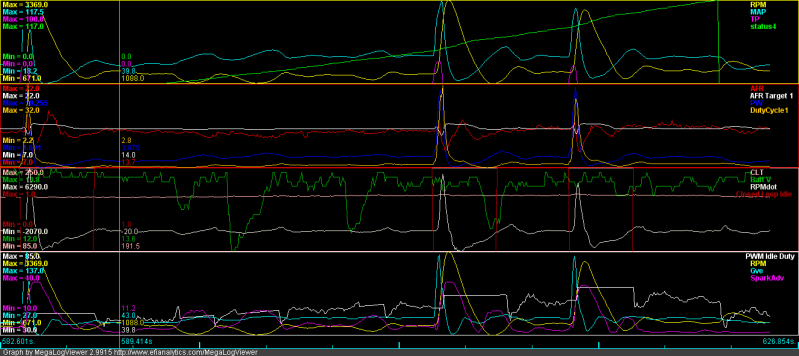
I did some more testing on v3 with regard to the droop on deceleration.
V3 (no corrections during dashpot event)
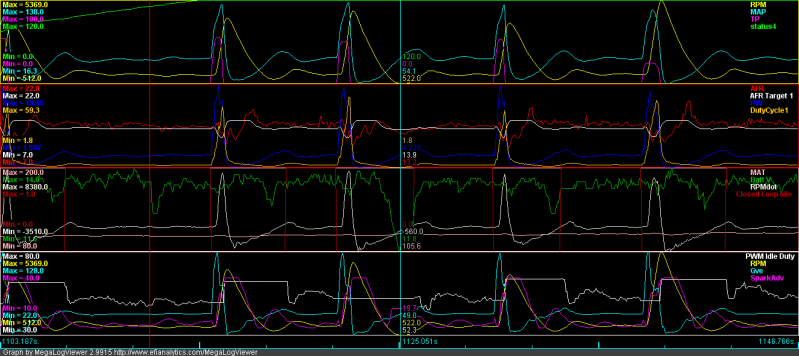
V4 (corrections during dashpot event)
Whoa! It aggressively increases the dashpot value. It still remains a flat line though- how was this implemented? Never get a droop now. I can lower my dashpot value from 12 to a much lower value now.
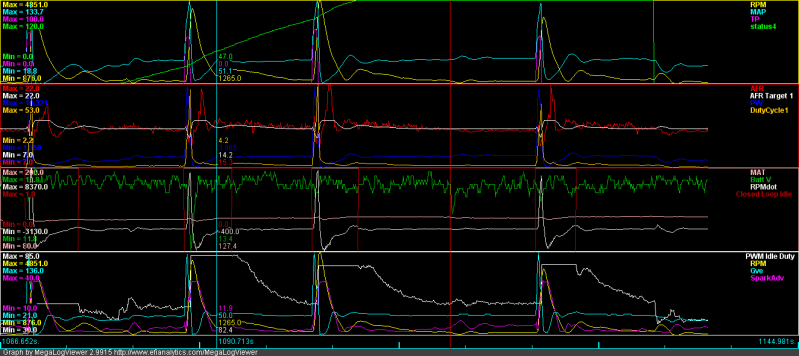
I also rewired the ECU as described in the previous page. The ECU now has full control of the AC with independent delays on the AC clutch and fans.
My current idle graph
The AC switch-on can be seen with the status 4 line. The AC clutch activates 0.333 seconds after, and the AC fan 4 seconds later.
V3 (no corrections during dashpot event)
V4 (corrections during dashpot event)
Whoa! It aggressively increases the dashpot value. It still remains a flat line though- how was this implemented? Never get a droop now. I can lower my dashpot value from 12 to a much lower value now.
I also rewired the ECU as described in the previous page. The ECU now has full control of the AC with independent delays on the AC clutch and fans.
My current idle graph
The AC switch-on can be seen with the status 4 line. The AC clutch activates 0.333 seconds after, and the AC fan 4 seconds later.
Reply
0
0
Thread Starter
Junior Member
Joined: Jun 2007
Posts: 411
Total Cats: 0
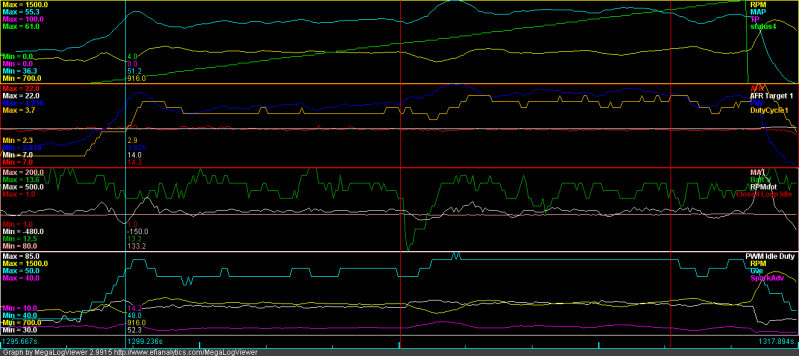
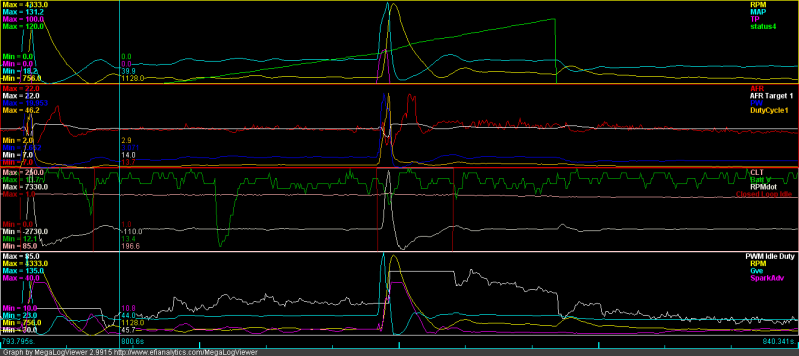
With the rewire, the timing of the AC clutch, AC fan, and main fan are all under the control of the ECU! All extra solenoids and associated relaays have been removed frm the car.
A snapshot of the current idle tune:
IMPT NOTE: 3.1.3 from which the modified FW was based has a serious issue with the injectors at >90% duty cycle or >6000RPM. Use with caution. Awaiting a fix for this.
A snapshot of the current idle tune:
IMPT NOTE: 3.1.3 from which the modified FW was based has a serious issue with the injectors at >90% duty cycle or >6000RPM. Use with caution. Awaiting a fix for this.
Reply
0
0
Thread Starter
Junior Member
Joined: Jun 2007
Posts: 411
Total Cats: 0
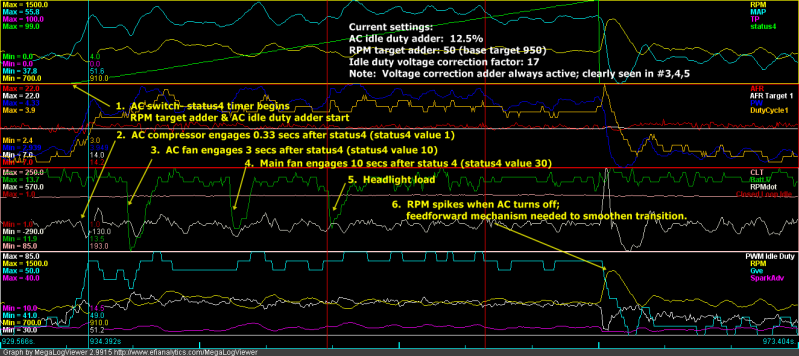
As requested- data comparing the dashpot actions with and without the AC idle up code.
Turns out, if I turn off the AC idle up, status4 does not start counting, and the AC compressor does not engage So I just kept it on and set the adder to 1.
AC adder 1, voltage correction factor 0
AC adder 13, voltage correction factor 18
Overlaid and magnified:
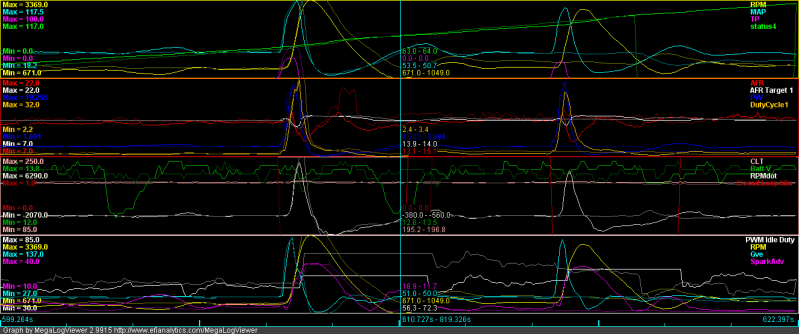
Turns out, if I turn off the AC idle up, status4 does not start counting, and the AC compressor does not engage
So I just kept it on and set the adder to 1.AC adder 1, voltage correction factor 0
AC adder 13, voltage correction factor 18
Overlaid and magnified:
Reply
0
0
Thread Starter
Junior Member
Joined: Jun 2007
Posts: 411
Total Cats: 0
OK. Tried installing the RX8 injectors along with the M-Tuned dual feed rail. I thought I was finished- when the fuel pump primed, fuel started leaking from the injectors and the Y-adapter!
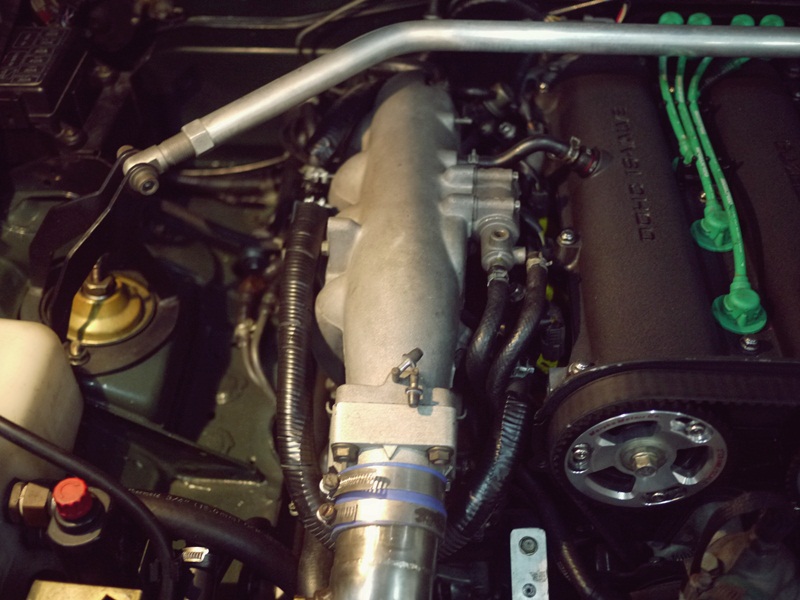
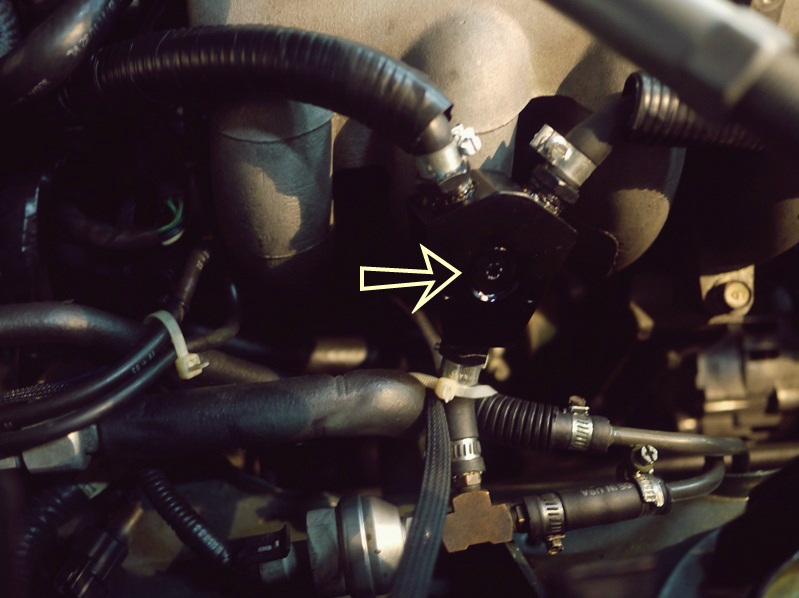
The Y- adapter has this threaded plug in the center, and it leaks like crazy! Plus a gorilla put it in- I can't remove it! If I use a vise grip, I'll end up mangling the anodized finish...
The leakage at the injectors- well that was on me! It was really tight, and I forgot to lube the o rings before pushing the injectors in. Yep, you guessed it...
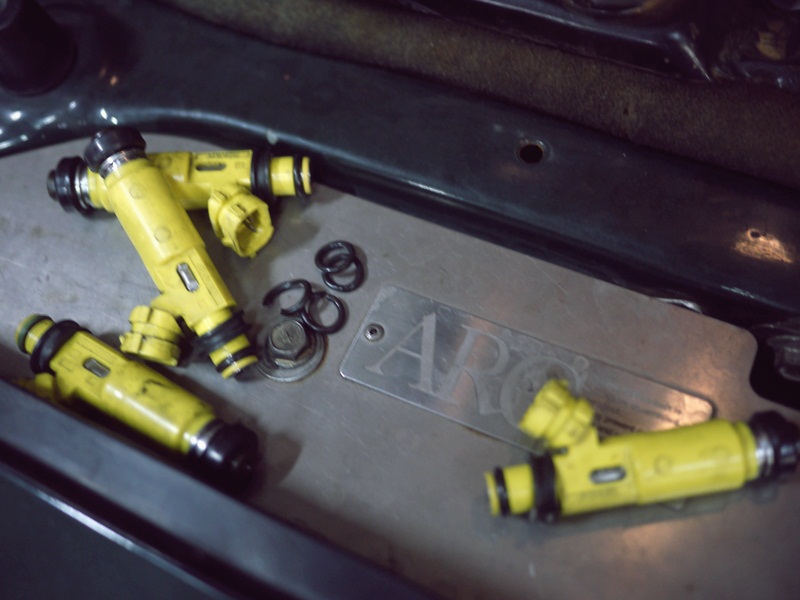

The last thing I need now is to worry about a fuel leak, so I wimped out and used the stock fuel rail
The Y- adapter has this threaded plug in the center, and it leaks like crazy! Plus a gorilla put it in- I can't remove it! If I use a vise grip, I'll end up mangling the anodized finish...
The leakage at the injectors- well that was on me! It was really tight, and I forgot to lube the o rings before pushing the injectors in. Yep, you guessed it...
The last thing I need now is to worry about a fuel leak, so I wimped out and used the stock fuel rail
Reply
0
0


go to advance auto parts and pick up a brass tee for $3. /leaks.
next time install those injectors with some lube on teh o-rings. vasoline or motor oil or something.
next time install those injectors with some lube on teh o-rings. vasoline or motor oil or something.
Reply
0
0

Thread Starter
Junior Member
Joined: Jun 2007
Posts: 411
Total Cats: 0
Is this a weird trigger angle offset value? It is correctly adjusted to get the commanded +10 advance. Are there any issues running this much offset?
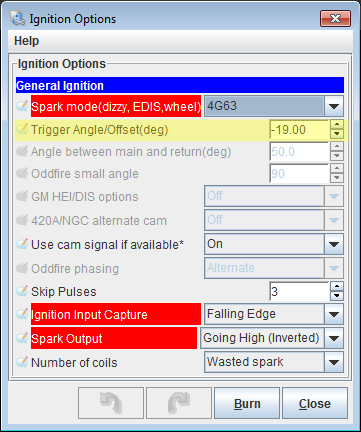
Is my trigger angle offset too "hellaflush"?
Should I rotate my CAS and adjust this to a lower number? If so, what?
Is my trigger angle offset too "hellaflush"?
Should I rotate my CAS and adjust this to a lower number? If so, what?
Reply
0
0
Reply
0
0

No need to touch the CAS. Spark advance is 100% controlled via software.
Reply
0
0
Reply
0
0
Thread Starter
Junior Member
Joined: Jun 2007
Posts: 411
Total Cats: 0
Ok next issue. Soldered a 2.2k resistor into r14 of input 1 so I can run 1v--input 1---pe0 (launch/clutch lockout). It had no resistor because it was previously used to connect 1q--1j (AC circuit)
Anyway, I am using input 2 to connect 1q to pe1. I peeked at the input 2 area and found that r17 was missing! Do I need to put a resistor there? What type? What happens without it? :/
Anyway, I am using input 2 to connect 1q to pe1. I peeked at the input 2 area and found that r17 was missing! Do I need to put a resistor there? What type? What happens without it? :/
Reply
0
0


