Post your DIY aero pics


Newb
Joined: May 2015
Posts: 37
Total Cats: 8
From: Australia
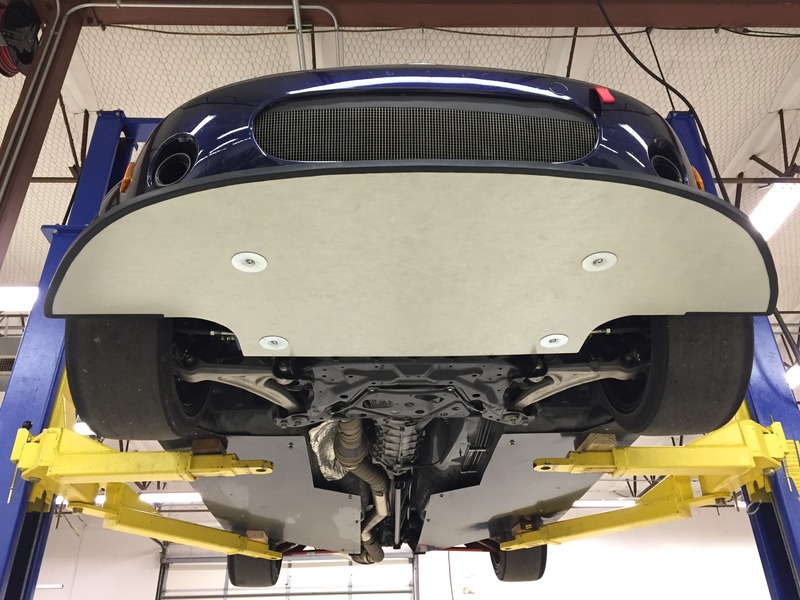
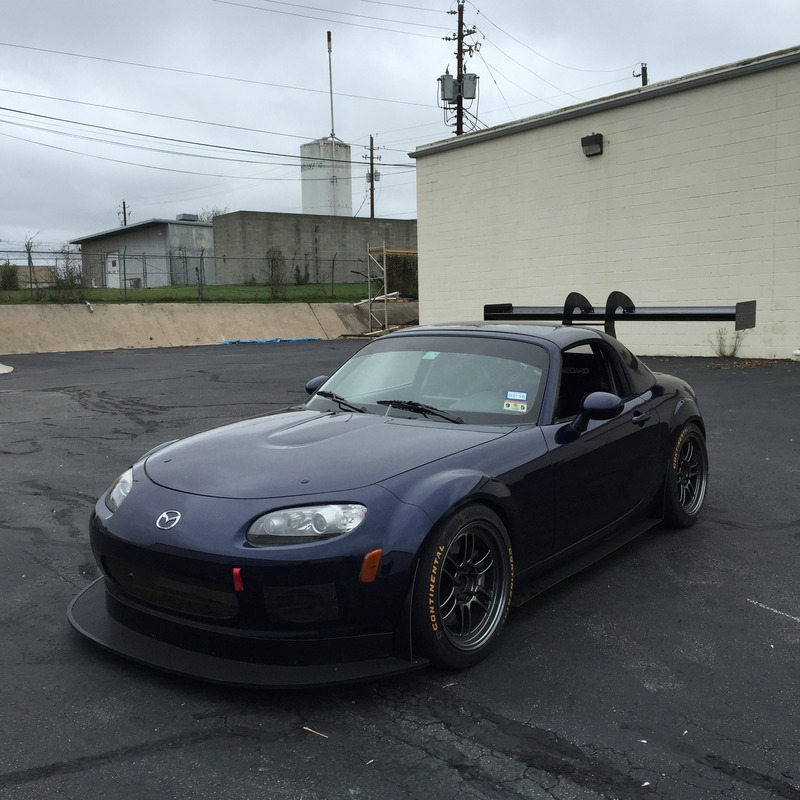
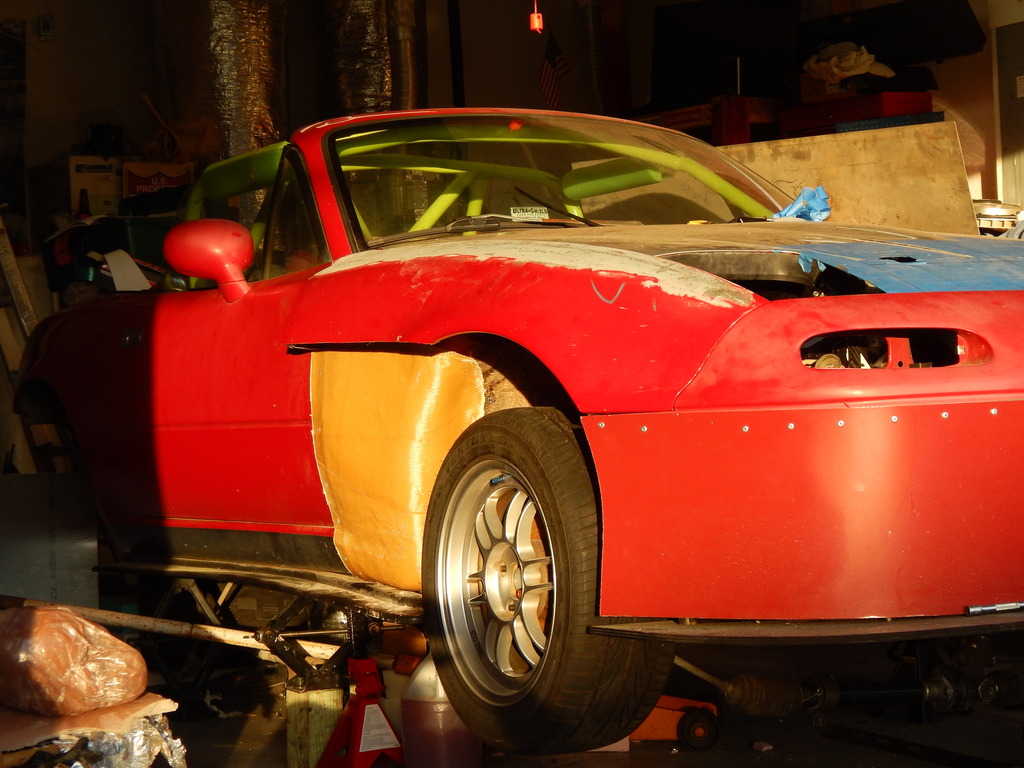
3rd splitter, and most likely not the last.
Dollars spent:
Materials for Splitter: ~$600 + ~$60 consumables
Materials for mold: ~$250
Hours spent:
Plug: ~6 hours
Mold: ~6 hours
Finished product: ~10 hours
How effective:
Testing next week
Materials used:
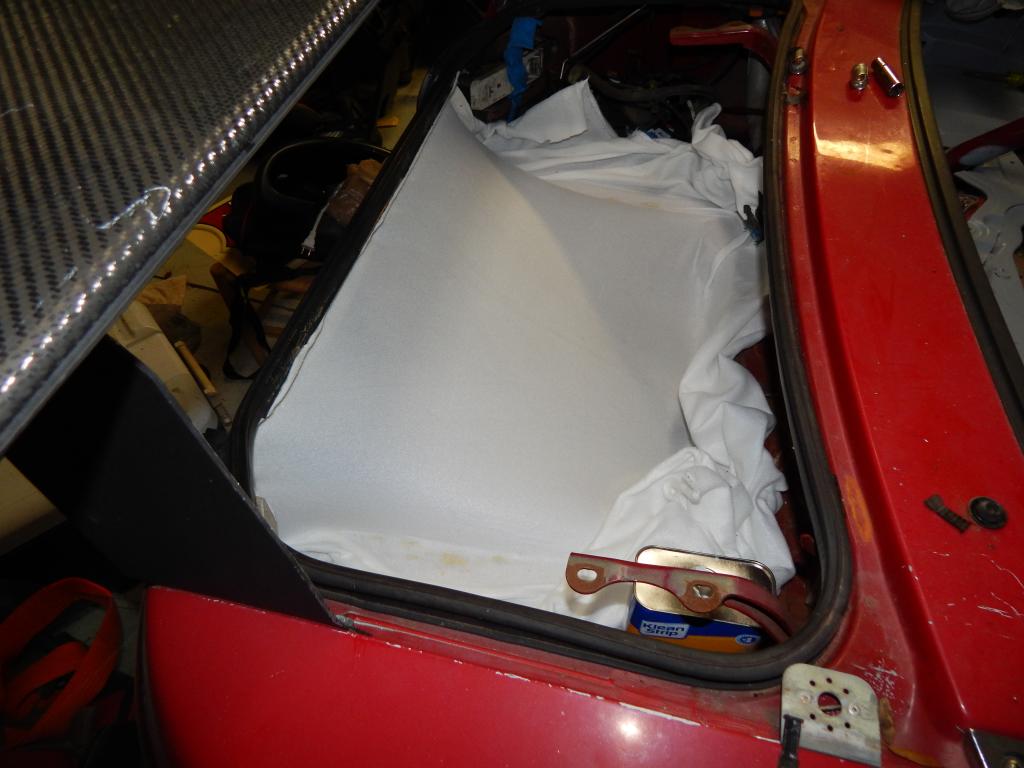
Plug: Coreflute x 2 layers of 3mm
2 layers of 225 fibreglass with vinyl ester resin
Standard house filler for some shaping
1 layer fibreglass weave cloth
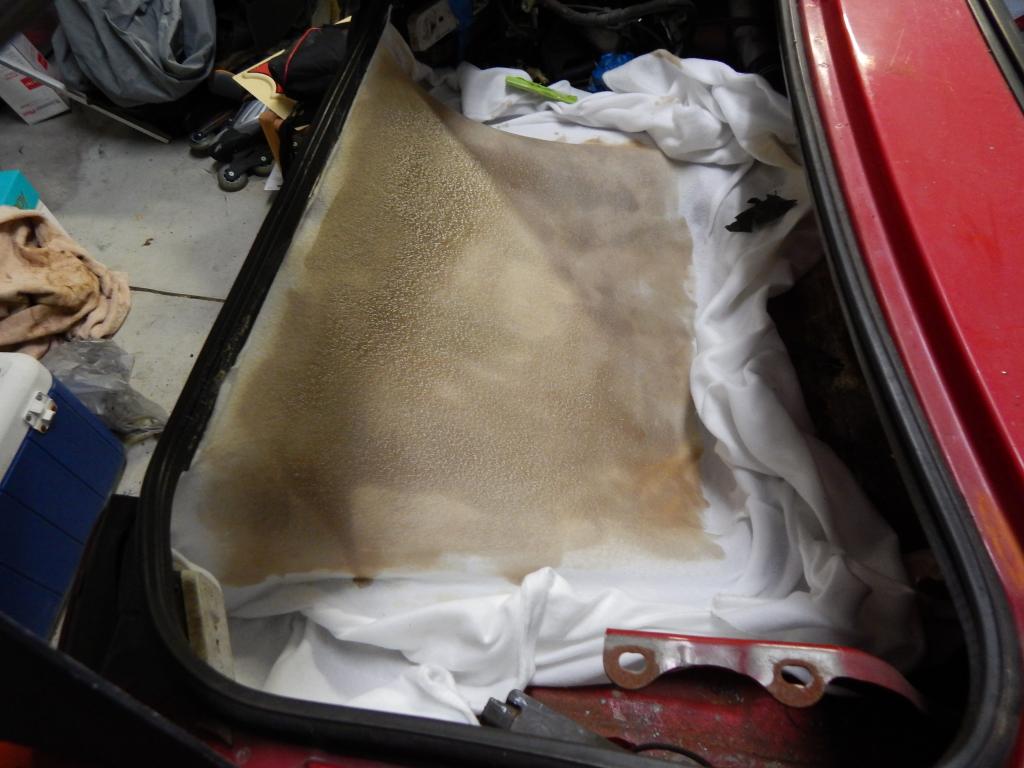
Mold: ~700g of tooling gelcoat
1 layer 225 fibreglass
2.5 layers of 450 fibreglass (mistake should have been more)
Massive wooden board for flange and layup.
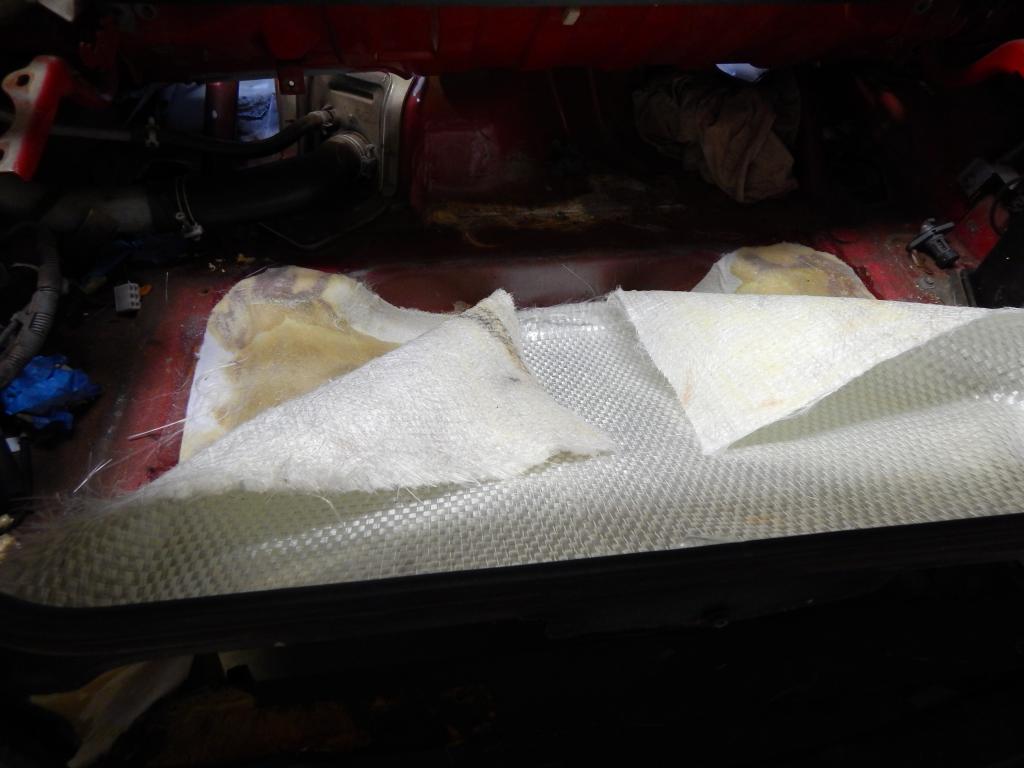
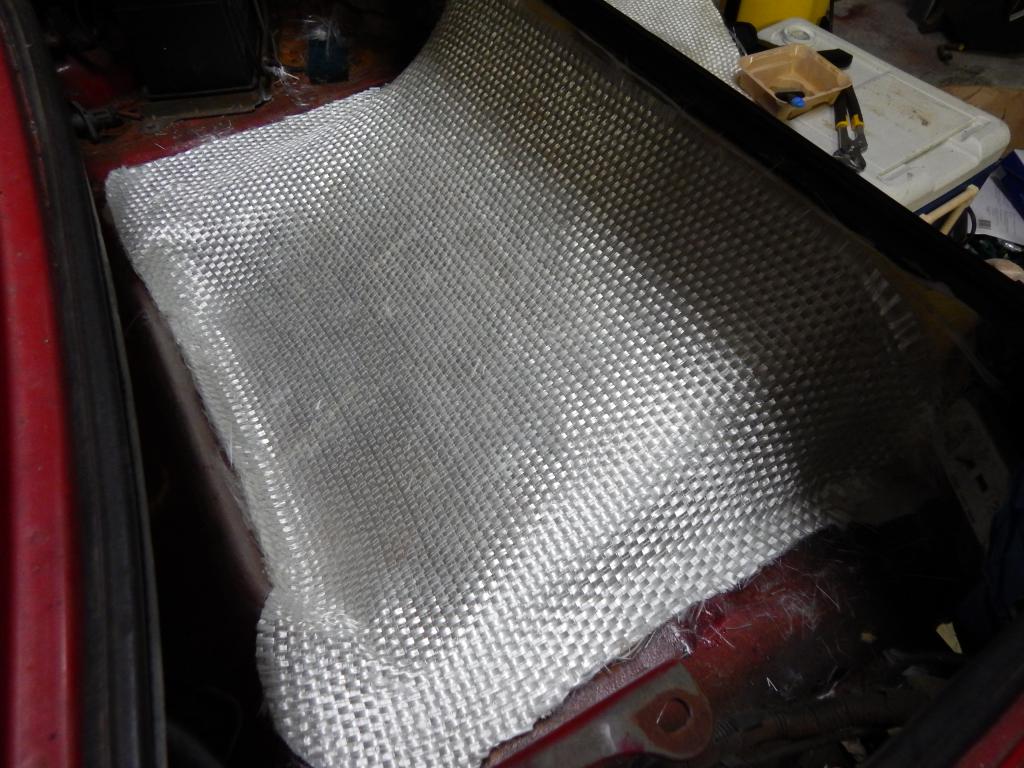
Finished product: 2 layers of twill weave (normal looking CF, top and bottom layers.
2 layer of 411, double bias CF (might have that wrong, but it has the weave going both ways and is thicker)
1 x 3mm coremat
strip of CF Kevlar around the outer edge
Multiple layers ~8 of CF around outer edge to match core.
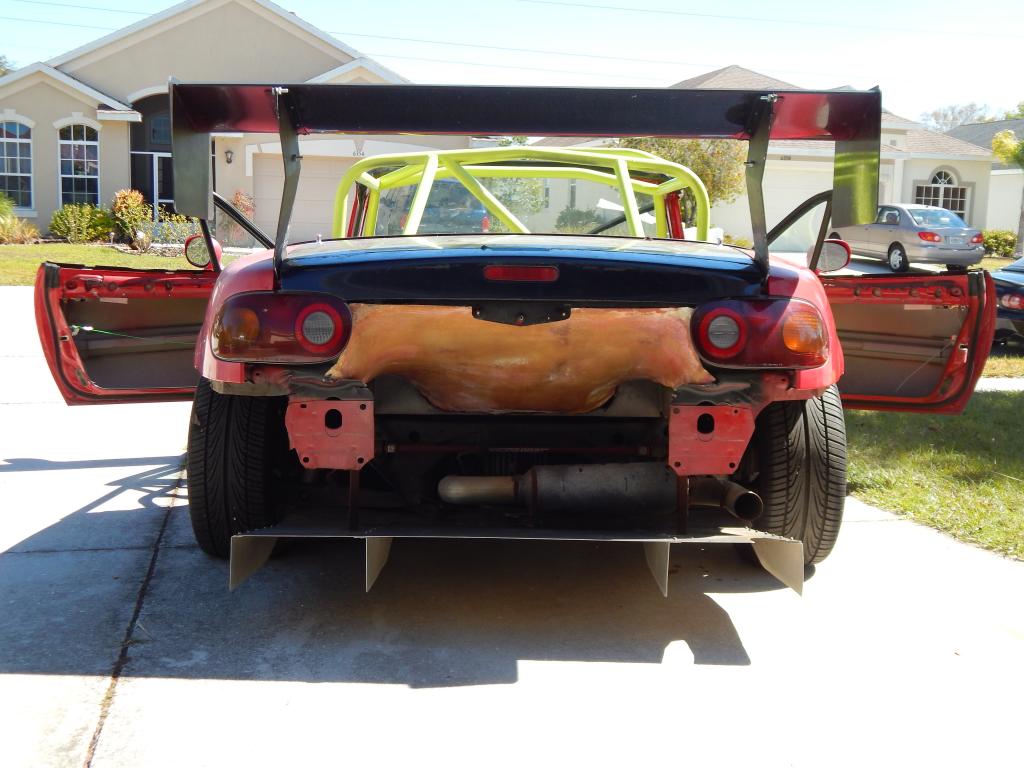
Bracket location: See picture
Tracks tested on: To be tested on Lakeside (QLD) on 5/6 Dec
Race/TT class built for: 2B (cams)/Time attack
I don't know if the design will work, and there are some points about it that I will change in the next version.
1) the rise goes into half the steering rack,
2) rises on either edge to go into the wheel wells
3) take more time on plug and mold to get a better finish.
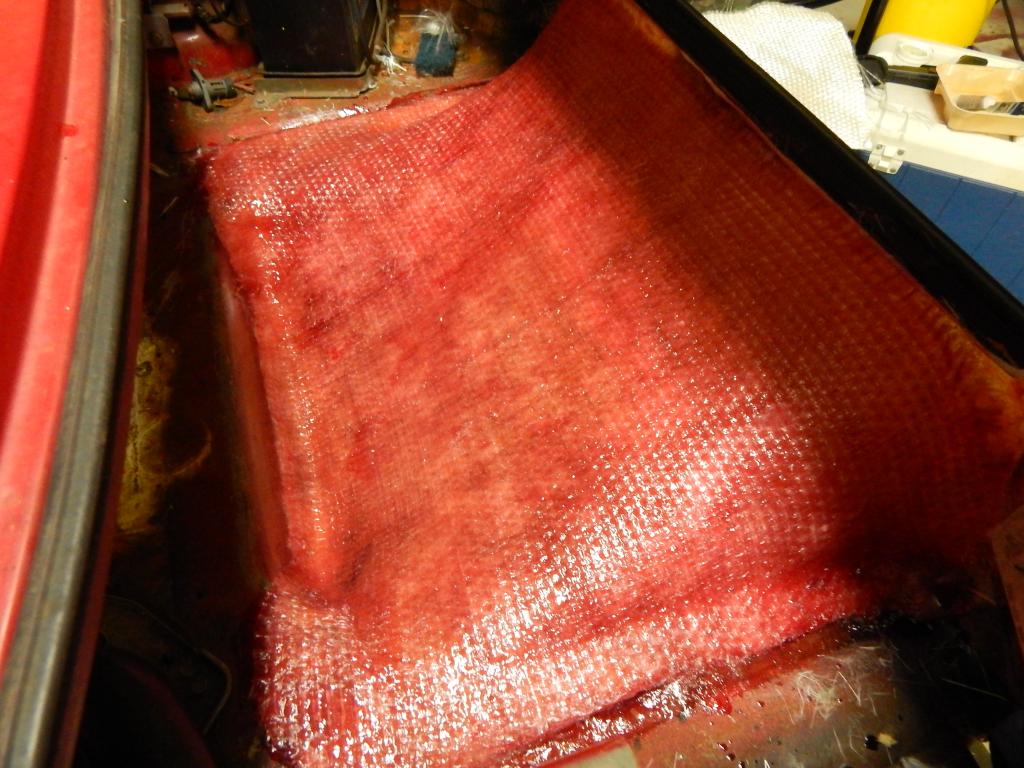
This was my 3rd attempt at vacuum infusion, the places I fell down for the end result were in making a quality plug and decent mold. The underside came up great though.
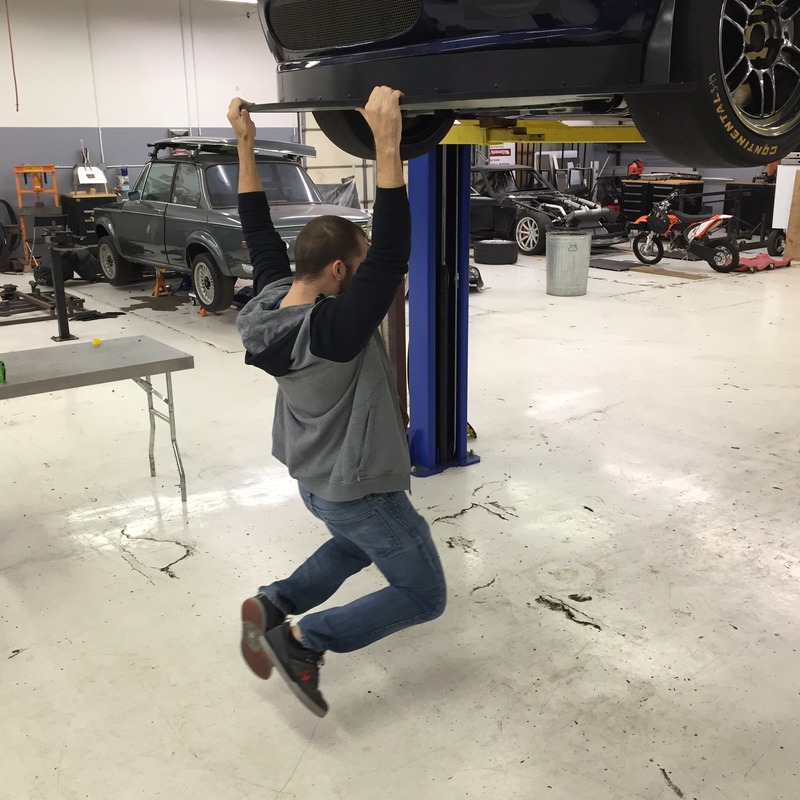
I think the strength will be adequate, feel quite stiff. I had planned to use an additional two mounting points on the front but after bolting up the rest I decided to try without.
I will update with how effective it is if all goes well next weekend.
Canards posted previously didn't get to be tested properly as there were some issues with the car. (caused by me.)
Dollars spent:
Materials for Splitter: ~$600 + ~$60 consumables
Materials for mold: ~$250
Hours spent:
Plug: ~6 hours
Mold: ~6 hours
Finished product: ~10 hours
How effective:
Testing next week
Materials used:
Plug: Coreflute x 2 layers of 3mm
2 layers of 225 fibreglass with vinyl ester resin
Standard house filler for some shaping
1 layer fibreglass weave cloth
Mold: ~700g of tooling gelcoat
1 layer 225 fibreglass
2.5 layers of 450 fibreglass (mistake should have been more)
Massive wooden board for flange and layup.
Finished product: 2 layers of twill weave (normal looking CF, top and bottom layers.
2 layer of 411, double bias CF (might have that wrong, but it has the weave going both ways and is thicker)
1 x 3mm coremat
strip of CF Kevlar around the outer edge
Multiple layers ~8 of CF around outer edge to match core.
Bracket location: See picture
Tracks tested on: To be tested on Lakeside (QLD) on 5/6 Dec
Race/TT class built for: 2B (cams)/Time attack
I don't know if the design will work, and there are some points about it that I will change in the next version.
1) the rise goes into half the steering rack,
2) rises on either edge to go into the wheel wells
3) take more time on plug and mold to get a better finish.
This was my 3rd attempt at vacuum infusion, the places I fell down for the end result were in making a quality plug and decent mold. The underside came up great though.
I think the strength will be adequate, feel quite stiff. I had planned to use an additional two mounting points on the front but after bolting up the rest I decided to try without.
I will update with how effective it is if all goes well next weekend.
Canards posted previously didn't get to be tested properly as there were some issues with the car. (caused by me.)
Last edited by Tim_Aus; Nov 27, 2015 at 01:09 AM. Reason: added pictures of construction.
Reply
 0
0

0

Senior Member
Joined: Aug 2009
Posts: 515
Total Cats: 93
From: melbourne aus
Reply
0
0
Newb
Joined: May 2015
Posts: 37
Total Cats: 8
From: Australia
Im still waiting for you to do a production run of those fast backs 
I'm going to make another splitter, especially since cams just changed the 2b rules to allow 100mm out the front. It will have the rises as you advised instead of the middle.
I'm going to make another splitter, especially since cams just changed the 2b rules to allow 100mm out the front. It will have the rises as you advised instead of the middle.
Reply
0
0


Nice work with the carbon Tim. One of the keys to an effective diffuser is to carefully manage the air's path and exit. You want the air accelerating out of the diffuser. Easy peasy when the diffuser's at the back of the car, less so when it isn't. That's why diffusers in the side portions of the splitter are most common; it's relatively easy to guide the air into the wheel well and then out to the side of the car with a few elements. Pointing the diffuser exit at essentially a wall like the subframe/steering rack is a lot less ideal.

Reply
0
0
Newb
Joined: May 2015
Posts: 37
Total Cats: 8
From: Australia
I've been stressing over this design but I had come to far to change it. I learnt a lot during the actual layup and infusion of this one so I'm not to stressed about it not being the perfect design. (Obviously I would have much preferred to nail it straight away though)
I think I originally intended to try and get all that air out from just behind the front tyres, but with no modified fenders and side skirts that direct air out it is sort of pointless.
I'm tossing up the idea of creating a quick fix air guide that will flatten out the middle and push the air out to the sides quite aggressively but I will probably not have the time to achieve this prior to testing this weekend.
The one thing I'm taking comfort though is after comparing this splitter and the first one I had, I'm confident that even with the path I have the air flowing now it should still be more effective than the first, and it worked quite well.
When I start the next I will post progress pictures so I don't make the same mistakes of the last.
Thanks for your feed back guys
Reply
0
0

Senior Member
Joined: Dec 2012
Posts: 624
Total Cats: 81
From: Charlotte, NC
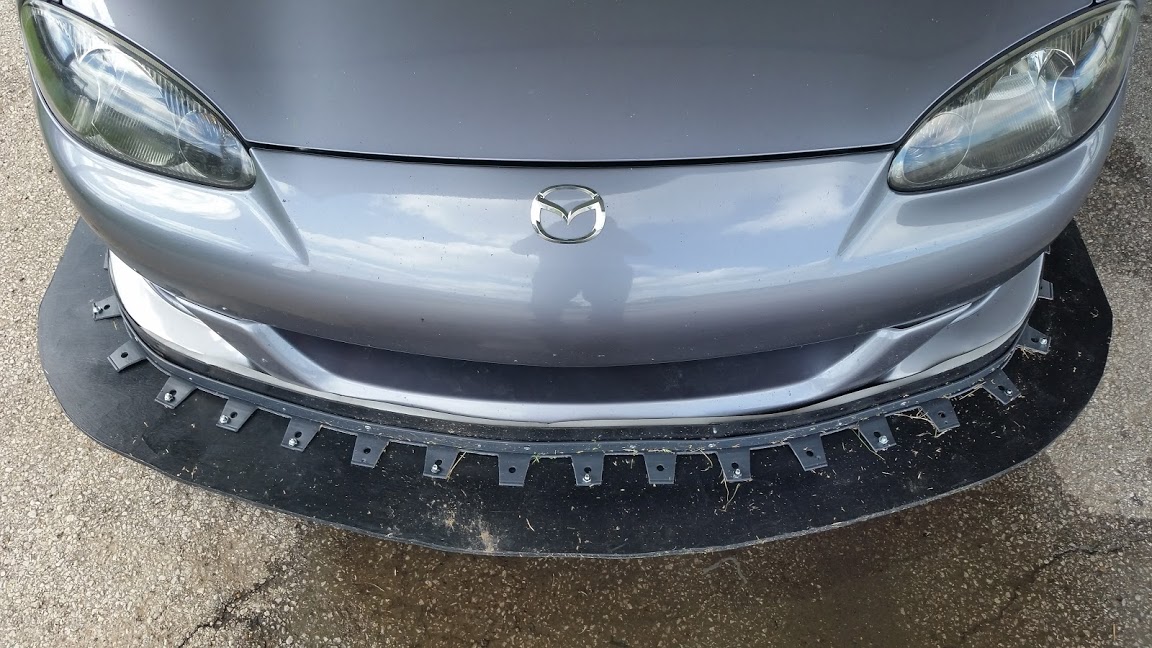
For those of you that run a notch or step in the front profile of your splitter - have you ever done any A/B testing vs. a splitter with a perfect curve or straight edge? I'm thinking having the step may help prevent me from stalling under heavy braking, and that having the extra lip out front may not be doing much at the radiator inlet area anyways, but was curious as to hear your thoughts.
Example would be Doran's old splitter:

Example would be Doran's old splitter:
Reply
0
0
Are you bottoming out the splitter under high-speed braking?
Reply
0
0
Senior Member
Joined: Dec 2012
Posts: 624
Total Cats: 81
From: Charlotte, NC
Not sure how new setup will work, but its a possibility given that the car is softly sprung for hill climbs (particularly at two tracks that have long straights and everything you've got braking zones). I know I can put wear strips under it to prevent that as well, but wondering if there is any inherent benefit in a stepped design.
Reply
0
0

Senior Member
Joined: Oct 2011
Posts: 646
Total Cats: 62
From: The Race Track & St Pete FL
Dollars spent:
Fiberglass: Free
Resin: $13 a/gal
Clay: $30
Kevlar: Free
Hours spent:
Trunk Delete:3 hours
Aero Fenders: 7 hours
How effective:
Not going to test until the engine swap is done, by then there will be alot more done in terms of aero. So How Effective: will never know
Materials used:
Trunk Delete:
1/2 yard of 36/10 fiberglass
1/2 gal of resin
Left over fabric
3M Spray Tack
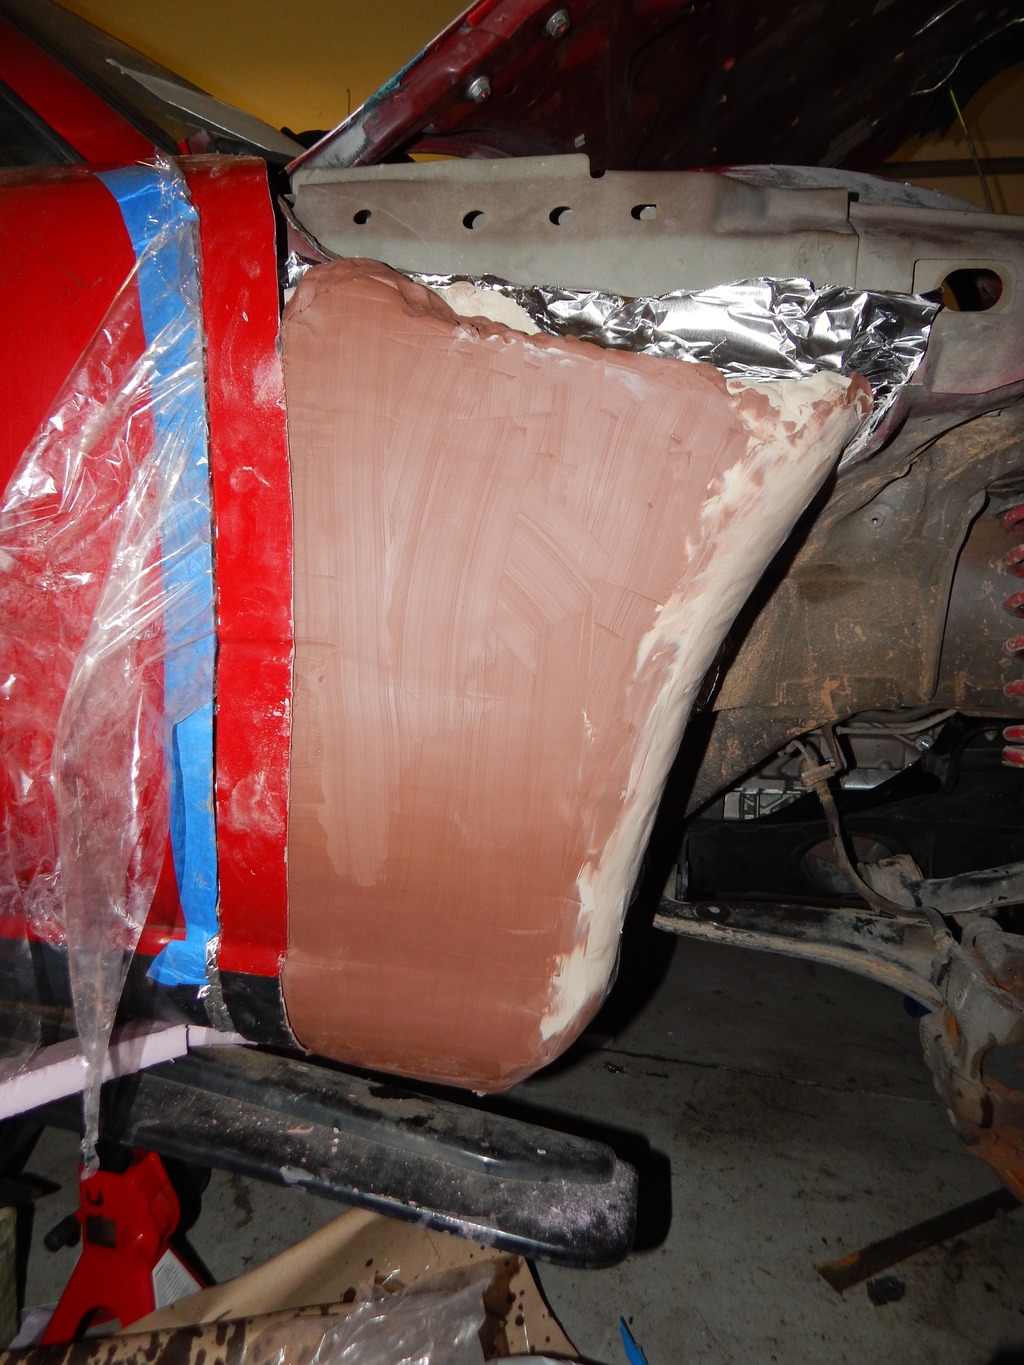
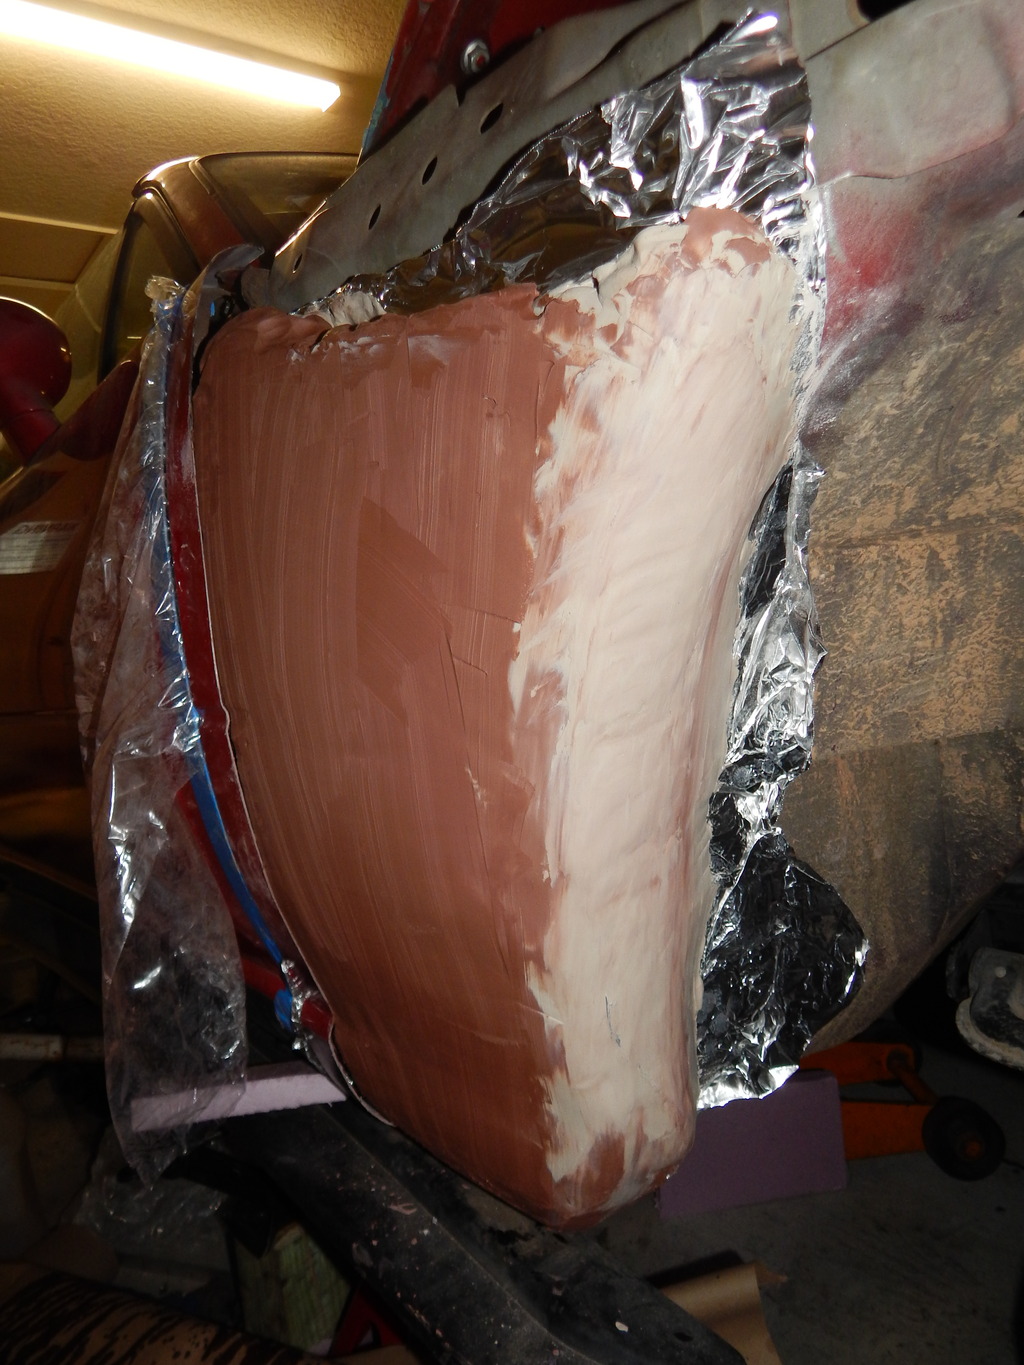
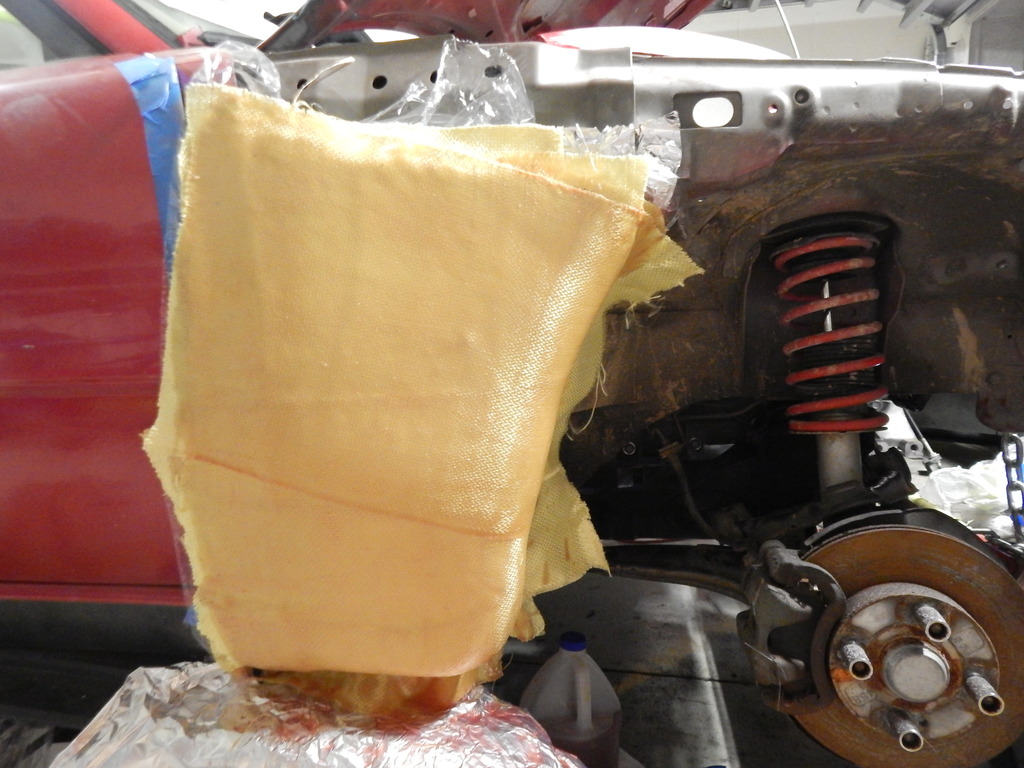
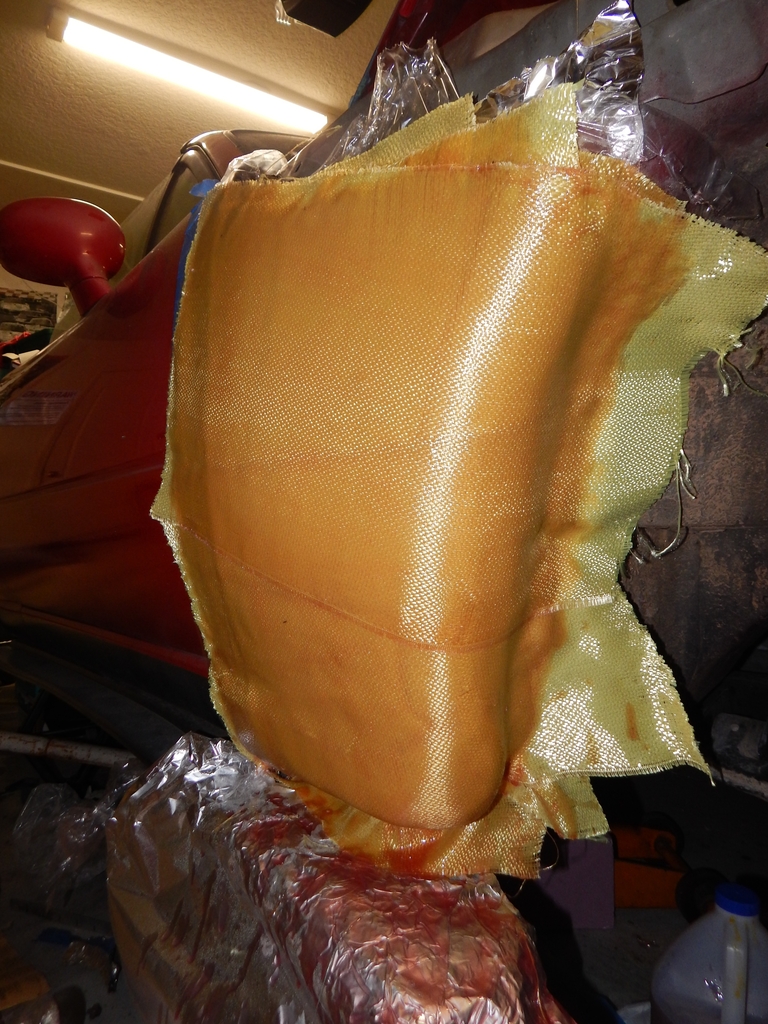
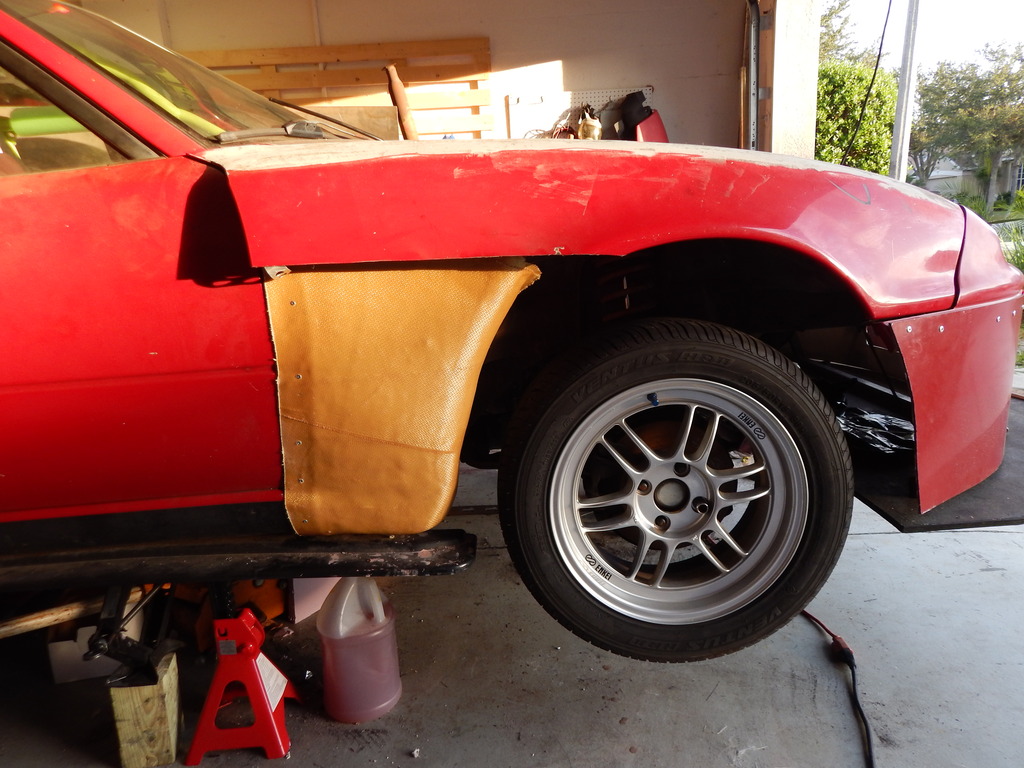
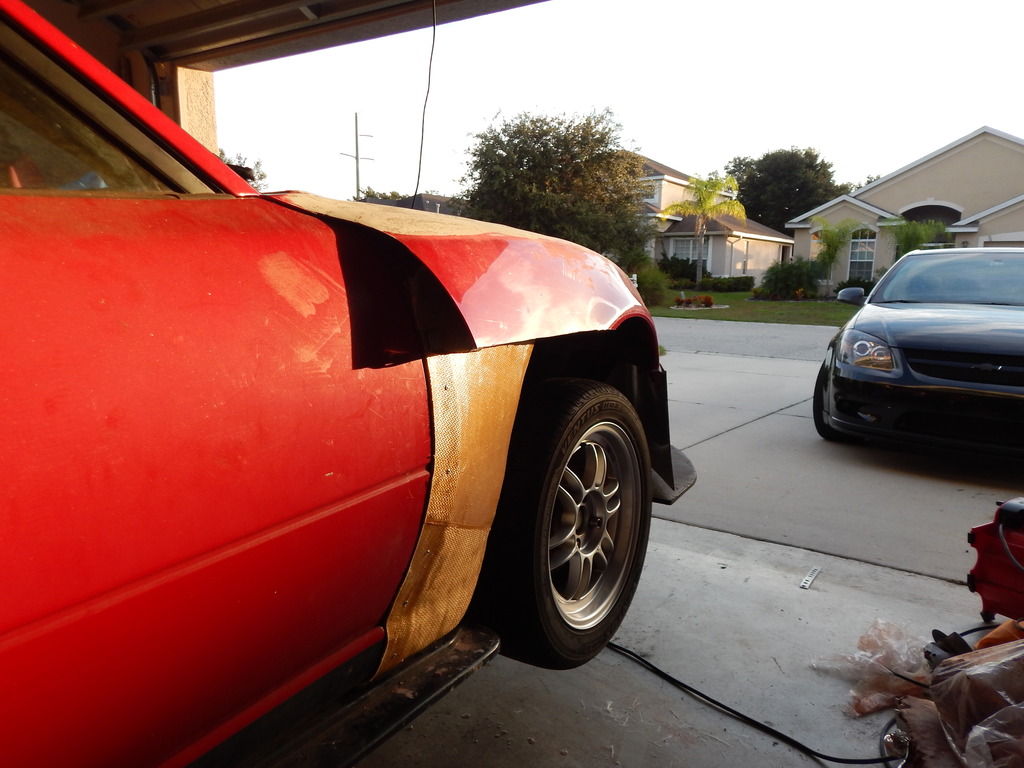
Aero Fenders:
20 lbs of Clay
3 yards of Kevlar
1/3 gal of resin
Aluminium foil
Cling Wrap
Trunk Delete (double diffuser)
Miata Aero Fenders:
Fiberglass: Free
Resin: $13 a/gal
Clay: $30
Kevlar: Free
Hours spent:
Trunk Delete:3 hours
Aero Fenders: 7 hours
How effective:
Not going to test until the engine swap is done, by then there will be alot more done in terms of aero. So How Effective: will never know
Materials used:
Trunk Delete:
1/2 yard of 36/10 fiberglass
1/2 gal of resin
Left over fabric
3M Spray Tack
Aero Fenders:
20 lbs of Clay
3 yards of Kevlar
1/3 gal of resin
Aluminium foil
Cling Wrap
Trunk Delete (double diffuser)


Miata Aero Fenders:


Last edited by 1993ka24det; Nov 30, 2015 at 06:52 PM.
Reply
0
0
Newb
Joined: May 2015
Posts: 37
Total Cats: 8
From: Australia
Day one of testing done.
Initially the car had some over steer, I got quite excited as I'm sure this meant the splitter was working.
Dialed in some more wing and car felt great.
I would say the turn in felt as good if not better than it was with splitter v1 and an open diff.
Sadly my data logging system (aka phone) decided to not work right so no accurate or to be trusted speeds or sector times :(
Still 1.2 odd seconds off PB, but there is always tomorrow.
In short:
How effective:
3 - did what I wanted so far
Last edited by Tim_Aus; Dec 6, 2015 at 04:00 PM. Reason: added pics
Reply
0
0

Ripped the splitter off at Road Atlanta this past weekend with a shortcut between turns 3 and 4. Bottom of the intercooler has a pair of small dents from the front mounts and the rear tabs used for the stock under tray are bent backwards. Front mount ripped through the slotted angle, side mounts ripped carriage bolts through the plywood, rear ripped bolts through plywood and bent the subframe mounting point.
The same off bent some of the rear subframe braces so all things considered, I'm happy.

I was right at 2 seconds slower without aero on Road Atlanta. After the off, I removed the CoT wing and ran naked for 3 more sessions.
1:44.76 with aero
1:46.69 without
The same off bent some of the rear subframe braces so all things considered, I'm happy.
I was right at 2 seconds slower without aero on Road Atlanta. After the off, I removed the CoT wing and ran naked for 3 more sessions.
1:44.76 with aero
1:46.69 without
Reply
0
0
that splitter did look beastly
__________________
OG Racing
Your Source For Motorsports Safety Equipment
WWW.OGRACING.COM
800.934.9112
703.430.3303
info@ogracing.com
OG Racing
Your Source For Motorsports Safety Equipment
WWW.OGRACING.COM
800.934.9112
703.430.3303
info@ogracing.com
Reply
0
0

Junior Member
Joined: Apr 2013
Posts: 142
Total Cats: 7
From: toronto
good data point. surprised it's not a bigger gap (re.aero/no aero) on a high power miata/very high speed track.
Reply
0
0

Elite Member
Joined: Jul 2014
Posts: 1,642
Total Cats: 250
From: Canberra, sort of
. Seriously, think about what you want to damage (ie fix) next time. Strengthen the splitter, it will bust the mounts. Strengthen the mounts, it will bend/bust whatever the mounts are fixed to.I like the idea of a weak point that is built in, in order to fail - saves more expensive/difficult repairs. Mine is the attachment between the splitter and the mount (a piece of relatively light ally angle), like yours is/was.
Reply
0
0
without the areo he probably went faster on the straights. Road ATL is all WOT for 2/3's of the track.
__________________
OG Racing
Your Source For Motorsports Safety Equipment
WWW.OGRACING.COM
800.934.9112
703.430.3303
info@ogracing.com
OG Racing
Your Source For Motorsports Safety Equipment
WWW.OGRACING.COM
800.934.9112
703.430.3303
info@ogracing.com
Reply
0
0