
90 FE-dohc (FE3) Turbo


Yeah well of course anything can be run, I didn't think the truck coils (which are not run in batch in their native application) could be run at our RPMS, twice as often as the original app. But cool if they can.
Reply
 0
0

0
Thread Starter
Elite Member
iTrader: (5)
Joined: Jan 2005
Posts: 7,486
Total Cats: 372
From: Atlanta
There are loads of cars running LS coils in wasted spark ignitions. Including V8s making silly power. That's where I made my assumption that the LS coils were far more robust that the COPs (or really anything else out there.) And therefore were superior for my application going starting wasted and ultimately going sequential.
Reply
0
0
Interesting. Good to know if I decide to clean up my engine bay. Do they have built in ignitors or do you run something external?
I didn't have good luck with the toyota COPs even in sequential.
I didn't have good luck with the toyota COPs even in sequential.
Reply
0
0
Thread Starter
Elite Member
iTrader: (5)
Joined: Jan 2005
Posts: 7,486
Total Cats: 372
From: Atlanta
Yes- integral ignitors. LSx coils are essentially "Coil Near Plug" vs "On". There are several on mt that have gone from COPs to the LSx coils. So you're not forging new ground and the principal is the same between the two ignitions.
Reply
0
0
Thread Starter
Elite Member
iTrader: (5)
Joined: Jan 2005
Posts: 7,486
Total Cats: 372
From: Atlanta
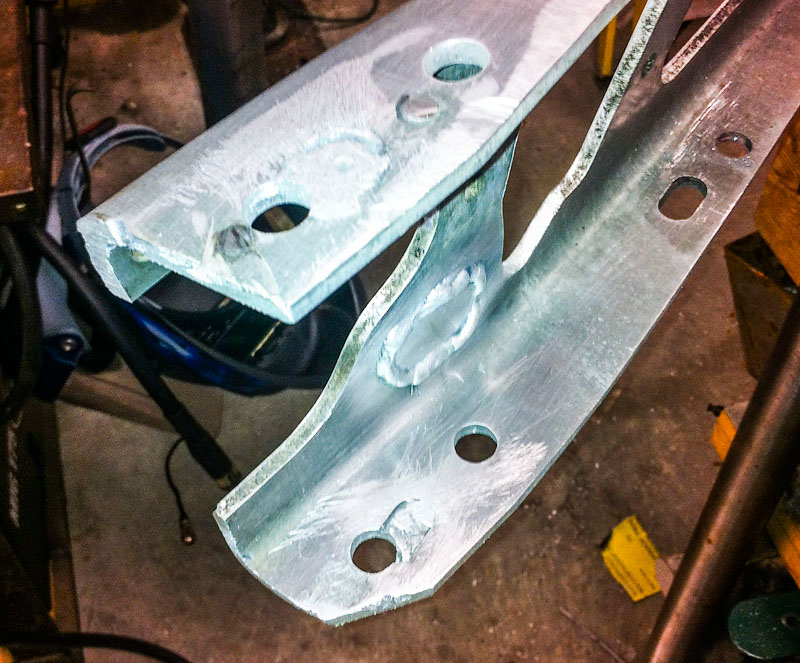
I reworked my modified PPF, creating precise bolt holes and patching the original speedo hole.


Got my CoolEFI A3 ecu set up for full sequential injection and successfully tested using benchtest fw.

Set up file needs to completed so I can crank to determine CAS/crank offset.
Got my CoolEFI A3 ecu set up for full sequential injection and successfully tested using benchtest fw.
Set up file needs to completed so I can crank to determine CAS/crank offset.
Last edited by m2cupcar; Apr 4, 2026 at 02:59 PM.
Reply
0
0


I'm considering adding in a PPF when i add the cage and install a new clutchmasters clutch soon. Its not much, but i can feel the nose of the rear diff popping up and down ever slow slightly under hard wot to decel transitions. I might just make a mount to the chassis too. depends on space constraints.
Good to see progress!
Good to see progress!
Reply
0
0
Thread Starter
Elite Member
iTrader: (5)
Joined: Jan 2005
Posts: 7,486
Total Cats: 372
From: Atlanta
Haven't mentioned it here, but "fredio" in NZ confirmed that the FD RX7 gearbox does in fact have a longer input shaft that the FC TII. And that makes the use of the Bongo van bell housing a PnP solution for the R trans to the FE3 block. That will be my transmission solution leaving me with having to resolve the connection to the ppf. I've seen enough bracketry done to marry the ppf to other trans that I don't think it will be too complicated. I've two Miata 5 speeds to last me until then. 
Reply
1
1

And then I think this was either 12,000 or 16,000 rpms. They were extremely happy to go even higher if I desired.
Reply
0
0
Haven't mentioned it here, but "fredio" in NZ confirmed that the FD RX7 gearbox does in fact have a longer input shaft that the FC TII. And that makes the use of the Bongo van bell housing a PnP solution for the R trans to the FE3 block. That will be my transmission solution leaving me with having to resolve the connection to the ppf. I've seen enough bracketry done to marry the ppf to other trans that I don't think it will be too complicated. I've two Miata 5 speeds to last me until then.
Reply
0
0
Yup, and the further add fuel. The Kia flywheel accepts miata clutches. Which means it should accept rx7 clutches or at least the friction disk. Or you could use the kia flex plate as the base for a budget twin disk.
Reply
0
0
Thread Starter
Elite Member
iTrader: (5)
Joined: Jan 2005
Posts: 7,486
Total Cats: 372
From: Atlanta
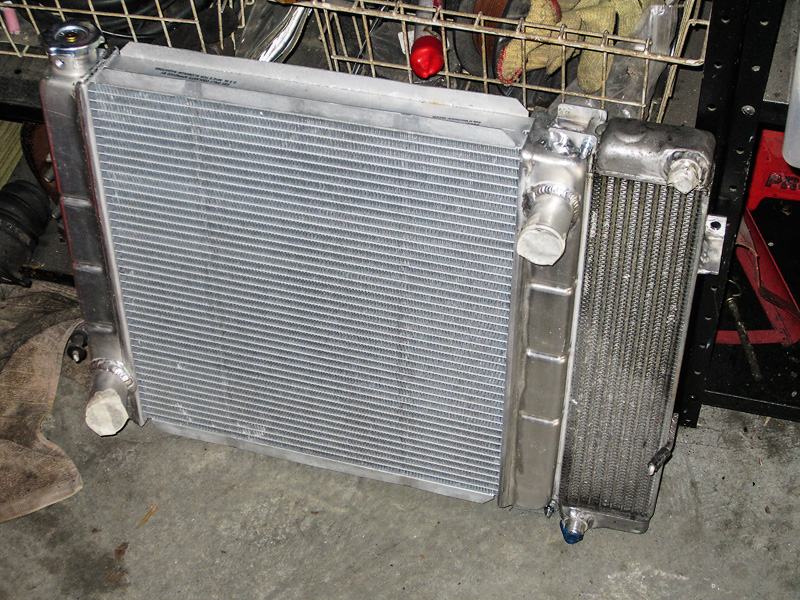
Radiator/oilcooler assembly with all mounts to chassis completed. Fab'd and welded brackets and hanging pegs to the "nascar" dual core crossflow 19x24"radiator. Brackets allow the use of the stock "sleeves" on the Benz W201 oil cooler and pegs hang on new "hooks" added to the stock Miata radiator/condenser mounting plates. Assembly now drops right in like a stock radiator with roughly 1/2" clearance on each side. I'll get a pic of it in place once I finish up the exhaust since having everything out that's in front of the engine makes working on the exhaust WAY easier.

Reply
0
0
Thread Starter
Elite Member
iTrader: (5)
Joined: Jan 2005
Posts: 7,486
Total Cats: 372
From: Atlanta
Downpipe is routed and tacked up. Everything is 3" from the turbine out. New downpipe connects to the old exhaust at the flex pipe. Next is a high flow cat, 18" resonator and giant Magnaflow 12578 straight-thru muffler. Pushing the engine back another 1-1/2" made for a tight fit. As before, there's two pieces with a junction after the first turn down. The real challenge will be fab'ing the EWG dump between runners 2 & 3 and back around into the down pipe. I have to run a new dipstick tube to clear up that area- though had to do that for the heater line anyway. Then need to squeeze the EWG dump by the turbo support rod. Hoping it will fit, if not, I'll be making a much shorter EWG connection right after the turbine v-band. Not ideal, but superior to the IWG.


Reply
1
1
Thread Starter
Elite Member
iTrader: (5)
Joined: Jan 2005
Posts: 7,486
Total Cats: 372
From: Atlanta
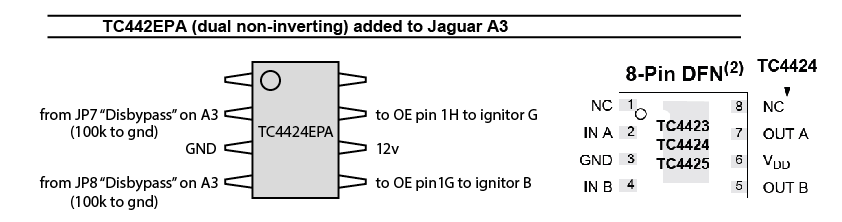
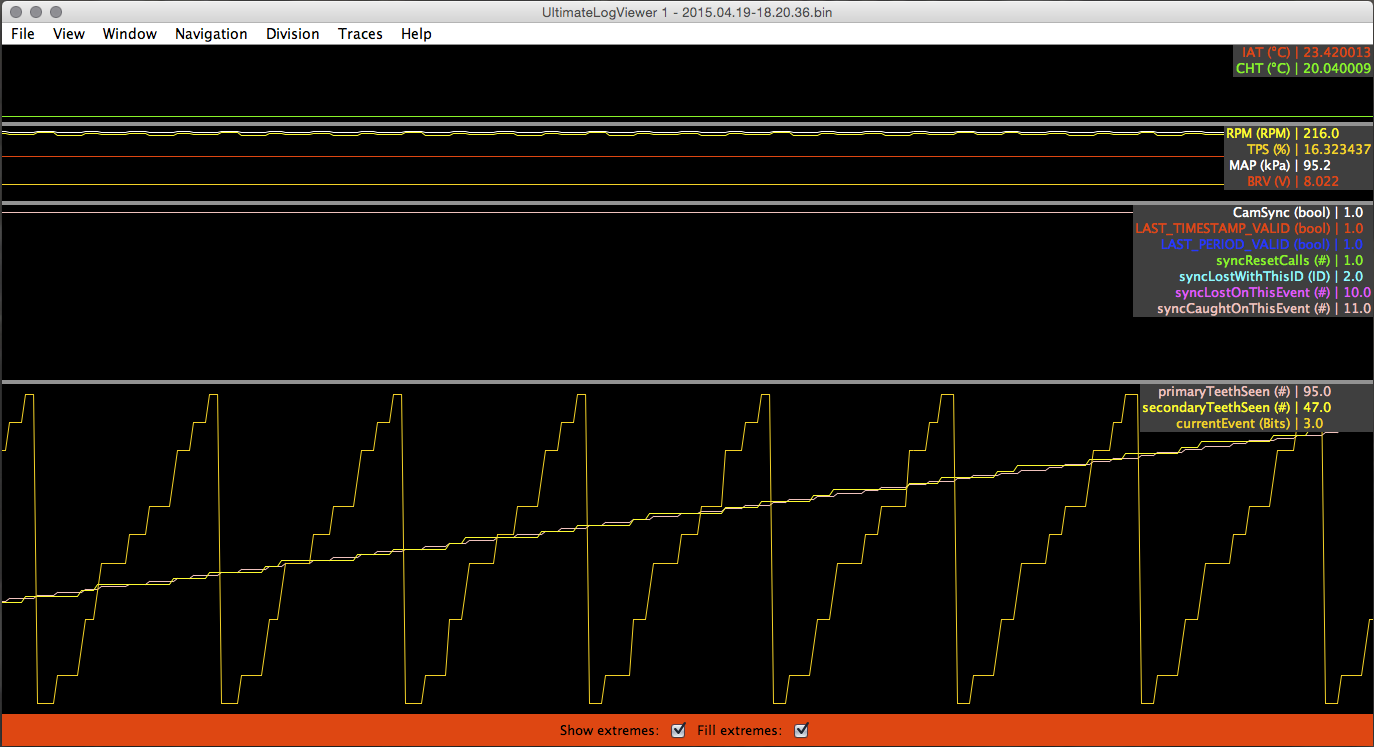
Finally arrived a clean/stable ign signal with ecu installed in the car. Upgraded ign to FET driver from XOR gate- added 100k resistors to ground on cpu signal to driver.
Full sequential injection is set up (on stim).
CAS/crank offset determined and firmware updated/loaded.
Just need to gas up, install plugs, reconnect solenoid and I'll be ready for the first start attempt.
Full sequential injection is set up (on stim).
CAS/crank offset determined and firmware updated/loaded.
Just need to gas up, install plugs, reconnect solenoid and I'll be ready for the first start attempt.
Reply
0
0


