
90 FE-dohc (FE3) Turbo


I have a silly question about the exhaust that is on the first page. Is there any sort of resonator or additional components to the system, or is it just the piping and the magnaflow muffler?
Reply
 0
0

0
Thread Starter
Elite Member
iTrader: (5)
Joined: Jan 2005
Posts: 7,486
Total Cats: 372
From: Atlanta
I've got a summit racing 3" x 18" glass pack after the cat- louvre opening facing the exhaust flow for max noise suppression (and inferior flow). That glass pack was in before the magnaflow install and I'm tempted to remove it since the magna is so quite in normal driving. Otherwise that glass pack should be a perforated resonator to reduce interference to exhaust flow.
I just realized that this thread still links to all my "lost" photobucket images. Need to fix that. Ugh.
I just realized that this thread still links to all my "lost" photobucket images. Need to fix that. Ugh.
Reply
0
0
My old turbo motor had a 3" straight back to a magnaflow 3" offset muffler and it was one of the best sounding exhausts I've ever heard, quite at cruise and deep when in boost.
Reply
0
0

Reply
0
0


Rob...
Got a question:
I read through your swap website, and have a question about the mounts that relates to the oil pan.
I saw that your mounts actually had a side effect of moving the motor forward. I'm wondering how far forward it was moved and how much that affected the need to modify the pan.
I guess basically, i'm asking if i had a way to move the motor back, if it would be possible to clear the firewall AND not have the oil pan run into the steering rack?
I'm starting this same basic swap, but in a.... more stupid manner. I realize the only way to really answer this question is to just do it myself, but i'm trying to see if a B2200 oil pan would clear, because, well.... yeah.
Last edited by concealer404; Feb 4, 2013 at 02:38 PM.
Reply
0
0

Rob...
I saw that your mounts actually had a side effect of moving the motor forward. I'm wondering how far forward it was moved and how much that affected the need to modify the pan.
I guess basically, i'm asking if i had a way to move the motor back, if it would be possible to clear the firewall AND not have the oil pan run into the steering rack?
Reply
0
0
There is no way you can push the engine back far enough to clear the steering rack without cutting a hole in the firewall. You make your own mounts so you put the engine where you want it. the stock pan is also too tall. (in theory it might fit but the engine would be sitting about 4 inches above the hood. I have oil pan modification pics in my build thread. Very low profile.
Fair enough. Was just asking because he had the templates for the mount plates on his site.

That said, who knows if the mounts would even interchange between the two motors. I do know that they're interchangeable in FWD form, but we certainly aren't using the same mounting points in this scenario.
Reply
0
0
Thread Starter
Elite Member
iTrader: (5)
Joined: Jan 2005
Posts: 7,486
Total Cats: 372
From: Atlanta
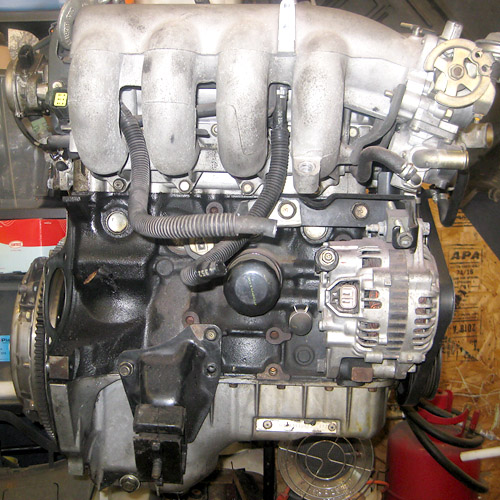
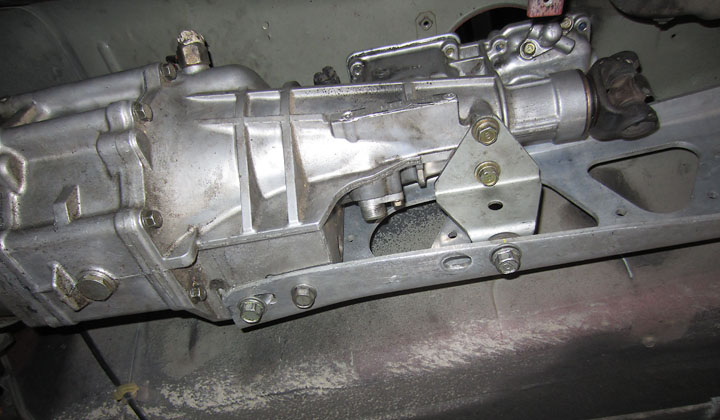
The advantage of those adapter plates for the stock mounts is that they allow use of the Miata trans with B2XXX front section (bell), the stock PPF and driveshaft. It is by far the simplest solution and though it may appear to set the engine forward- it's not so offensive when you see just how far forward the stock Miata engine sits (the mount bolts to the back half of the block- pic below.) Per a Mazda Miata engineer- the engine mounting was actually approached as an engine-transmission assembly mounting, where the PPF (at the trans tailshaft) is included as a part of that mounting arrangement. The load on the transmission/engine bolts was taken into consideration in this mounting. This time around I am moving the engine back over an inch and lower by at least an inch. Curious to see what that does for space, PPF and driveshaft fitting.
Any car time I've had, has been spent on the Benz- my daily- put 12k on it since purchase. Rest of the time is work, family or the backyard renovation (done.) I did roll the Miata over to the lift last weekend with good intentions.
Any car time I've had, has been spent on the Benz- my daily- put 12k on it since purchase. Rest of the time is work, family or the backyard renovation (done.) I did roll the Miata over to the lift last weekend with good intentions.
Reply
0
0
Gotcha, that makes sense. I'm going to have to come up with a trans mounting solution anyways... thinking something like the Boss Frog T56 setup, but well... different.
I'm using a TII trans with a B2600 bell (lets me use the larger diameter Mazda "H-type" clutch) and the starter salvaged from my donor car.
I need to look at the F2T block a little better and see if there's locations farther up front that would work. The outlier here is that i don't really know how much longer the F2 is than the BP. I sold my BP before i had a chance to sit them side by side.
Reply
0
0
Thread Starter
Elite Member
iTrader: (5)
Joined: Jan 2005
Posts: 7,486
Total Cats: 372
From: Atlanta
Accessories providing- you only need a place to bolt a flat plate, then put the mount where ever you want. Just think of the trans/engine as an assembly and the trans mount as a part of the "motor mount" group. I've seen more than a few examples of the OE PPF being used on other-than-miata transmissions. An adapter was just built to mount to the tailshaft so the PPF could bolt up.
Reply
0
0

Junior Member
Joined: Feb 2009
Posts: 78
Total Cats: 0
From: Madison, WI
I did roll the Miata over to the lift last weekend with good intentions.
im going to be coming south again soon. get some work done on the miata. id like to drop by again & check it out.
Reply
0
0
Thread Starter
Elite Member
iTrader: (5)
Joined: Jan 2005
Posts: 7,486
Total Cats: 372
From: Atlanta
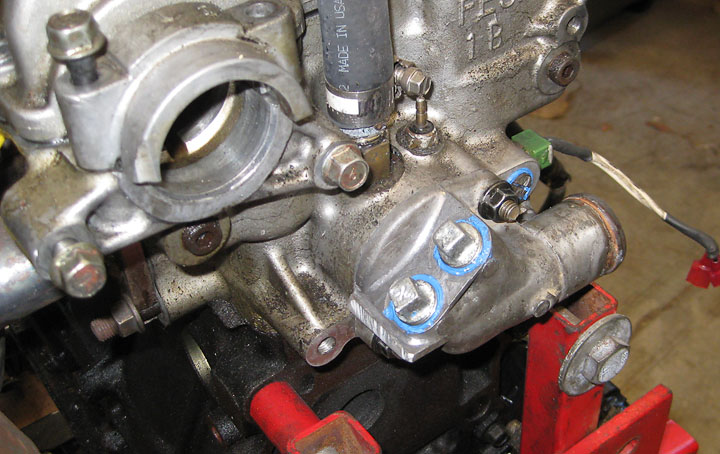
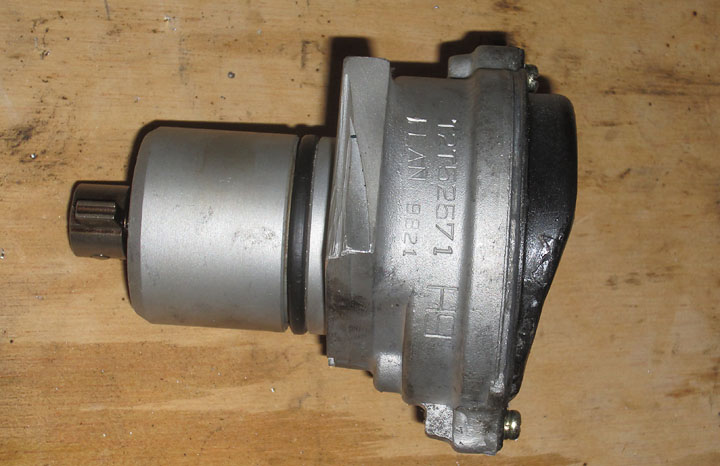
Rummaging through my parts I came across a coolant return neck that uses far less space than my prior piece- which I will need with the new engine position.
3.6 diff with poly mounts installed.
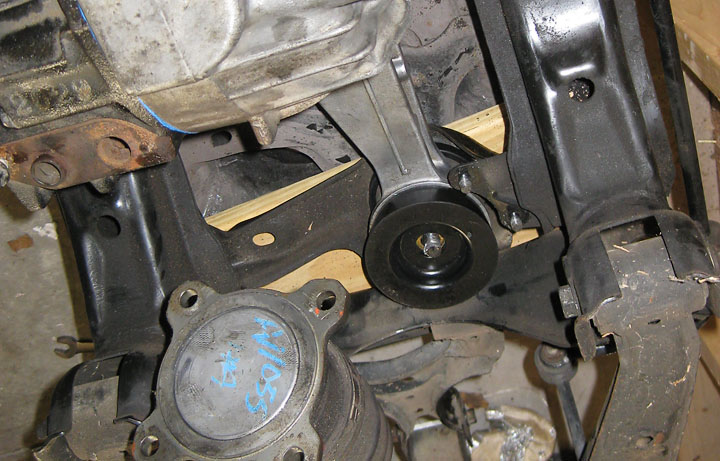
Motor mounts are fab'd similar in design to the stock Miata mounts, with provisions for the FE block mounting and positioning. Used spare subframe and spaced spare FE block at same angle as stock 1.6, then got started on the angles.


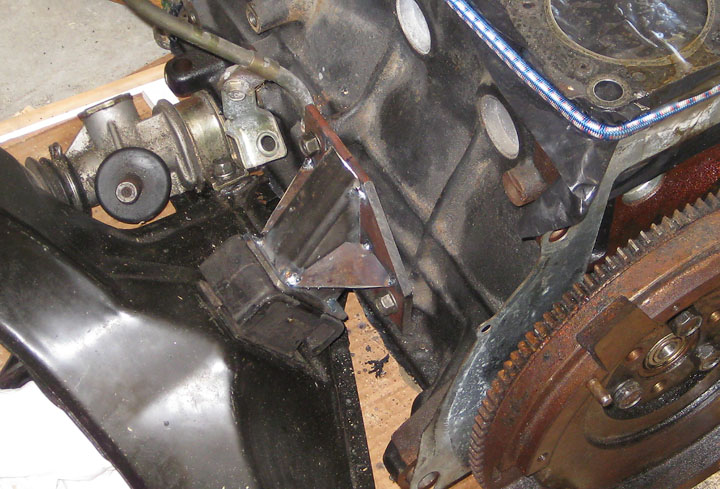
Mounts completed and installed.
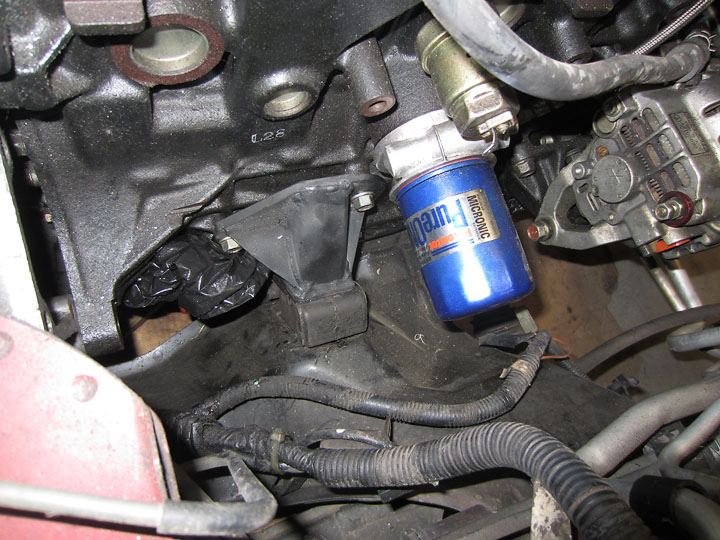
Engine now sits ~1.5" lower and further back than the prior installation. Hood framework shouldn't need any trimming to close.
PPF trimmed and slots/holes adjusted for new engine position.
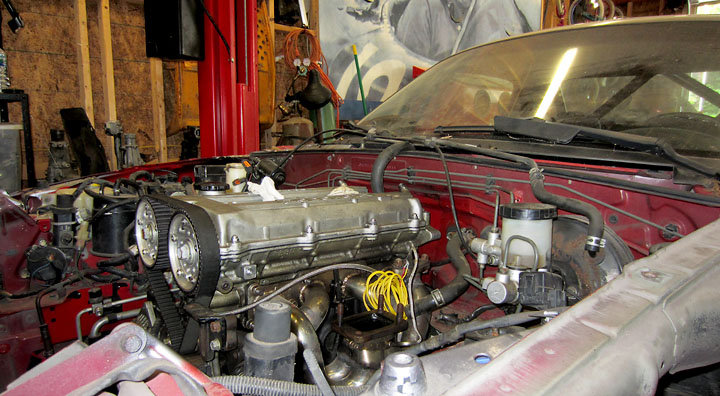
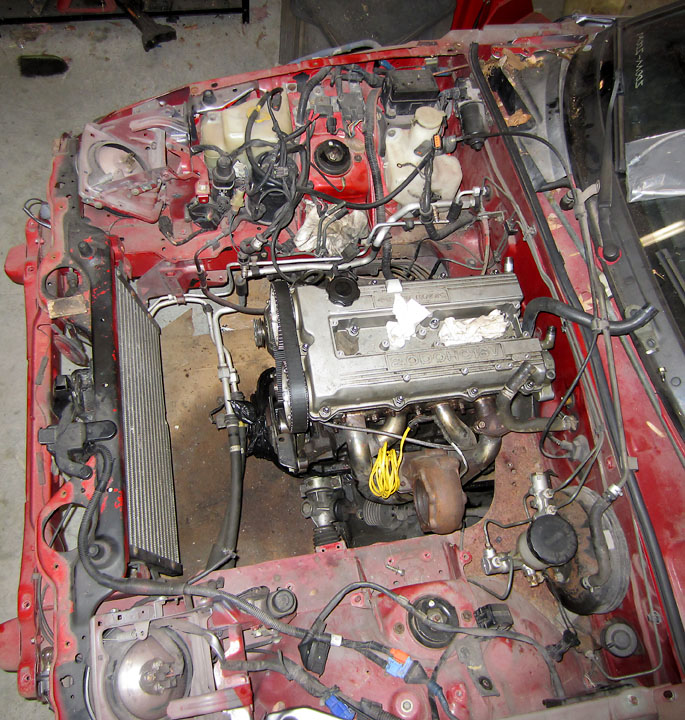
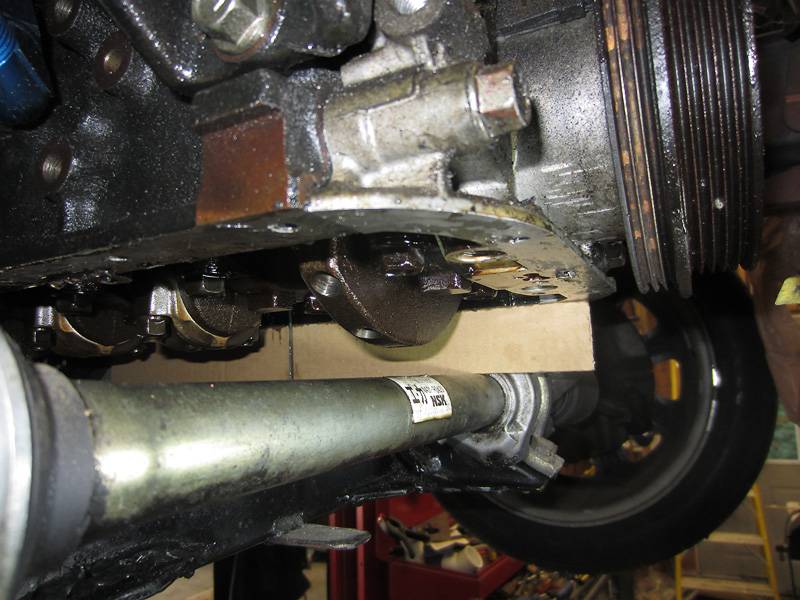
With the driveline bolted up, I can check clearances for the oil pan, downpipe, head-to-firewall, and mods length for the drivesahft. Unfortunately the NA FC driveshaft is 2-1/2" shorter than a stock Miata's and the length I need is between the two, so I'll have to take the Miata shaft to a shop for shortening.
The shelf under the brake booster will need to be trimmed if not cut to make some room for the downpipe. I've yet to decided if it will be 2-1/2 or 3 inches where it passes by that point. The seam weld in this area is over 1/2" at some points, so there is a large amount of space available with trimming/welding.
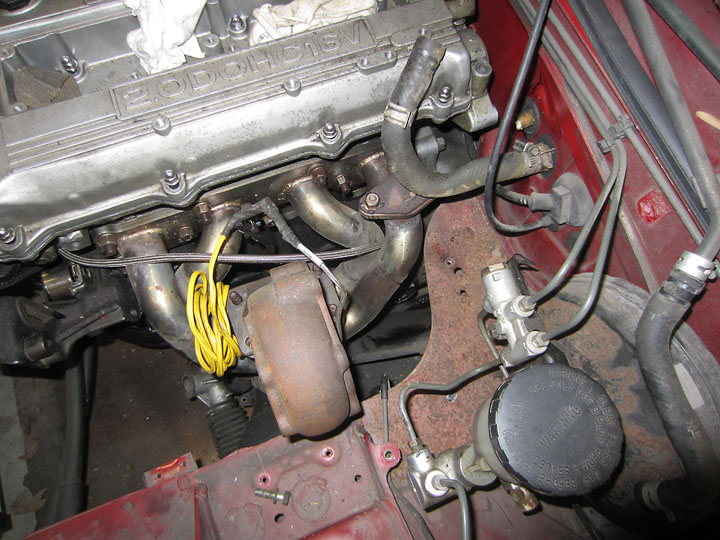
Firewall will require some reshaping at the CAS area to guarantee worst-case-engine-movement clearance. I'll start using the hybrid (FE distributor + Miata CAS) CAS for trigger and sync, and then eventually add a crank wheel for trigger, keeping the CAS for sync and enabling full sequential ign/fuel.
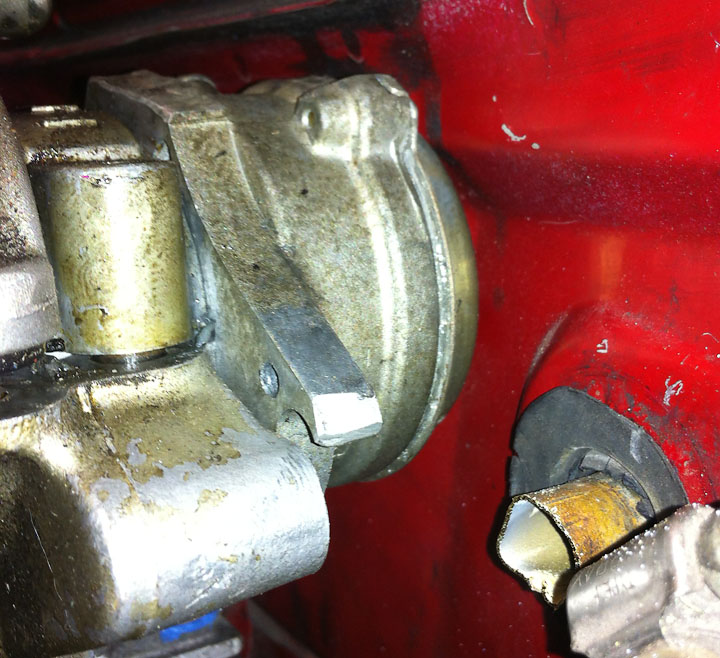
Stock 1.6 CAS cap modified to clear sensor and center screw while maximizing clearance to firewall.
3.6 diff with poly mounts installed.
Motor mounts are fab'd similar in design to the stock Miata mounts, with provisions for the FE block mounting and positioning. Used spare subframe and spaced spare FE block at same angle as stock 1.6, then got started on the angles.
Mounts completed and installed.
Engine now sits ~1.5" lower and further back than the prior installation. Hood framework shouldn't need any trimming to close.
PPF trimmed and slots/holes adjusted for new engine position.
With the driveline bolted up, I can check clearances for the oil pan, downpipe, head-to-firewall, and mods length for the drivesahft. Unfortunately the NA FC driveshaft is 2-1/2" shorter than a stock Miata's and the length I need is between the two, so I'll have to take the Miata shaft to a shop for shortening.
The shelf under the brake booster will need to be trimmed if not cut to make some room for the downpipe. I've yet to decided if it will be 2-1/2 or 3 inches where it passes by that point. The seam weld in this area is over 1/2" at some points, so there is a large amount of space available with trimming/welding.
Firewall will require some reshaping at the CAS area to guarantee worst-case-engine-movement clearance. I'll start using the hybrid (FE distributor + Miata CAS) CAS for trigger and sync, and then eventually add a crank wheel for trigger, keeping the CAS for sync and enabling full sequential ign/fuel.
Stock 1.6 CAS cap modified to clear sensor and center screw while maximizing clearance to firewall.
Reply
0
0

Thread Starter
Elite Member
iTrader: (5)
Joined: Jan 2005
Posts: 7,486
Total Cats: 372
From: Atlanta
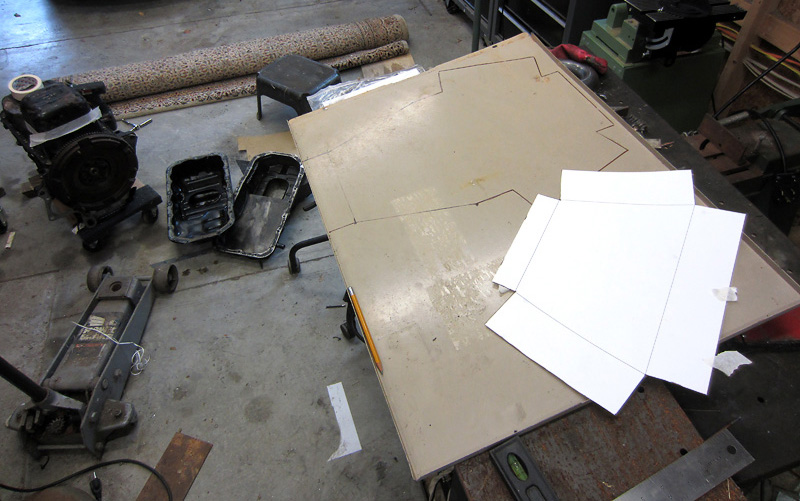
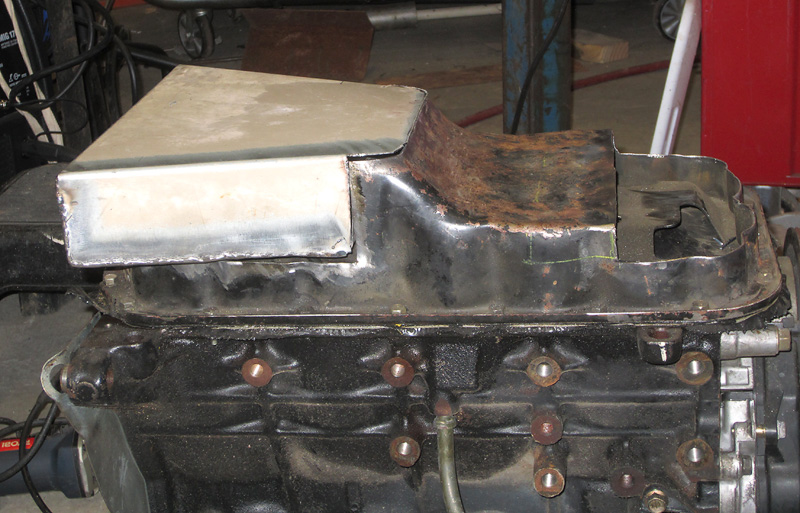
Sad how many months go by between updates. Oh well- I got some hours in on the oil pan this weekend. Got to play with my new eBay plasma cutter and I gotta say for $250 delivered, it does a tremendous job of improving speed and accuracy. Not to mention I don't miss a cutting wheel dust or grinder noise.
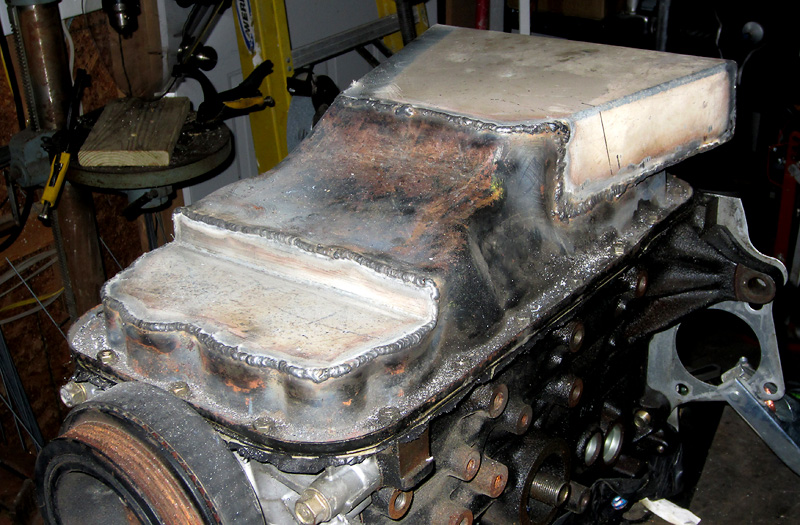
I started with a B2000 oil pan and did a cut-and-weld job on it to fit the Miata's subframe and the reduced ground clearance. Goal was to have 4qts capacity in the end, and by my calculations I'll be just shy of that. Final capacity will come once it's off the block and hopefully that'll show math errors in my engine's favor. I also have a 1.5+ qt oil cooler and lines to supplement the system.
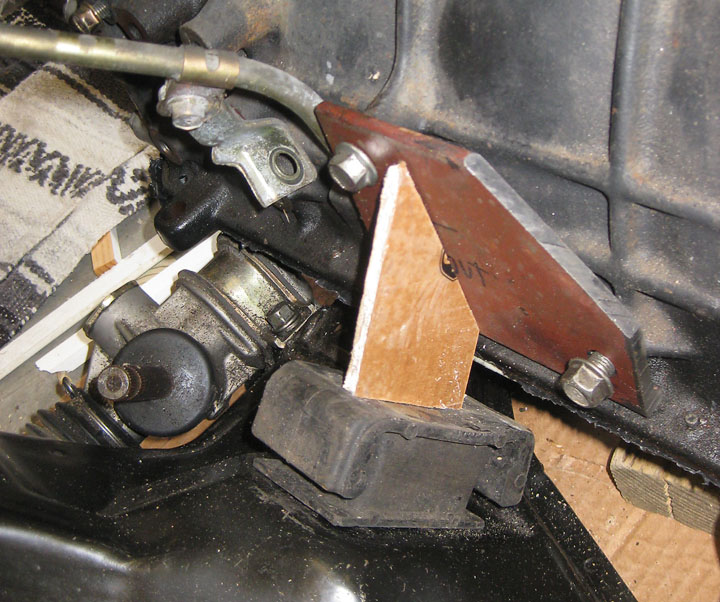
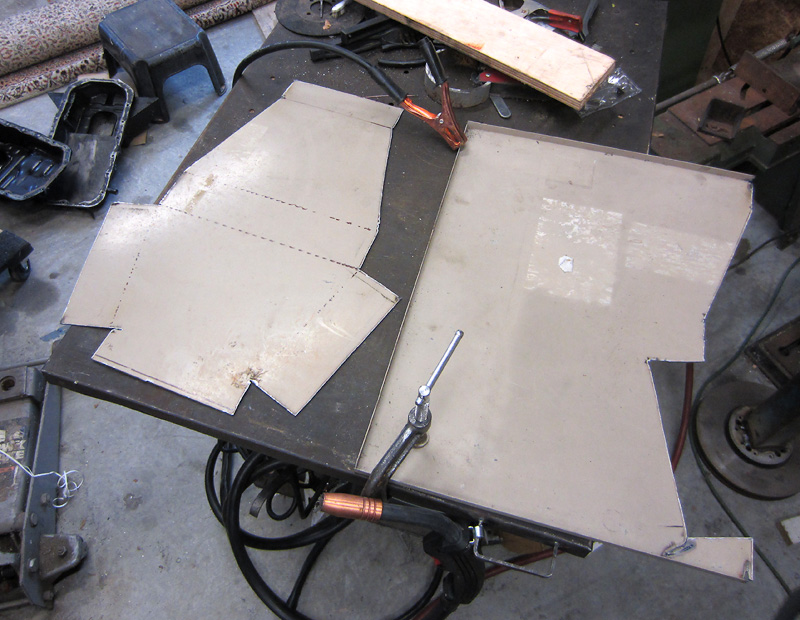
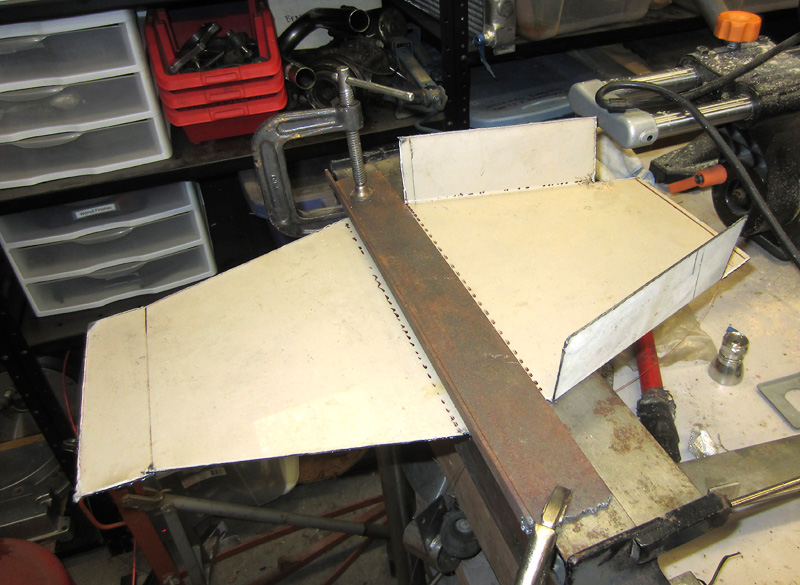
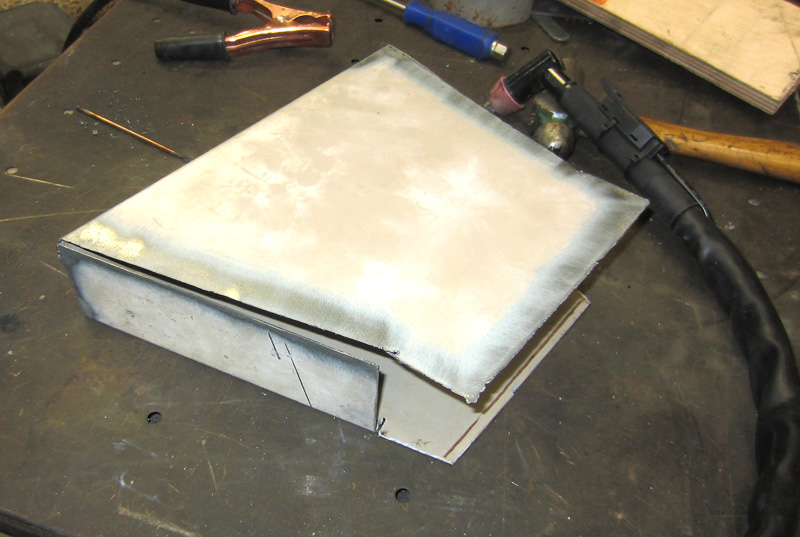
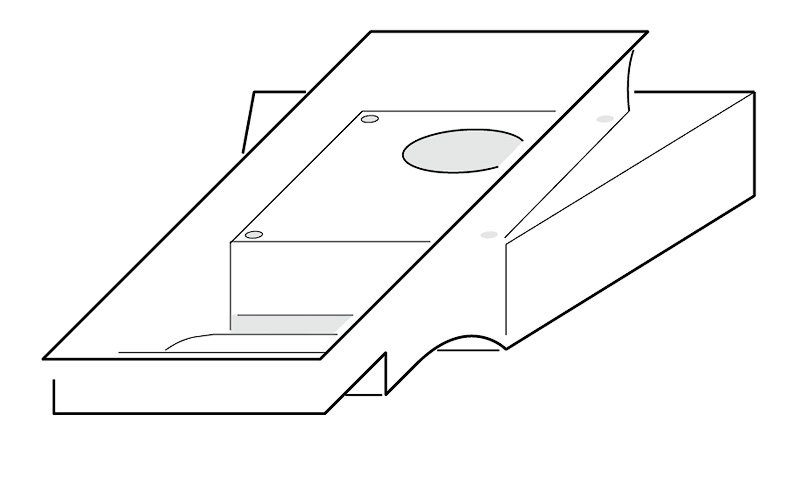
I started with a cardboard template to size the clearances with the engine completely installed - transmission, diff and ppf. That template was then traced over to the B2000 pan. Hammers were used to reshape the curved area to fit within the template limits. Measurements were taken and a actual size template drawn up computer and printed for the sump. Template was traced and cut from the sheet, then folded and welded. It was filled to leak check, then the short end folded up and a large pick-up hole cut. The sump was then welded into the sectioned B2000 pan along with an L panel up front. Still need to add the drain plug and boss from the OE sump, a temp sensor fitting and AN-10 fitting for the turbo oil return.
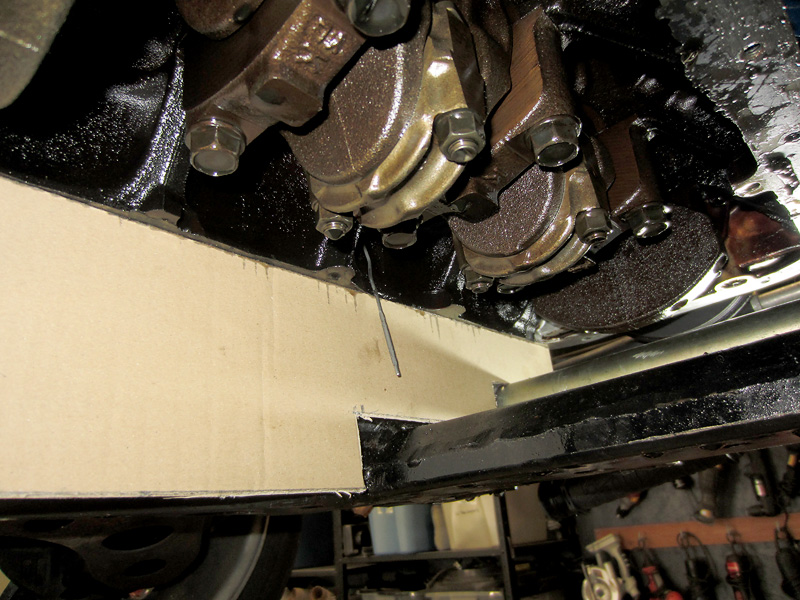
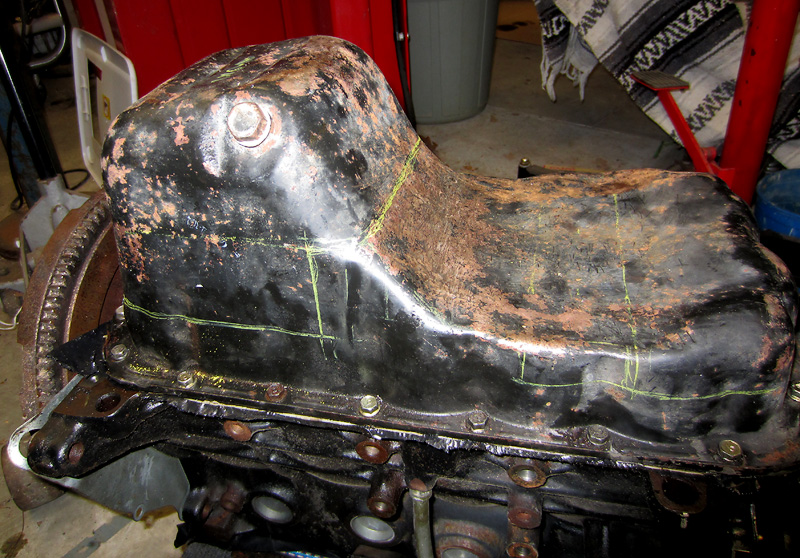
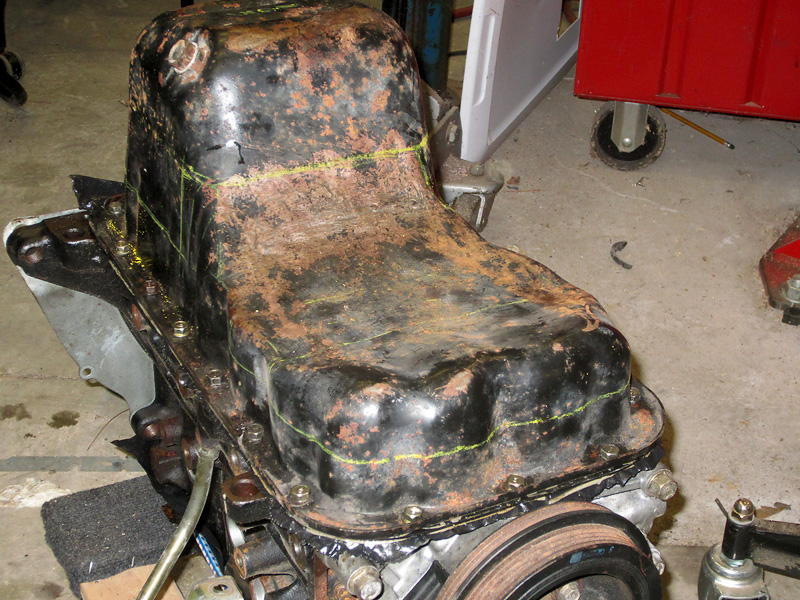

I started with a B2000 oil pan and did a cut-and-weld job on it to fit the Miata's subframe and the reduced ground clearance. Goal was to have 4qts capacity in the end, and by my calculations I'll be just shy of that. Final capacity will come once it's off the block and hopefully that'll show math errors in my engine's favor. I also have a 1.5+ qt oil cooler and lines to supplement the system.
I started with a cardboard template to size the clearances with the engine completely installed - transmission, diff and ppf. That template was then traced over to the B2000 pan. Hammers were used to reshape the curved area to fit within the template limits. Measurements were taken and a actual size template drawn up computer and printed for the sump. Template was traced and cut from the sheet, then folded and welded. It was filled to leak check, then the short end folded up and a large pick-up hole cut. The sump was then welded into the sectioned B2000 pan along with an L panel up front. Still need to add the drain plug and boss from the OE sump, a temp sensor fitting and AN-10 fitting for the turbo oil return.
Last edited by m2cupcar; Sep 23, 2013 at 05:07 PM.
Reply
2
2


