90 FE-dohc (FE3) Turbo


Thread Starter
Elite Member
iTrader: (5)
Joined: Jan 2005
Posts: 7,486
Total Cats: 372
From: Atlanta
Still lots to do. Don't like running without a cooling system when I can't disconnect the water pump from it's drive!  Not like a B.
Big things:
- finish the cooling system (mixing manifold to rad, hoses, fan, oil cooler connections)
- Weld up exhaust (tacked), external waste gate pipe
- Intercooler (allofit)
- AC (at least the condenser to complete the heat exchanger stack)
- Gauges (including WB02 install)
- body panels and interior parts
Not like a B. Big things:
- finish the cooling system (mixing manifold to rad, hoses, fan, oil cooler connections)
- Weld up exhaust (tacked), external waste gate pipe
- Intercooler (allofit)
- AC (at least the condenser to complete the heat exchanger stack)
- Gauges (including WB02 install)
- body panels and interior parts
Reply
 0
0

0

Thread Starter
Elite Member
iTrader: (5)
Joined: Jan 2005
Posts: 7,486
Total Cats: 372
From: Atlanta
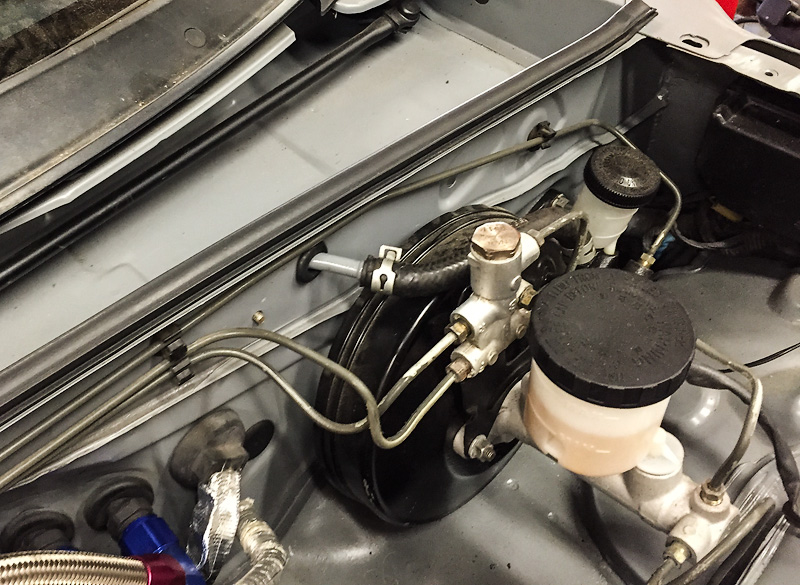
Brake booster line is now behind the cowl due to reduced space from the new engine position. I took two OE hard lines, cut them up and then brazed them together so they (mostly) follow the contour of the cowl.

Reply
0
0

Thread Starter
Elite Member
iTrader: (5)
Joined: Jan 2005
Posts: 7,486
Total Cats: 372
From: Atlanta
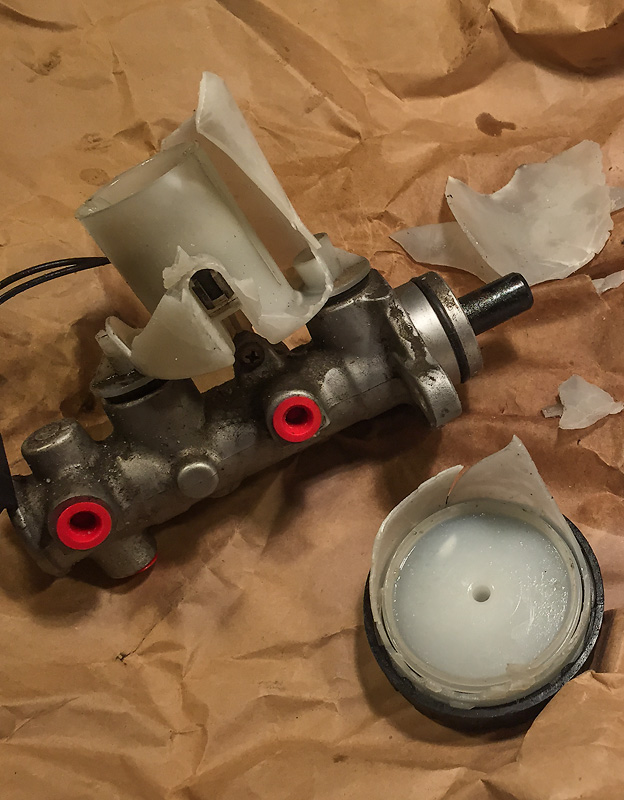
Picked up an 03-05 brake master for the "straight down" position on the LF brake line. Going to run it through the body with a grommet to the LF caliper line junction like BoostedSmurf. Fortunately it was sent priority mail and the USPS cut me a check for more than double the deal I got- but fair market value based on the three cheapest BIN auctions I provided as "proof of value". With that cash I managed to pick up an 03 master-reservoir-booster-prop assembly.
Discovered my never-used-by-me-since-purchased 3.63 torsen had a pinion leak. Old bed box frame corner made a great SST for breaking the nut loose- and reassembly. I've done three Miata pinion seals (1 street car, 2 race) by reassembling to the prior nut position plus just past my mark and haven't had a failure. Am I lucky? We'll see- doing this one the same way.
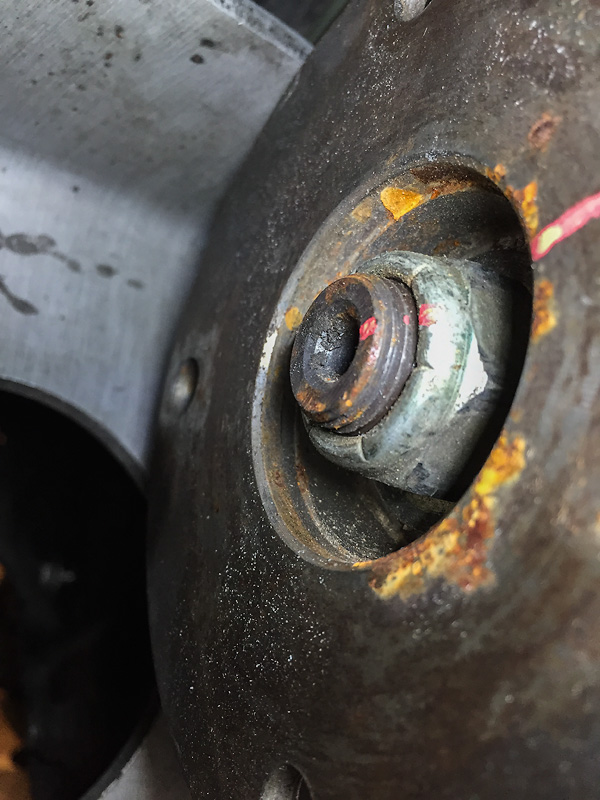
Discovered my never-used-by-me-since-purchased 3.63 torsen had a pinion leak. Old bed box frame corner made a great SST for breaking the nut loose- and reassembly. I've done three Miata pinion seals (1 street car, 2 race) by reassembling to the prior nut position plus just past my mark and haven't had a failure. Am I lucky? We'll see- doing this one the same way.
Reply
0
0
Thread Starter
Elite Member
iTrader: (5)
Joined: Jan 2005
Posts: 7,486
Total Cats: 372
From: Atlanta
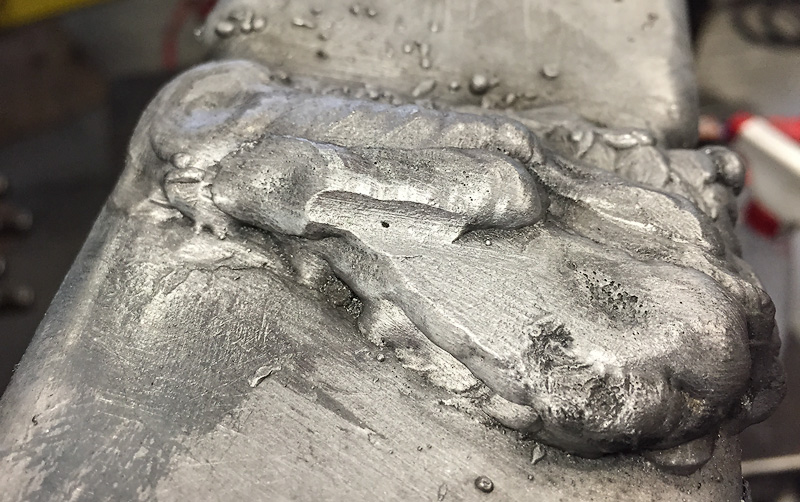
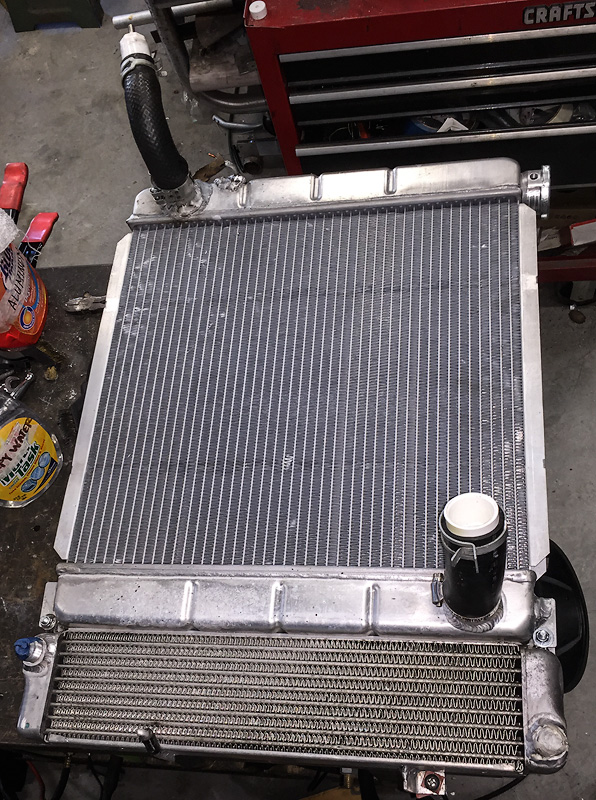
Radiator is done, but it was painful. Still is. I burned through the end tank when welding on the driver side hanging peg. I managed to get the new, smaller outlet on without any drama, but made a mess on this end tank. And just when I think I'm getting handle on the aluminum MIG welding.
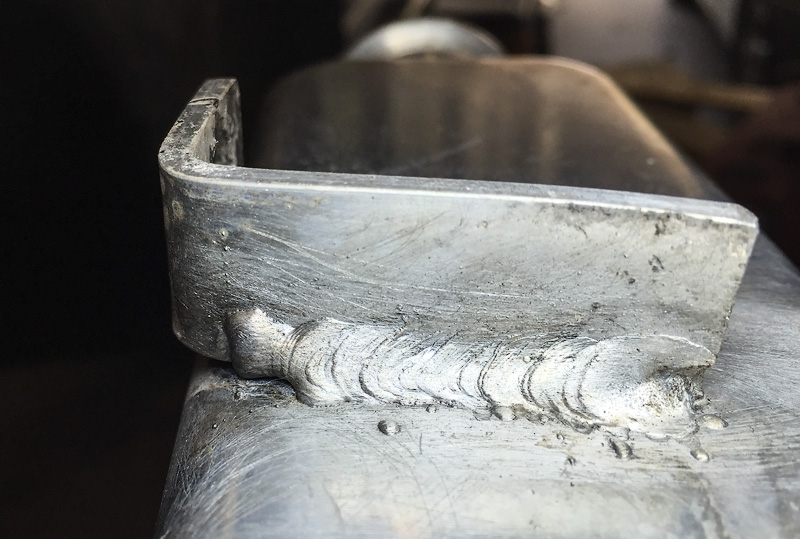
It's not perfect, but it's presentable. It's a volatile process - there's a very narrow window for success compared to MIG welding steel. I tried to braze the holes shut on the peg, but they were at various angles and braze just doesn't work at different angles in the same location.
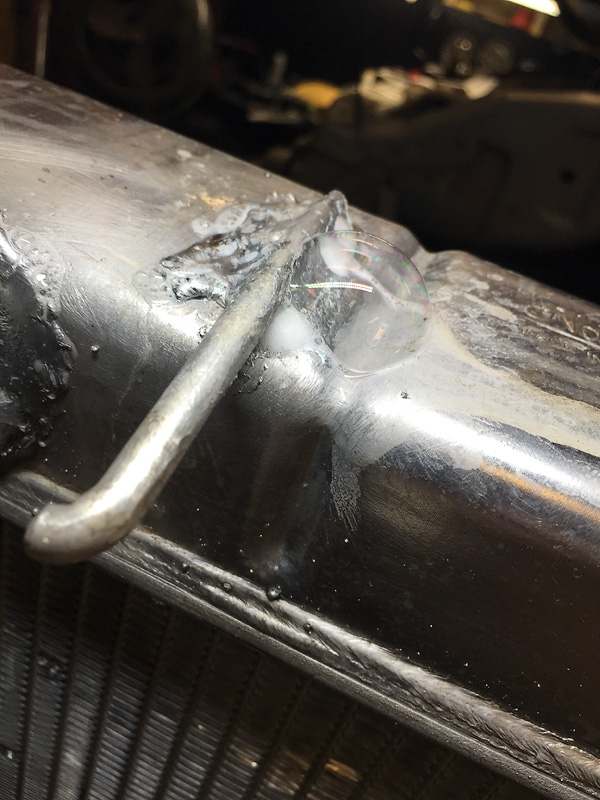
So I gave up on brazing and cut all the mess off. Started over with MIG but still got pin holes. And this is after preheating, brushing and aluminum weld cleaner. Rather than start over, I kept at it and made nice size scar on the end tank. Fortunately this lesion will be between the end tank and the frame rail out of sight. This was last pin hole I covered up (in the center of the round filed area):
Final pressure check with zero bubbles and holding air at 14psi for six days now.
It's not perfect, but it's presentable. It's a volatile process - there's a very narrow window for success compared to MIG welding steel. I tried to braze the holes shut on the peg, but they were at various angles and braze just doesn't work at different angles in the same location.
So I gave up on brazing and cut all the mess off. Started over with MIG but still got pin holes. And this is after preheating, brushing and aluminum weld cleaner. Rather than start over, I kept at it and made nice size scar on the end tank. Fortunately this lesion will be between the end tank and the frame rail out of sight.
This was last pin hole I covered up (in the center of the round filed area):Final pressure check with zero bubbles and holding air at 14psi for six days now.
Reply
0
0
Thread Starter
Elite Member
iTrader: (5)
Joined: Jan 2005
Posts: 7,486
Total Cats: 372
From: Atlanta
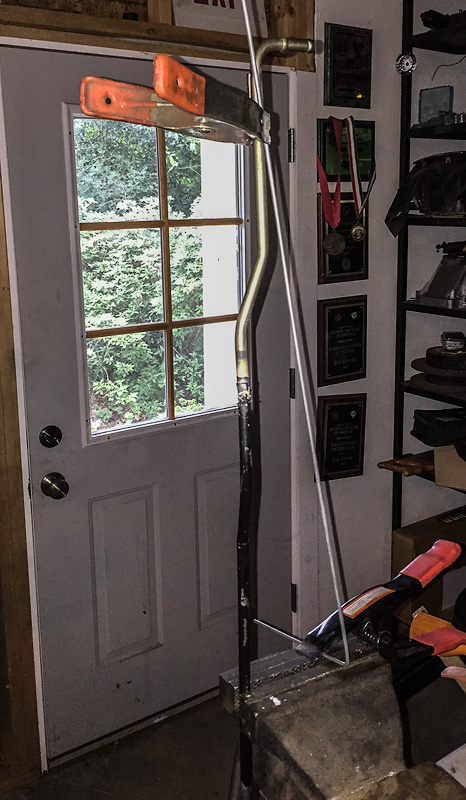
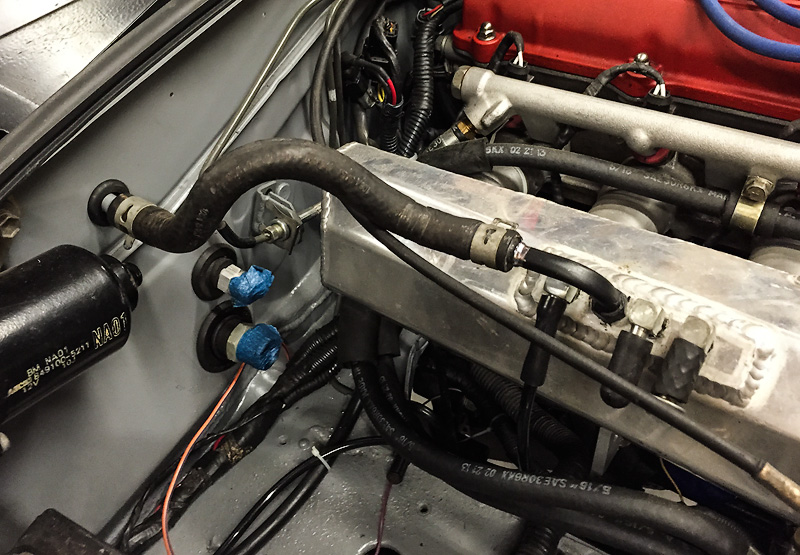
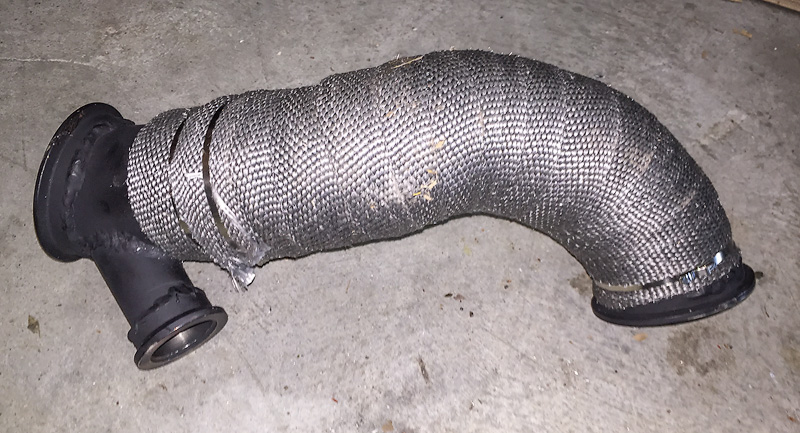
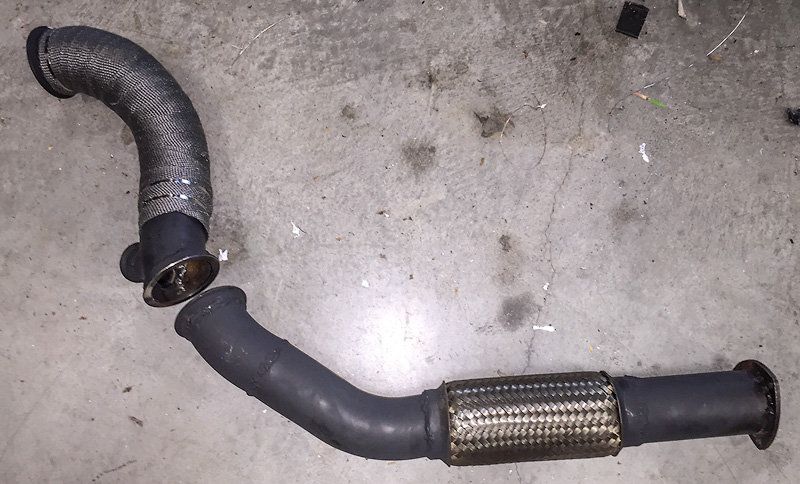
Exhaust is complete except for a "dyno" O2 bung. Will bolt it up after I get the pinion seal and drive shaft installed. Working out the external wastegate dump pipe was difficult. Had to snake it between the oil dipstick, heater core hose, manifold and manifold brace.
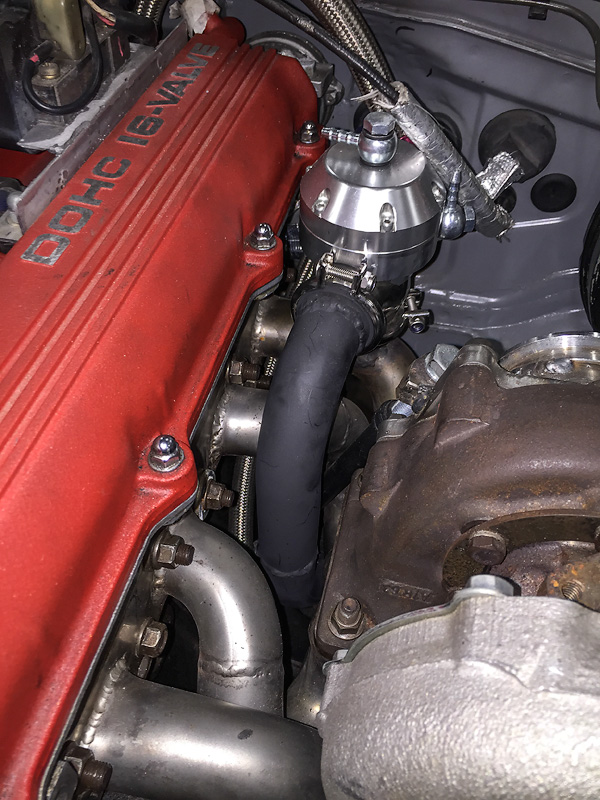
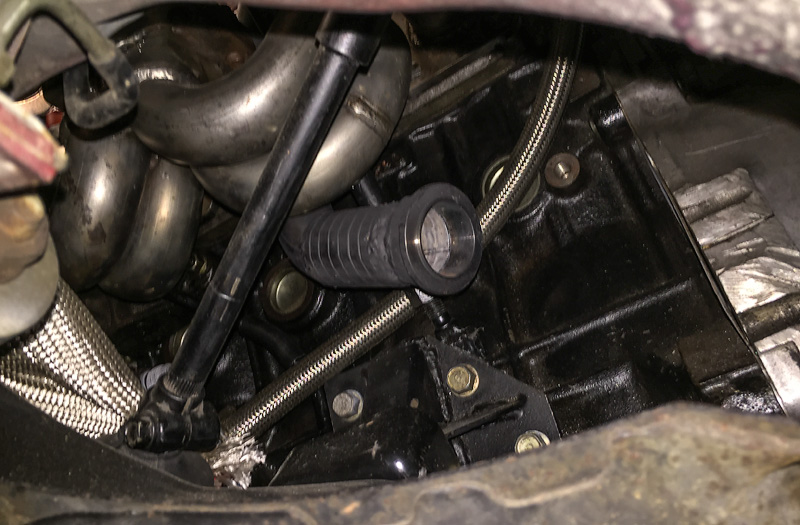
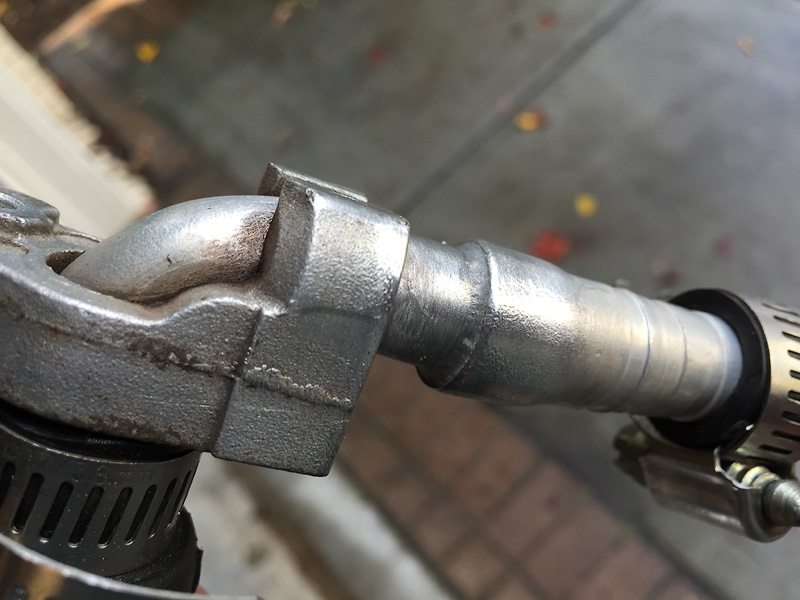
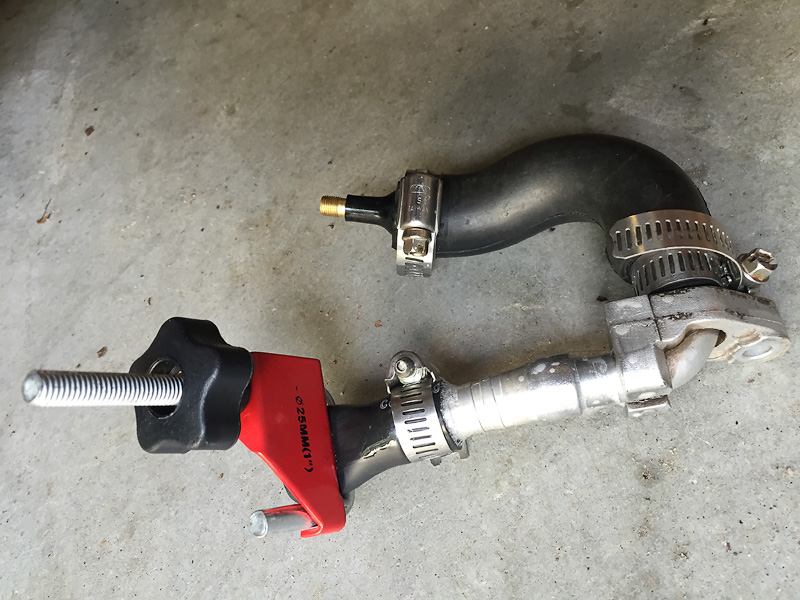
New dipstick/tube and water pump mixing manifold completed. Had to move the dipstick forward to make room for the wastegate dump pipe. The wp manifold makes a 90 and runs directly over the AC compressor to avoid the belt/tensioner.
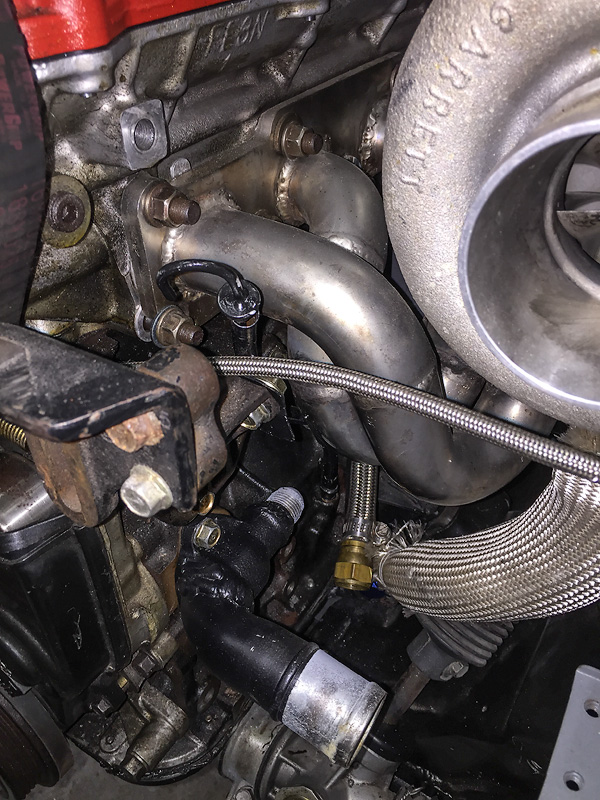
New dipstick/tube and water pump mixing manifold completed. Had to move the dipstick forward to make room for the wastegate dump pipe. The wp manifold makes a 90 and runs directly over the AC compressor to avoid the belt/tensioner.
Reply
0
0

I have a small Miller Maxstar 90. It's a 110V tig machine, with a lift start, but it cannot do aluminum. I can do all the thin mild steel and stainless I want, but it cannot do aluminum. If you want to do aluminum, make sure you get a machine that can do it.
Reply
0
0
Thread Starter
Elite Member
iTrader: (5)
Joined: Jan 2005
Posts: 7,486
Total Cats: 372
From: Atlanta
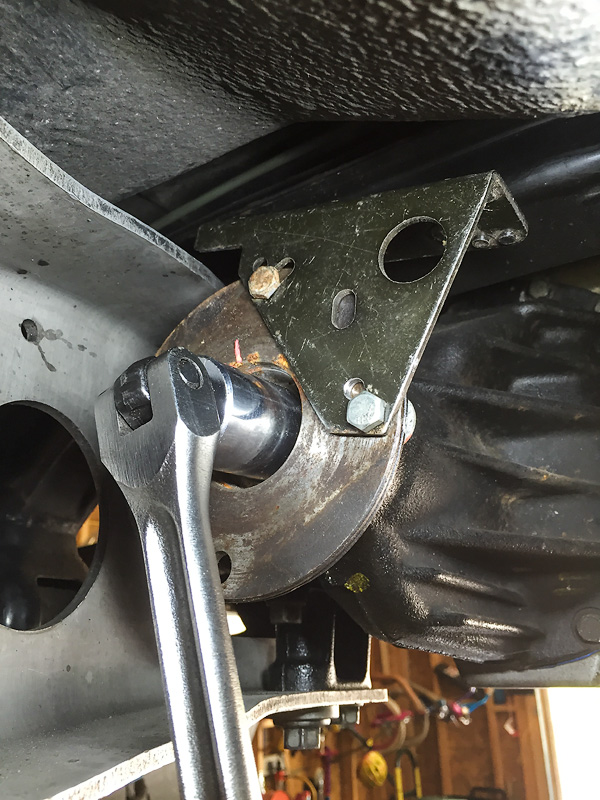
New diff pinion seal installed. Shortened driveshaft in. Exhaust completely installed. So much more complicated than just an internally gated turbo. Radiator hoses are size/sorted.
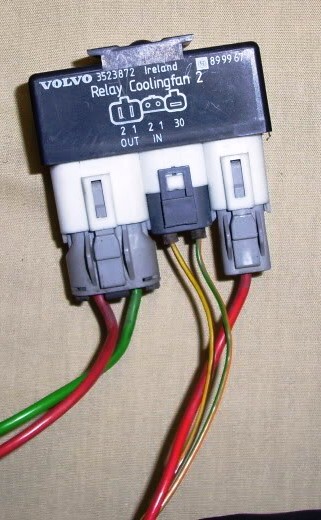
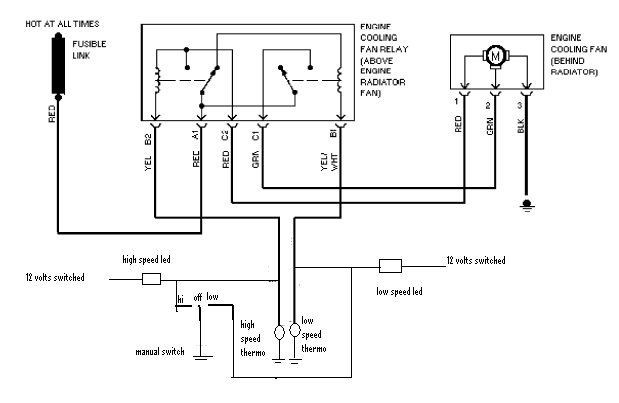
I can confirm that the siemens/ford/volvo fans are about an inch too thick to fit between an upgraded/thicker radiator and the sway bar. BUT I've tested the Volvo fan control/relay using one and two 100 watt .3 ohm resistors to create a high/low speed set up that works on a single speed fan. I need to decide between the straight blade 3000cfm 16" Spal I was using and a 16" Zirgo 2000 cfm curved blade. The low speed on the Spal IS significantly more quiet than high speed. Leaning towards the straight blade because Spal.
The volvo fan control/relay is a salvage yard bargain at < $10 in the yard. You get OE quality relays, connectors, mounting for a 30 amp circuit and twin gnd triggers. Going on my second summer with it and the fan on my Benz- zero issues.
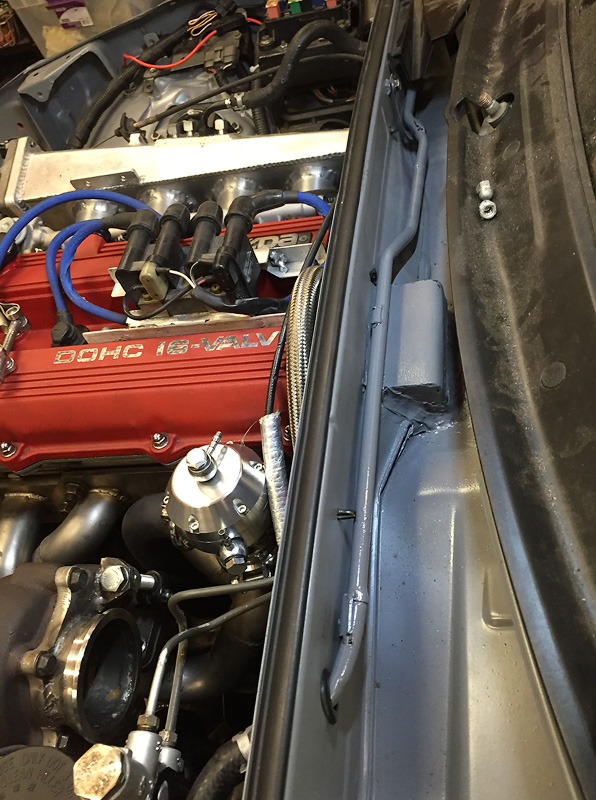
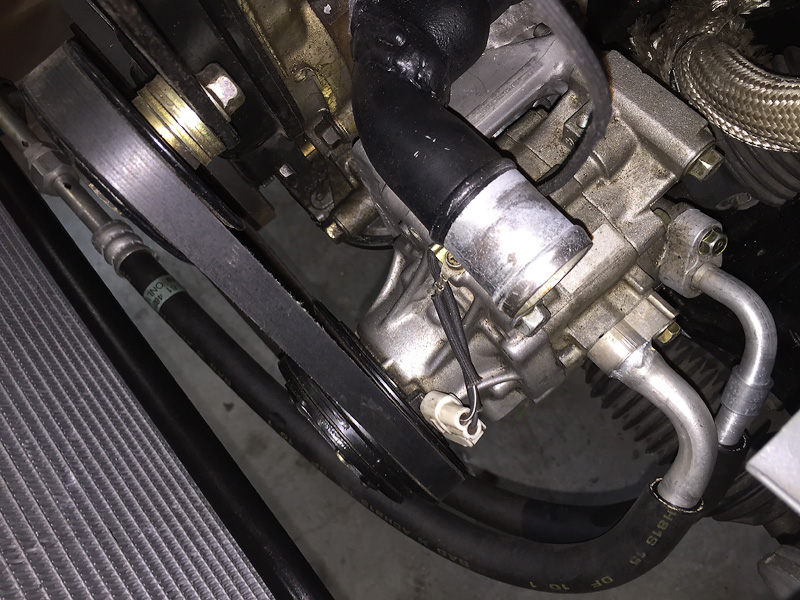
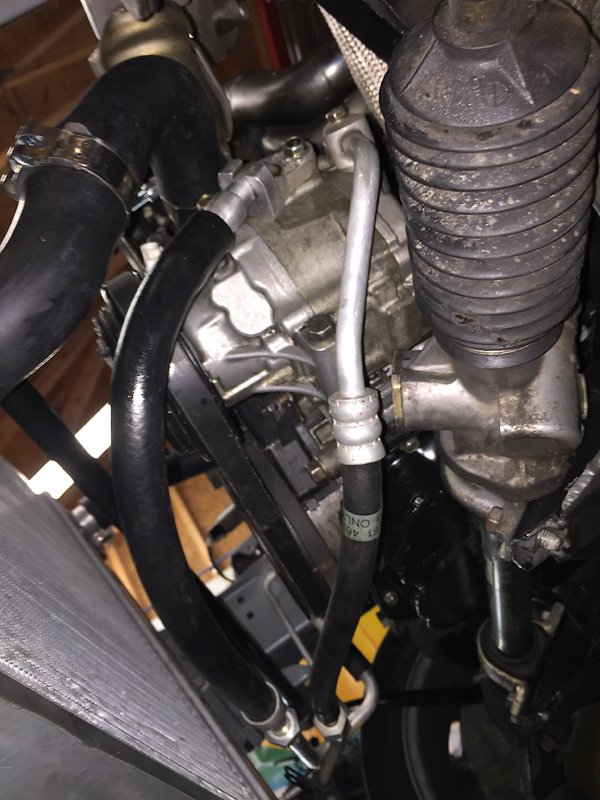
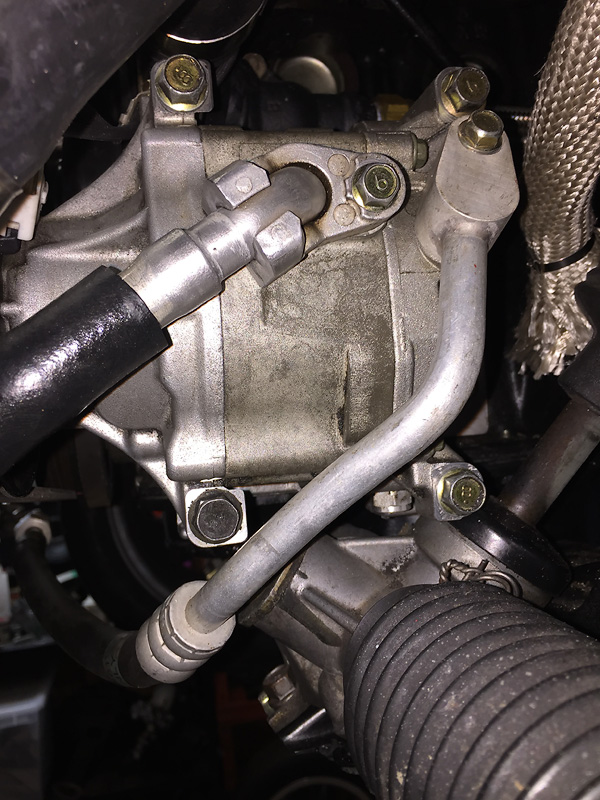
NB2 compressor and tensioner mounted up. Don't know if I can stand the rust on the hardware though. Mixing manifold and heater core line also installed.
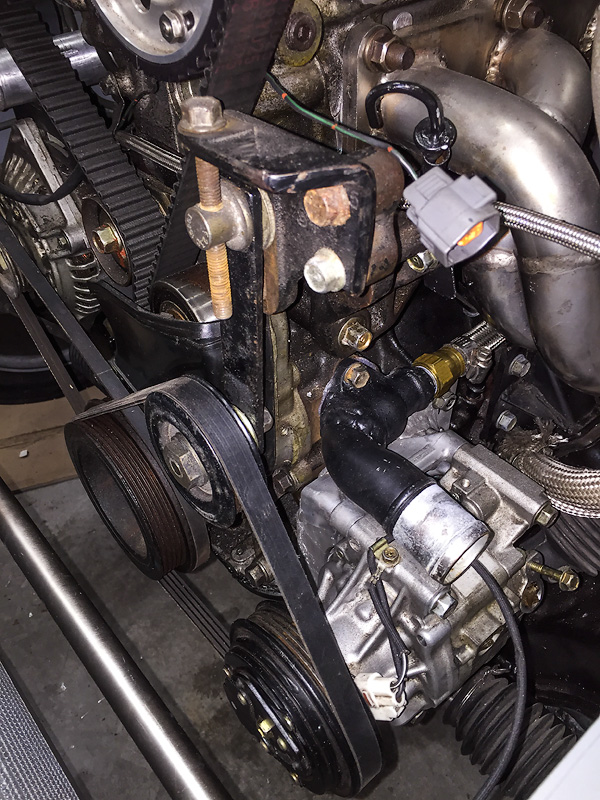
My biggest obstacle at this point are the AC lines from the compressor. The fittings on the NB2 (RX8) AC compressor are different and in different locations than the other Miata compressors. At this point I'll need to pick up some NB2 AC lines and then cut and braze to the NA compressor lines. After I get that sorted I can install the radiator and fill with coolant.
I can confirm that the siemens/ford/volvo fans are about an inch too thick to fit between an upgraded/thicker radiator and the sway bar. BUT I've tested the Volvo fan control/relay using one and two 100 watt .3 ohm resistors to create a high/low speed set up that works on a single speed fan. I need to decide between the straight blade 3000cfm 16" Spal I was using and a 16" Zirgo 2000 cfm curved blade. The low speed on the Spal IS significantly more quiet than high speed. Leaning towards the straight blade because Spal.
The volvo fan control/relay is a salvage yard bargain at < $10 in the yard. You get OE quality relays, connectors, mounting for a 30 amp circuit and twin gnd triggers. Going on my second summer with it and the fan on my Benz- zero issues.
NB2 compressor and tensioner mounted up. Don't know if I can stand the rust on the hardware though. Mixing manifold and heater core line also installed.
My biggest obstacle at this point are the AC lines from the compressor. The fittings on the NB2 (RX8) AC compressor are different and in different locations than the other Miata compressors. At this point I'll need to pick up some NB2 AC lines and then cut and braze to the NA compressor lines. After I get that sorted I can install the radiator and fill with coolant.
Reply
0
0
Thread Starter
Elite Member
iTrader: (5)
Joined: Jan 2005
Posts: 7,486
Total Cats: 372
From: Atlanta
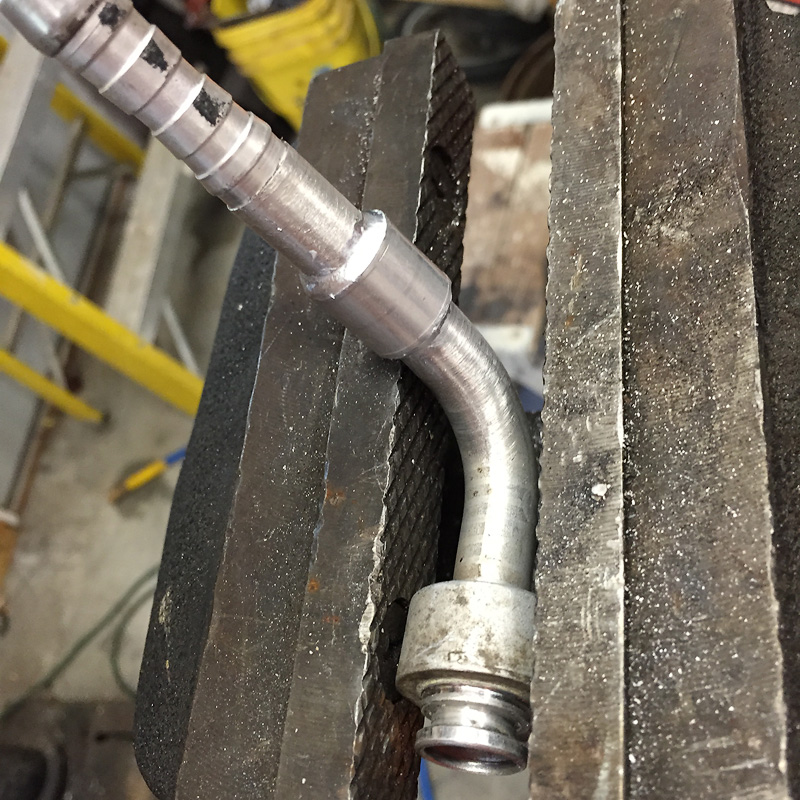
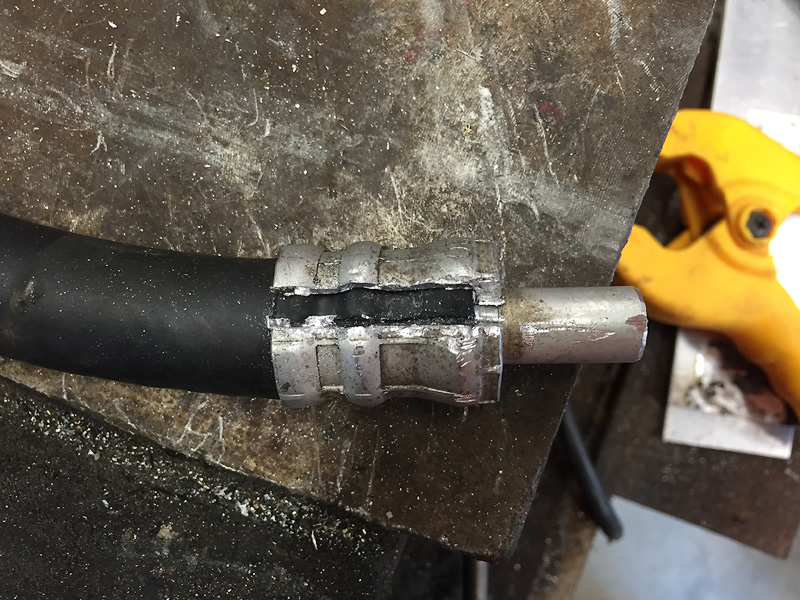
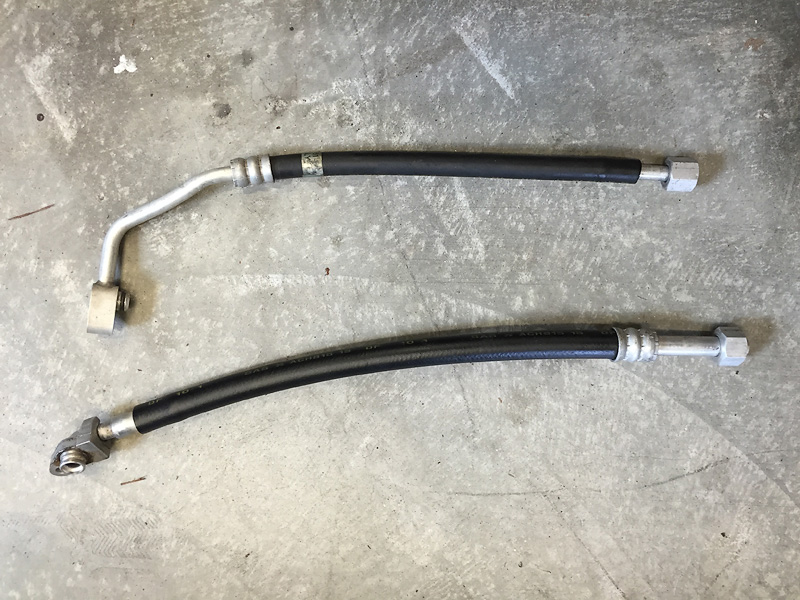
AC lines are resolved. Finally. Just need to get two ferrules/crimps- one on each. Compressor high side line is an original 04/05 high side, cut on the end with an NA high side barb fitting inserted. The other is the 04/05 low side fitting cut right after the 90� with a barb brazed on the end.
But that's not where it started. The first solution was using two other fittings cut at the compressor with barbs brazed on to make the 04/05-compressor-to-NA system conversion. It made for a very clean routing.
I brazed the joints using Alumiweld picked up from Harbor Freight. I've used this stuff before- though not for sealing, just attaching. Worked as before- fairly straight forward if you get good heat into the base metal. I ended up sleeving the high side (smaller diameter) since I couldn't get it to expand enough to make a joint w/o splitting. In the end I produced what looked to be a good brazed joint on both line fittings.
BUT when I pressure test both joints they produced bubbles in soapy water around the entire joint. And once this stuff is laid down, there's no removing it like an electrical solder joint.
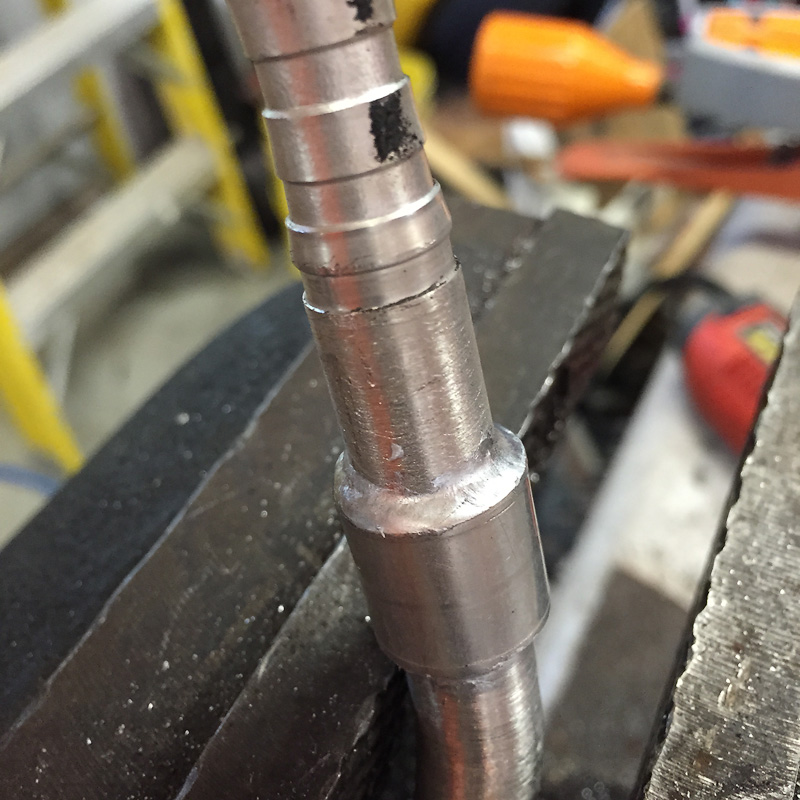
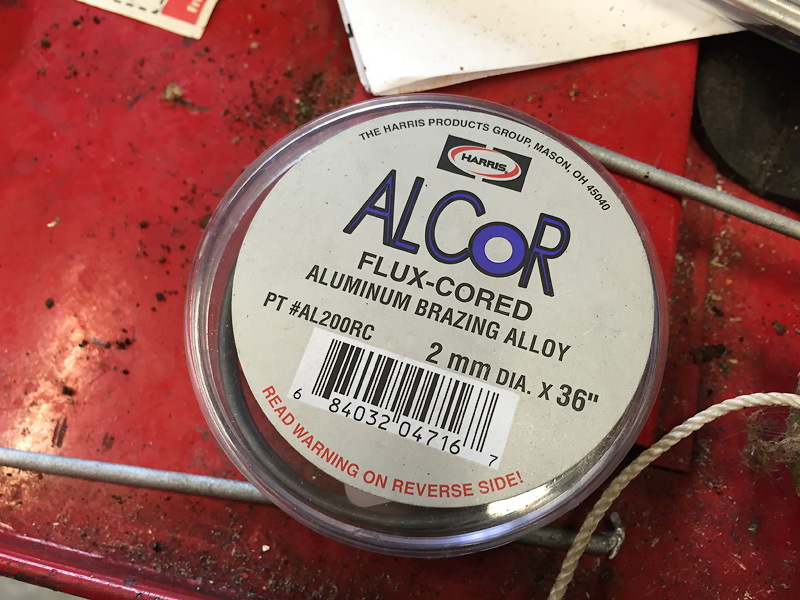
Back to square one- with enough fittings to finish the job, but not enough to make mistakes. Enter Alcor brazing alloy. This is what hvac techs use. $15-20 for 3ft - but you don't use much. This time I made a test joint (learn from my mistakes) with like tubing and pressure tested first. Used the same technique as aluminweld focusing the heat on the base metal. Got a sealed joint on the first try.
On to the actual job. Started by removing the barbs I need from existing AC lines (glad I salvaged these from way back). Cut the ferrules on both sides.
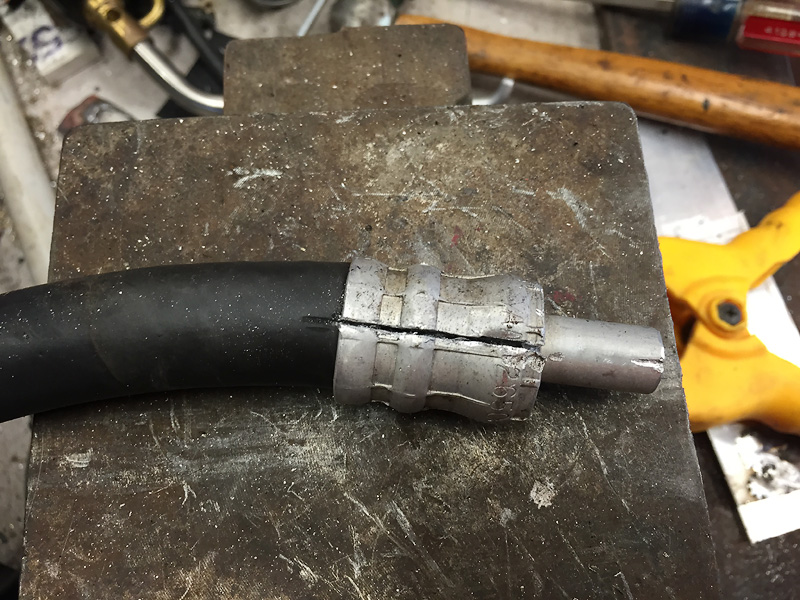
Pry apart until it splits and can be removed.
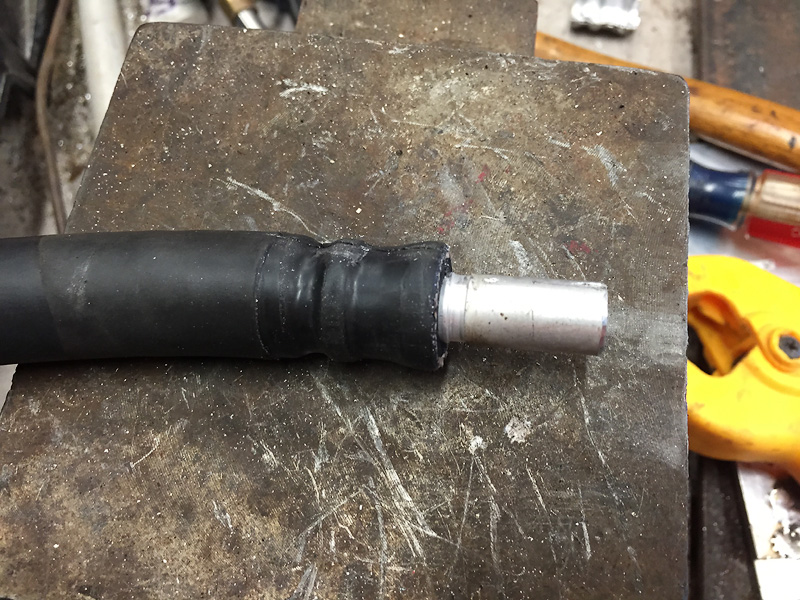
Then annealed and swaged the barb end that was pulled from the hose so it can accept the compressor fitting tube with enough tolerance for molten brazing alloy.
The Alcor flowed in much like sweating a copper pipe. Propane works well since it's capable of the 824�f temp needed for the brazing alloy. Produce a pressure-tested quality brazed joint on the first try.
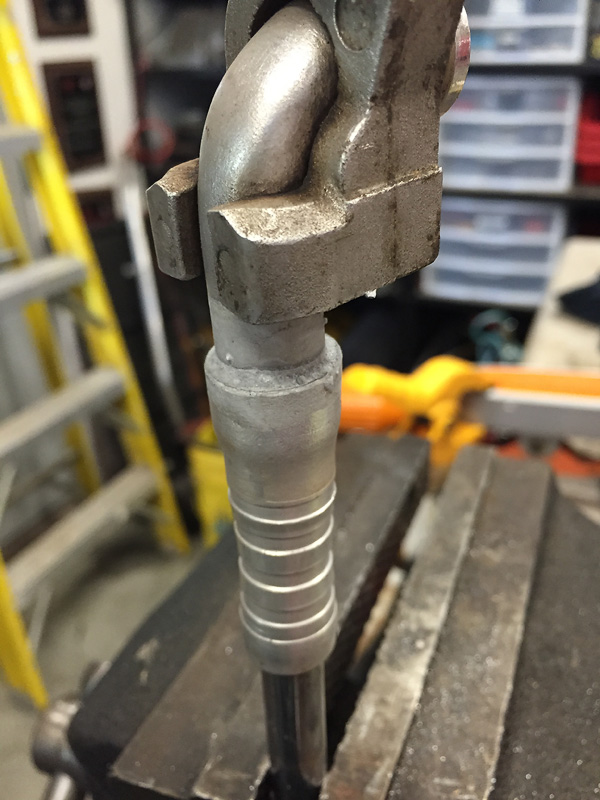
Final routing with plenty of clearance for both lines.
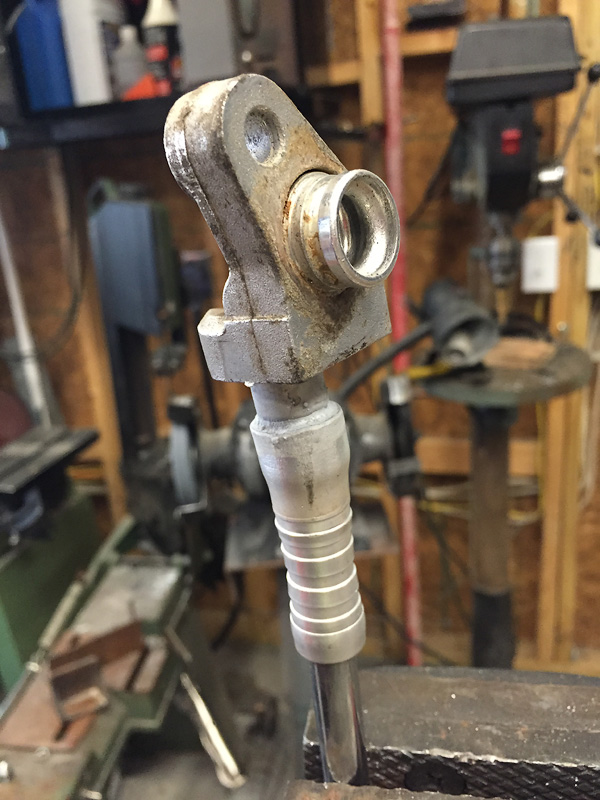
Lines ready for crimps. Once that's done and connections are made, the system will be ready to charge.
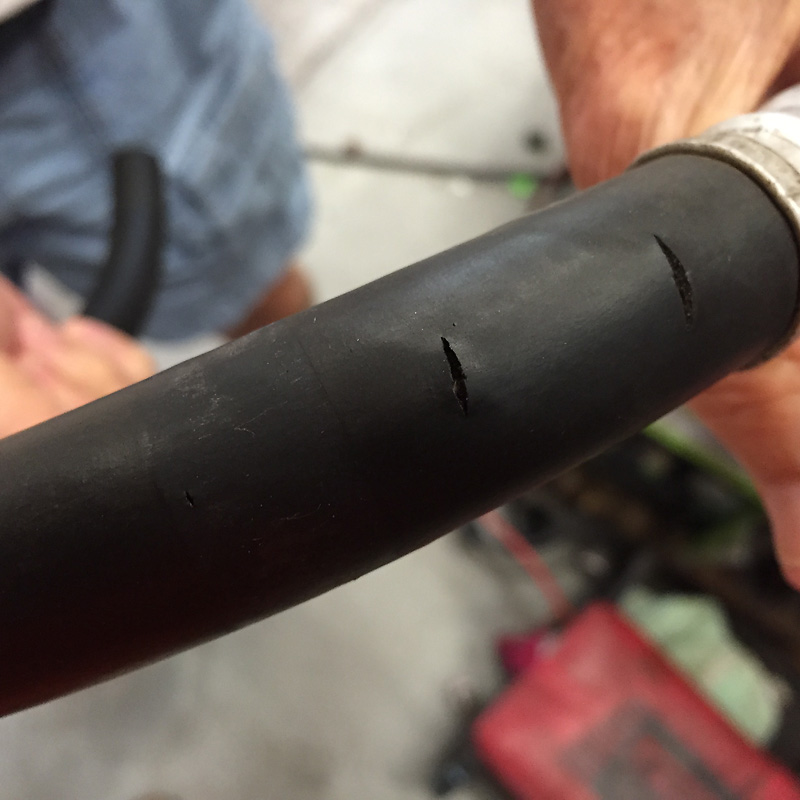
For the record- here's what 25 year old AC hoses typically look like.
But that's not where it started. The first solution was using two other fittings cut at the compressor with barbs brazed on to make the 04/05-compressor-to-NA system conversion. It made for a very clean routing.
I brazed the joints using Alumiweld picked up from Harbor Freight. I've used this stuff before- though not for sealing, just attaching. Worked as before- fairly straight forward if you get good heat into the base metal. I ended up sleeving the high side (smaller diameter) since I couldn't get it to expand enough to make a joint w/o splitting. In the end I produced what looked to be a good brazed joint on both line fittings.
BUT when I pressure test both joints they produced bubbles in soapy water around the entire joint. And once this stuff is laid down, there's no removing it like an electrical solder joint.
Back to square one- with enough fittings to finish the job, but not enough to make mistakes. Enter Alcor brazing alloy. This is what hvac techs use. $15-20 for 3ft - but you don't use much. This time I made a test joint (learn from my mistakes) with like tubing and pressure tested first. Used the same technique as aluminweld focusing the heat on the base metal. Got a sealed joint on the first try.
On to the actual job. Started by removing the barbs I need from existing AC lines (glad I salvaged these from way back). Cut the ferrules on both sides.
Pry apart until it splits and can be removed.
Then annealed and swaged the barb end that was pulled from the hose so it can accept the compressor fitting tube with enough tolerance for molten brazing alloy.
The Alcor flowed in much like sweating a copper pipe. Propane works well since it's capable of the 824�f temp needed for the brazing alloy. Produce a pressure-tested quality brazed joint on the first try.
Final routing with plenty of clearance for both lines.
Lines ready for crimps. Once that's done and connections are made, the system will be ready to charge.
For the record- here's what 25 year old AC hoses typically look like.
Reply
0
0