
93' Miata stolen and flipped build thread


Elite Member
Joined: Oct 2013
Posts: 2,764
Total Cats: 951
From: Cedar City, UT
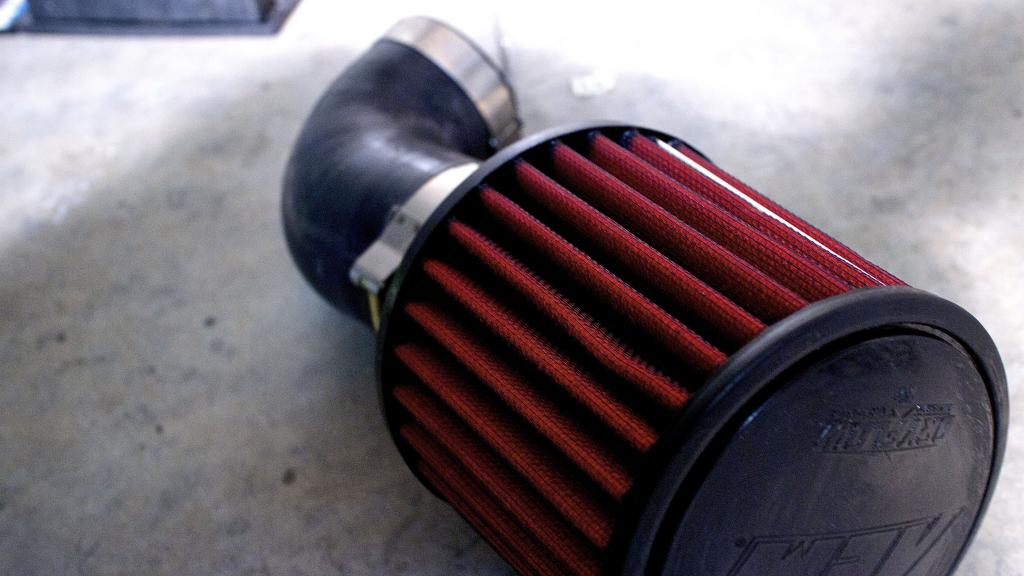
New AEM dryflow filter(old one got crushed in the crash)
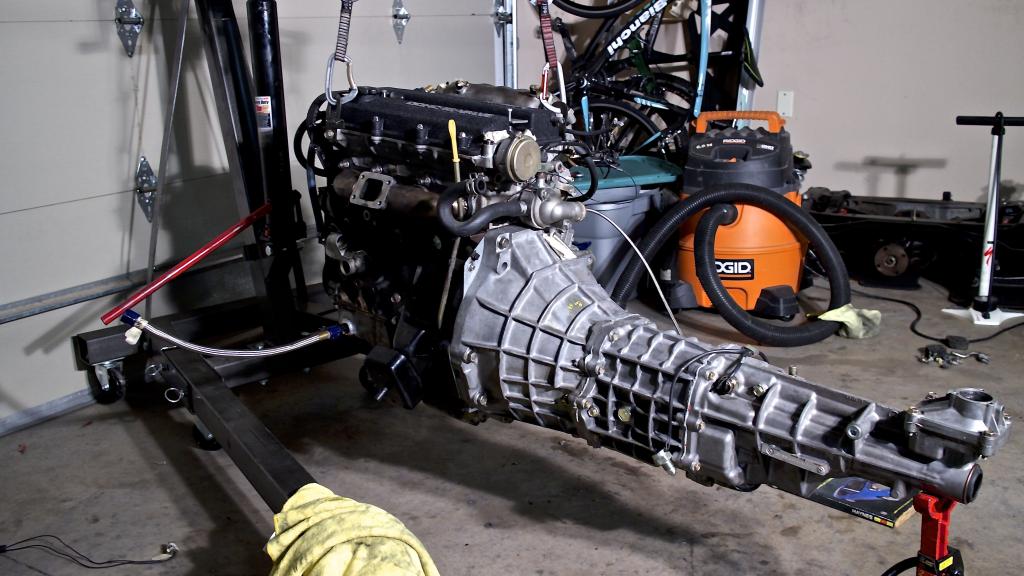
New rear main seal on engine
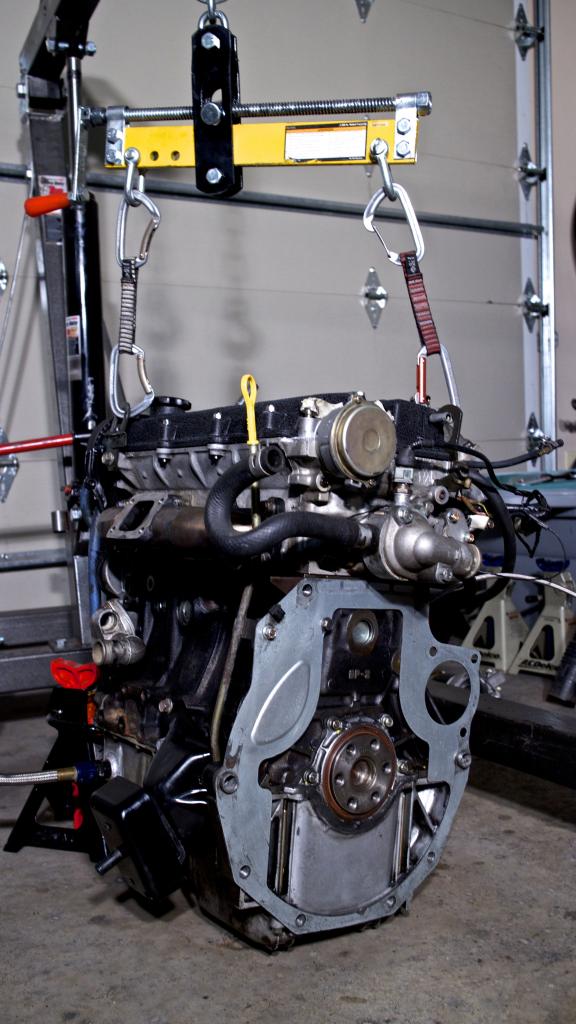
Flywheel on
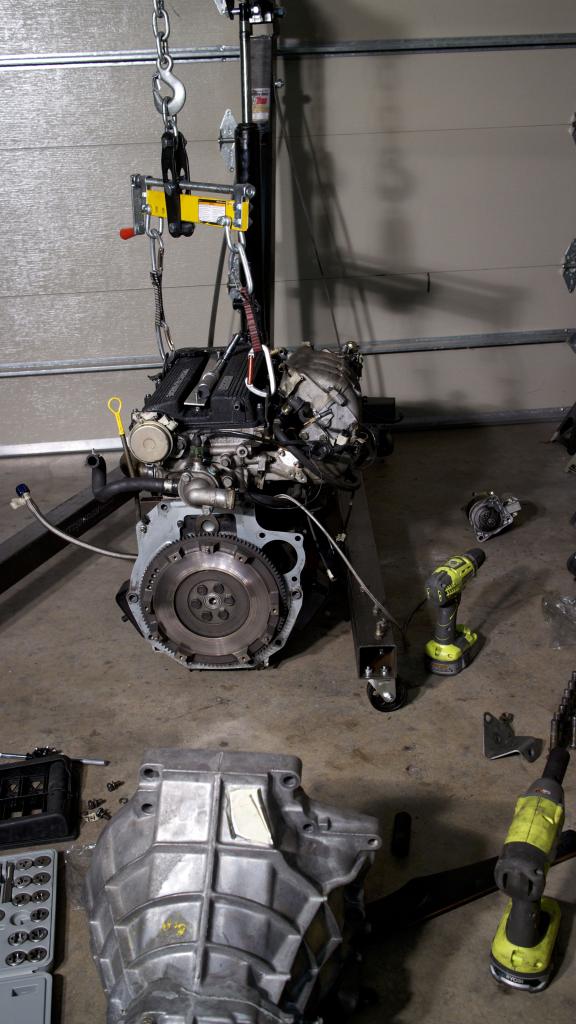
Transmission connected. Luckily I read a diy on making your own clutch alignment tool otherwise that would have been a bitch to put together.

New rear main seal on engine

Flywheel on

Transmission connected. Luckily I read a diy on making your own clutch alignment tool otherwise that would have been a bitch to put together.

Reply
 0
0

0

I suppose my question at this point is: What's stopping you from dipping into the extra money pool that you didn't plan on having when you first bought the car, and building a new harness from scratch specifically to work with Megasquirt, instead of carrying on with a factory harness and all the downsides they come with?
Besides the fact that wiring is scary, of course.
Besides the fact that wiring is scary, of course.
Reply
0
0

Newb
Joined: Oct 2013
Posts: 27
Total Cats: 4
From: Utah
Hooray u haz tahrboz! Looking good man. Can't wait to come down for Thanksgiving and help you out. Wish you'd have it running so we can tuuuuune your mega squirts. Definiteliy learn to read wiring. It's not rocket science once you have teh little "a ha that's how it works!" moment.
I'll be rewiring my engine harness when that time comes as well so maybe we can get that done at least.
Do you have the MS JimStim so I can show you some things virtually? Either way I can go through my log files with you on Megalog Viewer. Lisa called the scatter plots "pretty enough for the wall" and I have to agree.
Last edited by eduTechnic; Nov 22, 2013 at 10:21 AM.
Reply
0
0

I, for one, would not take the time/effort to re-wire the entire car. **** that, maybe if it was a race car. I mean you do all the work for what, a few saved lbs of wiring and potential electrical issues?
Reply
0
0

Oh, i didn't catch that it was his body harness that was hacked up.
That said, i did just go through removing and stripping all the extra bullshit no longer being used out of my body harness on my daily driver. Took about 4 hours. All lights seem to be brighter and voltage vital signs across the board seem much stronger. Not to mention it looks better.
Reply
0
0

BTW, on that rear main seal, I hope you used Mazda OEM or some other, similar known-quality source.
I installed a remanufactured engine almost a year ago. Ended up replacing both cam seals and the rear main seal over the course of the first six months. There's a lot of garbage out there. The rear main, in particular, is a PITA to redo.
I installed a remanufactured engine almost a year ago. Ended up replacing both cam seals and the rear main seal over the course of the first six months. There's a lot of garbage out there. The rear main, in particular, is a PITA to redo.
Reply
0
0
Elite Member
Joined: Oct 2013
Posts: 2,764
Total Cats: 951
From: Cedar City, UT
BTW, on that rear main seal, I hope you used Mazda OEM or some other, similar known-quality source.
I installed a remanufactured engine almost a year ago. Ended up replacing both cam seals and the rear main seal over the course of the first six months. There's a lot of garbage out there. The rear main, in particular, is a PITA to redo.
I installed a remanufactured engine almost a year ago. Ended up replacing both cam seals and the rear main seal over the course of the first six months. There's a lot of garbage out there. The rear main, in particular, is a PITA to redo.
Reply
0
0
BTW, on that rear main seal, I hope you used Mazda OEM or some other, similar known-quality source.
I installed a remanufactured engine almost a year ago. Ended up replacing both cam seals and the rear main seal over the course of the first six months. There's a lot of garbage out there. The rear main, in particular, is a PITA to redo.
I installed a remanufactured engine almost a year ago. Ended up replacing both cam seals and the rear main seal over the course of the first six months. There's a lot of garbage out there. The rear main, in particular, is a PITA to redo.
I went with an ebay timing belt kit before, the mitsuboshi is a great timing belt used by many OEM's, the GMB waterpump is quality as well. Almost all the seals and gaskets provided were trash. I used:
cam seals
front/rear main seals
valve cover gasket
I ended up replacing the cam seals, front main, and valve cover gasket. Although the front main wasn't leaking, after learning my lesson with the cam seals I yanked the ebay one out and went oem.
Reply
0
0
Elite Member
Joined: Oct 2013
Posts: 2,764
Total Cats: 951
From: Cedar City, UT
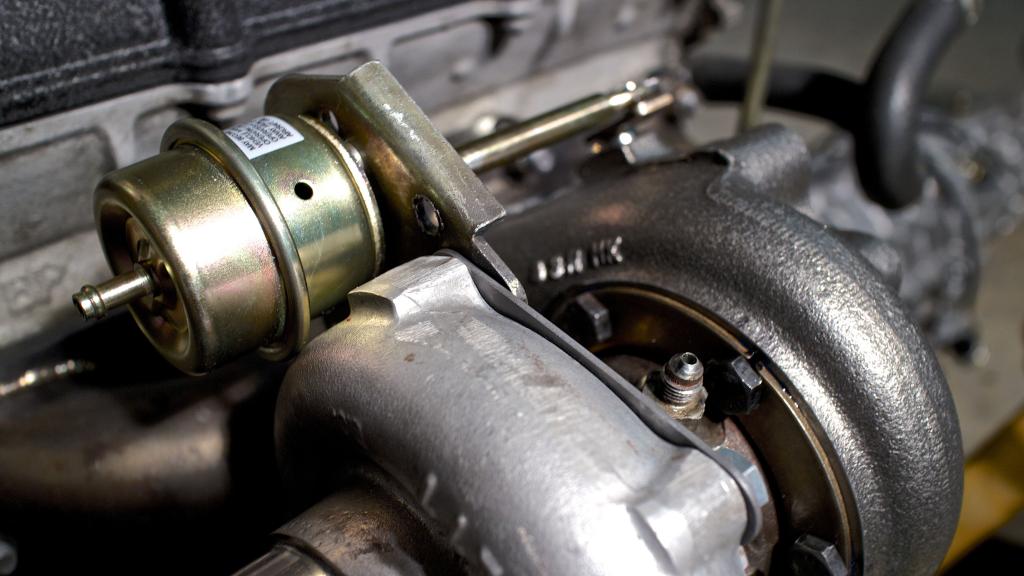
Spent last night clocking the turbo back to the correct angle. I think I nailed it. To my research you want to be under 10� from vertical. Hard to get it perfect with the engine on the ground but I believe it is close enough.
When asking the wastegate if it dressed to the left or the right it said no. Don't seem to see any bends in relation from the rod to the actuator housing. I may need to put another washer in between the actuator and the mount to make sure it doesn't rub on the compressor housing. It isn't rubbing very bad but it is still touching slightly.
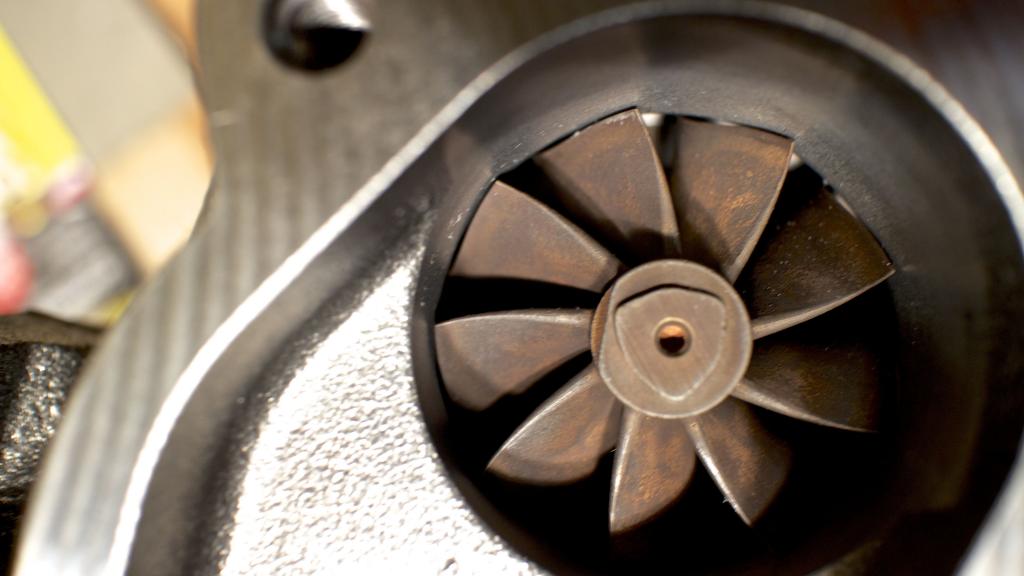
Coolant inlet looks to be about right.
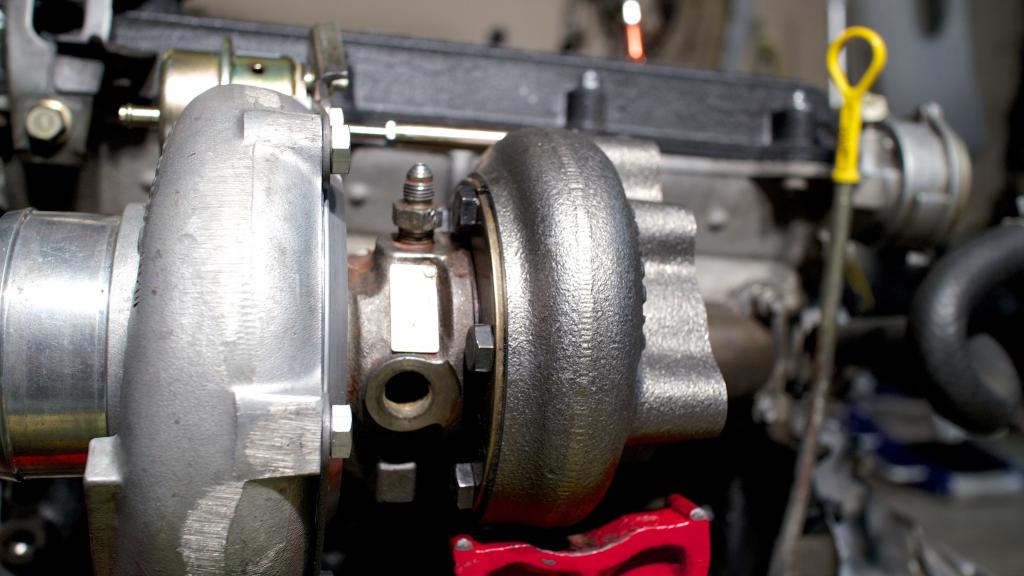
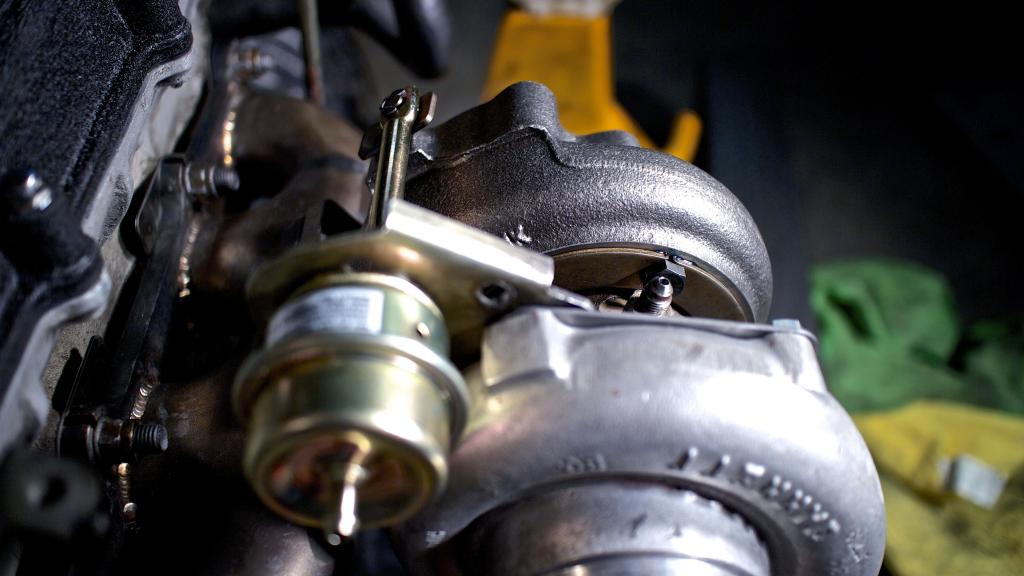
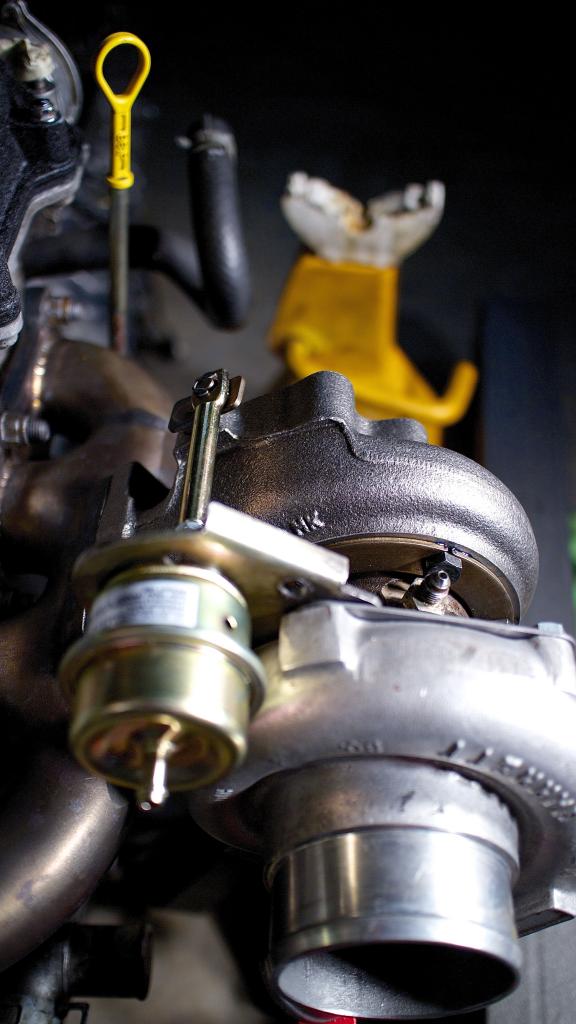
What do you guys think? Obviously might have to play with it once I actually get my TSE studs and get the engine in the car, but roughly looks about right.
That was a tedious job.
When asking the wastegate if it dressed to the left or the right it said no. Don't seem to see any bends in relation from the rod to the actuator housing. I may need to put another washer in between the actuator and the mount to make sure it doesn't rub on the compressor housing. It isn't rubbing very bad but it is still touching slightly.

Coolant inlet looks to be about right.


What do you guys think? Obviously might have to play with it once I actually get my TSE studs and get the engine in the car, but roughly looks about right.
That was a tedious job.
Reply
0
0

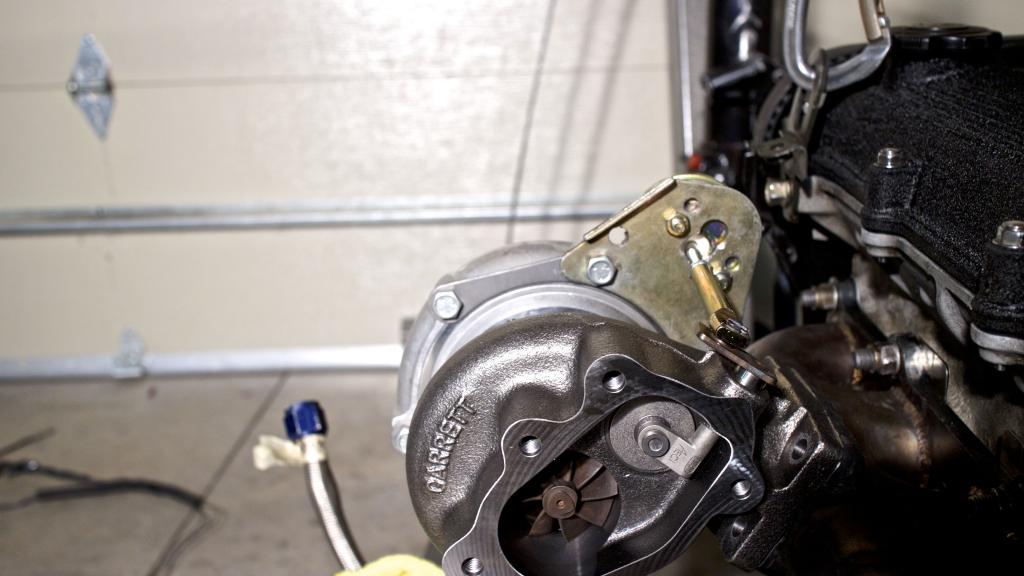
Looks good to me. Might want to keep the compressor housing and even the CHRA off until it's in the engine bay. CHRA off to keep it from getting damaged, and the compressor housing off for final intercooler fitting, unless you're just putting back on what was already there.
Reply
0
0
Elite Member
Joined: Oct 2013
Posts: 2,764
Total Cats: 951
From: Cedar City, UT
Looks good to me. Might want to keep the compressor housing and even the CHRA off until it's in the engine bay. CHRA off to keep it from getting damaged, and the compressor housing off for final intercooler fitting, unless you're just putting back on what was already there.
Reply
0
0

Elite Member
Joined: Oct 2013
Posts: 2,764
Total Cats: 951
From: Cedar City, UT
More rust removal...
Post Paint stripper

After too much wire wheel/sanding
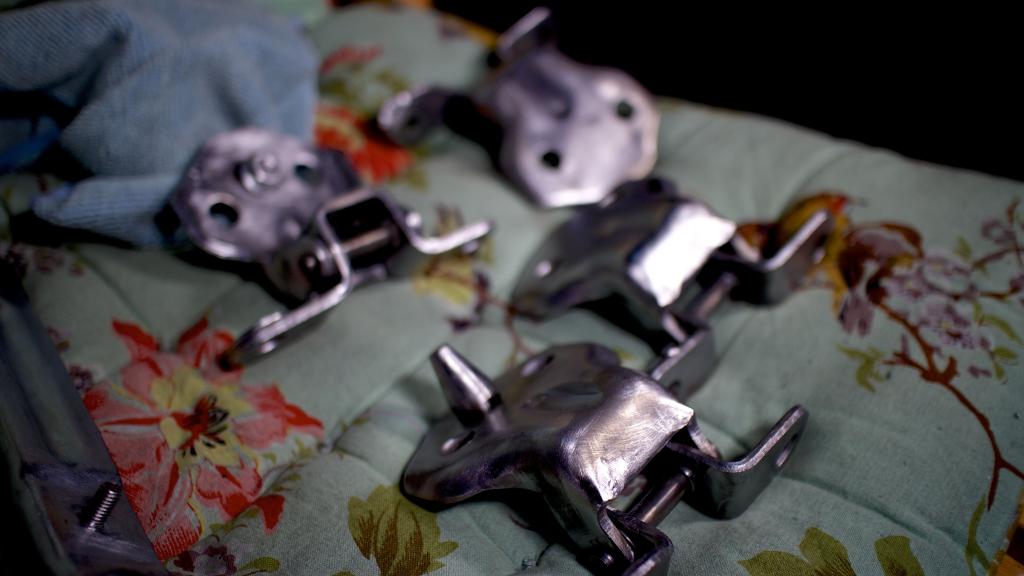
Found a ton of surface rust on the pedal assembly.
Pre
Post
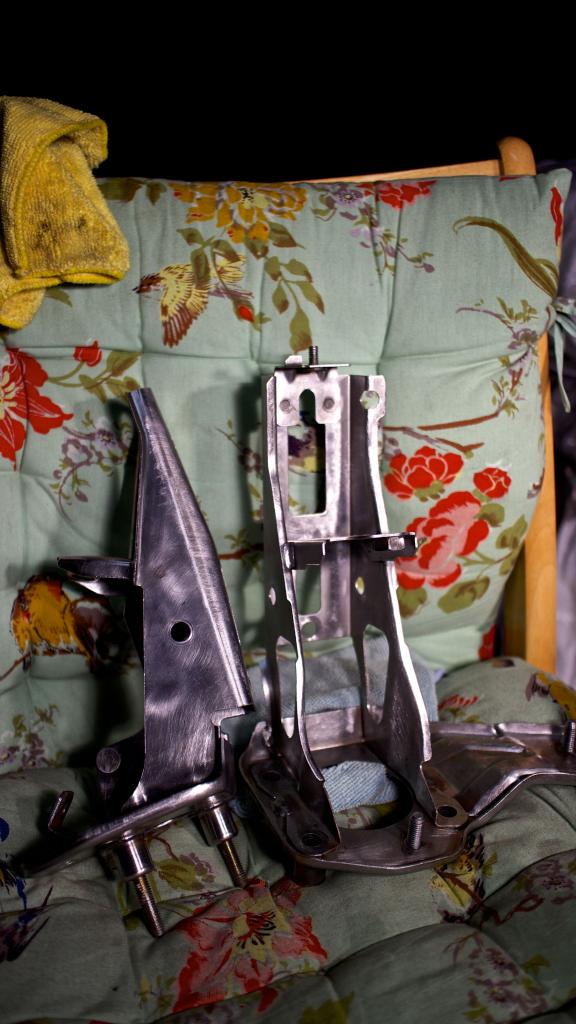
Also cleaned up the ECU bracket a little.
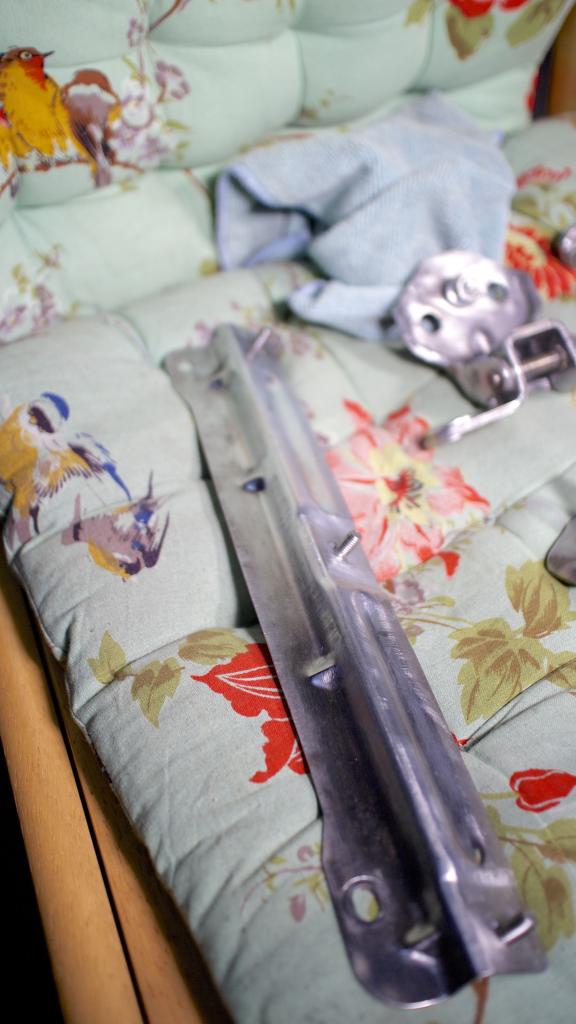
Going to do a satin black on all of them
Post Paint stripper

After too much wire wheel/sanding

Found a ton of surface rust on the pedal assembly.
Pre

Post

Also cleaned up the ECU bracket a little.

Going to do a satin black on all of them
Reply
1
1

Joined: Sep 2010
Posts: 8,154
Total Cats: 1,093
From: Lake Forest, CA
Reply
1
1

Junior Member
Joined: Aug 2006
Posts: 239
Total Cats: 5
From: Cedar City, UT
Mine is a 97, otherwise if it came down to it I could have just driven over and compared the wiring to find out where everything goes, but not sure what differences it would have.. OBD2 I think for example
Reply
0
0
Elite Member
Joined: Oct 2013
Posts: 2,764
Total Cats: 951
From: Cedar City, UT
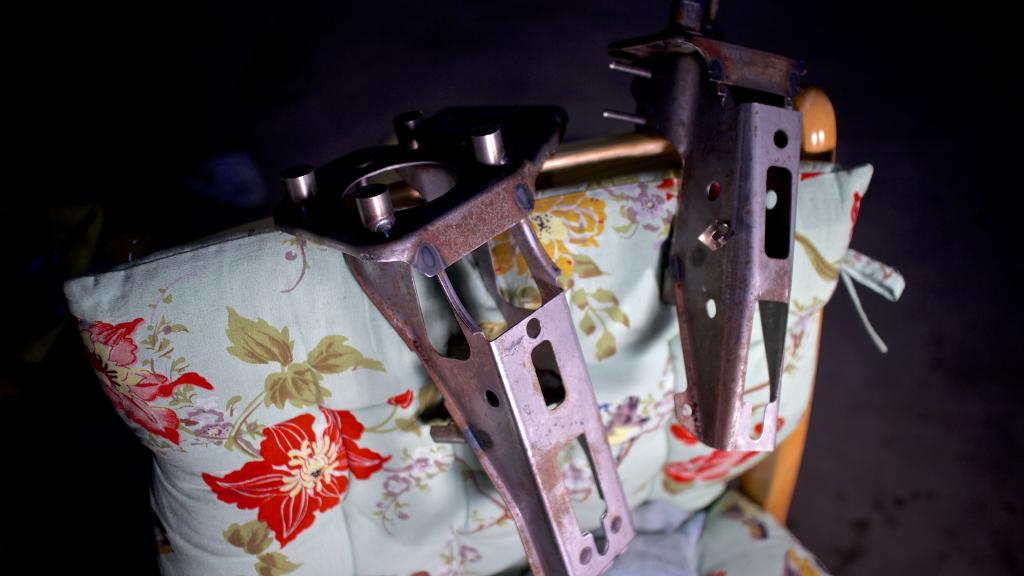
Not the greatest photos but here is the finished product. I let the paint cure all day long under some heat lamps so it wouldn't chip when I reassembled the pedal assembly.
Clutch
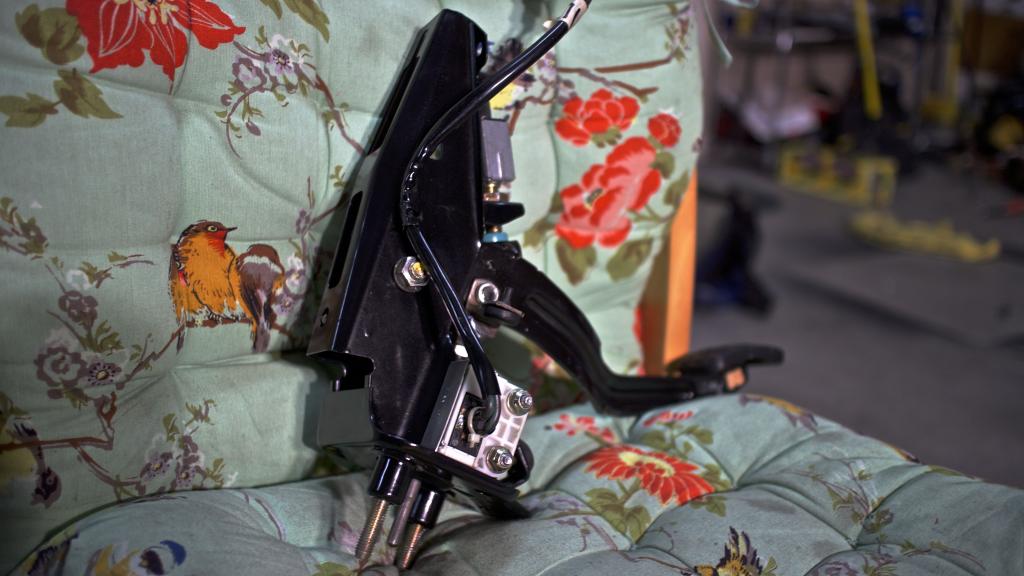
Gas/Brake
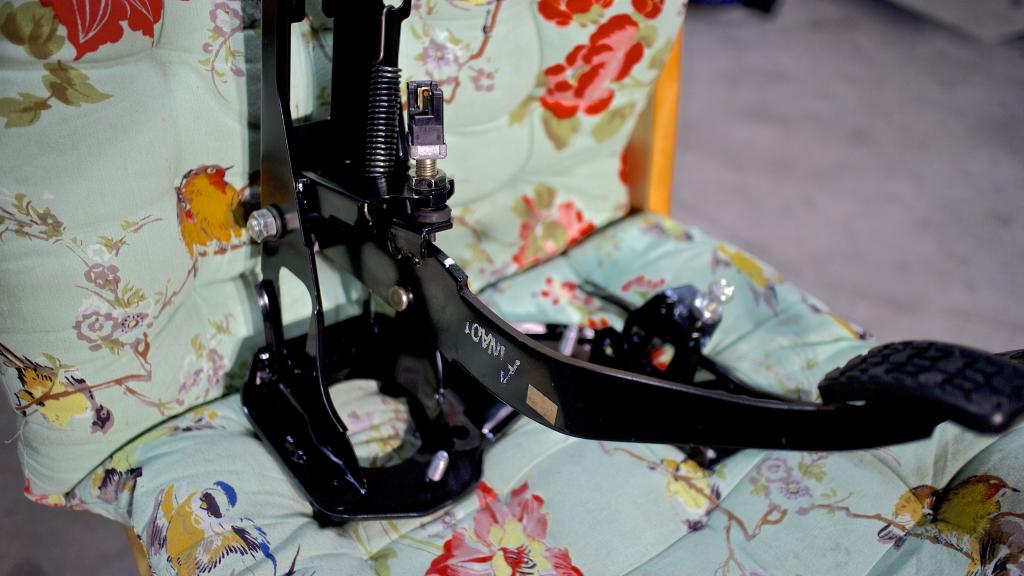
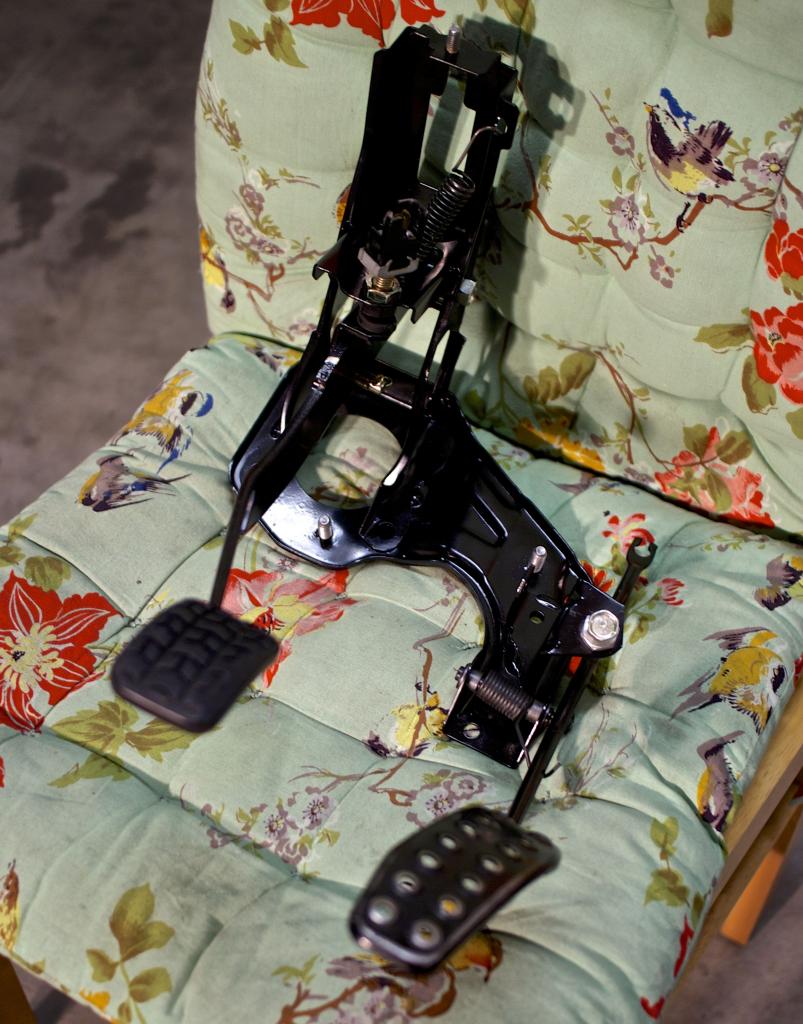
ECU Bracket
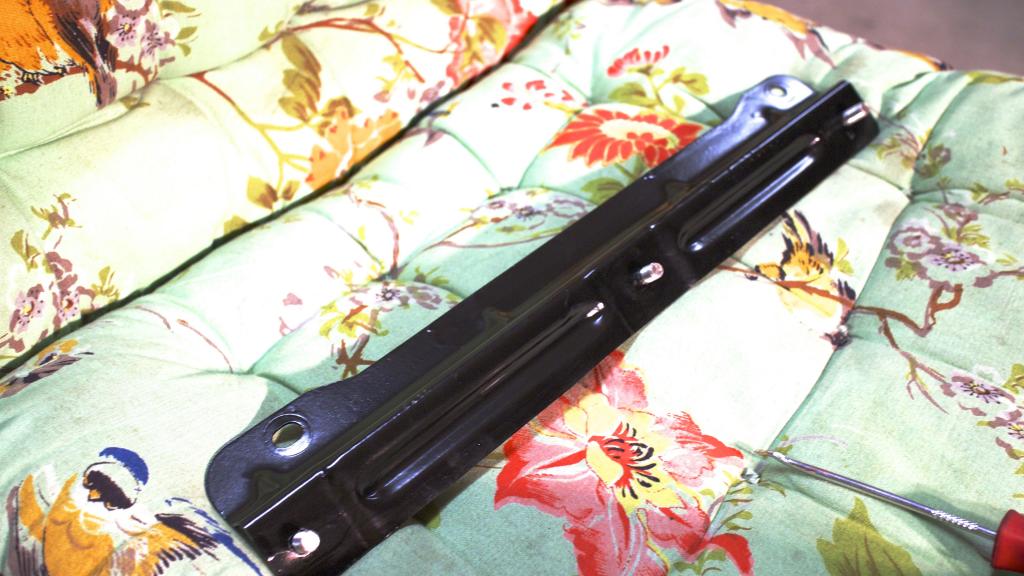
Door hinges
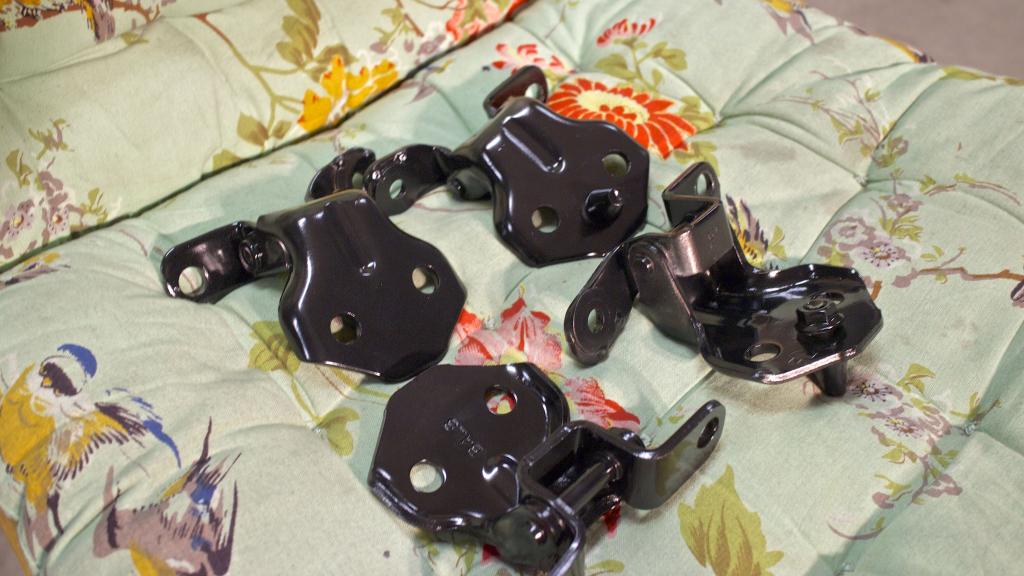
That was quite the project.
Clutch

Gas/Brake


ECU Bracket

Door hinges

That was quite the project.
Reply
0
0


