
93' Miata stolen and flipped build thread


Elite Member
Joined: Oct 2013
Posts: 2,764
Total Cats: 951
From: Cedar City, UT
Yup! Easy and super cheap. I think it was $20 shipped for the dye and the top coat.
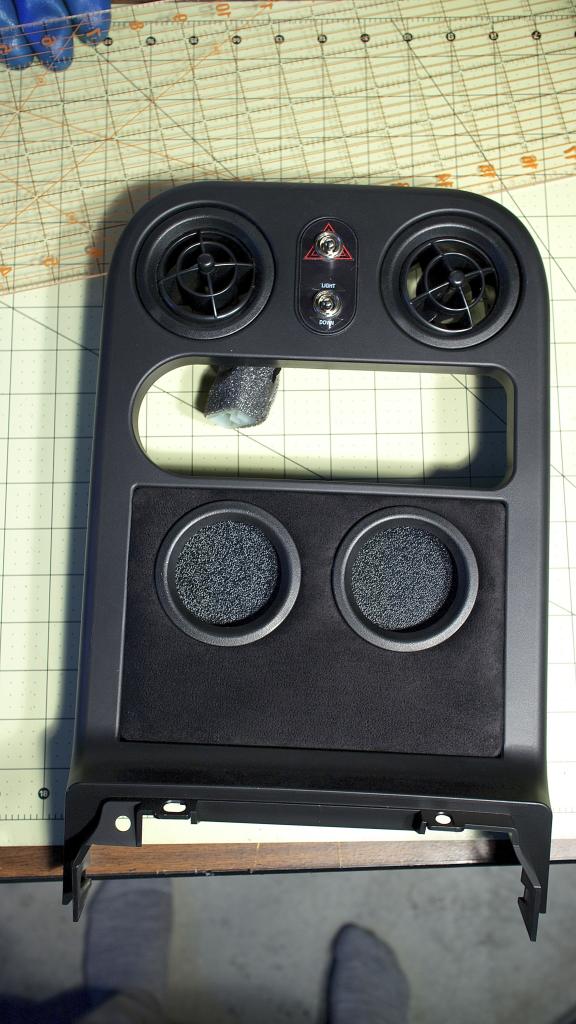
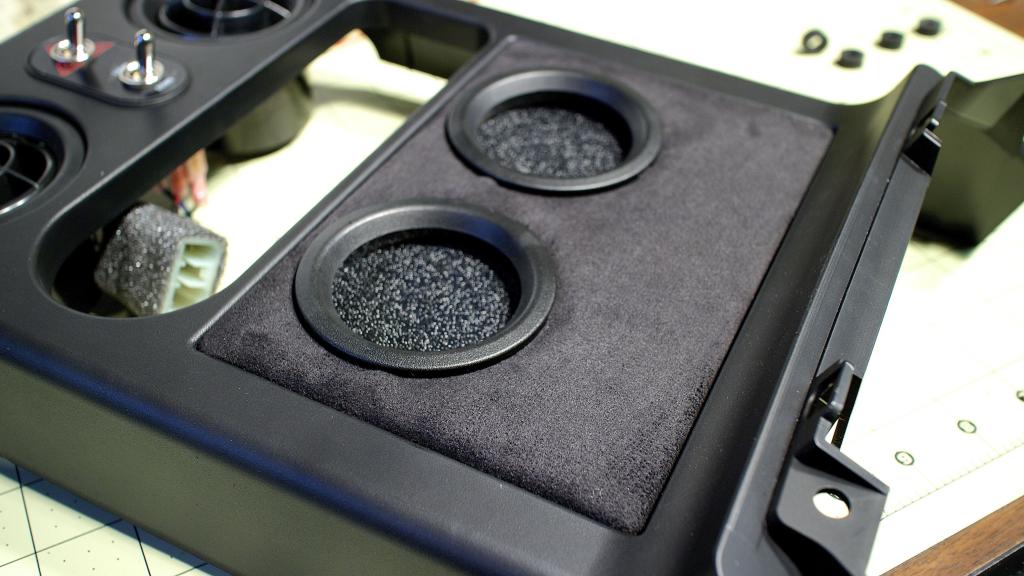
OK, curiosity got the better of me and I couldn't wait.
Damn, sometimes, things just work out perfectly. So pleased with how this will look. The fitment is so tight you have to squeeze it in, I think I got lucky on this one!

OK, curiosity got the better of me and I couldn't wait.
Damn, sometimes, things just work out perfectly. So pleased with how this will look. The fitment is so tight you have to squeeze it in, I think I got lucky on this one!


Reply
 3
3

3

Joined: Sep 2010
Posts: 8,157
Total Cats: 1,094
From: Lake Forest, CA
Every time I think I've got a handle on this project, you go and do something that looks like that.
Props.
Props.
Reply
0
0


Reply
0
0


Newb
Joined: Oct 2013
Posts: 27
Total Cats: 4
From: Utah
lol wut? You talking about Miatas or girls now? I, um, too easy.../8th grader giggle
Reply
-3
-3
Elite Member
Joined: Oct 2013
Posts: 2,764
Total Cats: 951
From: Cedar City, UT
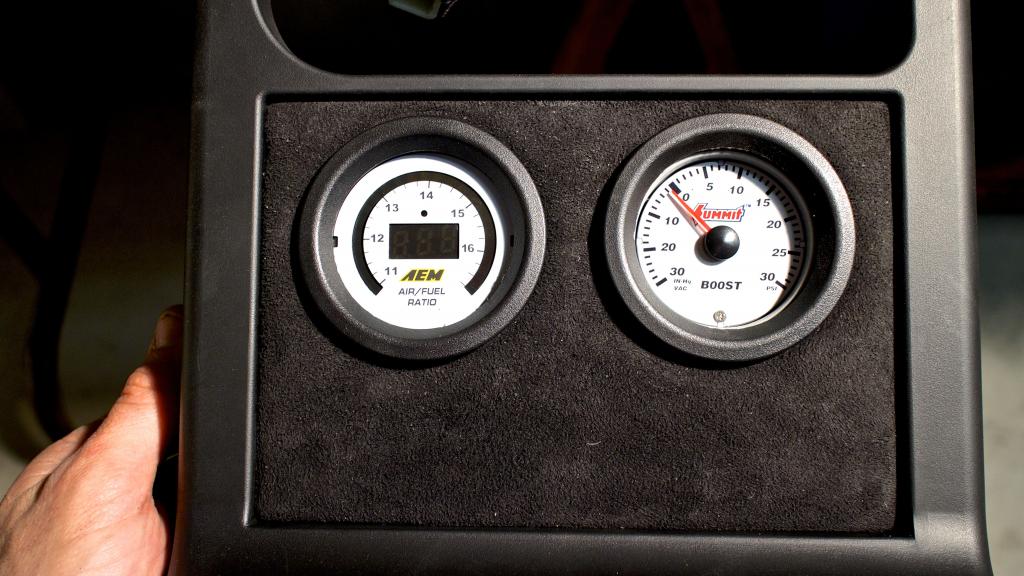
Wow this is harder than I thought it would be.
Need to find a way to tension the gauges tight so they don't move around. Also need to buy some plexiglass to replace the glass with. But I think it should turn out pretty good once I can get those done.

Need to find a way to tension the gauges tight so they don't move around. Also need to buy some plexiglass to replace the glass with. But I think it should turn out pretty good once I can get those done.


Reply
2
2

Finally finished reading this thread from beginning to end. Can honestly say I didn't expect it to turn into an all out restoration at the beginning of the thread. Must say I am truly impressed to the attention to detail and how quickly things got done here.
Keep it up! INB4 startup video
Keep it up! INB4 startup video
Reply
0
0
Elite Member
Joined: Oct 2013
Posts: 2,764
Total Cats: 951
From: Cedar City, UT
Hah, it didn't start as a full blown restoration but it slowly evolved to that due to Turbofan/Hornetball/Vlad and several others dictating the level of OCD I would go to.
Got the radiator cleaned up and slotted into the car. It took a lot of work to get it all cleaned up.
First started with some degreaser and a steam cleaner to clean all the dirt/bugs/grease out of the radiator fins. Glad I did, there were so many bugs in the radiator the water wouldn't penetrate the other side in some places. Overheating is no bueno!

Dirt fans

Needed to put some epoxy on a broken fan leg

Cleaned the fans

There were a lot of hard water stains and other scuffs on the radiator. I know 90% is covered by the radiator shroud but I decided to give it a quick polish "while it was out of the car"

All polished up Also spent an hour and a half straightening all the radiator fins. I was amazed how many were bent. It isn't pretty since I don't have a radiator fin tool but I used a dentist pick to get them all straight.


One of the fan brackets had a broken bolt stud in it so I needed to redrill & tap it

all assembled (yes I know the brackets are on upside down, I fixed that!)
I had some clearance issues with the fan shrouds with the sway bar. So instead of messing with it for another hour I just drilled a new hole which gave me juuusssttt enough clearance of the sway bar.


And all slotted in the car! Looks really good. Decided to leave the Miataturbo.net sticker on...you know...gotta represent the only reason the car has gotten this far this quickly!

Next is the intercooler.
Reply
2
2

No no, the only reason the car has gotten this far this quickly is you're a freak of nature. Don't forget that Jeffy.
Reply
3
3
Elite Member
Joined: Oct 2013
Posts: 2,764
Total Cats: 951
From: Cedar City, UT
 I would have been stuck at several points without you guys.
Reply
0
0

Elite Member
Joined: Mar 2006
Posts: 1,574
Total Cats: 106
From: Schwarzenberg, Germany
Hi Jeff, when you put the dashboard back in did you put on new wheaterstriping on the dashboard (I am just about to re-assemble mine and want to make sure there are no creaks and nasty noises afterwards)
Thanks!
Thanks!
Reply
0
0
Elite Member
Joined: Oct 2013
Posts: 2,764
Total Cats: 951
From: Cedar City, UT
From what I have read most recommend replacing the weather stripping under the defrost vents near the edge of the dash. Also I would just place it wherever you notice a potential rubbing point. I like to tap various plastic pieces and see if there are any rattling/odd noises that come from the area I shake/tap.
OK so here is the problem I'm having with the intercooler. It looks like the old intercooler was attached to the hood latching bracket. But seeing as I will be running hood pins, the top bracket on the intercooler is now kinda useless, unless I can come up with a bracket that will attach it to the 2 M6x1.0 bolt holes that were meant for the hood bracket.

Also this side bracket is odd...it looks like the intercooler was mounted off center to the very right of the radiator.

The left side is blank. There are only 2 mounting points for the intercooler, which seem about 2 too few for how damn heavy the thing is.

Anyone have any good ideas? I won't have access to a welder until next week, so hopefully a bolt & cut solution.
Reply
0
0
Stop while you're ahead and buy a fab9 intercooler. Pretty and perfectly new, bolt on to those diagonal threads on either side, and probably a better intercooler than that one.
Reply
1
1

This is exactly what I was thinking. With the lengths you've gone through to make this car what it is... a perfect fitting intercooler would definitely be beneficial
Reply
0
0
Elite Member
Joined: Oct 2013
Posts: 2,764
Total Cats: 951
From: Cedar City, UT
Reply
0
0


