
93' Miata stolen and flipped build thread


Reply
 0
0

0

Elite Member
Joined: Oct 2013
Posts: 2,764
Total Cats: 951
From: Cedar City, UT
Then after that put some sealant on it to seal the plastic from oxidation.
*edit* what is it with the Revlimiter guy? People seem to worship the ground he walks on...at least on the Mroadster site...
Last edited by Jeffbucc; Dec 13, 2013 at 12:37 AM.
Reply
1
1


It is quite simple. 300 grit on a block followed by wet 2000 grit and then polishing. If you don't have a random orbital buffer that is the only thing that would take a while, is polishing by hand.
Then after that put some sealant on it to seal the plastic from oxidation.
Then after that put some sealant on it to seal the plastic from oxidation.
I'm going to go through this thread and copy and paste some of your more specific instructional posts in to a Word document for my future reference.
*edit* what is it with the Revlimiter guy? People seem to worship the ground he walks on...at least on the Mroadster site...
He's got tons of tasteful aesthetic modifications and their vintage flavor gives him props on CR.
He's got lots of shiny bits on the interior and stripes on the exterior, which earns him some favor from the wine-and-cheesers.
He's got a full FM2 turbo setup which earns him some begrudging respect from the "I hate everything" curmudgeons on Trubo.net.
Etcetera.
Reply
0
0
Elite Member
Joined: Oct 2013
Posts: 2,764
Total Cats: 951
From: Cedar City, UT
Any preference for products? This has been on my "to-do someday" list. It's the sort of subtle but meaningful improvement I can appreciate.
I'm going to go through this thread and copy and paste some of your more specific instructional posts in to a Word document for my future reference.
.
Then go to O'Reilly auto store or vato-zone and pick up some sandpaper. Just make sure your 2k is wet/dry sandpaper. Most hardware stores only carry 400 at the most.
I have really pricy polishing compounds so I won't recommend those, but meguiars plastic polish will work just fine as long as you spend your time with the 2k sandpaper and get any deep scratches out of the lens.
The "feel" of the plastic after your wet sandpaper should be really smooth. You shouldn't be able to feel any scratches with your nails.
Try to vary your polishing patterns when doing it by hand. If you hold the towel in the same spot and don't alternate then the fibers will scratch the plastic. When the polish becomes clear or you can't see it anymore than you can stop and wipe it off and inspect if you need to apply more. If you stop before the polish compound breaks down then the abrasives haven't left the product leaving you with a lightly marred surface still. A little polish goes a long way. Glop too much on and you are just wasting money/time.
Sorry maybe too much info but I'm a nerd about car detailing (obviously).
Oh also when grinding the lettering off make sure you don't just sand that one spot, take the time to go over the entire surface evenly and your results will be much better.
Reply
2
2

Elite Member
Joined: Jul 2007
Posts: 3,215
Total Cats: 151
From: Houston, TX
Keith Tanner MegaDork
I've tried cheap mattress topper memory foam in seats, and I was not impressed. Simply too soft.
I ended up using Backsaver foam from Pegasus, which is of course anti-GRM - supporting race parts suppliers! But it worked beautifully, extending the time I could spend in the seat from 30 minutes to over 14 hours. Someone else on the GRM forum figured it was probably Confor foam, which is available from other sources. The stuff I used was 1" thick and blue.
If your goal is more support, then I suspect you can find the foam you need in a craft store. The memory foam would work well for fine-tuning the fit and avoiding pressure points in my opinion.
Found this hope it helps, Jake
Edit: Found it, Confor Foam CF45 is the blue version Kieth has. From the website below they suggest stacking different density's ie 1" medium on top with 1" hard below.
http://www.aviationsupplyonline.com/....em?pid=548924
Reply
2
2
Elite Member
Joined: Oct 2013
Posts: 2,764
Total Cats: 951
From: Cedar City, UT
Keith Tanner MegaDork
But it worked beautifully, extending the time I could spend in the seat from 30 minutes to over 14 hours.
If your goal is more support, then I suspect you can find the foam you need in a craft store. The memory foam would work well for fine-tuning the fit and avoiding pressure points in my opinion.
Found this hope it helps, Jake
Confor Foam
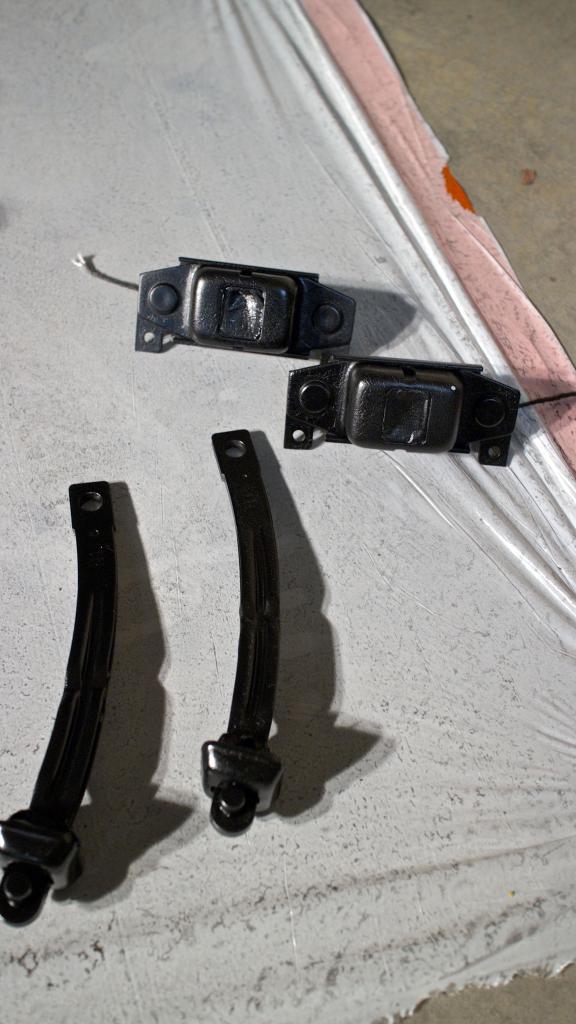
Just got word from the Zinc plating shop that they are shipping today so I should hopefully(big hopefully) have them tomorrow. I hope it can make it tomorrow, it is only 5 hours north in Logan, UT...did I mention I was full of hope?
I would recommend them for any zinc plating you want to do. They had to do some additional cleaning to do and they didn't charge me for it like most would. So out the door with shipping it cost $115 for 50, repeat, 50 POUNDS of bolts and bracket.
Talk to Todd and say Jeff sent yah.
Cache Valley Plating
700 W 200 N # B4
Logan, UT 84321
(435) 755-8000
Reply
1
1
Elite Member
Joined: Oct 2013
Posts: 2,764
Total Cats: 951
From: Cedar City, UT
Big update. Got a lot done last night.
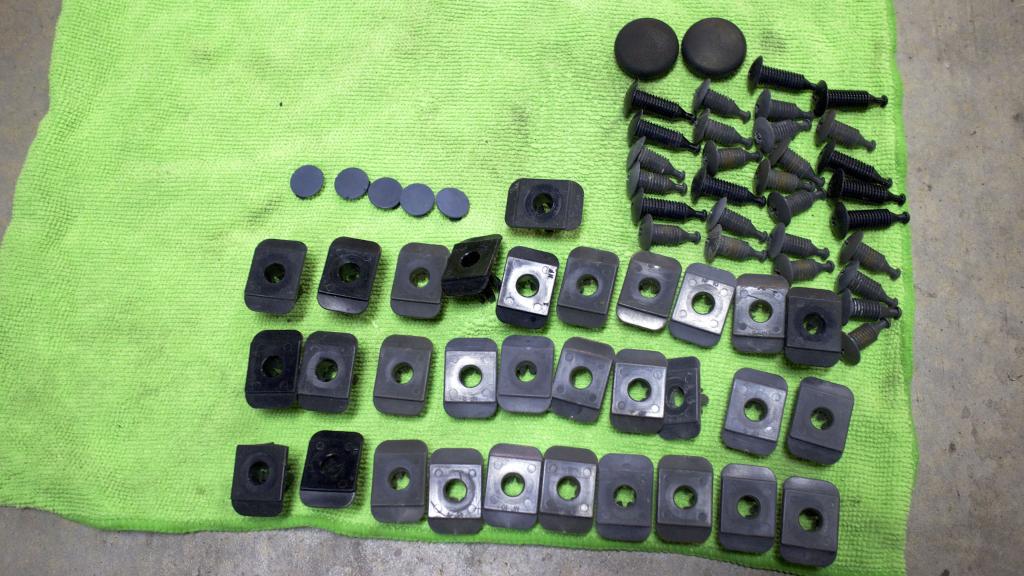
Cleaned more paint off of the plastic fasteners....
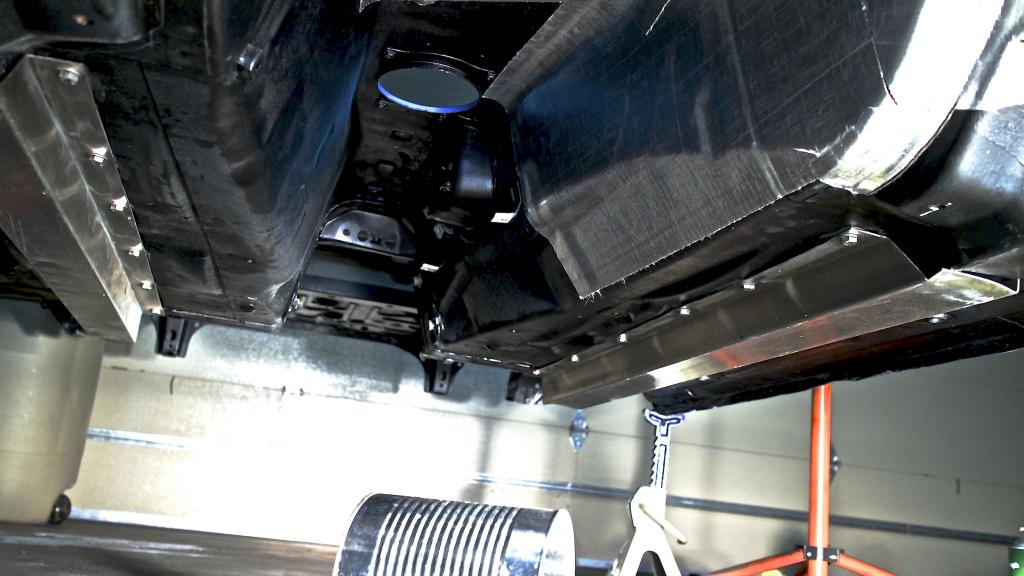
Frame rails bolted on. Couldn't find my sealant so I just used black gasket maker in between each hole.
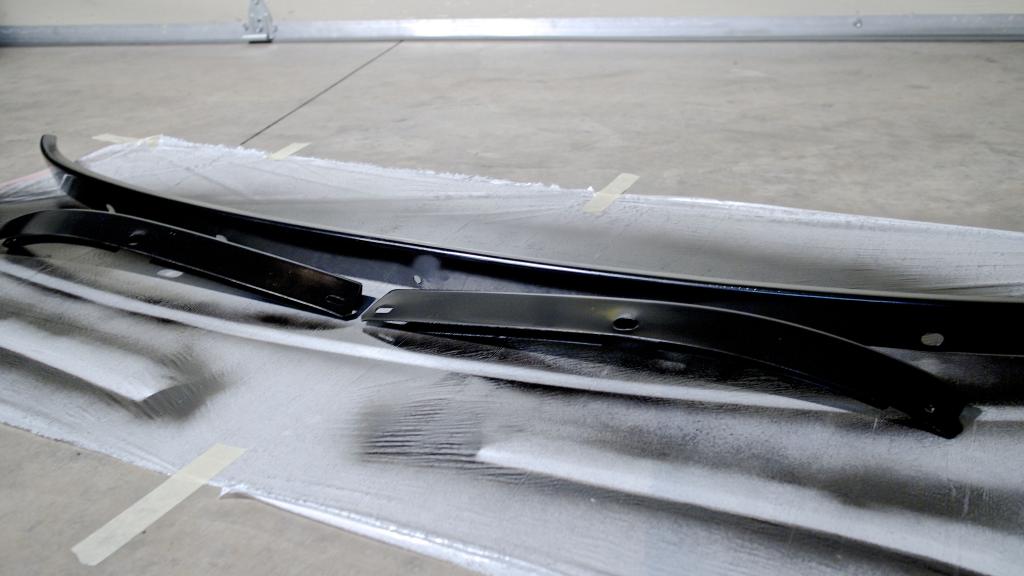
Rear trim panels sanded and repainted to fix some spot rust/delaminated paint
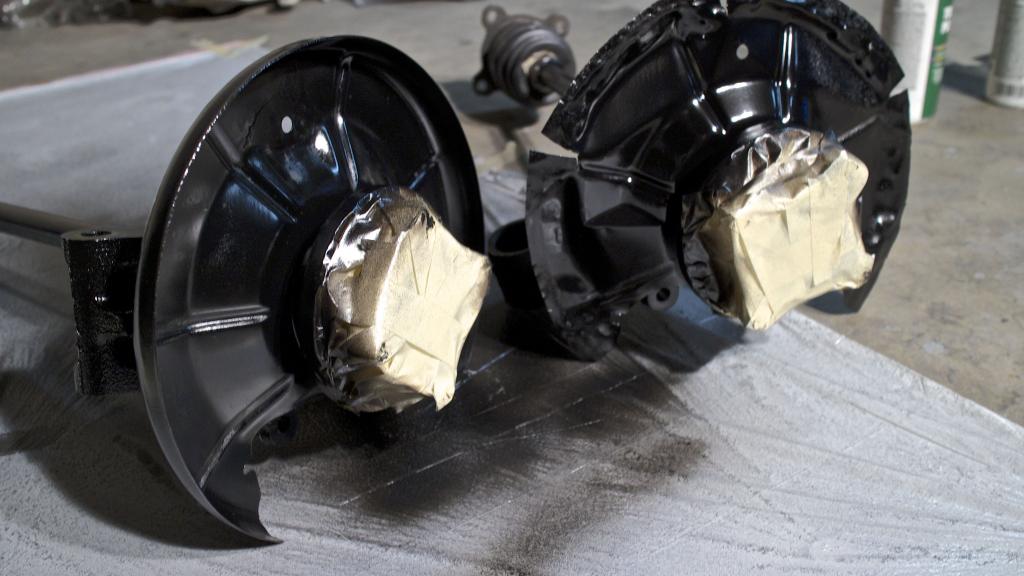
Rear axles finally ******* done, god, never again.
Door brackets retouched
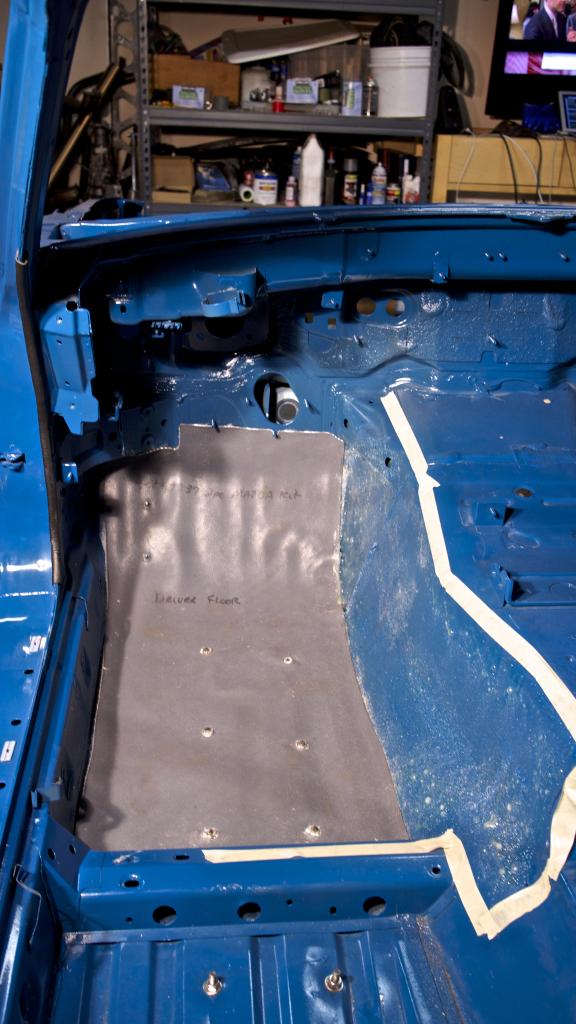
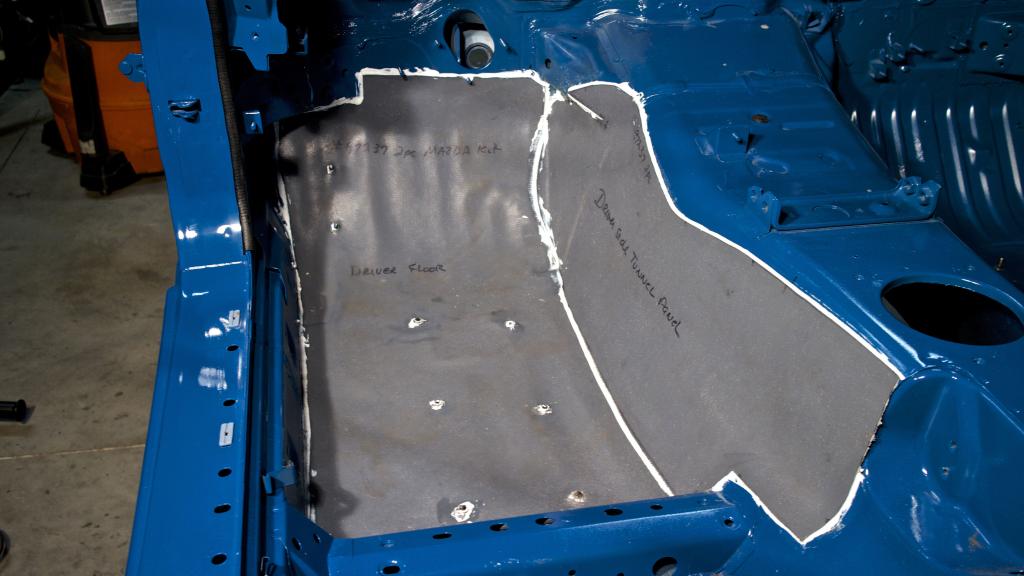
Koolmat installed, the white sealant I ended up finding turns clear after it cures so it won't look nearly as messy. Non-issue though since I will be putting carpet down on top.
Smaller jobs are slowly being whittled down. Just need to clean all the poly bushings and put them back in the control arms. Bolts didn't show up. :(
Cleaned more paint off of the plastic fasteners....

Frame rails bolted on. Couldn't find my sealant so I just used black gasket maker in between each hole.

Rear trim panels sanded and repainted to fix some spot rust/delaminated paint

Rear axles finally ******* done, god, never again.

Door brackets retouched

Koolmat installed, the white sealant I ended up finding turns clear after it cures so it won't look nearly as messy. Non-issue though since I will be putting carpet down on top.


Smaller jobs are slowly being whittled down. Just need to clean all the poly bushings and put them back in the control arms. Bolts didn't show up. :(
Reply
2
2

Elite Member
Joined: Oct 2013
Posts: 2,764
Total Cats: 951
From: Cedar City, UT
*edit* not sure if the reflection is causing you to see something weird in the middle but it's fine. Nice and straight.
Reply
0
0


You inspired me to shave the raised lettering on my tail lights today.
On another note, have you looked into what the plastic trim hardware costs new? I pretty much sacrificed much of it to get my car stripped in a reasonable amount of time. How long did it take you to clean them up?
Reply
0
0
Elite Member
Joined: Oct 2013
Posts: 2,764
Total Cats: 951
From: Cedar City, UT
You inspired me to shave the raised lettering on my tail lights today.
On another note, have you looked into what the plastic trim hardware costs new? I pretty much sacrificed much of it to get my car stripped in a reasonable amount of time. How long did it take you to clean them up?
On another note, have you looked into what the plastic trim hardware costs new? I pretty much sacrificed much of it to get my car stripped in a reasonable amount of time. How long did it take you to clean them up?
Reply
0
0
Or ClipsAndFasteners.com - Automotive Retainers,Clips and Fasteners
Warning: Not responsible for an OCD individual such as yourself going bankrupt via purchases from that site.
Reply
3
3
Elite Member
Joined: Oct 2013
Posts: 2,764
Total Cats: 951
From: Cedar City, UT
Or ClipsAndFasteners.com - Automotive Retainers,Clips and Fasteners
Warning: Not responsible for an OCD individual such as yourself going bankrupt via purchases from that site.
Warning: Not responsible for an OCD individual such as yourself going bankrupt via purchases from that site.

Reply
0
0


Elite Member
Joined: Oct 2013
Posts: 2,764
Total Cats: 951
From: Cedar City, UT
Reply
0
0


