
93' Miata stolen and flipped build thread


FM one piece silicone pipes FTW. Ask 18psi about fitment with the Fab9/Vibrant 350 core, I believe that's the setup he was running before partout.
Also, make sure you have those brackets oriented in such a way that the strain relief built into the bracket is supporting the wire, the put a hefty zip tie around it to secure it. If you do not, the wires will eventually work their way loose out of the back of the gauge... ask me how I know
Also, make sure you have those brackets oriented in such a way that the strain relief built into the bracket is supporting the wire, the put a hefty zip tie around it to secure it. If you do not, the wires will eventually work their way loose out of the back of the gauge... ask me how I know
Reply
 1
1

1

Its a compromise. If you put the gauges up where you can see them (A-pillar, dash) so can everyone else. You can stick them in the HVAC vents, but then you lose a vent. You can stick them in the console, but then they are out of direct line of sight.
If this was becauseracecar, there would be no question as to mounting. For becausestreetcar, I personally think its good to have the data available, even if the location is a compromise.
I'm starting to think needle gauges rotated to "nominal" is a good idea for this type of mounting.
If this was becauseracecar, there would be no question as to mounting. For becausestreetcar, I personally think its good to have the data available, even if the location is a compromise.
I'm starting to think needle gauges rotated to "nominal" is a good idea for this type of mounting.
Reply
0
0

Elite Member
Joined: Oct 2013
Posts: 2,764
Total Cats: 951
From: Cedar City, UT


FM one piece silicone pipes FTW. Ask 18psi about fitment with the Fab9/Vibrant 350 core, I believe that's the setup he was running before partout.
Also, make sure you have those brackets oriented in such a way that the strain relief built into the bracket is supporting the wire, the put a hefty zip tie around it to secure it. If you do not, the wires will eventually work their way loose out of the back of the gauge... ask me how I know
Also, make sure you have those brackets oriented in such a way that the strain relief built into the bracket is supporting the wire, the put a hefty zip tie around it to secure it. If you do not, the wires will eventually work their way loose out of the back of the gauge... ask me how I know
--------
Ok I wasn't really considering crushed pipes, just flights of errant laziness that kick in from time to time.

Rotated the turbo down.

But this damn bracket is right in the way of a 45/90 degree bend. I can not for the life of me recall what it is for. Power steering bracket?
Can I cut it off?
*edit* I guess I could use a straight silicone coupler and add the 90 bend to the aluminum pipe farther down...

Reply
0
0


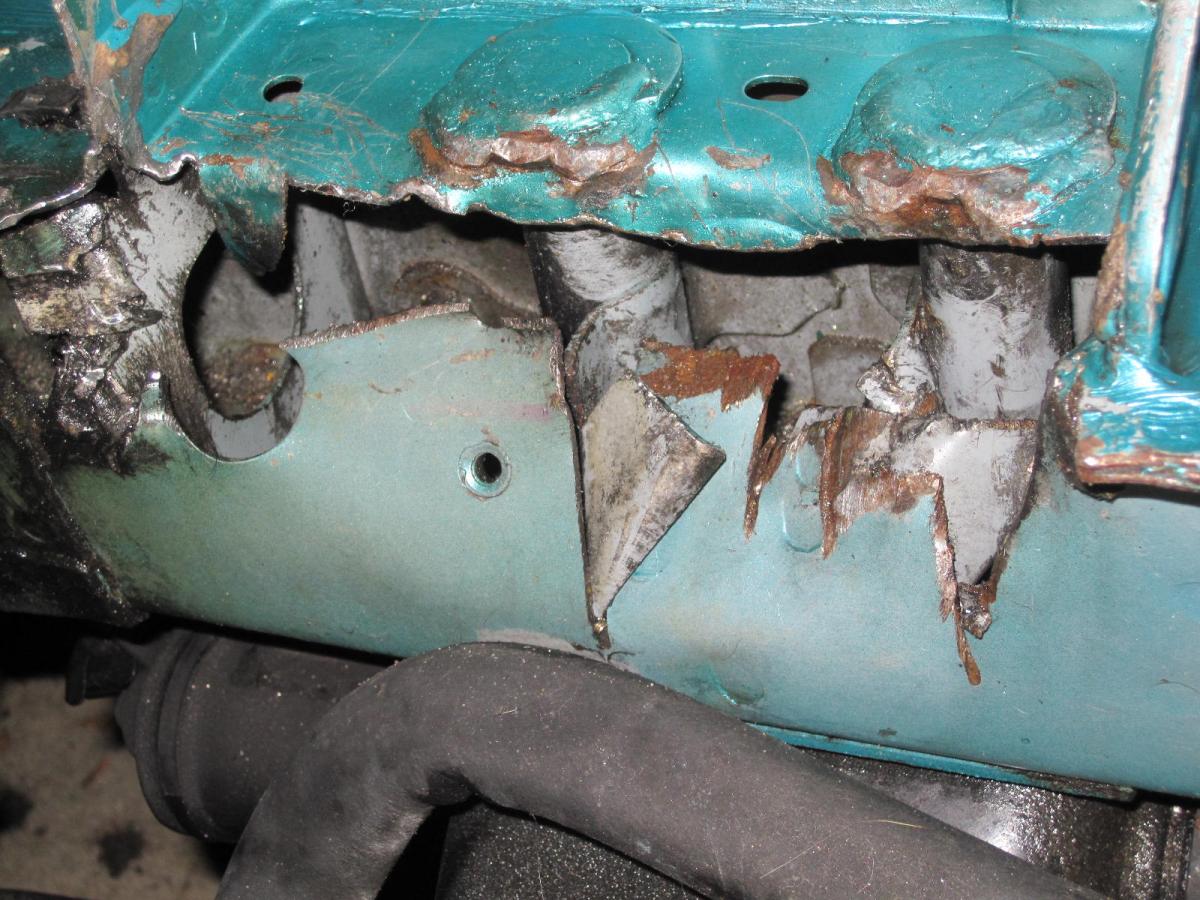

It's the mounting bracket for the OEM lower radiator hose hardpipe, NAs have two hose sections, one running from the radiator to the hardpipe and from the hardpipe to the mixing manifold. If you've moved to a single lower radiator hose (NB hose or FM hose) or another solution, you do not need that bracket any more. Cut or bend as needed, just not as much as faeflora. lol
Reply
1
1
Elite Member
Joined: Oct 2013
Posts: 2,764
Total Cats: 951
From: Cedar City, UT
Thanks Rotor
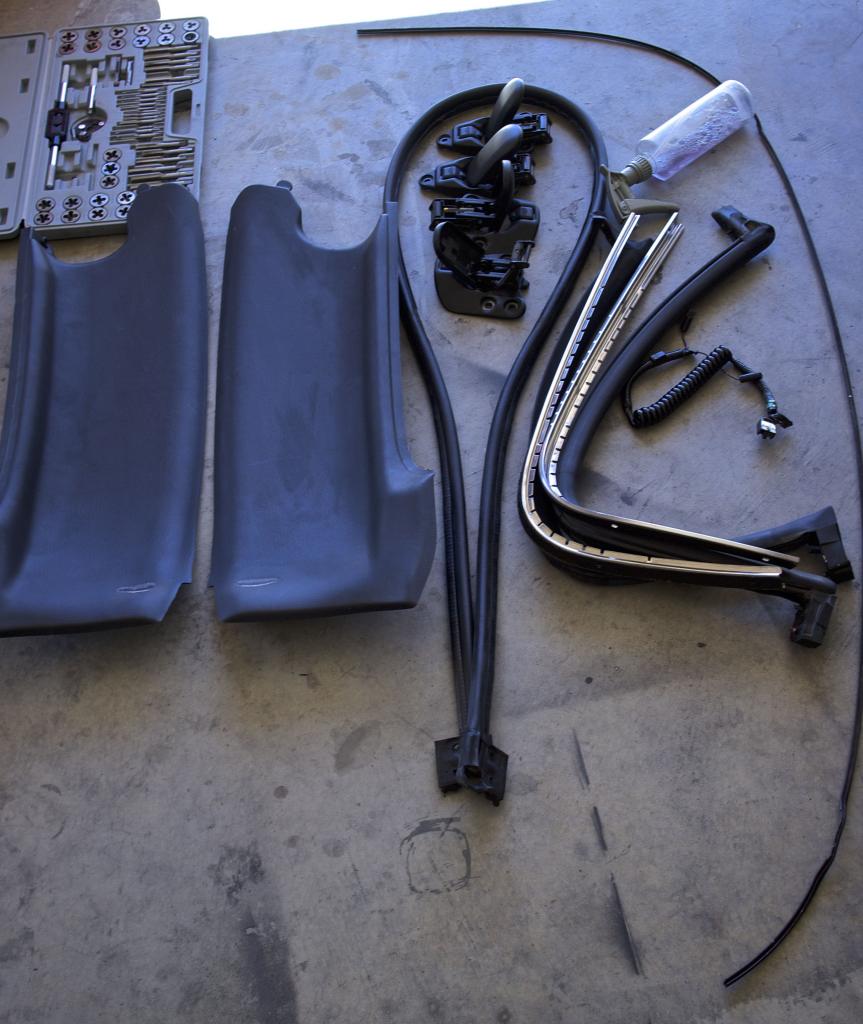
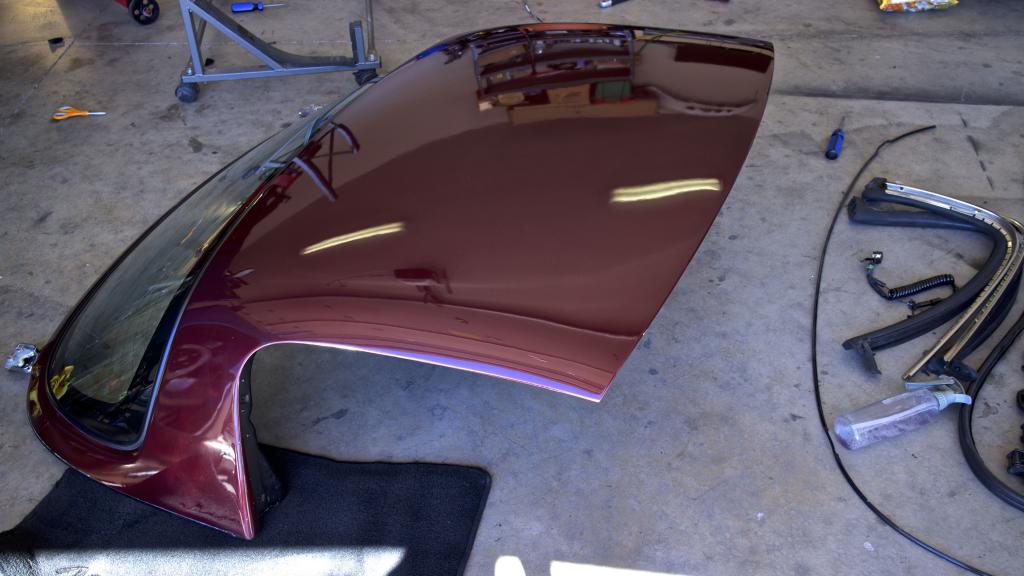
Slight segue, but I remember the paint shop telling me they get busy this time of the year so I stripped everything off the hardtop and am going to take it to a window shop to remove the glass. Vlad said you can do it yourself, but I don't want to risk breaking very very expensive hardtop glass(seriously have you looked at the price of it???)
Only bad thing I found was that the plastic trim along the bottom is missing about a foot of trim. Not sure if it is really necessary, but I'll be looking at replacing it.
I even managed not to break any clips! That is a first for me. Paint is in good shape but I think I'm going to lay some bondo down in a couple of deep scratches. Paint shop didn't do a very good job with my car on slight chips/dents so I'm going to do all the prep work myself this time.


Reply
1
1
When I had my hardtop repainted I was going to replace that trim as well. After some consideration I decided not to, IMO it looks better without it, at least on a black car. If you decide to replace your trim though, I have the little "protectors" brand new in the bag just wasting away on my shelf. You're welcome to them, would save you $30 or so for just those two pieces.
They look like:
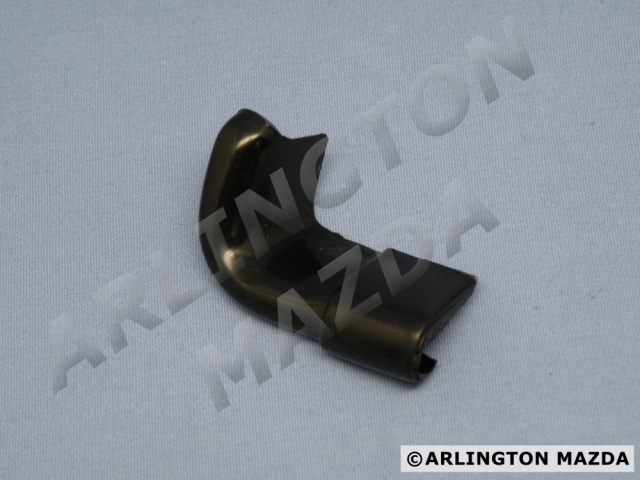
They just provide retention for the leading edges of the trim and mostly keep it from getting pulled off.
They look like:
They just provide retention for the leading edges of the trim and mostly keep it from getting pulled off.
Reply
0
0
Elite Member
Joined: Oct 2013
Posts: 2,764
Total Cats: 951
From: Cedar City, UT
If the trim is pricy I'll just day screw it. It's going g to be permanent anyways. I'm just glad all the latch screws came off easy. I have the Rennenmetal hardtop brackets sitting in a box waiting to be put on.
Reply
0
0

holler at me if you want an FM silicone lower rad hose. to get rid of that ugly bracket and failsauce 2 piece rad hose
as for trim: I re-installed mine on current HT because I didn't run it on previous and there was slight chipping on the edges without it or something.
agreed that it looks way better without though
as for trim: I re-installed mine on current HT because I didn't run it on previous and there was slight chipping on the edges without it or something.
agreed that it looks way better without though
Reply
0
0

Junior Member
Joined: Mar 2013
Posts: 111
Total Cats: 42
From: Redmond, WA
My brother cut his bracket off (using a hacksaw) just to where the surface overhanging above it would allow. Not sure if you have enough room at this point in your bay to get something in there and shave the whole thing off. It DOES free up a lot of space once that bracket is out of the way.
Question to anyone about the hardtop trim around the window: when I painted my hardtop, I removed my exterior trim around the window because it had paint on it from PO. Was wondering if anyone was able to fit on a new one without taking the window out. The two times I've seen someone try to put it on without taking out the window, it wrinkles at the bottom corners where the window bends.
Question to anyone about the hardtop trim around the window: when I painted my hardtop, I removed my exterior trim around the window because it had paint on it from PO. Was wondering if anyone was able to fit on a new one without taking the window out. The two times I've seen someone try to put it on without taking out the window, it wrinkles at the bottom corners where the window bends.
Reply
0
0
Elite Member
Joined: Oct 2013
Posts: 2,764
Total Cats: 951
From: Cedar City, UT
Am I just overthinking this?
AEM instructions call for a 12v power source with a 5A fuse in between the source.
I know you can just tap into a line under the dash, but am I crazy for doing it "the right way" and running some 16g wire back to the battery and putting a 30A 12v inline fuse before the battery?
(30A 12/24VDC Mini Blade In-Line Fuse Holder : Fuse Holders | RadioShack.com)
I know it is overkill, but it is what the instructions call for...Where do most people like to tap into?
I'm so excited to get rid of the rats nest of butt connectors from the previous gauges.
Reply
0
0

Am I just overthinking this?
AEM instructions call for a 12v power source with a 5A fuse in between the source.
I know you can just tap into a line under the dash, but am I crazy for doing it "the right way" and running some 16g wire back to the battery and putting a 30A 12v inline fuse before the battery?
(30A 12/24VDC Mini Blade In-Line Fuse Holder : Fuse Holders | RadioShack.com)
I know it is overkill, but it is what the instructions call for...Where do most people like to tap into?
I'm so excited to get rid of the rats nest of butt connectors from the previous gauges.
AEM instructions call for a 12v power source with a 5A fuse in between the source.
I know you can just tap into a line under the dash, but am I crazy for doing it "the right way" and running some 16g wire back to the battery and putting a 30A 12v inline fuse before the battery?
(30A 12/24VDC Mini Blade In-Line Fuse Holder : Fuse Holders | RadioShack.com)
I know it is overkill, but it is what the instructions call for...Where do most people like to tap into?
I'm so excited to get rid of the rats nest of butt connectors from the previous gauges.
Jeff - Use the wires off of the ignition harness.
BLUE is a switched 12v supply on the harness going to your Ignition Key harness.
WHITE is a 12v constant (battery) wire.
Reply
1
1
Elite Member
Joined: Oct 2013
Posts: 2,764
Total Cats: 951
From: Cedar City, UT

Reply
0
0

Am I just overthinking this?
AEM instructions call for a 12v power source with a 5A fuse in between the source.
I know you can just tap into a line under the dash, but am I crazy for doing it "the right way" and running some 16g wire back to the battery and putting a 30A 12v inline fuse before the battery?
(30A 12/24VDC Mini Blade In-Line Fuse Holder : Fuse Holders | RadioShack.com)
I know it is overkill, but it is what the instructions call for...Where do most people like to tap into?
I'm so excited to get rid of the rats nest of butt connectors from the previous gauges.
AEM instructions call for a 12v power source with a 5A fuse in between the source.
I know you can just tap into a line under the dash, but am I crazy for doing it "the right way" and running some 16g wire back to the battery and putting a 30A 12v inline fuse before the battery?
(30A 12/24VDC Mini Blade In-Line Fuse Holder : Fuse Holders | RadioShack.com)
I know it is overkill, but it is what the instructions call for...Where do most people like to tap into?
I'm so excited to get rid of the rats nest of butt connectors from the previous gauges.
I'd rather do this and not tap-into/molest a factory wiring harness.
Reply
0
0


