
93' Miata stolen and flipped build thread


Joined: Sep 2010
Posts: 8,157
Total Cats: 1,094
From: Lake Forest, CA
Did you miss the part where I said I didn't think the Miata is the right platform for such a business?
Reply
 0
0

0

Elite Member
Joined: Oct 2013
Posts: 2,764
Total Cats: 951
From: Cedar City, UT
Oh I'm crazy but believe me I wouldn't even attempt to open a business. Fun to think about, but I'll stick to making bread for a living and cars for my hobby.
Reply
0
0
Joined: Sep 2010
Posts: 8,157
Total Cats: 1,094
From: Lake Forest, CA
It has worked out well so far.
NOW BACK TO WORK!
NOW BACK TO WORK!
Reply
0
0


Elite Member
Joined: Oct 2013
Posts: 2,764
Total Cats: 951
From: Cedar City, UT
So my powdercoaters are finishing up the parts tomorrow and I had a question
The plastic piece on the outside of the butterfly valves....will this melt in the fiery inferno of powdercoating it?
How do you remove the butterfly valves to ensure no damage? Or how do you remove the plastic piece?
The plastic piece on the outside of the butterfly valves....will this melt in the fiery inferno of powdercoating it?
How do you remove the butterfly valves to ensure no damage? Or how do you remove the plastic piece?
Reply
0
0

Elite Member
Joined: Oct 2013
Posts: 2,764
Total Cats: 951
From: Cedar City, UT
So yes. I read the screws are stamped at the end so you cant remove it...
Reply
0
0
Elite Member
Joined: Oct 2013
Posts: 2,764
Total Cats: 951
From: Cedar City, UT
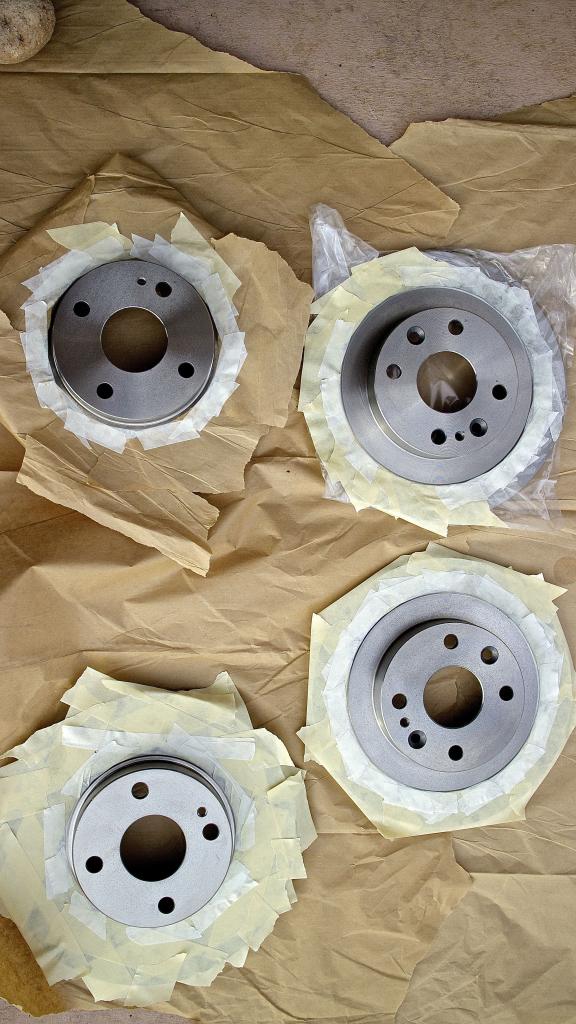
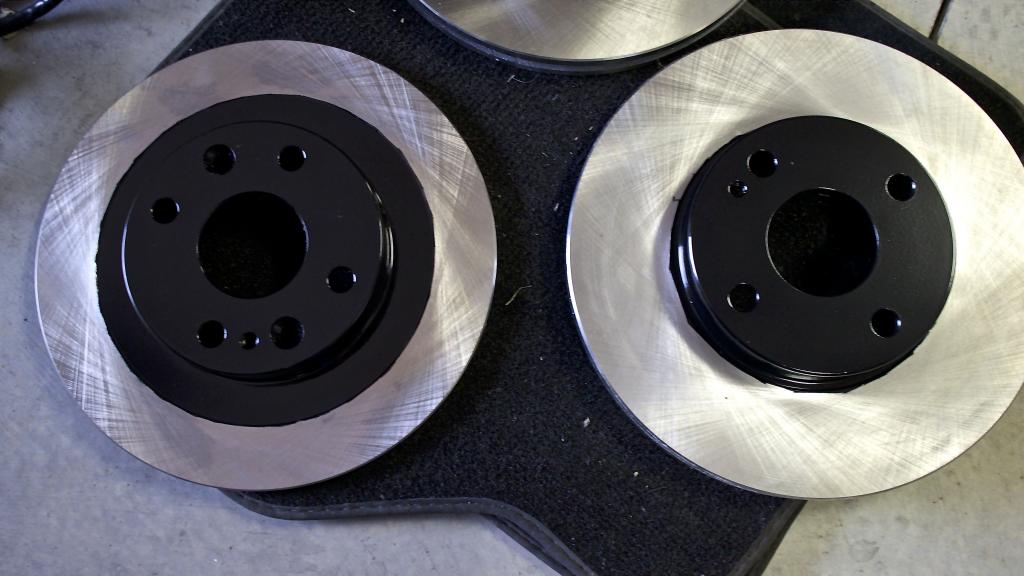
Bad photos but I decided to paint my rotor hubs to avoid the nasty looking rust you get from unfinished rotors. Doesn't look perfect, but taping a circle is hard when you don't have the right tape. It's only rotors though so who cares!


Reply
0
0

Elite Member
Joined: Oct 2013
Posts: 2,764
Total Cats: 951
From: Cedar City, UT
Reply
0
0
Elite Member
Joined: Oct 2013
Posts: 2,764
Total Cats: 951
From: Cedar City, UT
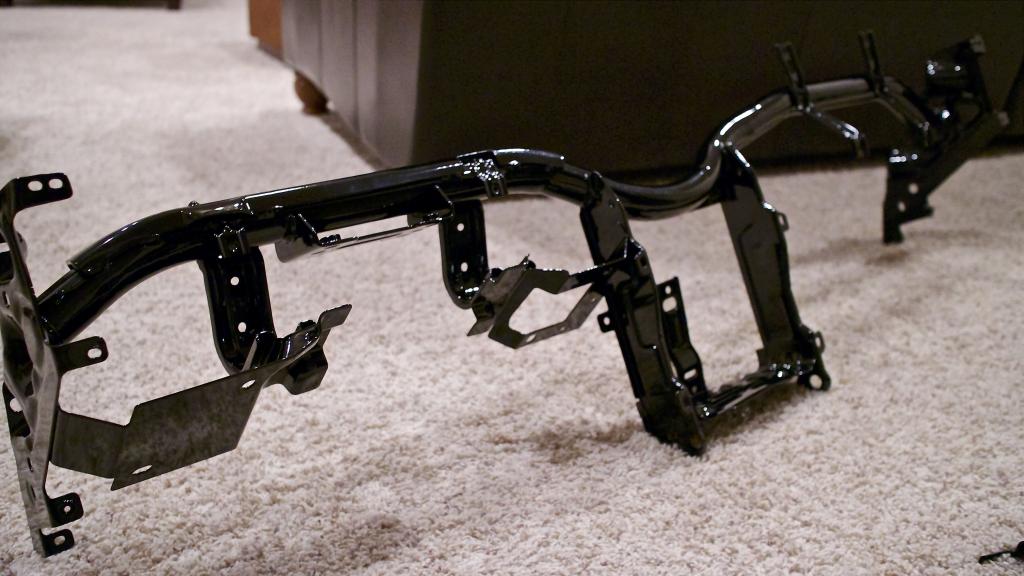
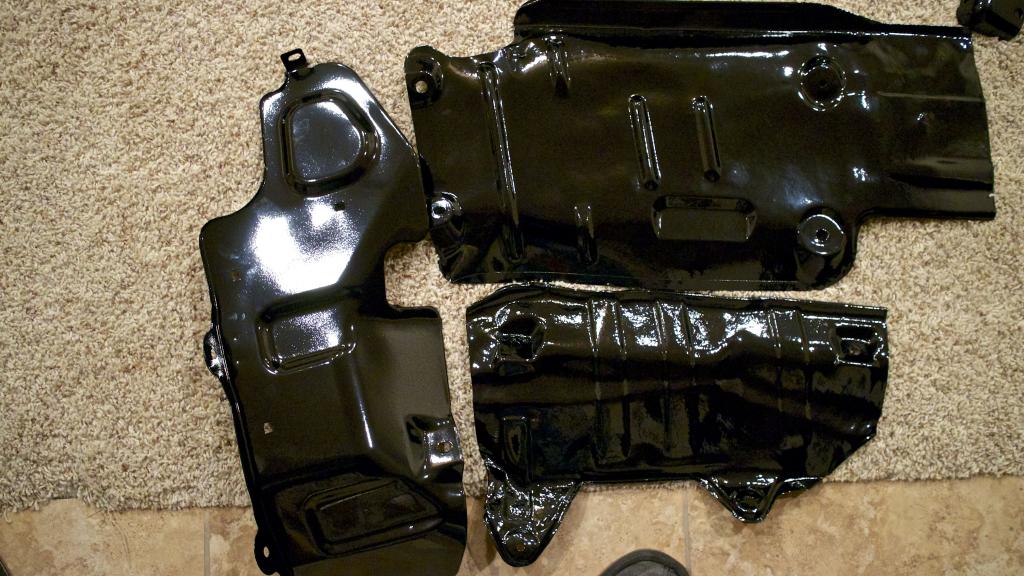
Powder coating is all done

Oh
My
Flying
Spaghetti
Monster
They turned out so damn good. Thank you, dear bastards, for making me spend more money.
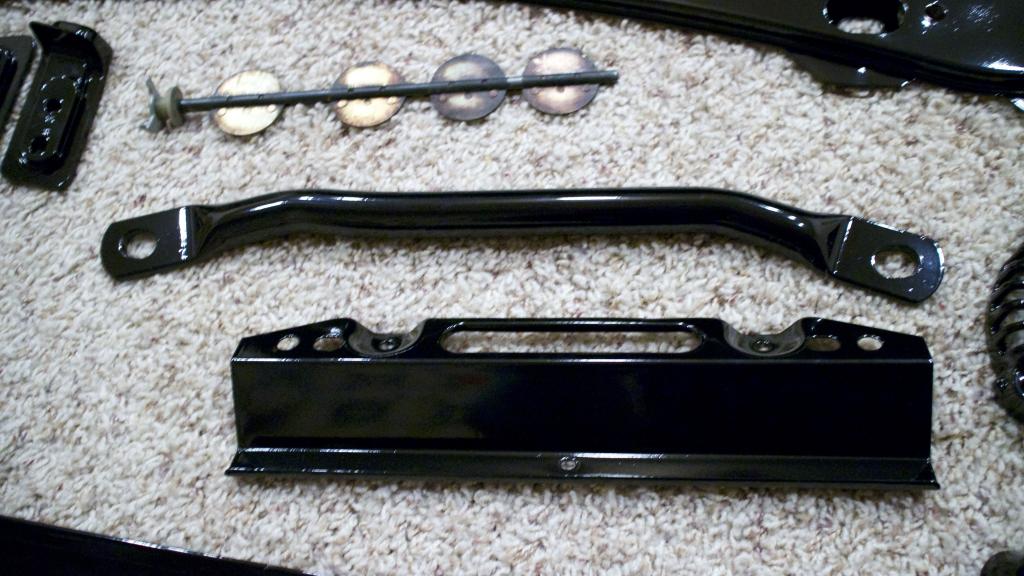
Dashboard Brace, gonna have to dremmel off the 2 ground locations.
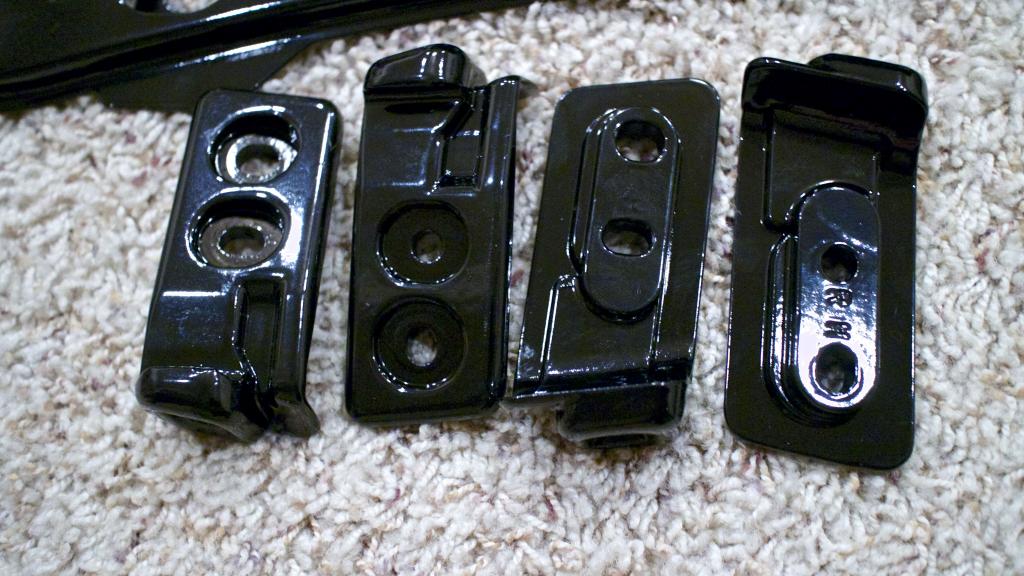
Misc covers for fuel filter etc etc
Alternator housing/brackets/pulley, these turned out really really good
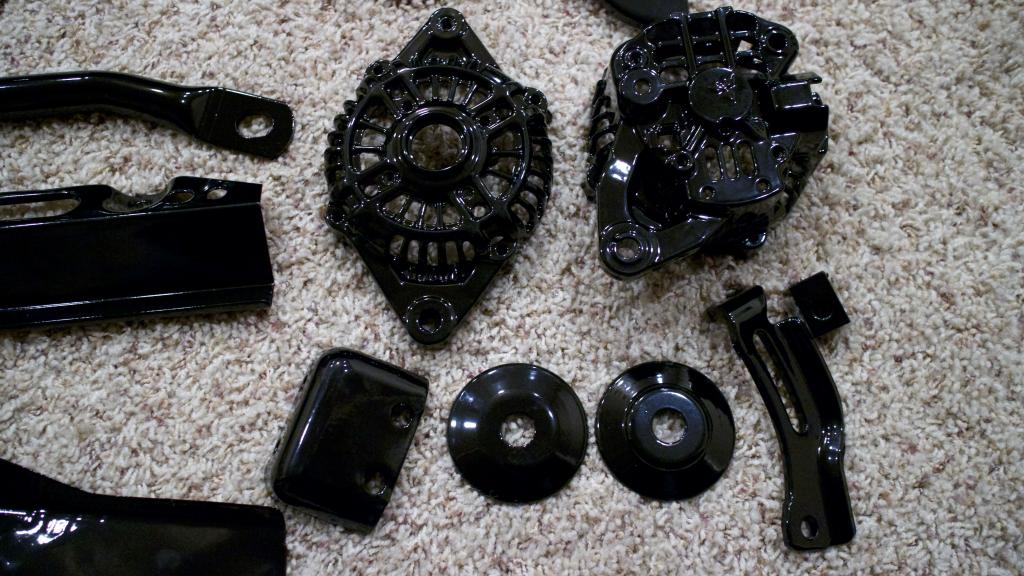
Rear Subframe Brace Dashboard part and the removed butterfly valves(obviously not powder coated)
Hard/soft top brackets. I had an extra set done if someone wants to buy them.
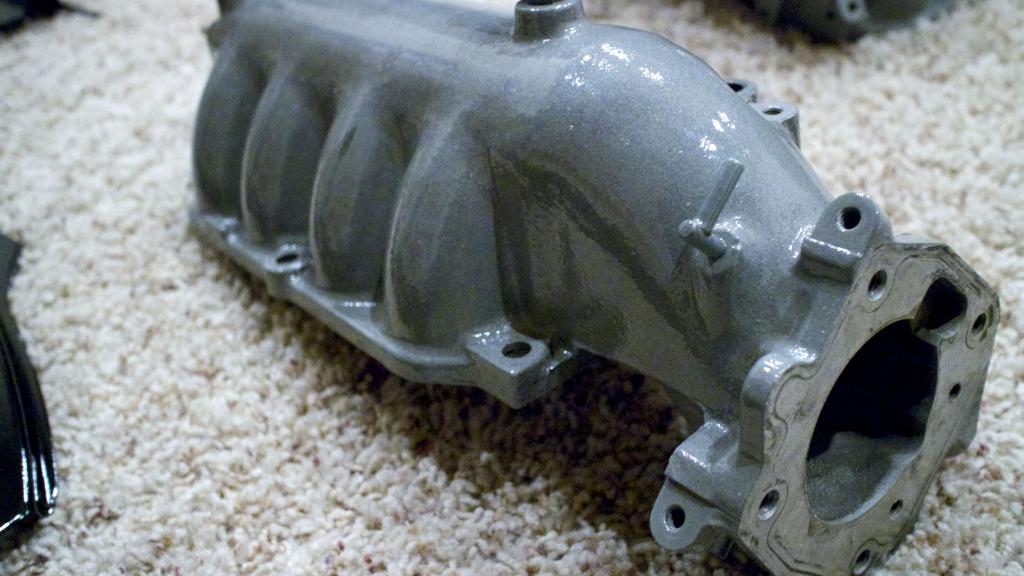
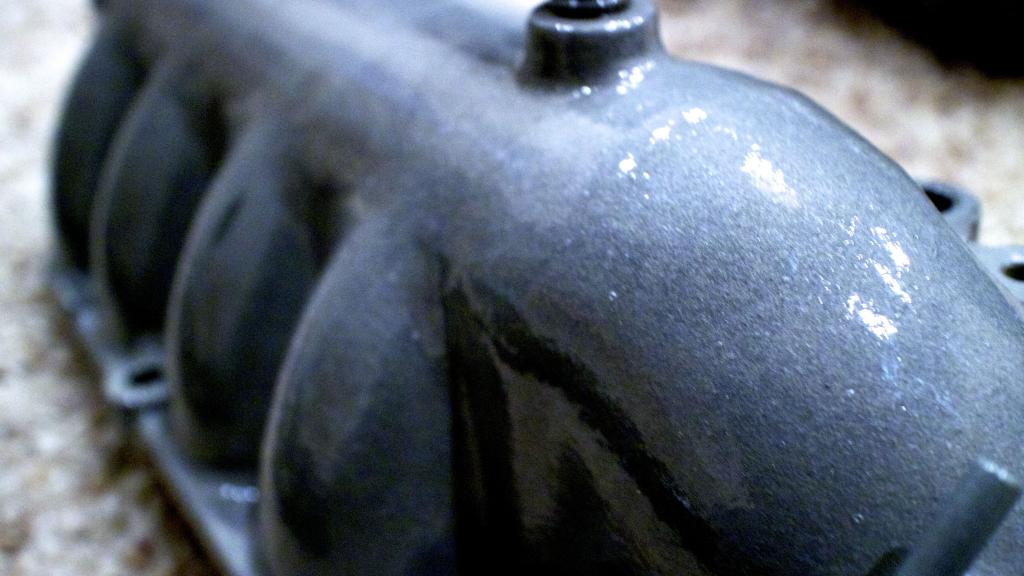
Upper intake manifold Decided to clear coat it to keep the raw look, which was the right choice, it looks most....choice!
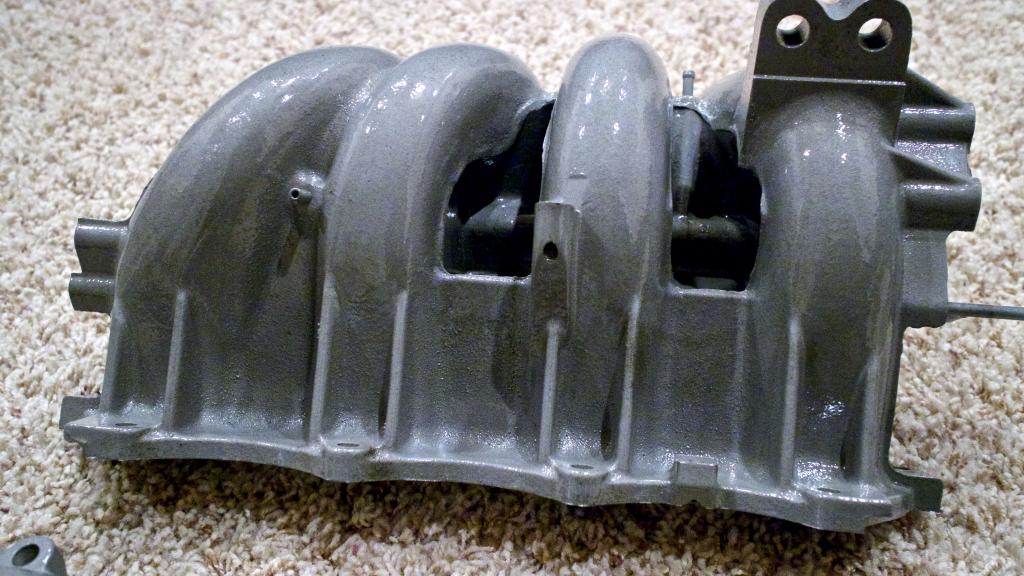
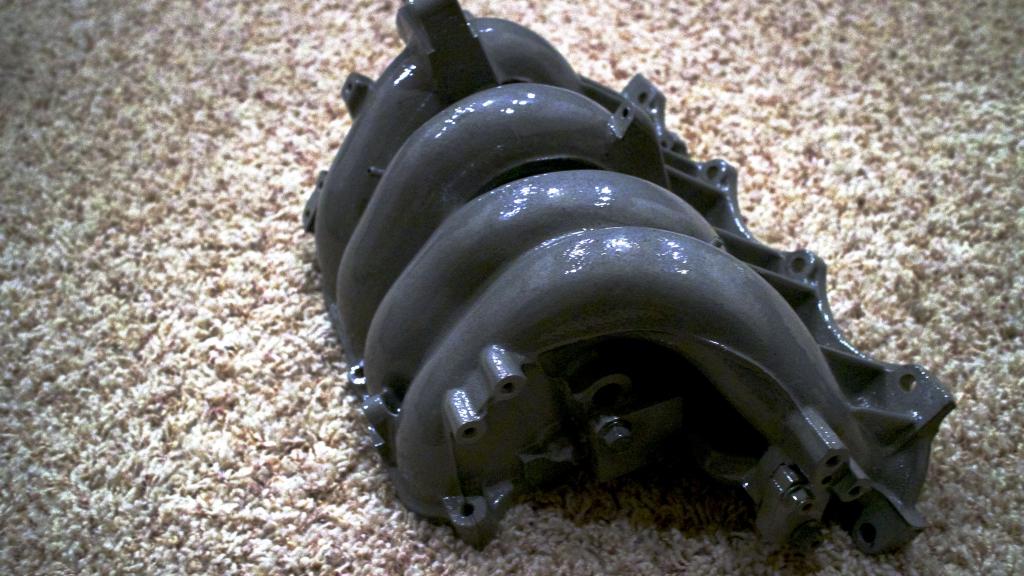
Lower Intake Manifold
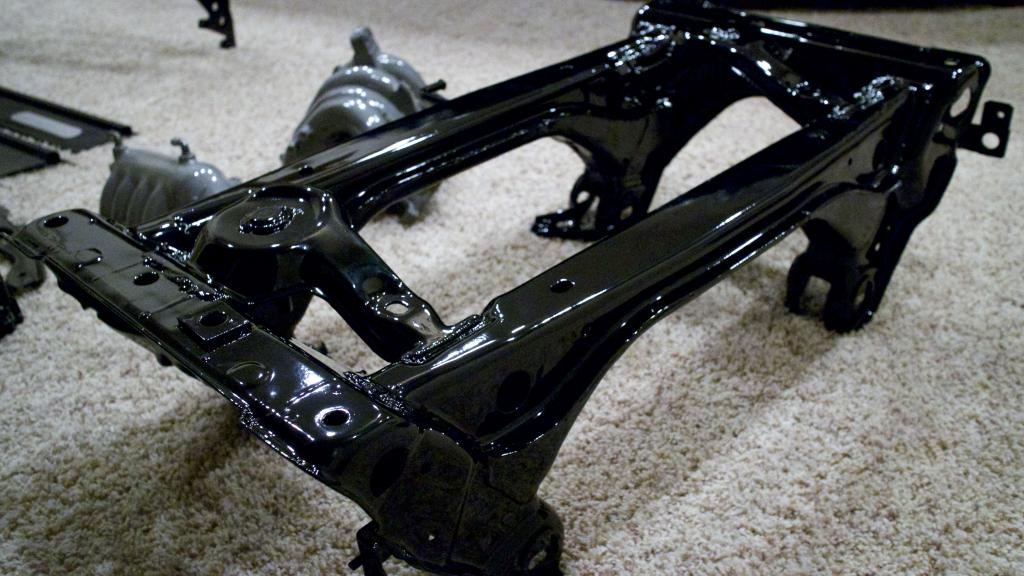
Rear Subframe turned out just as hot as the front.
I have every part for the car now so all it is going to take is getting the wiring harness finished, dashboard put back in, full interior put back in, and then I'll assemble the subframe and engine and put it all together.
.
.
.
sounds so simple when you condense it down to a paragraph!


Oh
My
Flying
Spaghetti
Monster
They turned out so damn good. Thank you, dear bastards, for making me spend more money.
Dashboard Brace, gonna have to dremmel off the 2 ground locations.

Misc covers for fuel filter etc etc

Alternator housing/brackets/pulley, these turned out really really good

Rear Subframe Brace Dashboard part and the removed butterfly valves(obviously not powder coated)

Hard/soft top brackets. I had an extra set done if someone wants to buy them.

Upper intake manifold Decided to clear coat it to keep the raw look, which was the right choice, it looks most....choice!


Lower Intake Manifold


Rear Subframe turned out just as hot as the front.

I have every part for the car now so all it is going to take is getting the wiring harness finished, dashboard put back in, full interior put back in, and then I'll assemble the subframe and engine and put it all together.
.
.
.
sounds so simple when you condense it down to a paragraph!
Reply
6
6

Looks great. I am neck deep into a bushing install & suspension resto right now. I decided not to powder coat my subframe because I can't fit it in the oven at work, but seeing yours makes me think twice! I only sanded & POR 15'ed it. I just did my lower and upper rear control arms & the hubs. They came out pretty decent with the eastwood kit. I love powder coat !!!
Reply
0
0
Elite Member
Joined: Oct 2013
Posts: 2,764
Total Cats: 951
From: Cedar City, UT
Looks great. I am neck deep into a bushing install & suspension resto right now. I decided not to powder coat my subframe because I can't fit it in the oven at work, but seeing yours makes me think twice! I only sanded & POR 15'ed it. I just did my lower and upper rear control arms & the hubs. They came out pretty decent with the eastwood kit. I love powder coat !!!
I probably could have powder coated it all myself in my bread oven at my bakery(huge *** oven), but I wouldn't want OSHA/health inspectors all over my *** for that one!
Reply
0
0
Elite Member
Joined: Oct 2013
Posts: 2,764
Total Cats: 951
From: Cedar City, UT
Woops! Forgot a picture.
Door sill plates. Need to track down a sticker to put in there. I know Revlimiter is contemplating making some in the future so maybe I will just wait for him to start producing some.

Door sill plates. Need to track down a sticker to put in there. I know Revlimiter is contemplating making some in the future so maybe I will just wait for him to start producing some.

Reply
0
0

Elite Member
Joined: Oct 2013
Posts: 2,764
Total Cats: 951
From: Cedar City, UT
Reply
0
0
Elite Member
Joined: Oct 2013
Posts: 2,764
Total Cats: 951
From: Cedar City, UT
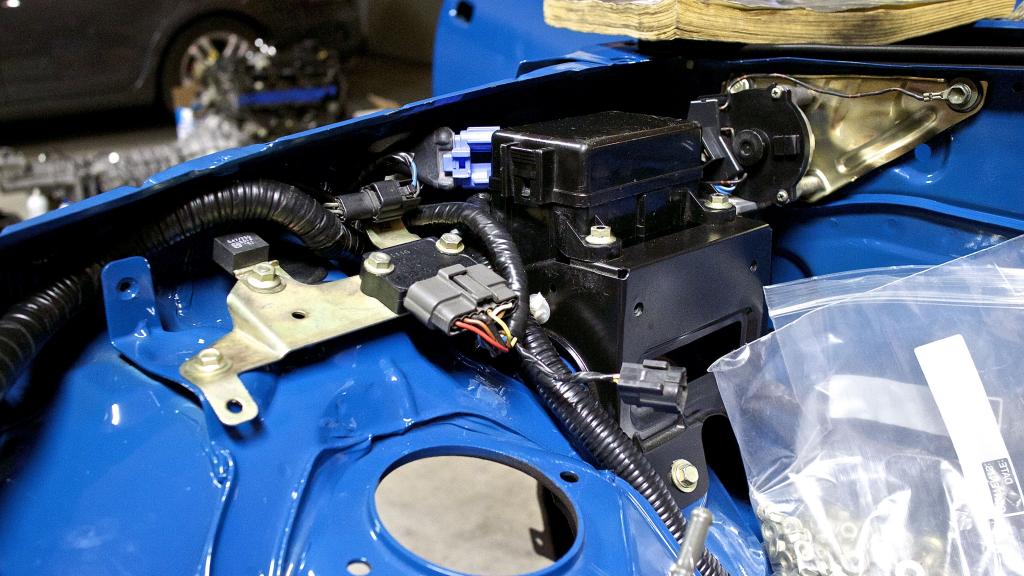
Another small update
Bill from Miataroadster had these Moss Low-pro headlights for sale that he had originally planned to put on his car, but last minute decided to go another route.
Normal Moss headlights but Bill added:
(2) Moss upper buckets powder coated wrinkle black
(2) stock lower brackets (that the motors mount to) shaved of tabs for the stock hood prop and powder coated wrinkle black
(2) new NA01-51-SA5 retractor rods
(4) new KA01-51-SD7 hinge bolts for bucket pivots
and still it was cheaper than buying the kit new! I love the look of them especially after talking to Revlimiter about them.
Before I installed them though I decided to clean up the motors a little. Wire brushed the aluminum, steam cleaned it, and laid down some fresh paint on the motor housing to give it a nice fresh look.
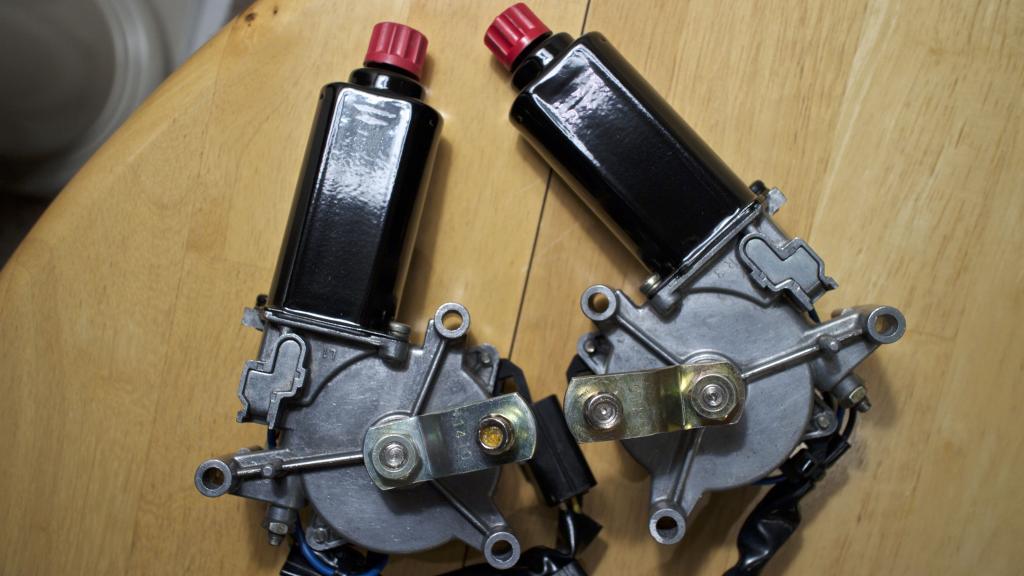
Pretty easy install, just need to figure out the wiring for it.
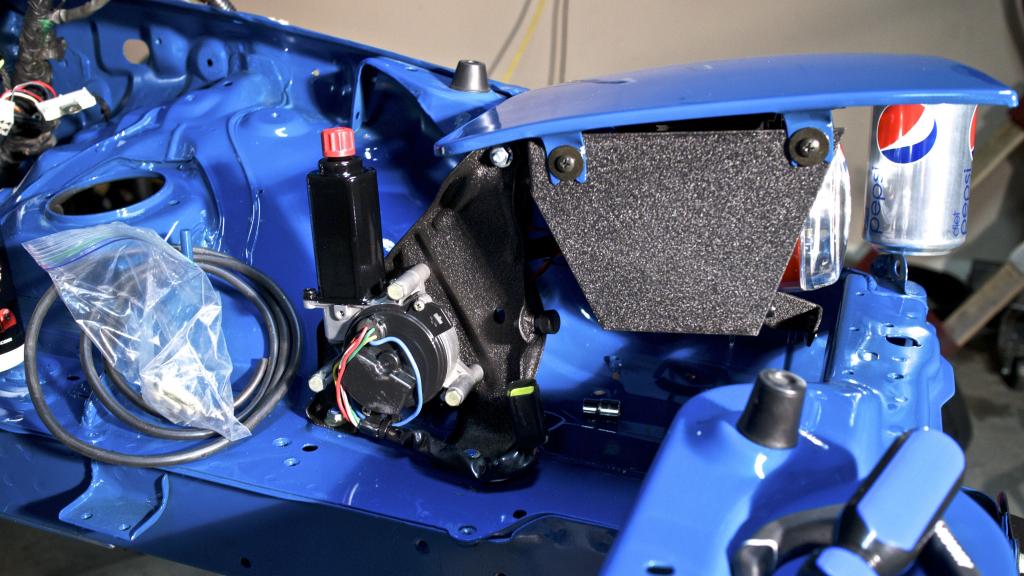
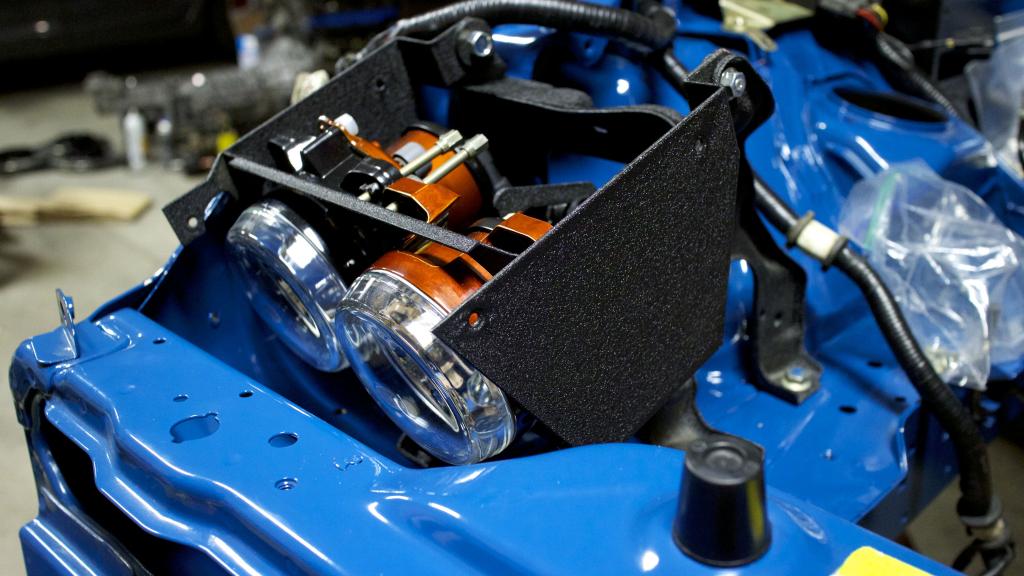
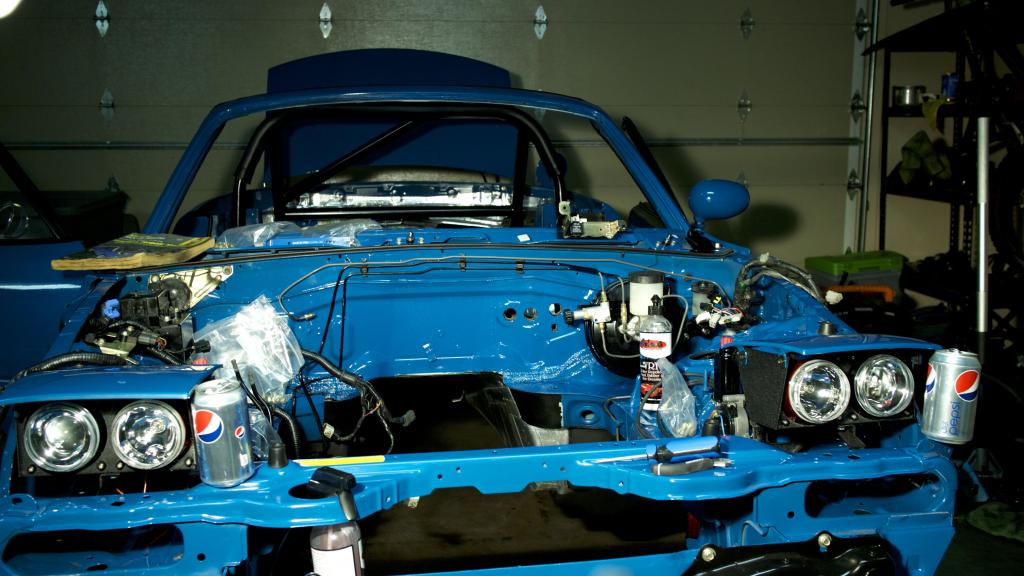
Also worked on getting the brackets for the wiring all installed
Bill from Miataroadster had these Moss Low-pro headlights for sale that he had originally planned to put on his car, but last minute decided to go another route.
Normal Moss headlights but Bill added:
(2) Moss upper buckets powder coated wrinkle black
(2) stock lower brackets (that the motors mount to) shaved of tabs for the stock hood prop and powder coated wrinkle black
(2) new NA01-51-SA5 retractor rods
(4) new KA01-51-SD7 hinge bolts for bucket pivots
and still it was cheaper than buying the kit new! I love the look of them especially after talking to Revlimiter about them.
Before I installed them though I decided to clean up the motors a little. Wire brushed the aluminum, steam cleaned it, and laid down some fresh paint on the motor housing to give it a nice fresh look.

Pretty easy install, just need to figure out the wiring for it.


Also worked on getting the brackets for the wiring all installed

Reply
5
5


