
97 Montego sr20 t25 Turbo Build


Just pull the CHRA apart, reposition it to where you want it, and reassemble carefully. Should be easy peasy with that fresh turbo.
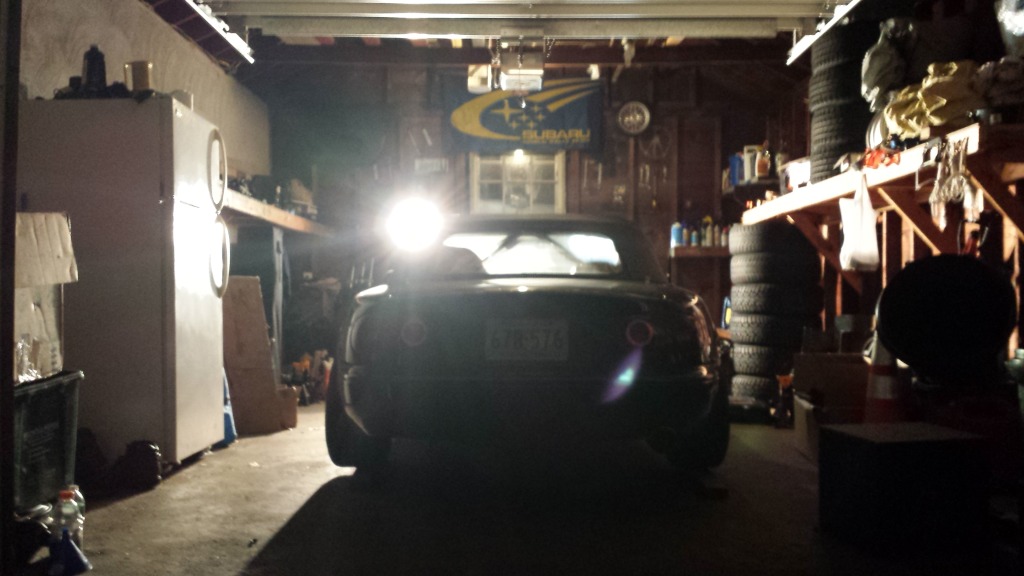
Edit: dude that electrical tape on your lights hurts me inside more than it should.
Edit: dude that electrical tape on your lights hurts me inside more than it should.
Reply
 0
0

0

Thread Starter
Junior Member
Joined: Sep 2012
Posts: 283
Total Cats: 12
From: Cranston, RI
The lights were done as a joke
 but secretly I like them
Reply
0
0
Thread Starter
Junior Member
Joined: Sep 2012
Posts: 283
Total Cats: 12
From: Cranston, RI
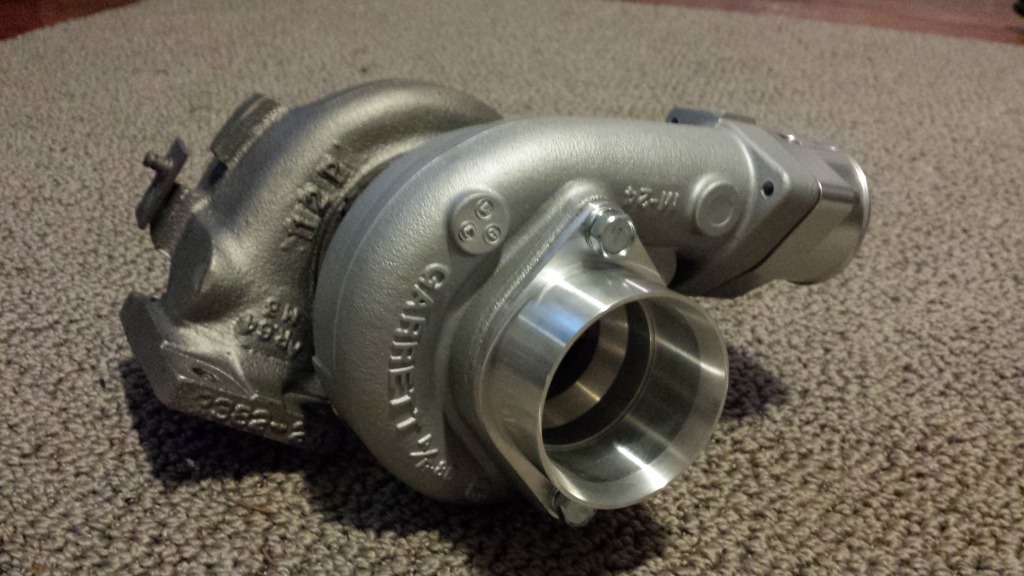
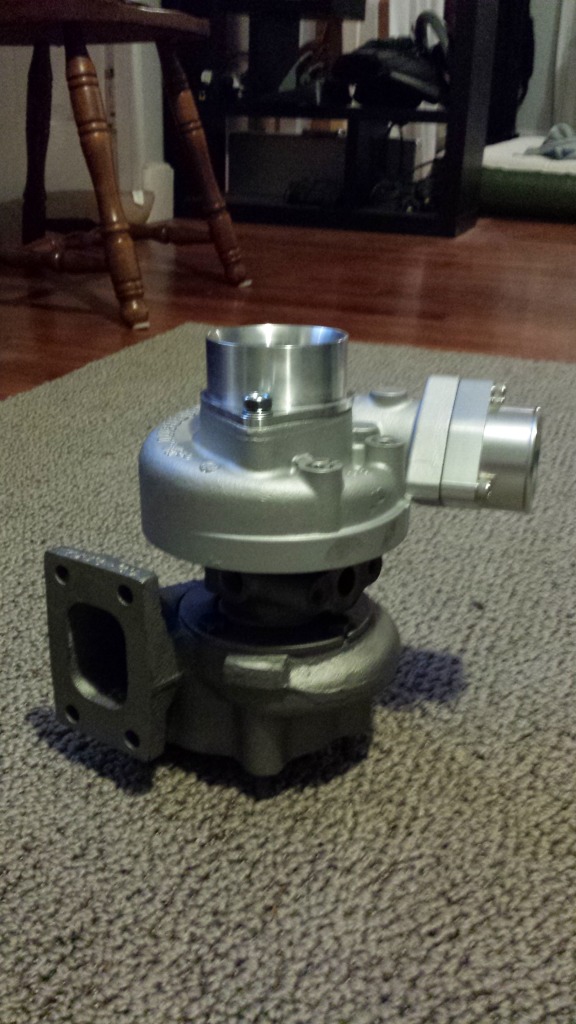
A little love from a rubber dead blow hammer, and the exhaust turbine housing popped right off! Got the oil drain facing downwards. I clocked the compressor side to where I think it will work, but it may have to be moved again.
I also got the valve cover back on with the new gasket, along with the coil pack and wires. I test fitted the manifold and turbo. I bent the heater core hard line out of the way a bit to make room for the manifold, but the dipstick is still in the way. Do I need to make a bracket to relocate it off to the side a bit? There is also a ground that attaches on the nut side of it.
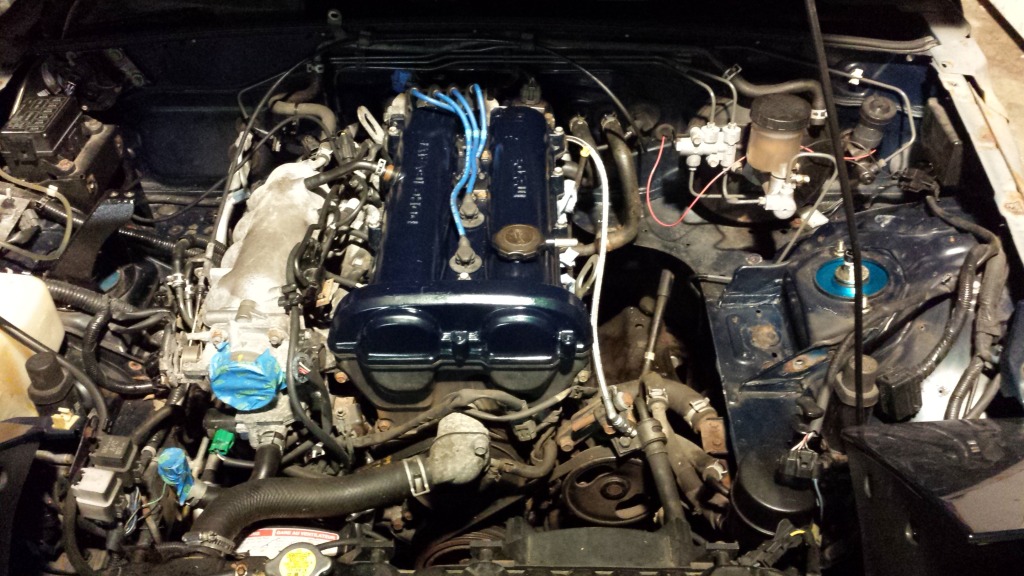
Also went over some of the engine bay with some Simple Green. It will need a few more passes, but its amazing what one cleaning can do!
Now for the good stuff:
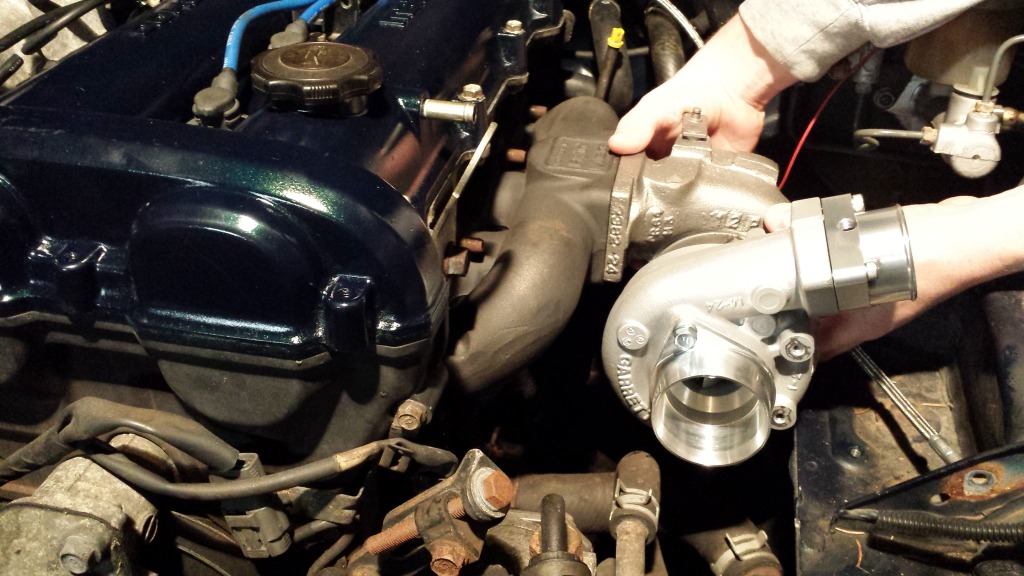
I also got the valve cover back on with the new gasket, along with the coil pack and wires. I test fitted the manifold and turbo. I bent the heater core hard line out of the way a bit to make room for the manifold, but the dipstick is still in the way. Do I need to make a bracket to relocate it off to the side a bit? There is also a ground that attaches on the nut side of it.
Also went over some of the engine bay with some Simple Green. It will need a few more passes, but its amazing what one cleaning can do!
Now for the good stuff:


Reply
0
0


Have you bolted the CHRA on yet? If not, leave it off. Do final assembly of the manifold, turbine housing, and downpipe. When you're ready, bolt on the CHRA with a level on the top or bottom. Then figure out the best way to rotate your compressor housing, and install the snap ring on last to lock it in place. Since it looks like you're keeping the AC and PS, one of the only options is to point it at the fender like you did, clamp on a 180* pipe or coupler, then clamp on a 90* to point it down. Then around the radiator, etc, etc.
Man, no AC/PS is so much easier. Good luck!
Man, no AC/PS is so much easier. Good luck!
Reply
0
0
Thread Starter
Junior Member
Joined: Sep 2012
Posts: 283
Total Cats: 12
From: Cranston, RI
Have you bolted the CHRA on yet? If not, leave it off. Do final assembly of the manifold, turbine housing, and downpipe. When you're ready, bolt on the CHRA with a level on the top or bottom. Then figure out the best way to rotate your compressor housing, and install the snap ring on last to lock it in place. Since it looks like you're keeping the AC and PS, one of the only options is to point it at the fender like you did, clamp on a 180* pipe or coupler, then clamp on a 90* to point it down. Then around the radiator, etc, etc.
Man, no AC/PS is so much easier. Good luck!
Man, no AC/PS is so much easier. Good luck!
I thought about removing AC/PS, but I'm going to see if I can do it with both first. My intercooler is the old style FMII. I believe the piping routes over the top of the AC/PS pumps, and drops down in front of the crank, then back around to the driver's side of the intercooler. I know that it is not the best set up, but it will do for version 1.0 of this build. I am sending the car to my performance shop to have the intercooler done. I think I will need a couple small pieces of piping fabbed.
For the next revision, I would like to run the IC pipes over the top of the radiator.
Reply
0
0
Thread Starter
Junior Member
Joined: Sep 2012
Posts: 283
Total Cats: 12
From: Cranston, RI
Wired up the IAT the other night. No other progress yet.
In other news, the car was scheduled in at Wicked Innovation in Manchester, NH. It will be getting towed up there on November 23rd to be finished and tuned! I have a laundry list of things that I need to get done before then.
In other news, the car was scheduled in at Wicked Innovation in Manchester, NH. It will be getting towed up there on November 23rd to be finished and tuned! I have a laundry list of things that I need to get done before then.
Reply
0
0

Newb
Joined: Oct 2013
Posts: 43
Total Cats: 0
From: Mass.
Might be a little off topic but how do you like the coilovers for the street? Hopefully I'll make it out to some adsi events once I get the Miata straightened out. Ironic that you have a bugeye as well, aren't you tuned by m@?
Reply
0
0


Thread Starter
Junior Member
Joined: Sep 2012
Posts: 283
Total Cats: 12
From: Cranston, RI
Wow, sorry guys. I just realized how long its been since I've checked/updated this thread! Answers and updates below.
They are great for the street. The adjustable damping is really nice to have, depending on the type of driving you're looking to do. When I'm commuting to/from work I typically have them on the soft side. Absolutely get out to ADSI! It's an awesome time. Very relaxed and fun atmosphere. Yes, my wagon is tuned by Matt. He will also be tuning the Miata.
Thanks! See the updated below...phase 1 is coming to a close
Updates! Last week I was travelling again, but this time out to California to visit a friend. Now I realize why all of your Miatas out there are so much cleaner than mine...
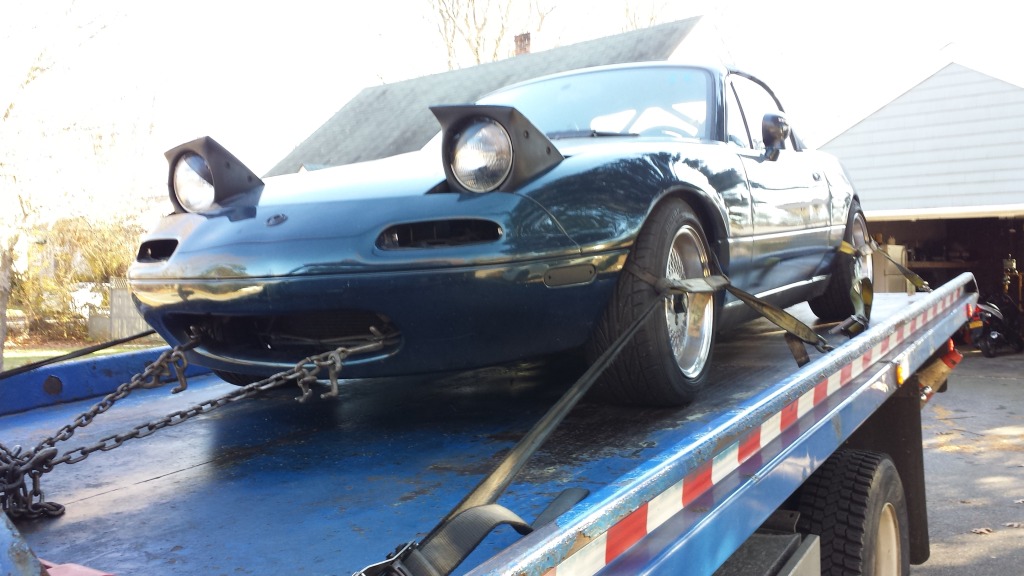
So I finally got around to wrapping up as much as I could do on my end of the build. Last Thursday and Friday I got the manifold mounted, got the bumper and fenders back on, filled some fluids, cleaned up some loose ends in the engine bay, and packed up and labeled the rest of the parts. Saturday morning I had the car towed to Wicked Innovation in Manchester, NH. They are going to mount intercooler and run the piping, tap the oil drain, fab a downpipe, and M@ is going to tune the car. They started on it yesterday. I actually decided to order the Flyin Miata turbine outlet for the upper part of the downpipe, since there is not much room behind the turbo.
Last time I heard, they were expecting to finish the build tomorrow. Then it just needs to be tuned and I can pick it up.
I hopefully will have more updates today as they make progress on the build. Here's a couple pictures from Friday and Saturday. (Nothing that exciting).
So with the Miata being down for the count, a few weeks ago I autocrossed in the wagon. Not as fun as a squirrelly Miata, but it was still a good time.


Updates! Last week I was travelling again, but this time out to California to visit a friend. Now I realize why all of your Miatas out there are so much cleaner than mine...
So I finally got around to wrapping up as much as I could do on my end of the build. Last Thursday and Friday I got the manifold mounted, got the bumper and fenders back on, filled some fluids, cleaned up some loose ends in the engine bay, and packed up and labeled the rest of the parts. Saturday morning I had the car towed to Wicked Innovation in Manchester, NH. They are going to mount intercooler and run the piping, tap the oil drain, fab a downpipe, and M@ is going to tune the car. They started on it yesterday. I actually decided to order the Flyin Miata turbine outlet for the upper part of the downpipe, since there is not much room behind the turbo.
Last time I heard, they were expecting to finish the build tomorrow. Then it just needs to be tuned and I can pick it up.
I hopefully will have more updates today as they make progress on the build. Here's a couple pictures from Friday and Saturday. (Nothing that exciting).


So with the Miata being down for the count, a few weeks ago I autocrossed in the wagon. Not as fun as a squirrelly Miata, but it was still a good time.


Reply
0
0


Thread Starter
Junior Member
Joined: Sep 2012
Posts: 283
Total Cats: 12
From: Cranston, RI
Lol. It's not the greatest, but it will work for now. The hot side goes from the turbo, in front of the motor, down by the alternator, and back around to the FMIC. It's a bit round-about, but it drops right in and allows me to keep AC/PS. As I said before, if it is impacting performance, I'd like to make some piping that goes over the radiator.
Reply
0
0
Thread Starter
Junior Member
Joined: Sep 2012
Posts: 283
Total Cats: 12
From: Cranston, RI
It's funny, sometimes at our weekly Subaru meets, more Miatas show up than Subies.
Reply
0
0

Lol. It's not the greatest, but it will work for now. The hot side goes from the turbo, in front of the motor, down by the alternator, and back around to the FMIC. It's a bit round-about, but it drops right in and allows me to keep AC/PS. As I said before, if it is impacting performance, I'd like to make some piping that goes over the radiator.
Reply
0
0


