
Blaen's because 350hp build


Definitely a cool idea.
Reply
 0
0

0
Thread Starter
Elite Member
iTrader: (6)
Joined: Sep 2010
Posts: 3,611
Total Cats: 25
From: Seattle, WA
But very happy with Abe's work, and it's cheap. Ran me a bit over thirty shipped for anyone looking to do the same - very, very well worth it imo.
The grime is being thoroughly cleaned whenever I decide if I'm building my 1.6, or swapping in a 1.8 - next time it's out, I've got a power washer waiting to clean the grime.
Reply
0
0
If you have a compressor, engine cleaning wand ($10 at HD/Lowes), paint thinner and a straight-bristled parts brush will have you cleaned up in no time. Plus, not hazardous to electronics.
Reply
0
0

Reply
0
0
Thread Starter
Elite Member
iTrader: (6)
Joined: Sep 2010
Posts: 3,611
Total Cats: 25
From: Seattle, WA
Figured it's time I updated this since last post.
Recent additions:
1.8 swap, BEGi divided manifold, eBay T28 turbo, COPs, intercooler and piping, FM HappyMeal.
Pictures hopefully coming Soon(TM)
Recent additions:
1.8 swap, BEGi divided manifold, eBay T28 turbo, COPs, intercooler and piping, FM HappyMeal.
Pictures hopefully coming Soon(TM)
Reply
0
0
Thread Starter
Elite Member
iTrader: (6)
Joined: Sep 2010
Posts: 3,611
Total Cats: 25
From: Seattle, WA
Well, finally have everything together, and got it all working together kind of. Took it out for a drive and hit ridiculous power.
Ended up having to rebuild the eBay BOV (!@#!@#!@#!@#), and yet it ended up working extremely well after rebuilding. Internally, they appear almost identical to a genuine Greddy (wtf?!?) with the one big caveat being the diaphragm.
No camera (Even lost my cell, argh), so pictures are going to have to wait.
Reply
0
0


Thread Starter
Elite Member
iTrader: (6)
Joined: Sep 2010
Posts: 3,611
Total Cats: 25
From: Seattle, WA
The BOV sucked before it was rebuilt, but once it was rebuilt and properly adjusted, I don't know if I can tell a difference between it and the Greddy in operation.
What's your Artech order look like?
Reply
0
0
Thread Starter
Elite Member
iTrader: (6)
Joined: Sep 2010
Posts: 3,611
Total Cats: 25
From: Seattle, WA
Well, time for a pretty major update. Other than "Holy fuckity ---- do my feet ever hurt".
Over this past month I've been steadily working on bodywork on the SOB. I found out pretty quickly it had gorramn 5 layers of paint from various owners. 5.
As a result, I've been in the process of not just doing a little bit of bodywork, but restoring the chassis. There were several spots that were so caked in layer after layer of paint there was no option but to just start over. I've got several boxes of parts from Rosenthal waiting to go on, because, well, half the ---- was painted onto the goddamn car at one point or another. No, seriously, they even painted the antenna holder and the goddamn windshield squirters onto the car.
On a good note, as of today I've finished dollying, shaving, welding, soldering, and almost to all of the mudding. All that is left is icing (I also know it as glazing), priming, basecoat, and clearcoat really.
Which is sooo close, but then again it's taken almost a month to finally get everything to this point. Having to do a full restoration to a body isn't something I was planning on doing, or expecting to have to do at all.
No pictures because, well, my camera is broken.
Reply
0
0
Thread Starter
Elite Member
iTrader: (6)
Joined: Sep 2010
Posts: 3,611
Total Cats: 25
From: Seattle, WA
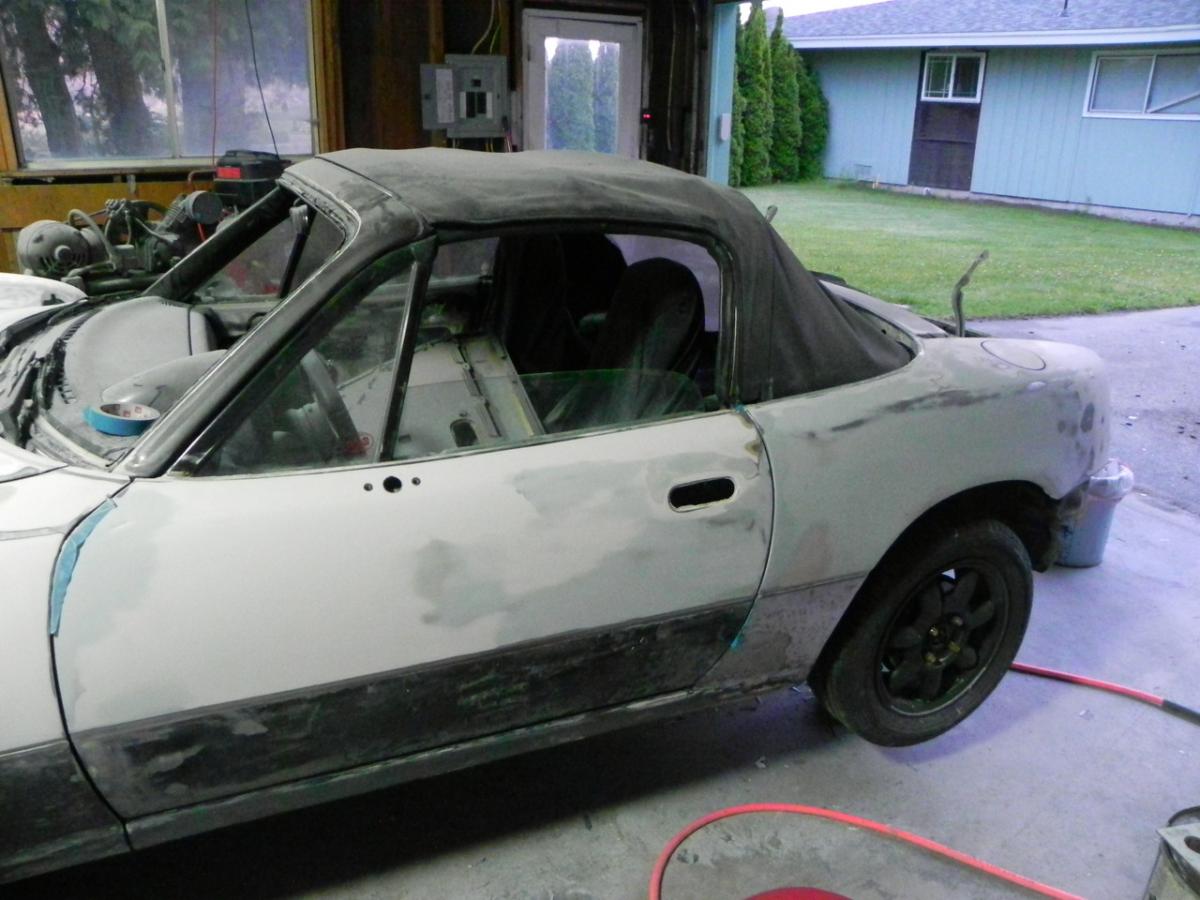
A bit of a background. This car has had at least 5 paint jobs, possibly more. The previous bodywork has been all over the place in quality.
Sadly, due to no camera issues, I wasn't able to get pictures of earlier in the car process. However, PICTURE TIME! I'll throw in some commentary that you guys can blatantly mock!
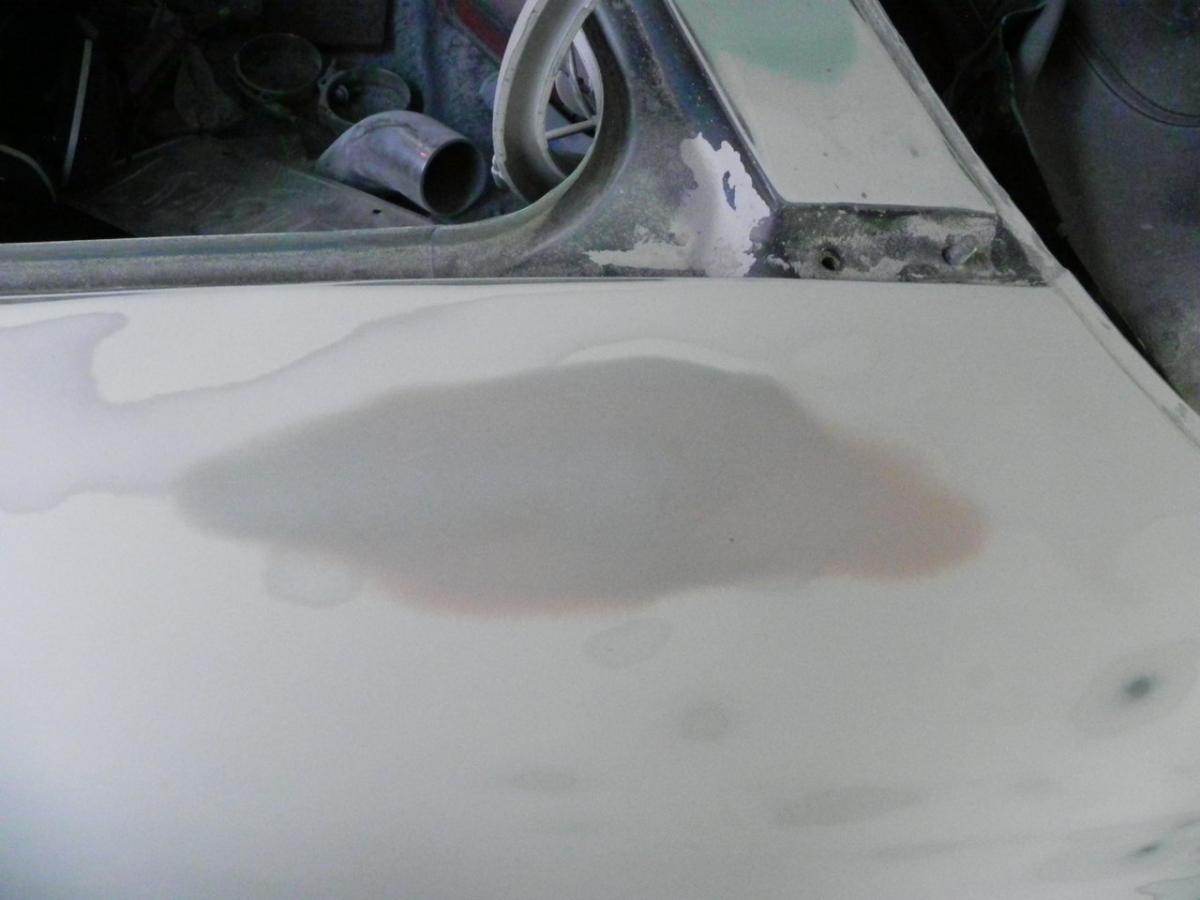
Filler used red hardener, icing/glazing used blue hardener to differentiate the layers.
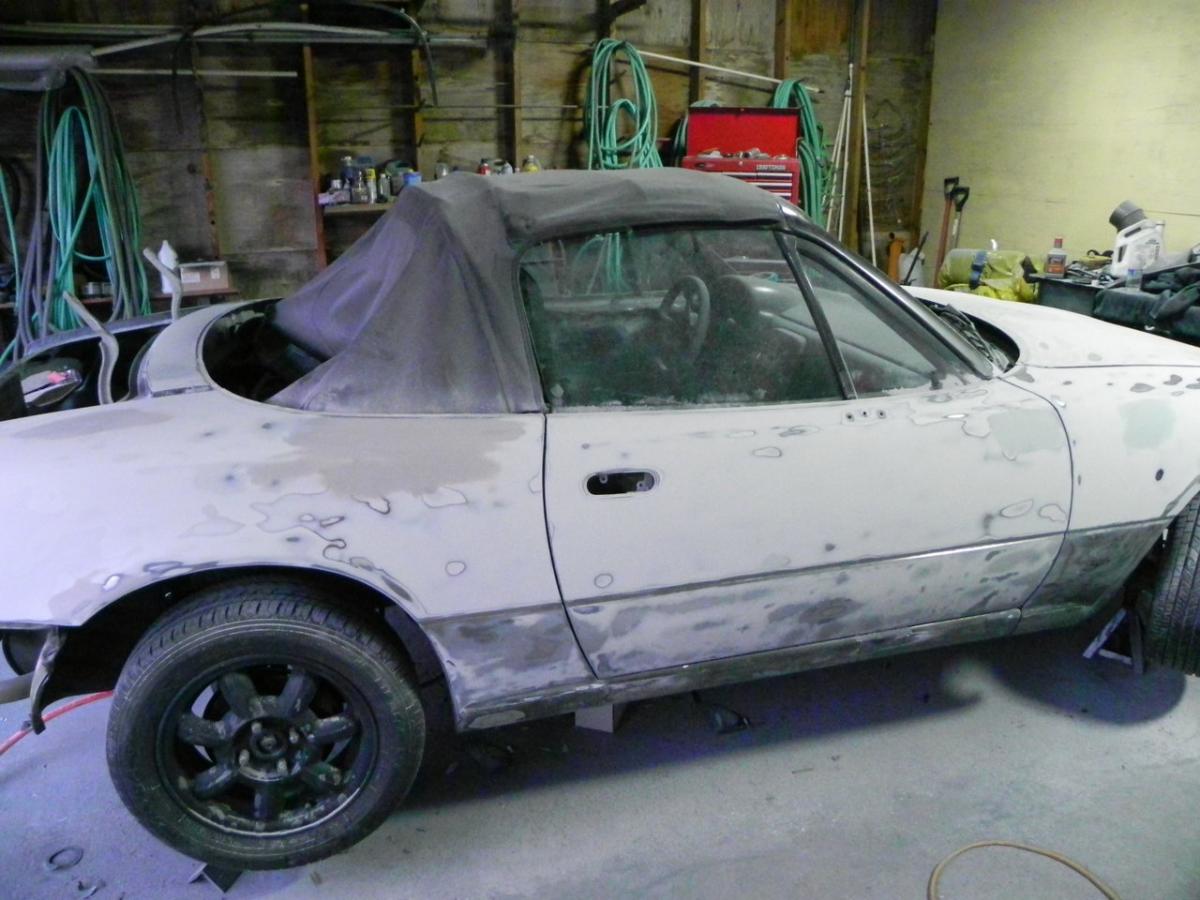
This is the rear passenger's quarter. As you can tell, I basically stripped the car of...all of it, because it's easier that way. This side, while it required a fair bit of bodywork, did not require nearly what the other quarter panel did.
This is a sample of the work after I shaved the antenna. It required more soldering than I am used to for this sort of thing.

Side shot of the passenger side, it had a few not-so-great spots.
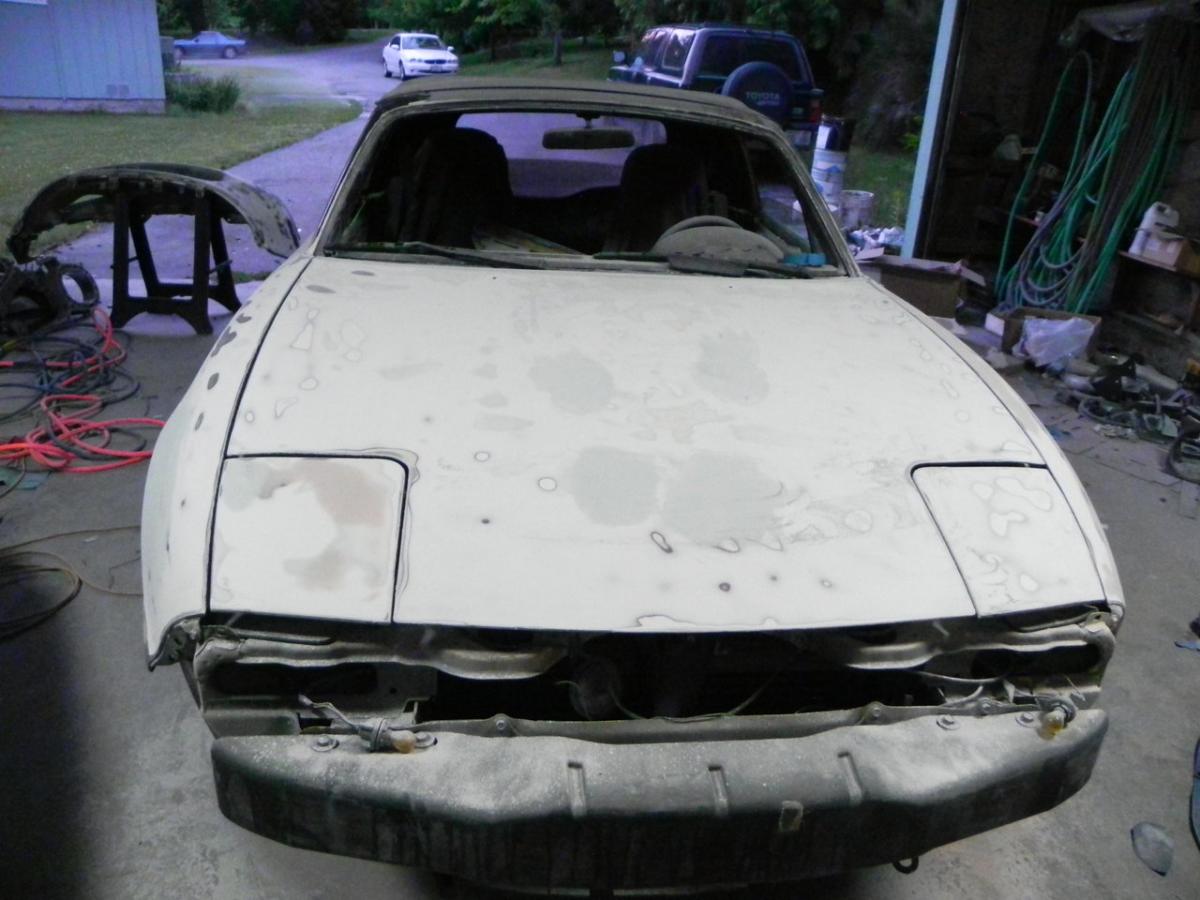
Hood, fair bit of work all around, and a little bit more to go still.
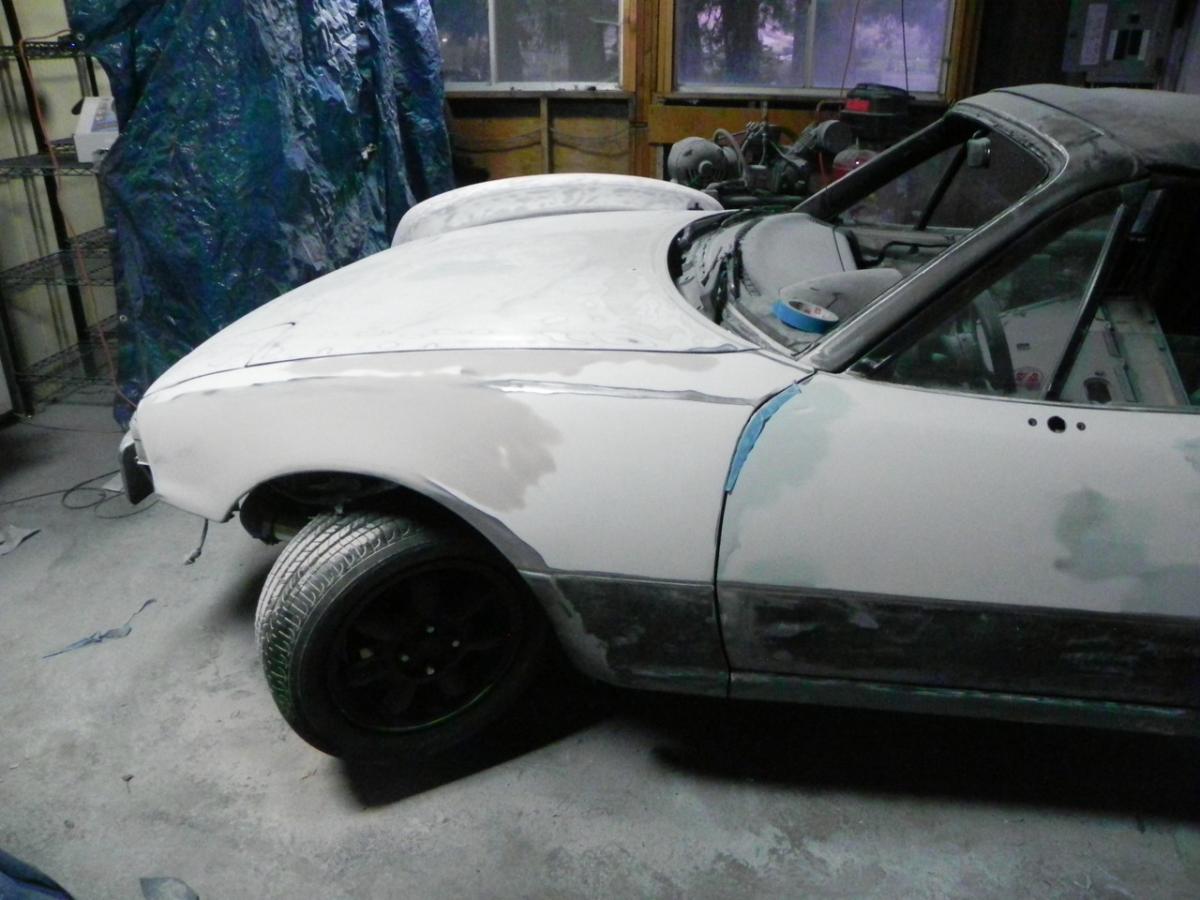
Driver's fender, bit of the door. Again, a fair bit of work. There's still some work to do. This actually required a lot of soldering to finally get everything to both look and work properly, not to mention almost an entire day of work.
Rear side. Little bit left to go still.
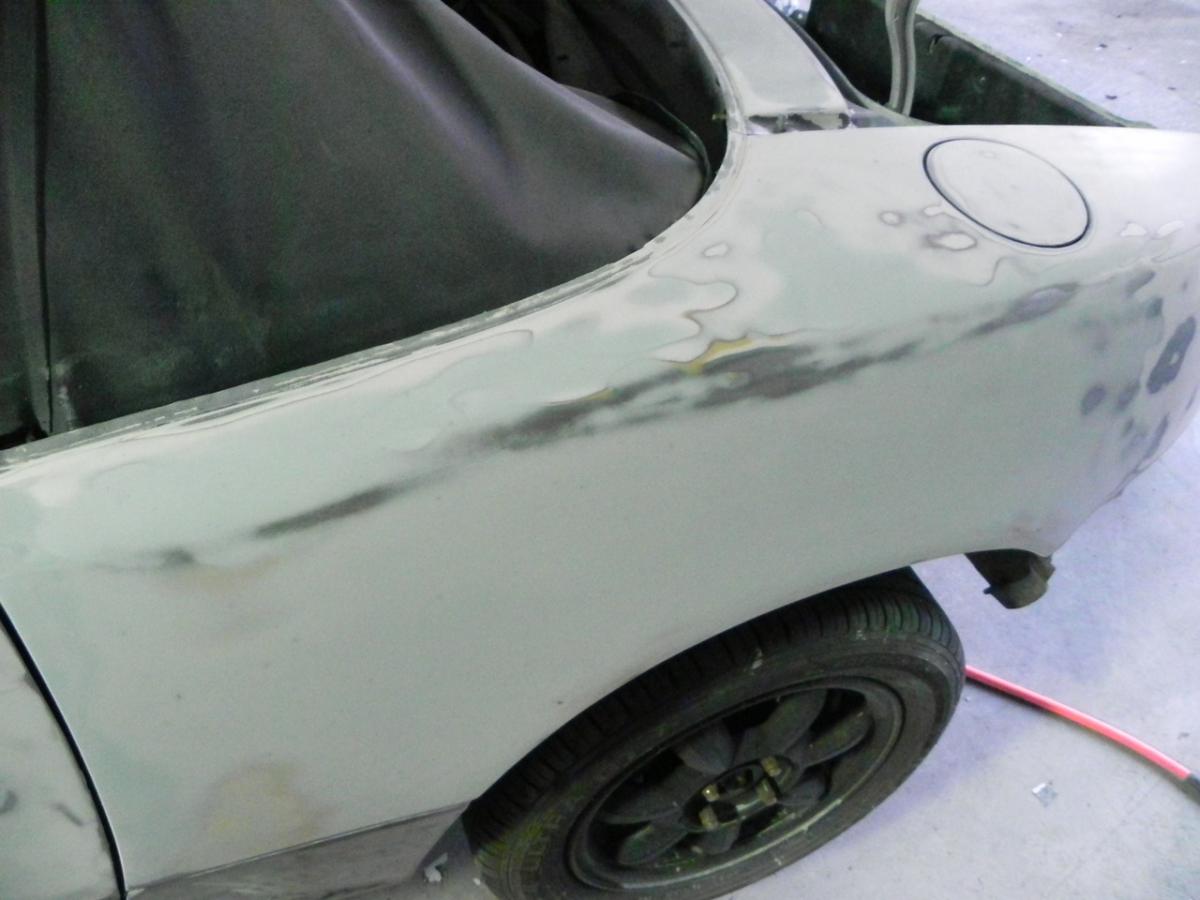
This side required a massive amount of work, and really a full restoration job. A massive amount of studs had to be welded on, and it required a ---- ton of mudding to get right. This also required soldering holes, which made me truly sad in the pants. Some of the work here was definitely shoddy - I do not think a previous body guy knew what he was doing in this area. This required an entire day of work again just to finally get close to getting right.
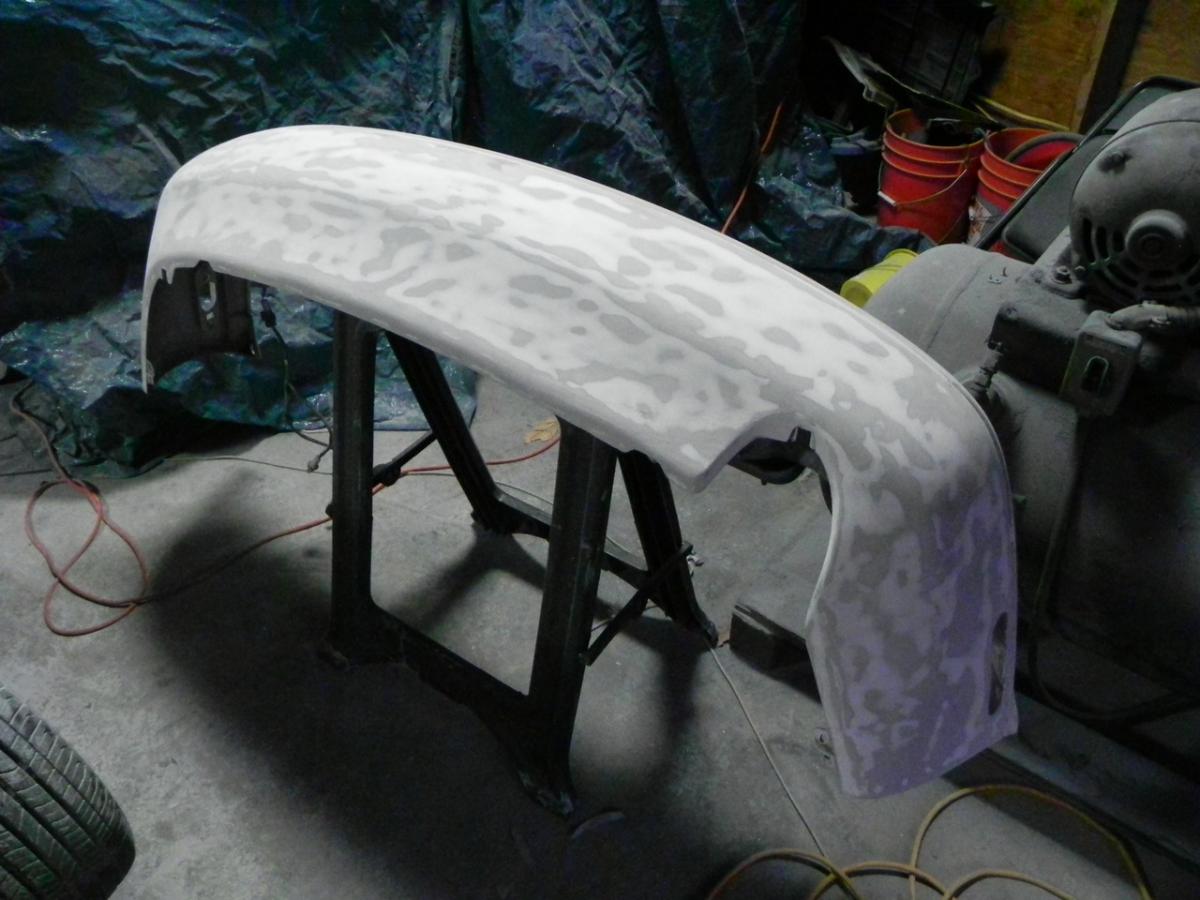
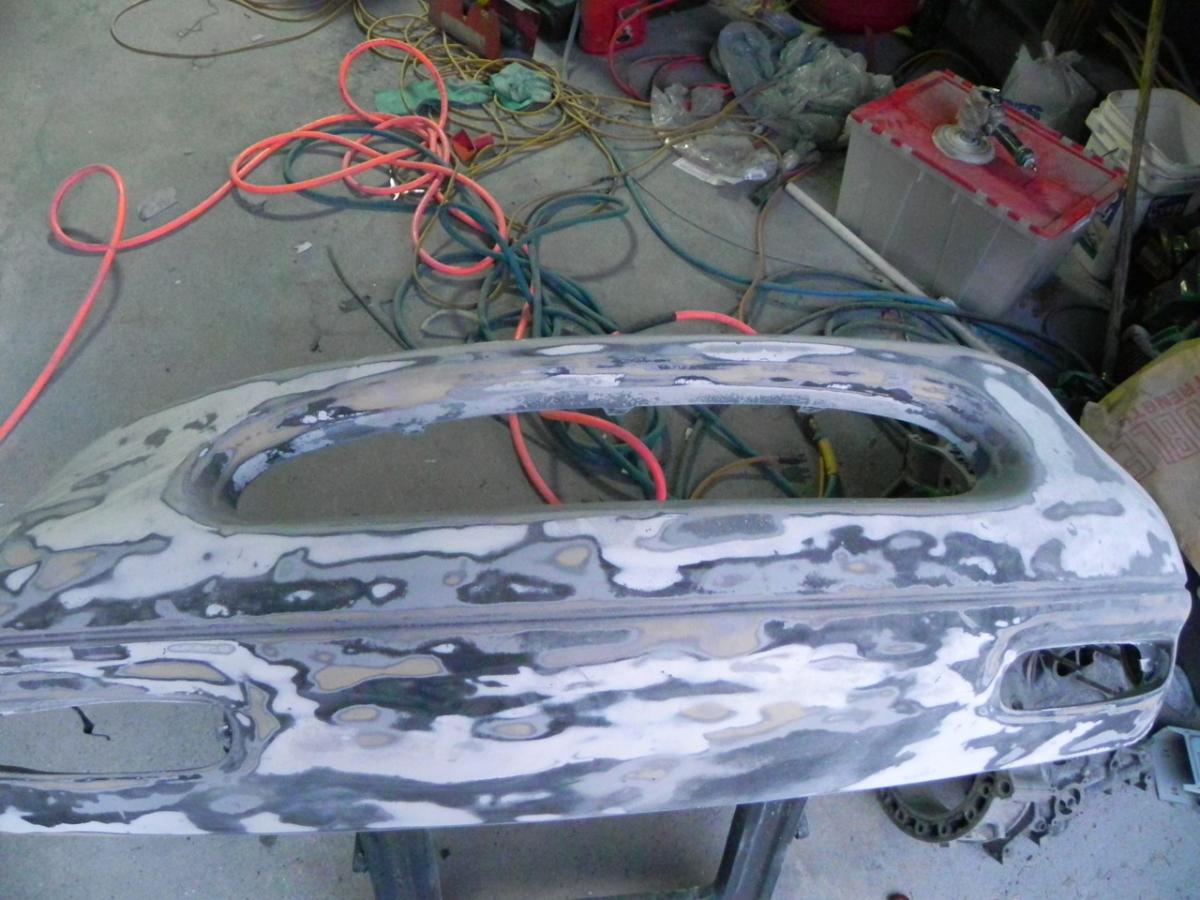
Bumpers, some work to do still.
Anyways, I'm within a day of starting to prime. I'll hopefully be painting in very short time, we'll see where it goes.
Sadly, due to no camera issues, I wasn't able to get pictures of earlier in the car process. However, PICTURE TIME! I'll throw in some commentary that you guys can blatantly mock!
Filler used red hardener, icing/glazing used blue hardener to differentiate the layers.
This is the rear passenger's quarter. As you can tell, I basically stripped the car of...all of it, because it's easier that way. This side, while it required a fair bit of bodywork, did not require nearly what the other quarter panel did.
This is a sample of the work after I shaved the antenna. It required more soldering than I am used to for this sort of thing.
Side shot of the passenger side, it had a few not-so-great spots.
Hood, fair bit of work all around, and a little bit more to go still.
Driver's fender, bit of the door. Again, a fair bit of work. There's still some work to do. This actually required a lot of soldering to finally get everything to both look and work properly, not to mention almost an entire day of work.
Rear side. Little bit left to go still.
This side required a massive amount of work, and really a full restoration job. A massive amount of studs had to be welded on, and it required a ---- ton of mudding to get right. This also required soldering holes, which made me truly sad in the pants. Some of the work here was definitely shoddy - I do not think a previous body guy knew what he was doing in this area. This required an entire day of work again just to finally get close to getting right.
Bumpers, some work to do still.
Anyways, I'm within a day of starting to prime. I'll hopefully be painting in very short time, we'll see where it goes.
Reply
1
1


Nice job on all of this, good body work impresses me. I'm jealous!
Reply
0
0


