
build thread (TII drivetrain swap, built motor, cage, widebody, blah blah)


Reply
 0
0

0


 I'm not changing them right now. Eventually yes, but I just want to drive the car. The tires are on, they are staying for the time being. I bought this car early June of last year and have yet to drive it. Swapping tires is just going to slow me down even more. If you want to swap them for me, by all means, go right ahead
Reply
0
0

I finally have an update! Got a lot done the past few weekends, even though I haven't had as much time to work on the car as I would have liked.
Installed my new front tow hook so when it's back on all 4s we have something to pull from so we can get it back on the trailer
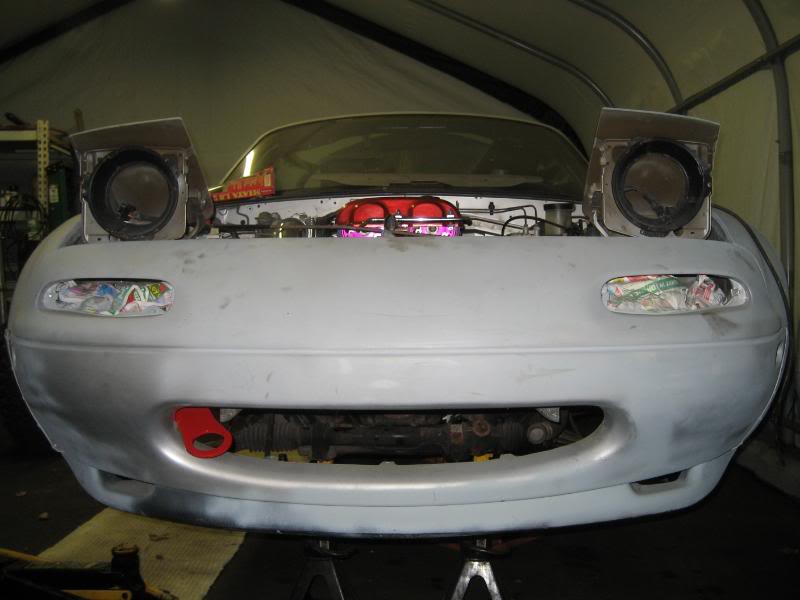
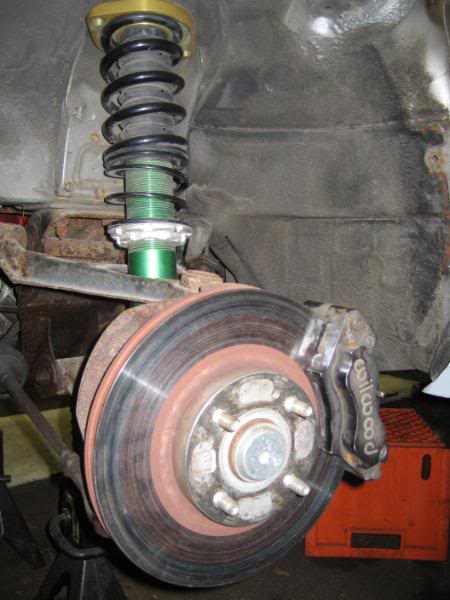
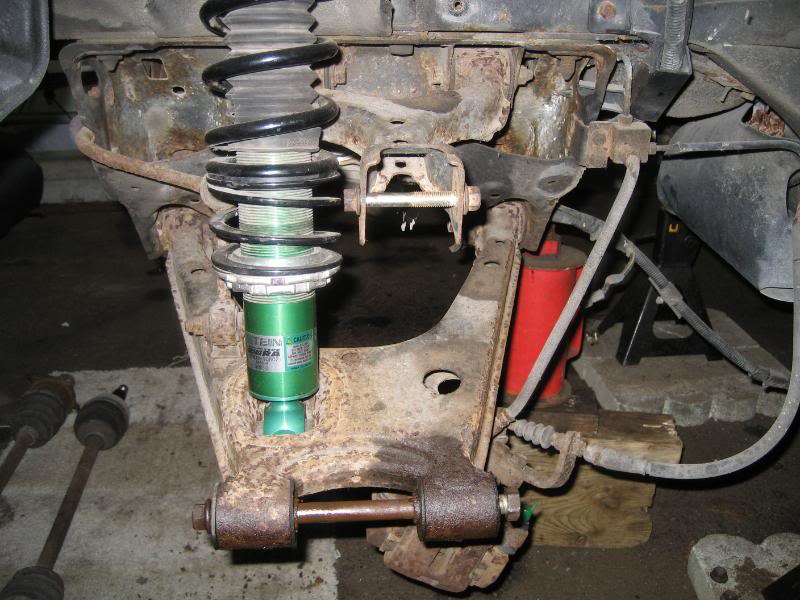
Willwood big brake kit- 11" rotors, Flyin' Miata stainless lines front/rear (not shown in the pic), Porterfield R4S pads front/rear. I didn't take a pic of the rears, as they aren't on at this time...
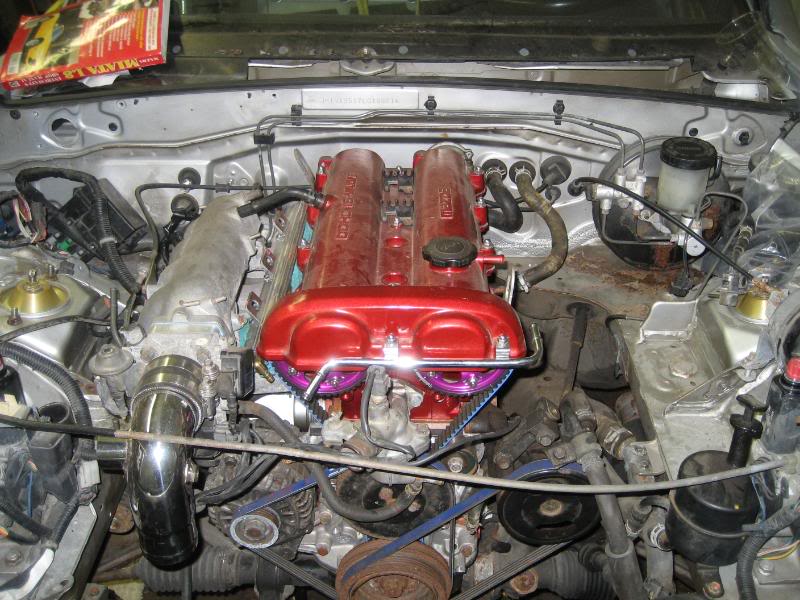
another shot of the motor, it's slowly coming together, although I really haven't spent much time up here...
On to the rear end!
test fitting of the TII diff. I installed Mazdaspeed diff mounts, but didn't take a pic of them (we all know what diff mounts look like )
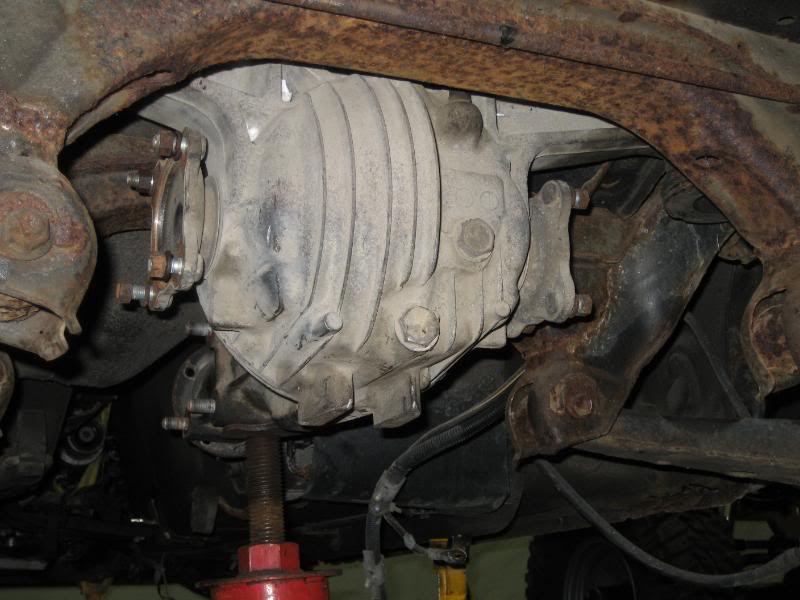
clearances are tight

diff more or less level
shot from under the tranny looking back
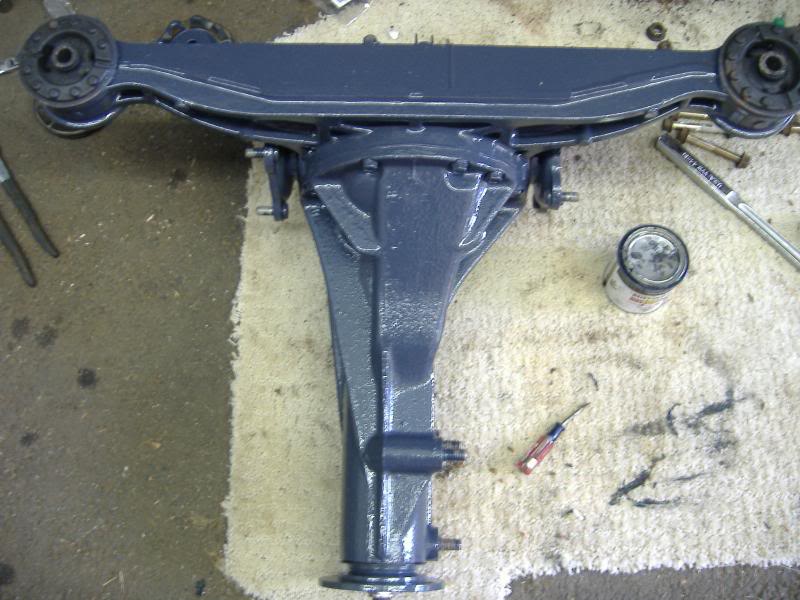
From here, I took the entire rear end out of the car, wire-brushed every piece of it, primed it with rustoleum rusty metal primer, and then hit all the control arms and the sub frame with rustoleum gloss black.
Finished product drying
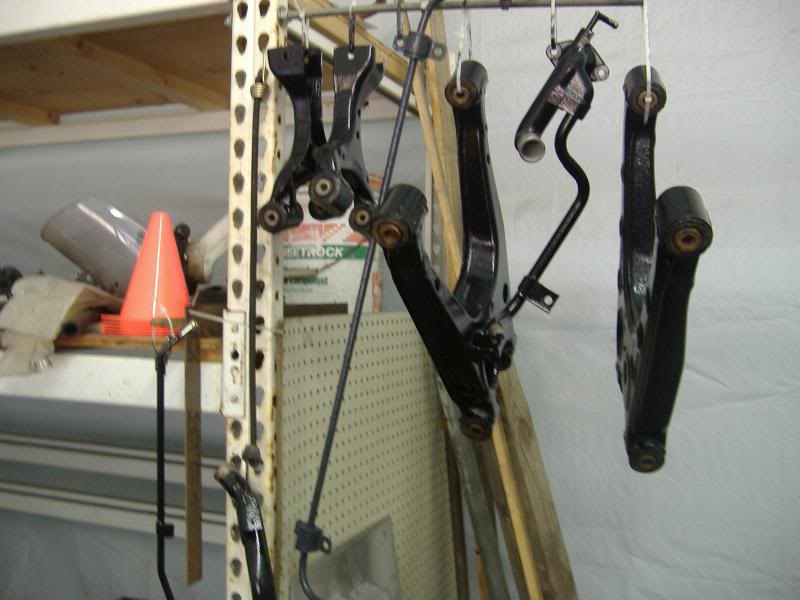
I made a mixture of black and gray to get this nice dark gray color, and I painted the axles, diff, diff mounts, and the rear sway bar and end links gray- finished product came out perfect.
diff
control arms, rear swap bar, the hard coolant lines, and the hard line coming off the brake booster
Installed my new front tow hook so when it's back on all 4s we have something to pull from so we can get it back on the trailer
Willwood big brake kit- 11" rotors, Flyin' Miata stainless lines front/rear (not shown in the pic), Porterfield R4S pads front/rear. I didn't take a pic of the rears, as they aren't on at this time...
another shot of the motor, it's slowly coming together, although I really haven't spent much time up here...
On to the rear end!
test fitting of the TII diff. I installed Mazdaspeed diff mounts, but didn't take a pic of them (we all know what diff mounts look like )
clearances are tight
diff more or less level
shot from under the tranny looking back
From here, I took the entire rear end out of the car, wire-brushed every piece of it, primed it with rustoleum rusty metal primer, and then hit all the control arms and the sub frame with rustoleum gloss black.
Finished product drying
I made a mixture of black and gray to get this nice dark gray color, and I painted the axles, diff, diff mounts, and the rear sway bar and end links gray- finished product came out perfect.
diff
control arms, rear swap bar, the hard coolant lines, and the hard line coming off the brake booster
Reply
0
0
Here's a shot of the old control arms before paint- they needed it!
shot of the subframe:

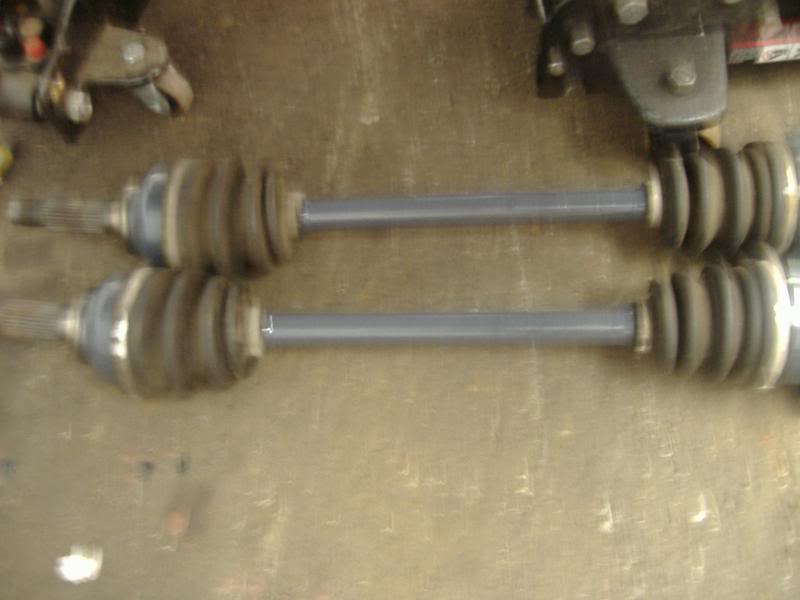
rear RX7 axles
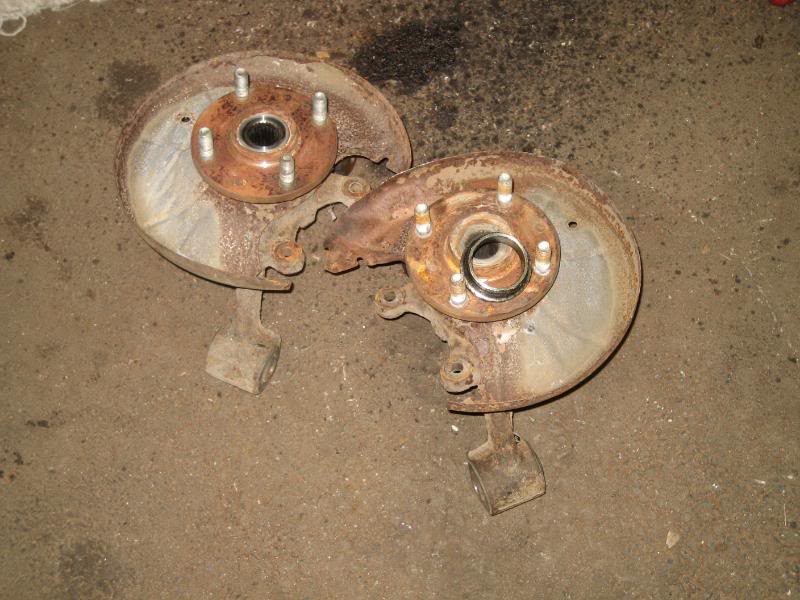
I found a guy over on roadster drift (forum name is Dhaark for those interested- great guy) who was offering his services for custom miata/RX7 hubs, so I took him up on his offer. What he did was machine down RX7 hubs to fit onto a miata spindle, which allows me to use stock RX7 axles.
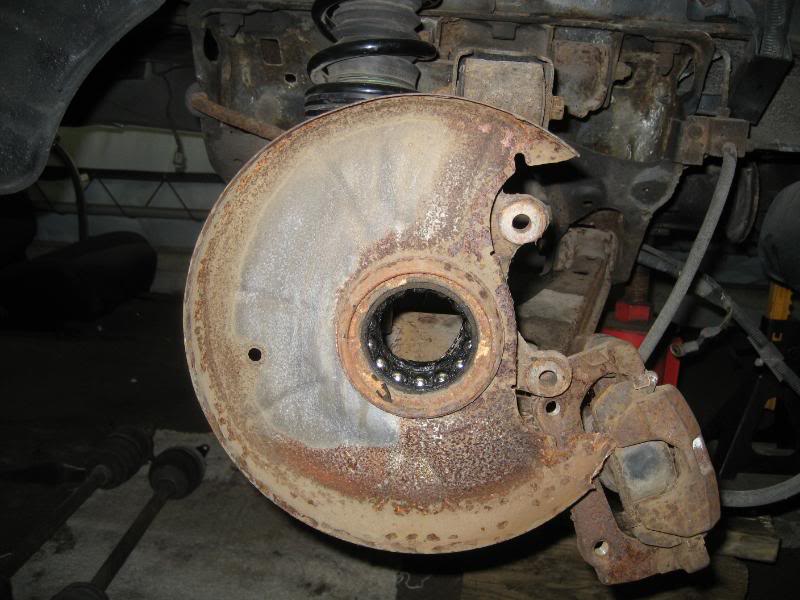
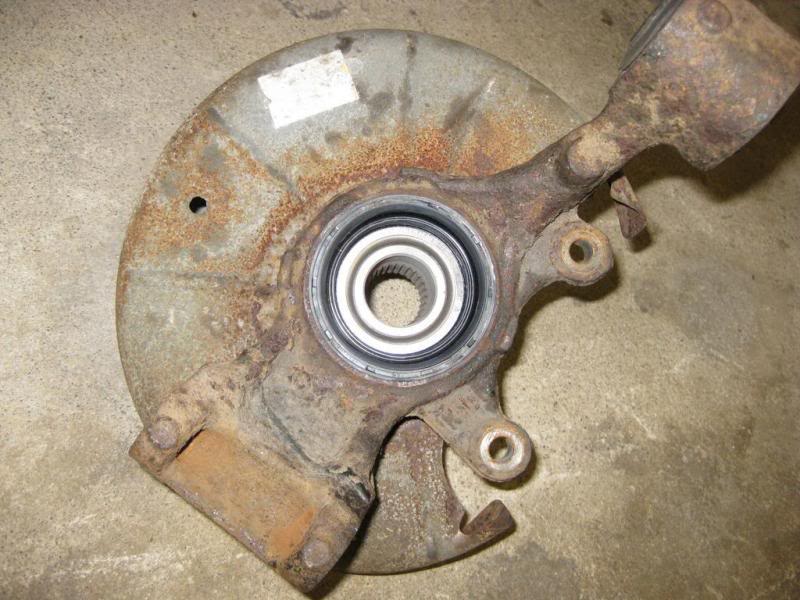
Here's the old crappy, rusty, wimpy miata hubs
and another off the car:
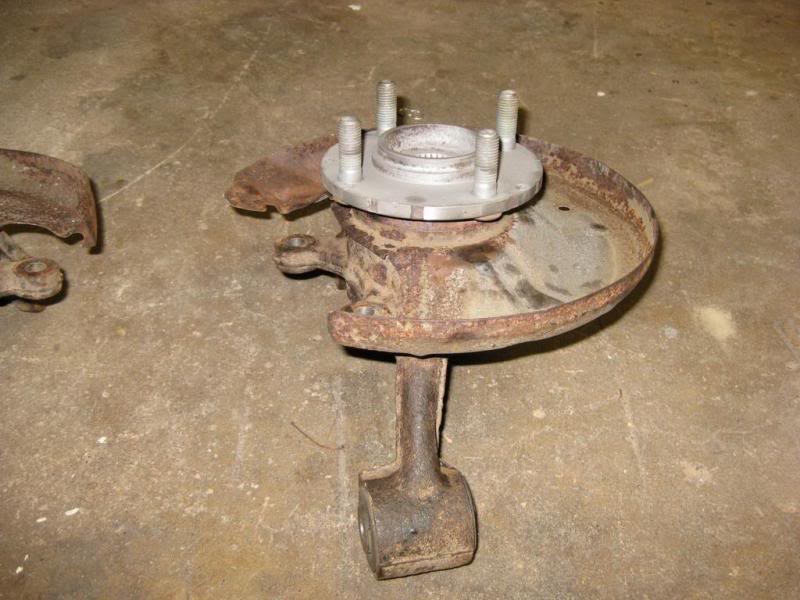
new hubs as I received them:
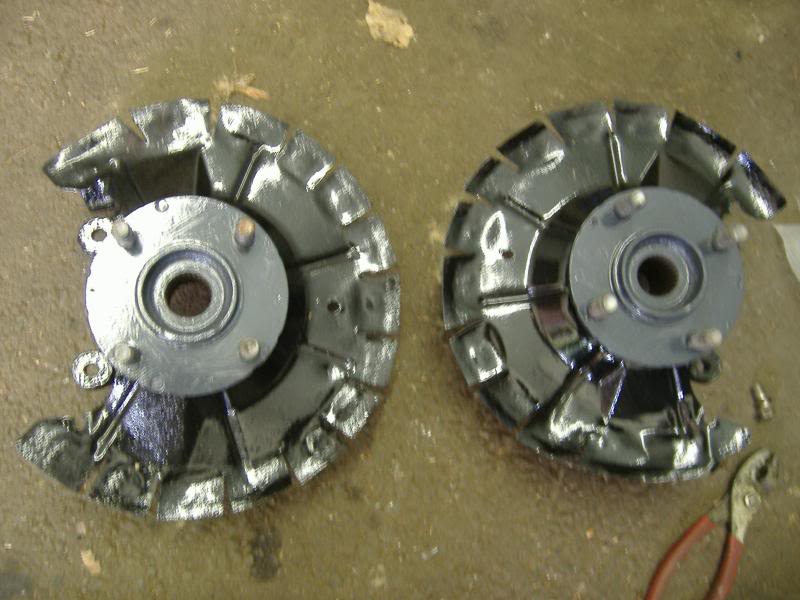
well now I have these awesome hubs, but they look like crap, so I wirebrushed them and painted them with the same black/grey paint scheme. I also cut slots in the curved portion of the dust shield and bent it all out flat so it would clear the 11" rotors out back:
finished product ready for install
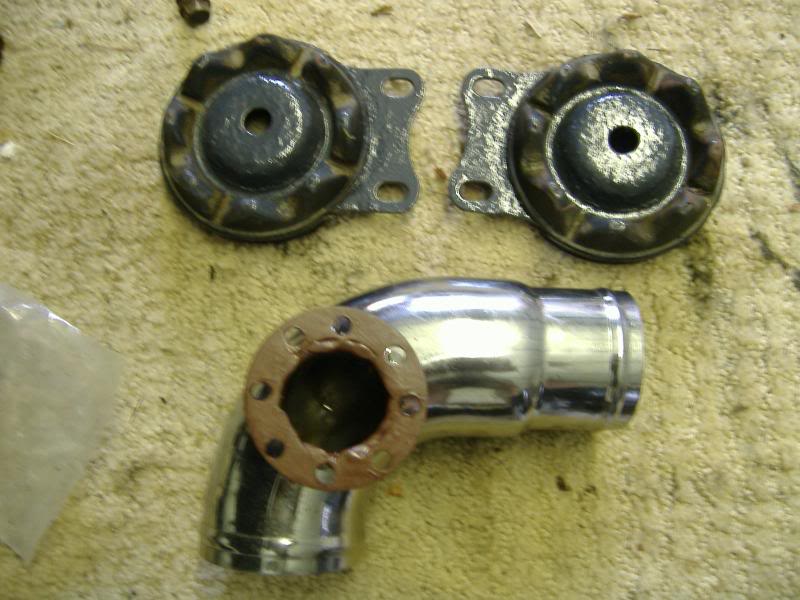
Here are the diff mounts all painted up and my Flyin miata intake elbow, with an adapter I made out of some scrap 3/16" steel welded to it. This will serve as a mounting point for my apexi bov. I drilled a bunch of holes in it as I want the option on mounting it, plus I think it looks neat, and it saves oh about 2 ounces
shot of the subframe:
rear RX7 axles
I found a guy over on roadster drift (forum name is Dhaark for those interested- great guy) who was offering his services for custom miata/RX7 hubs, so I took him up on his offer. What he did was machine down RX7 hubs to fit onto a miata spindle, which allows me to use stock RX7 axles.
Here's the old crappy, rusty, wimpy miata hubs
and another off the car:
new hubs as I received them:
well now I have these awesome hubs, but they look like crap, so I wirebrushed them and painted them with the same black/grey paint scheme. I also cut slots in the curved portion of the dust shield and bent it all out flat so it would clear the 11" rotors out back:
finished product ready for install
Here are the diff mounts all painted up and my Flyin miata intake elbow, with an adapter I made out of some scrap 3/16" steel welded to it. This will serve as a mounting point for my apexi bov. I drilled a bunch of holes in it as I want the option on mounting it, plus I think it looks neat, and it saves oh about 2 ounces
Reply
0
0
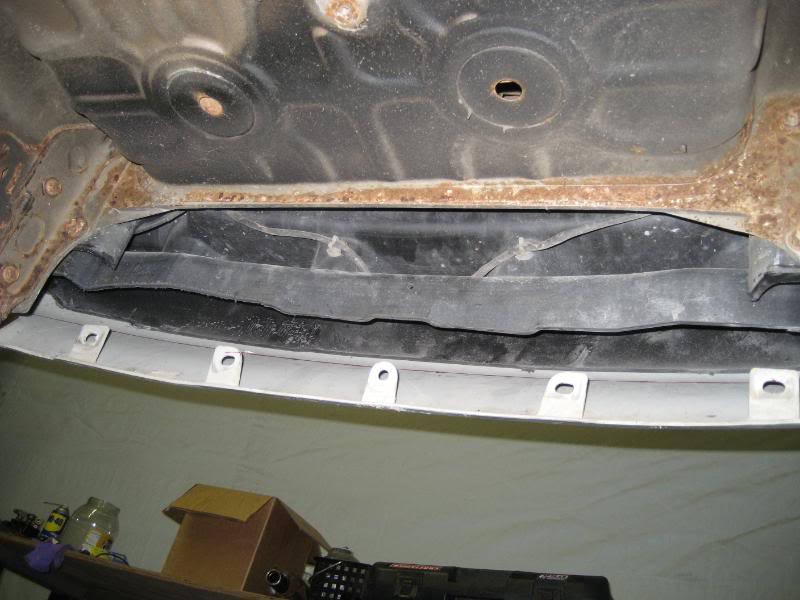
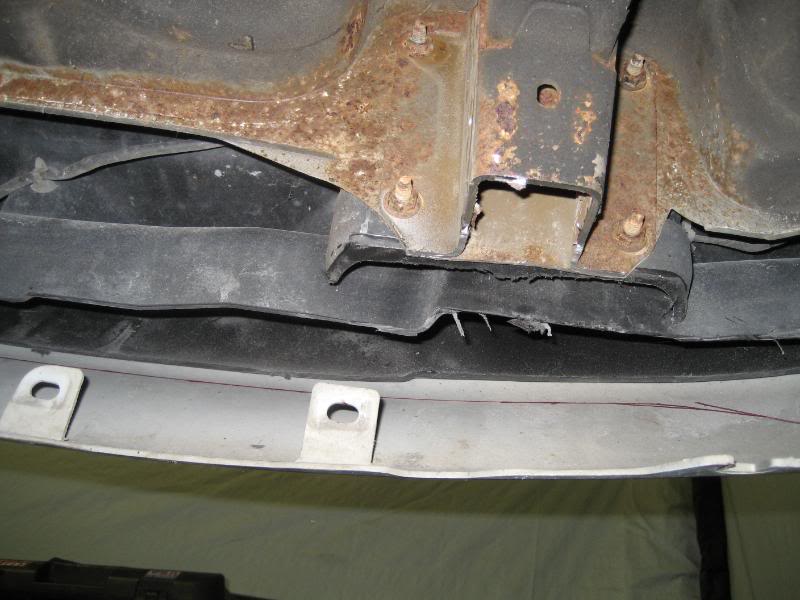
I cut up my rear bumper and the rear bumper support so i can run a left exit exhaust. I followed the contour of the original exhaust cutout and transfered it to the opposite side.
sorry for the crappy pics
rear bumper support
I also lopped off the tow point on the left (driver's) side so that it doesn't interfere with the exhaust at all.
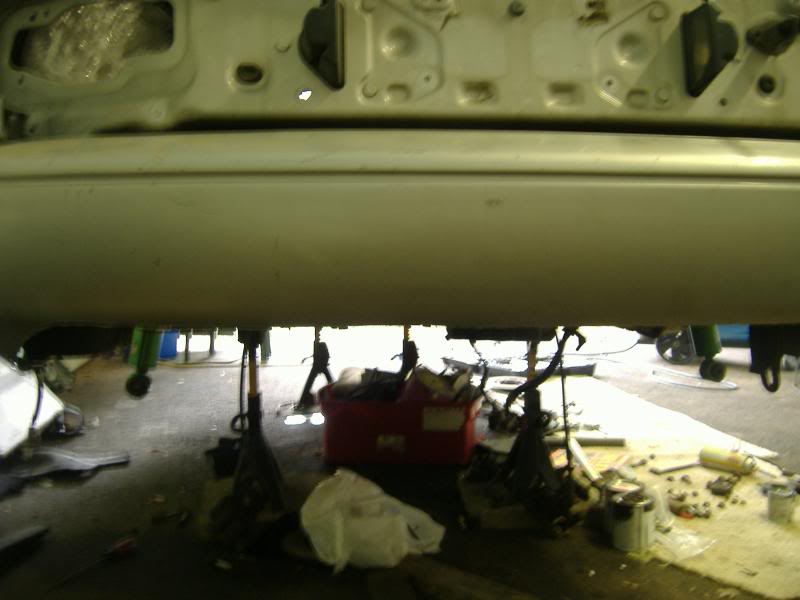
bumper
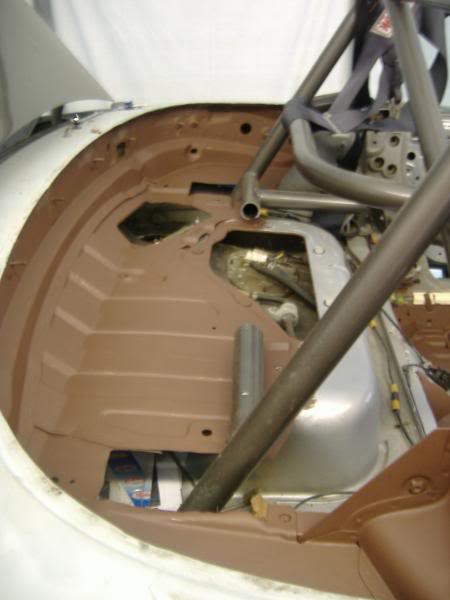
I also painted the interior with primer and will be hitting it with a coat or 2 of the same black at some point.
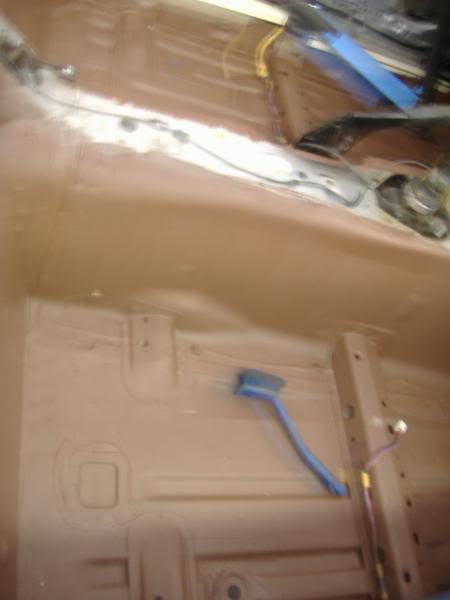
I took out the access panels in the rear deck, and the center console mount and primed and painted them, but never took a pic. Oops.
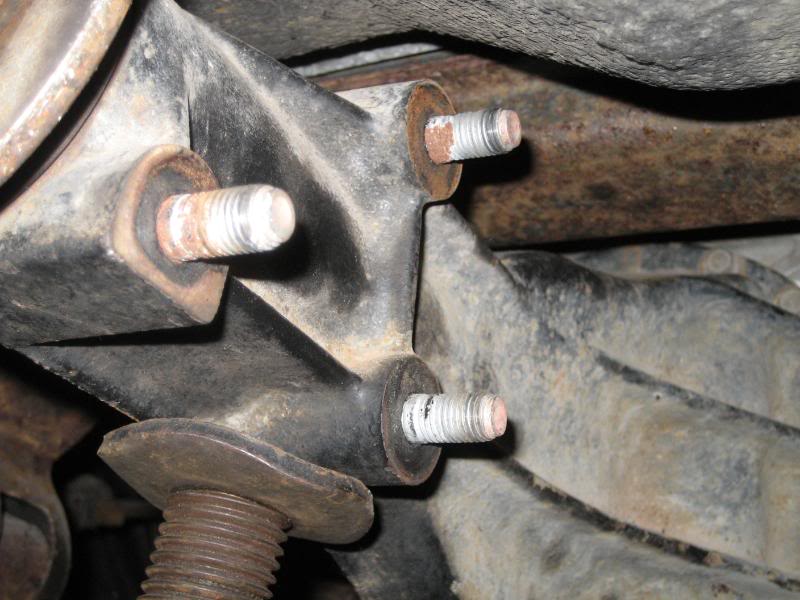
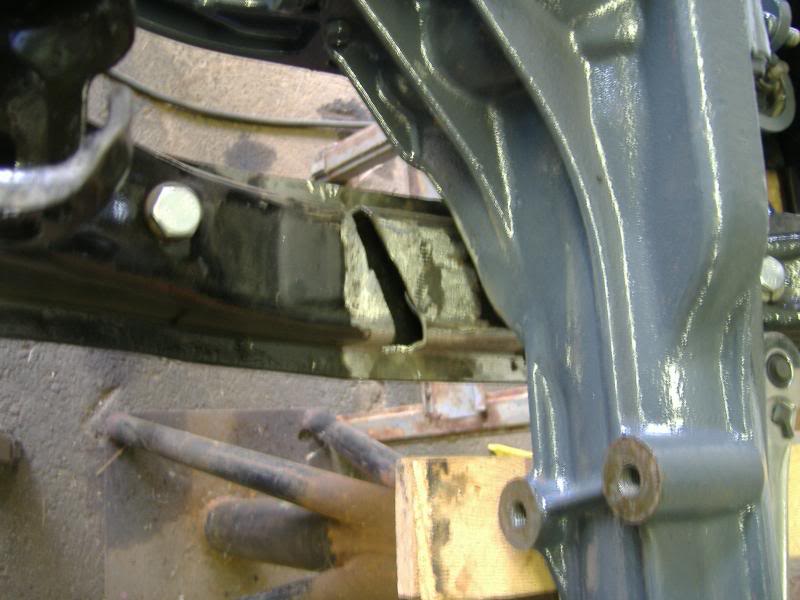
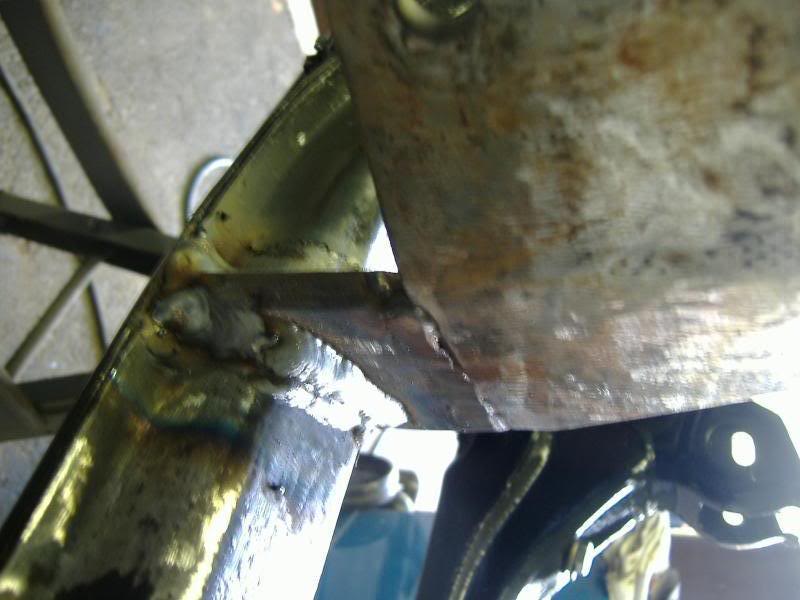
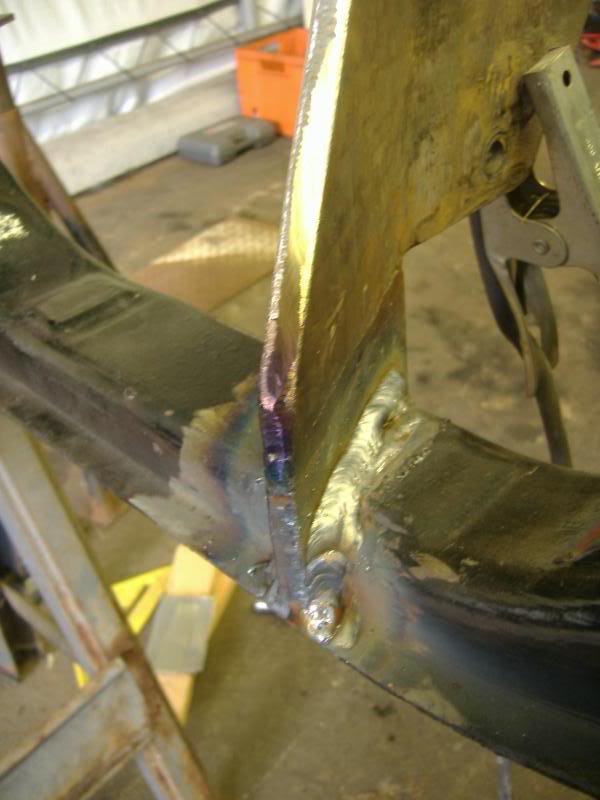
Sorry for jumping around, but now on to the meat and potatoes of getting the rear end into the miata- making the bracket.
We used a piece of 5/16" steel and bent it to follow the contour of the diff, and then butt-welded another piece of 5/16" to the bottom portion of it and drilled out the 3 holes

next, I cut out a section of the subframe so that the bracket can sit flush with the top of the subframe, which allowed us to weld the bracket on 3 sides
pic of the cut I made:
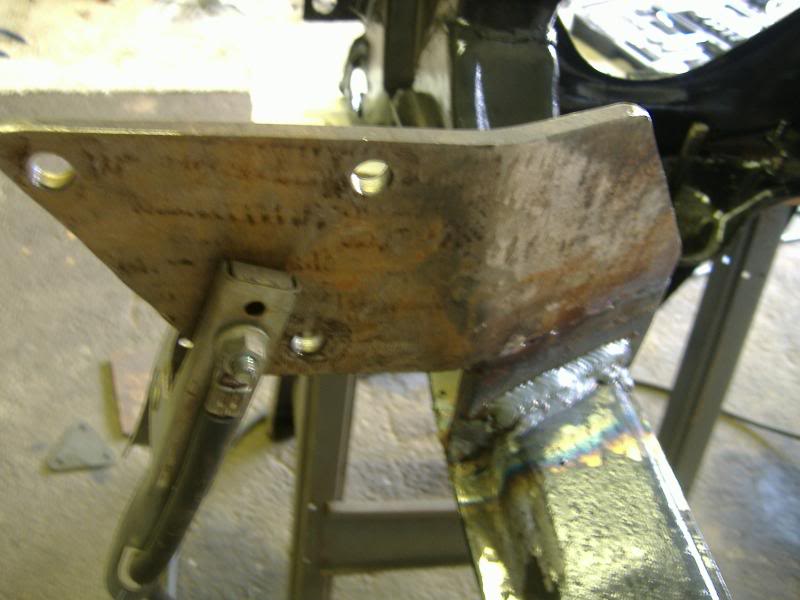
here's a shot of the bracket all burned in, waiting for paint. I also cut off the backside edge of the bracket to match the same angle on the front. Not only does it look much better, but it saves some weight. 5/16" sure is heavy, but I'm not taking any chances.

sorry for the crappy pics
rear bumper support
I also lopped off the tow point on the left (driver's) side so that it doesn't interfere with the exhaust at all.
bumper
I also painted the interior with primer and will be hitting it with a coat or 2 of the same black at some point.
I took out the access panels in the rear deck, and the center console mount and primed and painted them, but never took a pic. Oops.
Sorry for jumping around, but now on to the meat and potatoes of getting the rear end into the miata- making the bracket.
We used a piece of 5/16" steel and bent it to follow the contour of the diff, and then butt-welded another piece of 5/16" to the bottom portion of it and drilled out the 3 holes
next, I cut out a section of the subframe so that the bracket can sit flush with the top of the subframe, which allowed us to weld the bracket on 3 sides
pic of the cut I made:
here's a shot of the bracket all burned in, waiting for paint. I also cut off the backside edge of the bracket to match the same angle on the front. Not only does it look much better, but it saves some weight. 5/16" sure is heavy, but I'm not taking any chances.
Reply
0
0
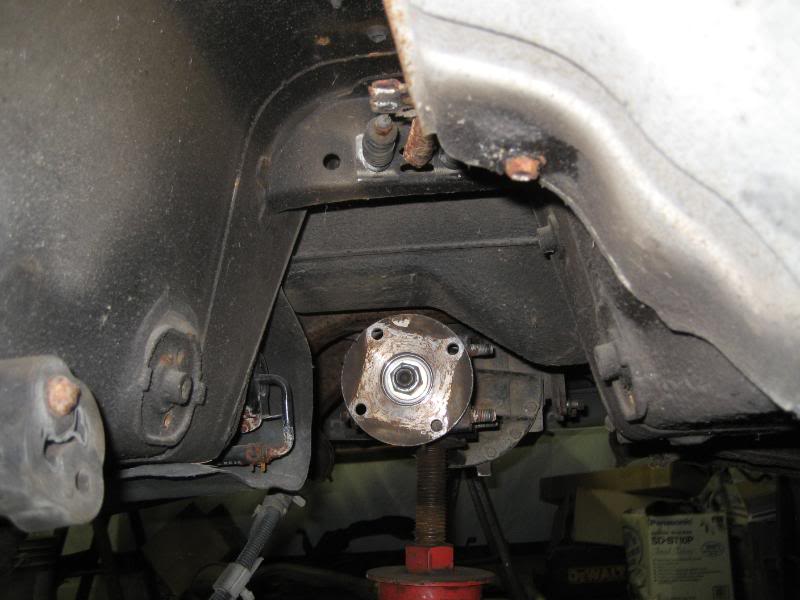
One thing is for sure: This bracket certainly isn't going to break!
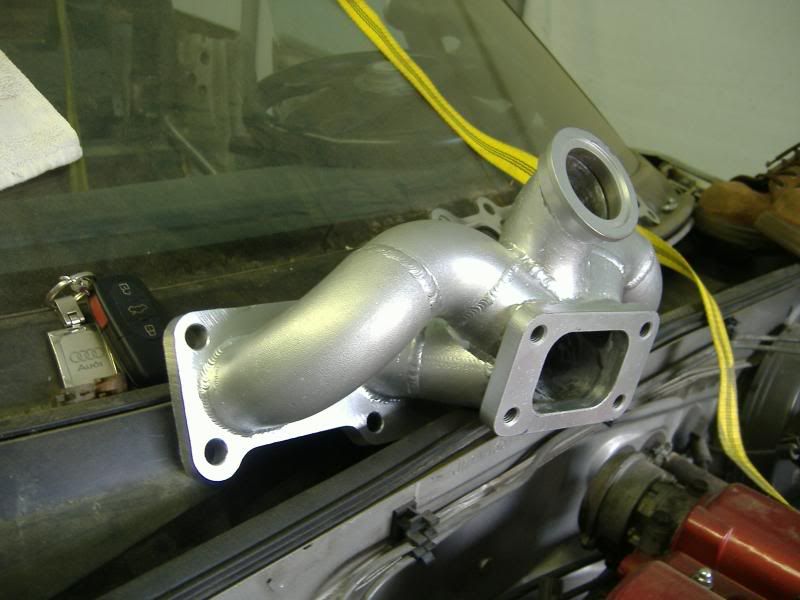
Got this in the mail 2 weeks ago too. It's an ETD Racing shorty tubular manifold with a Tial 44mm wastegate.

Pretty soon I'll get around to getting the motor stuff all buttoned up. That's it for now, I'm beat.
Reply
0
0

tires or not, thats awesome. Nice welding job!
Do you see any problem with solid mounting the front of the diff? I was just thinking with rubber bushings on the back, the back will move around and maybe crack the solid front mount.
Do you see any problem with solid mounting the front of the diff? I was just thinking with rubber bushings on the back, the back will move around and maybe crack the solid front mount.
Reply
0
0

I thought about that for a while, but all the other swaps I have seen did it this way except for 1 guy who used the stock mount. I'm going to try it and see. If it doesn't work out well, I can always bore out the holes and put in some rubber/poly bushings, but I think it will work out just fine. I have the mazdaspeed diff mounts in there, which are stiffer than stock, so we shall see.
Reply
0
0
Not going to lie, I'm still not impressed with the manifold. I called ETD to complain about it as soon as it arrived as the collector has pretty significant gaps between all the joints, the edges inside are very rough, there are metal "slivers" hanging off a couple of the joints, and the coating is already flaking off on the inside. They emailed me back and told me it was fine the way it was (I sent them pics), but it does not look like a "finished" piece to me, esp. considering how perfect the outside of it looks and the price it cost.
Reply
0
0


Reply
0
0
I definitely think it would be beneficial to anybody considering something like this. And it would probably reveal the difference between what you might think it costs and what it really costs. But for a hardcore build like this, it would definitely be interesting. My guess is in the end you will have the deal of century for what you're going to get in performance and durability when you compare the costs to others.
Reply
0
0


